I love setting beautiful tables any time of the year but the Christmas season lends itself so well to many creative tablesetting options. Sometimes, I have many more ideas than I have need to create new tablescapes!
Today, I am veering off the traditional color theme one might ordinarily expect to see on a Christmas table though I have incorporated some red and green into the design.
The Dishes
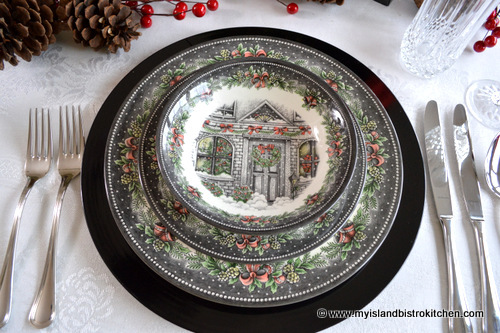
The dinnerware I have chosen is manufactured by Royal Stafford in England. The pattern is called “Christmas Home”.
These earthenware dishes are durable and not nearly so fragile as fine bone china. The dinnerware is both microwaveable and dishwasher safe so, for this reason, the dishes are a suitable option for everyday use during the holiday season or they can be dressed up for a Christmas dinner as I have done here.
The predominant black/gray color may not be what one would think of first for Christmas dinnerware. However, look closer and you can see the black/gray makes a lovely frame for the heartwarming scene on the dishes. It really makes the red and green pop in the pattern.
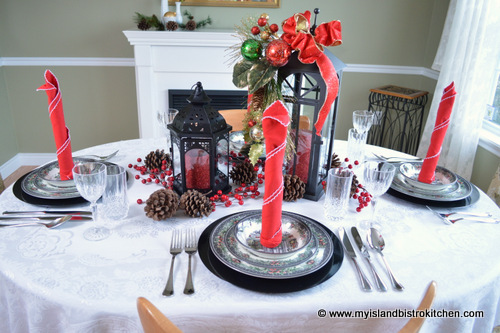
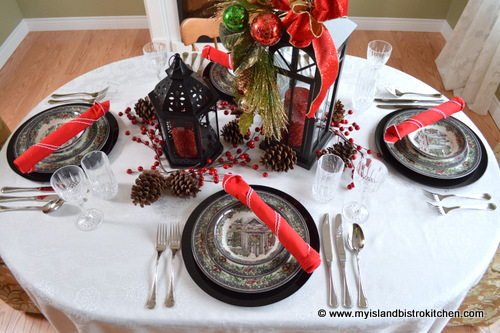
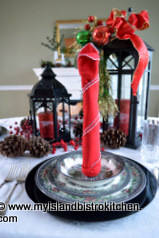
As soon as I examined the scene, I knew my tablescape would draw its inspiration from the glow of light in the windows of the dinnerware pattern and I have called this tablesetting the “Warmth of the Christmas Light“. I like how the nostalgic pattern in the dishes tells its own story.
Charger Plates
I have a wide collection of charger plates and use them frequently in my tablesettings. They are as functional as they are decorative. They are functional as they help to keep each placesetting clean. If a morsel of food escapes a plate, the charger plate (as opposed to a fine tablecloth or wood table) catches it. Charger plates also allow for the elements of each placesetting to be coralled in an orderly fashion. From a decorative point of view, chargers add a touch of class, elegance, and color to a finely set table. Charger plates are very inexpensive and I have chosen basic black to complement the black and white dishes and the black lanterns in the tablescape.
Linens
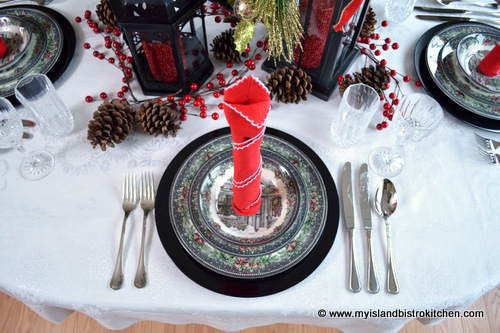
When the dinnerware pattern is busy, I recommend choosing a plain tablecloth that matches the background color in the dishes. In this case, I have selected one of my white Irish linen tablecloths because the background in the dinnerware is white. The blank white canvas of the tablecloth allows for the elements of the tablescape to stand out.
I am a big fan of cloth napkins and, in particular, plain napkins. Plain linens are very important if the dinnerware has a busy pattern so neither competes with the other. The plain napkins help to ground the patterned dinnerware. To use patterned napkins and tablecloth with this dinnerware would make it very cluttered to the eye. To add some brightness to the tablescape and to tie in with the hints of red in the dinnerware and the bow on the lantern, I have chosen red napkins.
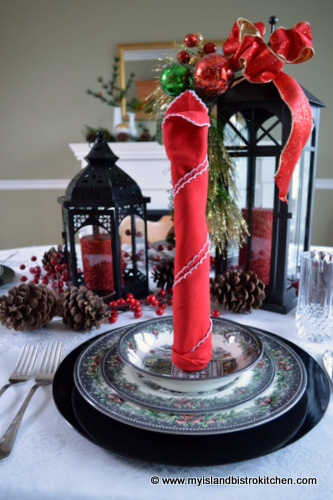
Candlestick Napkin Fold
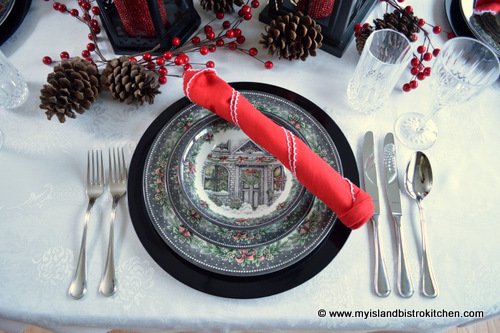
In keeping with my theme of the warmth of Christmas light, the napkin fold I have selected is the freestanding candlestick. This is a very easy-to-do napkin fold and a stiff napkin is required. The red napkins I have used have white trim on the edges so, when rolled into a candle shape, the white resembles candle drippings. If you find this napkin fold too tall for your liking, the napkins can always be laid across each place setting where they will appear as simple, elegantly rolled napkins.
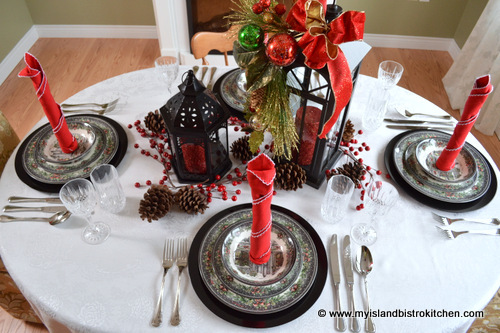
Centerpiece
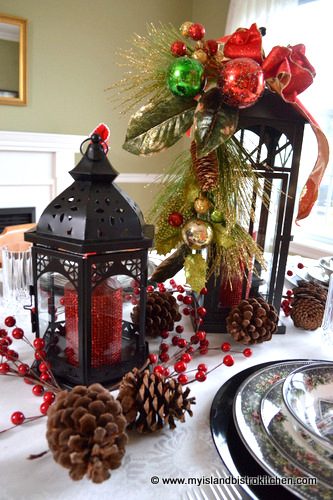
For the centerpiece on this table, I have used two black lanterns along with red pillar candles. I like to use props I already have and incorporate them into different table settings. The black lanterns blend well with the color of the dinnerware and are continuing the theme of light. I have dressed up the taller of the lanterns with a swag in colors complementary to the dinnerware along with a perky red bow. The lanterns also provide a safe place for the candles yet still allow them to add light to the tablescape. Some faux red berries and pine cones complete the look.
Glassware
To complement the nostalgic dinnerware, I have opted to use very traditional glassware of about average height for stemware.
I hope you have enjoyed my “Warmth of the Christmas Light” tablesetting that features Royal Stafford’s “Christmas Home” dinnerware.
To view other Christmas and New Years Tablesettings, click on the links below:
As Christmas approaches and temperatures dip (at least for those of us who live in colder climates), my thoughts tend to turn to substantial “comfort” foods — visions of roast turkey, stuffing and gravy, cranberry sauce, fluffy mashed potatoes, and lots of root vegetables (such as carrots and turnip) enter my head. And then, of course, there are the dessert options. Traditionally, in my family, the main Christmas meal of roast turkey is followed by a rich steamed plum pudding served with a brown sugar sauce. You can get my recipe for plum pudding here.
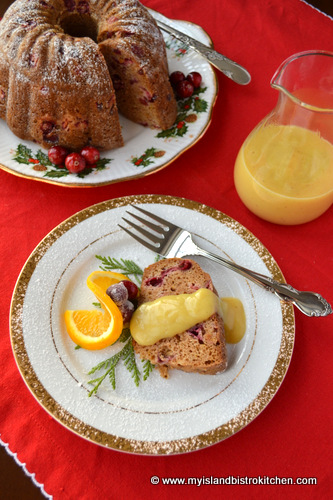
However, there are other options for steamed pudding, particularly for those who prefer something a little lighter than the rich plum pudding. So, I am sharing my recipe for steamed cranberry pudding which is divine when served with a decadent eggnog sauce (recipe follows).
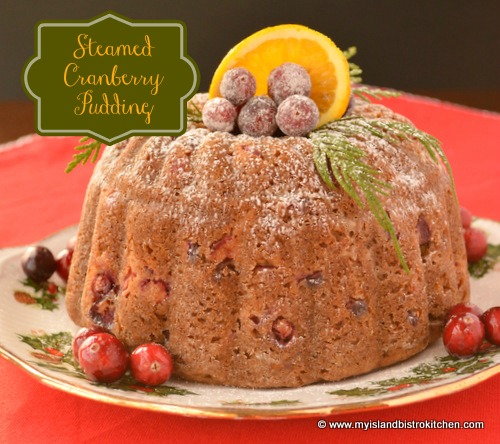
Steamed Cranberry Pudding with Eggnog Sauce
This cranberry pudding is super easy to make and, when paired with a smooth and silky eggnog sauce….well….you might want to have a second pudding on hand for those who have room for seconds!
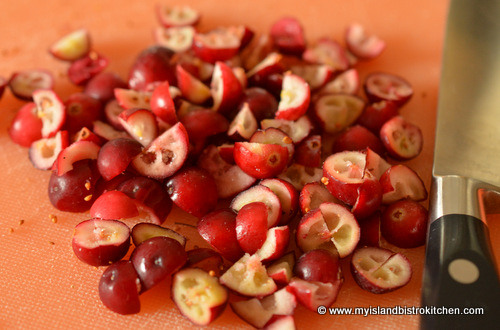
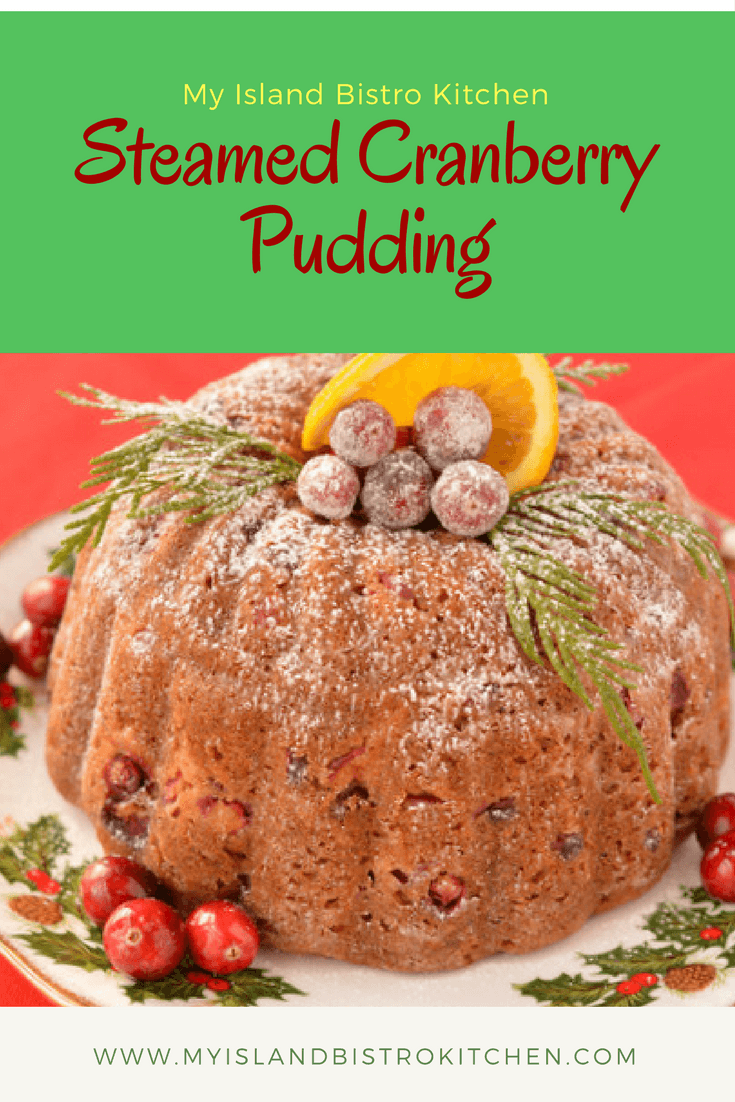
This pudding is not highly spiced. It has just enough cinnamon, nutmeg, and cloves to give it subtle flavour. Either fresh or frozen cranberries may be used. In order to release their flavour, the cranberries should be coarsely chopped into about 2-3 pieces each for this pudding. Tossing the cut berries in some sugar while the batter is being prepared further draws out their flavour.
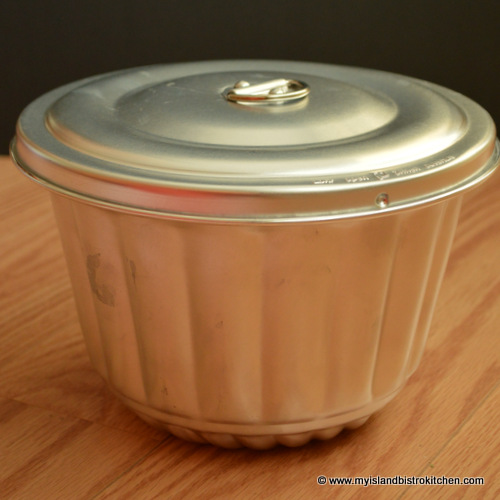
If you don’t have a steamed pudding mould like the one in the photo below, you can use clean tin cans or even a metal bowl. Simply spoon the batter into the cans or bowl, cover with a double thickness of heavy-duty tin foil, and secure it with string. The important thing is that, whatever vessel is used, it has a tight cover for the steaming process since the steam is what cooks the pudding and maintains the moisture without leaving the pudding wet and soggy. I used a standard 8-cup mould but I believe a 6-cup mould would suffice for this pudding.
Steamed Pudding Mould
The advantages of using a pudding mould specially designed for steaming puddings is that it comes with its own cover and it also has a funnel in the center which helps the pudding to cook evenly and without falling. This, of course, is in addition to the attractive shape of the pudding when it is unmoulded and plated.
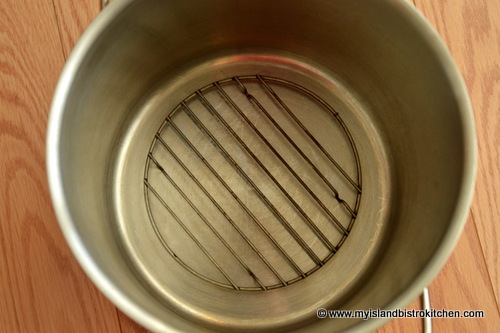
To steam this pudding, a large stock pot will be needed – one that allows enough room for the pudding mould to sit in the center of the pot and has at least 1 1/2 ” – 2 ” space all around the mould. A small wire rack that fits into the pot will also be required. This is what the mould needs to sit on as the pudding steams.
It’s important that the mould (or bowl or tin cans) not touch the bottom or sides of the pot as the water needs to circulate all around the pot (including underneath the pudding mould) in order for the pudding to cook evenly. Once the pudding mould is set on the wire rack, carefully pour in enough boiling water to come up to about the half-way point on the pudding mould. This is the level of water that must be maintained throughout the entire steaming process so additional boiling water may need to be added as the pudding steams. Once the boiling water has been added to the stock pot, cover the large pot with a lid and bring the water back to a full boil then immediately reduce the heat to a gentle boil.
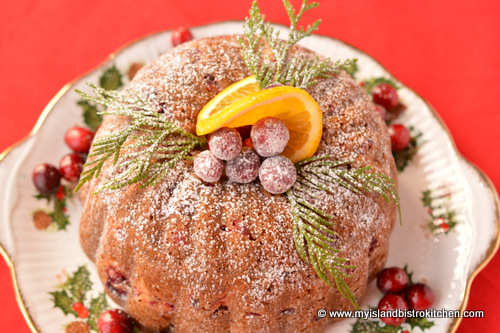
Generally speaking, you’ll need to allot at least 1 1/2 – 2 hours for the pudding to steam over medium-low heat. This, however, is only an estimate and the true test is when a cake tester inserted into the center of the pudding comes out clean. I recommend removing the lid from the pudding mould and checking the pudding with a cake tester at the 1 1/2-hour point and then, if not cooked, about every 10 minutes after until the tester comes out clean. When the pudding is cooked, remove it from its water bath and place the mould on a wire rack. Let the pudding rest in the mould for about 20 minutes then remove the lid from the mould and transfer the pudding to a serving plate.
Steamed Cranberry Pudding
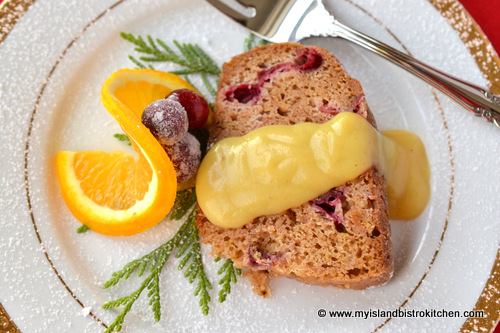
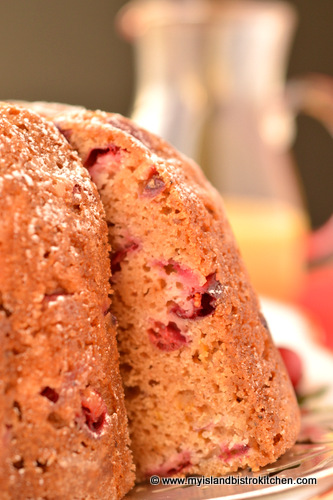
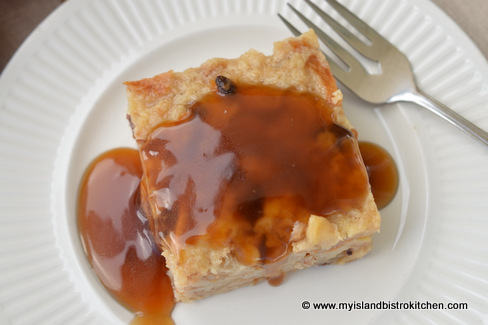
While this pudding would be well complimented by a traditional brown sugar sauce, it is particularly tasty served with a rich eggnog sauce. For ultimate flavour, the eggnog sauce is best served lukewarm, rather than piping hot, and can actually even be served quite cool. Because of the sauce’s richness, not a lot of the sauce is needed per serving. If you are an eggnog lover, you will love this sauce which would be equally good served over a bread pudding, too.
Steamed Cranberry Pudding
Steamed Cranberry Pudding
Ingredients:
1 1/3 cups coarsely chopped cranberries, fresh or frozen
½ cup butter ¾ cup granulated sugar (reserve ¼ cup for tossing with cranberries) 1 egg 1 tsp vanilla 2 tsp grated orange rind
1½ cups flour 1 tsp baking powder 1 tsp soda ¼ tsp salt ½ tsp cinnamon ¼ tsp nutmeg 1/8 tsp cloves
Grease 6- or 8-cup pudding mould or spray with cooking spray.
Toss the coarsely chopped cranberries with ¼ cup of the sugar, ensuring the cut sides of the berries are coated. Set aside.
Cream butter and remaining sugar in large bowl. Beat in egg and vanilla. Add grated orange rind.
In separate bowl, sift the flour, baking powder, soda, salt, and spices.
In small bowl, whisk together eggnog, milk, and Cointreau.
Add dry ingredients to the butter-sugar-egg mixture alternately with the wet ingredients, starting and ending with the dry ingredients.
Lastly, fold in the cranberries. Transfer batter to prepared pudding mould. Cover tightly with lid. Place mould on wire rack in large pot and fill pot with boiling water to about half way up the side of the mould. Cover steamer pot with lid and bring the water to a full boil then immediately reduce the heat to a gentle boil. Steam the pudding over medium-low heat for approximately 1½ hours or until cake tester inserted into centre of pudding comes out clean. (NOTE: Add more water to pot as necessary to maintain the water level at about the half-way point on the pudding mould during the entire steaming process.) Remove mould from water bath and place on wire rack and let rest for 20 minutes then turn pudding out onto serving dish and serve warm with Eggnog Sauce (recipe below).
In small bowl, combine the sugar, cornstarch, and nutmeg.
Pour eggnog into large microwaveable-safe bowl. Whisk in dry ingredients until smooth. Cook on HIGH until mixture is thickened to desired consistency, stirring after each 1½ minutes. Remove from microwave and stir in vanilla, Cointreau, and butter. (Note: Sauce will thicken slightly more as it cools.)
Sauce is best served lukewarm, spooned over individual slices of Steamed Cranberry Pudding.
A tasty steamed pudding served with smooth and silky eggnog sauce
Ingredients
For Pudding:
1 1/3 cups coarsely chopped cranberries, fresh or frozen
½ cup butter
¾ cup granulated sugar (reserve ¼ cup for tossing with cranberries)
1 egg
1 tsp vanilla
2 tsp grated orange rind
1½ cups flour
1 tsp baking powder
1 tsp soda
¼ tsp salt
½ tsp cinnamon
¼ tsp nutmeg
1/8 tsp cloves
2 tbsp prepared eggnog
2 tbsp milk
1 tbsp Cointreau
Eggnog Sauce Ingredients:
2/3 cup sugar
1½ - 2 tbsp cornstarch
¼ tsp nutmeg
2 cups prepared eggnog
2 tsp vanilla
3 tbsp Cointreau
2 tbsp butter
Instructions
Grease 6- or 8-cup pudding mould or spray with cooking spray.
Toss the coarsely chopped cranberries with ¼ cup of the sugar, ensuring the cut sides of the berries are coated. Set aside.
Cream butter and remaining sugar in large bowl. Beat in egg and vanilla. Add grated orange rind.
In separate bowl, sift flour, baking powder, soda, salt, and spices.
In small bowl, whisk together eggnog, milk, and Cointreau.
Add dry ingredients to the butter-sugar-egg mixture alternately with the wet ingredients, starting and ending with the dry ingredients.
Lastly, fold in the cranberries. Transfer batter to prepared pudding mould. Cover tightly with lid. Place mould on wire rack in large pot and fill pot with boiling water to about half way up the side of the mould. Cover steamer pot with lid and bring the water to a full boil then immediately reduce the heat to a gentle boil. Steam the pudding over medium-low heat for approximately 1½ hours or until cake tester inserted into centre of pudding comes out clean. (NOTE: Add more water to pot as necessary to maintain the water level at about the half-way point on the pudding mould during the entire steaming process.) Remove mould from water bath and place on wire rack and let rest for 20 minutes then turn pudding out onto serving dish and serve warm with Eggnog Sauce (recipe below).
Eggnog Sauce:
In small bowl, combine the sugar, cornstarch, and nutmeg.
Pour eggnog into large microwaveable-safe bowl. Whisk in dry ingredients until smooth. Cook on HIGH until mixture is thickened to desired consistency, stirring after each 1½ minutes. Remove from microwave and stir in vanilla, Cointreau, and butter. (Note: Sauce will thicken slightly more as it cools.)
Sauce is best served lukewarm, spooned over individual slices of Steamed Cranberry Pudding.
If you have made this recipe and enjoyed it and/or wish to share it with your friends and family, please do so on social media but be sure to share the direct link to this posting from my website.
Connect with My Island Bistro Kitchen on Social Media
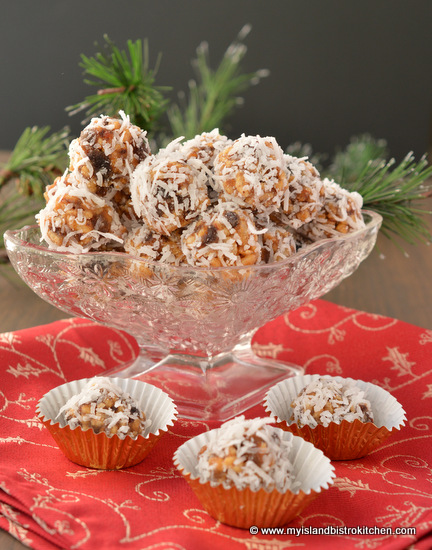
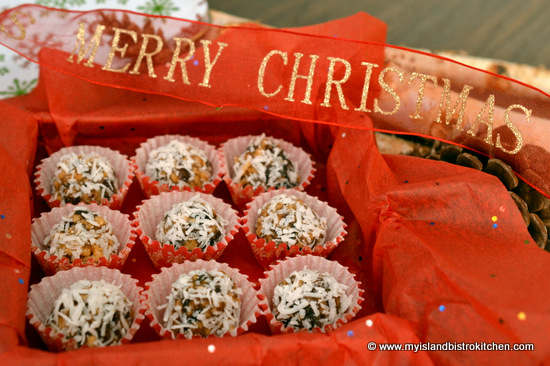
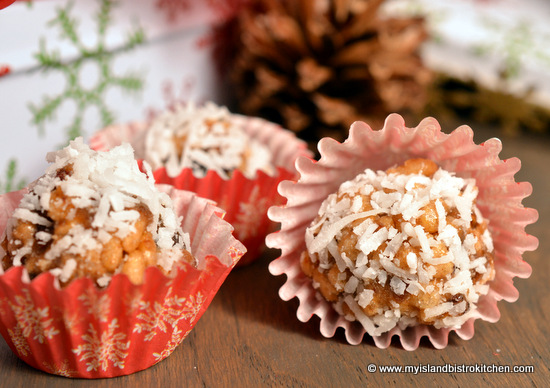
I have no idea why these tasty morsels are called cookies because, in my view, they in no way resemble my definition of a cookie! Nonetheless, they have always been called Frypan Cookies in my family and, regardless their name, they are mighty tasty. In fact, I think they’re actually more like candy than cookies.
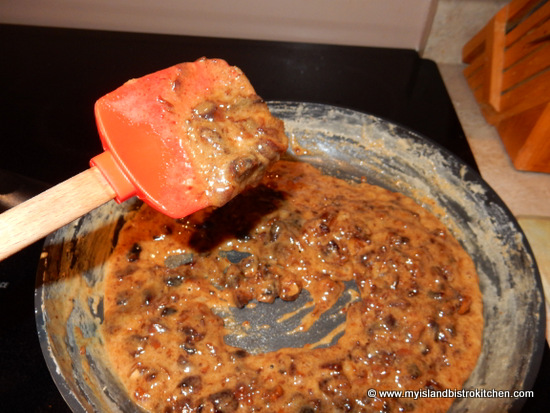
Why they are called “Frypan Cookies” is a mystery to me but that’s what I’ve always known them as and my mother has been making them since I was a wee child (and probably even longer ago than that). My best guess is that, somewhere back in time, someone picked up a frypan and used it to cook the date, sugar, and egg mixture and simply named the result “Frypan Cookies”. In any event, we’ve continued the tradition of using a frypan which, I must admit due to its shallow depth, is easier to scoop the mixture from to make the balls than would be a deeper saucepan.
While these treats don’t take a lot of ingredients or any difficult-to-find ones, I tend to only make them once a year – at Christmas – probably because that was the only time of the year my mother made them and they were always considered to be a special Christmas treat.
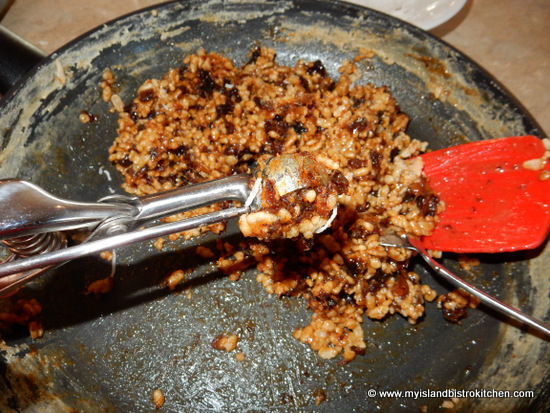
The trick to making these balls is in the thickening of the egg, sugar, and date mixture. It is important to stir the mixture continuously as it cooks to avoid scorching. Once the mixture starts to thicken, it’s done. This generally takes about 5-7 minutes.
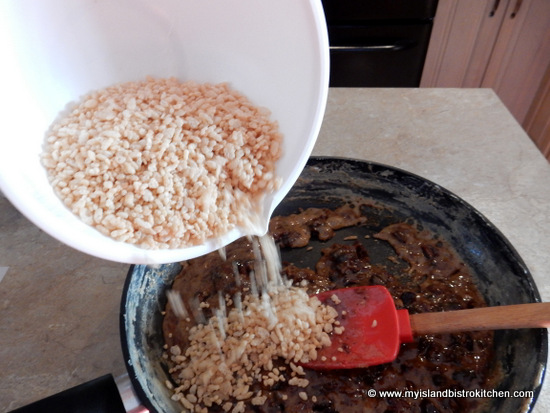
Don’t let the mixture get too thick as it will then be difficult to incorporate the rice cereal into the mixture.
Adding nuts, such as chopped walnuts or pecans, is optional in this recipe. I generally do not add them. One-half cup of chopped glazed red cherries can also be added, if desired.
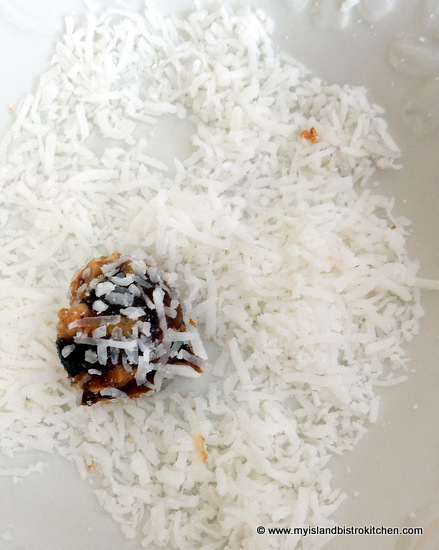
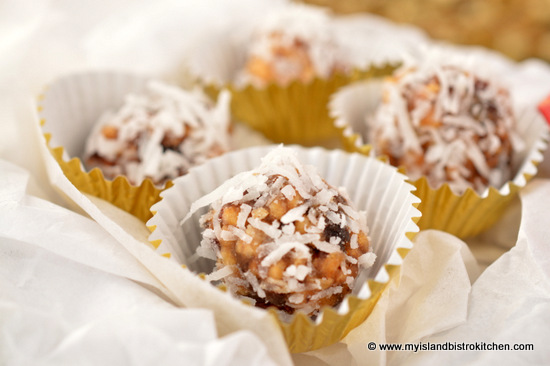
There are a couple of options when it comes to the coconut coating for frypan cookie balls. Traditionally, sweetened shredded coconut is used – this is the long stringy kind of coconut.
While, sometimes, it is tricky to get the coconut to stick to the balls, this coconut makes a more showy frypan cookie ball.
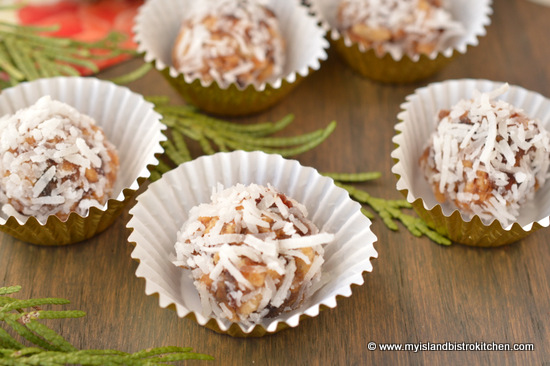
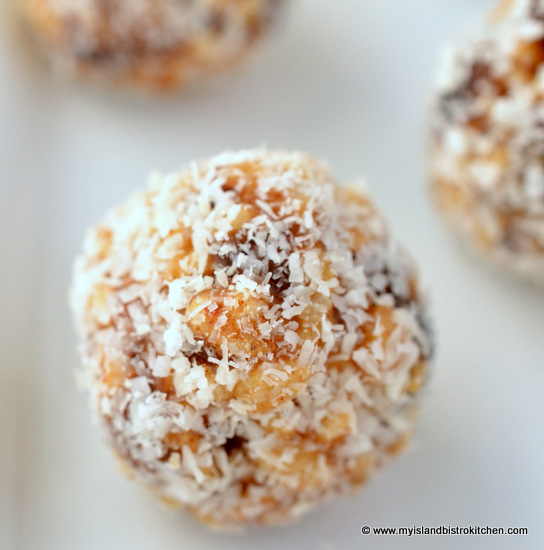
The shorter, more fine-textured, macaroon coconut may also be used.
It makes a neater looking ball but is not quite as interesting and showy looking.
I often choose the macaroon coconut if I am making these balls for trays for an afternoon tea since they are more dainty and the coconut adheres better and does not tend to fall off the balls.
Choice of coconut in which to roll the balls is, of course, a matter of personal preference.
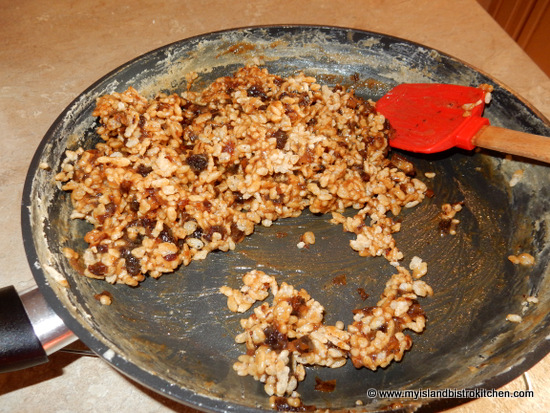
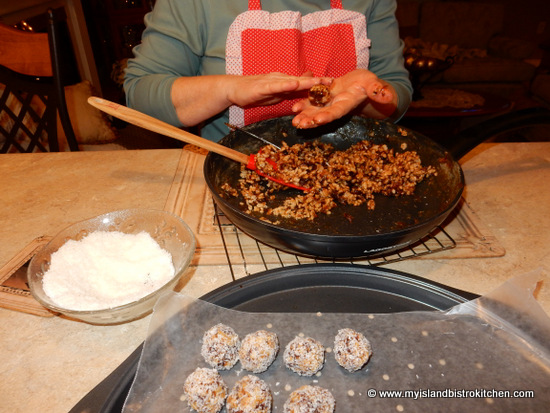
The mixture needs to be quite warm in order for the coconut to stick to the balls. So, it’s important to work quickly when making the balls. If the mixture gets too cool, you can transfer it to a microwave-safe bowl and heat the mixture for just a very few seconds (i.e., 7-8 seconds) to warm it up.
The balls can be formed by hand but it’s a sticky process (although spraying the hands with cooking spray helps).
The best method is to use a small 1″ cookie scoop. This will also ensure that the balls are of consistent size.
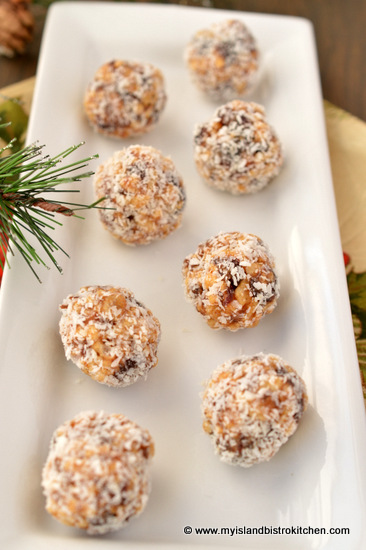
These balls need to be kept chilled and will keep in the refrigerator for about a week. They also freeze really well if longer storage is needed. Whether refrigerating or freezing, just ensure that the balls are stored in an airtight container and are separated between layers of wax paper.
Frypan Cookies
Frypan Cookie Balls
Ingredients:
2 tbsp butter 2 eggs, beaten until light 1 tsp. vanilla 1 cup granulated sugar 1½ cups pitted dates, chopped
2 cups crisped rice cereal (such as Rice Krispies) ½ cup chopped nuts (optional) Apx. 1½ – 2 cups sweetened shredded coconut or apx. 2/3 – 1 cup macaroon coconut
Method:
Line large baking sheet with wax paper.
In large frypan, over medium heat, melt the butter. Whisk the eggs, vanilla, and sugar together. Add the liquid mixture along with the dates to the frypan and reduce heat to medium low. Cook mixture, stirring constantly to avoid scorching, for approximately 5-7 minutes or until mixture thickens. Remove from heat and stir in the rice cereal and nuts.
Place coconut in bowl. Using a 1” cookie scoop, form the mixture into balls then drop balls into coconut; roll to coat then place on cookie sheet. Refrigerate until firm. Keep refrigerated in an airtight container or freeze for longer storage.
Yield: Apx. 56 balls
If you have made this recipe and enjoyed it and/or wish to share it with your friends and family, please do so on social media but be sure to share the direct link to this posting from my website.
Connect with My Island Bistro Kitchen on Social Media
2 cups crisped rice cereal (such as Rice Krispies)
½ cup chopped nuts (optional)
Apx. 1½ - 2 cups sweetened shredded coconut or apx. 2/3 - 1 cup macaroon coconut
Instructions
Line large baking sheet with wax paper.
In large frypan, over medium heat, melt the butter. Whisk the eggs, vanilla, and sugar together. Add the liquid mixture along with the dates to the frypan and reduce heat to medium low. Cook mixture, stirring constantly to avoid scorching, for approximately 5-7 minutes or until mixture thickens. Remove from heat and stir in the rice cereal and nuts.
Place coconut in bowl. Using a 1” cookie scoop, form the mixture into balls then drop balls into coconut; roll to coat then place on cookie sheet. Refrigerate until firm. Keep refrigerated in an airtight container or freeze for longer storage.
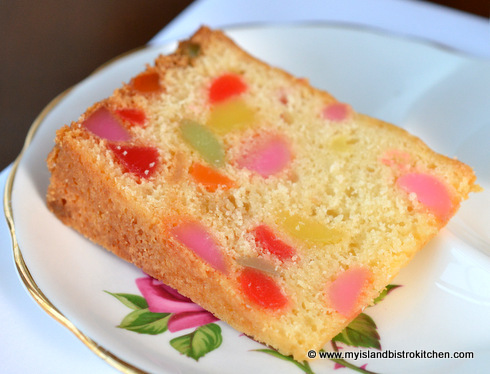
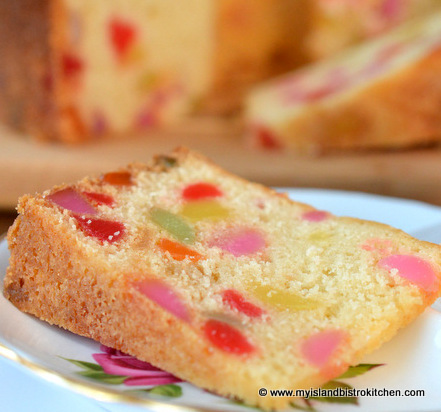
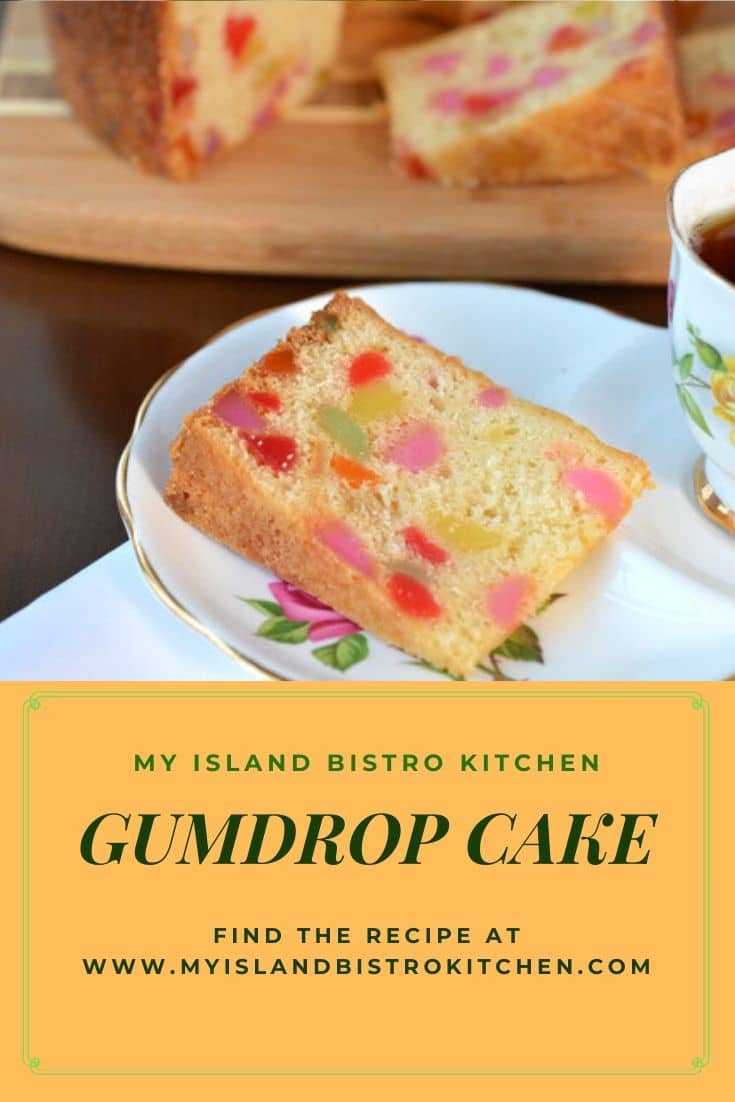
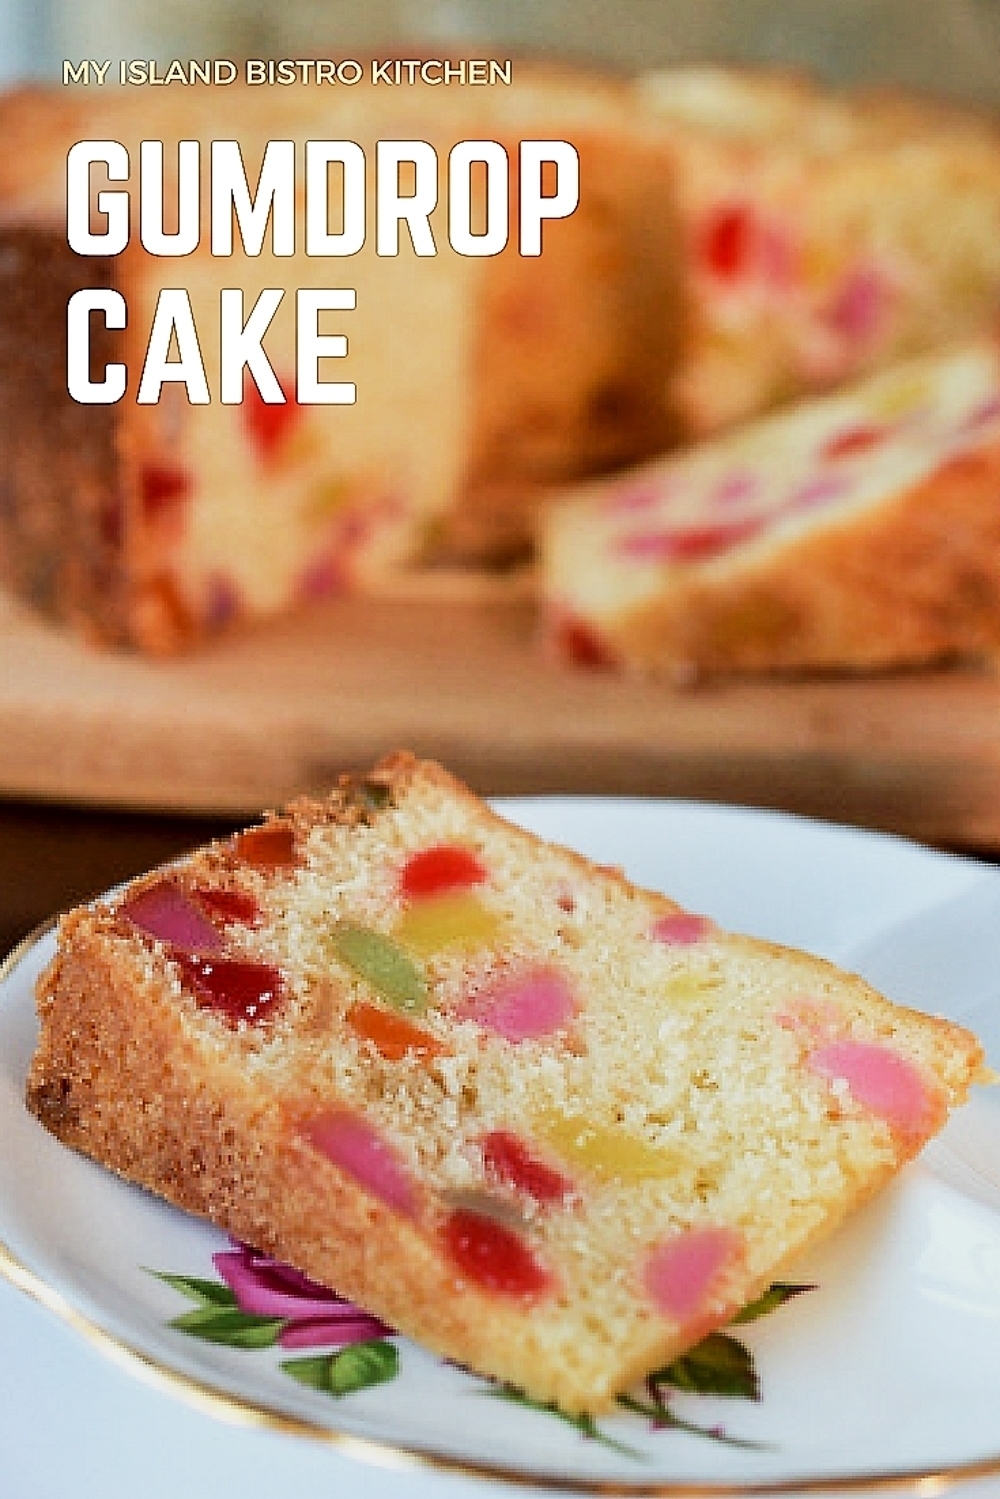
This is one of my all-time favorite cakes! It’s colorful and it’s tasty. While I make this cake at any time of the year (and it’s often a staple in my freezer because it freezes very well), it’s a great Christmas cake because of the colorful gumdrops which give it a festive appearance. It is also a perfect alternative for those who do not like the traditional fruitcakes associated with the holiday season. It’s lighter, both in the color of the cake and its texture, than a fruitcake and yet it is colorful with its myriad of shades of gumdrops.
Gumdrop Cake
The cake is a bit time-consuming to make because cutting the sticky gumdrops can be a bit tedious and it does take over 2 hours to bake so you do need to do some planning ahead to make this cake. That said, the method is not at all difficult.
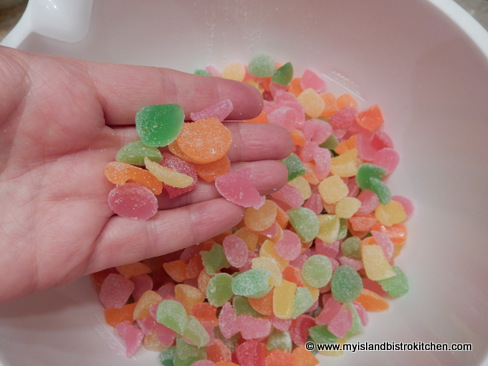
To begin, buy good sugared gumdrops. Hard to believe it but there is a difference in the quality of gumdrops. Don’t use black gumdrops in this cake – those are good for snacking while cutting up the other colored gumdrops 😉 Black gumdrops are just plain ugly in a cake and may bleed out their intense color. I also don’t put a lot of white gumdrops in the cake either because they are not bright and showy enough. Cut each of the gumdrops into 3-5 pieces, depending on the size of the gumdrops to begin with.
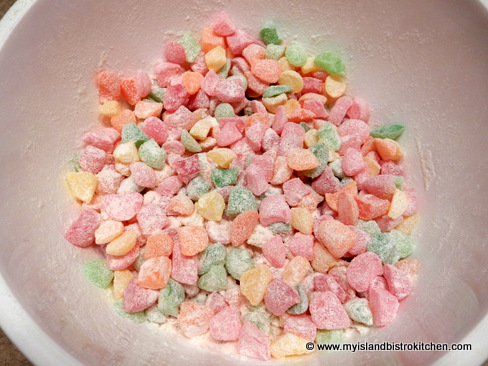
The thing about gumdrops is that they are heavy, even when they are cut. This means there is a possibility they could fall to the bottom of the cake with the top half or more of the cake having few, if any, gumdrops. To counter this issue, make sure the gumdrops are well dredged (floured). Dredging means some of the flour called for in the recipe is used to coat the cut sticky edges of the gumdrops so they don’t all stick to each other and fall, with their collected weight, to the bottom of the cake.
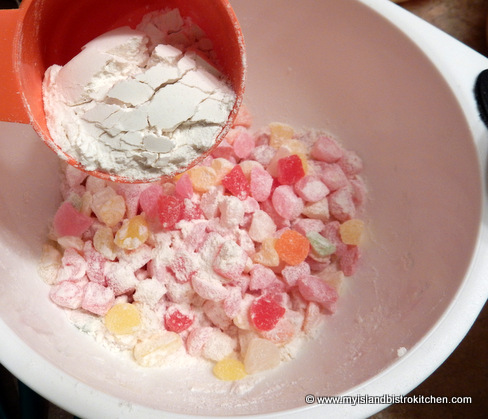
To dredge the gumdrops, simply place the cut gumdrops in a bowl and add a small amount of flour from the amount called for in the recipe. By spoon or by hand, toss the gumdrops in the flour, making sure the cut side of each gumdrop is well floured.
The other tip to avoid ‘falling gumdrops’ is to only use a reasonable amount in the recipe. It’s tempting to add lots and lots more gumdrops; however, those add weight to the cake and they will likely all get together and congregate to have a party at the bottom of the cake. This cake has a light batter so it doesn’t have the power to hold up a lot of heavy gumdrops. I use 1 pound of gumdrops for this cake and find it is sufficient.
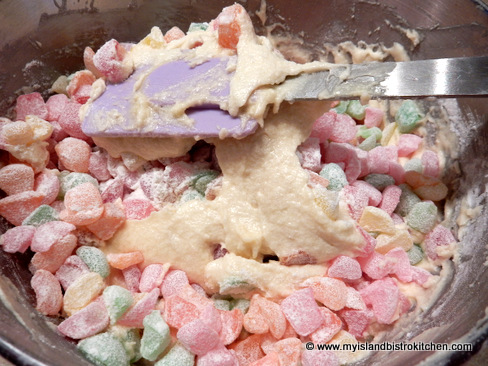
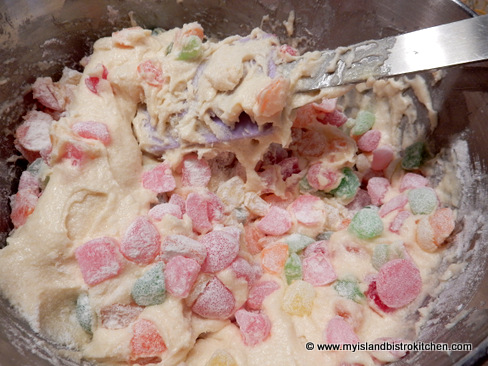
Adding the gumdrops to the batter is the last step in making this cake so, when doing so, fold them in gently with a rubber spatula and don’t over-mix. Just fold them in till there is no flour visible. Over-mixing them will remove the flour from their floured edges and may cause the gumdrops to fall to the bottom of the cake. The flour is meant to act as a “barrier” between the sticky gumdrops and the wet batter. As shown in the photograph below, just keep gently rolling the spatula over and under the batter until all the gumdrops are incorporated.
Gently folding in the gumdrops
You can see how each roll of the spatula brings up more batter each time until the gumdrops are finally all blended in.
The batter for this cake will not result in a lily-white cake because it uses butter. To get a white cake, shortening would have to be used but you would be sacrificing the butter flavour for which this cake is meant. Use the good stuff!
Gumdrop Cake
The butter will cream much easier and faster if it is at room temperature so take the butter out of the fridge an hour or two ahead of preparing the cake. Avoid the temptation of softening the butter in the microwave as, inevitably, some of it will melt and that causes a different texture to the butter. I also remove the eggs and the milk from the fridge about 35-40 minutes before making the cake, bringing them to room temperature. I find this helps the ingredients to incorporate better and more smoothly than if they are used in their refrigerated cold state.
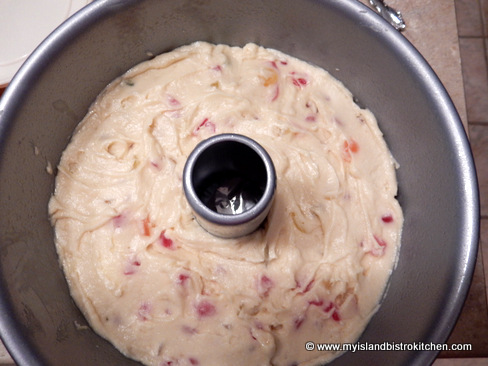
The best pan to use for this cake is a funnel cake pan. The hole in the center of this pan helps the cake to bake evenly without it falling in the center, leaving it unbaked and gummy. I use my large 16-cup angel food pan for this recipe but a slightly smaller funnel pan would accommodate the amount of batter called for in this recipe.
Place the oven rack in the center of the oven to bake the cake and place the cake pan in the center of the rack. If the cake starts to brown too quickly on the top, loosely lay a piece of tin foil over the top of the pan once the top of the cake is set. It takes about 2 hours and 15 minutes for this cake to bake in my oven but I recommend that you start testing for doneness at the 2 hour point so the cake does not dry out. It is done when a cake tester inserted near the center close to the funnel comes out clean and the top of the cake is no longer sticky.
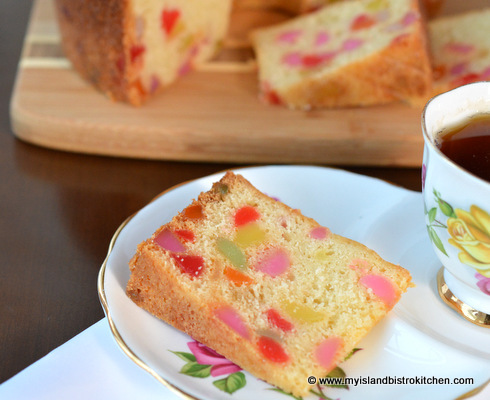
Remove the cake from the oven and let it cool in the pan for 20-30 minutes then turn it out on to a wire rack, removing the parchment paper from the bottom of the cake. Let the cake cool completely before cutting. This cake is best left for a day or two to age before slicing it.
3 cups flour (reserve 1/4 cup for dredging cut gumdrops) 2½ tsp baking powder ½ tsp salt
1 cup milk, room temperature
1 lb gumdrops, cut into 3-5 pieces each
Method:
Place oven rack in center of oven and preheat oven to 300°F. Grease large funnel pan and line bottom with parchment paper.
In medium-sized bowl, dredge the cut gumdrops with 1/4 cup of the flour, making sure that the cut edges of each gumdrop are well floured. Set aside. In separate bowl, sift together the remaining flour, baking powder and salt. Set aside.
In bowl of stand mixer, cream the butter. Gradually add the sugar, beating until well incorporated. Add the eggs, one at a time, beating well after each addition. Beat in the vanilla along with the almond and lemon flavourings. Add the dry and wet ingredients in three parts (3 parts dry and 2 parts wet) starting and ending with the dry ingredients. After all ingredients have been added, beat batter on medium speed for 1 minute.
Remove bowl from stand mixer and, by hand, gently fold in the floured gumdrops just until incorporated and no dry flour remains visible. Do not overmix.
Transfer batter to prepared pan and, with knife, smooth batter out even. Bake for approximately 2¼ hours or until cake tester inserted near funnel center of pan comes out clean. Remove cake from oven and let cool in pan for 20-30 minutes then turn cake out onto wire rack to cool completely. Cake will slice better a day or two after baking.
Gumdrop Cake
If you have made this recipe and enjoyed it and/or wish to share it with your friends and family, please do so on social media but be sure to share the direct link to this posting from my website.
Connect with My Island Bistro Kitchen on Social Media
Follow “the Bistro” on Pinterestat https://www.pinterest.ca/peibistro/ and pin the Pinterest-ready photo found at the end of this post to your favorite Pinterest boards.
A buttery cake loaded with flavour and dotted with colorful gumdrops.
Ingredients
1 cup butter, softened
1 2/3 cups granulated sugar
3 eggs, room temperature
1¼ tsp vanilla
1 tsp almond flavouring
1 tsp lemon flavouring
3 cups flour (reserve 1/4 cup for dredging cut gumdrops)
2½ tsp baking powder
½ tsp salt
1 cup milk, room temperature
1 lb gumdrops, cut into 3-5 pieces each
Instructions
Place oven rack in center of oven and preheat oven to 300°F. Grease large funnel pan and line bottom with parchment paper.
In medium-sized bowl, dredge the cut gumdrops with 1/4 cup of the flour, making sure that the cut edges of each gumdrop are well floured. Set aside. In separate bowl, sift together the remaining flour, baking powder and salt. Set aside.
In bowl of stand mixer, cream the butter. Gradually add the sugar, beating until well incorporated. Add the eggs, one at a time, beating well after each addition. Beat in the vanilla along with the almond and lemon flavourings. Add the dry and wet ingredients in three parts (3 parts dry and 2 parts wet) starting and ending with the dry ingredients. After all ingredients have been added, beat batter on medium speed for 1 minute.
Remove bowl from stand mixer and, by hand, gently fold in the floured gumdrops just until incorporated and no dry flour remains visible. Do not overmix.
Transfer batter to prepared pan and, with knife, smooth batter out even. Bake for approximately 2¼ hours or until cake tester inserted near funnel center of pan comes out clean. Remove cake from oven and let cool in pan for 20-30 minutes then turn cake out onto wire rack to cool completely. Cake will slice better a day or two after baking.
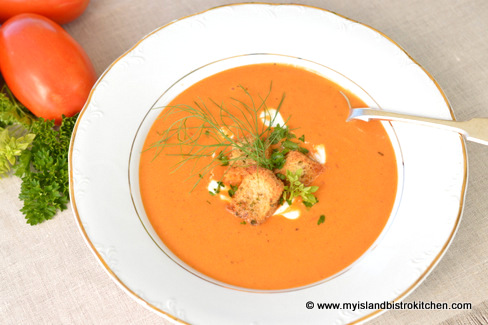
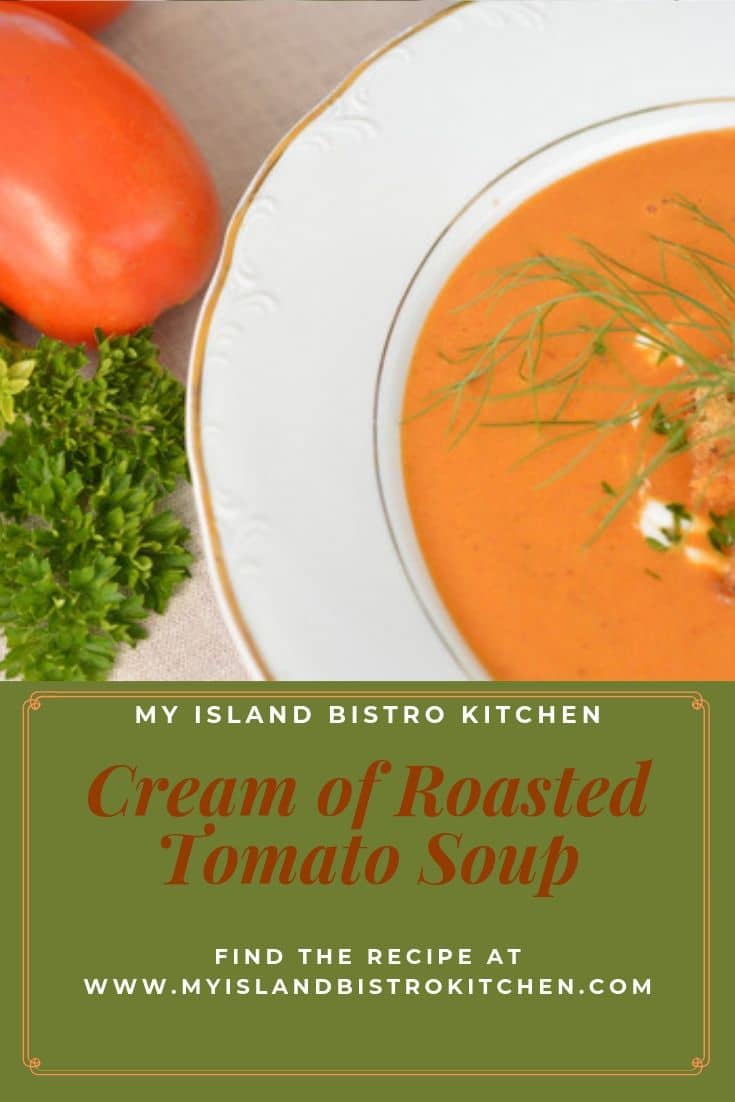
One of my all-time favorite comfort soups is homemade tomato soup. I have been working for the past couple of years to develop a tomato soup recipe that uses the right blend of ingredients and spices to achieve a balanced tomato soup that is pleasing to my palate. Recipe development can be a lengthy and tedious process and the recipe I am sharing today is the result of my efforts. Once I crafted the final version of this soup, no canned tomato soup will now do!
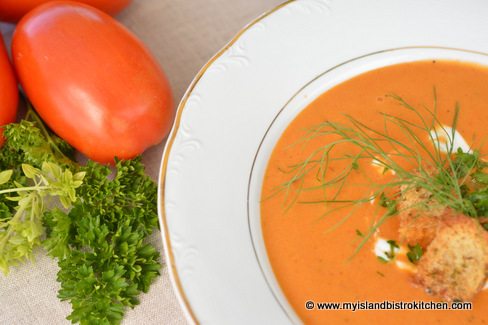
Cream of Roasted Tomato Soup
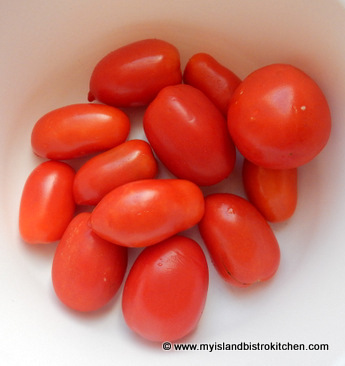
The tomatoes I recommend to use in tomato soup are the plum tomatoes, sometimes referred to as the “Romas” or “Italian tomatoes”.
Roma Tomatoes
These are an oblong, almost egg-shaped, tomato and they are a firm tomato, quite meaty, and less watery with fewer seeds than other tomato varieties. They also have a gorgeous vibrant red color that translates into wonderful color for soups and sauces. They are ideal for roasting because of their thick wall of flesh that does not break down and collapse quickly. For these reasons, the Romas are often used in canning, soup-making, and for making tomato sauce and paste.
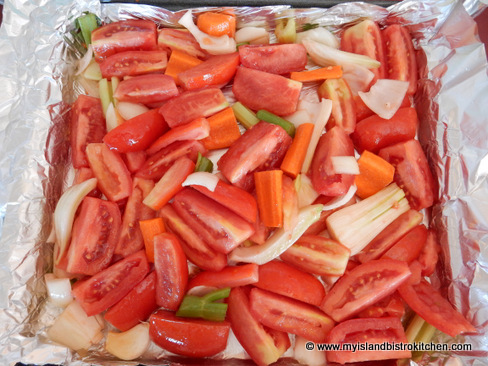
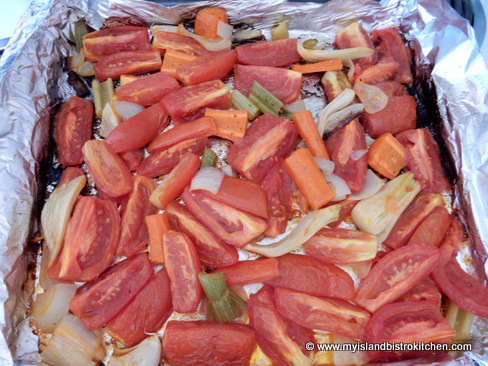
I like to roast the vegetables for this soup because the roasting draws out and heightens their flavour, making a more flavorful soup. It’s important to coat (but not drench or soak) the vegetables with a high quality olive oil before roasting them. This will help to keep the vegetables from drying out during the roasting process. Although a plain olive oil can certainly be used, I like to use a flavored oil such as oregano or herbes de provence, for example, as this adds additional flavor. The only vegetable I find difficult to get roasted soft is the celery so, for this vegetable, I recommend cutting it into small chunks about 1″ long. Through the roasting and cooking processes, the celery will eventually soften but it does take more time (but it is necessary for the flavor it provides to the soup). Use care not to burn or over-char the vegetables — there is a definite line between vegetables that are well-roasted and those that are burned. The goal is to have a flavourful soup that uses roasted vegetables but has no ‘burnt’ taste to it.
Use the freshest of ingredients you can find for this soup; it matters. Using fresh herbs is essential for the best flavor of the soup and add them near the end of the cooking process so their flavor will be more intense and true.
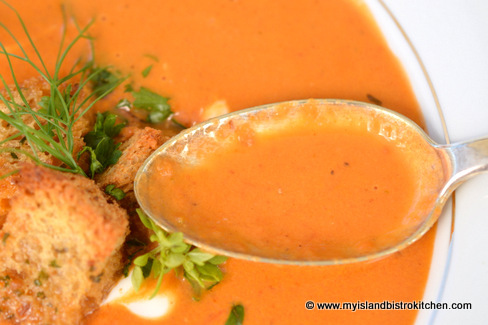
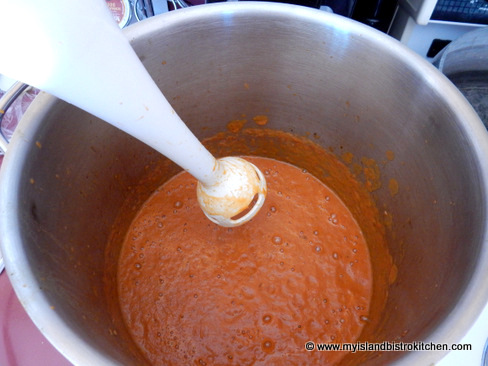
I use a hand-held immersion blender to purée the vegetables although a standard food processor would also work. How smooth to purée the mixture is a matter of preference. For a more refined soup, purée the mixture until very smooth then strain it through a fine wire-mesh sieve; for a more rustic, artisan soup, purée less and don’t strain through a sieve.
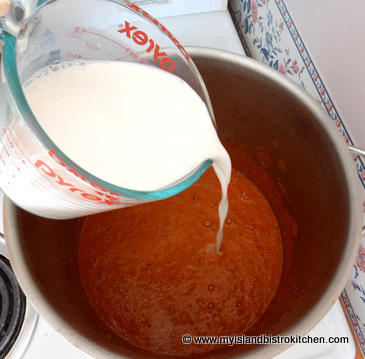
While whole milk by itself can be used in this recipe, I like to add a mixture of whole milk and blend (or, if I want to be really extravagant, whipping cream) because it gives better flavor and texture to the soup. I make this soup in large batches and freeze it. It will not freeze well and maintain its quality texture if anything less than whole milk is used and it freezes even better if blend or whipping cream is used along with the whole milk.
This is not a highly spiced soup because my intent is that it remain very much a tomato-flavored soup. Any ingredients added are intended to compliment and enhance the soup’s flavor, not mask or overpower the tomato flavor.
Cream of Roasted Tomato Soup
Cream of Roasted Tomato Soup
Ingredients:
1 medium-sized carrot 1 medium-sized onion 1 leek ½ celery stalk 1 – 1½ oz piece of fennel bulb 2½ lbs ripe plum tomatoes (Romas) 4-5 garlic cloves, unpeeled Olive oil 1 tbsp butter 2 tbsp liquid chicken bouillon 2 cups hot water 1 tbsp ketchup or tomato paste 1 tsp sugar or honey 1 bay leaf 3 tbsp fresh basil, chopped 1 tbsp fresh oregano, chopped 1 tbsp fresh thyme, chopped 1¼ cups whole milk ½ – ¾ cup blend or whipping cream Sea Salt Pepper
Preheat oven to 450°F. Place oven rack in center of oven.
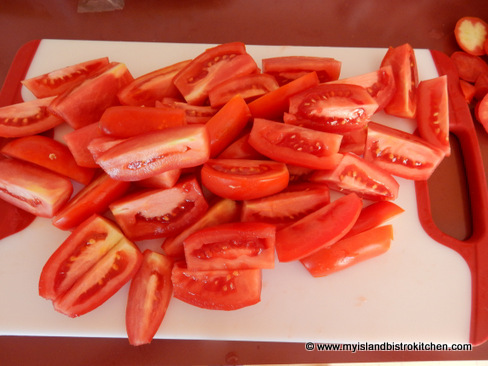
Peel carrot, onion, and strip outer layers from leek – use only white and light green part of the leek. Cut carrot, leek, and celery into chunks about 1” – 2”. Chop fennel bulb into 2-3 chunks. Cut tomatoes and onion into quarters. Place vegetables into a large bowl and add unpeeled garlic cloves. Drizzle vegetables and garlic cloves with enough olive oil to coat and sprinkle with sea salt and pepper. Toss gently to coat mixture with oil. Place vegetables and garlic, single layer, on greased tinfoil-lined baking pan.
Roast, uncovered for apx. 45-60 minutes, or until vegetables are cooked soft (do not burn them). Remove vegetables from oven and split garlic peeling to extract garlic.
Melt 1 tbsp of butter in a large pot over medium-high heat. Add the roasted vegetables and garlic along with the liquid chicken bouillon, hot water, ketchup or tomato paste, sugar or honey, and bay leaf. Stir. Cover. Bring to a boil then immediately reduce heat to simmer for 20 minutes. In the last 10 minutes of simmering, add the fresh basil, oregano, and thyme.
Let mixture cool to lukewarm. Remove bayleaf, then purée mixture with immersion blender or in a food processor to desired consistency/smoothness. For an even creamier texture, strain the mixture through a fine wire mesh sieve and discard any remaining solid bits.
Return puréed mixture to large pot. Add milk and blend (or whipping cream). Stir well.
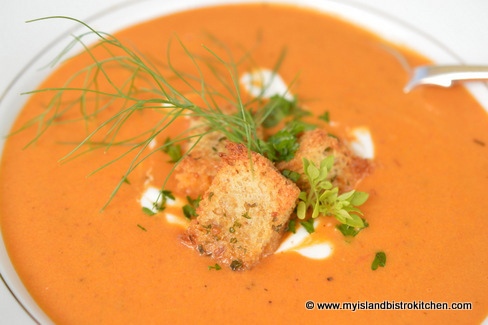
Heat gently, over medium-low heat, stirring often to prevent scorching. Season with salt and pepper to taste. Ladle into soup bowls and garnish with sour cream, seasoned croutons and fresh herbs, if desired.
Cream of Roasted Tomato Soup
Yield:Apx. 6-8 servings
—————————————————————————-
Thank you for visiting “the Bistro” today. If you enjoyed this posting and recipe, please share it on your social media websites.
Connect with “the Bistro” through the following social media:
A flavorful homemade tomato soup filled with goodness.
Ingredients
1 medium-sized carrot
1 medium-sized onion
1 leek
½ celery stalk
1 – 1½ oz piece of fennel bulb
2½ lbs ripe plum tomatoes (Romas)
4-5 garlic cloves, unpeeled
Olive oil
1 tbsp butter
2 tbsp liquid chicken bouillon
2 cups hot water
1 tbsp ketchup or tomato paste
1 tsp sugar or honey
1 bay leaf
3 tbsp fresh basil, chopped
1 tbsp fresh oregano, chopped
1 tbsp fresh thyme, chopped
1¼ cups whole milk
½ - ¾ cup blend or whipping cream
Sea Salt
Pepper
Sour Cream (optional)
Seasoned Croutons (optional)
Fresh Herbs (optional)
Instructions
Preheat oven to 450°F. Place oven rack in center of oven.
Peel carrot, onion, and strip outer layers from leek – use only white and light green part of the leek. Cut carrot, leek, and celery into chunks about 1” - 2”. Chop fennel bulb into 2-3 chunks. Cut tomatoes and onion into quarters. Place vegetables into a large bowl and add unpeeled garlic cloves. Drizzle vegetables and garlic cloves with enough olive oil to coat and sprinkle with sea salt and pepper. Toss gently to coat mixture with oil. Place vegetables and garlic, single layer, on greased tinfoil-lined baking pan. Roast, uncovered for apx. 45-60 minutes, or until vegetables are cooked soft (do not burn them). Remove vegetables from oven and split garlic peeling to extract garlic.
Melt 1 tbsp of butter in a large pot over medium-high heat. Add the roasted vegetables and garlic along with the liquid chicken bouillon, hot water, ketchup or tomato paste, sugar or honey, and bay leaf. Stir. Cover. Bring to a boil then immediately reduce heat to simmer for 20 minutes. In the last 10 minutes of simmering, add the fresh basil, oregano, and thyme.
Let mixture cool to lukewarm. Remove bayleaf, then purée mixture with immersion blender or in a food processor to desired consistency/smoothness. For an even creamier texture, strain the mixture through a fine wire mesh sieve and discard any remaining solid bits.
Return puréed mixture to large pot. Add milk and blend (or whipping cream). Stir well. Heat gently, over medium-low heat, stirring often to prevent scorching. Season with salt and pepper to taste. Ladle into soup bowls and garnish with sour cream, seasoned croutons and fresh herbs, if desired.
Title:Best of Bridge Home Cooking Author: Various Publication Date: 2015 Publisher: Robert Rose Inc. Cover: Hardcover Price: $29.95 Pages: 360
Robert Rose Inc. has offered me the opportunity to conduct a review of Best of Bridge Home Cooking. This is the latest in the “Best of Bridge” series of cookbooks.
This cookbook is a collection of standard home cooking recipes that aims to get people in to the kitchen to create special memories and meals around the table. Many of the recipes would be suitable for every day meals. The book has an attractive, sturdy hardcover and the pages are spiral bound making it easy for the book to stay open and the pages to lay flat for the recipe being made.
The book features a collection of 250 recipes spread out through 13 chapters: Breakfast, Breads & Muffins; Snacks, Spreads & Dips; Soups; Salads; Sandwiches, Lunches & Light Suppers; One-pot Dinners; Pizza, Pasta & Noodles; Meatless Mains; Fish & Seafood; Chicken & Turkey; Pork, Lamb & Beef; Side Dishes; and Desserts & Sweet Treats. At the beginning of each chapter, there is also a separate table of contents outlining the recipes (and their page numbers) found in that section of the book. There is also a handy alphabetical index at the back of the book.
Each recipe is accompanied by a 1-2 sentence lead-in about the recipe and many offer serving suggestions. In addition, useful tips and suggestions for alternate ingredients or ways to vary a recipe are provided with many of the recipes.
The Best of Bridge books use capital letters in a font that I find too large and folksy. This makes the pages cluttery and difficult to read. Generally, the instructions for making the recipes are all lumped together in one long paragraph, as you’ll see in the three recipes below which the publisher has granted me permission to include with this review. This instruction-writing style makes it difficult to follow the method. I find cookbooks that lay out the instructions in separate, step-by-step paragraphs are easier to follow, particularly for less experienced cooks. Breaking down the steps of a recipe into separate short paragraphs makes them less daunting and it is easier and quicker to find your place and progress in the instructions as you go about making the recipe.
I found the ingredients in recipes are used in the instructions in the order in which they are listed and, for the most part, the instructions are easily understandable. The recipes in the book call for, what I would consider to be, ordinary ingredients which makes it easy to shop for and to prepare the dishes. Most, if not all, ingredients would be found in standard supermarkets. However, many recipes call for pre-packaged foods and, in particular, a lot of canned goods. While this may have been a trend in the 1970s – 1990s, and it is a quick way to pull together a meal, today there is a trend toward the slow food movement, cooking from scratch, and cooking healthy. Therefore, with many diets restricting the amount of salt intake, simply opening and dumping cans of salt-laden ingredients with preservatives into dishes to make a meal may not be a selling point for everyone.
The exact quantity of ingredients called for in some recipes is sometimes vague. For example, some recipes call for ingredients in measures such as 1 head of broccoli, 2 small zucchini, or 1 bunch of asparagus. These products are available in different sizes so it would have been clearer to have specified a certain pound or kilogram measure, for example. As well, some recipes call for 1 onion – onions, too, come in different sizes so, for the benefit of more inexperienced cooks, it would be preferable if the ingredients specified if it is ¼ cup, ½ cup, or 1 cup of chopped onions. Providing exact measures helps to ensure successful cooking, particularly for novice cooks.
I also found several recipes in the book for the same dish – for example, there are about 5 chili recipes and more than one recipe for shepherd’s pie. When I buy a cookbook, I expect that it has been quality controlled and recipes are not repetitive, even if there are slight ingredient differences in the recipes. Therefore, unless the cookbook is specifically a book on chili or shepherd’s pie, I suggest picking just one recipe for each when it is a general cookbook. The other thing I noted was that there were some really basic recipes like the one on page 8 for hot oatmeal calling for rolled oats, salt, and water. If I am paying $29.95 for a cookbook, I am not looking for a recipe that would be available on the back of a rolled oats package when I buy them. Recipes for basic potato salad, peanut butter cookies, macaroni and cheese, and simple stir-fries are ones that can be found in other sources such as existing cookbooks or through a quick internet search. If I am buying a cookbook today to add to my collection, I am looking for one that has new or different recipes that I don’t already have in one or more cookbooks already on my shelf or would not likely be able to find through an internet search. In short, I’m looking for something new and different or, if it is a traditional recipe, that it has been updated or jazzed up in some way.
There are a lot of slow cooker recipes in this cookbook. Not everyone owns a slow cooker, or even likes to cook by that method. My suggestion would be that with a count of about 40 slow cooker recipes in the book, perhaps those should have been reserved for a specialized slow cooker recipe book.
There are 24 color photos in the book and they are of good quality but there is obviously not a photo for each of the 250 recipes. Including photos is so important in a cookbook as, not only do photos of mouth-watering food inspire people to try the recipes but the color photos also give a frame of reference of what the finished dish should look like. Including a large book of page after page of solid print is not very inviting or inspiring, particularly when the subject matter is food.
Test-driving recipes
I tested three recipes out of the cookbook. Robert Rose Inc has given me permission to share the recipes and their photos for Carrot Raisin Muffins, Just Peachy Pork, and Creamy Tuna Pasta Bake to accompany my review of this cookbook. The recipes follow at the end of this review.
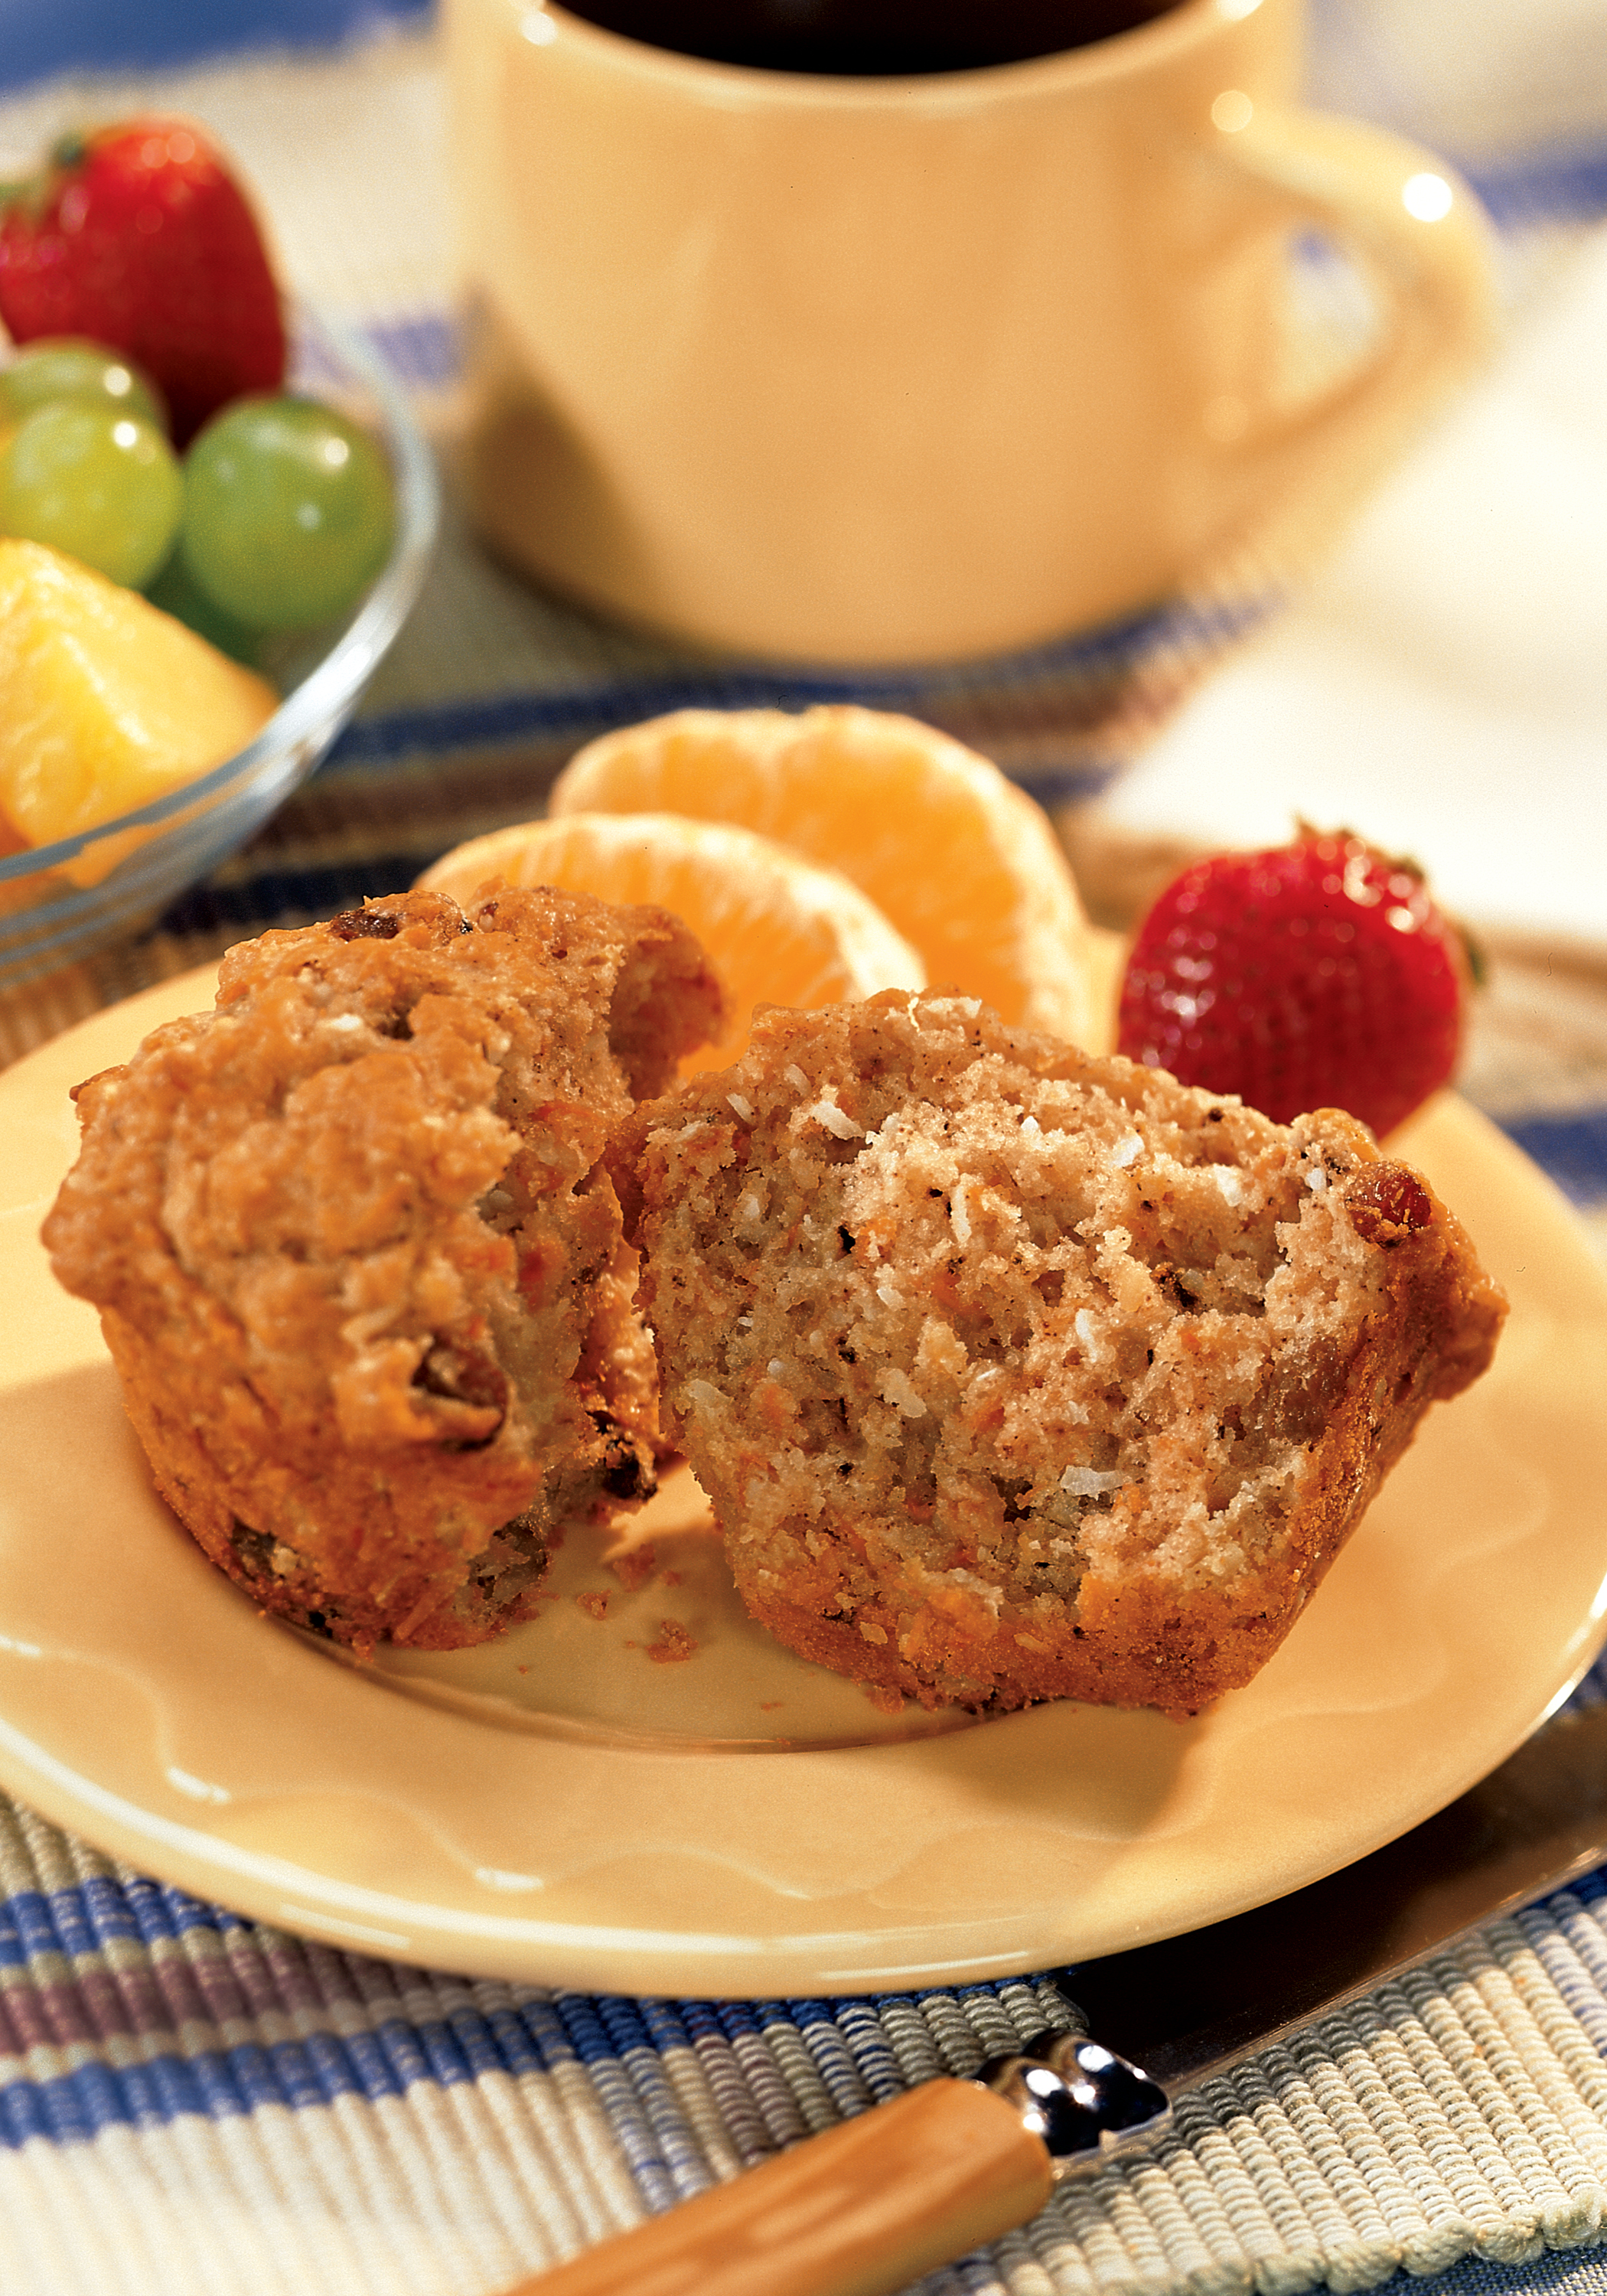
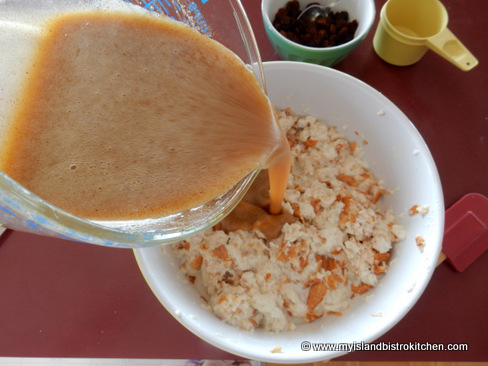
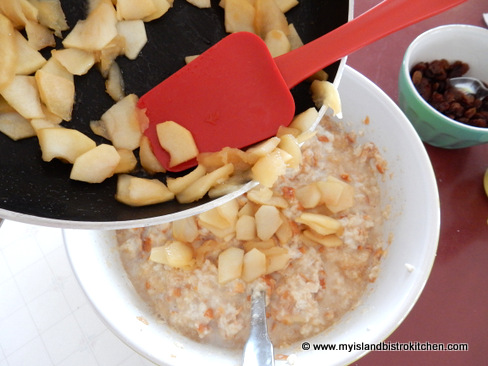
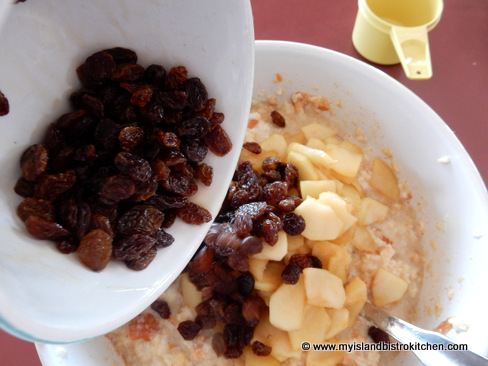
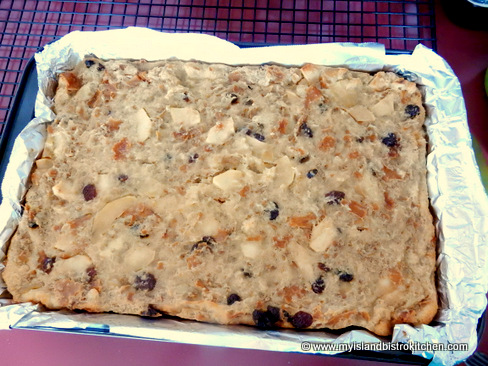
Carrot Raisin Muffins
These muffins combine a tasty combination of grated carrots and apple, raisins, coconut, cinnamon, and nutmeg. These turned out for me but they are time-consuming to make because the carrots and apple have to be grated. The recipe indicates that it yields 16 muffins; I got 15 out of the batch and they certainly were not large muffins by any means. The instructions said to bake the muffins for 25-30 minutes; however, mine were baked in 17 minutes (and my oven has true temperature) so the baking time was off substantially.
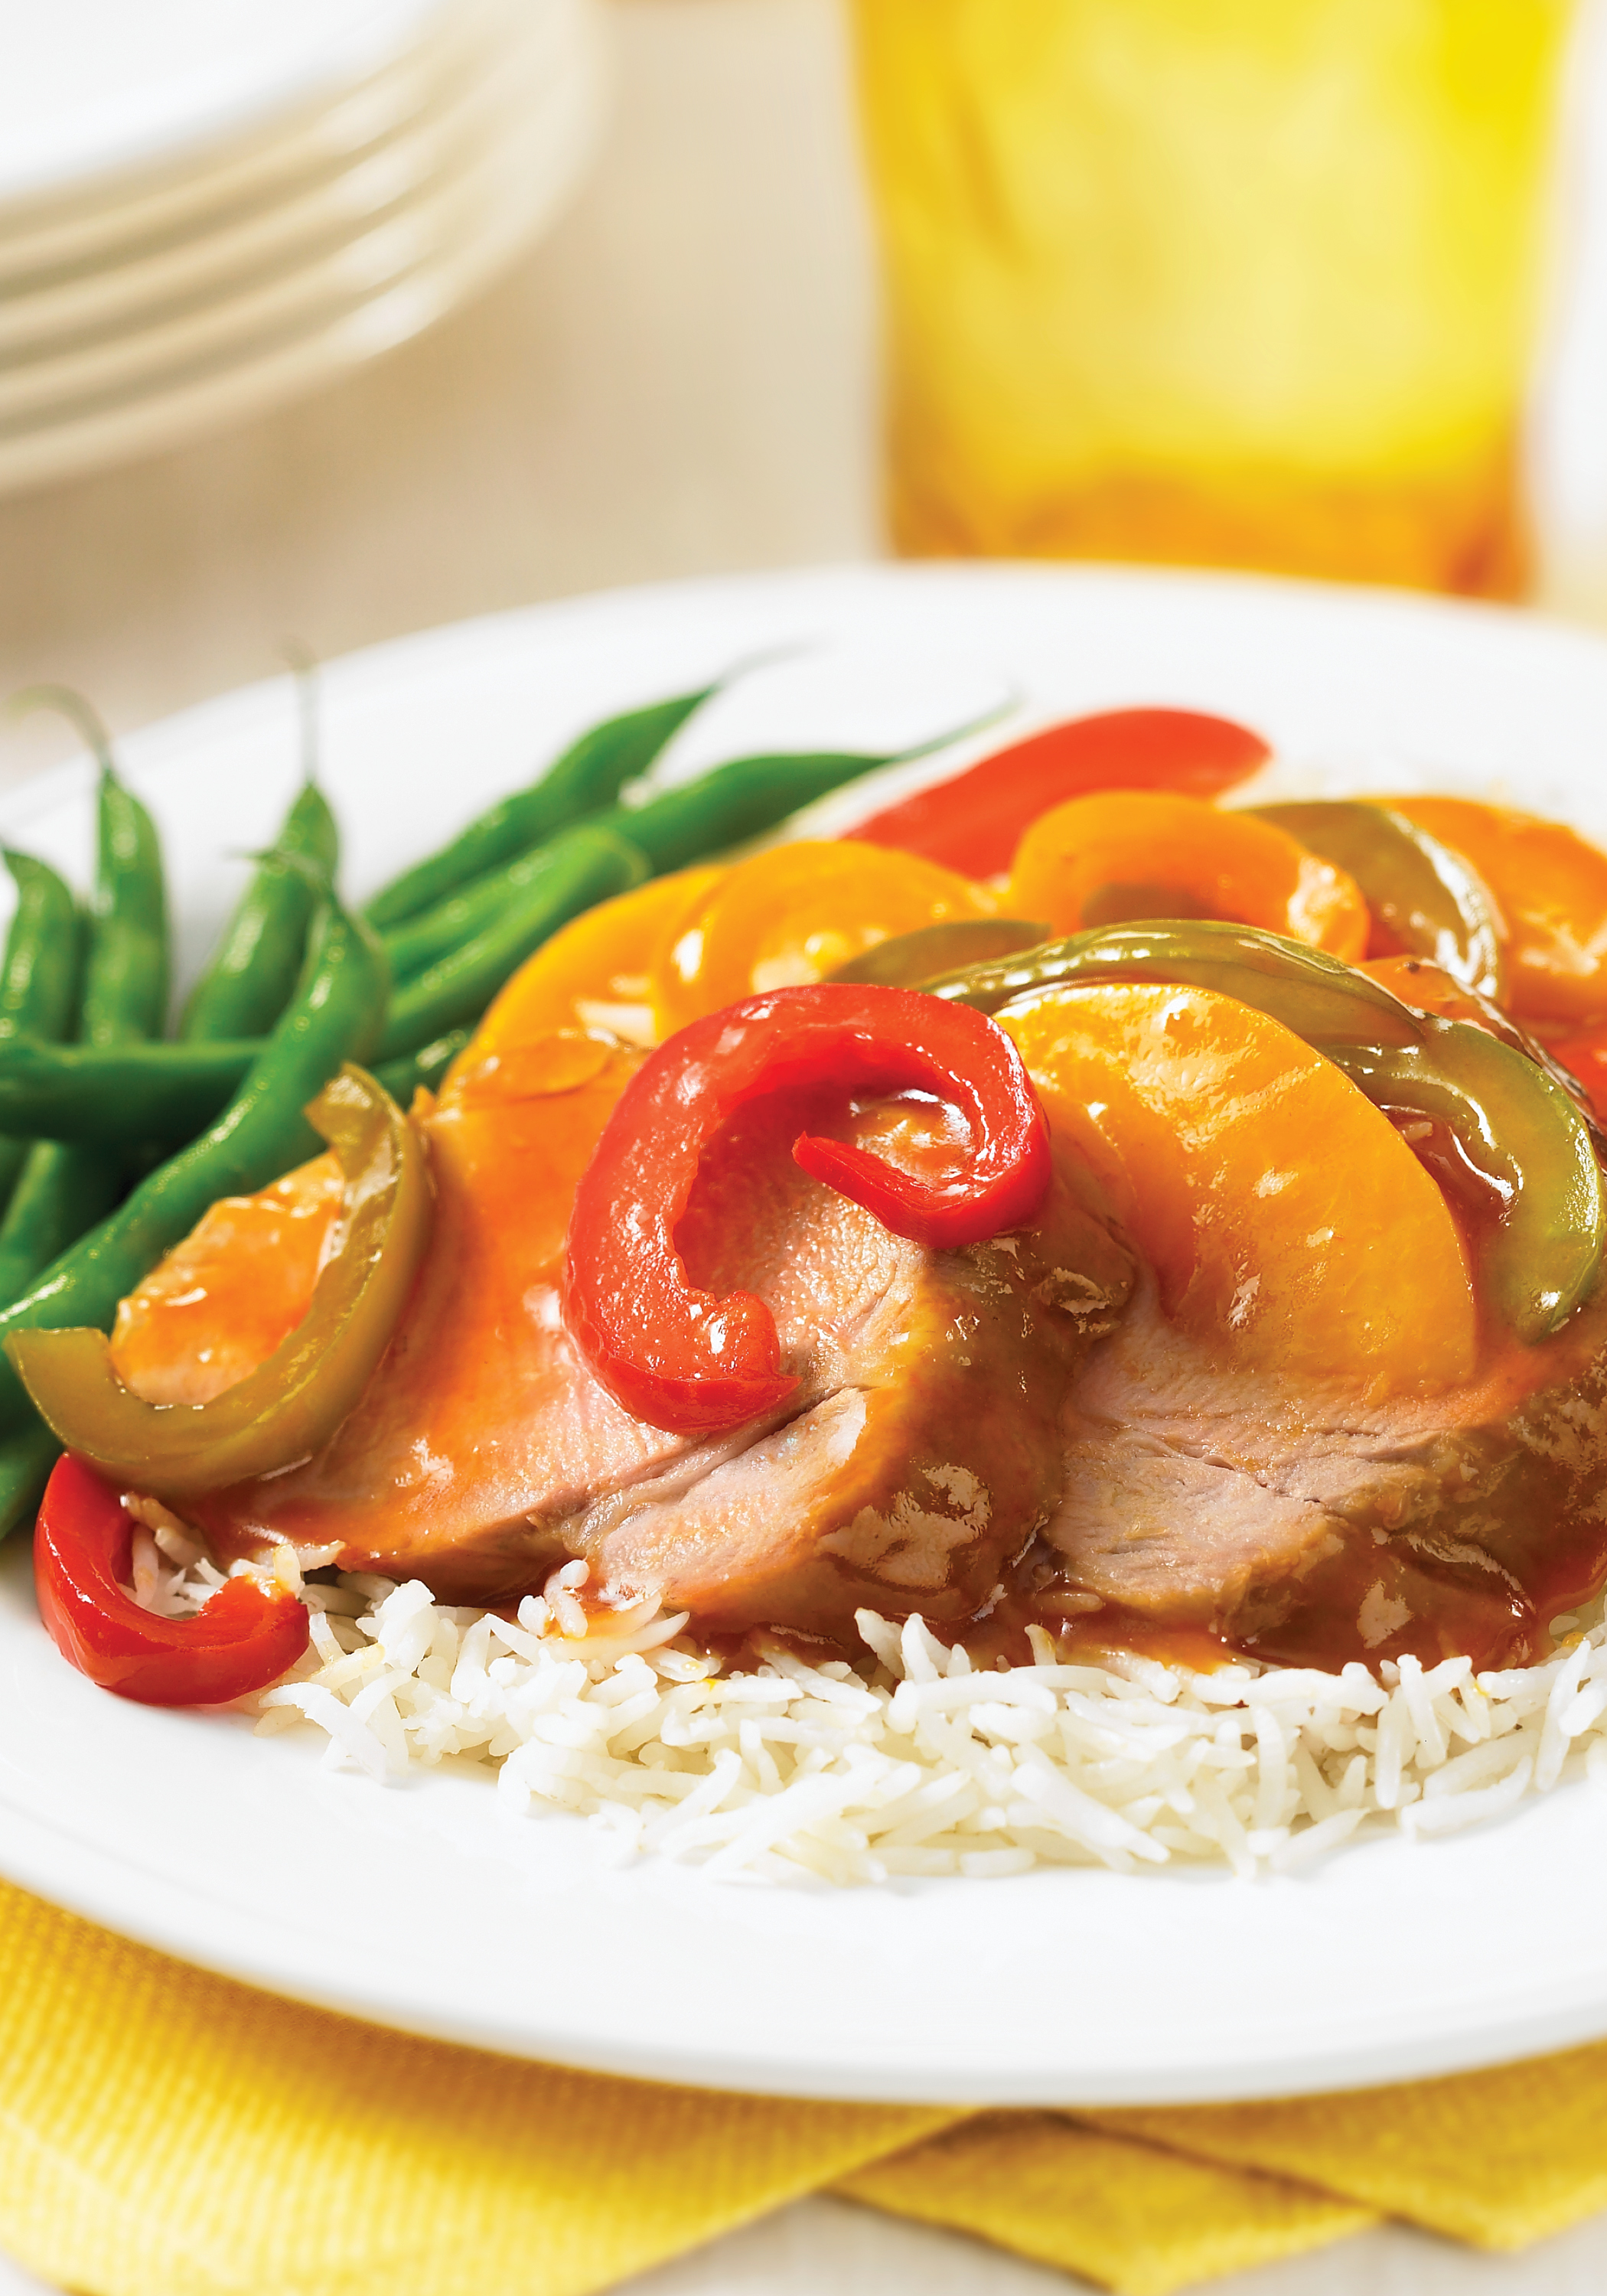
Just Peachy Pork
This recipe, in a word, was a flop and it had expensive ingredients in it. The recipe calls for 1 lb pork tenderloin, canned peaches, green pepper, barbecue sauce, and Dijon mustard. When I read the recipe, I wondered if it had enough of the right ingredients to give it flavour and I found it did not. This dish had absolutely no flavour and was not a good use of an expensive pork tenderloin. The list of ingredients caused me to wonder what color the sauce would be. The sauce turned an ugly gray-brown color (probably due to the barbeque sauce and mustard) and the green pepper discoloured and went limp as it cooked in the oven. This dish turned out to be a very unappetizing color, did not plate well, and had zero flavour. I will not make this again. The publisher has provided a photograph for the purposes of this review and my dish did not in any way resemble the promotional photograph.
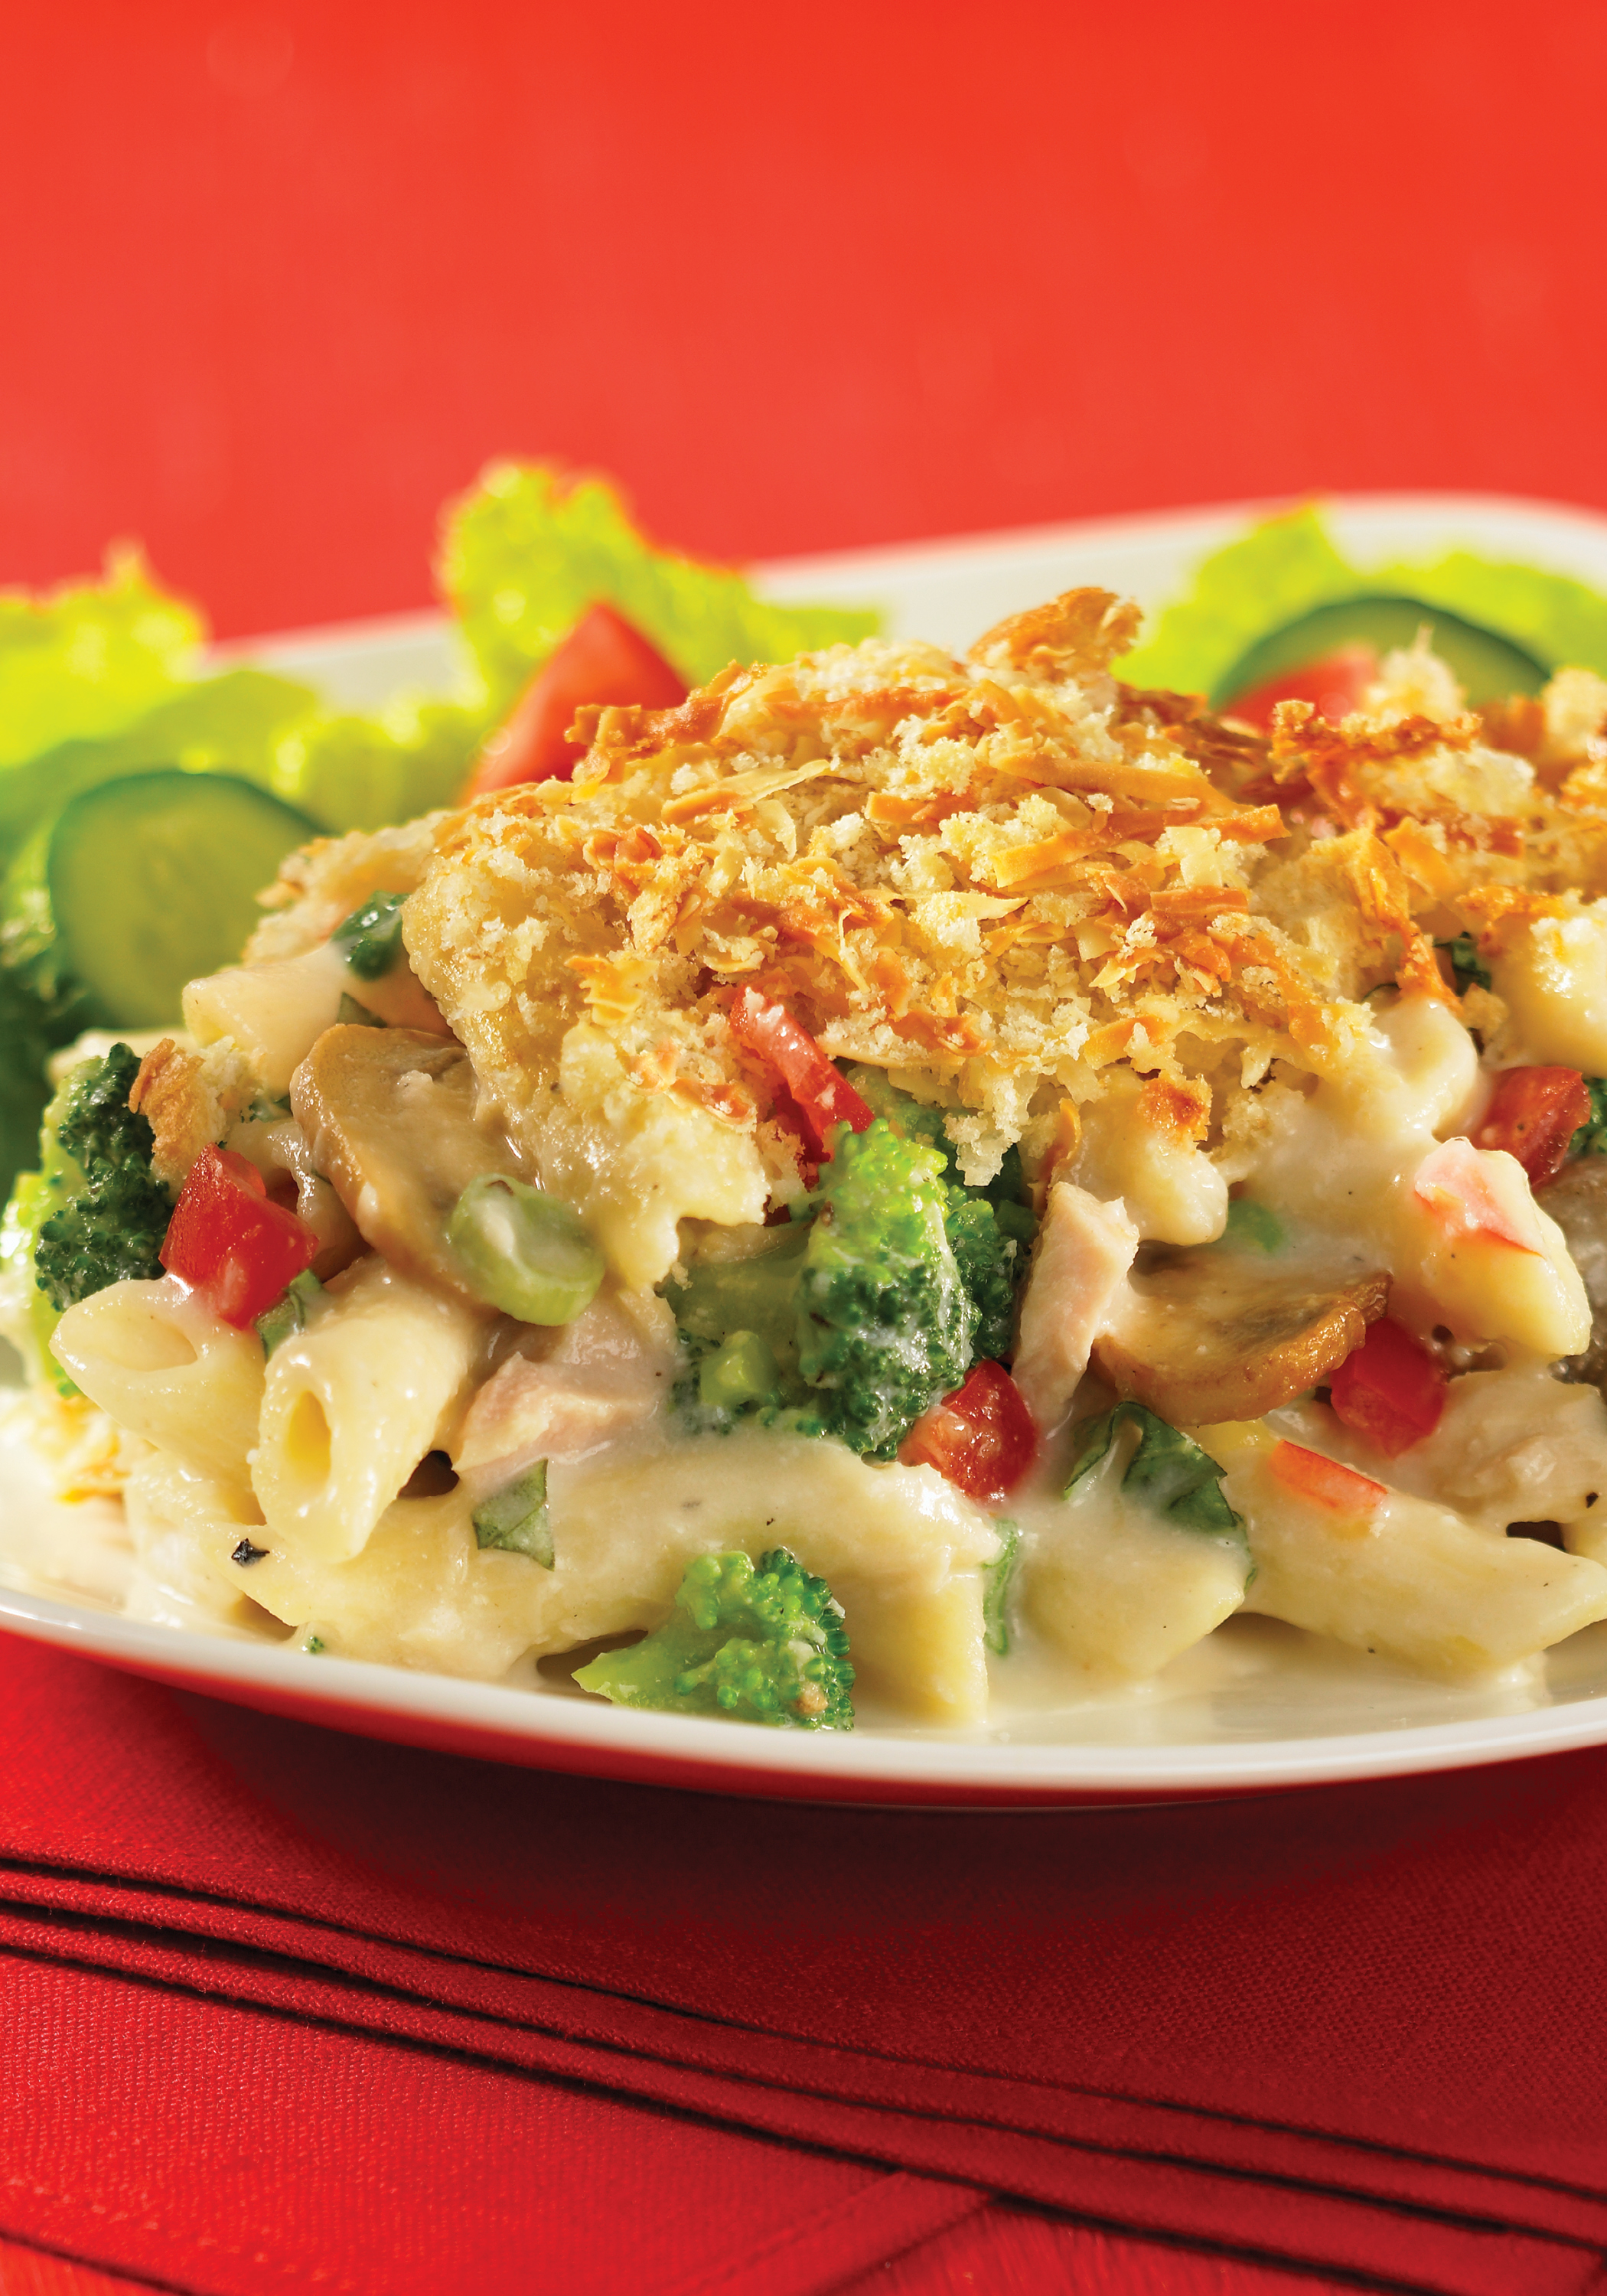
Creamy Tuna Pasta Bake
This recipe turned out fine for me and is quite tasty. It calls for ingredients that actually give a flavour boost to a typical tuna casserole.
Concluding Thoughts
While I can appreciate that the goal of this book may be on using easy-to-find, common ingredients to prepare fast and convenient meals at home, I am not a fan or advocate of using a lot of prepared foods in dishes I cook. I found that there were many recipes in Best of Bridge Home Cooking that use pre-packaged ingredients that come with a lot of salt and preservatives.
There is substantial competition on the cookbook market and through recipes available for free on the internet. While the Best of Bridge Home Cooking does have some tasty recipes, I would have to say, overall, I didn’t find a lot of inspiration or anything really new and creative in the book. In fact, I found most recipes were ones for which I could find equally-good or better/similar ones in other cookbooks or on the internet.
Carrot Raisin Muffins from “The Best of Bridge Home Cooking” (2015). Photo courtesy Robert Rose Inc., publisher.
Packed with nuts, fruits and carrots, these scrumptious muffins are perfect for breakfast. But they are just as tasty for afternoon snacks or stowed away in a lunch box.
2 cups all-purpose flour (500 ml) 3⁄4 cup granulated sugar (175 ml) 11⁄2 TSP ground cinnamon (7 ml) 1 TSP baking powder (5 ml) 1 TSP baking soda (5 ml) 1⁄2 TSP freshly grated nutmeg (2 ml) 1⁄4 TSP salt (1 ml) 11⁄2 cups grated carrots (about 3 medium) (375 ml) 1 cup grated peeled apples (250 ml) 1⁄2 cup raisins (125 ml) 1⁄2 cup sweetened shredded coconut (125 ml) 1⁄2 cup chopped walnuts (optional) (125 ml) 2 large eggs (2) 2⁄3 cup plain yogurt (150 ml) 1⁄3 cup vegetable oil (75 ml)
Preheat oven to 375°F (190°C). Grease 8 cups in each of two 12-cup muffin pans or line the cups with paper liners. In a large bowl, stir together flour, sugar, cinnamon, baking powder, baking soda, nutmeg and salt. Stir in carrots, apples, raisins, coconut and walnuts (if using). In another bowl, beat eggs; add yogurt and oil. Stir into flour mixture just until combined. (Batter will be very thick.) Spoon batter into prepared muffin cups, filling almost to the top. Bake for 25 to 30 minutes or until tops spring back when lightly touched. Let cool in pans for 5 minutes, then transfer muffins to a wire rack to cool. Makes 16 muffins. Tip: Have only one muffin pan? Place muffin paper liners in 6-oz (175 ml) glass custard cups or small ramekins and fill with extra batter. Bake alongside muffin pan.
Creamy Tuna Pasta Bake
Creamy Pasta Bake from “The Best of Bridge Home Cooking” (2015). Photo courtesy Robert Rose Inc., publisher.
This modern rendition of a tuna casserole includes a nutritional boost of broccoli in a creamy basil sauce.
2 bsp butter (30 ml) 6 green onions, chopped (6) 3 cloves garlic, finely chopped (3) 4 cups sliced mushrooms (1 L) 1⁄2 TSP salt (2 ml) 1⁄2 TSP freshly ground black pepper (2 ml) 1⁄3 cup all-purpose flour (75 ml) 2 cups light (5%) cream or milk (500 ml) 11⁄2 cups Chicken Stock (page 42) or ready-to-use chicken broth (375 ml) 3 tomatoes, seeded and diced (3) 2⁄3 cup freshly grated Parmesan cheese (150 ml) 1⁄2 cup chopped fresh basil (125 ml) 12 oz penne (375 g) 4 cups broccoli florets and chopped peeled stems (1 L) 2 cans (each 6 oz/170 g) solid white tuna, drained and flaked (2) 1 1⁄2 cups soft fresh bread crumbs (375 ml) 1 cup shredded Asiago or mozzarella cheese (250 ml)
Preheat oven to 350°F (180°C). Grease a 13- by 9-inch (33 by 23 cm) baking dish. In a Dutch oven or large saucepan, melt butter over medium-high heat. Cook green onions, garlic, mushrooms, salt and pepper, stirring occasionally, for 5 minutes or until softened. In a bowl, whisk flour with 1⁄2 cup (125 ml) cream until smooth; add the remaining cream. Add to pan along with stock. Bring to a boil, stirring, for 3 minutes or until sauce thickens. Remove from heat. Stir in tomatoes, Parmesan and basil. (Can be prepared to this point, covered and refrigerated for up to 1 day.) In a large pot of boiling salted water, cook pasta for 7 minutes or until almost tender. Add broccoli; cook for 2 minutes or until broccoli is bright green and crisp, and pasta is just tender. Drain; chill under cold water. Drain well and return to pot. Stir in tuna and sauce. Spread in baking dish. (Casserole can be prepared to this point; cover and refrigerate for up to 4 hours before serving. Increase baking time by 15 minutes.) In a bowl, combine bread crumbs and Asiago cheese; sprinkle over top. Bake for 40 to 45 minutes or until golden and center is piping hot. Serves 8. Tips: If fresh basil is unavailable, substitute 2 TSP (10 ml) dried basil and cook with onions. Assemble the dish no more than 4 hours ahead to prevent pasta from soaking up the sauce. Variation: For a vegetarian version, omit tuna and substitute 1 can (19 oz/540 ml) kidney beans, drained and rinsed.
Just Peachy Pork
Just Peachy Pork from “The Best of Bridge Home Cooking” (2015). Photo courtesy Robert Rose Inc., publisher.
Loaded with peaches, this sweet and tangy sauce is a great accompaniment for pork. Serve over hot white rice and add an assortment of steamed vegetables for a delightfully different meal.
1 can (14 oz/398 mL) sliced peaches, drained, 1⁄4 cup (60 mL) syrup reserved 1 cup finely chopped green bell pepper (250 mL) (or 1 1⁄2 cups/375 mL frozen mixed bell pepper strips) 1⁄2 cup barbecue sauce (125 mL) 1 tbsp Dijon mustard (15 mL) 1 lb pork tenderloin, cut into 1⁄2-inch (1 cm) thick slices (500 g)
Preheat oven to 350°F (180°C). In a saucepan over medium heat, combine peaches, reserved syrup, green pepper, barbecue sauce and mustard. Bring to a boil. Reduce heat to low and simmer for 3 minutes. Place pork slices in a single layer in an 8-cup (2 L) baking or gratin dish. Pour sauce over meat. Bake until just a hint of pink remains, about 30 minutes. Serves 4.
Disclosure: I received a complimentary copy of Best of Bridge Home Cooking from Robert Rose Inc., for the purposes of conducting a review of the cookbook. I received no compensation for this review and was under no obligation to provide a positive review. All opinions expressed are purely my own.
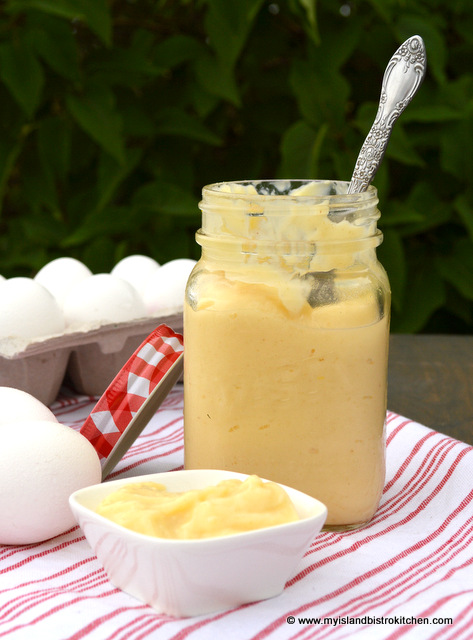
Homemade salad dressing is simple to make and is a tasty addition to many salads and sandwiches. It’s also a more economical alternative to commercial varieties on the grocery store shelves. Additionally, if you find yourself in need of salad dressing and are not near a supermarket, you can quickly whip up a batch of homemade salad dressing so long as you have eggs, sugar, milk, vinegar, dry mustard, and flour. Continue reading Homemade Salad Dressing→
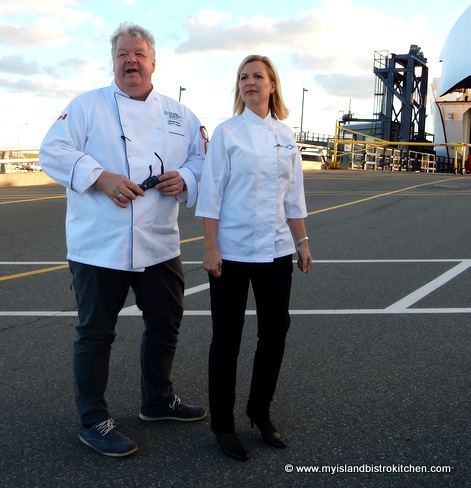
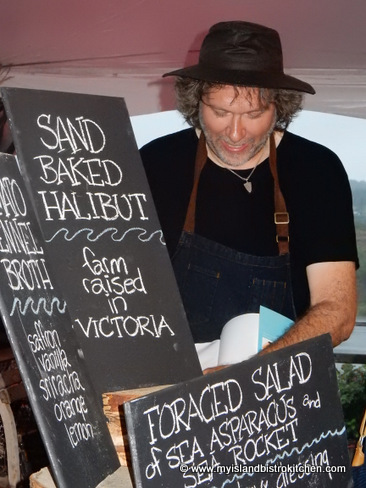
If you are a fan of Chef Michael Smith, one of Canada’s top celebrity chefs and noted cookbook author, you probably know he and his wife, Chastity, bought The Inn at Bay Fortune in eastern Prince Edward Island late last spring. This was the Inn where Chef Michael once worked and where his first TV show, The Inn Chef, was filmed.
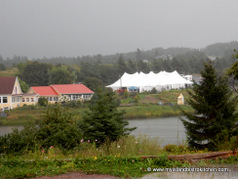
The Inn at Bay Fortune, PEI, Canada
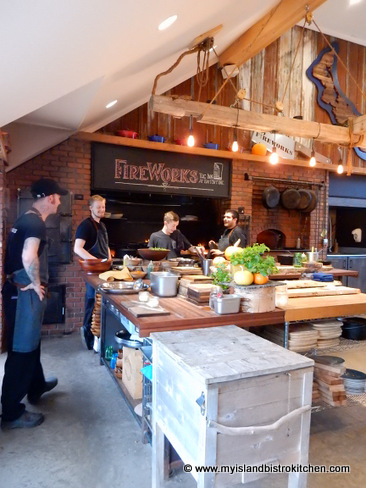
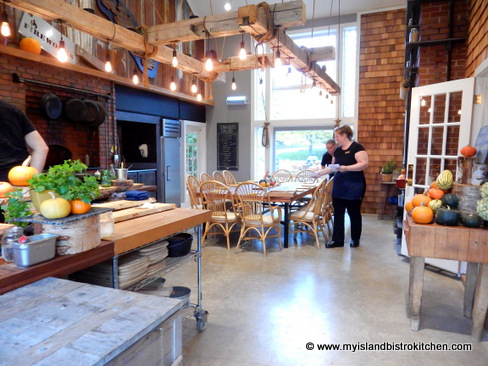
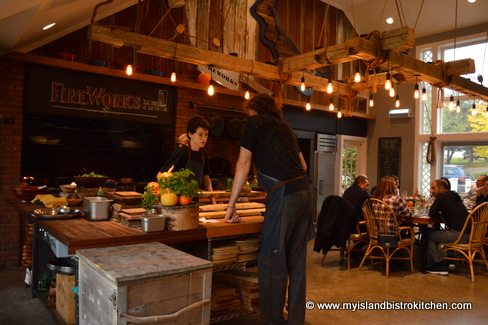
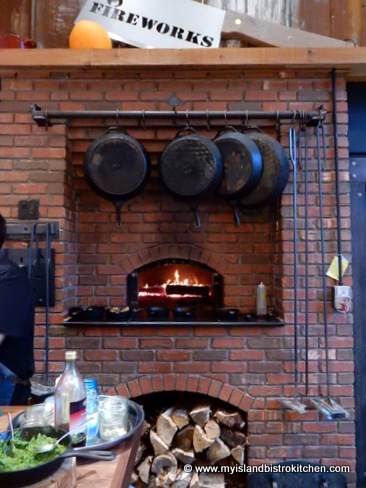
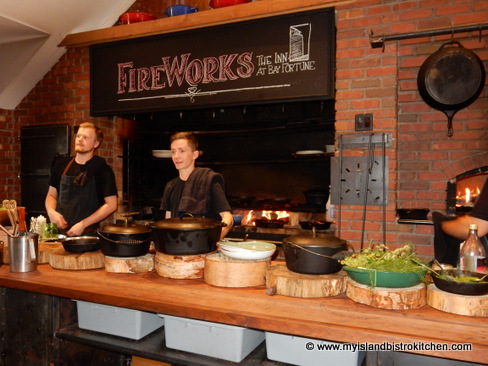
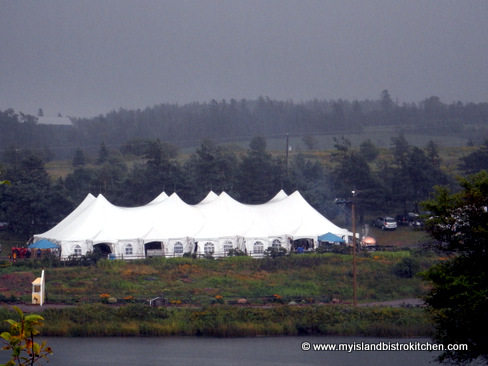
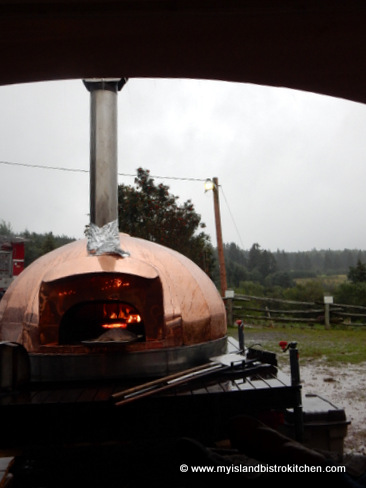
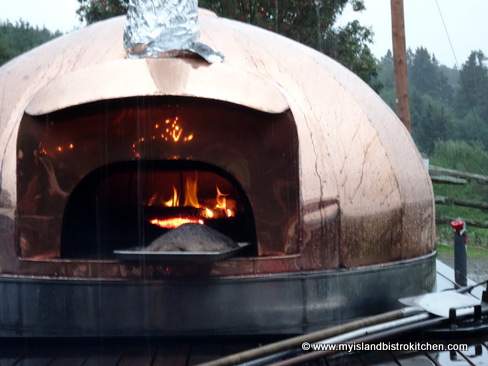
Early in the summer, Chef Michael completely renovated and transformed the kitchen and dining experience at the Inn. Named for its newly-constructed 25-foot brick-lined, wood-burning fire over, through, and about which the meal is cooked, FireWorks Restaurant opened for the 2015 tourist season to rave reviews.
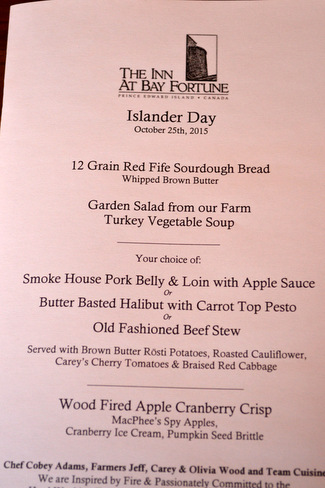
On Sundays this fall, the Inn celebrates the harvest season by hosting what the culinary team refers to as “Islander Day“.
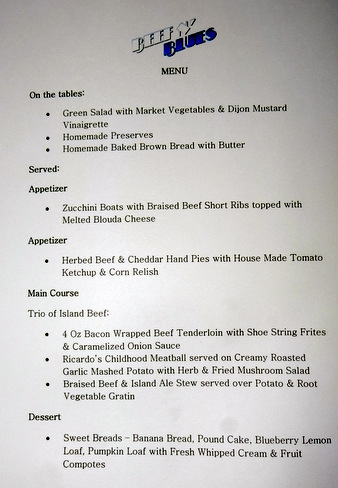
Offered on a slightly different scale and lower price point than their usual evening feast (which is priced at $80 per guest + HST at time of writing), the Sunday event offers a three-course (I’d say it’s four courses, counting the salad) harvest menu that includes fresh bread baked in their wood-fired brick oven served with brown butter, turkey-vegetable soup, green salad, a choice of entree (Beef Stew, Pork Loin, or Halibut) served with garden-fresh vegetables and, as a finale, a freshly-baked harvest dessert. Reservations are not accepted for the Sunday event but the meal is served continuously, on a first come first served basis, from 12 noon until 7pm. The restaurant has the capacity to serve about 50 people at a time. The cost for the Sunday meal is $40 per adult guest and $20 per child under age 12 + HST.
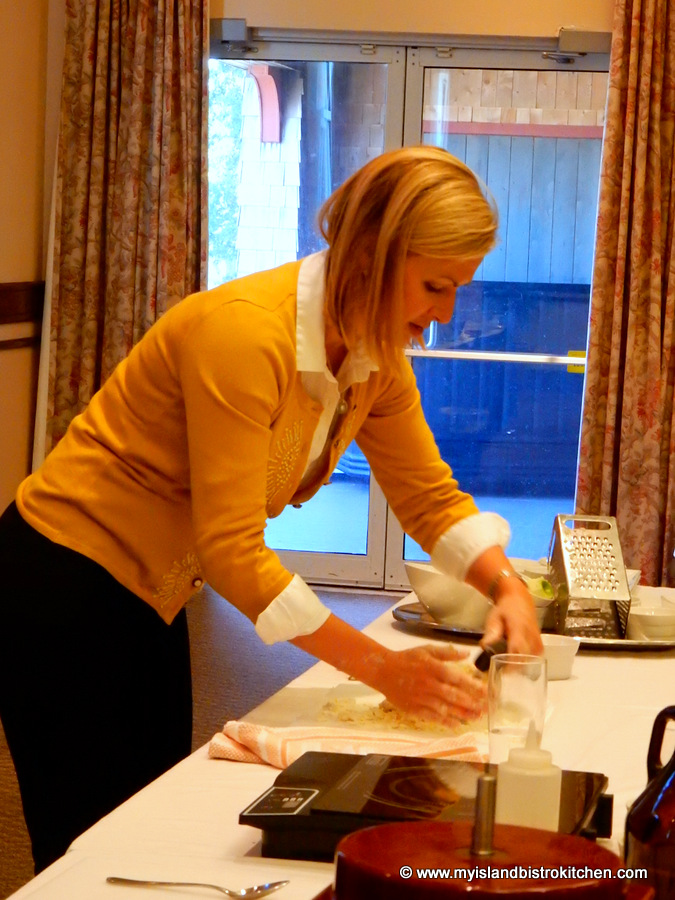
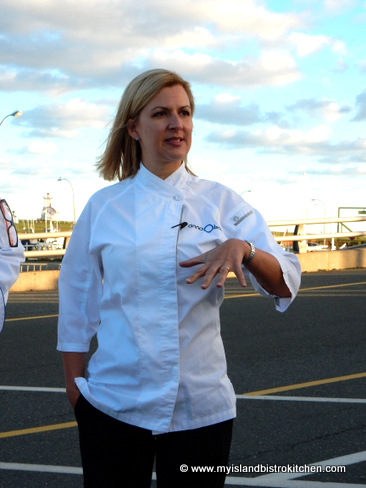
At the beginning of this year, we made a commitment to, once a month, dine at a restaurant we’ve not eaten at before and we’ve stuck to it so, this past Sunday, my mom and I made our way to the new FireWorks Restaurant at the Inn at Bay Fortune which is about a 45-50 minute drive east from Charlottetown. And, the experience did not disappoint, especially since Chef Michael himself was in the kitchen on this particular day! This is one busy guy who travels a lot so we were quite thrilled that he was on the Island in his FireWorks kitchen on the day we chose to dine at his new restaurant.
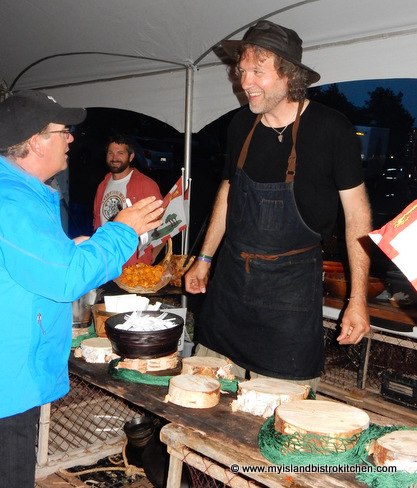
Chef Michael Smith
While I don’t normally write restaurant reviews per se on my food blog or write about my dining-out experiences, I felt this one is in keeping with my blog’s focus of eating local foods when possible and is sufficiently unique that it merits a blog posting so, here goes!
We arrived mid-afternoon to find a large limo and several cars in the parking lot so we weren’t the only ones who decided to head to the small country community of Bay Fortune to dine at FireWorks in the middle of a Sunday afternoon in late October.
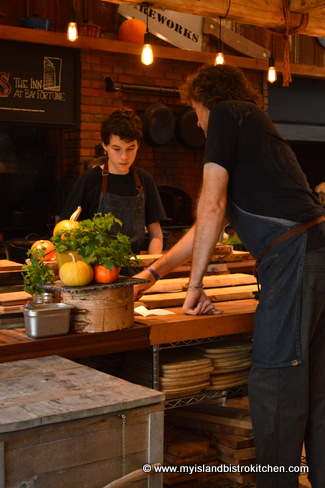
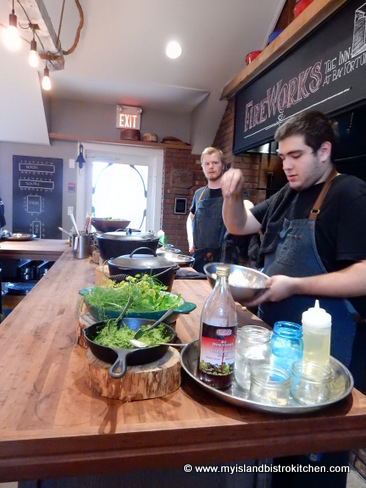
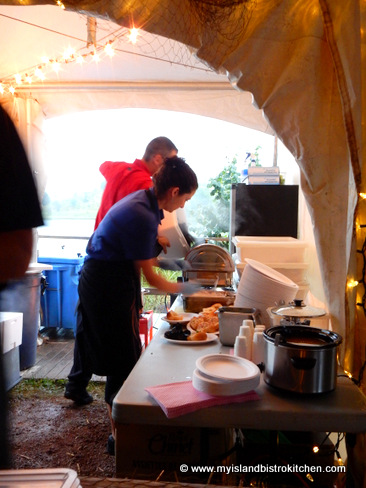
We were greeted by a very personable and friendly hostess who explained how the meal experience would unfold and she was quick to point out that we were to be sure and take all kinds of photos if we wished and we were invited to roam freely about the kitchen which was at the end of the long closed-in sunporch dining room.
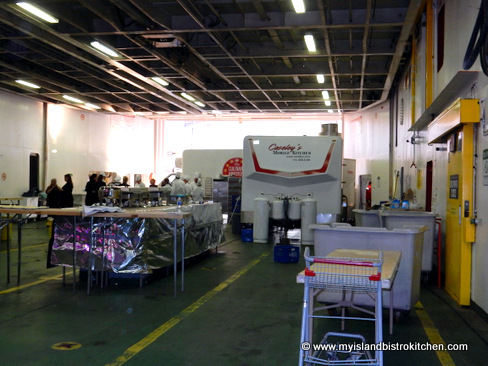
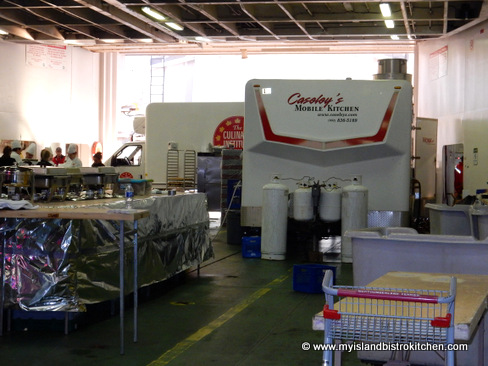
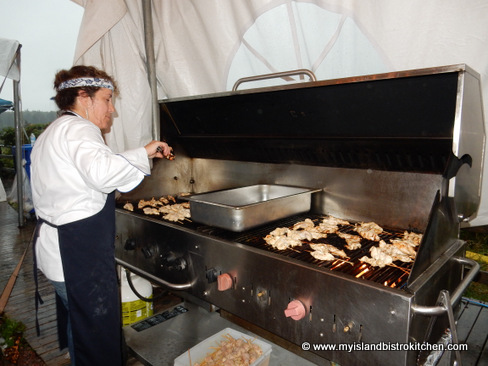
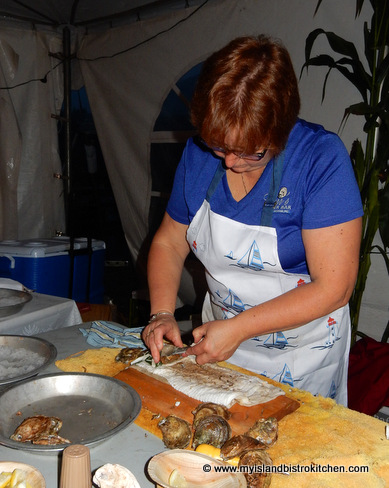
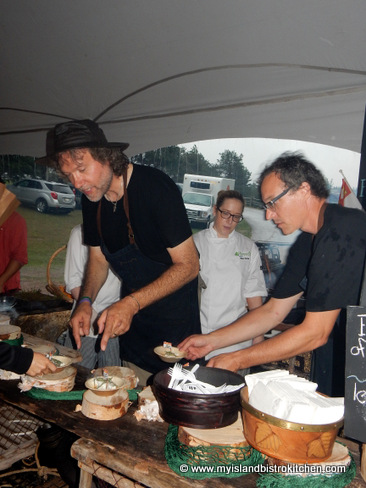
This is quite extraordinary to be offered this opportunity because this is a working kitchen and there were a number of the team cuisine and servers busy at their work. It was a beehive of activity and no one made me feel like I was in their way as I scurried about taking photographs.
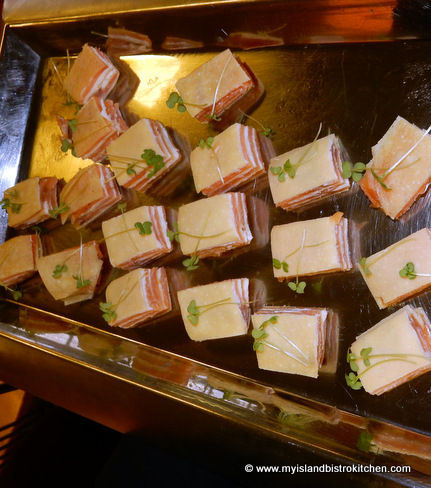
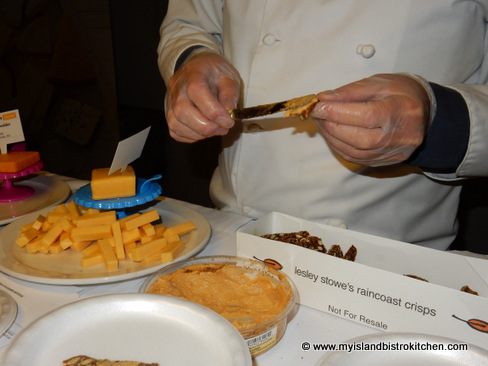
Learning from the master! I think there was a good bit of knowledge transfer and training taking place in the kitchen on Sunday and who better to learn from!
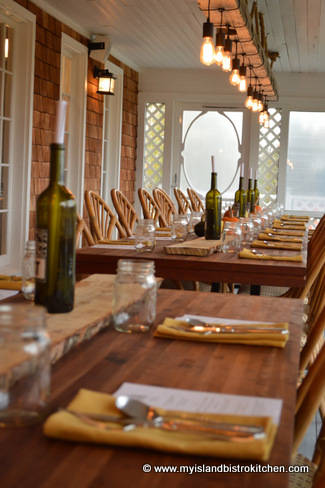
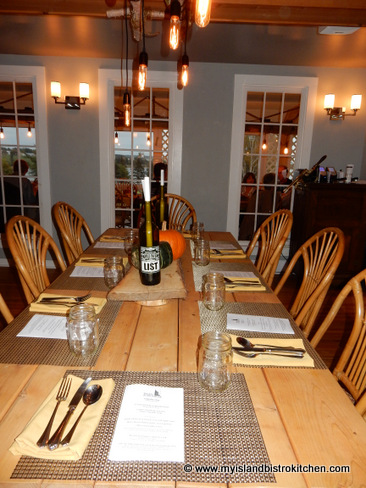
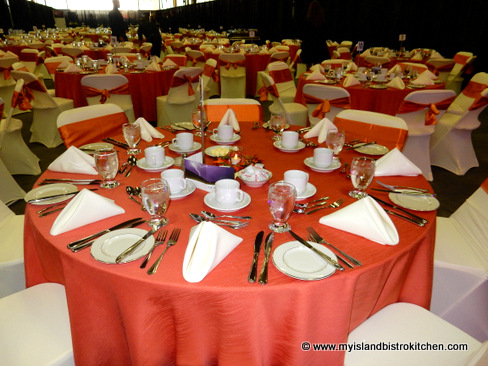
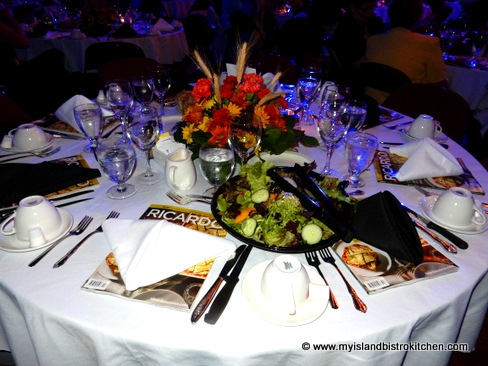
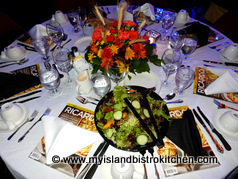
Dinner is served, family-style, at long communal block-style tables so, if you are looking for a private table for two or four, you won’t find that at FireWorks. Guests are seated as they arrive and as space is available at any of the four large tables. Two of the long tables are situated on the front of the Inn in a closed-in sunporch that overlooks Bay Fortune.
One of the tables is actually in the kitchen so you really get the feeling that dining is family style and non-pretentious.
I almost felt like I was simply dining in a friend’s home kitchen…well, except for the fact that most of us don’t have a professional culinary team catering to us nor do many of us have a brick oven or an open fire….but, other than that….
The fourth table seats eight and is in a more private dining room just off the kitchen and behind the sunporch.
I don’t mind this communal style of dining as I am quite accustomed to it as I am a regular cruiser where I’m often seated at tables for 8 or 10 with people I don’t know. On this Sunday evening, we lucked in as a group of four ladies soon joined us at one of the long tables in the sunporch and were very open to dinner conversation making for a pleasant meal and overall dining experience.
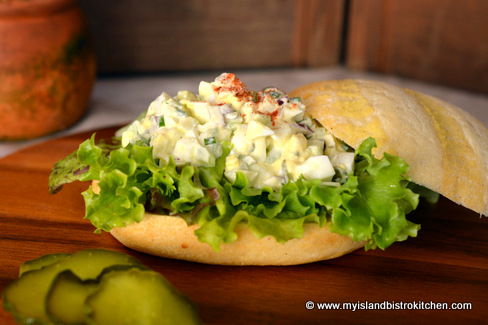
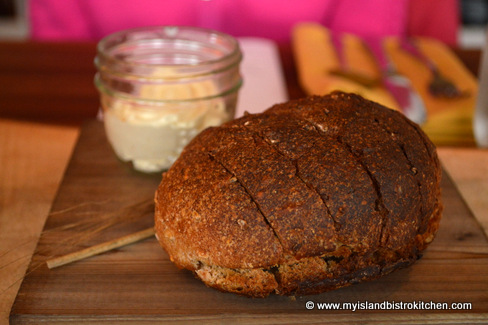
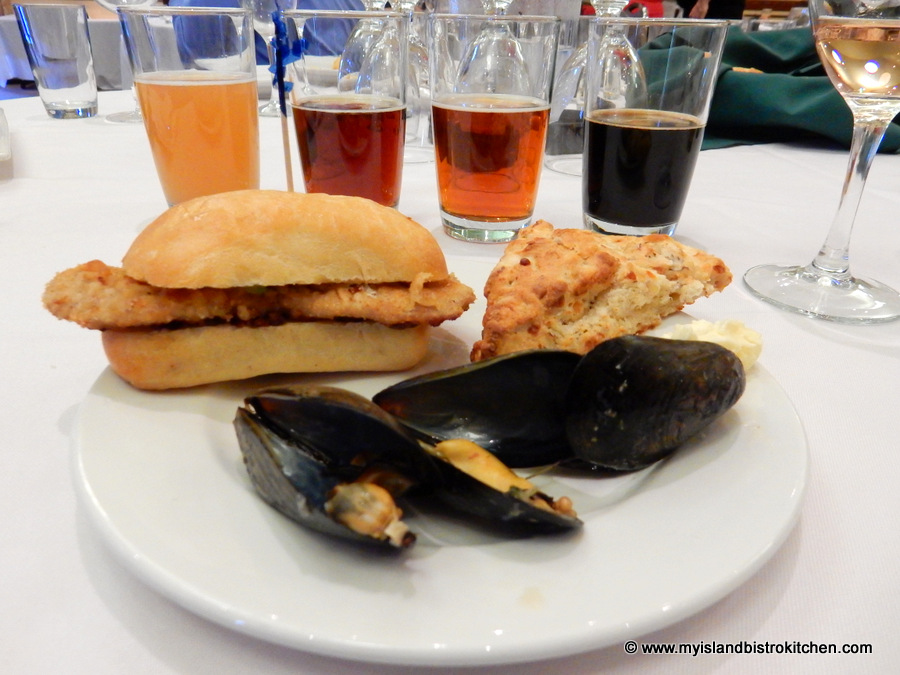
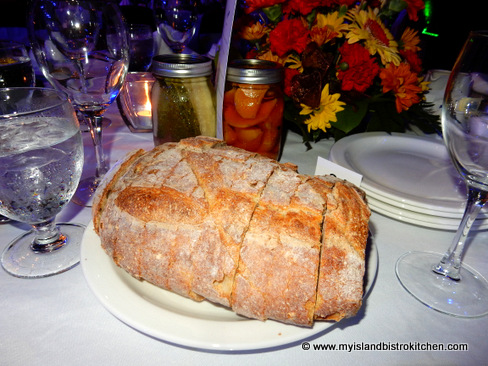
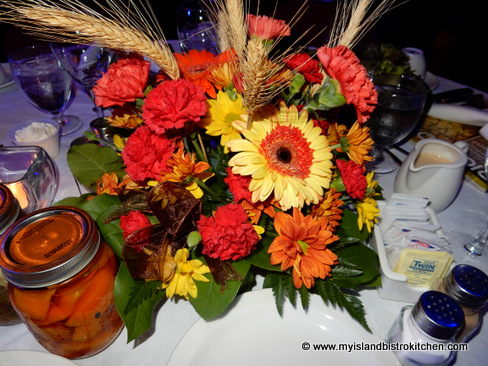
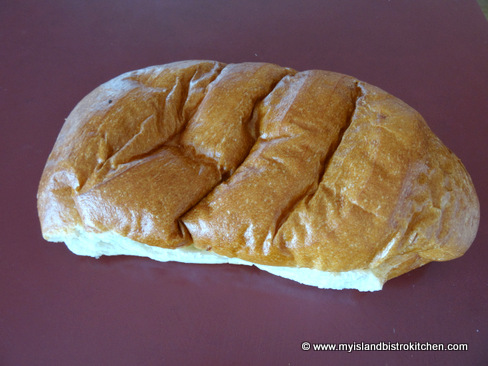
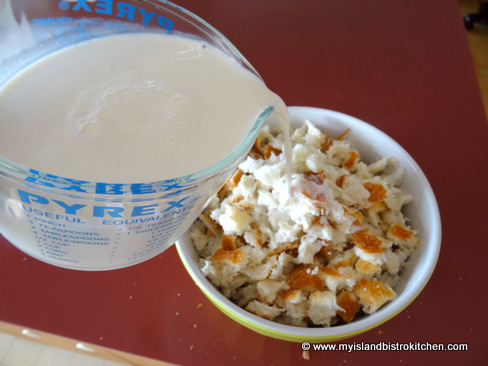
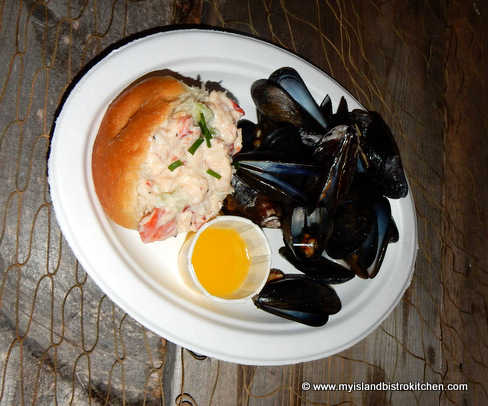
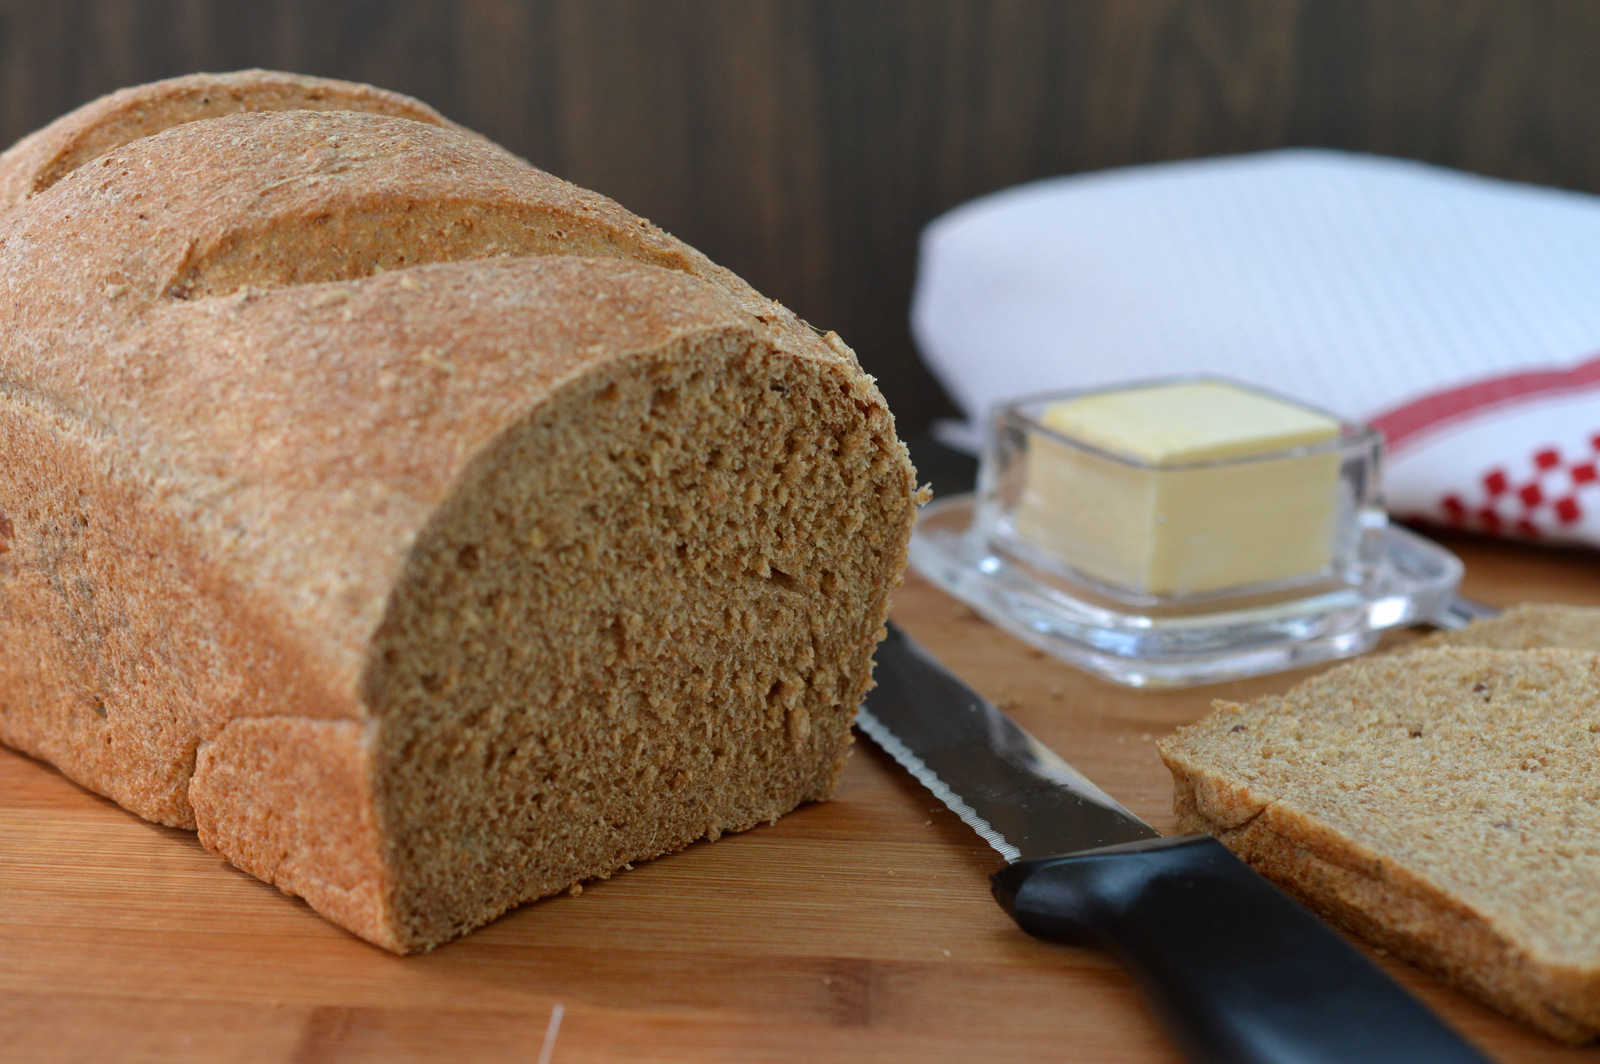
We were no sooner seated than a server brought a small loaf of fresh-baked 12-grain red fife sourdough bread and a small jar of butter. Lots of Mason jars are visible on the table as the larger ones are used as water glasses.
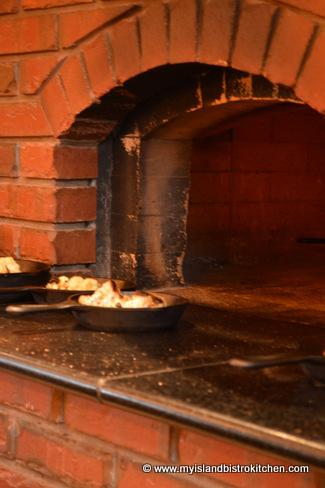
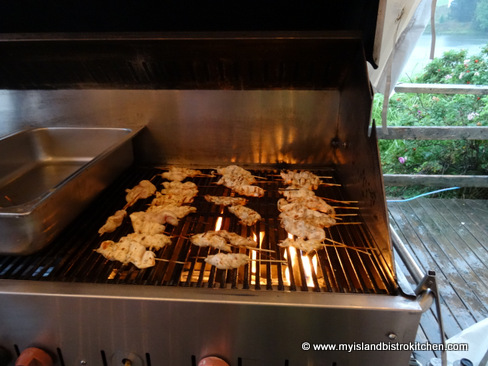
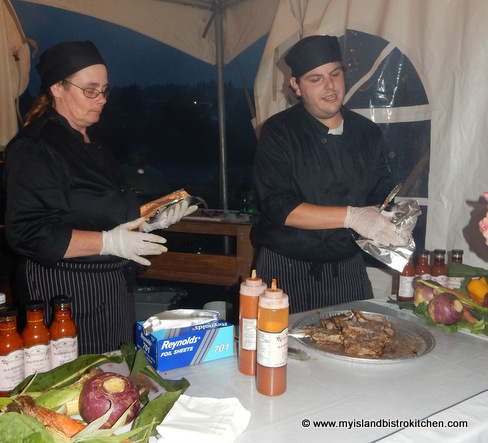
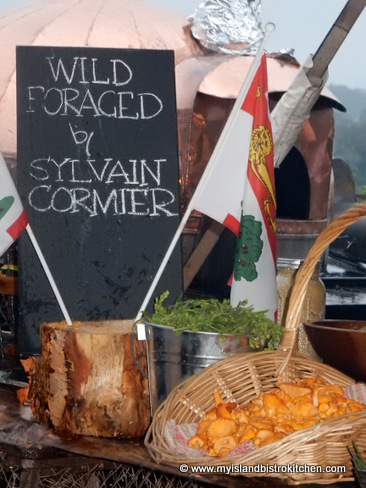
In keeping with FireWorks’ focus on local and regional fare, all of the vegetables used in the meal were grown onsite in the Inn’s gardens and the meat and fish locally sourced. The entire meal was cooked over an open fire or in the large brick oven.
Roasted Cauliflower Emerging from the Brick Oven
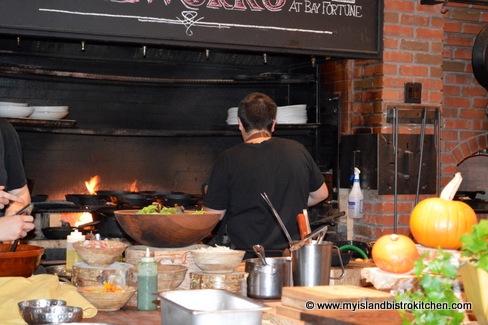
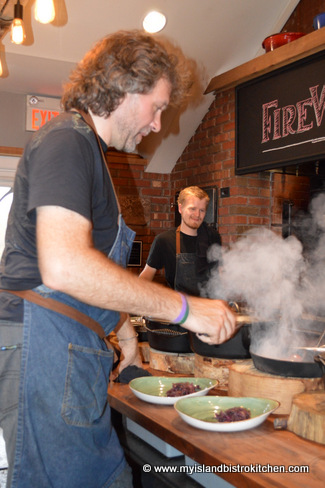
The kitchen makes use of lots of heavy cast-iron pots for cooking over the open fire seen in the background in the photo below. In keeping with the rustic theme, note the blocks of wood that are used for stationing the hot pots. Use of natural wood in the decor is prevalent, even on the tables.
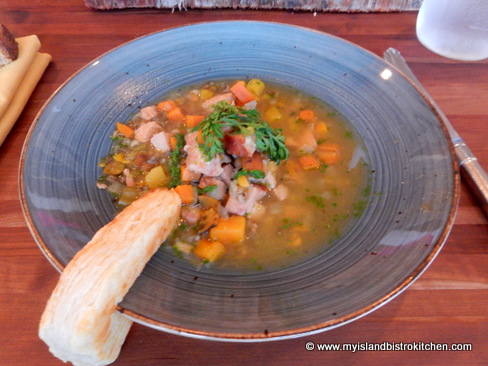
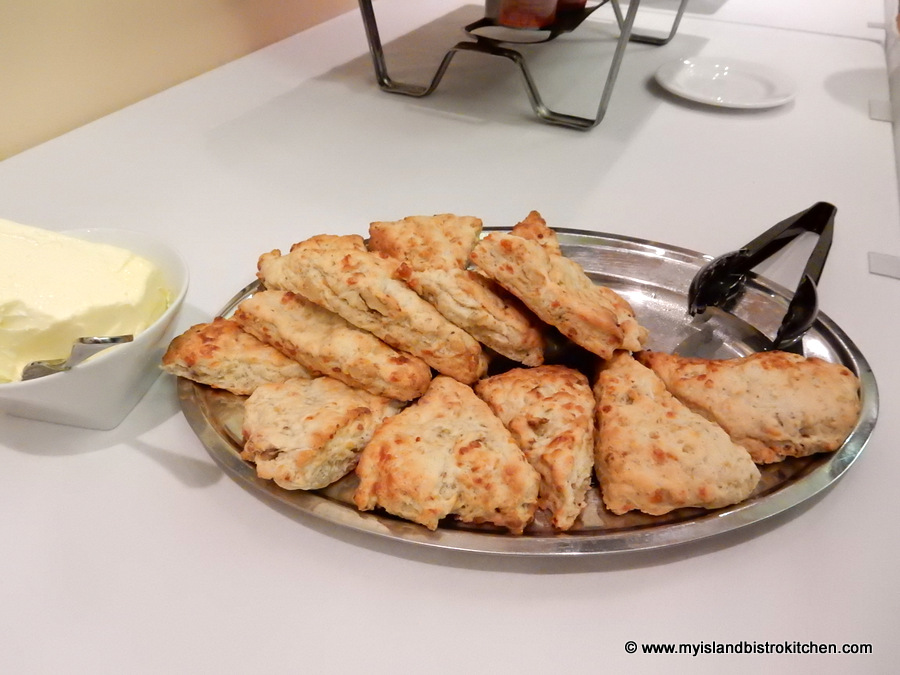
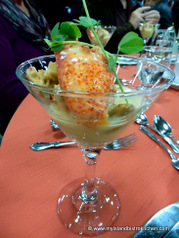
Chef Michael soon arrived at the table with bowls of piping hot turkey vegetable soup accompanied by a light and flaky biscuit hung over the soup bowl rim.
Turkey Vegetable Soup
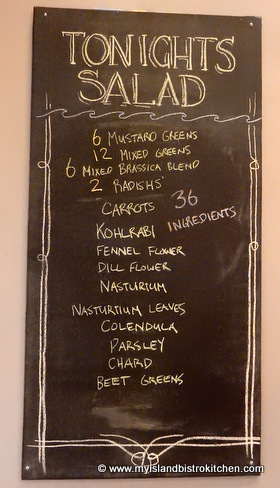
This was followed by a small green salad that I neglected to take a photo of but here is a list of the salad’s ingredients that was posted on the wall.
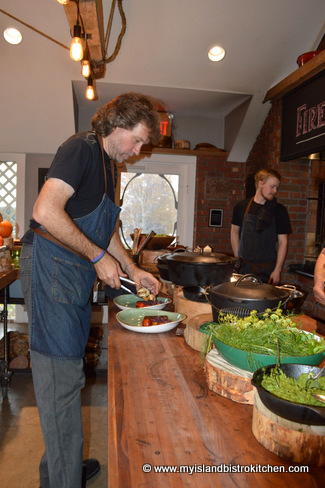
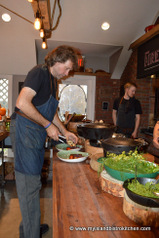
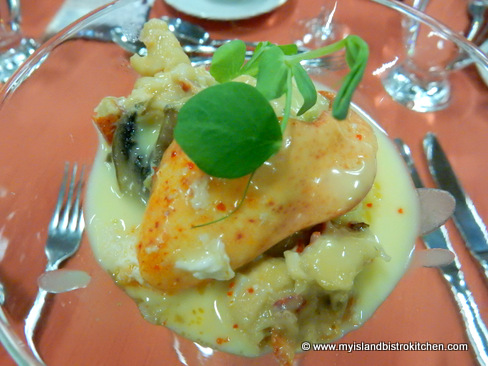
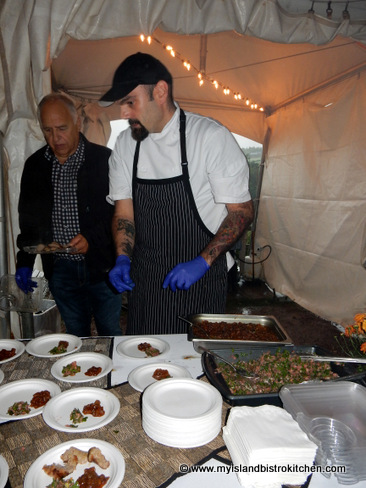
I wandered into the kitchen area just as Chef Michael was plating our meal. I just had to check up on him (lol)!
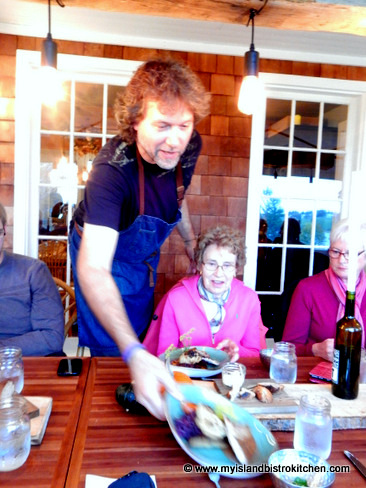
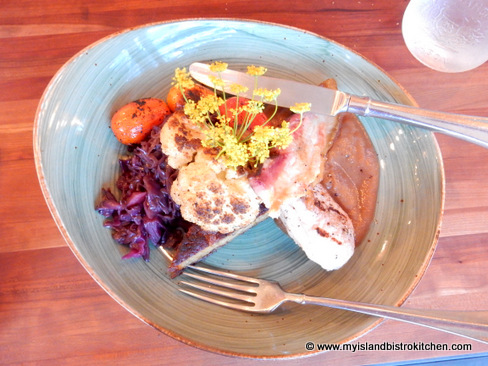
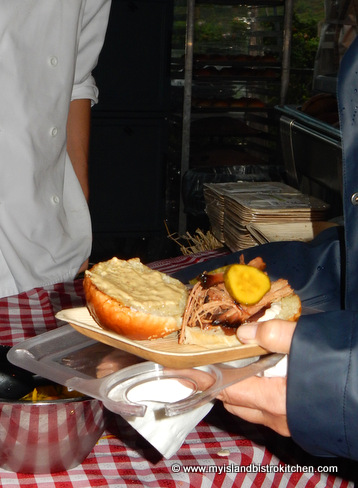
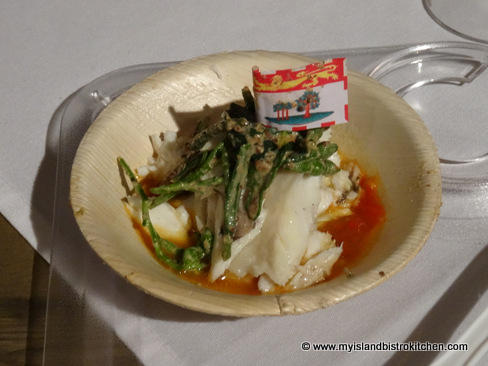
Satisfied he was doing a great job, I hurried back to the table in time for Chef Michael to arrive with our dinners. And, no, my dinner did not slide off the plate….it’s just the split second that I captured the photo of Chef Michael serving my dinner that makes it look like it’s about to slide off the plate!
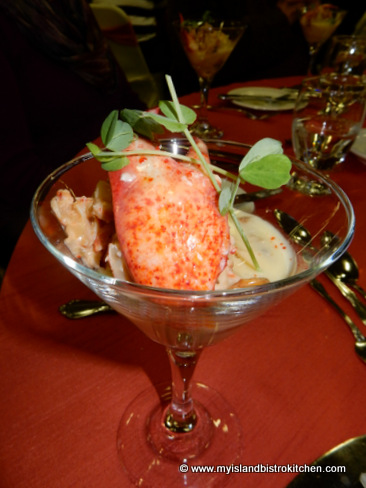
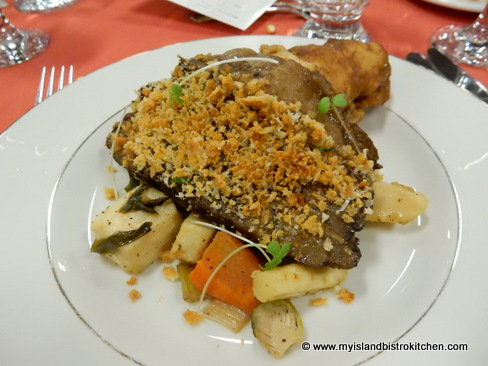
We each chose to have the smoke house pork belly and loin with apple sauce which was served with brown butter rösti potatoes which were ever so tasty. Side vegetables included roasted cauliflower straight from the wood-fired brick oven, slightly charred cherry tomatoes, and braised red cabbage.
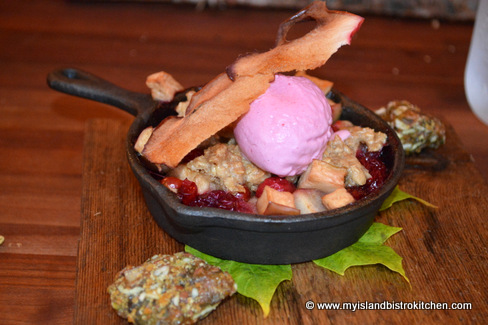
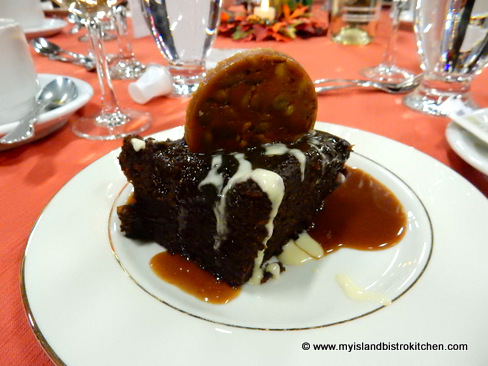
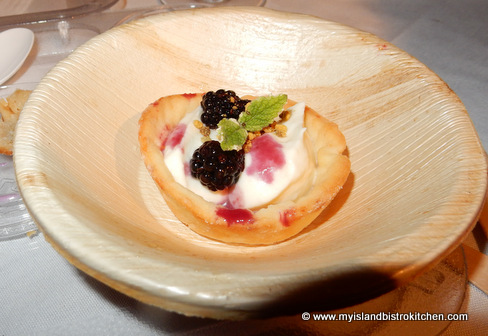
And, for dessert, we had a very seasonal dessert: Wood-fired apple cranberry crisp that was served with cranberry ice cream and pumpkin seed brittle.
Throughout the meal, Chef Michael’s wife, Chastity, accompanied by musicians Reg Ballagh and Jon Rehder, provided dinner music from the vantage point of the Inn’s nearby cozy sitting room.
So, I would class this experience as the full meal deal! If you find yourself on Prince Edward Island on a Sunday between now and November 15, 2015, and are looking for a unique dining experience, I recommend a visit to FireWorks Restaurant at the Inn at Bay Fortune. And, if you are planning a vacation on our lovely Island next summer, FireWorks plans to re-open in early May when they will be offering their daily full-scale feast each evening for which reservations are taken.
For more information on dining at FireWorks, visit the Inn at Bay Fortune website.
—————————————————————————-
Thank you for visiting “the Bistro” today. If you enjoyed this posting, please share it on your social media websites.
Connect with “the Bistro” through the following social media:
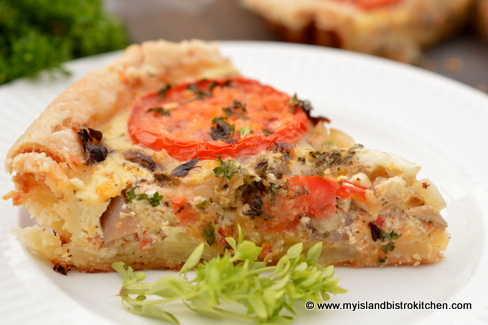
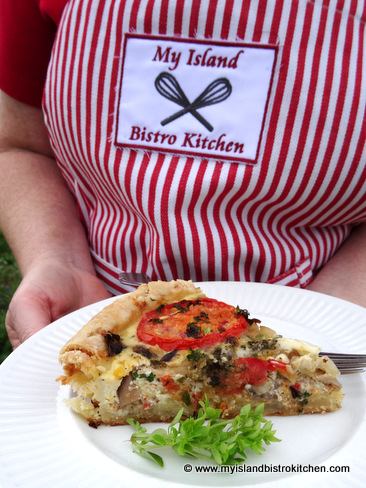
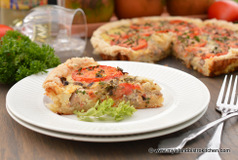
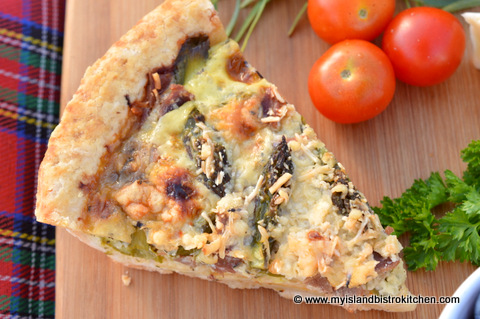
My newly-created recipe combines several wonderful flavors to create this tasty quiche – sausage meat, leeks, mushrooms, Roma tomatoes, and a mixture of cheeses. While this savory quiche can, of course, be made year-round, it is especially good in the fall when the tomatoes are fresh off the vine and leeks and mushrooms are locally harvested.
Harvest Quiche
This quiche is a little bit time-consuming to make but the end result is so worth it! But, first, here are some of my tips for quiche-making.
There are three key elements to a good savory quiche: 1) A tender, flaky pie crust; 2) The right combination of flavorful, fresh ingredients; 3) A custard filling that holds the ingredients together so that each slice of the quiche holds its own when cut and does not fall apart and spread all over the plate.
First, I recommend par-baking the pie shell. This helps to keep the crust flaky and prevents it from becoming soggy when an egg mixture filling is added. Time the preparation of this quiche so that the par-baked shell comes out of the oven when the filling is ready to be added. Allowing the pie shell to cool first may result in a tougher crust than if the filling is added to the warm shell and the quiche immediately placed in the oven. Either an unbaked frozen pie shell or one made from your own favorite pastry recipe will work fine for this recipe. Adding a layer of shredded cheese on top of the par-baked pie shell before adding the other ingredients and custard filling also helps act as a barrier to prevent moisture from the filling soaking into the pie shell as the quiche bakes.
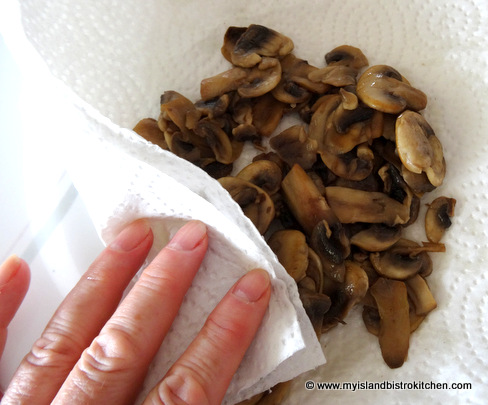
Second, use a good combination of flavorful ingredients that are as fresh as you can get them. Part of the issue with some quiches is that the filling is simply too moist and this can come as a result of a couple of reasons – either the wrong amounts of eggs and/or milk used or ingredients that, themselves, are too wet and have not been drained enough. Because this quiche recipe uses ingredients that already have significant moisture content in them (mushrooms, leeks, sausage, and tomato), it is important to drain the cooked sausage meat well and to blot the cooked mushrooms and leeks with paper towel before adding them to the quiche.
In fact, in addition to draining the cooked sausage meat, I often blot the cooked meat in this way, too. It does make a difference.
The other recommendation I have is to use a “meaty” tomato, such as the Roma/plum tomato variety, as it is tends to be less watery than some other varieties of tomatoes. It’s also important to keep the ratio of ingredients in proportion and to curb the urge to, say, add more sausage meat, mushrooms, leeks, or tomatoes than the recipe calls for as this will add more moisture to the quiche which may make it difficult for it to stay together when cut. It will also make a heavier quiche and the light, custard filling part of the quiche will be lost.
Quiches may be eaten warm or cold. It’s important to let the quiche rest for at least 20 minutes when it comes out of the oven. This allows it to set so that, when it is cut, each piece stays intact when plated and the rest of the quiche stays together without the filling running all over the pie plate before the next slice is cut. A quiche should not be sloppy.
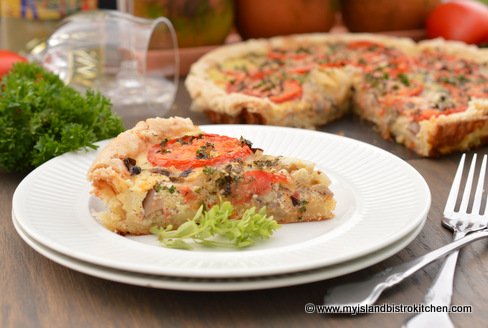
Harvest Quiche
Any combination of hard cheese can be used in this recipe so long as it can be shredded and equals 1 1/2 cups total. Cheddar cheese is pretty much a standard addition to most of my quiche recipes. In addition, I also like to buy a bag of already-shredded mixed cheese such as mozzarella, provolone, gouda, and parmesan to add to the quiche. This is a quick way to get shredded cheese and is the most economical way to get a mixture of cheeses for a recipe.
It’s a good idea to place the pie plate on a rimmed baking sheet as this catches any drips should they occur and it also makes it easier to transfer the quiche to and from the oven.
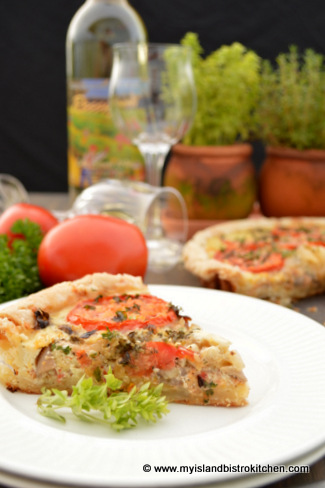
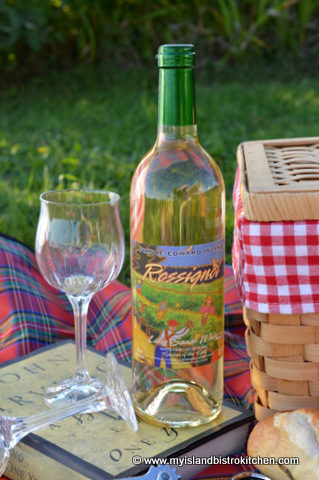
This quiche is a great brunch dish and I also use it as a main entrée alongside a green salad and paired with a good white wine such as Rossignol’s Little Sands White Wine produced right here on Prince Edward Island.
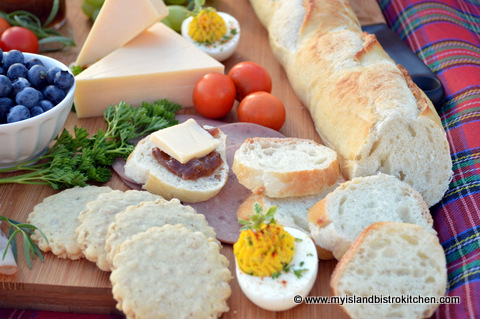
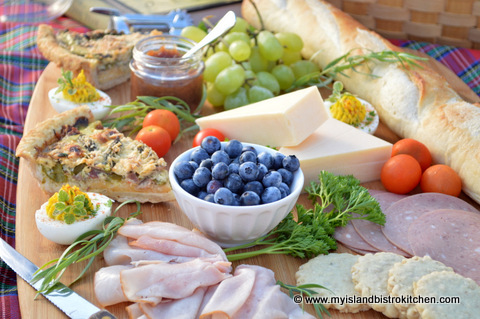
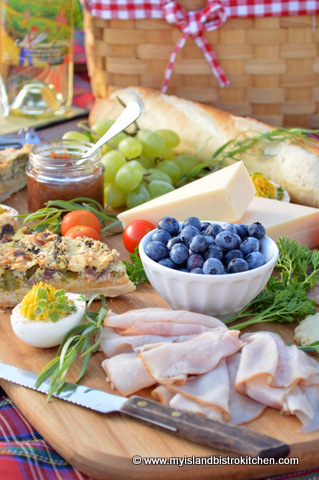
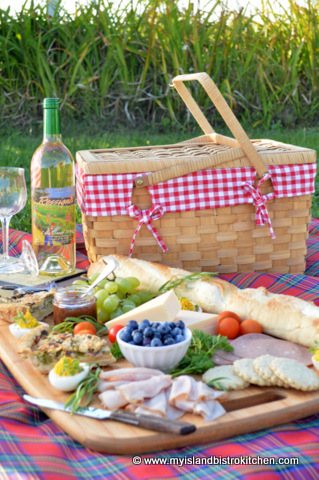
Because quiches can be eaten warm, at room temperature, or cold, I often add quiche slices to a picnic basket, especially if I’m preparing a savory picnic.
Harvest Quiche
Harvest Quiche
Ingredients:
1 – 9” pie shell, chilled for 30 minutes before par-baking
½ tbsp butter 1½ tsp vegetable oil 2 small leeks (about 1 cup sliced), white and light green parts only 4 oz. button mushrooms, thinly sliced
1-2 tsp vegetable oil 4 oz. sweet Italian or sun-dried tomato sausage meat, removed from casing
2 extra-large eggs, lightly beaten 1 cup whole milk or blend 1 tsp liquid chicken bouillon 1 tsp. dried basil ¼ tsp garlic salt Pinch pepper
1½ cups shredded cheese (any mix of cheddar, mozzarella, provolone, gouda, and/or parmesan) 1 medium-sized Roma tomato, thinly sliced 2-3 tbsp grated parmesan cheese Fresh basil leaves and parley for garnish (optional)
Method:
Preheat oven to 375°F. Lay a piece of parchment paper over the unbaked chilled pie shell and add a layer of ceramic pie weights or dried baking beans to keep the pastry from puffing up while it bakes. Bake the pastry for about 12-13 minutes then remove the parchment paper and pie weights and return pastry to oven to bake for 5 minutes longer.
The pie crust should not be cooled before adding the filling so, while pastry is baking, prepare the filling. In small frypan over medium high heat, melt the butter and vegetable oil. Add the sliced leeks and mushrooms. Sauté, stirring constantly, until leeks are golden brown and mushrooms tender (about 3-5 minutes). Remove from heat and transfer leeks and mushrooms to paper towel. Blot dry to remove excess moisture. Set aside.
In clean frypan over medium high heat, add 1-2 tsp. cooking oil. Add the sausage meat and scramble-fry until browned. Remove from heat, drain well, and set meat aside.
In small bowl, beat the eggs lightly. Whisk in the milk or blend and the liquid chicken bouillon. Add the dried basil, garlic salt, and pepper.
To assemble quiche:
Reduce oven heat to 350°F.
Place pie plate with warm partially-baked shell on rimmed baking sheet.
Line the pastry shell with half of the cheese mixture. Distribute the sausage meat over the cheese. Next, add the layer of leek and mushrooms followed by the remaining cheese mixture. Lay a layer of the tomato slices over the cheese. Lastly, pour the milk mixture over the quiche ingredients and sprinkle with 2-3 tbsp of grated parmesan cheese. Add some fresh basil leaves to top of quiche along with a sprinkle of chopped parsley, if desired.
Transfer quiche to oven and bake for 45-50 minutes, or until knife inserted into center of quiche comes out clean. Remove from oven and let quiche stand on wire rack for at least 20 minutes before cutting and serving. May be served warm, at room temperature, or cold.
Yield: Apx. 6-8 servings.
—————————————————————————-
Thank you for visiting “the Bistro” today. If you enjoyed this posting and recipe, please share it on your social media websites.
Connect with “the Bistro” through the following social media:
Fresh basil leaves and parley for garnish (optional)
Instructions
Preheat oven to 375°F. Lay a piece of parchment paper over the unbaked chilled pie shell and add a layer of ceramic pie weights or dried baking beans to keep the pastry from puffing up while it bakes. Bake the pastry for about 12-13 minutes then remove the parchment paper and pie weights and return pastry to oven to bake for 5 minutes longer.
The pie crust should not be cooled before adding the filling so, while pastry is baking, prepare the filling. In small frypan over medium high heat, melt the butter and vegetable oil. Add the sliced leeks and mushrooms. Sauté, stirring constantly, until leeks are golden brown and mushrooms tender (about 3-5 minutes). Remove from heat and transfer leeks and mushrooms to paper towel. Blot dry to remove excess moisture. Set aside.
In clean frypan over medium high heat, add 1-2 tsp. cooking oil. Add the sausage meat and scramble-fry until browned. Remove from heat, drain well, and set meat aside.
In small bowl, beat the eggs lightly. Whisk in the milk or blend and the liquid chicken bouillon. Add the dried basil, garlic salt, and pepper.
To assemble quiche:
Reduce oven heat to 350°F.
Place pie plate with warm partially-baked shell on rimmed baking sheet.
Line the pastry shell with half of the cheese mixture. Distribute the sausage meat over the cheese. Next, add the layer of leek and mushrooms followed by the remaining cheese mixture. Lay a layer of the tomato slices over the cheese. Lastly, pour the milk mixture over the quiche ingredients and sprinkle with 2-3 tbsp of grated parmesan cheese. Add some fresh basil leaves to top of quiche along with a sprinkle of chopped parsley, if desired.
Transfer quiche to oven and bake for 45-50 minutes, or until knife inserted into center of quiche comes out clean. Remove from oven and let quiche stand on wire rack for at least 20 minutes before cutting and serving. May be served warm, at room temperature, or cold.
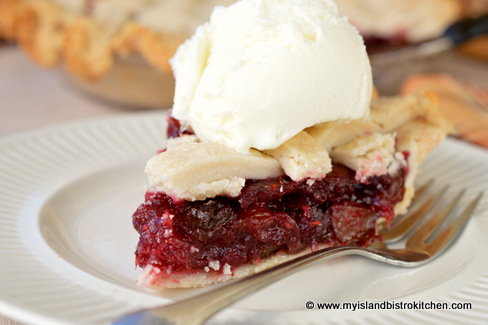
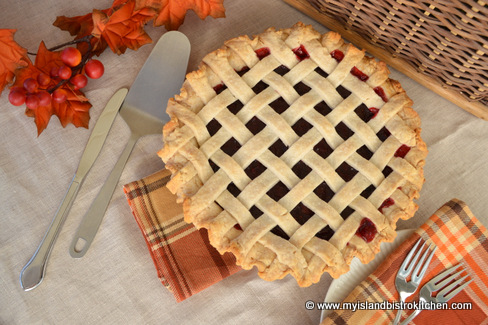
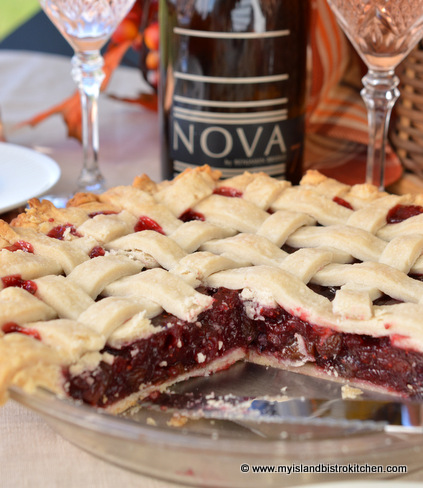
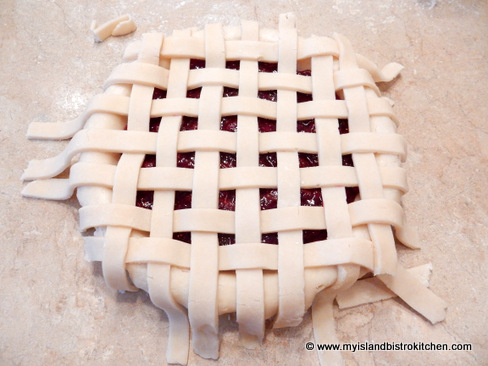
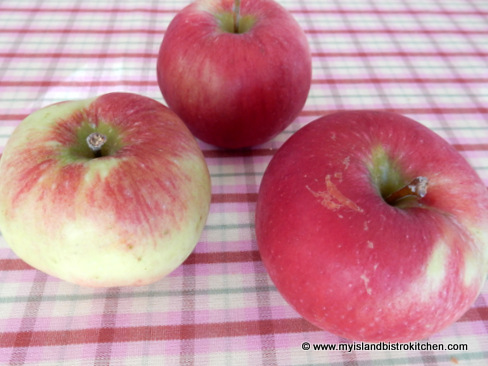
I’m not sure of the origins of Mock Cherry Pie but my grandmother made a version of this delight when I was a small child. Sometimes called cranberry pie, it’s not an altogether common pie (at least in my circles) these days but it is very tasty and colorful with its deep ruby red color. It lends itself well to a lattice top crust but is often made with a standard full top crust.
Mock Cherry Pie
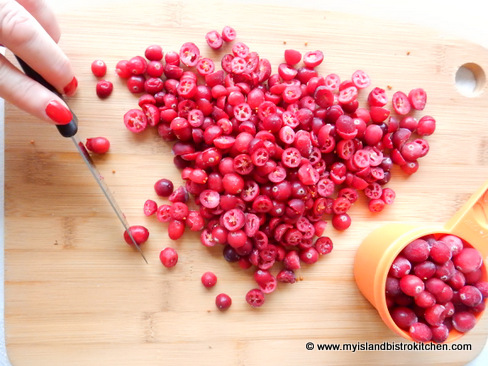
Either fresh or frozen cranberries can be used for this filling. I like to coarsely chop up most of the cranberries for the filling but leave some whole to give texture to the filling. The idea behind chopping the cranberries in half is that it quickly releases the juice from the berries in the cooking process. But, don’t get crazy and chop them too finely as the pie won’t have texture if the berries are ground up too fine. Adding the raisins to the filling enhances flavour complexity and also makes the filling more substantial. The sweetness of the raisins counters the tartness of the cranberries.
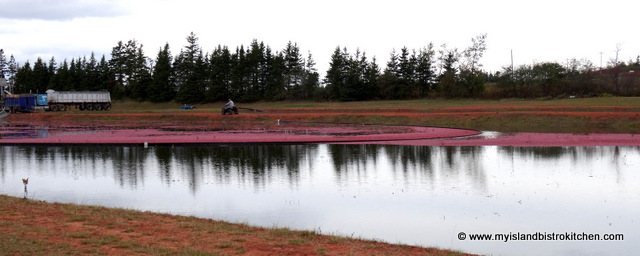
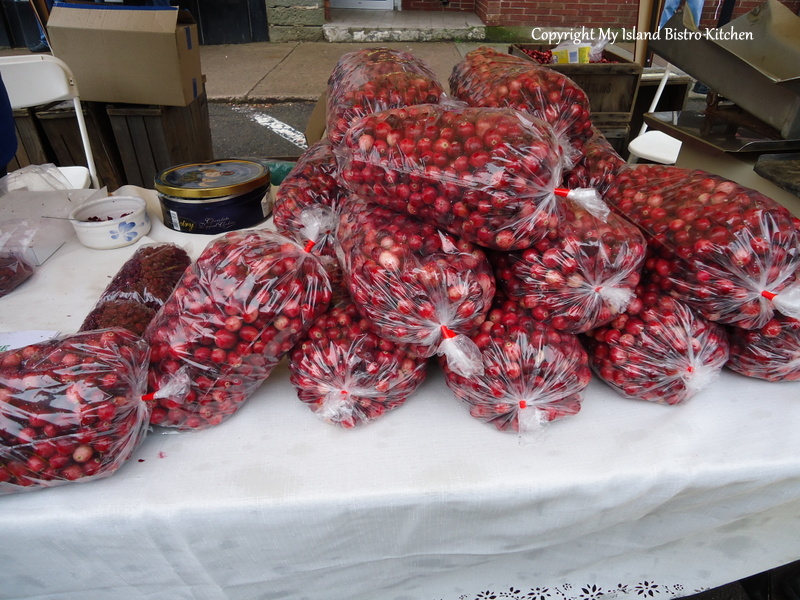
The cranberries I am using in this filling came from Mikita Farms in Farmington, near Souris in the eastern part of Prince Edward Island. To my knowledge, this is the only cranberry producer that wet harvests the berries on the Island. To see photos I took in 2014 of the wet harvesting of cranberries, click here.
Corralling the Cranberries
Cranberries freeze really well so I keep a large bag of cranberries in my freezer for use year-round. This time of the year, many farm markets will have bags of these tasty berries available so don’t hesitate to pick up a bag and store them in the freezer for later use.
Fresh PEI Cranberries
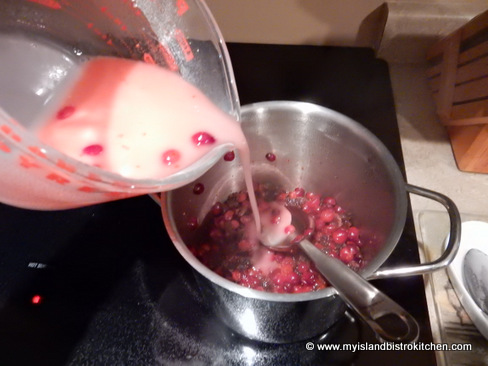
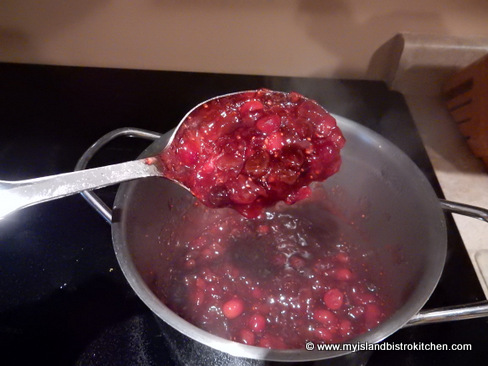
The key to making the filling for this pie is to get it thickened so that it does not run when the pie is cut. It takes a little patience but is worth the effort. It’s important to cool down the filling before putting it in the unbaked pie shell as, otherwise, it will break down the fat in the pastry causing it to be a soggy crust. About 30-40 minutes of cooling time will be just right. Remember to stir the filling as it cools as this will help it to cool faster and also aid in its thickening.
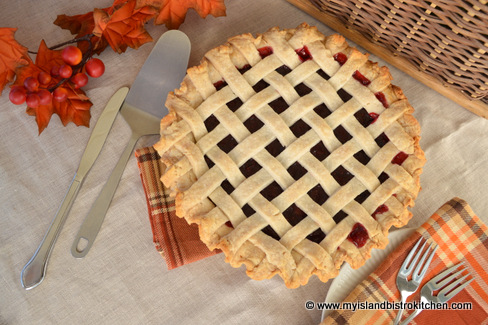
Mock Cherry Pie
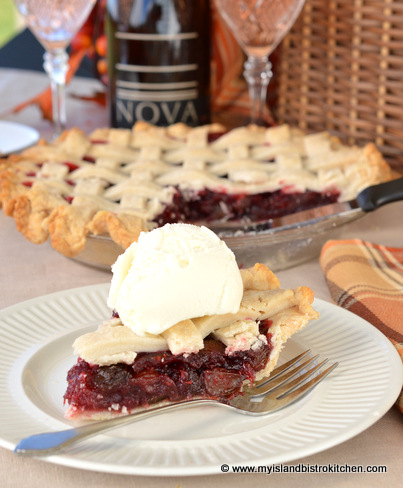
This is a lovely rich dessert, perfect for Thanksgiving or Christmas. A scoop of high quality vanilla ice cream goes particularly well with Mock Cherry Pie. The wine I have selected to pair with this dessert for my Thanksgiving dinner this year comes from Benjamin Bridge Vineyards in Gaspereau Valley, Nova Scotia. I discovered this wine through the 2015 PEI Fall Flavours Culinary Festival for which Benjamin Bridge was this year’s wine sponsor. Benjamin Bridge wines were served at the signature culinary events during the month-long festival in September. My wine selection is Nova 7. This is the perfect wine to pair with this dessert because it has a hint of sweetness to compliment the tartness of cranberries and a beautiful pale blush color. I think I will seriously have to go on a field trip and pay this winery a visit!
Mock Cherry Pie Paired with Benjamin Bridge’s Nova 7 Wine
For my pastry recipe, tips, and hints on making pie pastry, clickhere.
Mock Cherry Pie
Ingredients:
Pastry for 9” double pie crust
2 cups cranberries, fresh or frozen 1 cup sultana raisins ½ cup boiling water
1 cup sugar 3 tbsp cornstarch Pinch salt 1/3 cup cold water
Chop 1 1/3 cups cranberries in half. Leave remaining 2/3 cup whole.
In medium-sized saucepan, combine the cranberries, raisins, and boiling water. Cook over high heat to the boiling point. Reduce heat to medium and cook 2-3 minutes, stirring occasionally.
In small bowl, combine the sugar and cornstarch with 1/3 cup cold water. Whisk until smooth. Add 1-2 tbsp of the hot mixture to temper the sugar-cornstarch mixture (don’t worry if a few cranberries get scooped up, too) and pour it into the hot cranberry-raisin mixture. Stir well.
Cook over medium heat, stirring often to prevent scorching, until thickened – about 11-13 minutes. Remove from heat and stir in the vanilla, almond flavouring, Cointreau, grated orange rind, and butter. Stir well. Let cool for 30-40 minutes, stirring occasionally.
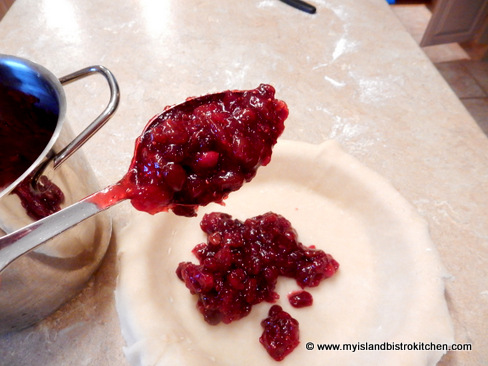
Preheat oven to 400°. Prepare pastry for bottom crust and roll to desired thickness. Transfer pastry to a greased 9” pie plate. Trim pastry.
Pour cooled filling into crust.
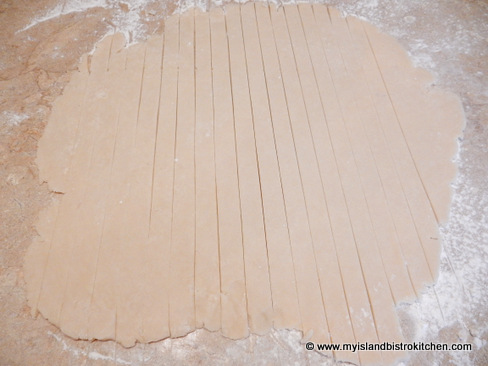
Roll out pastry for top crust. If desired, cut into strips for lattice top.
Dampen edges of bottom pie crust.
Place top crust (or, alternatively, lattice strips) over filling, gently pressing the outside edges to seal to bottom crust.
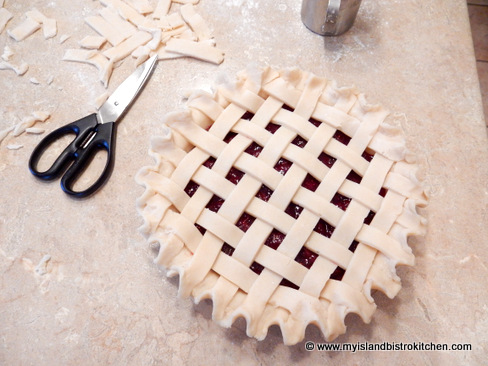
Using kitchen shears, trim excess pastry.
Crimp pastry edges or press together with the tines of a fork. If using complete top crust, cut vents in pastry to allow steam to escape as the pie cooks (omit this step if using a lattice top since there are obviously already lots of spaces for the steam to escape).
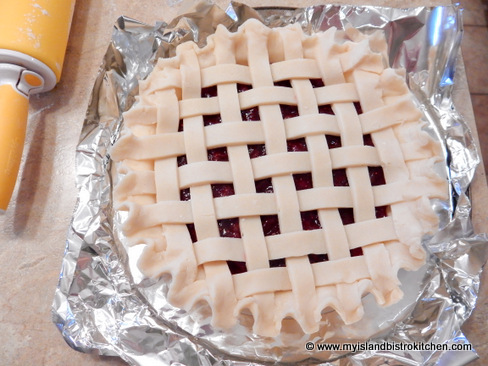
Place pie plate on a rimmed baking sheet and bake in the lower third of the oven for 10 minutes at 400° then reduce heat to 375° and bake for 45-50 minutes longer or until the crust is lightly browned and juices start to bubble from the filling.
Transfer pie to a wire rack and let cool completely before cutting and serving.
A rich and flavourful pie that combines cranberries and raisins with a hint of orange flavour.
Ingredients
Pastry for 9” double pie crust
2 cups cranberries, fresh or frozen
1 cup sultana raisins
½ cup boiling water
1 cup sugar
3 tbsp cornstarch
Pinch salt
1/3 cup cold water
1 tsp vanilla
½ tsp almond flavouring
1 tbsp Cointreau
1 tsp finely grated orange rind
1 tbsp butter
Instructions
Chop 1 1/3 cups cranberries in half. Leave remaining 2/3 cup whole.
In medium-sized saucepan, combine the cranberries, raisins, and boiling water. Cook over high heat to the boiling point. Reduce heat to medium and cook 2-3 minutes, stirring occasionally.
In small bowl, combine the sugar and cornstarch with 1/3 cup cold water. Whisk until smooth. Add 1-2 tbsp of the hot mixture to temper the sugar-cornstarch mixture and pour it into the hot cranberry-raisin mixture. Stir well. Cook over medium heat, stirring often to prevent scorching, until thickened – about 11-13 minutes. Remove from heat and stir in the vanilla, almond flavouring, Cointreau, grated orange rind, and butter. Stir well. Let cool for 30-40 minutes, stirring occasionally.
Preheat oven to 400°. Prepare pastry for bottom crust and roll to desired thickness. Transfer pastry to a greased 9” pie plate. Trim pastry. Pour cooled filling into crust.
Roll out pastry for top crust. If desired, cut into strips for lattice top. Dampen edges of bottom pie crust and place top crust (or, alternatively, lattice strips) over filling, gently pressing the outside edges to seal to bottom crust. Trim excess pastry. Crimp pastry edges or press together with the tines of a fork. If using complete top crust, cut vents in pastry to allow steam to escape as the pie cooks (omit this step if using a lattice top since there are obviously already lots of spaces for the steam to escape).
Place pie plate on a rimmed baking sheet and bake in the lower third of the oven for 10 minutes at 400° then reduce heat to 375° and bake for 45-50 minutes longer or until the crust is lightly browned and juices start to bubble from the filling.
Transfer pie to a wire rack and let cool completely before cutting and serving.
If you have made this recipe and enjoyed it and/or wish to share it with your friends and family, please do so on social media but be sure to share the direct link to this posting from my website.
Connect with My Island Bistro Kitchen on Social Media
Follow “the Bistro” on Pinterest at https://www.pinterest.ca/peibistro/ and pin the Pinterest-ready photo found at the end of this post to your favorite Pinterest boards.
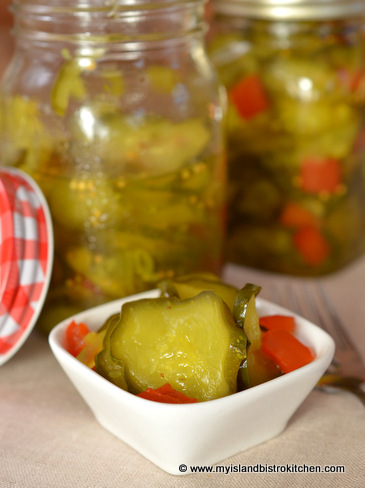
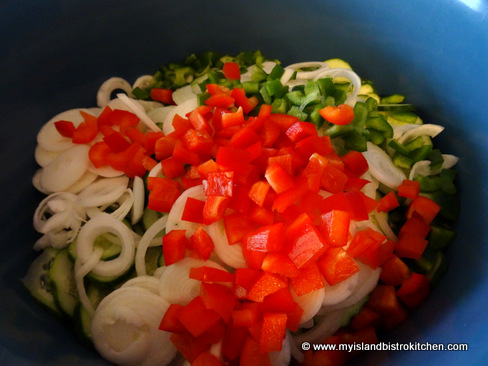
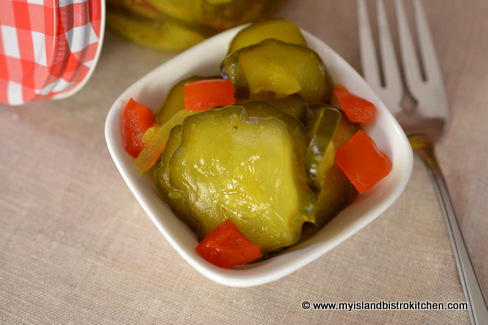
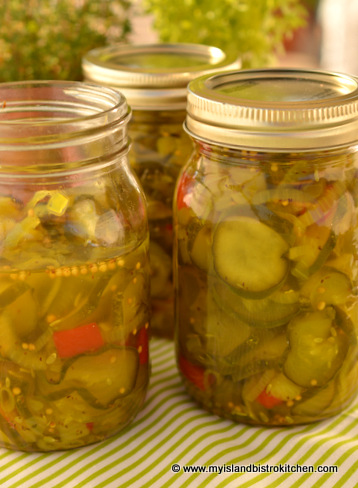
One of my very favorite kinds of pickles are the traditional sweet Bread and Butter Pickles. If I didn’t limit myself, I could sit down and eat an entire bottle of these pickles! They are especially good with sandwiches and burgers.
Bread and Butter Pickles
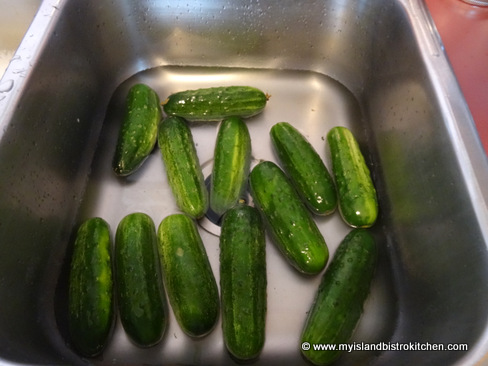
These pickles are not hard to make but, like most pickled products, they are a bit time-consuming and, sometimes, finding the right ingredients can be a bit of a challenge. The first challenge is to get the cucumbers that are suitably-sized for bread and butter pickles.
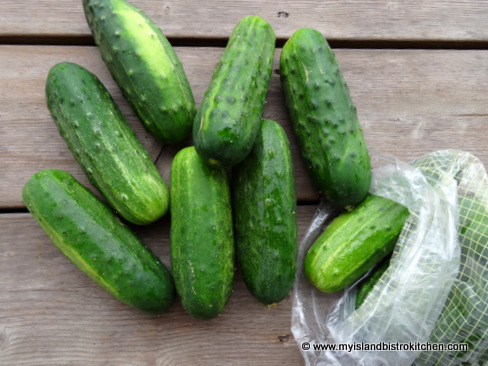
Small Pickling Cucumbers
These are small cucumbers (but bigger than those used to make dill pickles), about 6-7 inches long and only about 1 1/2″ to 2″ wide. You don’t want to use large field cucumbers because they have too many seeds, meaning they will fall apart as opposed to holding their shape when sliced. As well, large slices of pickled cucumbers are not attractive to serve alongside a sandwich or burger.
To make quality pickles, fresh produce is needed. I recommend using cucumbers that have not been picked any longer than 24 hours. Cucumbers that have been picked for days start to get soft and “punky” and are not good for pickling because they have already started to deteriorate and lose their freshness. As well, the skin on the cucumbers will be very tough.
Ask for “bread and butter pickling cucumbers” at your local farm stand or market and the sellers should know what you mean. Be sure to ask when they were picked and check to make sure the cucumbers are firm to the touch. I bought mine at Balderston’s Farm Market in Stratford, PEI, and the big bin of the cucumbers had just been brought in from the field and were being bagged up while I was at the stand.
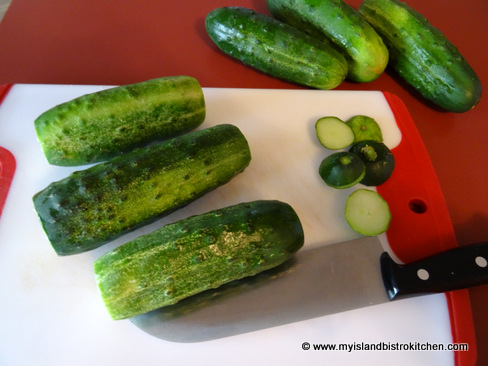
Give the cucumbers a good wash and then dry them off.
Trim and discard the cucumber ends but leave the peeling on for these pickles. Not only does the peeling give color and texture but it helps to hold the cucumber slices intact.
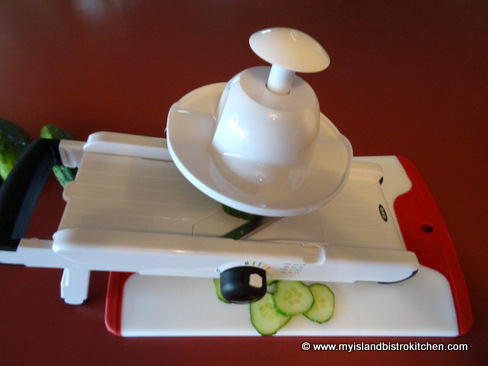
If you have a mandolin, it will make slicing the cucumbers easier and you will have uniformly-sized slices of cucumbers. I suggest cutting the cucumbers into either 3/16″ or 1/4″ thick slices, depending on how thin or thick you like pickle slices. The 1/4″ thickness will help the pickles retain their shape the best.
I recommend using the small silver-skinned onions (often referred to as “pickling onions”) for these pickles because, when sliced, they will be about the same size in diameter as the cucumbers. I find these onions are somewhat stronger in flavour than the standard garden variety of onions.
Silver-skinned Onions
Even if you don’t like onions, they really are needed to give these pickles flavour.
Use firm, blemish-free peppers – 1 red and 1 green – for this recipe and dice them up.
The green pepper contributes to the flavour and the red pepper adds a splash of color to the pickles (as well as taste).
Be sure to use pickling (coarse) salt, never table salt, for the soaking of these pickles. You should be able to find this salt in the same grocery aisle as regular table salt or at your bulk food store where it may be labeled as either “pickling” or “coarse” salt.
Coarse/Pickling Salt
Once all the vegetables are cut up, place them in a large bowl or pot.
Sprinkle the vegetables with the pickling salt.
Give the vegetables a good stir to mix in the salt.
For the brine, you will need a total of about 5-6 dozen large ice cubes. Completely cover the vegetables with a layer of ice cubes. As these melt, they combine with the salt to make the brine in which the vegetables will soak for three hours at room temperature. Make sure you have additional ice cubes to add to the vegetables as cubes melt. The key is to keep the vegetables ice cold as this will help the cucumbers retain their crispness.
Once the ice cubes melt, the vegetables will start to float in the water if they are not weighted down so I suggest placing another lightweight plastic bowl directly on top of the vegetables and ice cubes and weighting it down with a couple of frozen freezer packs which will also help to keep the vegetables cold. Be sure to cover this top bowl to keep the cold trapped inside.
After the vegetables have soaked for three hours at room temperature, drain them in one to two large colanders and discard any ice cubes that may still remain.
Give the vegetables a quick short rinse of fresh cold water. This will remove any salt residue that may remain. Don’t over-do the rinsing – just a quick rinse-off is all that is needed.
Drain the vegetables really well, letting them sit for at least 20 minutes or so. If too much water is left in the vegetables, it will dilute the syrup and make for watery pickles. As they are draining, I often will scoop up a handful or two of the vegetables and move them around in the colander and then gently shake the colander to release any trapped water.
For any pickling, I recommend using vinegar that is specially labelled for pickling – it will usually have 7% acidity, making it stronger than table vinegar which will help to preserve the pickles longer.
Pickling Vinegar
The syrup is easy to make. There is no need to bundle up all the spices into a cheesecloth sachet for the syrup as it is perfectly fine to have the spices loose in the pickle jars. Just remove and discard the cinnamon stick before bottling the pickles. To make the syrup, simply combine all the syrup ingredients in a large stock pot and bring it to a boil over medium-high heat.
Once the syrup has reached the boiling point, add the drained vegetables.
Bring the mixture back to the boiling point, occasionally stirring the vegetables. Once it reaches the boiling point, remove the pot from the heat. All this process aims to do is to heat the vegetables and they should not be cooked until they are soft – these pickles are meant to be crispy. Overcooking will make them soft and punky.
Some use the sanitizing cycle on their dishwashers to sterilize the jars. I’m still using the old traditional method of sterilizing the jars in hot water. The jars must be hot when they are filled with the vegetables.
Sterilizing Jars
Use a slotted spoon to gather up the vegetables and place them in the hot sterilized jars. A wide-mouthed funnel is useful for this process. Fill the jars, leaving about 1″ headroom in each.
Pour the hot syrup into the jars and over the vegetables, leaving about 1/2″ headroom in each bottle. Remove any air bubbles that may appear in the jars by inserting knife into each bottle and gently moving vegetables to allow liquid to fill any pockets of air that may have formed.
Wipe the tops of the jars with a clean, damp cloth to remove any syrup. Seal immediately with heated lids. Screw on jar bands just until resistance is met.
Process filled jars in hot water bath according to canner manufacturer’s directions for the proper time for your local altitude.
Cool jars completely and listen for the “ping/pop” sound that will tell you that the jar is sealed. This may happen quickly or it can take several hours. The lids should also have an inward dent in the center of their tops if they have sealed to the jars properly. If a lid has not made the “popping/pinging” sound and is not dented inward, store the jar in the refrigerator and use it first.
Store the jars in a cool, dark area.
How many jars of pickles you get from this batch will be determined by how tightly or loosely you pack the cucumbers into the jars. This will also dictate how much syrup is used, too.
Bread and Butter PicklesBread and Butter Pickles
Bread and Butter Pickles
Ingredients:
6 – 6½ lbs small pickling cucumbers, peeling on, sliced either 3/16” or 1/4″ thick 4 cups silver-skinned onions, peeled and thinly sliced 1 red pepper, diced 1 green pepper, diced ½ cup pickling salt 5-6 dozen ice cubes
Syrup: 5 cups white sugar 1 tsp tumeric 1 tbsp mustard seed 1 tsp celery seed 3 cups pickling white vinegar ½ cinnamon stick
Method:
Wash the cucumbers and trim and discard their ends. Slice the cucumbers either 3/16″ or 1/4″ thick, depending on the desired thickness of the pickle slices. Slice onions and dice the peppers. Combine the sliced cucumbers, onions, and peppers in a large bowl. Sprinkle pickling salt over vegetables. Stir mixture with a large wooden spoon to distribute the pickling salt. Completely cover mixture with a layer of ice cubes. Place a large bowl over the vegetables and weigh it down with a weight (a couple of freezer ice packs work well) to keep the vegetables soaking in the brine. Let sit at room temperature for 3 hours, adding more ice cubes as they melt to ensure vegetables are kept cold.
Drain vegetables into 1-2 large colanders and rinse with cold water to remove any salt residue. Drain again for several minutes.
In large stock pot, combine all of the syrup ingredients. Bring the syrup to the boiling point over medium-high heat, stirring occasionally. Add the vegetables. Bring the mixture just to the boiling point, stirring occasionally. Remove pot from heat.
Using a slotted spoon, fill hot sterilized jars with the vegetables leaving 1” headroom in each bottle. Pour hot syrup into the bottles, leaving ½” headroom in each bottle. Remove any air bubbles that may appear in the jars by inserting knife into each bottle and gently moving vegetables to allow liquid to fill any pockets of air that may have formed.
With clean, damp cloth, wipe clean each jar rim. Seal immediately with heated lids. Screw on jar bands just until resistance is met.
Process filled jars in hot water bath according to canner manufacturer’s directions for the proper time for your local altitude.
Store jars in cool dark area.
Yield: Apx. 7-9 pint bottles
For other great pickle, chow, and relish recipes from My Island Bistro Kitchen, click on the links below:
6 – 6½ lbs small pickling cucumbers, peeling on, sliced either 3/16” or 1/4" thick
4 cups silver-skinned onions, peeled and thinly sliced
1 red pepper, diced
1 green pepper, diced
½ cup pickling salt
5-6 dozen ice cubes
Syrup:
5 cups white sugar
1 tsp tumeric
1 tbsp mustard seed
1 tsp celery seed
3 cups pickling white vinegar
½ cinnamon stick
Instructions
Wash the cucumbers and trim and discard their ends. Slice the cucumbers either 3/16" or 1/4" thick, depending on the desired thickness of the pickle slices. Slice onions and dice the peppers. Combine the sliced cucumbers, onions, and peppers in a large bowl. Sprinkle pickling salt over vegetables. Stir mixture with a large wooden spoon to distribute the pickling salt. Completely cover mixture with a layer of ice cubes. Place a large bowl over the vegetables and weigh it down with a weight (a couple of freezer ice packs work well) to keep the vegetables soaking in the brine. Let sit at room temperature for 3 hours, adding more ice cubes as they melt to ensure vegetables are kept cold.
Drain vegetables into 1-2 large colanders and rinse with cold water to remove any salt residue. Drain again for several minutes.
In large stock pot, combine all of the syrup ingredients. Bring the syrup to the boiling point over medium-high heat, stirring occasionally. Add the vegetables. Bring the mixture just to the boiling point, stirring occasionally. Remove pot from heat.
Using a slotted spoon, fill hot sterilized jars with the vegetables leaving 1” headroom in each bottle. Pour hot syrup into the bottles, leaving ½” headroom in each bottle. Remove any air bubbles that may appear in the jars by inserting knife into each bottle and gently moving vegetables to allow liquid to fill any pockets of air that may have formed. Seal jars with sterilized lids and metal screw bands. Store in refrigerator or in cold storage room. For longer storage, or if storing outside a cold/refrigerated environment, process the pickle jars in a hot water bath following the canner manufacturer's directions.
The PEI Fall Flavours Culinary Festival introduced a new culinary event in 2015. While still classed as a “signature” event, the “Cooking with Chefs Anna and Michael Olson”, was a small, intimate, casual gathering of about 50 people on a sunny Sunday afternoon at the Rodd Brudenell River Resort in Prince Edward Island. The Olsons’ relaxed and authentic style along with their sense of humour made for a lovely and informative afternoon.
Chefs Anna & Michael Olson Cooking Demonstration, PEI Fall Flavours Culinary Festival 2015
The afternoon started out with a tutoring session on beer and cheese pairing (plus one wine and cheese pairing).
Locally-brewed beers from PEI breweries were used to pair against locally-made cheeses (with the exception of the Brie cheese which came from New Brunswick because there is no Brie currently made on PEI).
The cheeses were from Glasgow Glen Farm in New Glasgow and COWS Creamery in North River on the outskirts of Charlottetown.
By way of example, some of the Chefs’ pairing suggestions included: Aged Gouda from Glasgow Glen Farm and COWS Creamery Avonlea Clothbound Cheddar pair well with the PEI Brewing Company’s “Island Red” ale. COWS Creamery Appletree Smoked Cheddar teams well with the PEI Brewing Company’s “Sydney Street Stout”.
The Olsons also suggested some food pairings with the beer. They suggest Upstreet Craft Brewing’s “Rhuby Social Strawberry Rhubarb Witbier” pairs well with seafood – in particular, mussels, clams, and white fish. “Island Red” ale compliments roasts, ribs, and barbequed foods. Chef Michael referred to the “Sydney Street Stout” as the “red wine of beers” so suggested it could be paired with a wide variety of foods including oysters, roast beef, rich cheeses, and desserts. In particular, he says that onions and stout are a great combination to make a rich sauce for meat.
The Olsons offered a cheese and wine pairing suggestion using wine from Benjamin Bridge Vineyards in Nova Scotia which was this year’s wine sponsor for the Culinary Festival. They suggest that the “Nova 7” wine, that has a hint of sweetness, pairs particularly well with double cream Brie.
The second half of the afternoon was devoted to a cooking demonstration. Three dishes were prepared: PEI Mussels steamed in Ale with Mustard; Apple and Cheese Scones, and Schnitzel Sliders. As they demonstrated the food preparation, Chefs Anna and Michael offered cooking and baking tips.
Chef Anna Olson Demonstrating How to Make SconesAnna’s Apple and Cheese SconesPEI Mussels Steamed in BeerSchnitzel Sliders
And, yes, we did get to sample the food, too!
The event was also a good occasion to purchase cookbooks authored by Chefs Anna and Michael Olson and have them autographed.
I liked this culinary event because it was casual and interactive with the chefs and it was educational. As a foodie, I am always looking for new and different ways to prepare local foods so including this type of event into a culinary festival is very appealing to me. I hope more of this type of event is included in the future.
For more information on the PEI Fall Flavours Culinary Festival and information on tickets and upcoming culinary events, visit their website.
To read stories about other PEI Fall Flavours Culinary Events I have attended, click on these links:
The evening of Saturday, September 26, 2015, could not have had better weather for a short sunset sail out of Wood Islands, PEI, along the Northumberland Strait. When great PEI food is featured on a sail and dine dinner hosted by celebrity chefs Anna and Michael Olson, you just know it’s going to be an awesome event and this evening delivered on all fronts.
The venue was the mv Confederation which normally operates as a ferry boat between Wood Islands, PEI, and Caribou, Nova Scotia. However, on this Saturday evening, the ship was transformed into an elegant floating dining hall. Staging a PEI Fall Flavours Culinary Event aboard one of the ferry boats is very appropriate given the significance of the ferries to Island life. Before the Confederation Bridge was built and opened to traffic in 1997, the ferry service (there were two – one in Borden-Carleton and the other in Wood Islands) was the only way on or off Prince Edward Island. While the Borden-Carleton to Tormentine, New Brunswick ferry service no longer operates, the ferry service between Wood Islands, PEI, and Caribou, NS, remains in operation.
MV Confederation
Greeting guests on the pier as they arrived for dinner were celebrity chef hosts, Anna and Michael Olson.
Chefs Anna and Michael Olson
One of the things I like most about PEI Fall Flavours events is when the chef(s) interact with guests and this couple was very interactive and visible throughout the entire evening.
Chef Anna Olson giving a few hints of the evening’s fare
Upon entering the ship, the lively strains of the musical talents of Mark Haines and Brad Fremlin greeted guests.
Mark Haines (violin) and Brad Fremlin (keyboard)
The evening began with wine and hors d’oeuvres on the passenger deck.
Brendan MacNeill from Benjamin Bridge Winery in Nova Scotia (this year’s Festival wine sponsor) greeted each guest with a glass of wine.
Brendan MacNeill, Benjamin Bridge Winery
Check out these tasty sausage and gouda sliders on spent grains buns!
PEI Oysters on the half shell with raspberry mignonette are always a hit!
PEI Oysters
Lovers of PEI mussels were in for a real treat with these “mussel shooters” which were marinated mussels served with crispy potato bits.
“Mussel Shooters”
These delicate smoked salmon crepe mini tortes melted in the mouth!
Smoked Salmon Crepe Mini Tortes
And, these piping hot mini apple cheddar turnovers with honey mustard sauce added a mix of sweet and savory flavours.
Rounding out the hors d’oeuvres was a cheese table compliments of the Dairy Farmers of Canada.
The lively musicians moved upstairs to entertain guests while they enjoyed hors d’oeuvres.
Mark HainesBrad Fremlin
As guests sampled the hors d’oeuvres, the mvConfederation left on a short sail of the Northumberland Strait, past iconic lighthouses.
Wood Islands, PEI Lighthouses
The evening light changed quickly. Yes, our cliffs really are this ruddy red color on PEI!
How stunning was this evening sky! This was the view from the top deck of the mvConfederation (unfiltered and non-retouched).
And, as the shades of the evening sky started to fade away, and the mv Confederation made its way back to port, thoughts turned to the dinner that awaited guests.
Curious to know how a ferry boat could be turned into a stunning dining hall or how food for a large number of guests could be prepared on board?
Enter a mobile kitchen and a team of chefs and professionally-trained wait staff from the Culinary Institute of Canada, part of Holland College in Charlottetown, PEI. I have been at events this group has catered to before and they are #1, hands down. I cannot even begin to imagine the level of organization and planning that would have been put in to this dinner which was very capably and efficiently executed.
I took a couple of quick photos from a distance of the mobile kitchen that had been brought on board for the event and the culinary team hard at work behind the scenes.
This food prep center was at one end of the car deck on the mvConfederation where, just mere hours before, autos would have been offloading having crossed the Northumberland Strait.
The main part of the car deck on the boat was transformed into this festive venue.
Note that this is just a small part of the dining area.
Here’s a closer look at the elegantly-set tables, resplendent in their fall rust-colored theme.
Now, for the three-course meal. Each course was served with wine pairings from Benjamin Bridge Winery.
Fresh rolls and jars of homemade bread and butter pickles and chow were on each table. The appetizer consisted of warm lobster fricassee and butter-poached claw on garlic mashed potatoes cozied up with a whiskey butter sauce and garnished with baby cress.
This was beyond decadent!
The main course consisted of “Sydney St. Premium Stout” beer-braised PEI beef short rib with cheddar crumble accompanied by a fluffy dumpling and roasted root vegetables.
And, then of course, the pièce de résistance – Chef Anna’s warm sticky toffee pudding topped with a pumpkin spice caramel and pumpkin seed praline! Can you say ‘melt in your mouth’?
Throughout the dinner, entertainment was provided by Irish Mythen.
Irish Mythen
Anyone for Bingo? Our Bingo callers, Chefs Anna and Michael, engaged everyone in a lively game of PEI Bingo in between the main and dessert courses.
This was a first class event all the way and exhibited the “WOW” factor. Congratulations to the organizers, chefs, wait staff, and entertainers for yet again another fine PEI Fall Flavours Culinary Festival event.
If you have never been to one of these Festival events, I highly recommend them. They are very well done and are a great way to sample premier Island foods presented in creative ways.
For more information on the PEI Fall Flavours Culinary Festival and information on tickets and upcoming culinary events, visit their website.
To read stories about other Fall Flavours Culinary Events I have attended, click on these links:
PEI Flavours ran a Facebook contest asking folks to share their Sunday dinner traditions for a chance to win a pair of tickets to the Beef ‘n Blues event that was part of the PEI Fall Flavours Culinary Festival. I was pleased to have my name drawn so off we went to Summerside on September 18th to the Credit Union Place where the event was being held.
Even though the venue was quite dark, I was able to take some photos to share with you so you can have a “taste” of the event.
Because this was classed as a signature event of the Festival, it was hosted by a celebrity chef. This marked the first time that Chef Ricardo was part of the PEI Fall Flavours Culinary Festival.
Chef Ricardo
Chef Ricardo is very personable and was a great dinner host! He found himself in demand throughout the evening to sign autographs.
Chef Ricardo
I must admit I am a fan of sit-down dinners with plated meals served. The theme of the evening revolved around the idea of a traditional Sunday family dinner so the beautifully-set tables supported this theme by having a big bowl of salad on the table along with homemade bread and jars of pickled beets and dill pickles, much like could be found on a traditional family dinner table.
This bread was still warm from the oven! Note the jars of homemade pickles!
Beautiful floral arrangements with fall colors adorned each table.
Here are a couple of overviews of one of the tables:
And, a close-up of a placesetting (bonus, a copy of the current issue of Ricardo’s beautiful magazine!).
Take a look at the scrumptious menu – is your mouth watering yet?
The appetizers –
Zucchini Boats with Braised Beef Short Ribs topped with Melted Gouda Cheese
Herbed Beef & Cheddar Hand Pies with House Made Tomato Ketchup & Corn Relish
The main course – Trio of Island Beef:
4 Oz Bacon Wrapped Beef Tenderloin with Shoe String Frites & Caramelized Onion Sauce
Ricardo’s Childhood Meatball served on Creamy Roasted Garlic Mashed Potato with Herb & Fried Mushroom Salad
Braised Beef & Island Ale Stew served over Potato & Root Vegetable Gratin
Dessert –
Sweet Breads – Banana Bread, Pound Cake, Blueberry Lemon Loaf, Pumpkin Loaf with Fresh Whipped Cream & Fruit Compotes
I hope you have enjoyed this glimpse into the 2015 Beef ‘n Blues culinary event in Summerside, PEI. My thanks to PEI Flavours for the tickets to this fine event.
For more information on the PEI Fall Flavours Culinary Festival and information on tickets and upcoming culinary events, visit their website.
To read stories about other Fall Flavours Culinary Events I have attended, click on these links:
Today, I’m taking you on a tour with me to Beamish Organic Apple Orchard and Deep Roots Distillery in Warren Grove, PEI. Owner, Mike Beamish, has been growing apples since 1990 when he started with 200 trees on his hobby farm near Charlottetown.
Mike Beamish Checking on his Apple Crop
Mike’s goal was always to grow apples organically although he did initially grow them using conventional methods in the early years because it was difficult to find non-chemical controls for some pests. Once more research was done and non-chemical controls were available to growers, Beamish transitioned his orchard to be organic in 2003 following the standard three-year period to be certified organic. During the three-year period, no chemical applications can be used. Beamish is certified under Atlantic Certified Organics (ACO), a certification body which is accredited with the Canadian federal government. This body enforces the national organic standards such as buffer zone requirements from surrounding farms using conventional farming methods and it provides a list of approved substances that can be used in organic farming. The orchard is subject to annual audits by the ACO to ensure only approved substances and organic farming practices are used. Certified organic farmers are required to keep records of any products or substances used and the farmers must be re-certified each year.
Beamish Organic Apple Orchard, Warren Grove, PEI
Growing apples organically does come with its challenges since farmers don’t have access to the traditional chemical treatments non-organic apple growers can use. Beamish says the biggest challenges are dealing with pests such as bugs and rodents, disease in the trees and apples, and ensuring soil nutrition. Any products applied to the ground or trees must be certified organic products only. He counters these challenges by buying and applying organic compost around the trees, installing little ground fences around each tree to deter rodents, and hanging certified organic products in the trees to fend off pests such as moths, apple fruit flies, and railroad worms.
At one point, the Beamish Orchard had 800 apple trees; however, Island winters can be harsh and, in 1999, the orchard cut back to 500 trees in its U-pick orchard. The orchard currently has about 300 apple-producing trees. Beamish grows four varieties of apples – Red Free, Novamac, Liberty, and Freedom. The biggest seller are the Red Free, an early variety ready in mid-September.
The Red Free variety is particularly good for cooking as these apples keep their shape and, because they are non-acidic, there is no need for a lot of sugar.
Red Free Apples
This year (2015) will mark the first year that the Beamish Orchard will not operate as a U-pick. They will still have apples for sale at the farm but, because they have reduced the number of trees in the orchard, there will not be enough apples to operate a U-pick. In addition, Beamish has also created another usage of his apple crop as he has started a distillery.
Deep Roots Distillery, Warren Grove, PEI
When Beamish retired three years ago from Holland College, he was looking for a retirement activity. Since he already had a ready supply of apples, he began making sweet apple cider and selling it at the Farmers Market in Charlottetown. His interest in distilling grew so he pursued a course hosted by the Bio-Food-Tech Centre in Charlottetown that focused on the science of distilling. In addition, he received some technical assistance from the New Brunswick Community College in Grand Falls. In June, 2014, Beamish obtained his license to distill and it wasn’t long before he began producing liquor, using local raw products whenever possible.
Mike Beamish at his Warren Grove, PEI, Distillery – “Deep Roots”
Today, Beamish has four products on the market: Island Tide (a cane-sugar spirit), Blueberry Eau de Vie, Maple Liqueur, and his newest, Camerise Haskap Liqueur.
Deeproots Distillery Products
Beamish says the Island Tide liquor moonshine, with an alcohol content of 45%, is a cross between rum and vodka and would be best suited for martinis and mojitas. Historically, much of the moonshine made in PEI was made from cane-sugar. However, with more modern distilling techniques, it is somewhat smoother than what some folks may remember!
Mike Beamish says the Blueberry Eau de Vie does not have a strong blueberry taste but rather has the essence of blueberry. It has 45% alcohol content and is best served as an after dinner beverage over ice or in a fruit-based cocktail.
The Maple Liqueur is made from New Brunswick maple syrup and, with 25% alcohol, is stronger than most liqueurs. It is also suitable as an after dinner drink or served over vanilla ice cream or in baking.
The Camerise Haskap Liqueur is a new product from the distillery and has just been released this summer.
This liqueur, with 26.5% alcohol, is made with haskap berries which come from Phyto Cultures Inc. in nearby Clyde River. This liqueur is developed using a method by which the alcohol is infused with the whole haskap berries which sit in the alcohol for four months before being crushed. The Camerise Haskap Liqueur also is an after dinner drink and is meant to be served straight over ice.
Producing liquor is government-regulated and the products have to be analyzed by a certified lab in the same way as any big brand liquors.
Boxes of product ready for shipping
The products are labelled under the Deep Roots Distillery label and can be purchased at the Charlottetown Farmers Market and at the Distillery located at 2100 North York River Road, Route 248, in Warren Grove just outside Charlottetown. You can also find them on the shelves of many local liquor stores on the Island.
Sales Outlet at Deep Roots Distillery, Warren Grove, PEI
Tours of the apple orchards and the distillery are available for a nominal fee and Mike welcomes visitors to learn more about his organic apple orchard and new distillery. For more information, and hours of operation, visit the websites for Beamish Organic Apple Orchard and Deep Root Distillery.
Apple-Maple Bread Pudding
As is my standard practice when I visit a local food producer, I develop a recipe using the producer’s product(s). In my Apple-Maple Bread Pudding with Maple Sauce, I have used the Red Free apples from the Beamish Orchard along with the Deep Roots Distillery Maple Liqueur.
Red Free Apples
The Red Free apples are great in this recipe because they keep their shape and don’t go to “mush” or a sauce-like consistency in the pudding which would make it too soggy. The key is to sauté the apples enough that they are softened before adding them to the pudding batter. Adding some maple liqueur as the apples sauté provides additional flavour.
It’s a matter of opinion as to whether a bread pudding should be baked in a hot water bath or not. I have made bread puddings both in a water bath and without and, to be frank, don’t see any appreciable difference in quality of the baked pudding. So, for this recipe, I did not use the hot water bath baking method and the pudding was lovely and moist.
Apple-Maple Bread Pudding
Apple-Maple Bread Pudding
Ingredients:
1 – 1 lb loaf French bread 3 cups whole milk 1 cup less 1½ tbsp Blend/cream (10%)
2½ cups thinly sliced baking apples (about 3 medium-sized apples) ½ tbsp butter 1 tbsp brown sugar 1 tbsp maple liqueur
3 extra-large eggs 1 cup white sugar 1/3 cup maple syrup 3 tbsp melted butter 2 tsp vanilla 3/4 tsp cinnamon 1/8 tsp nutmeg 1/8 tsp allspice Pinch cardamom ¾ cup raisins soaked in 1½ tbsp maple liqueur
Method:
Assemble ingredients.
Preheat oven to 325°F.
Grease or line 9”x13” pan with greased tin foil.
In large bowl, break the French bread into small pieces, crusts and all.
Pour the milk and blend (cream) over the bread.
Cover and let sit for 30 minutes then handcrush mixture until well blended.
Meanwhile, peel, core, and thinly slice the apples.
Melt butter in saucepan over medium heat. Add the apples and sauté for about 2 minutes. Sprinkle with brown sugar and sauté apples for another minute. Remove pan from heat and add liqueur. Return to heat and sauté the apples for 5-7 minutes, or until they are softened and a golden color.
In medium-sized bowl, beat the eggs well. Add the sugar and beat again. Beat in the maple syrup, melted butter, and vanilla. Add the spices and stir well. Pour over bread-milk mixture in large bowl and mix well.
Lastly, gently fold in the sautéd apples along with the raisins.
Pour mixture into prepared pan. Smooth batter evenly in pan.
Bake for about 50-60 minutes or until it springs back to a light touch and/or a cake tester (or knife) inserted into 2-3 places in the pudding comes out clean.
Remove pudding from oven and transfer pudding pan to a cooling rack to rest for 20 minutes. Slice into 12 pieces and serve warm with maple sauce (recipe below), crème anglaise, or ice cream.
Yield:12 servings
Maple Sauce
Ingredients:
1 cup brown sugar 3 tbsp cornstarch dash of salt 2 cups boiling water 2 tbsp maple syrup 2 tbsp maple liqueur 2 tsp vanilla ¼ cup butter
Method:
In saucepan, mix the brown sugar, cornstarch, and salt together well. Add the boiling water, maple syrup, maple liqueur, and vanilla together. Mix well. Add butter. Cook until sauce boils and reaches desired consistency. Serve hot over Apple-Maple Bread Pudding.
Yield:Apx. 2½ cups
Maple Sauce on Apple-Maple Bread Pudding
—————————————————————————-
Thank you for visiting “the Bistro” today. If you enjoyed this posting and recipe, please share it on your social media websites.
Connect with “the Bistro” through the following social media:
Join My Island Bistro Kitchen on Facebook Follow “the Bistro’s” tweets on Twitter Follow “the Bistro” on Pinterest Follow “the Bistro” on Instagram
Apple and maple flavours combine to make a delectable bread pudding
Ingredients
Pudding:
1 – 1 lb loaf French bread
3 cups whole milk
1 cup less 1½ tbsp Blend/cream (10%)
2½ cups thinly sliced baking apples (about 3 medium-sized apples)
½ tbsp butter
1 tbsp brown sugar
1 tbsp maple liqueur
3 extra large eggs
1 cup white sugar
1/3 cup maple syrup
3 tbsp melted butter
2 tsp vanilla
3/4 tsp cinnamon
1/8 tsp nutmeg
1/8 tsp allspice
Pinch cardamom
¾ cup raisins soaked in 1½ tbsp maple liqueur
Sauce:
1 cup brown sugar
3 tbsp cornstarch
dash of salt
2 cups boiling water
2 tbsp maple syrup
2 tbsp maple liqueur
2 tsp vanilla
¼ cup butter
Instructions
Assemble ingredients.
Preheat oven to 325°F.
Grease or line 9”x13” pan with greased tin foil.
In large bowl, break the French bread into small pieces, crusts and all. Pour the milk and blend (cream) over the bread. Cover and let sit for 30 minutes then handcrush mixture until well blended.
Meanwhile, peel, core, and thinly slice the apples. Melt butter in saucepan over medium heat. Add the apples and sauté for about 2 minutes. Sprinkle with brown sugar and sauté apples for another minute. Remove pan from heat and add liqueur. Return to heat and sauté the apples for 5-7 minutes, or until they are softened and a golden color.
In medium-sized bowl, beat the eggs well. Add the sugar and beat again. Beat in the maple syrup, melted butter, and vanilla. Add the spices and stir well. Pour over bread-milk mixture in the large bowl and mix well.
Lastly, gently fold in the sautéed apples along with the raisins. Pour mixture into prepared pan. Smooth batter evenly in pan.
Bake for about 50-60 minutes or until it springs back to a light touch and/or a cake tester (or knife) inserted into 2-3 places in the pudding comes out clean.
Remove pudding from oven and transfer pudding pan to a cooling rack to rest for 20 minutes. Slice into 12 pieces and serve warm with maple sauce, crème anglaise, or ice cream.
To make the maple sauce, combine the brown sugar, cornstarch, and salt together in saucepan. Add the boiling water, maple syrup, maple liqueur, and vanilla together. Mix well. Add butter. Cook until sauce boils and reaches desired consistency. Serve hot over Apple-Maple Bread Pudding.
New to the 2015 roster of the Prince Edward Island Fall Flavours Culinary Festival was the “Taste of New Glasgow” event. New Glasgow is a small rural community in the central part of the province. Despite its small size, it has a number of fine restaurants, chefs, and food producers and they brought their A-game to ensure festival goers had a fine “Taste of New Glasgow”, despite the challenges that the weather presented.
September 11th dawned with gray skies that, by late afternoon, resulted in a torrential downpour for the 2015 Festival kick-off event.
Organizers had planned to hold the event outside in the Gardens of Hope at the Prince Edward Island Preserve Company in New Glasgow, PEI. However, Mother Nature had other ideas.
An alternative plan of action was implemented and a huge tent was erected in the parking lot of the Prince Edward Island Preserve Company and, instead of outdoor open firepits as originally planned, chefs improvised and used barbeques and other cooking appliances adjacent to the big tent.
While the rain certainly changed location plans, it did not dampen the enthusiasm of event goers or the participating chefs but umbrellas and rain gear were certainly the order of the day.
This event was classed as a signature festival event meaning it was hosted by a celebrity chef who in this case was PEI’s own Chef Michael Smith.
Chef Michael Smith, Celebrity Chef Host at “Taste of New Glasgow”, A PEI Fall Flavours Signature Culinary Event
“Taste of New Glasgow” was a roaming feast which meant that several participating local restaurants/chefs/food producers each had a station where they served food to patrons who made their way, at their leisure, around the tent to sample the offerings. Participating restaurants/chefs/food producers were Prince Edward Island Preserve Company, Glasgow Glen Farm, New Glasgow Lobster Suppers, The Mill in New Glasgow, The Culinary Institute of Canada, Larkin Brothers, and Carr’s Oyster Bar. In addition, there were four Beverage Stations featuring local beers and wines – Barnone Brewery, Upstreet Craft Brewing, Prince Edward Island Brewing Co., and Matos Winery.
To give you a flavour of the feast, here’s a sampling of what was on the menu:
New Glasgow Lobster Suppers served up lobster salad on their famous homemade rolls alongside steamed PEI mussels and, for dessert, offered lemon meringue tarts reminiscent of their mile high lemon meringue pie.
The Mill in New Glasgow offered Larkin Brothers chicken with rhubarb cranberry chutney and a blueberry mousse for dessert.
Carrs Oyster Bar hosted an oyster station and also offered lots of steamed bar clams, too.
Glasgow Glen Farm had lots of breads and spreads along with a cheese fondue. They also served Florrie’s Pride Goat Cheese Cake with smoked tomato aioli, garden cherry and tomato salad, all in a small mason jar. Their dessert offering was a blackberry and honey tart with bee pollen and chokecherry syrup.
Location host, the Prince Edward Island Preserve Company, served spice-encrusted smoked pork ribs and, for dessert, offered a popular ginger cookie sandwich which was filled with homemade vanilla bean ice cream.
The Culinary Institute of Canada offered a charcoal beef brisket served with roasted onion aioli on a milk bun while Larkin Brothers provided grilled turkey sausage.
Chef Michael Smith and his crew from his new restaurant, “Fireworks”, at the Inn at Bay Fortune served up wood-fired crusted Island halibut from Victoria-by-the-Sea.
Chef Michael had a portable wood-fired oven which he used to cook the halibut near his serving station.
The halibut was accompanied by saffron tomato broth and sea rocket slaw (and, on yes, the miniature PEI flag, of course!).
Ever personable and engaging, Chef Michael had a very long line up all evening at his station as foodie fans arrived with the chef’s cookbooks in hand ready for autographing as they picked up a sample of the halibut.
But, make no mistake about it, the master was still overseeing the preparation and presentation of the halibut.
A good PEI party includes two things: Good food and entertainment.
The event was also an occasion for a local food producer to create awareness with people about the source of some of the food they enjoyed during the evening. Florrie Sanderson from Island Hill Farm in Hampshire, PEI, raises a herd of some 60 goats and milks 10 goats.
Florrie Sanderson and “Bae”
Florrie sells her goat milk to Chef Jeff McCourt of Glasgow Glen Farm who uses it to make cheese, some of which was used in a feature dish at the Glasgow Glen Farm station.
Florrie brought along one of her goats, “Bae”, who quickly became a celebrity and photo star throughout the evening. “Bae” drew many smiles and chuckles throughout the evening and she was exceptionally well-behaved!
“Bae”
So, this event featured many PEI flavours – from both the rich PEI soil and the waters that surround our Island. One of the advantages of a roaming feast event is that you get to sample food prepared by different chefs, restaurants, and local food producers all in one venue. Often, it is an occasion to try foods and beverages you may not have tried before so it’s an opportunity to sample something new or, alternatively, perhaps it’s a familiar food but prepared in a new and innovative way.
For more information on the PEI Fall Flavours Culinary Festival and information on tickets and upcoming culinary events, visit their website.
To read stories about other Fall Flavours Culinary Events I have attended, click on these links:
I recently paid a visit to the Bernard family at Barnyard Organics in Freetown, PEI. Sally and Mark Bernard operate one of the largest (if not the biggest) organic farms on the Island and Sally and her daughter, Lucy, were my tour guides.
Sally and Lucy Bernard from Barnyard Organics
Sally (who grew up on a farm in New Brunswick) and Mark (from an Island farming family) met at the Nova Scotia Agricultural College (NSAC) in Truro, Nova Scotia. Sally has an English degree from Mount Alison as well as a Plant Science Diploma from NSAC while Mark holds an Agricultural Business Diploma with a minor in Plant Science. In 2003, while still in college, Mark knew he wanted to pursue organic farming. His father had recently retired from farming so Mark began the groundwork for preparing the first 50 acres on his family’s farm to be taken out of conventional farming practices. The Bernards officially became certified organic farmers in 2006 and, since 2010, they have 550 organic acres on their farm and also rent additional acreage near Kensington.
Barnyard Organics, the name of the farm, is certified under Atlantic Certified Organics (ACO), a certification body which is accredited with the Canadian federal government. This body enforces the national organic standards such as buffer zone requirements from surrounding farms using conventional farming methods and it provides a list of approved substances that can be used in organic farming. As such, the farm is required to keep records of any products or substances used. In order to remain certified organic, the Bernards are subject to yearly inspections from ACO.
The main focus of the farm is on growing grains that include soybean, barley, wheat, oats, field peas, buckwheat, and clover. More than half of the grains are sold to small-scale organic producers in the Maritimes as a complete mixed animal feed. The remaining half goes to Speerville Flour Mill in New Brunswick and to brokers in Quebec and Ontario. Of note, 35-40 acres of the farm are dedicated to growing wheat specifically for bread.
Bread made with Wheat Grown on Barnyard Organics Farm in Freetown, PEI
In addition, the Bernards also have both meat birds and about 150 laying hens.
The meat birds are raised on a portable pasture system which means the shelters they live in are moved each day so the birds always have fresh grass to nibble on.
The laying hens are completely free range so they have unfettered roaming privileges in a field nearest the farm buildings. They then take up winter residence inside a barn.
These are their summer condos!
This is where the flock hangs out when they are not out roaming about the field.
And, this is what is found on the other side of the “condos”.
Baby chicks on the farm!
Both meat and laying birds are raised on organic grains grown on the farm so the Bernards know exactly what their fowl are fed and customers can be assured the chickens and eggs are organic and of the highest quality.
About 90% of their meat birds and eggs are direct marketed to customers through CSA (Community Supported Agriculture) shares. This is a program whereby consumers (sometimes referred to as shareholders) invest in their food system by paying, the producer, upfront, for a season of fresh farm products. In exchange, the producer agrees to employ good farming practices to ensure a food supply and commits to sharing the resulting farm produce with those shareholders. This method of farming gives the farmer operating capital to buy supplies and run the farm and, in turn, CSA customers get quality fresh produce – in this case, fresh organic chickens and eggs from the Bernards.
Barnyard Organics currently has 100 CSA members and delivers to customers every two weeks in both Charlottetown and Summerside, alternating week about. Sally packages her fresh chickens and eggs, loads up her trolley fitted with refrigeration, and heads off with her deliveries.
Through the CSA market method, Sally gets to know her customers directly and they get to meet with the producer of their food and have the opportunity to put money directly into the producer’s hands with no middle parties. In addition, this customer-producer interaction provides the opportunity for customers to know where their food comes from and learn how it is produced. For the producer, this method allows for face-to-face feedback on products.
The remaining 10% of the farm’s products are sold to customers who regularly drop by the farm to pick up their farm-fresh eggs and chickens from the large cooler the family installed on the farm.
Barnyard Organics also has a small provincially-inspected processing plant where they process approximately 60 chickens a week, ready for distribution to their customers.
Farming organically is not without its challenges. For example, the Bernards don’t use chemical treatments that conventional farmers do so they can’t buy just any kind of fertilizer for their fields. Instead, they use mussel shell waste as well as manure from a nearby dairy farm; however, the manure needs to first be composted before being spread on the fields because it is not organic.
The farm also has its own grain dryer and soybean roaster which are needed because the Bernards can’t take their product to any local commercial dryers or roasters because of potential cross-contamination with non-organic grains.
Sally says their greatest satisfaction comes from knowing they have healthy soil on their farm to produce healthy food. The Bernards practice healthy crop rotation and focus on feeding the soil, not taking from it and depleting its goodness.
Lucy Bernard
In particular, Sally derives great satisfaction from seeing their children interact with farm life. Because she home schools the children, they are exposed each and every day to experiential learning on the farm. Even 7-year old Lucy is already involved with organic farming. She takes the livers and hearts of the processed chickens, dehydrates them, and sells them for organic dog food. Lucy is also helping with the chicken business on the farm, too, and happily moves about the field of hens.
Sally jokes that Lucy could give the tour of the farm as well as she can and says their children are so acclimatized to farm life that they don’t even know that not everyone knows what life on a farm is like.
This summer Sally started a “Rent-A-Chicken” project that was so popular, she ended up with a waiting list. Essentially, the initiative allowed people to have a couple of chickens in their own backyards from June until October, enjoy the eggs, and then return the chickens to the Bernards in the fall without having to worry about what to do with the birds in the winter. The Bernards delivered, to renters, a small, portable chicken coop, two laying hens, feed and grit, food and water dishes, and a guide for raising hens.
Sally showing one of the portable chicken coops that are part of her “Rent-A-Chicken” Package
Ideally, each hen could be expected to lay six eggs a week so renters have a dozen fresh organic eggs every week.
In the fall, the Bernards will pick up the birds and take them back to the farm. Cost for the package for the 2015 season was around $300. Feedback has been very positive and, in fact, some folks have already asked that the birds be banded so they can have the same ones back next year!
To find out, from a renter’s perspective, what the chicken rental experience was like, I met with Shirley Gallant who had two birds rented from the Bernards this summer.
As soon as she heard of the opportunity, Shirley knew it was for her as she had had a few hens in her backyard some years ago but wintering them was a problem for her. Because the Bernards will collect the two hens in the fall, Shirley has been able to have the hens for the summer and enjoy their eggs with no worries about what to do with the hens over the winter. The two hens happily roam around Shirley’s yard during the day and then retire to their coop for the night. For Shirley, the experience has been very positive and she says she would do it again because “the hens are fun to have around” and she has fresh eggs for her organic diet.
Shirley Gallant with one of her rented chickens from Barnyard Organics
Barnyard Organics farm does offer tours but the Bernards appreciate advance reservations as this is a busy working farm and family. For more information on Barnyard Organics, visit their website.
As is my standard practice when I visit a local food producer, I like to create a recipe using and featuring one of their products. I have chosen to use the brown eggs to make devilled eggs. These eggs have gorgeous vibrant yellow yolks so they make colorful devilled eggs.
Devilled Egg
The Bistro’s Devilled Eggs
Ingredients:
5 hard-boiled eggs, cooled, peeled, and sliced in half lengthwise 2 – 2½ tbsp mayonnaise 1 tsp sour cream ½ tsp prepared mustard 1½ tsp onion, minced ¾ tbsp sweet pickle relish 2 tsp Parmesan cheese, finely grated Pinch garlic powder ½ tsp fresh dill, chopped fine ¾ tsp fresh parsley, chopped Pinch cayenne Salt and pepper, to taste
Paprika Fresh parsley, chopped Sprigs of fresh herbs (optional) Method:
Gently scoop out egg yolks and place in small bowl. Set egg whites aside.
Mash egg yolks with fork. Add all remaining ingredients. Mix well.
Fill egg white cavities with the devilled egg mixture using either a pastry bag fitted with a large decorative tip (I use a Wilton 6B tip) or, alternatively, use a spoon.
Refrigerate devilled eggs at least 1 hour before serving. At time of serving, sprinkle with chopped fresh parsley and/or paprika. Garnish each with a small sprig of a fresh herb, if desired.
Yield: 10 servings (1 devilled egg each)
Devilled EggsDevilled Eggs
—————————————————————————-
Thank you for visiting “the Bistro” today. If you enjoyed this posting and recipe, please share it on your social media websites.
Connect with “the Bistro” through the following social media:
5 hard-boiled eggs, cooled, peeled, and sliced in half lengthwise
2 – 2½ tbsp mayonnaise
1 tsp sour cream
½ tsp prepared mustard
1½ tsp onion, minced
¾ tbsp sweet pickle relish
2 tsp Parmesan cheese, finely grated
Pinch garlic powder
½ tsp fresh dill, chopped fine
¾ tsp fresh parsley, chopped
Pinch cayenne
Salt and pepper, to taste
Paprika
Fresh parsley, chopped
Sprigs of fresh herbs (optional)
Instructions
Gently scoop out egg yolks and place in small bowl. Set egg whites aside.
Mash egg yolks with fork. Add all remaining ingredients. Mix well.
Fill egg white cavities with the devilled egg mixture using either a pastry bag fitted with a large decorative tip (I use a Wilton 6B tip) or, alternatively, use a spoon.
Refrigerate devilled eggs at least 1 hour before serving. At time of serving, sprinkle with chopped fresh parsley and/or paprika. Garnish each with a small sprig of a fresh herb, if desired.
Summer is reluctant to leave Prince Edward Island this year and I’m perfectly fine with that. Today (September 19, 2015), the temperature soared to almost the 30C mark! We’re not accustomed to these kinds of temperatures in mid-September here on the Island ….but we’ll take them!
Just as summer may not be in a hurry to leave us, I’m equally reluctant to put away my picnic basket. When temperatures are still delightfully summer-like, I want to continue with my picnics.
A Charcuterie board is a wonderful and easy way to prepare a light meal, whether indoors or in the great outdoors. It can be as simple or elaborate as you like. I’ve opted to prepare a fairly substantial board for our meal this evening because I’m not cooking a dinner this evening (it’s simply too warm – how great is it to be able to say that!). So, here’s our early evening charcuterie-plus board fare.
Let’s take a closer look at what’s on the board. Quiches are great additions to picnic fare since they can be eaten cold or served slightly warm and they can be prepared ahead of time. This is my asparagus quiche and you can get my recipe here.
Asparagus Quiche
I’ve included devilled eggs on the menu since they are classic picnic fare. Besides their wonderful flavor, they also add color and texture to the board. Those are three elements I like to keep in mind when preparing a charcuterie board.
Add any cold cuts you like to the board. I’ve included salami and Tuscan ham on my board today.
I’ve only included one cheese on the board – a good quality Gouda. If I hadn’t included the quiche, I would have added more cheese and meat varieties. Adding some garden-fresh cherry or grape tomatoes adds a bright pop of color to the board. These are fresh from our garden. We have a bountiful supply of fresh herbs in the garden and they make great “fillers” to close in space on charcuterie boards.
Slices from a long baguette are suitable bases for the cold cuts and cheese.
My rhubarb relish is a tasty condiment to this type of meal.
Green grapes and blueberries round out the fruit component. The blueberries are fresh picked from the Tryon Blueberries U-pick. We are lucky to have them not far away as they have late season varieties of blueberries so we have fresh local berries through September.
My staple of oatcakes can be used as either a savory or sweet aspect to the meal. Spread an oatcake with a bit of rhubarb relish and add some meat and/or cheese, and you have a savory bite. Or, eat them plain as cookies. They’re good either way.
My wine pairing today is Rossignol Little Sands White Wine produced in eastern PEI.
And, there you have all the components of my colorful and tasty late summer charcuterie picnic!
Perfect for easy, relaxed casual dining anytime, anyplace.
I’m just not going to pack away that picnic basket just yet!
—————————————————————————-
Thank you for visiting “the Bistro” today. If you enjoyed this posting and recipe links, please share it on your social media websites.
Connect with “the Bistro” through the following social media:
We have had an abundance of yellow wax string beans this year. They were late producing but they sure made up for their tardiness.
We can only eat so many fresh beans so one way of preserving them is to make mustard beans. This is similar to mustard pickles which are made with cucumbers.
Mustard beans are actually quite easy and quick to make. The beans are par-cooked in boiling water, drained, then added to a mustard sauce . The trick is to cook the beans just until they are barely fork tender as, otherwise, they will become soggy and tough. The beans should still hold their shape but not be extremely hard when you bite into them.
Mustard beans are a great addition to many meals; we use them just like we would mustard pickles. They are simply a different texture and I make the mustard sauce a wee bit differently.
Mustard Beans
Ingredients:
1 lb yellow wax beans, cut into 1½” lengths (apx. 4 cups) 1½ – 2 cups boiling water ½ tsp table salt
1½ cups white vinegar 1 cup granulated sugar 1/3 cup brown sugar, lightly packed ¼ cup all-purpose flour 1½ tbsp dry mustard ½ tsp celery seed 1½ tsp turmeric ½ tsp. ground ginger ½ tsp table salt
Supplies and Equipment Needed:
4 half-pint glass canning jars for the mustard beans (plus 2-3 more half-pint-sized jars to take up extra space in the canner basket during the hot water bath process) 4 – two-piece lid and screw band sets (lids must be brand new and NOT previously used) Medium-to-large sized, heavy-bottomed, stock pot for par-cooking beans and for making the mustard beans Large colander for draining beans Large pot for sterilizing jars Small saucepan for heating jar lids Large, heat-proof spoon for stirring beans Water bath canner with basket Jar lifter tongs Wide-mouthed canning funnel Large ladle or heat-proof glass measuring cup Chopstick or small non-metallic heat-proof spatula to remove any air bubbles/air pockets from filled jars Magnetic lid lifter A timer Clean cloth for wiping jar rims of filled jars
Method:
Wash jars in hot soapy water. Rinse. Fill a large-sized pot about two-thirds full of hot tap water. Place the jars, upright, into the water. Ensure the jars are fully submerged, each jar filled with water, and that the water is at least an inch over the tops of the jars, adding more if necessary. Cover, bring to a boil, and boil gently for 10 minutes. Turn off heat and leave the jars in the hot water to have ready to fill once the mustard beans are ready for bottling.
Fill the canner about half full of hot tap water. Cover and bring to a boil to have it ready for processing of the filled jars.
In medium-to-large sized heavy-bottomed pot and over medium-high heat, bring beans to a boil in salted water. Reduce heat to medium-low and par-cook beans just until they are barely fork tender. Drain in colander. Do not overcook or beans will become soft and mushy.
In the same medium-to-large sized pot in which the beans were par-cooked, heat 1 cup of the vinegar to the boiling point.
Combine sugars, flour, mustard, spices, and salt in bowl. Mix well. Add remaining 1/2 cup of vinegar to make a paste. Add and stir in 2-3 tablespoons of the hot vinegar to the mixture to temper it and then pour all the sauce ingredients into the hot vinegar in the pot. Cook sauce over medium-low heat until thickened, stirring frequently to prevent scorching. When sauce coats a spoon and drips off slowly, it is thick enough to add the par-cooked beans.
Add drained beans. Stir gently to coat beans with sauce. Heat beans over medium-low heat for about 5 minutes just to heat the beans. Gently stir beans constantly to prevent scorching. Do not overheat or overcook beans. Remove pot from heat.
Use jar lifter tongs to carefully remove the hot sterilized jars from the water, one at a time, emptying the water from the jars back into the pot. Drain jars well.
Using a large ladle, or a heat-proof glass measuring cup, and a wide-mouthed canning funnel, transfer mustard beans into the hot sterilized jars, leaving about ¼” headroom in each jar to allow for expansion during the hot water processing. Remove any trapped air bubbles in the jars with a chopstick or small heatproof, non-metallic spatula. Wipe the jar rims with a clean damp cloth to remove any stickiness or sauce particles that could prevent the lids from sealing properly to the jars.
Remove a small amount of the hot water from the stockpot in which the jars were sterilized and place in small saucepan over simmering heat. Place the lids in the hot water just long enough to heat them and to soften the rubber sealing compound. Do not boil the lids or leave in the hot water for an extended time.
Using a magnetic lid lifter, remove lids from the hot water and center the heated lids on jars so the sealing compound on the lid edges aligns with the jar rims. Fingertip tighten ring/screw bands on jars until resistance is encountered. Do not over-tighten.
Using jar lifter tongs, carefully place the hot filled jars upright in wire basket positioned in the canner, ensuring jars do not touch each other or fall over. Depending on the canner basket shape and design, it may be necessary to add some of the hot empty jars, upright, to the basket to fill up space so the filled jars do not topple over. Let the empty jars fill with water from the canner as they are submerged. Ensure the water level is at least 1” above the tops of jars, adding more boiling water as necessary. Cover with canner lid. Increase the heat to return the water to a full rolling boil then decrease the heat to just keep the water at a moderately rolling boil but not boiling over. Process jars in the hot water bath for 10 minutes, adjusting time as and if necessary for altitude. Start timing the processing from the point at which a full rolling boil is reached after jars have been added to the canner. At the end of the processing time, turn off heat and remove canner lid.
Let jars sit in the hot water for 5 minutes then, using jar lifter tongs, carefully remove the jars filled with the mustard beans, one at a time, and transfer them to a heat-proof cutting board, that has been covered with a towel to protect the board, to cool completely.
Listen for the “pop” or “ping” sound as the bottles seal over the next few minutes or hours. The lids of properly sealed jars will curve downward. Let jars rest, undisturbed, on counter for 24 hours. Then, test each jar for proper sealing by lightly pressing down on the center of each jar lid. If the lid is already pressed downward, and does not pop back up, it is properly sealed. Any jars that do not pass this test should be refrigerated and the mustard beans used within a week or so.
Store properly sealed bottles in cool, dark place. Refrigerate mustard beans once jar has been opened.
If you have made this recipe and enjoyed it and/or wish to share it with your friends and family, please do so on social media but be sure to share the direct link to this posting from my website.
Connect with “the Bistro” through the following social media:
Mustard Beans are a great way to use up excess yellow wax beans in the garden for enjoyment outside the growing season. Serve this condiment with any meal of choice.
Course Condiment
Cuisine Canadian
Keyword beans, mustard beans
My Island Bistro KitchenBarbara99
Ingredients
1lbyellow wax beans, cut into 1½” lengths (apx. 4 cups)
1½– 2 cups boiling water
½tsptable salt
1½cupswhite vinegar
1cupgranulated sugar
1/3cupbrown sugar, lightly packed
¼cupall-purpose flour
1½tbspdry mustard
½tspcelery seed
1½tspturmeric
½tsp.ground ginger
½tsptable salt
Instructions
Wash jars in hot soapy water. Rinse. Fill a large-sized pot about two-thirds full of hot tap water. Place the jars, upright, into the water. Ensure the jars are fully submerged, each jar filled with water, and that the water is at least an inch over the tops of the jars, adding more if necessary. Cover, bring to a boil, and boil gently for 10 minutes. Turn off heat and leave the jars in the hot water to have ready to fill once the mustard beans are ready for bottling.
Fill the canner about half full of hot tap water. Cover and bring to a boil to have it ready for processing of the filled jars.
In medium-to-large sized heavy-bottomed pot and over medium-high heat, bring beans to a boil in salted water. Reduce heat to medium-low and par-cook beans just until they are barely fork tender. Drain in colander. Do not overcook or beans will become soft and mushy.
In the same medium-to-large sized pot in which the beans were par-cooked, heat 1 cup of the vinegar to the boiling point.
Combine sugars, flour, mustard, spices, and salt in bowl. Mix well. Add remaining 1/2 cup of vinegar to make a paste. Add and stir in 2-3 tablespoons of the hot vinegar to the mixture to temper it and then pour all the sauce ingredients into the hot vinegar in the pot. Cook sauce over medium-low heat until thickened, stirring frequently to prevent scorching. When sauce coats a spoon and drips off slowly, it is thick enough to add the par-cooked beans.
Add drained beans. Stir gently to coat beans with sauce. Heat beans over medium-low heat for about 5 minutes just to heat the beans. Gently stir beans constantly to prevent scorching. Do not overheat or overcook beans. Remove pot from heat.
Use jar lifter tongs to carefully remove the hot sterilized jars from the water, one at a time, emptying the water from the jars back into the pot. Drain jars well.
Using a large ladle, or a heat-proof glass measuring cup, and a wide-mouthed canning funnel, transfer mustard beans into the hot sterilized jars, leaving about ¼” headroom in each jar to allow for expansion during the hot water processing. Remove any trapped air bubbles in the jars with a chopstick or small heatproof, non-metallic spatula. Wipe the jar rims with a clean damp cloth to remove any stickiness or sauce particles that could prevent the lids from sealing properly to the jars.
Remove a small amount of the hot water from the stockpot in which the jars were sterilized and place in small saucepan over simmering heat. Place the lids in the hot water just long enough to heat them and to soften the rubber sealing compound. Do not boil the lids or leave in the hot water for an extended time.
Using a magnetic lid lifter, remove lids from the hot water and center the heated lids on jars so the sealing compound on the lid edges aligns with the jar rims. Fingertip tighten ring/screw bands on jars until resistance is encountered. Do not over-tighten.
Using jar lifter tongs, carefully place the hot filled jars upright in wire basket positioned in the canner, ensuring jars do not touch each other or fall over. Depending on the canner basket shape and design, it may be necessary to add some of the hot empty jars, upright, to the basket to fill up space so the filled jars do not topple over. Let the empty jars fill with water from the canner as they are submerged. Ensure the water level is at least 1” above the tops of jars, adding more boiling water as necessary. Cover with canner lid. Increase the heat to return the water to a full rolling boil then decrease the heat to just keep the water at a moderately rolling boil but not boiling over. Process jars in the hot water bath for 10 minutes, adjusting time as and if necessary for altitude. Start timing the processing from the point at which a full rolling boil is reached after jars have been added to the canner. At the end of the processing time, turn off heat and remove canner lid.
Let jars sit in the hot water for 5 minutes then, using jar lifter tongs, carefully remove the jars filled with the mustard beans, one at a time, and transfer them to a heat-proof cutting board, that has been covered with a towel to protect the board, to cool completely.
Listen for the “pop” or “ping” sound as the bottles seal over the next few minutes or hours. The lids of properly sealed jars will curve downward. Let jars rest, undisturbed, on counter for 24 hours. Then, test each jar for proper sealing by lightly pressing down on the center of each jar lid. If the lid is already pressed downward, and does not pop back up, it is properly sealed. Any jars that do not pass this test should be refrigerated and the mustard beans used within a week or so.
Store properly sealed bottles in cool, dark place. Refrigerate mustard beans once jar has been opened.
Recipe Notes
Yield: Apx. 4 half pints
Pin Me To Pinterest!
This post was last updated August 20, 2023
(Mostly) PEI and Maritime Food – Good Food for a Good Life!