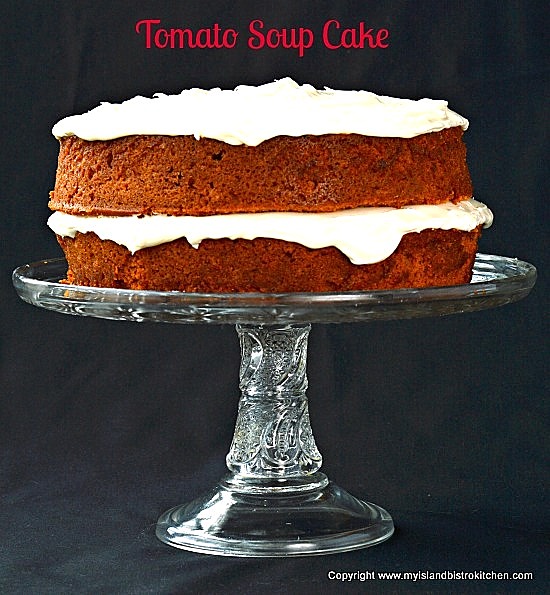
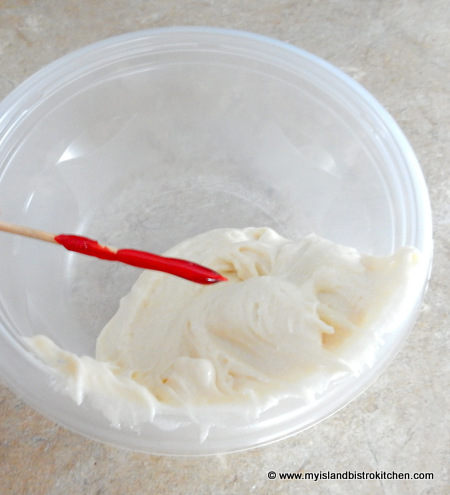
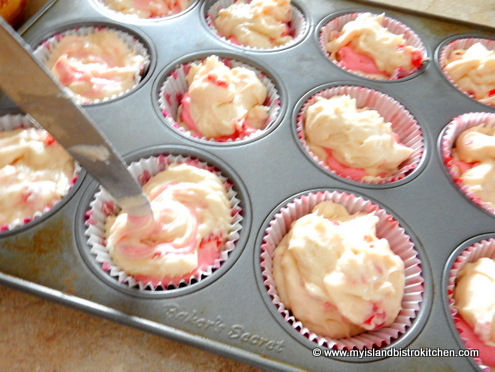
By now, if you are a regular follower of my food blog, you have probably detected that I like vintage foods and those that could be called comfort foods. I’d put this Tomato Soup Cake in that category. Continue reading Vintage Tomato Soup Layer Cake Recipe→
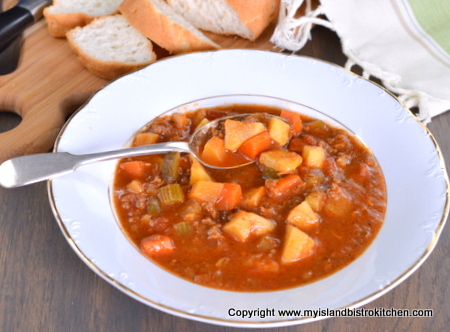
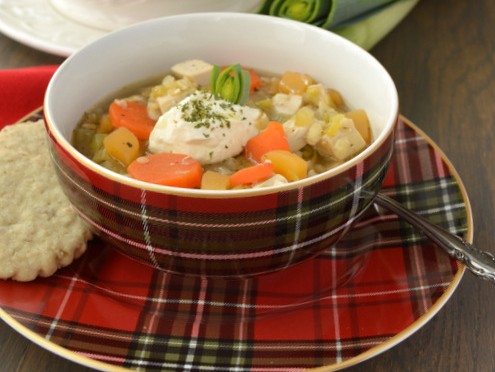
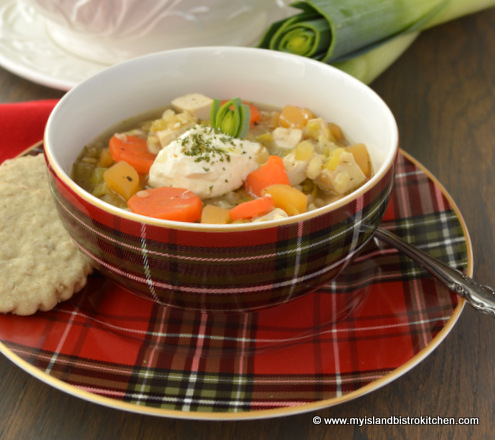
For many years, I have been making this hearty soup known as Goulash. It’s a well-filled soup and is a very filling one! Good any time of the year, this soup is especially tummy-warming on cold days. Continue reading Rich and Hearty Goulash Soup Recipe→
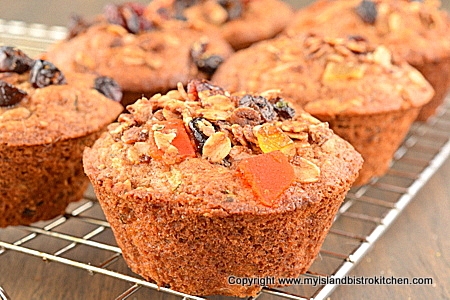
I make a lot of muffins and freeze them to take to work for coffeebreak snacks. I am always testing out flavour combinations for muffins. This recipe for Zucchini Granola Muffins combines grated zucchini, applesauce, granola, orange rind, and spices to make tasty muffins. Adding some granola to the muffin tops makes them colorful and interesting. Continue reading Best Zucchini Granola Muffins Recipe→
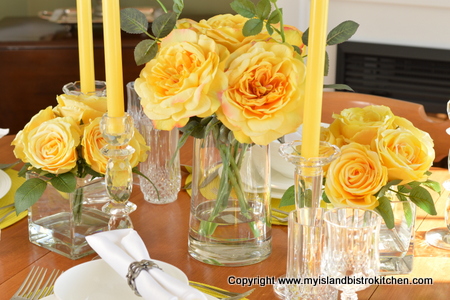
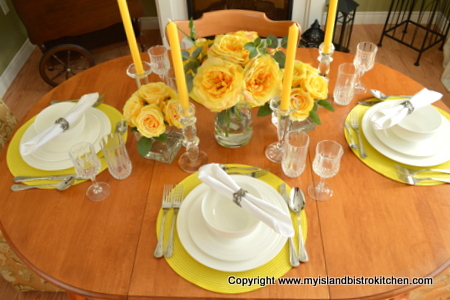
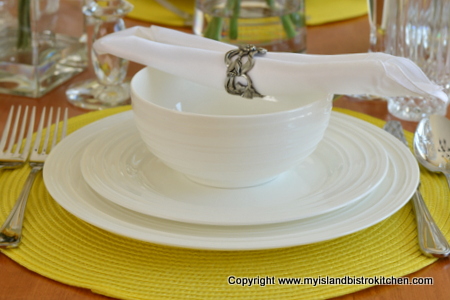
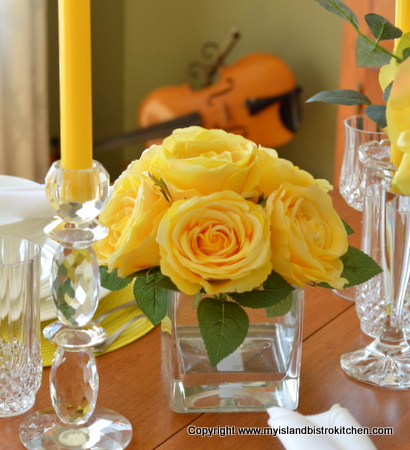
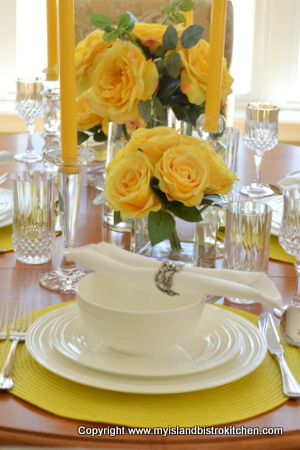
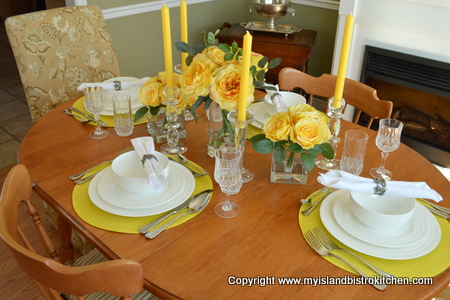
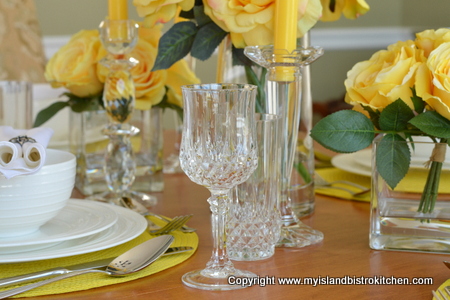
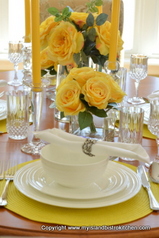
This springtime tablesetting has a yellow theme going on – after dreary winter months, it’s always good to see some bright and cheery colors and yellow is definitely in that category.
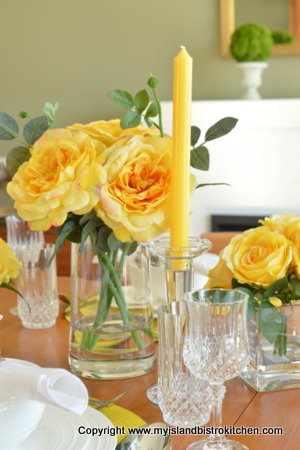
The three yellow floral arrangements, a tall flanked by two shorter complementary ones, add a burst of color in the center of the table. For a longer table, simply add more down the length of the table, alternating between tall and short arrangements.
The yellow tapers in glass candlesticks lend both an air of height and elegance. By keeping everything in the same color, the eye is not kept busy trying to focus on the focal point of the table. I find using all one color lends a more elegant look and feel to a tablesetting.
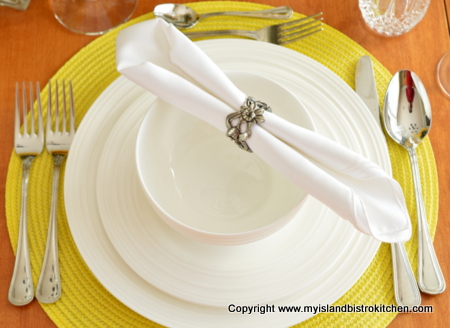
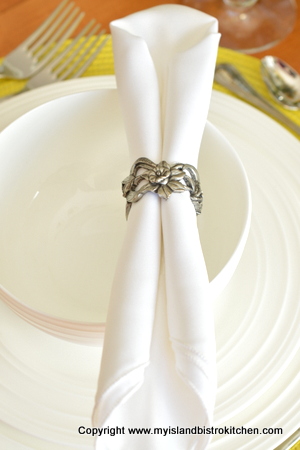
The yellow round placemats are an inexpensive way to pull the color down from the centerpiece into each placesetting. Good quality basic white napkins are a must! Using napkin rings is an easy and quick way to present napkins at placesettings. There are several ways napkins can be folded into the rings but this is one of the more classic. Made of pewter, these napkin rings have a daffodil design so are perfect for springtime tables.
I am a big fan of white dishes. First, food looks fabulous against a white background. And, second, white goes with anything which means a set of basic white dinnerware is a good all-round investment. With white dishes, you can go with any color scheme on the table so, although the dinnerware remains the same, the look can change dramatically simply by using different tablecloths, placemats, chargers, napkins, and/or centerpieces.
Adding lots of glassware to the table gives it a light look and feel – just what’s needed for a springtime tablesetting!
Don’t worry about mixing and matching glass candlesticks – in fact, having several different styles on the table makes it more interesting and takes away from the “matchy-matchy” look. To keep the look casual, just weave the candlesticks in at random among the flowers – they don’t have to be symmetrically placed.
No need for charger plates to frame the plates when round placemats are used.
For more tablesetting inspiration, click on the “Tablescape” tab at the top of my home page.
—————————————————————————-
Thank you for visiting “the Bistro” today. If you enjoyed this posting and recipe, please share it on your social media websites.
Connect with “the Bistro” through the following social media:
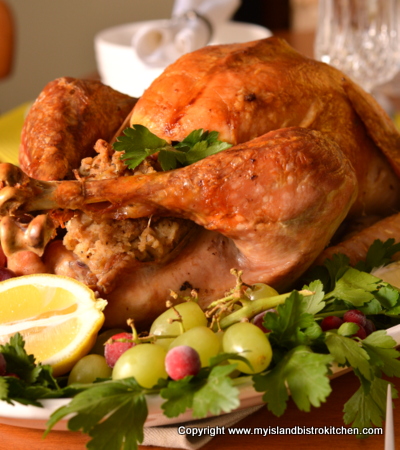
There is nothing like the scent of a turkey roasting in the oven! I love a roast turkey dinner with all the trimmings and I especially love the bread stuffing or, you may know it as “dressing”. The theory is that, if it goes inside the turkey cavity, it’s called “stuffing” but, if it is cooked separately (as in a casserole or loaf pan), then it’s called “dressing”. Regardless what it’s called, it just would not be a roast turkey dinner without this wonderful savory side dish. Continue reading Bread Stuffing/Dressing Recipe for Roast Turkey/Chicken→
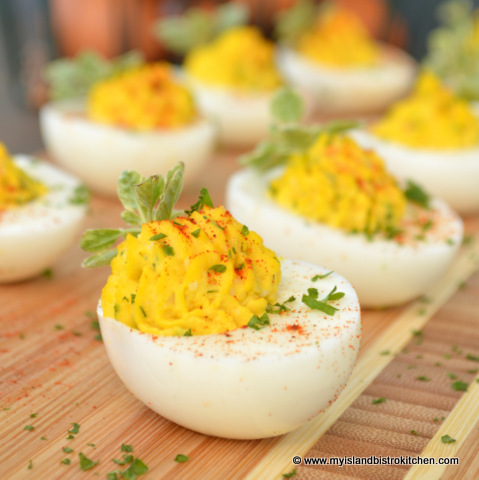
Deviled Eggs are so tasty and easy to make. They are perfect for potlucks, picnics, snacks, and even appetizers or hors d’oeuvres. And, of course, they are often found at many Easter gatherings. To top it off, Deviled Eggs are showy, too. I have never taken a plate of these to any function and had any left over! Continue reading The Bistro’s Best Deviled Eggs Recipe→
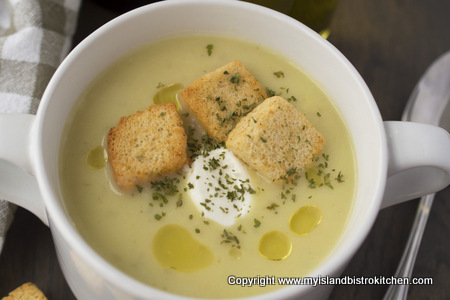
I am not sure which country can, in fact, lay claim to being the originator of Potato Leek Soup. Some say it is of Welsh origin while others give Ireland credit for this tasty soup. If you have ever eaten Vichyssoise, a cold version of Potato Leek Soup, you may attribute its origins to France due to its association with Vichy. Then, of course, there is Tattie and Leekie soup from Scotland. Continue reading PEI Potato Leek Soup Recipe→
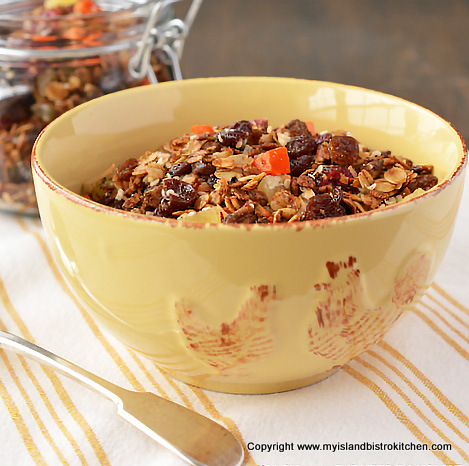
This granola recipe features a tasty mixture of toasted rolled oats, coconut, and dried fruits and berries. Notably missing in this recipe are any nuts or whole seeds which are often found in granola. This is intentional. For anyone who, for any reason, cannot consume nuts or whole seeds, this Nut-free Granola is especially for you! Continue reading The Bistro’s Great Nut-free Granola Recipe→
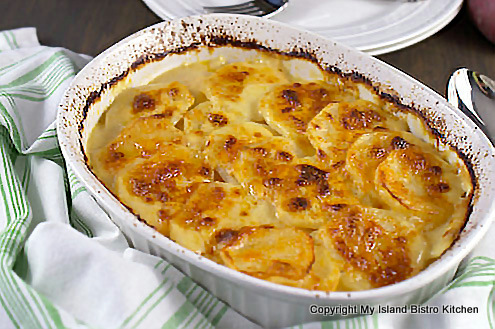
One of my very favorite ways to present potatoes is in the form of Scalloped Potatoes. A mixture of potatoes, onions, and milk along with a bit of seasoning and grated cheese make this a great comfort food dish any time of the year. My mother often made scalloped potatoes sometime on the weekend and made enough that we’d have leftovers for dinner a day or two later. To this day, I still believe that this is one dish that is better a day or two after it is made as the flavours really settle in. Continue reading Best Creamy Scalloped Potatoes Recipe→
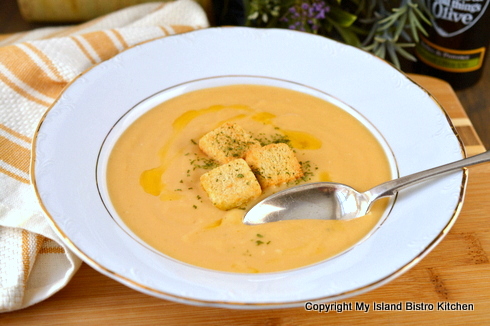
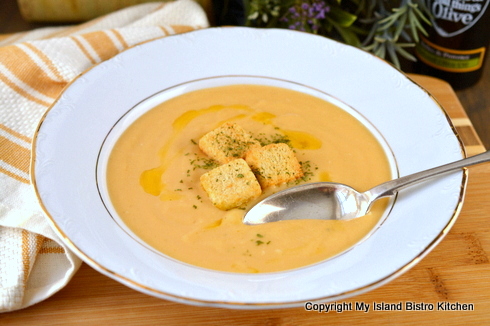
This Creamy Winter Root Vegetable Soup is perfect for those cold winter days when the body and mind crave comfort food.
I make a lot of soups and freeze many of them in single servings so that they are quick and easy to pull out for lunchtime or, for those who are in the workforce, to place in the lunch bag on weekday mornings. The soups arehealthy and nutritious, not to mention tasty. I like to have a variety of different soups on hand that includes those that are broth-based and hearty vegetable along with those that are cream-based or puréed.
The recipe I am sharing today is a new recipe creation that is a cream-based vegetable soup. It’s the perfect soup for winter because it uses what we often refer to as winter, or root, vegetables. These are ones that are traditionally harvested late in the fall and they store and keep well over several months – think of potatoes, rutabaga, carrots, and parsnip, for example.
This is an easy soup to make and it blends a number of wonderful flavours that include both celery and leek. It’s very lightly spiced and is a silky smooth soup that I would put in the comfort food category. The great thing about this soup is that none of the nutrients from any of the vegetables is lost. The vegetables are all cooked in the chicken broth and then the whole mixture is puréed so all of the goodness of the vegetables is maintained.
I find recipes that simply call for ingredients in quantities like a small parsnip or 2 medium-sized potatoes or 1 large carrot are not very helpful, particularly for less experienced cooks. I have, therefore, tested out this recipe and carefully measured the weights of vegetables to be used for best success. One of the most used (and most useful) tools in my kitchen is my digital scale and I use it all the time. I highly recommend that every cook invest in a good quality digital scale.
I miss my herb garden in winter. However, dried herbs work really well in this winter soup. Because, for presentation purposes, I don’t want any specks of herbs to appear in this soup, I make a small herb packet out of cheesecloth to contain the herbs while the soup cooks. The cheesecloth has a sufficiently open weave that the soup mixture is infused with the flavour of the herbs as it cooks. It’s very easy to remove and discard the herb packet before the soup is puréed.
Different vegetables take different cooking times so this soup starts with those that take the longest – rutabaga, carrots, parsnip, and celery. Give them about 15 minutes headstart before adding the leek and let it cook for 10 minutes then add the potatoes which take the least amount of time to cook.
I make good use of my immersion blender for cream and purée soup making. However, you can certainly use either a blender or a food processor to purée the vegetables. I generally allow the soup to cool for 30-40 minutes before using my immersion blender and, sometimes, if I am in a hurry, I put the soup pot in a sink full of cold water for a few minutes to speed up the cooling process. I know some people do use their immersion blenders in really hot soup. I recommend you check your instruction manual for your immersion blender to see what it says about using the blender in hot liquids.
I recommend that whole milk be used in this recipe (or, alternatively, you could use a milk-cream blend for a richer soup). I have tested freezing this soup and find it freezes well for me; however, it is very important that at least whole (not skim, or partly skimmed) milk be used if you intend to freeze any of the soup. Using a fat free or low fat milk will result in the soup breaking down when frozen and it just does not hold its structure when it is reheated. I know that some people frown on freezing puréed and cream soups but I have been freezing them with great success for many, many years.
When making the roux (the butter and flour) for the cream base, make sure you stir the roux while it is blending to prevent it from scorching. Add the milk slowly to the roux, whisking it constantly to prevent lumps from forming. It’s quite unappealing to have lumps in what is supposed to be a silky smooth cream soup.
Adding some shredded cheese to this soup makes a richer soup and certainly enhances the flavour. While a basic cheddar cheese could certainly be used, my preference is to use a shredded cheese blend such as mozzarella, provolone, and parmesan.
Cream of Winter Root Vegetable Soup
Cream of Winter Root Vegetable Soup
Ingredients:
3 cups chicken stock
1 bay leaf
½ tsp dried basil
¼ tsp. dried fennel
1/8 tsp dried marjoram
½ tsp dried parsley
1 clove garlic, minced
5 oz rutabaga, diced
5 oz carrots, sliced
2 oz parsnip, thinly sliced
2 oz celery, sliced
7½ oz leek, white and light green parts only, sliced into ¼“ slices
7 oz potato, diced
2 tbsp butter
2 tbsp flour
1½ cups whole milk
Salt and pepper to taste
¾ cup shredded cheese blend (e.g., mozzarella, provolone, and parmesan)
Method:
Bring chicken stock to a boil in medium-sized soup pot.
Cut small 4”-5” square of finely woven cheese cloth. Make the herb packet by placing the bay leaf, basil, fennel, marjoram, and parsley in the center of the cheese cloth. Gather up ends of cheesecloth, tie tightly with kitchen string, and add the herb packet to the chicken stock along with the garlic, rutabaga, carrots, parsnip, and celery. Bring to a boil then reduce heat to medium low and cook vegetables for 15 minutes.
Add leek and cook 10 minutes then add potatoes and cook vegetables 15 minutes or until vegetables are soft.
Remove from heat and discard the herb packet. Purée mixture until smooth using an immersion blender or food processor.
Melt the butter in separate medium-sized soup pot over medium-low heat. Stir in the flour to make a roux, stirring constantly to blend the two ingredients and to prevent scorching. Gradually whisk in the milk until mixture is smooth. Increase heat to medium and continue to whisk milk mixture until it is thickened to desired consistency then add the puréed vegetable mixture. Stir mixture until heated then add the cheese, stirring until cheese is melted and blended into soup. Add salt and pepper, to taste.
Ladle into soup bowls and garnish with croutons, a sprinkle of parsley, and a drizzle of a good quality finishing olive oil, if desired. Enjoy!
Yield:Apx. 5-6 servings
—————————————————————————-
If you have made this recipe and enjoyed it and/or wish to share it with your friends and family, please do so on social media but be sure to share the direct link to this posting from my website.
Connect with My Island Bistro Kitchen on Social Media
Follow “the Bistro” on Pinterest at https://www.pinterest.ca/peibistro/ and pin the Pinterest-ready photo found at the end of this post to your favorite Pinterest boards.
7½ oz leek, white and light green parts only, sliced into ¼“ slices
7 oz potato, diced
2 tbsp butter
2 tbsp flour
1½ cups whole milk
Salt and pepper to taste
¾ cup shredded cheese blend (e.g., mozzarella, provolone, and parmesan)
Instructions
Bring chicken stock to a boil in medium-sized soup pot.
Cut small 4”-5” square of finely woven cheese cloth. Make the herb packet by placing the bay leaf, basil, fennel, marjoram, and parsley in the center of the cheese cloth. Gather up ends of cheesecloth, tie tightly with kitchen string, and add to the chicken stock along with the garlic, rutabaga, carrots, parsnip, and celery. Bring to a boil then reduce heat to medium low and cook vegetables for 15 minutes.
Add leek and cook 10 minutes then add potatoes and cook vegetables 15 minutes or until vegetables are soft.Remove from heat and discard the herb packet.
Purée mixture until smooth using an immersion blender or food processor.
Melt the butter in separate medium-sized soup pot over medium-low heat. Stir in the flour to make a roux, stirring constantly to blend the two ingredients and to prevent scorching. Gradually whisk in the milk until mixture is smooth. Increase heat to medium and continue to whisk milk mixture until it is thickened to desired consistency then add the puréed vegetable mixture. Stir mixture until heated then add the cheese, stirring until cheese is melted and blended into soup.
Add salt and pepper, to taste.
Ladle into soup bowls and garnish with croutons, a sprinkle of parsley, and a drizzle of a good quality finishing olive oil, if desired. Enjoy!
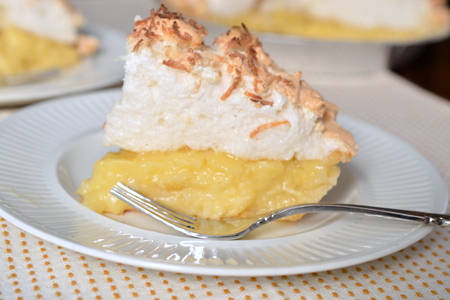
Funny how certain foods will evoke great memories. When I was a small child, our family often went to a tiny local restaurant in North Tryon, PEI, on Sunday evenings for dinner. Simmons’ Restaurant was built and run by Jean and Harold Simmons and they served up really good traditional home-cooked meals. One of the desserts I most fondly remember from their restaurant was coconut cream pie with mile-high meringue. Every time I have coconut cream pie, I remember Sunday dinners at the Simmons’ restaurant. Continue reading Coconut Cream Pie→
Today marks my 4th Blogiversary and I’m celebrating with my newly-developed recipe for Dreamy Hawaiian Cupcakes! These are perfect for any event, any time of the year but, with their pink swirl centers and mile high frosting, I think they would be very suitable for Valentines Day. So, they’re doing double duty as they celebrate my 4th Blogiversary and act as a catalyst for Valentine’s baking.
Dreamy Hawaiian Cupcake
These cupcakes deliver a flavor punch with coconut milk, amaretto, shredded coconut, and maraschino cherries. That’s a flavor combo that’s hard to beat!
Dreamy Hawaiian Cupcakes
In addition to the wonderful flavor, the coconut milk makes these cupcakes lovely and moist. They also have a fine tender crumb which makes them very velvety when you sink your teeth into them.
Here are my tips and recommendations for making cupcakes:
Use the best quality ingredients available. Don’t substitute margarine for the butter or artificial vanilla for pure vanilla in this recipe. Using lesser quality ingredients will affect the quality and taste of the cupcakes.
Measure ingredients accurately – that means, for example, spooning the flour into the measuring cup and then leveling it off with the flat side of a knife, without stirring the flour around in the cup or tapping it to shake the flour down into the cup.
Use the stated size of eggs – this matters as extra-large eggs (which this recipe calls for) yield more liquid than do large eggs. If you use smaller eggs than the recipe calls for, it will yield a drier cupcake.
Resist the urge to add increased amounts of ingredients such as more coconut or cherries than the recipe states as the liquid content in this recipe has been calculated to moisten the dry ingredients accurately. If more dry ingredients, such as extra coconut, are added without increasing the liquid content, the cupcakes will be dry.
All the ingredients should be at room temperature as this will help them to blend together better.
The eggs should be at room temperature for about 20 minutes or so before using them in this recipe.
Soften the butter at room temperature. Never melt the butter in the microwave to soften it as it will change the properties of the butter.
Add the dry and liquid ingredients alternately in three parts, always starting and ending with the dry ingredients.
Don’t overbeat the batter as this can make a tough crumb and a heavy, dense cupcake as opposed to a light-textured cupcake. Beat the batter on low speed and just until all the ingredients are incorporated.
Grease the top of the cupcake pan as, even if paper cupcake liners are used, there will always be at least one rogue cupcake that will rise up and stick to the top of the pan, making it difficult to remove the cupcake without damaging it.
Make sure your oven temperature is accurate and that the oven has been preheated. If the oven temperature is too high, it will dry out the cupcakes; if it is too low, they won’t rise and bake properly.
It’s also important not to overbake the cupcakes as that will make them dry. I recommend checking them at about the 14 or 15-minute baking point by either a light finger touch to see if the top of the cupcake is set and if it bounces back from the touch. Alternatively, use a cake tester to insert into the center of a cupcake. If it comes out clean, the cupcakes are baked.
Let the cupcakes rest in the cupcake pan for 3-4 minutes to allow them to set then gently remove them from the pan and transfer them to a wire rack to cool completely before decorating.
Dreamy Hawaiian Cupcakes
The frosting consists of two flavors to complement the cupcake flavor – coconut and cherry. Combined, these two recipes will give you ample to frost 12 cupcakes with mile high swirled frosting as shown in the photos. If, however, that’s just a tad too much frosting for your taste, simply make just one of the frosting recipes.
Dreamy Hawaiian Cupcake
I used Wilton decorating tip 2D for the swirl frosting and the two colors were achieved by filling one side of the decorating bag with white frosting and the other side with the cherry frosting.
Dreamy Hawaiian Cupcakes
Dreamy Hawaiian Cupcakes
Ingredients:
1½ cups all-purpose flour
1½ tsp baking powder
¼ tsp baking soda
½ tsp salt
½ cup butter, room temperature
1 cup granulated sugar
2 extra-large eggs
1 tsp vanilla
1 tbsp Amaretto
½ cup coconut milk
1/3 cup shredded coconut
¼ cup chopped maraschino cherries, well drained and patted dry
Pink food coloring
Method:
Preheat oven to 350°. Grease 12 muffin cups or, alternatively, line each cup with paper cupcake liners.
In medium-sized bowl, combine four dry ingredients. Set aside.
Fit mixer with paddle attachment. Cream butter and sugar until fluffy. Add the eggs, one at a time, beating well after each addition. Add the vanilla and Amaretto.
Add the dry ingredients in three parts alternately with the coconut milk, starting and ending with the dry ingredients.
Remove ½ cup of the batter and add the food coloring to it, just enough to tint the batter pink.
Add the coconut and chopped cherries to the white batter.
Fill each muffin cup about 1/3 full with the white coconut batter. Divide the ½ cup of pink batter between the 12 cupcakes.
Divide the remaining white batter evenly between the 12 cupcakes.Use the tip of a knife to gently swirl the pink batter into the white in each cupcake.
Bake in center of oven for 15-19 minutes or until cupcakes spring back to a light touch or a cake tester inserted into center of a cupcake comes out clean. Cool cupcakes in pan for 3-4 minutes then carefully transfer them to wire rack to cool completely.
Frost and decorate cupcakes as desired. The two frosting recipes provided with this recipe will, combined, easily frost the 12 cupcakes with the amount of swirled frosting shown in the photographs that accompany the cupcake recipe. If less frosting is desired, make only one of the recipes.
Yield:12 cupcakes
Dreamy Hawaiian Cupcakes
Coconut Frosting
¼ cup butter
¼ cup shortening
1 tbsp coconut milk
¼ tsp almond flavouring
Apx. 2 cups confectioners (powdered) sugar, sifted
Sprinkle of salt (optional)
Beat butter and shortening together. Add coconut milk and almond flavouring. Blend in enough sifted confectioners sugar for desired spreading consistency.
Cherry Frosting
¼ cup butter
¼ cup shortening
1½ tbsp cherry juice
¼ tsp almond flavouring
Apx. 2 cups confectioners (powdered) sugar, sifted
Sprinkle of salt (optional)
Beat butter and shortening together. Add cherry juice and almond flavouring. Blend in enough confectioners sugar for desired spreading consistency.
To achieve dual-colored swirl frosting, fit cake decorating bag with Wilton 2D decorating tip. Fill one side of decorating bag with the white frosting and the other half with the pink frosting. Pipe onto cupcake in swirl motion.
—————————————————————————-
Thank you for visiting “the Bistro” today. If you enjoyed this posting and recipe, please share it on your social media websites.
Connect with “the Bistro” through the following social media:
Preheat oven to 350°. Grease 12 muffin cups or, alternatively, line each cup with paper cupcake liners.
In medium-sized bowl, combine four dry ingredients. Set aside.
Fit mixer with paddle attachment. Cream butter and sugar until fluffy. Add the eggs, one at a time, beating well after each addition. Add the vanilla and Amaretto.
Add the dry ingredients in three parts alternately with the coconut milk, starting and ending with the dry ingredients.
Remove ½ cup of the batter and add the food coloring to it, just enough to tint the batter pink.
Add the coconut and chopped cherries to the white batter.
Fill each muffin cup about 1/3 full with the white coconut batter. Divide the ½ cup of pink batter between the 12 cupcakes. Divide the remaining white batter evenly between the 12 cupcakes. Use the tip of a knife to gently swirl the pink batter into the white in each cupcake.
Bake in center of oven for 15-19 minutes or until cupcakes spring back to a light touch or a cake tester inserted into center of a cupcake comes out clean. Cool cupcakes in pan for 3-4 minutes then carefully transfer them to wire rack to cool completely.
Frost and decorate cupcakes as desired. The two frosting recipes provided with this recipe will, combined, easily frost the 12 cupcakes with lots of swirled frosting. If less frosting is desired, make only one of the recipes.
Coconut Frosting: Beat butter and shortening together. Add coconut milk and almond flavouring. Blend in enough sifted confectioners sugar for desired spreading consistency.
Cherry Frosting: Beat butter and shortening together. Add cherry juice and almond flavouring. Blend in enough confectioners sugar for desired spreading consistency.
To achieve dual-colored swirl frosting, fit cake decorating bag with Wilton 2D decorating tip. Fill one side of decorating bag with the white frosting and the other half with the pink frosting. Pipe onto cupcake in swirl motion.
There are so many ways to make rice pudding. Some use the stove-top method, others (like me) use the oven. Some bake the rice pudding directly in the oven but I prefer the hot water bath method for reasons explained below.
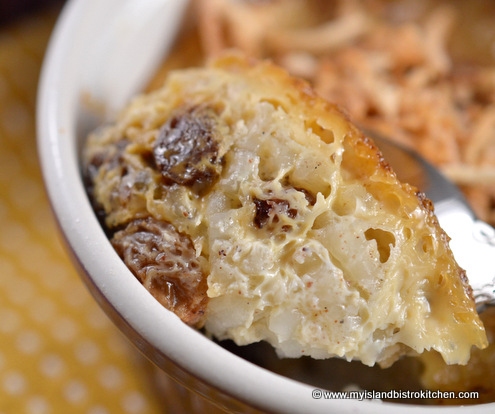
For rice pudding, I prefer a short grain rice such as Arborio which is what I have used in this pudding. Arborio rice (often used in risotto) is named after the Italian town where it is grown. What makes it my preference for rice pudding is that, when cooked, it has lovely round pearl-like grains that hold their shape and don’t turn to “mush”. This rice also has a high starch level and that helps to self-thicken the pudding as it bakes and also contributes to its creamy texture.
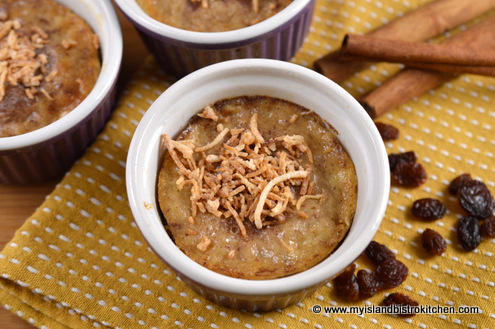
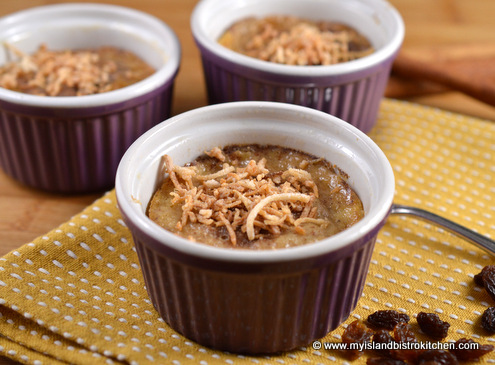
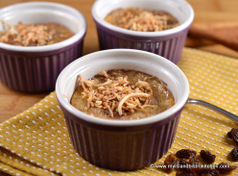
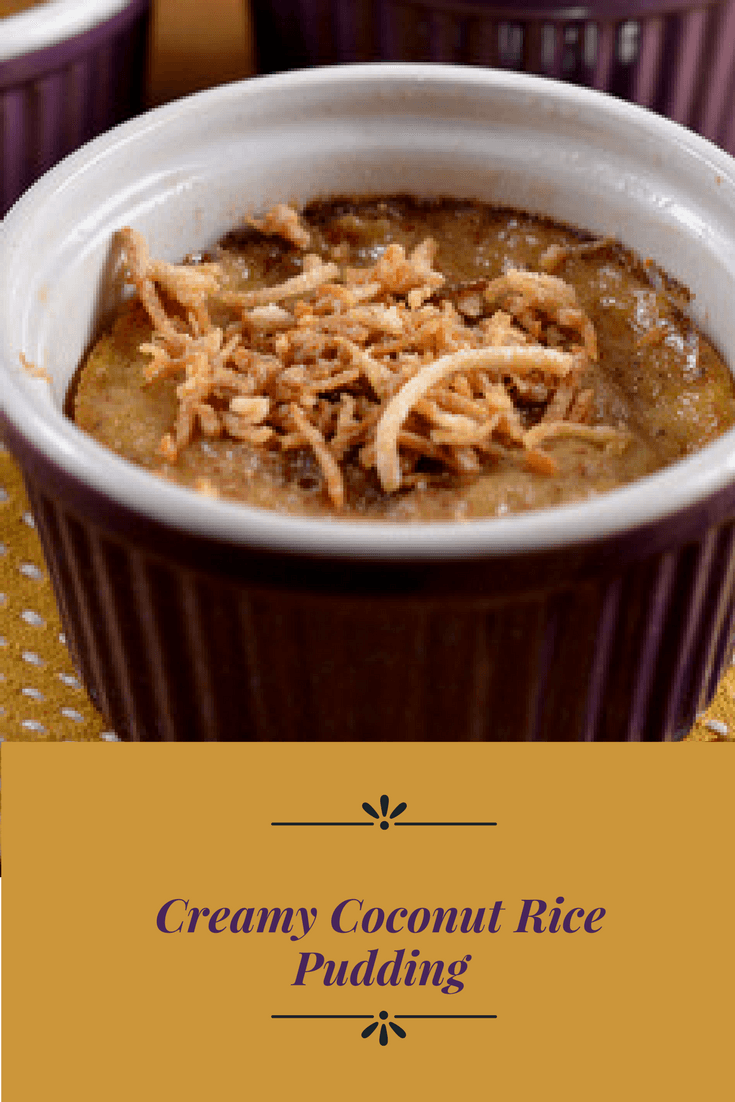
Creamy Coconut Rice Pudding
This pudding is true comfort food. The addition of coconut milk gives the pudding a subtle hint of coconut but not so strong that it detracts from the basic flavour we expect to find in an old-fashioned rice pudding. I think the texture of the coconut milk also helps to keep the custard creamy.
I have used a maple syrup that was infused with cinnamon, nutmeg, and cloves. This does add a bit of discrete flavor to the pudding but, certainly, plain maple syrup would work just fine. I have added a blend of three spices – cardamon, nutmeg, and cinnamon – but again, not in large quantities because I don’t want the pudding to be overly spiced. I just want it to be delicately flavored.
Raisins, a traditional addition to rice puddings, do need to be “plumped” before adding them to the pudding as, otherwise, they don’t become very soft in the custard. It’s not very pleasing to the palette to bite into hard, dry raisins amidst a soft creamy custard. For this recipe, I have soaked the 1/3 cup of raisins in about 1 tablespoon of Amaretto by placing these two ingredients in a small covered dish for at least 45 minutes. Shaking the dish periodically helps to ensure that all raisins are coated with the liqueur. In fact, you could leave them soaking for a couple of hours (the raisins will just be extra happy if you do so!).
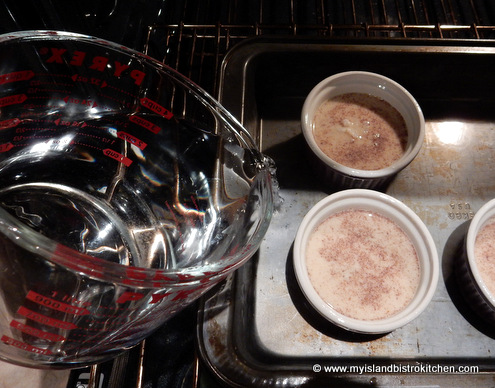
Rice pudding custard is actually quite delicate and, for greatest success, it is best if the egg proteins are protected from direct hot heat and from fast baking. Because the pudding is made with an egg-milk custard, it is therefore, in my opinion, best if it is baked slowly in a hot water bath. This is simply a method of baking whereby the pudding dish(es) are placed inside a larger pan into which hot water is poured up to about half way on the pudding dishes or even up to the level of the custard in the ramekins. However, the water should not be so deep that the pudding dishes start to float. They need to sit stable in the water as the pudding bakes.
The benefits of baking this pudding in a hot water bath are several. First, the hot water adds steam and moisture to the oven which will prevent the puddings from drying out and cracking on the top as they bake. Second, any custard mixture of milk and eggs has the potential to curdle – that’s when the milk-egg mixture separates from the solids (in this case, the rice and raisins). Because it is a slower method of baking and the hot water provides an even heat source, the hot water bath method helps to prevent the risk of curdled custard. The hot water also helps the custard to bake evenly, both its outside edges as well as its center. Without the hot water baking method, the custard could bake quicker on the outside edges of the pudding than in the center and part of the pudding would be dried out. Lastly, the slow baking combined with an oven of moist heat will help to keep the pudding creamy in texture as opposed to “rubbery”.
I place the 9″x13″x2″ pan with the ramekins in it on the oven shelf and just ever-so-slightly pull the shelf out, just enough that I can safely pour the hot water into the larger baking pan without getting a burn. I find this is a safer method than filling the pan with the hot water and transporting it to the oven. The water needs to be kept at the same level during the baking process so, since it naturally evaporates, you may need to add more hot water as the pudding bakes.
Bake the puddings for approximately 1 hour or until pudding top edges are set, centers are still a little “jiggly”, and the puddings are golden-colored. A knife inserted in or near the centre of the pudding should come out clean if the pudding is done. Don’t overbake the pudding as it will dry out and be less creamy. Remove ramekins from water bath and let them stand on a wire rack to set for approximately 10 minutes before serving.
Adding toasted coconut to the top of this pudding is optional but the crunchiness and flavour are an added touch. Toasting coconut is simple. The coconut gets spread thinly on a baking sheet and baked in a 350° F oven for about 8-9 minutes. It is important to watch that the coconut does not burn and it should be turned once or twice during the toasting process to ensure even color.
Creamy Coconut Rice Pudding
Creamy Coconut Rice Pudding
Ingredients:
1¼ cups cooked Arborio rice
1/3 cup raisins, soaked in 1 tbsp Amaretto
½ cup coconut milk
¾ cup whole milk
1 extra-large egg, lightly beaten
2 tbsp granulated sugar
2 tbsp maple syrup
¼ tsp salt
½ tsp vanilla
1/8 tsp cardamom
1/8 tsp nutmeg
¼ tsp cinnamon
¼ cup shredded coconut (sweetened or unsweetened), toasted (optional)
Method:
In small covered dish, soak raisins in Amaretto for at least 45 minutes to plump them, shaking or stirring occasionally to ensure all raisins are coated with the liqueur.
In large bowl, whisk together the coconut and whole milk, egg, sugar, maple syrup, salt, vanilla, and spices. Add rice and raisins and stir gently. Divide mixture between 6 prepared ramekins and place in 9”x13”x2” pan. Pour hot water into pan up to half-way on the sides of the ramekins or even up to about the level of the custard in the dishes. However, make sure the ramekins are not floating in the water.
Bake for approximately 1 hour or until pudding top edges are set, centers are still a little “jiggly” and puddings are golden-colored. A knife inserted in or near the centre of the pudding should come out clean if the pudding is done. Remove ramekins from water bath and let stand on wire rack to set for approximately 10 minutes before serving. To serve, top each with toasted coconut, if desired.
[To toast coconut: Spread coconut on baking sheet and bake in 350° F oven for 8-9 minutes, stirring once or twice, until coconut is lightly tanned in color.]
Yield: 6 servings.
—————————————————————————-
Thank you for visiting “the Bistro” today. If you enjoyed this posting and recipe, please share it on your social media websites.
Connect with “the Bistro” through the following social media:
A delicate coconut-flavored creamy baked rice pudding with subtle spice flavoring
Ingredients
1¼ cups cooked Arborio rice
1/3 cup raisins, soaked in 1 tbsp Amaretto
½ cup coconut milk
¾ cup whole milk
1 extra-large egg, lightly beaten
2 tbsp granulated sugar
2 tbsp maple syrup
¼ tsp salt
½ tsp vanilla
1/8 tsp cardamom
1/8 tsp nutmeg
¼ tsp cinnamon
¼ cup shredded coconut (sweetened or unsweetened), toasted (optional)
Instructions
In small covered dish, soak raisins in Amaretto for at least 45 minutes to plump them, shaking or stirring occasionally to ensure all raisins are coated with the liqueur.
In large bowl, whisk together the coconut and whole milk, egg, sugar, maple syrup, salt, vanilla, and spices. Add rice and raisins and stir gently. Divide mixture between 6 prepared ramekins and place in 9”x13”x2” pan. Pour hot water into pan up to half-way on the sides of the ramekins or even up to about the level of the custard in the dishes. However, make sure the ramekins are not floating in the water.
Bake for approximately 1 hour or until pudding top edges are set, centers are still a little “jiggly” and puddings are golden-colored. A knife inserted in or near the centre of the pudding should come out clean if the pudding is done. Remove ramekins from water bath and let stand on wire rack to set for approximately 10 minutes before serving. To serve, top each with toasted coconut, if desired.
[To toast coconut: Spread coconut on baking sheet and bake in 350°F oven for 8-9 minutes, stirring once or twice, until coconut is lightly tanned in color.]
It’s a new year so it’s a good time for readers to familiarize themselves with the acceptable use of content from this blog.
The “Disclaimers and Terms and Conditions of the Use of Material on this Food Blog” document has been updated effective today, January 13, 2016.
Readers and users of recipes from this website are STRONGLY encouraged to read this document that can be found here and to ensure that they comply with the stated terms and conditions of acceptable use of content from this blog. This document also covers copyright issues as well.
I cooked a boiled dinner with ham that I got on a great deal so am fortunate that the ham has a lot of meat on it. You can get my method for making a boiled ham dinner here. After sandwiches and leftovers for a night or two, it was time to find other uses for the rest of the ham and ones that would extend the use of the meat into more servings than simply slicing and plating it. I am not one to throw out food so I always find ways to use up leftovers.
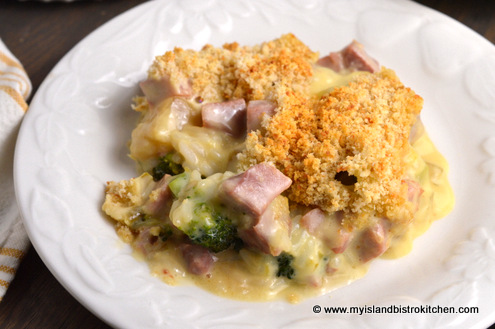
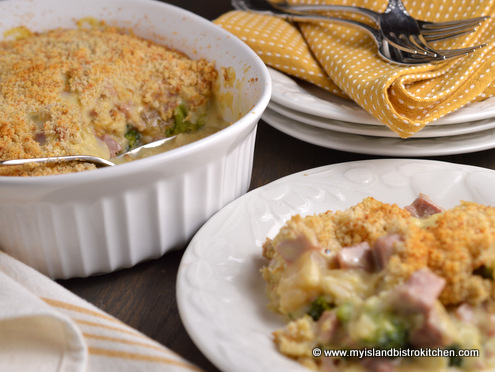
Hawaiian Fiesta Casserole
So, I made what I call a Hawaiian Fiesta Casserole aptly named because, in addition to the ham, it has pineapple, rice, and bright green broccoli florets. This casserole is not difficult to make but it does take a bit of time, planning, and coordination since the rice and broccoli have to be pre-cooked and the pineapple fried (yes, fried). Continue reading Hawaiian Fiesta Casserole→
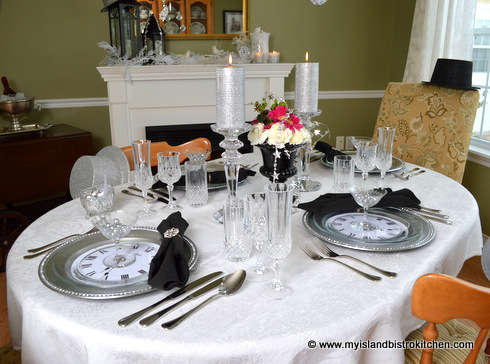
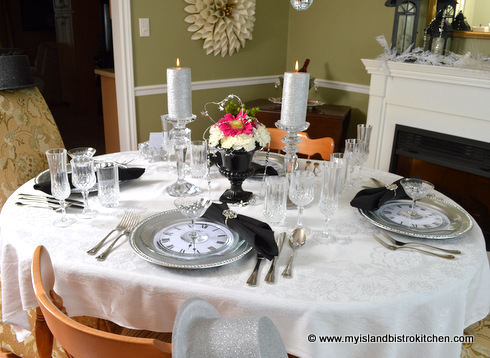
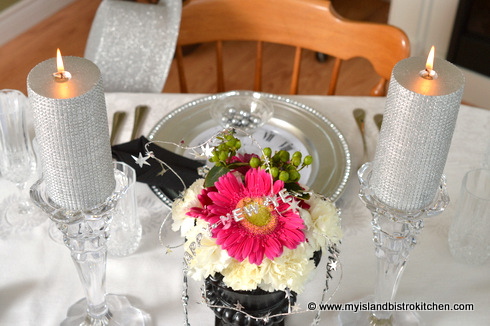
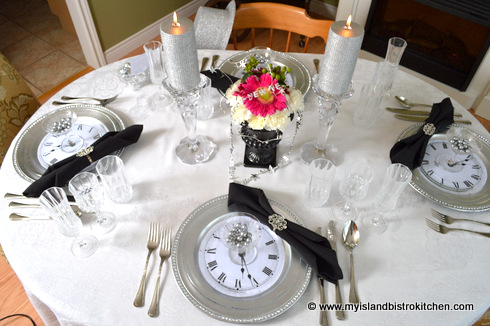
New Year’s Eve is the perfect occasion to bring on all the bling, glitz, and glamour …. and that includes dressing up the dining table. I thought you might be interested in taking a peek at how I transformed my dining room from Christmas into an elegant venue for a New Year’s Eve dinner. And, yes, each guest had a glittery and elegant silver or black hat to wear for the evening.
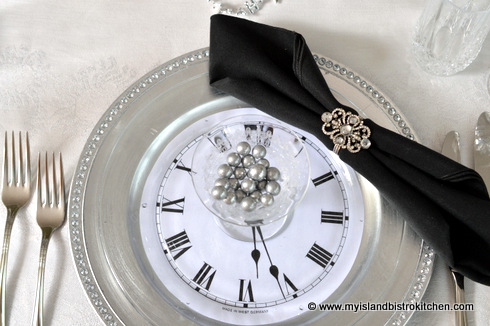
As you can see, the color theme was silver, black and white.
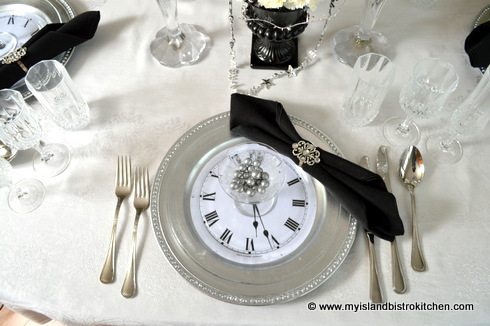
Each place setting was framed by a silver charger plate with a rhinestone edge.
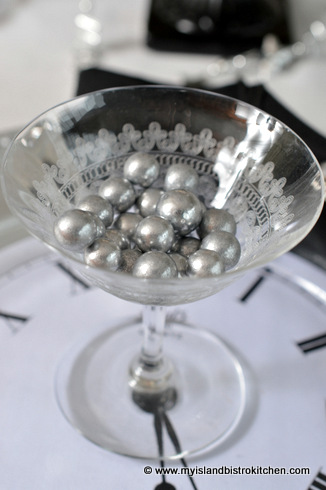
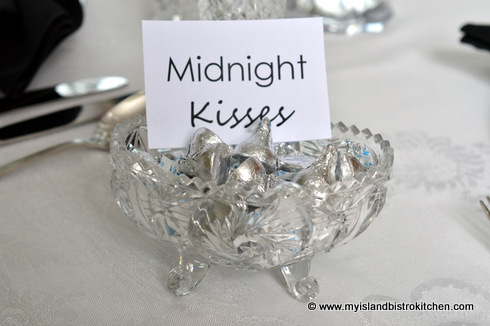
A small glass dessert dish contained silver cola balls at each placesetting.
Silver Cola Balls
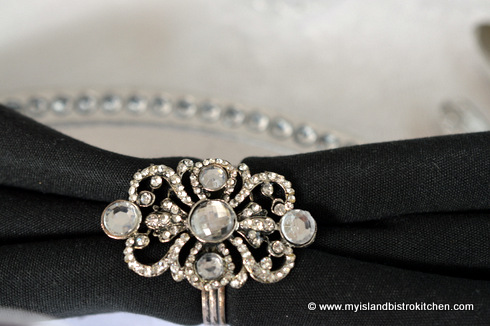
I used one of my napkin ring sets that has a lot of bling to contain the black napkin because, well, there’s no such thing as too much bling on NYE, is there!
I think the napkin looks very stylish and elegant placed diagonally over the edge of the plate and charger. For elegant and sophisticated tablesettings, always use a high quality cloth napkin.
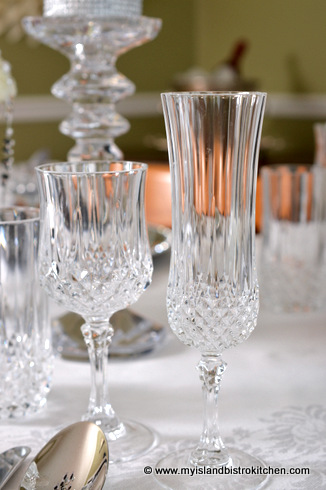
Of course, any “blingy” tablesetting needs lots of glassware to reflect the light. Each placesetting had three glasses – a water glass, a white wine glass, and a champagne flute. When I am setting an elegant table, I try to make sure the glassware all matches. For more casual tablesettings, mix-and-match glassware may work but, for formal settings, I use matched glassware. The more cuts there are in the glassware, the more dazzling it is in different lighting situations.
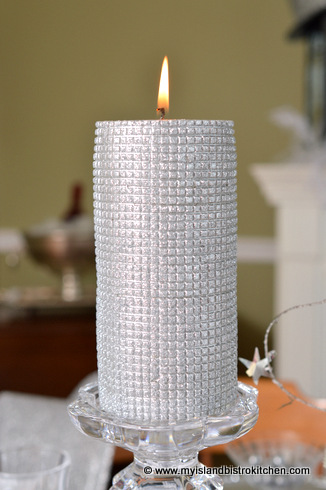
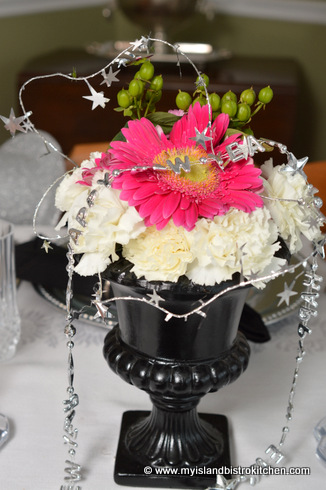
I went with a very simple centerpiece. Two glittery silver pillar candles on medium-height glass candlesticks and a white and deep rose floral arrangement in a small black urn.
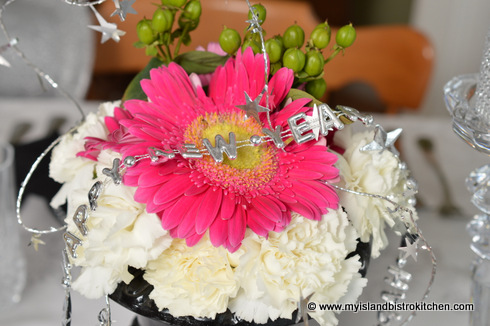
For the floral centerpiece, I used bright rose-colored Gerber daisies surrounded by a collar of white carnations with green berry highlights.
With all the white, silver, and glass on the table, I thought the centerpiece needed a bit of bright color to stand out.
Simple yet elegant.
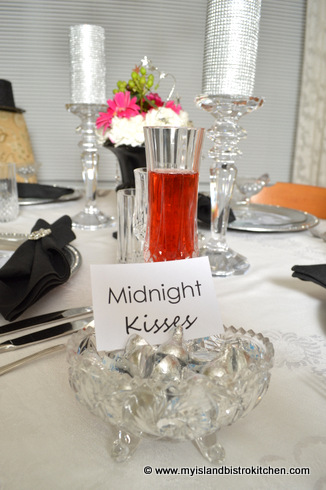
And, of course, there were little Hershey kisses for midnight! It’s all about the little details!
Here’s an overhead view of the table. Once I set a table, I always take a photo as that will quickly let me see what’s out of place and needs adjustment. Amazing how a photograph will reveal what an eye does not always see!
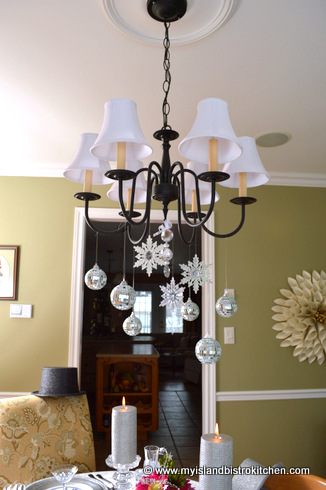
To keep the glitz going, I hung some mirror balls, glittery snowfakes, and glass from my dining room lighting fixture.
These are simply inexpensive ornaments I purchased at a dollar store. They do the trick!
Glittery snowflakes!
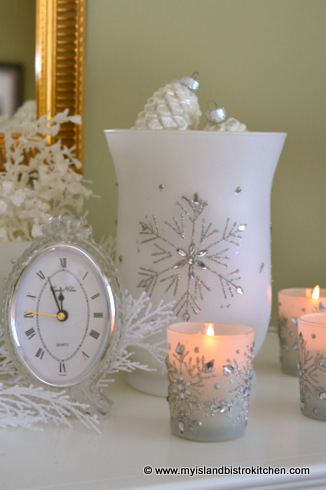
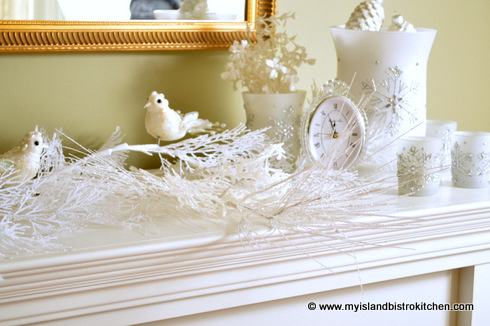
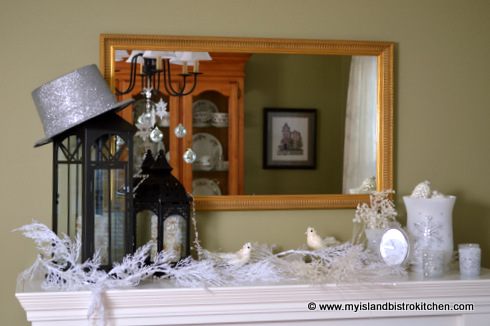
My fireplace mantle featured winter white and black. Tick-tock as we made our way to midnight!
The black lanterns tied in with the black on the table and provided the glow of soft candle light as evening darkness settled in.
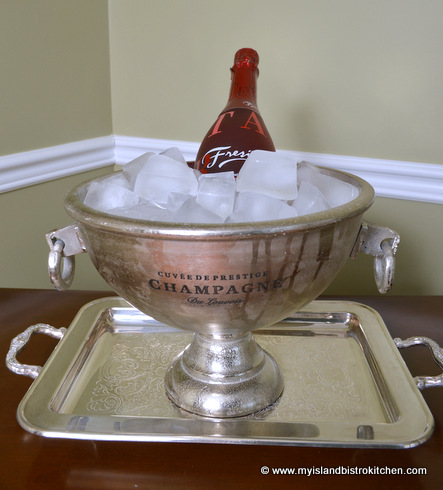
The champagne bucket was filled with ice.
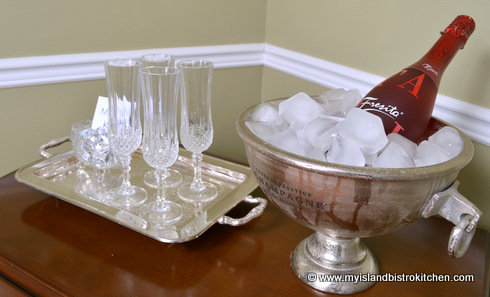
And the champagne flutes stood at the ready.
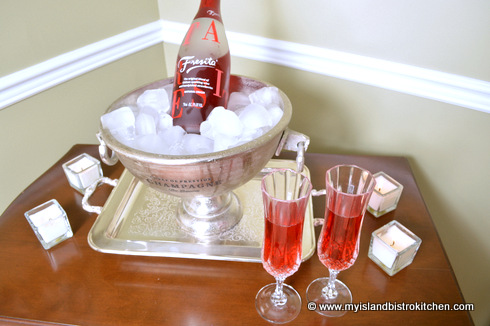
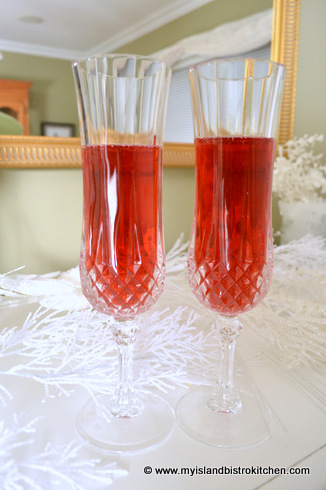
Then, the beverage was poured…..
And, before long, it was the midnight hour!
I hope you have enjoyed this glimpse into my New Year’s Eve dining room. Best wishes for health, happiness, and prosperity in the new year. Happy New Year, everyone!
To view other seasonal tablesettings, click on the links below:
By now, if you are a regular follower of this food blog, you have probably detected that I am a big fan of cranberries! I am always developing recipes using these tasty morsels. Continue reading Chunky Cranberry Salsa→
While cranberry sauce is traditionally associated with Thanksgiving and Christmas, I eat it year-round. In fact, I batch cook it and freeze it for use throughout the year.
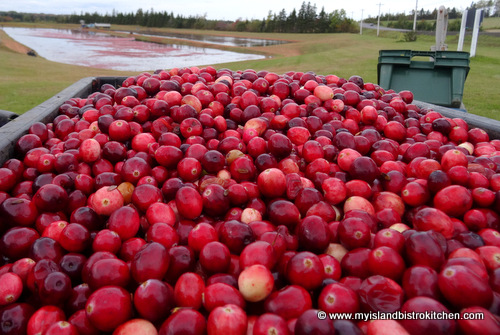
Each fall, I eagerly await the cranberry harvest on PEI. The photo below was taken on a day that Mikita Farms in Farmington, PEI was wet harvesting their cranberry crop. Produce just does not get any fresher than this!
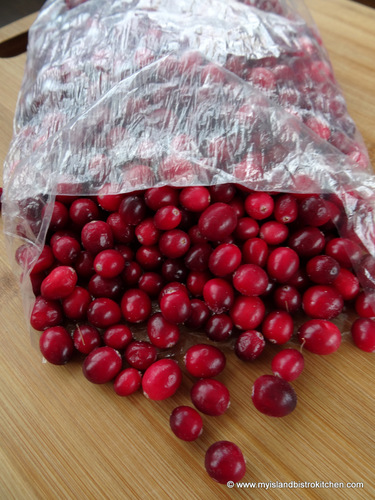
In the fall, I buy a huge bag of cranberries for the freezer as I use them in several recipes, including cranberry-orange sauce.
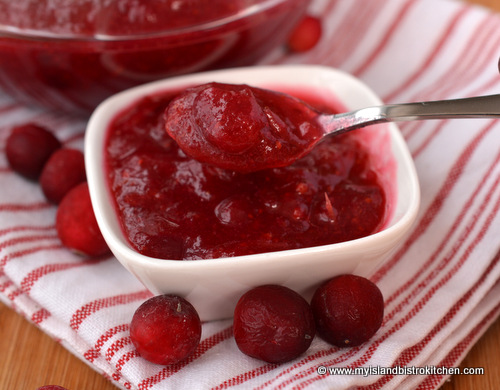
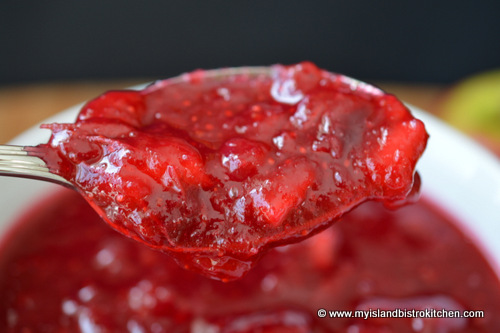
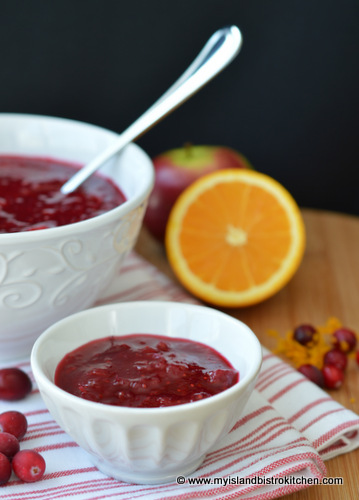
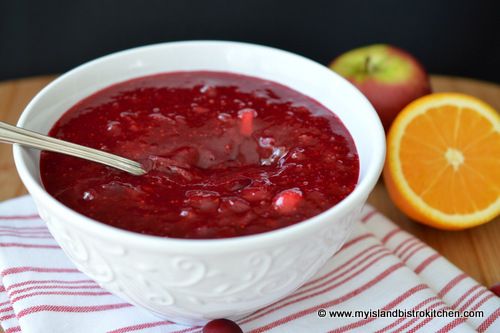
These gems turn into a rich jeweled-toned cranberry sauce.
Zesty Cranberry-Orange Sauce
Any time I am cooking a chicken dinner, chicken pieces, or have a craving for cranberry sauce, I head to the freezer for a small container of the sauce as it just seems to make the meal.
Zesty Cranberry-Orange Sauce
I hope you enjoy my recipe for cranberry-orange sauce. This is not a sickeningly sweet sauce although you can add a bit more sugar if you have a really sweet tooth! Adding some apple and orange juice to the sauce gives it an extra flavour boost and both fruits complement the cranberry flavour well. While the sauce is lovely without the Cointreau, it does add to the flavour of the sauce.
The method I use for the sauce is to make a simple syrup by boiling the sugar and water and then adding the cranberries, apple, and orange juice. I don’t care for runny cranberry sauce so I have learned this tip from my mother: Occasionally stir the sauce as it is cooking but make sure you stir it several times as it cools as this will help to thicken the sauce.
Don’t save this zesty cranberry-orange sauce for the holidays; enjoy it year-round!
Zesty Cranberry-Orange Sauce
Zesty Cranberry-Orange Sauce
Ingredients:
1 cup granulated sugar
1 cup water
2 cups cranberries, fresh or frozen
½ cup apple, finely chopped
1/3 cup orange juice
1 tsp finely grated orange rind
1½ tbsp Cointreau (optional)
Method:
In medium-sized saucepan, bring sugar and water to boil. Boil, uncovered, for 5 minutes over medium-high heat, stirring occasionally.
Add cranberries, apple, and orange juice. Bring to a boil. Cook over medium-low heat, stirring periodically throughout the cooking process for about 15 minutes or until mixture thickens.
Remove saucepan from heat and add orange rind and Cointreau. Stir several times as the sauce cools to help it to thicken.
Store, covered, in refrigerator for up to 5 days or freeze for longer storage.
A mildly tart and flavorful sauce that pairs well with roast turkey and any poultry dishes
Ingredients
1 cup granulated sugar
1 cup water
2 cups cranberries, fresh or frozen
½ cup apple, finely chopped
1/3 cup orange juice
1 tsp finely grated orange rind
1½ tbsp Cointreau (optional)
Instructions
In medium-sized saucepan, bring sugar and water to boil. Boil, uncovered, for 5 minutes over medium-high heat, stirring occasionally.
Add cranberries, apple, and orange juice. Bring to a boil. Cook over medium-low heat, stirring periodically throughout the cooking process for about 15 minutes or until mixture thickens.
Remove saucepan from heat and add orange rind and Cointreau. Stir several times as the sauce cools to help it to thicken.
Store, covered, in refrigerator for up to 5 days or freeze for longer storage.
If you have made this recipe and enjoyed it and/or wish to share it with your friends and family, please do so on social media but be sure to share the direct link to this posting from my website.
Connect with My Island Bistro Kitchen on Social Media
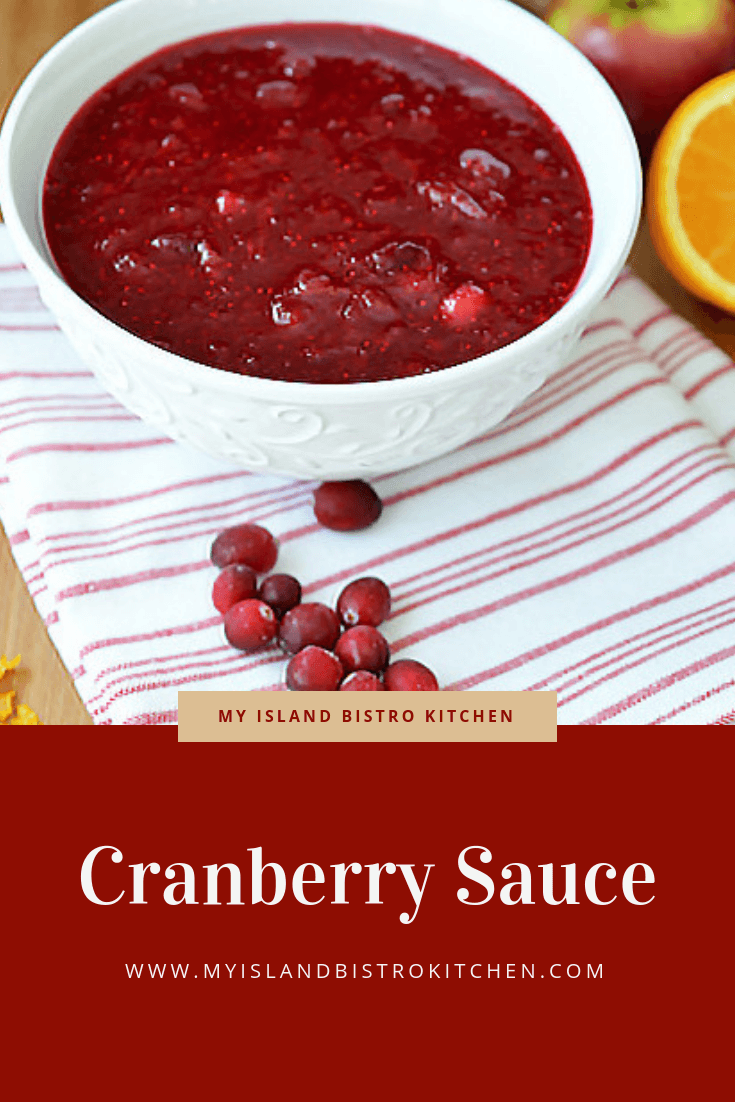
Follow “the Bistro” on Pinterestat https://www.pinterest.ca/peibistro/ and pin the Pinterest-ready photo found at the end of this post to your favorite Pinterest boards.
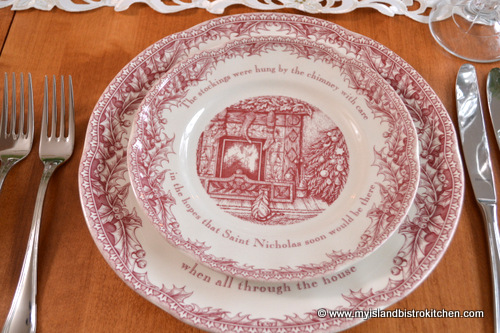
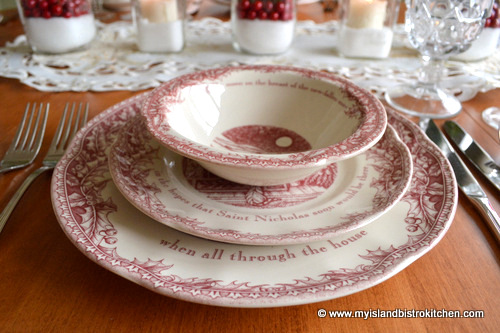
Johnson Brothers’ “Twas The Night” dinnerware is classic Johnson Brothers in every way. The dinnerware features nostalgic scenes and text from the classic Christmas story “Twas the Night Before Christmas“.
Made of earthenware, this is a sturdy, durable easy-to-care for set of dinnerware that is both dishwasher and microwave safe.
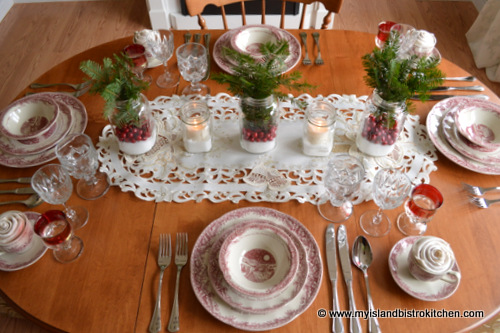
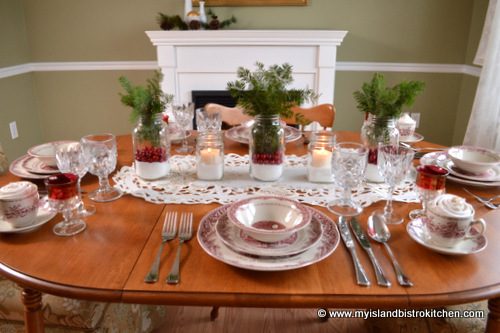
This tableware has a distinctively pinkish-red and ivory color and, with text from the afore-mentioned Christmas story, it is definitely Christmas-only dinnerware. For this reason, I have chosen it for Christmas Eve dinner.
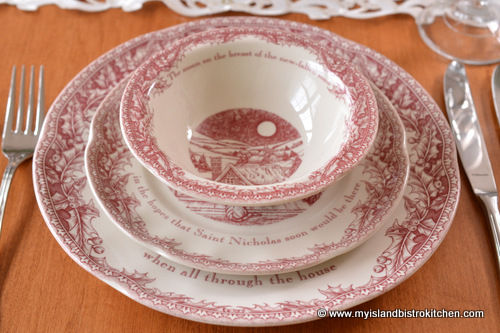
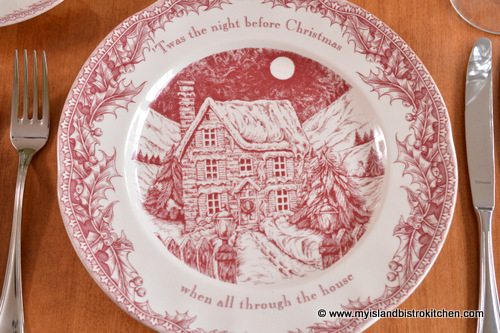
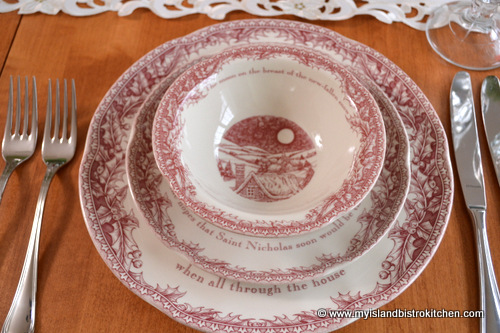
Let’s take a look at the intricate pattern on each plate and the bowl.
The dinner plate features the exterior of an old stone house.
The salad plate shows a tree by the fireplace with stockings hung.
The soup bowl shows a full moon in the winter sky over the rooftop.
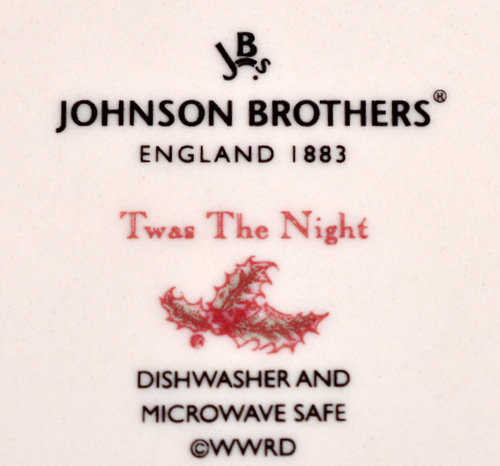
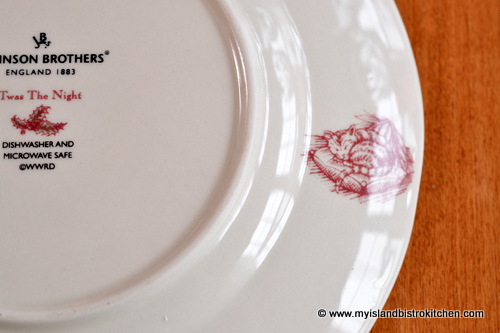
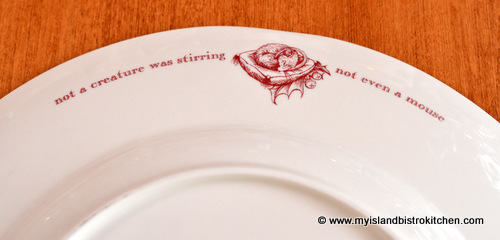
Even the bottom of the plates has detail.
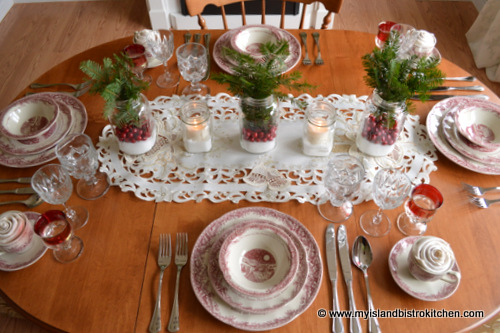
As those of you who follow the tablesetting part of my food blog will know, I’m a big fan of charger plates, both for their functionality and for the color and elegance they lend to a tablesetting. However, as I have discovered, not all dinnerware necessarily benefits from the use of charger plates. This Twas the Night pattern is a prime example of that. I did try pink chargers under the plates but found the dinnerware too informal and, for my taste, the chargers looked out of place. This, of course, does not mean a pretty table cannot be set with these dishes.
Glassware
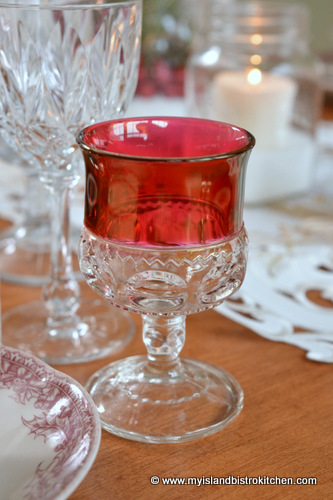
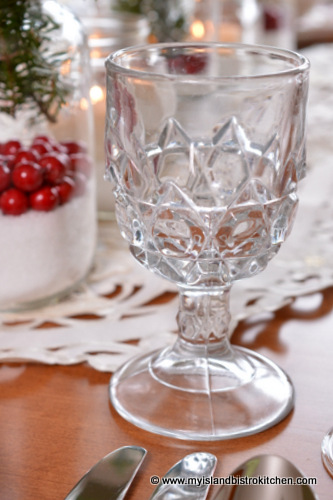
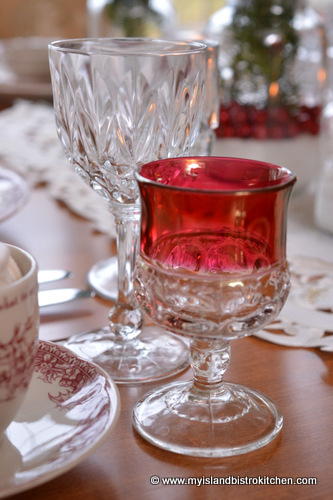
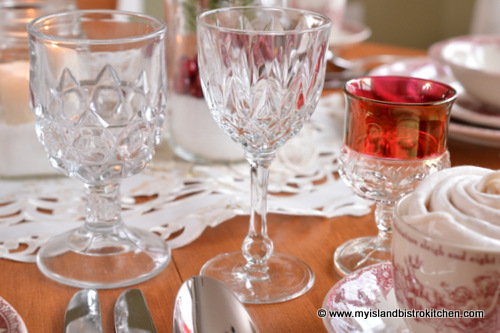
Because this dinnerware is more vintage in design, I have chosen glassware in styles that complement the dishes. This is dinnerware that allows mix-and-match glassware. In fact, none of the three vintage glasses are a matched set yet they seem to work in this setting. The stem glasses with red trim give a bit of extra pop of color to the tablesetting and blend in with the red berries in the jars.
Linens and Napkins
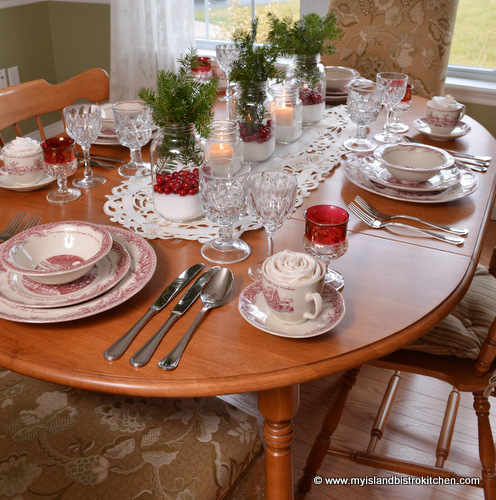
It is not often that I set a table without either a full tablecloth, a square, or placemats. However, for this setting, I have chosen to use a short Christmas runner down the center of my oval table and let the maple wood of my table shine. I think this complements the informal casual look of this dinnerware.
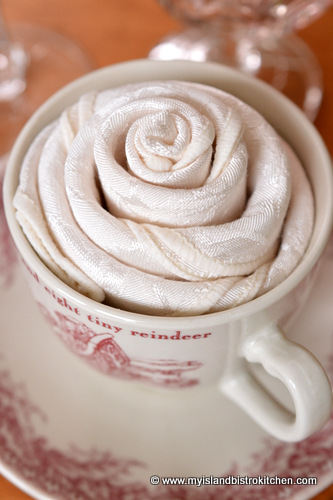
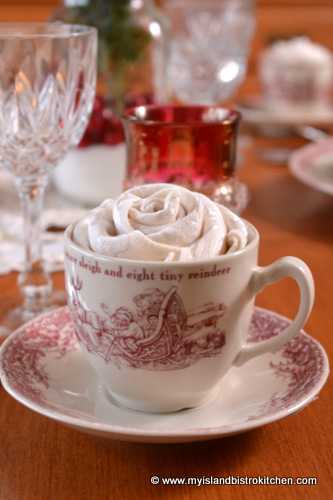
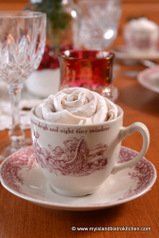
When selecting napkins, I try to choose them in a color that either matches the background color of the dinnerware or, alternatively, select a color from the pattern. In this case, I have opted to go with ivory napkins and the fold I have chosen is the rose.
The Rose Napkin Fold
This is a simple-to-do napkin fold. I like to use this fold when space on the table is limited to display a napkin, when a napkin fold would substantially cover up the dinnerware pattern which is a focal point of the table, or when placement of the napkin would clutter up, or compete with, a simplistic tablescape design.
The rose fold requires either a soup bowl or a cup to contain it and hold it in place. This method of styling and presenting a napkin is unpretentious yet gives the look and feel that planning and effort have been put into the tablesetting.
Tablescape/Centerpiece
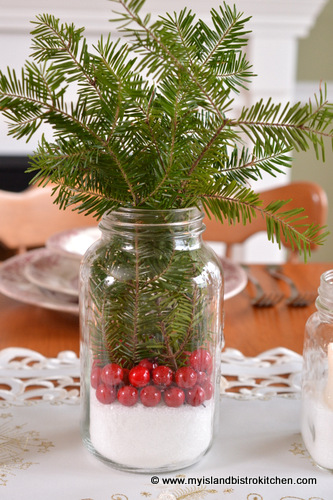
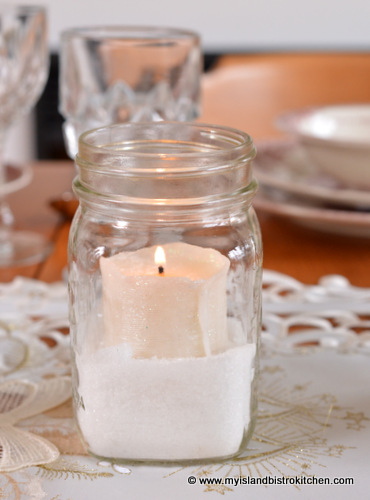
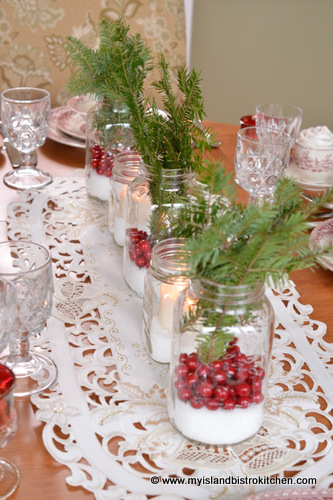
Since my goal with this setting is to keep it very simplistic, I have chosen to use standard glass canning jars of two sizes for the table decor. You may know these as Mason or Ball brand jars.
In the three larger jars, I have added a base of Epsom salt to resemble snow topped with some faux red berries to symbolize cranberries. To add a touch of seasonal greenery, I have topped each jar with a few sprigs of fresh greenery.
In each of the smaller jars, I have placed a small white votive candle on a base of Epsom salt. Just make sure you put the candle in a small votive glass inside the jar to contain the melting wax.
Using an odd number of jars is more pleasing to the eye than if an even number was used. More (or fewer) jars can be used depending on the length of the table.
Using these glass jars is remaining quite popular and trendy probably because of their versatility. I think their “home-y” look blends well with the nostalgic tableware that has a homestead, casual look to it. When I think of homestead, I think of canning fruits and vegetables which is the traditional use of these jars.
This dinnerware is sure to be a conversation piece on the dinner table for many Christmases to come.
To view other Christmas Tablesettings, click on the links below: