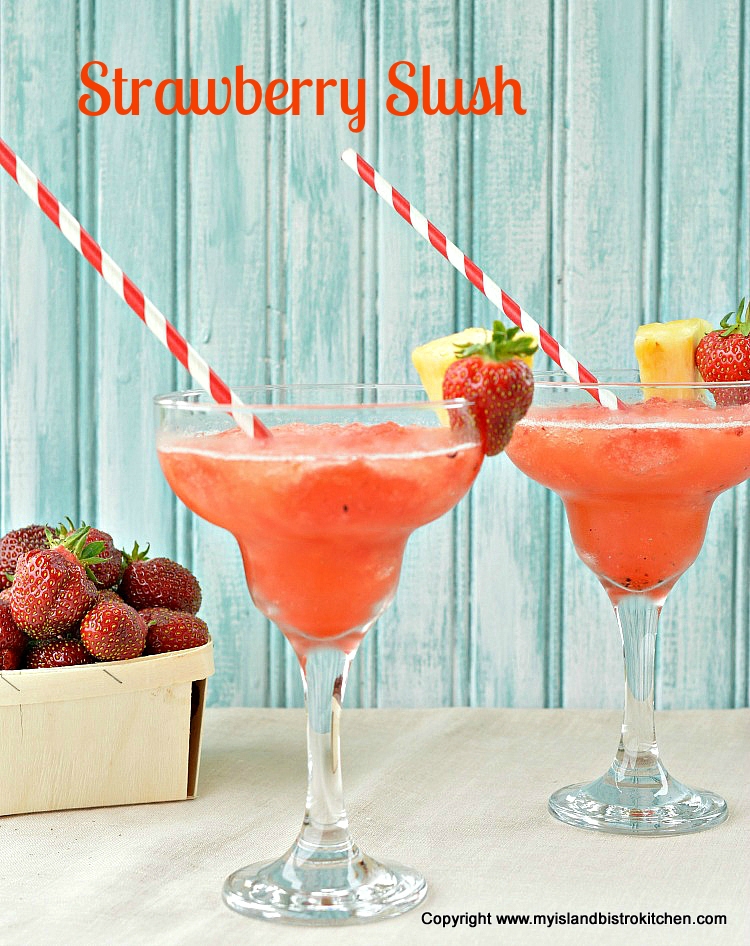
Strawberry Slush is my newest summer drink creation and it has quickly become a favorite! Strawberries take center stage in this beverage but there is also a mix of other fruit juices that include rhubarb, pineapple, lemon and orange juices, and some pink lemonade. The addition of Epicure’s “Summer Berry” sweet dip mix deepens the flavor and adds some interesting speckles throughout the slush. Because I know Epicure products may not be available everywhere, I have included this as an optional addition as the slush will still taste quite fine without it. My recipe calls for gin and any brand may be used. Continue reading Strawberry Slush→
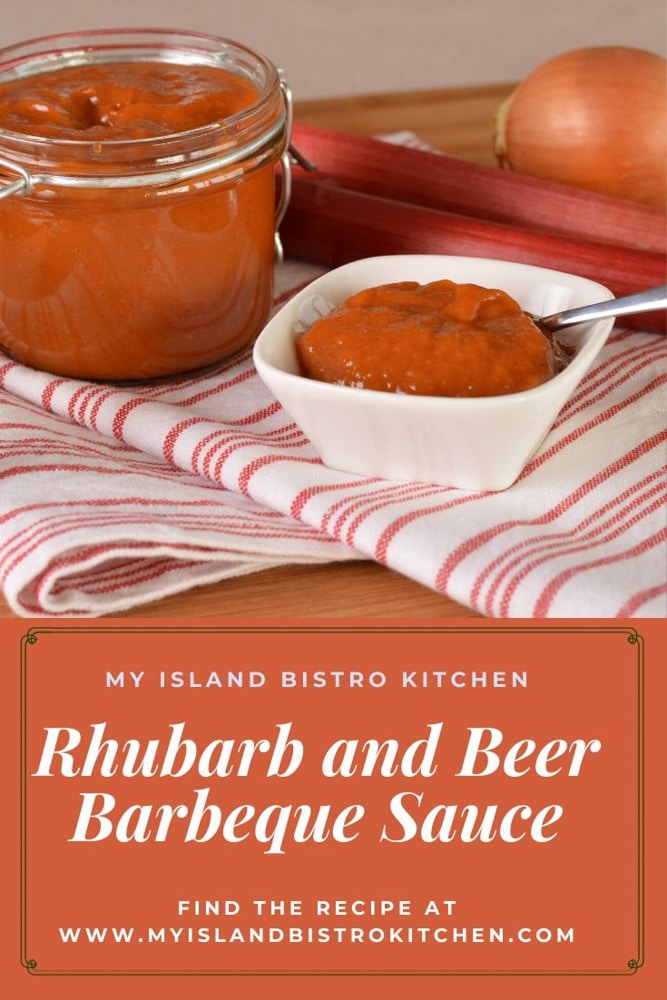
We have a good-sized patch of rhubarb and, every year, I develop one or more new recipes using it. I recently paid a visit to Upstreet Craft Brewing in Charlottetown in preparation for a story on this brewery and, lo and behold, they have a strawberry-rhubarb beer. This got me to thinking that I could combine the rhubarb with this beer to make a tasty barbeque sauce which is just what I did!
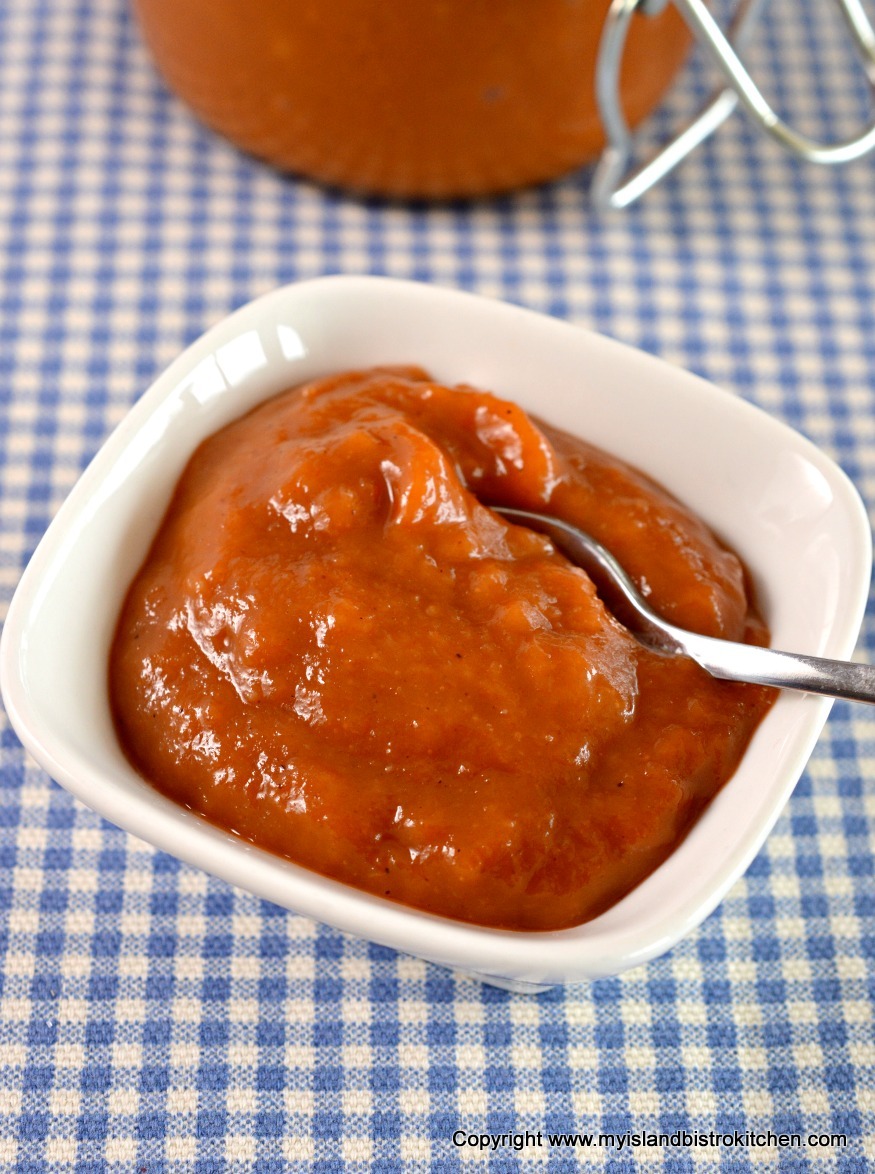
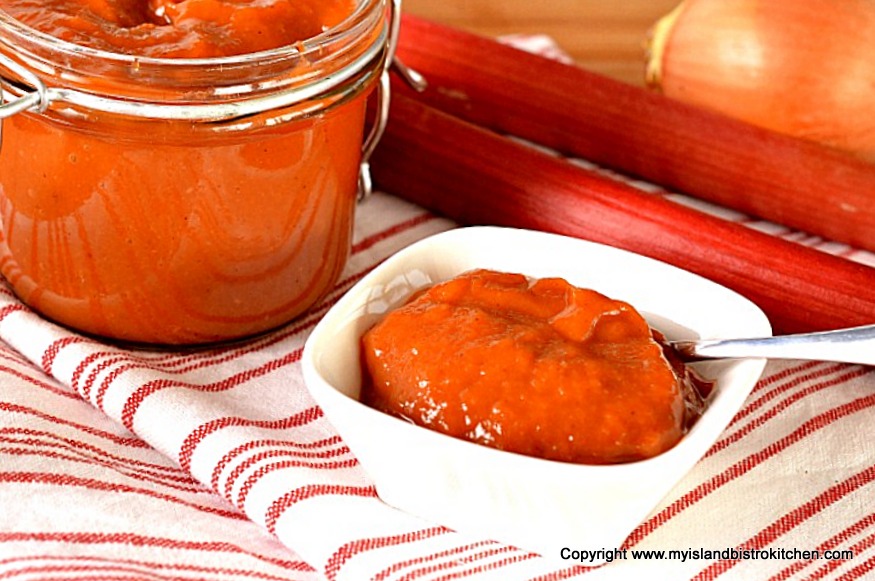
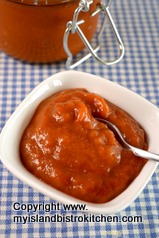
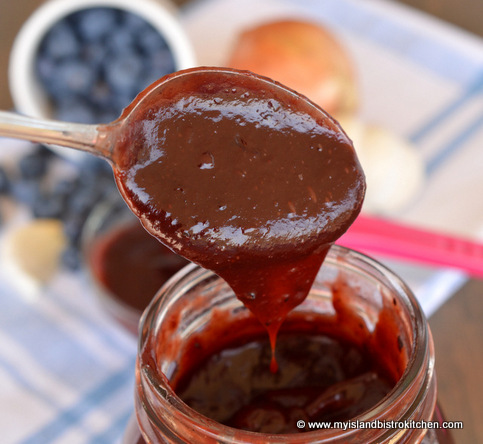
Rhubarb and Beer Barbeque Sauce
Now, this barbeque sauce takes a little time to make but the end result is so worth it. Just like making a traditional fine tomato sauce, the key is in letting the sauce simmer to allow the flavors to mix and mingle and get to know each other – very social just like Upstreet’s Rhuby Social beer! The sauce is a mix of savory, tart, and sweet, especially with the addition of crushed pineapple that goes well with rhubarb.
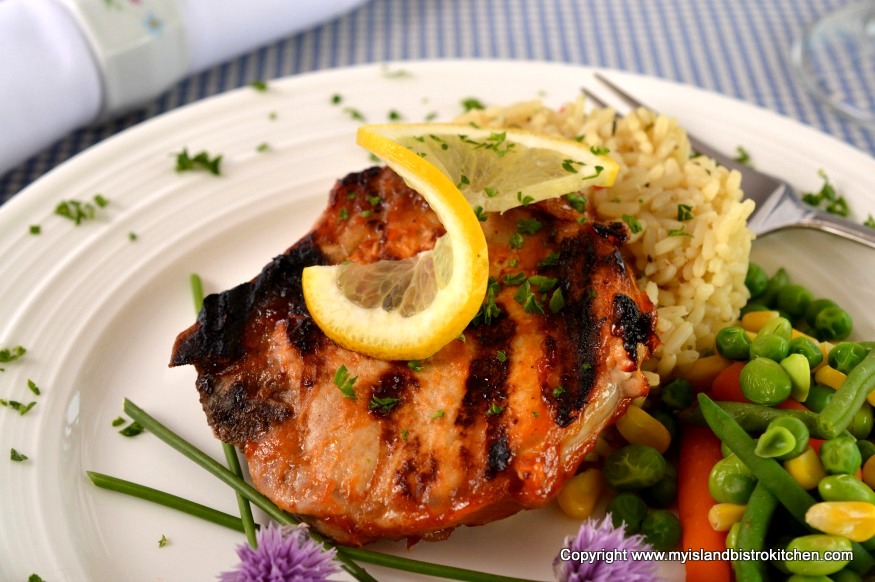
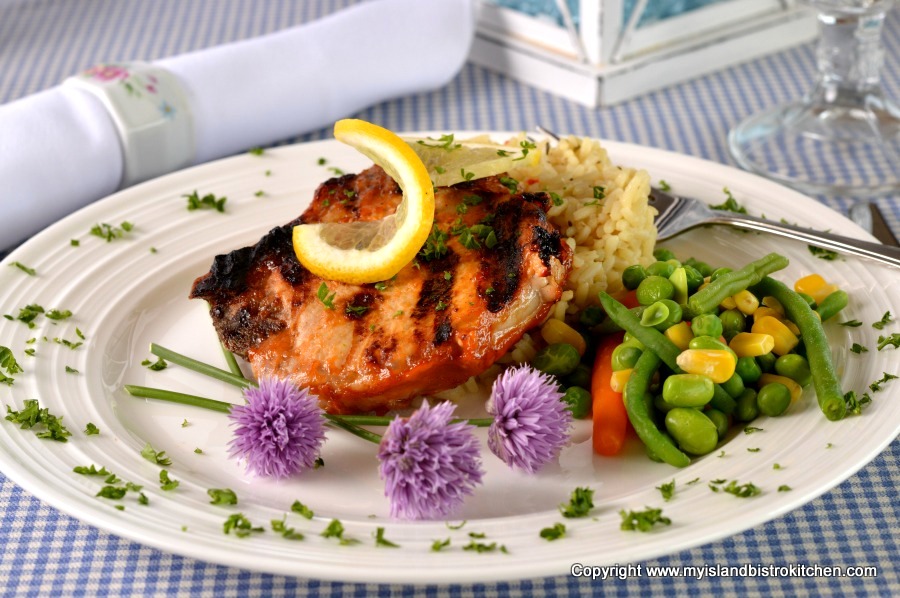
Porkchops with Rhubarb and Beer Barbeque Sauce
This barbeque sauce is particularly good on pork and chicken but also pairs well with burgers. This is my signature barbeque sauce for this summer. I use my immersion blender in the sauce but, if you like it more thick and chunky, leave it just as it is. I hope you enjoy it.
Porkchops with Rhubarb and Beer Barbeque Sauce
(Printable recipe follows at end of posting)
Rhubarb and Beer Barbeque Sauce
Ingredients:
½ lb rhubarb, sliced ½” thick
2 tbsp water
1½ tsp lemon juice
2-3 tbsp. oil
½ cup onion, finely chopped
3-4 cloves garlic, minced
½ cup ketchup
2 tbsp tomato paste
2 tbsp Dijon mustard
¼ cup maple syrup
½ cup brown sugar, firmly packed
¼ tsp cinnamon
2 tbsp apple cider vinegar
½ tbsp. Worcestershire sauce
½ tsp salt
Pinch cayenne
¾ cup crushed pineapple with juice
½ cup Upstreet Craft Brewing’s “Rhuby Social” beer
Method:
In medium-sized saucepan, combine rhubarb, water, and lemon juice. Bring to a boil. Reduce heat to medium-low and cook for approximately 10 minutes, or until rhubarb is soft and mushy.
In separate medium-sized saucepan, heat oil and, over medium heat, sauté onions until soft and translucent. Add garlic and cook for one additional minute, stirring constantly, being careful not to burn the onions or garlic. Add the cooked rhubarb, ketchup, tomato paste, mustard, maple syrup, brown sugar, cinnamon, vinegar, Worcestershire sauce, salt, and cayenne. Bring to a boil then reduce heat to medium low and cook for approximately 45 minutes or until thickened, stirring regularly.
Add the crushed pineapple and beer. Cook for apx. 30 minutes longer, stirring regularly to prevent scorching. Cool. Purée in blender, food processor, or with an immersion blender.
Store in refrigerator for up to 1 week. Use on chicken, pork, or burgers.
Yield: Apx. 2½ cups
Savory and sweet barbeque sauce combines rhubarb, crushed pineapple, and beer to make a tasty sauce for pork, chicken, and burgers.
Ingredients
½ lb rhubarb, sliced ½” thick
2 tbsp water
1½ tsp lemon juice
2-3 tbsp. oil
½ cup onion, finely chopped
3-4 cloves garlic, minced
½ cup ketchup
2 tbsp tomato paste
2 tbsp Dijon mustard
¼ cup maple syrup
½ cup brown sugar, firmly packed
¼ tsp cinnamon
2 tbsp apple cider vinegar
½ tbsp. Worcestershire sauce
½ tsp salt
Pinch cayenne
¾ cup crushed pineapple with juice
½ cup Upstreet Craft Brewing’s “Rhuby Social” beer
Instructions
In medium-sized saucepan, combine rhubarb, water, and lemon juice. Bring to a boil. Reduce heat to medium-low and cook for approximately 10 minutes, or until rhubarb is soft and mushy.
In separate medium-sized saucepan, heat oil and, over medium heat, sauté onions until soft and translucent. Add garlic and cook for one additional minute, stirring constantly, being careful not to burn the onions or garlic. Add the cooked rhubarb, ketchup, tomato paste, mustard, maple syrup, brown sugar, cinnamon, vinegar, Worcestershire sauce, salt, and cayenne. Bring to a boil then reduce heat to medium low and cook for approximately 45 minutes or until thickened, stirring regularly. Add the crushed pineapple and beer. Cook for apx. 30 minutes longer, stirring regularly to prevent scorching. Cool. Purée in blender, food processor, or with an immersion blender. Store in refrigerator for up to 1 week. Use on chicken, pork, or burgers.
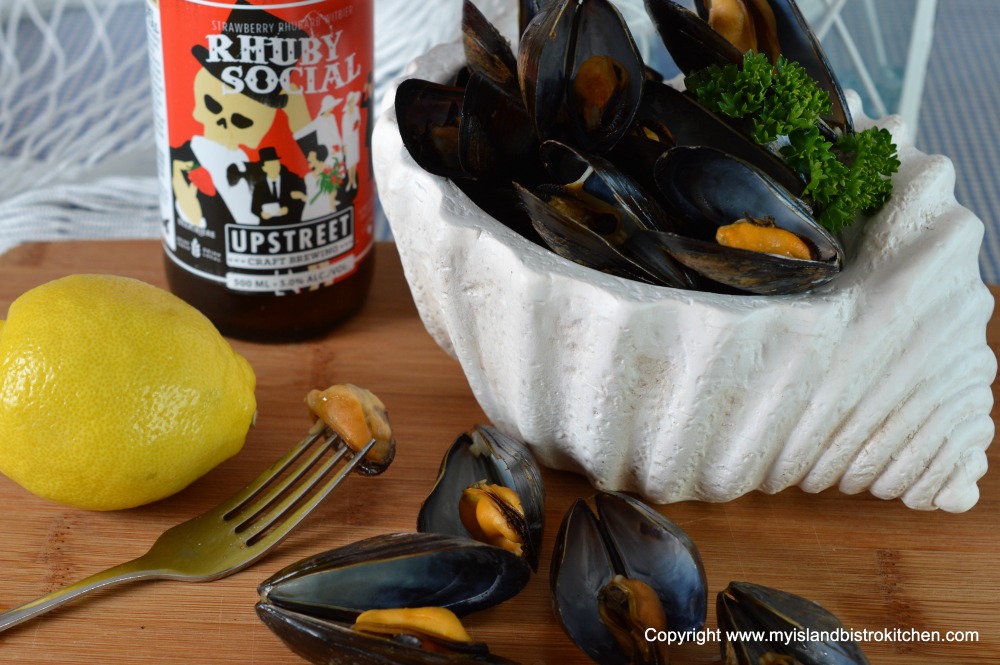
PEI Mussels Steamed in Rhuby Social Beer from Upstreet Craft Brewing
My recipe for steamed mussels calls for some aromatics to build a flavor base in which to steam the tasty little morsels. Aromatic cooking involves some type of fat or oil – I’m using butter in this recipe – combined with some aromatic vegetables and herbs. In this case, I am using onion, celery, and garlic along with some fresh thyme. The combination of a fat product and heat help to release the wonderful aromas of ingredients and infuse dishes with fabulous flavors. Ever walk into the tantalizing scent of a kitchen where onions and garlic are cooking in oil or butter? That’s aromatics at work.
Preparing this flavor base at the beginning of the cooking process adds depth and complexity to the dish. Since mussels cook rapidly, chop the vegetables up somewhat fine as they need to release their flavors quickly in order to add flavor to the dish.
The fresh mussels should be rinsed under cold water before they are cooked. If any of the shells don’t close up after this rinsing, tap the shells lightly. If they still don’t close, discard them. Any “beard” on the mussels also needs to be removed.
Once the vegetables have been sautéed and released their flavors, it’s time to add a small amount of lemon juice and some beer to the mixture. The lemon juice adds fresh, crisp notes to the broth. This helps to balance the seafood qualities of the broth once the mussels are added. Beer adds both depth and complexity of flavor to the mussels which should be steamed in a very small amount of liquid. If too much liquid is used, it will dilute the flavor altogether. It’s the steam, not the amount of liquid, that cooks the mussels. In this recipe, I have chosen to use a craft beer that has been brewed right here on Prince Edward Island at Upstreet Craft Brewing in Charlottetown (click here for my story on this brewery). The strawberry and rhubarb flavored “Rhuby Social” witbier with its slight tartness pairs particularly well with seafood.
It’s important not to overcook the mussels as they will become tough. I find that 5-7 minutes is usually sufficient; however, the amount of steaming time depends on several factors including how many (and the size of the) mussels in the pot, the weight of the pot, and amount of heat over which they are steamed. The ultimate test of doneness is a peek inside the pot to see if the shells have opened. It’s very important that, at the end of the steaming process, any shells that have not opened be discarded. If a shell has to be pried open, it is not considered safe for consumption.
These mussels can be eaten with bread dipped in the steaming broth. Simply strain the broth to remove the vegetables and herbs. Alternatively, they can be eaten dipped in melted butter or even with a simple splash of freshly squeezed lemon juice.
(Printable recipe follows at end of posting)
PEI Mussels Steamed in Beer
Ingredients:
2 lbs. PEI mussels, rinsed and beards removed
1 tbsp butter
1/3 cup onion, chopped
2-3 cloves garlic, minced
4” piece of celery with leaves, chopped
½ tsp salt
2 sprigs fresh thyme
2 tsp lemon juice
1 cup Upstreet Craft Brewing’s “Rhuby Social” Beer
Method: In medium-sized stock pot, melt the butter over medium-high heat. Add the onion, garlic, celery and salt. Sauté, stirring briskly, just until onion has softened and has started to become transparent. Add the thyme, lemon juice, and beer. Increase the heat to high and bring liquid to a boil. Add the mussels. Cover and steam the mussels for approximately 5-7 minutes, or until the mussel shells have opened. Remove pot from heat and let mussels stand in broth for 1-2 minutes.
Remove mussels from broth with a slotted spoon and discard any shells that have not opened. If desired, strain the broth and use for dipping bread to enjoy with the mussels. Alternatively, melt butter in which to dip the mussels.
Yield: Apx. 2 servings
If you have made this recipe and enjoyed it and/or wish to share it with your friends and family, please do so on social media but be sure to share the direct link to this posting from my website.
Connect with My Island Bistro Kitchen on Social Media
PEI Mussels steamed in an aromatic beer broth. Dip the mussels in melted butter for the ultimate treat.
Ingredients
2 lbs. PEI mussels, rinsed and beards removed
1 tbsp butter
1/3 cup onion, chopped
2-3 cloves garlic, minced
4” piece of celery with leaves, chopped
½ tsp salt
2 sprigs fresh thyme
2 tsp lemon juice
1 cup Upstreet Craft Brewing’s “Rhuby Social” Beer
Instructions
In medium-sized stock pot, melt the butter over medium-high heat. Add the onion, garlic, celery and salt. Sauté, stirring briskly, just until onion has softened and has started to become transparent. Add the thyme, lemon juice, and beer. Increase the heat to high and bring liquid to a boil. Add the mussels. Cover and steam the mussels for approximately 5-7 minutes, or until the mussel shells have opened. Remove pot from heat and let mussels stand in broth for 1-2 minutes.
Remove mussels from broth with a slotted spoon and discard any shells that have not opened. If desired, strain the broth and use for dipping bread to enjoy with the mussels. Alternatively, melt butter in which to dip the mussels.
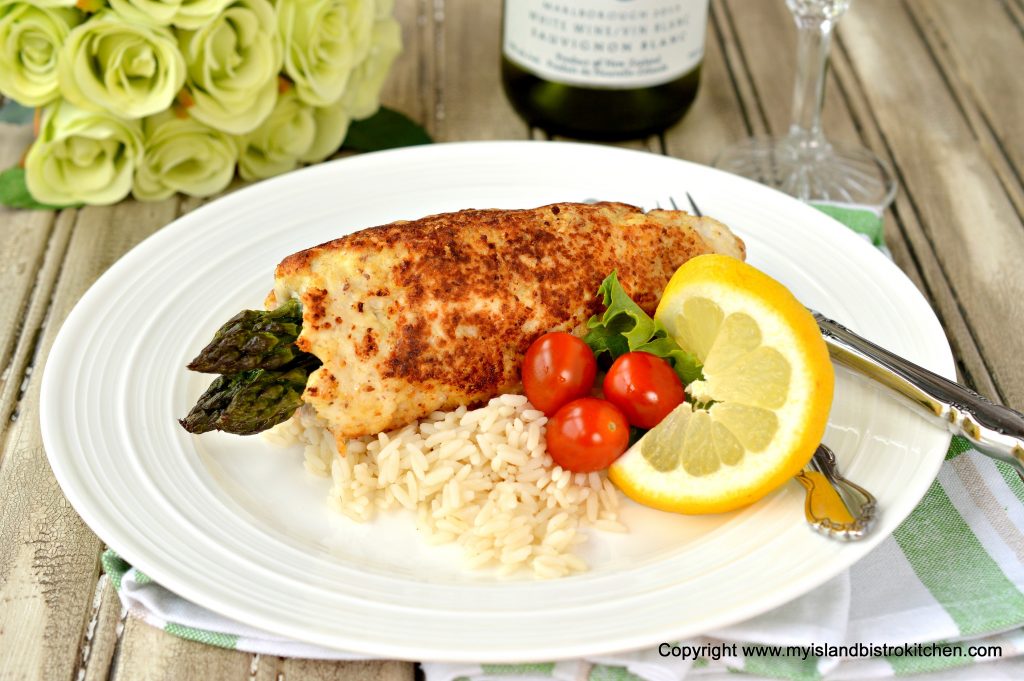
Asparagus is one of the most versatile vegetables, both in the ways in which it can be prepared and the ingredients with which it can be paired. Locally, in Atlantic Canada, asparagus has a very short growing season in late May/early June and it is a harbinger of wonderful produce to come from the land.
I like to feature asparagus in springtime on my dinner table and, for this recipe, I have chosen to combine Boursin cheese, prosciutto, and chicken breasts with the asparagus for this delightful entrée – Asparagus-stuffed Chicken Breasts. This stuffed chicken breast can be served whole or it can be sliced into 3/4″ slices and served on either a bed of rice or on a green salad. The latter is quite colorful as it shows the green asparagus stuffing. Continue reading Asparagus-stuffed Chicken Breasts Recipe→
Remember the days when a hamburger was simply ground beef flattened to about the depth of a pancake, a slice of processed cheese, and condiments were simply store-bought ketchup, mustard, and sweet pickle relish all sandwiched between a soggy bakery bun?
Today, burgers are becoming more gourmet and creative. Indeed, some border on works of art and can be towering structures! Specially created burger sauces, unique relishes, specialty meats, and gourmet cheeses are now common ingredients on burgers. And, of course, there are several different ways a burger can be cooked. Sometimes, as in the case of my recipe, more than one cooking method is used to cook the burgers. All this to say that the benchmark on burger creativity has now been raised to a new level.
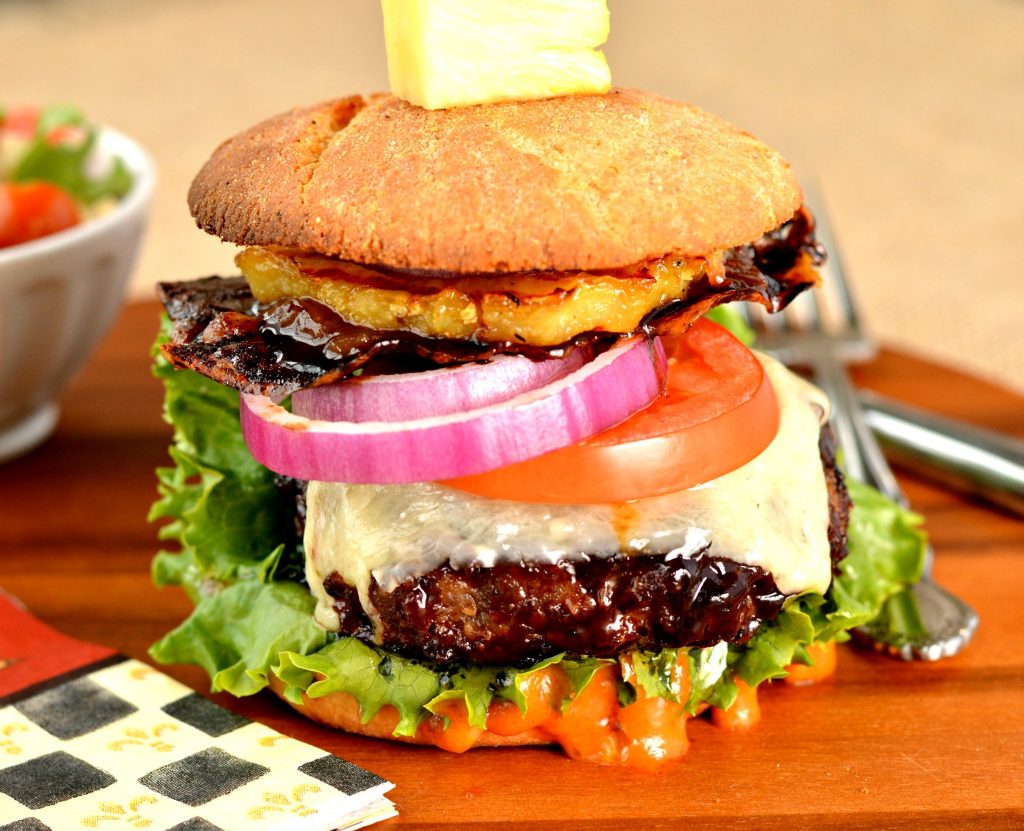
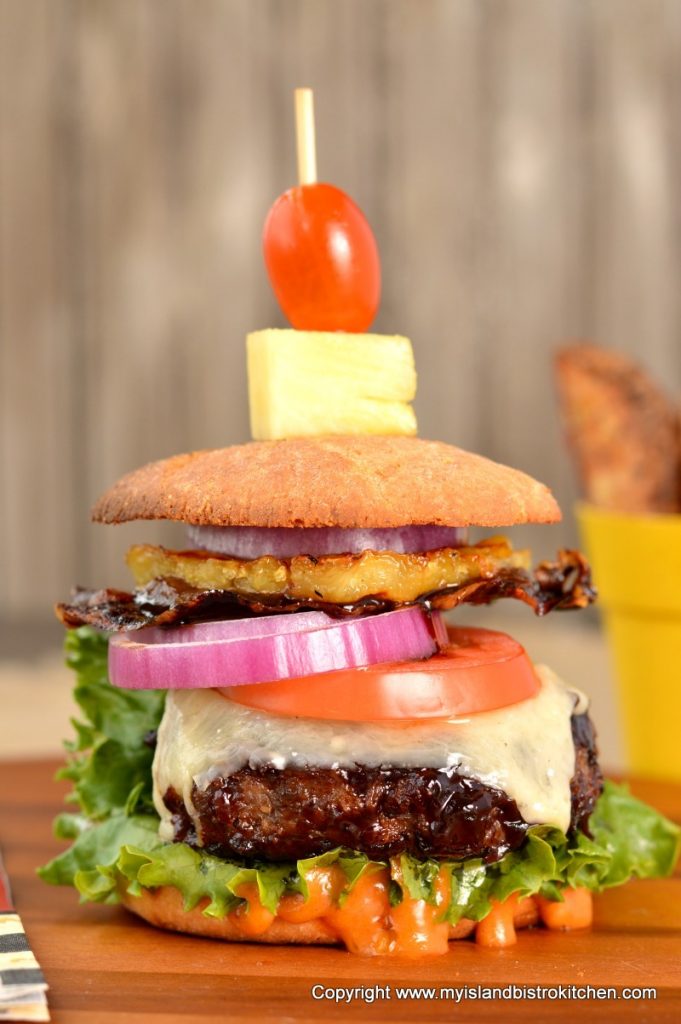
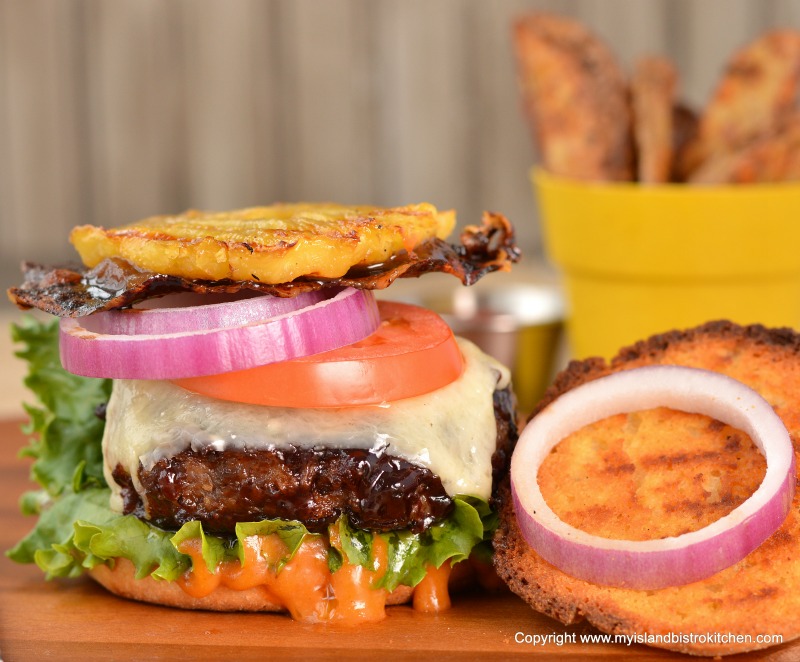
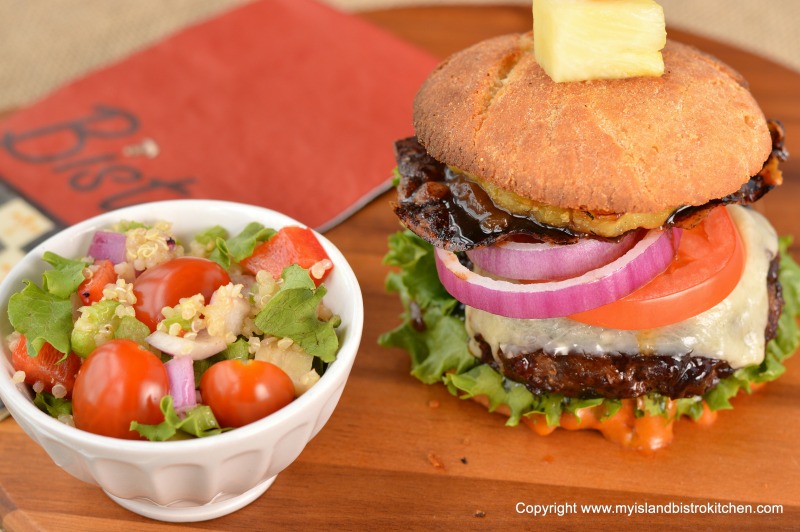
“The Bistro Burger” on a Gluten-Free (GF) Hamburger Roll
When I am developing any recipe, the first thing I think about is what flavors will play well together and be pleasing to the palate. As far as I’m concerned, it’s not about how many ingredients are included in the burger or how big or tall the burger is but rather it’s about the quality of ingredients and their ability to blend well and compliment each other.
I don’t personally like a whole lot of ingredients on my burger or ones that are, well, just plain wonky and don’t blend well with the beef. If there are too many ingredients, I find it hard to detect any discernible flavour and, for my taste, they detract from the burger experience. I still need to taste the beef! Any additions should only enhance, not smother or mask, the beefy flavor.
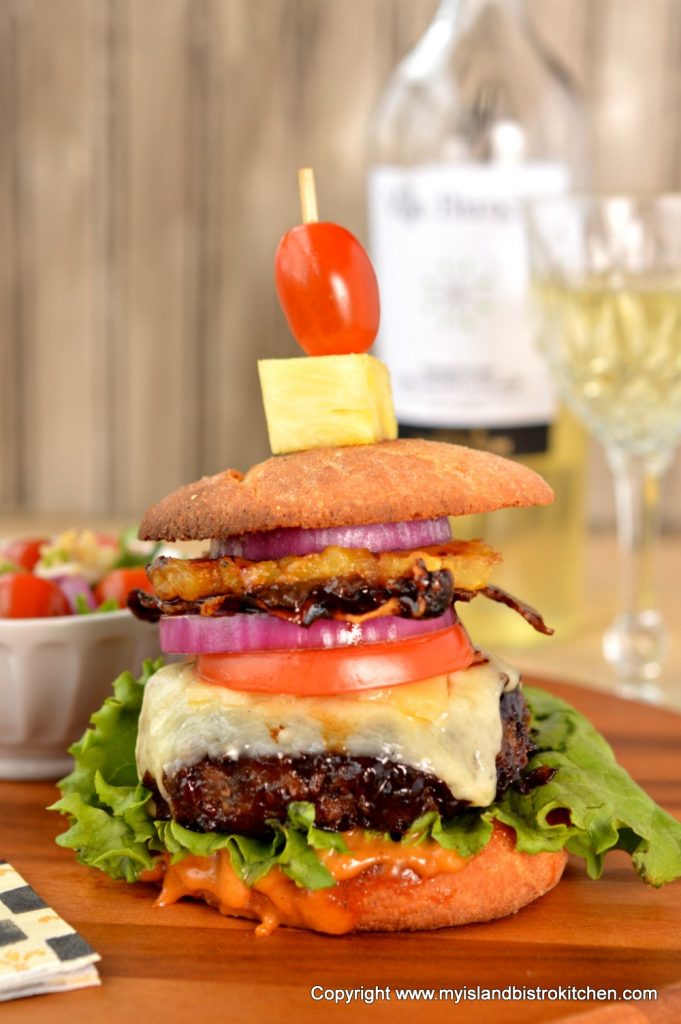
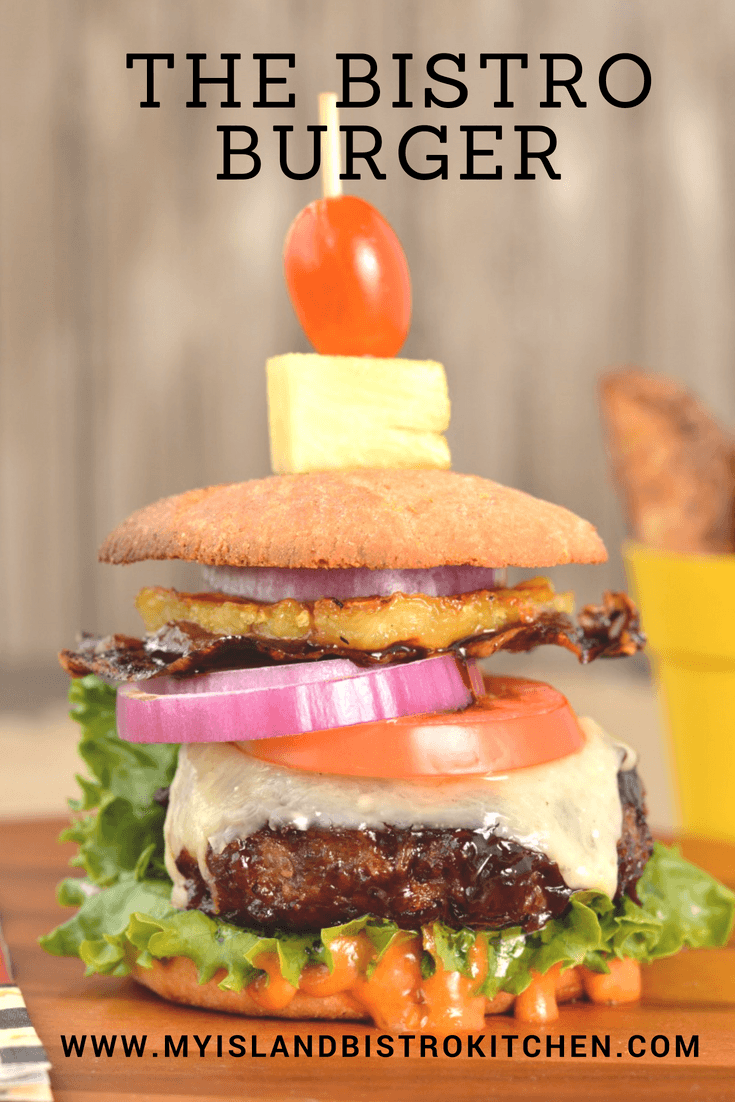
“The Bistro Burger”
My burger creation aims to strike the middle ground through the chosen selection of ingredients and a carefully-tested cooking method. In my view, there are two challenges with burger creation. The first challenge is to cook the burger perfectly so it is moist and juicy. The second challenge is to maintain, not mask, the flavor of the meat itself and to choose toppings with flavors that play well with, and bring out the savoriness of, good quality beef.
Now, that is not to say that new flavours cannot be introduced into burgers or that the types of ingredients typically associated with burgers cannot be prepared in different ways to “up” the calibre of the burger – onions can be carmelized or be in the form of jam, sauces can blend complimentary flavors, and veggies can be marinated. Other ingredients, such as the traditional bacon, can be replaced with alternatives such as prosciutto which can be eaten raw or candied. Fresh fruit can be added to infuse some sweetness to the burger and counter the savory flavour of the meat.
When I was creating this burger recipe, I had five (5) objectives in mind:
Recipe would be adaptable for those with a gluten intolerance/sensitivity;
Hamburger would include sauces and the relish made from my own recipes;
To the extent possible, locally-produced products, including the beef, would be used; (ingredient sources listed at end of posting)
Ingredients would be chosen for their ability to play well together and be pleasing to the palate; and
The resulting hamburger would be both eye appealing and appetizing.
The following is my recipe for a tasty beef burger that uses my own recipe creations for sauces and relish most of which were previously posted on this food blog. Also, to the extent possible, I have used locally-produced products. Following the recipe below, you will find some of my hints for burger making along with some explanations of my choices of ingredients in this burger. At the bottom of this posting, you will also find a printable version of the recipe.
The Bistro Burger
The Bistro’s Burger Sauce
Ingredients:
1/3 cup mayonnaise
2½ tbsp pure maple syrup
2 tbsp ketchup
2 tbsp rhubarb relish
1½ tsp Dijon mustard
1 tsp garlic powder
1½ tbsp. sour cream
½ tsp onion salt
Salt and pepper, to taste
Yield: Apx. 1 cup
Frozen Flavor Burst Logs
Ingredients: 2 tbsp butter, softened at room temperature
2½ tsp mustard (Dijon or sweet)
2 tbsp finely grated Parmesan Cheese
1½ tsp dried parsley Yield: Apx. 6 Logs
Burger Patties:
Ingredients:
1 lb ground chuck (apx 80:20 ratio meat-to-fat content)
¼ cup finely grated Parmesan cheese
2 tbsp Blueberry Barbeque Sauce
1½ tbsp maple syrup
½ tsp onion salt
¼ tsp garlic salt
2 tsp dry onion soup mix
Pinch cayenne pepper
Salt and pepper, to taste
1 egg, lightly beaten
¼ cup+ medium-ground bread crumbs
Yield: Apx. 6 patties
Cooking oil Blueberry Barbeque Sauce
6 hamburger rolls of choice
The Bistro’s Burger Sauce Rhubarb Relish
Cheddar Cheese Slices
Red Onion
Tomato Bread and Butter Pickles
6 thin slices Proscuitto
Maple Syrup and Brown Sugar (for candying the Proscuitto and pineapple)
Fresh pineapple, sliced between 1/8” and ¼” thick
Method:
For the Bistro Burger Sauce, mix all ingredients together well. Store in tightly sealed jar. Refrigerate for up to one week.
For the Frozen Flavour Burst Logs, combine the butter, mustard, Parmesan Cheese, and parsley together. In teaspoon measures, portion out the mixture and shape into small logs or disk shapes. Place on plastic-lined tray and freeze for about 30 minutes.
Preheat oven to 375°F and panini grill to medium-high setting.
For the Burger Patties: In large bowl, mix all burger ingredients just until combined, adding more bread crumbs if necessary to achieve desired consistency.
Measure the meat mixture into six (6) equal portions (apx. 4 oz each). With hands, gently and loosely clump together the meat and enclose one frozen flavour burst log into centre of each burger and surround it with meat mixture. Shape into patties that are apx. 1” thick (or to desired thickness to match size of hamburger roll). Refrigerate for one hour before cooking to allow patties to firm up and give flavours time to blend.
Heat 1½ – 2 tbsp cooking oil in frypan over medium high heat. Sear burgers, two minutes each side. Do not press down on the burgers. Remove from frypan and brush Blueberry Barbeque Sauce over both sides of burgers and transfer to greased wire rack suspended over baking pan (to catch any drips). Bake in pre-heated oven until desired doneness is reached, adding the cheese slices to the burgers for the last minute of baking.
To candy the prosciutto – mix together 2 tbsp maple syrup with 2 tbsp. brown sugar. Lightly brush each thin slice of prosciutto with the mixture, being careful not to tear the delicate meat. Place over greased wire rack suspended over baking pan. Bake in 375° oven for apx 7-10 minutes or until prosciutto is browned and starts to become crispy.
Fresh pineapple slices can be added to the burgers without glazing them. However, to glaze the pineapple slices, mix together 2 tbsp maple syrup with 2 tbsp brown sugar. Lightly brush mixture on both sides of each pineapple slice and place slices on panini grill (set at medium-high) and press grill top down on to pineapple slices and grill on medium-high for about 1-2 minutes, or until pineapple is heated and has grill marks.
To assemble burgers:
Select hamburger rolls of choice and split in half, horizontally. Butter each half and, if desired, toast on grill or in oven. Slather a generous helping of burger sauce on the bottom half of each roll. Add lettuce and then the burger. Add pickles, sliced tomato, onion, candied prosciutto, rhubarb relish, and maple glazed pineapple. Place the top halves of the rolls on each burger and garnish each with a chunk of fresh pineapple and a cherry tomato. Serve with your favorite side salad or home fries.
Yield: Apx. 6 – 4oz burgers.
Burger-Making Hints and Additional Information on The Bistro Burger Ingredients
Meat
To get the juicy burger, there needs to be some fat mixed in with the meat. While I normally choose extra lean ground beef for recipes, the one exception I make to that is for burgers. The general standard is a ratio of 80:20 meat-to-fat content. My preference is to use ground chuck that is freshly ground by my local butcher while I wait. Burgers are no different than any other food – fresh is always best!
To get a really tasty burger, I like to enhance the meat with additional flavour, moisture, and some sort of binding agent(s). For mine, I enhanced the flavour with some grated Parmesan cheese, onion and garlic salts, dry onion soup mix, cayenne pepper, salt, and pepper. To give additional moisture (and flavor) to the burger, I used some of my blueberry barbeque sauce along with maple syrup (I used a chipotle and lemon grass infused syrup but plain maple syrup works well, too). Medium-grind bread crumbs add structure to the burger and help hold it together along with the addition of an egg. Don’t use fine bread crumbs that would typically be used to bread chicken, for example, as these are too fine and won’t add the needed structure and stability to the burger that coarser bread crumbs will provide. As well, if the bread crumbs are too fine, it will take too many which changes the texture of the burger. To make the recipe gluten-free, use gluten-free breadcrumbs.
To give an extra burst of flavor in each burger, I mix butter, mustard, finely grated parmesan cheese, and parsley together and, using a teaspoon measure, portion out and form the mixture into small logs or disks which I freeze for about 30 minutes. As I am forming each patty, I enclose one of the flavor burst logs in the centre, surrounded by the meat. As the burger cooks, it melts the flavour log and releases and distributes the flavour burst inside each burger.
When forming the burger patties, it is very important not to over knead the meat or the result will be a tough burger. It’s the same principle as applies to pastry or biscuit dough – too much kneading and you won’t have a tender product. Basically, just loosely clump together the burger mixture with your hands and form it into a disk shape. Resist the urge to pack the meat tightly or press down/flatten the patties as this, too, will create a tough burger.
The standard pre-cooked weight of each of my hamburger patties is approximately 4 oz and each one is about 1” thick.
Onions
My preference, if using raw onion on the burger, is to use red onions for both their flavour and color. Other options include fried or carmelized onions or even onion jam. While carmelized onions and onion jam are tasty, they don’t necessarily go with all burgers. The other ingredients and, particularly, the relishes or sauces used (and how many) will dictate the best way to present onions in the burger.
Sauce
A good sauce enhances the flavour of the burger. I use my own recipe made with mayonnaise, maple syrup, ketchup, rhubarb relish, mustard, sour cream, and some garlic and onion seasoning. This sauce contains the traditional condiments of mustard and ketchup but blends them with other complimentary flavours. The result is a colorful and tasty orange sauce. Truffle ketchup adds an “earthy” flavor to this sauce but it is an acquired taste. Any variety of tomato ketchup will work just fine.
Relish
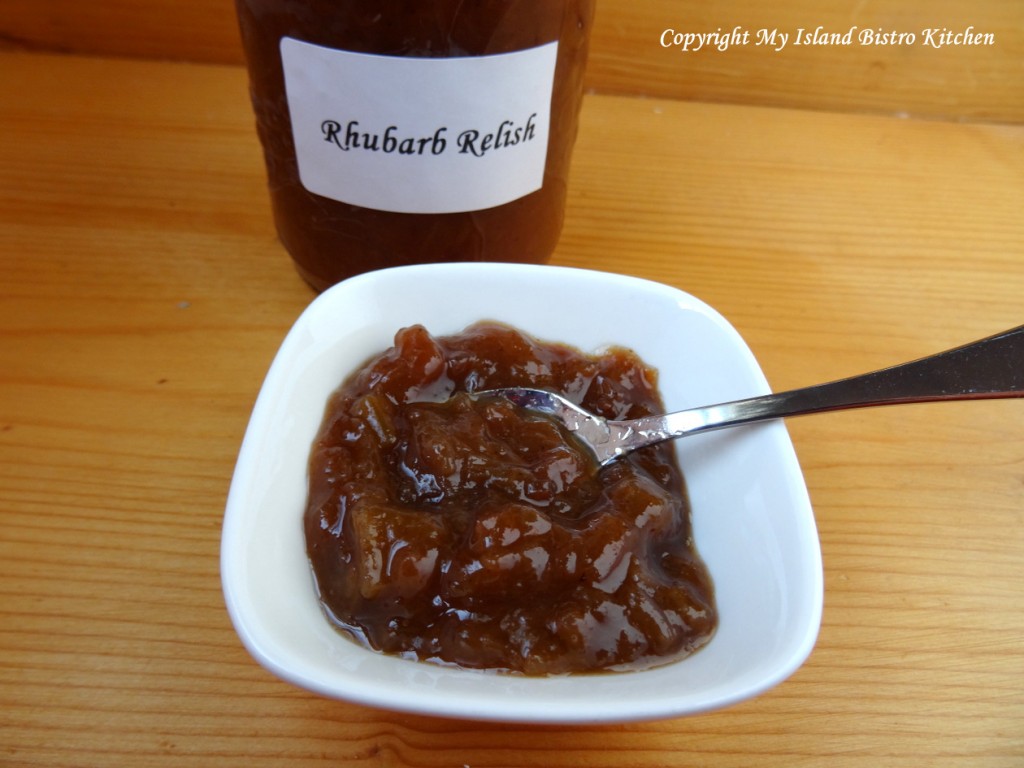
Traditionally, a sweet pickle relish has been used on burgers. However, to bring out the savory meat flavour, I am using my own recipe for rhubarb relish. You can access my recipe here. This relish works well with the other ingredients in this burger and ties in with the flavor of the sauce so I’m not introducing another flavor to confuse the taste buds. The sweetness of the rhubarb relish effectively counters, but blends in a positive way with, the savory flavour of the beef.
Rhubarb Relish
Cheese
Choose a cheese that melts well like a good quality cheddar, for example. I’m using COWS Creamery Extra-Old Cheddar produced here on PEI where it has been aged for at least two (2) years. This is a high quality cheese with rich, deep flavour that really compliments the beef well. The cheese has a firm texture and is a slower melting cheese. In fact, as it melts, it forms almost a second sauce on the burger and has a lovely tangy bite to it.
Prosciutto
While traditionally eaten raw, I have chosen to candy the prosciutto with a mixture of brown sugar and maple syrup. All I did for this process was very lightly brush both sides of the prosciutto with the mixture, lay it over a greased wire rack suspended over a baking pan, and bake it in a 375°F oven for apx 7-10 minutes, just until it is browned and crispy. This gives both flavor and a crunchy texture to the burger.
Barbeque Sauce
I used my own Blueberry Barbeque Sauce (recipe here) for my burgers. This dark barbeque sauce adds both flavor and a rich, deep color to the burger.
Blueberry Barbeque Sauce
Lettuce
Bright green lettuce adds great color to burgers. Choose a “sturdy” lettuce for burgers, such as that found on head lettuce (e.g. Boston lettuce). These are strong leaves that don’t tend to wilt so quickly as, for example, delicate lettuce leaves like the mesclun mix, when they come into contact with hot burgers.
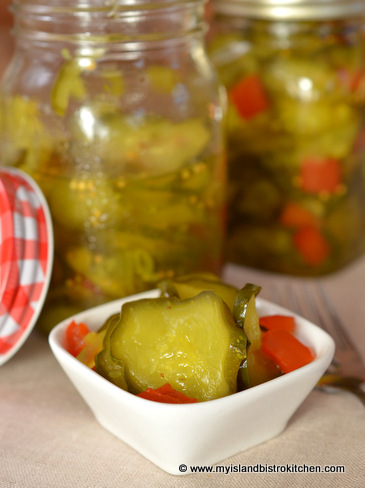
Pickles
My preference for pickles in the burger are sweet homemade bread and butter pickles (get my recipe here).
Bread and Butter Pickles
These are a lovely, crisp pickle and their acidity plays off sweetness of any fruit added to the burger as well as the sauce. Pickles contribute a bit of sweet tang to the burger experience.
Pineapple
I like to add some sweetness to my burgers by adding a slice of fruit such as pineapple. The choice of fruit, however, has to be one that, structurally, is strong enough to hold together in the burger. I have chosen pineapple for this burger as it “holds its own” and pairs very well with the rhubarb relish and blueberry barbeque sauce. I cut the pineapple slice between 1/8” and ¼” thick, brush some of the brown sugar and maple syrup glaze on it, and grill it on my panini grill for a few minutes – just long enough for the pineapple to warm up and release its natural sweetness and get those wonderful grill marks that are very attractive.
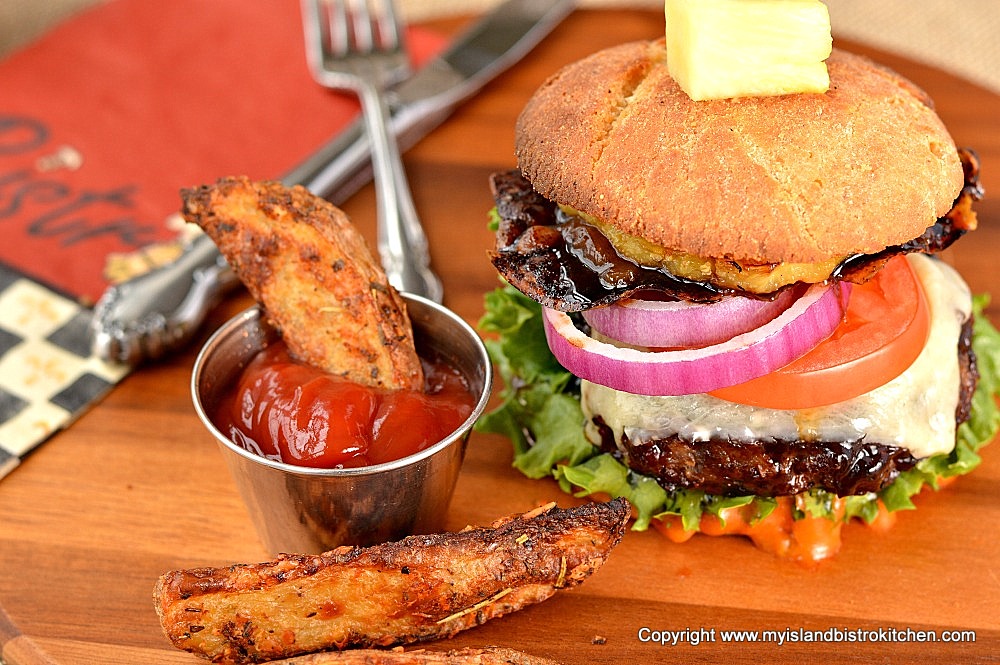
“The Bistro Burger”
Hamburger Rolls
There are so many options for hamburger rolls – too many to list. I prefer ones that are not too soft as they quickly become soggy when the burger ingredients are added to the point that they sometimes break down before the burger even reaches the table. The hamburger rolls used in the photos in this posting are gluten-free homemade rolls. Whatever variety of rolls are chosen, they should be size-appropriate in relation to the burger – i.e., the patty should not extend beyond the sides of the roll but neither should it look like a little meatball in the center of the roll.
Cooking the Burger
There are a multitude of ways in which burgers can be cooked – grilled, broiled, sautéed, barbequed, fried, baked or, sometimes, a combination thereof. I recommend cooking them to your personal preferred method. For the ones in the photos in this post, I seared the burgers over medium-high heat in a heavy-bottomed frypan for 2 minutes on each side, without touching them and never flattening them. Any time a burger is pressed down when it is being cooked, it squeezes out the juices in the burger, resulting in a dry, tough burger.
After the searing process is complete, I remove the burgers from the pan and brush both sides with the blueberry barbeque sauce. I then transfer the burgers to a greased wire rack suspended over a baking pan (to catch any drips) and finish cooking the burgers in a 375°F oven. Placing the burgers on a cooking rack allows the heat and air to circulate around the burgers resulting in more even cooking. I am a big fan of using meat thermometers and I do use one when cooking the burgers so they are cooked to my personal preference.
Side Dishes
The most common side dishes served with burgers are fries.
“The Bistro Burger” with Homemade Fries
However, salads with vinaigrettes also work well as side dishes to burgers.
“The Bistro Burger” with a Side Salad
Wine Pairing
While a robust red wine or a beer are often paired with a burger, I have chosen to pair this one with Villa Bianchi’s Verdicchio Dei Castelli Di Jesi (Italy 2014). Pairing a white wine with a beef burger works so long as the wine chosen has a high degree of acidity to counter the protein and fat of the burger (not that my burger is a “fatty” one!). With floral and citrus notes along with a hint of almond, this Verdicchio is fresh and crisp and I found it compliments this burger nicely.
A delectable burger that combines flavours complimentary to savory beef
Ingredients
The Bistro’s Burger Sauce
1/3 cup mayonnaise
2½ tbsp pure maple syrup
2 tbsp ketchup
2 tbsp rhubarb relish (for recipe, visit My Island Bistro Kitchen's "Recipe" page)
1½ tsp Dijon mustard
1 tsp garlic powder
1½ tbsp. sour cream
½ tsp onion salt
Salt and pepper, to taste
Yield: Apx. 1 cup
Frozen Flavor Burst Logs:
2 tbsp butter, softened at room temperature
2½ tsp mustard (Dijon or sweet)
2 tbsp finely grated Parmesan Cheese
1½ tsp dried parsley
Yield: Apx. 6 Logs
Burger Patties:
1 lb ground chuck (apx 80:20 ratio meat-to-fat content)
¼ cup finely grated Parmesan cheese
2 tbsp Blueberry Barbeque Sauce (for recipe, visit My Island Bistro Kitchen's "Recipe" page)
1½ tbsp maple syrup
½ tsp onion salt
¼ tsp garlic salt
2 tsp dry onion soup mix
Pinch cayenne pepper
Salt and pepper, to taste
1 egg, lightly beaten
¼ cup+ medium-ground bread crumbs
Yield: Apx. 6 patties
Cooking oil
Blueberry Barbeque Sauce
6 hamburger rolls of choice
The Bistro’s Burger Sauce
Rhubarb Relish
Cheddar Cheese Slices
Red Onion
Tomato
Bread and Butter Pickles (for recipe, visit My Island Bistro Kitchen's "Recipe" page)
6 thin slices Proscuitto
Maple Syrup and Brown Sugar (for candying the Proscuitto and pineapple)
Fresh pineapple, sliced between 1/8” and ¼” thick
Instructions
For the Burger Sauce, combine all ingredients in a jar and mix well. Store in refrigerator, for up to 7 days.
For the Frozen Flavour Burst logs, combine the butter, mustard, Parmesan Cheese, and parsley together. In teaspoon measures, portion out the mixture and shape into small logs or disk shapes. Place on plastic-lined tray and freeze for about 30 minutes.
Preheat oven to 375°F and panini grill to medium-high setting.
For burger patties: In large bowl, mix all burger ingredients just until combined, adding more bread crumbs if necessary to achieve desired consistency.
Measure the meat mixture into six (6) equal portions (apx. 4 oz each). With hands, gently and loosely clump together the meat and enclose one frozen flavour burst log into centre of each burger and surround it with meat mixture. Shape into patties that are apx. 1” thick (or to desired thickness to match size of hamburger roll). Refrigerate for one hour before cooking to allow patties to firm up and give flavours time to blend.
Heat 1½ - 2 tbsp cooking oil in frypan over medium high heat. Sear burgers, two minutes each side. Do not press down on the burgers. Remove from frypan and brush Blueberry Barbeque Sauce over both sides of burgers and transfer to greased wire rack suspended over baking pan (to catch any drips). Bake in pre-heated oven until desired doneness is reached, adding the cheese slices to the burgers for the last minute of baking.
To candy the prosciutto – mix together 2 tbsp maple syrup with 2 tbsp. brown sugar. Lightly brush each thin slice of prosciutto with the mixture, being careful not to tear the delicate meat. Place over greased wire rack suspended over baking pan. Bake in 375° oven for apx 7-10 minutes or until prosciutto is browned and starts to become crispy.
Fresh pineapple slices can be added to the burgers without glazing them. However, to glaze the pineapple slices, mix together 2 tbsp maple syrup with 2 tbsp brown sugar. Lightly brush mixture on both sides of each pineapple slice and place slices on panini grill (set at medium-high) and press grill top down on to pineapple slices and grill on medium-high for about 1-2 minutes, or until pineapple is heated and has grill marks.
To assemble burgers:
Select hamburger rolls of choice and split in half, horizontally. Butter each half and, if desired, toast on grill or in oven. Slather a generous helping of burger sauce on the bottom half of each roll. Add lettuce and then the burger. Add pickles, sliced tomato, onion, candied prosciutto, rhubarb relish, and maple glazed pineapple. Place the top halves of the rolls on each burger and garnish each with a chunk of fresh pineapple and a cherry tomato. Serve with your favorite side salad or home fries.
Burger Sauce – my own homemade recipe Blueberry Barbeque Sauce – my own sauce recipe made with blueberries from Murray’s U-pick in North Tryon, PEI Ground Beef Patty – ground chuck, sourced from KJL Meats in Charlottetown, PEI. I had the butcher grind the beef especially to my personal specification using a ratio of approximately 20% fat to 80% meat to give that juicy burger result. Cheese – COWS Extra-old Cheddar from COWS Creamery, North River, PEI Bread and Butter Pickles – my own homemade recipe made with cucumbers from Balderston’s Farm Stand, Stratford, PEI Tomatoes – organic, from the greenhouses of the Schurman Family Farm in Spring Valley, PEI Rhubarb Relish – my own homemade recipe made with rhubarb from my garden
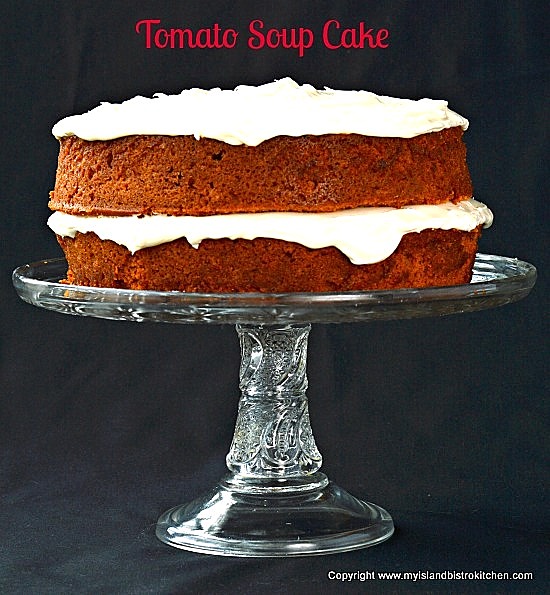
By now, if you are a regular follower of my food blog, you have probably detected that I like vintage foods and those that could be called comfort foods. I’d put this Tomato Soup Cake in that category. Continue reading Vintage Tomato Soup Layer Cake Recipe→
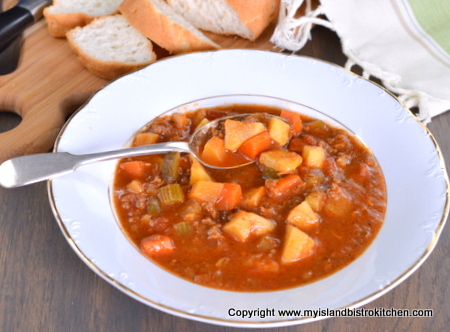
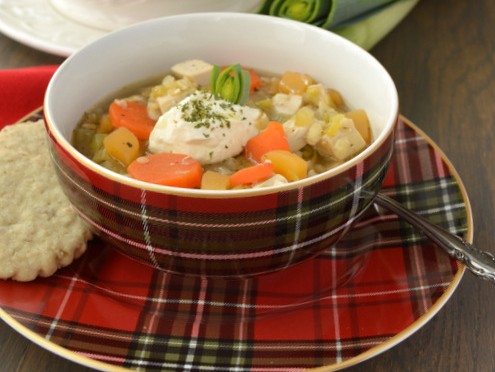
For many years, I have been making this hearty soup known as Goulash. It’s a well-filled soup and is a very filling one! Good any time of the year, this soup is especially tummy-warming on cold days. Continue reading Rich and Hearty Goulash Soup Recipe→
I make a lot of muffins and freeze them to take to work for coffeebreak snacks. I am always testing out flavour combinations for muffins. This recipe for Zucchini Granola Muffins combines grated zucchini, applesauce, granola, orange rind, and spices to make tasty muffins. Adding some granola to the muffin tops makes them colorful and interesting. Continue reading Best Zucchini Granola Muffins Recipe→
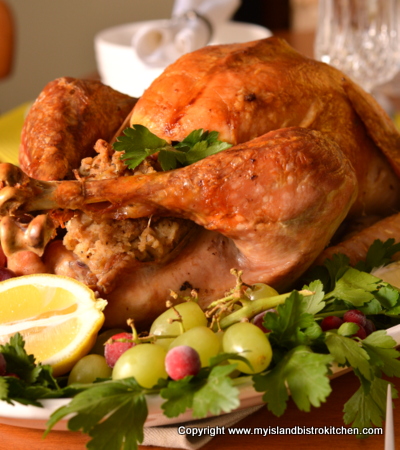
There is nothing like the scent of a turkey roasting in the oven! I love a roast turkey dinner with all the trimmings and I especially love the bread stuffing or, you may know it as “dressing”. The theory is that, if it goes inside the turkey cavity, it’s called “stuffing” but, if it is cooked separately (as in a casserole or loaf pan), then it’s called “dressing”. Regardless what it’s called, it just would not be a roast turkey dinner without this wonderful savory side dish. Continue reading Bread Stuffing/Dressing Recipe for Roast Turkey/Chicken→
Deviled Eggs are so tasty and easy to make. They are perfect for potlucks, picnics, snacks, and even appetizers or hors d’oeuvres. And, of course, they are often found at many Easter gatherings. To top it off, Deviled Eggs are showy, too. I have never taken a plate of these to any function and had any left over! Continue reading The Bistro’s Best Deviled Eggs Recipe→
I am not sure which country can, in fact, lay claim to being the originator of Potato Leek Soup. Some say it is of Welsh origin while others give Ireland credit for this tasty soup. If you have ever eaten Vichyssoise, a cold version of Potato Leek Soup, you may attribute its origins to France due to its association with Vichy. Then, of course, there is Tattie and Leekie soup from Scotland. Continue reading PEI Potato Leek Soup Recipe→
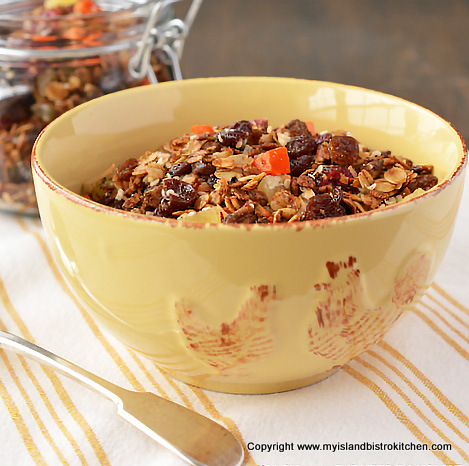
This granola recipe features a tasty mixture of toasted rolled oats, coconut, and dried fruits and berries. Notably missing in this recipe are any nuts or whole seeds which are often found in granola. This is intentional. For anyone who, for any reason, cannot consume nuts or whole seeds, this Nut-free Granola is especially for you! Continue reading The Bistro’s Great Nut-free Granola Recipe→
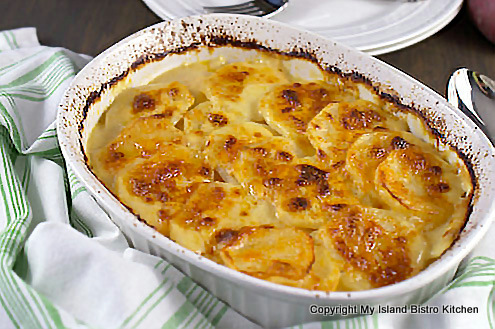
One of my very favorite ways to present potatoes is in the form of Scalloped Potatoes. A mixture of potatoes, onions, and milk along with a bit of seasoning and grated cheese make this a great comfort food dish any time of the year. My mother often made scalloped potatoes sometime on the weekend and made enough that we’d have leftovers for dinner a day or two later. To this day, I still believe that this is one dish that is better a day or two after it is made as the flavours really settle in. Continue reading Best Creamy Scalloped Potatoes Recipe→
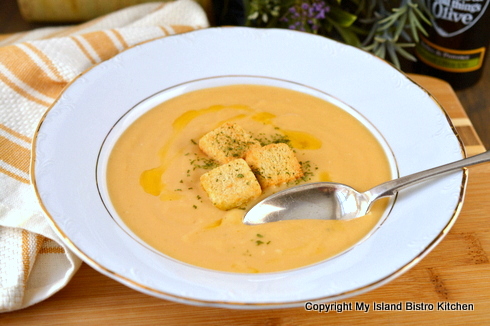
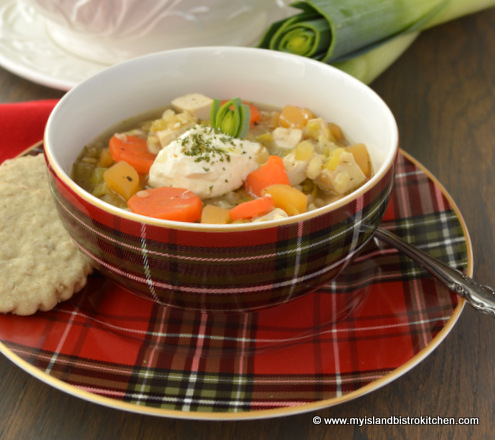
This Creamy Winter Root Vegetable Soup is perfect for those cold winter days when the body and mind crave comfort food.
I make a lot of soups and freeze many of them in single servings so that they are quick and easy to pull out for lunchtime or, for those who are in the workforce, to place in the lunch bag on weekday mornings. The soups arehealthy and nutritious, not to mention tasty. I like to have a variety of different soups on hand that includes those that are broth-based and hearty vegetable along with those that are cream-based or puréed.
The recipe I am sharing today is a new recipe creation that is a cream-based vegetable soup. It’s the perfect soup for winter because it uses what we often refer to as winter, or root, vegetables. These are ones that are traditionally harvested late in the fall and they store and keep well over several months – think of potatoes, rutabaga, carrots, and parsnip, for example.
This is an easy soup to make and it blends a number of wonderful flavours that include both celery and leek. It’s very lightly spiced and is a silky smooth soup that I would put in the comfort food category. The great thing about this soup is that none of the nutrients from any of the vegetables is lost. The vegetables are all cooked in the chicken broth and then the whole mixture is puréed so all of the goodness of the vegetables is maintained.
I find recipes that simply call for ingredients in quantities like a small parsnip or 2 medium-sized potatoes or 1 large carrot are not very helpful, particularly for less experienced cooks. I have, therefore, tested out this recipe and carefully measured the weights of vegetables to be used for best success. One of the most used (and most useful) tools in my kitchen is my digital scale and I use it all the time. I highly recommend that every cook invest in a good quality digital scale.
I miss my herb garden in winter. However, dried herbs work really well in this winter soup. Because, for presentation purposes, I don’t want any specks of herbs to appear in this soup, I make a small herb packet out of cheesecloth to contain the herbs while the soup cooks. The cheesecloth has a sufficiently open weave that the soup mixture is infused with the flavour of the herbs as it cooks. It’s very easy to remove and discard the herb packet before the soup is puréed.
Different vegetables take different cooking times so this soup starts with those that take the longest – rutabaga, carrots, parsnip, and celery. Give them about 15 minutes headstart before adding the leek and let it cook for 10 minutes then add the potatoes which take the least amount of time to cook.
I make good use of my immersion blender for cream and purée soup making. However, you can certainly use either a blender or a food processor to purée the vegetables. I generally allow the soup to cool for 30-40 minutes before using my immersion blender and, sometimes, if I am in a hurry, I put the soup pot in a sink full of cold water for a few minutes to speed up the cooling process. I know some people do use their immersion blenders in really hot soup. I recommend you check your instruction manual for your immersion blender to see what it says about using the blender in hot liquids.
I recommend that whole milk be used in this recipe (or, alternatively, you could use a milk-cream blend for a richer soup). I have tested freezing this soup and find it freezes well for me; however, it is very important that at least whole (not skim, or partly skimmed) milk be used if you intend to freeze any of the soup. Using a fat free or low fat milk will result in the soup breaking down when frozen and it just does not hold its structure when it is reheated. I know that some people frown on freezing puréed and cream soups but I have been freezing them with great success for many, many years.
When making the roux (the butter and flour) for the cream base, make sure you stir the roux while it is blending to prevent it from scorching. Add the milk slowly to the roux, whisking it constantly to prevent lumps from forming. It’s quite unappealing to have lumps in what is supposed to be a silky smooth cream soup.
Adding some shredded cheese to this soup makes a richer soup and certainly enhances the flavour. While a basic cheddar cheese could certainly be used, my preference is to use a shredded cheese blend such as mozzarella, provolone, and parmesan.
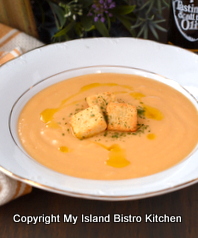
Cream of Winter Root Vegetable Soup
Cream of Winter Root Vegetable Soup
Ingredients:
3 cups chicken stock
1 bay leaf
½ tsp dried basil
¼ tsp. dried fennel
1/8 tsp dried marjoram
½ tsp dried parsley
1 clove garlic, minced
5 oz rutabaga, diced
5 oz carrots, sliced
2 oz parsnip, thinly sliced
2 oz celery, sliced
7½ oz leek, white and light green parts only, sliced into ¼“ slices
7 oz potato, diced
2 tbsp butter
2 tbsp flour
1½ cups whole milk
Salt and pepper to taste
¾ cup shredded cheese blend (e.g., mozzarella, provolone, and parmesan)
Method:
Bring chicken stock to a boil in medium-sized soup pot.
Cut small 4”-5” square of finely woven cheese cloth. Make the herb packet by placing the bay leaf, basil, fennel, marjoram, and parsley in the center of the cheese cloth. Gather up ends of cheesecloth, tie tightly with kitchen string, and add the herb packet to the chicken stock along with the garlic, rutabaga, carrots, parsnip, and celery. Bring to a boil then reduce heat to medium low and cook vegetables for 15 minutes.
Add leek and cook 10 minutes then add potatoes and cook vegetables 15 minutes or until vegetables are soft.
Remove from heat and discard the herb packet. Purée mixture until smooth using an immersion blender or food processor.
Melt the butter in separate medium-sized soup pot over medium-low heat. Stir in the flour to make a roux, stirring constantly to blend the two ingredients and to prevent scorching. Gradually whisk in the milk until mixture is smooth. Increase heat to medium and continue to whisk milk mixture until it is thickened to desired consistency then add the puréed vegetable mixture. Stir mixture until heated then add the cheese, stirring until cheese is melted and blended into soup. Add salt and pepper, to taste.
Ladle into soup bowls and garnish with croutons, a sprinkle of parsley, and a drizzle of a good quality finishing olive oil, if desired. Enjoy!
Yield:Apx. 5-6 servings
—————————————————————————-
If you have made this recipe and enjoyed it and/or wish to share it with your friends and family, please do so on social media but be sure to share the direct link to this posting from my website.
Connect with My Island Bistro Kitchen on Social Media
Follow “the Bistro” on Pinterest at https://www.pinterest.ca/peibistro/ and pin the Pinterest-ready photo found at the end of this post to your favorite Pinterest boards.
7½ oz leek, white and light green parts only, sliced into ¼“ slices
7 oz potato, diced
2 tbsp butter
2 tbsp flour
1½ cups whole milk
Salt and pepper to taste
¾ cup shredded cheese blend (e.g., mozzarella, provolone, and parmesan)
Instructions
Bring chicken stock to a boil in medium-sized soup pot.
Cut small 4”-5” square of finely woven cheese cloth. Make the herb packet by placing the bay leaf, basil, fennel, marjoram, and parsley in the center of the cheese cloth. Gather up ends of cheesecloth, tie tightly with kitchen string, and add to the chicken stock along with the garlic, rutabaga, carrots, parsnip, and celery. Bring to a boil then reduce heat to medium low and cook vegetables for 15 minutes.
Add leek and cook 10 minutes then add potatoes and cook vegetables 15 minutes or until vegetables are soft.Remove from heat and discard the herb packet.
Purée mixture until smooth using an immersion blender or food processor.
Melt the butter in separate medium-sized soup pot over medium-low heat. Stir in the flour to make a roux, stirring constantly to blend the two ingredients and to prevent scorching. Gradually whisk in the milk until mixture is smooth. Increase heat to medium and continue to whisk milk mixture until it is thickened to desired consistency then add the puréed vegetable mixture. Stir mixture until heated then add the cheese, stirring until cheese is melted and blended into soup.
Add salt and pepper, to taste.
Ladle into soup bowls and garnish with croutons, a sprinkle of parsley, and a drizzle of a good quality finishing olive oil, if desired. Enjoy!
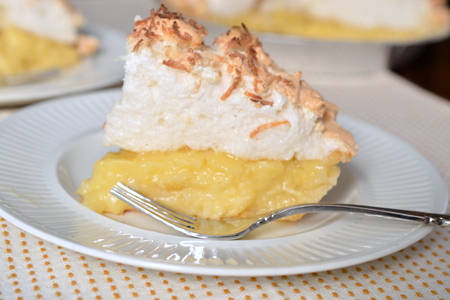
Funny how certain foods will evoke great memories. When I was a small child, our family often went to a tiny local restaurant in North Tryon, PEI, on Sunday evenings for dinner. Simmons’ Restaurant was built and run by Jean and Harold Simmons and they served up really good traditional home-cooked meals. One of the desserts I most fondly remember from their restaurant was coconut cream pie with mile-high meringue. Every time I have coconut cream pie, I remember Sunday dinners at the Simmons’ restaurant. Continue reading Coconut Cream Pie→
Today marks my 4th Blogiversary and I’m celebrating with my newly-developed recipe for Dreamy Hawaiian Cupcakes! These are perfect for any event, any time of the year but, with their pink swirl centers and mile high frosting, I think they would be very suitable for Valentines Day. So, they’re doing double duty as they celebrate my 4th Blogiversary and act as a catalyst for Valentine’s baking.
Dreamy Hawaiian Cupcake
These cupcakes deliver a flavor punch with coconut milk, amaretto, shredded coconut, and maraschino cherries. That’s a flavor combo that’s hard to beat!
Dreamy Hawaiian Cupcakes
In addition to the wonderful flavor, the coconut milk makes these cupcakes lovely and moist. They also have a fine tender crumb which makes them very velvety when you sink your teeth into them.
Here are my tips and recommendations for making cupcakes:
Use the best quality ingredients available. Don’t substitute margarine for the butter or artificial vanilla for pure vanilla in this recipe. Using lesser quality ingredients will affect the quality and taste of the cupcakes.
Measure ingredients accurately – that means, for example, spooning the flour into the measuring cup and then leveling it off with the flat side of a knife, without stirring the flour around in the cup or tapping it to shake the flour down into the cup.
Use the stated size of eggs – this matters as extra-large eggs (which this recipe calls for) yield more liquid than do large eggs. If you use smaller eggs than the recipe calls for, it will yield a drier cupcake.
Resist the urge to add increased amounts of ingredients such as more coconut or cherries than the recipe states as the liquid content in this recipe has been calculated to moisten the dry ingredients accurately. If more dry ingredients, such as extra coconut, are added without increasing the liquid content, the cupcakes will be dry.
All the ingredients should be at room temperature as this will help them to blend together better.
The eggs should be at room temperature for about 20 minutes or so before using them in this recipe.
Soften the butter at room temperature. Never melt the butter in the microwave to soften it as it will change the properties of the butter.
Add the dry and liquid ingredients alternately in three parts, always starting and ending with the dry ingredients.
Don’t overbeat the batter as this can make a tough crumb and a heavy, dense cupcake as opposed to a light-textured cupcake. Beat the batter on low speed and just until all the ingredients are incorporated.
Grease the top of the cupcake pan as, even if paper cupcake liners are used, there will always be at least one rogue cupcake that will rise up and stick to the top of the pan, making it difficult to remove the cupcake without damaging it.
Make sure your oven temperature is accurate and that the oven has been preheated. If the oven temperature is too high, it will dry out the cupcakes; if it is too low, they won’t rise and bake properly.
It’s also important not to overbake the cupcakes as that will make them dry. I recommend checking them at about the 14 or 15-minute baking point by either a light finger touch to see if the top of the cupcake is set and if it bounces back from the touch. Alternatively, use a cake tester to insert into the center of a cupcake. If it comes out clean, the cupcakes are baked.
Let the cupcakes rest in the cupcake pan for 3-4 minutes to allow them to set then gently remove them from the pan and transfer them to a wire rack to cool completely before decorating.
Dreamy Hawaiian Cupcakes
The frosting consists of two flavors to complement the cupcake flavor – coconut and cherry. Combined, these two recipes will give you ample to frost 12 cupcakes with mile high swirled frosting as shown in the photos. If, however, that’s just a tad too much frosting for your taste, simply make just one of the frosting recipes.
Dreamy Hawaiian Cupcake
I used Wilton decorating tip 2D for the swirl frosting and the two colors were achieved by filling one side of the decorating bag with white frosting and the other side with the cherry frosting.
Dreamy Hawaiian Cupcakes
Dreamy Hawaiian Cupcakes
Ingredients:
1½ cups all-purpose flour
1½ tsp baking powder
¼ tsp baking soda
½ tsp salt
½ cup butter, room temperature
1 cup granulated sugar
2 extra-large eggs
1 tsp vanilla
1 tbsp Amaretto
½ cup coconut milk
1/3 cup shredded coconut
¼ cup chopped maraschino cherries, well drained and patted dry
Pink food coloring
Method:
Preheat oven to 350°. Grease 12 muffin cups or, alternatively, line each cup with paper cupcake liners.
In medium-sized bowl, combine four dry ingredients. Set aside.
Fit mixer with paddle attachment. Cream butter and sugar until fluffy. Add the eggs, one at a time, beating well after each addition. Add the vanilla and Amaretto.
Add the dry ingredients in three parts alternately with the coconut milk, starting and ending with the dry ingredients.
Remove ½ cup of the batter and add the food coloring to it, just enough to tint the batter pink.
Add the coconut and chopped cherries to the white batter.
Fill each muffin cup about 1/3 full with the white coconut batter. Divide the ½ cup of pink batter between the 12 cupcakes.
Divide the remaining white batter evenly between the 12 cupcakes.Use the tip of a knife to gently swirl the pink batter into the white in each cupcake.
Bake in center of oven for 15-19 minutes or until cupcakes spring back to a light touch or a cake tester inserted into center of a cupcake comes out clean. Cool cupcakes in pan for 3-4 minutes then carefully transfer them to wire rack to cool completely.
Frost and decorate cupcakes as desired. The two frosting recipes provided with this recipe will, combined, easily frost the 12 cupcakes with the amount of swirled frosting shown in the photographs that accompany the cupcake recipe. If less frosting is desired, make only one of the recipes.
Yield:12 cupcakes
Dreamy Hawaiian Cupcakes
Coconut Frosting
¼ cup butter
¼ cup shortening
1 tbsp coconut milk
¼ tsp almond flavouring
Apx. 2 cups confectioners (powdered) sugar, sifted
Sprinkle of salt (optional)
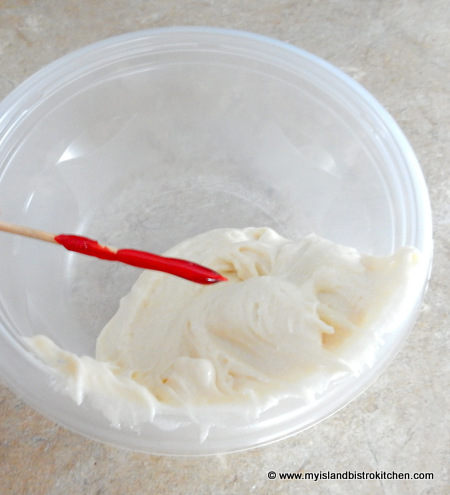
Beat butter and shortening together. Add coconut milk and almond flavouring. Blend in enough sifted confectioners sugar for desired spreading consistency.
Cherry Frosting
¼ cup butter
¼ cup shortening
1½ tbsp cherry juice
¼ tsp almond flavouring
Apx. 2 cups confectioners (powdered) sugar, sifted
Sprinkle of salt (optional)
Beat butter and shortening together. Add cherry juice and almond flavouring. Blend in enough confectioners sugar for desired spreading consistency.
To achieve dual-colored swirl frosting, fit cake decorating bag with Wilton 2D decorating tip. Fill one side of decorating bag with the white frosting and the other half with the pink frosting. Pipe onto cupcake in swirl motion.
—————————————————————————-
Thank you for visiting “the Bistro” today. If you enjoyed this posting and recipe, please share it on your social media websites.
Connect with “the Bistro” through the following social media:
Preheat oven to 350°. Grease 12 muffin cups or, alternatively, line each cup with paper cupcake liners.
In medium-sized bowl, combine four dry ingredients. Set aside.
Fit mixer with paddle attachment. Cream butter and sugar until fluffy. Add the eggs, one at a time, beating well after each addition. Add the vanilla and Amaretto.
Add the dry ingredients in three parts alternately with the coconut milk, starting and ending with the dry ingredients.
Remove ½ cup of the batter and add the food coloring to it, just enough to tint the batter pink.
Add the coconut and chopped cherries to the white batter.
Fill each muffin cup about 1/3 full with the white coconut batter. Divide the ½ cup of pink batter between the 12 cupcakes. Divide the remaining white batter evenly between the 12 cupcakes. Use the tip of a knife to gently swirl the pink batter into the white in each cupcake.
Bake in center of oven for 15-19 minutes or until cupcakes spring back to a light touch or a cake tester inserted into center of a cupcake comes out clean. Cool cupcakes in pan for 3-4 minutes then carefully transfer them to wire rack to cool completely.
Frost and decorate cupcakes as desired. The two frosting recipes provided with this recipe will, combined, easily frost the 12 cupcakes with lots of swirled frosting. If less frosting is desired, make only one of the recipes.
Coconut Frosting: Beat butter and shortening together. Add coconut milk and almond flavouring. Blend in enough sifted confectioners sugar for desired spreading consistency.
Cherry Frosting: Beat butter and shortening together. Add cherry juice and almond flavouring. Blend in enough confectioners sugar for desired spreading consistency.
To achieve dual-colored swirl frosting, fit cake decorating bag with Wilton 2D decorating tip. Fill one side of decorating bag with the white frosting and the other half with the pink frosting. Pipe onto cupcake in swirl motion.
There are so many ways to make rice pudding. Some use the stove-top method, others (like me) use the oven. Some bake the rice pudding directly in the oven but I prefer the hot water bath method for reasons explained below.
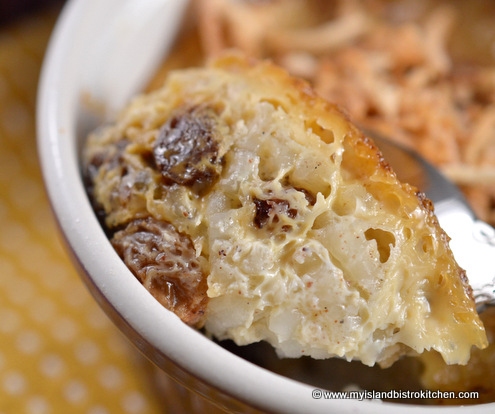
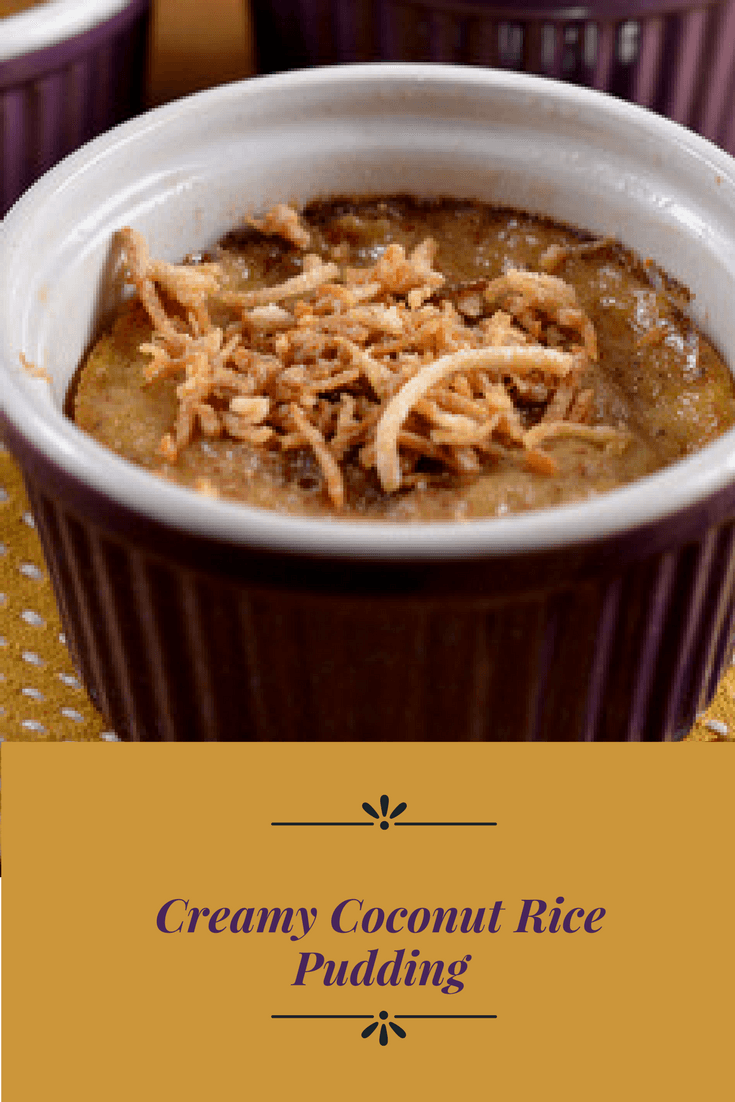
For rice pudding, I prefer a short grain rice such as Arborio which is what I have used in this pudding. Arborio rice (often used in risotto) is named after the Italian town where it is grown. What makes it my preference for rice pudding is that, when cooked, it has lovely round pearl-like grains that hold their shape and don’t turn to “mush”. This rice also has a high starch level and that helps to self-thicken the pudding as it bakes and also contributes to its creamy texture.
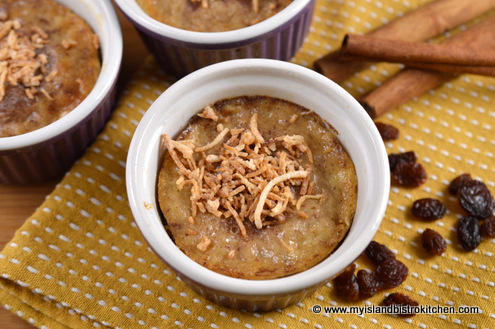
Creamy Coconut Rice Pudding
This pudding is true comfort food. The addition of coconut milk gives the pudding a subtle hint of coconut but not so strong that it detracts from the basic flavour we expect to find in an old-fashioned rice pudding. I think the texture of the coconut milk also helps to keep the custard creamy.
I have used a maple syrup that was infused with cinnamon, nutmeg, and cloves. This does add a bit of discrete flavor to the pudding but, certainly, plain maple syrup would work just fine. I have added a blend of three spices – cardamon, nutmeg, and cinnamon – but again, not in large quantities because I don’t want the pudding to be overly spiced. I just want it to be delicately flavored.
Raisins, a traditional addition to rice puddings, do need to be “plumped” before adding them to the pudding as, otherwise, they don’t become very soft in the custard. It’s not very pleasing to the palette to bite into hard, dry raisins amidst a soft creamy custard. For this recipe, I have soaked the 1/3 cup of raisins in about 1 tablespoon of Amaretto by placing these two ingredients in a small covered dish for at least 45 minutes. Shaking the dish periodically helps to ensure that all raisins are coated with the liqueur. In fact, you could leave them soaking for a couple of hours (the raisins will just be extra happy if you do so!).
Rice pudding custard is actually quite delicate and, for greatest success, it is best if the egg proteins are protected from direct hot heat and from fast baking. Because the pudding is made with an egg-milk custard, it is therefore, in my opinion, best if it is baked slowly in a hot water bath. This is simply a method of baking whereby the pudding dish(es) are placed inside a larger pan into which hot water is poured up to about half way on the pudding dishes or even up to the level of the custard in the ramekins. However, the water should not be so deep that the pudding dishes start to float. They need to sit stable in the water as the pudding bakes.
The benefits of baking this pudding in a hot water bath are several. First, the hot water adds steam and moisture to the oven which will prevent the puddings from drying out and cracking on the top as they bake. Second, any custard mixture of milk and eggs has the potential to curdle – that’s when the milk-egg mixture separates from the solids (in this case, the rice and raisins). Because it is a slower method of baking and the hot water provides an even heat source, the hot water bath method helps to prevent the risk of curdled custard. The hot water also helps the custard to bake evenly, both its outside edges as well as its center. Without the hot water baking method, the custard could bake quicker on the outside edges of the pudding than in the center and part of the pudding would be dried out. Lastly, the slow baking combined with an oven of moist heat will help to keep the pudding creamy in texture as opposed to “rubbery”.
I place the 9″x13″x2″ pan with the ramekins in it on the oven shelf and just ever-so-slightly pull the shelf out, just enough that I can safely pour the hot water into the larger baking pan without getting a burn. I find this is a safer method than filling the pan with the hot water and transporting it to the oven. The water needs to be kept at the same level during the baking process so, since it naturally evaporates, you may need to add more hot water as the pudding bakes.
Bake the puddings for approximately 1 hour or until pudding top edges are set, centers are still a little “jiggly”, and the puddings are golden-colored. A knife inserted in or near the centre of the pudding should come out clean if the pudding is done. Don’t overbake the pudding as it will dry out and be less creamy. Remove ramekins from water bath and let them stand on a wire rack to set for approximately 10 minutes before serving.
Adding toasted coconut to the top of this pudding is optional but the crunchiness and flavour are an added touch. Toasting coconut is simple. The coconut gets spread thinly on a baking sheet and baked in a 350° F oven for about 8-9 minutes. It is important to watch that the coconut does not burn and it should be turned once or twice during the toasting process to ensure even color.
Creamy Coconut Rice Pudding
Creamy Coconut Rice Pudding
Ingredients:
1¼ cups cooked Arborio rice
1/3 cup raisins, soaked in 1 tbsp Amaretto
½ cup coconut milk
¾ cup whole milk
1 extra-large egg, lightly beaten
2 tbsp granulated sugar
2 tbsp maple syrup
¼ tsp salt
½ tsp vanilla
1/8 tsp cardamom
1/8 tsp nutmeg
¼ tsp cinnamon
¼ cup shredded coconut (sweetened or unsweetened), toasted (optional)
Method:
In small covered dish, soak raisins in Amaretto for at least 45 minutes to plump them, shaking or stirring occasionally to ensure all raisins are coated with the liqueur.
In large bowl, whisk together the coconut and whole milk, egg, sugar, maple syrup, salt, vanilla, and spices. Add rice and raisins and stir gently. Divide mixture between 6 prepared ramekins and place in 9”x13”x2” pan. Pour hot water into pan up to half-way on the sides of the ramekins or even up to about the level of the custard in the dishes. However, make sure the ramekins are not floating in the water.
Bake for approximately 1 hour or until pudding top edges are set, centers are still a little “jiggly” and puddings are golden-colored. A knife inserted in or near the centre of the pudding should come out clean if the pudding is done. Remove ramekins from water bath and let stand on wire rack to set for approximately 10 minutes before serving. To serve, top each with toasted coconut, if desired.
[To toast coconut: Spread coconut on baking sheet and bake in 350° F oven for 8-9 minutes, stirring once or twice, until coconut is lightly tanned in color.]
Yield: 6 servings.
—————————————————————————-
Thank you for visiting “the Bistro” today. If you enjoyed this posting and recipe, please share it on your social media websites.
Connect with “the Bistro” through the following social media:
A delicate coconut-flavored creamy baked rice pudding with subtle spice flavoring
Ingredients
1¼ cups cooked Arborio rice
1/3 cup raisins, soaked in 1 tbsp Amaretto
½ cup coconut milk
¾ cup whole milk
1 extra-large egg, lightly beaten
2 tbsp granulated sugar
2 tbsp maple syrup
¼ tsp salt
½ tsp vanilla
1/8 tsp cardamom
1/8 tsp nutmeg
¼ tsp cinnamon
¼ cup shredded coconut (sweetened or unsweetened), toasted (optional)
Instructions
In small covered dish, soak raisins in Amaretto for at least 45 minutes to plump them, shaking or stirring occasionally to ensure all raisins are coated with the liqueur.
In large bowl, whisk together the coconut and whole milk, egg, sugar, maple syrup, salt, vanilla, and spices. Add rice and raisins and stir gently. Divide mixture between 6 prepared ramekins and place in 9”x13”x2” pan. Pour hot water into pan up to half-way on the sides of the ramekins or even up to about the level of the custard in the dishes. However, make sure the ramekins are not floating in the water.
Bake for approximately 1 hour or until pudding top edges are set, centers are still a little “jiggly” and puddings are golden-colored. A knife inserted in or near the centre of the pudding should come out clean if the pudding is done. Remove ramekins from water bath and let stand on wire rack to set for approximately 10 minutes before serving. To serve, top each with toasted coconut, if desired.
[To toast coconut: Spread coconut on baking sheet and bake in 350°F oven for 8-9 minutes, stirring once or twice, until coconut is lightly tanned in color.]
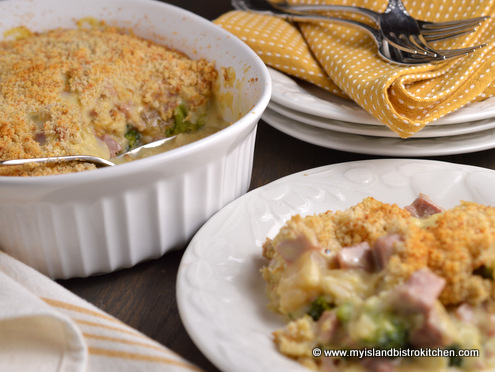
I cooked a boiled dinner with ham that I got on a great deal so am fortunate that the ham has a lot of meat on it. You can get my method for making a boiled ham dinner here. After sandwiches and leftovers for a night or two, it was time to find other uses for the rest of the ham and ones that would extend the use of the meat into more servings than simply slicing and plating it. I am not one to throw out food so I always find ways to use up leftovers.
Hawaiian Fiesta Casserole
So, I made what I call a Hawaiian Fiesta Casserole aptly named because, in addition to the ham, it has pineapple, rice, and bright green broccoli florets. This casserole is not difficult to make but it does take a bit of time, planning, and coordination since the rice and broccoli have to be pre-cooked and the pineapple fried (yes, fried). Continue reading Hawaiian Fiesta Casserole→
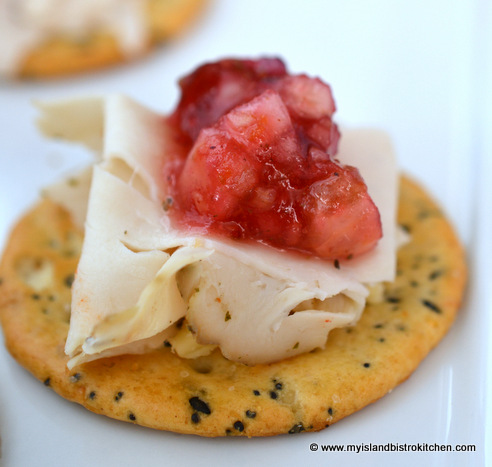
By now, if you are a regular follower of this food blog, you have probably detected that I am a big fan of cranberries! I am always developing recipes using these tasty morsels. Continue reading Chunky Cranberry Salsa→
(Mostly) PEI and Maritime Food – Good Food for a Good Life!