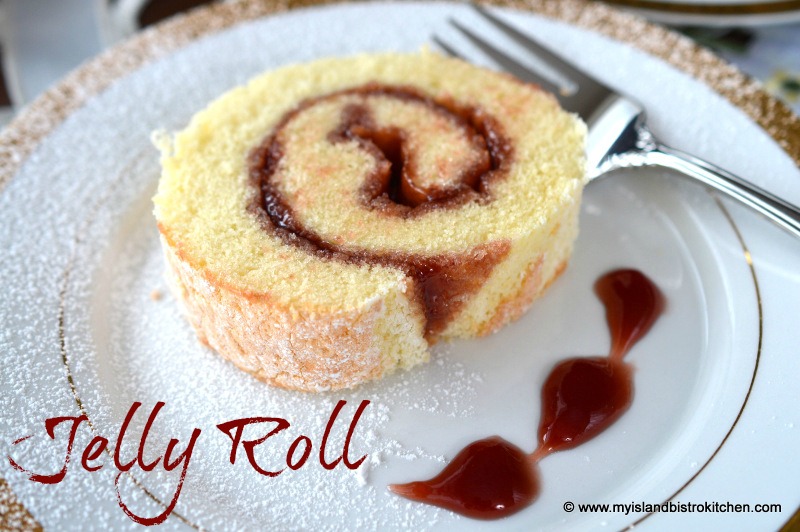
I grew up with jelly rolls being regularly made in my home. They’re a quick dessert, best eaten on the day they are made. This is because a jelly roll is really a sponge-type cake and, when the jam or jelly is spread on it, it tends to seep into the cake and after several hours can become somewhat soggy. Jelly rolls don’t take a lot of ingredients. So long as you have basic baking supplies and some jam or jelly, you can make a jelly roll.
Here are my tips for making jelly rolls:
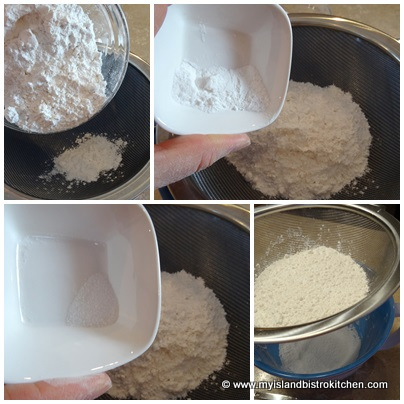
1. Use cake and pastry flour as it gives a finer texture than all-purpose flour.
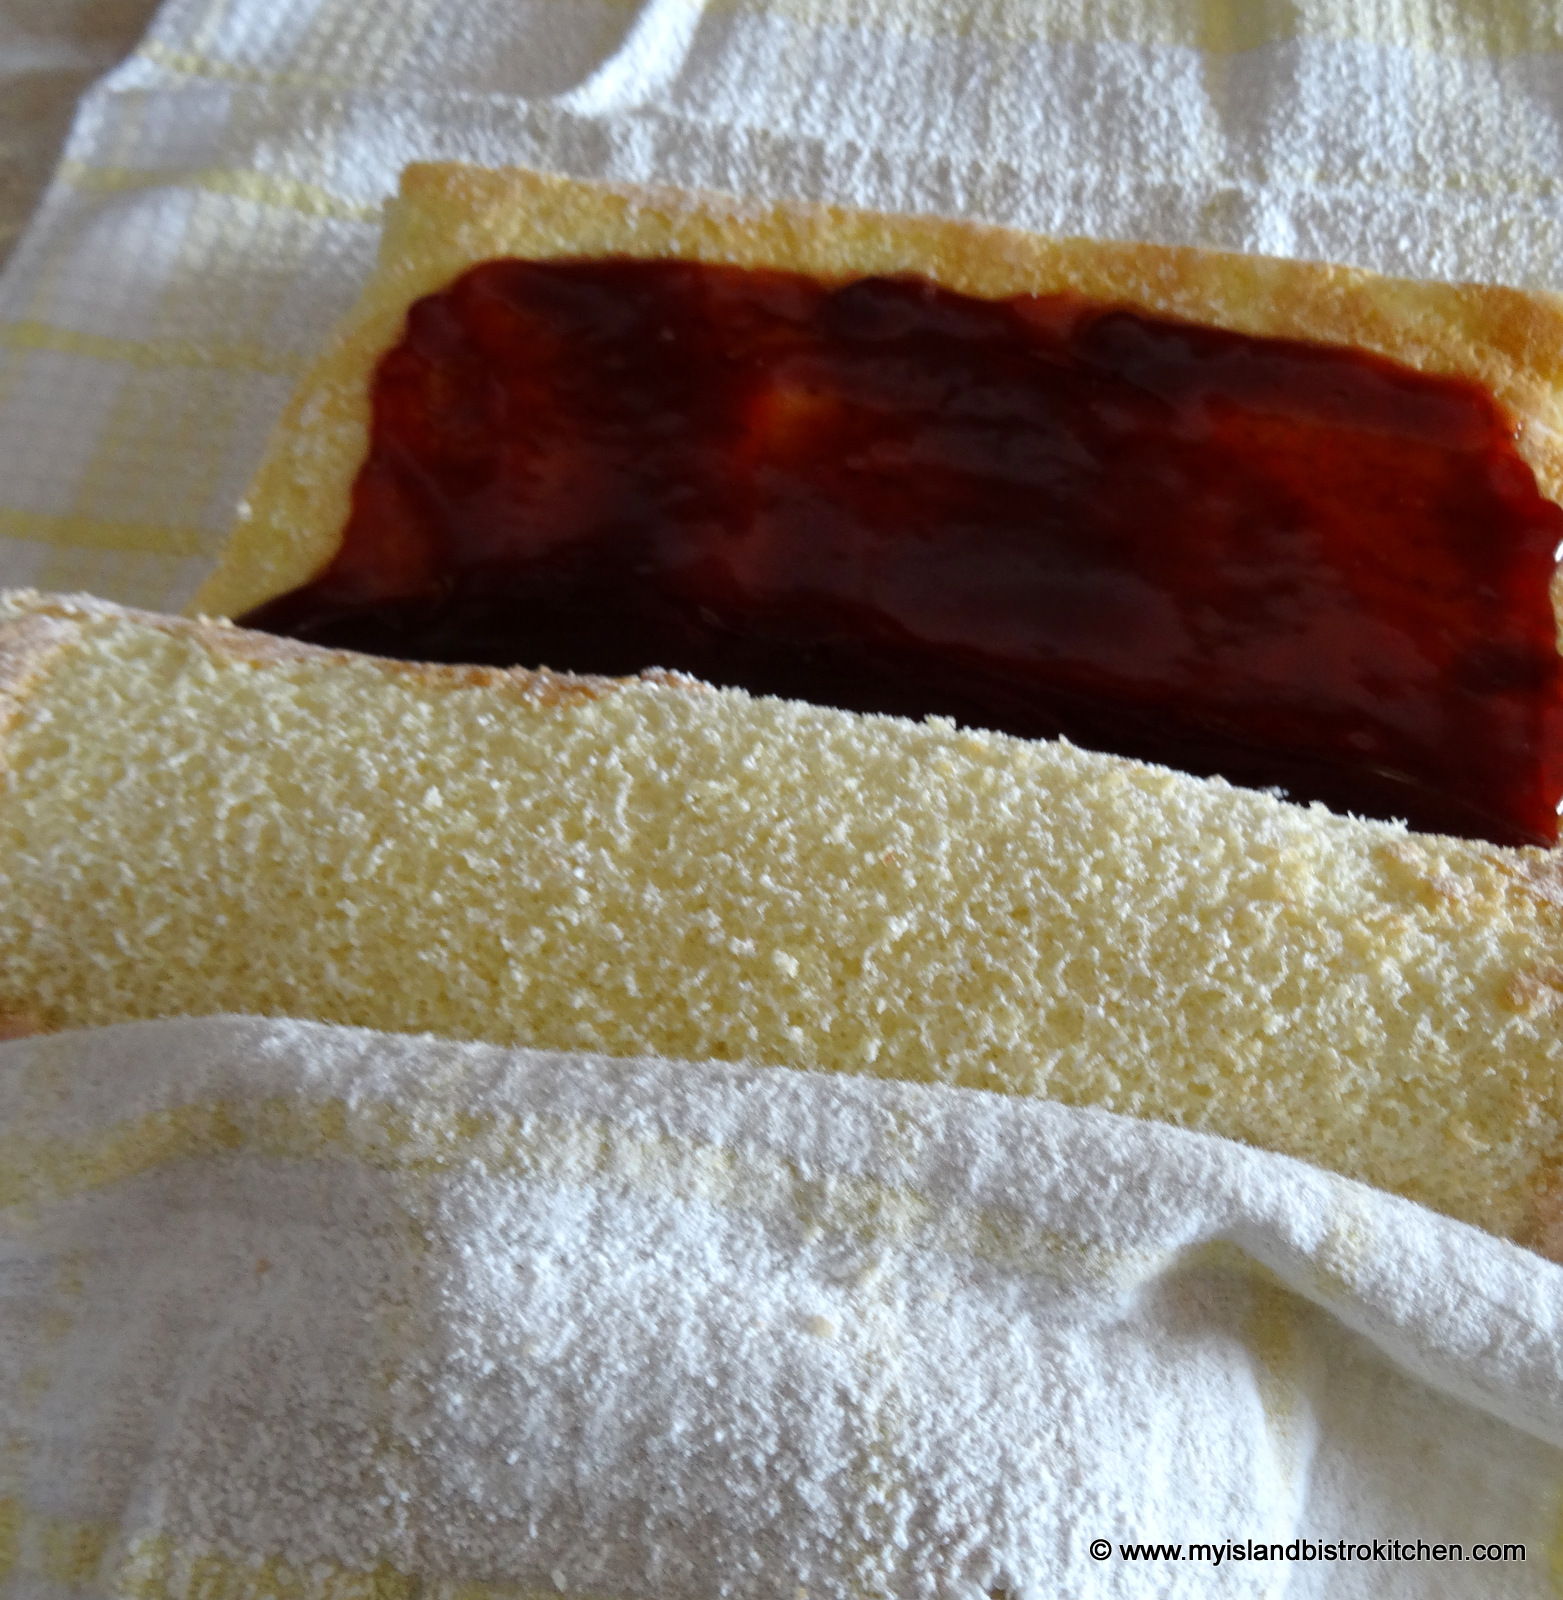
2. Don’t let the cake cool for too long before spreading it with jam or jelly as it may crack as you try to roll the jelly roll up. About 15-20 minutes cooling time is about right. If you put the jam or jelly on the cake when it is still too warm, though, it will cause it to seep into the cake too quickly, creating a soggy jelly roll.
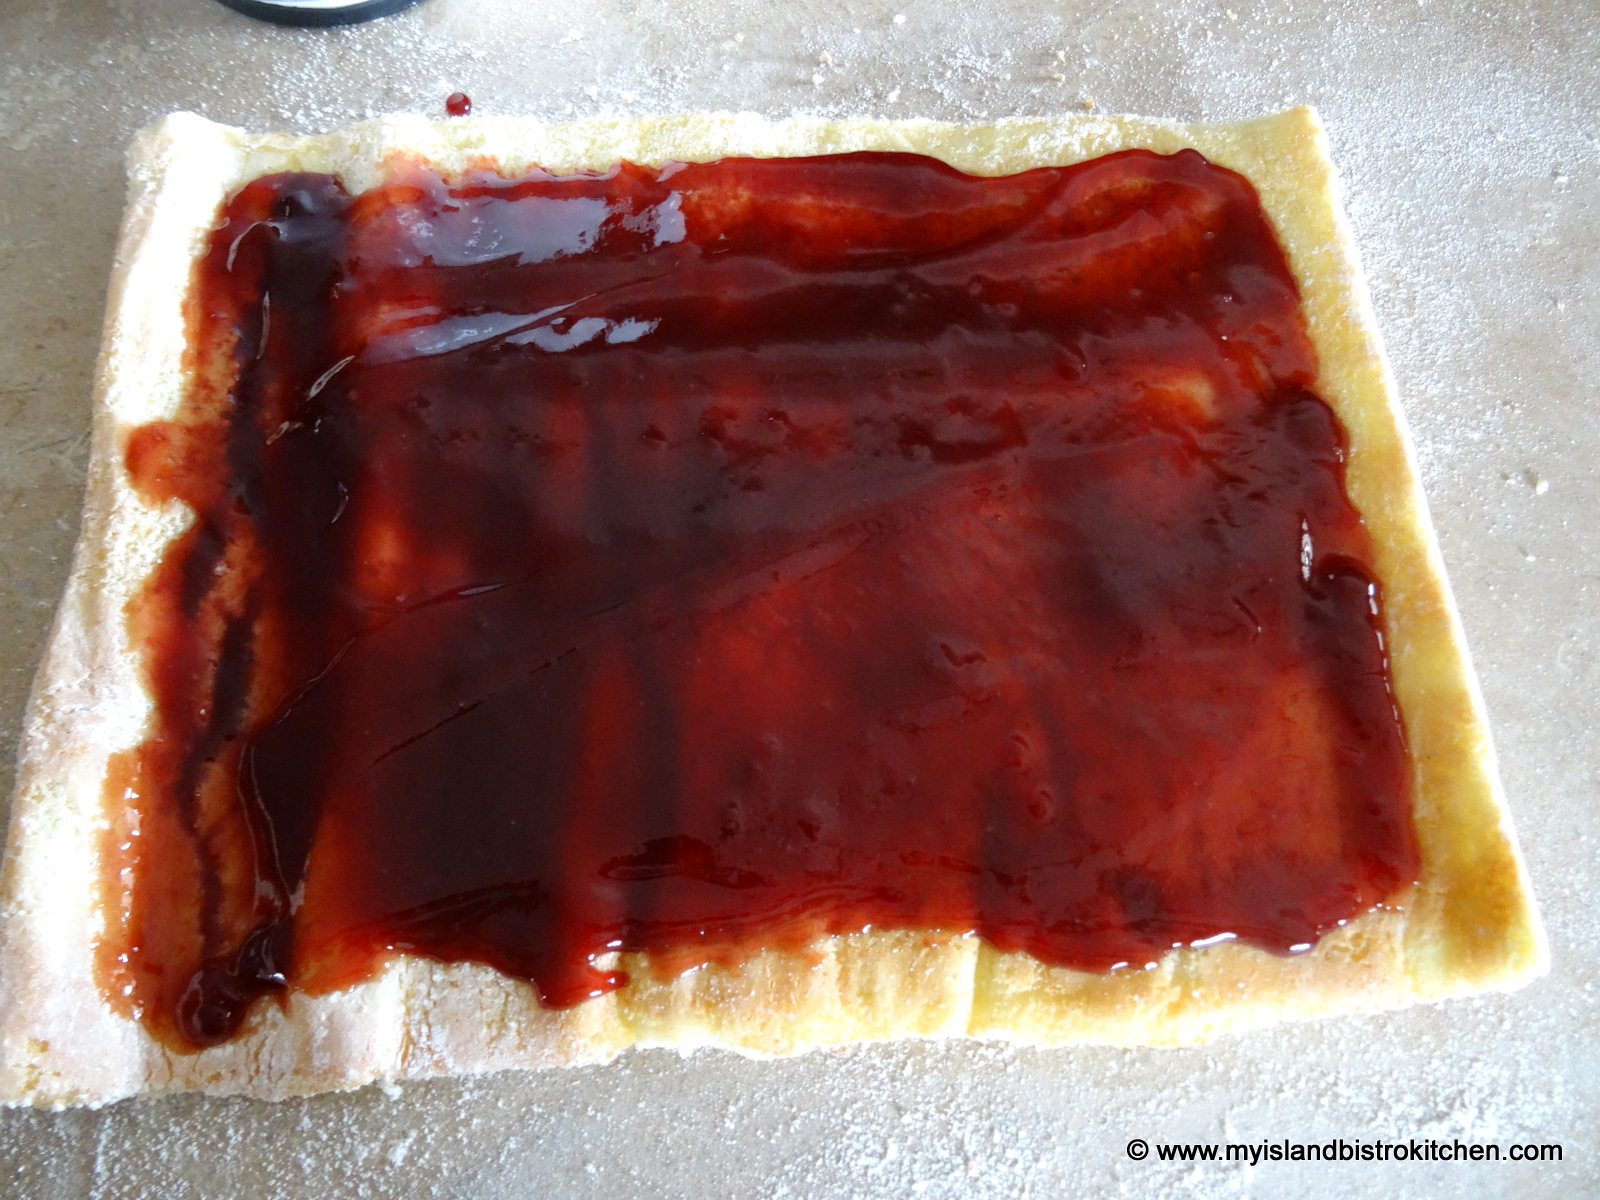
3. Use a good quality jam or jelly. If using jam, choose one that does not have big chunks of fruit in it; otherwise, it will make it more difficult to slice and plate presentation will not be optimal. I prefer colorful red jams and ones that are seedless – for example, seedless raspberry jam.
4. The jelly roll may be dusted with either granulated sugar or icing sugar. However, icing sugar stands up better than granulated sugar which tends to dissolve into the cake more quickly.
Jelly Roll
Ingredients:
1 cup + 3 tbsp cake and pastry flour 1¼ tsp baking powder ¼ tsp salt
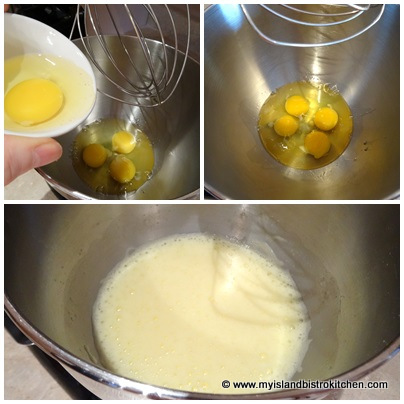
4 large eggs 1 cup sugar 1 tsp vanilla ¼ tsp almond flavouring 2 tbsp cold water
¾ – 1 cup jam or jelly Icing sugar for dusting
Method:
Preheat oven to 400°F.
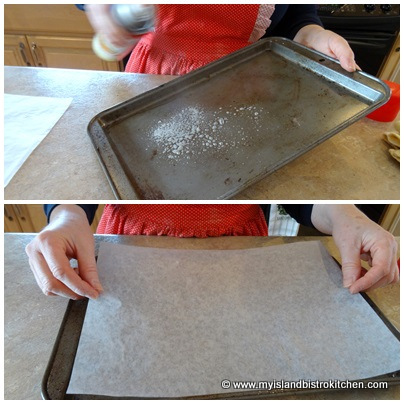
Grease, or spray cooking oil on 10”x15” rimmed baking sheet, ensuring sides are well-greased. Line bottom of pan with parchment paper. Lightly spray parchment paper with cooking oil.
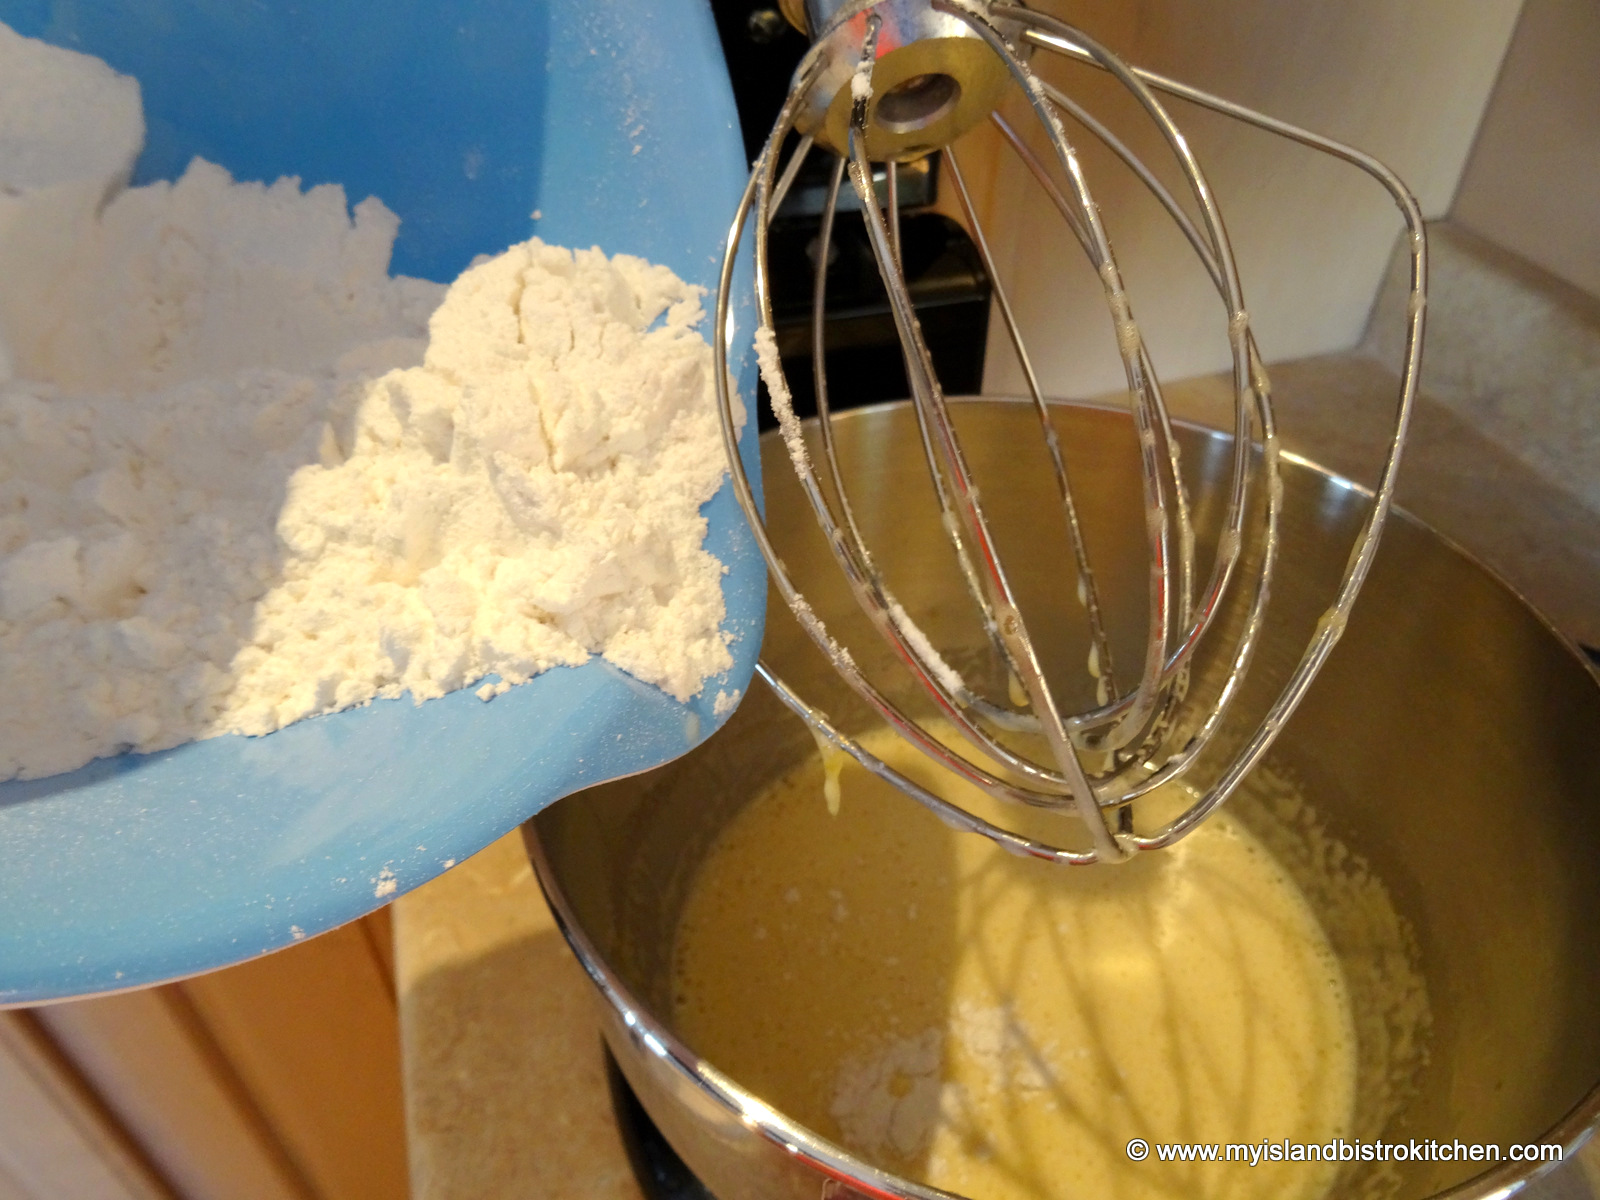
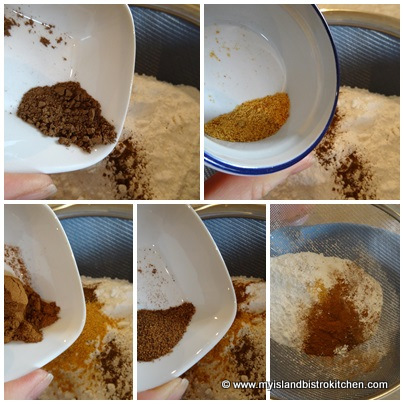
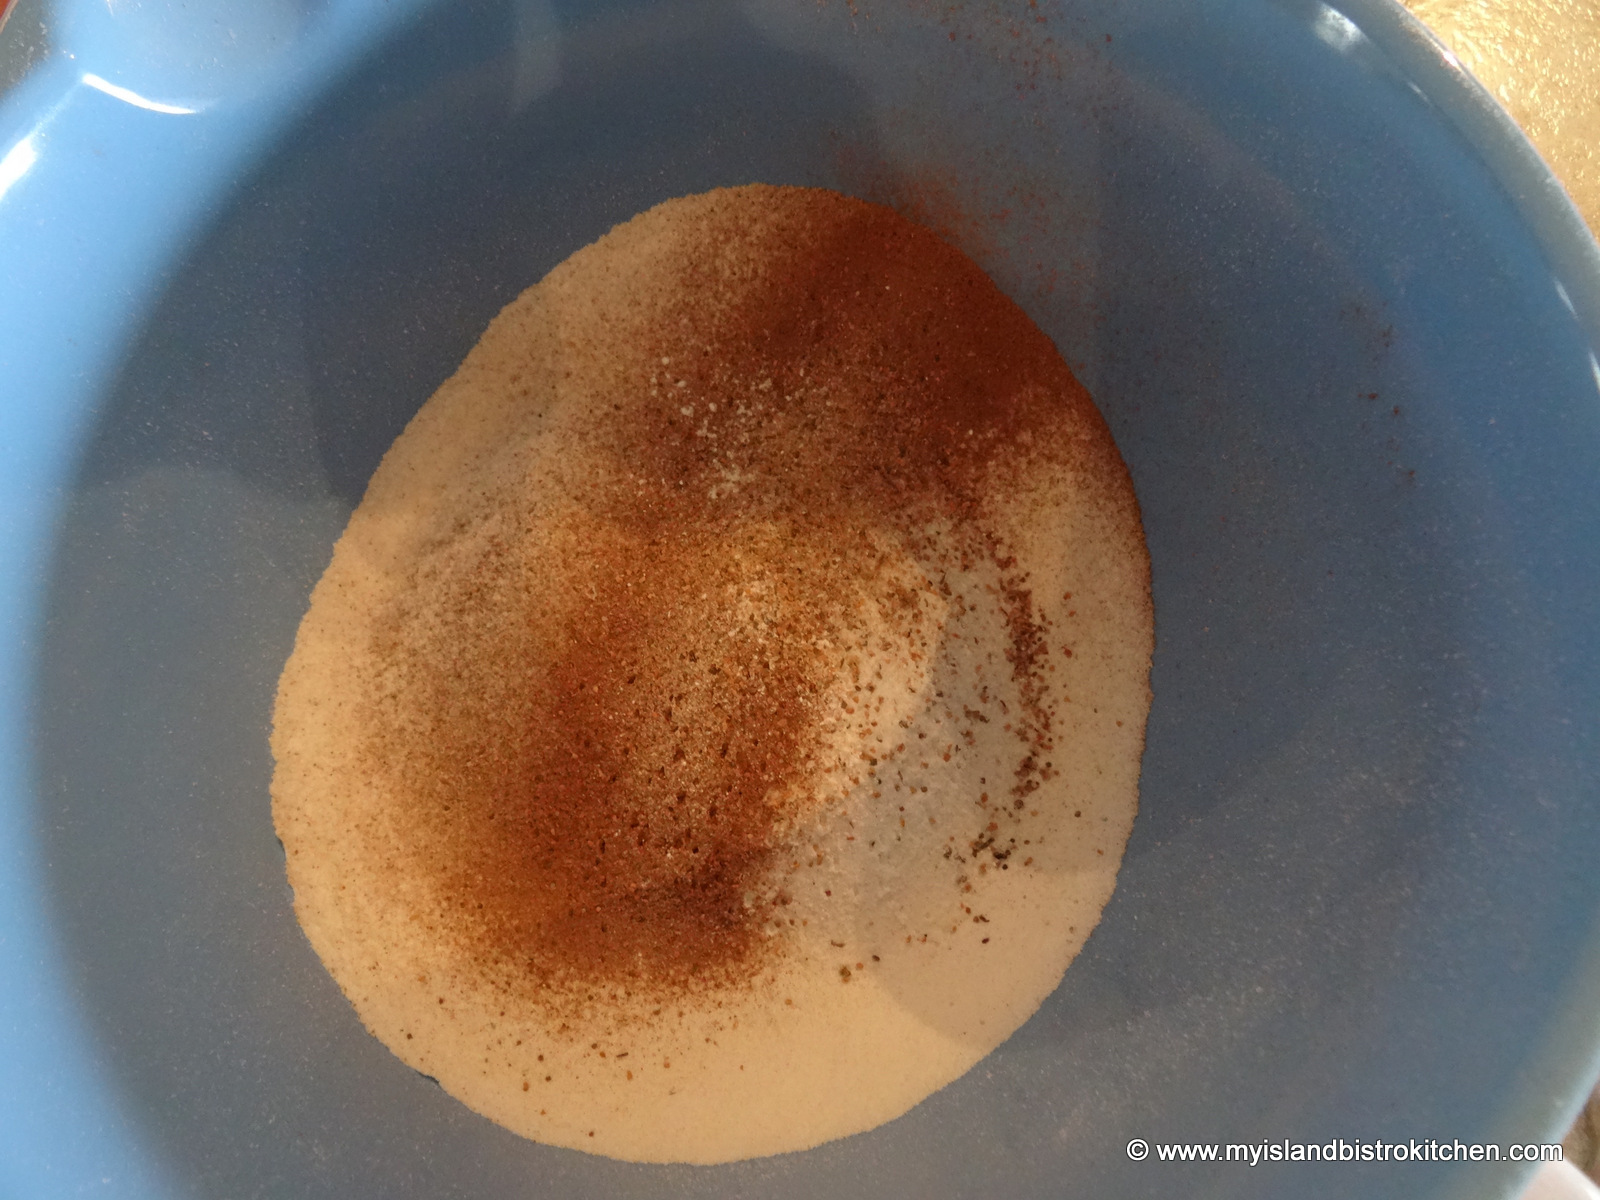
Sift flour, baking powder, and salt together. Set aside.
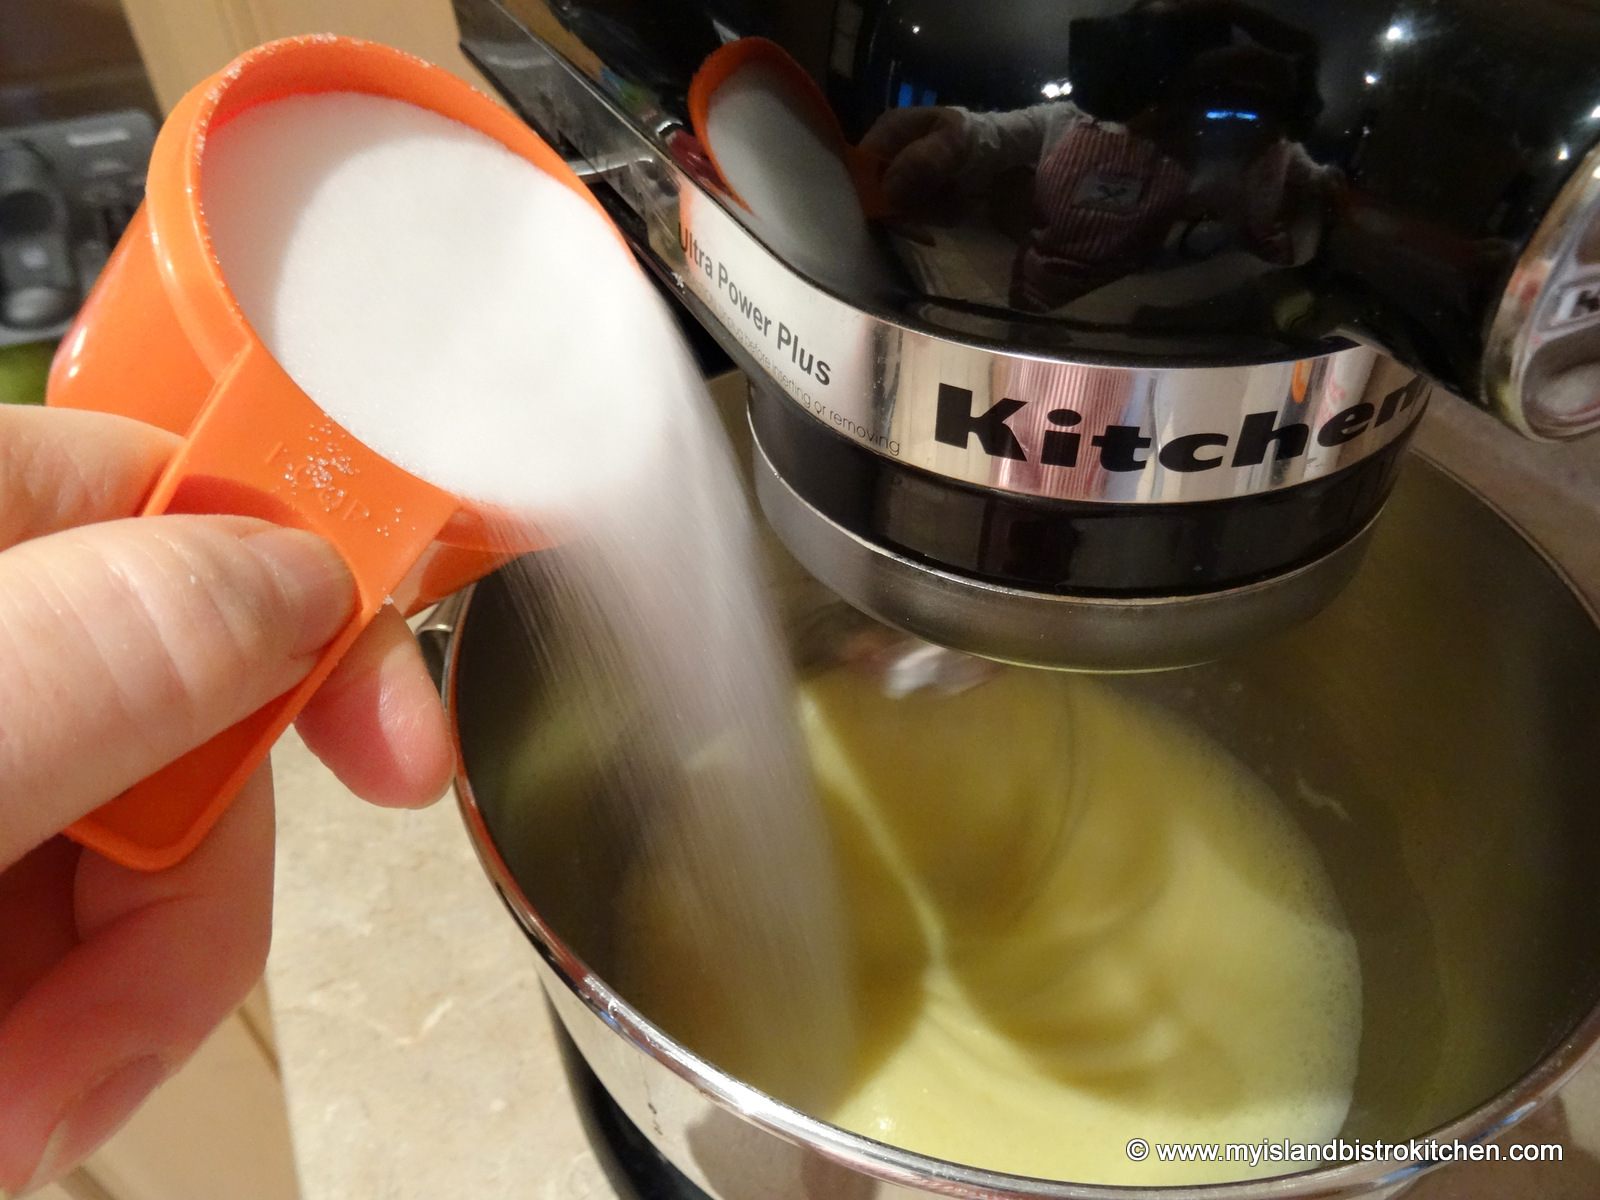
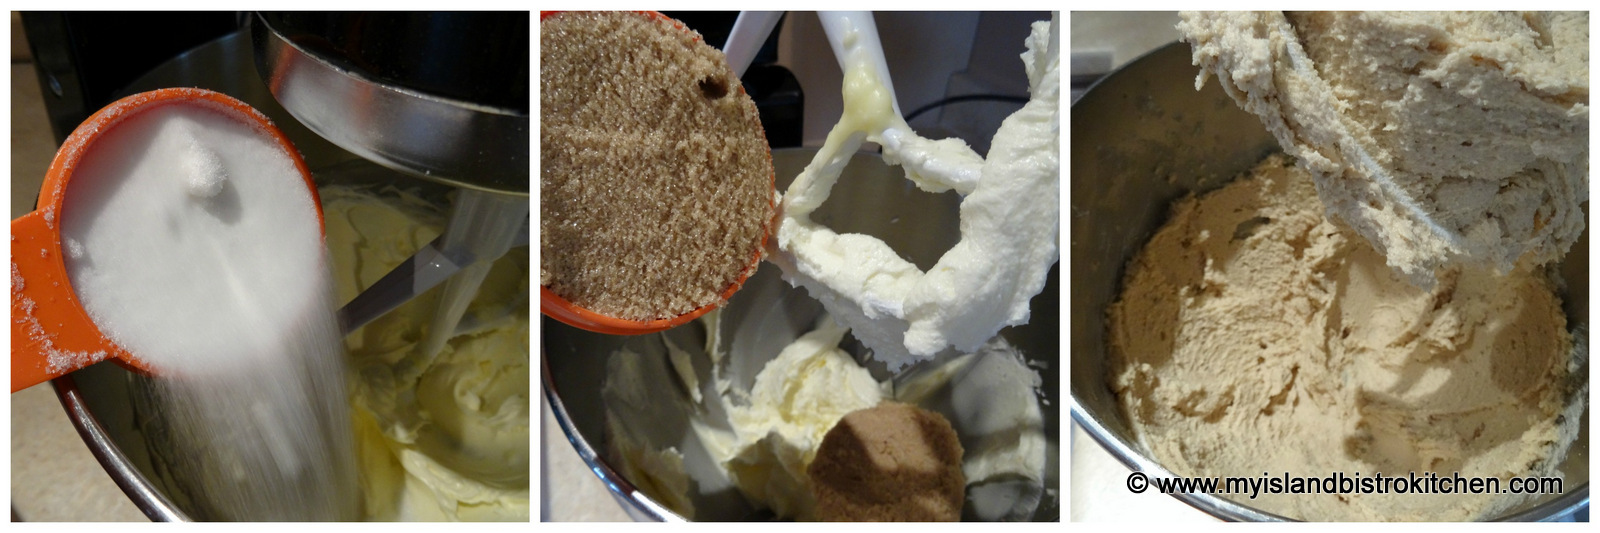
Beat eggs until frothy.
Slowly and steadily add the sugar and beat until light-colored and slightly thickened.
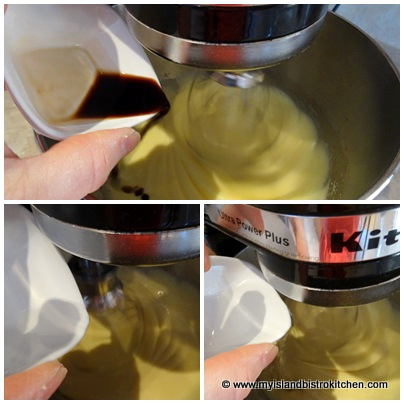
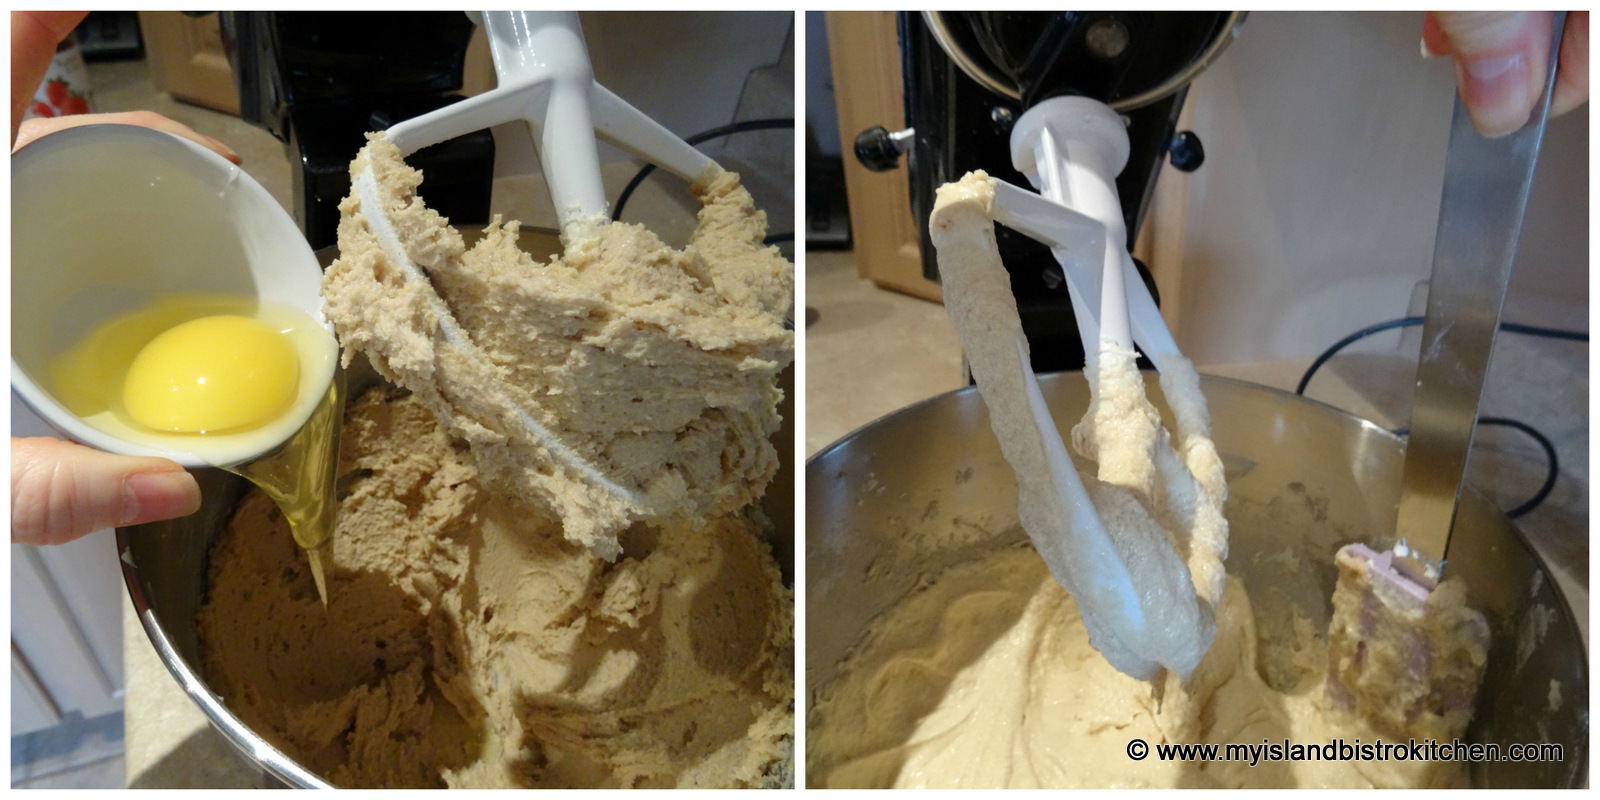
Beat in vanilla, almond flavouring, and water.
Add the sifted dry ingredients to the egg-sugar mixture. Stir just until incorporated.
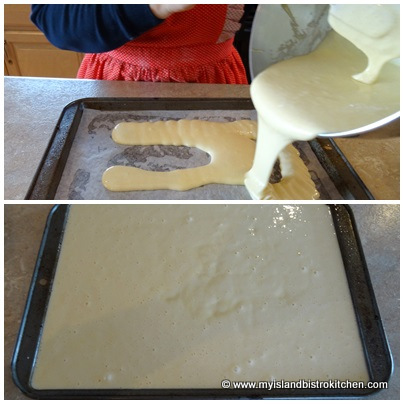
Pour batter into prepared pan.
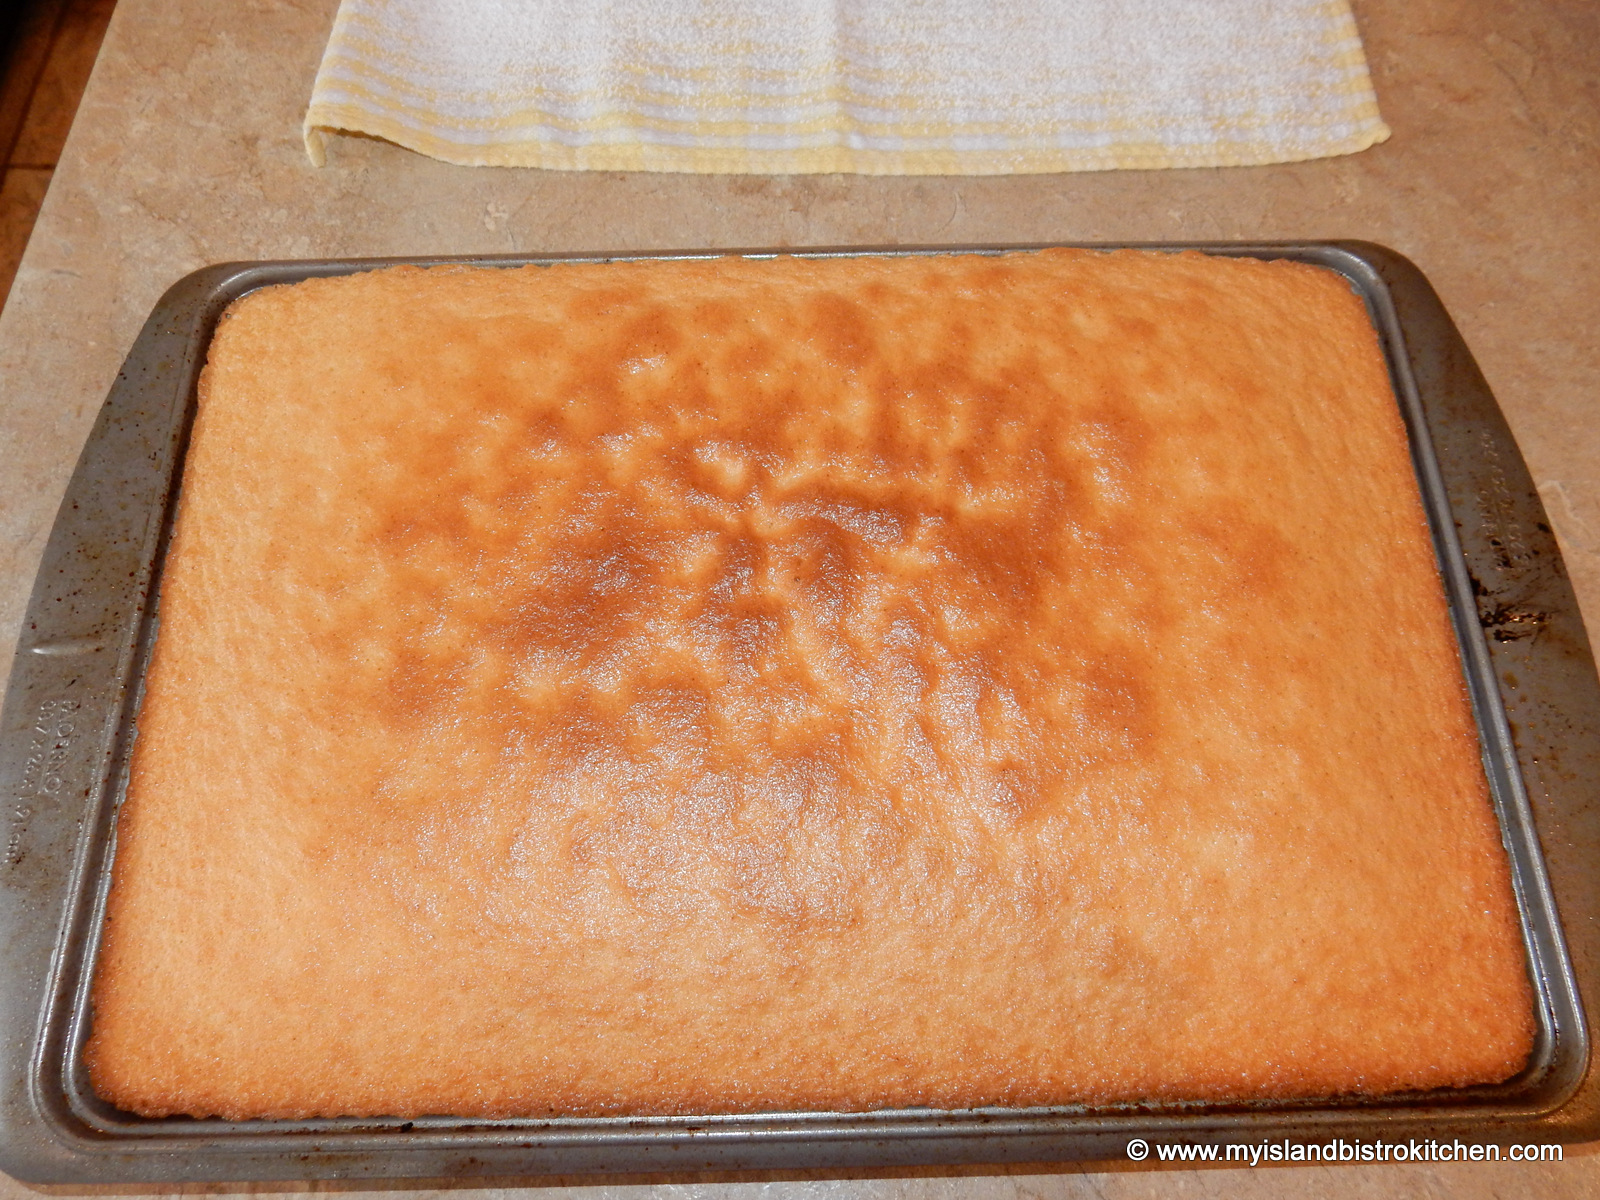
Bake 9-12 minutes or until cake tester inserted into cake comes out clean and cake springs back to a light touch. Do not overbake.
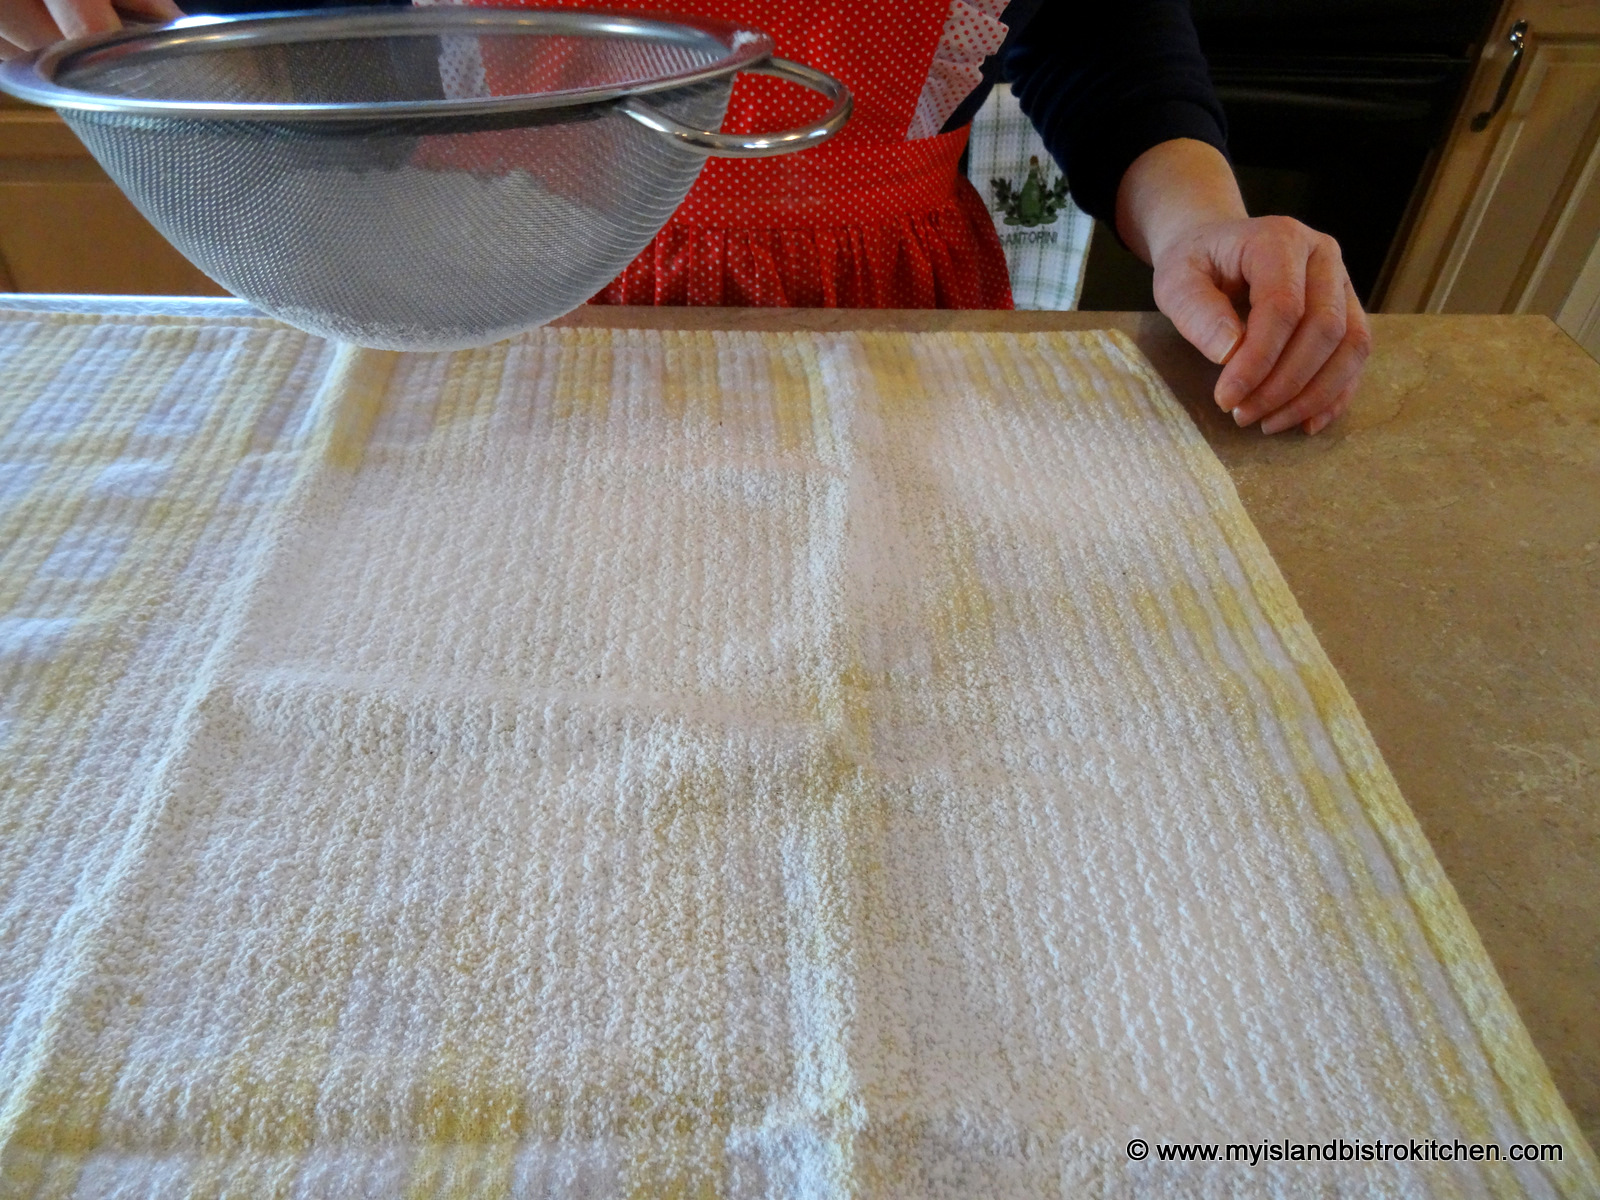
While cake is baking, lay a clean tea towel on counter and generously sprinkle with sifted icing sugar.
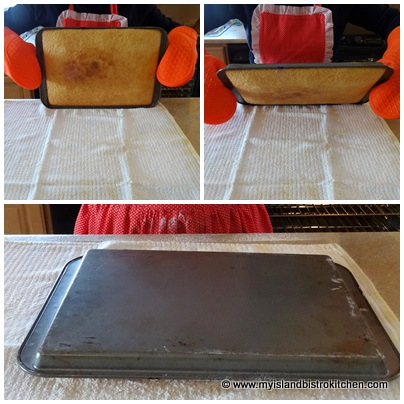
Remove cake from oven and run knife around all four edges to loosen cake from pan sides. Invert baked cake on sugar-dusted tea towel.
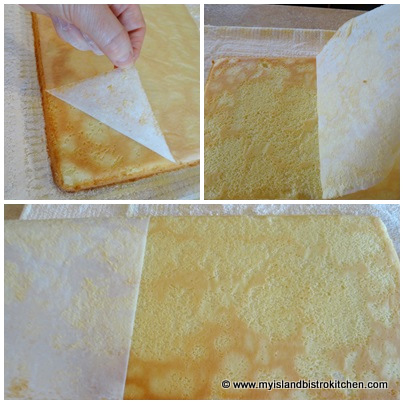
Peel off parchment paper, being careful not to tear cake.
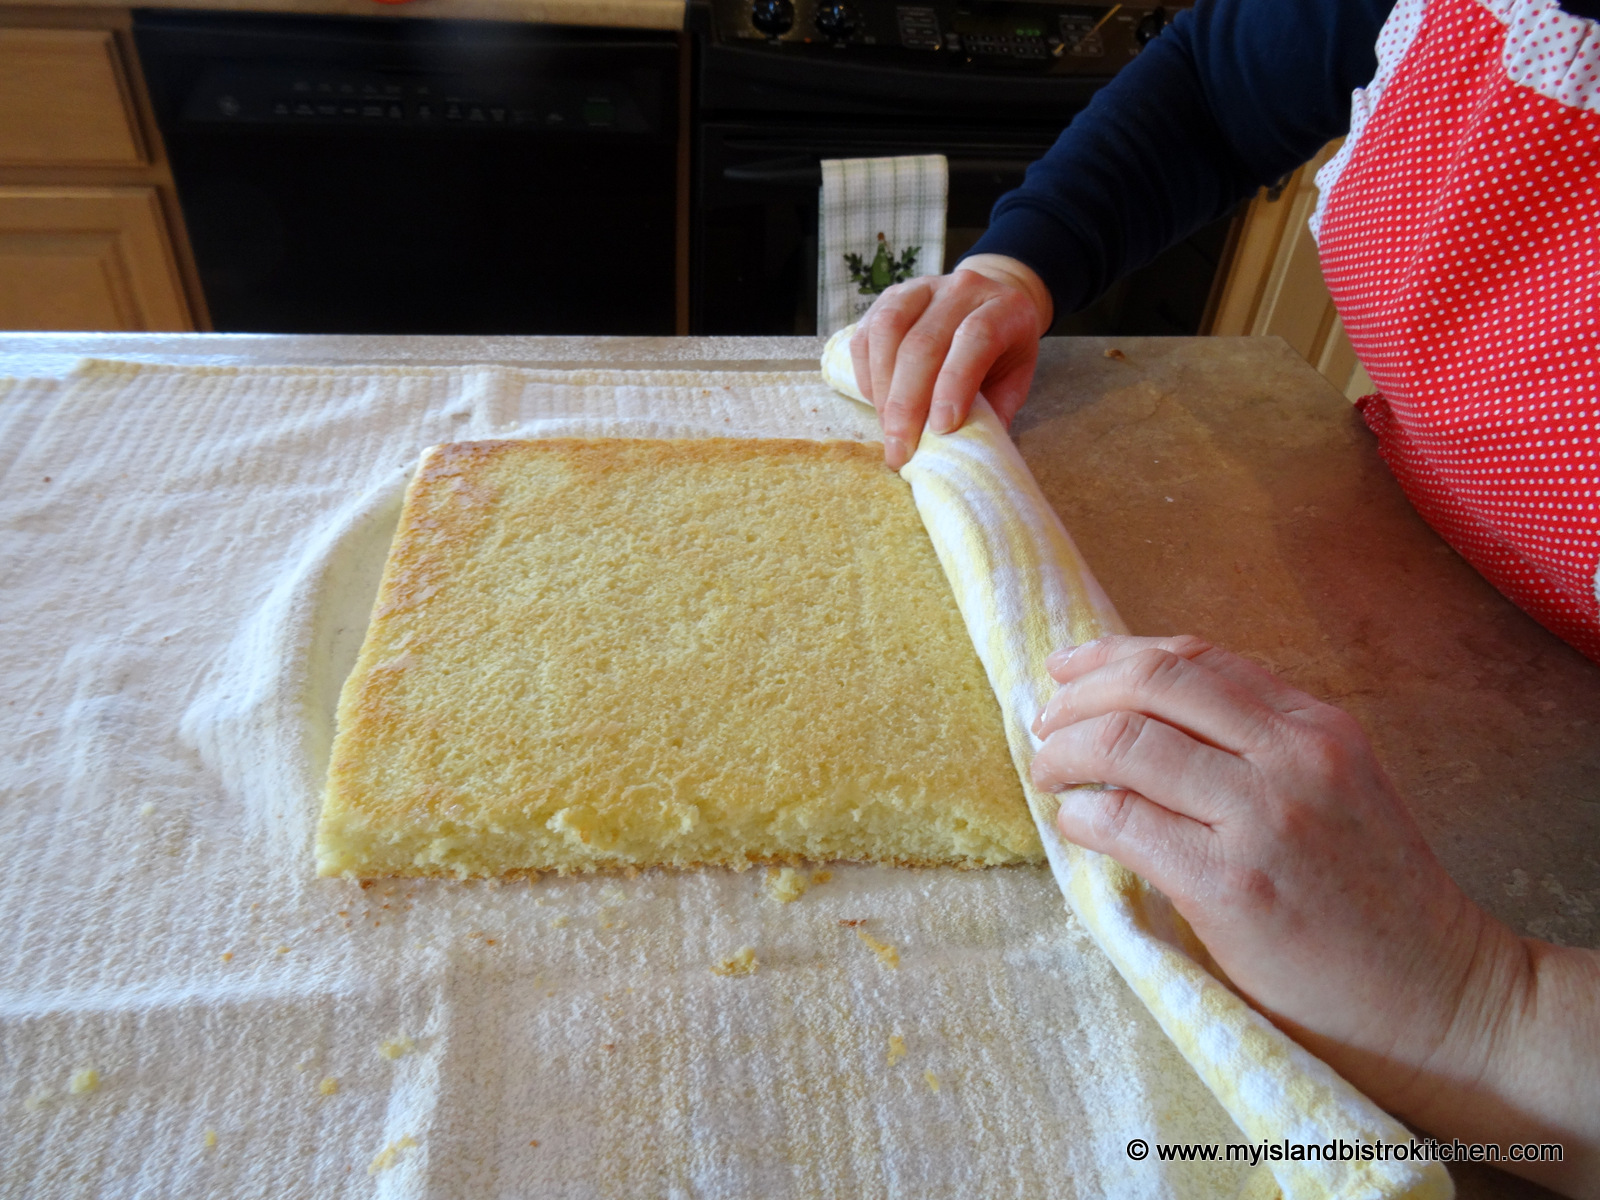
Trim off outside edges of cake.
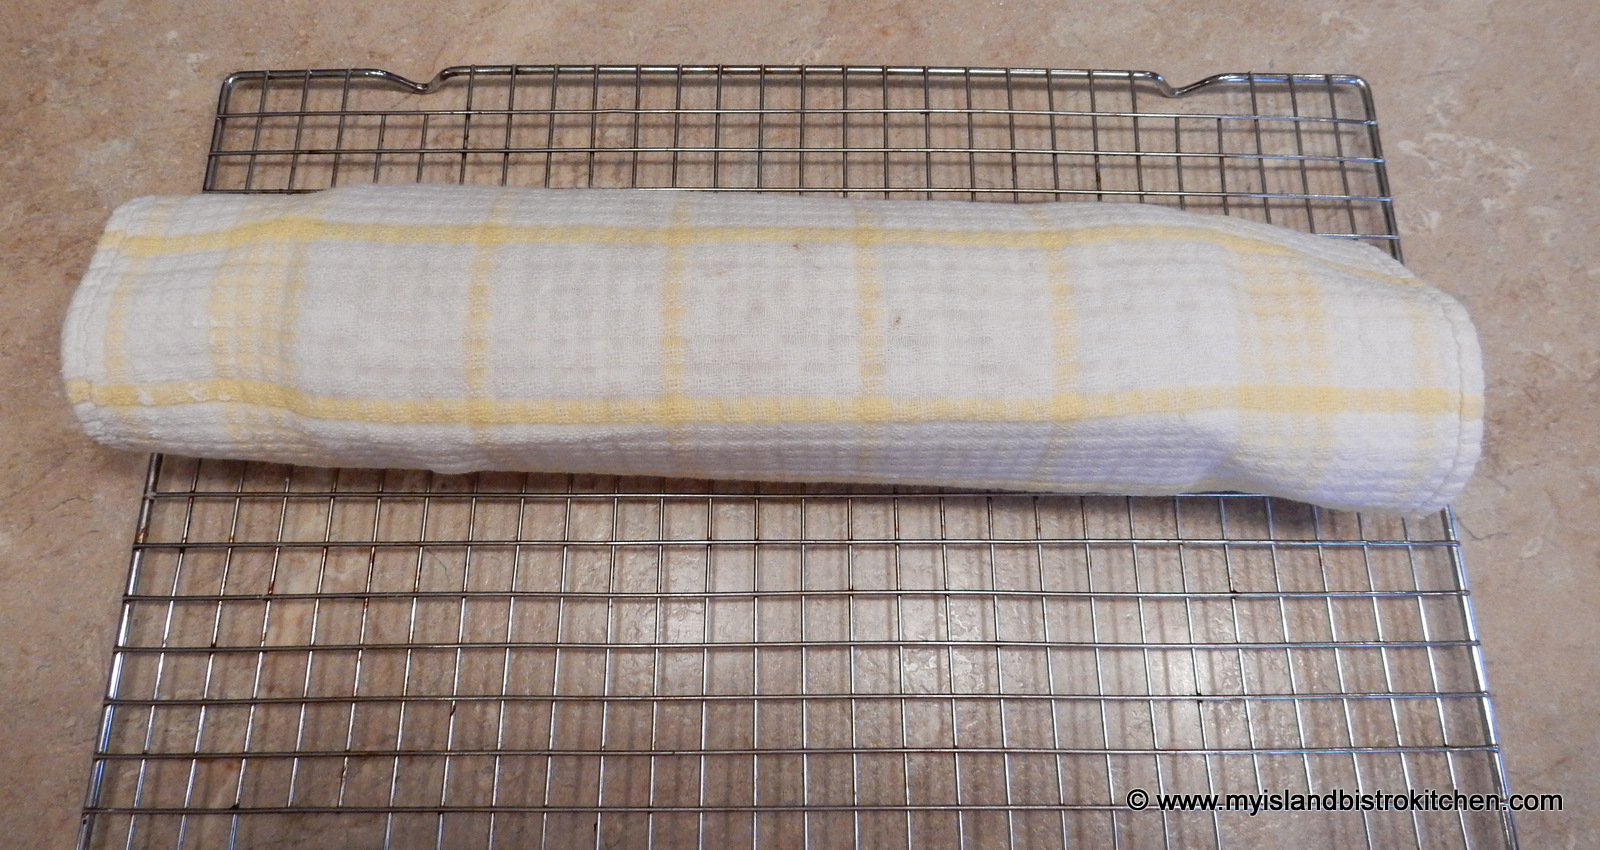
Rolling from the narrow end of the cake, roll up cake and tea towel together.
Transfer to wire rack and cool for about 15-20 minutes.
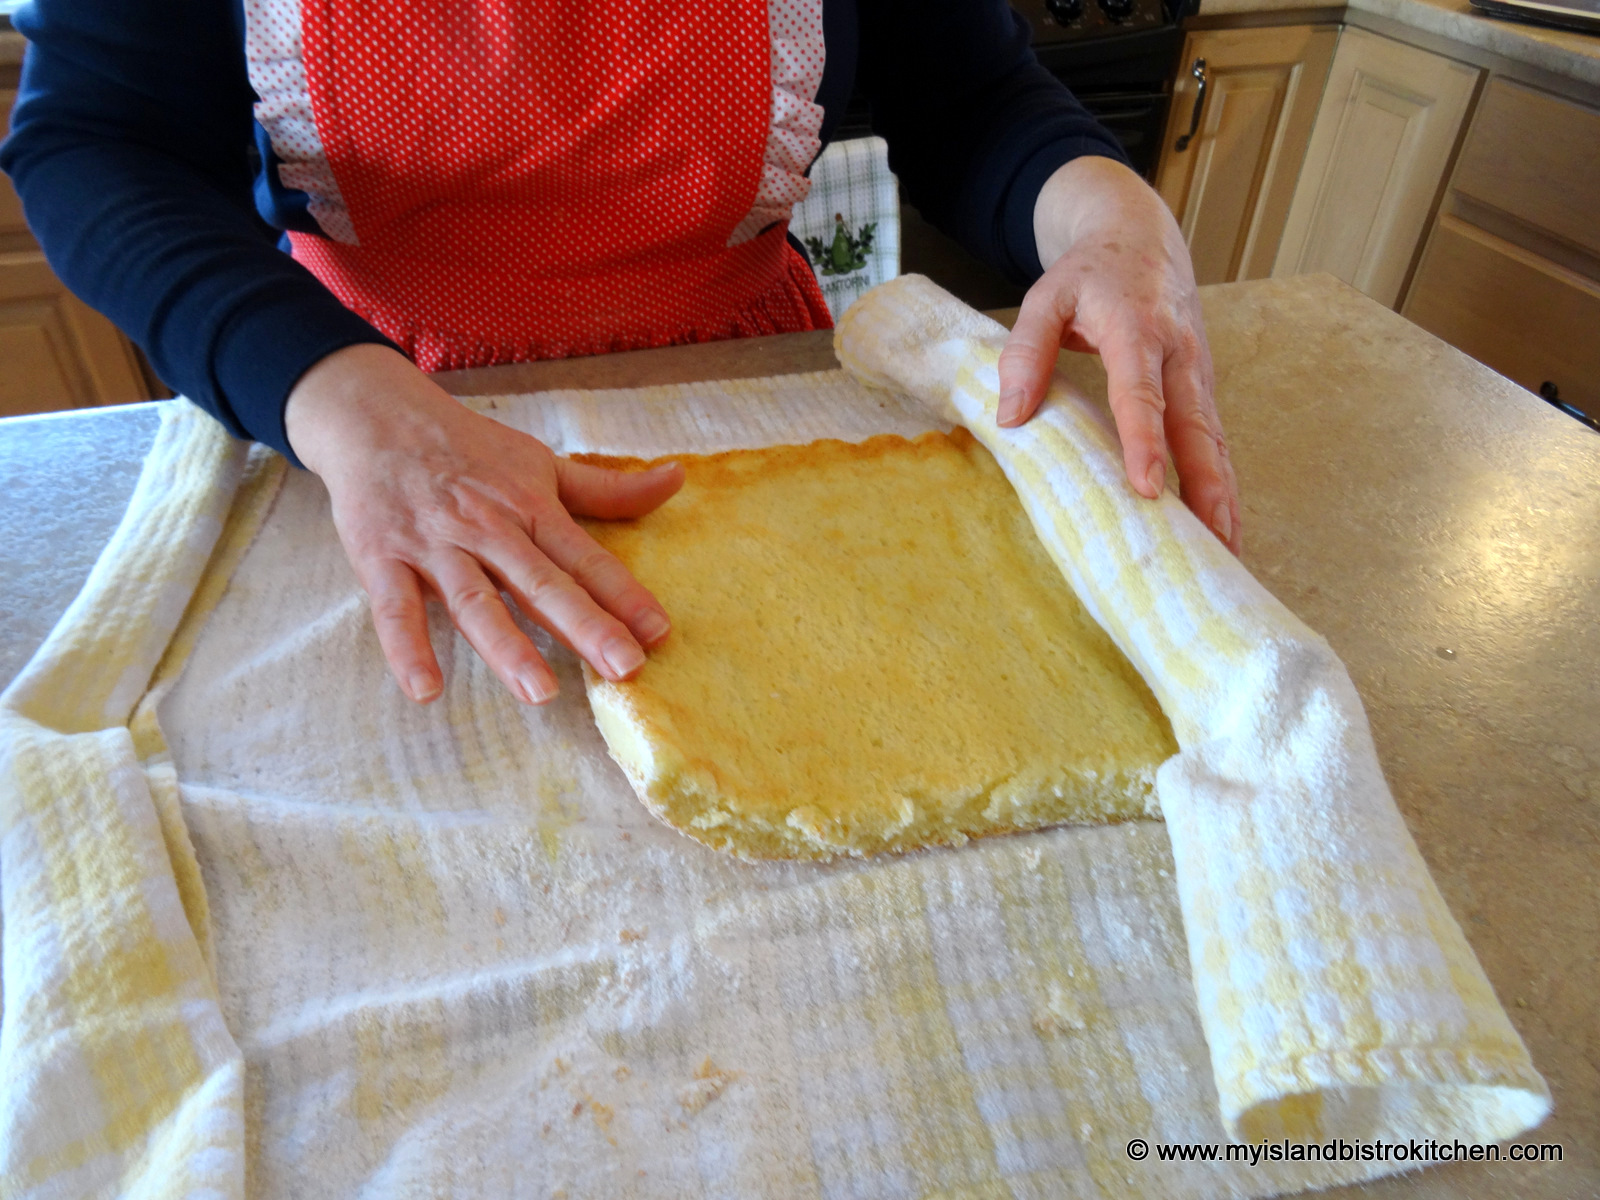
Carefully unroll the cake.
Spread cake with jam or jelly, leaving about ½” on sides of cake free of jam or jelly.
Using the tea towel as a guide, re-roll the filled cake.
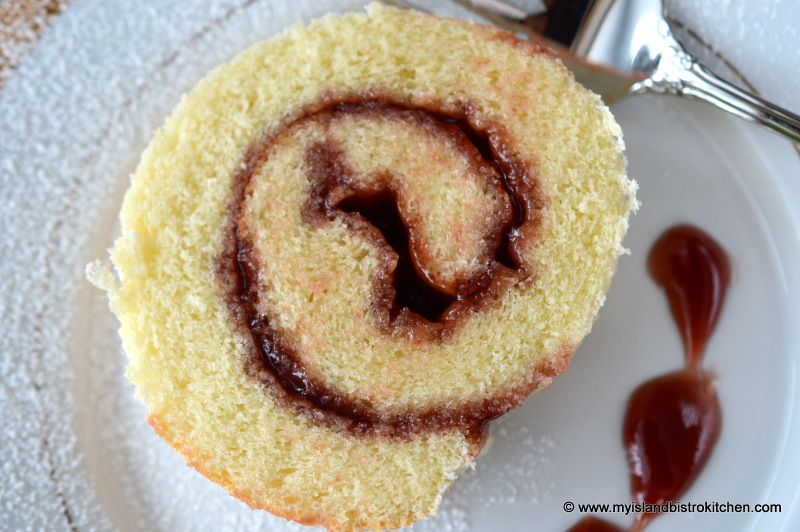
Refrigerate for at least 30 minutes. Dust with icing sugar, cut, and serve.
Yield:Apx. 10-12 servings
If you have made this recipe and enjoyed it and/or wish to share it with your friends and family, please do so on social media but be sure to share the direct link to this posting from my website.
Connect with My Island Bistro Kitchen on Social Media
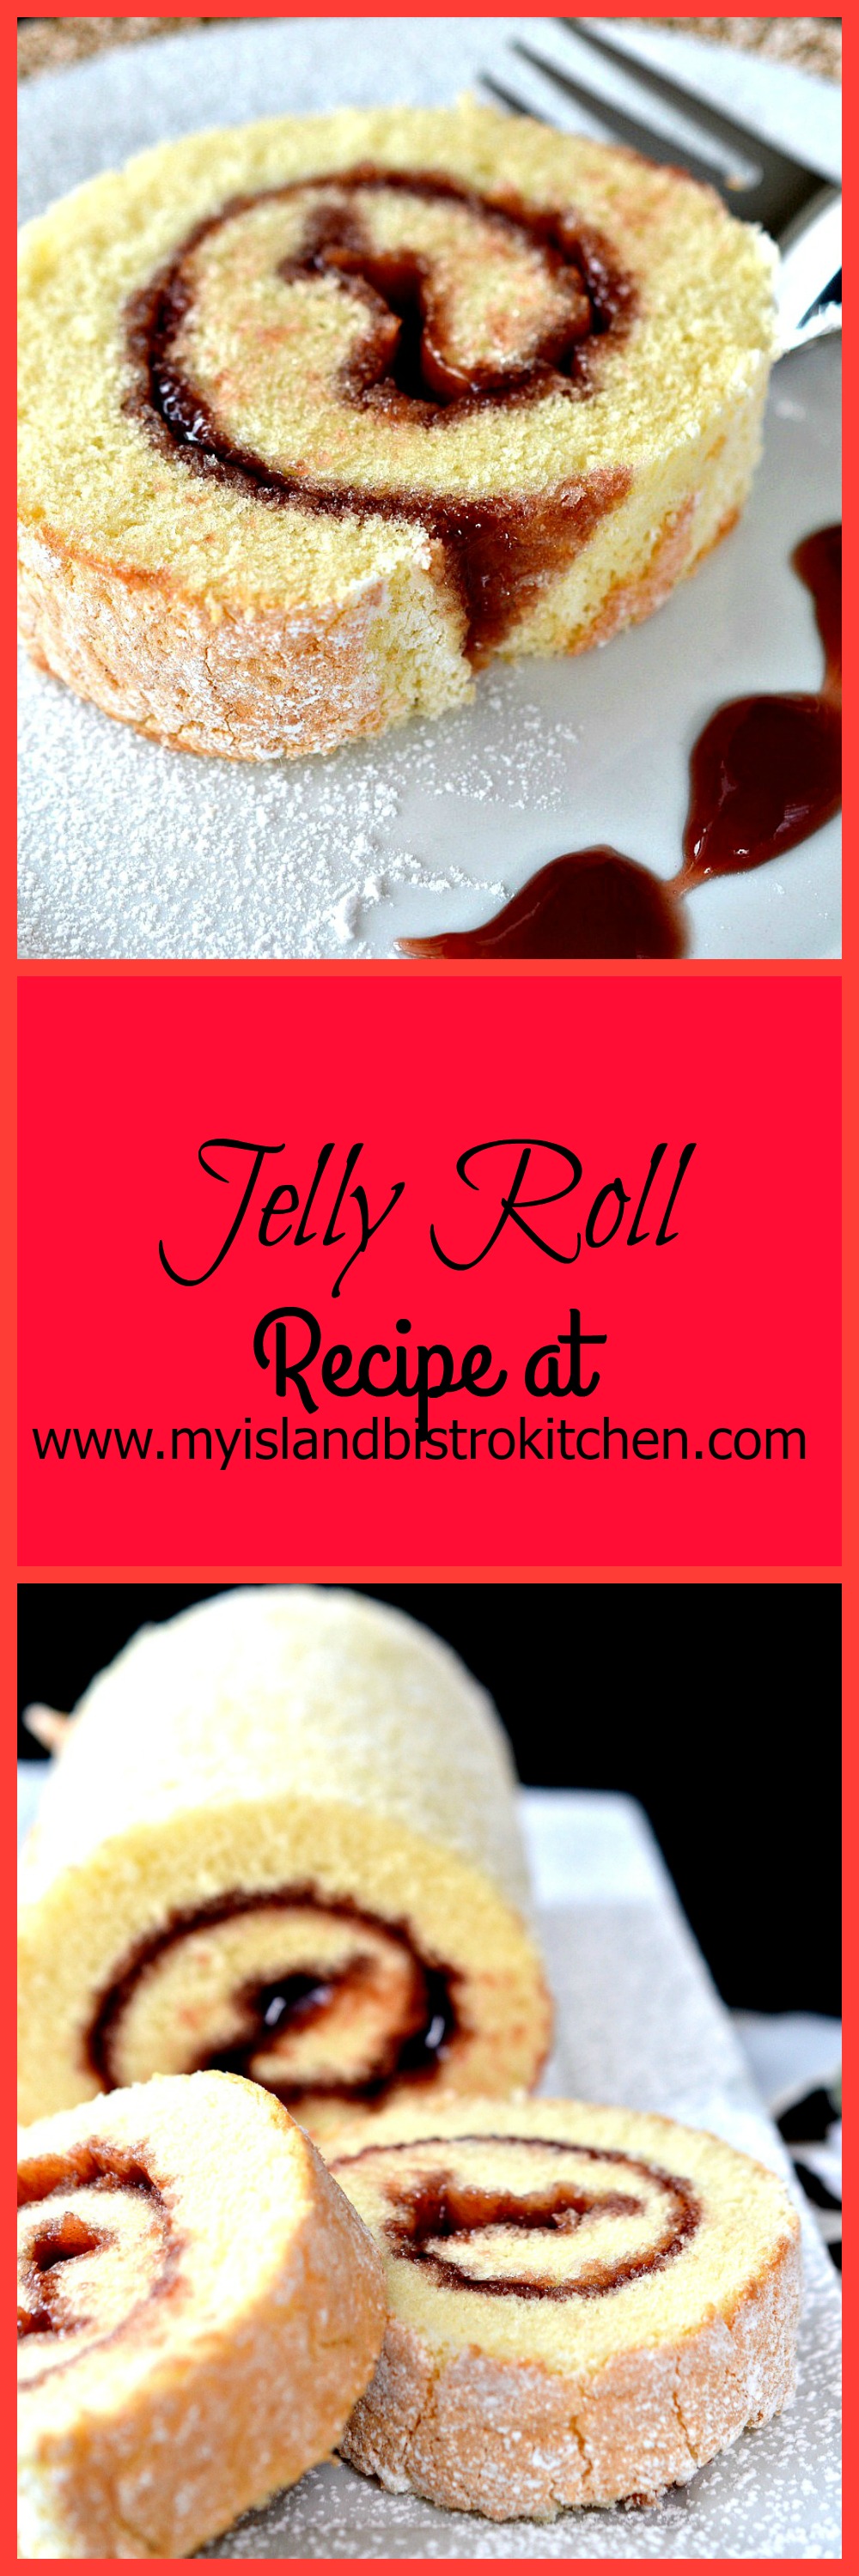
Follow “the Bistro” on Pinterest at https://www.pinterest.ca/peibistro/ and pin the Pinterest-ready photo found at the end of this post to your favorite Pinterest boards.
A Jelly Roll is an impressive dessert made with a thin sponge cake spread with a favorite jam or jelly and then rolled up, dusted with icing sugar, and sliced.
Course Dessert
Keyword jelly roll
Servings10
My Island Bistro KitchenMy Island Bistro Kitchen
Ingredients
1cup+ 3 tbsp cake flour
1¼tspbaking powder
¼tspsalt
4large eggs
1cupsugar
1tspvanilla
¼tspalmond flavouring
2tbspcold water
¾ - 1cupjam or jelly
Icing sugar for dusting
Instructions
Preheat oven to 400°F.
Grease, or spray cooking oil on 10”x15” rimmed baking sheet, ensuring sides are well-greased. Line bottom of pan with parchment paper. Lightly spray parchment paper with cooking oil.
Sift flour, baking powder, and salt together. Set aside.
Beat eggs until frothy. Slowly and steadily add the sugar and beat until light-colored and slightly thickened. Beat in vanilla, almond flavouring, and water.
Add the sifted dry ingredients to the egg-sugar mixture. Stir just until incorporated.
Pour batter into prepared pan. Bake 9-12 minutes or until cake tester inserted into cake comes out clean and cake springs back from a light touch. Do not overbake.
While cake is baking, lay a clean tea towel on counter and generously sprinkle with sifted icing sugar. Remove cake from oven and run knife around all four edges to loosen cake from pan sides. Invert baked cake on sugar-dusted tea towel. Peel off parchment paper being careful not to tear cake.
Trim off outside edges of cake. Rolling from the narrow end of the cake, roll up cake and tea towel together. Transfer to wire rack and cool for about 15 minutes. Carefully unroll the cake and spread with jam or jelly, leaving about ½” on sides of cake free of jam or jelly. Re-roll. Refrigerate for at least 30 minutes. Dust with icing sugar, cut, and serve.
Recipe Notes
Yield: Apx. 10-11 servings
NOTE: Be sure to read the accompanying blog post to this recipe as it contains tips for making the jelly roll successfully as well as step-by-step photos of the method used to make the jelly roll.
[Copyright My Island Bistro Kitchen]
Try one of these Jellies or Fruit Curds in your next Jelly Roll:
In October, I traveled to Farmington, near Souris, PEI, to watch the wet harvesting of cranberries at Mikita Farms. One of the recipes I developed with the Mikita Farm cranberries is for Cranberry-Banana Eggnog Muffins. Continue reading Cranberry-Banana Eggnog Muffins→
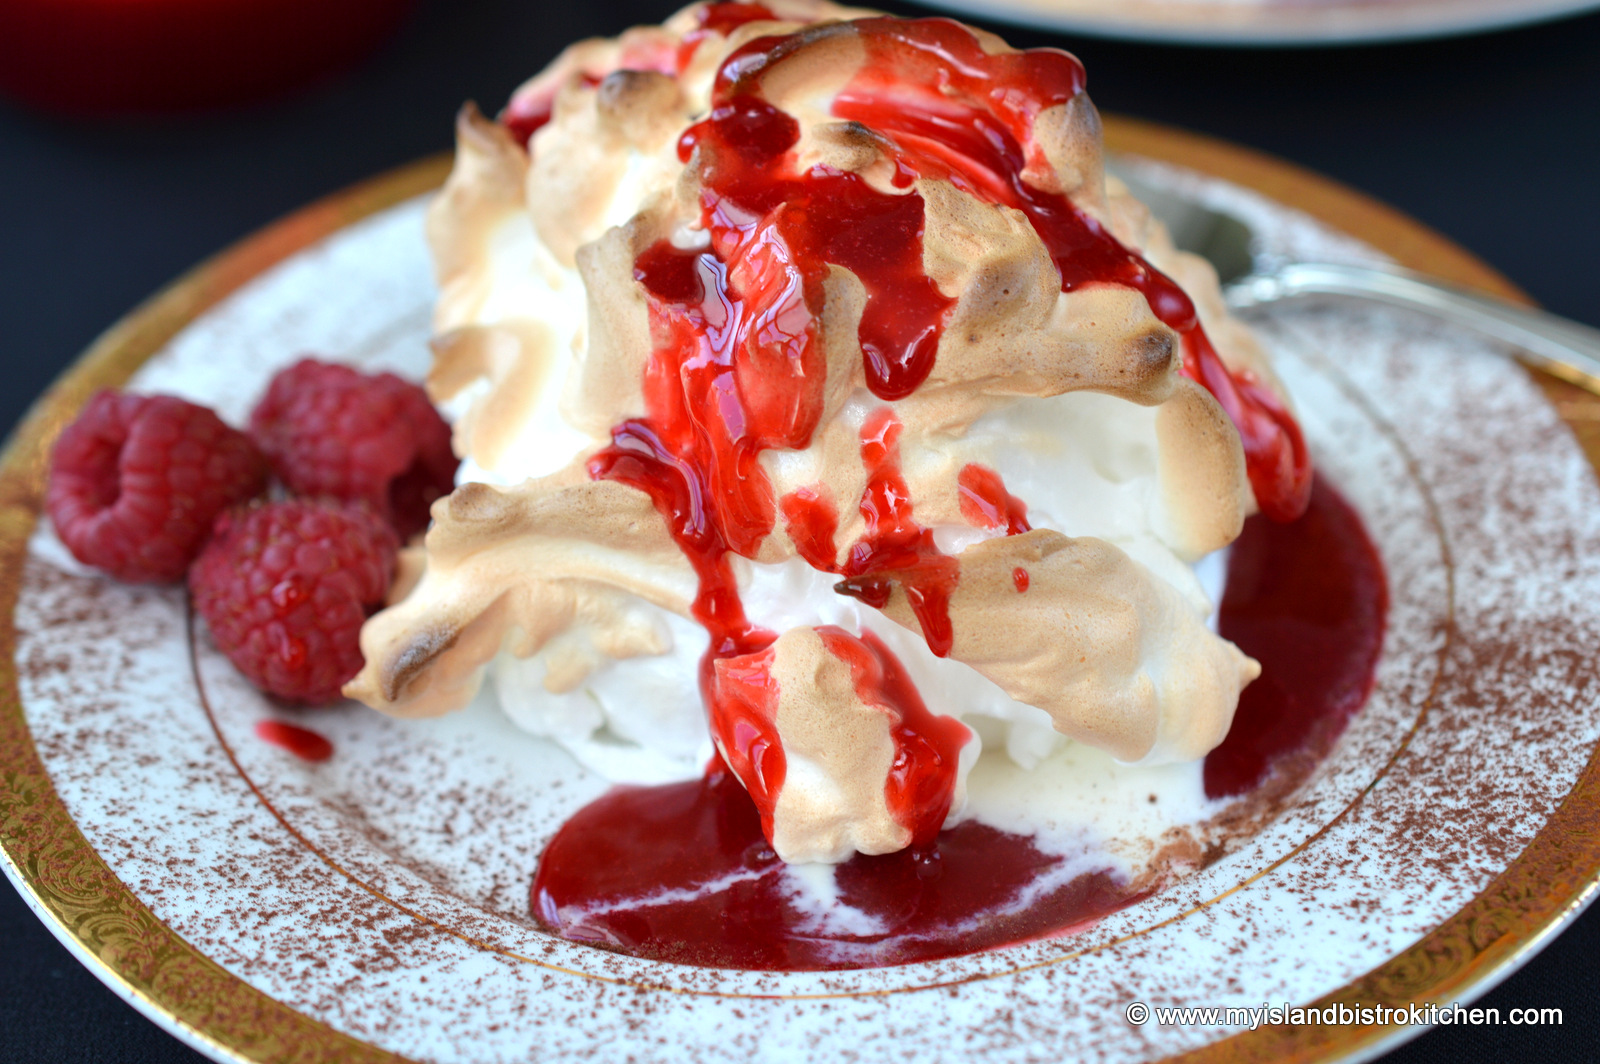
One of my all-time favorite desserts is Baked Alaska. I first had Baked Alaska on a cruise many, many years ago and I have loved it ever since. Many people think Baked Alaska is difficult to make but I don’t find it is. It does, however, take a little planning and time since it is prepared in stages. Baked Alaska can be made as a large dessert to serve several or it can be tailored down to serve one or two. My recipe is for two individual servings, perfect for a special intimate dinner such as Valentine’s Day, or anytime as a nice treat.
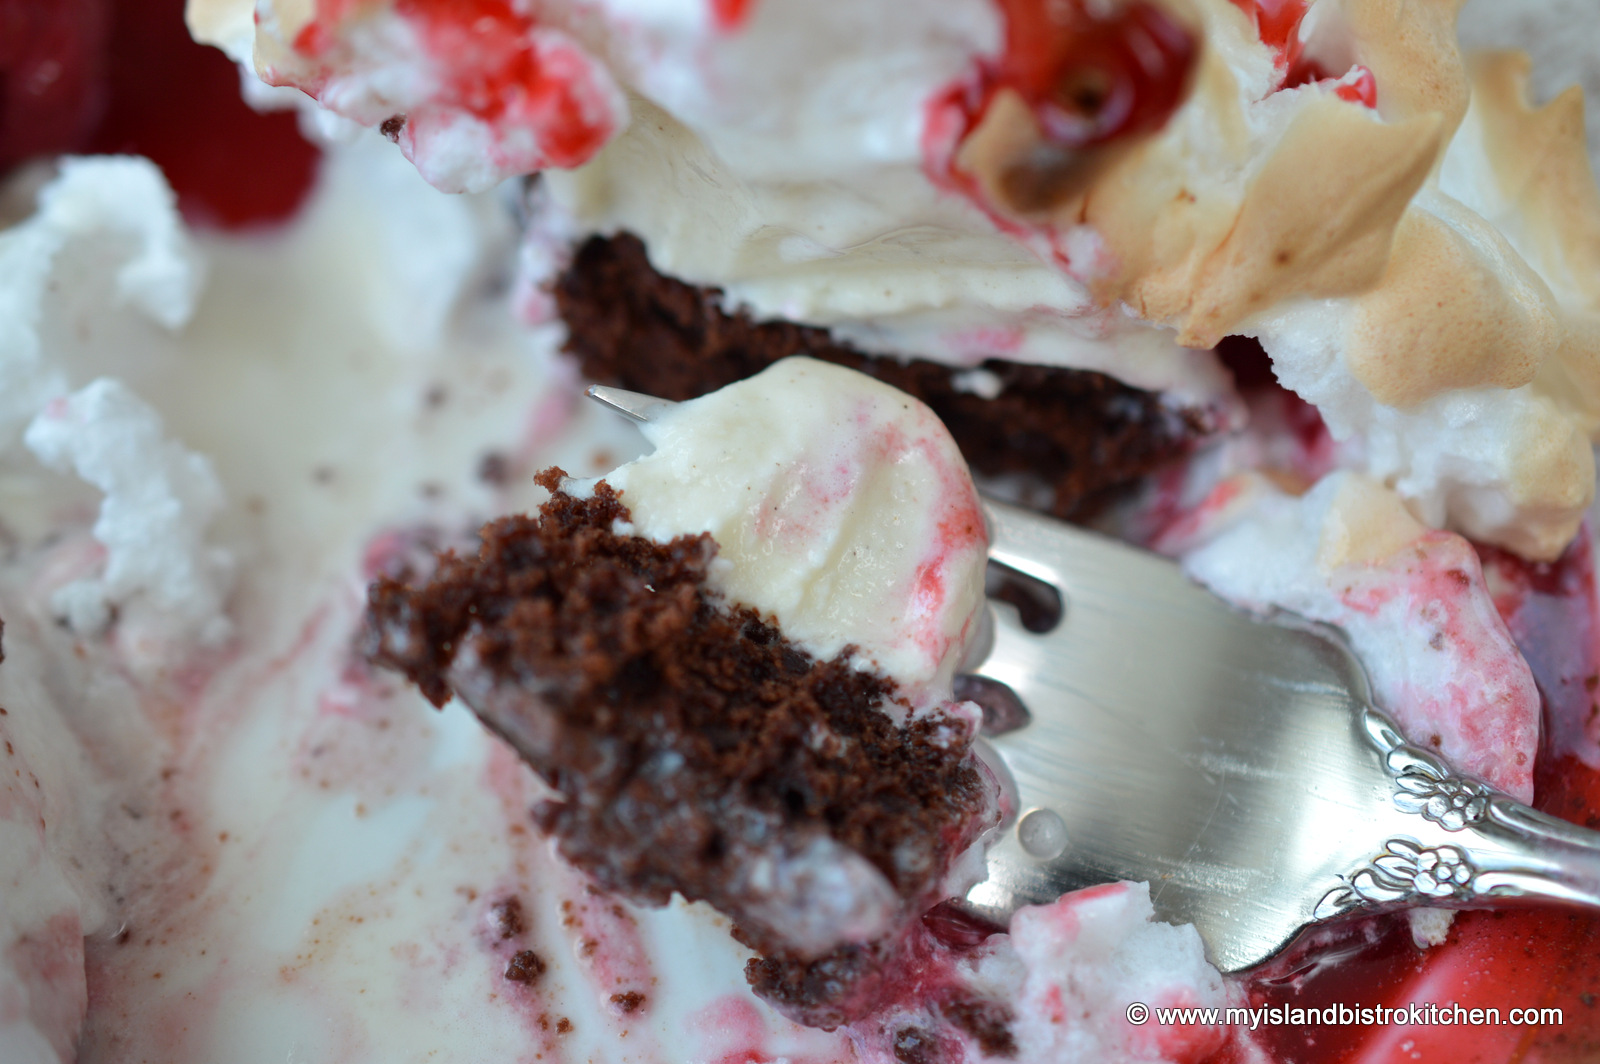
There are options for the cake base of a Baked Alaska. Brownies or pound cake are my preferences and they can be either bought or homemade. I like brownies because the dark contrast is eye-appealing with a light-colored ice cream. Whatever base is used, it needs to be cut out with a 2” cookie cutter and it should have a depth of about ½” to ¾ “. Now, at first glance, this might appear to be a rather miniscule dessert but, as you’ll soon discover, the meringue adds a lot of volume to the Baked Alaska.
Choice of ice cream is important for the Baked Alaska. Choose a high quality ice cream with a high percentage cream content for this dessert because it will freeze hard. Some of the lower fat or cheaper ice creams tend to be softer and, because this ice cream is going into a 475° oven, it needs to be able to stand up for itself! Any flavour of ice cream of your choosing will work. My favorites are vanilla, coffee, or strawberry. Let the ice cream soften slightly at room temperature for 5-7 minutes before scooping it out. You want to try and get as perfectly a round scoop as you can because this is what will give the Alaska its dome shape.
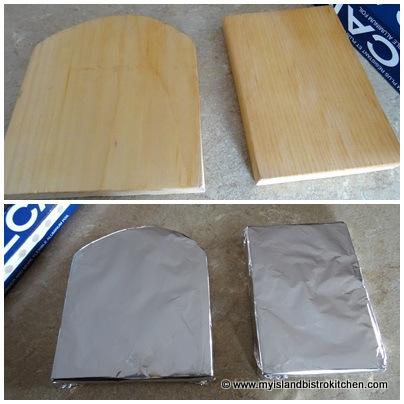
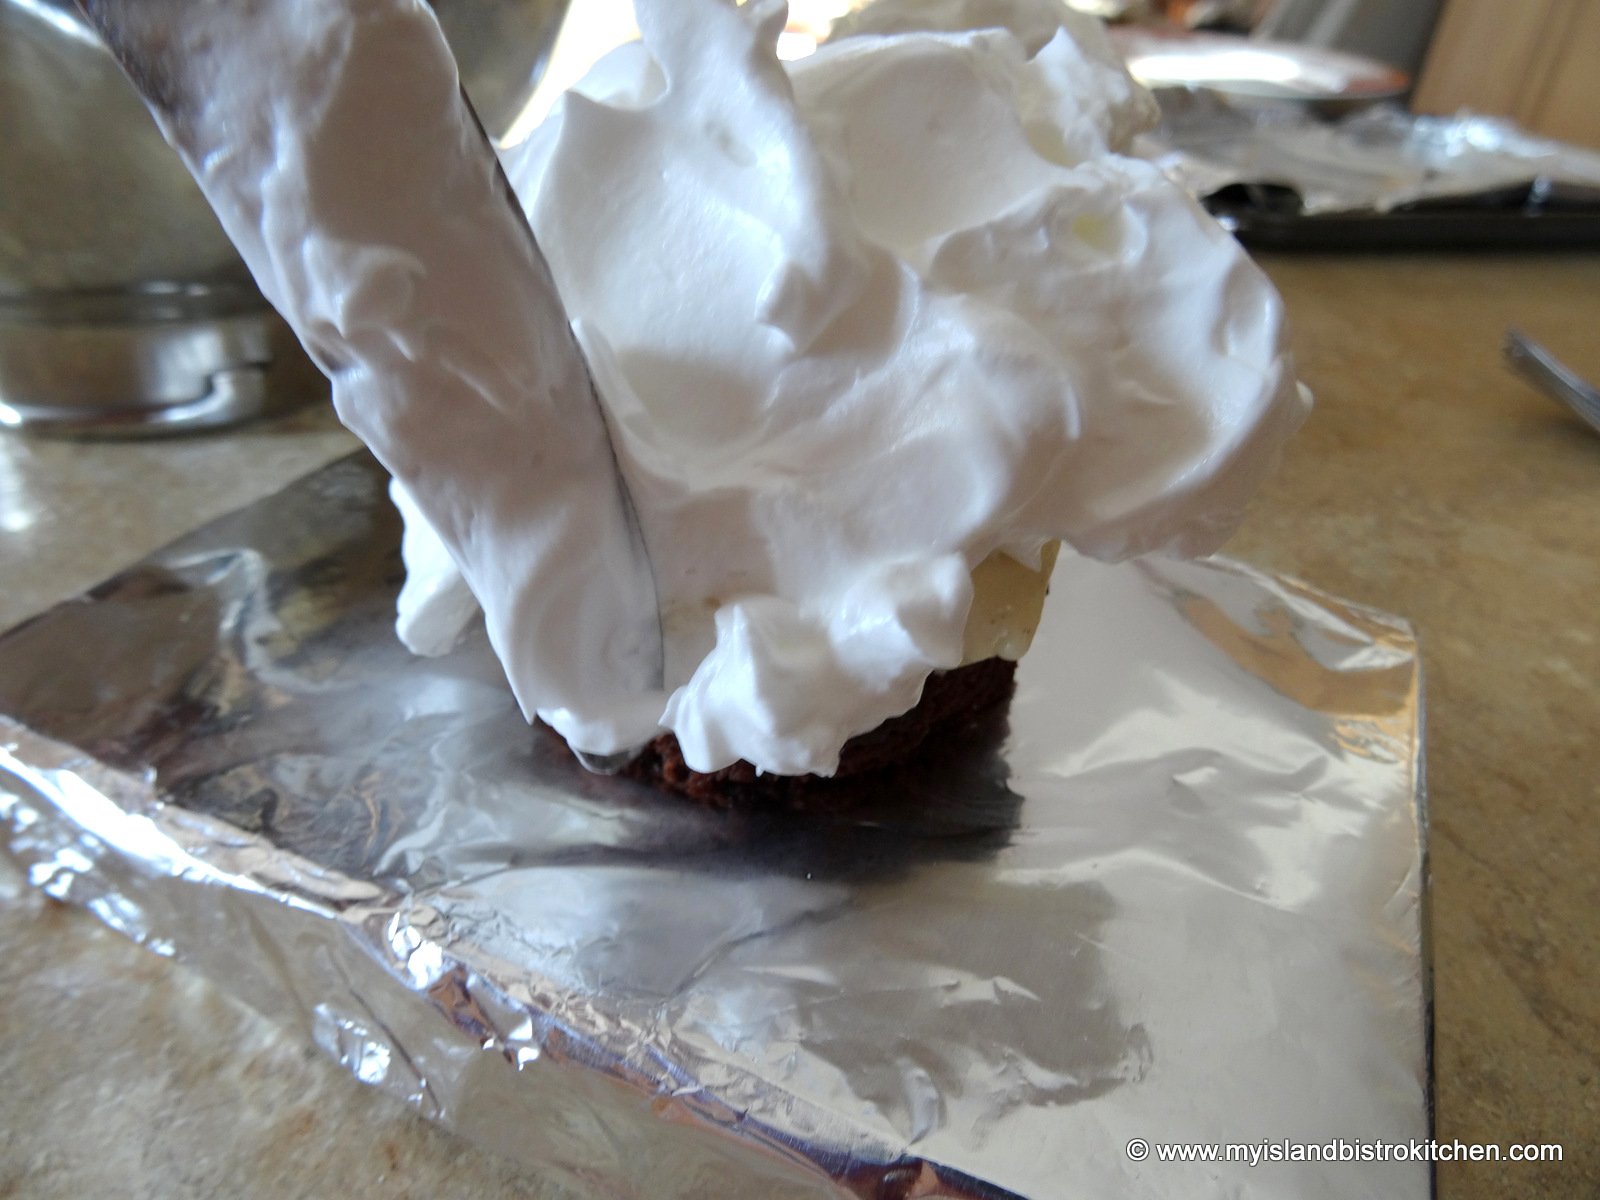
It’s important that both the cake base and the scoop of ice cream be frozen super hard so plan ahead to have them frozen for at least two hours or longer before serving time. I use a couple of small pieces of wooden boards covered with tin foil on which to bake the Alaskas because the boards don’t heat as fast as a metal cookie sheet would which could cause the Alaskas to start to melt down too quickly in the oven. The idea is to keep the Baked Alaskas as cold as possible. The Alaskas are only put in the oven for 2-3 minutes solely to tan the meringue.
The Raspberry Coulis can be made a day or two ahead and kept refrigerated.
I find I have greater success with whipping egg whites for the meringue when they are at room temperature. Allow the separated egg whites to come to room temperature for about 30-40 minutes before whipping.
It’s super important to completely cover the ice cream and base with the meringue as, otherwise, heat will reach the ice cream which will simply melt and ooze out of the Alaska when placed in the oven. The meringue acts as an insulator of sorts which prevents the ice cream from melting for the 2-3 minutes it is in the oven. I have found that even the smallest gap in the meringue will cause the ice cream to melt in even the short time it is in the oven. Work as quickly as you can to apply the meringue so that the ice cream does not soften and melt.
Individual Baked Alaskas with Raspberry Coulis
Raspberry Coulis:
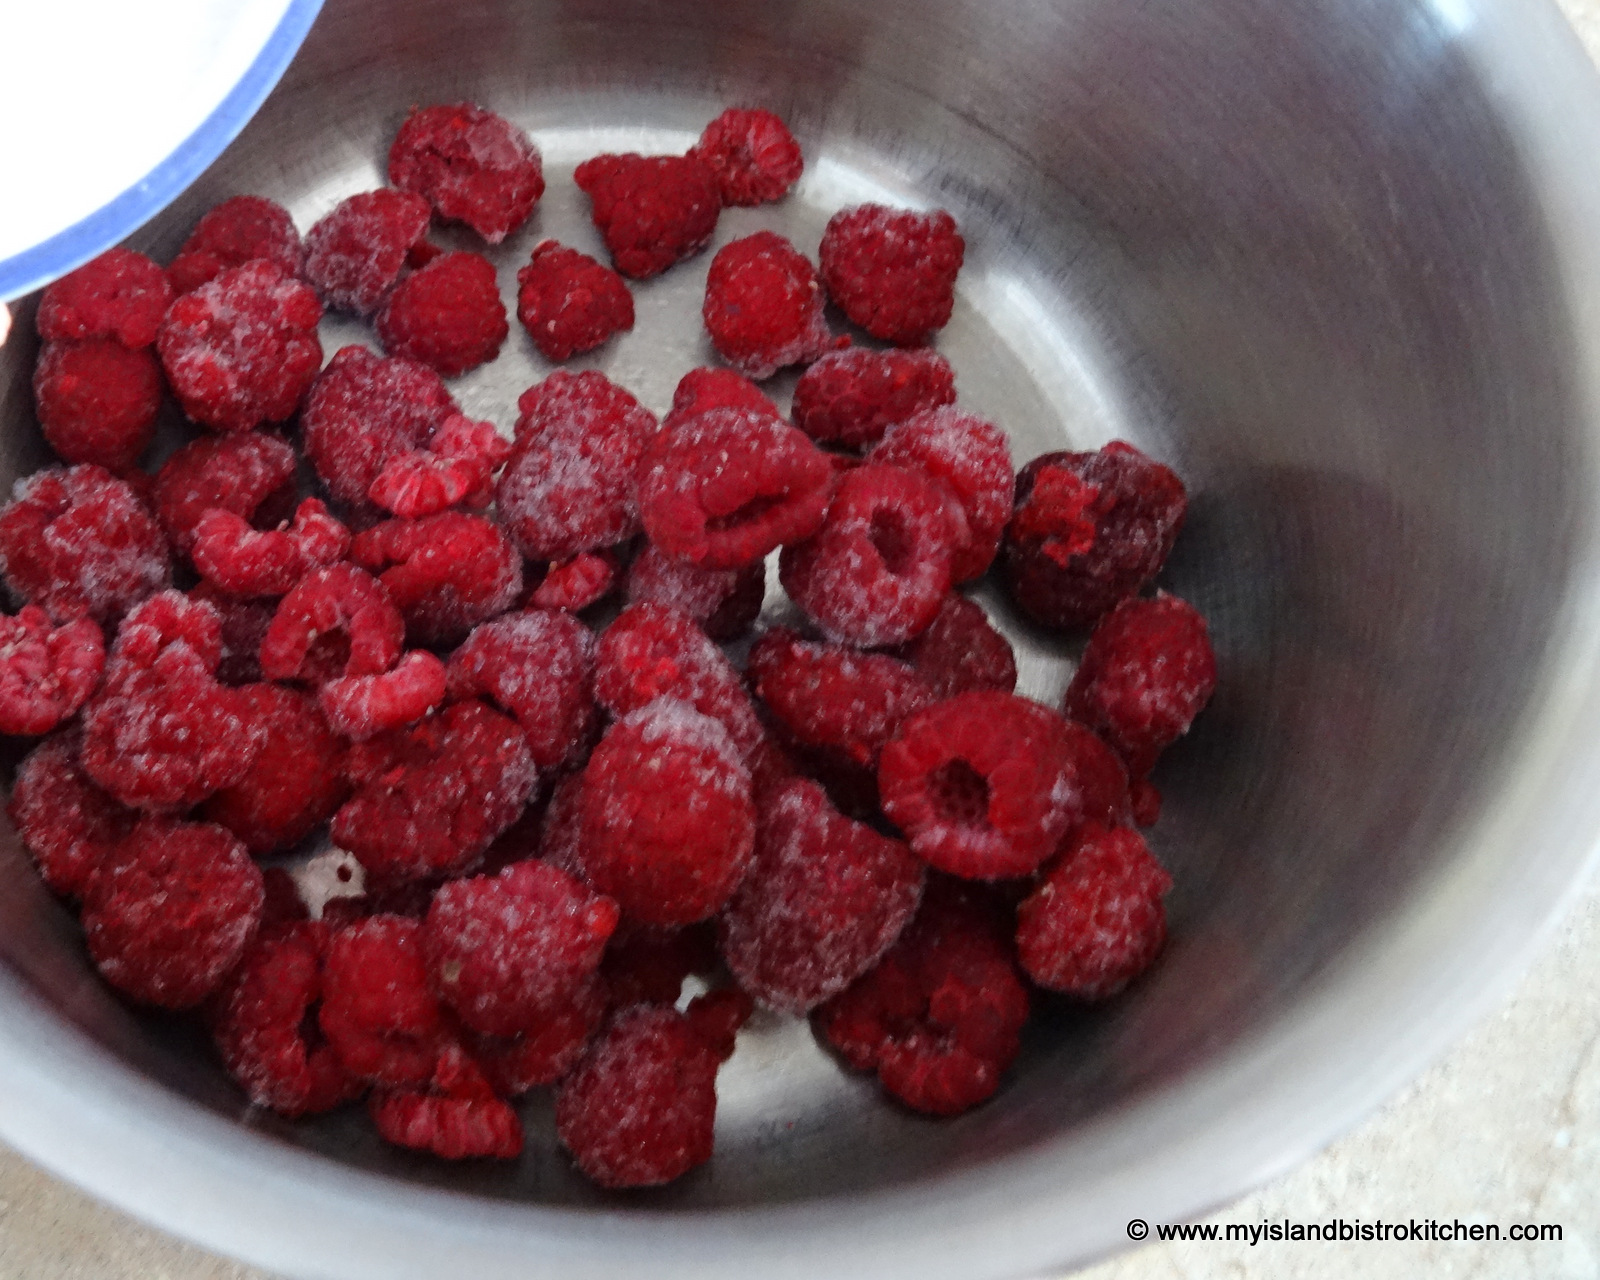
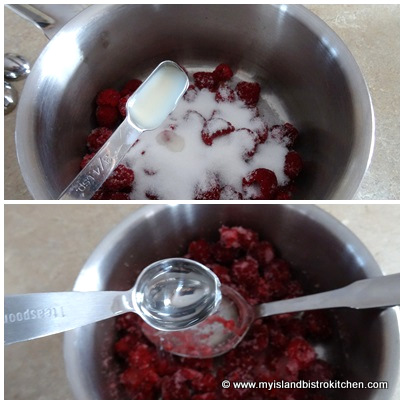
1¼ cups raspberries, fresh or frozen ⅓ cup sugar ¾ tsp lemon juice 1 tsp water
In medium-sized saucepan, combine all ingredients.
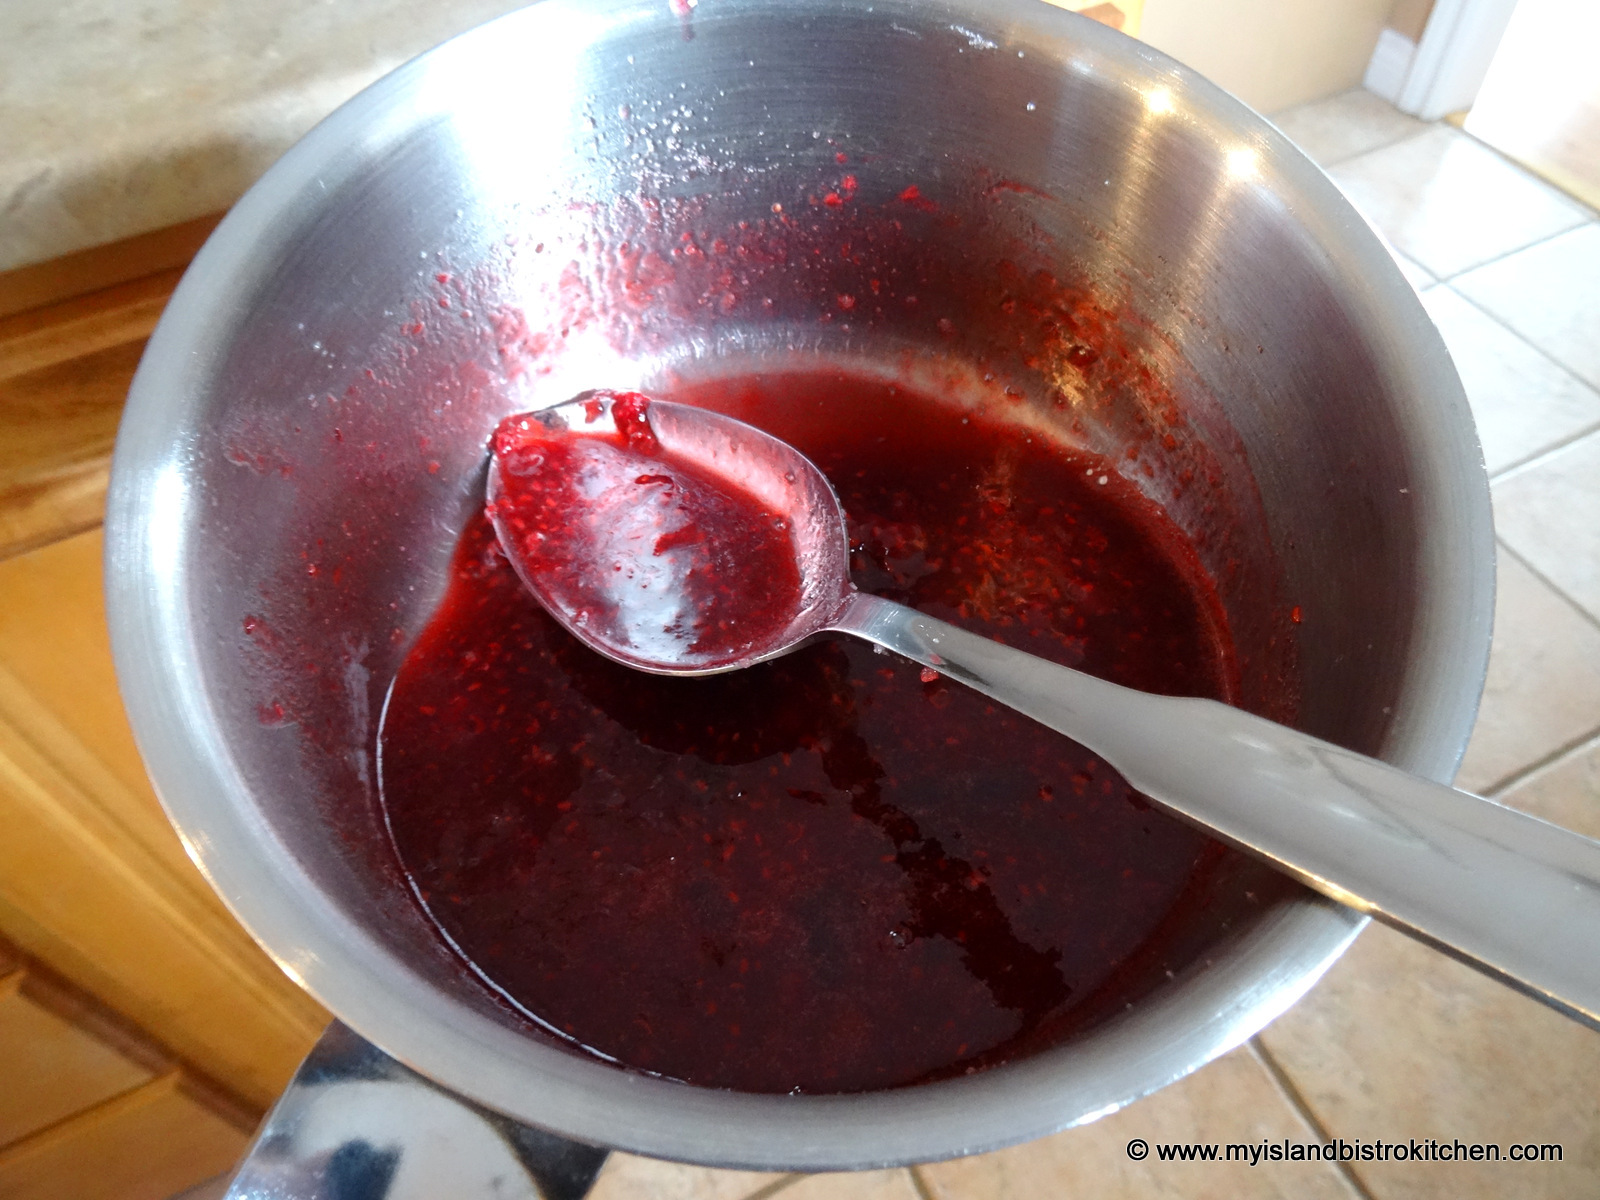
Cook over medium heat, stirring constantly until raspberries have broken down and released their juices.
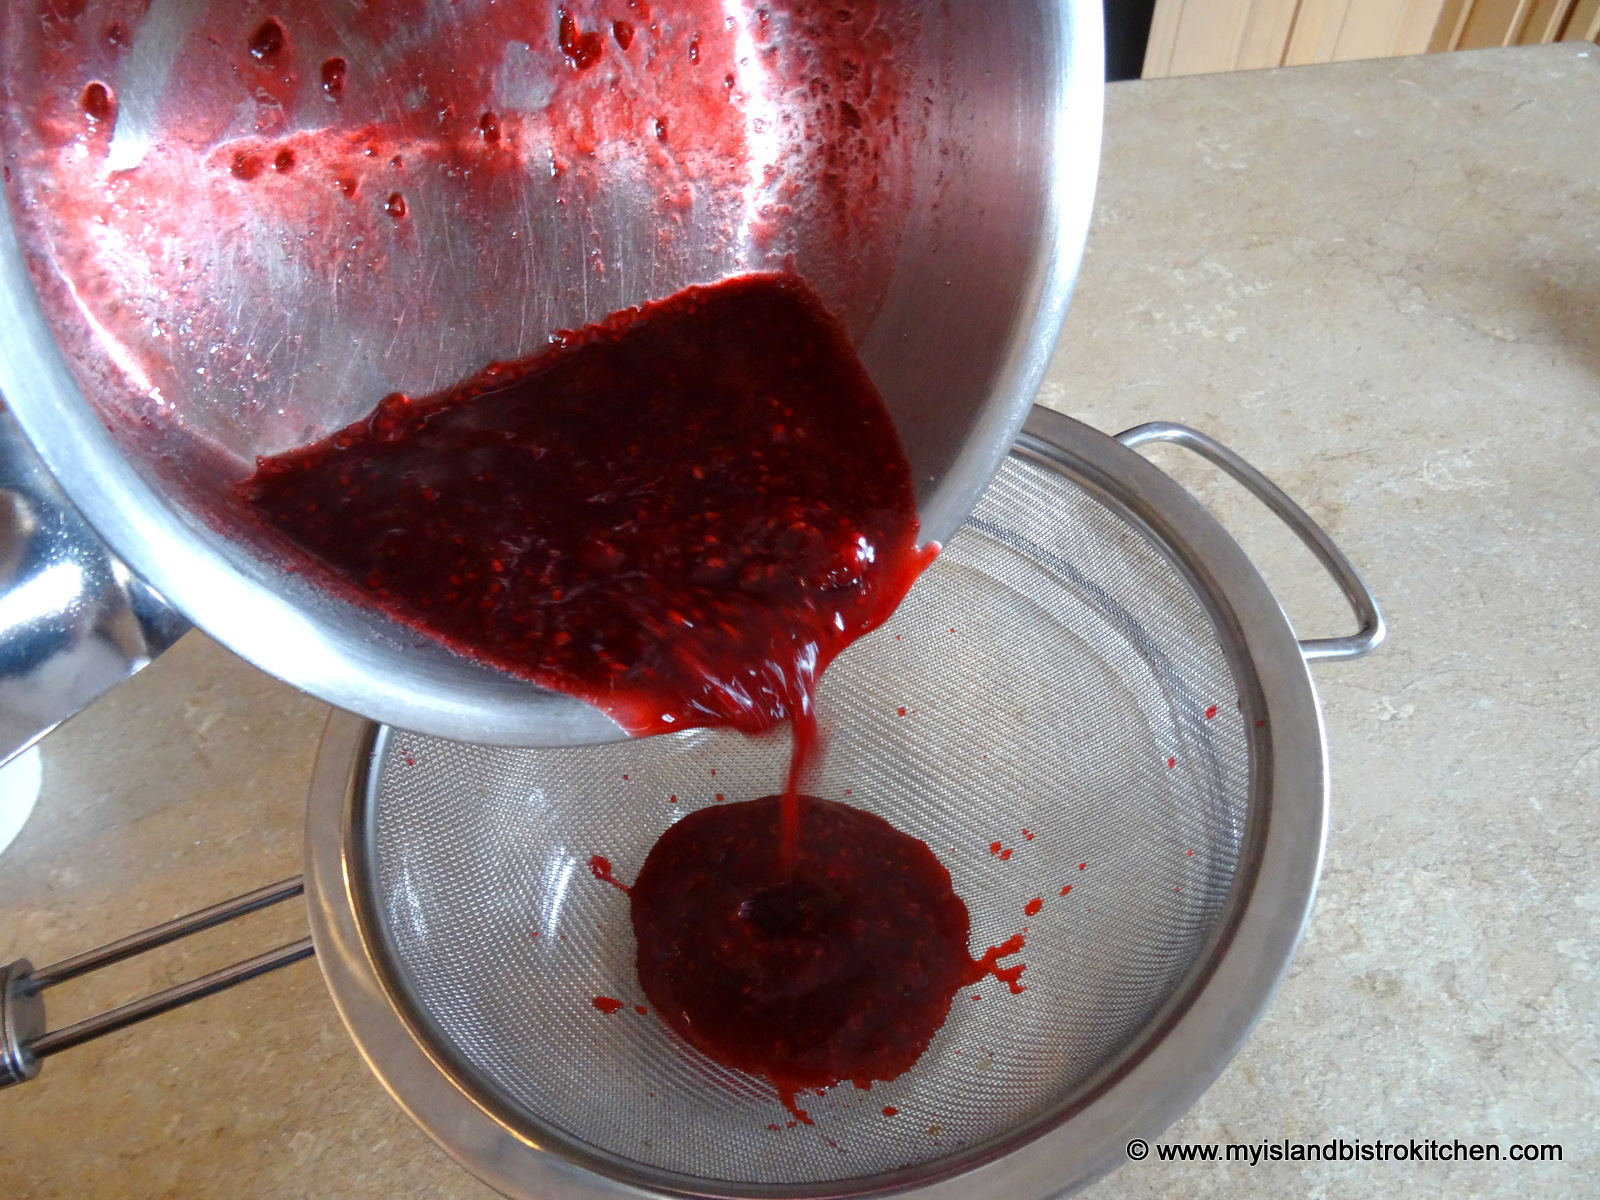
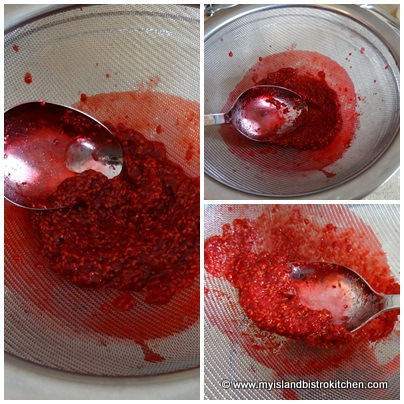
Remove from heat and pour mixture into a fine sieve over a bowl.
Press mixture with the back of a spoon to extract as much juice as possible. Discard raspberry seeds left in the sieve.
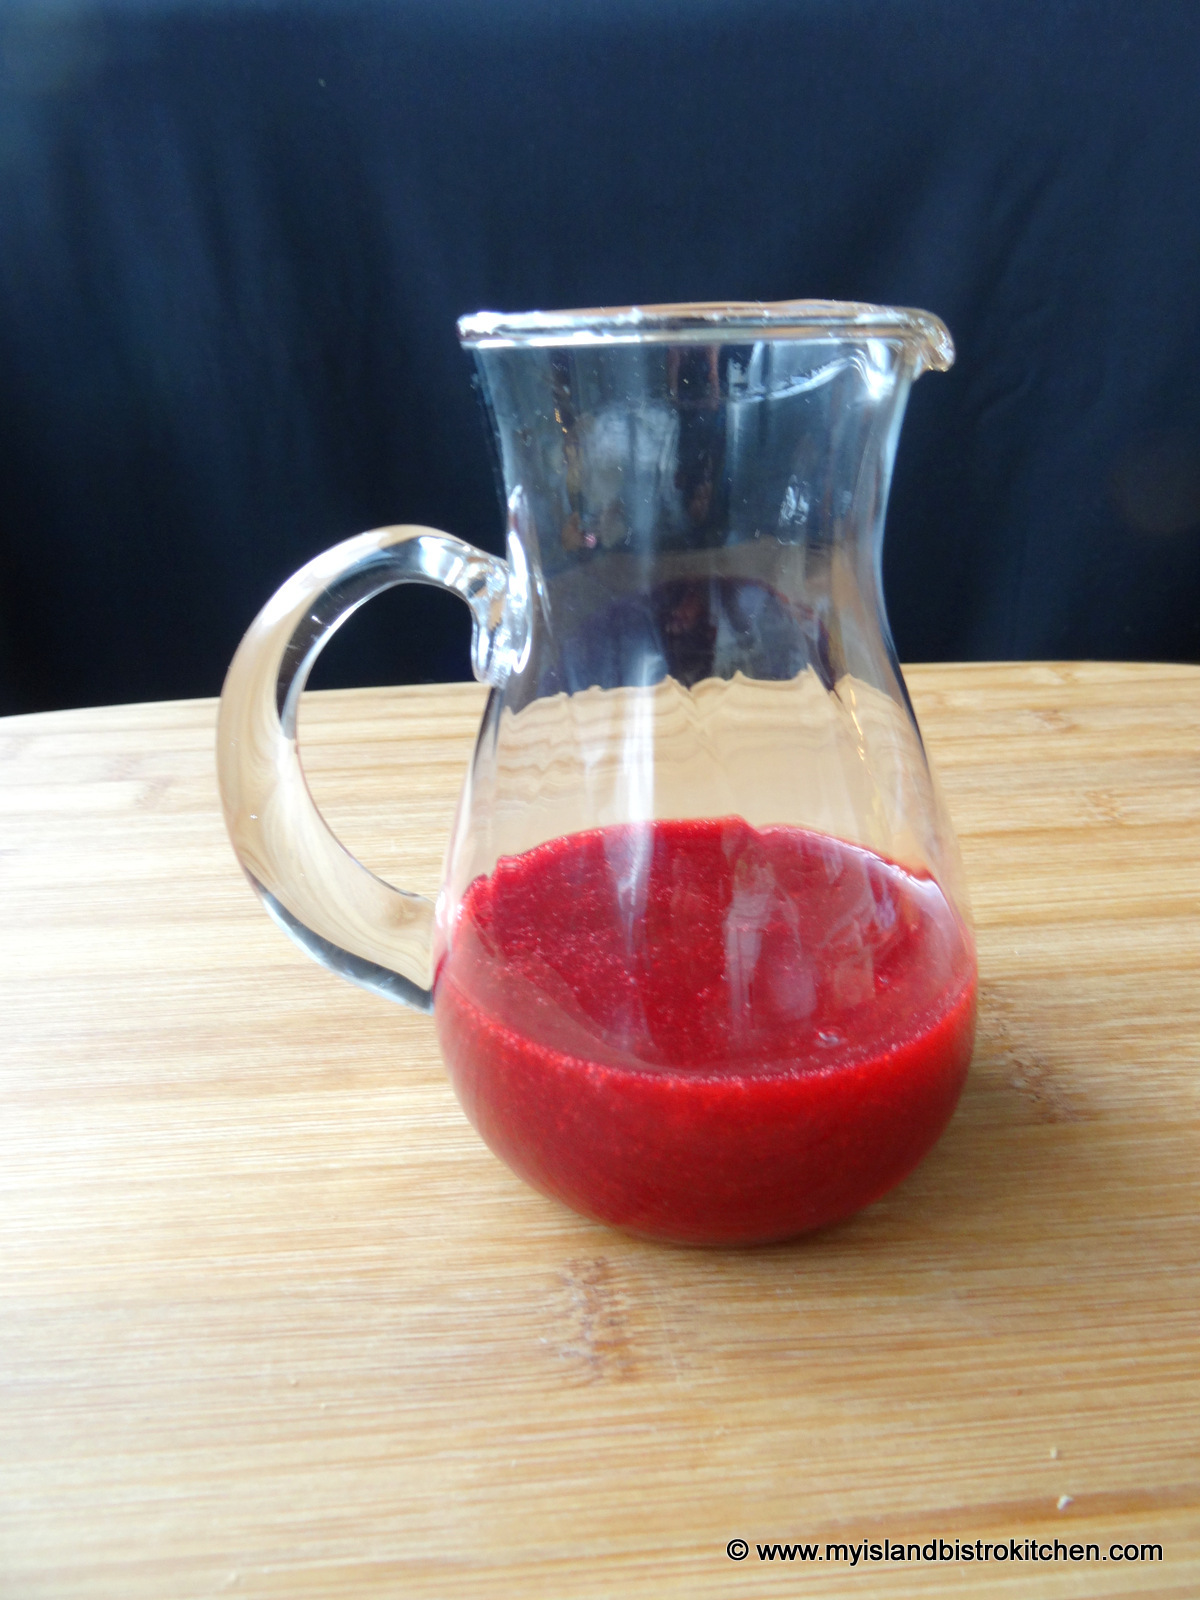
Cover coulis tightly with plastic wrap and refrigerate until well chilled.
Yield: ½ cup
Baked Alaskas:
2 pieces of brownie cut into 2” circles and sliced ½“ – ¾” thick. 2 round scoops of ice cream, your favourite flavour
Meringue:
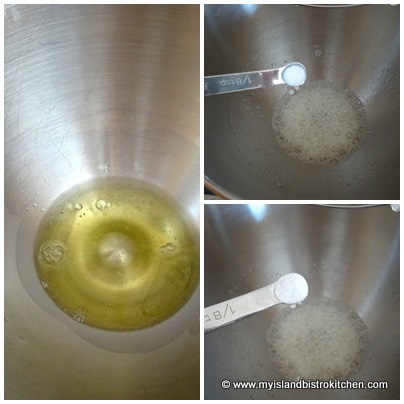
2 large egg whites, room temperature ⅛ tsp salt ⅛ tsp cream of tartar ¼ cup sugar ½ tsp almond flavouring
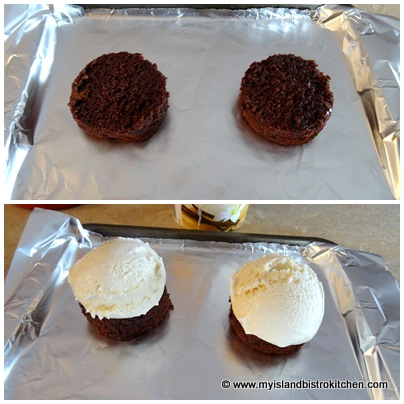
Line a small rimmed baking sheet with tin foil. Using the rimmed baked sheet allows for easy transport to and from the freezer and keeps the Alaska bases from accidentally sliding off. Place the brownie circles on the baking sheet and top each with a scoop of ice cream. Place in freezer for at least 2 hours, until very firm.
At the same time, cover two small boards with tin foil and place in freezer.
When ready to prepare the dessert, place oven rack about 8” from broiler and preheat oven to 475°F.
In bowl of stand mixer, beat egg whites just until frothy then add the salt and cream of tartar.
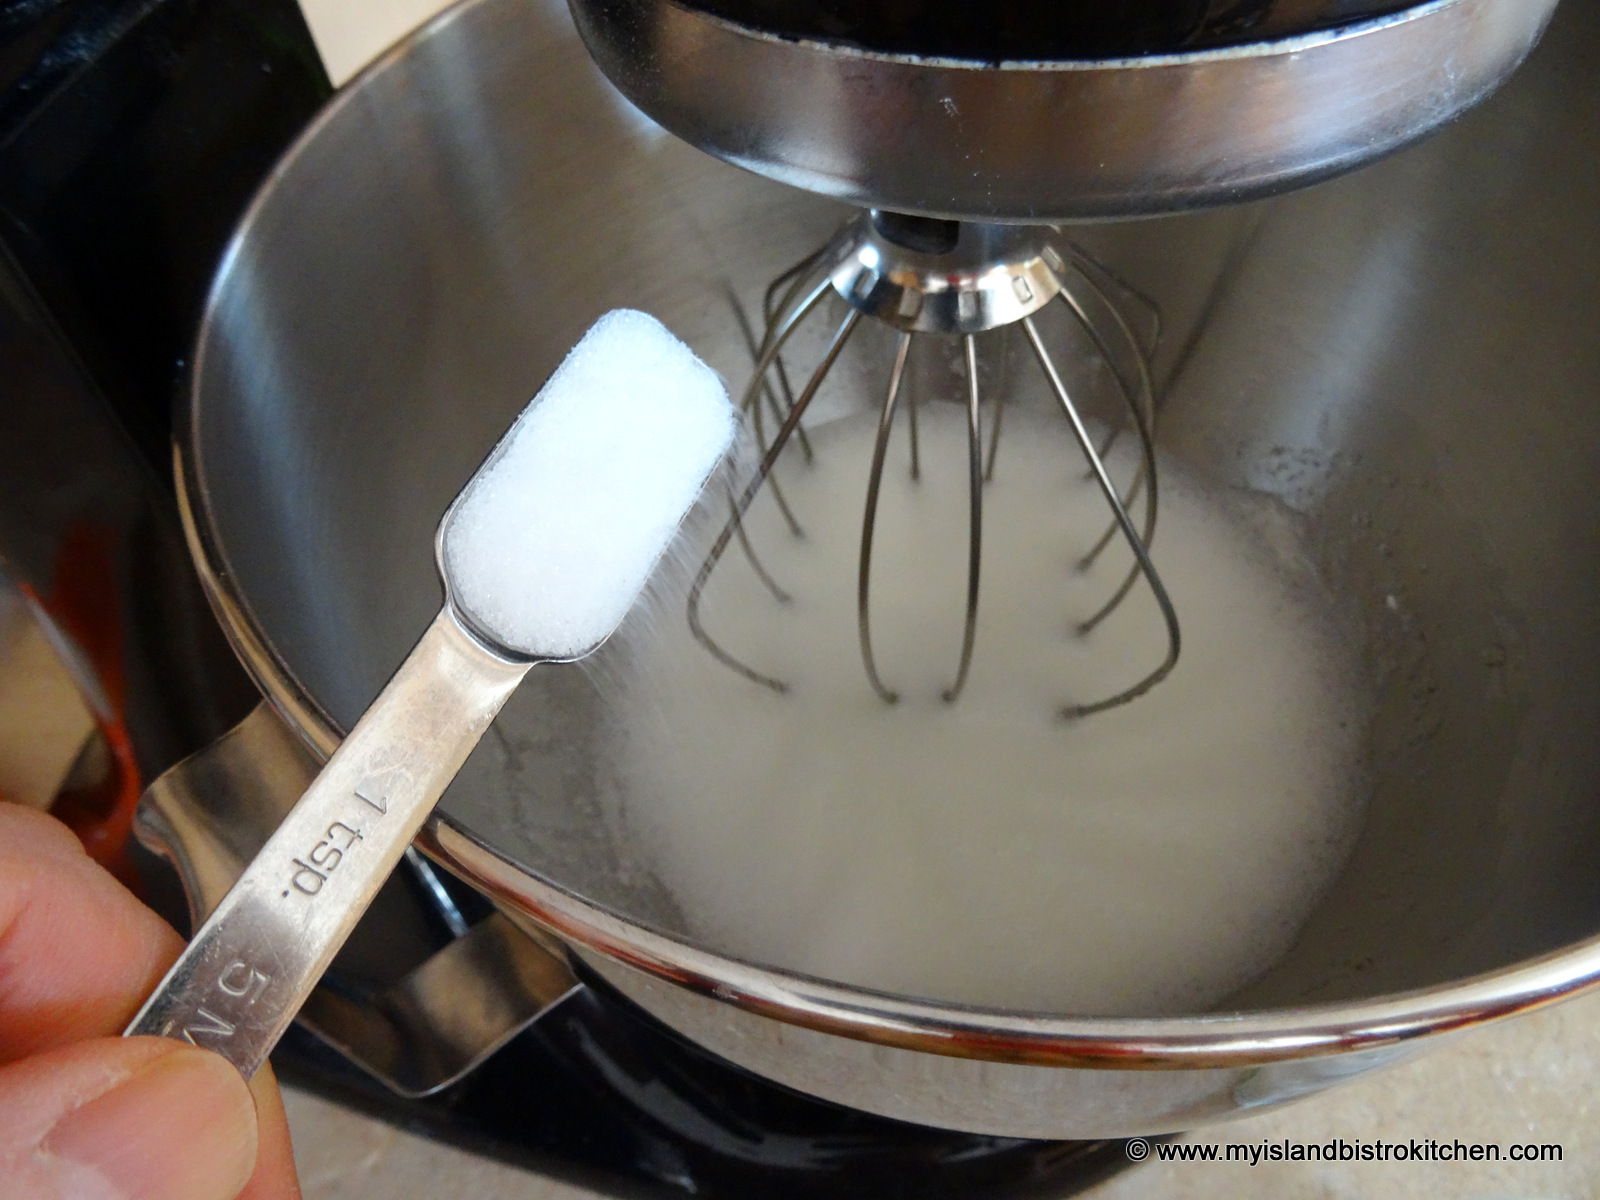
While beating the egg whites, add the sugar slowly, about a teaspoon at a time.
Continue to beat the egg whites until stiff peaks form when wire whisk is lifted from the egg whites.
Add the almond flavoring and beat for 10-15 seconds longer.
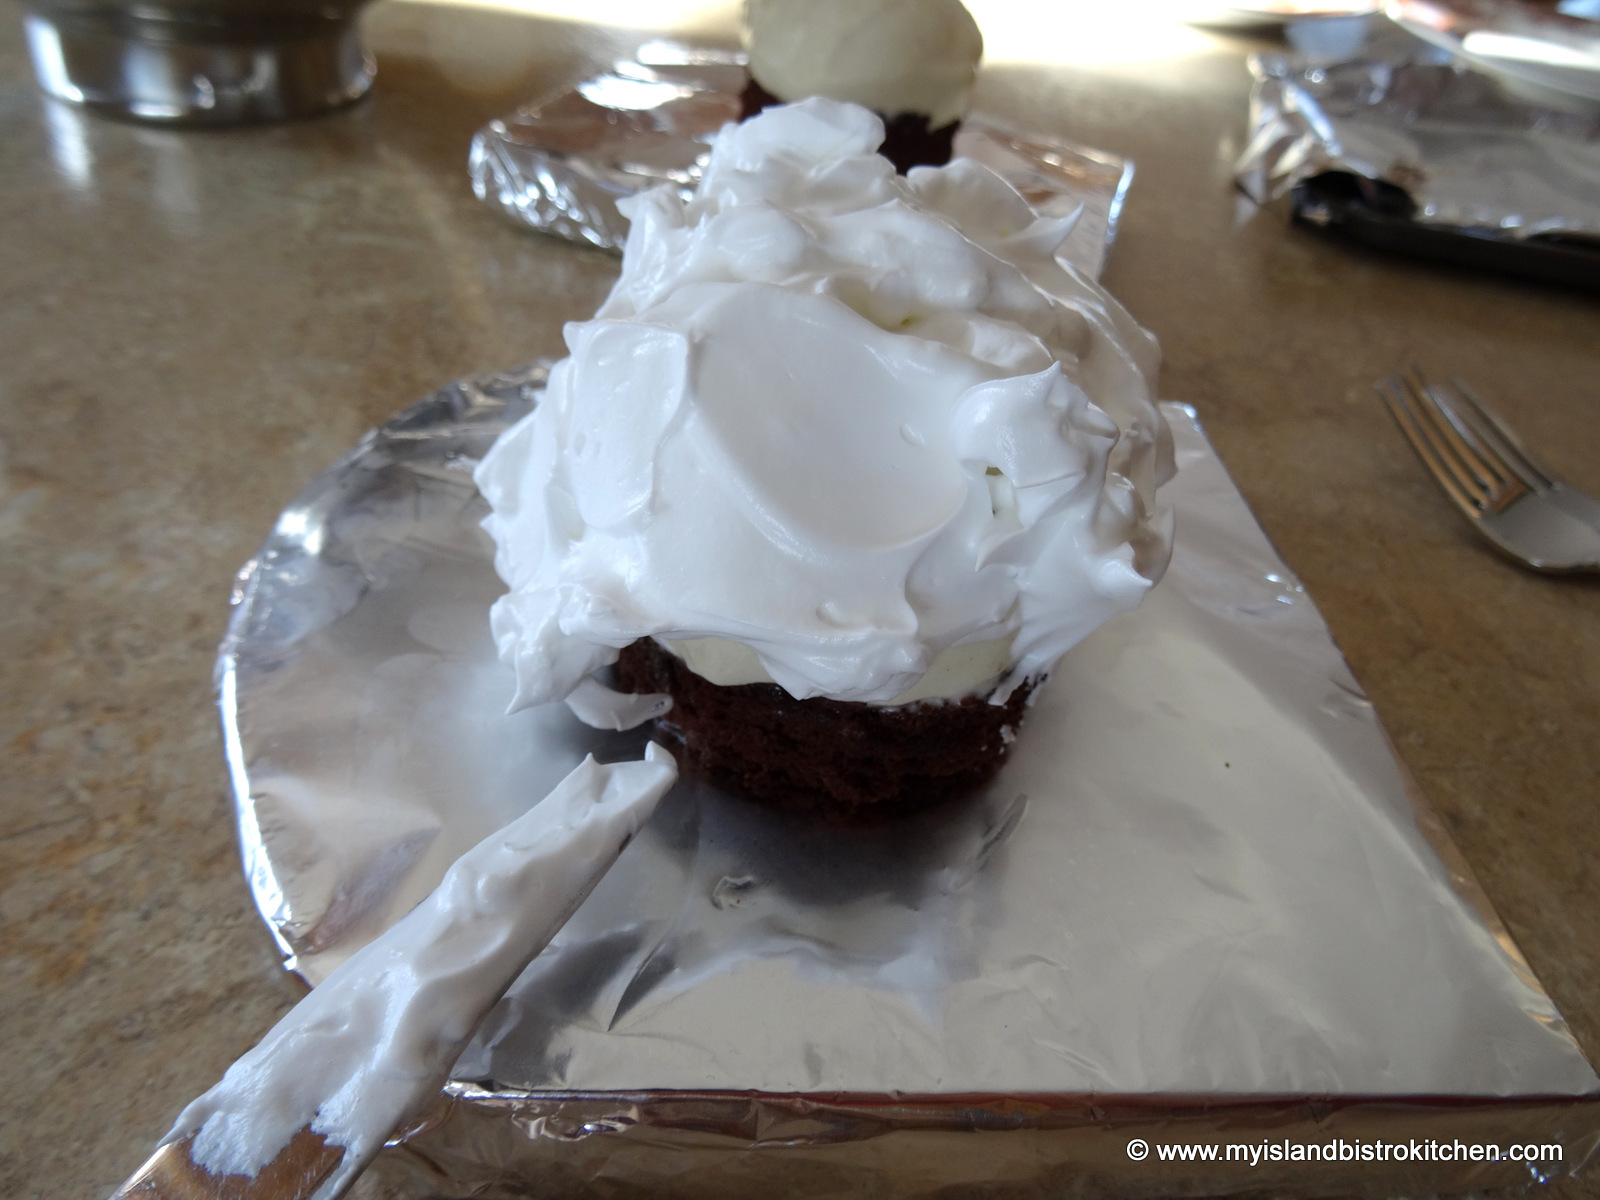
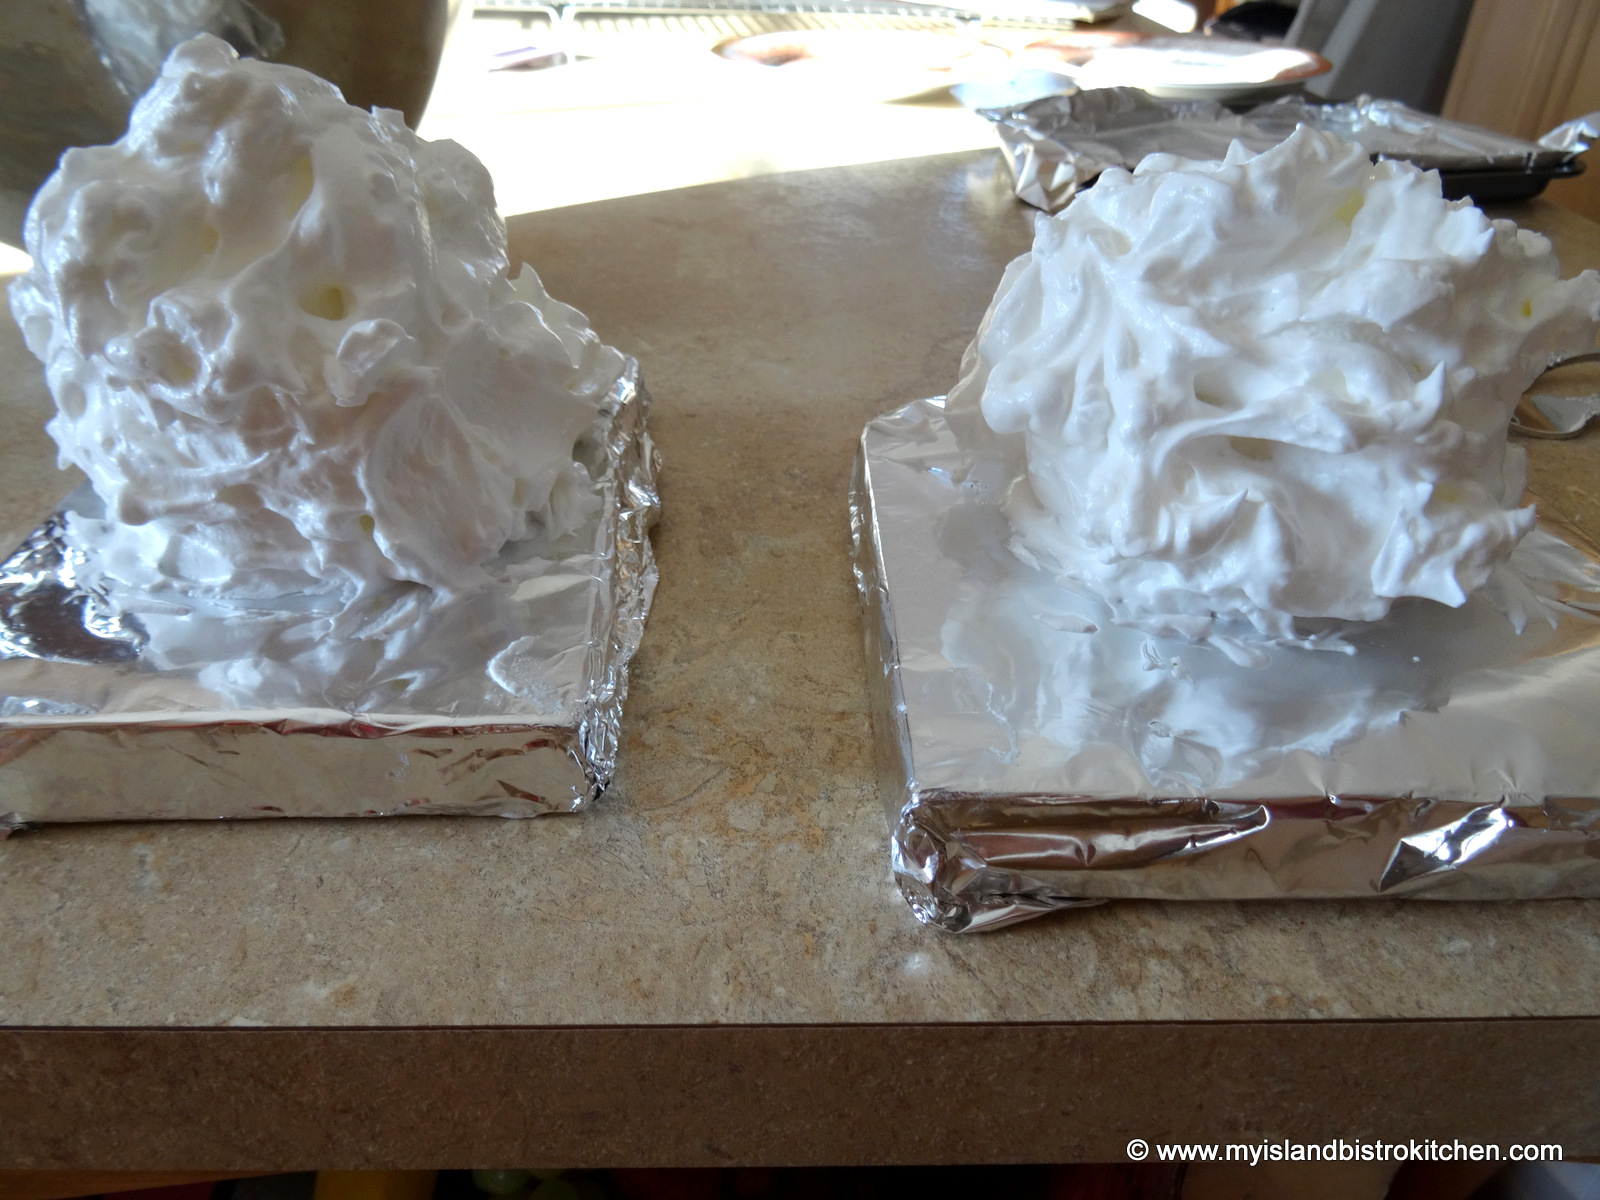
Remove brownie and ice cream rounds along with the foil-covered boards from the freezer. Transfer the brownie and ice cream rounds to the foil-covered boards. Quickly cover the ice cream and brownie completely with the meringue.
With the tip of a knife, twirl the meringue into decorate tips.
Place the Alaskas on a rimmed baking sheet for ease of transfer to and from oven. Bake in the pre-heated oven until the meringue browns, about 2-3 minutes.
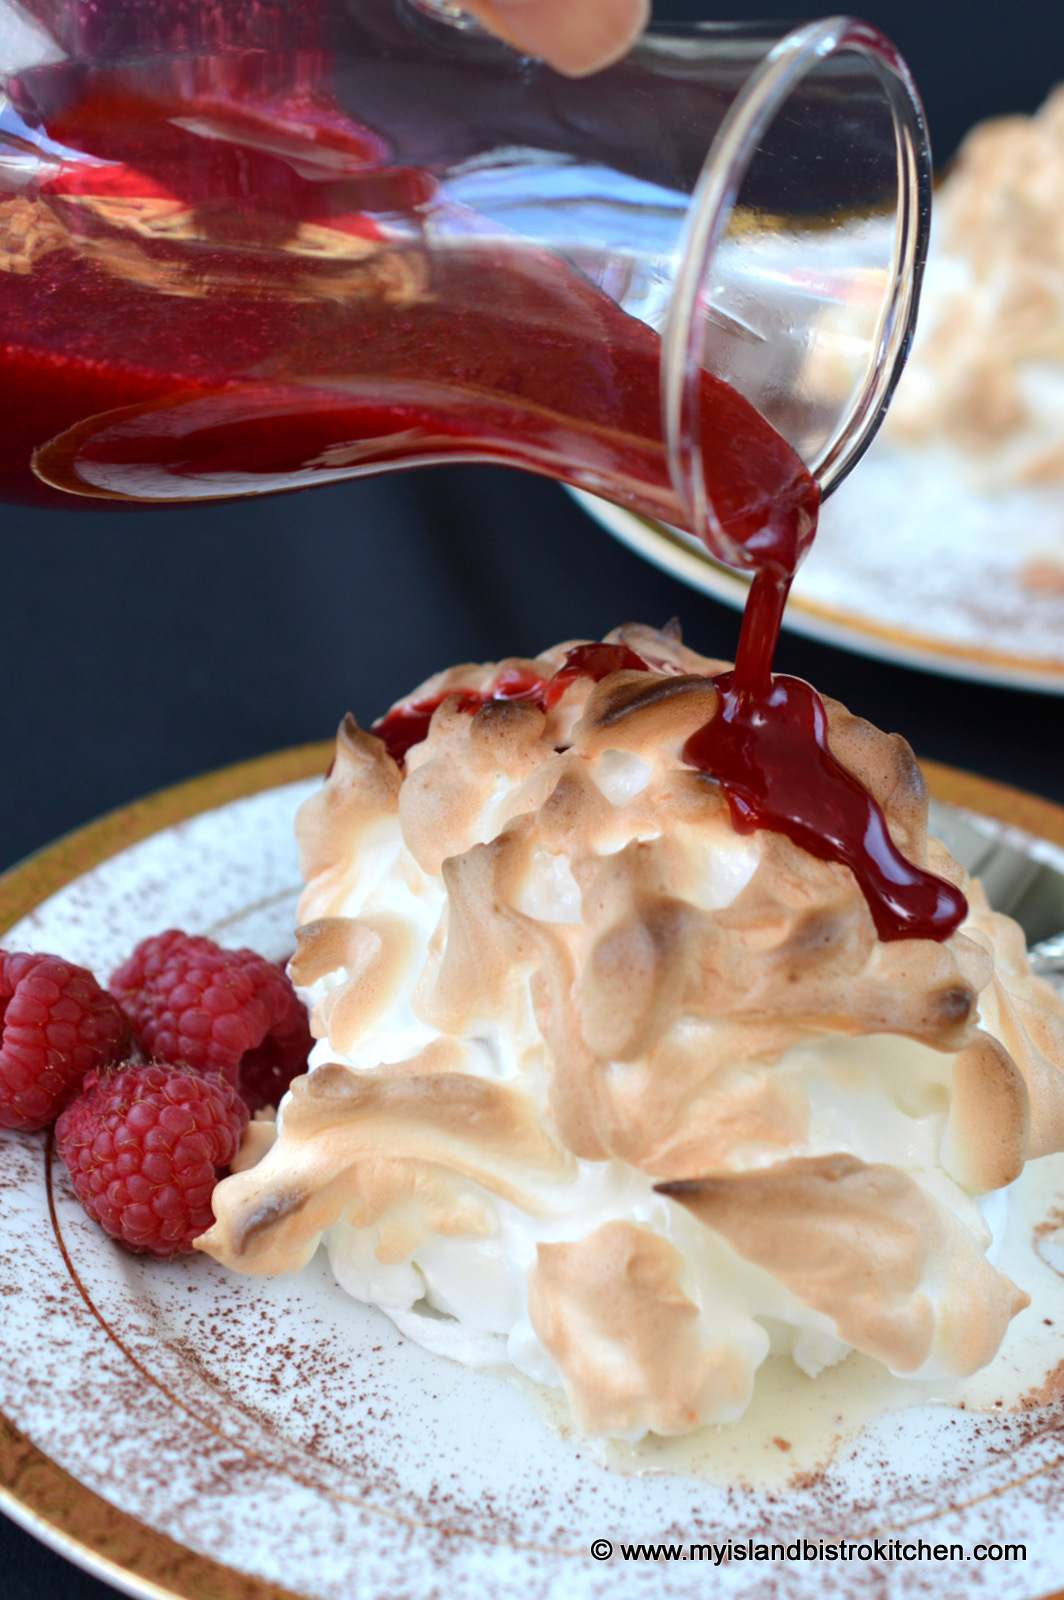
Remove from oven and plate. Drizzle with Raspberry Coulis and garnish with fresh raspberries. Serve immediately.
Serves: 2
——————
Thank you for visiting “the Bistro” today. There are lots of ways to connect with “the Bistro” through social media:
Title:Easy Everyday Slow Cooker Recipes Author: Donna-Marie Pye Publication Date: 2014 Publisher: Robert Rose Inc. Cover: Softcover Price: $24.95 (US$)/$27.95 (CDN$) Pages: 352
I recently received a complimentary review copy of Donna-Marie Pye’s “Easy Everyday Slow Cooker Recipes” from publisher, Robert Rose. This compendium of 200 recipes is, in my view, really the only slow cooker recipe book the home cook needs as it contains a vast variety of taste-tempting recipes.
Divided into 10 chapters, the recipes are conveniently and logically grouped: Soups; Stews: Chilis and Beans; Poultry; Beef and Veal; Pork and Lamb, Big-Batch Dinners for a Crowd; Meals for Two, Double-Duty Dinners; and Desserts. There is also a complete index of recipes in the back of the book. While there aren’t photos to accompany every recipe, there are over 75 full-page, color photographs and they are well-executed and of high quality.
The first 21 pages of the book are dedicated to explaining the construction of the slow cooker along with handy and useful tips on cooking with the counter top appliance, adapting conventional recipes for use in slow cookers, and information on food safety. Undoubtedly of use to even seasoned home cooks, this segment of the book would be particularly useful for those unfamiliar with slow cookers. I recommend reading these pages before starting to make any recipe from the book as they contain some great “meat”.
Each recipe is well laid out with print font that is easy to read. Ingredients are listed in the order in which the directions call for them which facilitates preparation. Ingredient amounts are given in both imperial and metric measurements. Directions are described in easy-to-follow, step-by-step method. Each recipe is accompanied by a friendly lead-in paragraph. As well, each recipe also has a “Tip” box on the page so the book becomes a self-teaching tool for the home cook. Look for tips on serving suggestions, liquids to tenderize meats, ingredient substitutions, and other useful hints for cooking with a slow cooker. In addition, with many of the recipes, there is also an explanation of any special ingredients the recipe may use. For example, this might include a description of fennel and how to prepare it for use or what certain foods, like tamari, are used for. Each recipe also gives its yield in terms of number of servings the recipe is expected to generate.
In terms of ingredients, I found most recipes call for easy-to-find ingredients that are likely to be available in most large supermarkets. However, there are a few recipes that call for ingredients that are unfamiliar to me – for example, sambal oelek or edamame – but these recipes are the minority in the book. For the most part, ingredients are inexpensive with the exception of the meat called for in any recipe. As with any recipe, I recommend pre-reading each recipe carefully before beginning preparation to ensure you have all the necessary ingredients and/or that they are ones you can source in your area. Some recipes do incorporate more contemporary/trendy ingredients such as balsamic vinegars, roasted red peppers, fennel, and salsa. In my view, the quantity of ingredients (particularly spices and flavourings) called for in the recipes is reasonable and the instructions are clear in terms of explaining if an item is to be finely or coarsely chopped or minced, whether to include liquid with contents of a canned ingredient, and the size of pieces into which the meat or vegetables are to be cut.
One of the things I like most about this book is the section on meals for two as not many recipe books include scaled-down recipes for the smaller household.
Test-driving Recipes
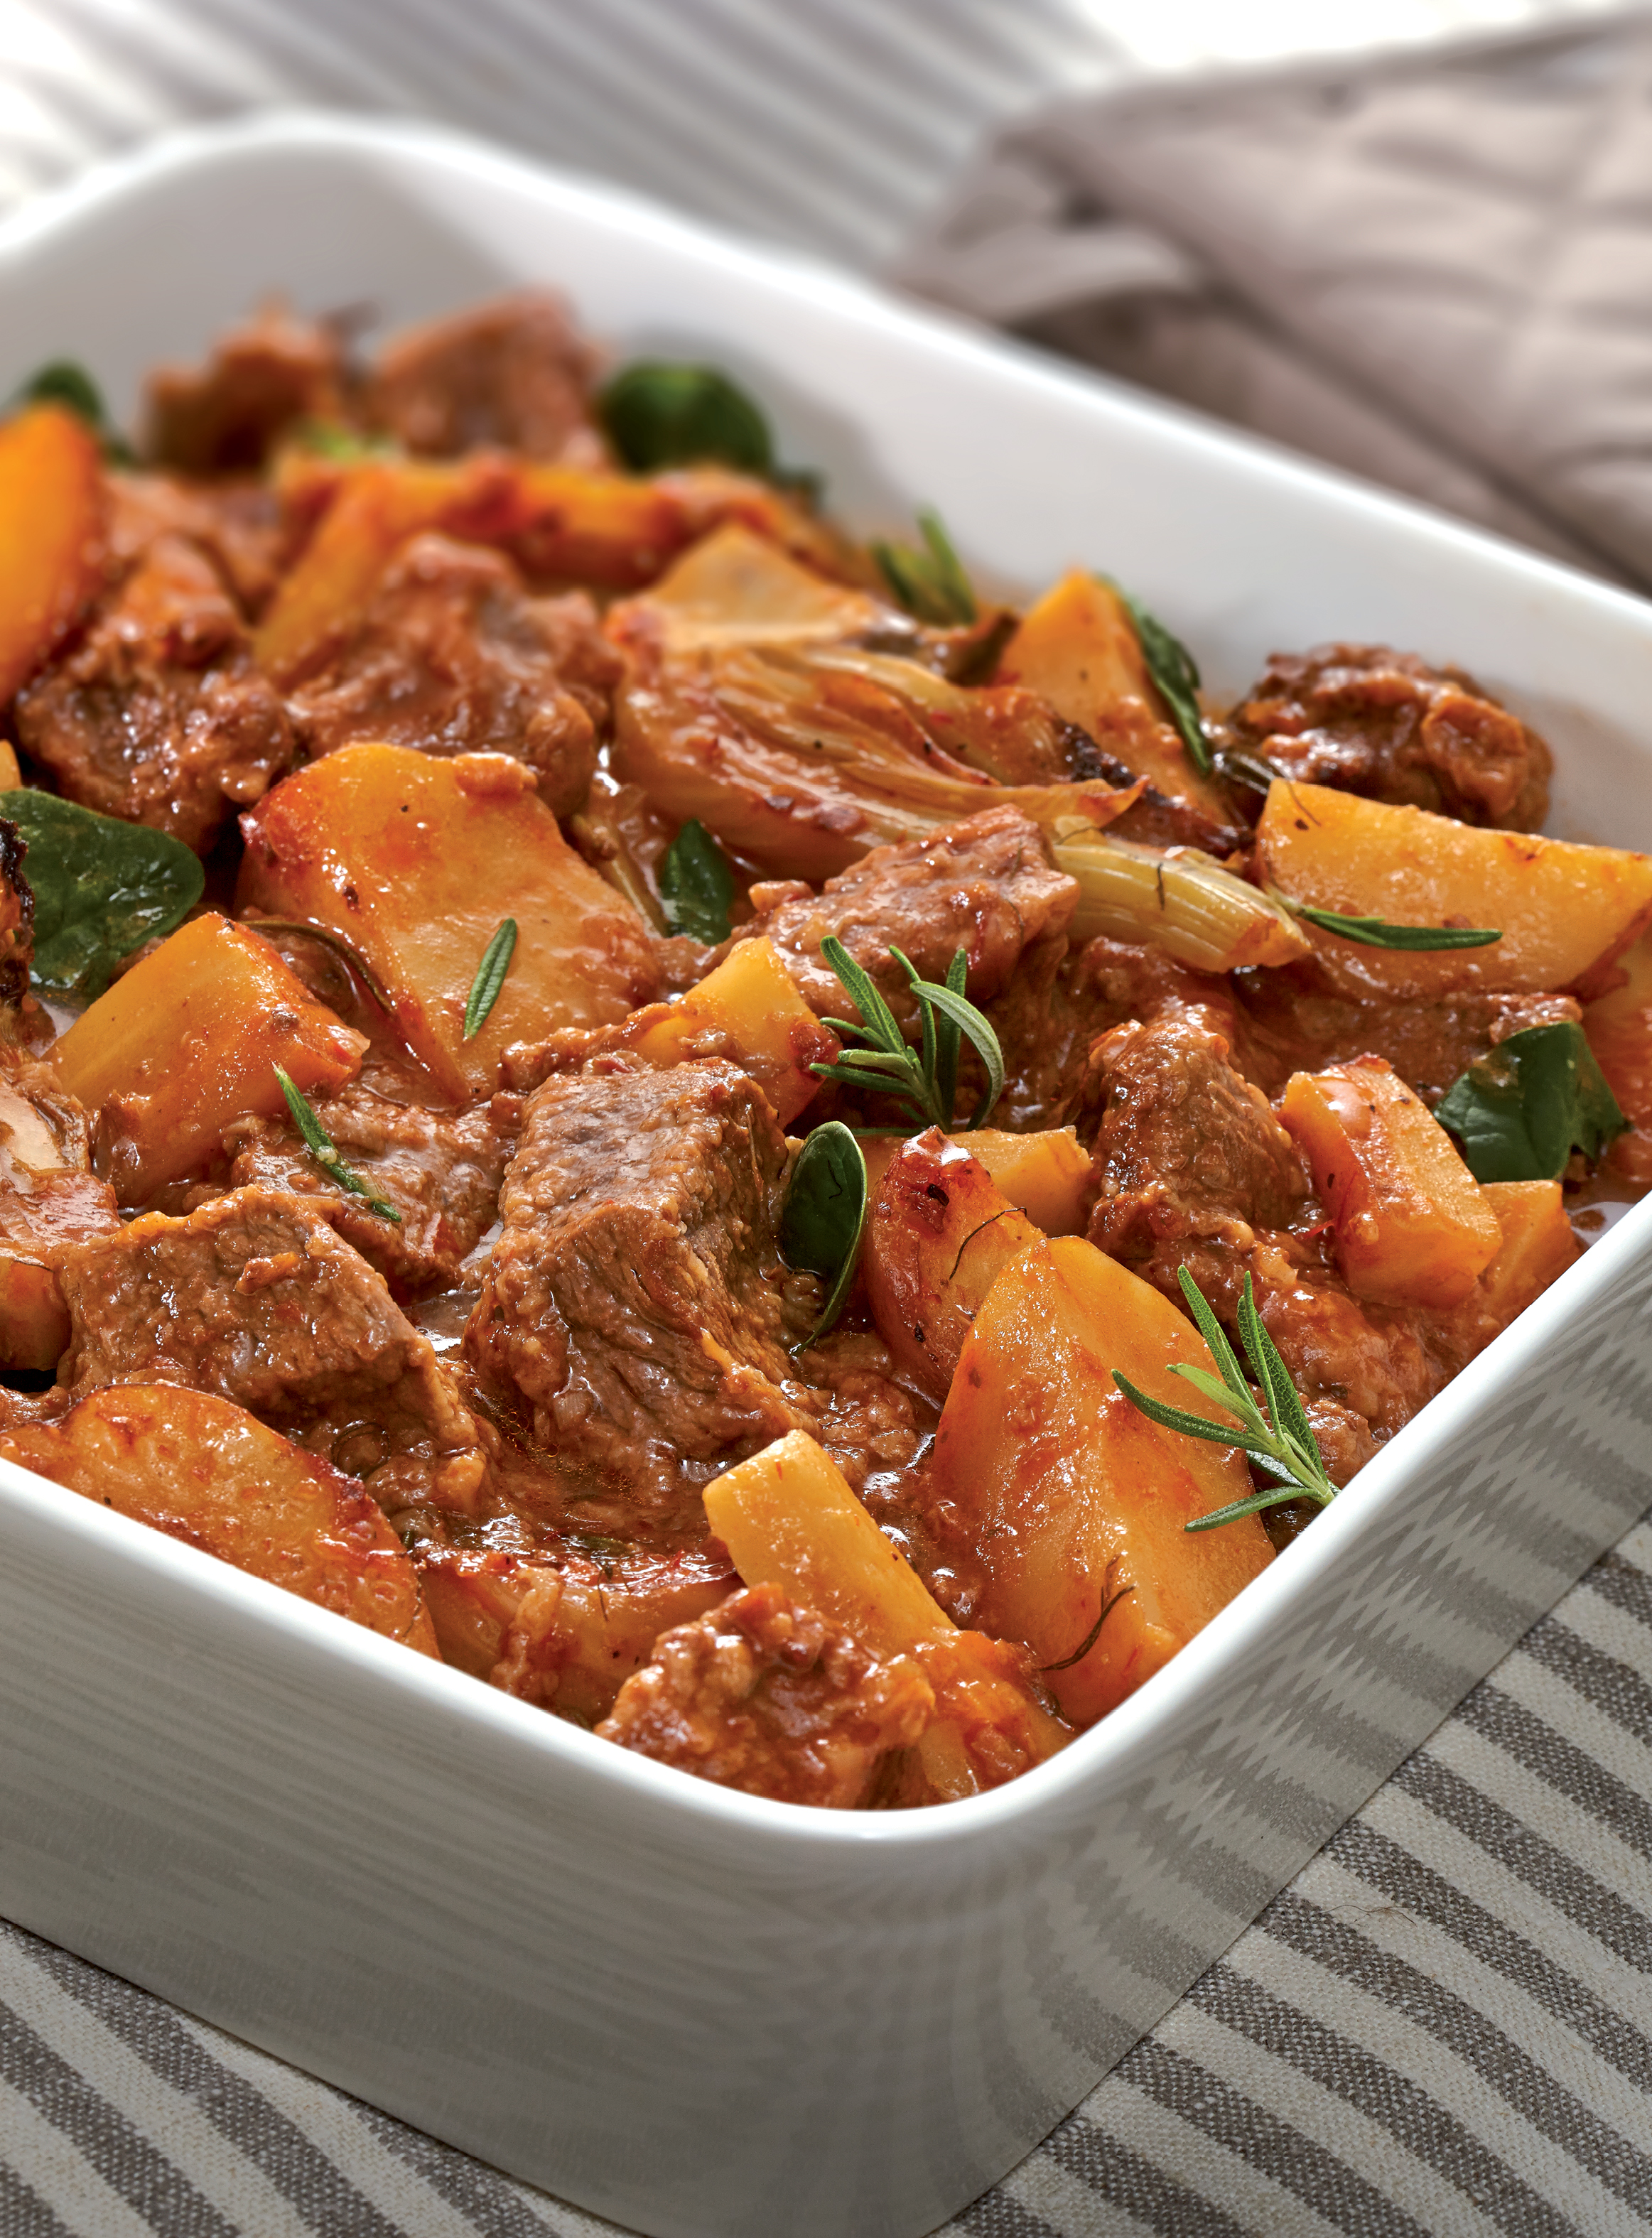
I recently made the Country Italian Beef Stew for which the publisher is allowing me to share the recipe and photo along with my review (recipe follow below review). This is a yummy stew with a delicious brown sauce/gravy and is one I will definitely make again. This was also the first time that I cooked with a fennel bulb. Not being familiar with whether all fennel bulbs are the same size or not (the recipe called for one fennel bulb), I erred on the side of caution and used only a good half of the bulb in case I didn’t like it. However, I loved it – it has a subtle but not overpowering fennel flavour. This stew has good flavour and texture and reheats well, too.
Concluding Thoughts
I like this book. Very much, in fact, and it will make its way on to my crowded, and now premium-spaced, recipe bookcase and I will use the book as it contains many taste-tempting recipes. Retailing for $24.95 (US$)/$27.95 (CDN$), I feel this book is reasonably priced for its content and quality. If you are a committed slow cooker user, I think you’ll find this a wonderful inspiration for many meals and, if you are new to slow cookers, I believe you will find a number of new recipes to add to your meal preparation.
Country Italian Beef Stew (page 66, beef, international) Makes 6 to 8 servings
This stew features the wonderful flavors of the Mediterranean — fennel, basil and rosemary. Fennel has a distinctive mild licorice flavor, but even if you are not a licorice fan, you will enjoy the bold flavors of this beef stew. • Minimum 4-quart slow cooker 3 tbsp all-purpose flour (45 mL) 1 tsp salt (5 mL) 1 tsp freshly ground black pepper, divided (5 mL) 2 lbs stewing beef, cut into 1-inch (2.5 cm) (1 kg) cubes 2 tbsp vegetable oil (approx.) (30 mL) 6 tiny new potatoes, halved or quartered (6) 2 parsnips, cut into 1- to 2-inch (2.5 to 5 cm) (2) pieces 1 fennel bulb, trimmed and cut into 1 1⁄2-inch (1 cm) wedges 1 cup chopped onion (250 mL) 1 cup beef broth (250 mL) 1⁄2 cup dry red wine (125 mL) 1 can (71⁄2 oz/213 mL) pizza sauce (1) 4 cloves garlic, minced (4) 1 tsp dried rosemary, crumbled (5 mL) 1 cup fresh baby spinach leaves (250 mL)
1. In a heavy plastic bag, combine flour, salt and 1⁄2 tsp (2 mL) of the pepper. In batches, add beef to bag and toss to coat with flour mixture. Discard excess flour mixture. 2. In a large nonstick skillet, heat half the oil over medium-high heat. Cook beef in batches, adding more oil as needed, for 5 minutes or until browned all over. Using a slotted spoon, transfer to slow cooker stoneware. Stir in potatoes, parsnips, fennel and onion. 3. In a 2-cup (500 mL) measuring cup, combine broth, wine, pizza sauce, garlic, rosemary and the remaining pepper. Pour over beef mixture. 4. Cover and cook on Low for 8 to 10 hours or on High for 4 to 5 hours, until bubbling. Just before serving, stir in spinach until wilted.
Tip: Crush dried rosemary between your thumb and fingers before adding it to a dish. This helps release the full aromatic flavor of the herb.
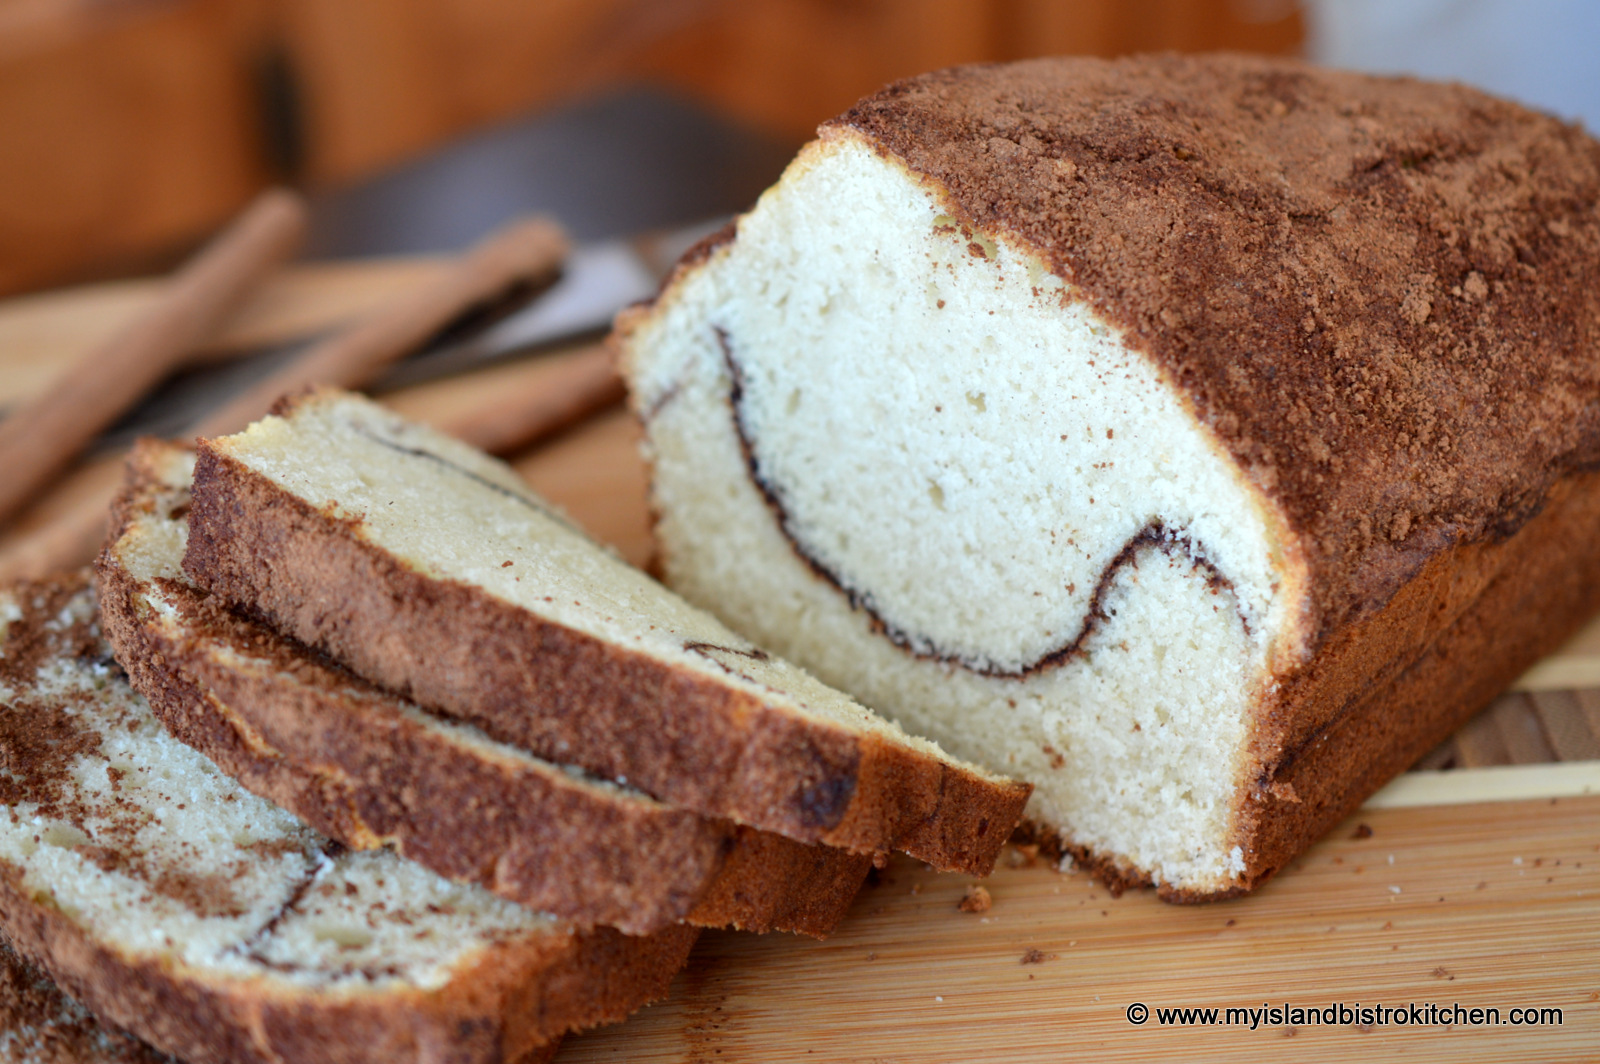
Did you ever get the urge to bake (often on a storm day, for example) and realize that every recipe you look at requires a shopping trip to the supermarket? Well, here’s my answer to that dilemma. Today’s recipe is Cinnamon Quick Bread that takes no more than pantry staples. So long as you have basic baking supplies, you can whip this tasty sweet bread up in no time. Continue reading Cinnamon Quick Bread→
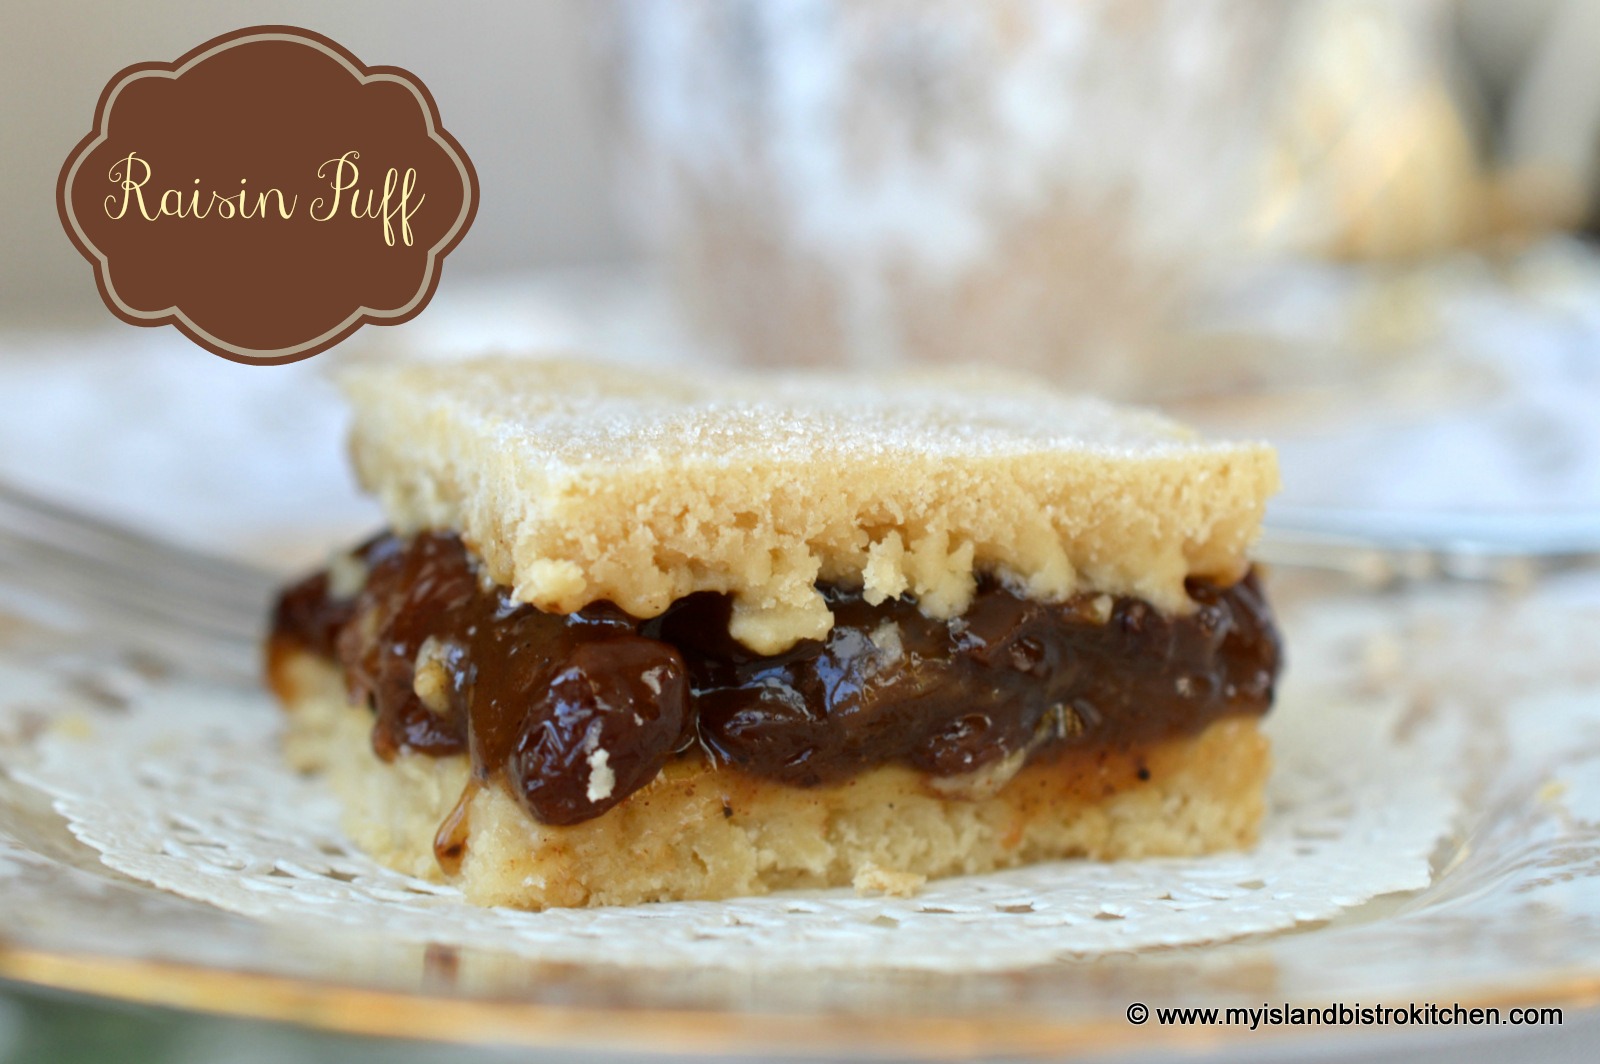
Today, I’m sharing the recipe for a real old-fashioned vintage dessert. Some of you may remember your mother or grandmother making Raisin Puff (aka Plum Puff) dessert or, perhaps, you have made it yourself. Continue reading Raisin Puff (aka Plum Puff)→
Today, I celebrate my third blogiversary, three years blogging about food. For those of you who are regular followers of my blog, you’ll notice I often focus on food that is produced in my home province of Prince Edward Island on the East Coast of Canada and I frequently features stories about Island food producers. As I have said countless times, we may be Canada’s smallest province but we sure do produce some mighty fine food! Along with top quality food products to work with, Island-produced food gives me great inspiration to cook, bake, and blog.
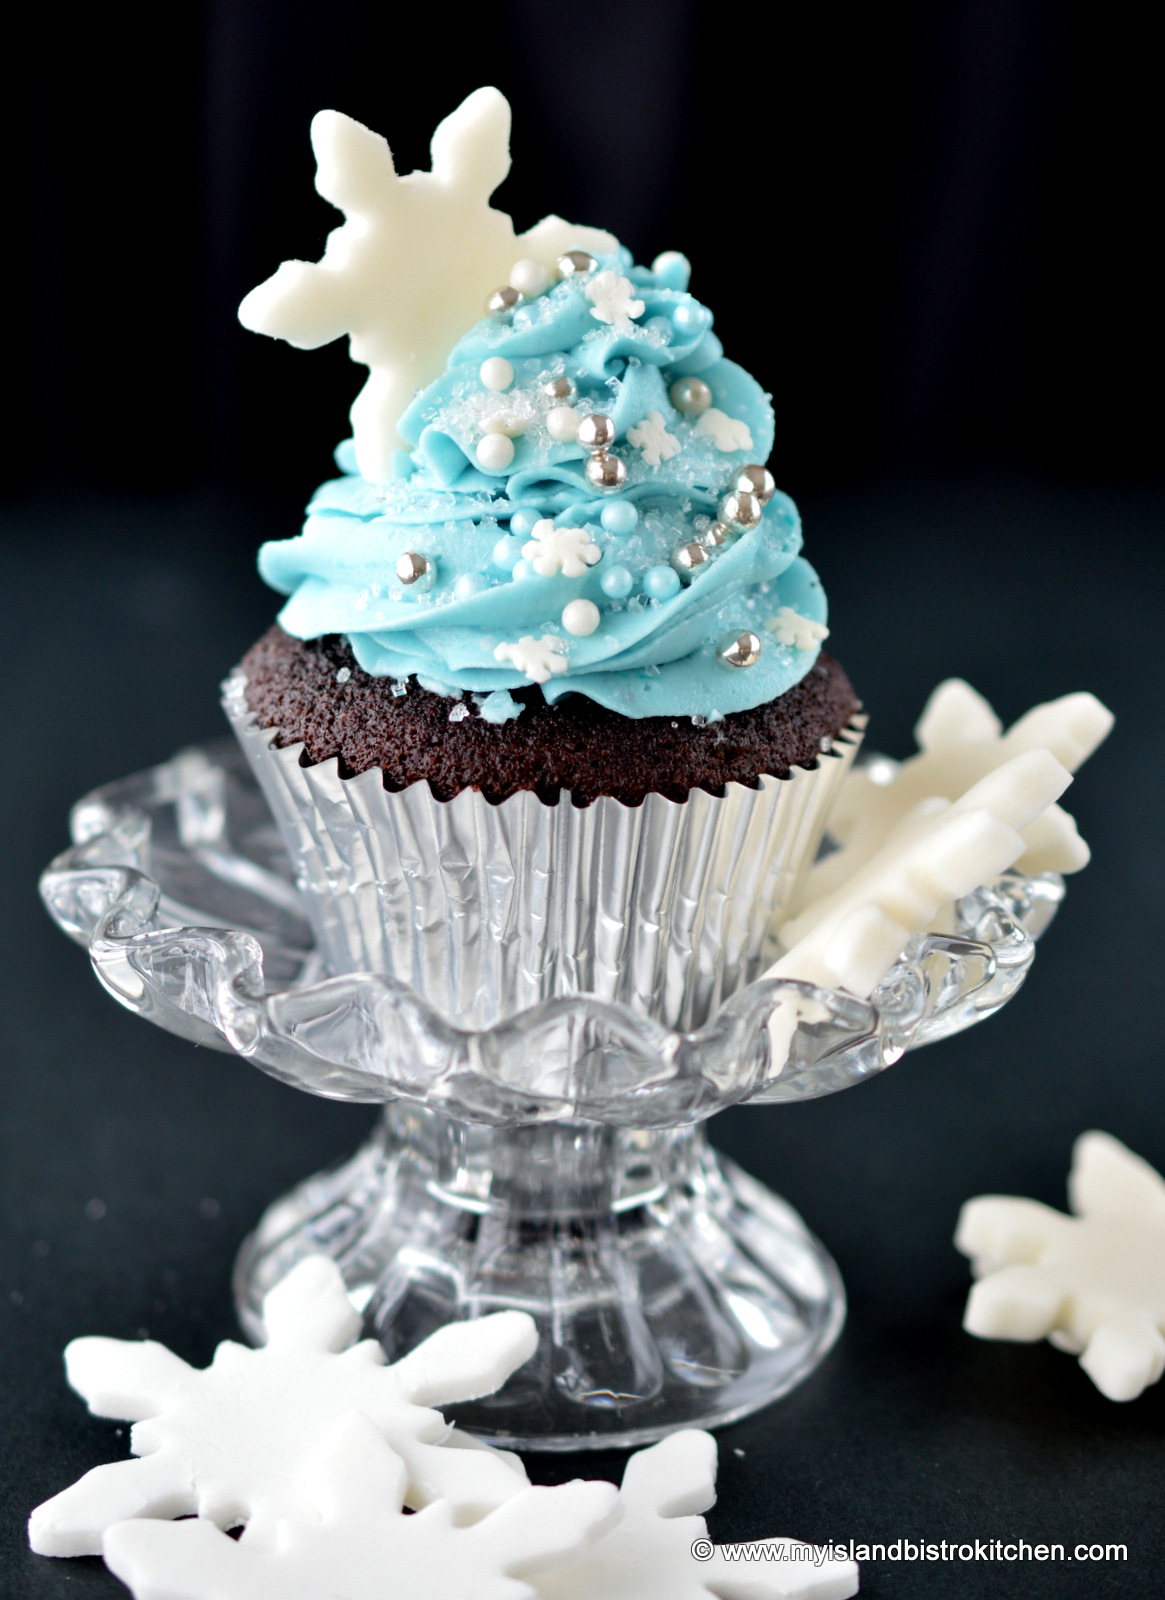
So, some “eye candy” to celebrate the blogiversary.
I live in a winter climate so I chose ice blue for the cupcake frosting, almost a Tiffany blue.
I like the turquoise-colored frosting against the chocolate cupcakes encased in the silver foil liners. There are many pretty paper cupcake liners on the market but I have yet to discover the trick to keeping the oil/butter from seeping through and spoiling the look of them. That’s one reason why I like the foil liners – they stay clean.
The cupcakes are themed around snowflakes and ice crystals. Here’s a close-up of the detail.
I spent some time playing with the lighting today so these cupcakes starred in many photos! (They were very patient subjects!)
One of the things I like most about cupcakes is that they are each a little mini canvas to work with. They are also more casual than a cake and each guest gets his/her own mini cake. As well, they are size and portion-controlled and don’t need to be served on a plate!
They may be a more casual option to a celebratory cake but that doesn’t mean cupcakes can’t be dressed up for the party!
Thanks for stopping by “the Bistro” today and celebrating my third blogiversary with me! Cheers!
———————–
Thank you for visiting “the Bistro” today. There are lots of ways to connect with “the Bistro” through social media:
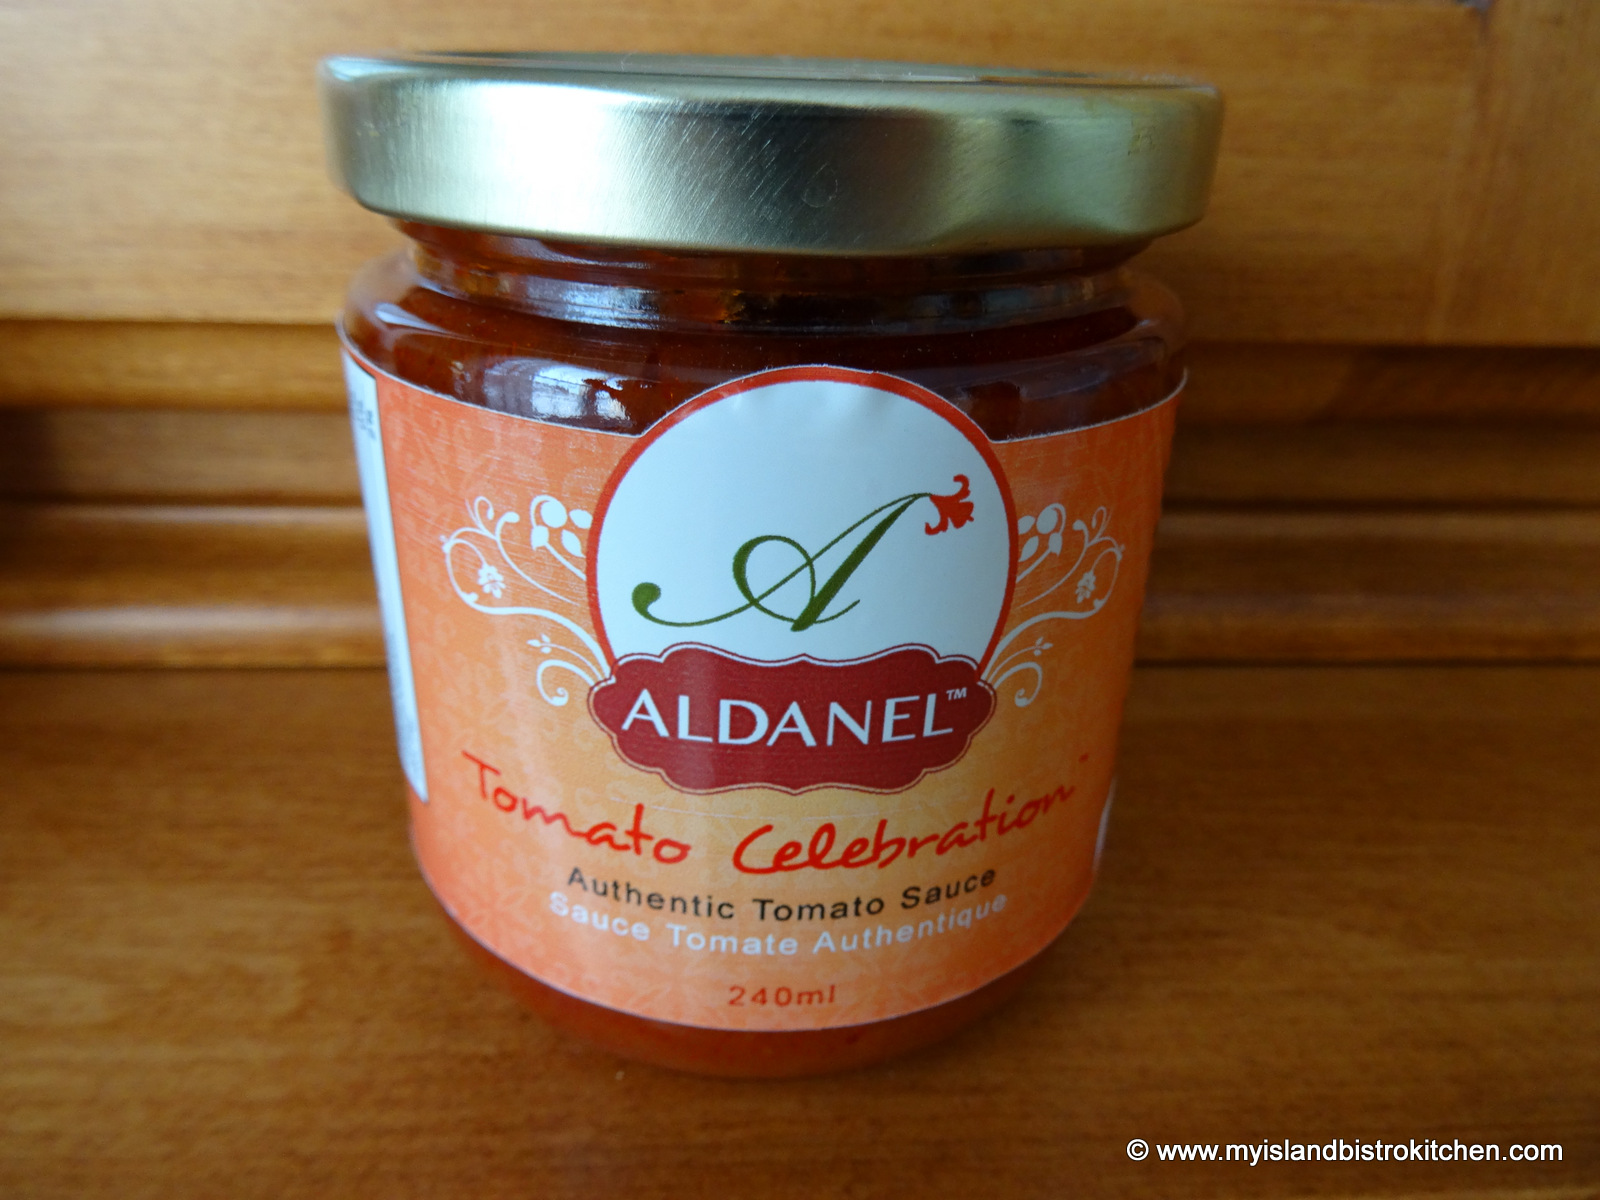
I was recently contacted by Laure Solange Tchamdja, President and CEO of Aldanel Authentic Foods, of Charlottetown, PEI, to let me know about her new line of tomato sauces being produced right here on PEI. I sat down for a chat with Tchamdja to find out more about the sauces.
In October, 2013, Tchamdja began producing tomato sauce. The company manufactures five varieties of their tomato-based sauces, all sold in 240ml bottles: Tomato Celebration, Spinach Carnival, Chili Tango, Carrot Symphony, and Rouge Poivron. Over the period of some nine months in the lab, the BioFood Technology plant on the UPEI campus in Charlottetown helped Tchamdja convert her family recipe into a commercial product suitable for the retail market. As the company does not presently have its own manufacturing plant, the sauces are produced at the BioFood Technology plant on the UPEI campus in Charlottetown.
Tchamdja wanted to create a tomato sauce product that is safe and healthy, not too spicy, and that would help working women, young professionals, and students prepare healthy meals at home. She says her products are versatile and multipurpose and one does not have to be a chef to use them. They can be used directly from the bottle as pasta sauces, added to soups and vegetables, used as a condiment for meat and fish, as a sauce for pizza, on nachos, and even as marinades for meat and fish. So, the product can be used as is without having to cook it again or it can be used as an ingredient in a recipe. Tchamdja says her products are all natural with no preservatives and are low in sugar.
Initially, Tchamdja sold her tomato sauces at local PEI shops such as Riverview Country Market. She has since expanded her markets to include Sobey’s and Co-op Supermarkets, Pete’s Frootique in Halifax, and Winners and Home Sense stores in Eastern Canada.
The products are sold under the Aldanel™ label, the letters for which are formed from those found in the names of her children. Depending on the retailer, prices per 240 ml bottle range from $4.49 to $5.99 (as of the time of writing).
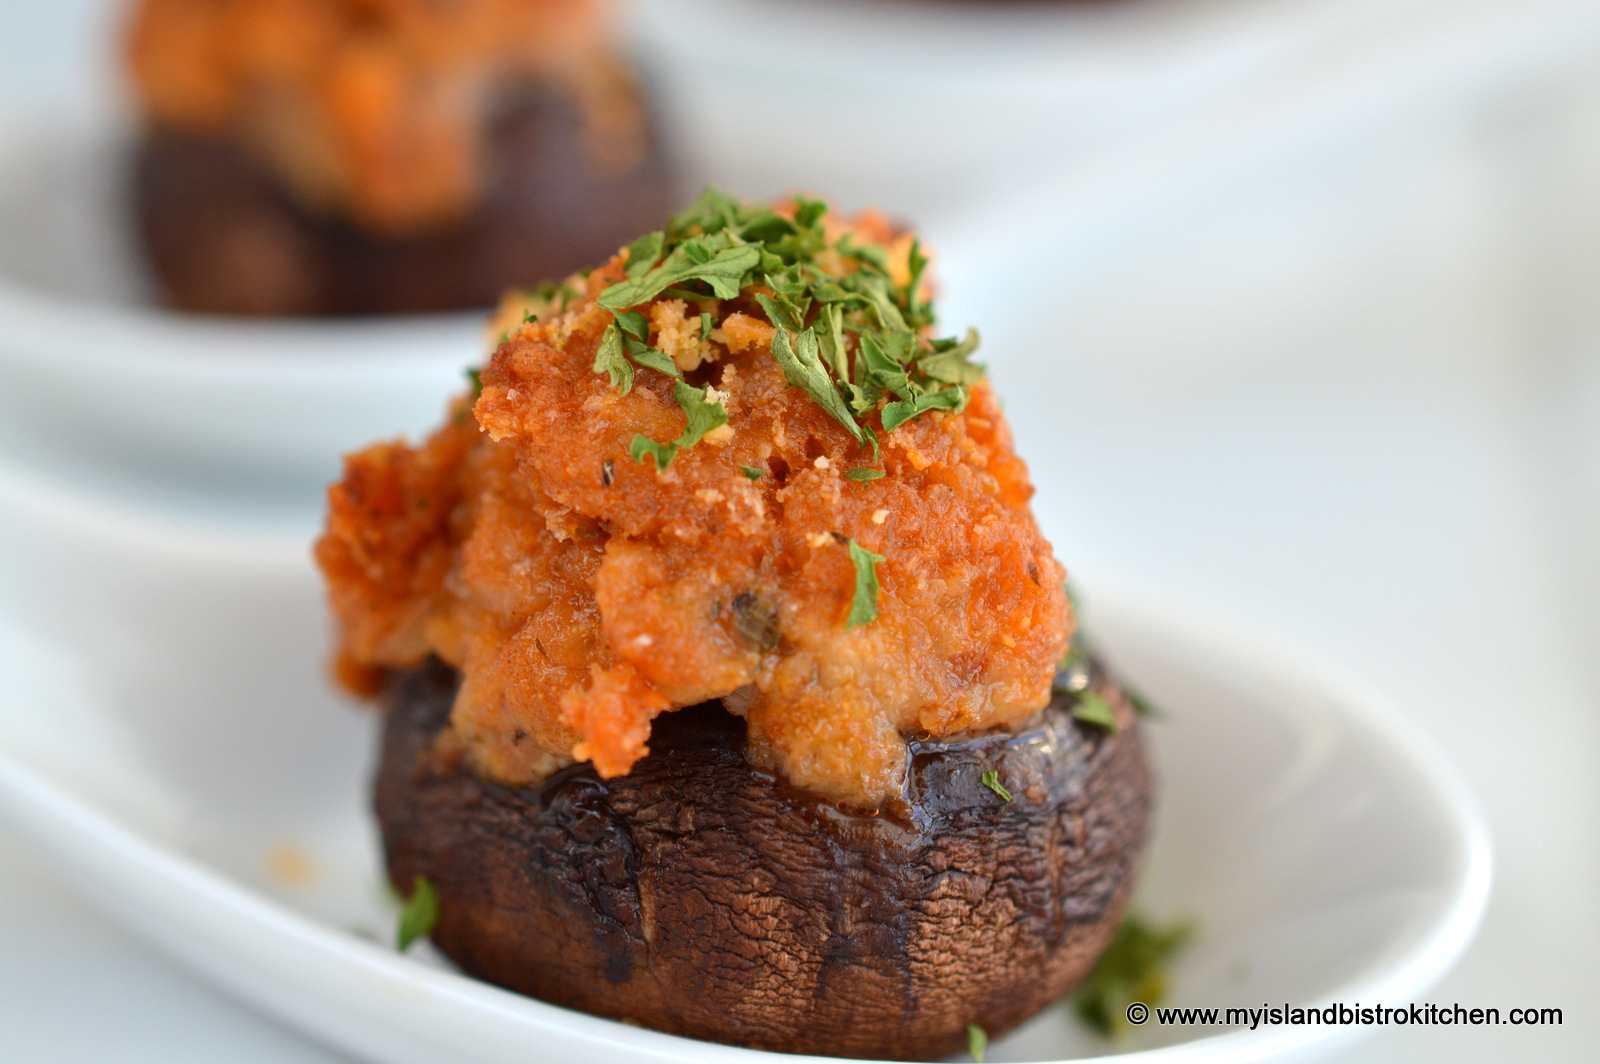
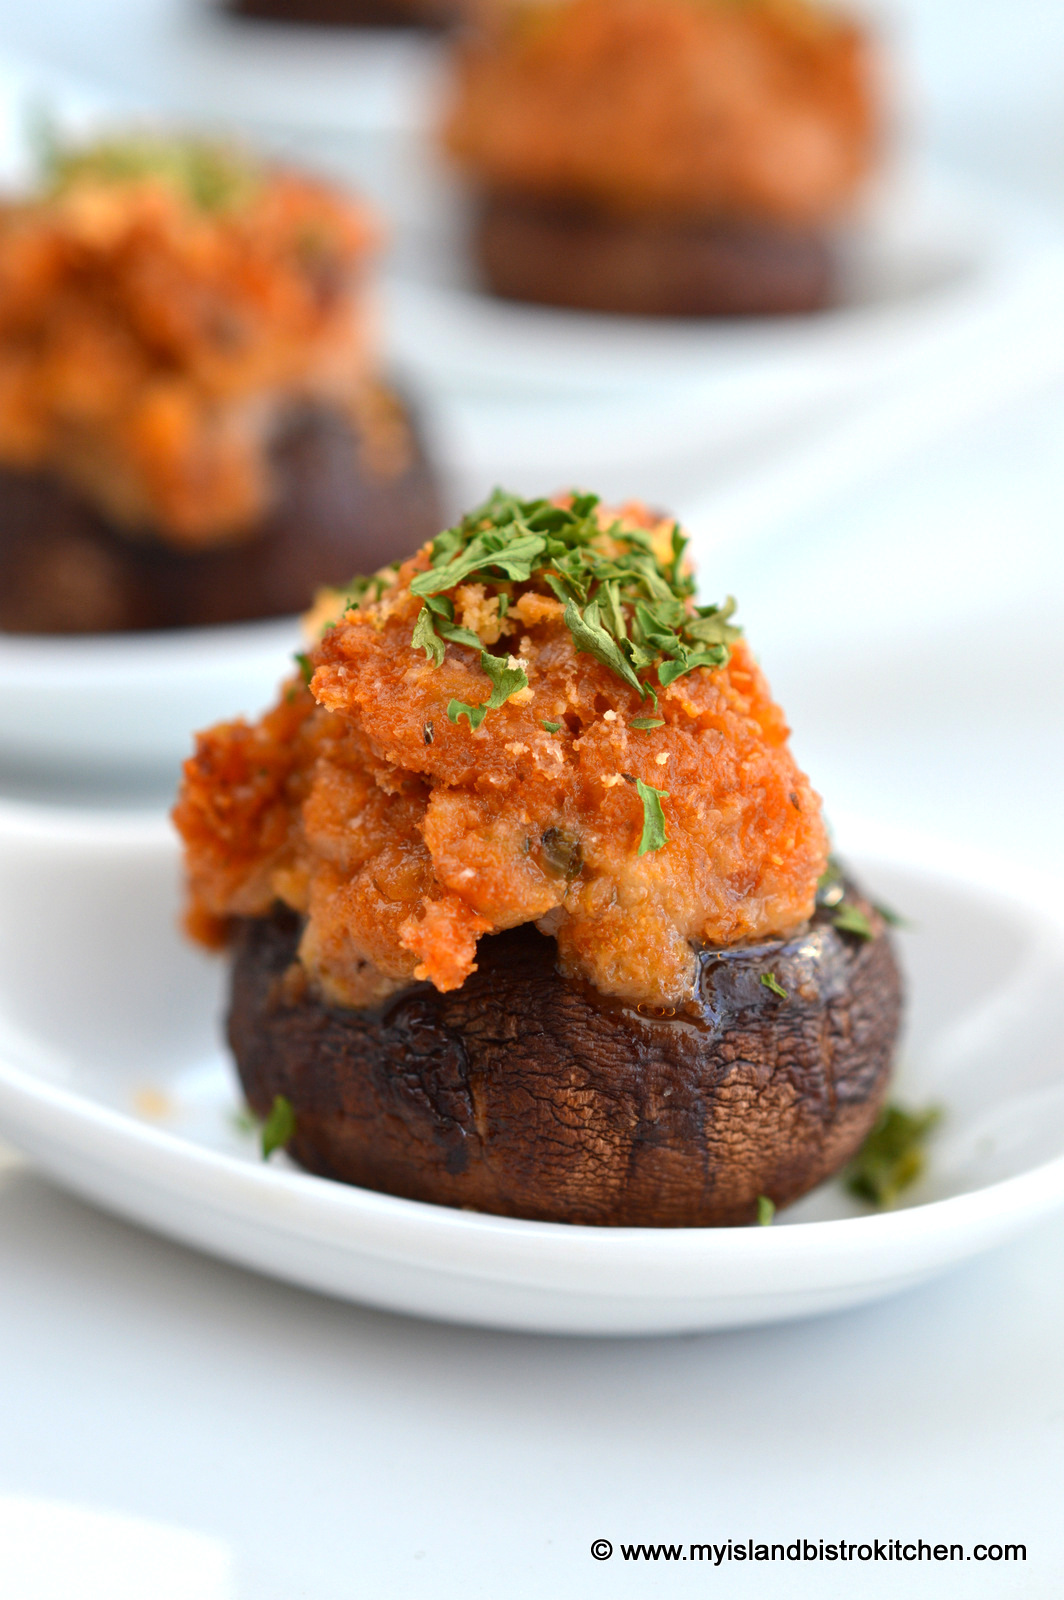
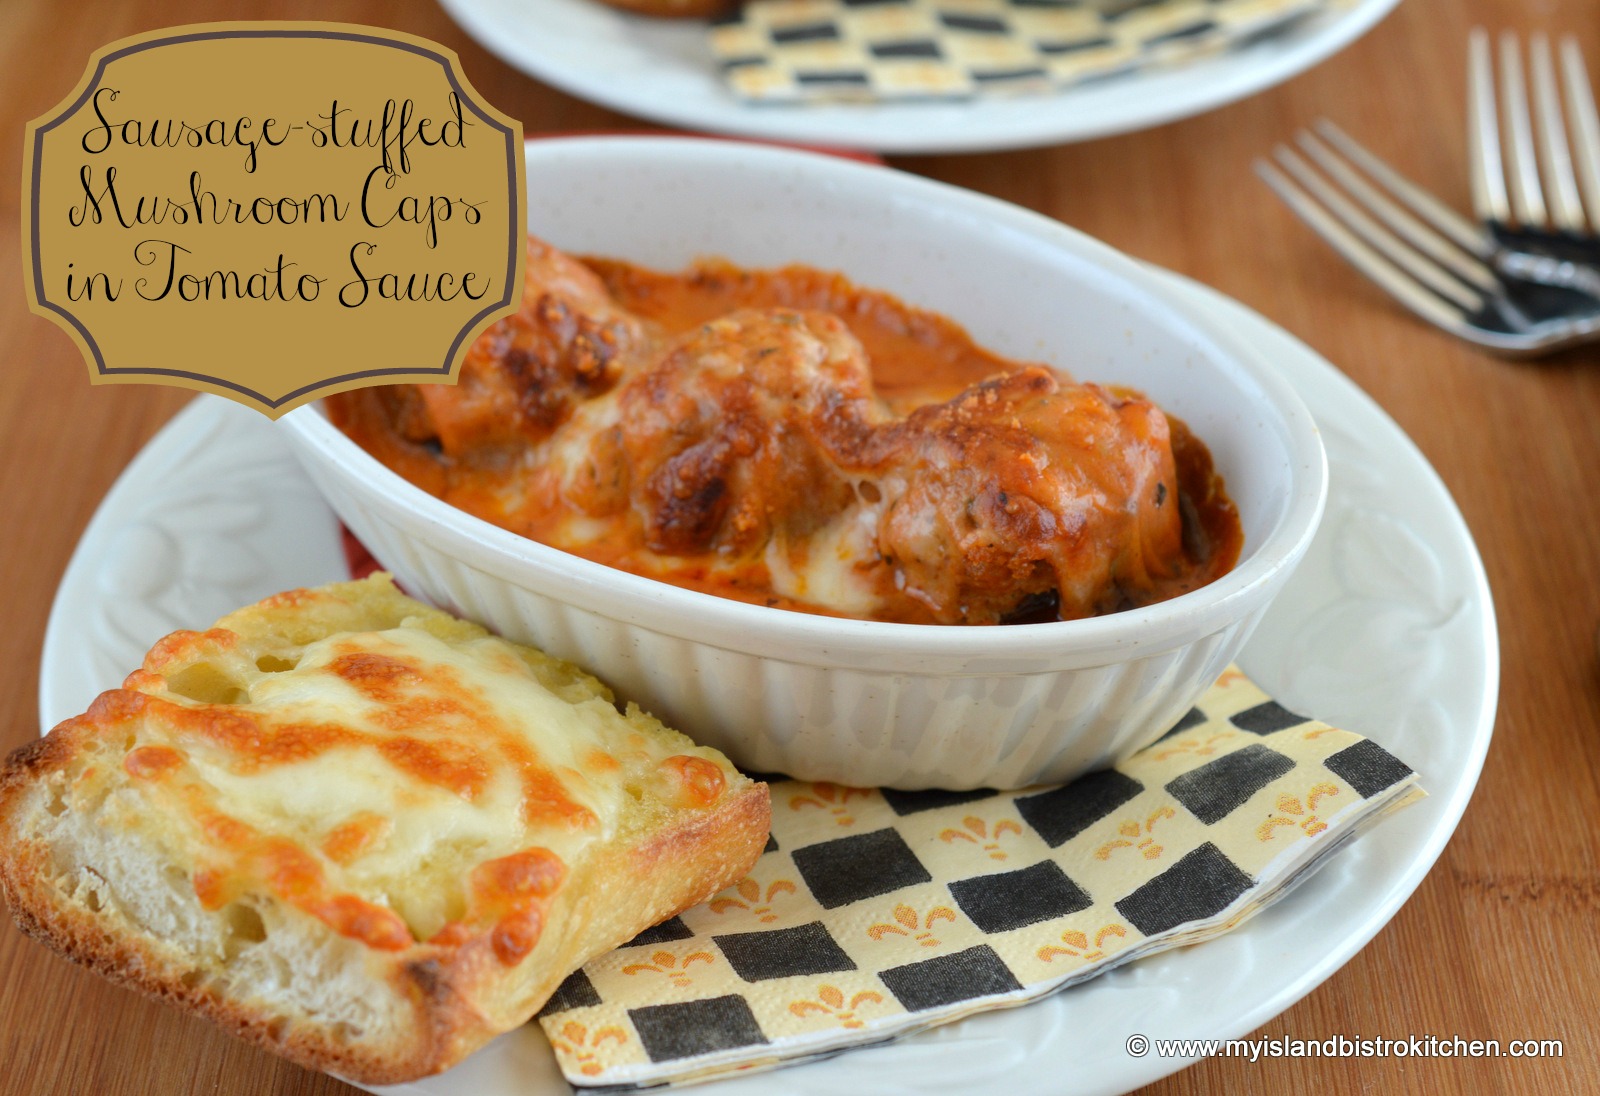
Tchamdja offered me some complimentary samples of her Tomato Celebration sauce to try. Tchamdja is correct – I found the sauce to be a versatile ingredient in several dishes. I have used it as a pizza sauce and found it very tasty. I have also used it in a recipe I created for baked stuffed fingerling hors d’oeuvres. And, I have used it as an ingredient in the following recipes for sausage-stuffed cremini mushroom caps.
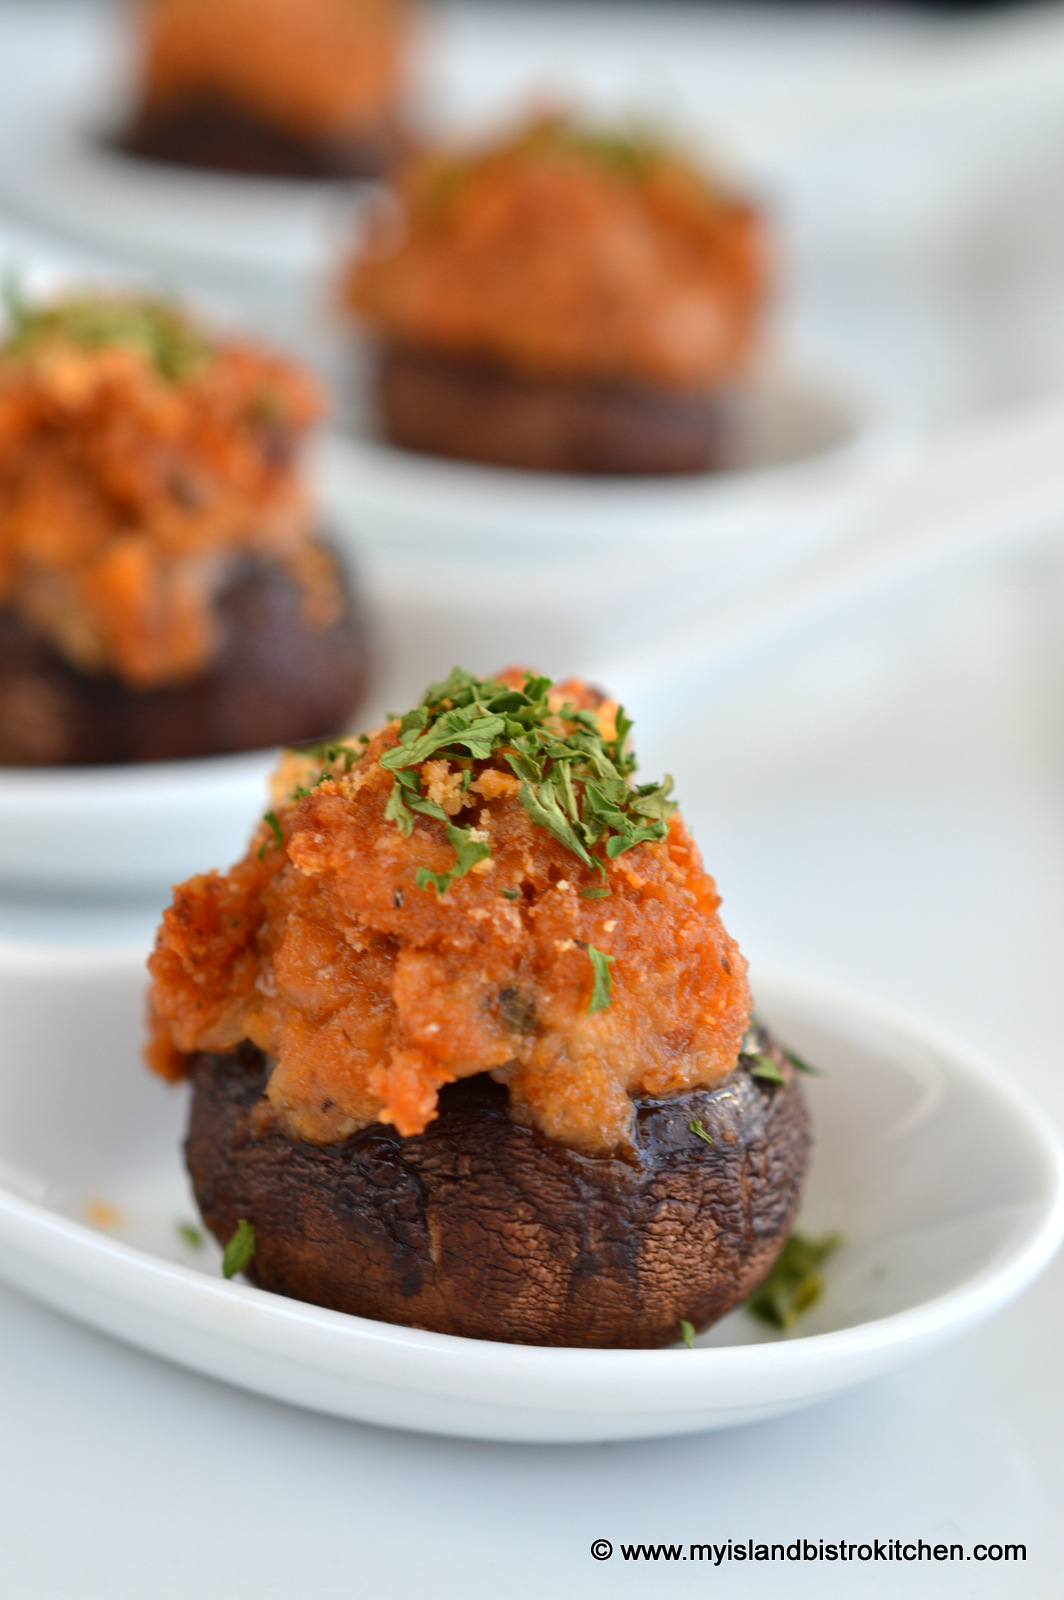
My recipe for stuffed mushrooms is suitable for hors d’oeuvres or, add a tomato sauce, and they turn into an appetizer.
I have chosen to use cremini mushrooms but white button mushrooms would also work. As well, any kind of sausage can be used – I have chosen to use sun-dried tomato sausage from KJL Meats here in Charlottetown. The herb and garlic Gouda cheese I used is from Glasgow Glen Farm in New Glasgow, PEI. The tomato sauce that I am featuring in both recipes is Aldanel’s “Tomato Celebration” variety but any of their other sauces would work well, too.
Sausage-stuffed Cremini Mushroom Caps
Stuffed Cremini Mushroom Caps (Hors d’oeuvres)
1 tsp olive oil ½ tsp butter
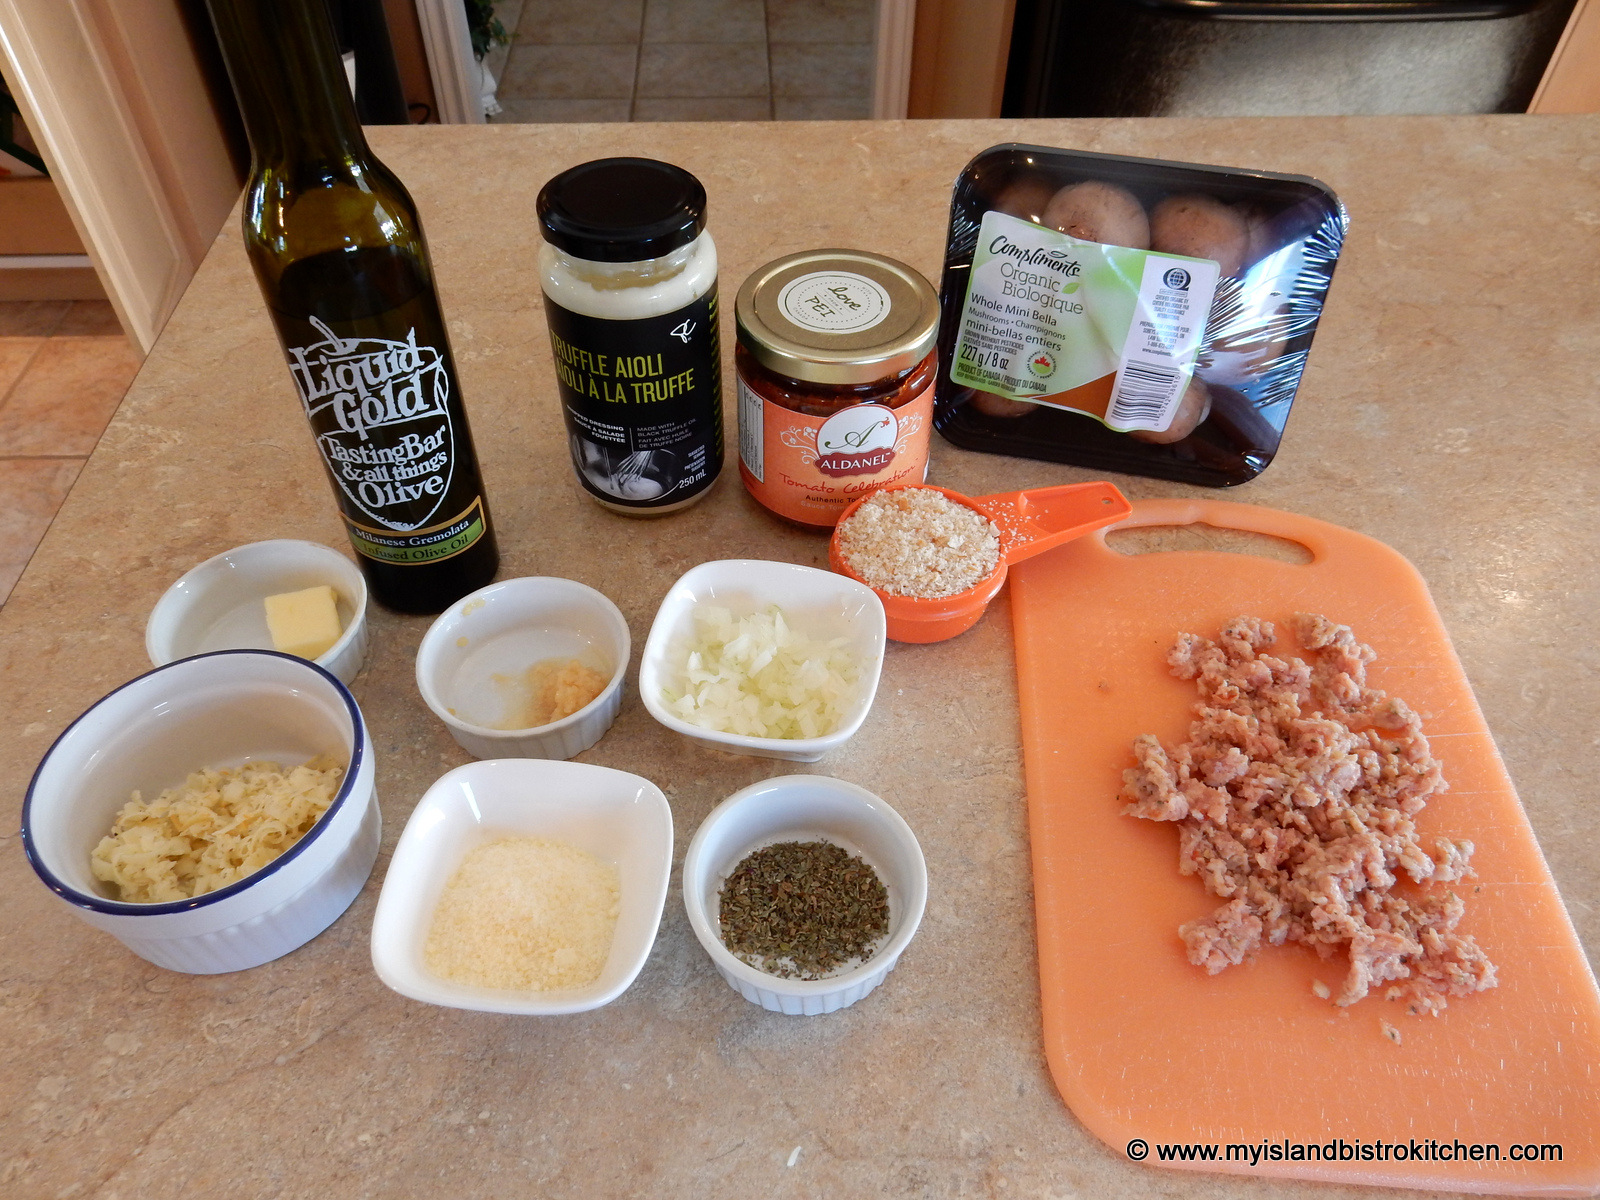
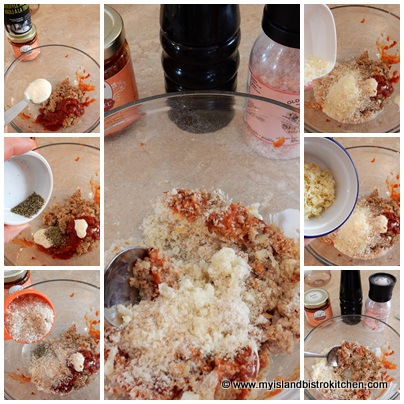
12 medium-sized cremini mushrooms, washed, dried, and de-stemmed (reserve the stems) 2 cloves of garlic, minced 1½ tbsp onion, finely chopped 2 oz. sun-dried tomato sausage, removed from casing and loosely broken up 2 tbsp Ardanel™ tomato sauce 2 tsp truffle aioli ½ tsp basil ½ cup fine breadcrumbs 2 tbsp shredded Gouda cheese 1 tbsp finely grated Parmesan cheese Salt and pepper, to taste
Method:
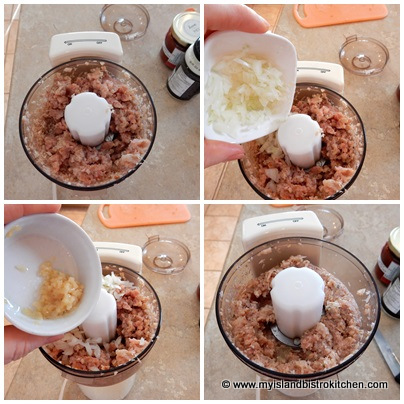
Assemble ingredients.
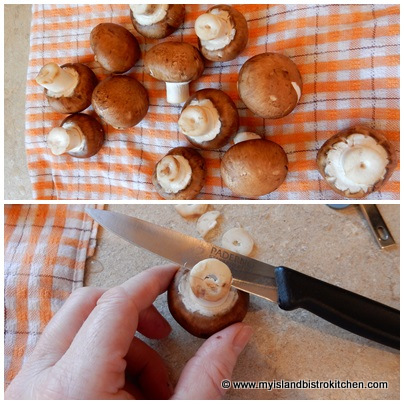
Trim and discard ends from mushroom stems.
Remove the stems from the mushroom caps and place mushroom stems into bowl of small food processor. Pulse until mixture is finely chopped.
Add garlic, onion, and sausage and pulse just until mixture is combined.
Preheat oven to 375ºF.
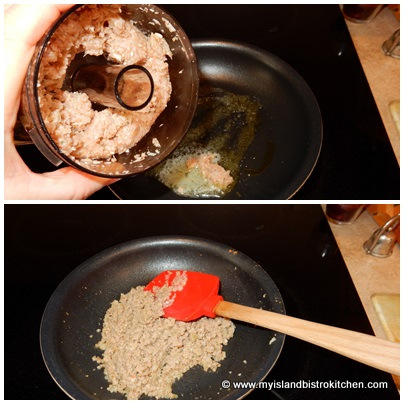
Heat oil in small frypan. Add butter.
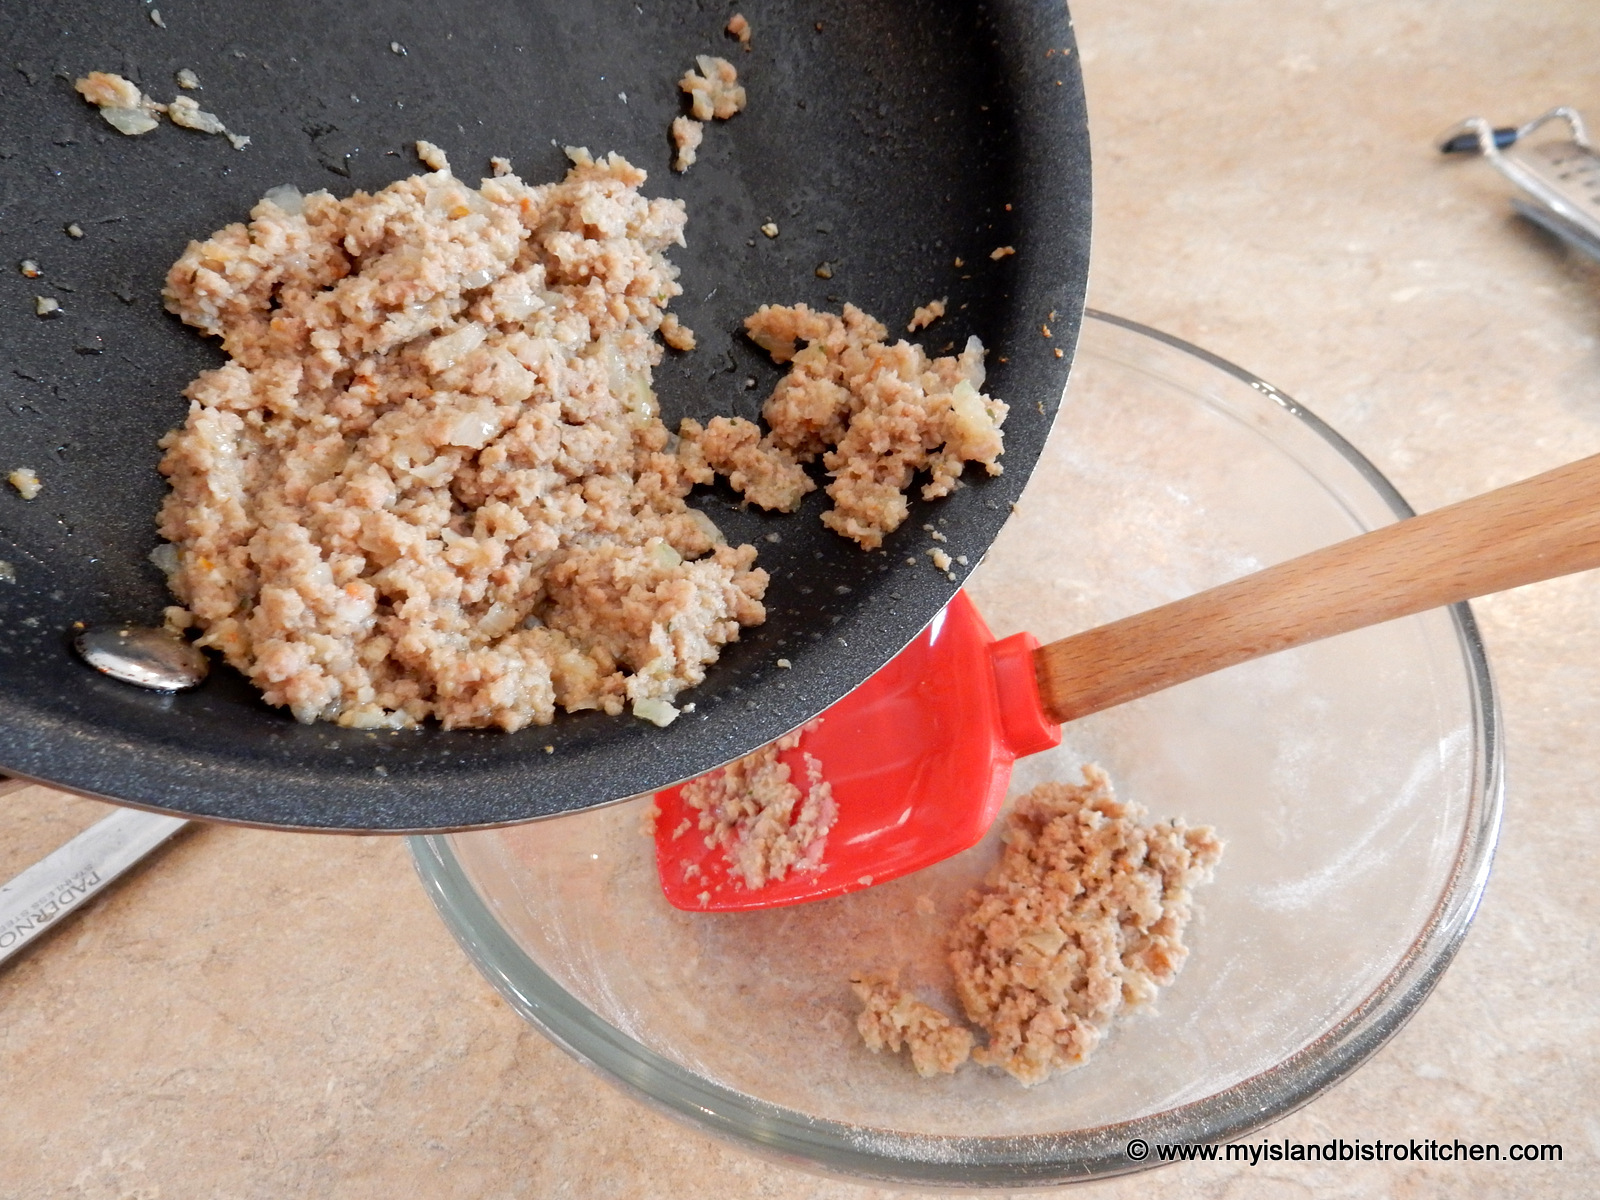
Add mushroom-sausage mixture and cook over medium heat for 4-5 minutes, or until sausage meat is no longer pink.
Transfer mixture to small bowl.
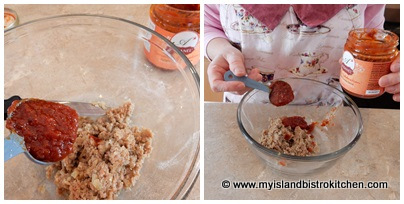
Add the tomato sauce.
Add truffle aioli, basil, breadcrumbs, and cheeses along with salt and pepper to taste.
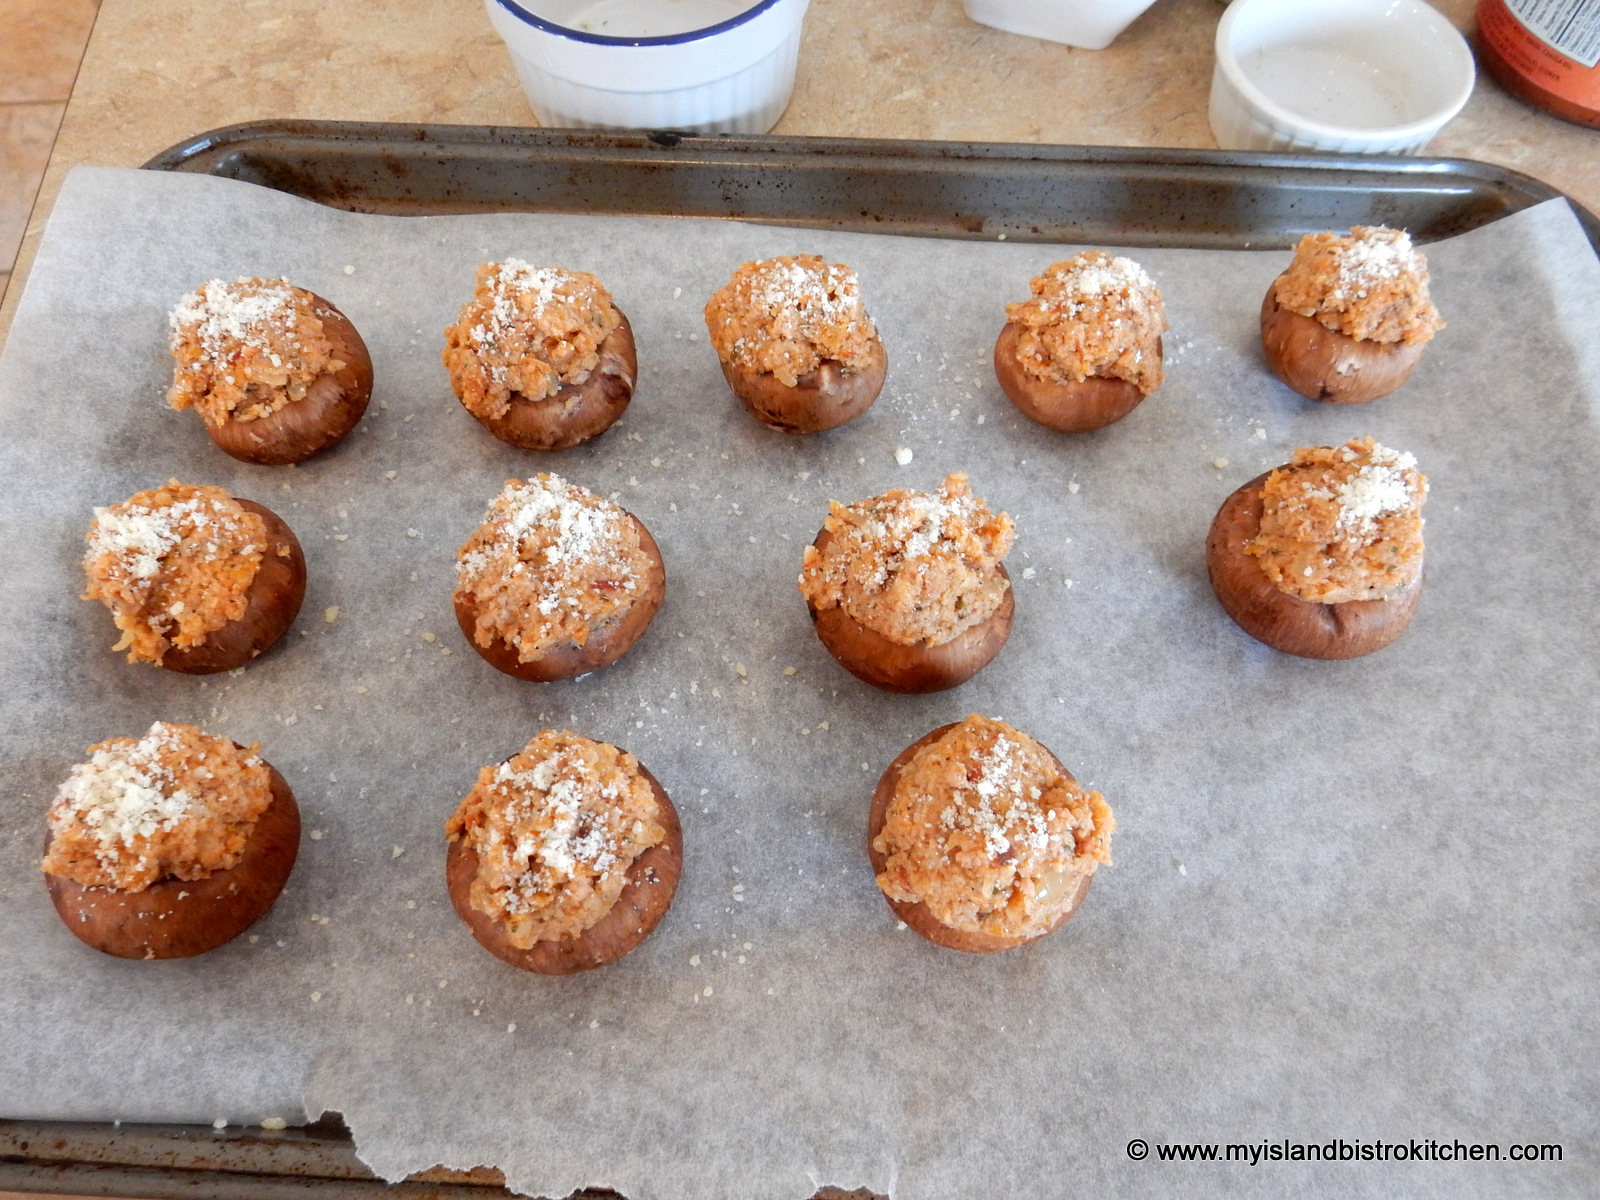
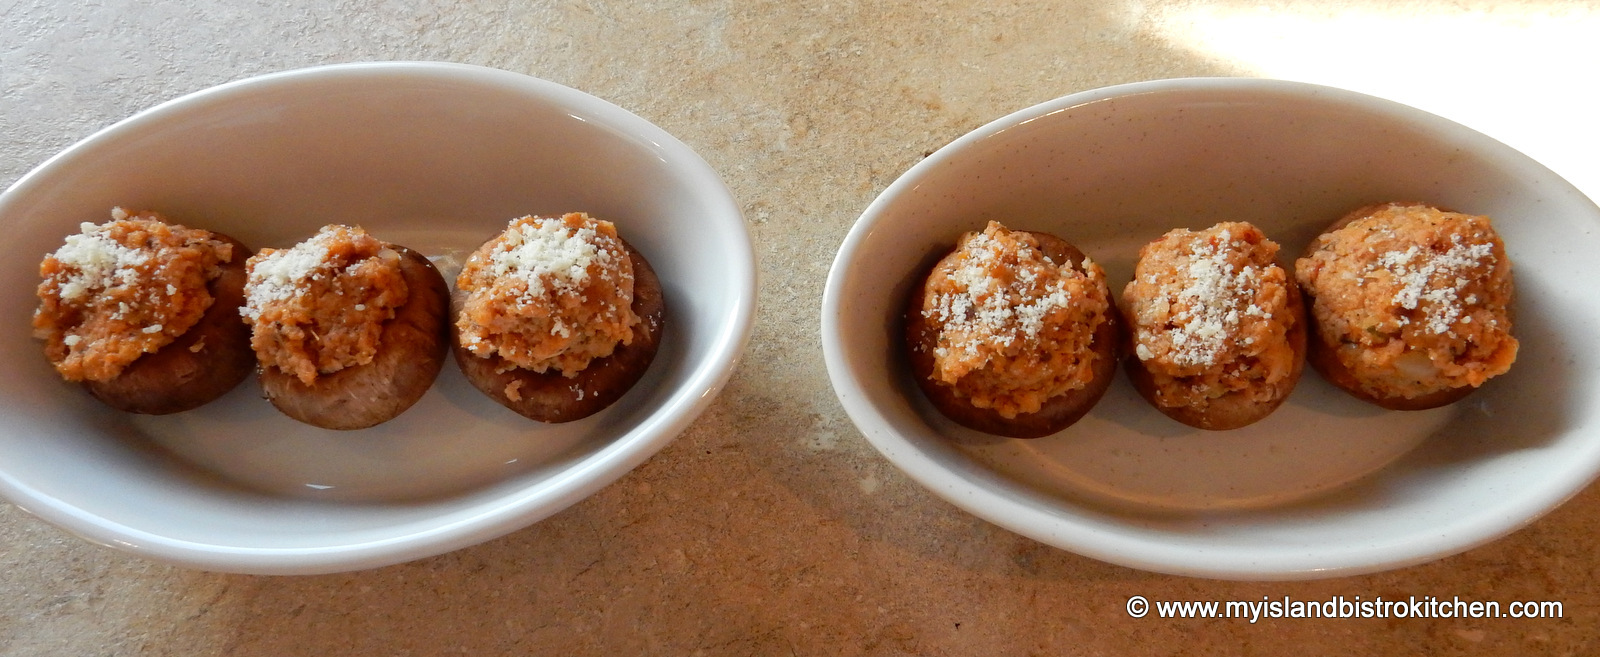
Place mushroom caps on parchment-lined baking sheet. Stuff each mushroom cap with mixture, slightly mounding the top. Sprinkle with finely grated Parmesan cheese.
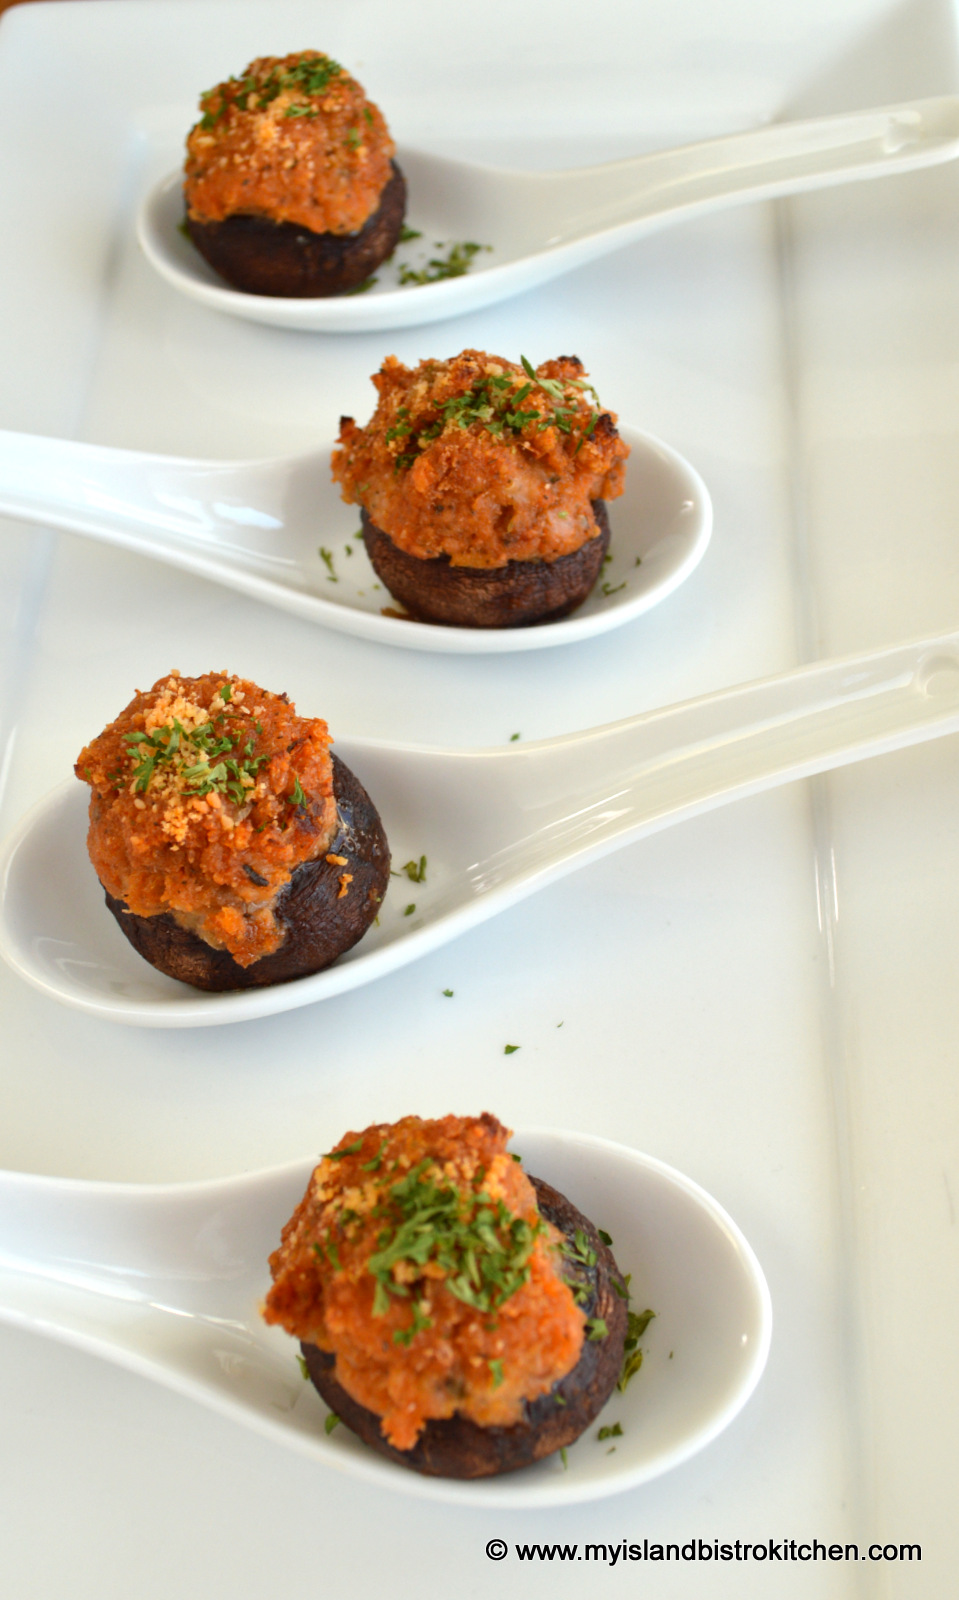
Bake for about 12 minutes. Garnish with fresh chives, sliced green onion, or parsley, if desired. Serve immediately.
Yield:12 hors d’oeuvres
Sausage-stuffed Cremini Mushroom Caps
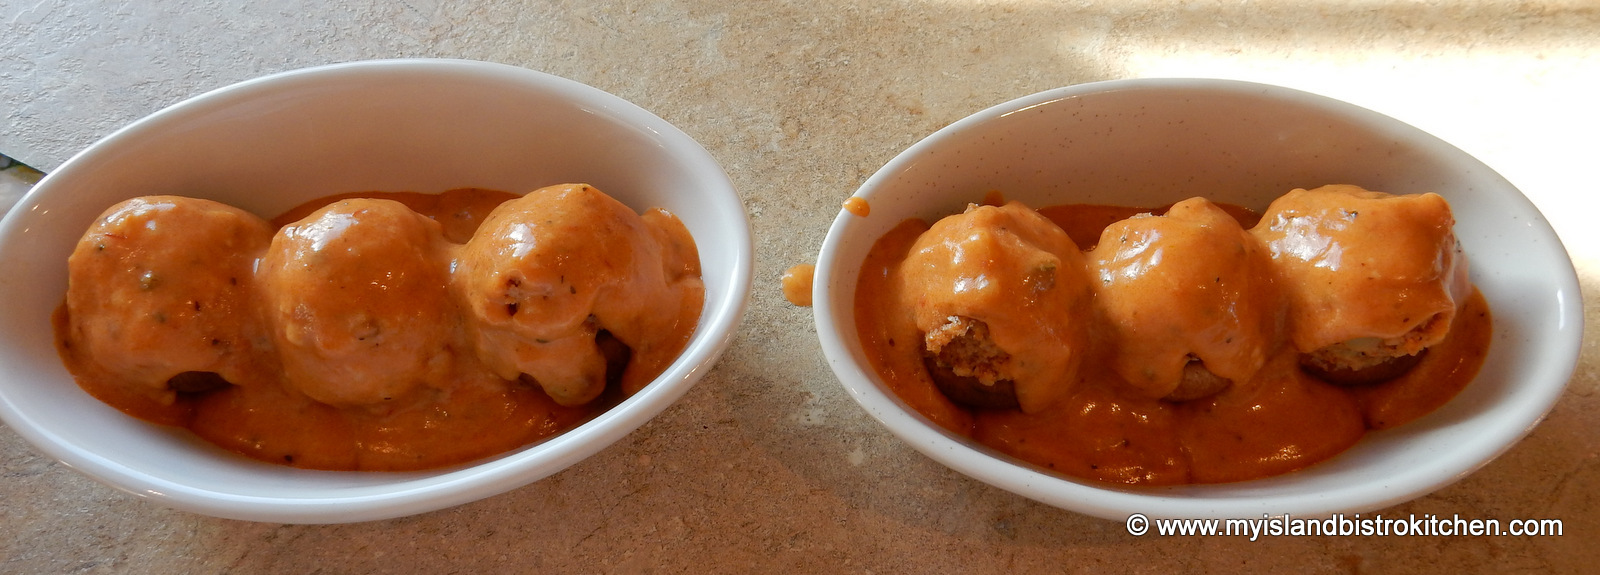
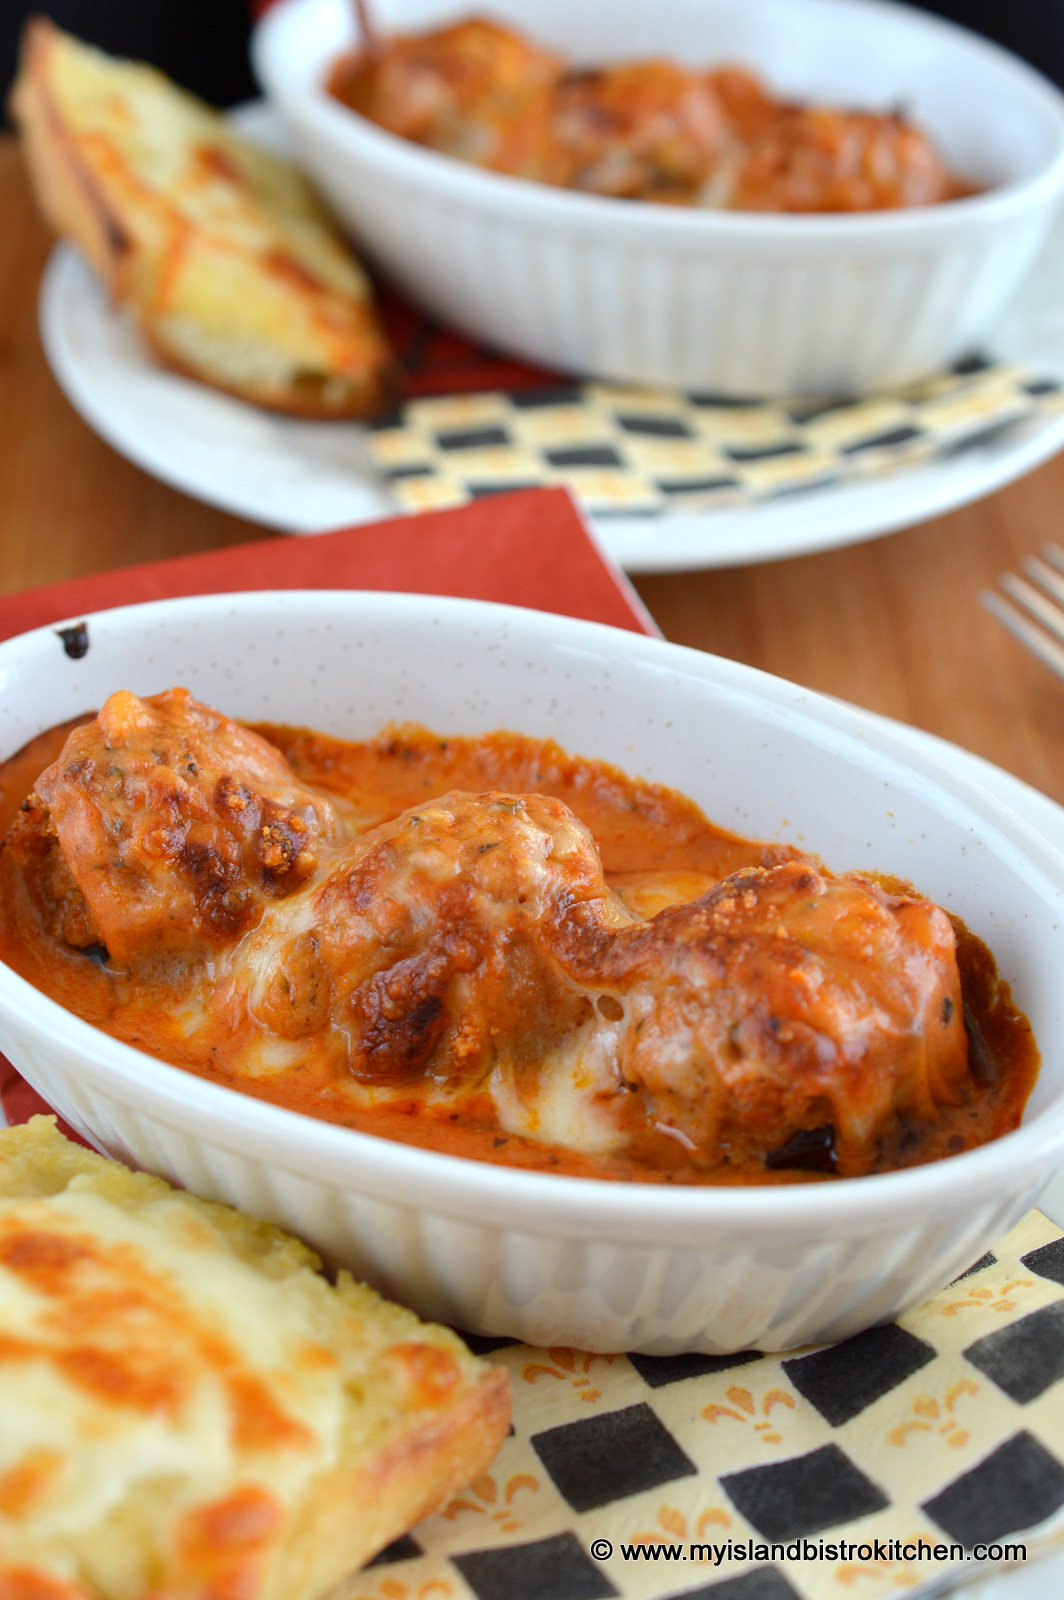
Stuffed Cremini Mushroom Caps with Tomato Sauce (Appetizer)
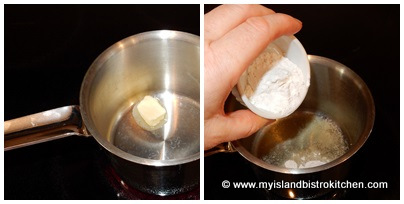
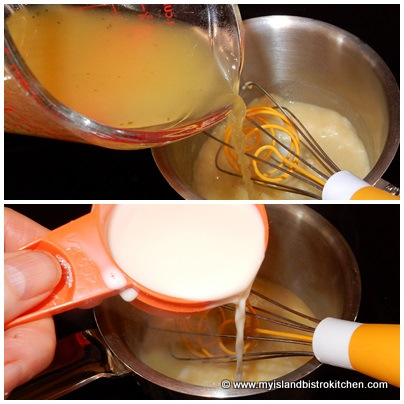
½ tbsp butter 1½ tbsp flour ½ cup chicken or vegetable broth ½ cup light cream or milk ¼ cup Ardanel™ tomato sauce ½ tsp Italian seasoning ¼ cup finely grated Parmesan cheese ½ cup shredded Mozarella cheese
Method:
Over medium heat, melt butter. Stir in flour.
Whisk in the broth and milk until mixture is smooth.
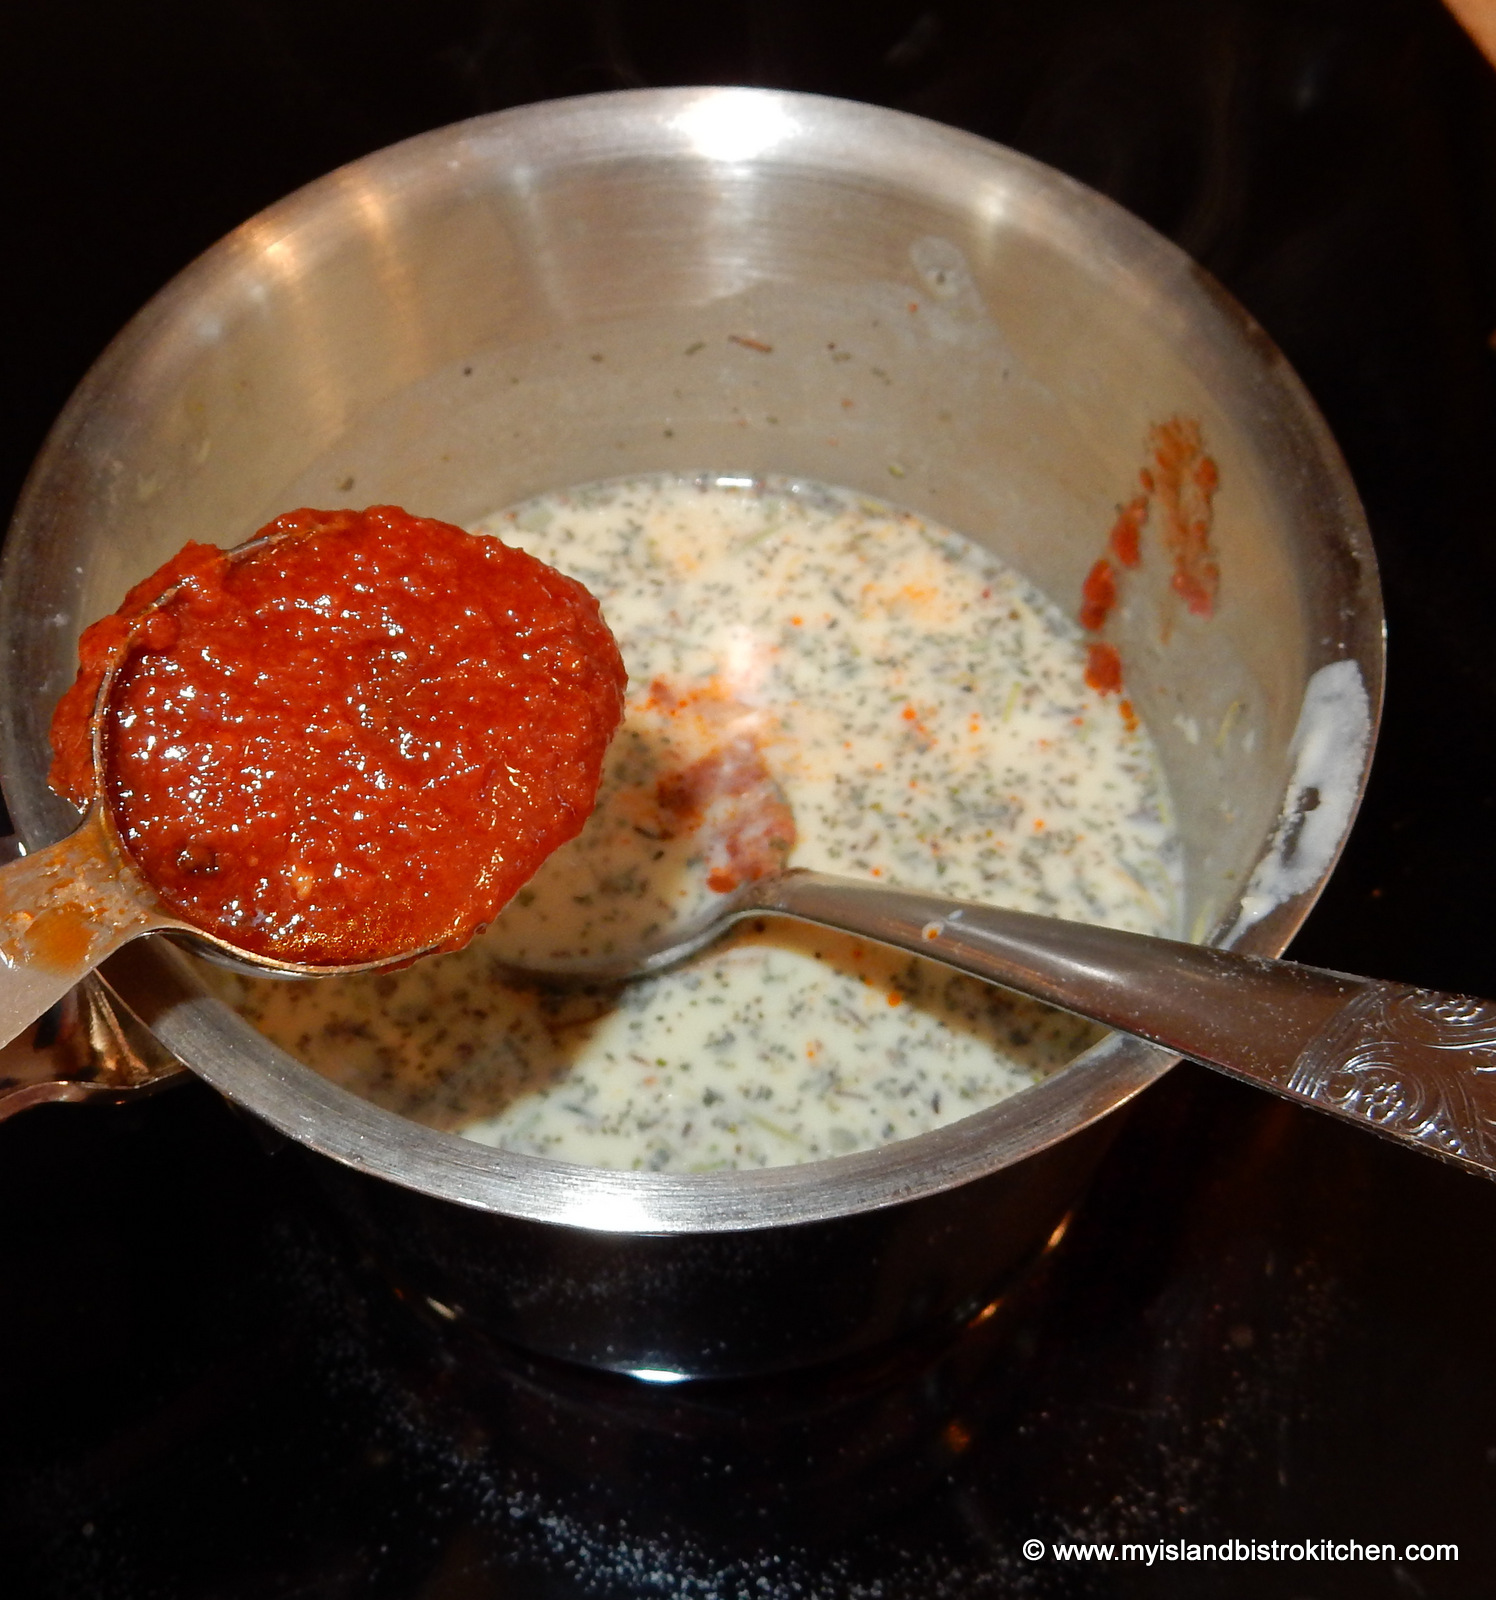
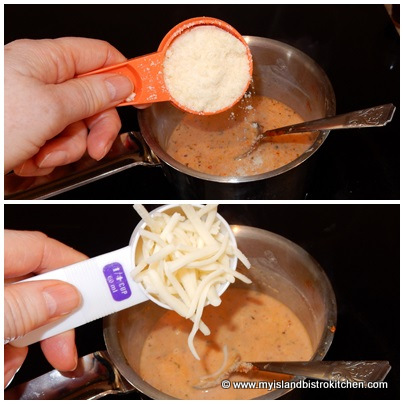
Stir briskly until mixture starts to thicken then add the tomato sauce, Italian seasoning, and cheeses.
Stir until cheese is melted and sauce is thickened to desired consistency.
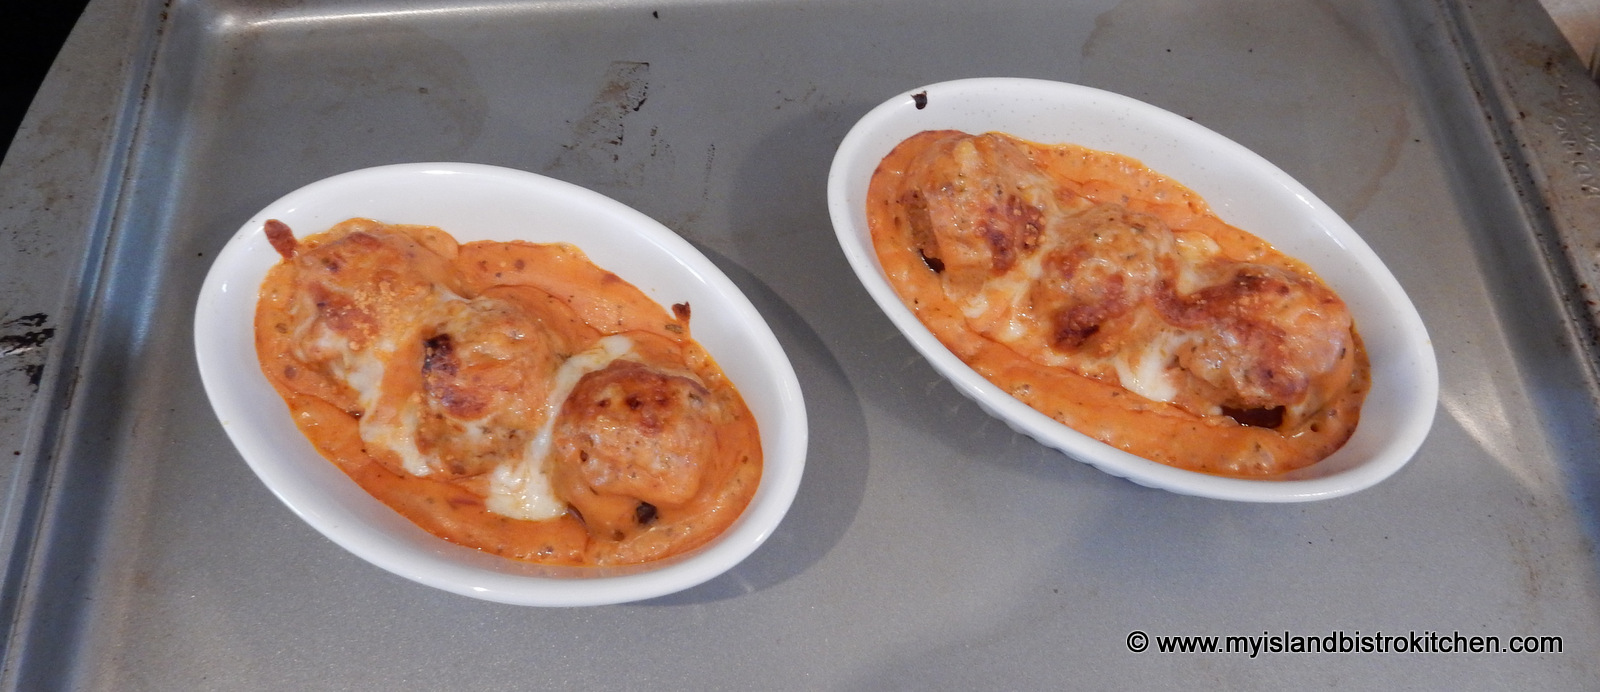
Grease four oven-safe appetizer-sized baking dishes. Place three stuffed mushrooms into each dish.
Pour the sauce over the mushrooms, dividing it equally between the four dishes.
Sprinkle with shredded mozzarella cheese.
Broil on high for about 5-6 minutes, until cheese is melted and sauce is bubbling. Serve immediately.
Yield:4 appetizer servings
Sausage-stuffed Cremini Mushroom Caps in Tomato Sauce
To learn more about the Aldanel tomato sauce products, visit their website.
This recipe is also being submitted for the Foodie Pages CHEF’S BOX Challenge.
———————–
Thank you for visiting “the Bistro” today. There are lots of ways to connect with “the Bistro” through social media:
Brrrrr, it’s been a cold day on Prince Edward Island. Our first cold snap of the season. Temperatures were around -13C but, with the wind chill, it certainly felt a lot colder than that. A good day to curl up by the fireside with some tasty food and a good cup of tea.
Was overseas to New Brunswick yesterday and, of course, that meant a stop at Tony’s Bistro and Pâtisserie in Moncton. I introduced you to this great French Pâtisserie back in November (click here for the link to the story).
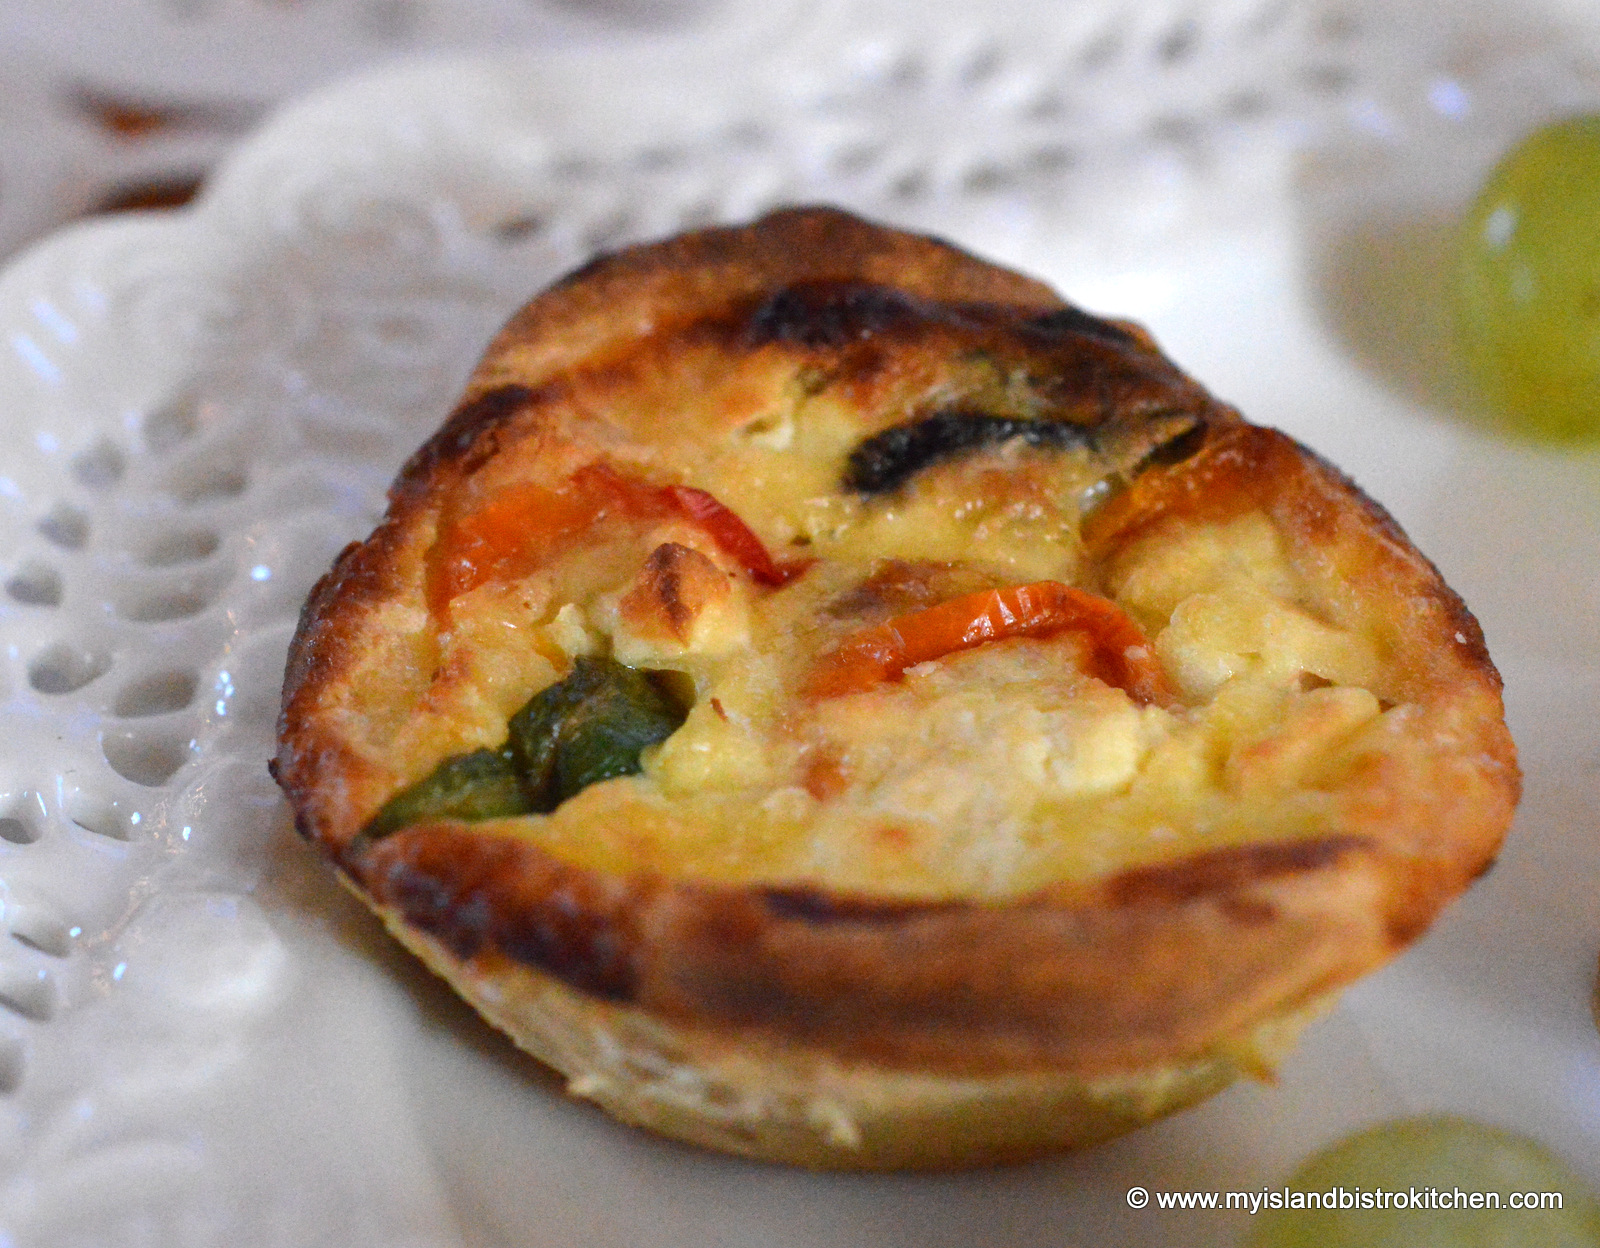
We had lunch at Tony’s yesterday and, naturally, I had to bring home some goodies that we could have for afternoon tea today. Ready to have a peek?
Let’s start with these tasty little quiches. Nice flaky pastry, these were delicious!
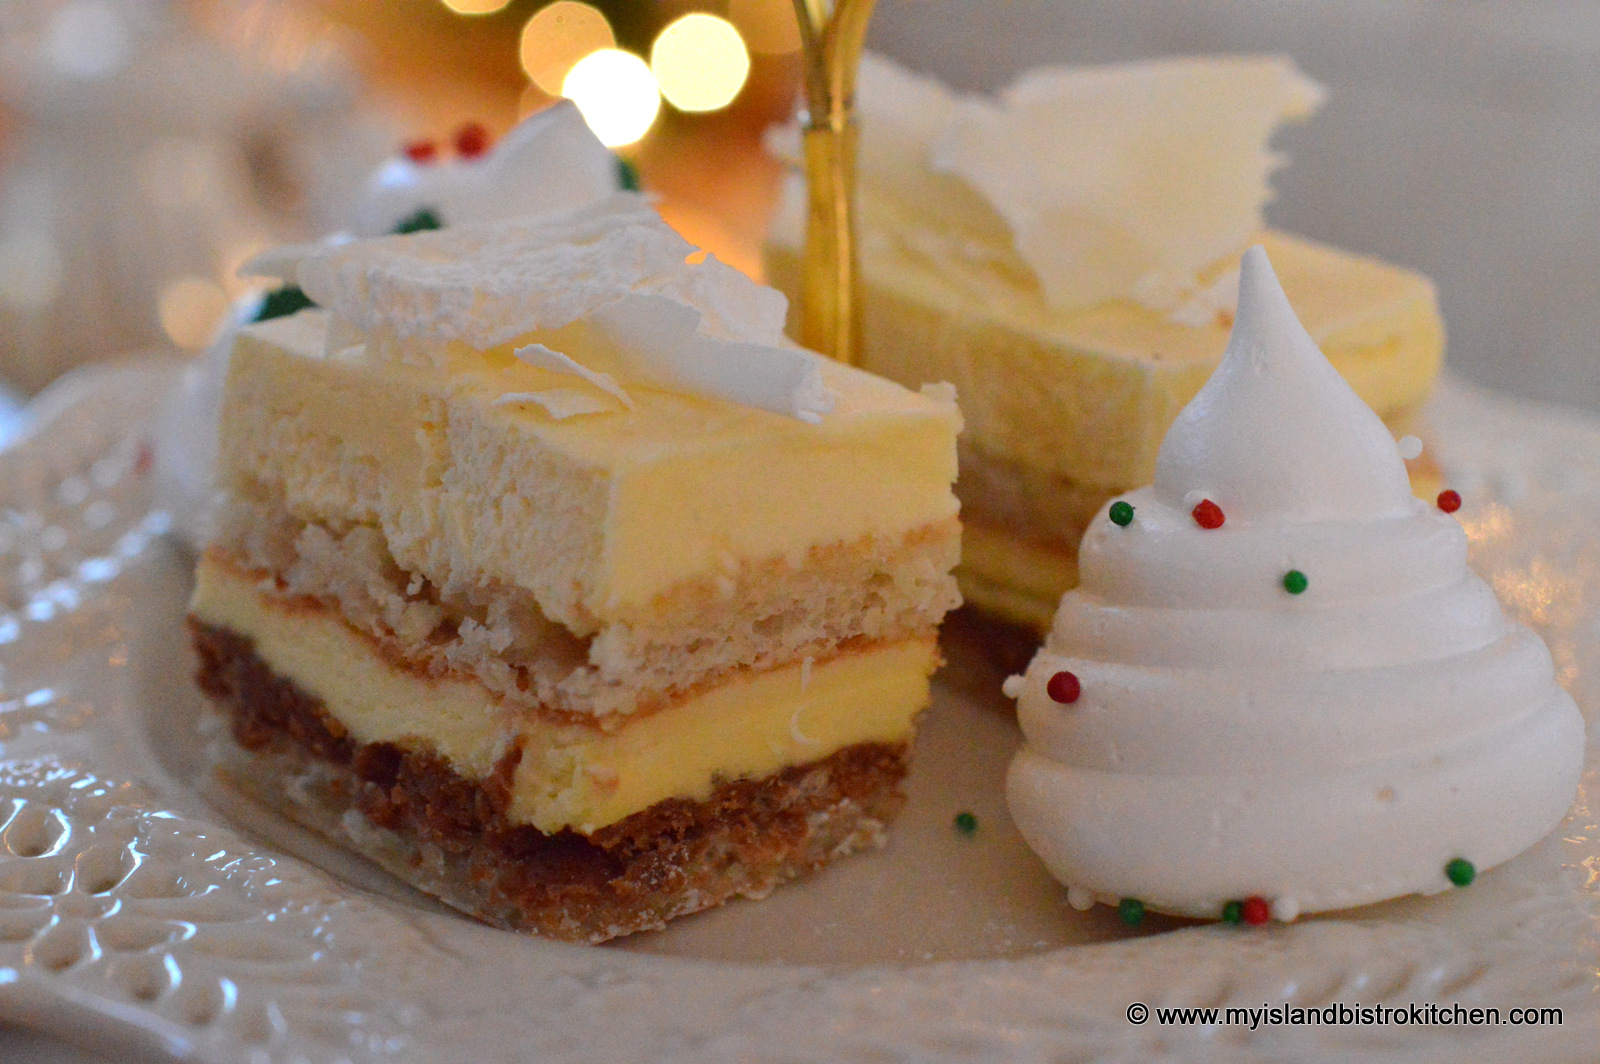
Then, there was the White Chocolate Rocher cake. This was seriously rich and decadent! Layers of decadence!
Did you check out the little white meringue trees? Light as air.
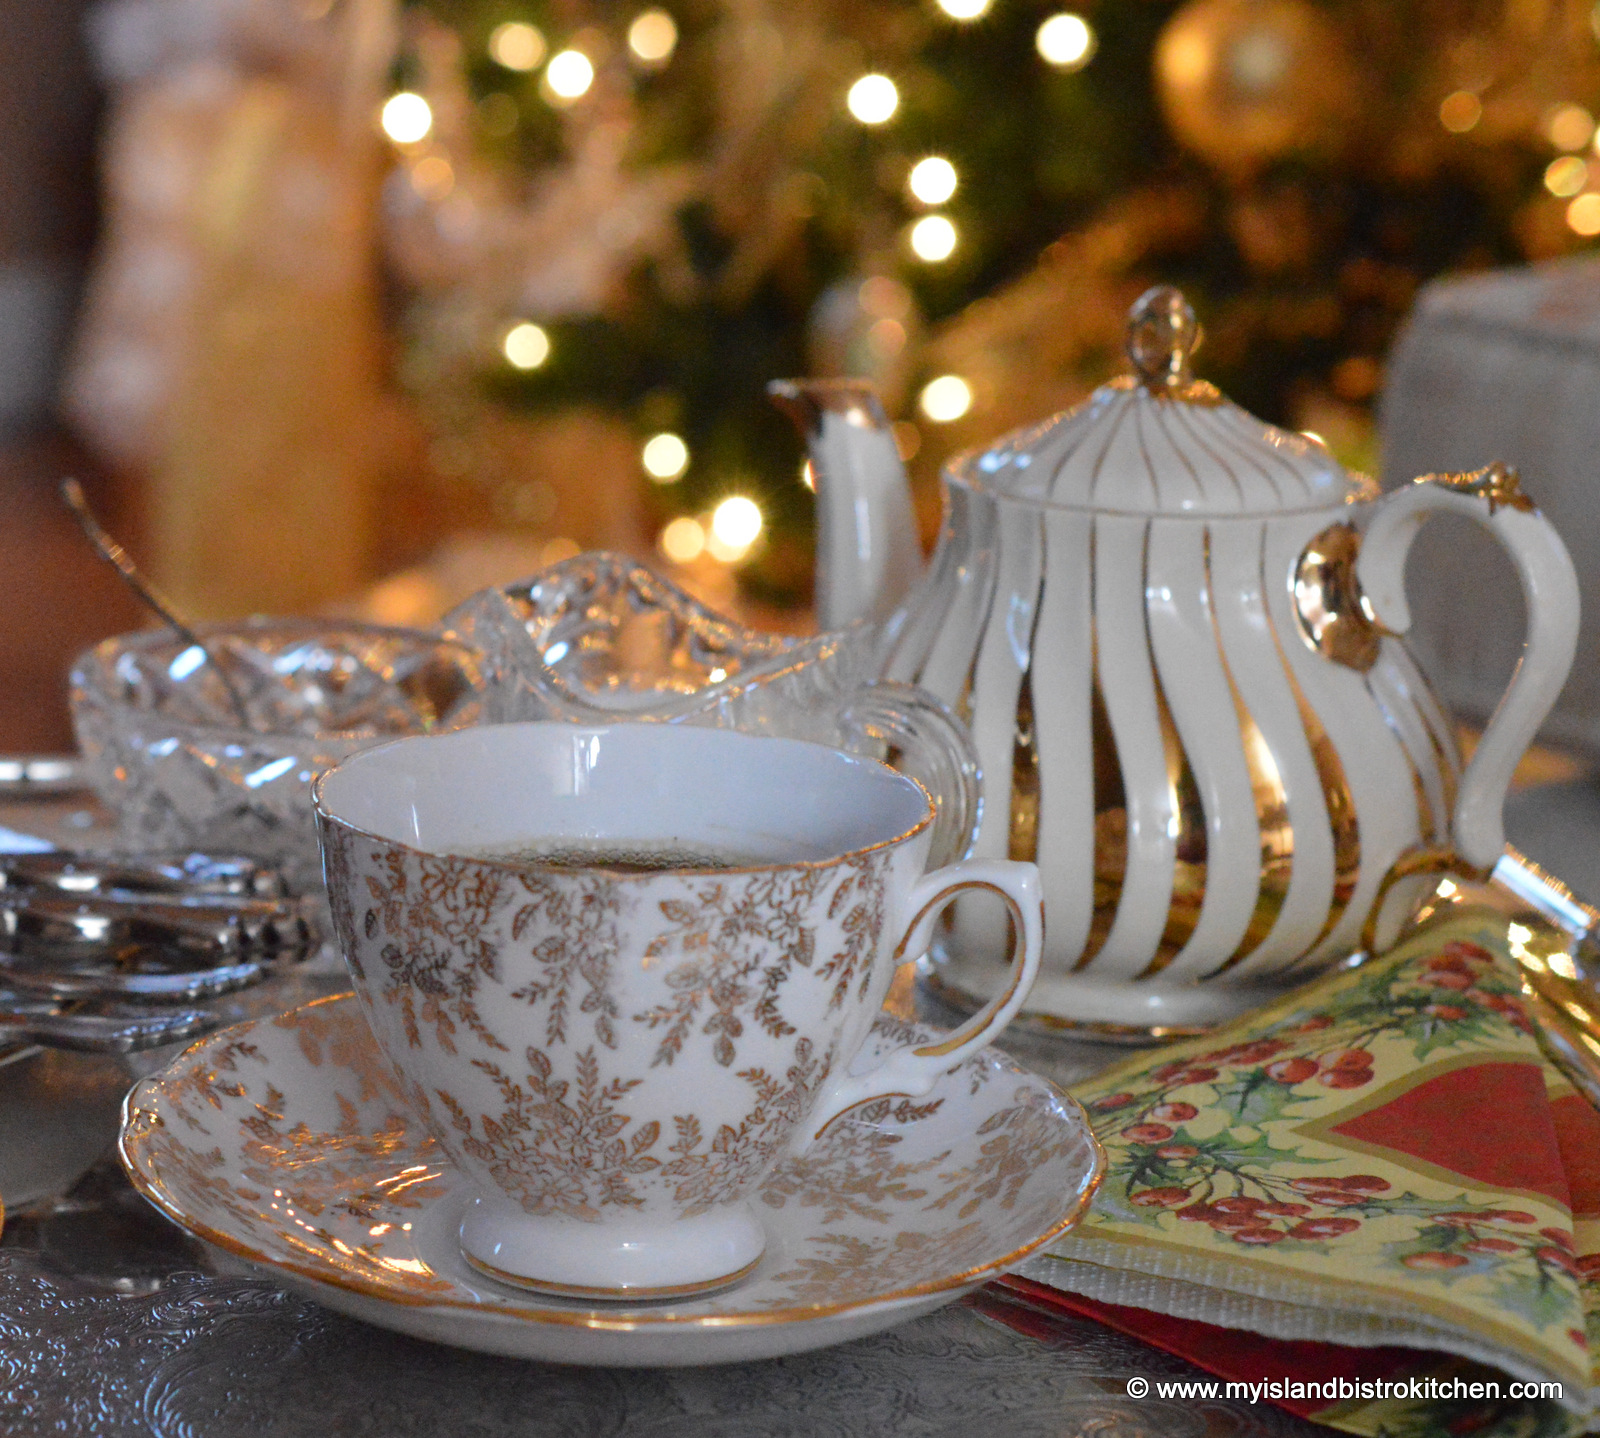
My choice of tea today was the Lady Slipper Blend from Lady Baker’s Tea Trolley. You can read the story I previously published on this tea company by clicking here.
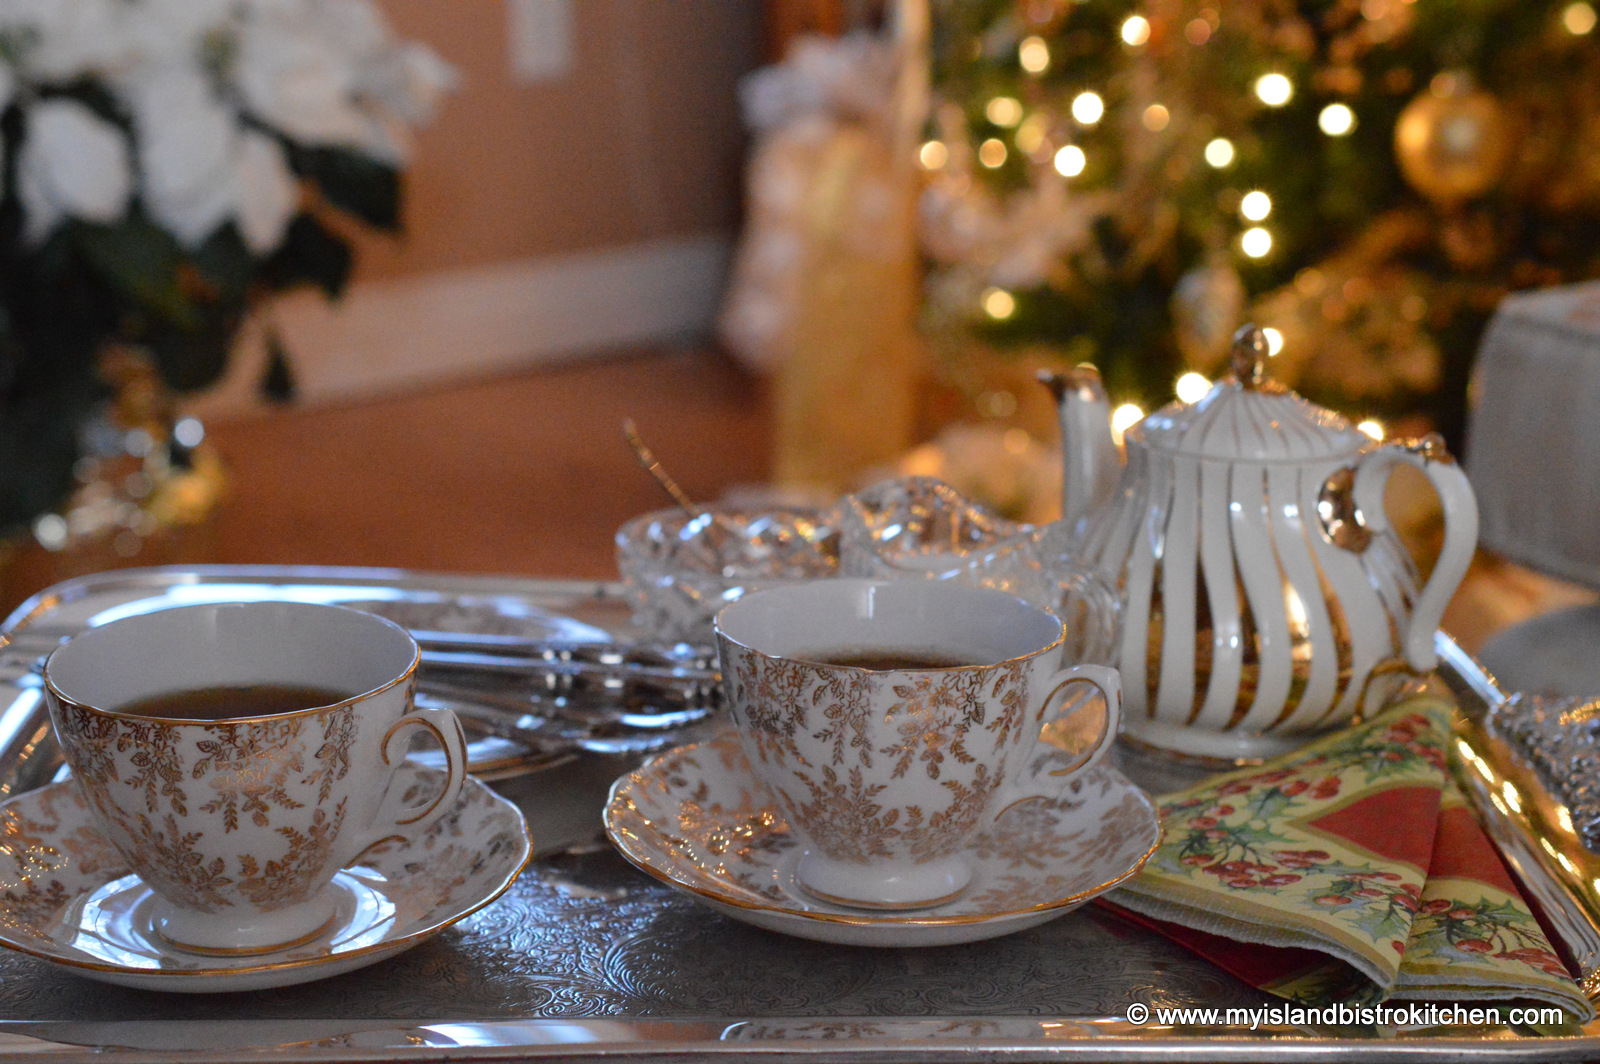
The China cups and saucers are Royal Vale but I could find no pattern name on them.
This will be my last afternoon tea of 2014 so thank you to those who have visited my tea table over the past year. I will also be joining Sandi’s last Tea Time party of the year over at Rose Chintz Cottage.
And, if you find yourself in Moncton, New Brunswick, I recommend a visit to Tony’s Bistro and Pâtisserie at 137 McLaughlin Drive.
Happy New Year, everyone!
——————–
Thank you for visiting “the Bistro” today. There are lots of ways to connect with “the Bistro” through social media:
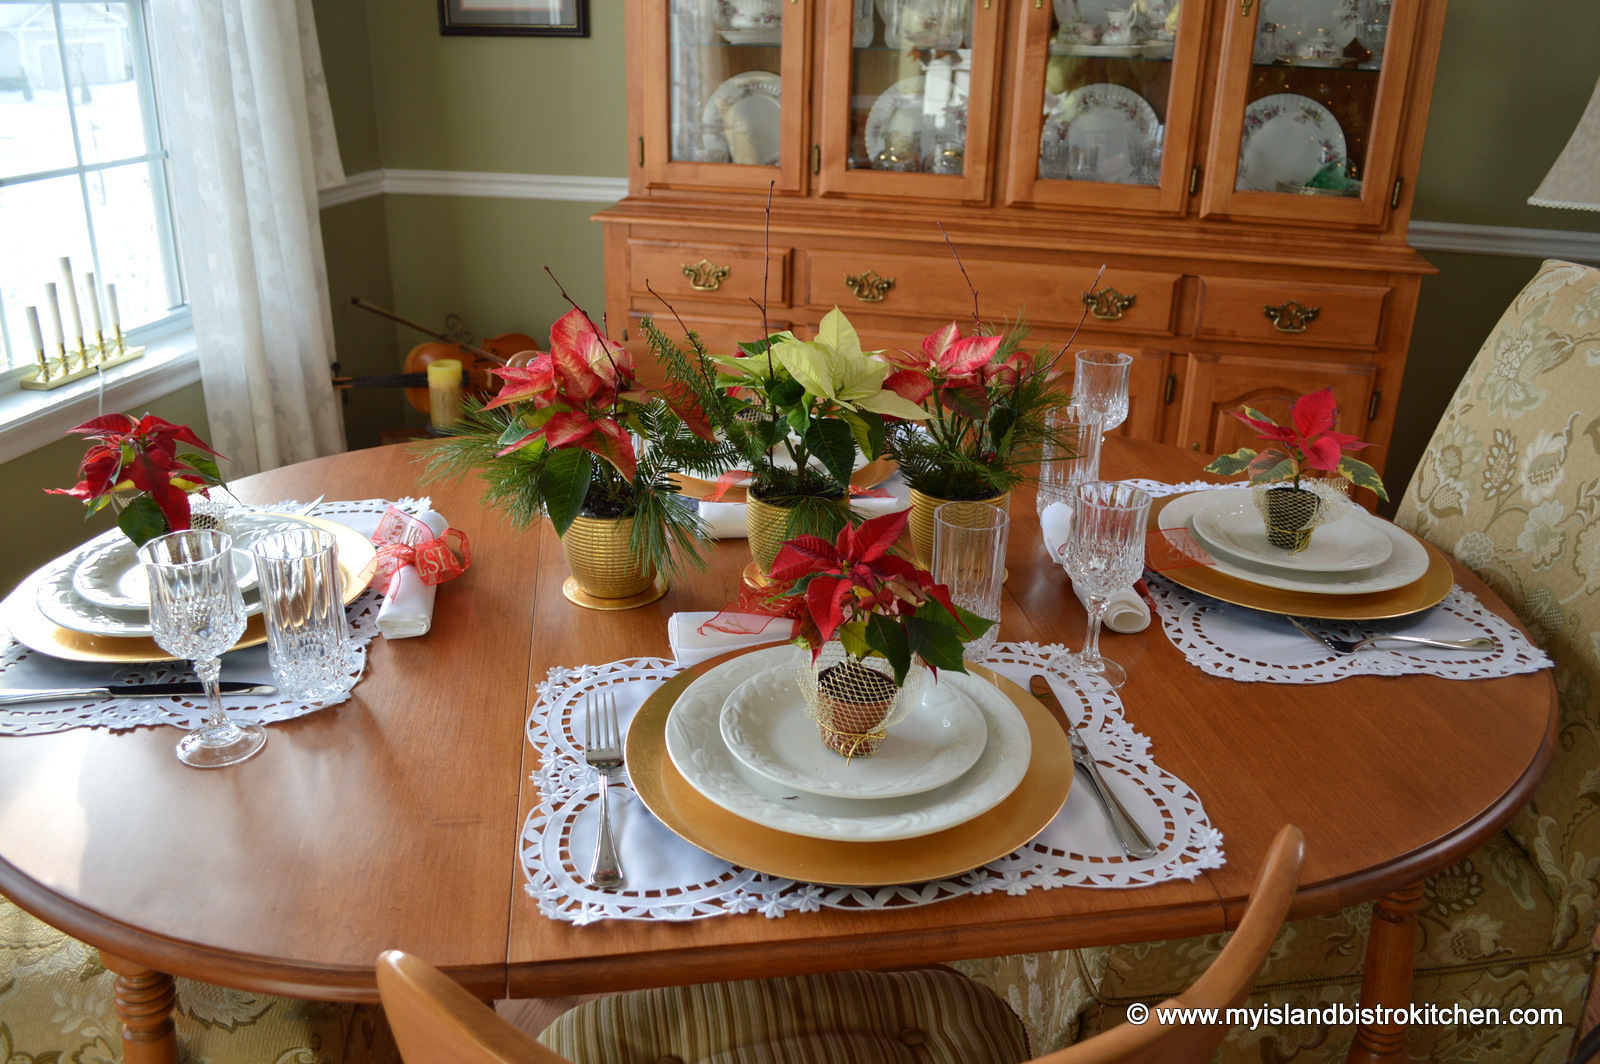
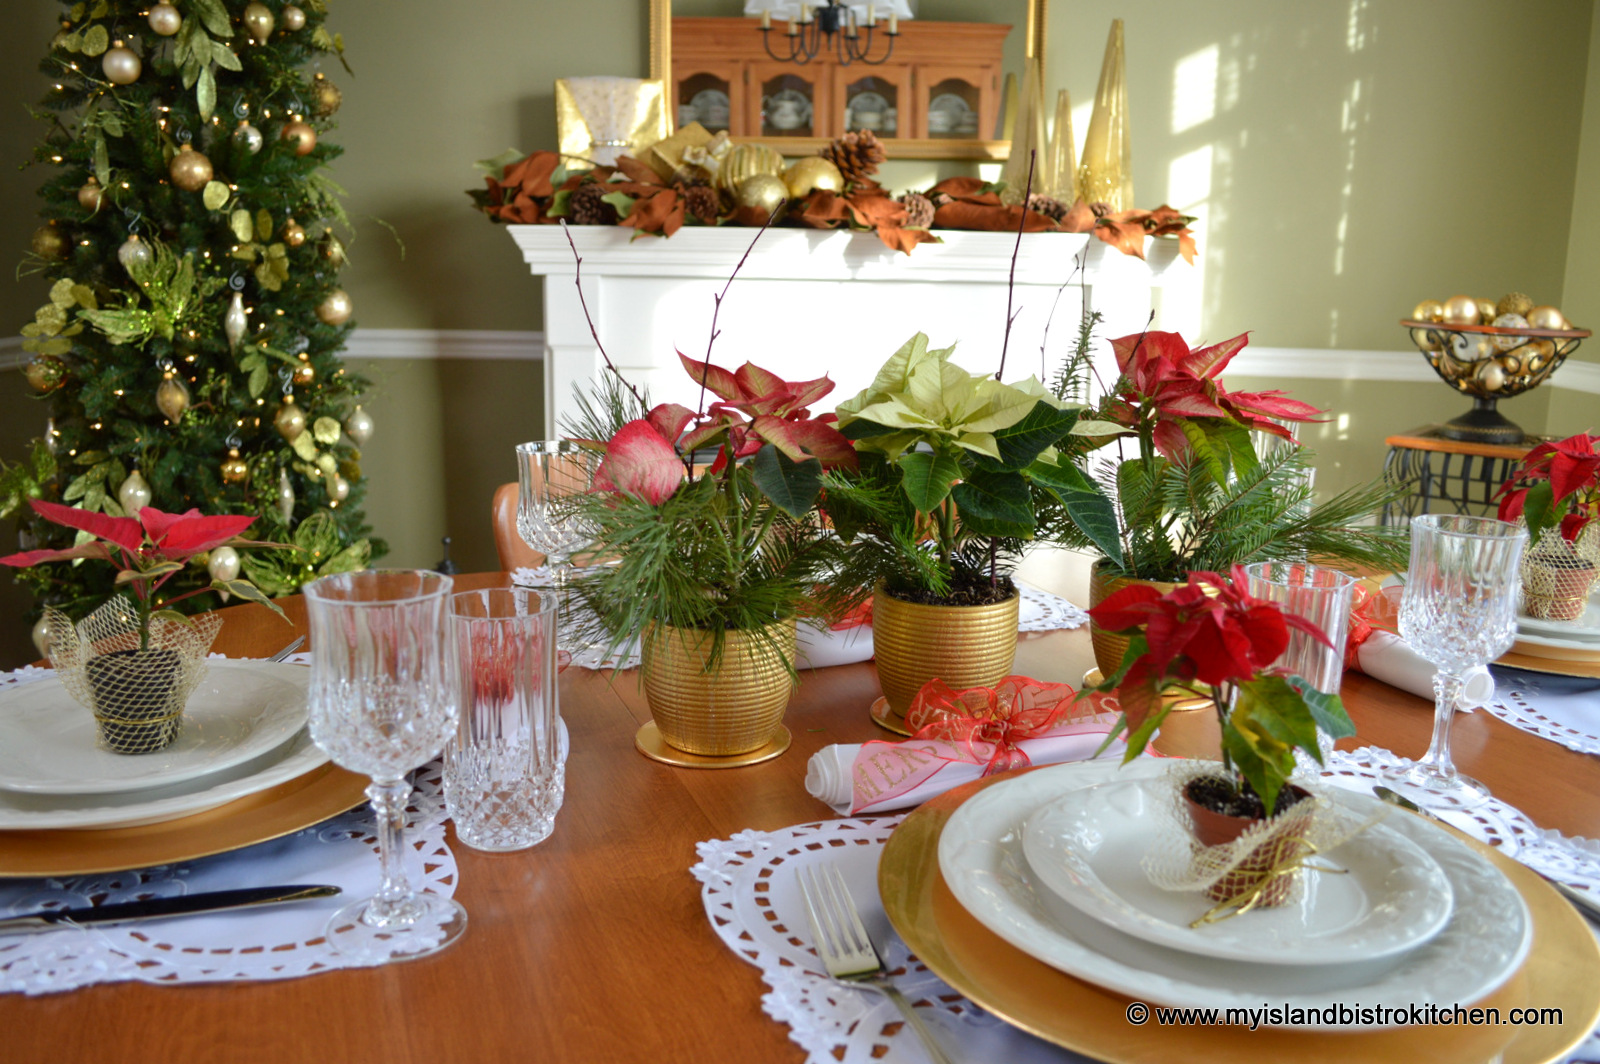
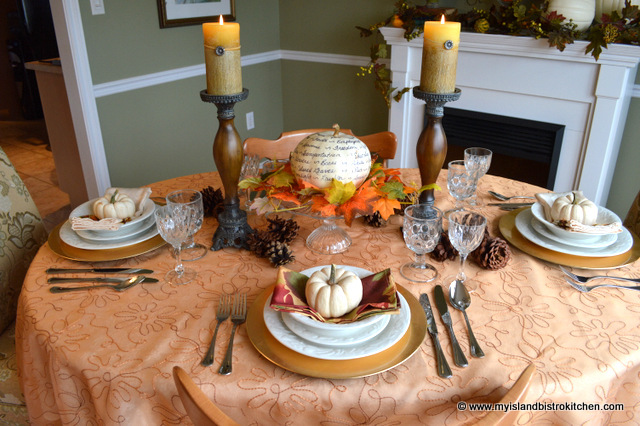
Throughout the holiday season, I am known to change tablesettings several times depending on number of guests and type of dining (e.g., brunch, lunch, dinner, etc.). That, however, doesn’t mean that I don’t rejig and re-use some of the same elements in more than one tablesetting.
I recently shared my tablesetting for an intimate dinner for four where I clustered three poinsettias in the center of the small round table and set a miniature poinsettia at each place setting. To view this tablesetting, click here.
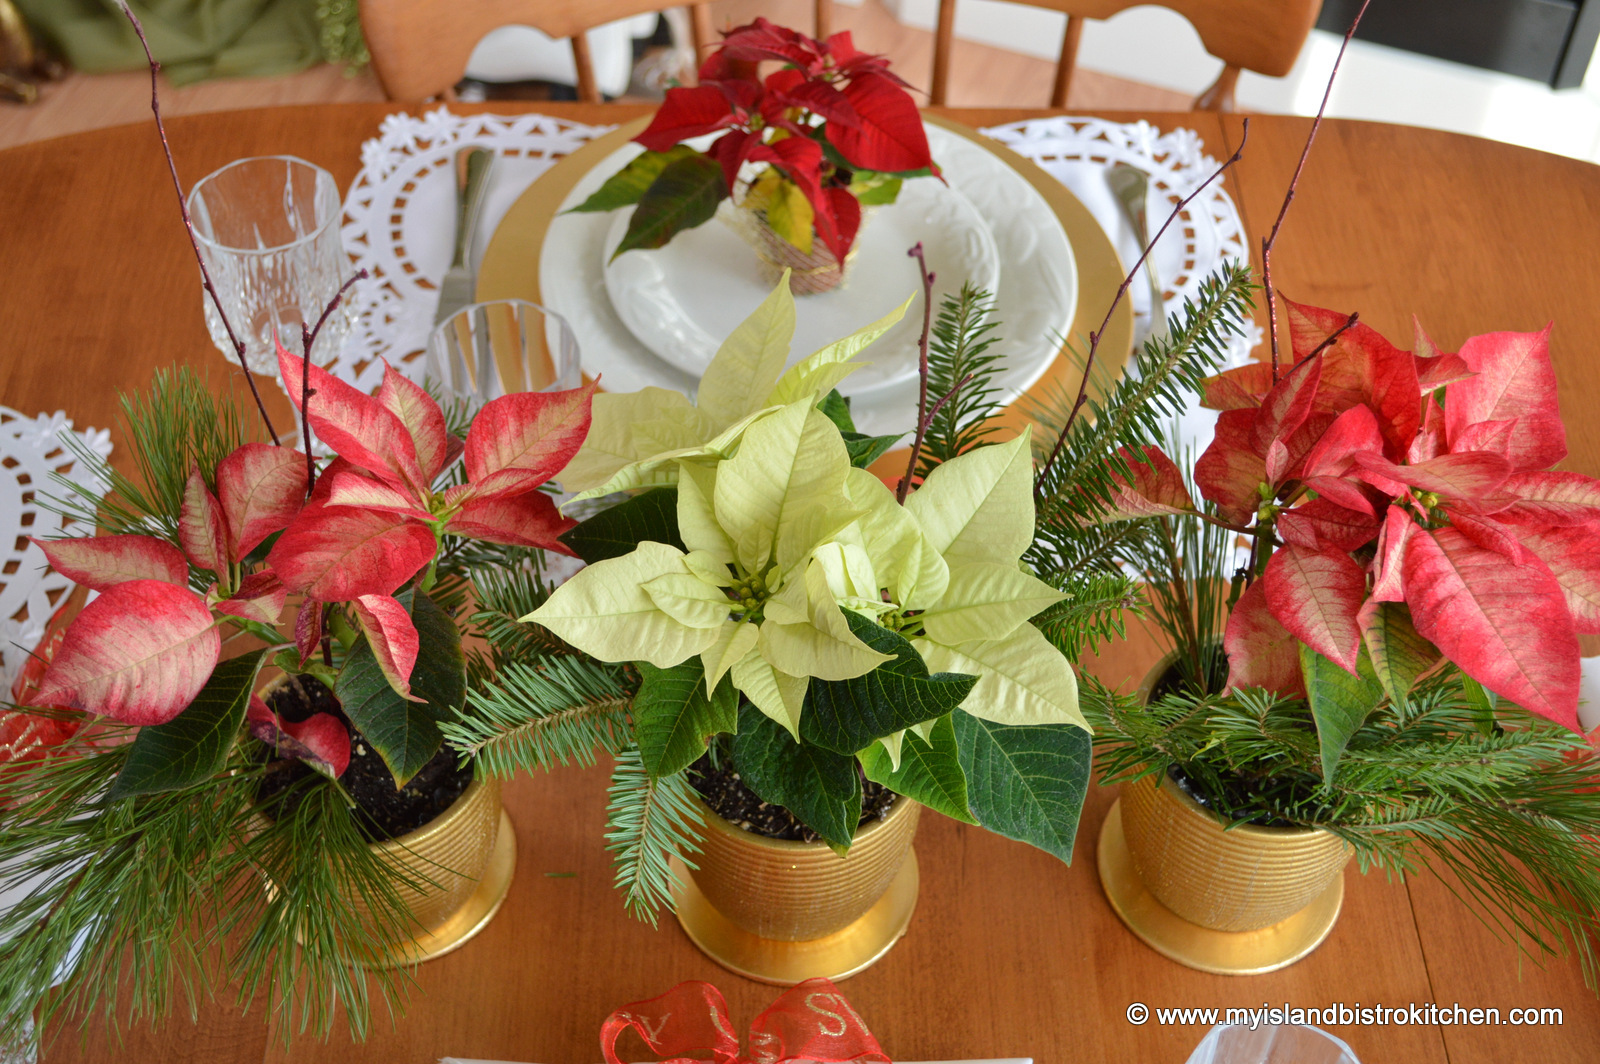
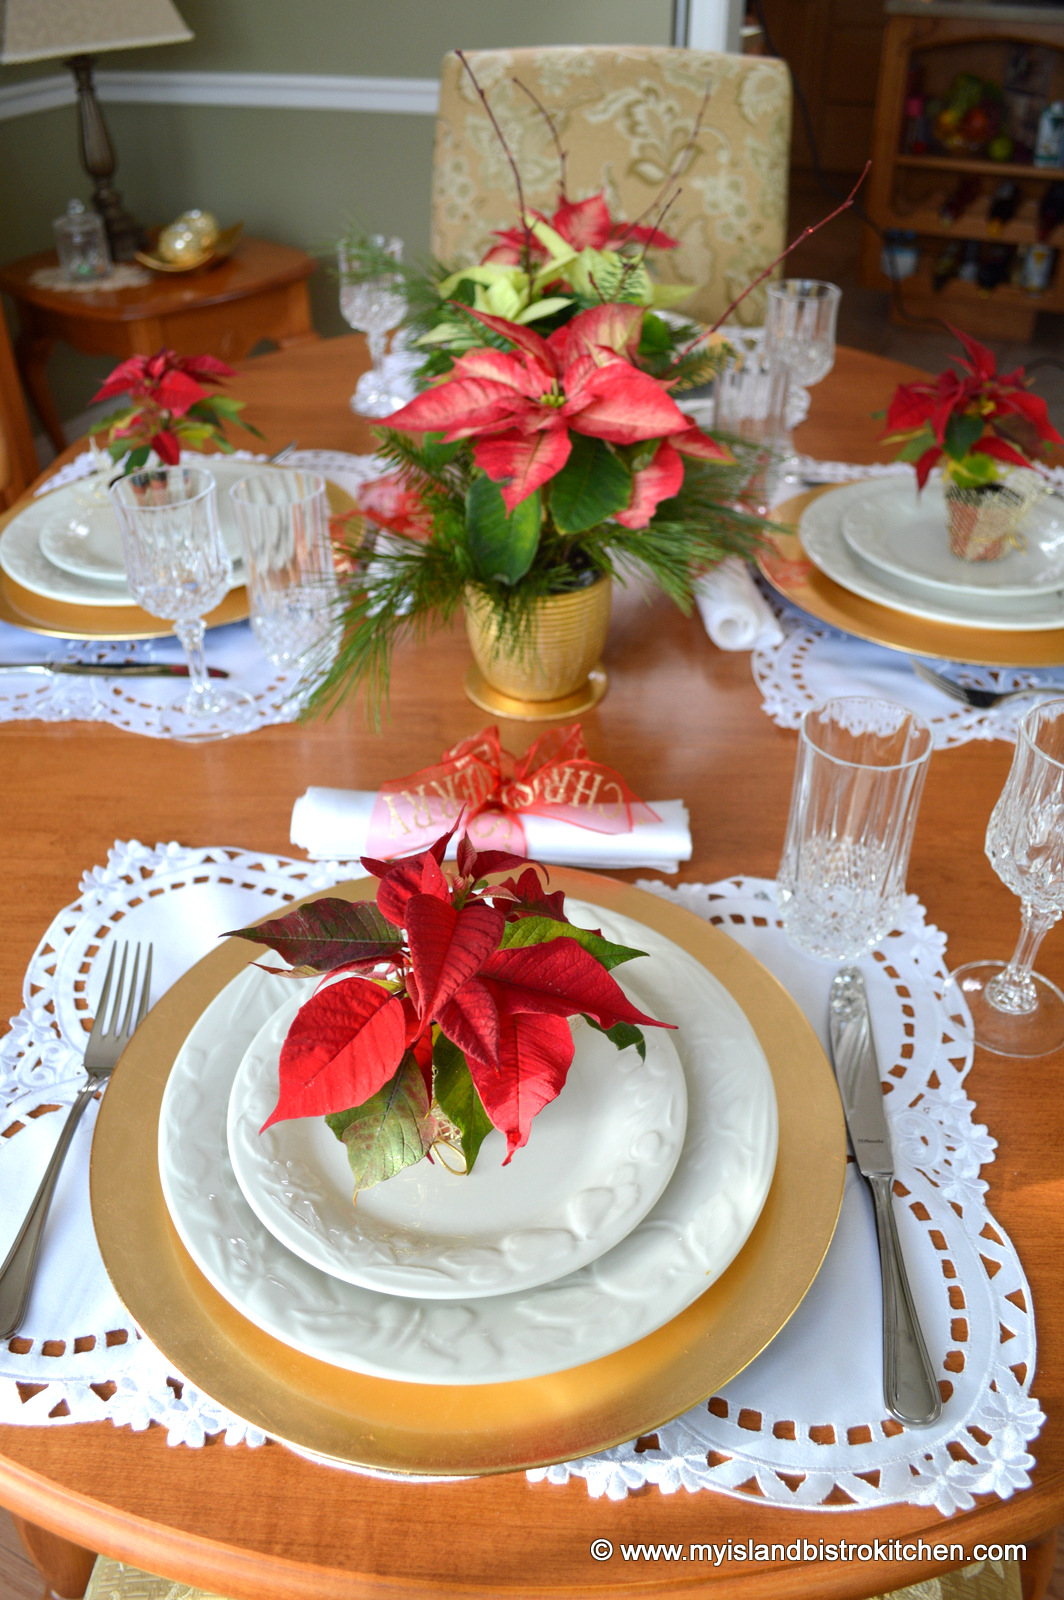
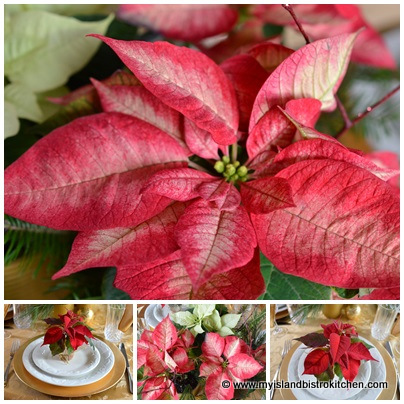
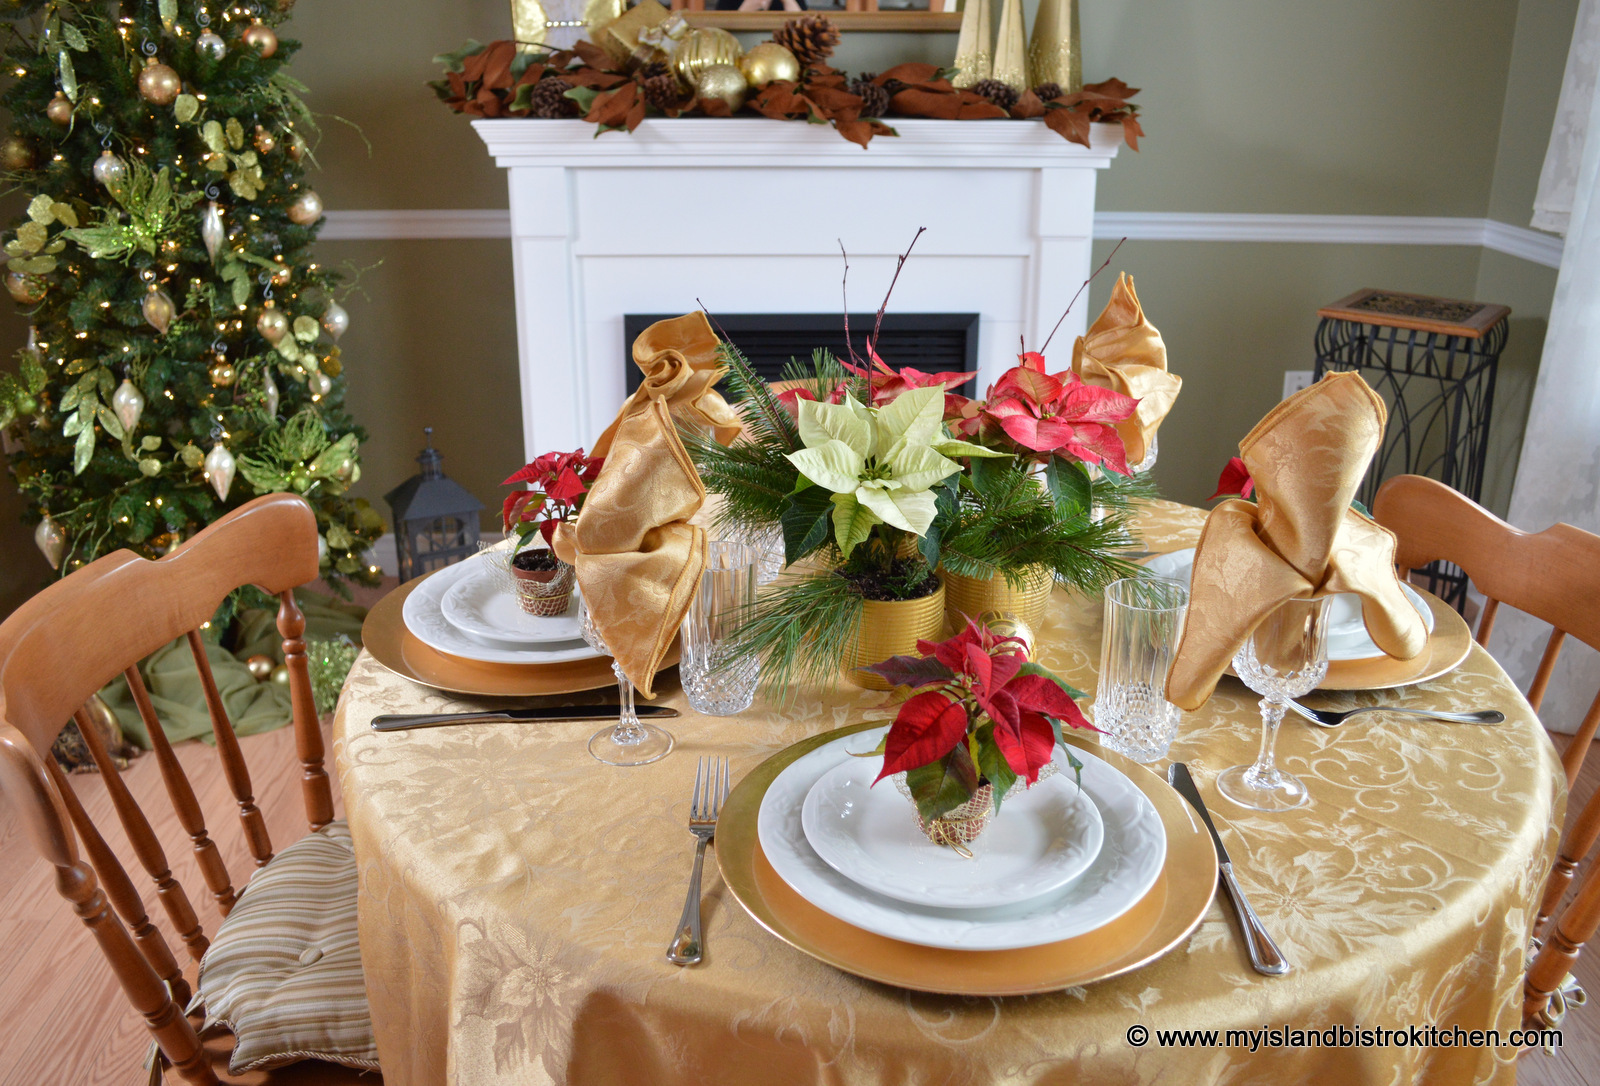
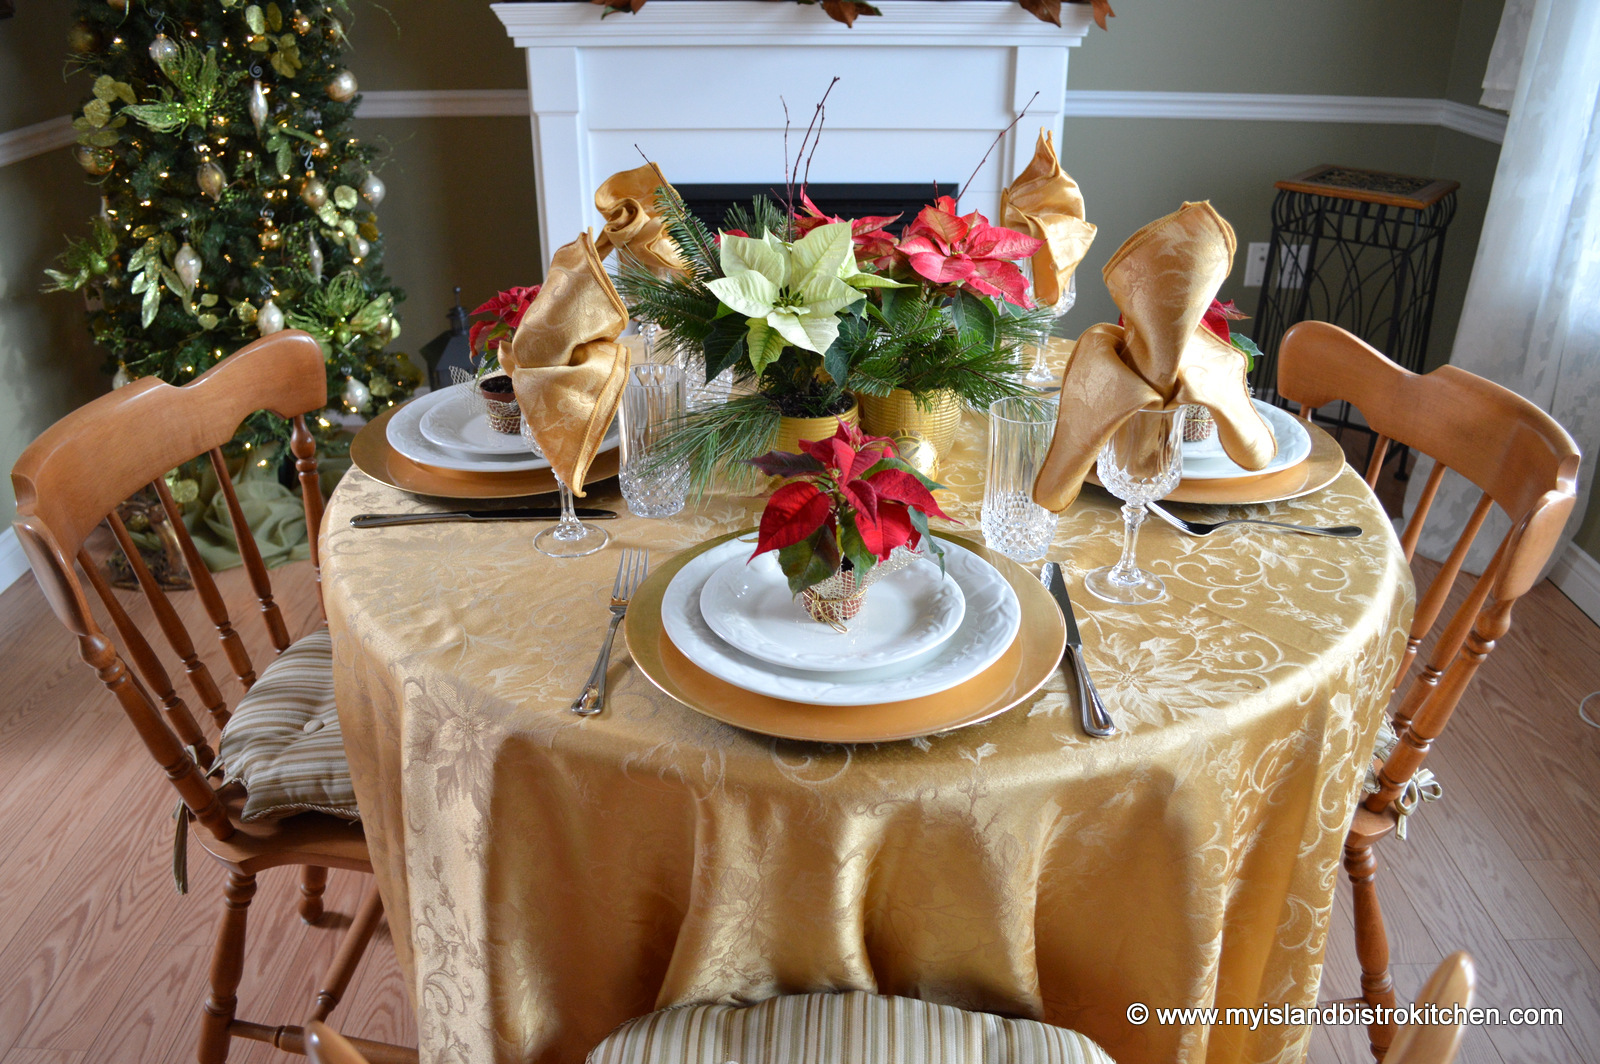
Today, I have turned my table back into its oval shape, bought more miniature poinsettias for guest favours but have used the same three small poinsettias for the table centerpiece. This is a very economical way to achieve a centerpiece for more than one dinner party (and less work!). Instead of clustering the 3 poinsettias into a centerpiece, I have placed them at equal distance apart down the center line of the table.
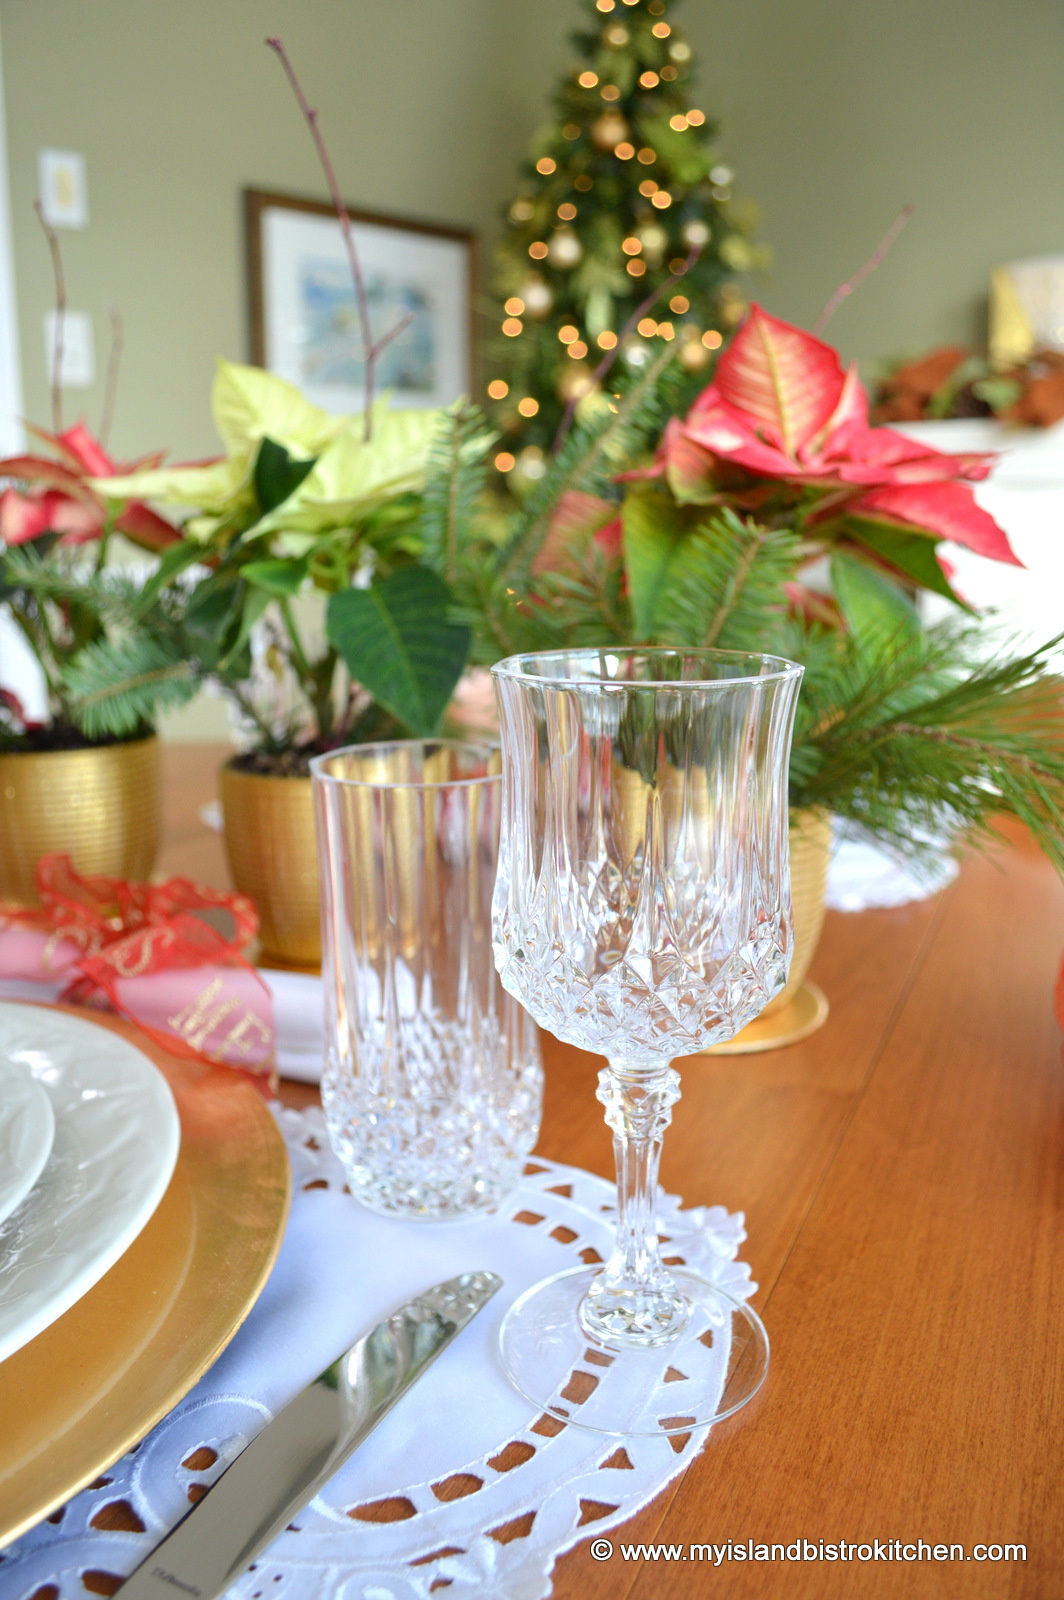
I have decided that, this year, I want my tablesettings to show the maple wood in my table as opposed to covering it up with a full tablecloth. I bought the placemats and matching napkins on a trip to San Juan and it’s a wonderful memory of a great vacation each time I dress my table with them.
Letting the wood of the table show lends a slightly more casual look to the table than does a tablecloth.
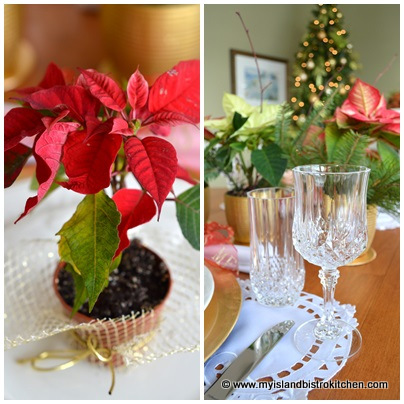
I purchased several of the miniature poinsettias at the beginning of the season and have used them on bed trays, tea tables and, of course, at placesettings on the dinner table.
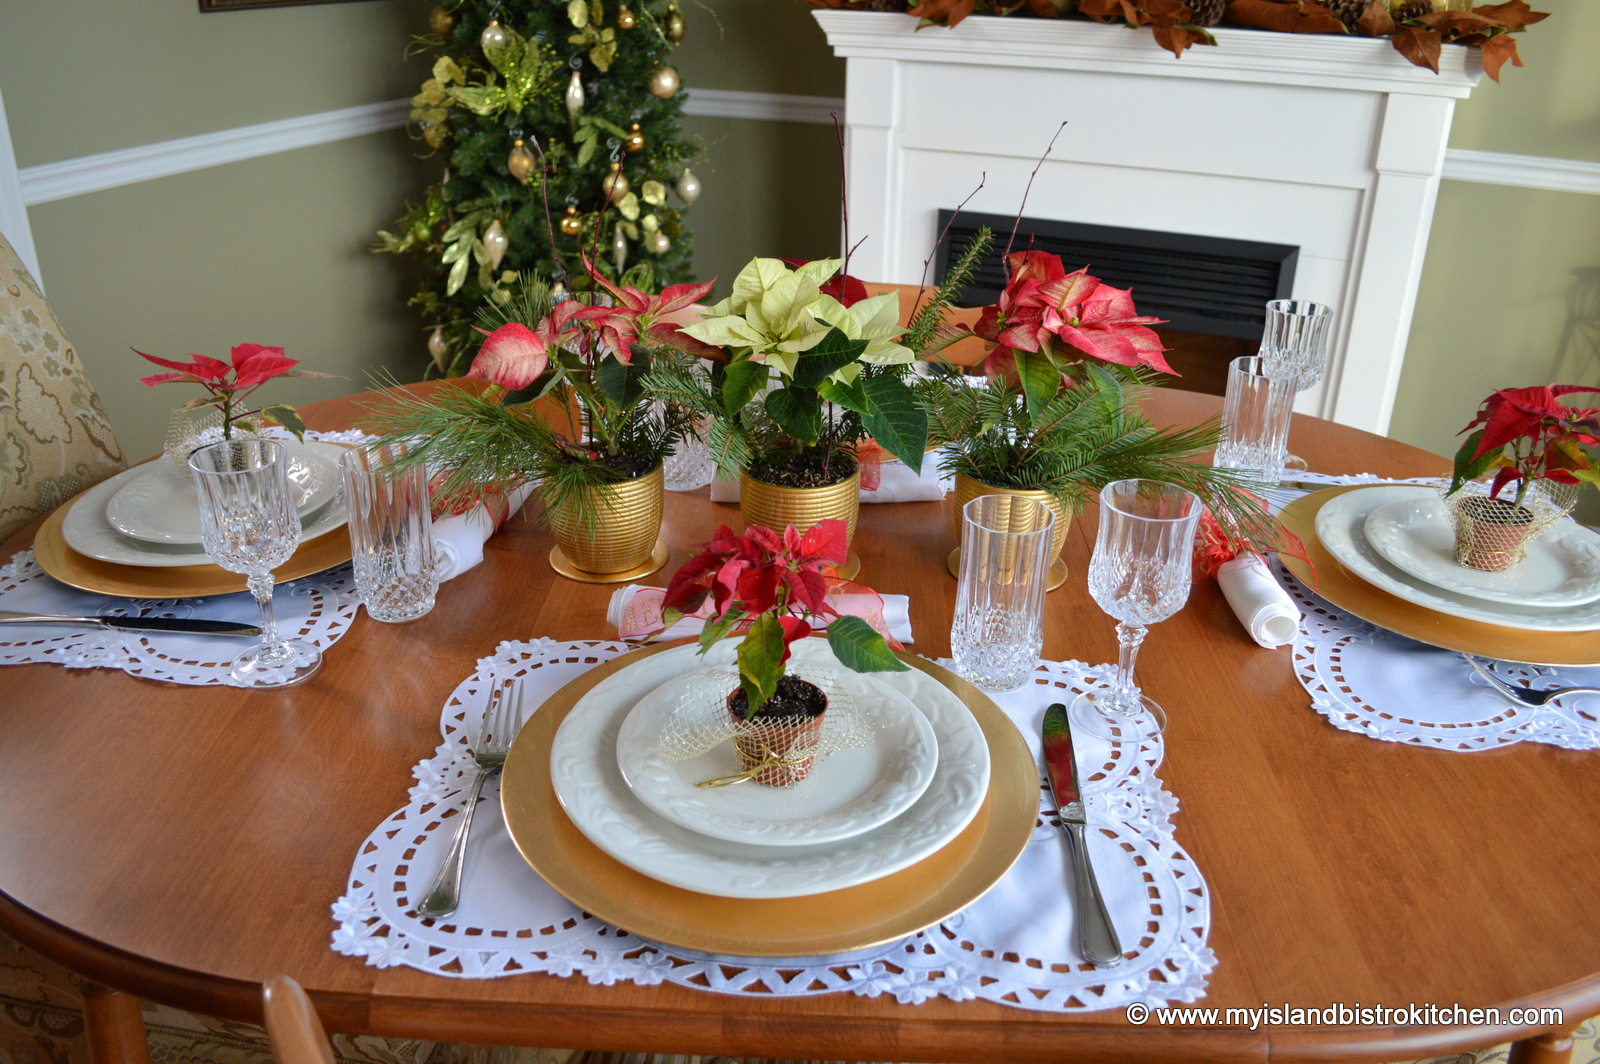
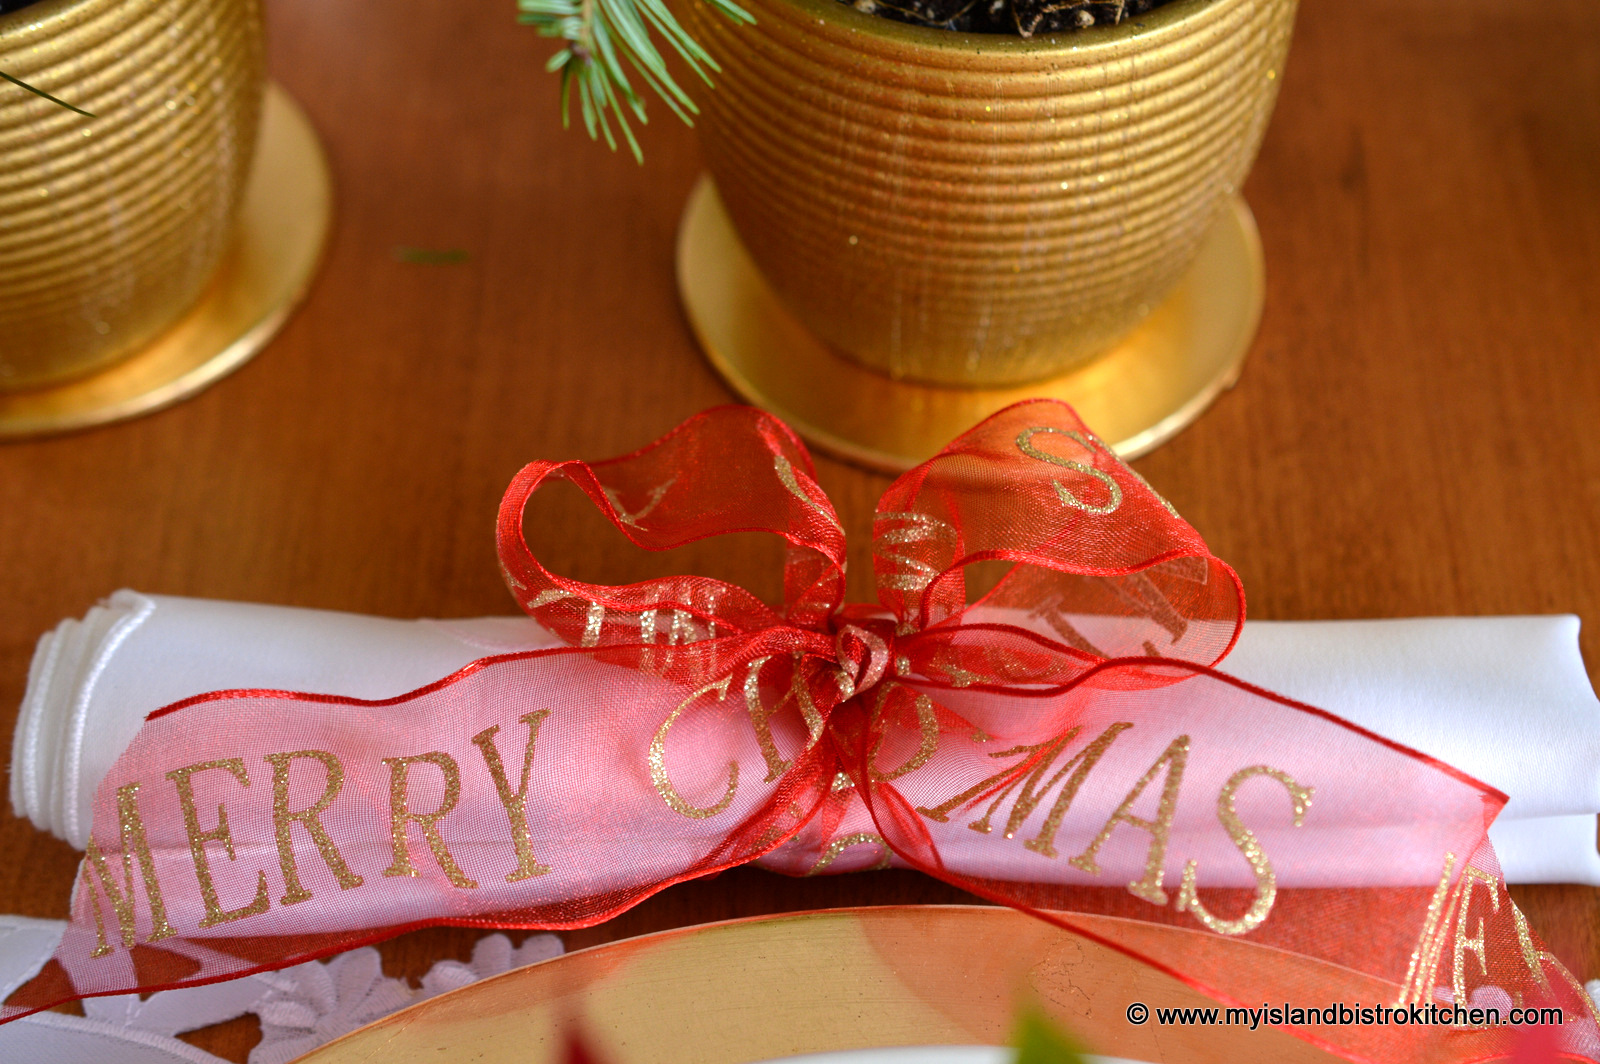
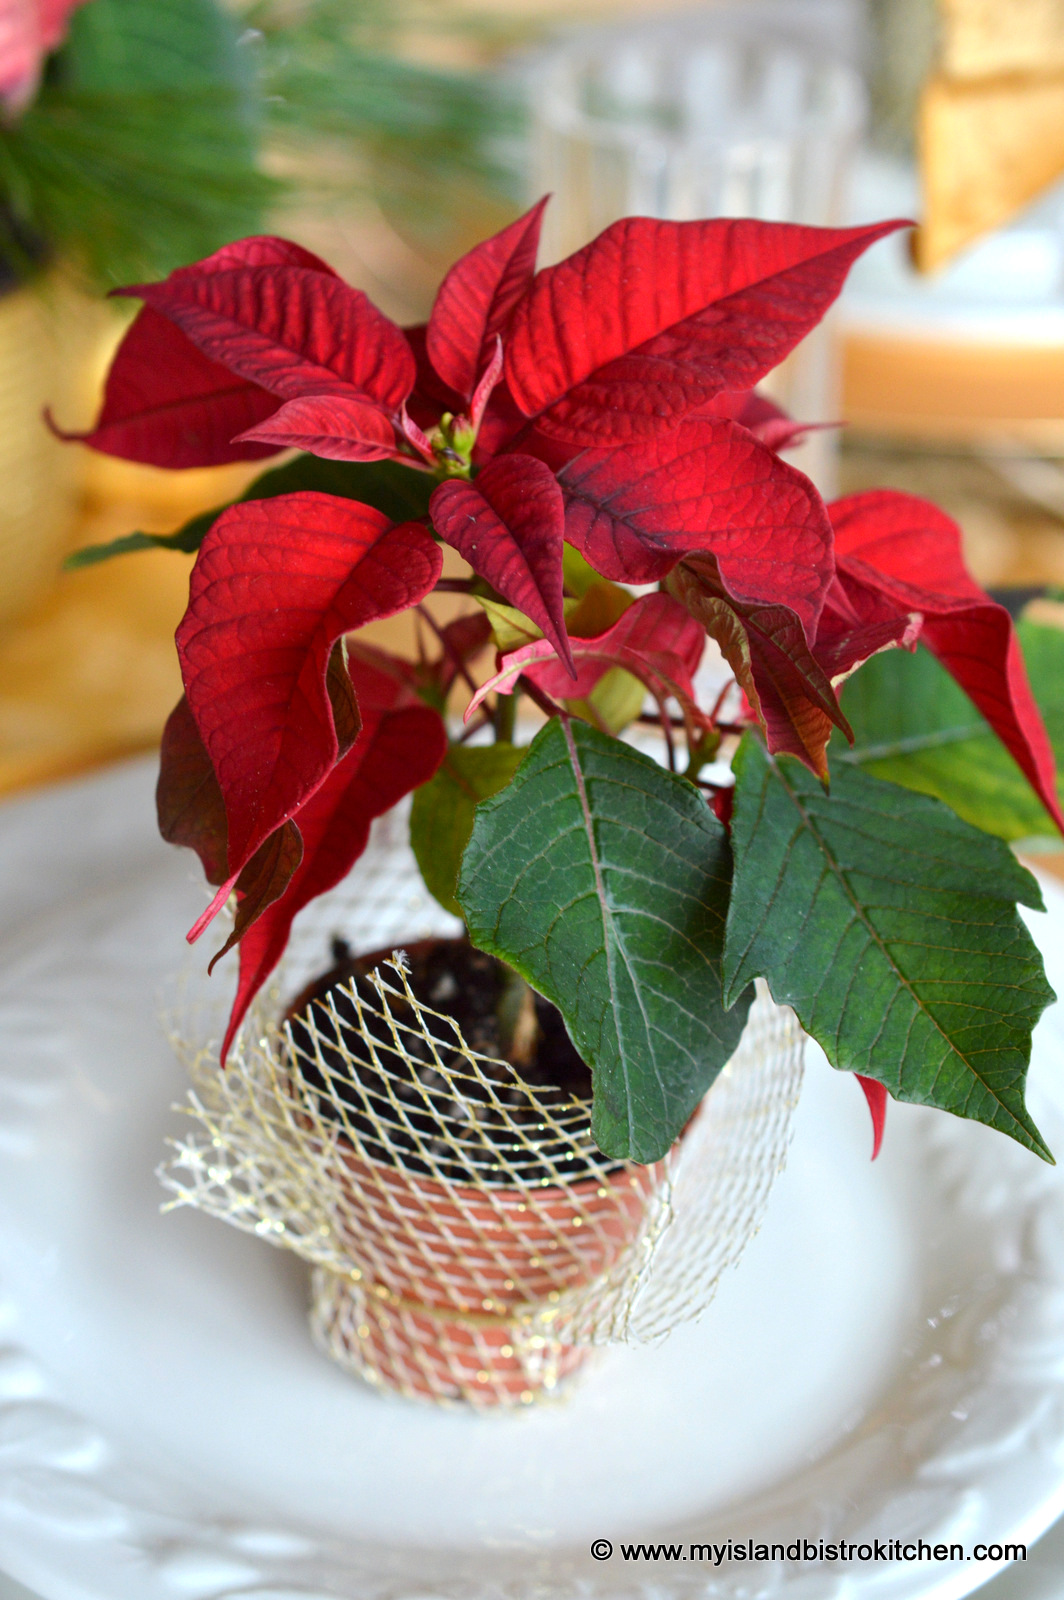
The miniature poinsettias came in little plastic terracotta pots so I simply wrapped them in gold sparkly netting and tied them with gold cord for a festive look. They make great take-away guest favours.
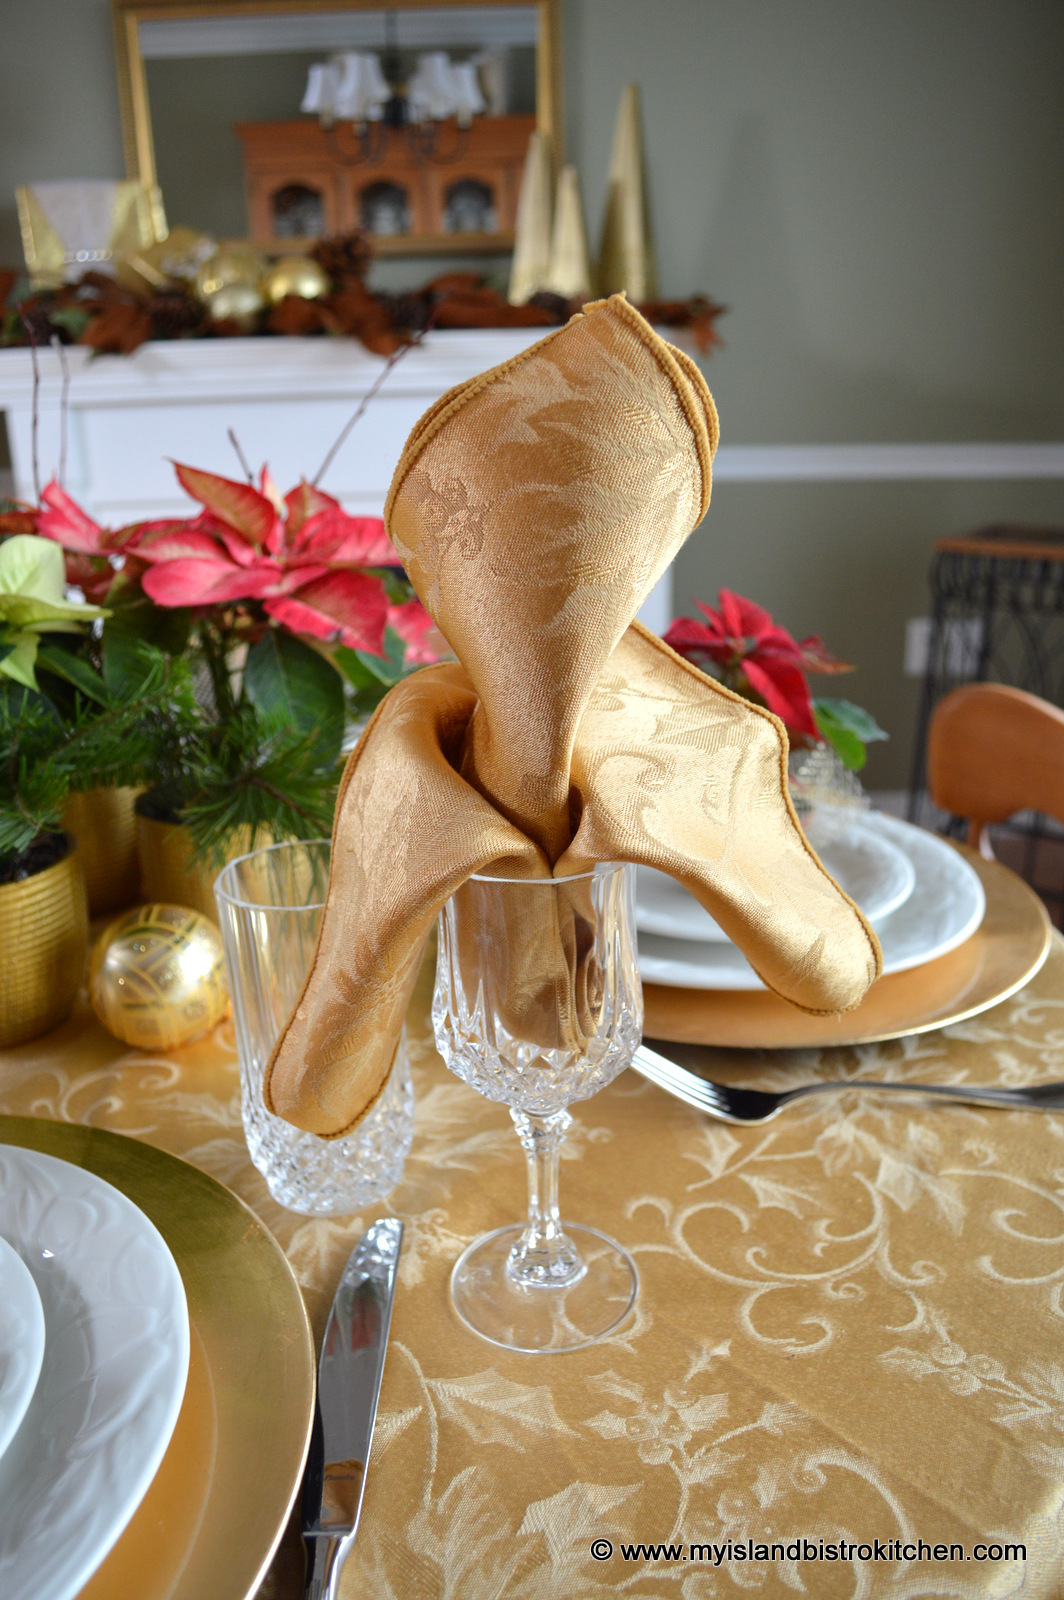
For those who regularly follow my tablescape segment on my food blog, you will recall that I have previously said that, if you aren’t knacky with, or don’t have time to do, fancy napkin folds, then a simple and effective way is to simply use a napkin ring and roll or fluff the napkin through the ring.
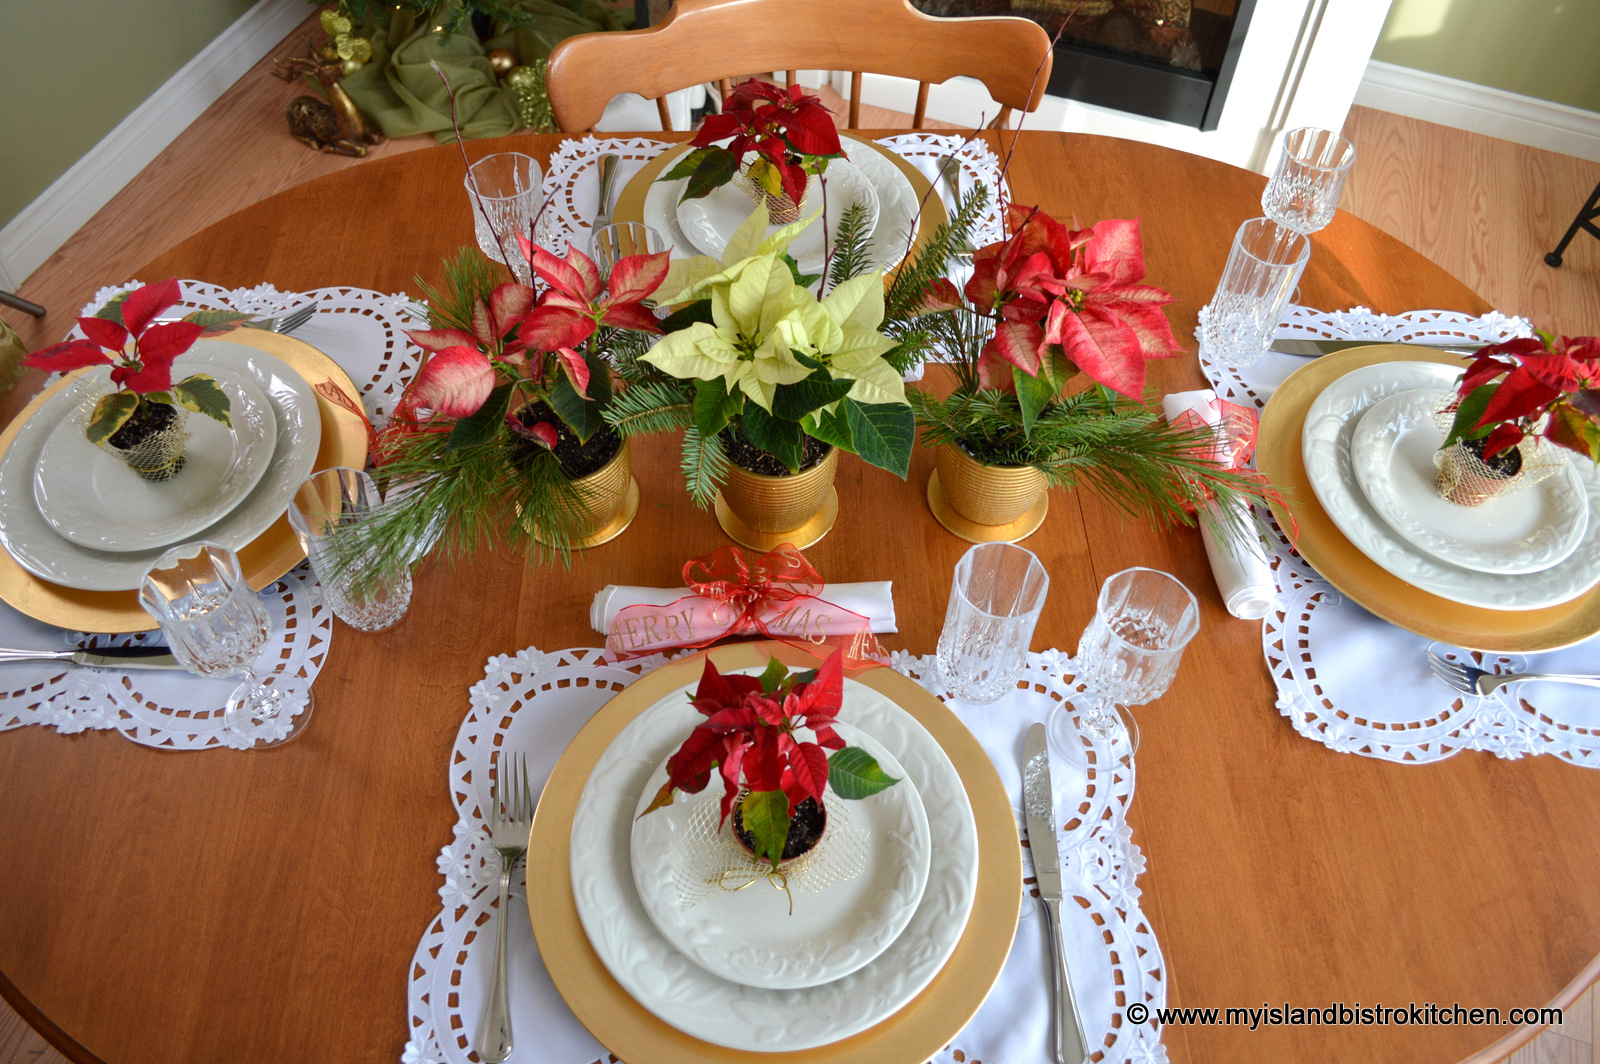
However, if you don’t have napkin rings, all you really need is a spool of pretty ribbon to tie around the napkin as I have done here with a sheer organza wire-edged ribbon that bears the words “Merry Christmas” in gold glittery print, again tying in the gold color and the red of the poinsettias.
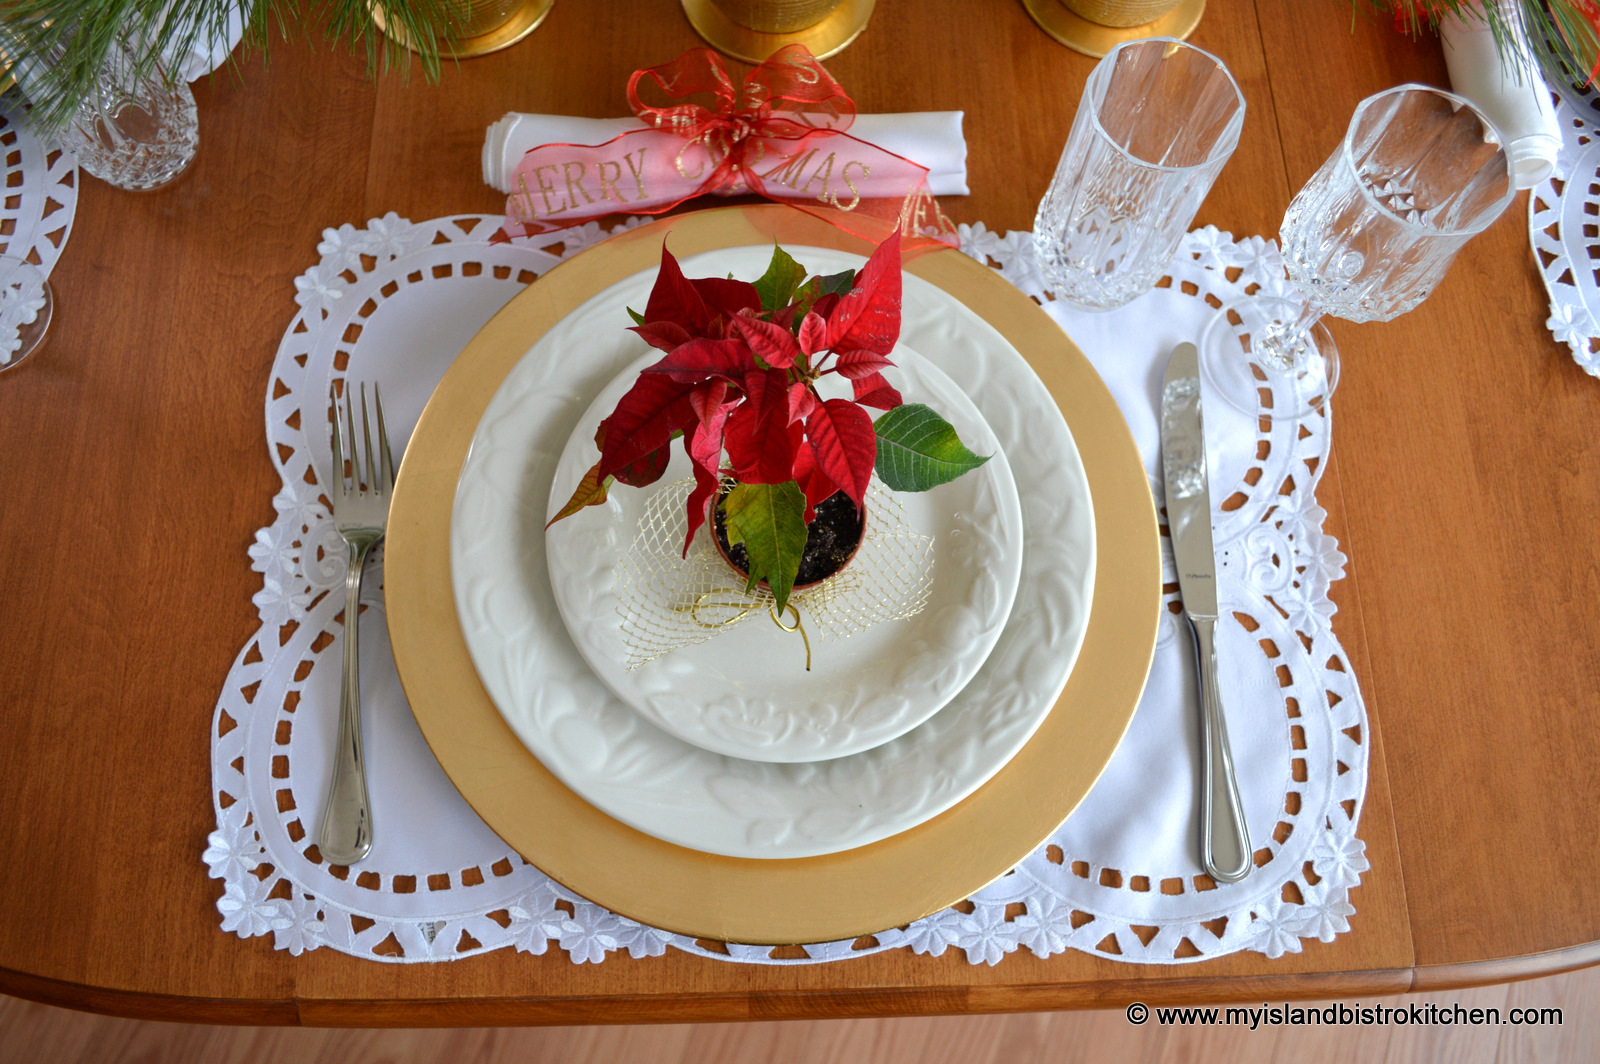
The photo below shows the individual placesetting. You don’t need expensive formal China to set a pretty table. This one is set with basic everyday ironstone dinnerware. Again, I am using my basic gold chargers to tie in with the poinsettia gold pots.
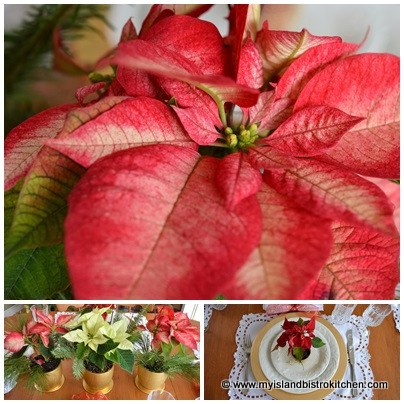
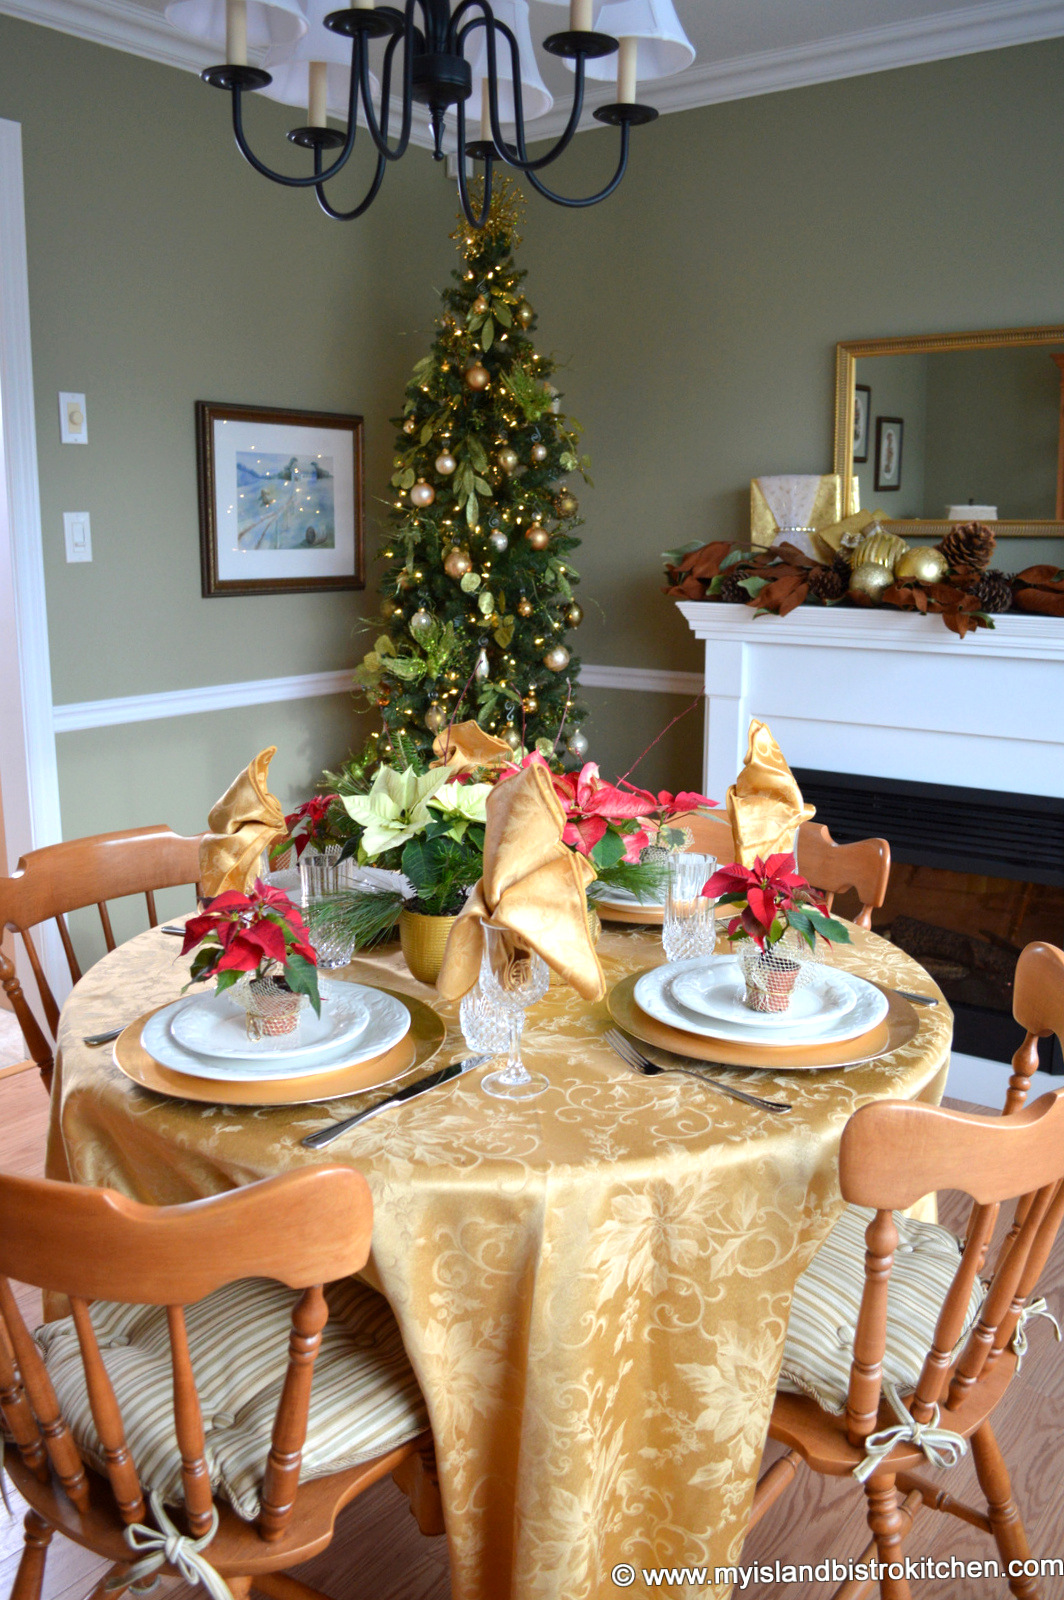
The photo below shows an overhead view of my colorful Christmas table.
To view other Christmas and New Year’s Tablesettings, click on the links below:
Poinsettias are one of the most commonly seen plants over the Christmas season. They come in a variety of colors and shades and in various sizes. Each season I have several placed around my home — in front of fireplaces, in the entryway, and anywhere else that I think needs a pop of color and a festive touch.
Today, I am using both small and miniature poinsettias in a seasonal tablescape.
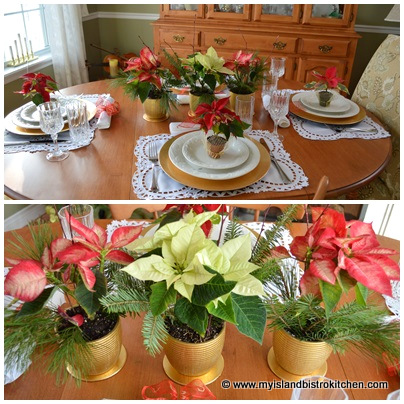
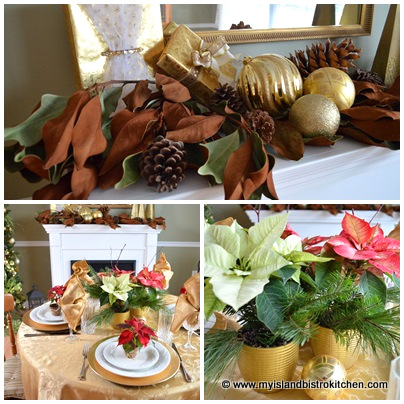
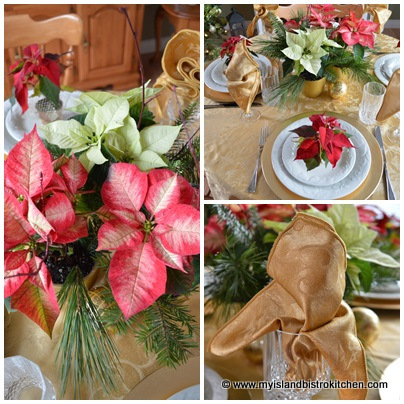
Poinsettia Tablescape
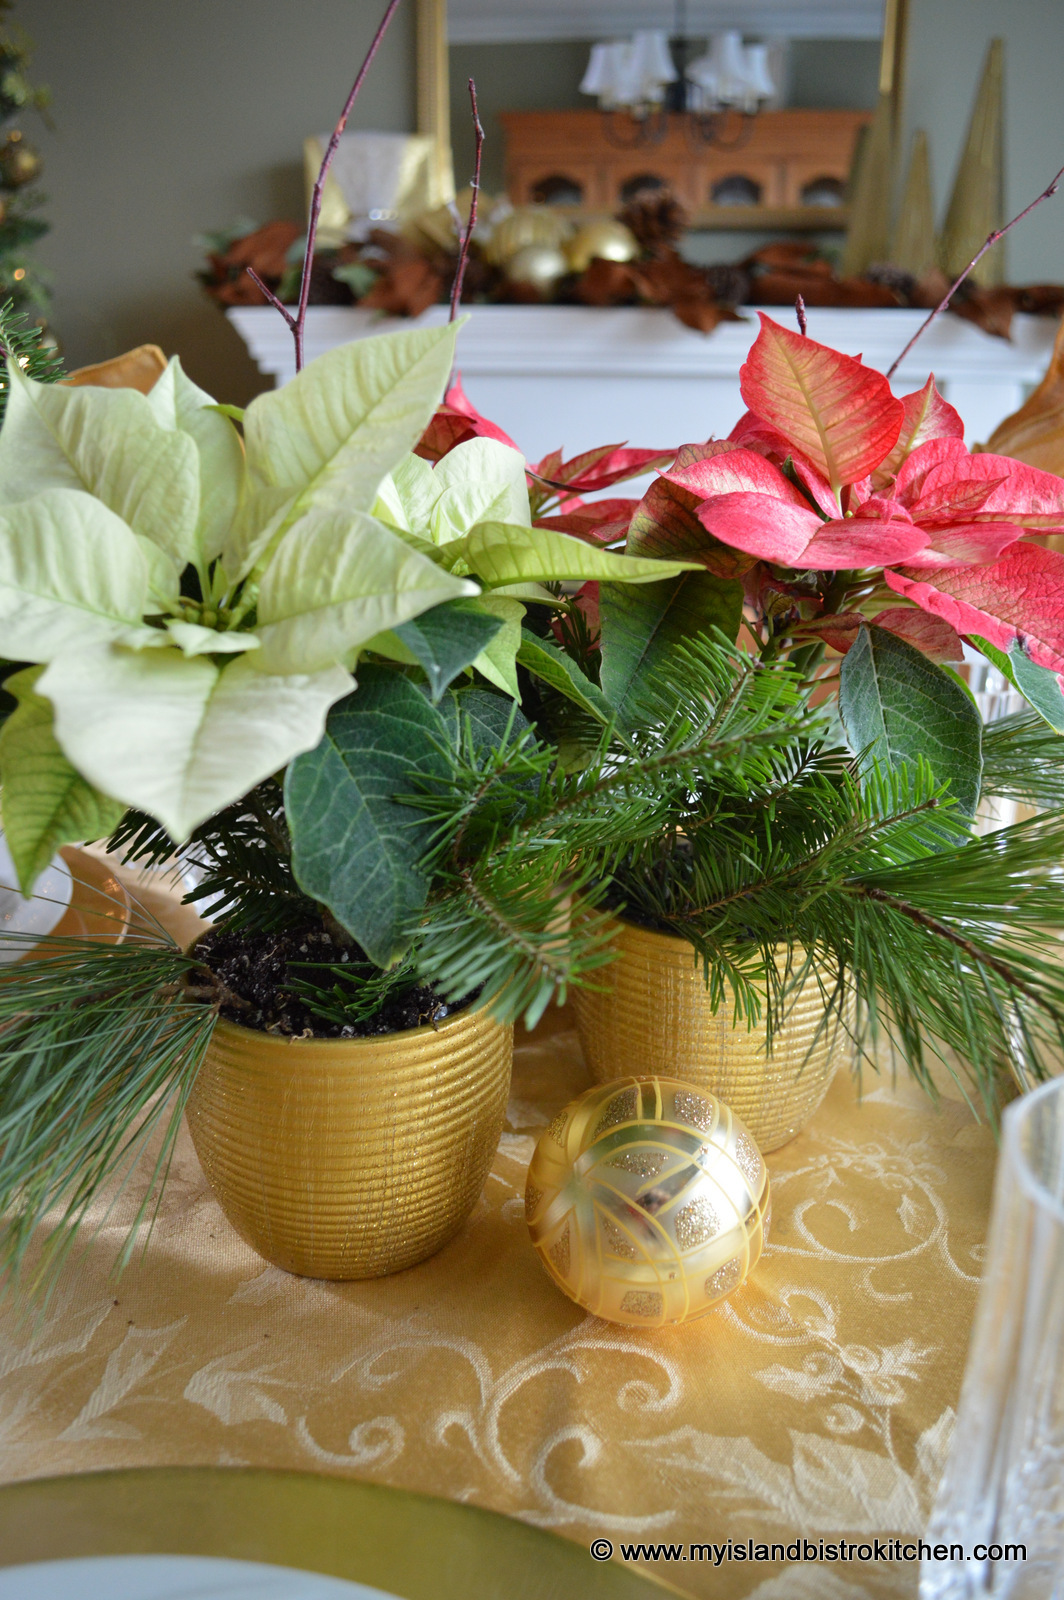
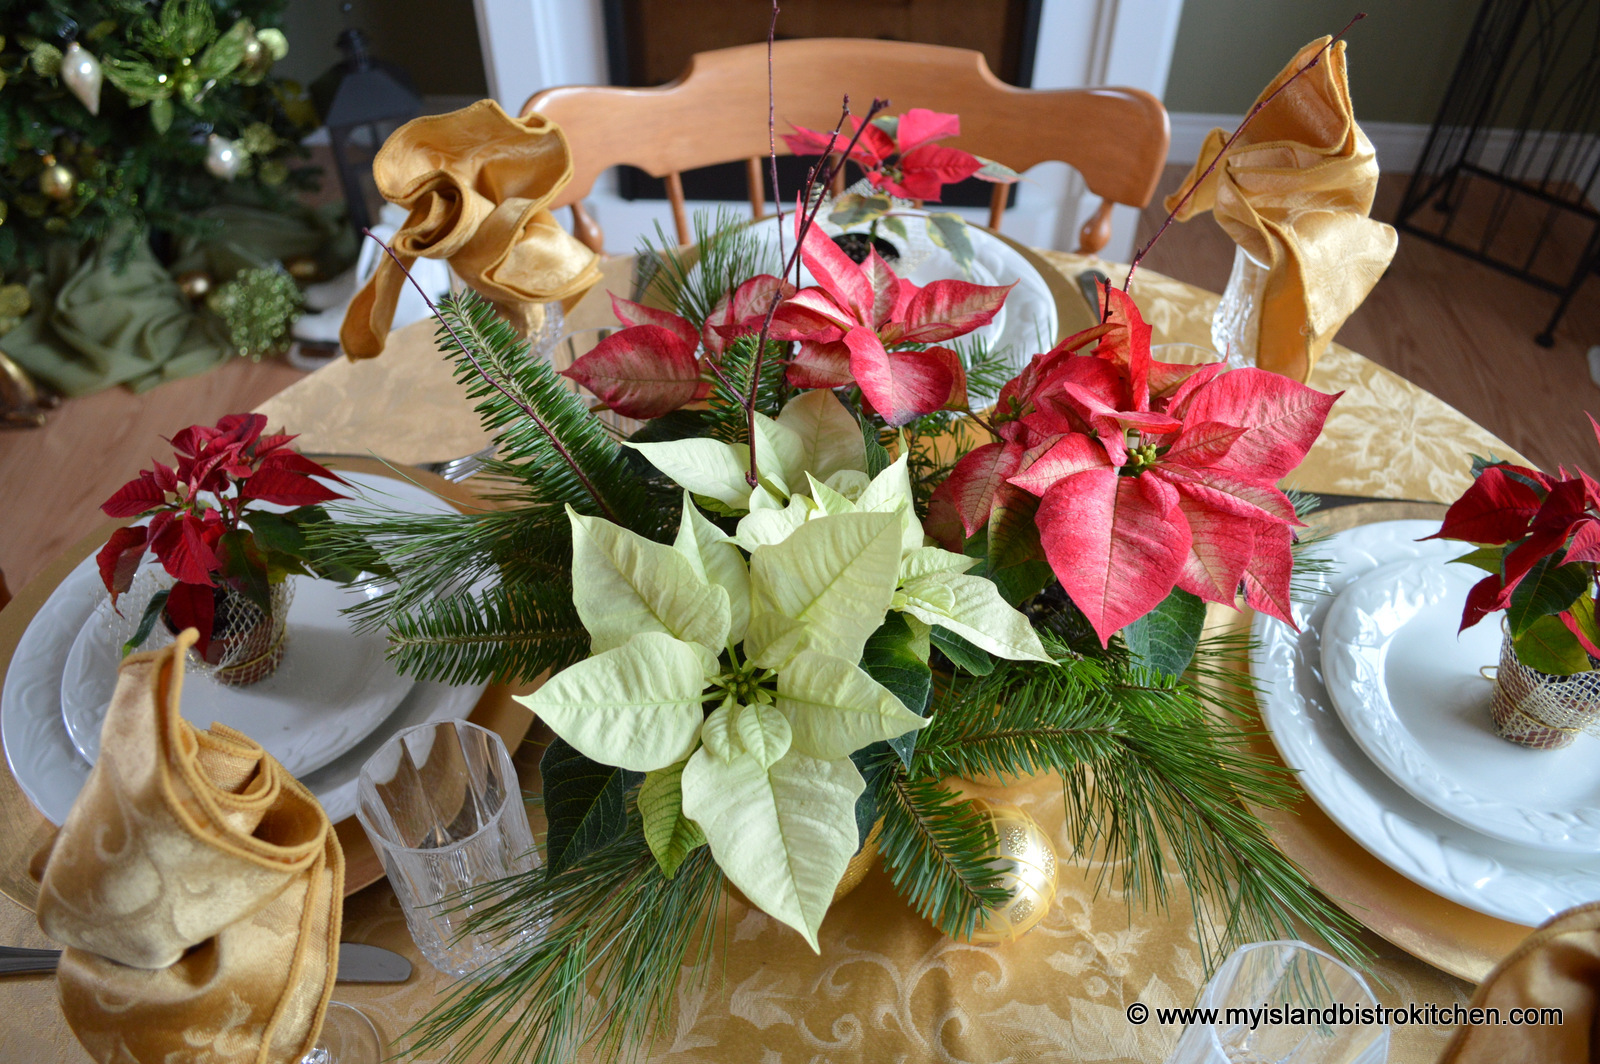
I have clustered three small poinsettias in the center of the small round dining table.
Three Poinsettias Cluster to Form a Table Centerpiece
These plants are just supermarket stock so I removed the commercial plastic wrappers from them and transplanted them into small glittery gold pots that I found at my local dollar store. I added some fresh pine and green fir along with a few twigs, scattered some Christmas balls around the trio and, voilà, I have the look of a custom-made centerpiece at a fraction of the price. By keeping each plant in its own pot, it allows me to use them as a grouping or elsewhere individually. I chose two variegated plants in red shades and one in the soft green for contrast.
Poinsettia Tablescape
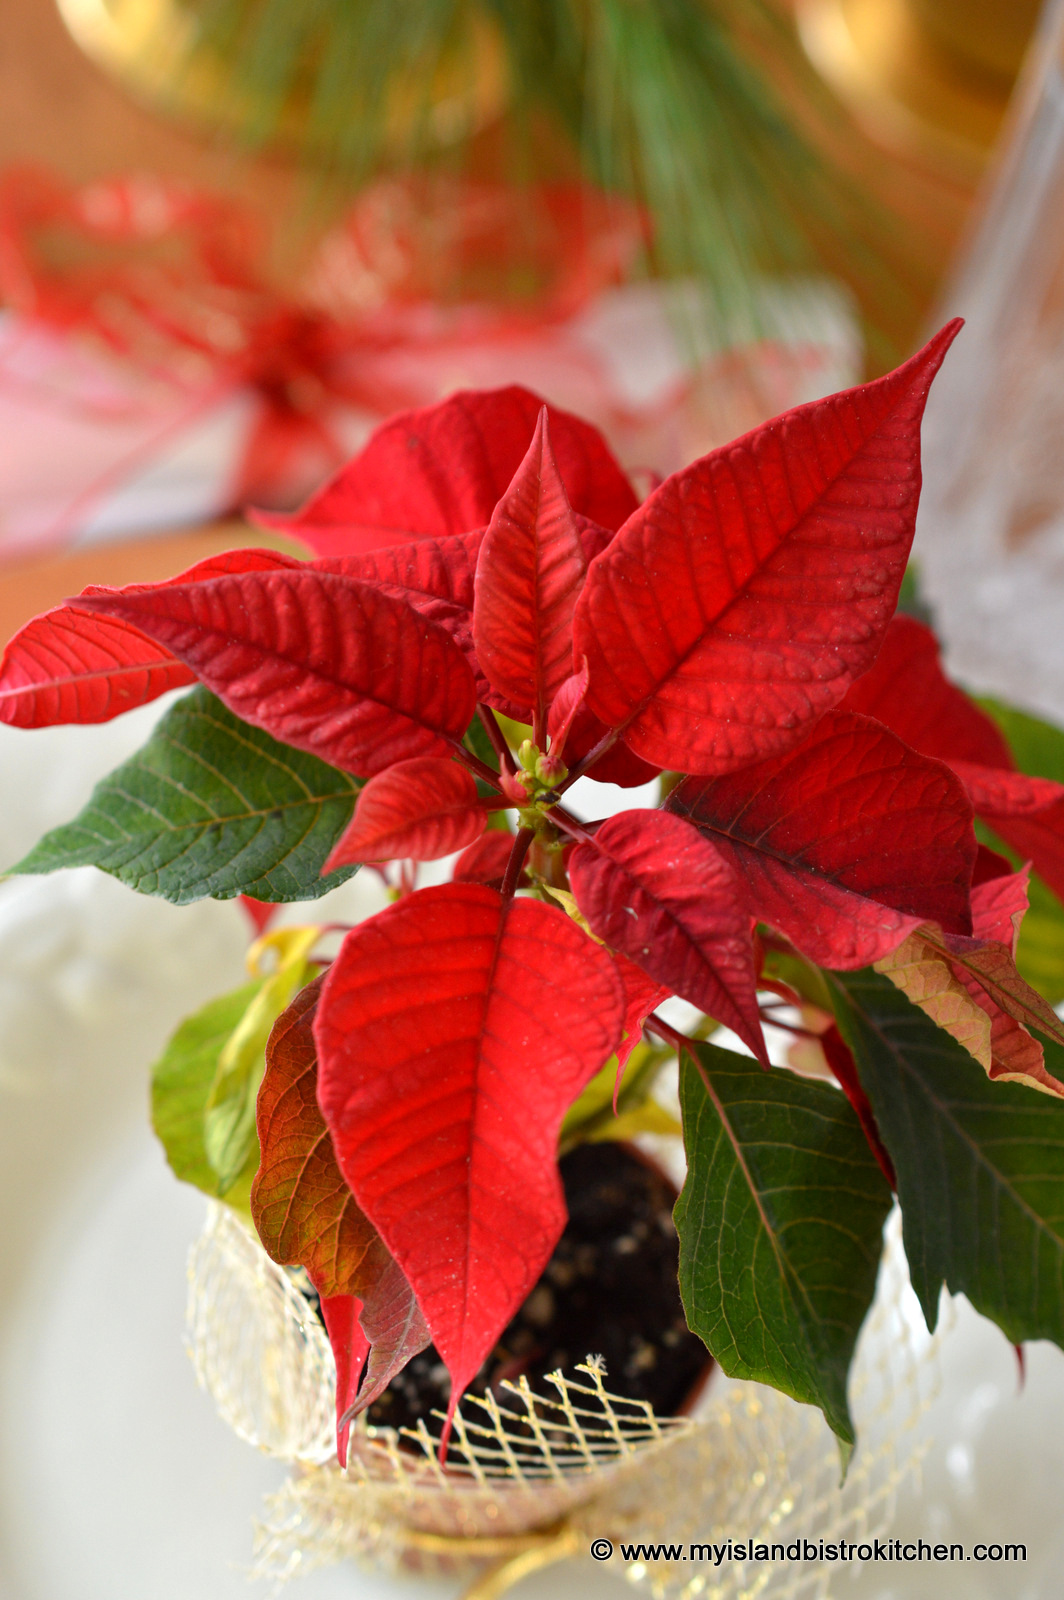
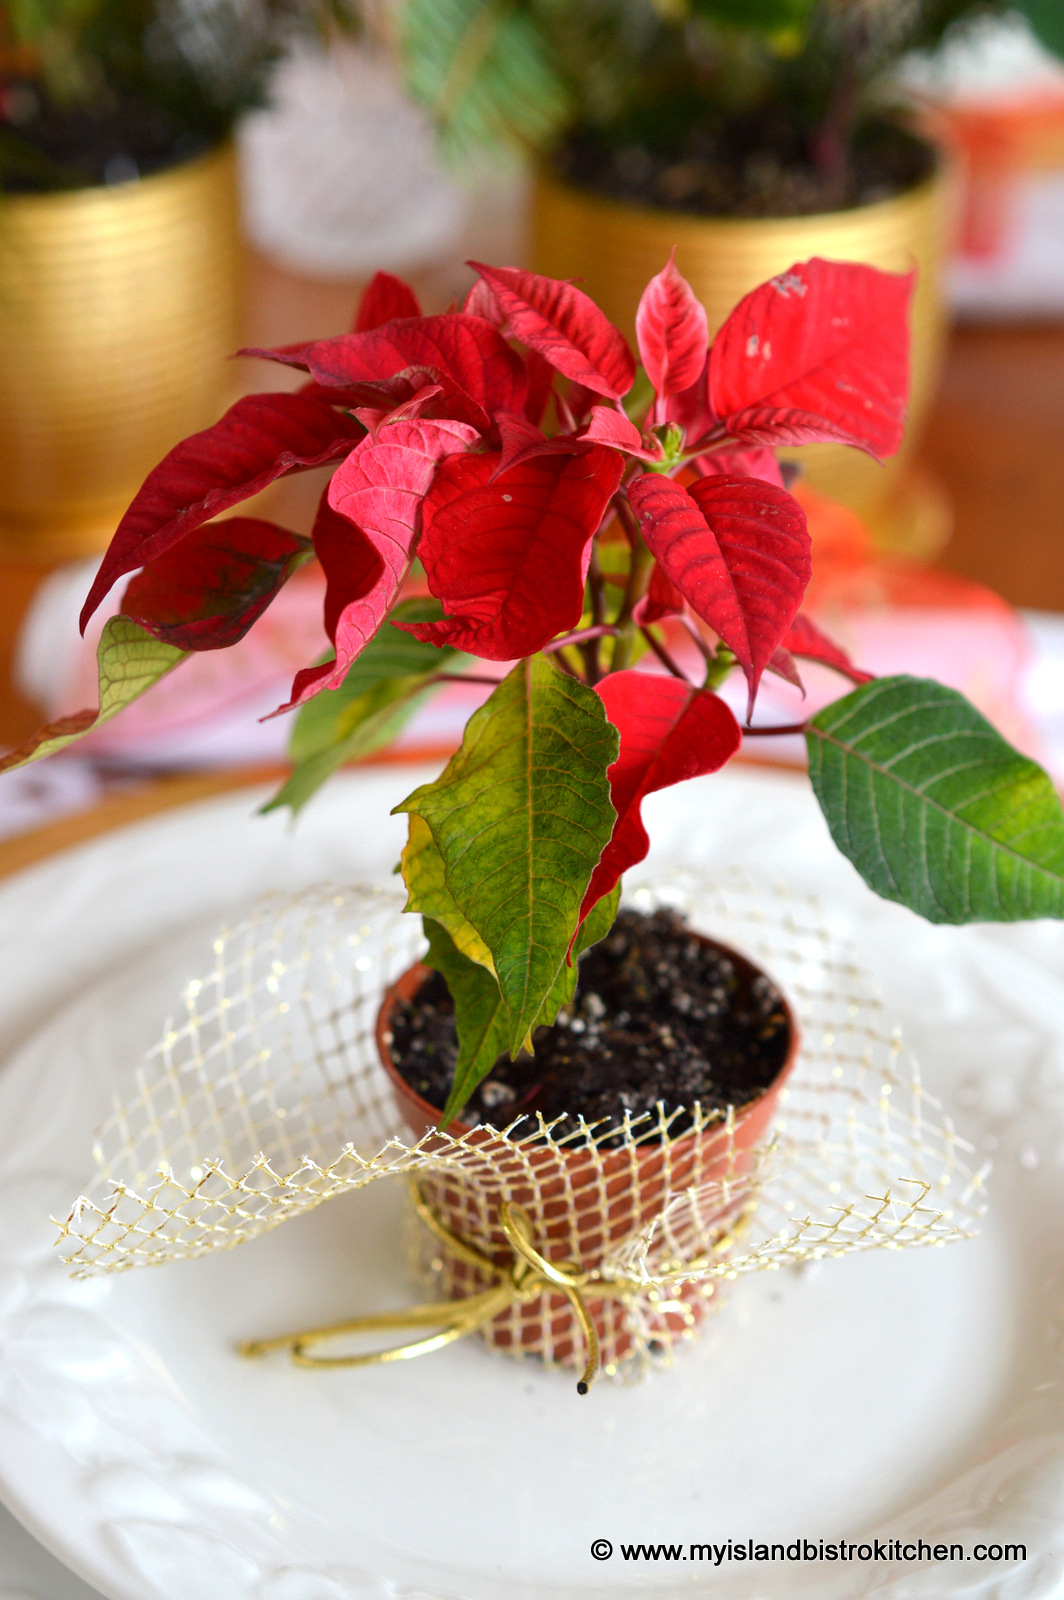
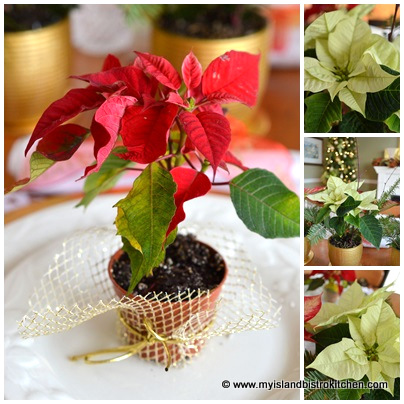
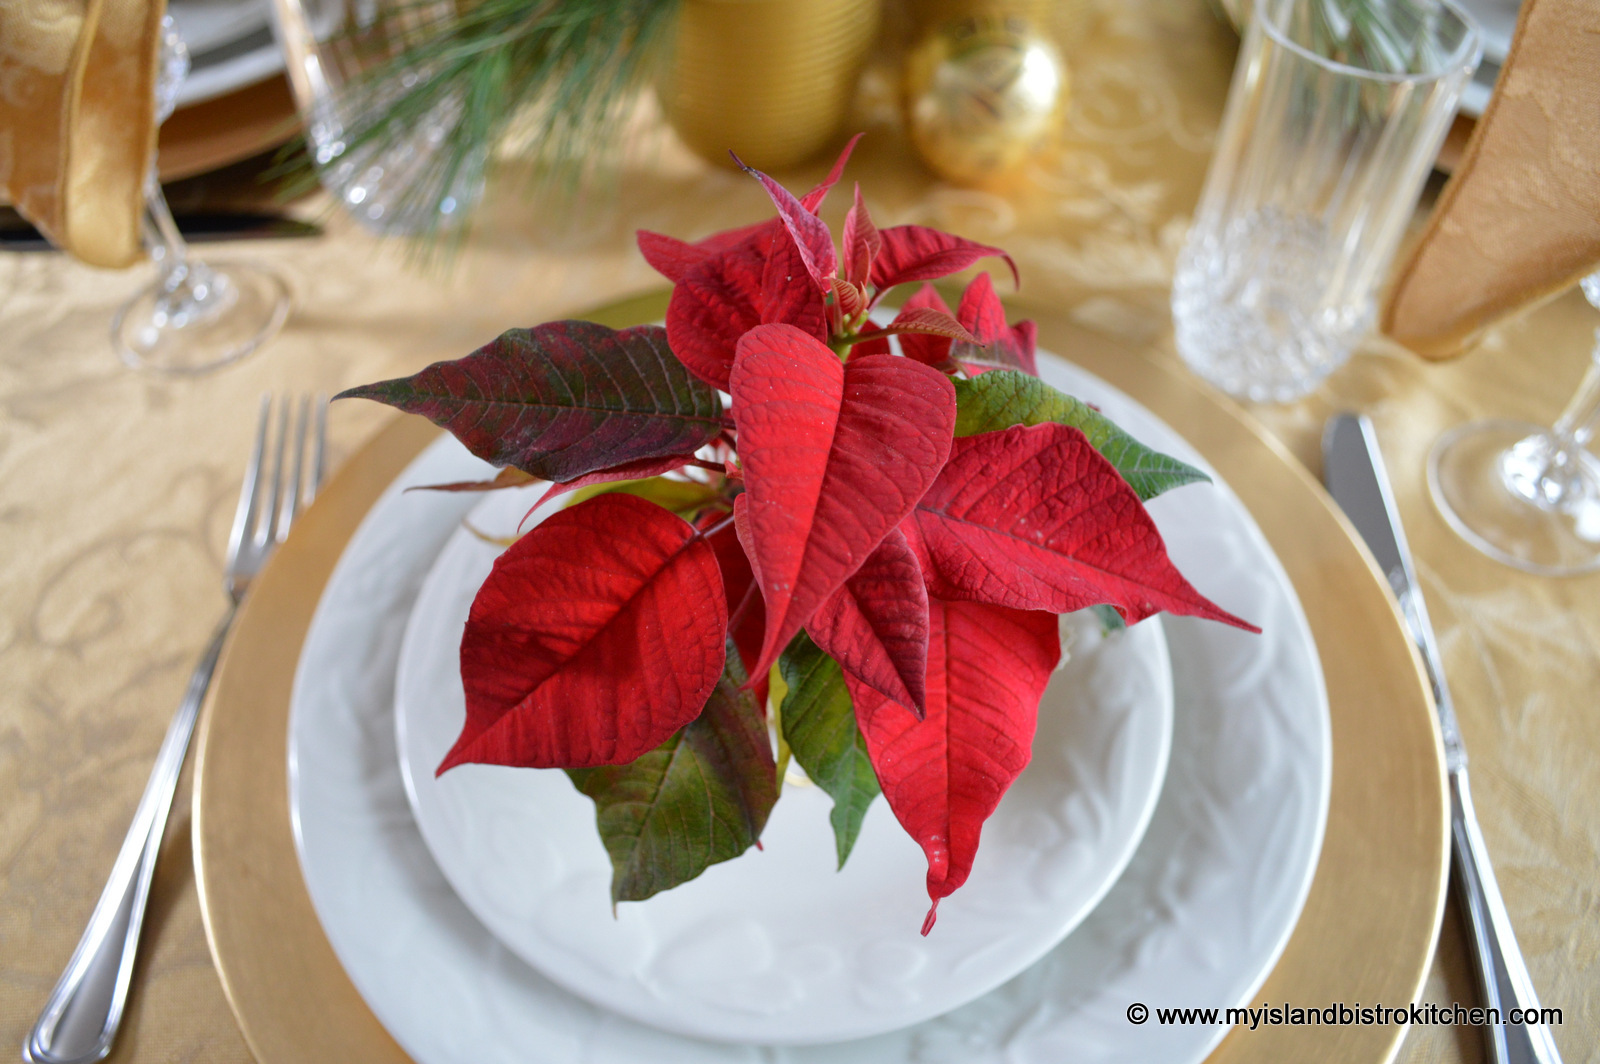
I also found these little tiny miniature poinsettias at the supermarket and thought they would be ideal decorations for each place setting and would be nice take-away favours for guests to take home with them as a remembrance of the dinner.
Miniature Poinsettia
I simply covered the little terracotta pots with some gold netting and tied it with gold elastic cord.
Miniature Poinsettia
I used a floor-length round gold tablecloth for the table and opted to use my gold charger plates as the backdrop for white dinnerware which, of course, makes the red poinsettias pop in color. By keeping the gold theme going in the charger plates, it keeps the tablesetting in the same color scheme without introducing another color. This is particularly important when the table is small as is the case with this tablesetting. Keeping the same color of charger plates as the tablecloth gives the illusion that this table is bigger than it actually is. Had I used other colored charger plates (e.g., red or green), the difference would have been very noticeable.
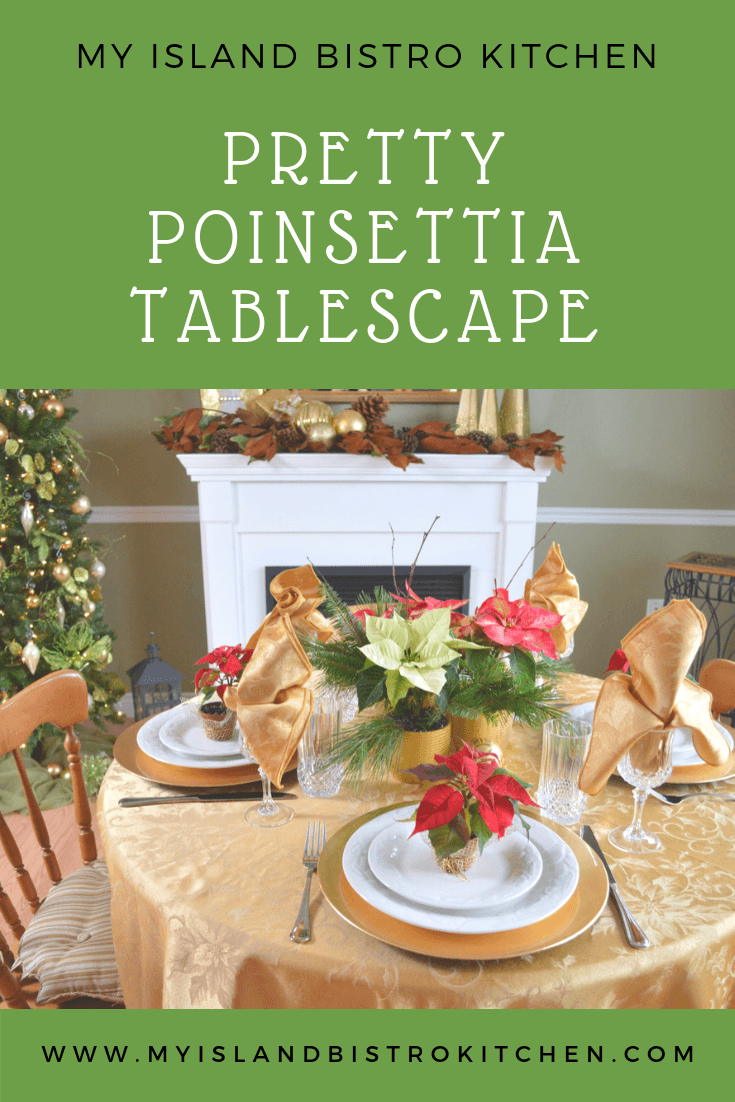
Pretty Poinsettia Tablescape
The small table creates a setting for very intimate dining. However, it does not leave a lot of room for extras on the table, such as napkins. For this reason, I opted to place the matching gold napkins in the wineglasses in a simple cascade napkin fold for economy of space.
Easy Napkin Fold
The photo below shows the top down view of the tablesetting.
Pretty Poinsettia Tablescape
I usually put a tree in my dining room and decorate it in shades of green, gold, and ivory. I then carry these shades into my mantle decorations this season. The gold tablecloth blends in with the color scheme and, of course, the red poinsettias give a pop of color.
Poinsettia Tablesetting
I hope you have enjoyed a glimpse into my seasonal poinsettia tablesetting.
To see another tablesetting where I have used the same elements as in this one for a totally different look, click here.
To view other Christmas and New Year’s Tablesettings, click on the links below:
Title: Best of Bridge Holiday Classics Author: Various Publication Date: 2014 Publisher: Robert Rose Inc. Cover: Hardcover Price: $29.95 Pages: 303
Robert Rose Inc. has offered me the opportunity to conduct a review of Best of Bridge Holiday Classics. This is the latest in the “Best of Bridge” series of cookbooks.
While this cookbook is aimed at holiday entertaining, I would suggest there are recipes that would be suitable year-round for both everyday and special event use. The book has an attractive, sturdy hardcover and the pages are spiral bound making it easy for the book and pages to stay open for the recipe being made.
The book features a collection of 225 recipes spread throughout eight chapters: Holiday Brunches, Cocktail Parties Plus, Buffets and Potlucks, Sit-down Dinners, Leftovers, Holiday Cookies and Squares, Desserts and Other Sweet Treats, and Food Gifts. At the beginning of each chapter, there is a separate table of contents outlining the recipes (and their page numbers) found in that section of the book. There is also a handy alphabetical index at the back of the book.
In addition, there are a couple of pages at the front of the book giving sample menus for holiday brunch, a buffet party, a traditional holiday meal, a snowy Christmas Eve, New Year’s Eve Banquet, and a Vegetarian Celebration. Recipes suitable for each event are listed along with their page numbers for ease of retrieval. This is useful, particularly for those who have no idea which recipe pairs well with another or what to serve with what.
When I am conducting a cookbook review, I try to approach it from the stance of how user-friendly it would be for someone with little culinary experience unless, of course, the book is highly specialized and advanced and is targeted for experienced cooks. So, I review recipes from the point of whether someone with little cooking and/or baking experience could take the recipes and easily follow and understand the instructions sufficiently to achieve success.
To begin, I found the font in the book a bit large and folksy. Everything (ingredients and method of preparation) is printed in capital letters which I find makes the pages cluttery and difficult to read. Generally, the instructions for making the recipes are all lumped together in one long paragraph. This makes it difficult to follow the method. I find cookbooks that lay out the instructions in separate, step-by-step, paragraphs are easier to follow, particularly for less experienced cooks. Breaking down the steps of a recipe into separate short paragraphs makes them less formidable and daunting and it is easier and quicker to find your place and progress in the instructions as you go about making the recipe.
I found the ingredients are used in the instructions in the order in which they are listed. The recipes in the book call for, what I would consider to be, ordinary ingredients which makes it easy to prepare the dishes. Most, if not all, ingredients would be found in standard grocery stores. The exact quantity of ingredients called for, though, is sometimes vague or lacking in the recipe. For example, on page 71, the recipe for Guacamole Cherry Tomato Halves calls for “1 small basket cherry tomatoes”. Cherry tomatoes come in various sizes of baskets and home gardeners would obviously harvest their own so it would have been clearer to have specified a certain quantity of tomatoes, in pound or kilogram measure, for example.
I also found that the instructions for several recipes were somewhat vague as well. For example, on p. 169, the recipe for Rhubarb Relish was very vague with the method starting out by “Simmer, uncovered, approximately 4 hours” but it didn’t say what to simmer or what kind or size of pot to use– i.e., in my view, it should have started out by saying “Combine all ingredients in the order listed in a certain size of pot (i.e., small, medium, or large pot). Simmer, uncovered, approximately 4 hours.” I also found several recipes would neglect to state early on in the instructions to preheat the oven and the oven temperature would only be given as the last instruction, at the stage when the dish was going into the oven. Now, experienced cooks would automatically know to preheat the oven whether it was stated as the first step in the recipe or not. However, a novice cook would be unlikely to know of this requirement, hence the importance of stating this step at the beginning of the method/instructions. It’s very important to pre-read each recipe carefully all the way through before starting to make it to ensure that the amount of ingredients required and the method of preparation are clearly understood.
In addition, I also found that, while most recipes did give a yield indication, some do not indicate a clear yield to be expected. For example, on page 231, the recipe for Nanny’s Real Scottish Shortbread gives the yield as “makes a tinful” which is not helpful as there is no indication what size of tin or how many shortbread the recipe makes and, as we all know, tins come in all sizes and some would hold four cookies and others 44, depending on the size of tin and cookies. This recipe does not indicate what size each shortbread cookie should be cut into. Regardless if that is how someone shared their recipe, the recipe should have, in my opinion, been tested to determine its exact yield before publishing it in the book. If someone is making a recipe and has a need for a specific number of shortbread, or servings, they need to know how many the recipe is expected to generate.
There are a few color photos in the book and they are of good quality but there is certainly not a photo for every recipe. Including photos is so important in a cookbook as, not only do photos of mouth-watering food inspire people to try the recipes but the color photos also give a frame of reference of what the finished dish should look like.
Test-driving Recipes
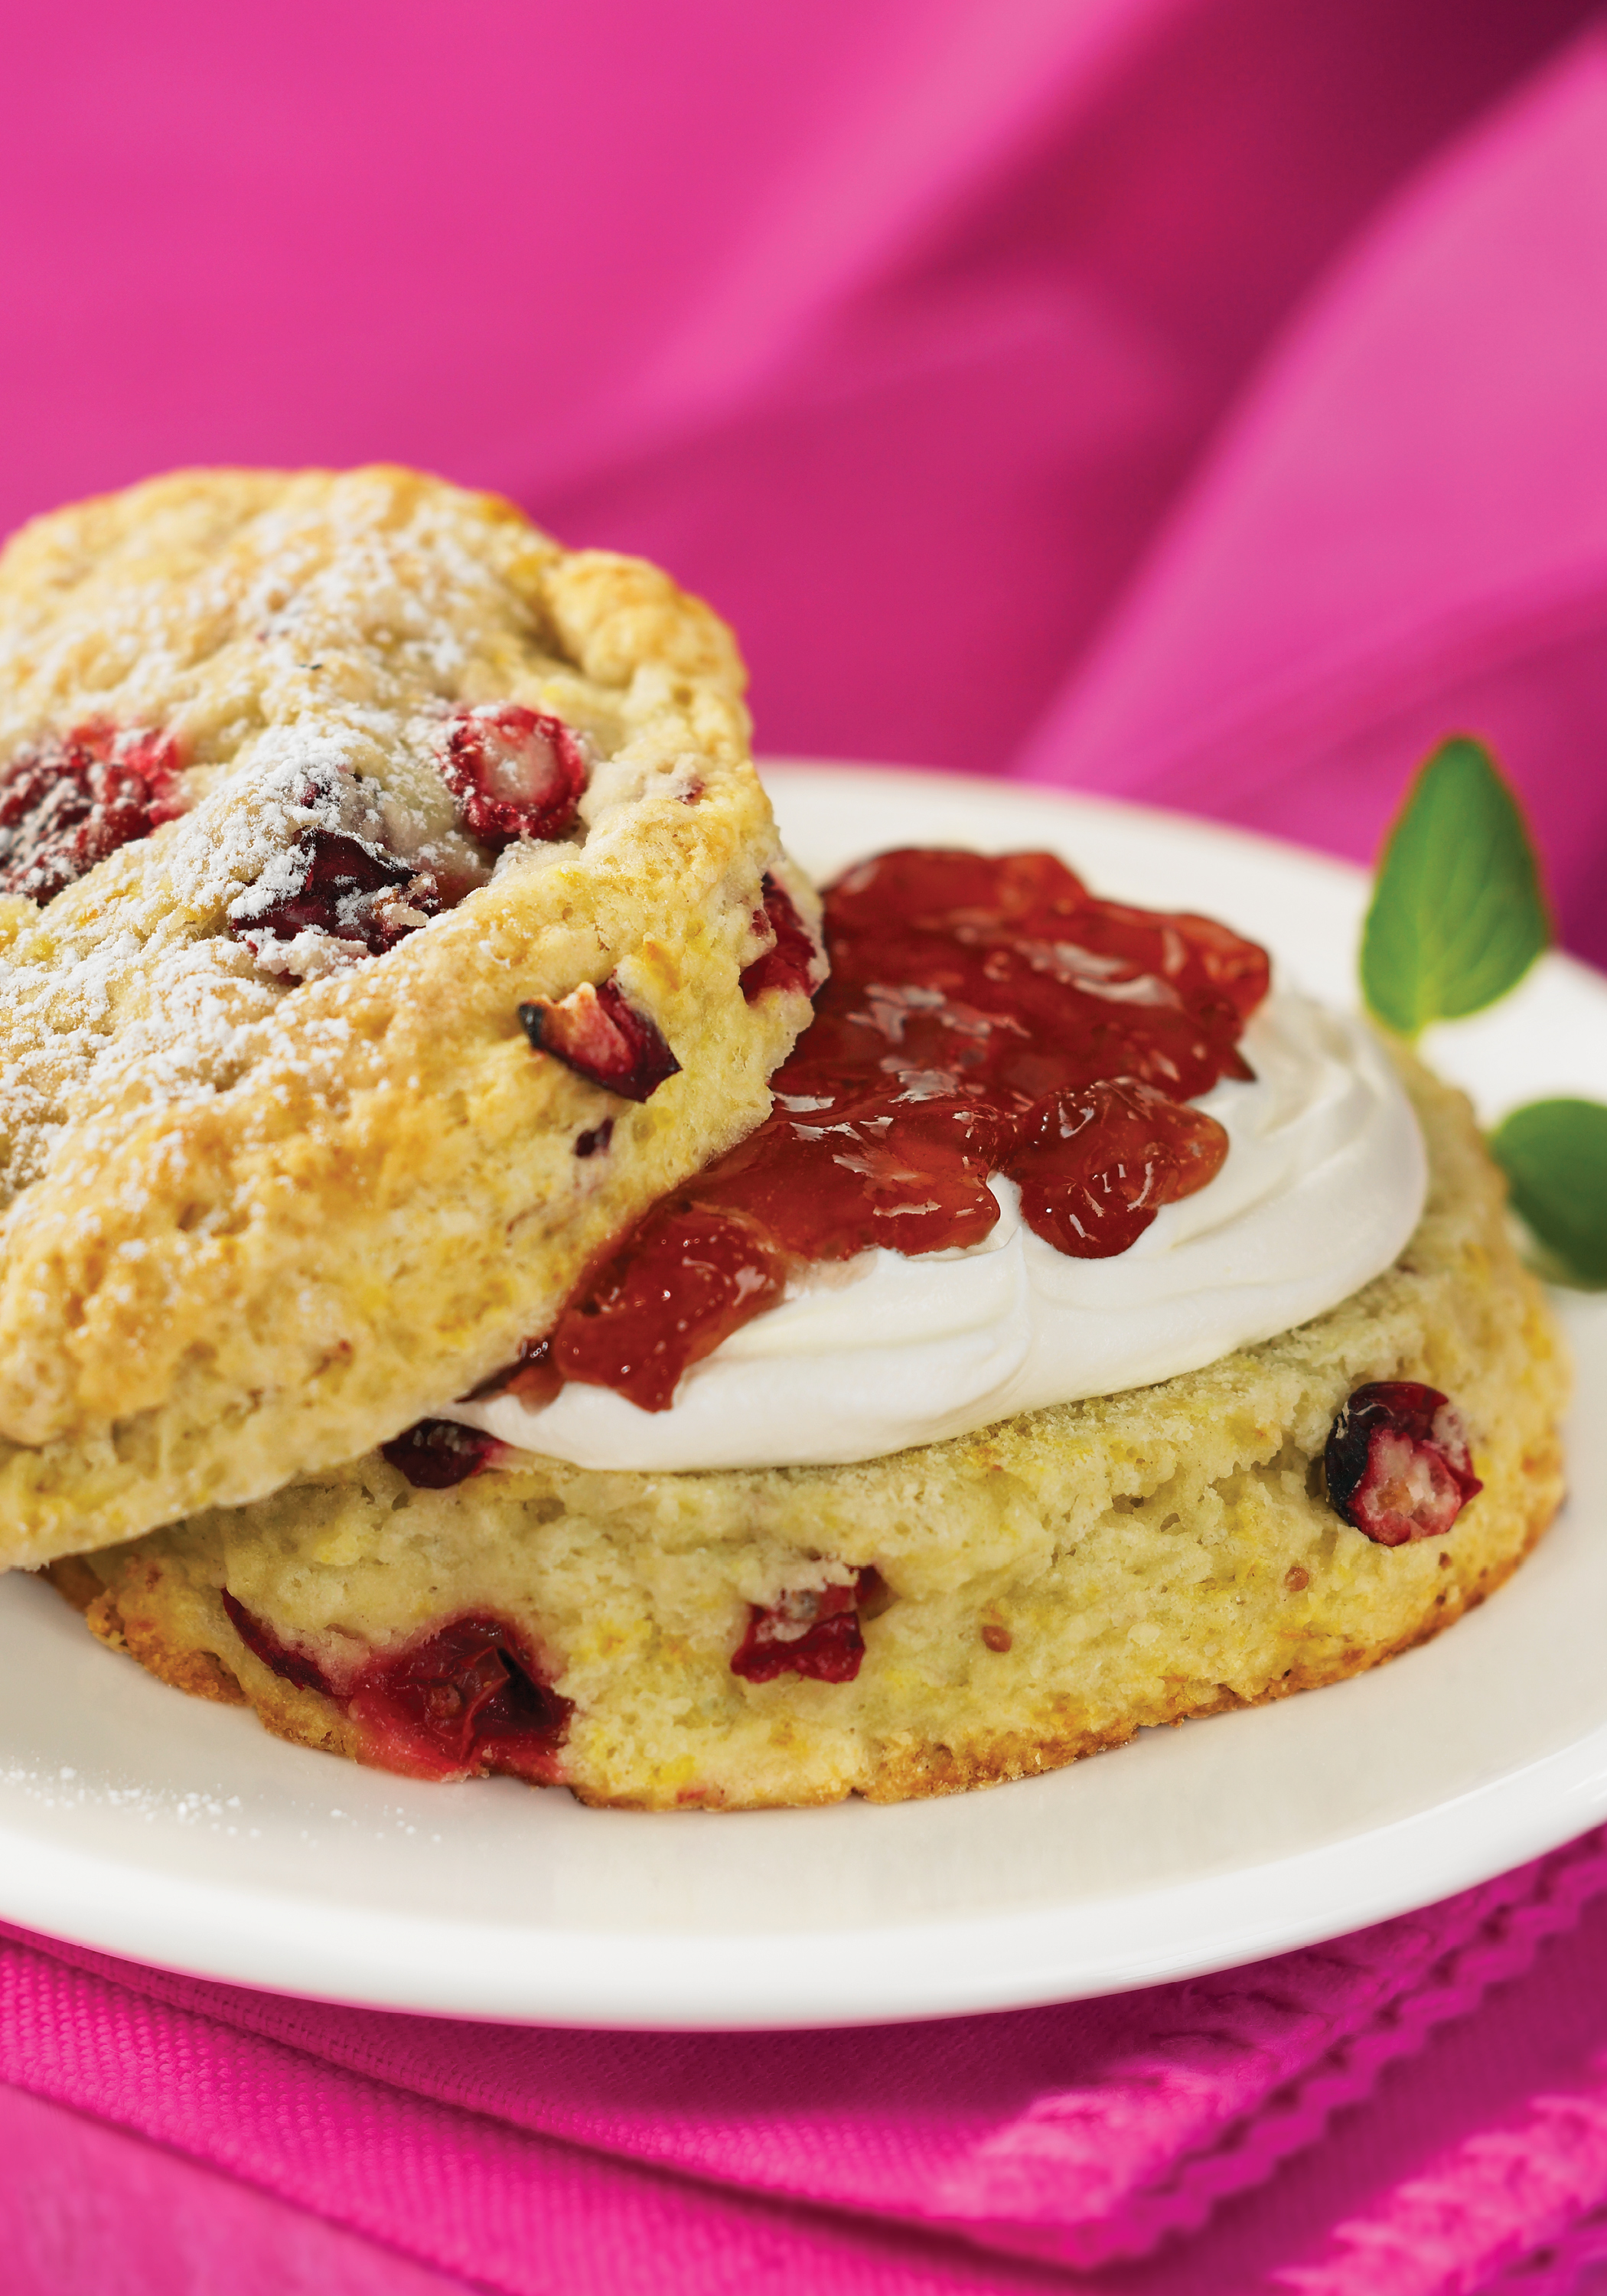
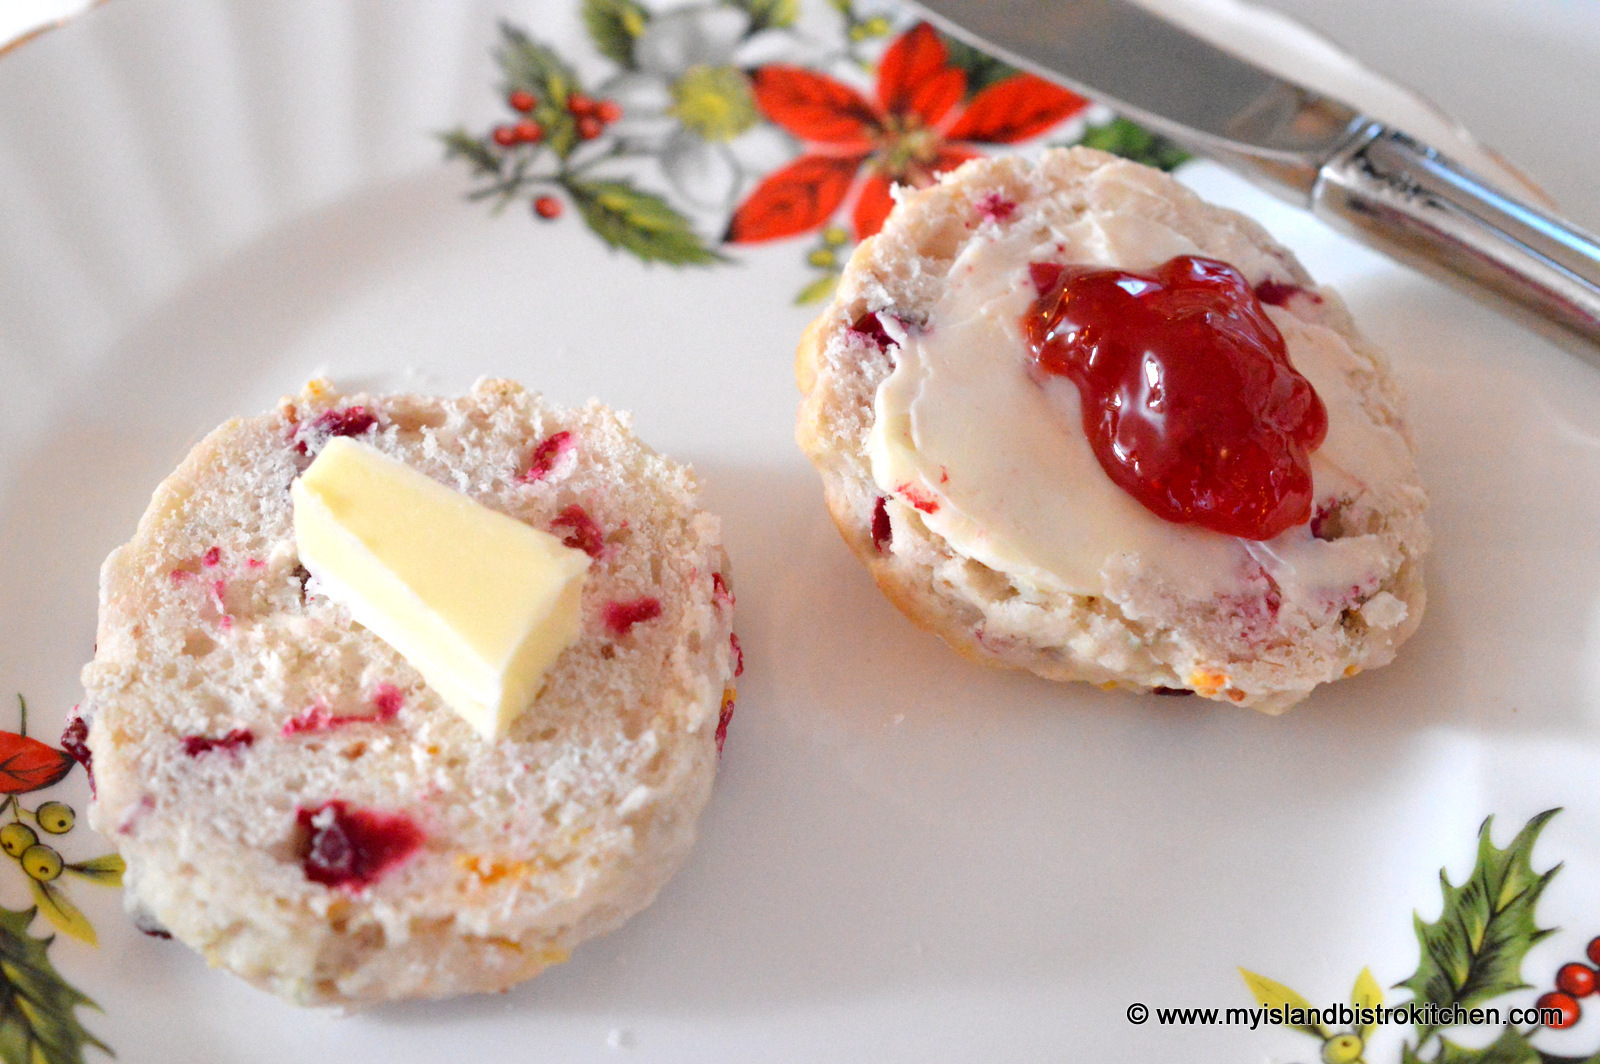
I tested two recipes out of the cookbook, choosing two in categories that I have significant personal experience. Robert Rose Inc has given me permission to share the recipes and their photos for Cranberry Scones and Crazy Crunch to accompany my review of this cookbook. The recipes follow at the end of this review. Cranberry Scones
These combine a tasty combination of cranberries and orange; however, I found they did not have the light and airy texture I associate with scones and find I get from other recipes. I also did not find that they rose as scones usually do for me and they had a prevalent flour taste.
Crazy Crunch
I have a lot of experience making similar recipes and know that the caramel syrup has to reach the hard crack stage (300°F) before it is done. This recipe, however, gave a wide time span of “10-15 minutes” and a vague description of the mixture having a “light caramel color” for instructions to determine when the syrup is done. As any experienced candy maker knows, a five-minute span differential is a lifetime in candy-making and is the difference between success and failure. Also, there is no definition of “light caramel color” – what is a light color to some may be dark to another and, with no photo as a frame of reference, I did not find this particularly helpful.
The recipe also does not indicate at what temperature the mixture should be boiled – i.e., over high, medium, or low heat, a rolling or gentle boil, and whether or not the syrup should be stirred as it cooks. In my view, it would have been more useful had the recipe given directions for the use of a candy thermometer and a certain temperature which is a more accurate determination of doneness.
I used a thermometer and cooked the mixture over medium heat and found it took more than 15 minutes to reach the hard crack state of doneness. The recipe turned out for me and is tasty but I am not sure I would have had success had I removed it from the heat at any point between 10 and 15 minutes as the recipe suggested. Someone, inexperienced in candy-making, would not likely know how to adjust the recipe for success.
Concluding Thoughts
Overall, I found the book contains a good selection and number of appealing recipes that call for tasty ingredients and I will certainly make more recipes from it. However, in my opinion and given the foregoing, some quality control and assurance over ingredient listing, instruction writing (and ensuring the instructions for each recipe are consistently written across the book) and, in some cases, precise recipe yields are missing. For a cookbook priced at $29.95, I want to know the recipes have been tested for success and have exact amounts of ingredients listed and clear, fulsome, accurate instructions along with the expected yield from each recipe. For this reason, I would suggest the book would be best suited for individuals who have experience cooking and baking as some recipes in the book could prove challenging for novice cooks.
Disclosure: I received a complimentary copy of Best of Bridge Holiday Classics from Robert Rose Inc., for the purposes of conducting a review of the cookbook. I received no compensation for this review and was under no obligation to provide a positive review. All opinions expressed are purely my own.
Cranberry Scones from “The Best of Bridge Holiday Classics”. Photo courtesy Robert Rose Inc., publisher.
Cranberry Scones, page 46
3⁄4 cup buttermilk or plain yogurt (175 mL) 1 large egg (1) 2 3⁄4 cups all-purpose flour (675 mL) 4 tsp baking powder (20 mL) 1⁄2 tsp baking soda (2 mL) 1⁄2 tsp salt (2 mL) 1⁄2 cup margarine (125 mL) 1 cup coarsely chopped cranberries (250 mL) (fresh or frozen) 1⁄2 cup granulated sugar (125 mL) Grated zest of 1 orange 1 tbsp butter, melted (15 mL) 1⁄4 cup confectioners’ (icing) sugar (60 mL) Preheat oven to 375°F (190°C). Beat buttermilk and egg in small bowl and set aside. In large bowl, Combine flour, baking powder, baking soda and salt. Cut in margarine until mixture resembles small peas. Mix in cranberries, sugar and orange zest. Add buttermilk mixture and stir until soft dough forms. Using your hands, form dough into a large ball and place on floured surface. Pat out to 1-inch (2.5 cm) thickness. Cut in 4-inch (20 cm) rounds. Place on ungreased cookie sheet and bake scones for 15 to 20 minutes. While still warm, brush with butter and sprinkle with confectioners’ sugar. Makes 8 large scones.
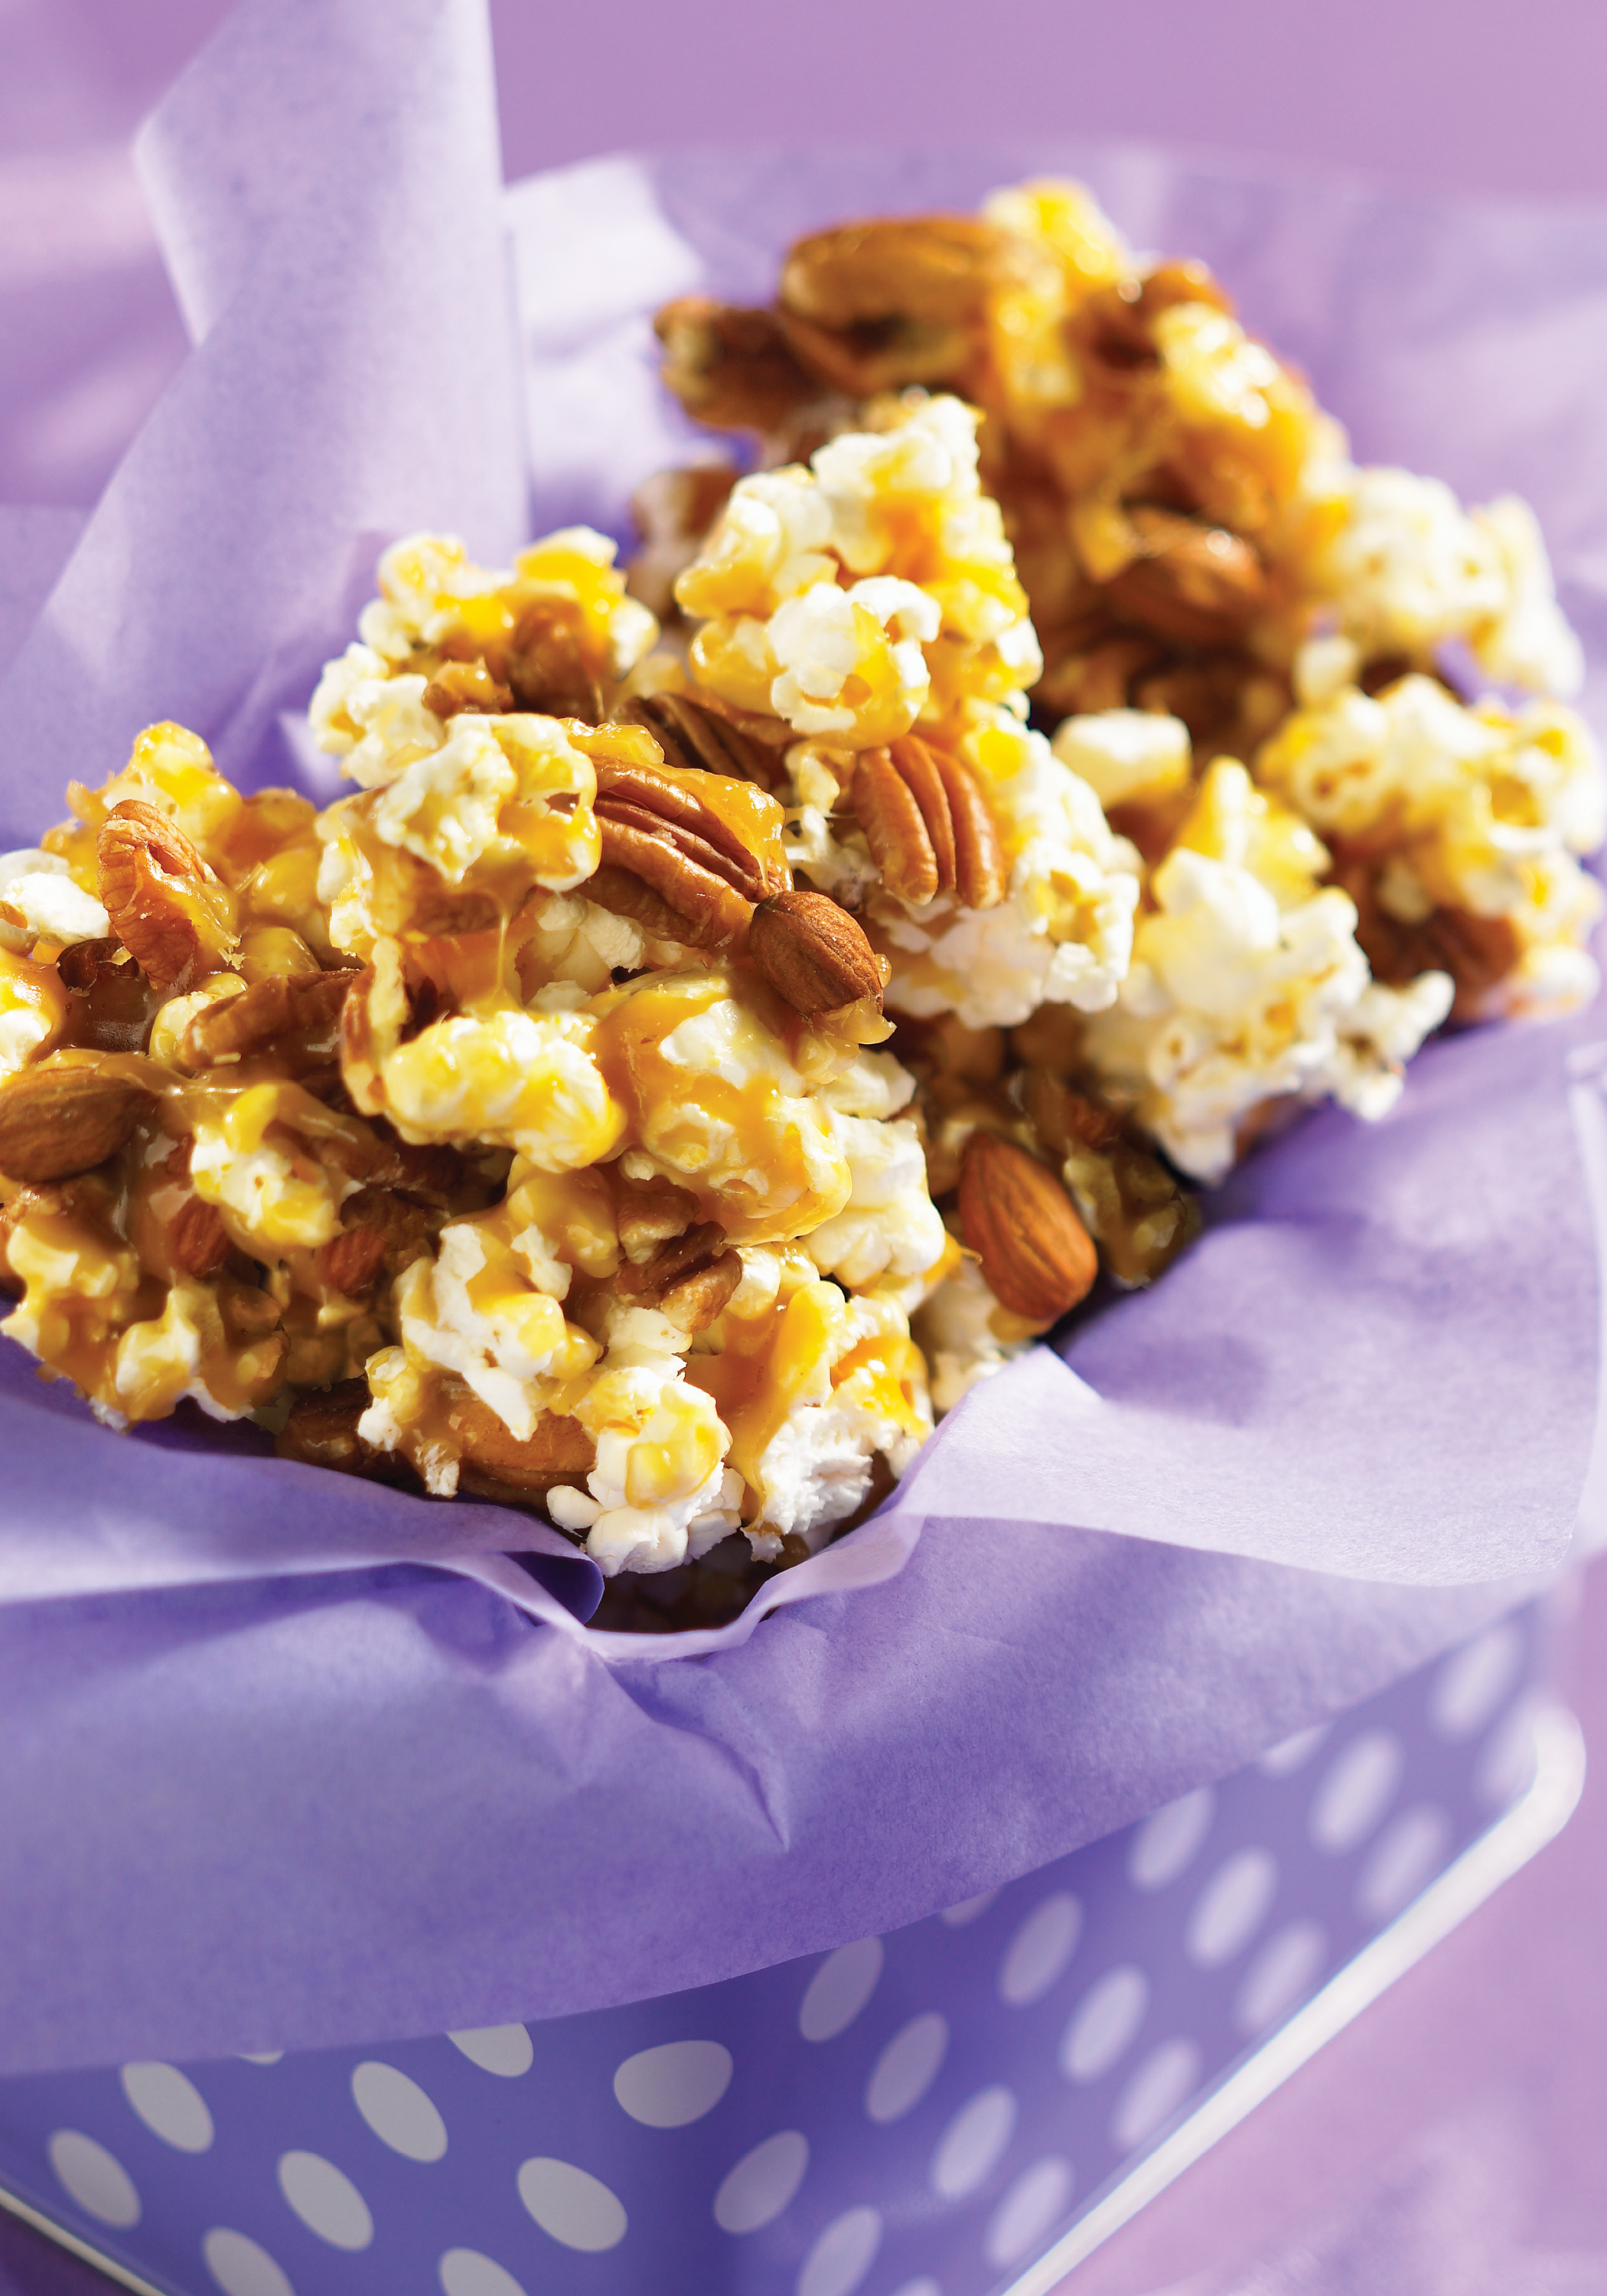
Crazy Crunch, page 280
Crazy Crunch from “Best of Bridge Holiday Classics”. Photo courtesy Robert Rose Inc., publisher.
Put this in fancy jars and give it as a little extra at Christmas time. 2 quarts popped popcorn (2 L) 1 1⁄3 cups pecans (325 mL) 2⁄3 cup almonds 150 mL 1 1⁄3 cups granulated sugar (325 mL) 1 tsp vanilla (5 mL) 1 cup margarine (250 mL) 1⁄2 cup corn syrup (125 mL) Mix popcorn, pecans and almonds on a cookie sheet. Combine sugar, vanilla, margarine and syrup in a pan. Boil 10 to 15 minutes or to a light caramel color. Pour over corn, pecans and almonds. Mix well. Spread to dry. Makes about 10 cups (2.5 L).
I suspect some of you may be giving bottles of wine, balsamic vinegars, or olive oils as gifts, or host/hostess gifts, over the holidays. So, I thought I would share some of my favorite ways to decorate long-necked bottles for gift giving.
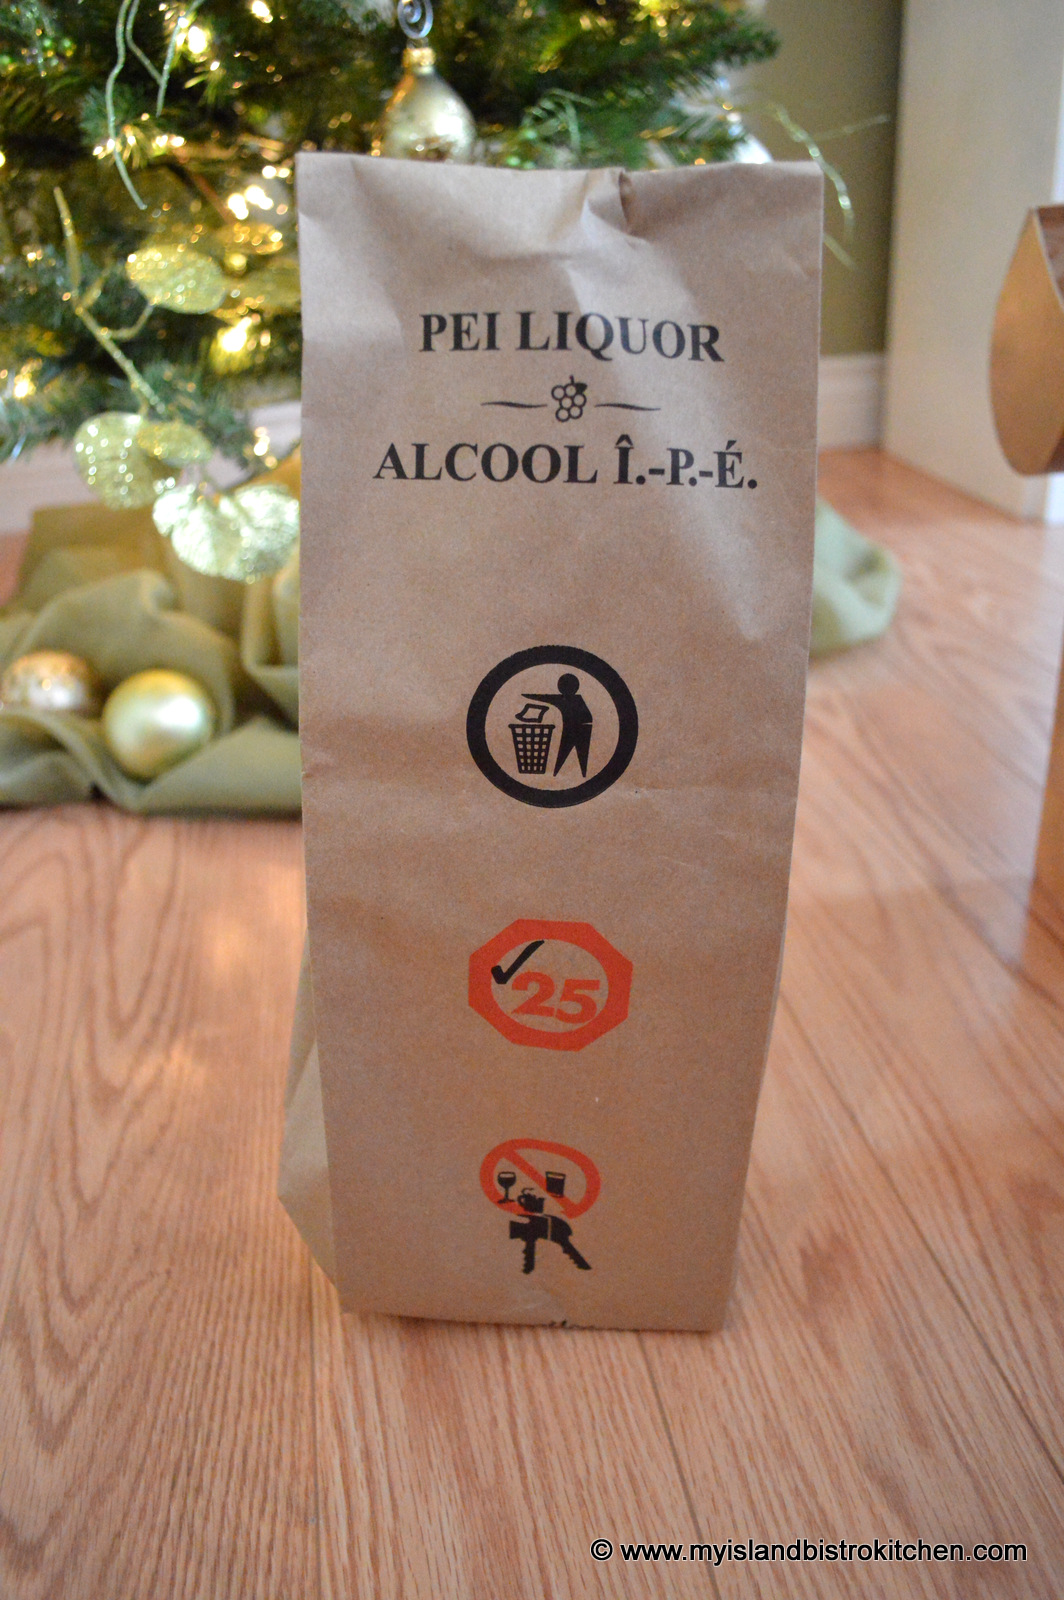
To start, here’s how NOT to present a gift:
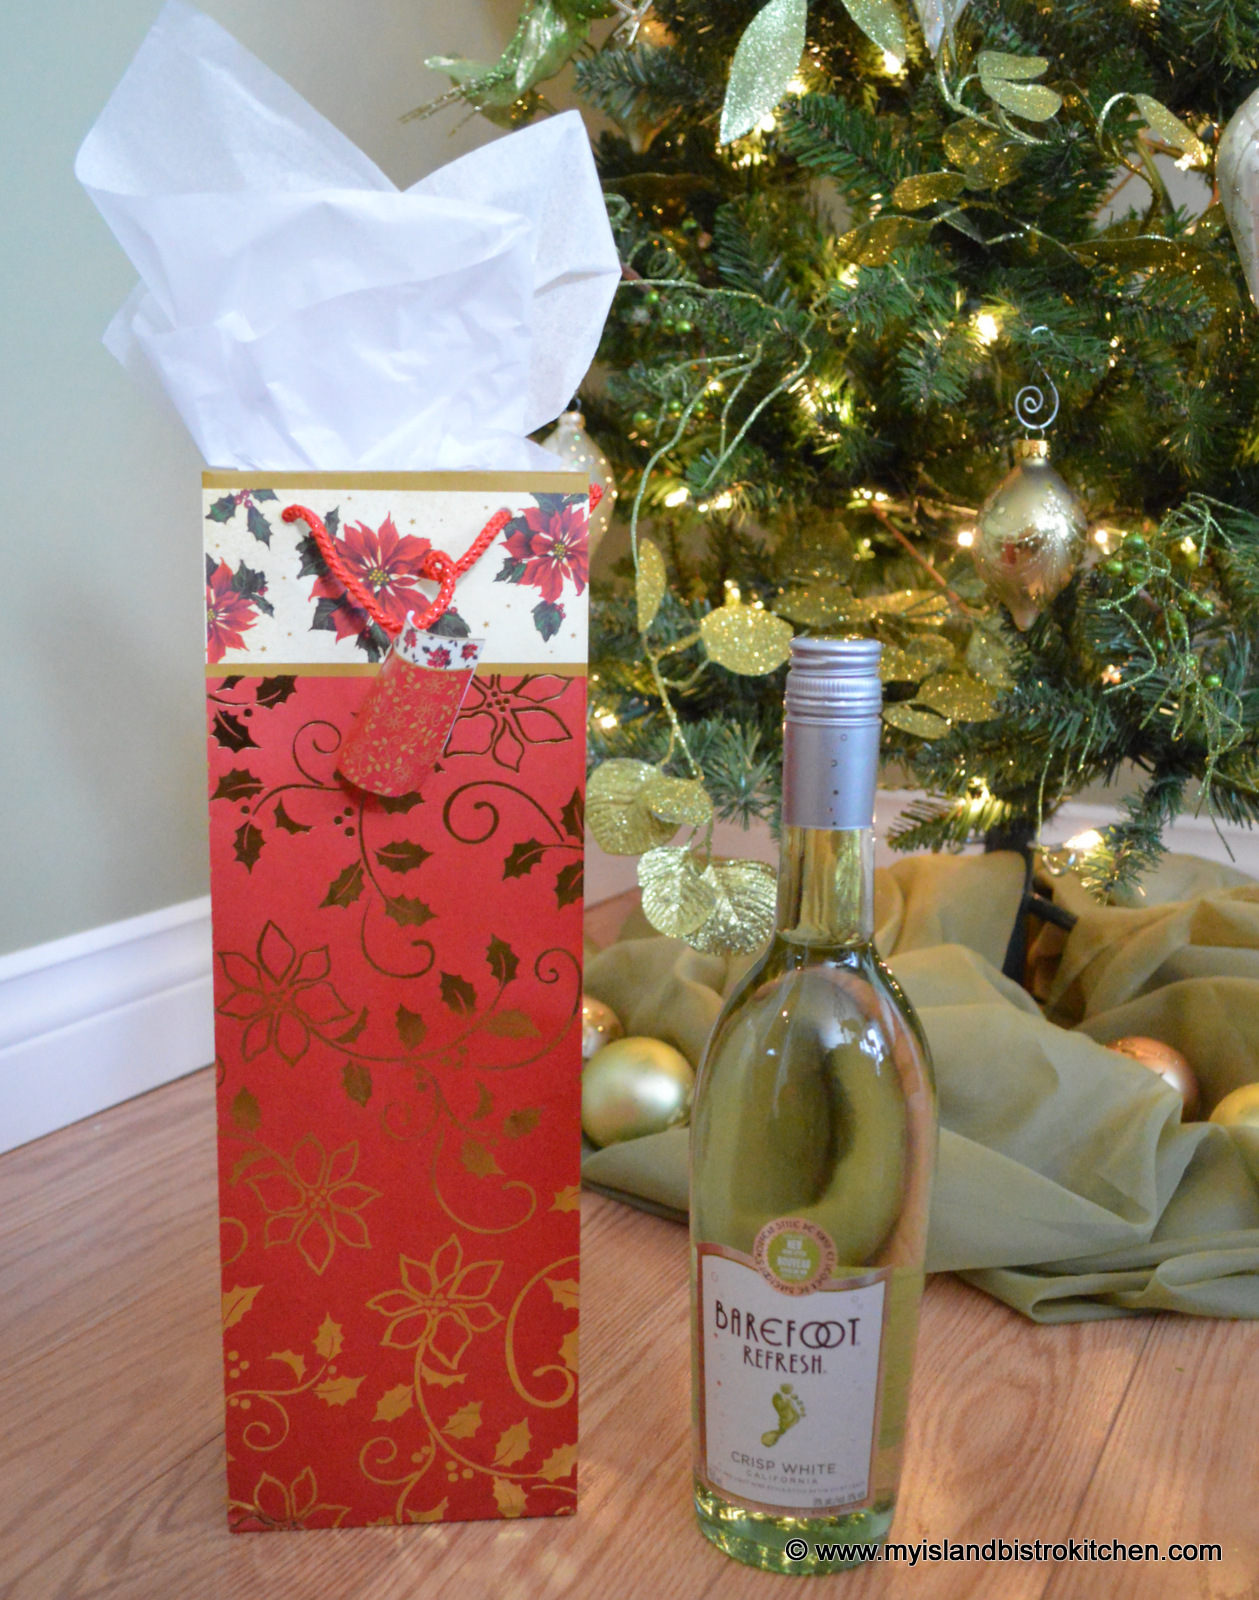
The easiest and most traditional way is to use a decorated gift bag. These are quite economical and can be found just about anywhere, including dollar stores. Be sure to fluff some tissue paper on top for a polished look.
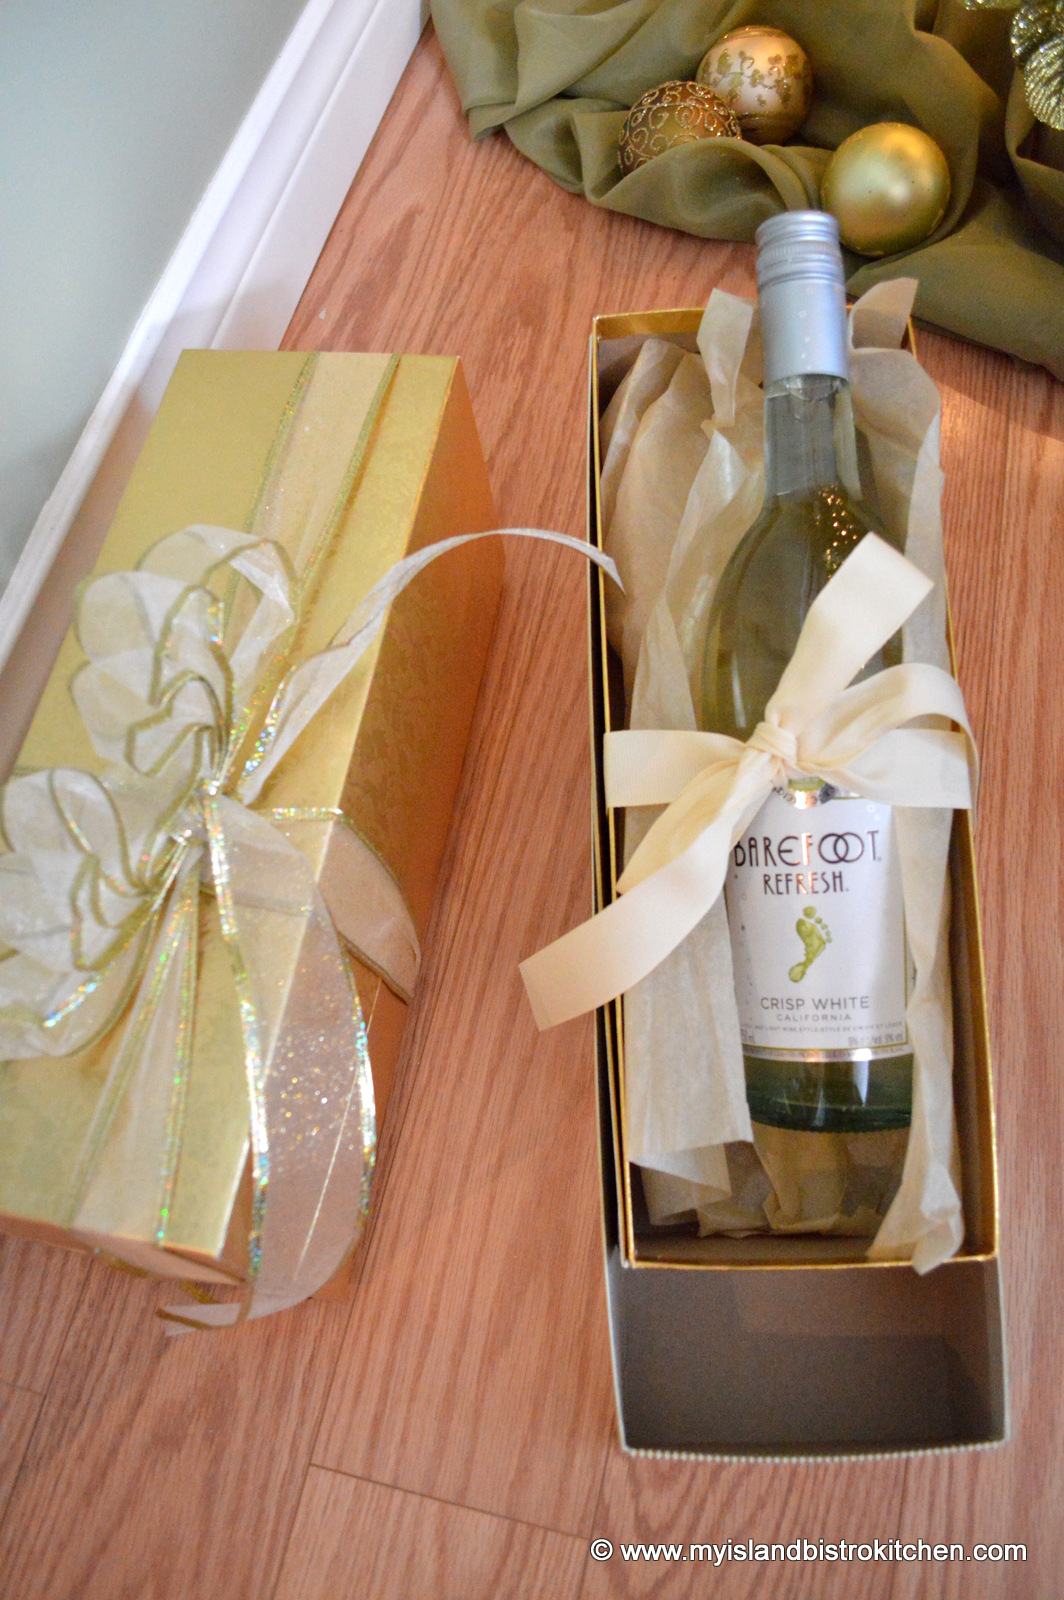
I like the boxes below which are made especially for wine. Most come with lovely ribbon attached that can simply be tied around the box. Some even have a sheet of tissue paper in them so they are a quick and elegant option. These are readily available in different stores; these came from Winners.
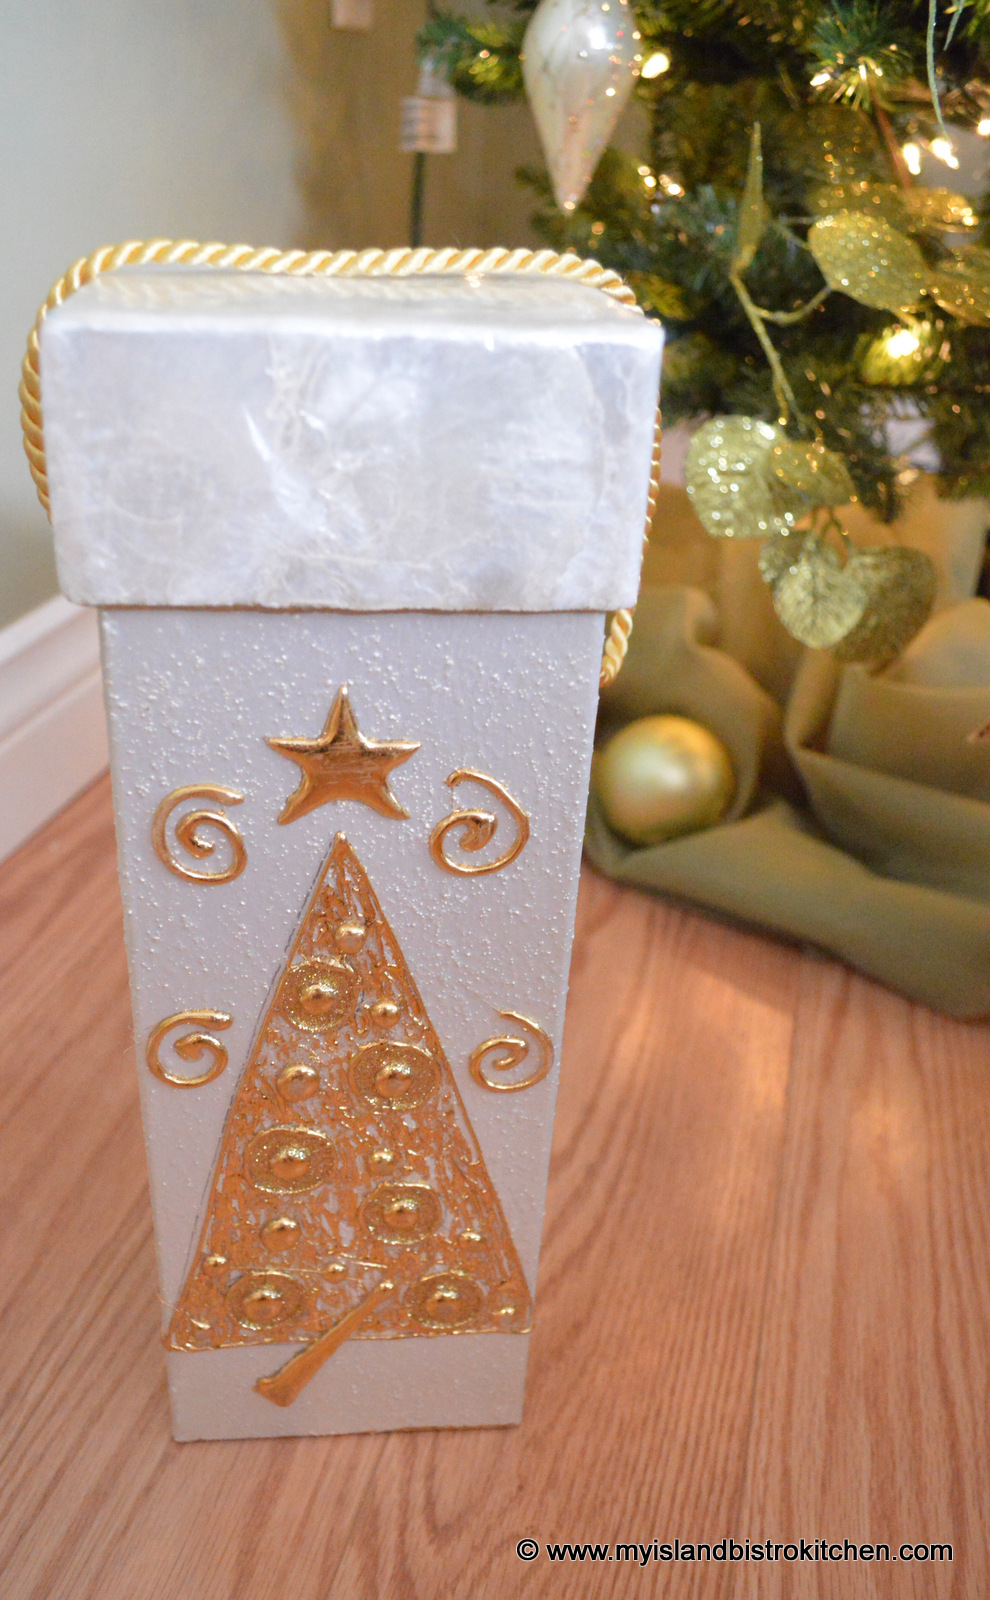
The wonderful hard-sided box below is almost a gift in itself and no further decoration is required. Simply slip the bottle inside and off you go. The box in the photo was a purchase from my local Winners store.
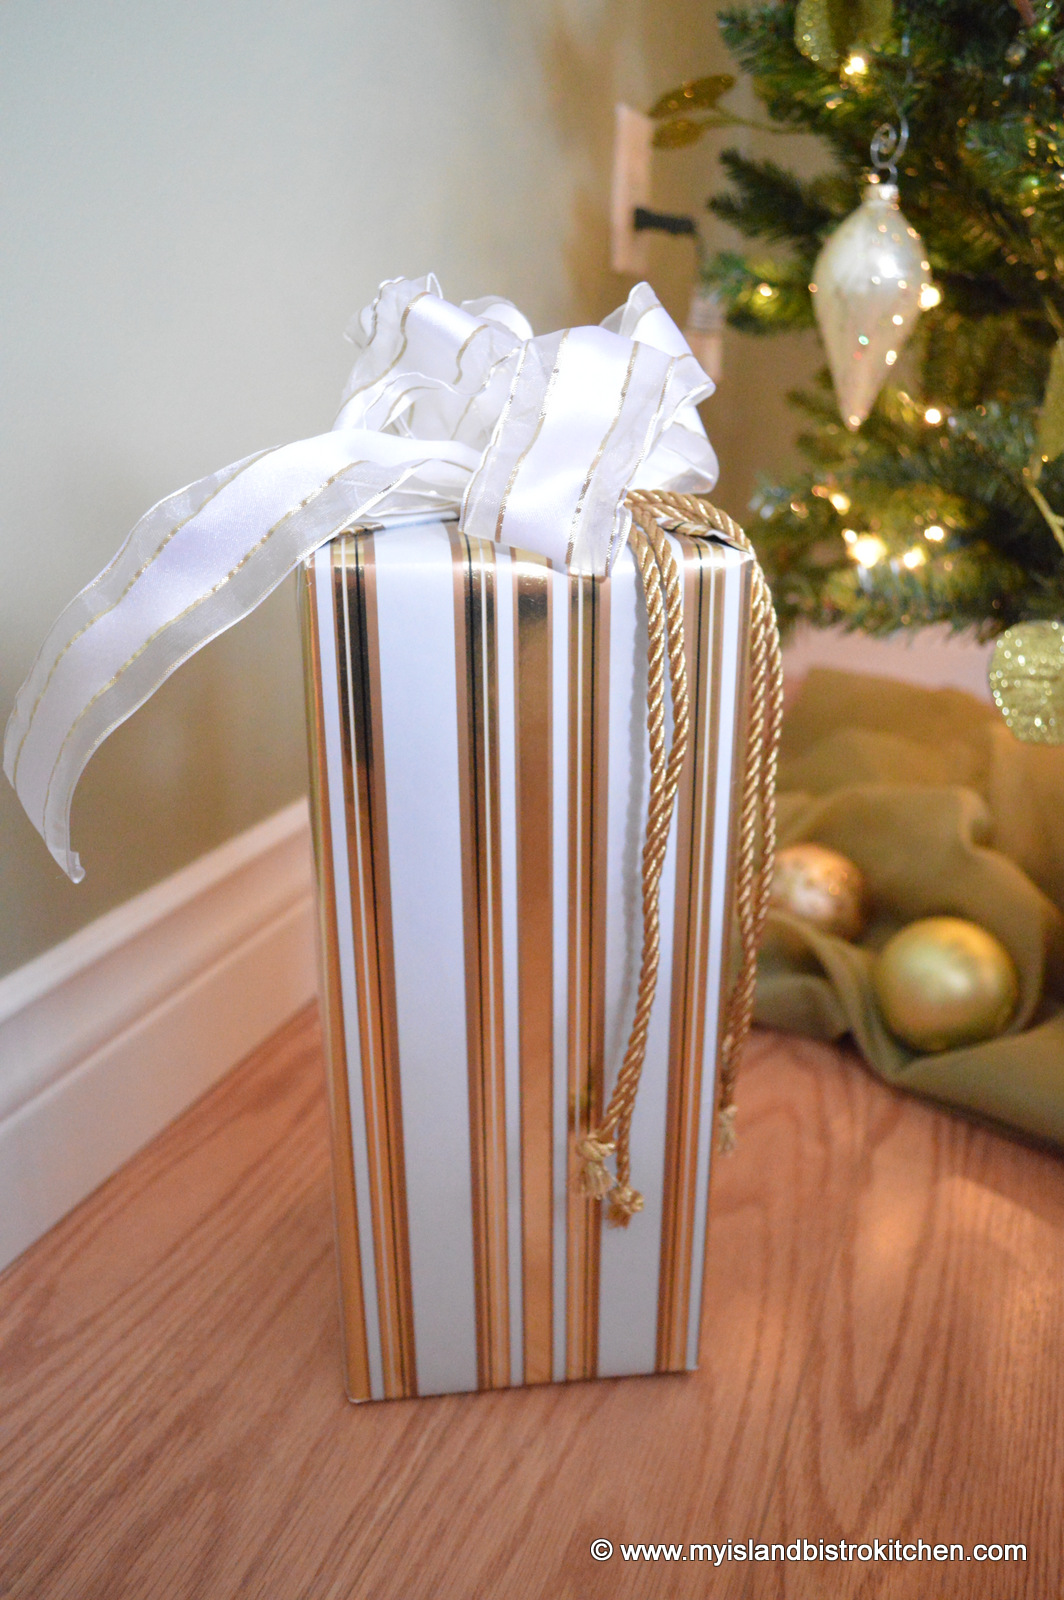
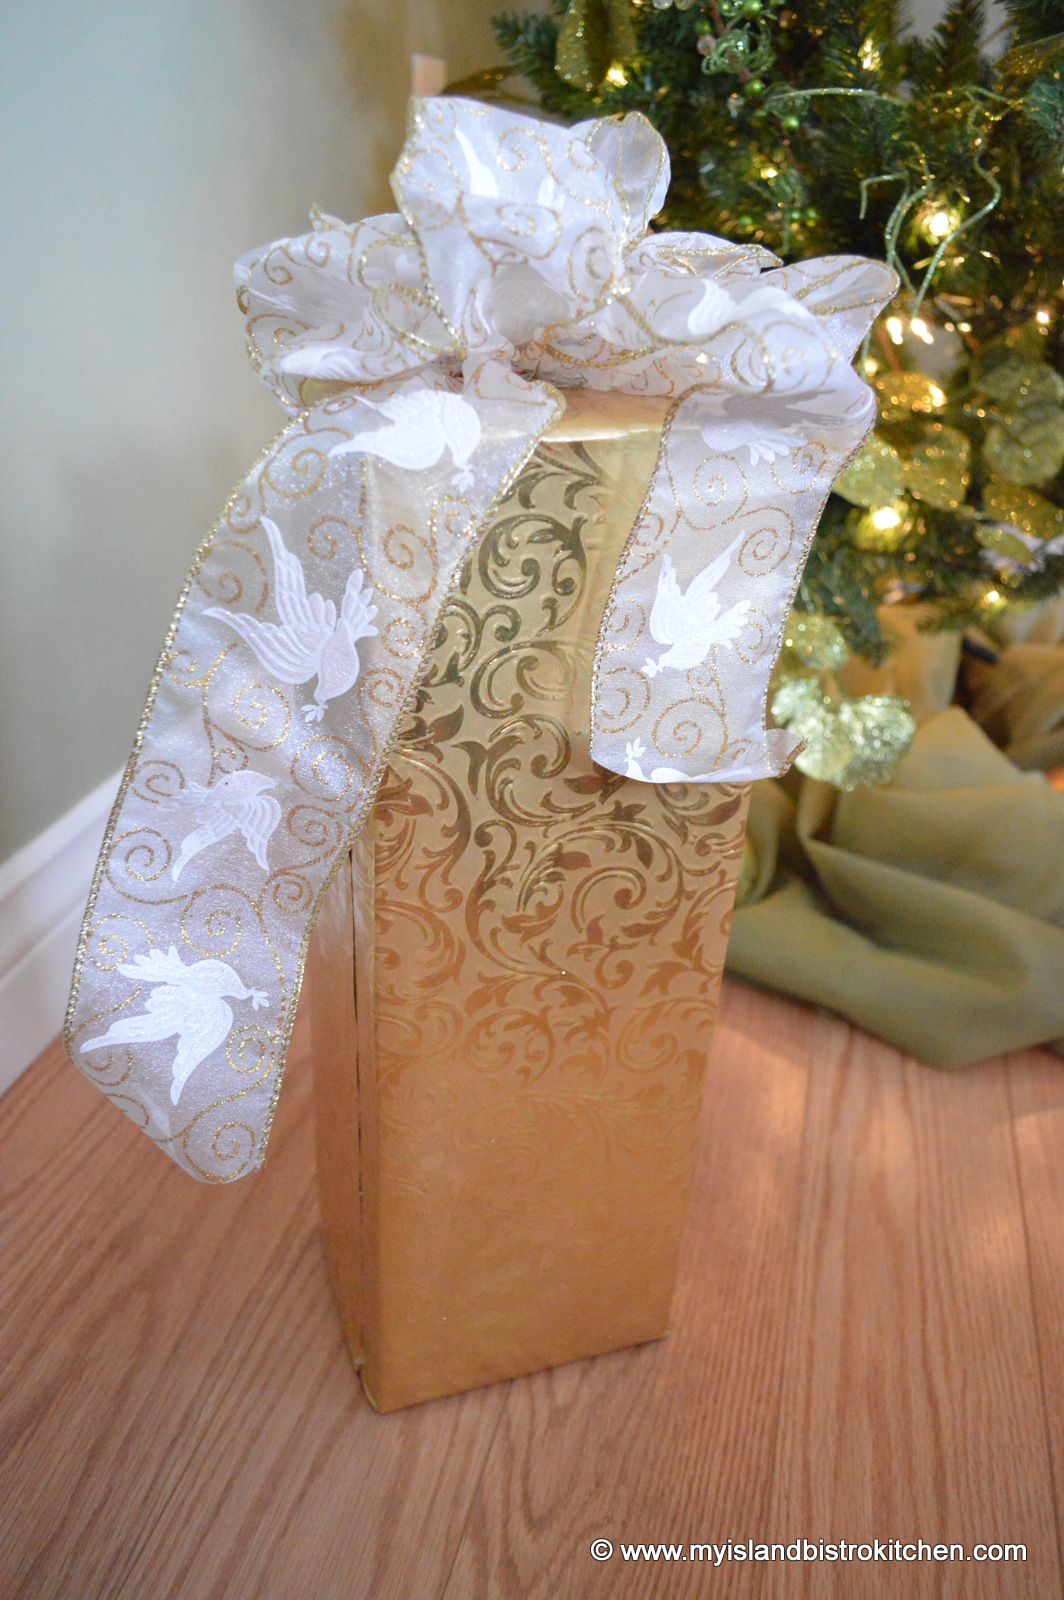
If you are into wrapping gifts, any box that the bottle will fit into will do. Choose elegant wrapping paper and pretty ribbon and/or cord to decorate the box.
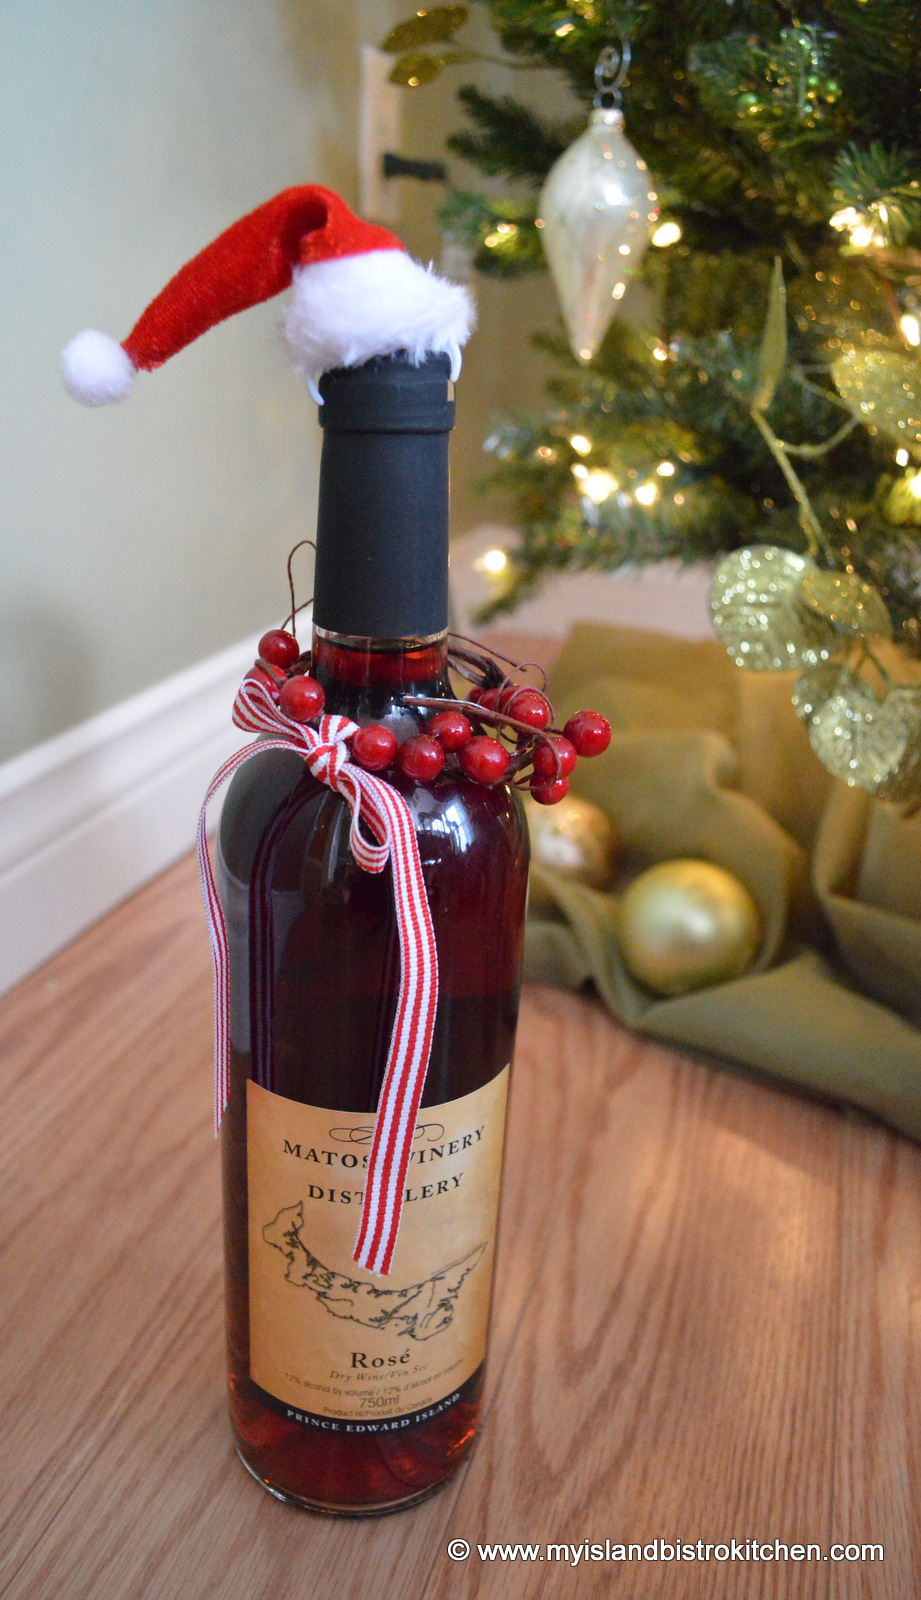
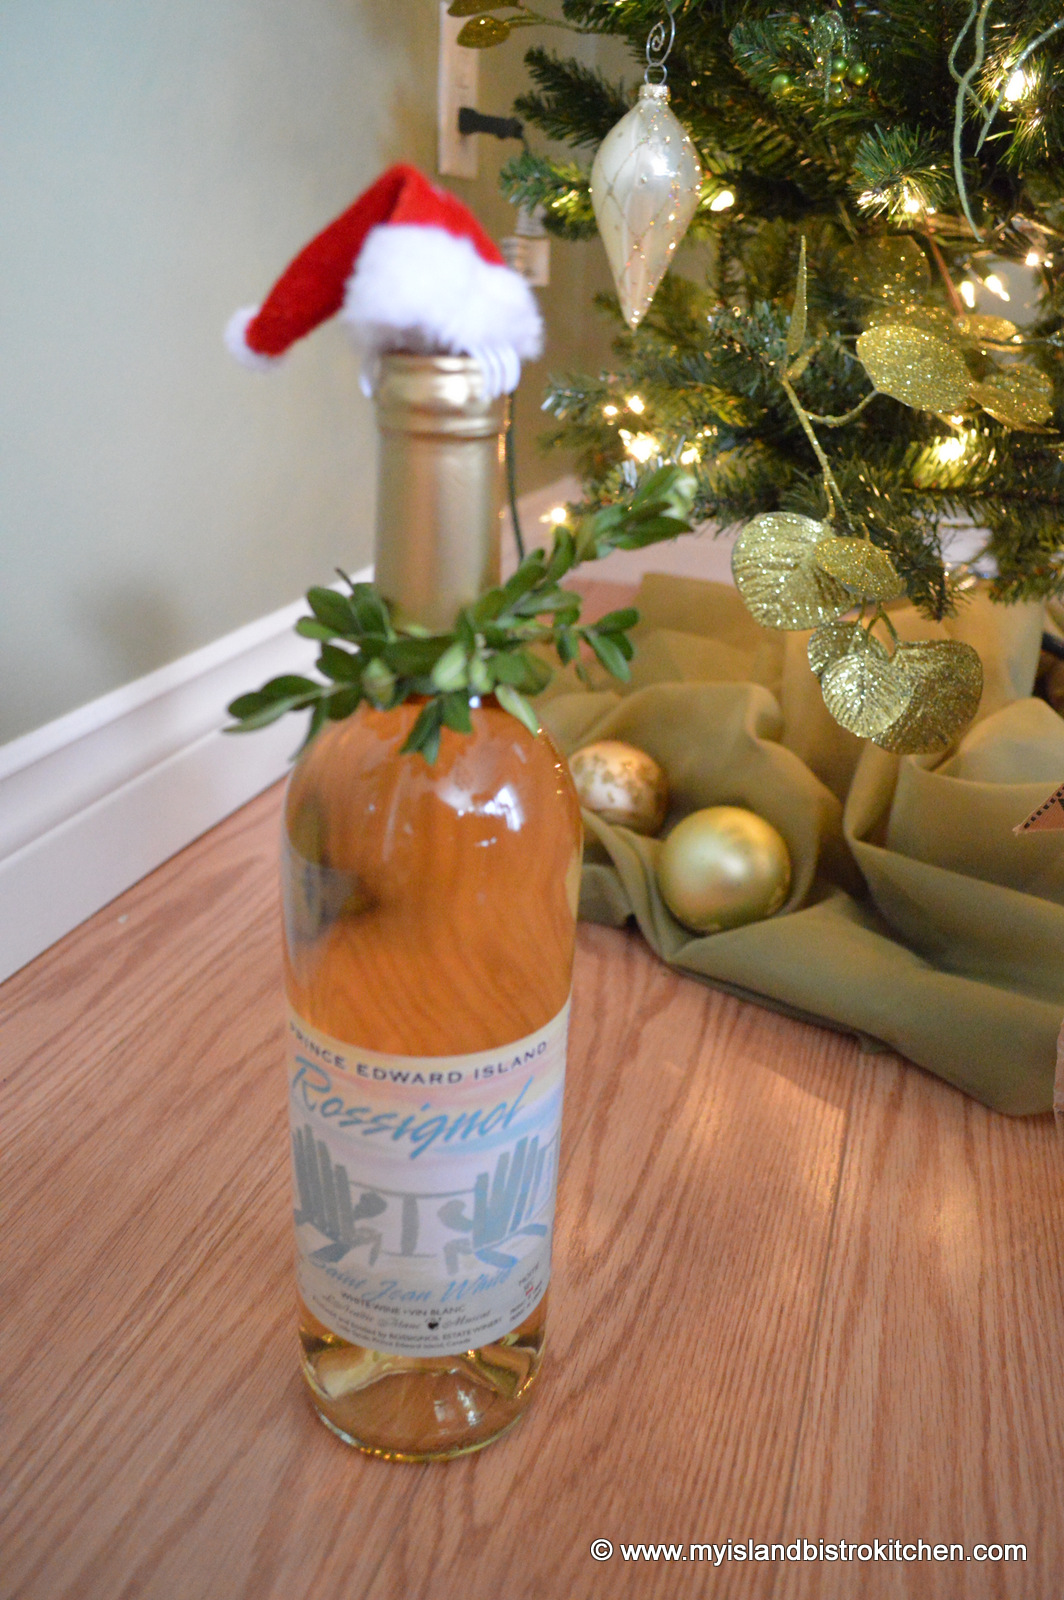
Wine bottles don’t always have to be fully wrapped and concealed. In the photo below, I used a Santa hat hairclip from the local dollar store to adorn the top of the bottle and added a tiny wreath of red berries and a pretty stripped ribbon to make this bottle a conversation piece.
For the bottle below, I used the Santa hat hair clip and cut a piece of boxwood from the tree beside my walkway and used it to make a tiny fresh wreath for the neck of the bottle.
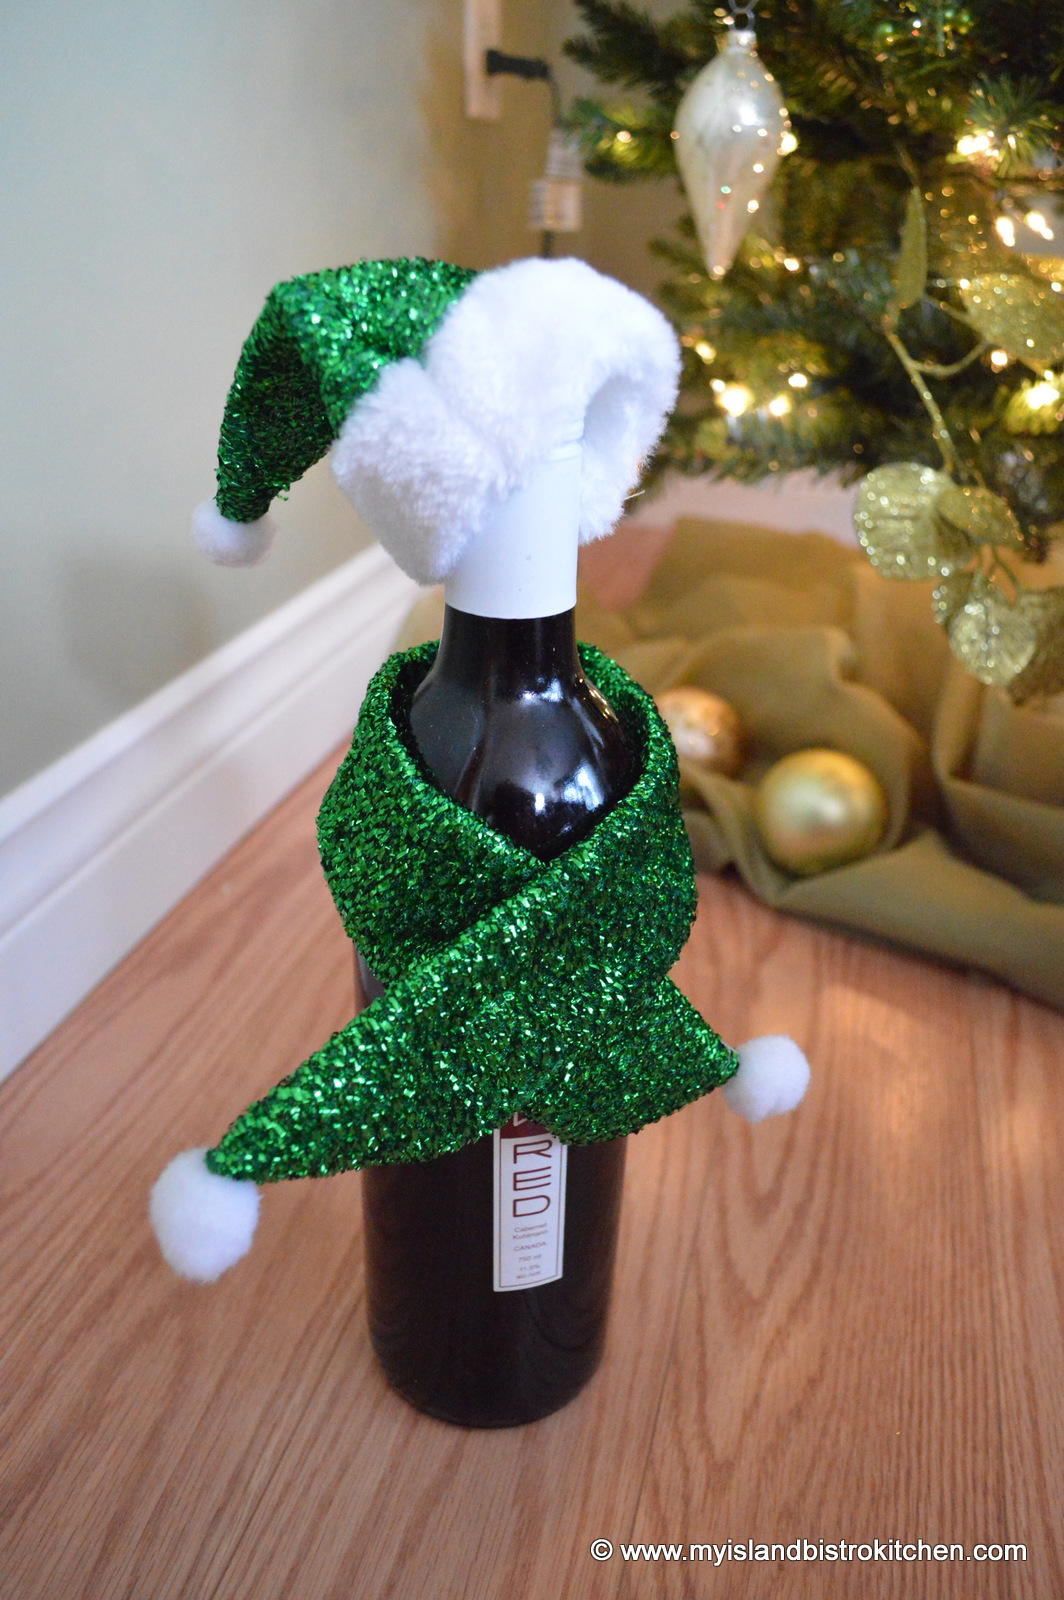
I found the Santa hat and matching scarf below at my local Dollarama store. It’s a fun and funky way to present a gift of wine.
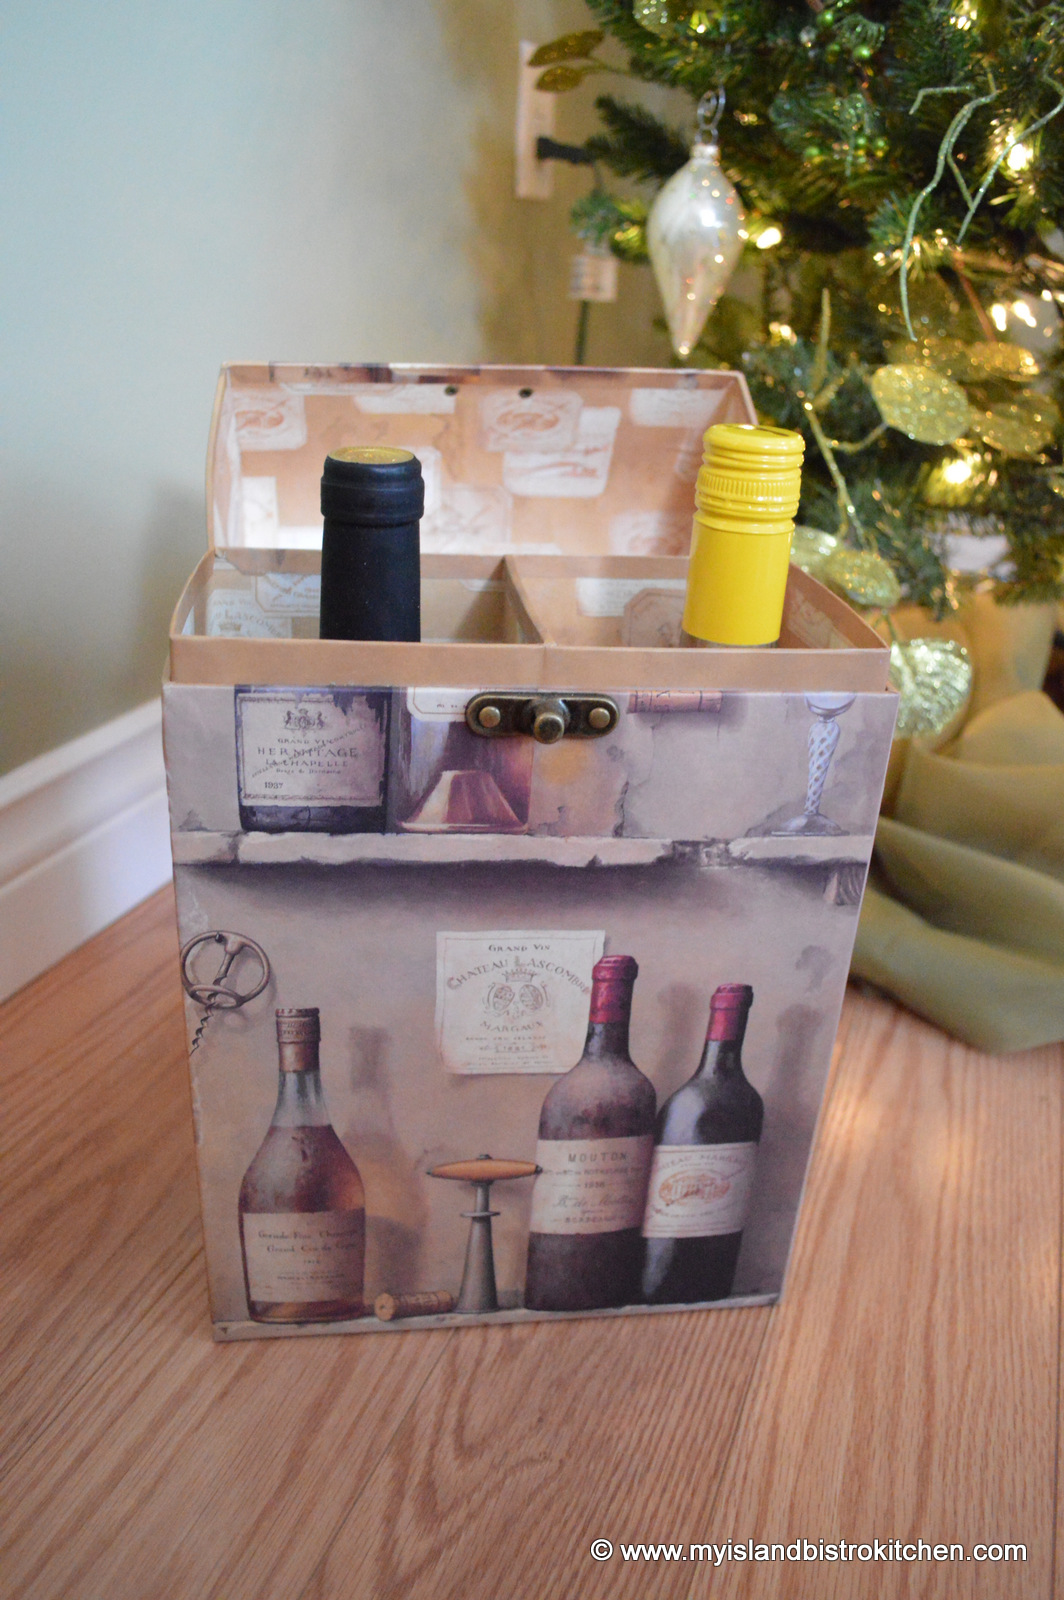
If you are feeling particularly generous and are giving two bottles of wine, the option below is a hard-sided box that accommodates two bottles. It’s another Winners find.
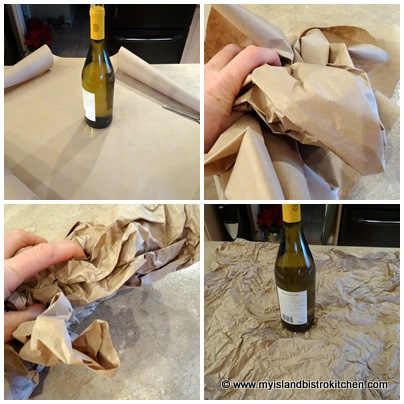
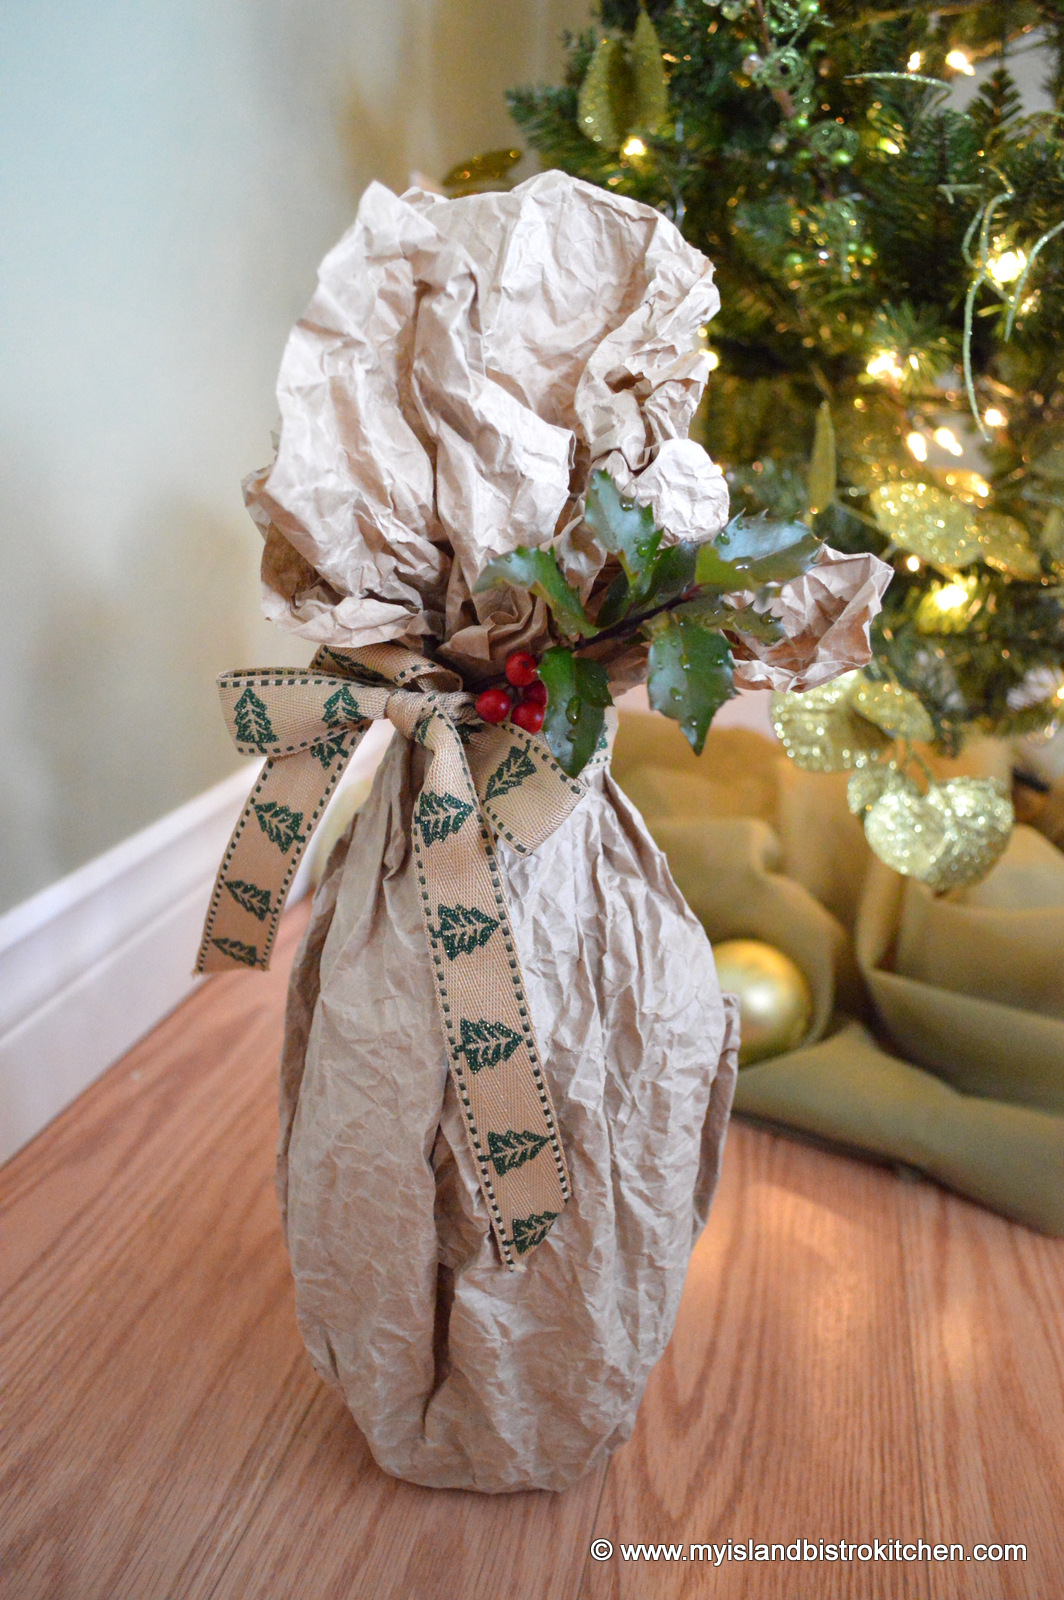
For the bottle below, I used distressed brown paper.
Simply take a 30″ square of brown wrapping paper and crumple it up and massage it until it is soft and supple. This is a good thing to do to relieve stress (or to keep the kids busy)! Place the bottle in the centre of the distressed paper and draw all sides up and secure around the bottle top with an elastic band, then decorate with pretty rustic ribbon and a sprig of holly.
I hope these suggestions will inspire you to decorate your bottles of wine, olive oils, and vinegars for gift-giving presentation.
Have a wonderful holiday!
——————————–
Thank you for visiting “the Bistro” today. There are lots of ways to connect with “the Bistro” through social media:
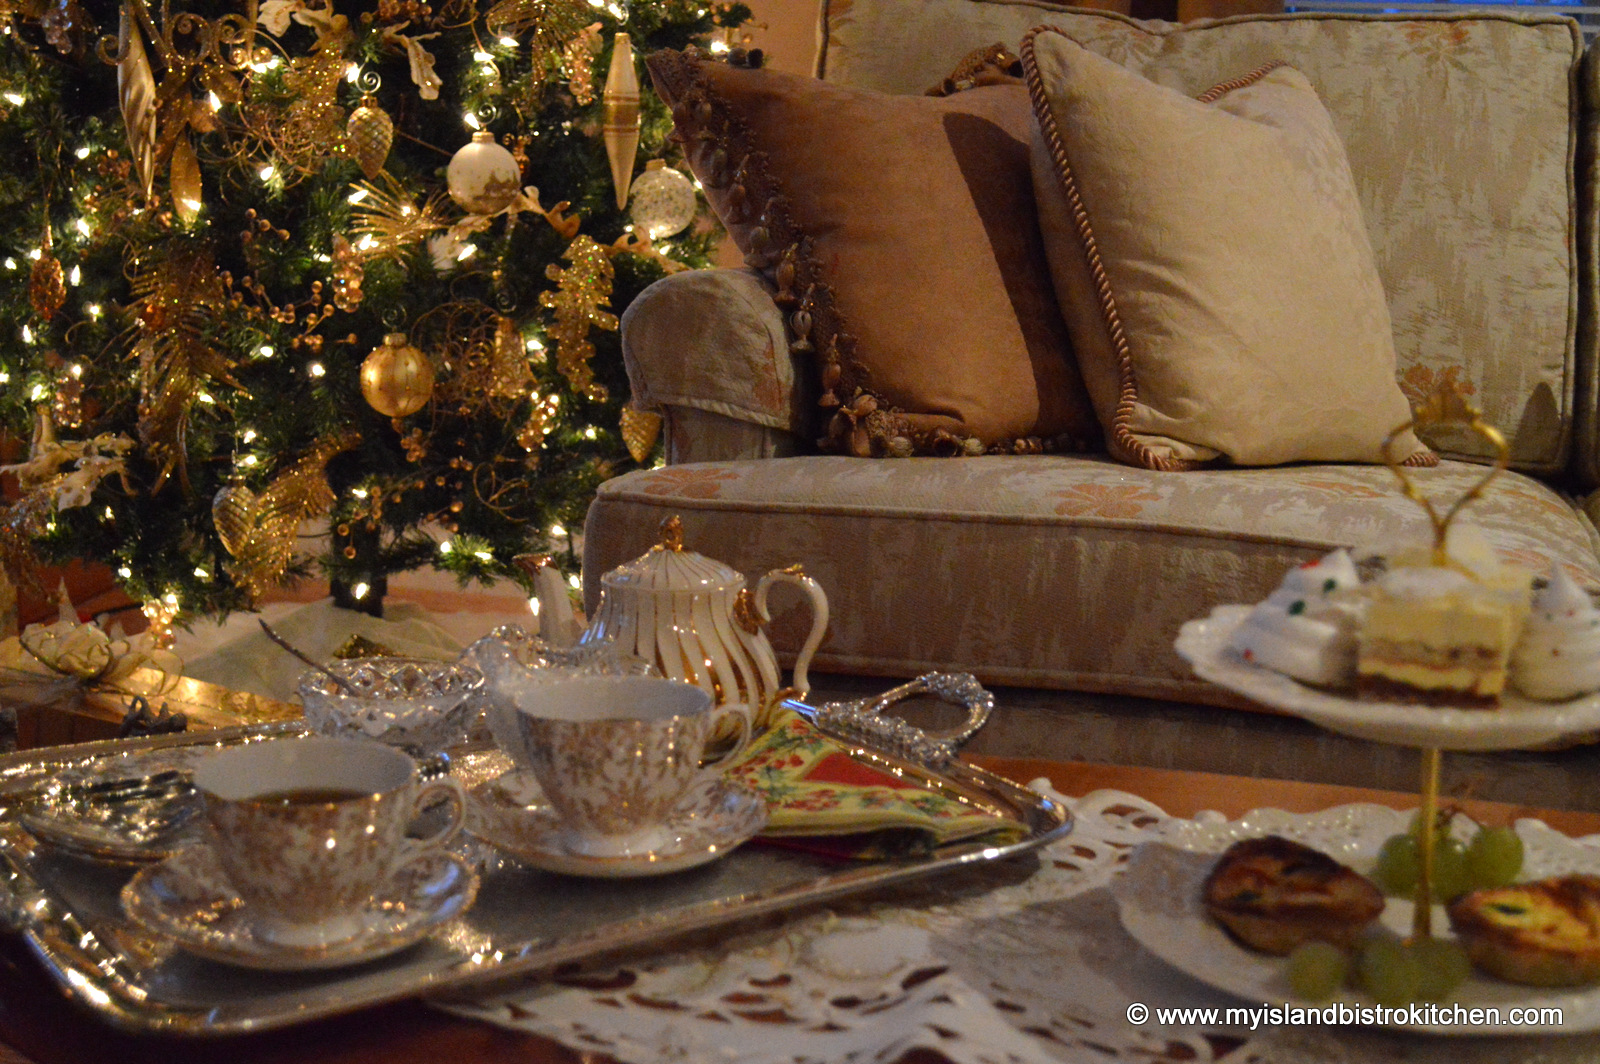
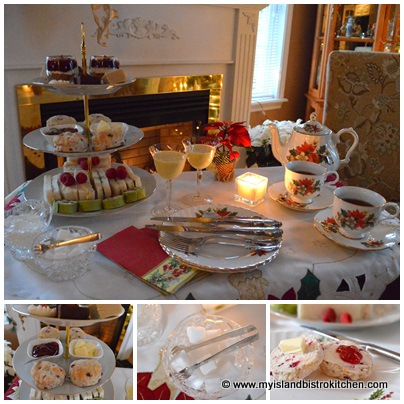
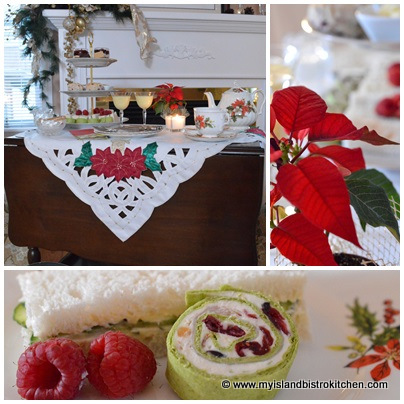
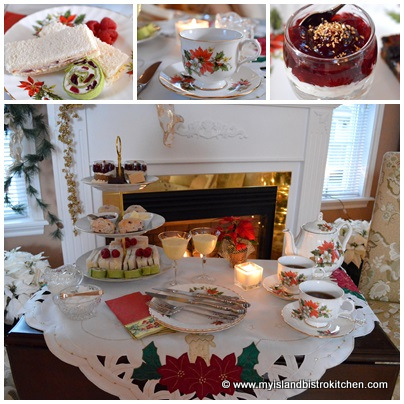
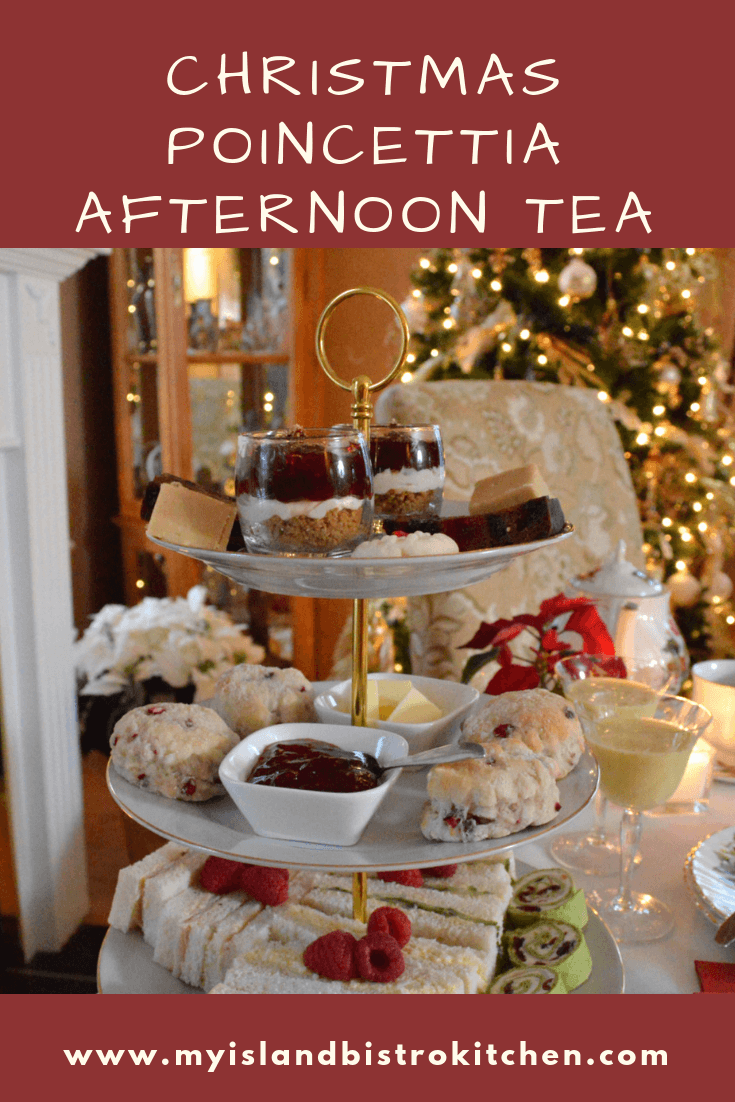
One of my absolute favorite ways to celebrate the holidays is with a festive afternoon tea. It’s a relaxed way to entertain whether it’s one guest or several. The best part of entertaining with afternoon tea is that much of the preparation can be done in advance before guests arrive.
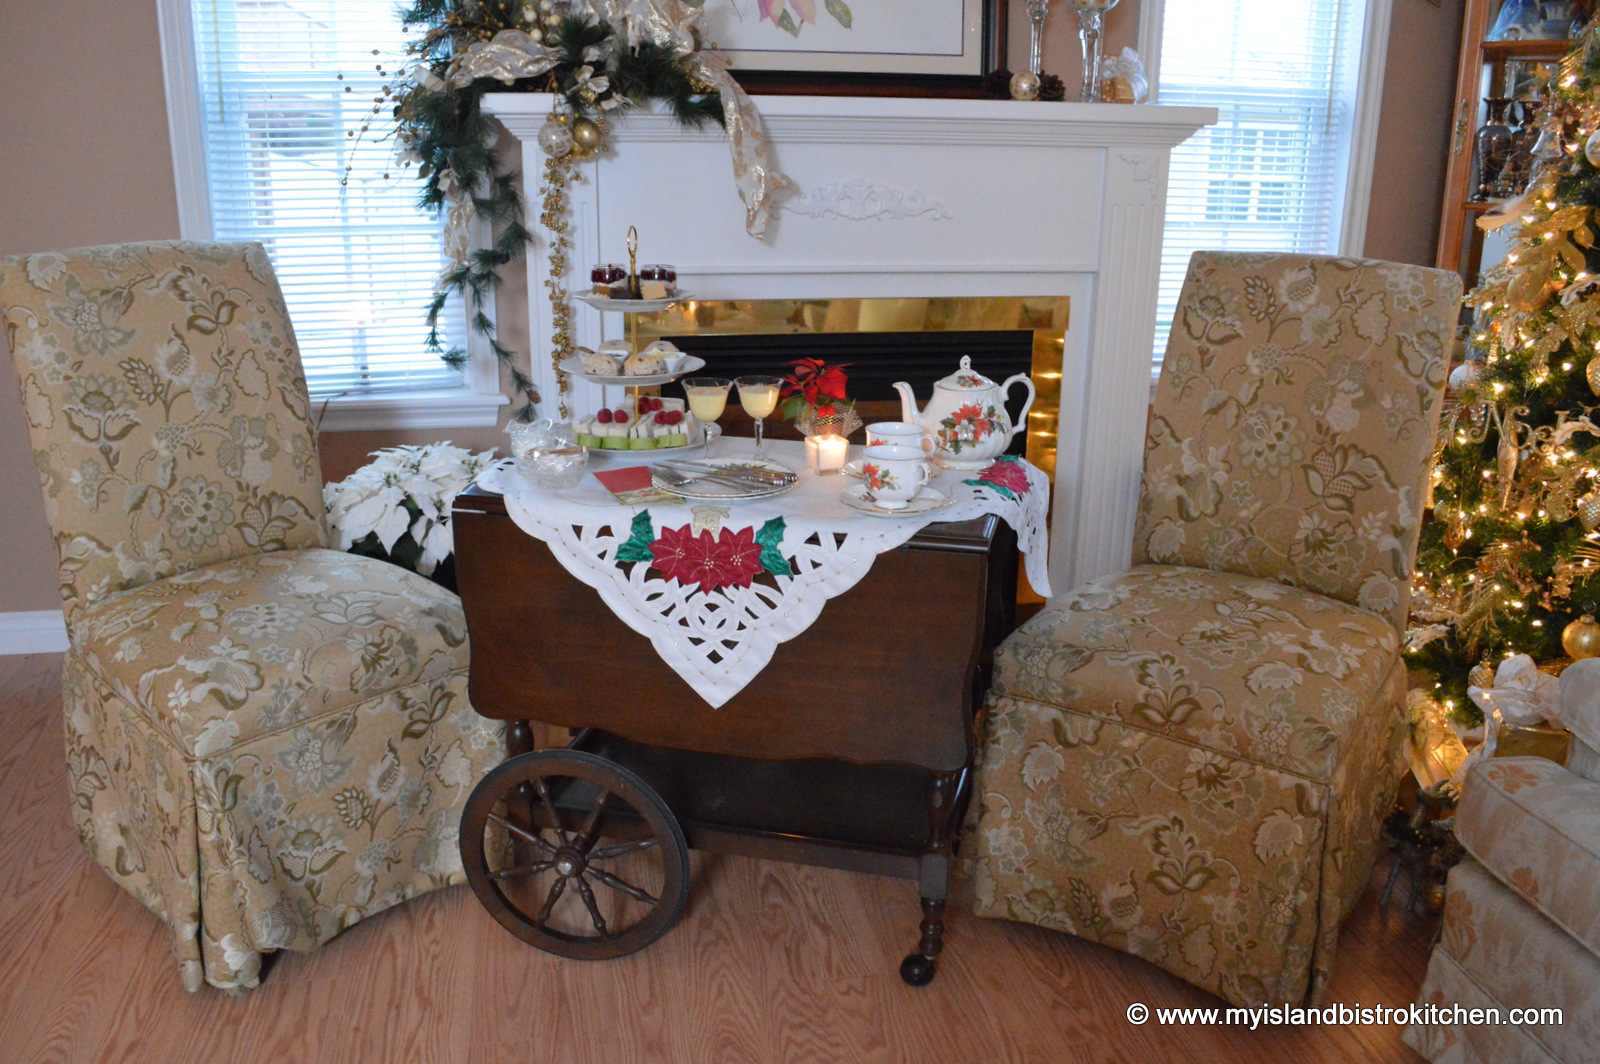
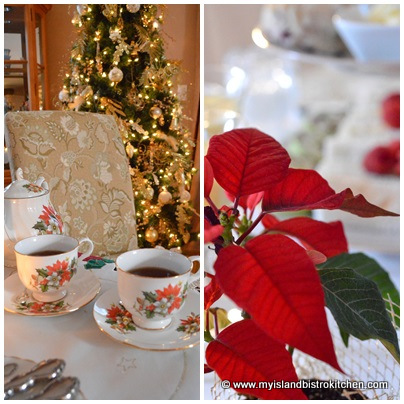
Today, my afternoon tea setting is for two in front of the warm and cozy fireplace and beside the Christmas tree. It’s a reason to stop, pause, and relax during the busy Christmas preparations.
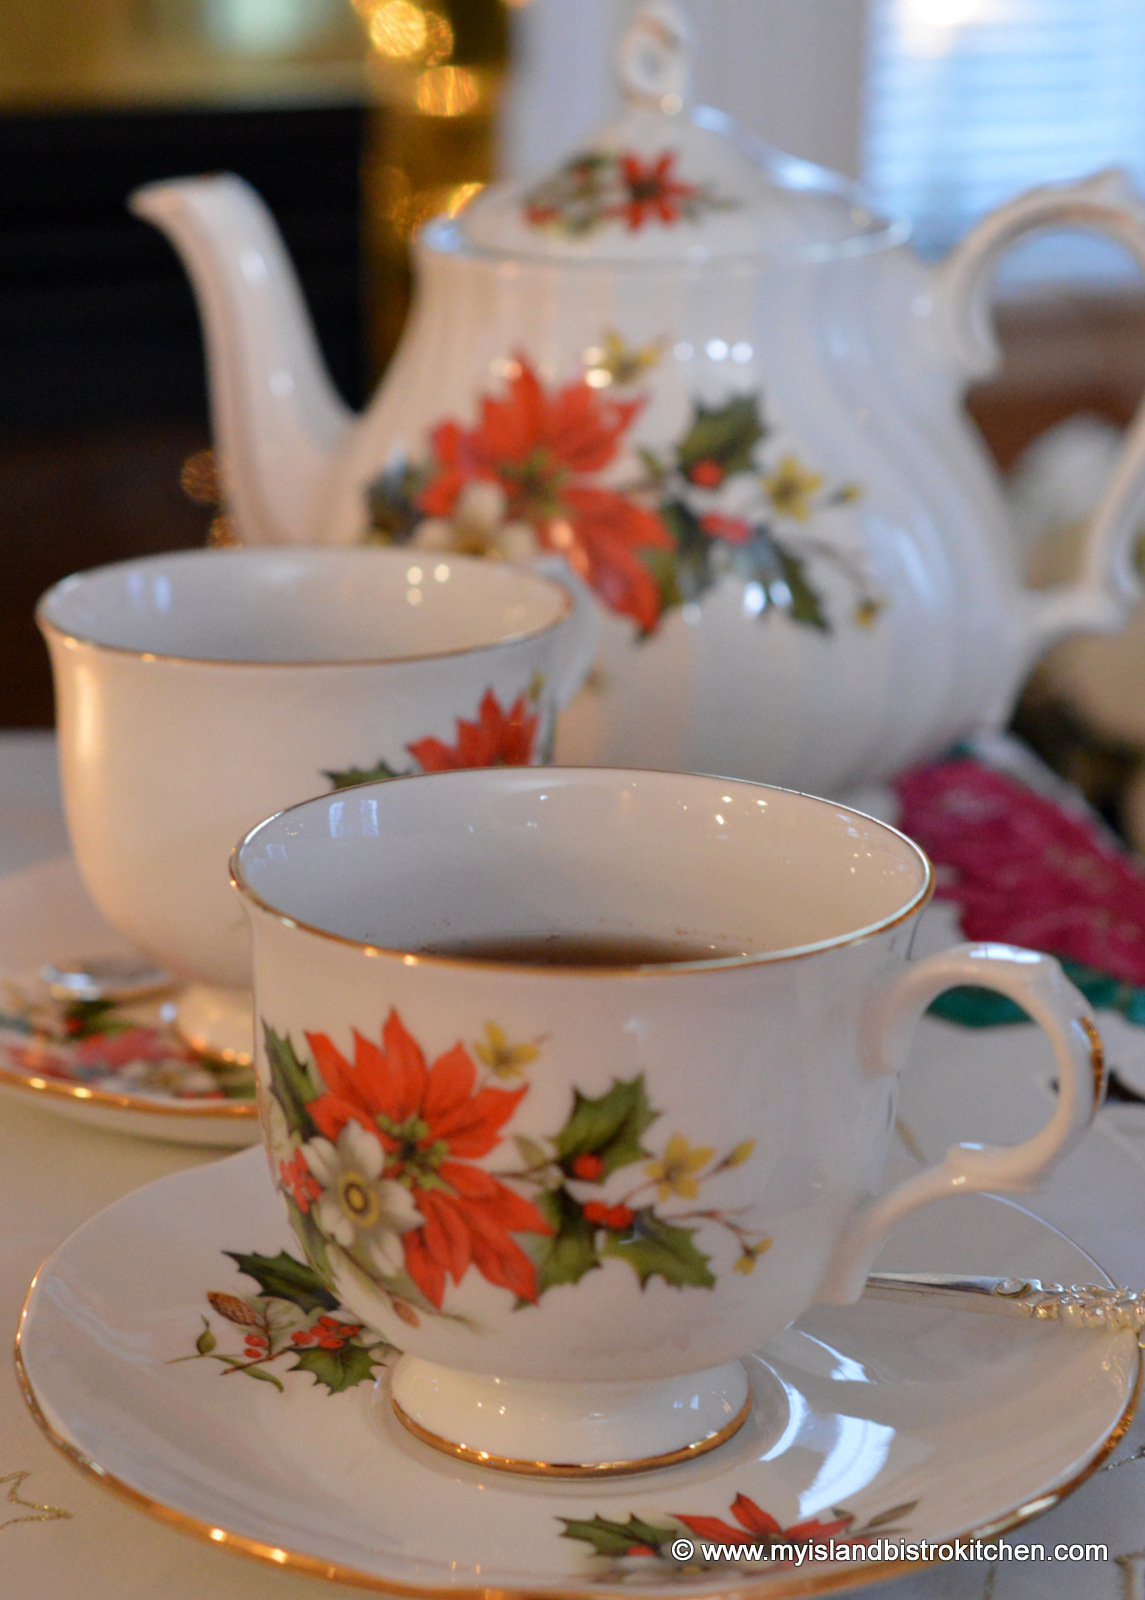
I have been fortunate in finding some pieces of Christmas China over the years that just beg for an afternoon tea experience. The teapot and teacups are made by Sadler.
The tea is being served on a tea trolley. I like the versatility of trolleys as they can be used solely as a serving unit beside a larger table or even, depending on their size, as a miniature self-serve buffet. Or, either one or both of the trolley extensions can be lifted, turning the unit into a tea table as I have done today. This tea trolley is the larger of the two I own.
A few years ago, I found the delightful Christmas table square in the photo above. With its poinsettias and candles, it became the canvas and theme for today’s tea.
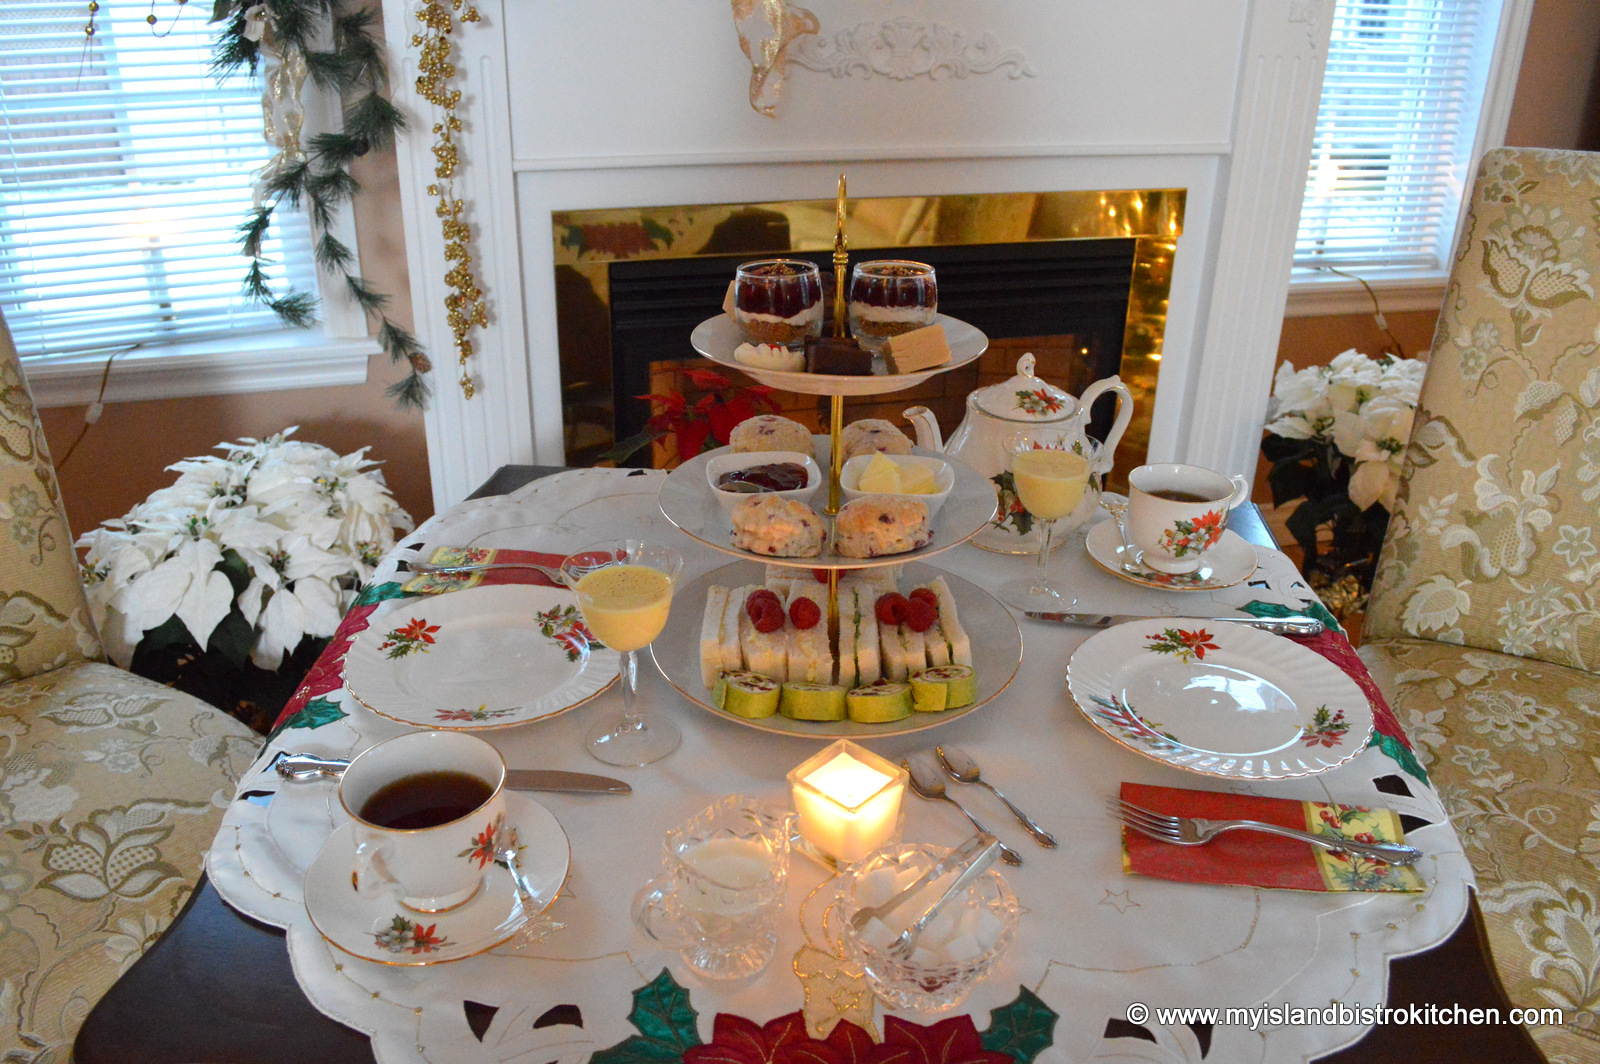
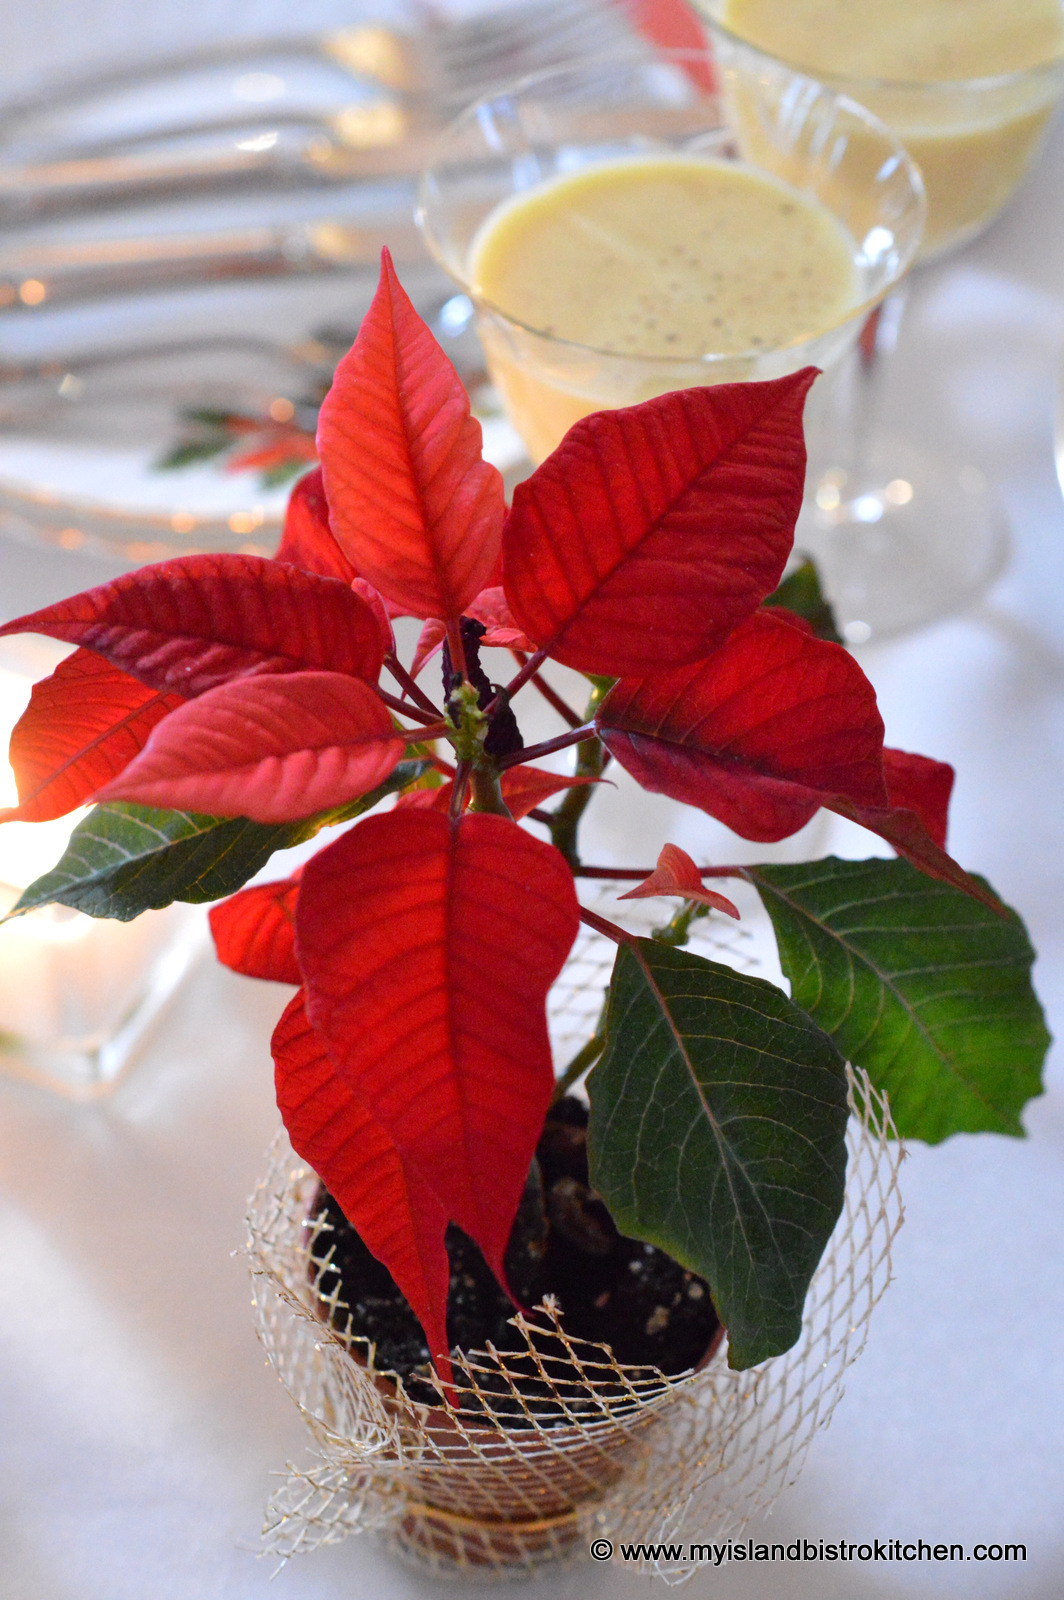
I like the miniature poinsettias like the one in the photo above. I use them on tea tables, in placesettings, and on bed trays because they are just the perfect size and add a touch of Christmas wherever they are used.
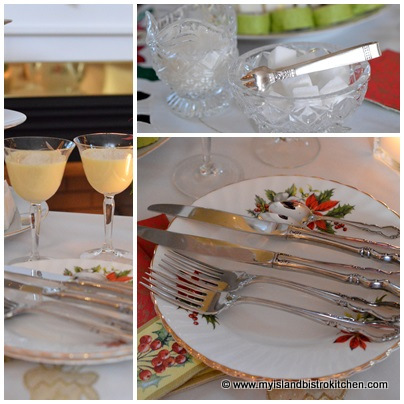
I have been searching for some time now for a small set of sugar tongs. I found the antique tongs in a local second-hand shop recently. The tea plates in the photo below are Royal Adderly “Poinsettia” pattern.
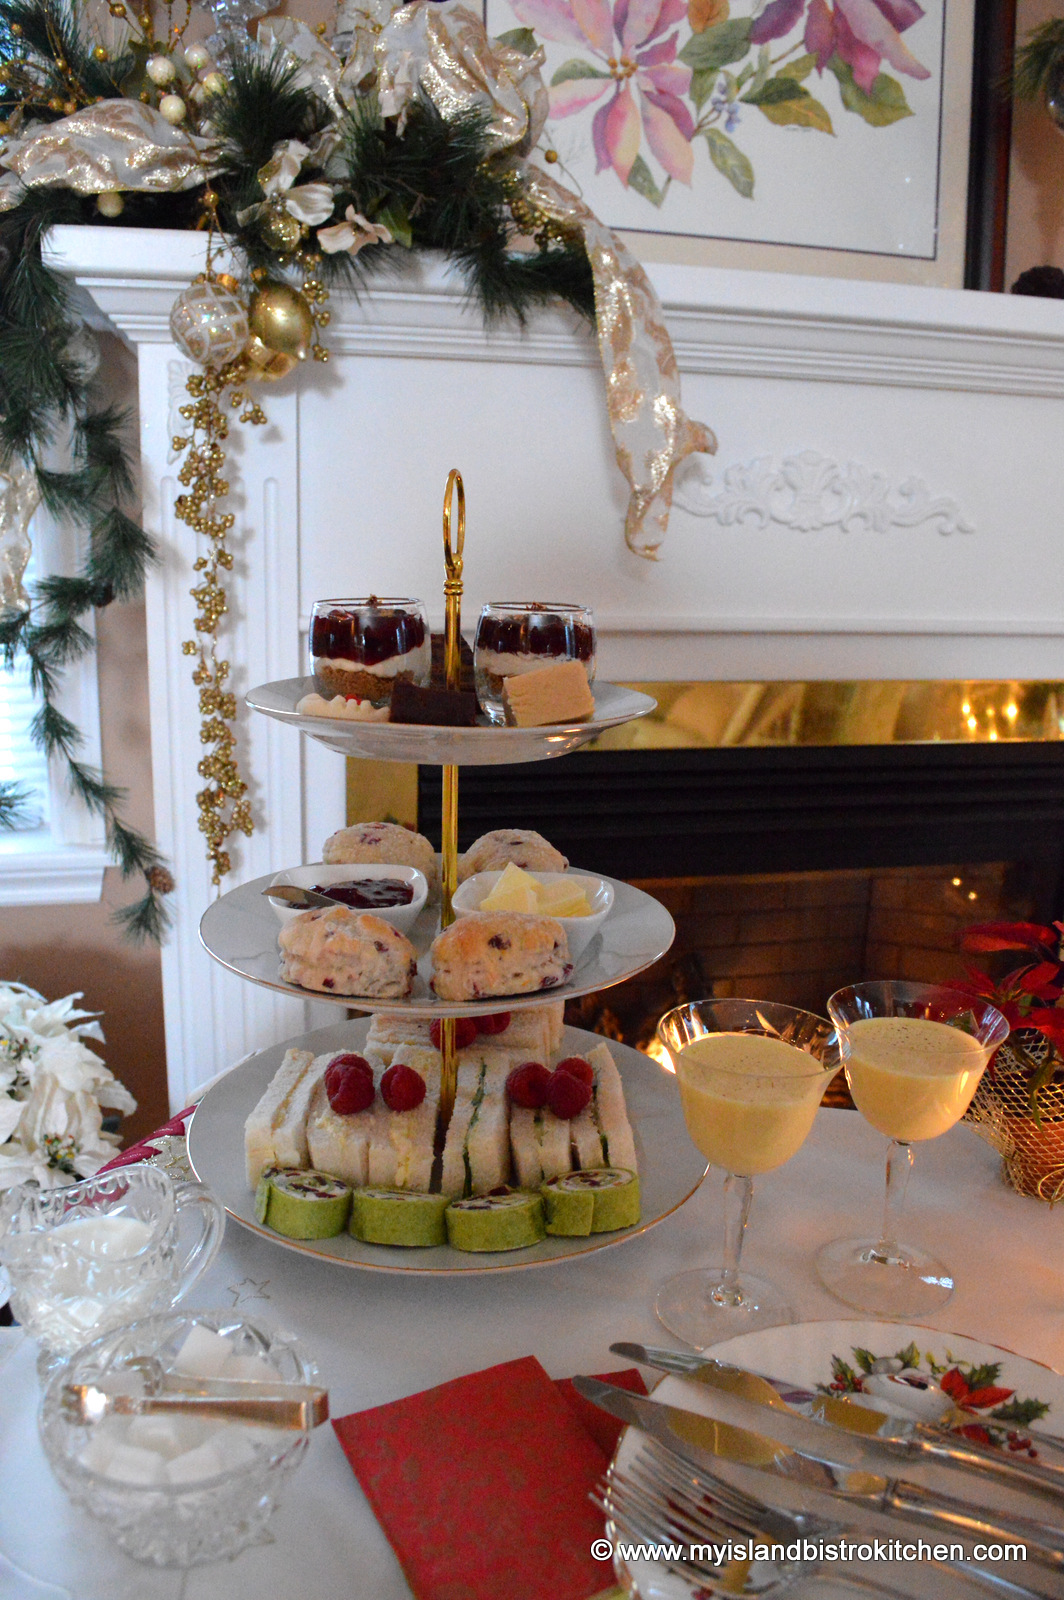
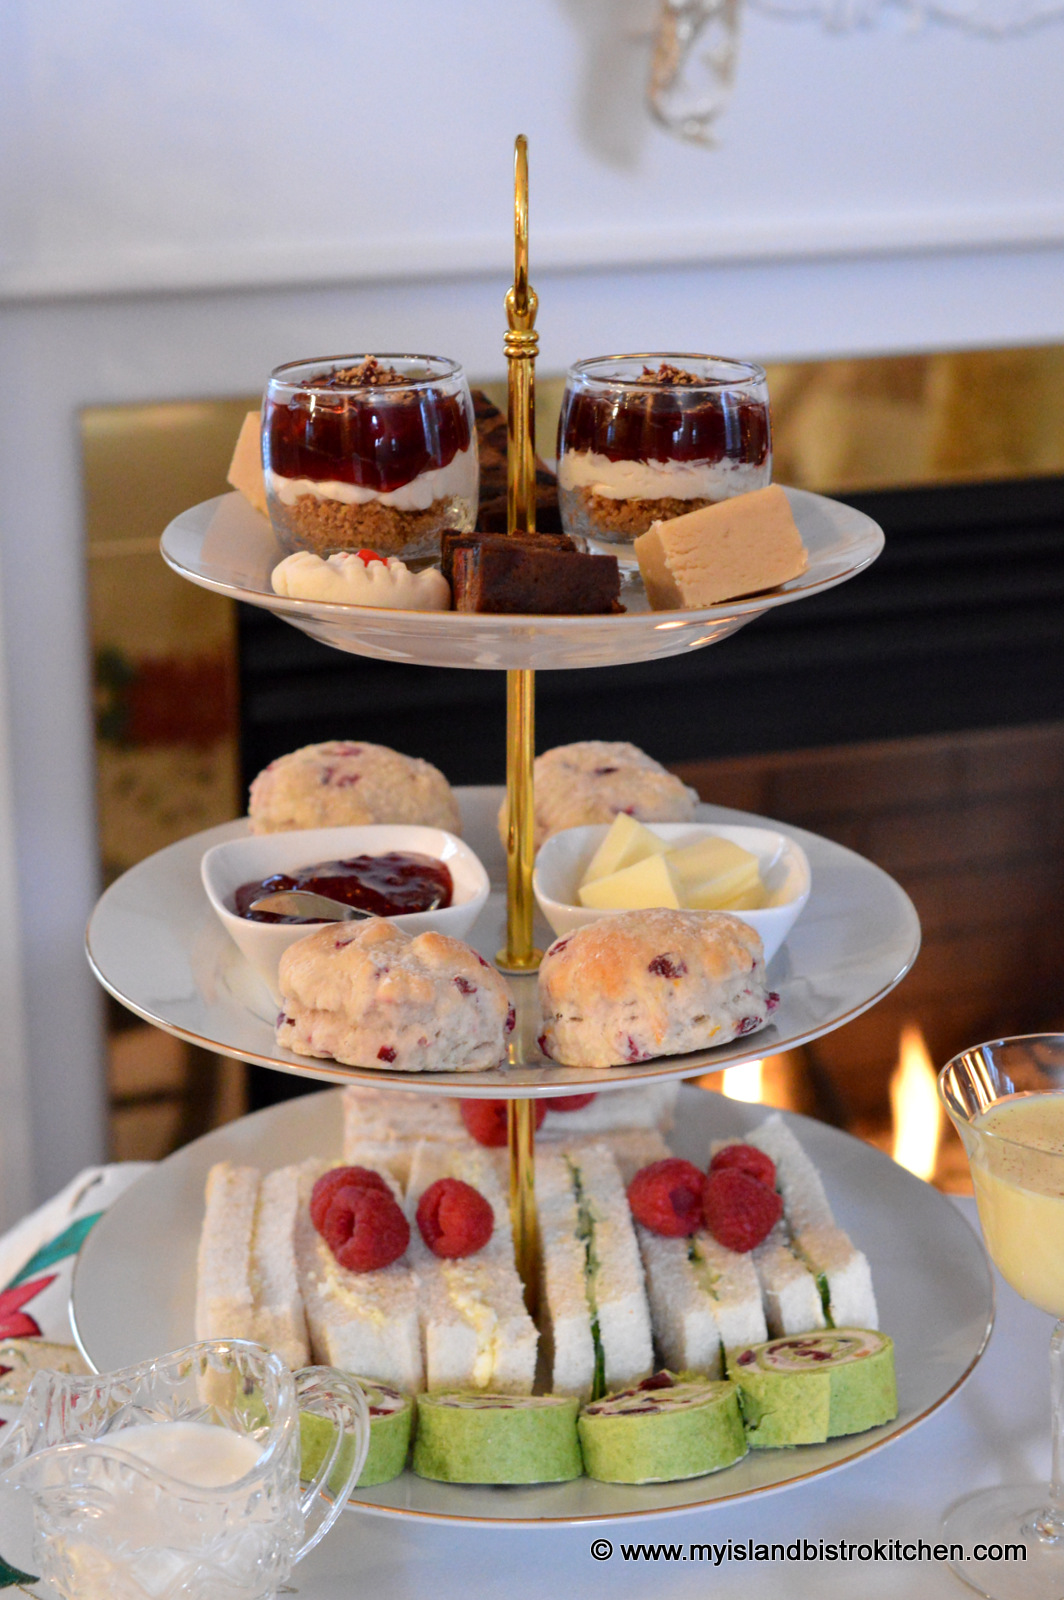
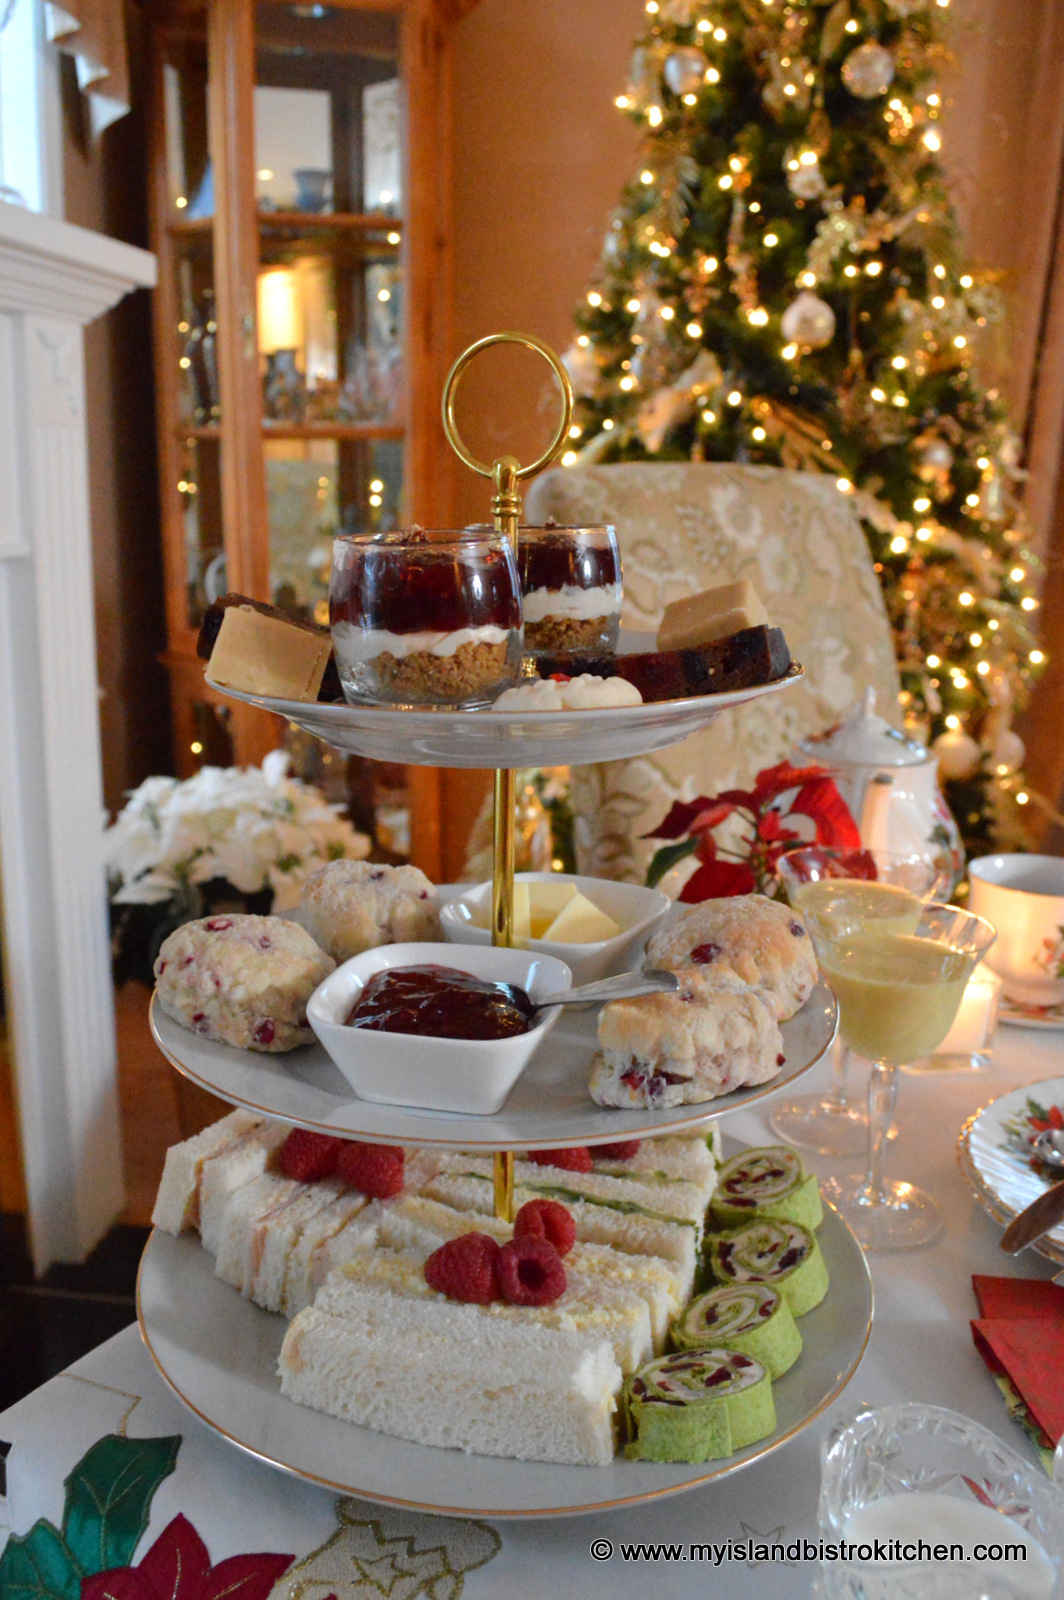
I love tiered servers and, while there are many pretty floral ones available, my preference is for the plain white because the food really stands out against the white background. I can mix and match my teapots and cups and saucers much easier with a white server than with a floral.
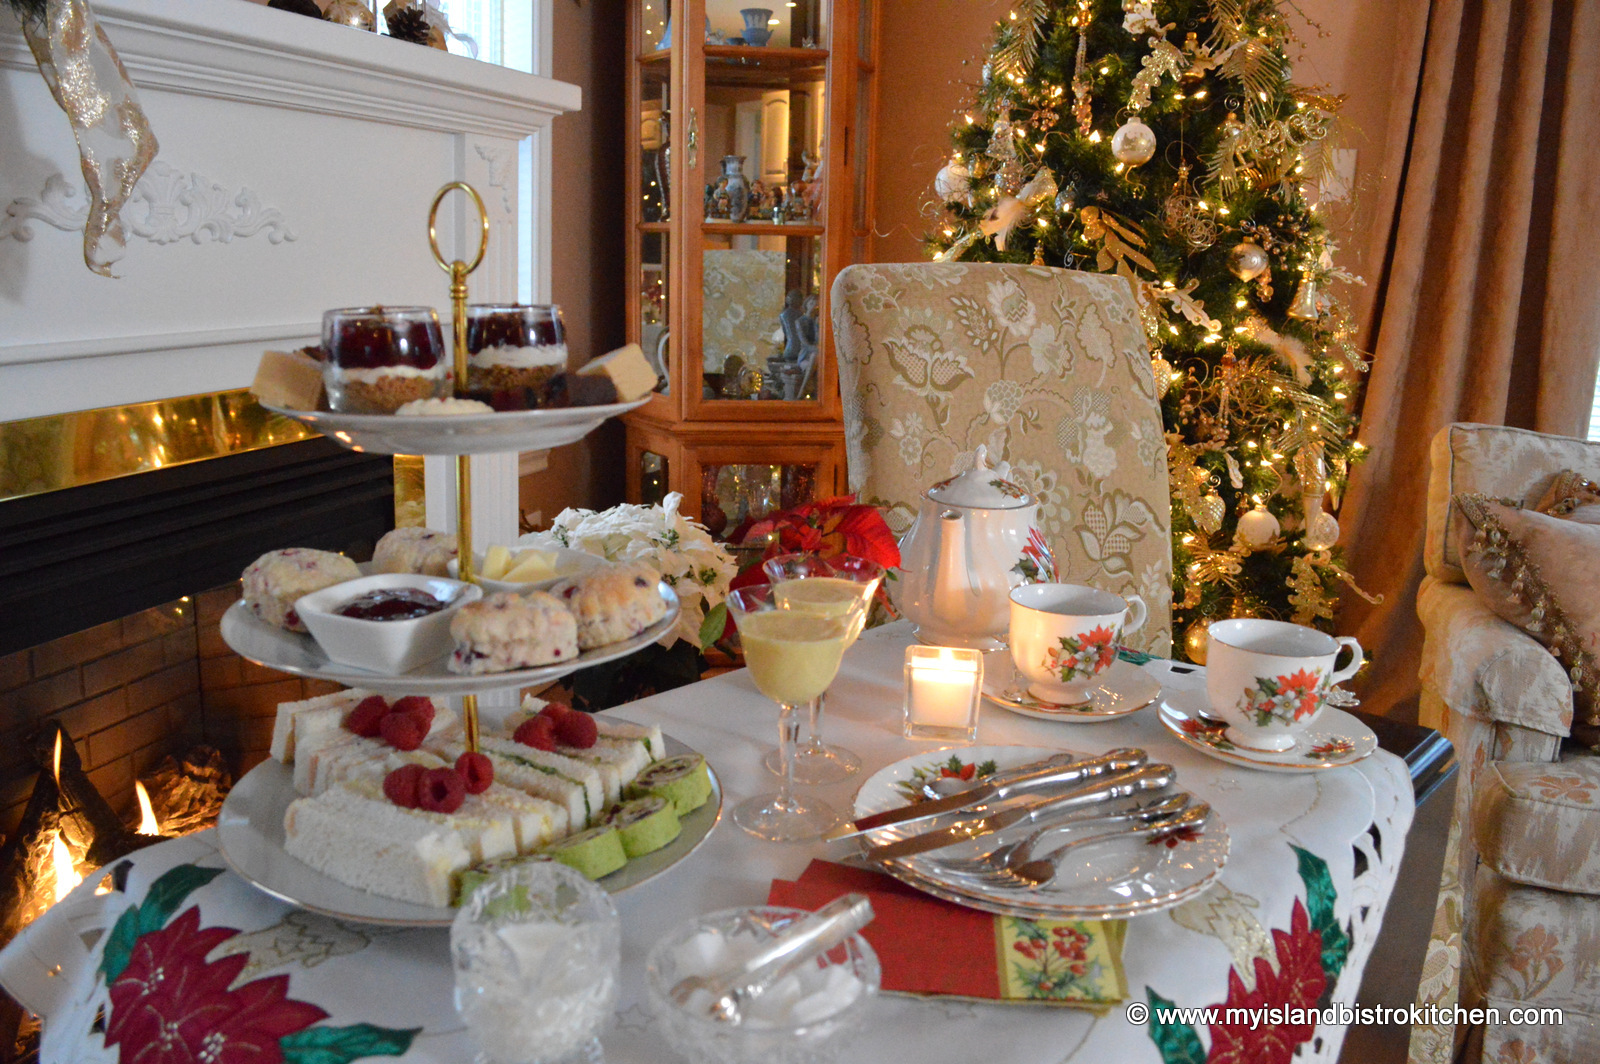
I have followed the traditional order of placement on a three-tier server: sandwiches on the bottom plate, scones on the middle, and sweets on the top tier.
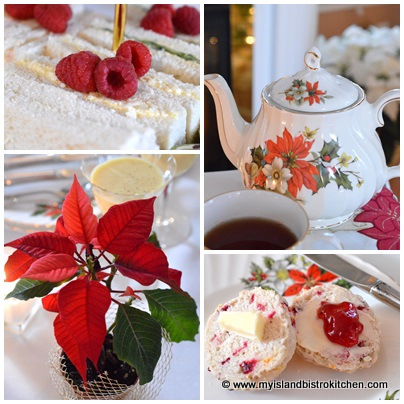
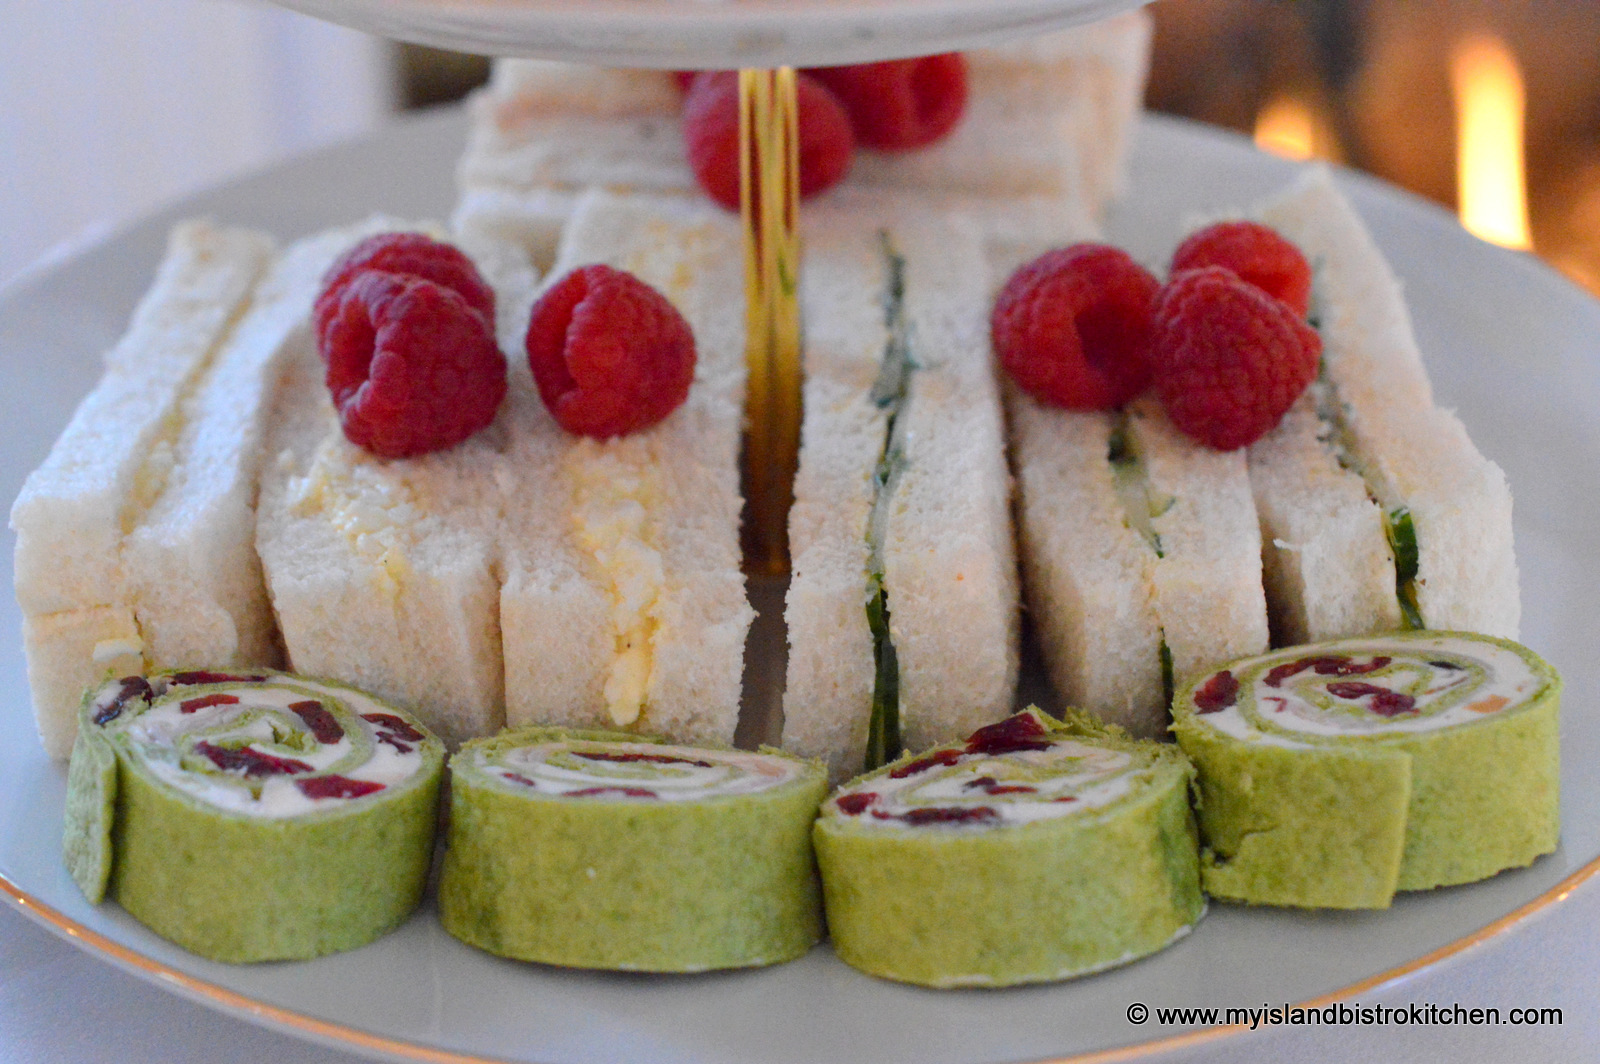
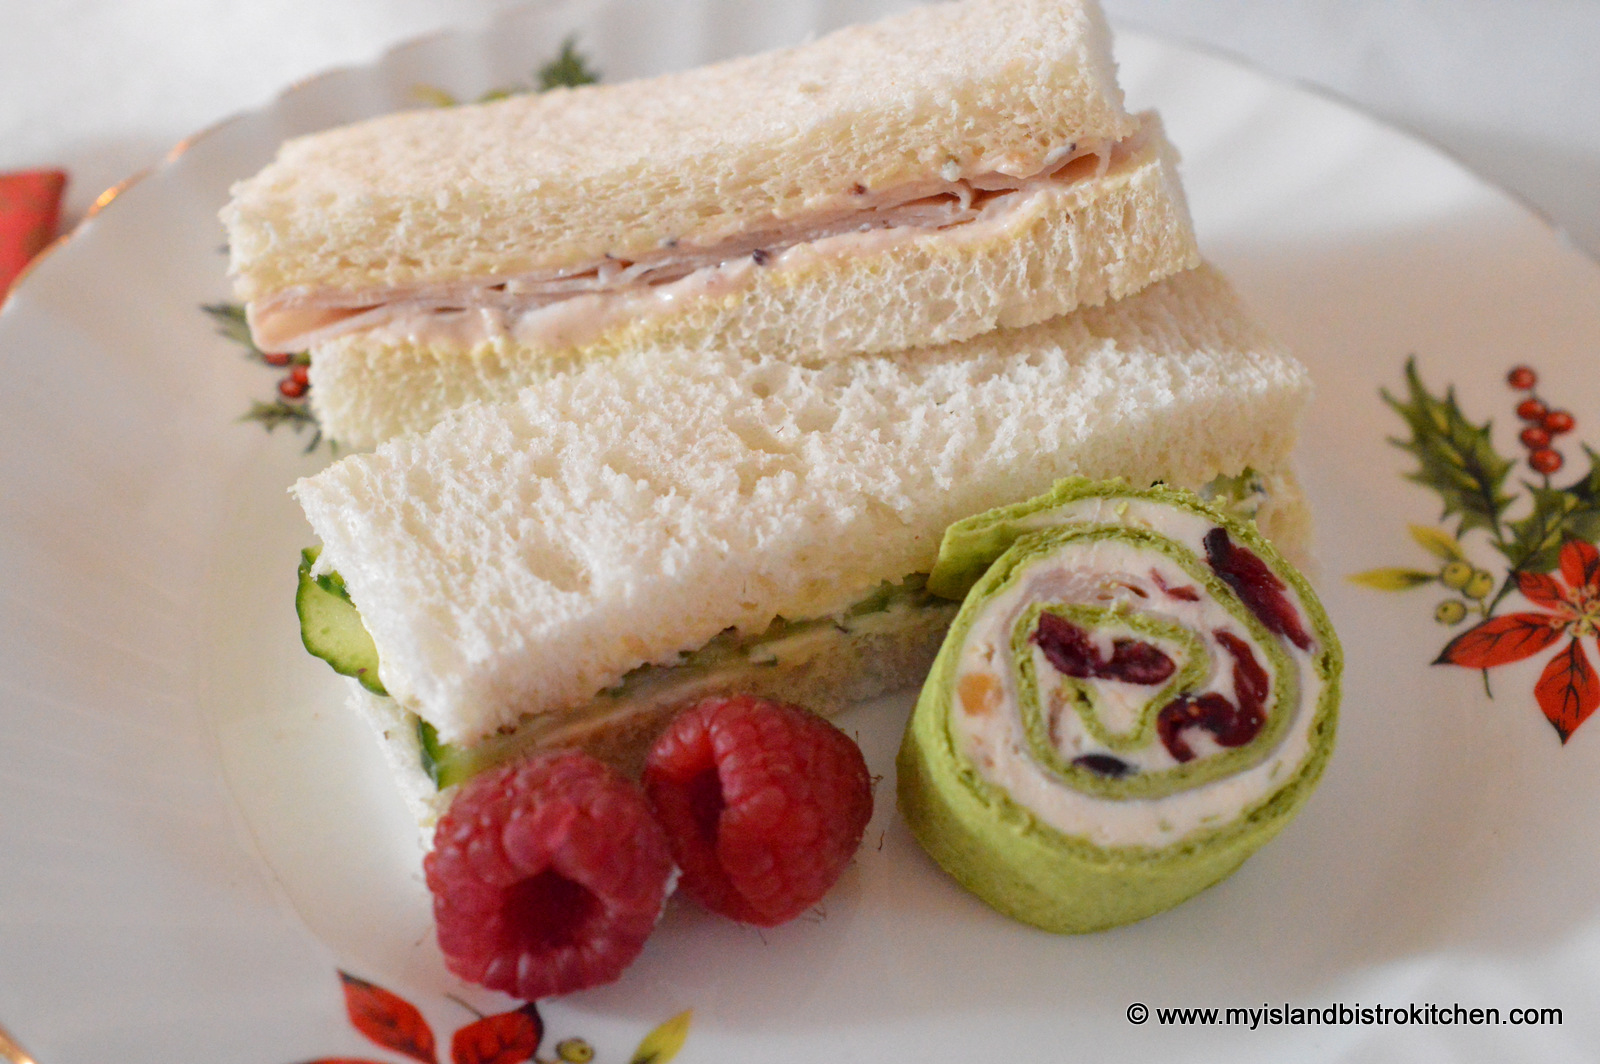
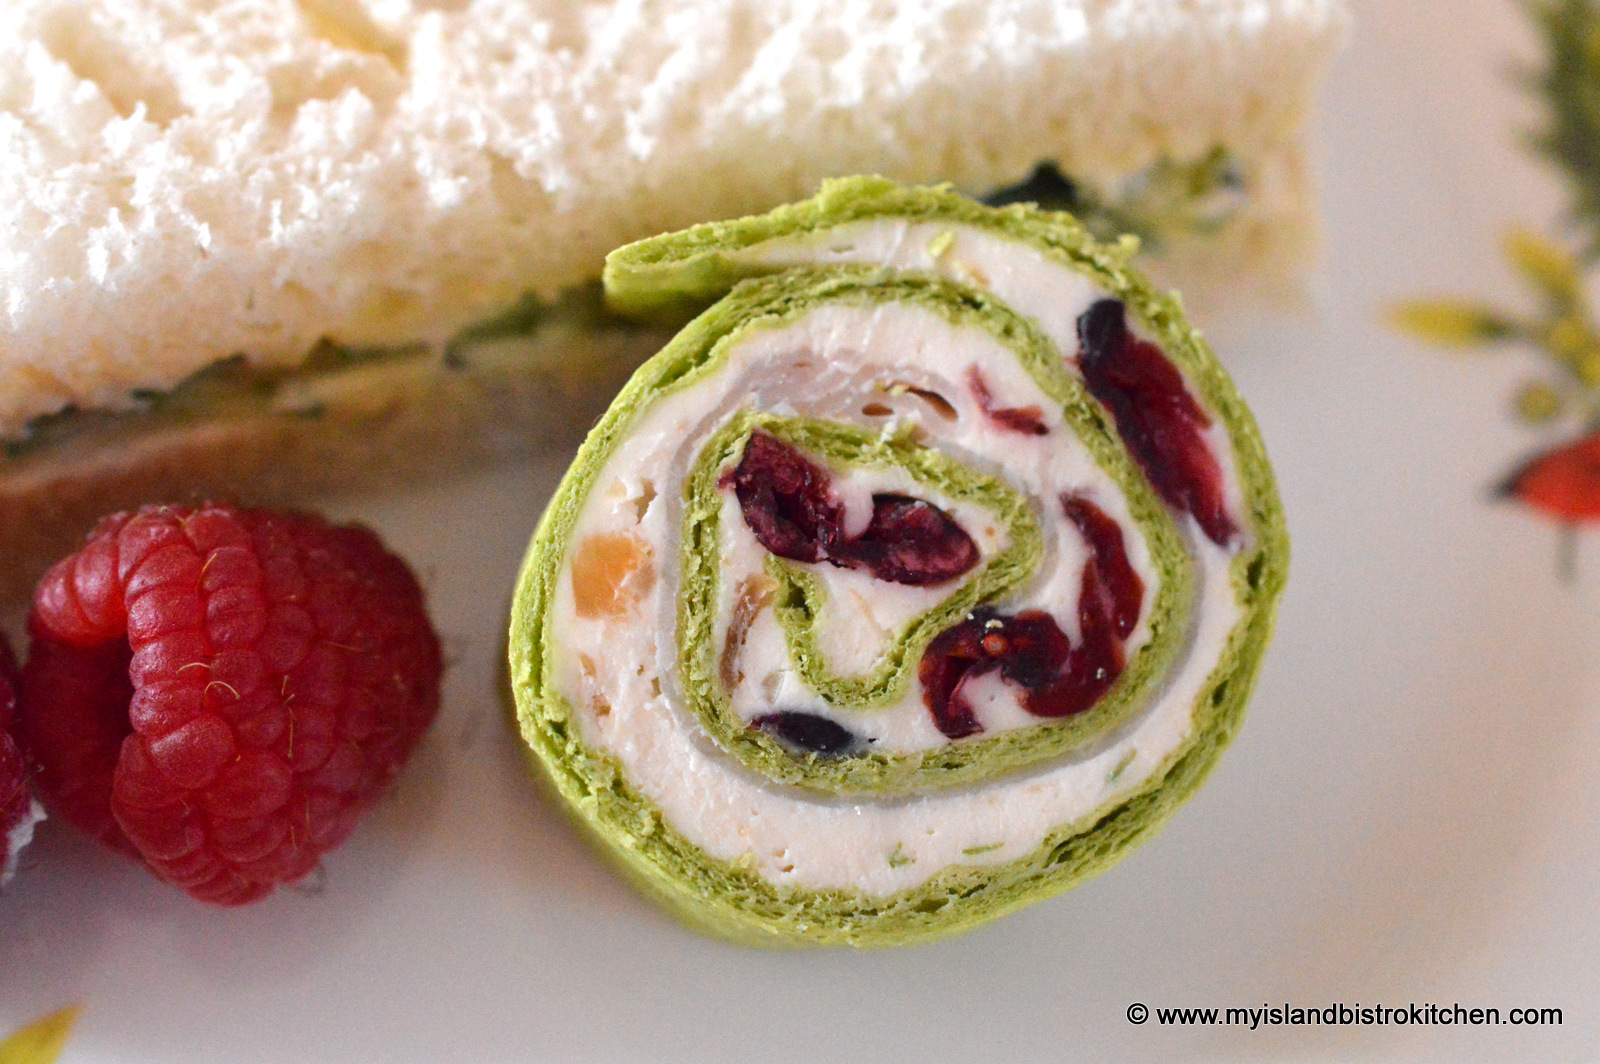
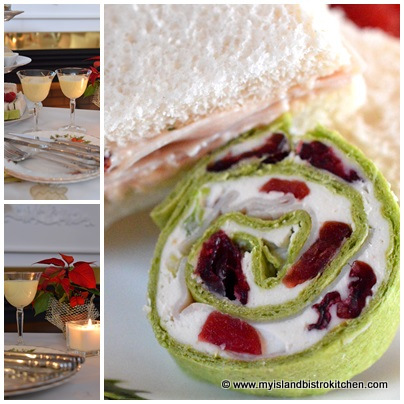
The green spinach tortillas with the dots of dried cranberries add color to the sandwich plate and the fresh raspberries add a splash of red against the white bread.
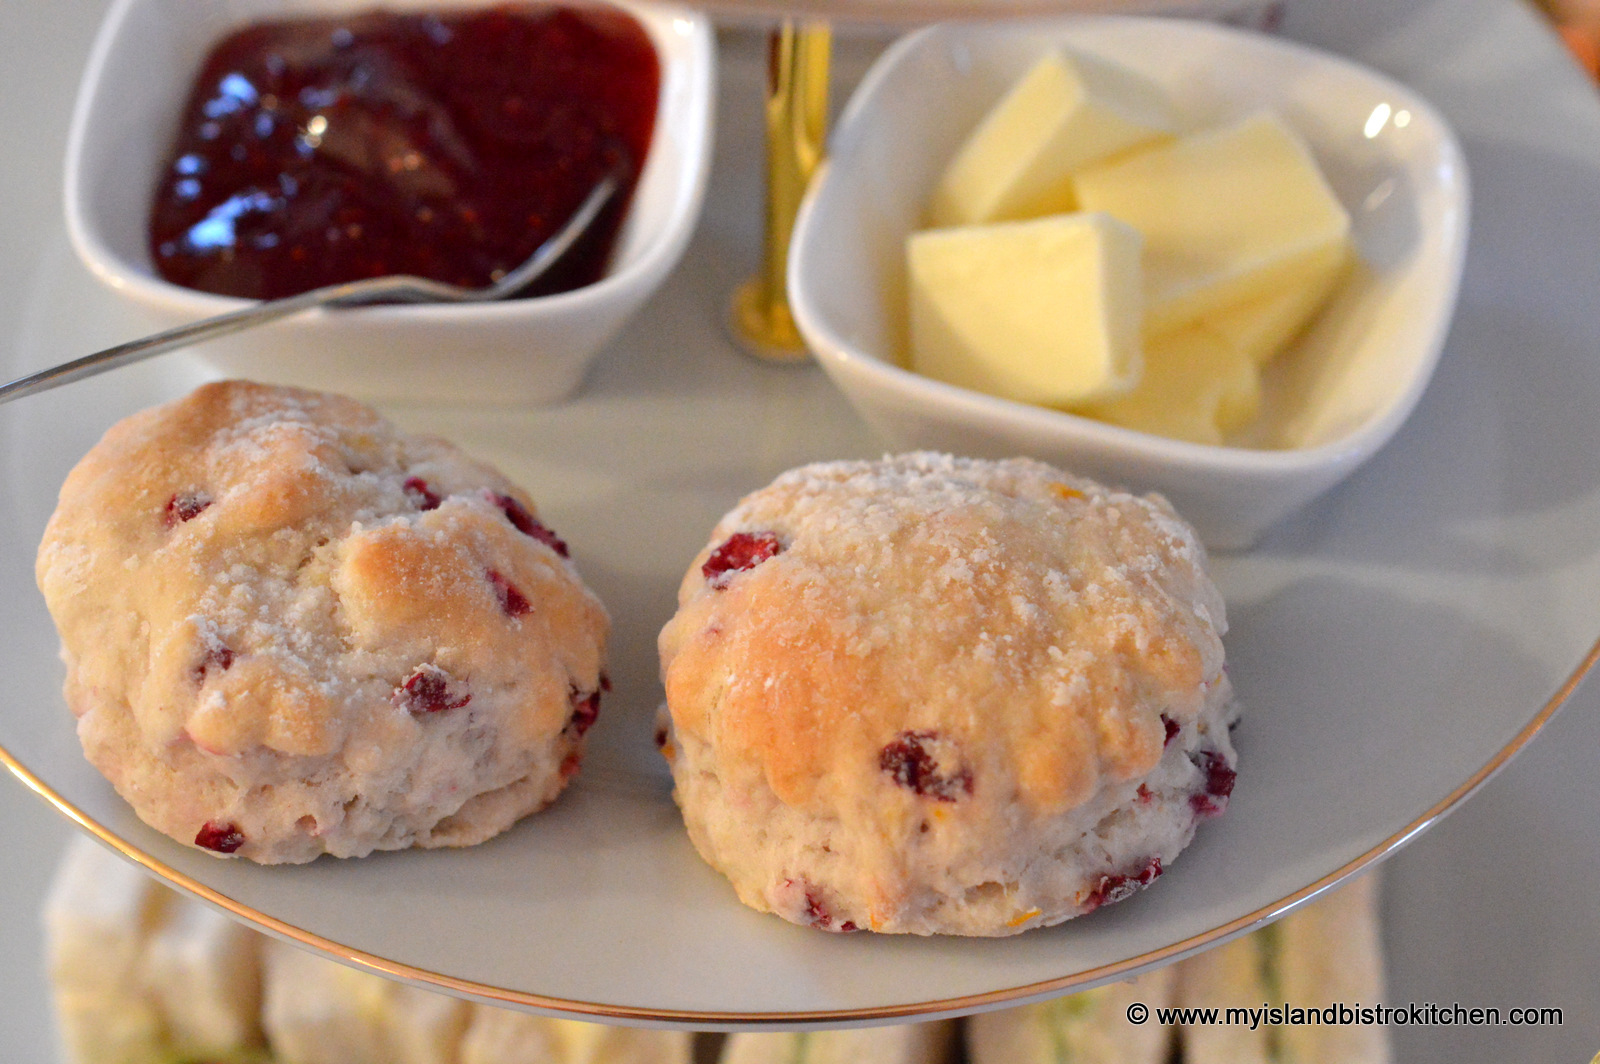
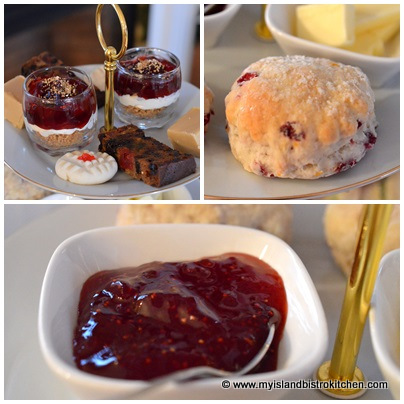
Toothsome cranberry scones in the photo above were enjoyed for the scones course.
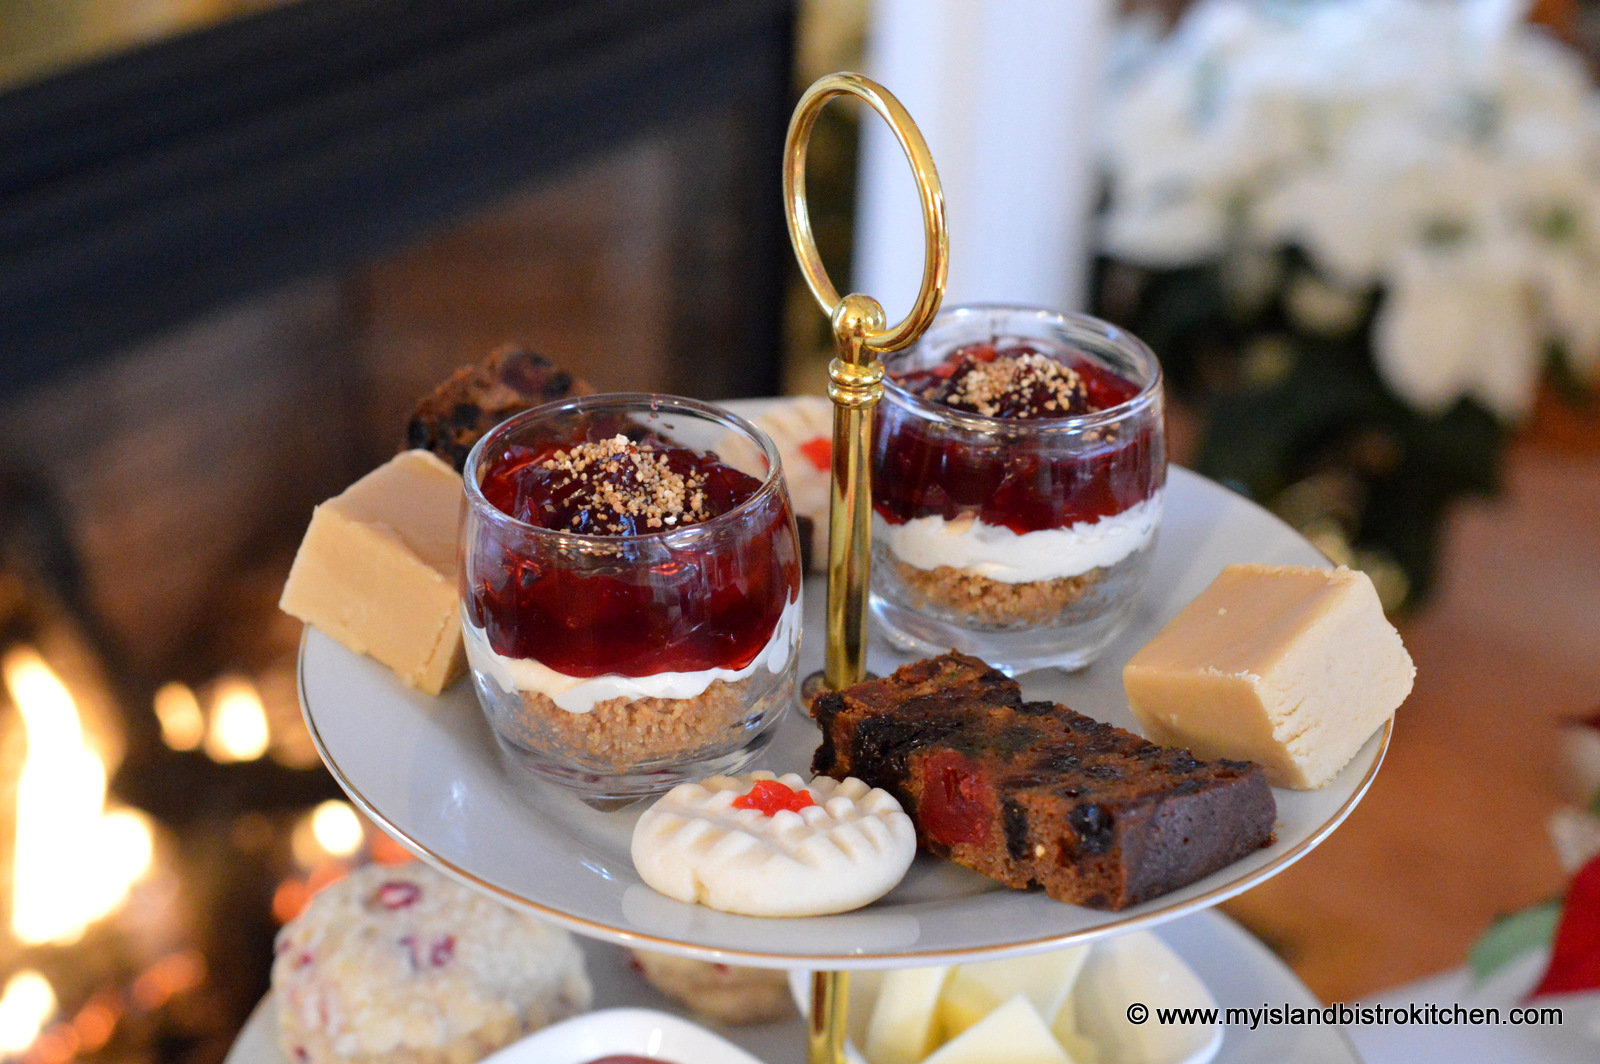
An easy way to get a taste of cherry cheesecake when you only want a couple of servings is to make them individually in tiny glasses.
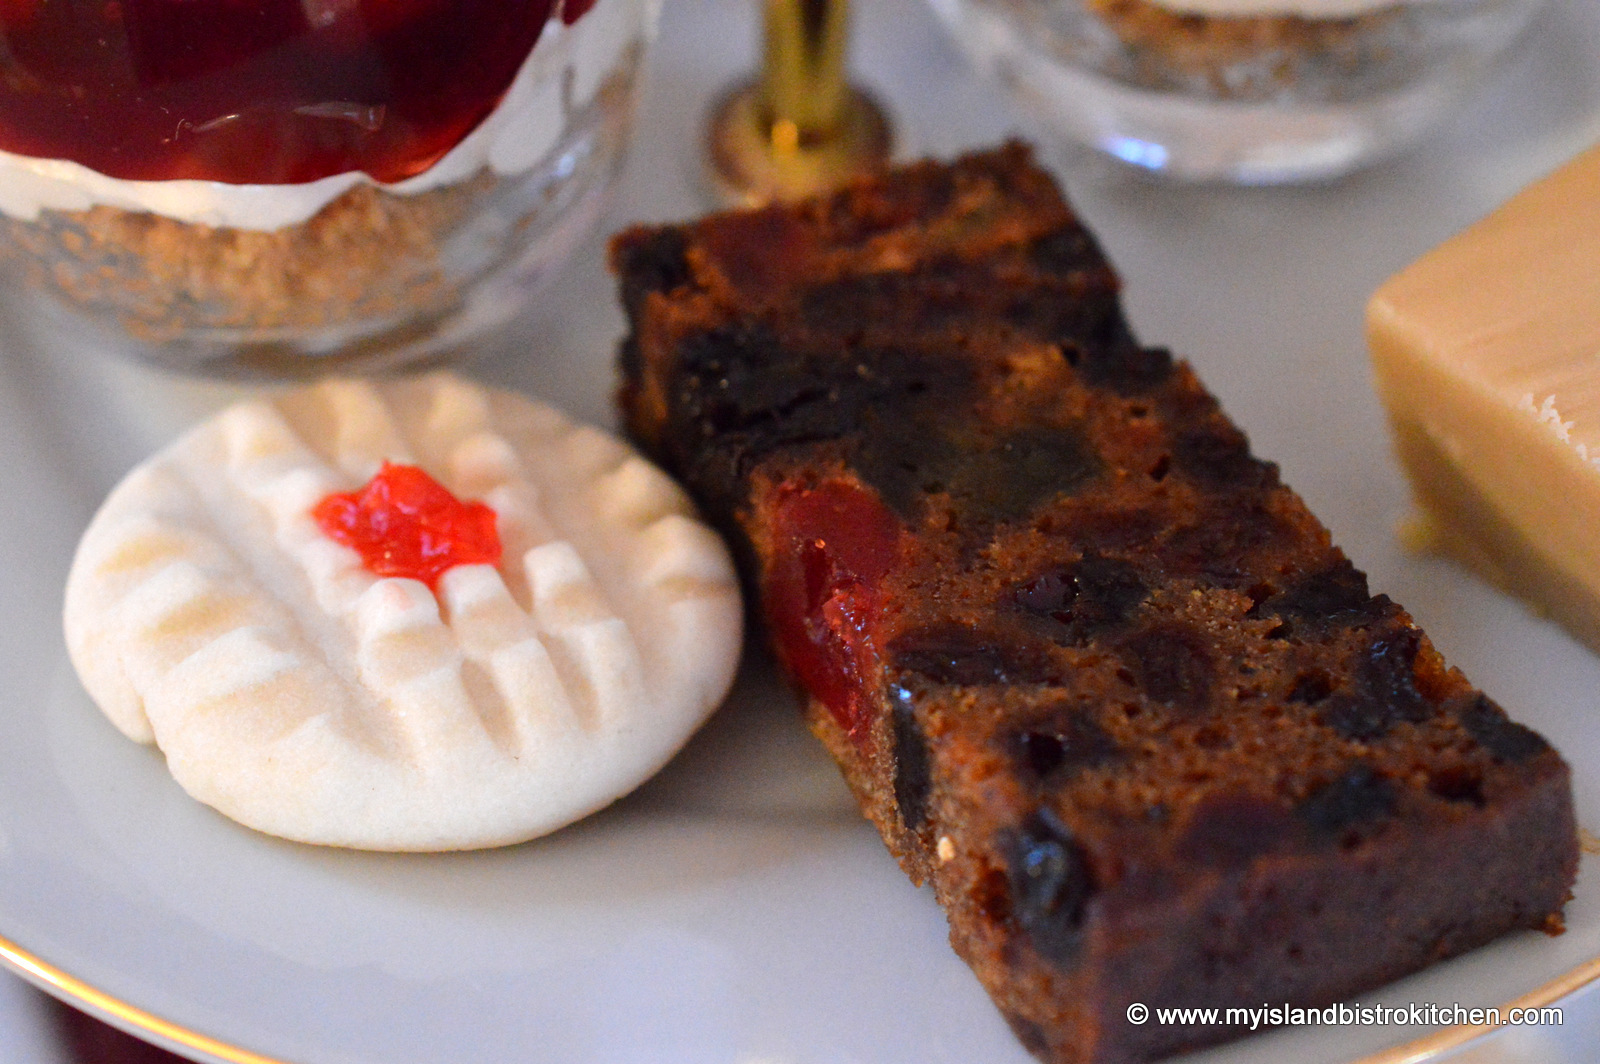
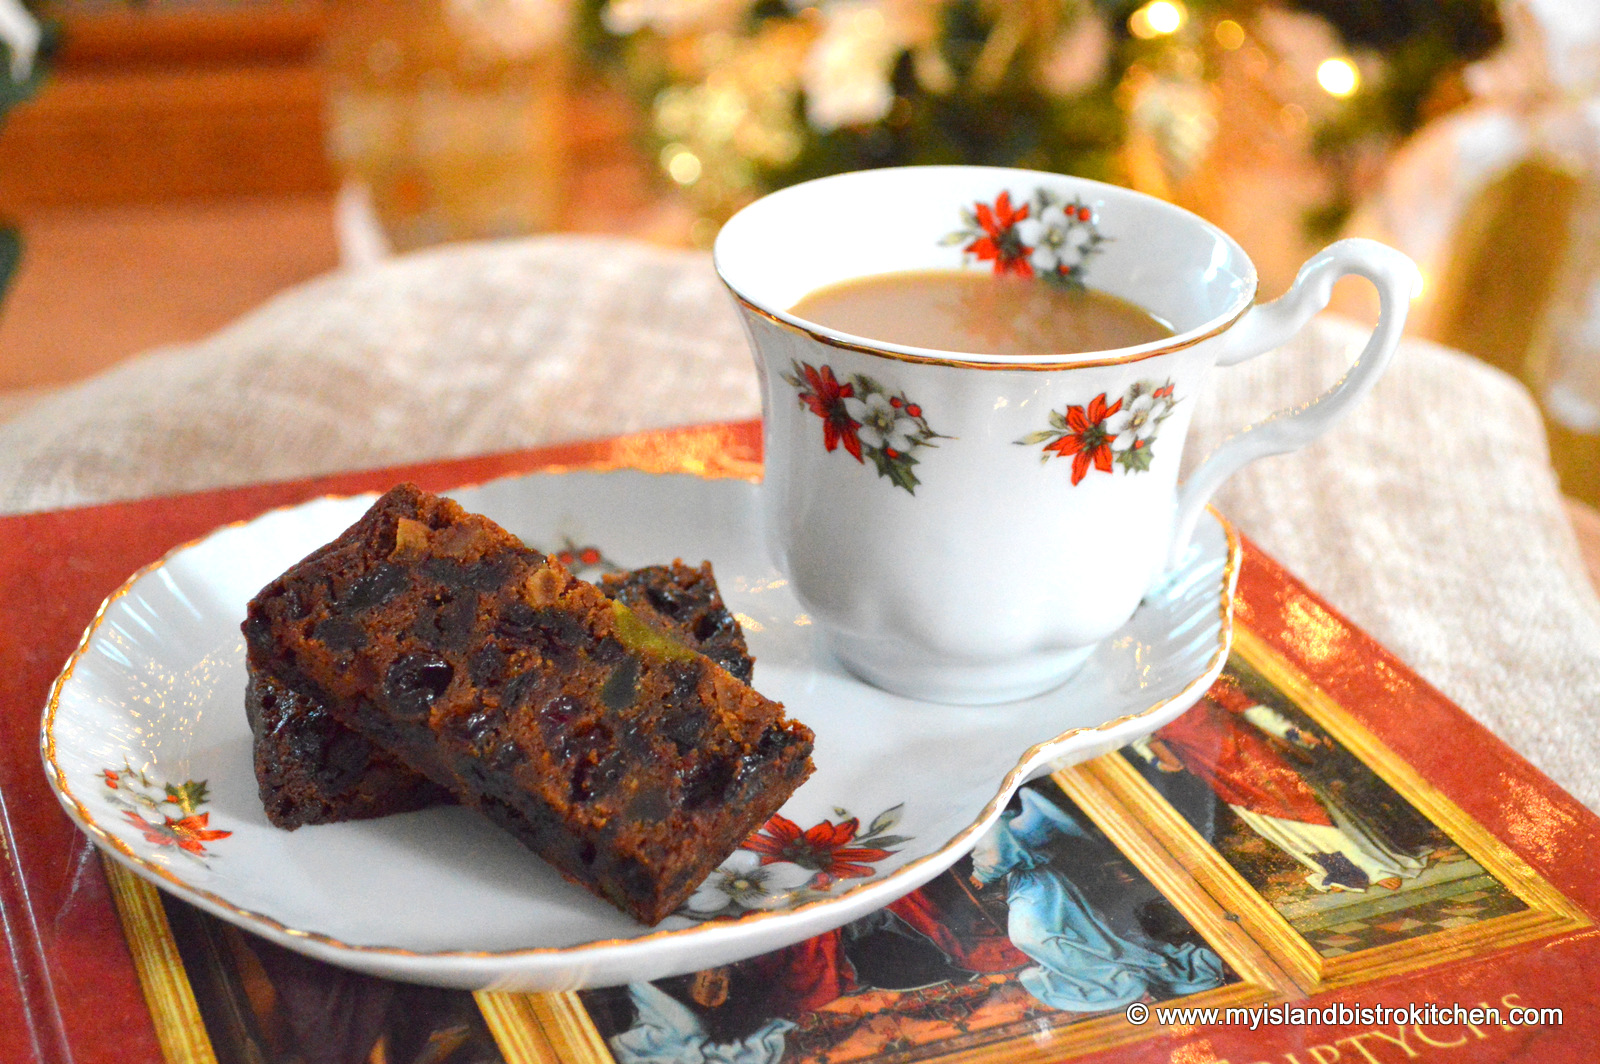
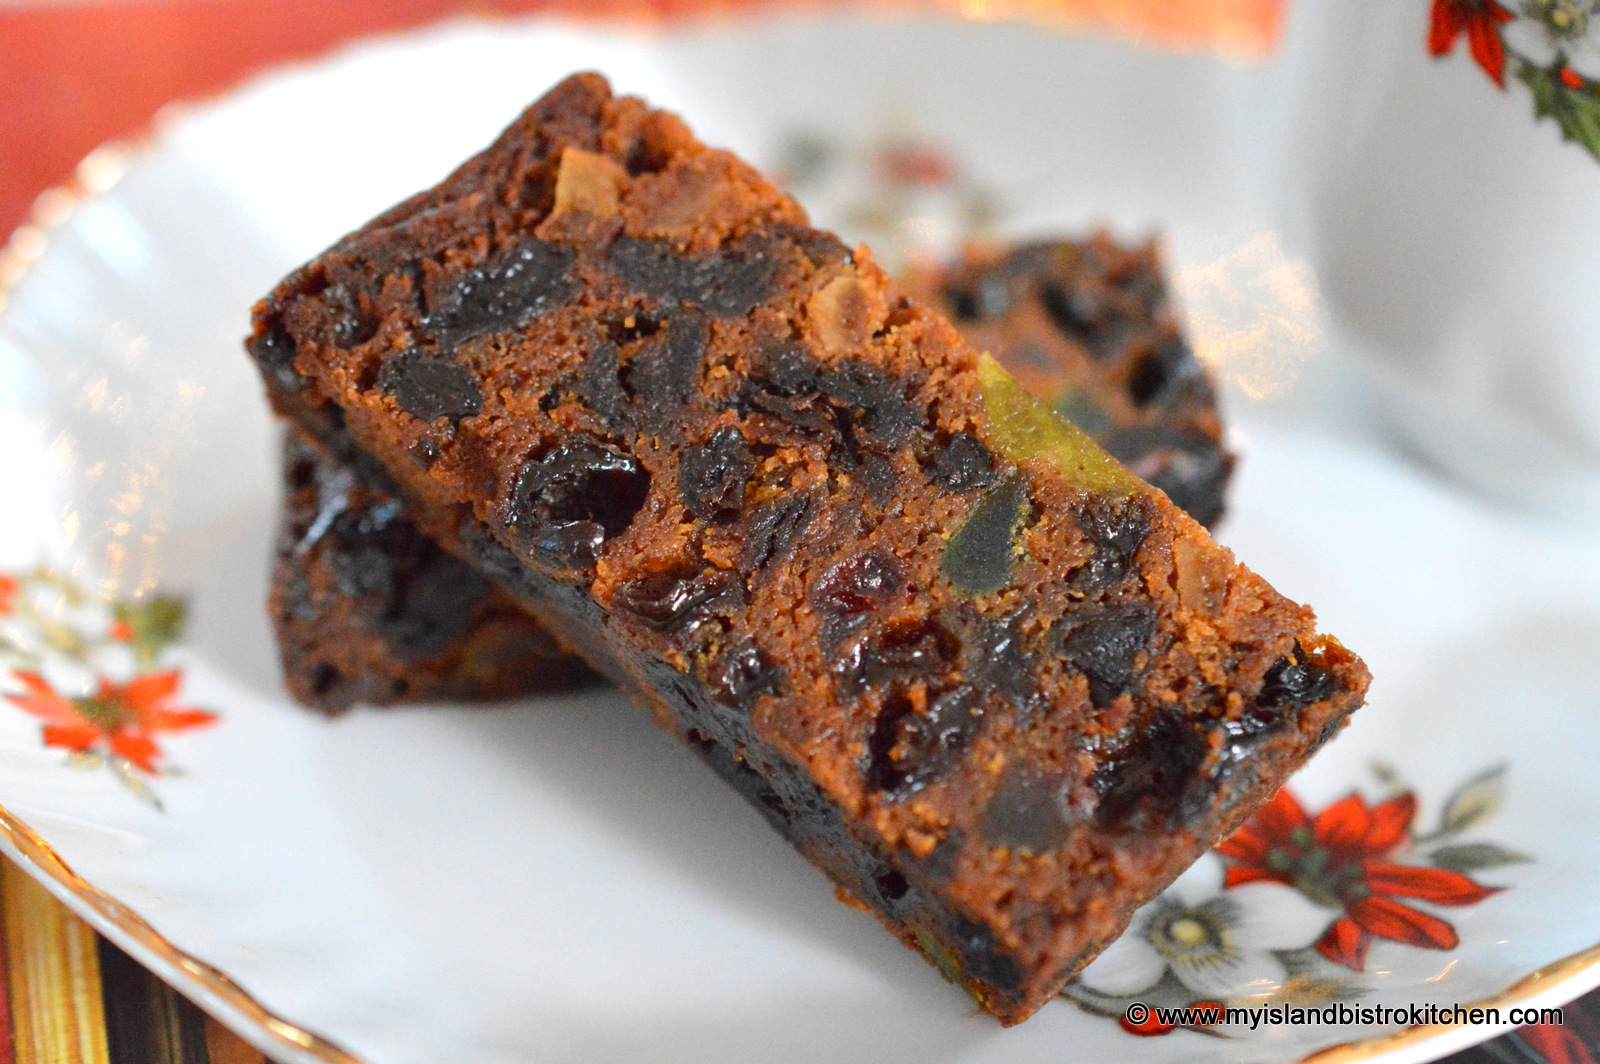
Of course, a traditional tea tray would include fruitcake. This is my own recipe which I developed and shared earlier and you can find it by clicking here.
Here is the menu for the tea.
~ Eggnog with a sprinkle of Nutmeg ~
~ Selection of Tea Sandwiches ~
Egg Salad
Sliced Turkey with Cranberry Mayonnaise
Cucumber with Herbed Cream Cheese
Pinwheel Spinach Wraps with Cream Cheese, Fig Goat Cheese, Sliced Turkey, Green Onions and Dried Cranberries
~ Scones ~
– Cranberry Scones served with Butter and Homemade Strawberry Jam ~
~ Sweets ~
My Island Bistro Kitchen’s Dark Fruitcake
Melting Moments
Miniature Cherry Cheesecake
Brown Sugar Fudge
~ Tea Selection ~
Kenyan Tinderet (David’s Tea)
I hope you have enjoyed a glimpse into my Christmas afternoon tea.
My best wishes to you and yours for a wonderful Christmas season.
——————————–
Thank you for visiting “the Bistro” today. There are lots of ways to connect with “the Bistro” through social media:
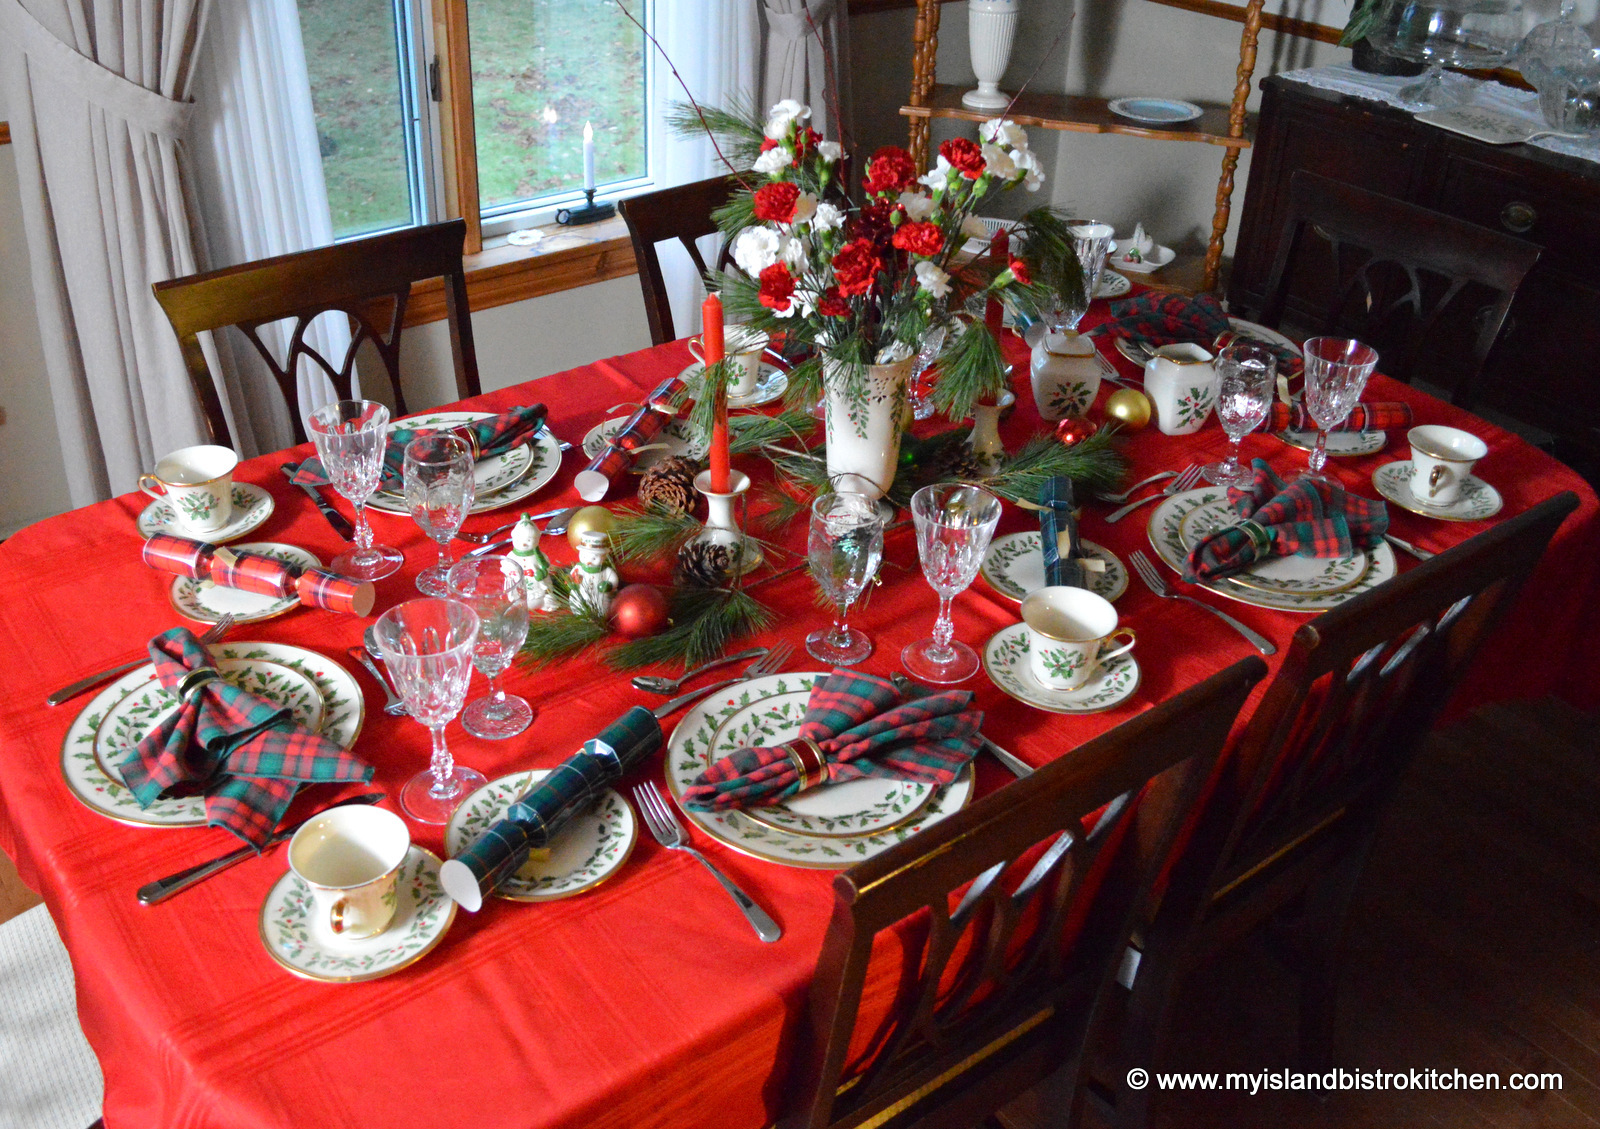
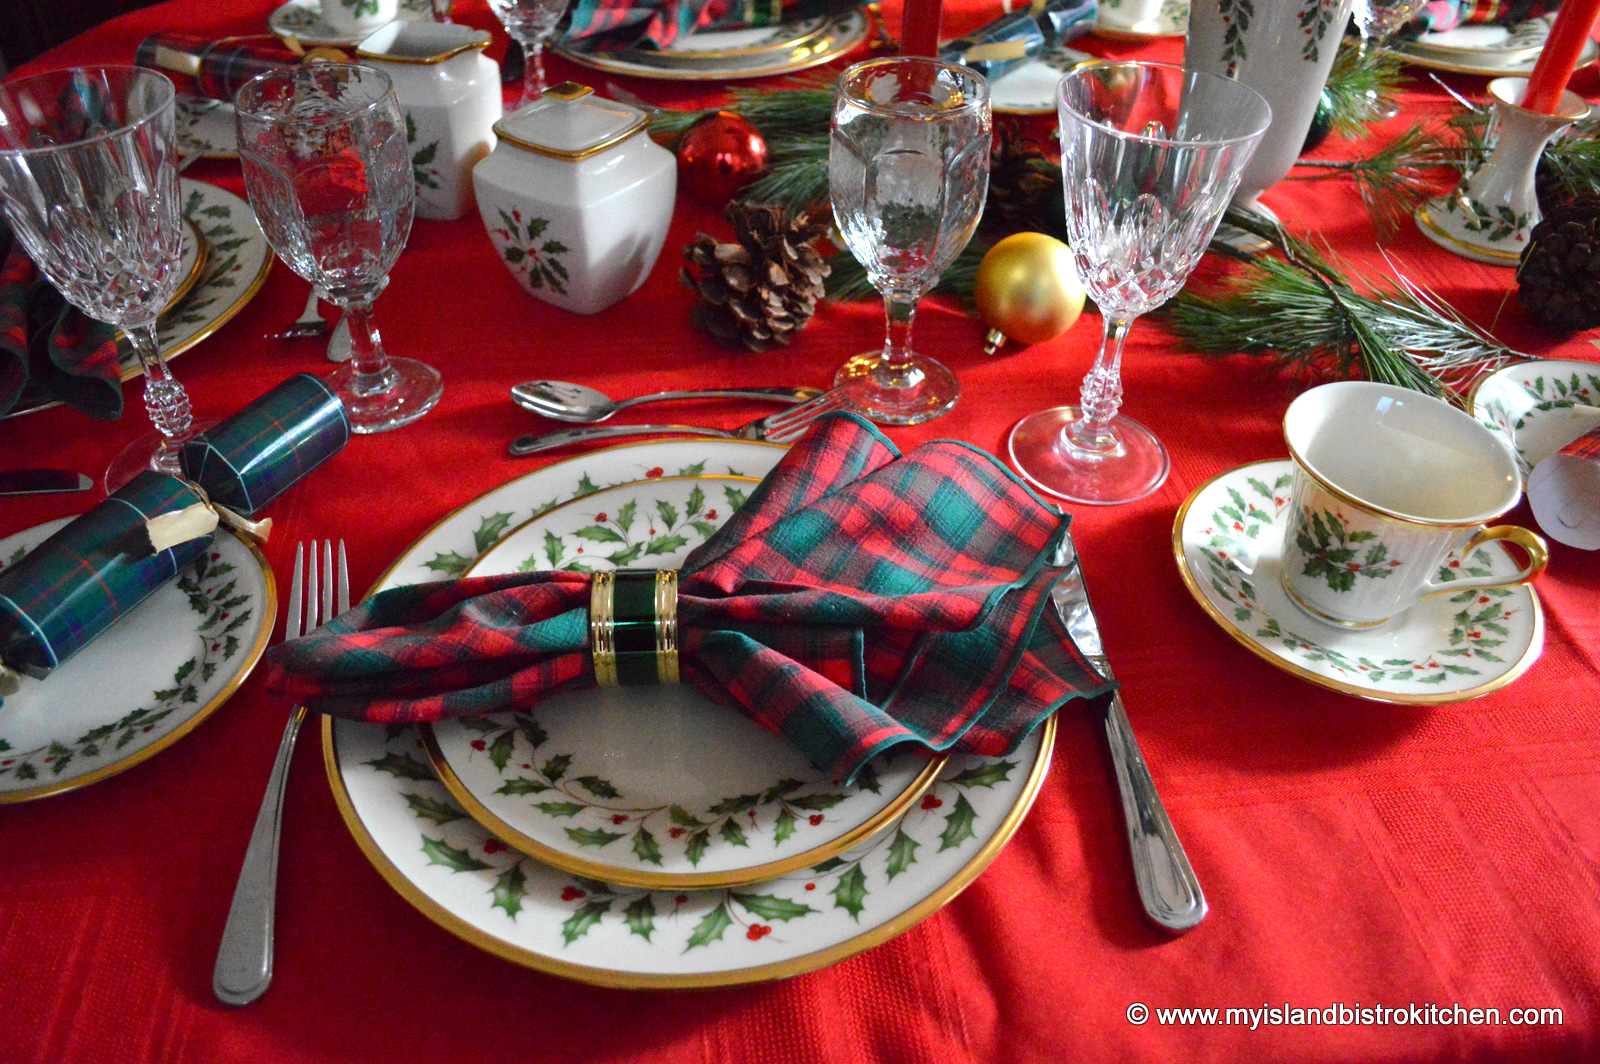
I love Christmas China but I don’t own it. When a friend discovered my fondness for Christmas China, she graciously offered her wonderful setting for 12 of Lenox’s “Holiday” pattern for a photoshoot for my Tablescapes section here on my food blog. Needless to say, I was thrilled to set her dining room table with six placesettings of this lovely China pattern.
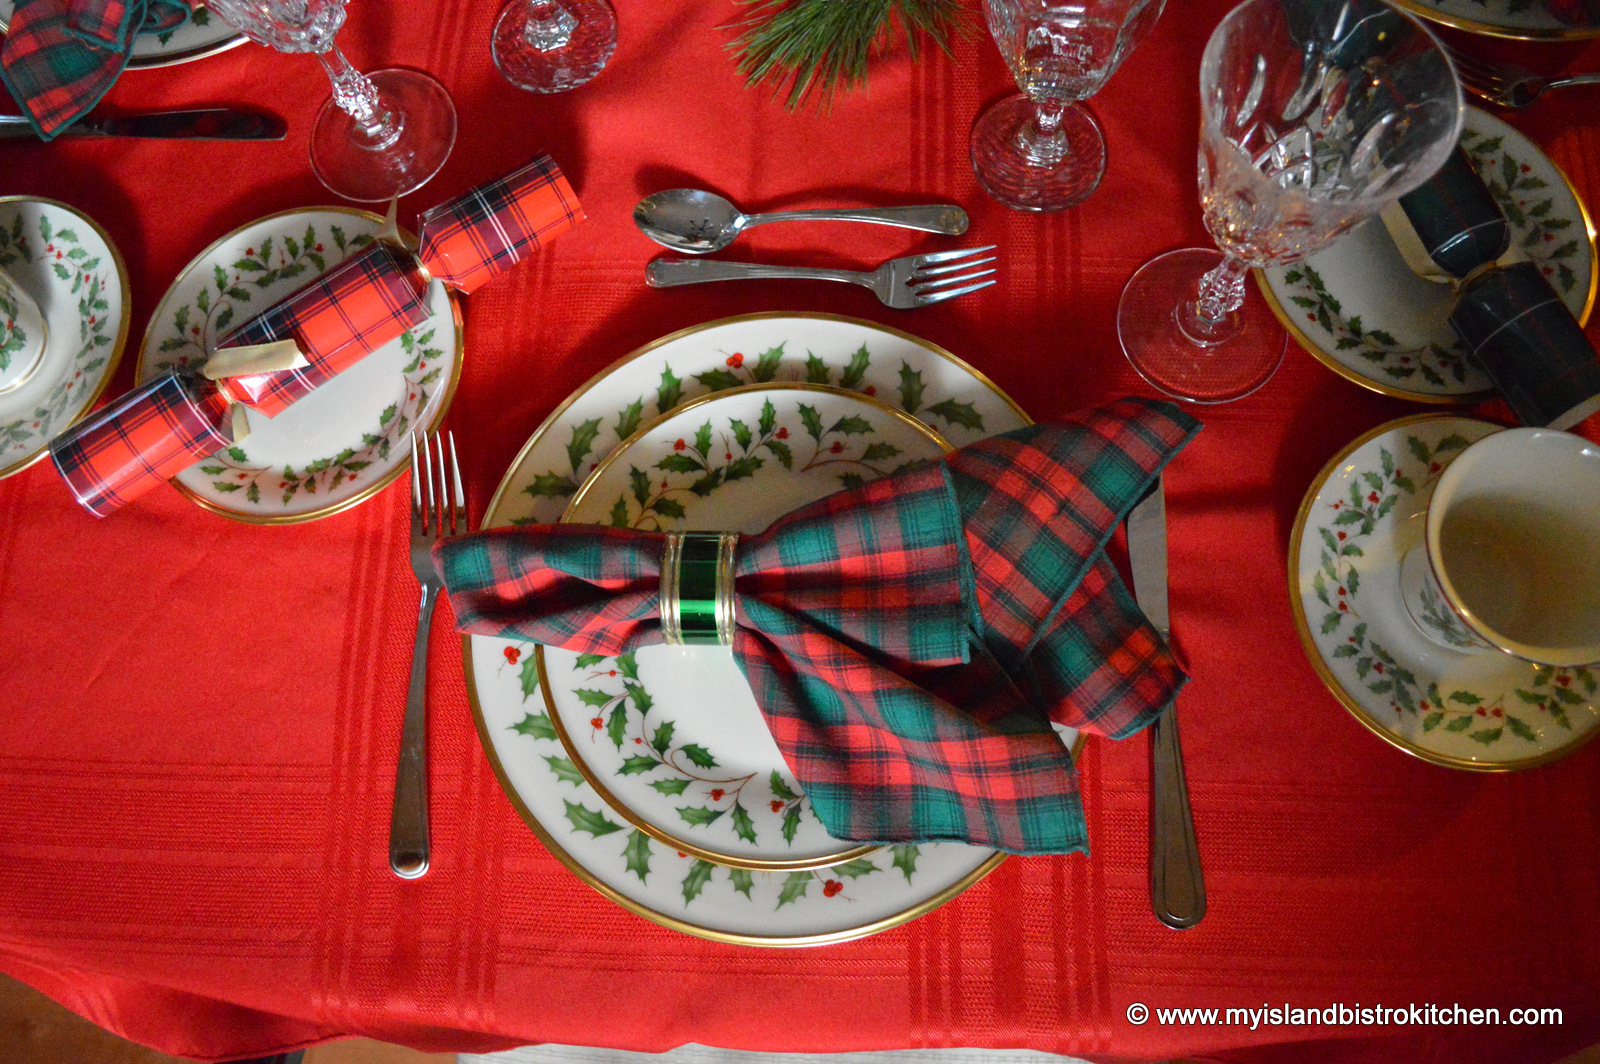
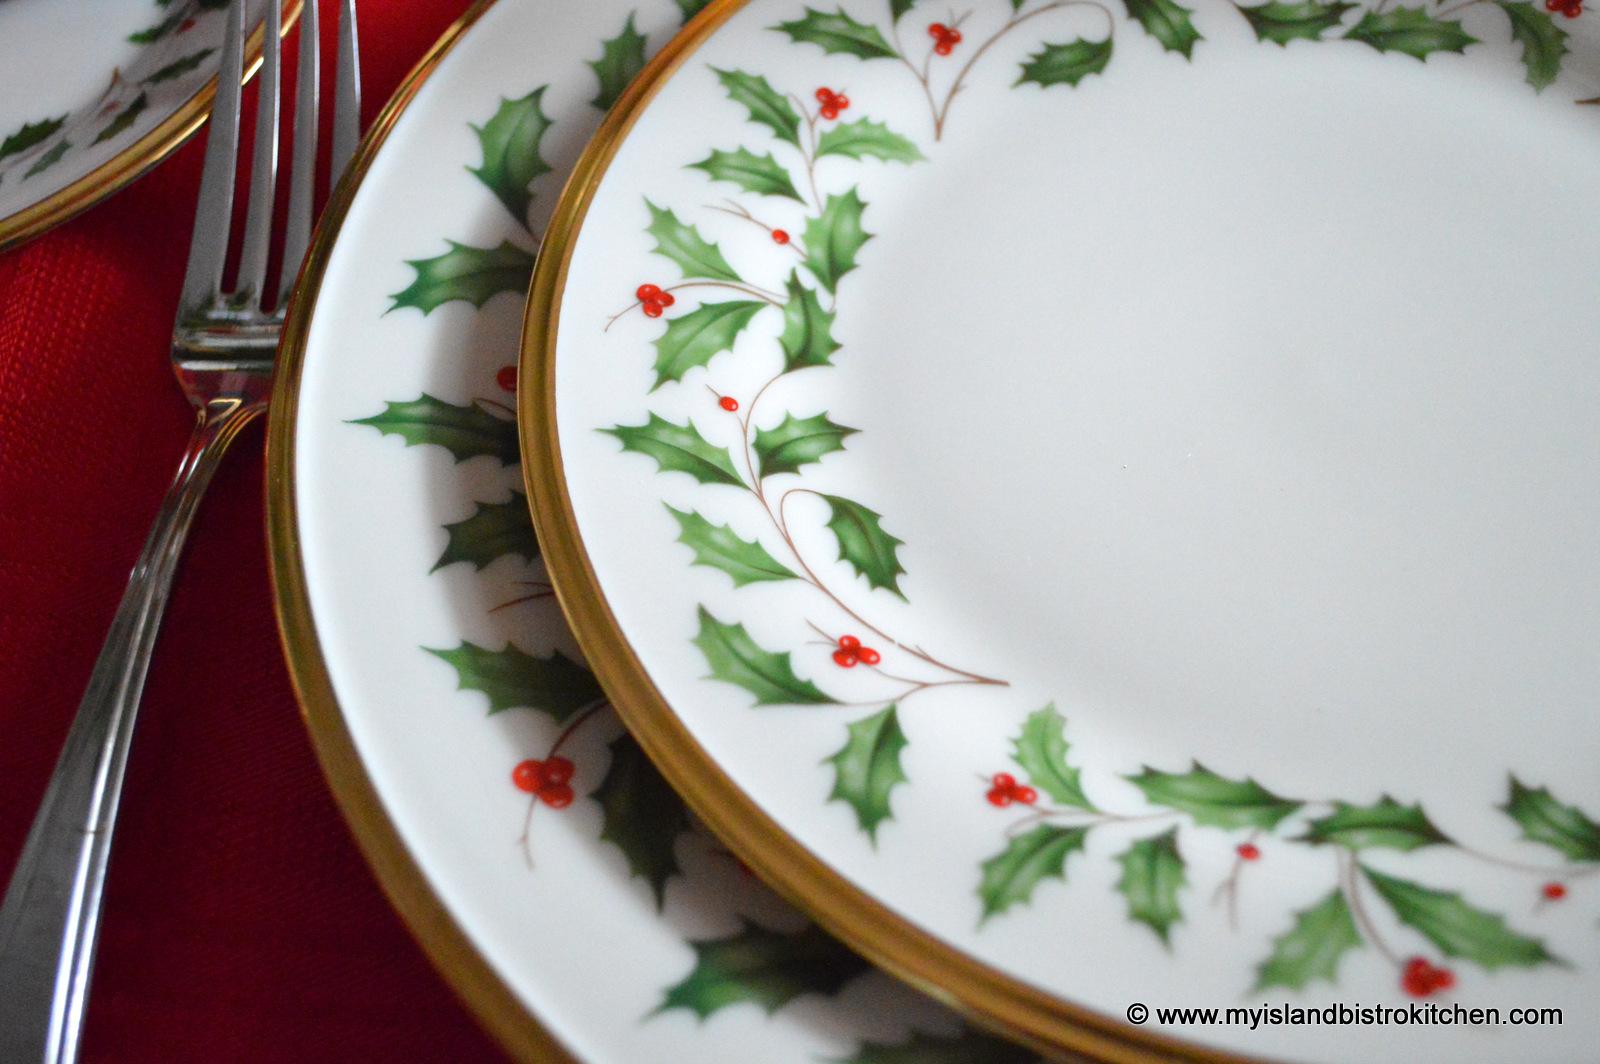
I started with a solid red tablecloth to make the dinnerware pop. It adds a cheerful, vibrant, yet warm look to the table, perfect for a traditional Christmas dinner.
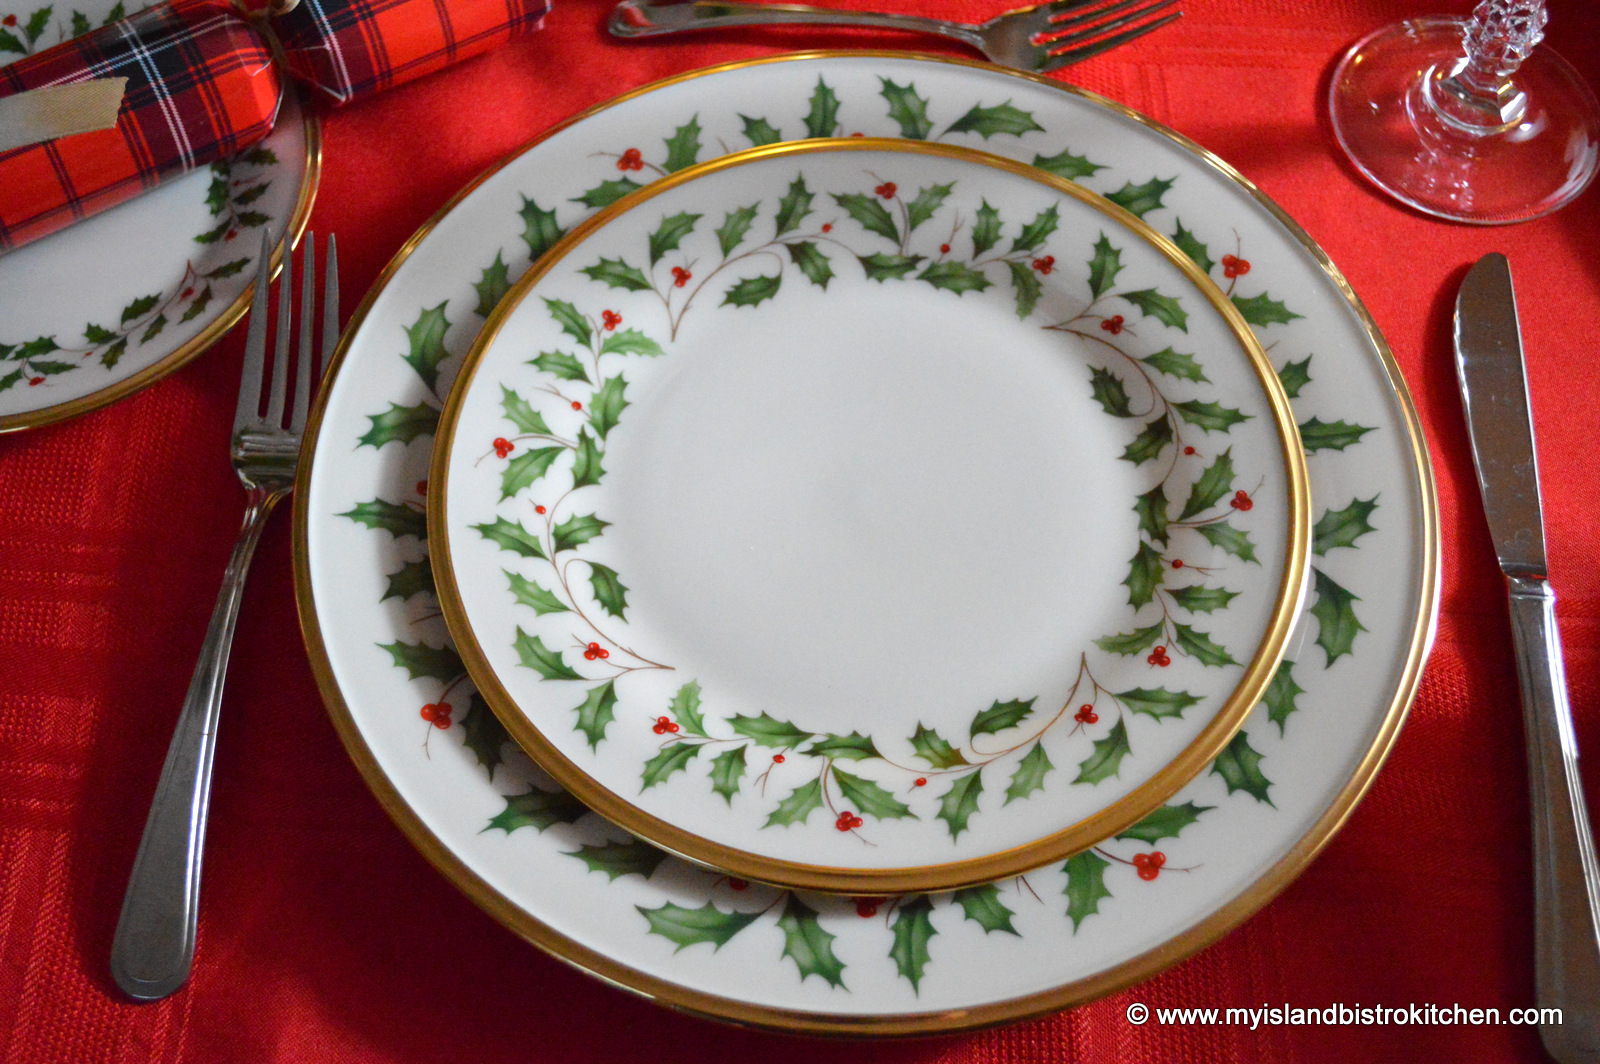
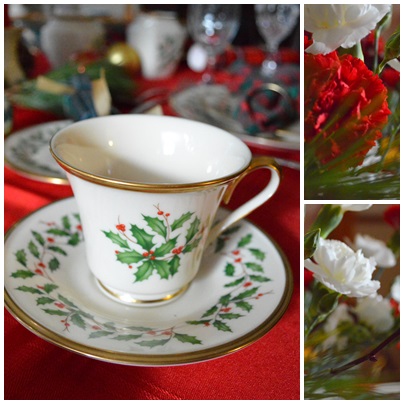
The China pattern is mostly soft white with a pattern of green holly leaves and red berries. Here’s a close-up of the pattern which is trimmed in 24-karat gold:
Lenox “Holiday” Pattern
And, for those who would like a closer view of the pattern, here it is:
The owner has the completer set to complement the dishes and has many other pieces as well, too many to use in one photoshoot!
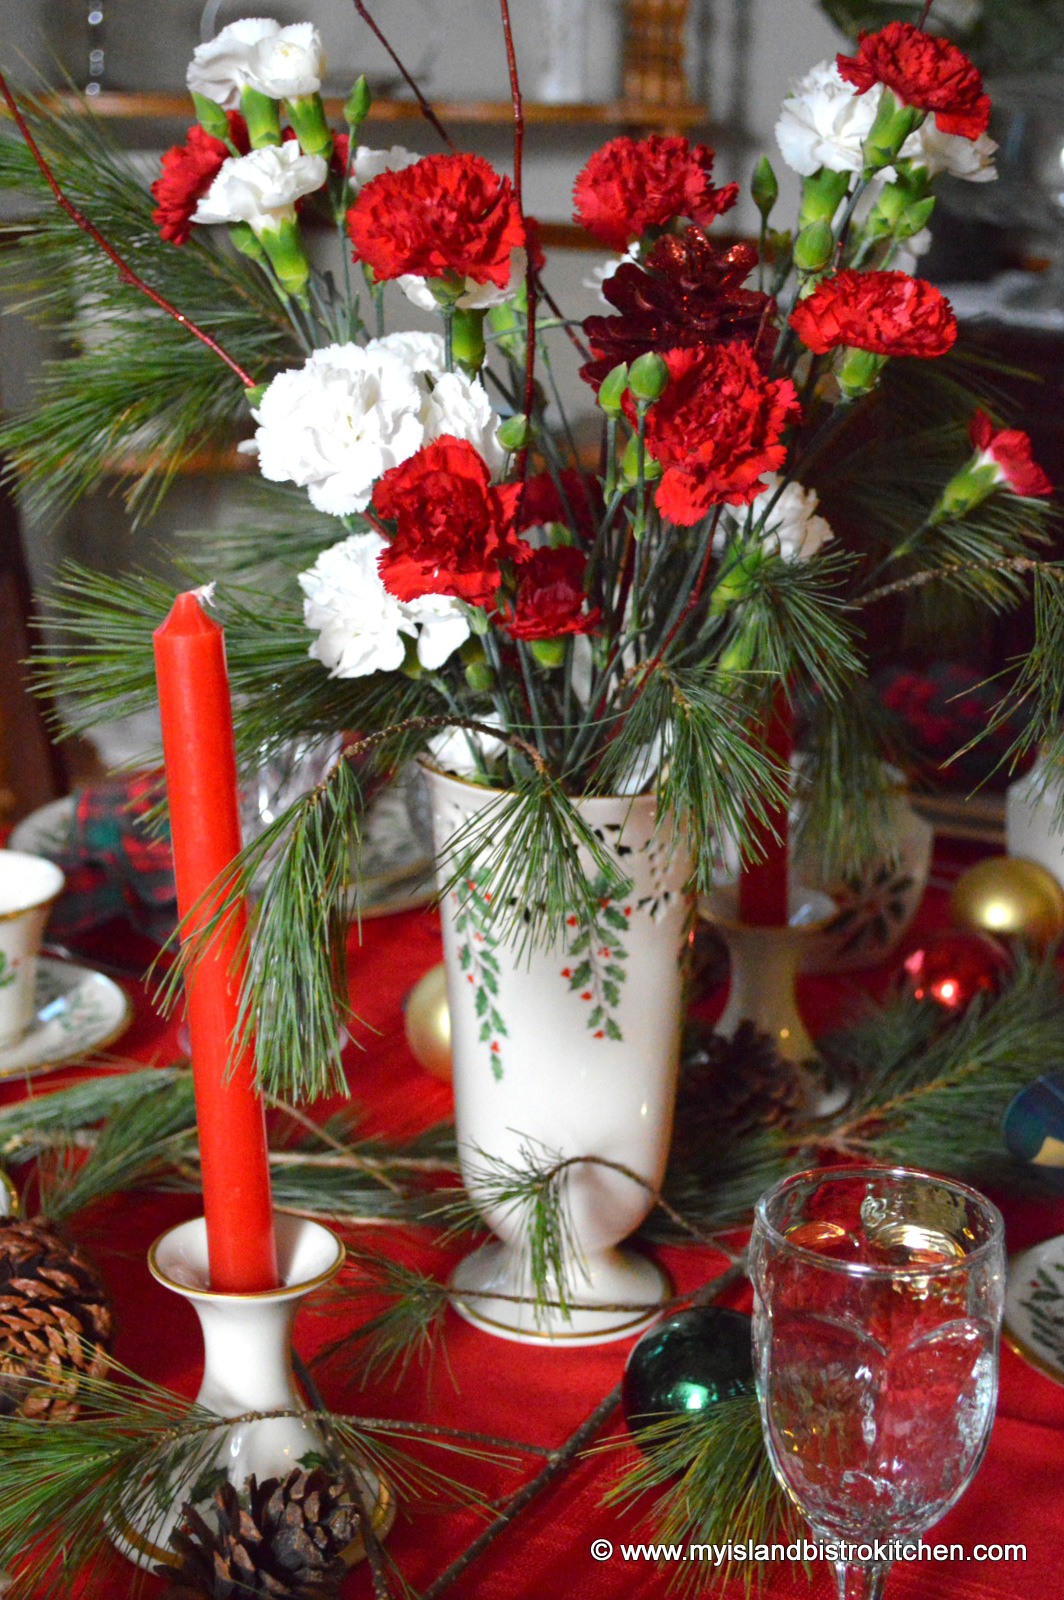
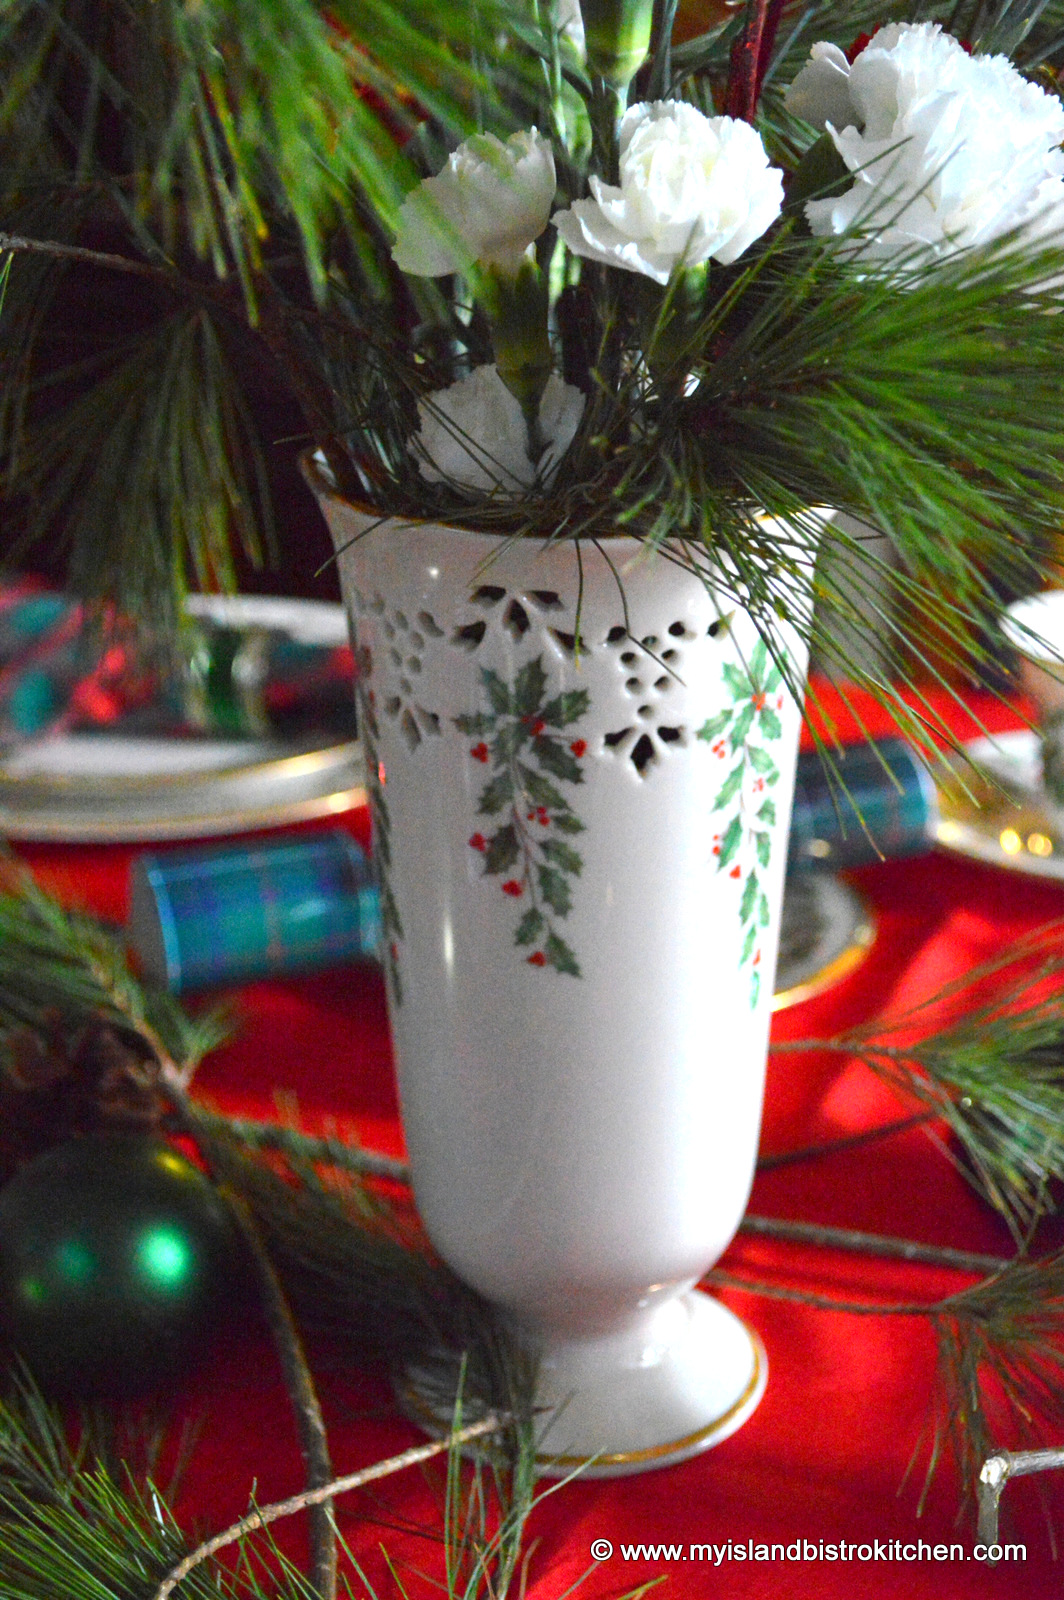
When I discovered she had the lovely vase and matching candlesticks in the “Holiday” pattern, I knew they had to be the centerpiece for the table.
Take a look at the beautiful cutwork in the design of the vase.
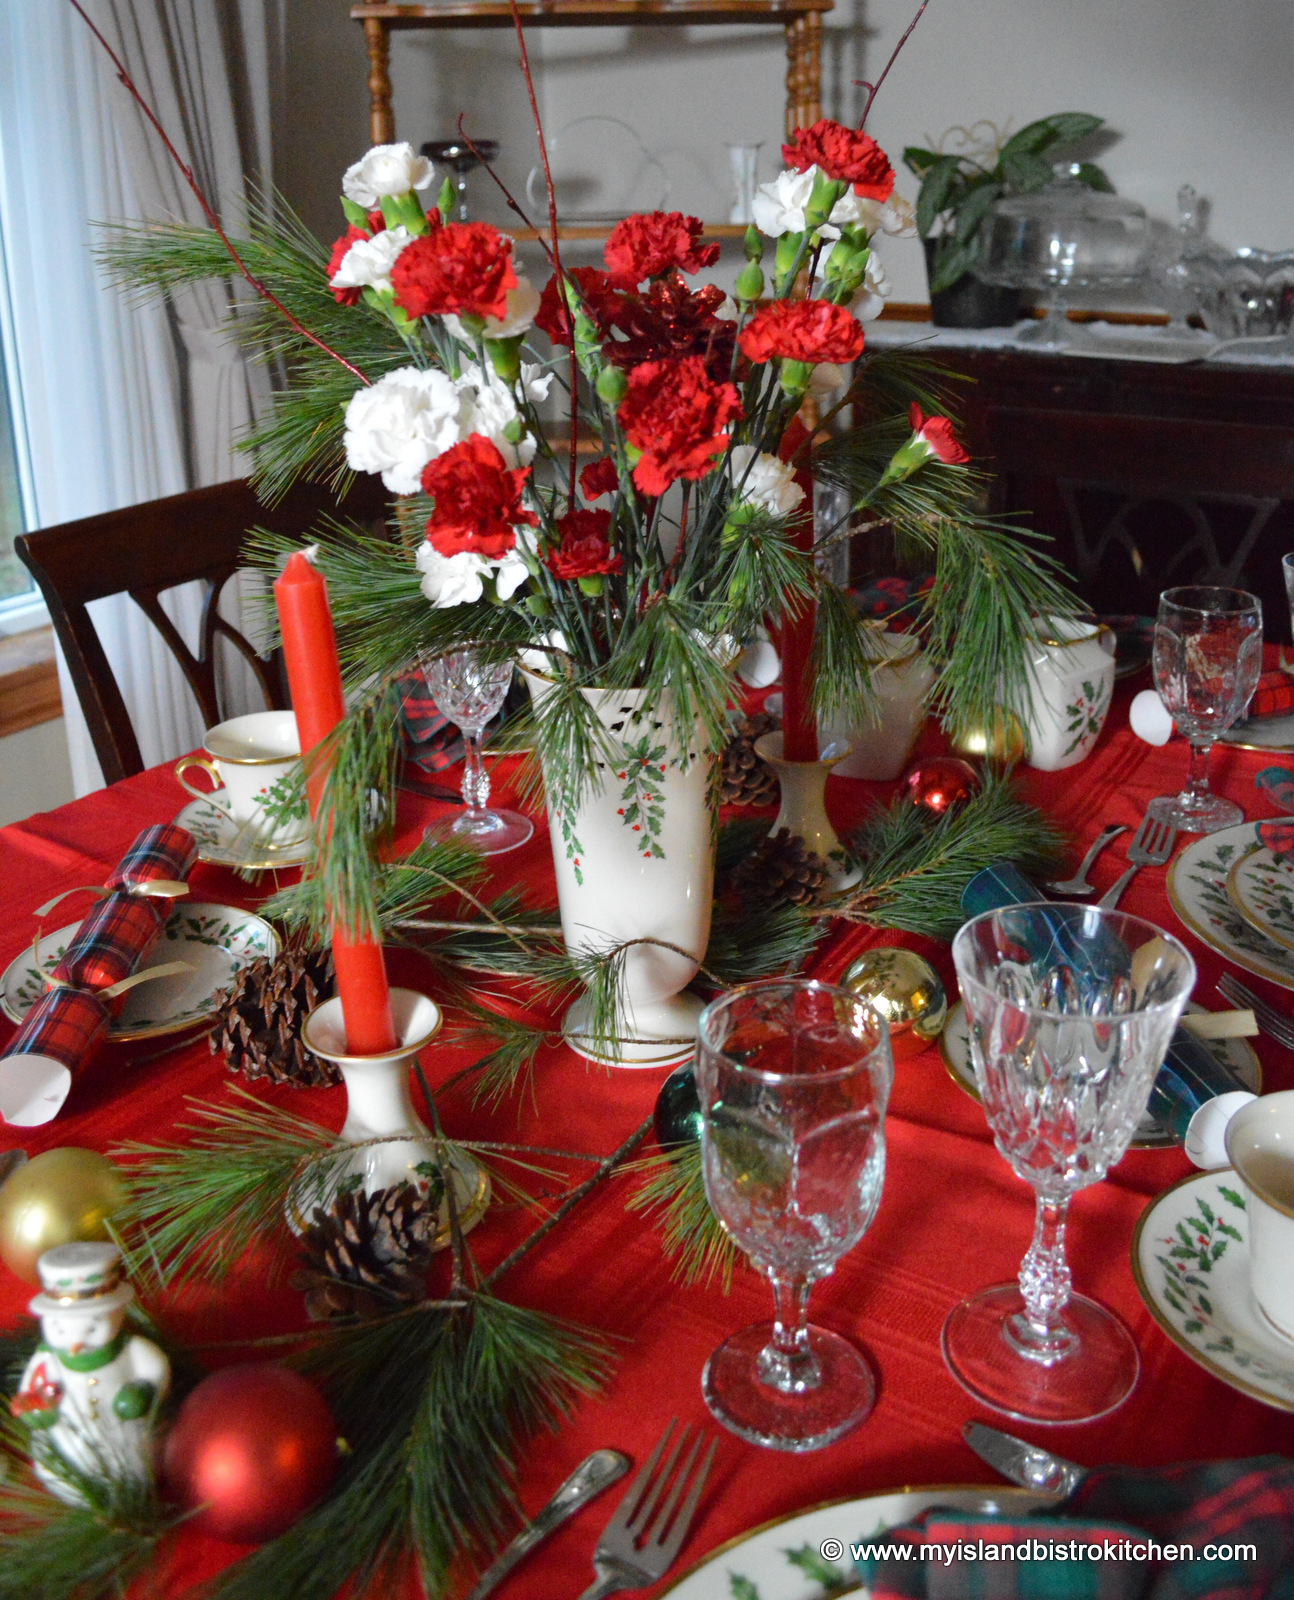
I chose red and white carnations with some fresh pine and red tapers to match the colors in the China pattern. To draw the eye to either end of the table, I simply trailed some fresh pine down the center of the table and added some pine cones and red, green, and gold balls to tie the look together.
I used the owner’s green and red plaid napkins. Plaid always gives such a nice warm feeling. Matching green napkin rings complete the look.
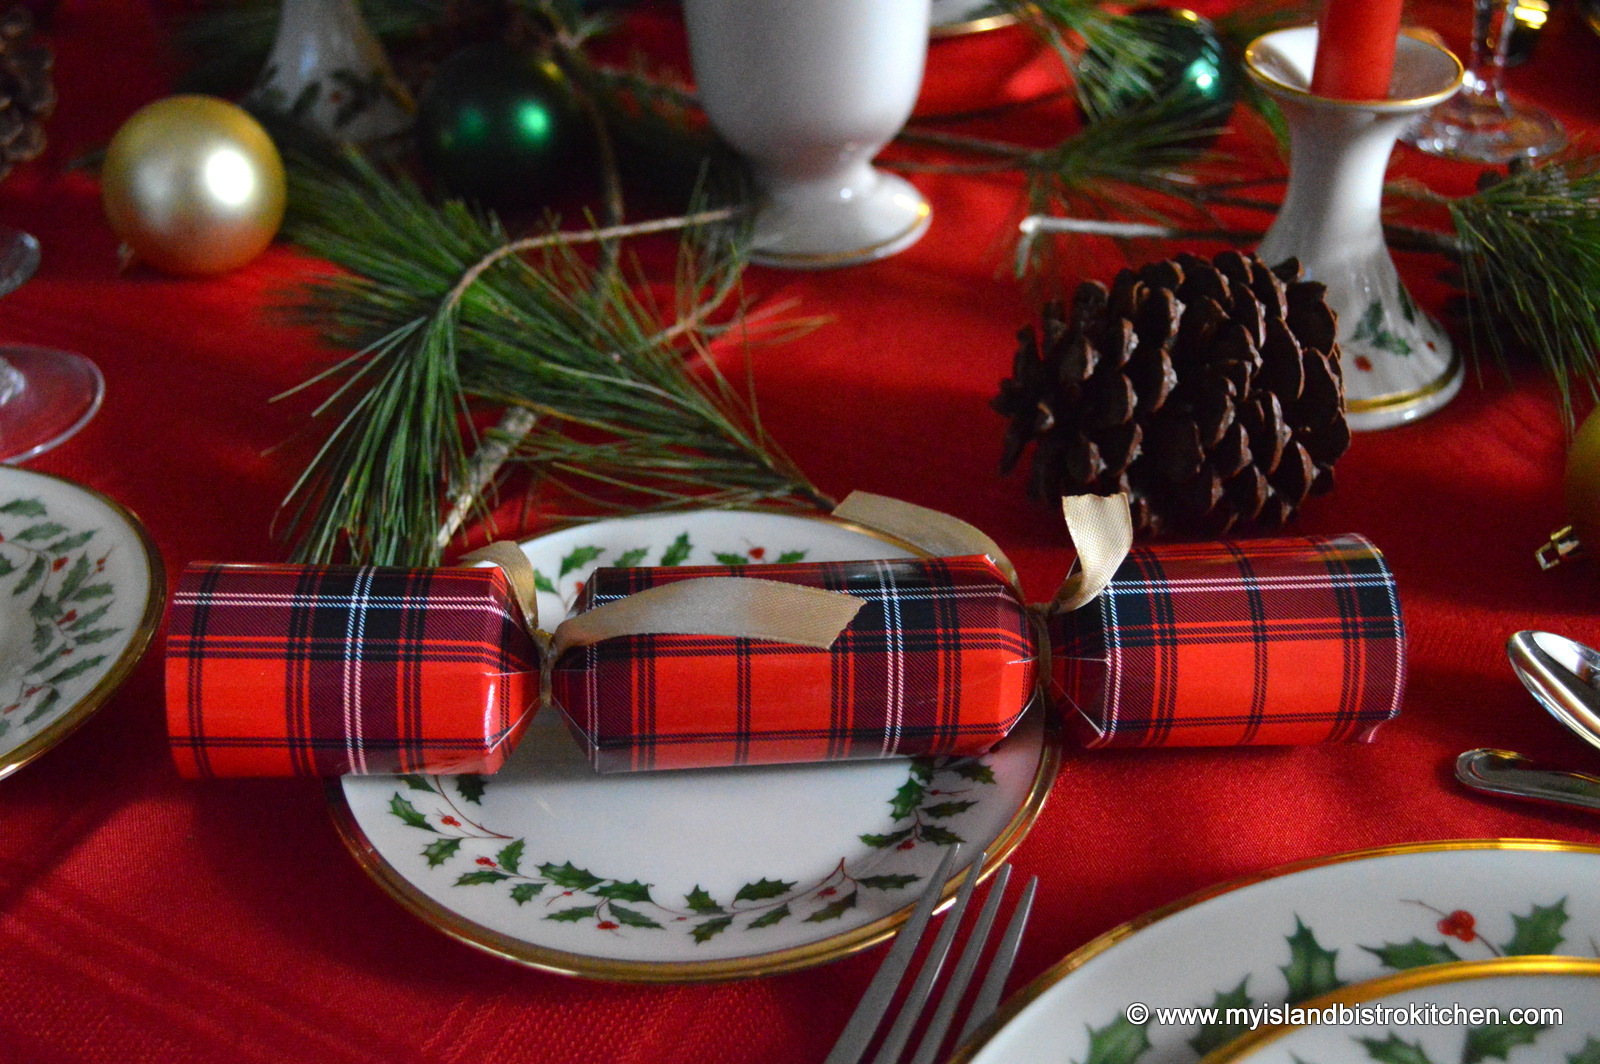
Plaid Christmas crackers add a fun and festive flair to the setting.
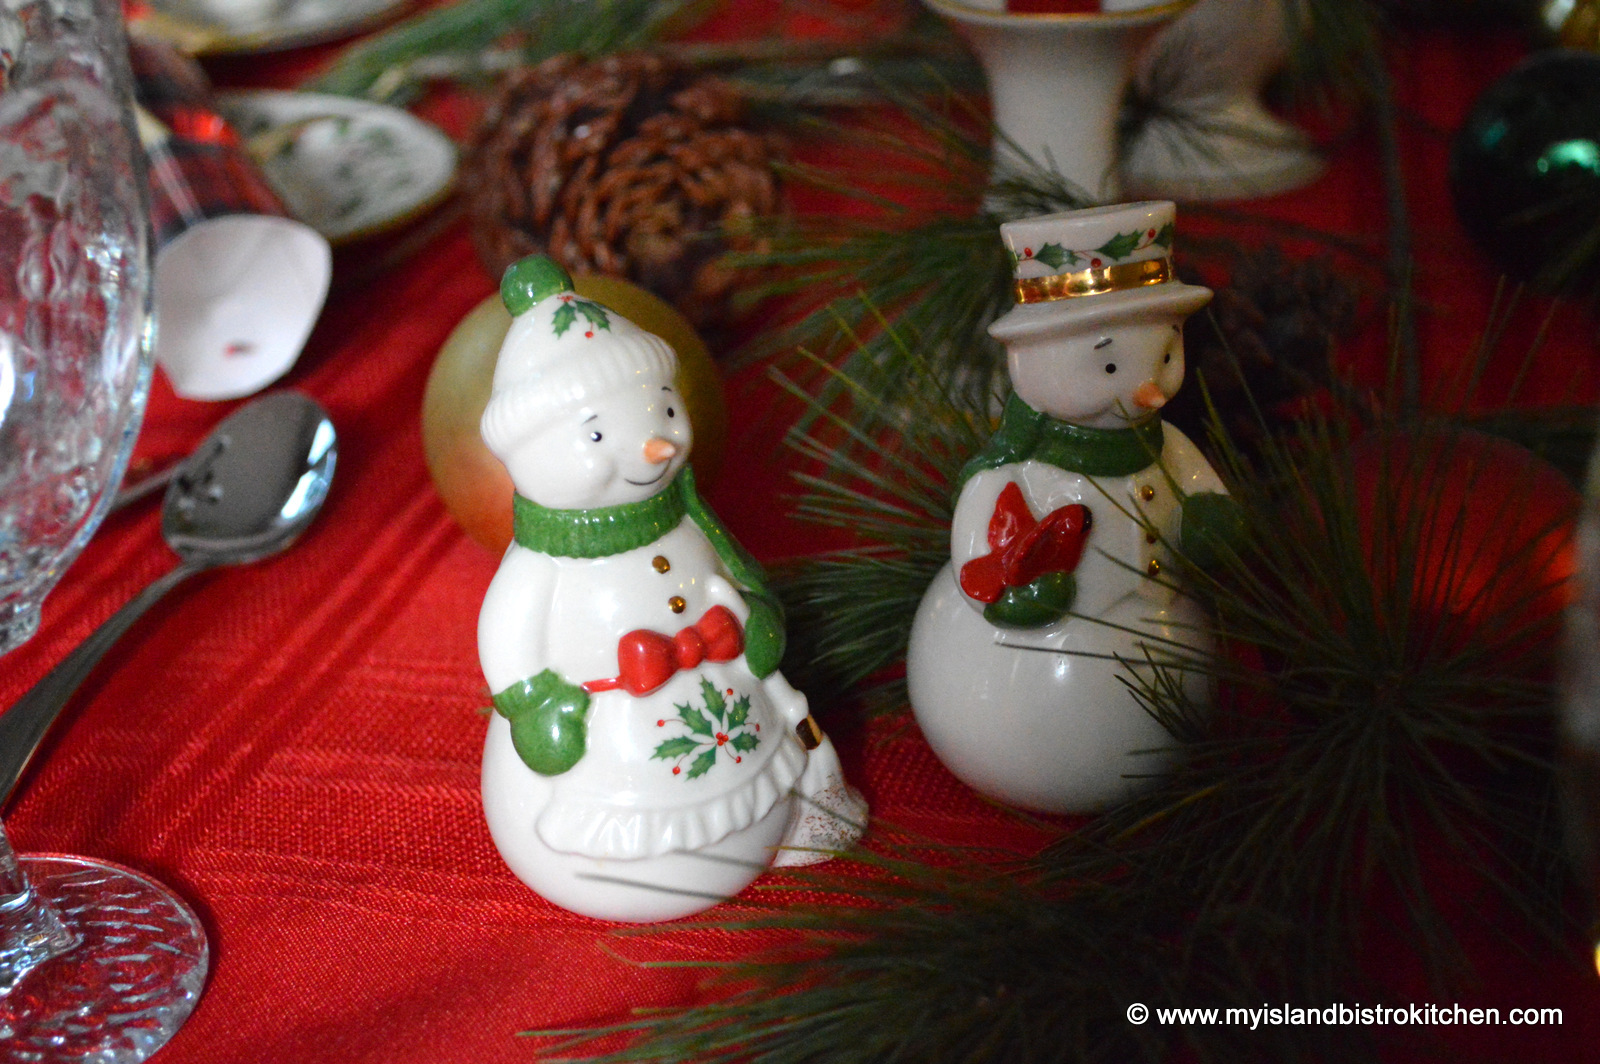
The little salt and pepper shakers also bear the “Holiday” pattern and add a touch of whimsy to the tablescape.
I hope you have enjoyed viewing the tablesetting featuring the beautiful Lenox “Holiday” pattern. My thanks to the owner for giving me the privilege of setting a holiday table with this beautiful China.
If you live on Prince Edward Island, where I live, and have beautiful China – Christmas or otherwise, vintage or formal – and would like to share and have it featured in a tablesetting here on my food blog, please don’t hesitate to get in touch with me to see what we could arrange. Unfortunately, I can’t commit to off-Island photoshoots of tablesettings due to travel logistics.
To view other Christmas and New Year’s Tablesettings, click on the links below:
I love miniature potatoes. They’re fun to work with. They make wonderful hors d’oeuvres, are the perfect size for roasting, and are the ideal size to drop into soups just the way they are without cutting them up.
Through the Food Bloggers of Canada association of which I am a member, an opportunity arose this fall to take little creamer potatoes produced by the Little Potato™ Company of Alberta and create an original recipe using the potatoes. Coming into the Christmas party season, I immediately saw them as potential hors d’oeuvres.
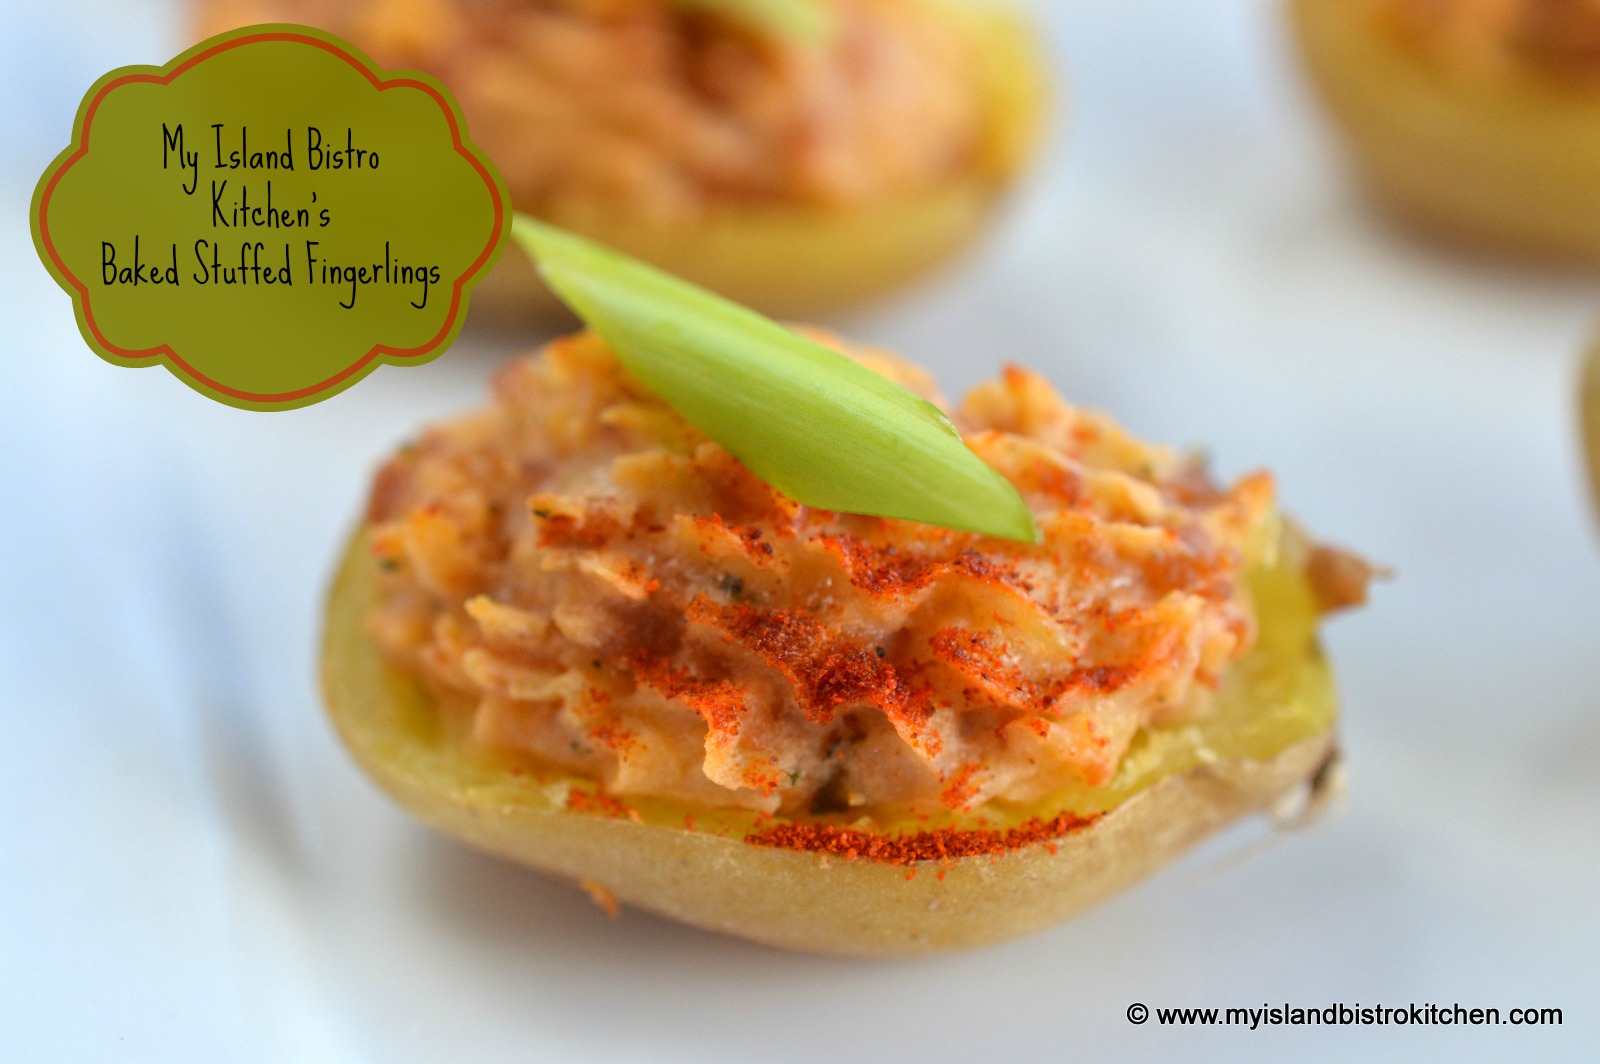
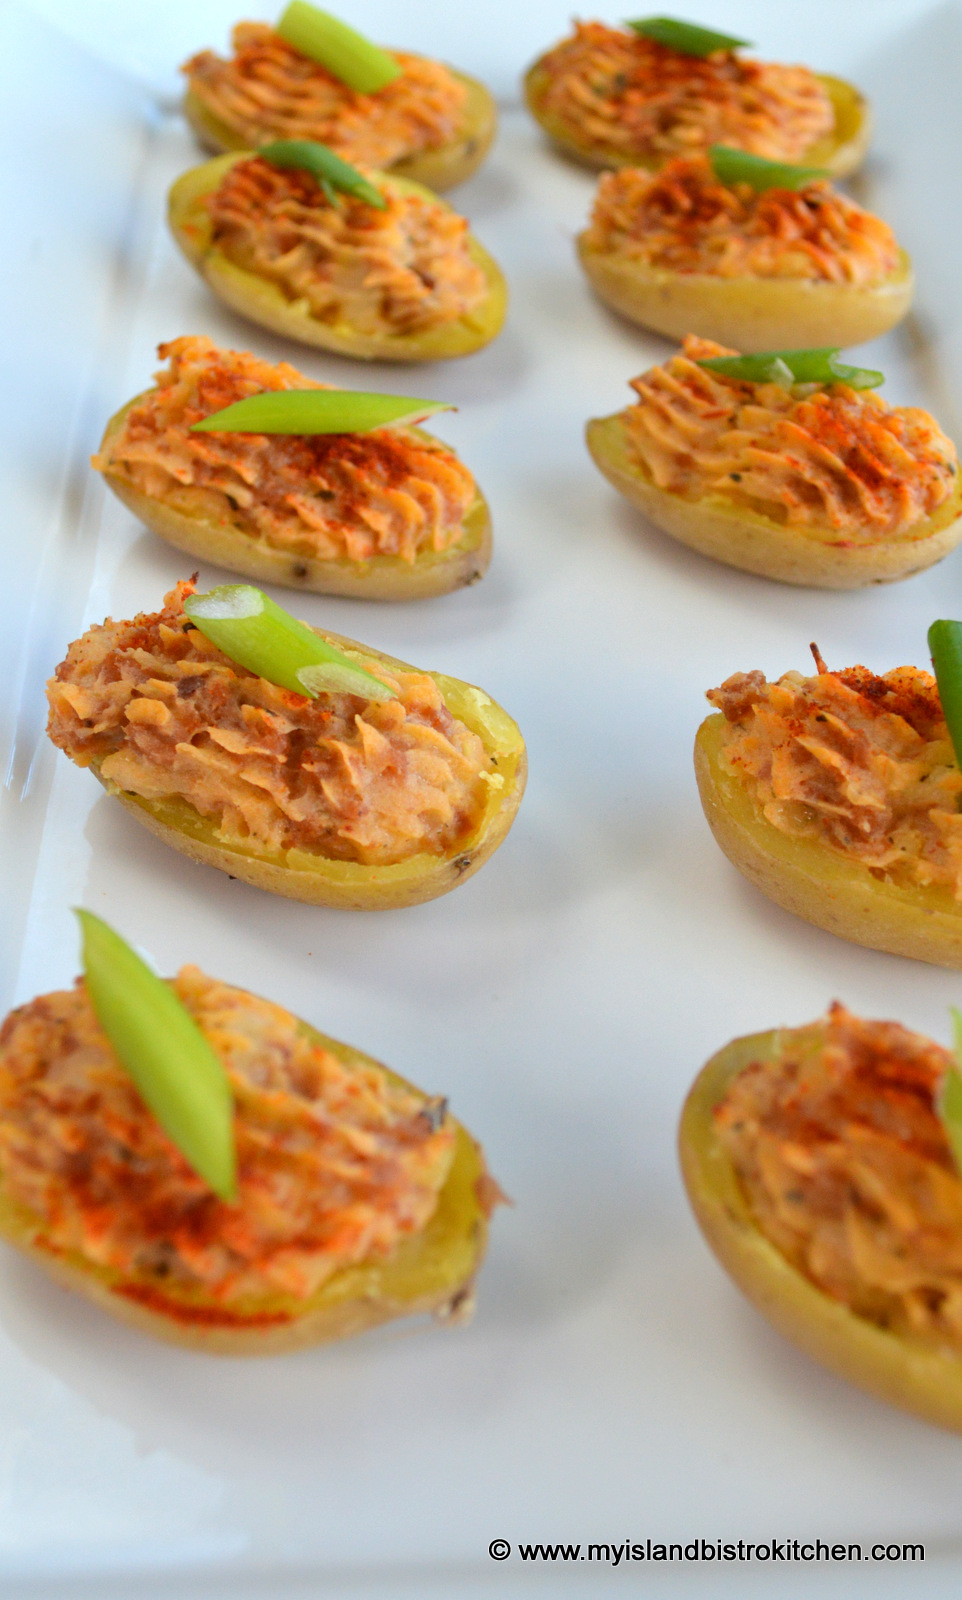
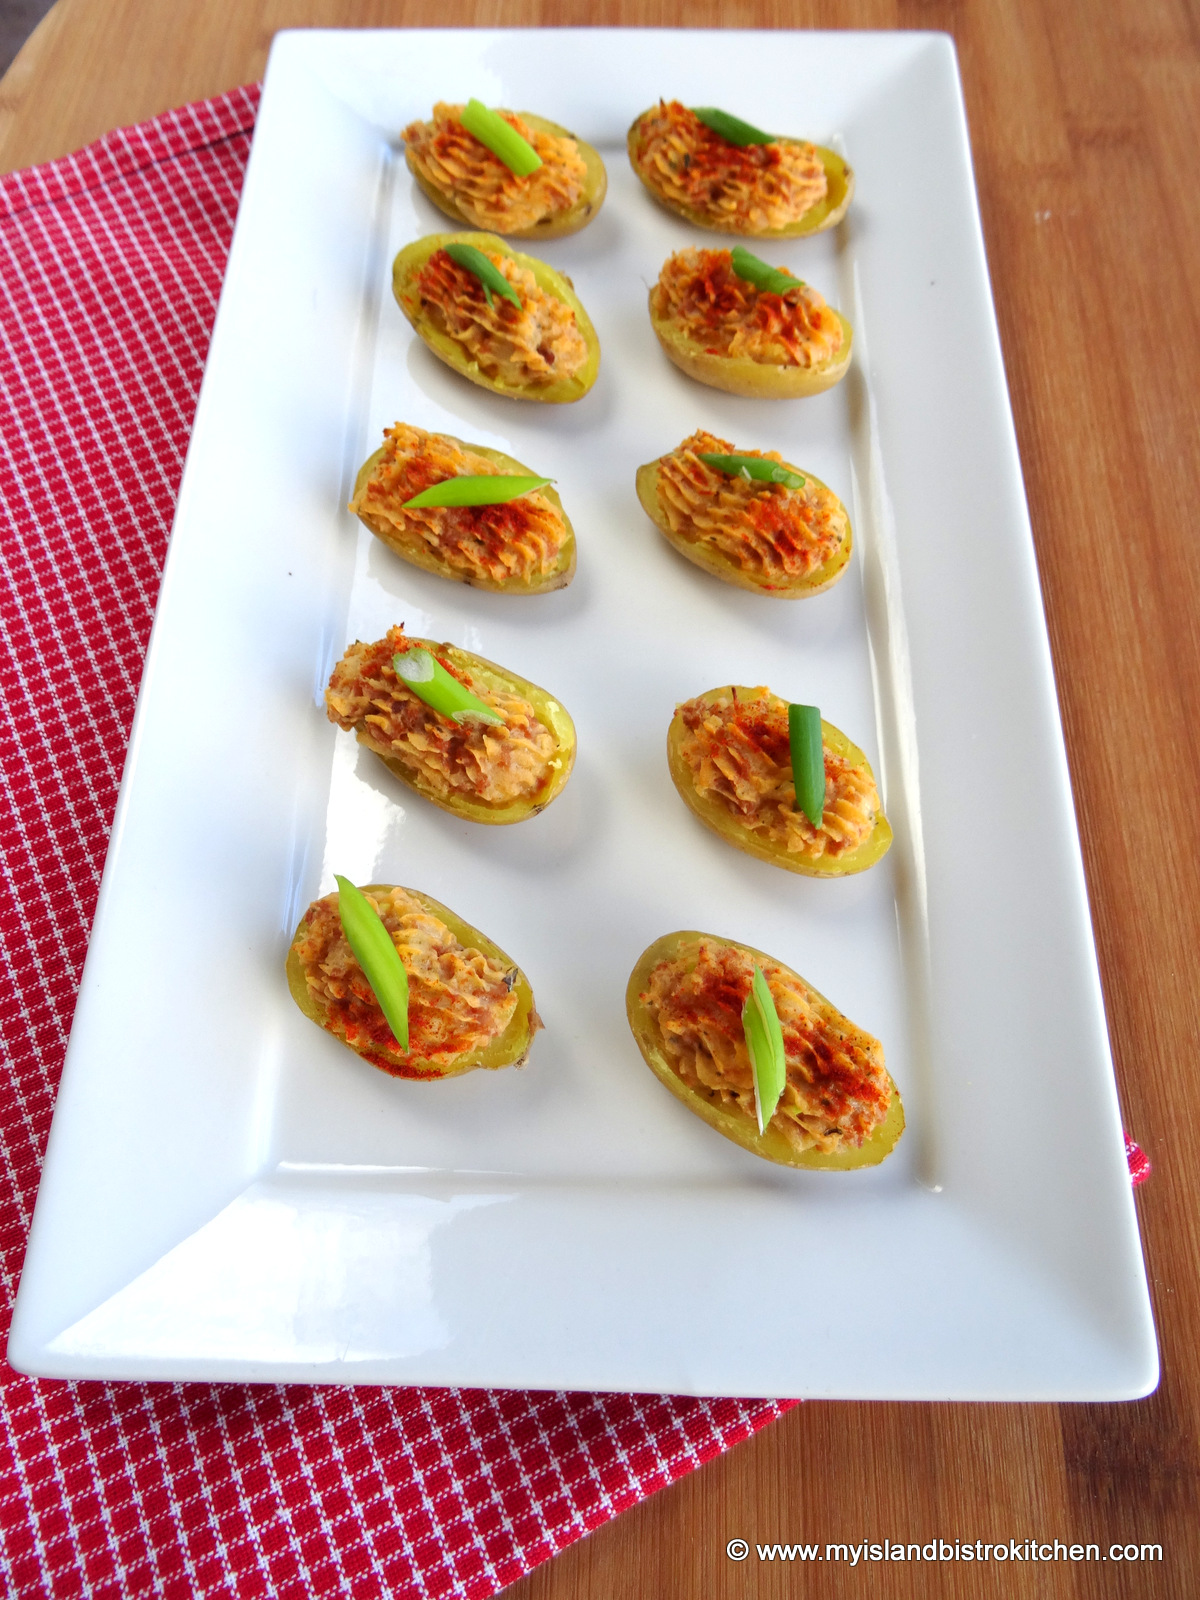
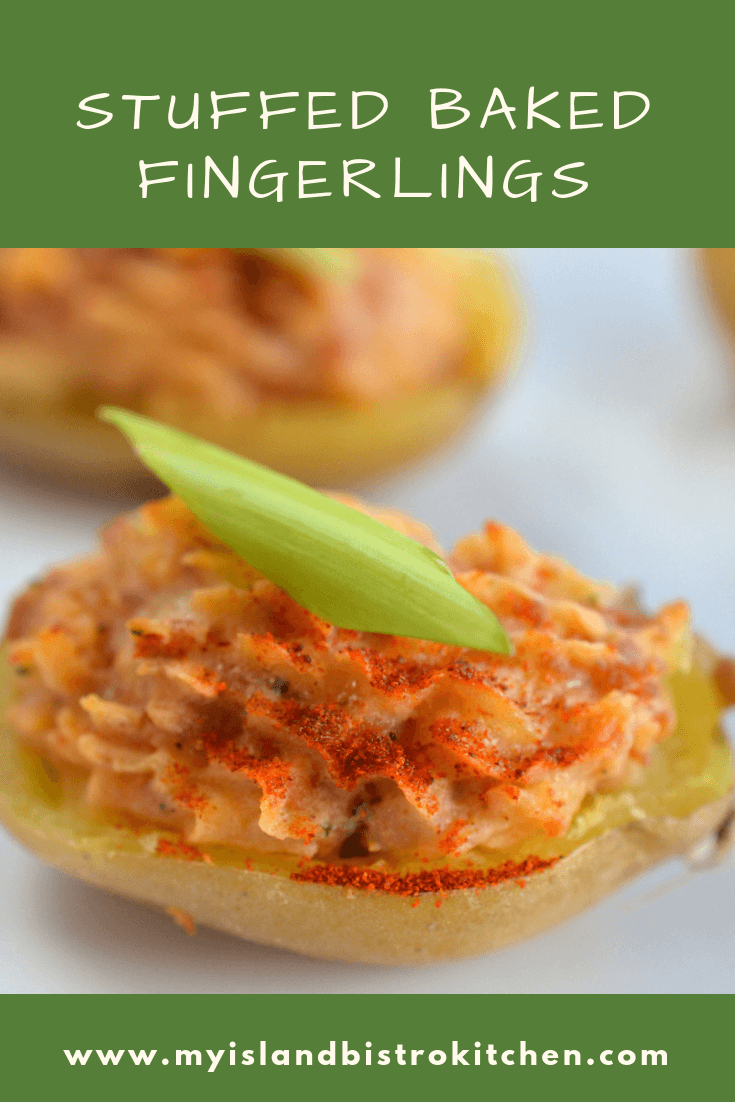
Stuffed Baked Fingerlings
The Little Potato™ Company grew their first acre of tiny potatoes in 1996. A father and daughter team, Jacob Van der Schaaf and Angela Santiago, planted, weeded, and harvested the first crop by hand. It was a success and soon Angela began marketing the potatoes at Farmers Markets and to restaurants.
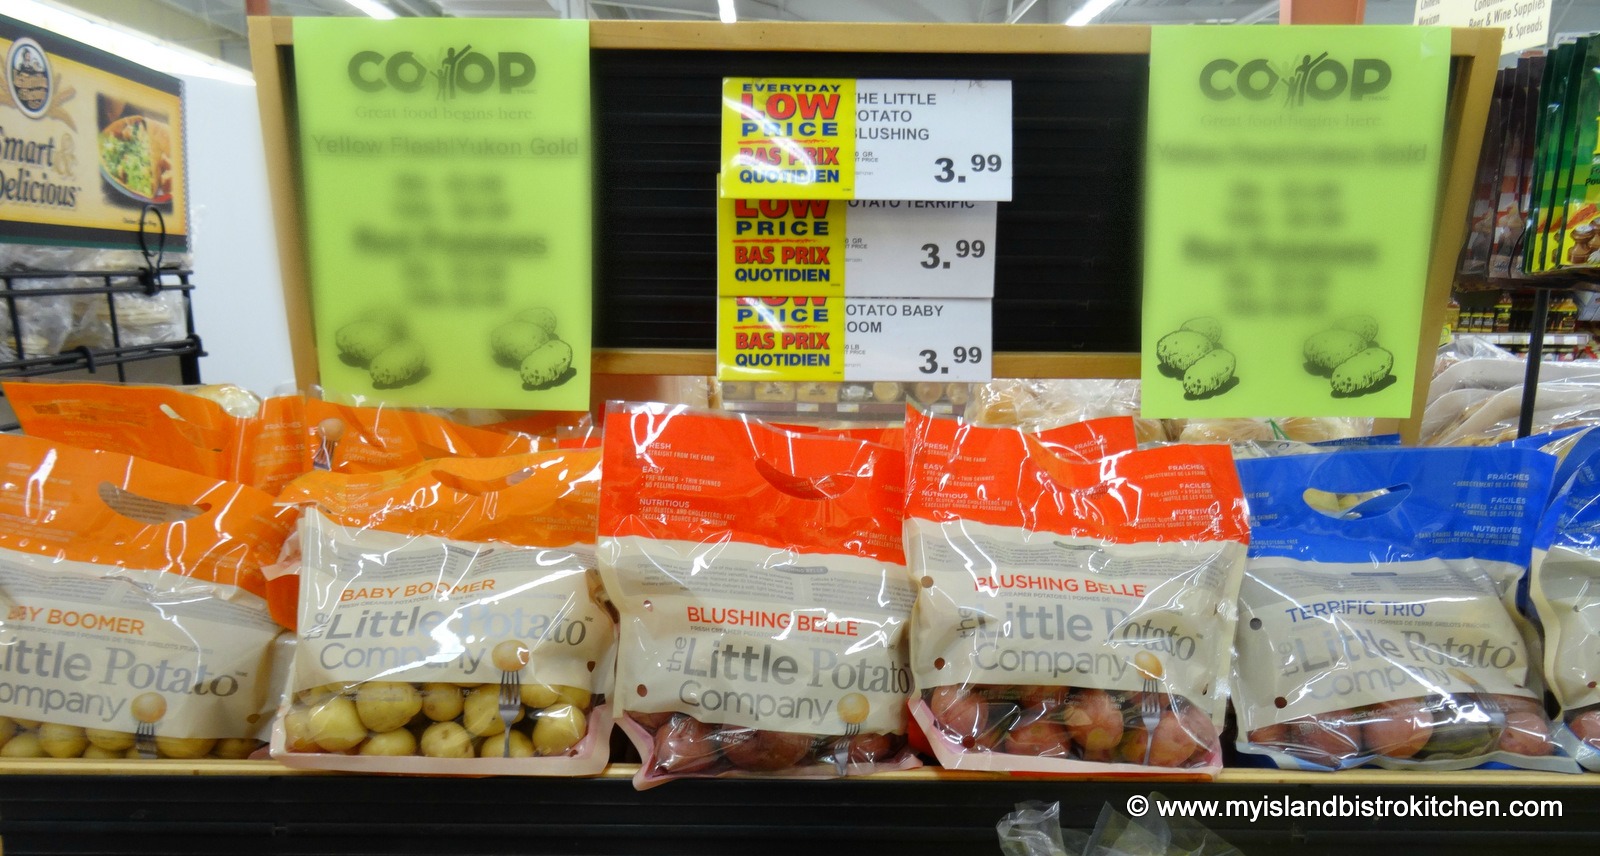
The tiny potatoes grew in such popularity that production expanded and, today, the Little Potato™ Company grows six varieties of the little gems which are available at grocery stores across North America. To learn more about The Little Potato™ Company and their various varieties of miniature potatoes, visit their website. You can also find them on Facebook.
The Little Potato Company varieties of potatoes available at the Co-op Food Market on Walker Avenue in Charlottetown, PEI
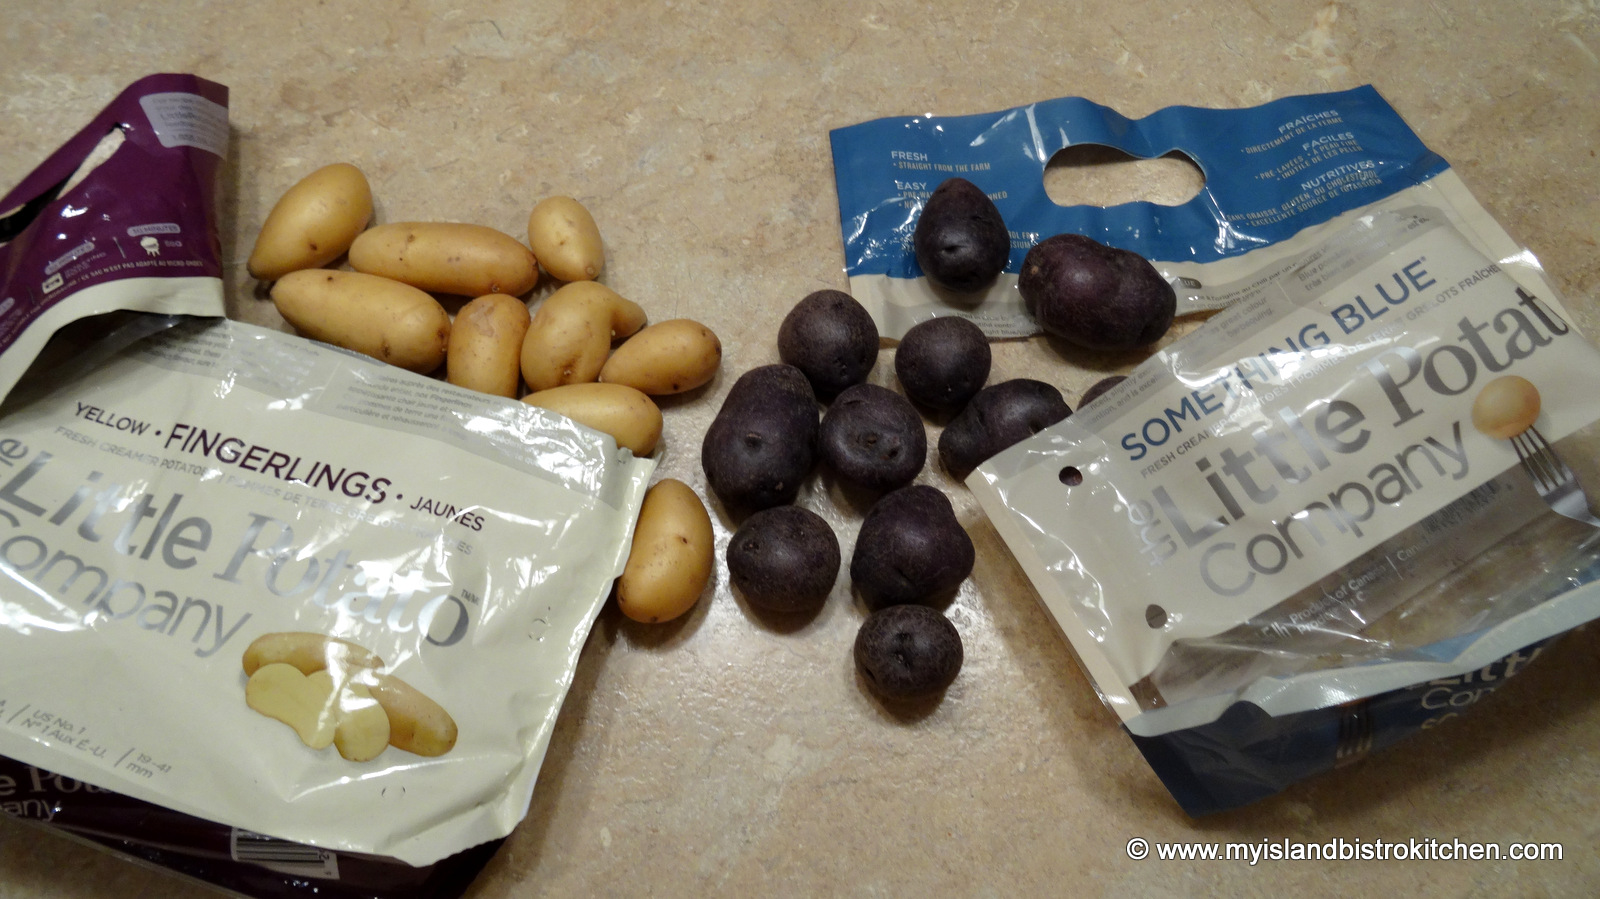
Two bags each of Little Potato™ Company yellow fingerlings and Something Blue® mini potatoes arrived via UPS at my door one evening. I was thrilled that the oblong fingerlings were sent since they are the perfect shape and size to use when making miniature stuffed baked potato hors d’oeuvres. The recipe I have created especially for these little creamer potatoes can also be used to stuff mini round potatoes as well but the shape of the fingerlings really lends them to being stuffed attractively.
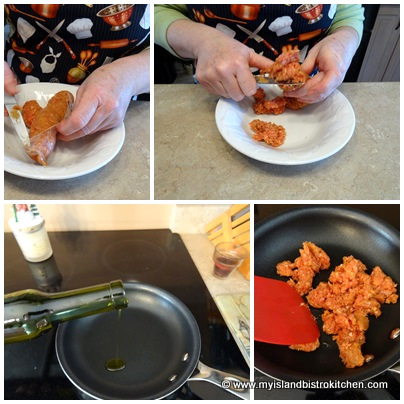
Any flavour of sausage can be used in this recipe. My choice is sweet Italian but, if you like hot flavours, then chipotle would be a good option. The sausage needs to be removed from its casing and it is important to break up the sausage meat really well as it is being scramble-fried because it is going to be piped through a pastry bag. Also, its purpose is to add flavour to the filling and a large chunk of sausage is not desirable in a tiny hors d’oeuvre.
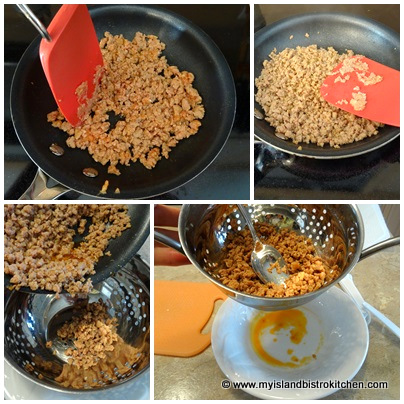
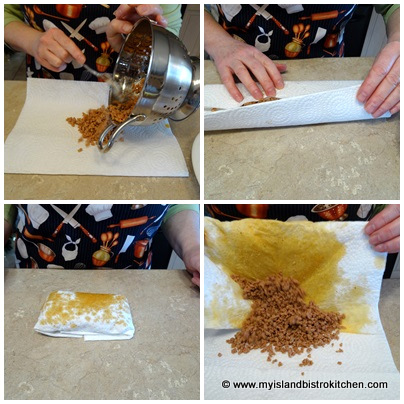
It’s also necessary to extract as much fat as possible from the cooked sausage as the fat can drip through the potato skin and make a messy hors d’oeuvre. To remove the fat, let the cooked sausage drain in a colander for about 15 minutes then wrap the meat in paper towel, repeating the process a couple of times, if necessary, to remove the excess fat.
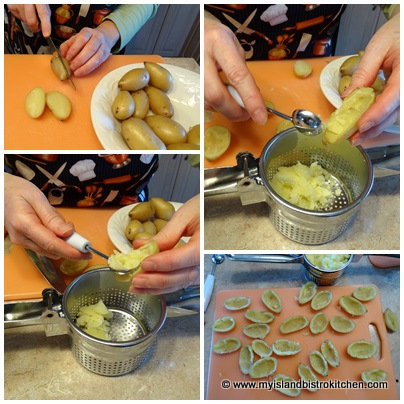
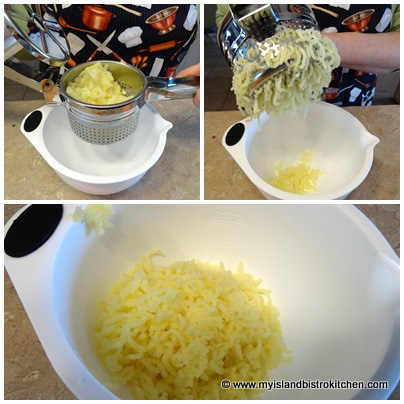
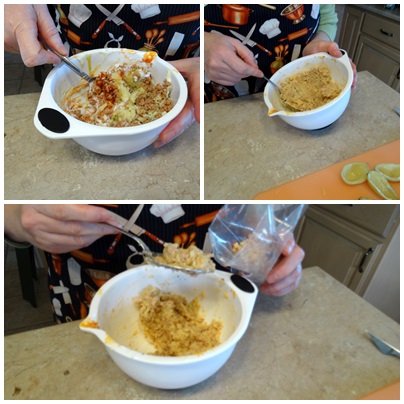
The little fingerlings take about 15 minutes to cook. Once they are removed from the boiling water, just barely let them cool enough that they can be handled. Slice each fingerling in half, horizontally. Then, using a melon baller, remove the potato pulp, leaving about a 1/16th inch thick wall of potato in each half to give the potato shape. Transfer the potato pulp to a potato ricer.
Press the potato through the ricer into a small bowl. The potatoes can be mashed instead of ricing but the potato ricer gives a smoother, finer texture that is completely lump-free.
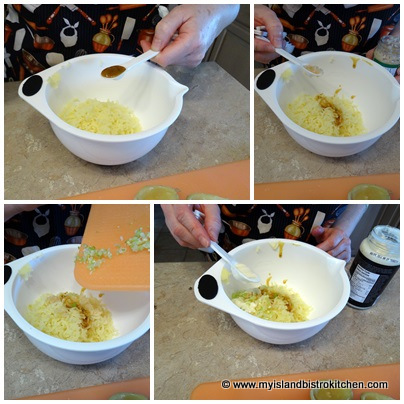
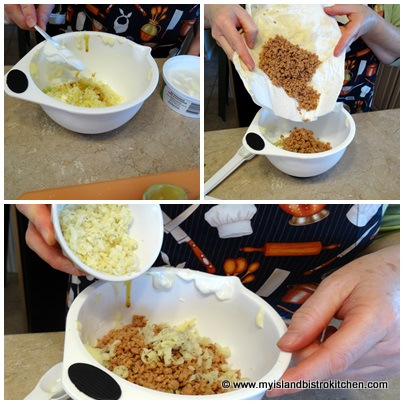
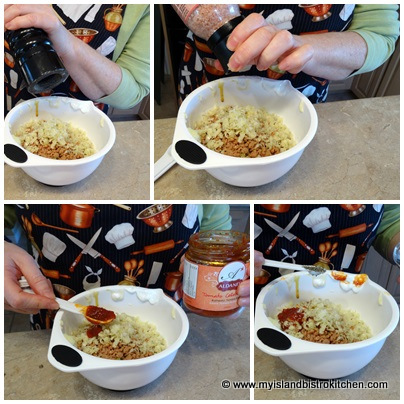
Add the remainder of the ingredients to the riced potato and mix well.
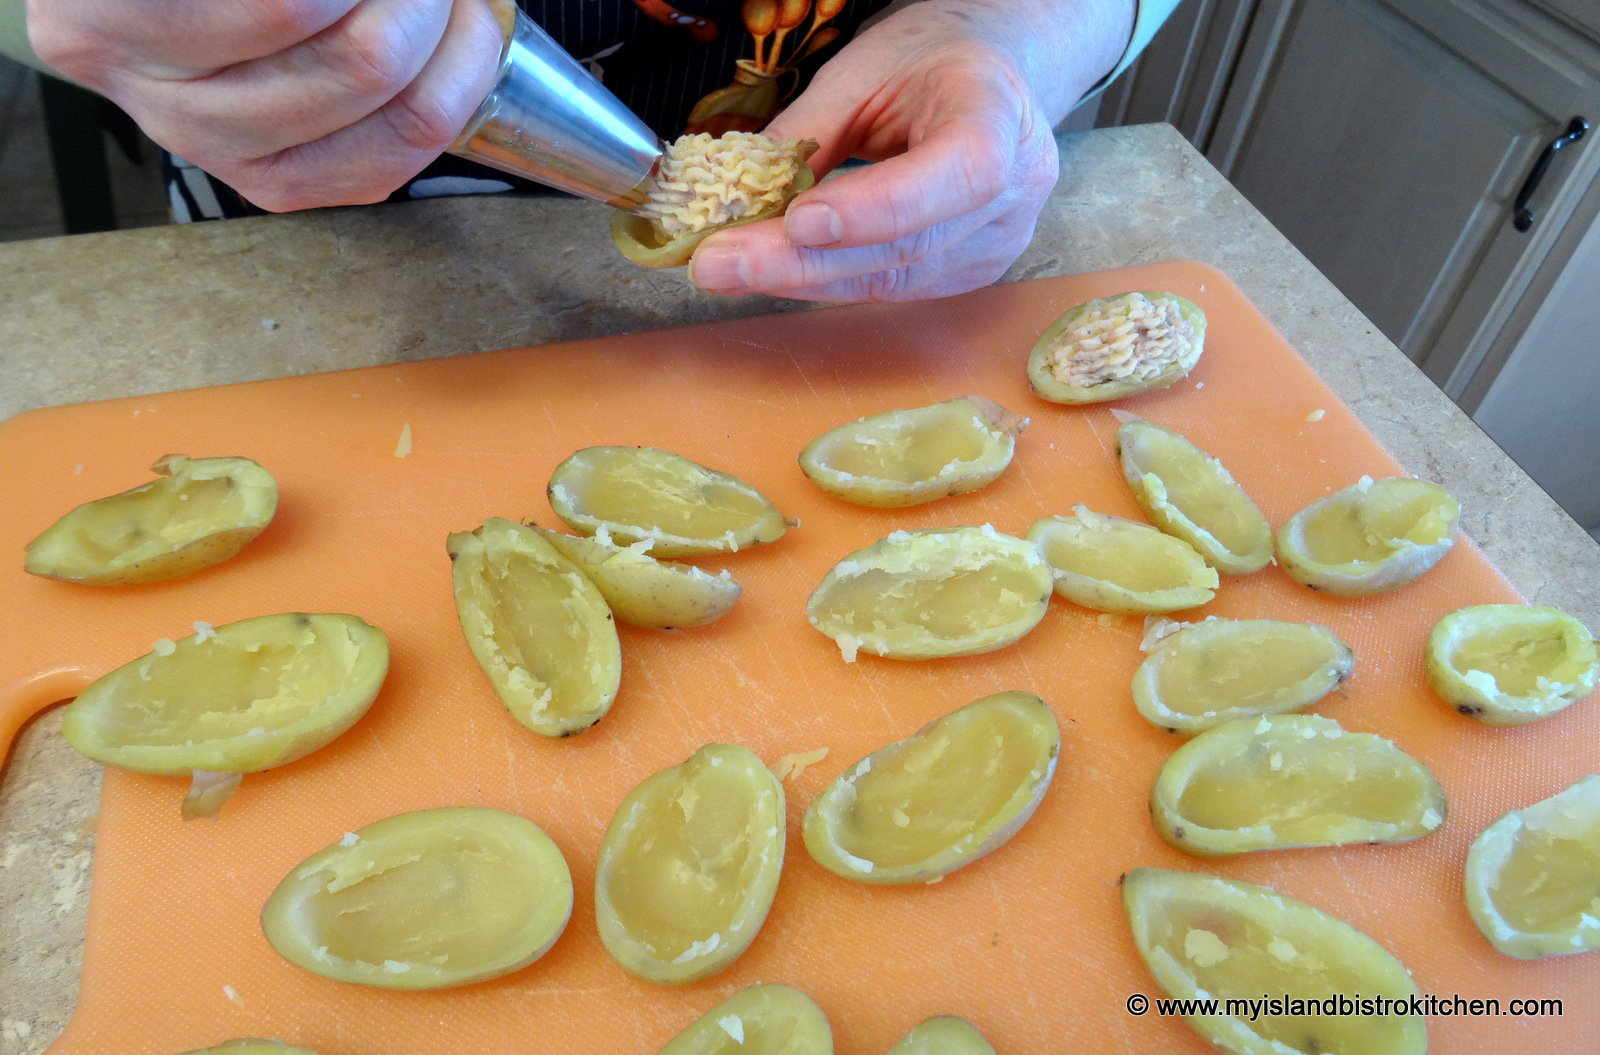
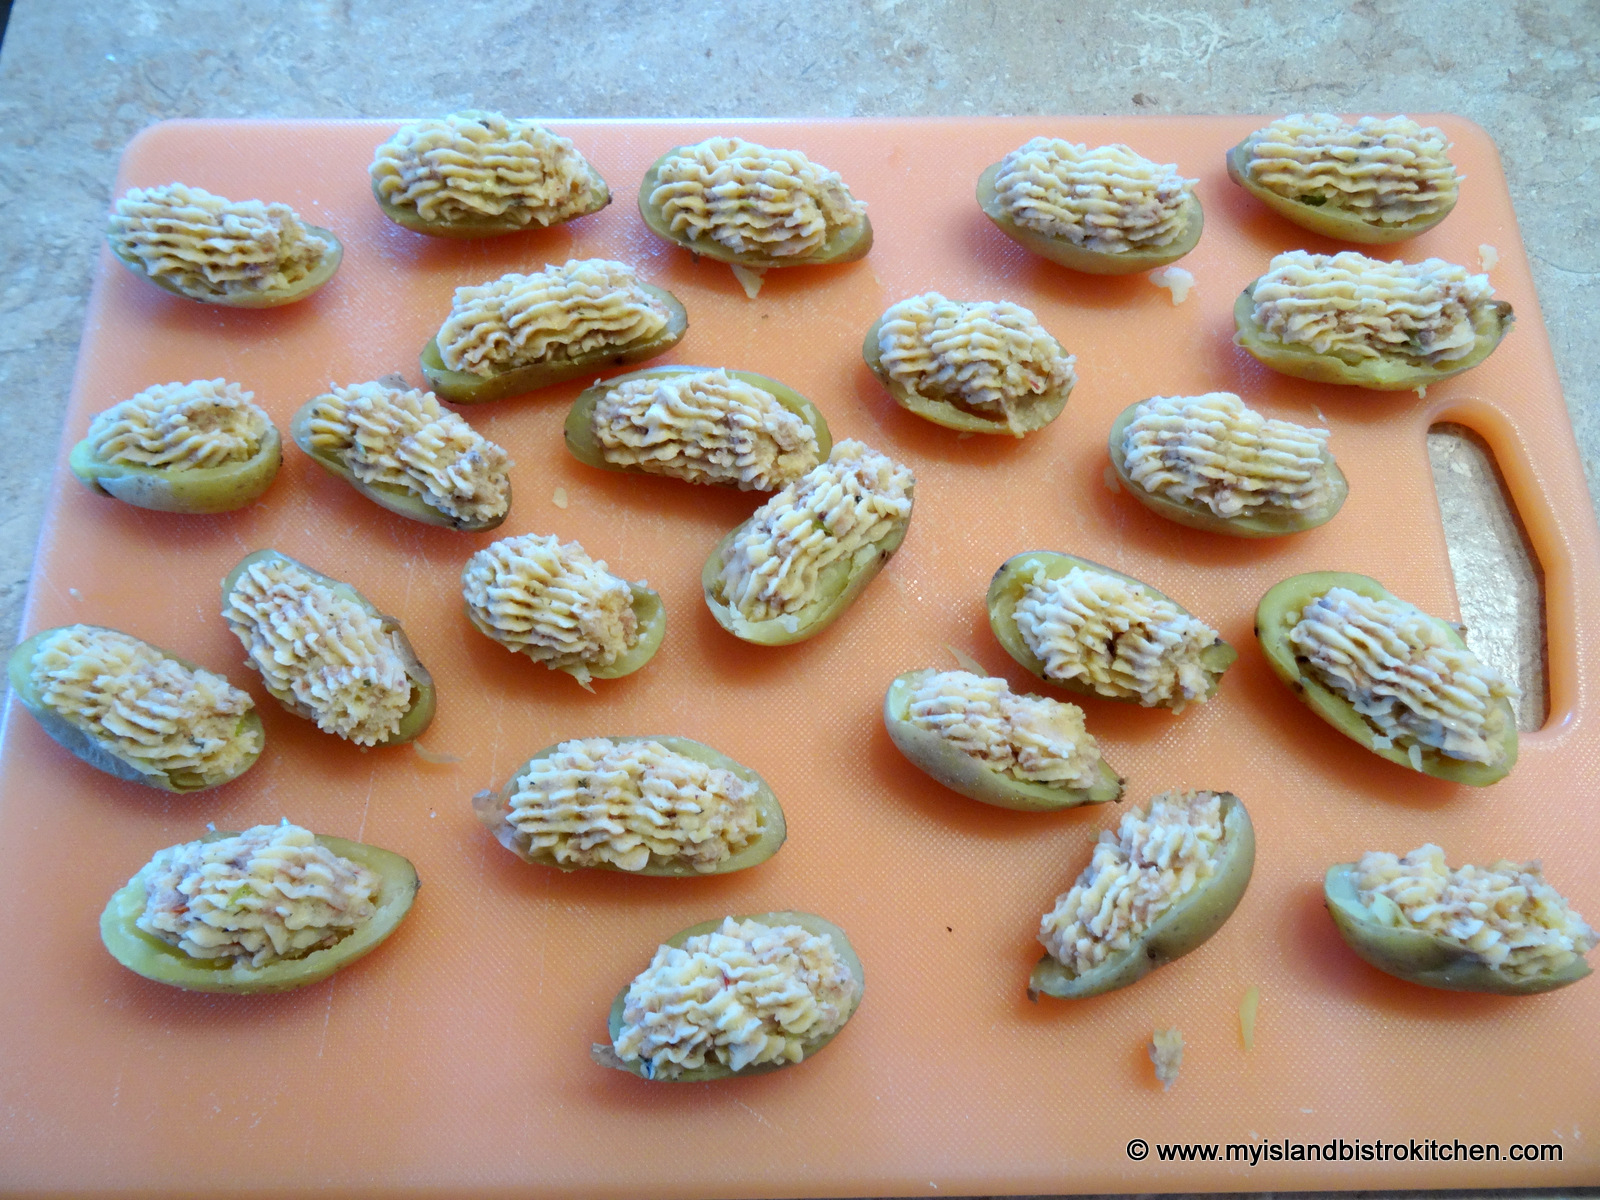
The filling can be transferred to the potatoes with a spoon but a piping bag and Wilton tip 8B makes the job quicker, easier, and will give a neater presentation.
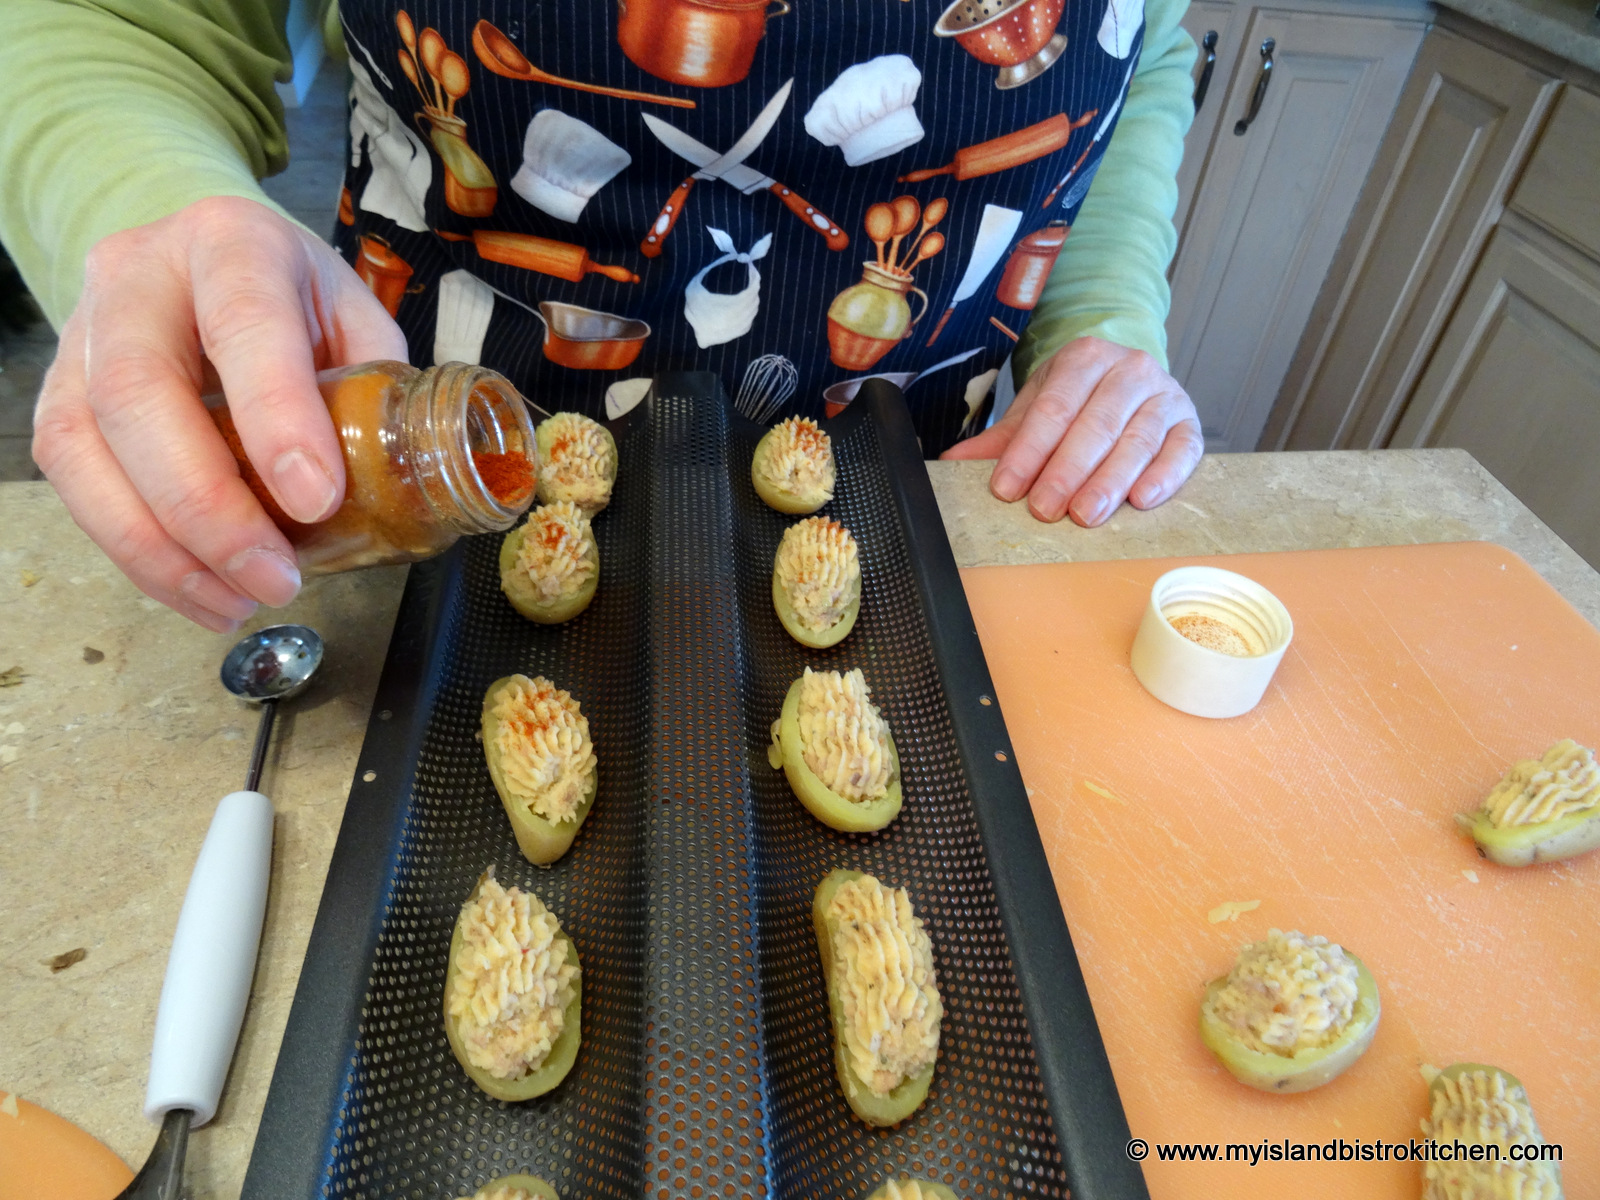
Add a sprinkle of paprika, and pop these little hors d’oeuvres into a 375ºF oven for about 12 minutes. Use either a parchment-lined baking sheet to bake the stuffed potatoes or, if you have a baguette pan, it works really well, too.
Garnish, if desired, with a sliver of green onion or chopped chives, then serve to the delight of guests at your next party.
Baked Stuffed Fingerling Hors d’oeuvres made with potatoes from The Little Potato Company
12 Little PotatoCompany fingerling creamer potatoes ½ tsp liquid chicken bouillon ½ tsp minced garlic 1 green onion, finely chopped 1½ tsp truffle aioli 2 tbsp sour cream 3 tbsp Gouda cheese, finely grated 1½ tsp tomato sauce ⅛ tsp basil Salt and pepper, to taste Paprika Slivers of green onion tops or chopped chives for garnish
Method:
Heat olive oil in small frypan. Remove sausage from casing and crumble. Add to hot oil. With the end of a flat, heat-resistant lifter or spatula, continue to break up the sausage as it cooks. Scramble fry until sausage is brown, approximately 7-10 minutes. Transfer sausage to a colander and let fat drip out for about 10-15 minutes. Then, roll the cooked sausage in paper towel to remove any remaining fat. Set aside.
Cook fingerling potatoes in boiling water for about 15 minutes or until fork tender. Remove from heat.
Preheat oven to 375ºF.
As soon as the potatoes are just cool enough to handle, cut each in half, horizontally. Using a melon baller, remove the potato pulp from the skin, leaving about a 1/16th inch thick wall of potato in each half to give the potato shape. Transfer potato pulp to a potato ricer. Press pulp through ricer into small bowl. Add remaining ingredients and mix until incorporated.
Transfer mixture to a pastry bag fitted with Wilton tip 8B. Pipe filling into each fingerling half. Sprinkle with paprika. Place mini stuffed potatoes on a parchment-lined baking sheet or in the cradle of a baguette pan. Bake in preheated oven for about 12 minutes. Remove and garnish with a sliver of green onion or chopped chives. Serve hot.
Yield:24 hors d’oeuvres
Pin Me To Pinterest!
Disclosure: The potatoes used in this recipe were provided to me, free of charge, from The Little Potato™ Company for the purposes of sampling them and creating a recipe with them. The recipe for Baked Stuffed Fingerlings in this posting is an original recipe developed by me in my home kitchen.
——————————–
Thank you for visiting “the Bistro” today. There are lots of ways to connect with “the Bistro” through social media:
It’s the time of the year when people are busy with holiday preparations which often brings a host of events and a shortage of time to prepare for them. I recently met with a couple of Island chefs to chat about canapés and to find out what’s trendy these days in finger foods.
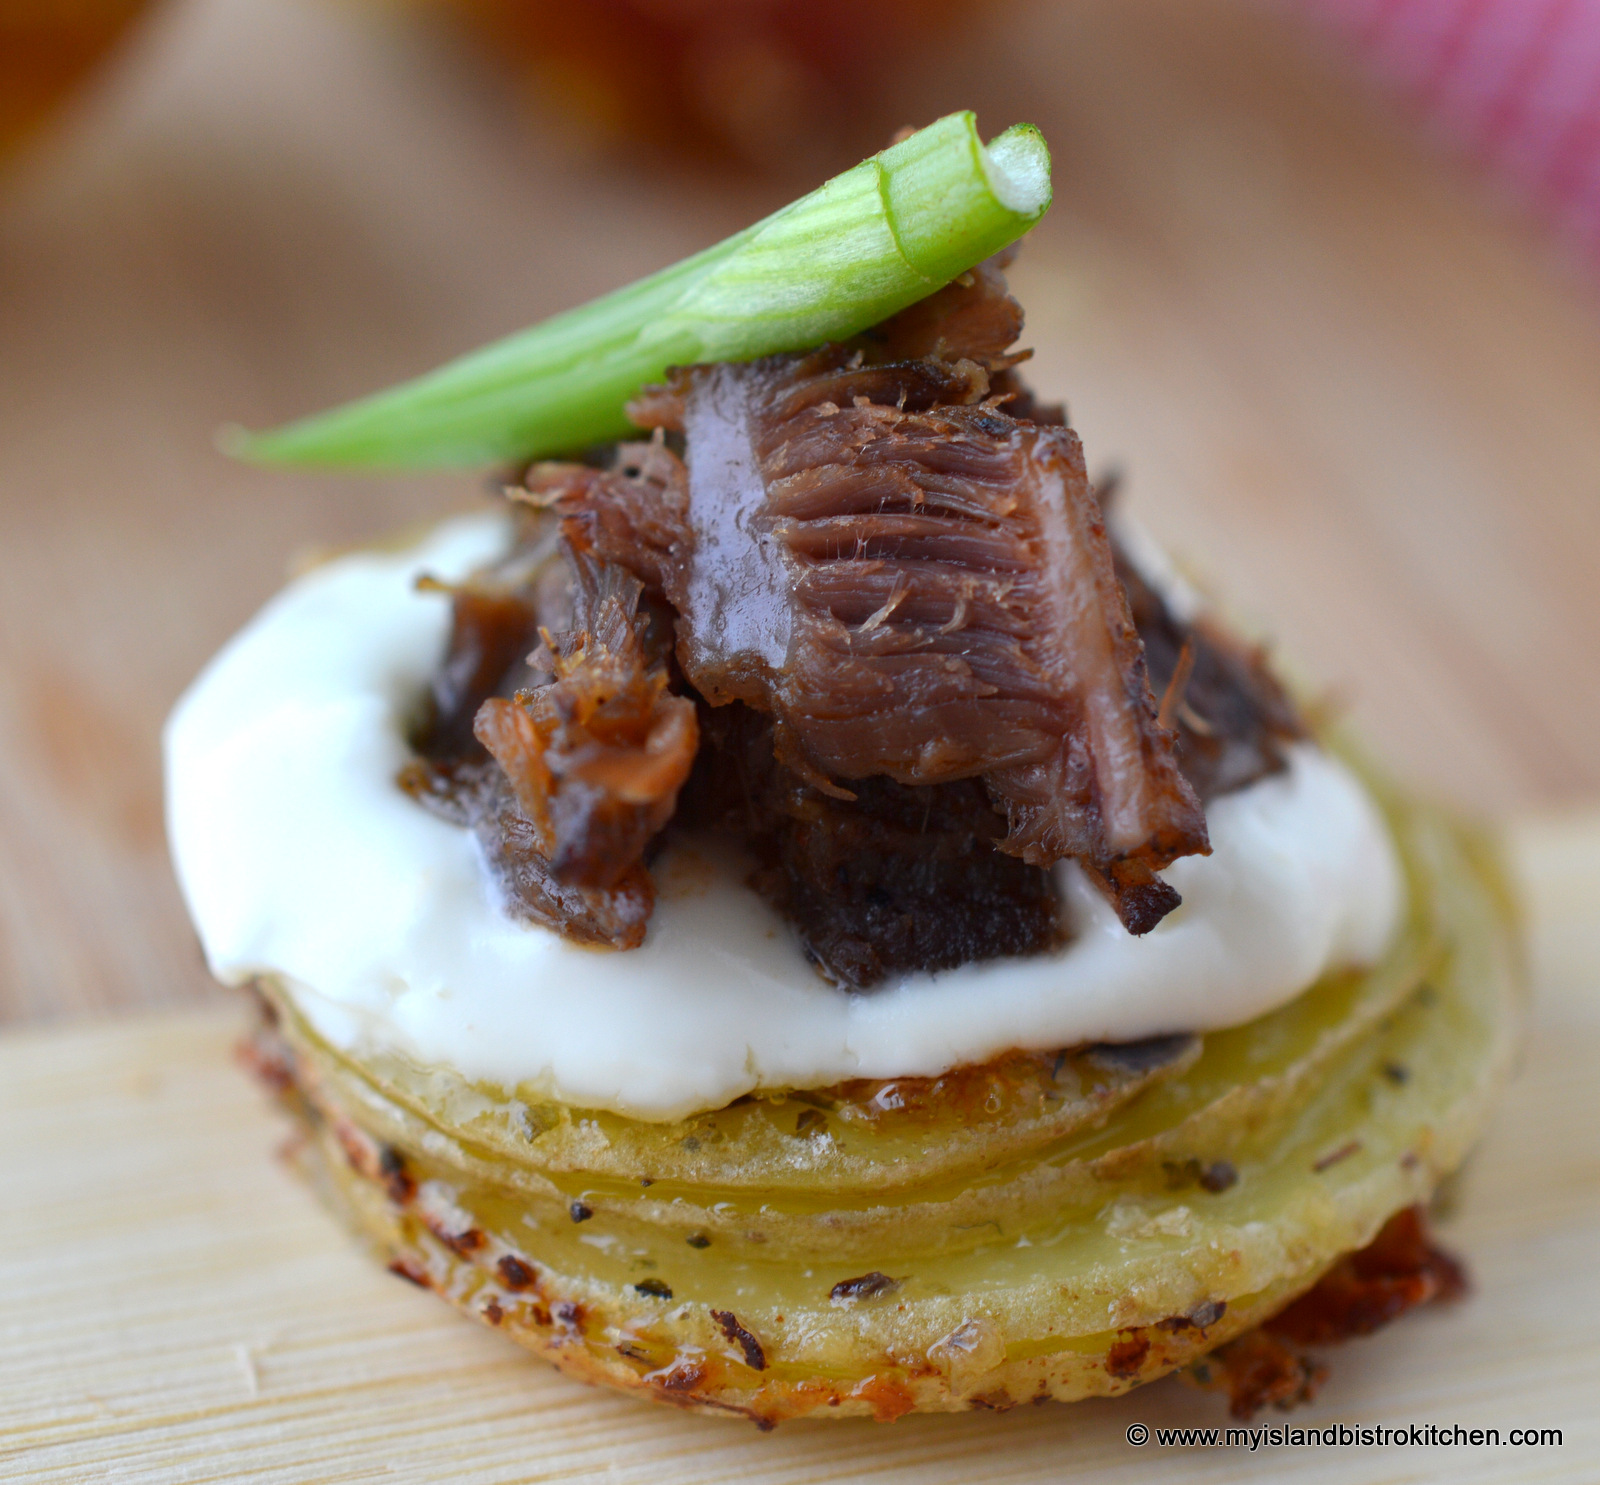
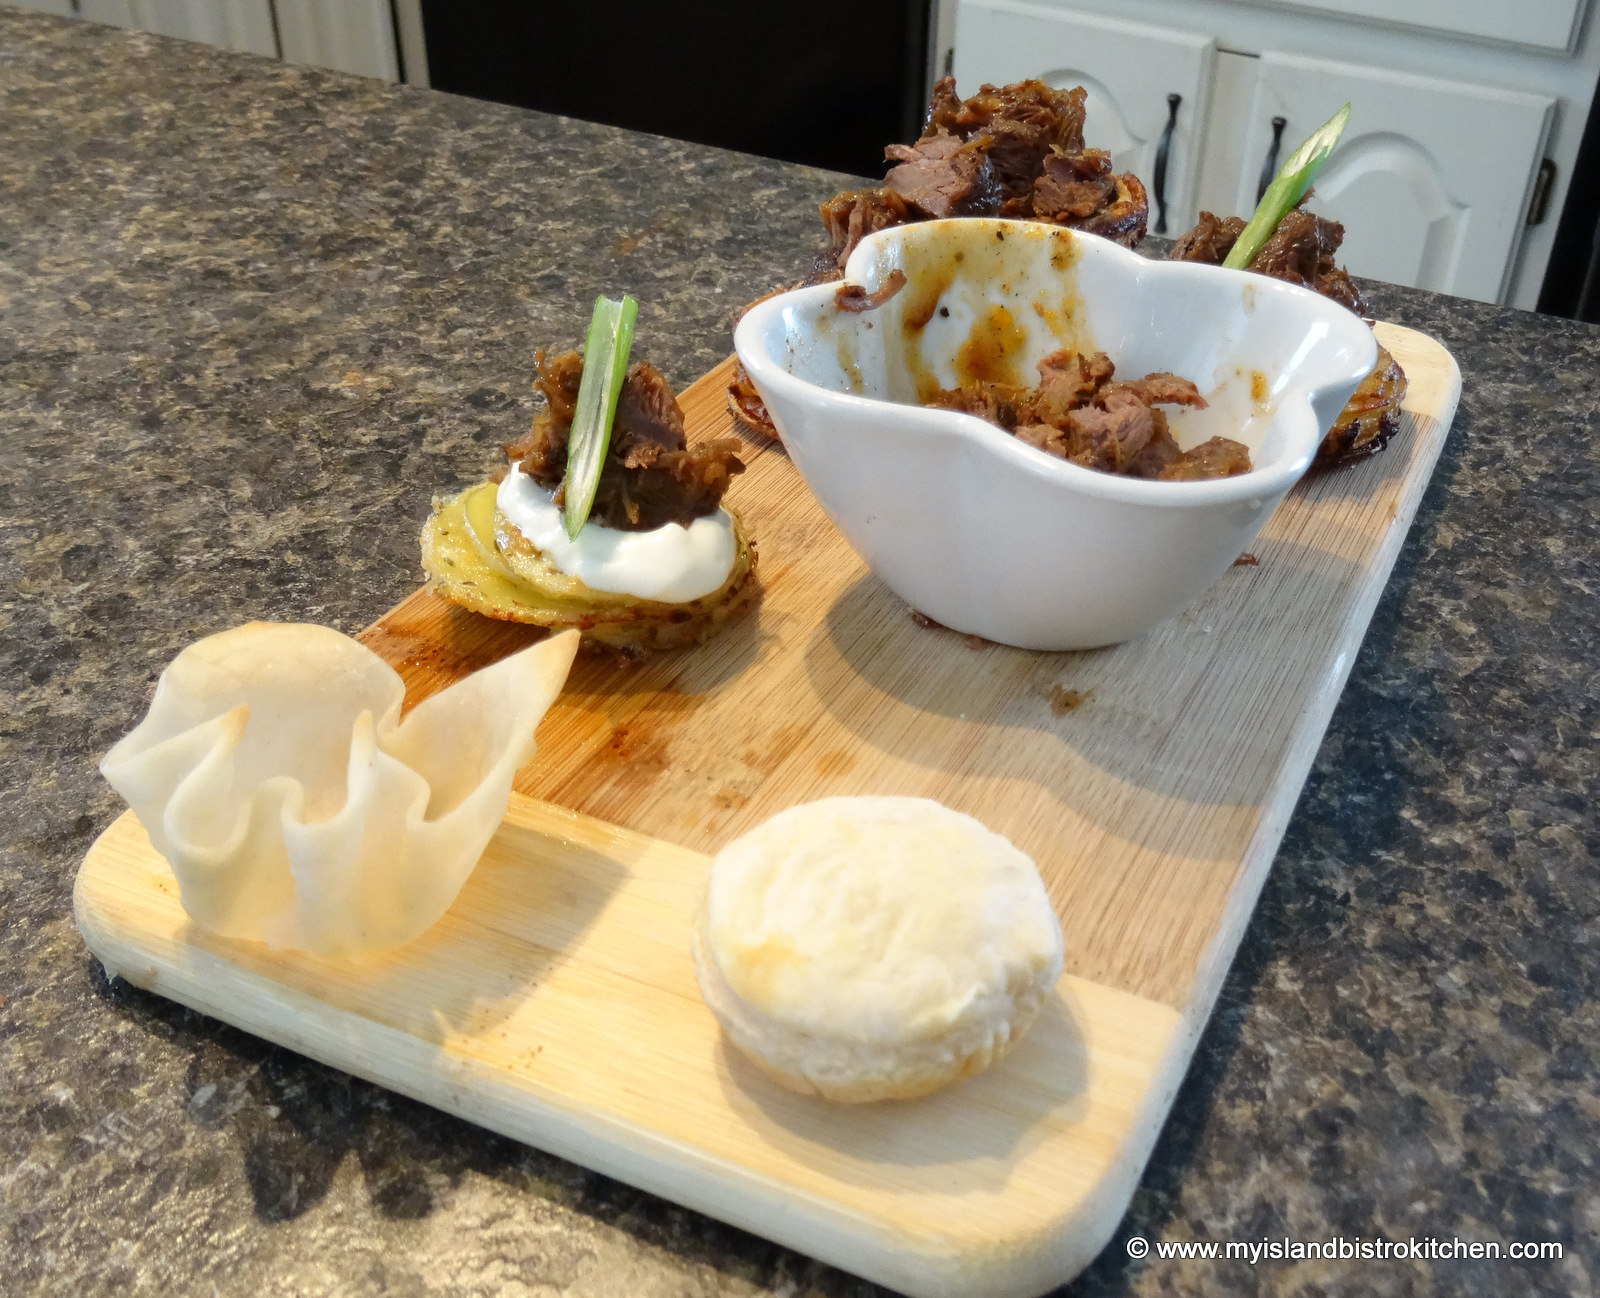
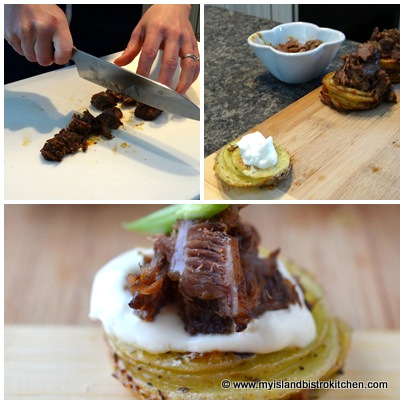
Canapé of potato base, topped with sour cream and tender beef
Jennifer & Mike Levy, from Rusticoville, PEI, operate Green Island Catering Company. Yes, there is help for your holiday events! The couple, both originally from Ontario, took a rather roundabout way to find their way to the Island. Both have university degrees and worked in the corporate world in Calgary before heading off to the sunny Caribbean to spend three years living and working in Grand Cayman. While soaking up the southern sun, they found themselves working in the food industry and becoming more interested in cooking. They came across some Prince Edward Islanders living in Grand Cayman who kept telling them about the Culinary Institute of Canada in Charlottetown, PEI, suggesting they check it out. But, first, they returned to their native Ontario where they spent a few months during which time Mike took a hobby cooking course at George Brown College which really sealed his interest in pursuing a career in culinary arts. Soon, they were on their way to PEI to study at the Culinary Institute from which both graduated from the two-year program in 2012.
While they have worked in various restaurants since graduating from culinary school, they have started a successful catering business and will cater any event of any size. In fact, they have catered the PEI Legislature’s “Speaker’s Tartan Tea” for the past three years.
I began by asking the chefs how many canapés should be prepared per person for an event. As a general rule, they suggest 3-5 per person if the time of the event is not a regular meal time or if it is at a time that guests most likely would have already eaten. However, if the event is between the hours of 11am – 1 pm or 5pm – 7pm, then 5-7 canapés should be prepared per guest.
We then discussed what’s trendy in canapés these days. Canapés generally consist of three parts: a base, some kind of sauce, and a garnish. The base can consist of a variety of items – for example, small biscuits, phyllo pastry, spring roll wrappers, or wonton cups.
Braised beef and pulled pork tend to be popular in canapés, just as they are in main meal menu items.
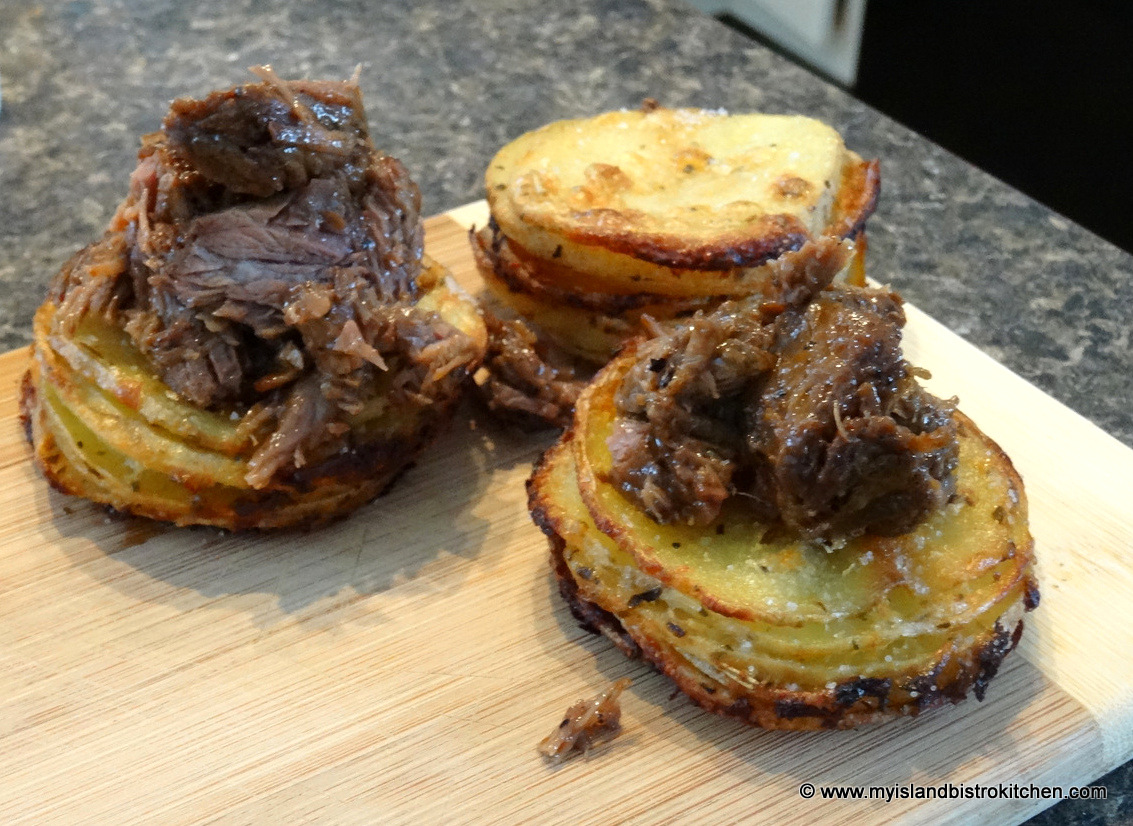
Braised beef atop a stack of cheesy potato slices
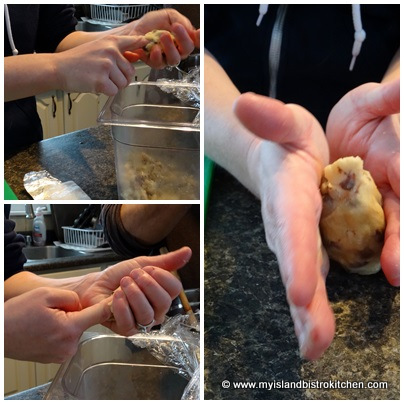
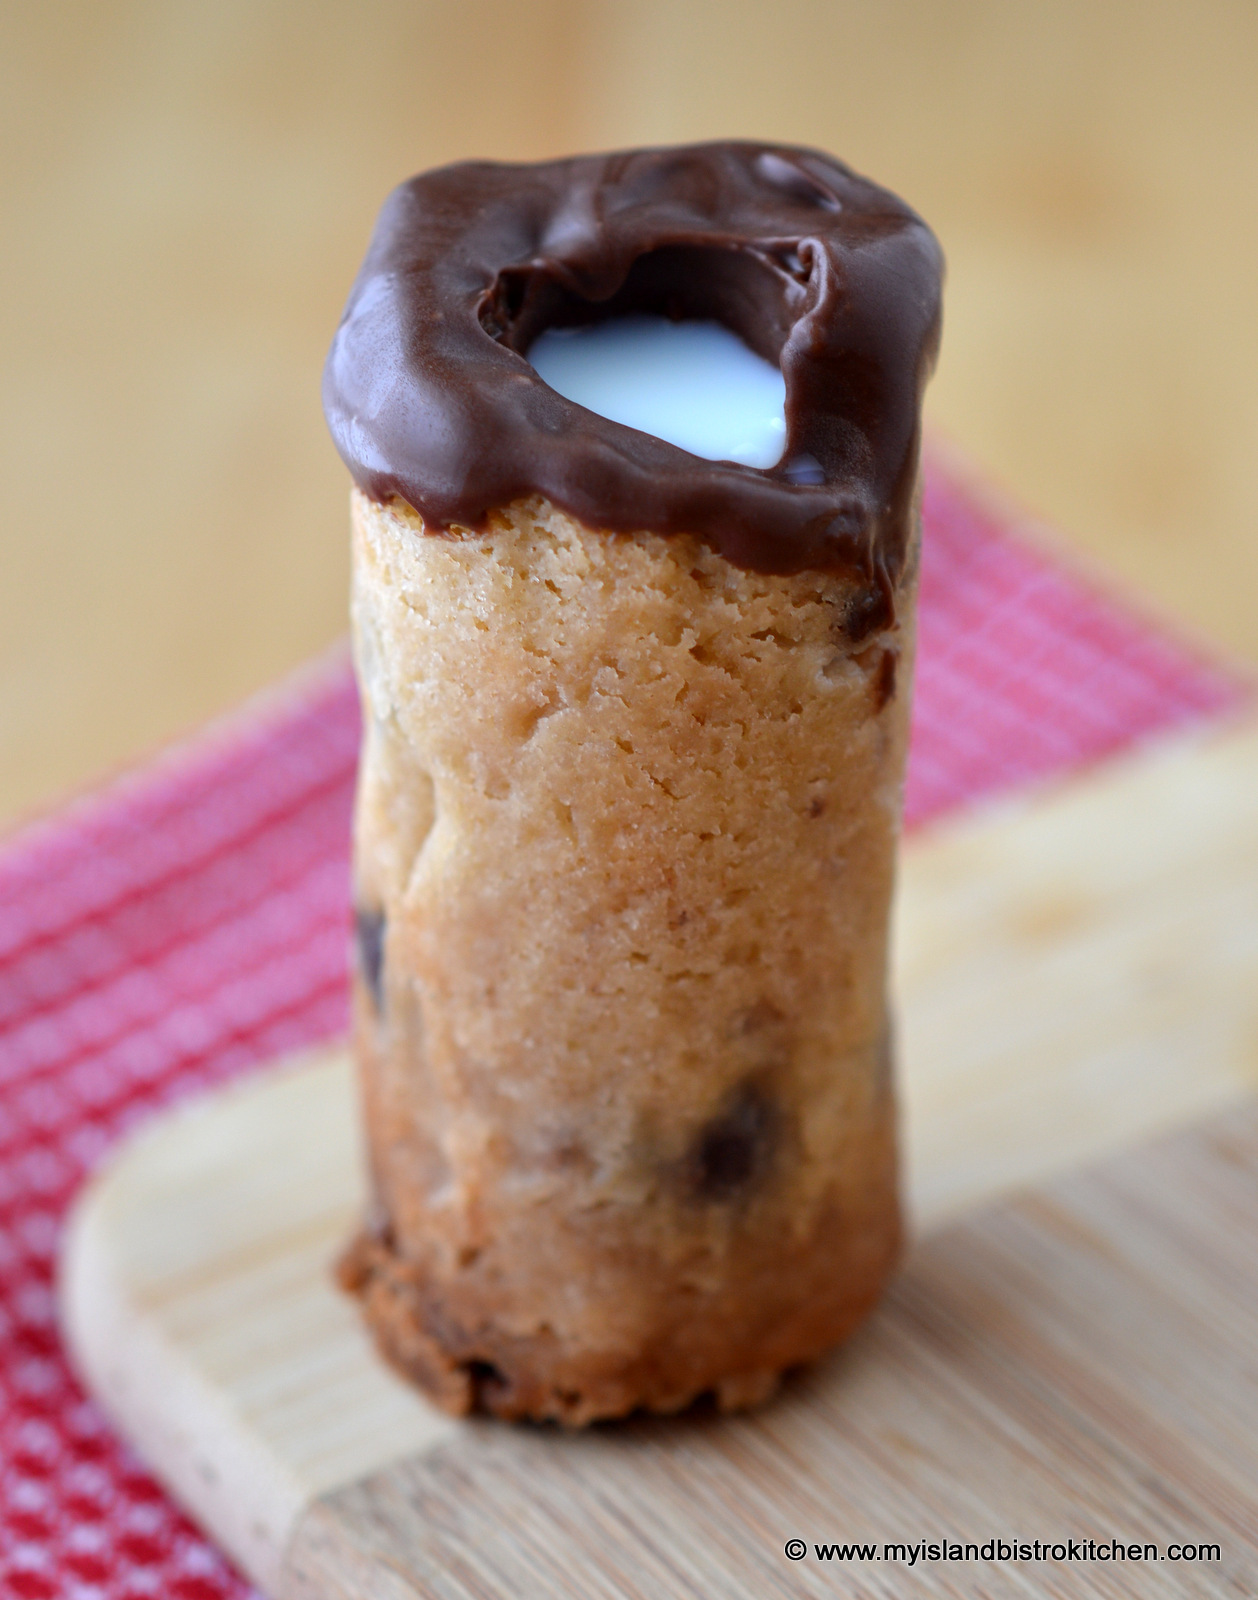
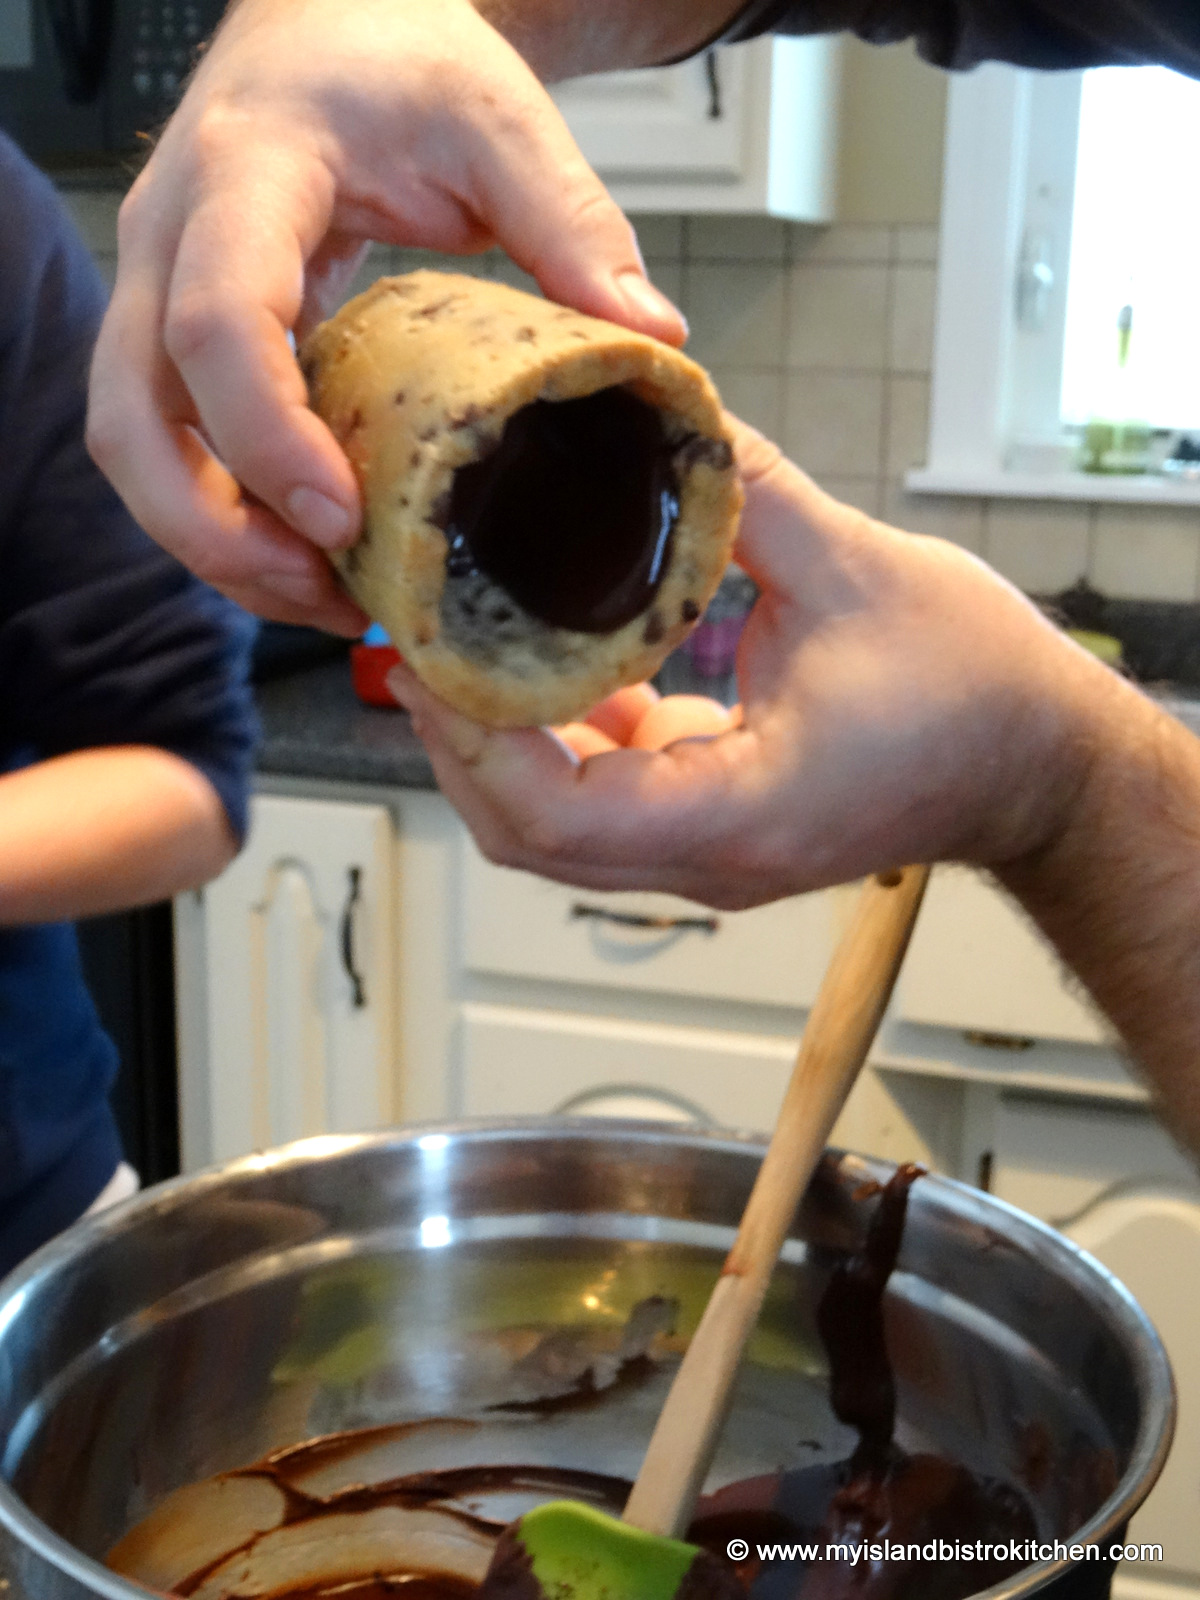
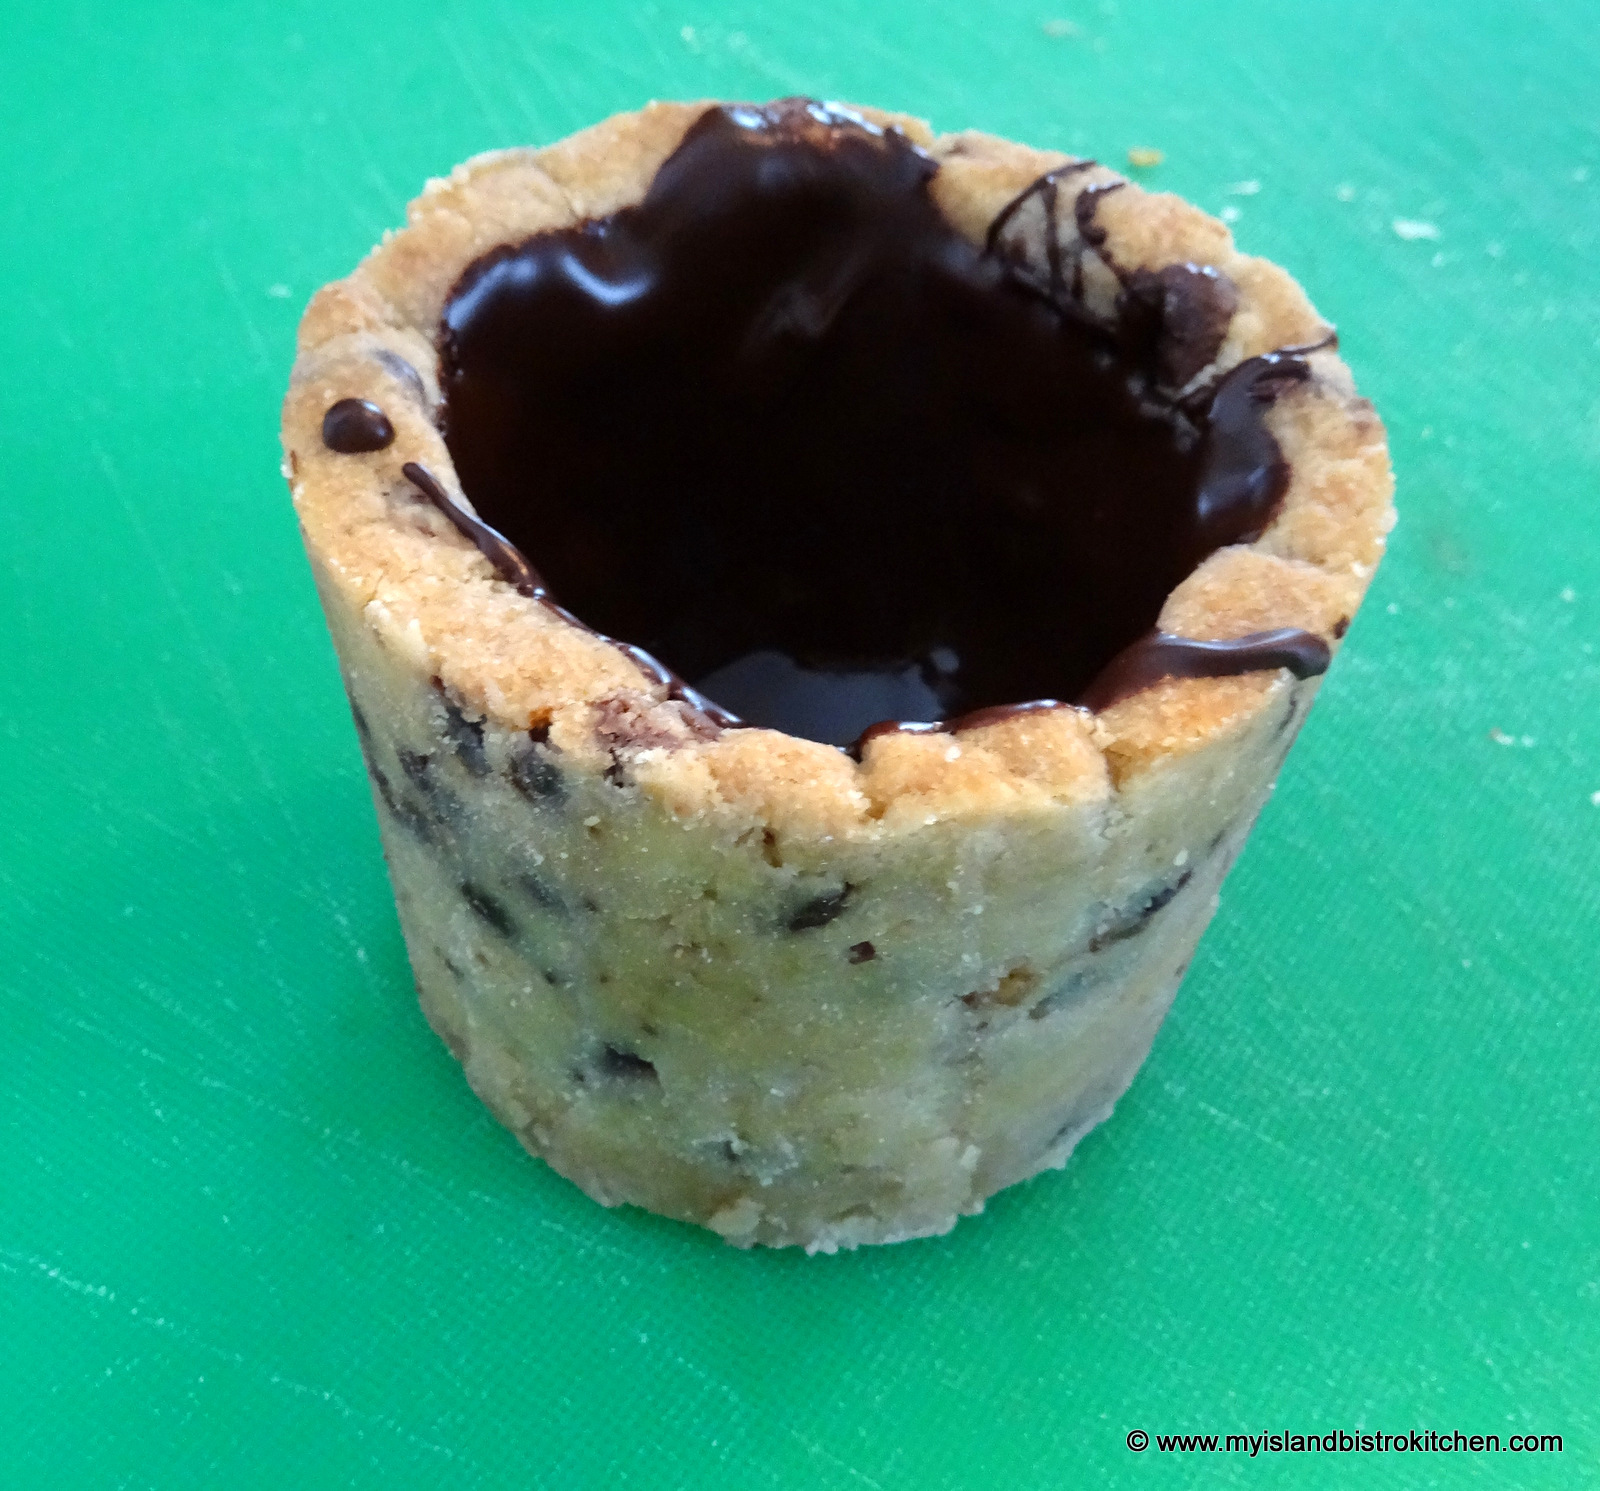
Foods that are easy to prepare and canapés that include comfort foods are also popular. For example, tiny tea biscuits topped with braised beef or turkey/chicken are quite popular. Cookie dough shot glasses are also quite a trendy novelty item – they consist of cookie dough formed into a container shape, baked, and filled with a favourite liqueur or, for the younger crowd, milk.
Making Cookie Shot Glasses
Cookie Shot Glass
Or, make the cookie shot containers even larger and line them with melted chocolate (yum!)
Lining a larger cookie shot glass with melted chocolate
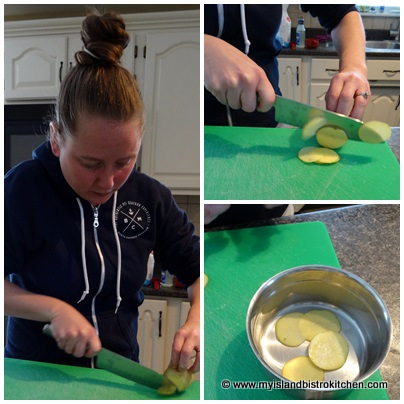
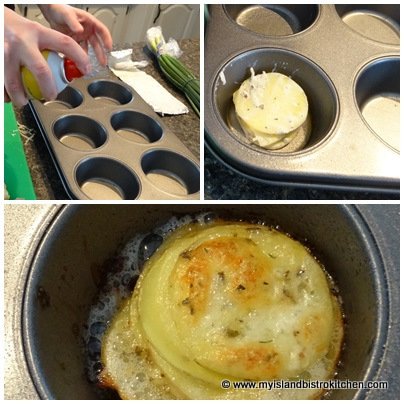
During my visit, the chefs demonstrated how to make a base from thinly sliced potatoes, seasoned with a mixture of herbs (such as rosemary, thyme, and oregano), grated Parmesan or Asiago cheese, and a bit of cream (yes, the real stuff!). Layered into greased muffin tins and baked for 20 minutes at 400°F, these make a tasty canapé base with a dob of sour cream or herbed cream cheese added and topped with braised beef or pulled pork.
Making Potato Base for CanapésMaking Potato Base for CanapésBaked Potato Base for Canapés
These canapés are tasty with, or without, the addition of sour cream.
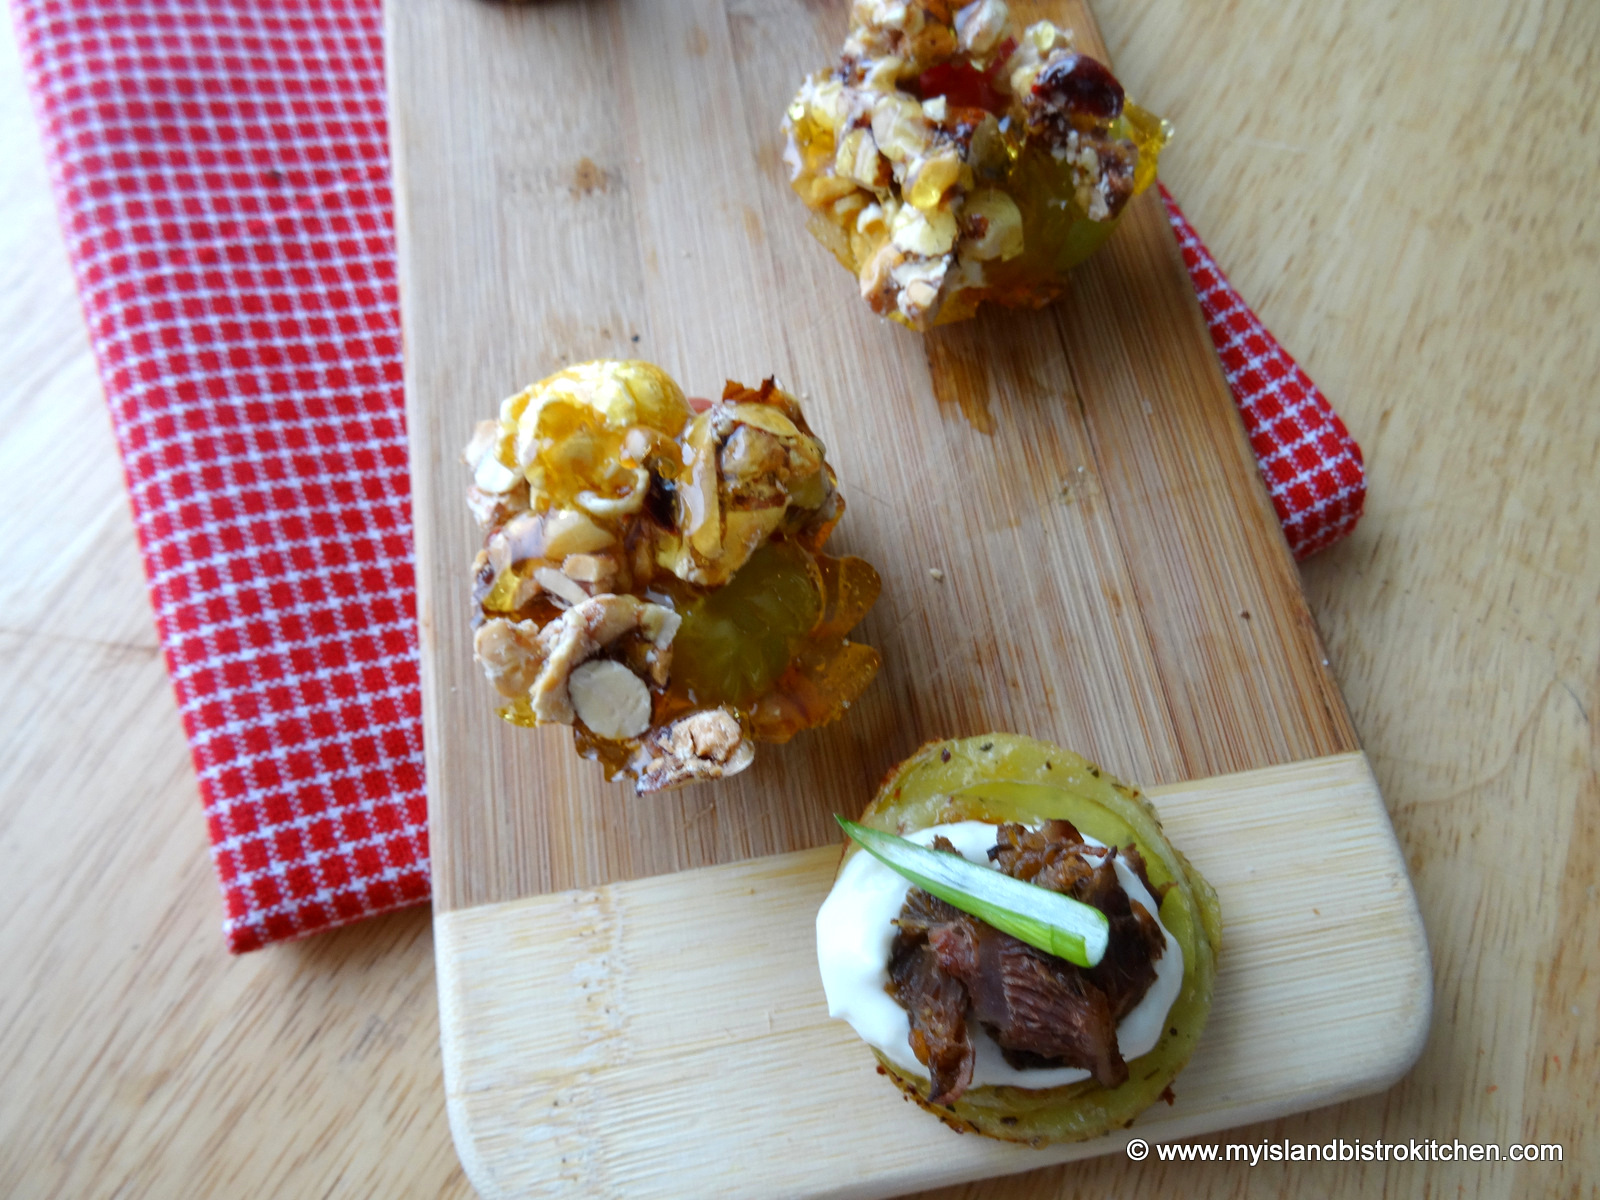
Potato Base Canapé topped with Sour Cream and Braised Beef
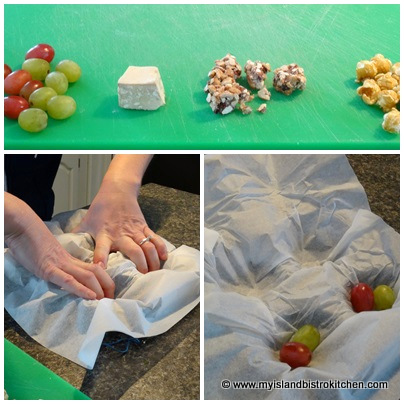
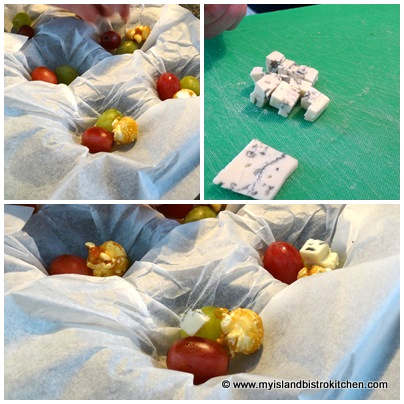
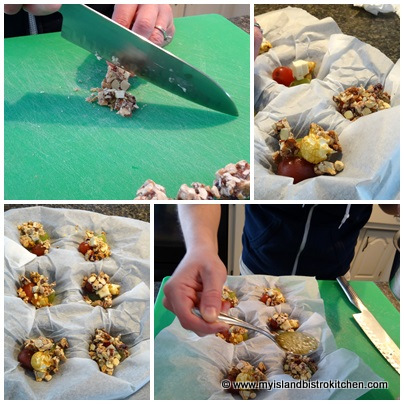
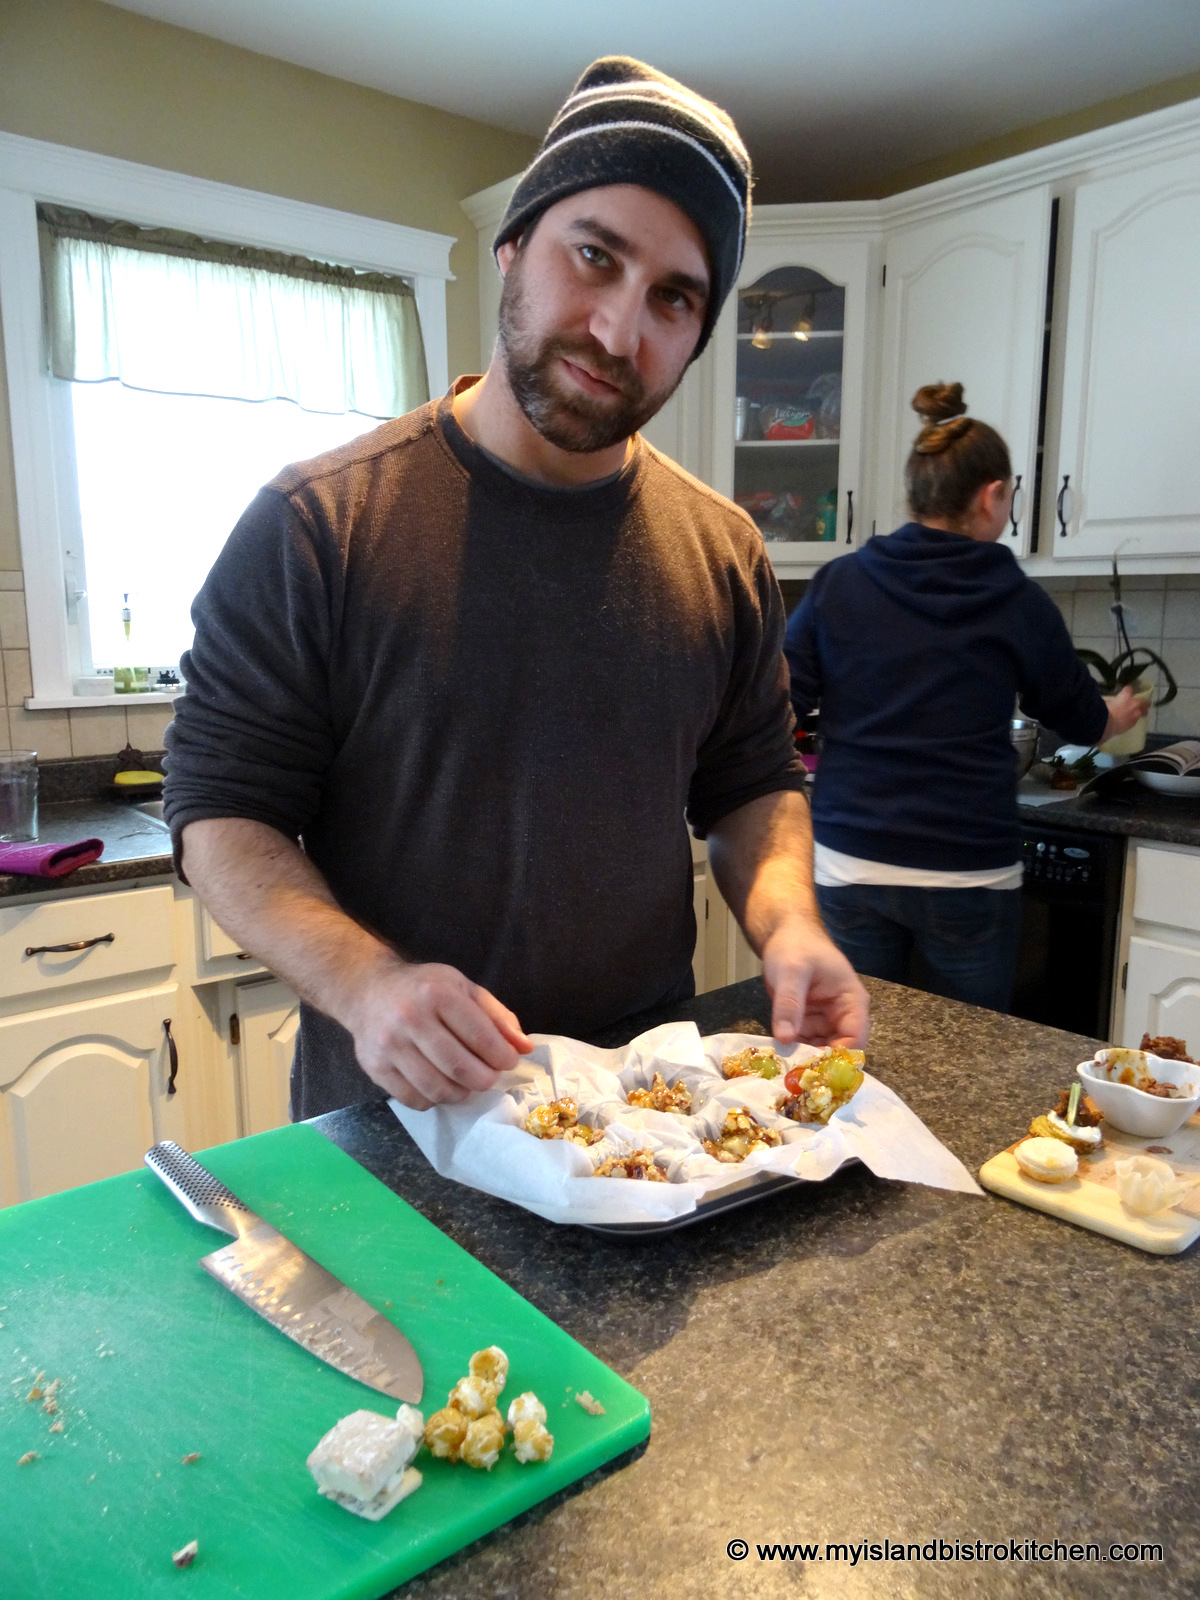
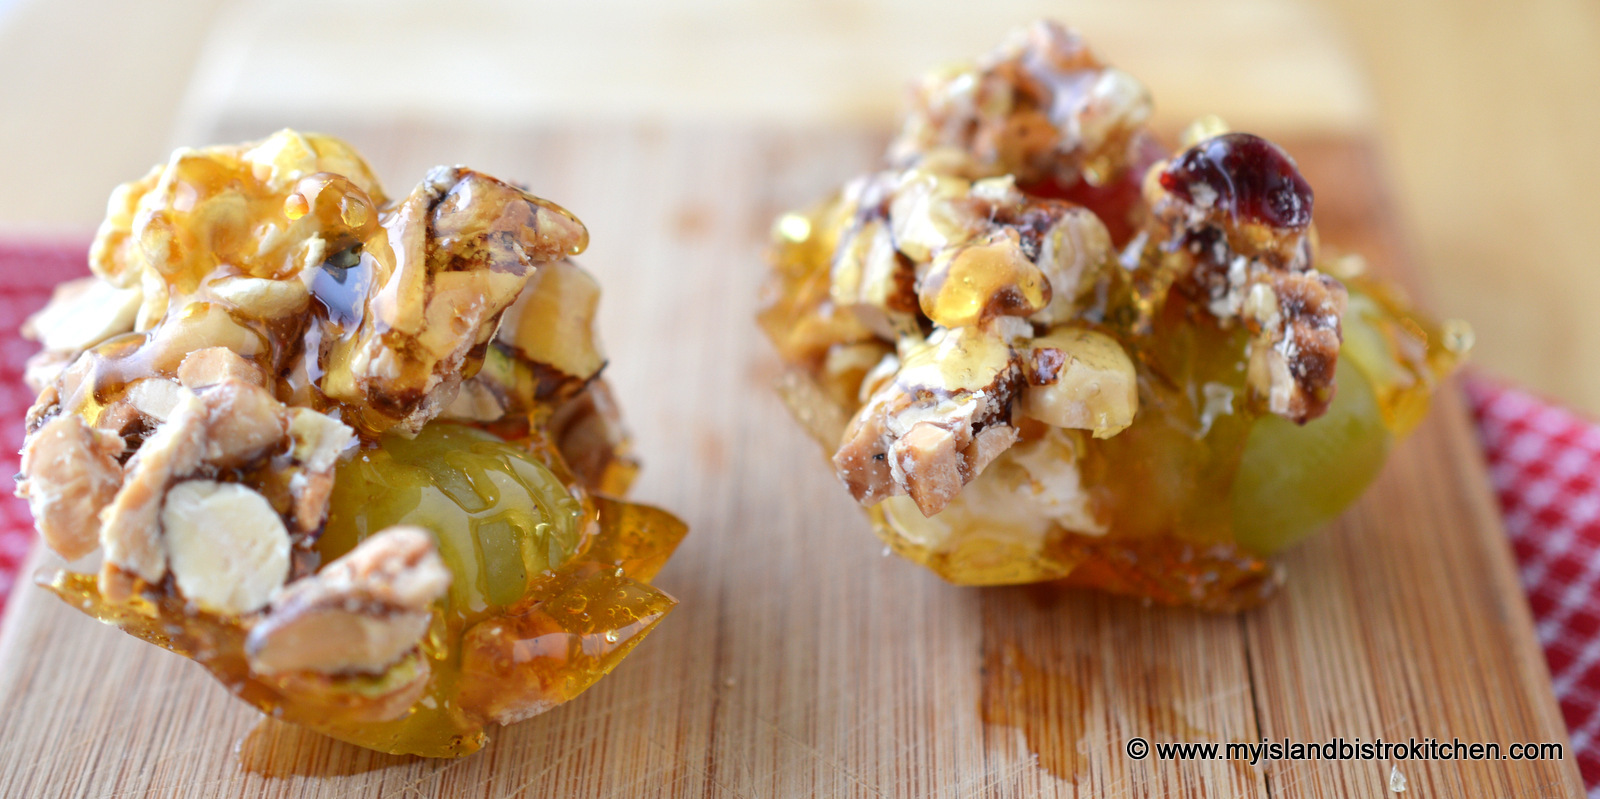
Jennifer also demonstrated how to make a sweet treat that consists of grapes, caramel popcorn, chopped nut clusters, and Cambozolo cheese, all held together with a caramel sauce made with corn syrup, sugar, and water.
Grape and Caramel ClustersGrape and Caramel ClustersGrape and Caramel ClustersMike gets ready to remove the Grape Cluster Canapés from the panGrape and Caramel Clusters
So, if you are short on time this holiday season and want to take the stress out of preparing for a cocktail party or other holiday event, you may want to consider having the event catered. Jennifer and Mike run a full service catering company and can be reached by phone at 902-963-2176, by email at greenislcatering@gmail.com, or through Facebook at https://www.facebook.com/pages/Green-Island-Catering-Company/
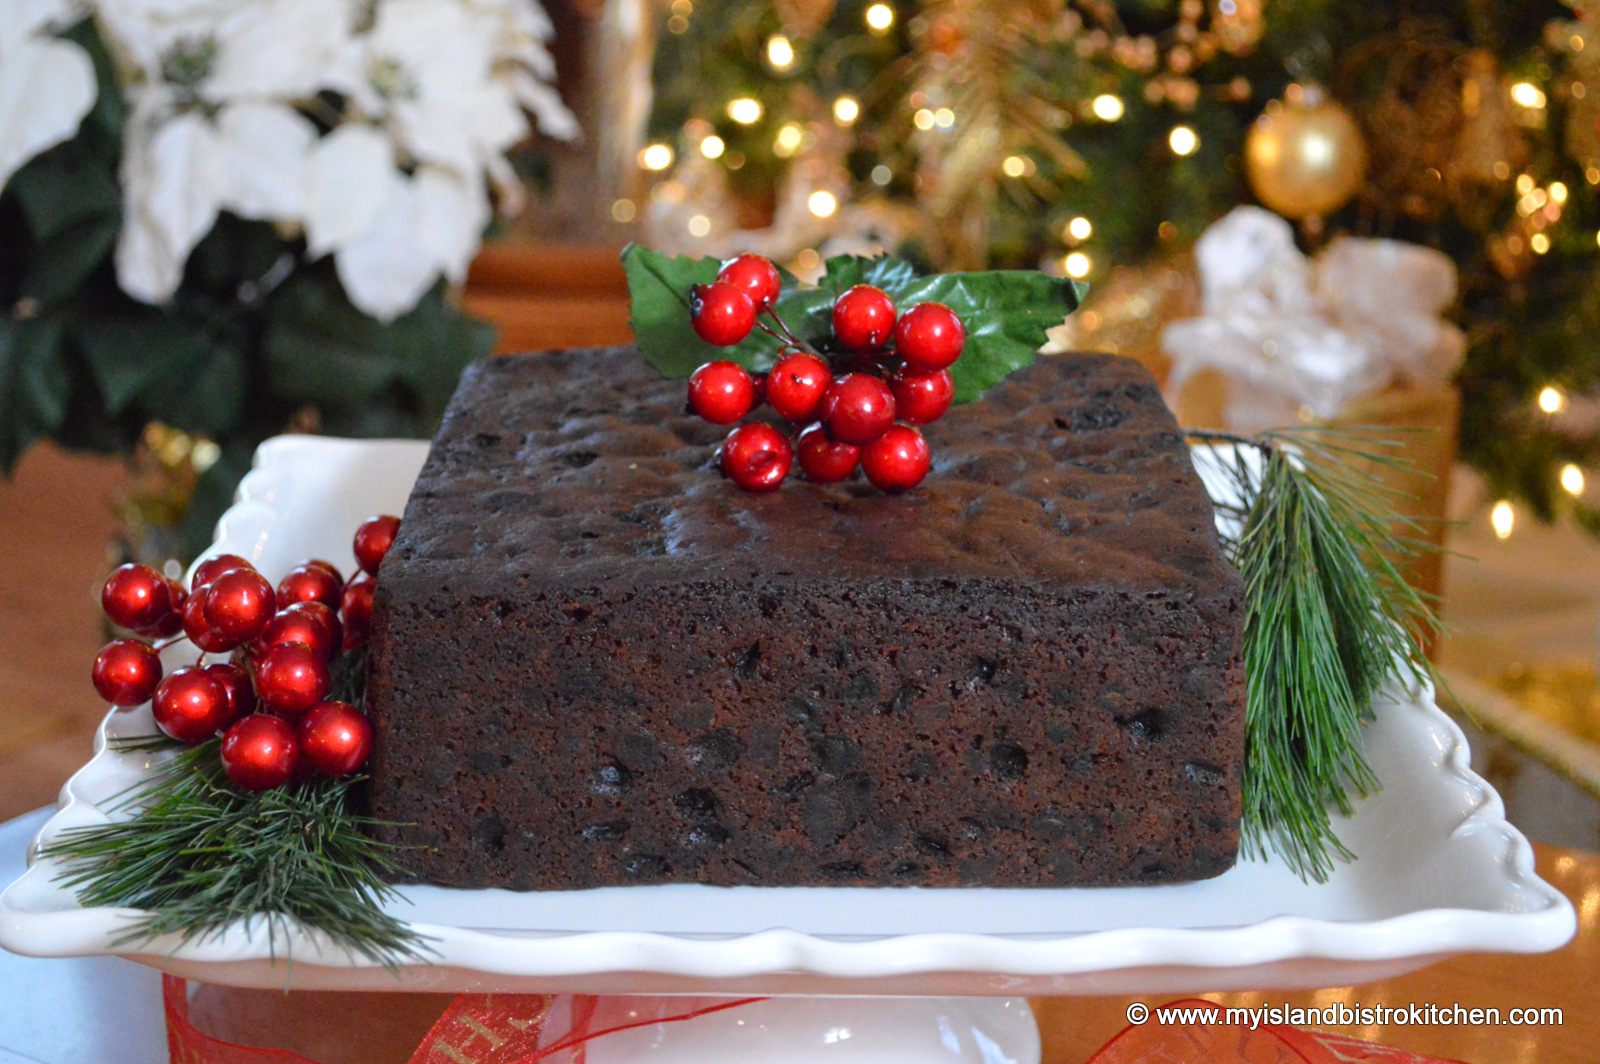
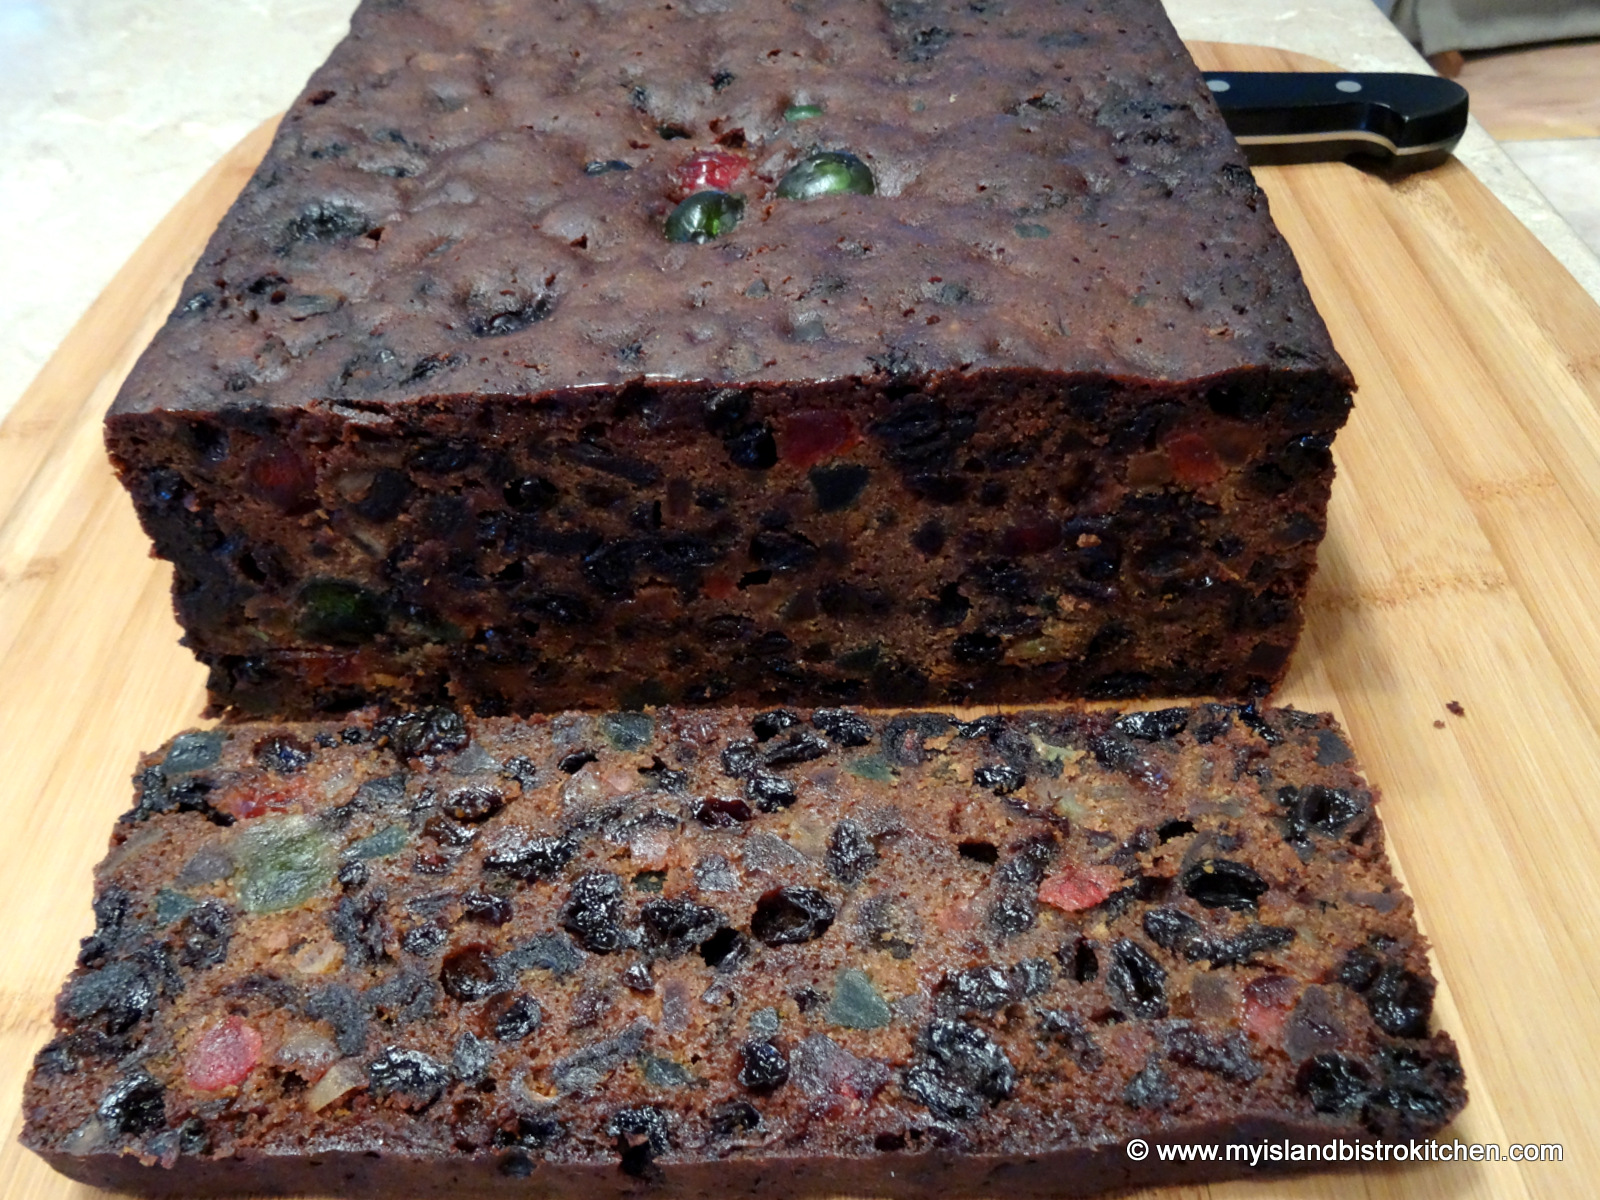
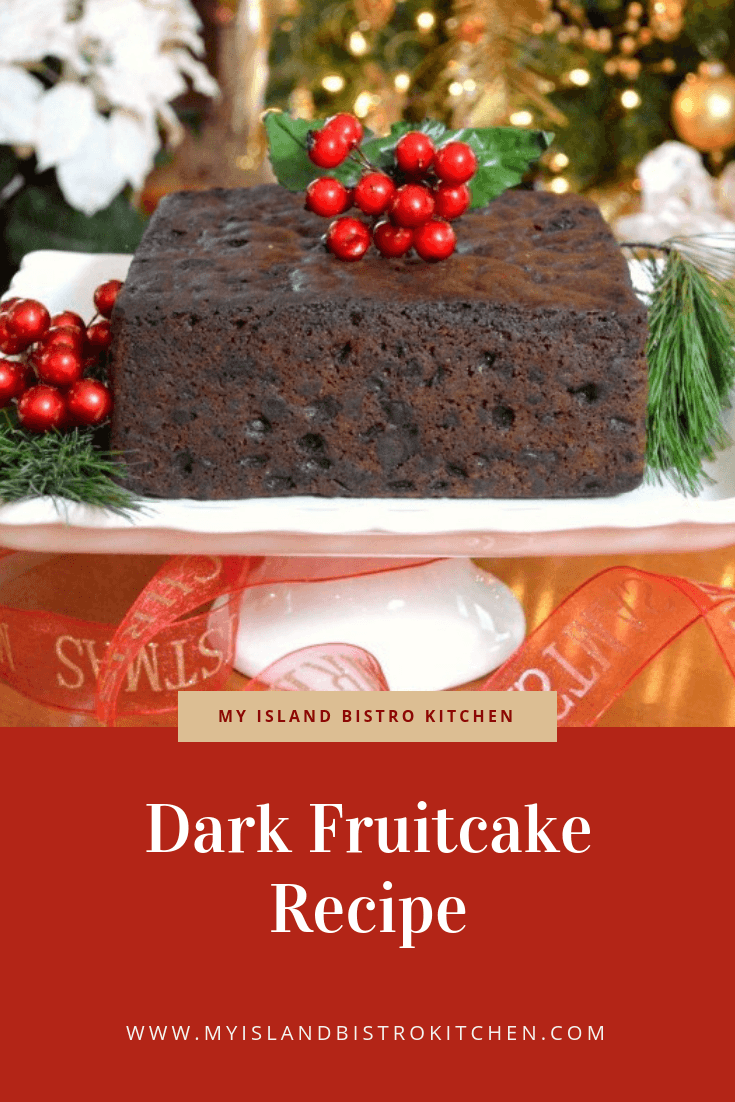
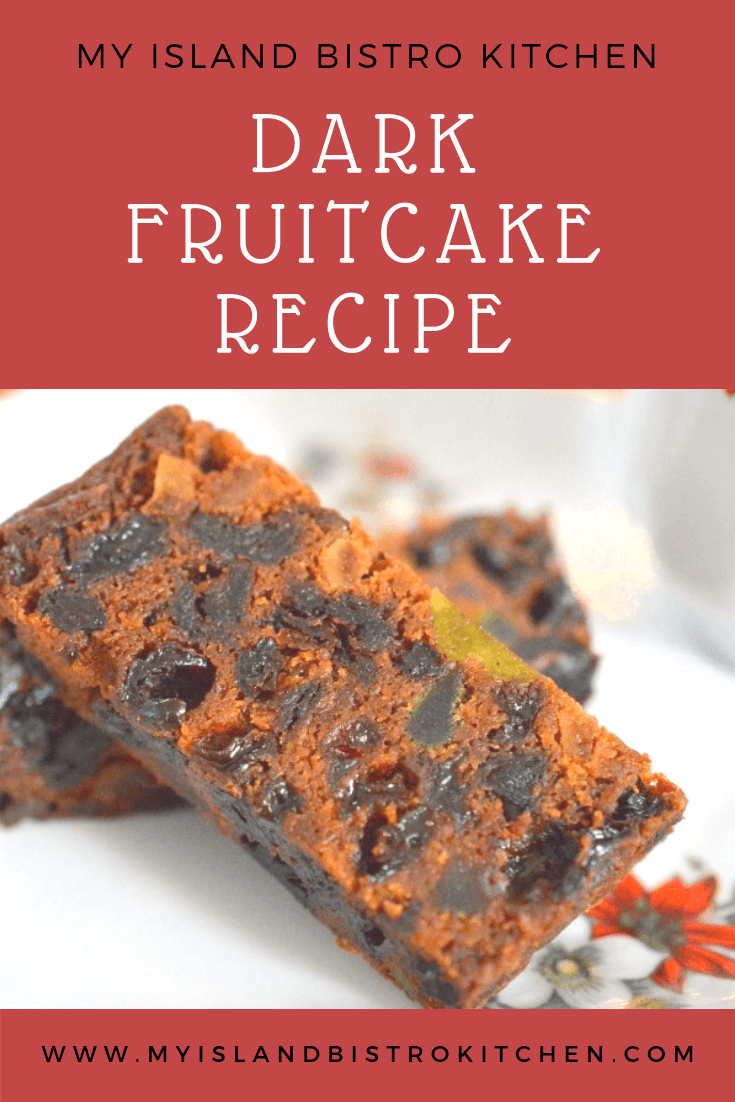
Fruitcakes. People either love them or loathe them and there seems to be no middle ground. I personally favour them and they have long been a part of my annual Christmas traditions.
My Island Bistro Kitchen’s Dark Fruitcake
There are basically two kinds of fruitcakes, a light cake and a dark cake. The dark fruitcake is characterized by the addition of molasses, spices, and often strawberry jam, all of which contribute to its dark color. The light fruit cake has a light-colored batter which makes the jewel tones of the glazed fruit pop. It is, by far, the most colorful of the two cakes. While I could not find any conclusive statistics, it seems to me that dark fruitcakes may perhaps be the more common.
Fruitcakes are sometimes called Christmas cakes since that’s often the only time of the year they make an appearance anymore. Years ago, however, fruitcake was a staple at weddings where the dark fruitcake was referred to as the groom’s cake while white pound cake was the bride’s cake. This tradition, at least where I live, has long since been dispensed with and replaced, instead, with many other cake flavor options.
I have been making fruitcakes for decades (I started making them when I was two! At least that’s my story and I’m sticking to it! Or, maybe it’s the vapors from the joy juice I’ve been brushing on my fruitcake over the past several weeks talking!). Some years I make both dark and light fruitcakes and, other years, one or the other. I simply love the smell of a fruitcake baking in the oven on a cold November afternoon. I always make my fruitcake around Remembrance Day as that gives it lots of time to “ripen” and mellow before the holidays. The making of the fruitcake heralds the beginning of my holiday preparations.
Fruitcakes are still considered a luxurious treat by many because the ingredients can be costly and the cake is time-consuming to make. Sometimes it is even hard to find the big sticky raisins, often referred to as Lexia raisins, which are a signature ingredient in a traditional dark fruitcake.
Lexia Raisins (big sticky raisins)
Essentially, a fruit cake is a mixture of candied/glazed fruit, different kinds of raisins, and often nuts, all held together by a small amount of batter. Before I share my recipe for dark fruitcake at the end of this posting, I am going to share some hints and tips from my many years of making fruitcakes. I hope you will find them helpful.
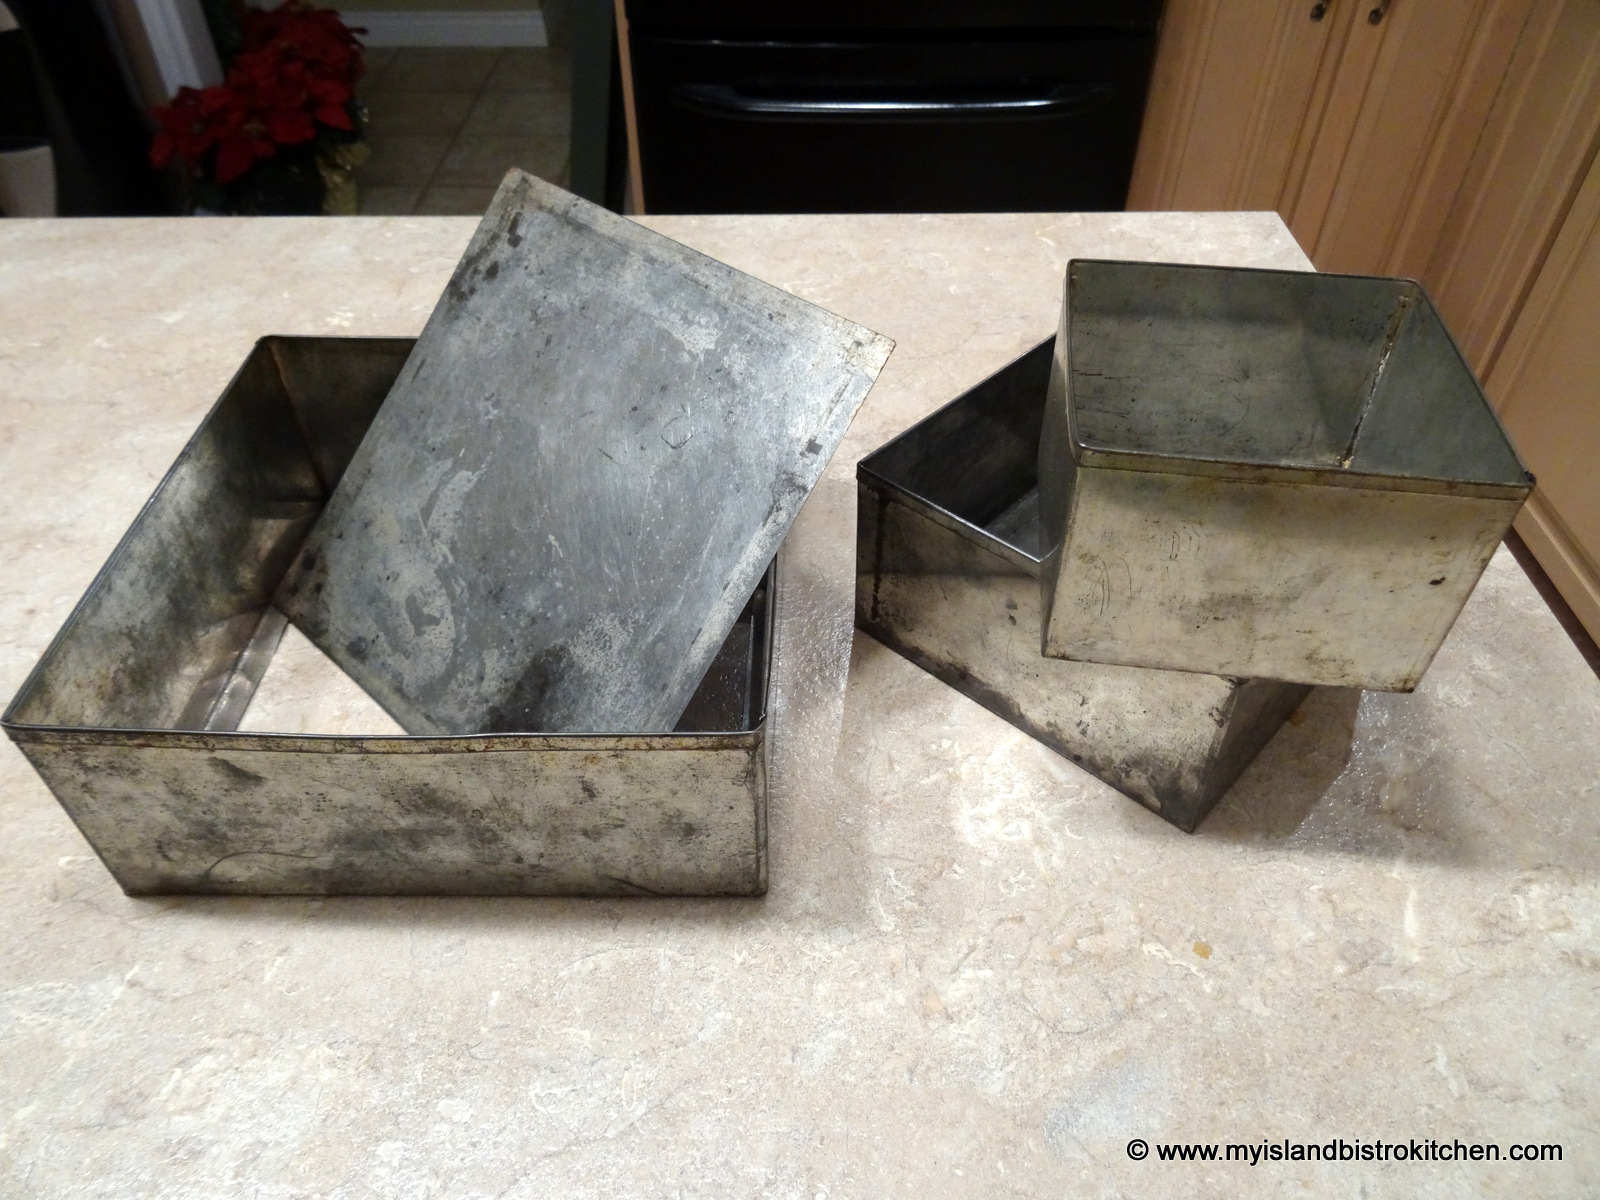
Cake Shape
Traditionally, fruitcakes are either square or round-shaped and quite deep – at least 2½” – 3” deep. The pans should be ones that have removable bottoms as this makes it easy to remove the cake from the pan. The pans below have been in my family for years and have held many fruitcakes. They may be old and discolored but they do the trick!
Fruitcake pans
Square cakes are infinitely easier to cut and plate more attractively than round cakes. With square pans, each piece can be cut to the same size and shape whereas, with round cakes, it is more difficult to get nice, even shaped pieces cut. There is a trick to cutting round cakes but it is certainly more complicated and time-consuming that cutting straight slices from a square-edged cake. However, the shape of the cake is a personal preference and the cake will taste the same regardless of shape.
It is very important to use the size of pan the recipe calls for as baking times have been tested for its size. Some bakers use loaf pans, 9”x13” shallow pans, or even muffin cups or soup cans in which to bake their fruit cakes. If changing a pan size from the one indicated by a recipe, remember that baking times will need to be adjusted accordingly as a more shallow or smaller cake will take less time than a deeper one to bake. Bakers will need to rely on their baking experience to determine when a cake is baked if they choose to use a pan size different from the one indicated in a recipe and in which the cake recipe has been tested.
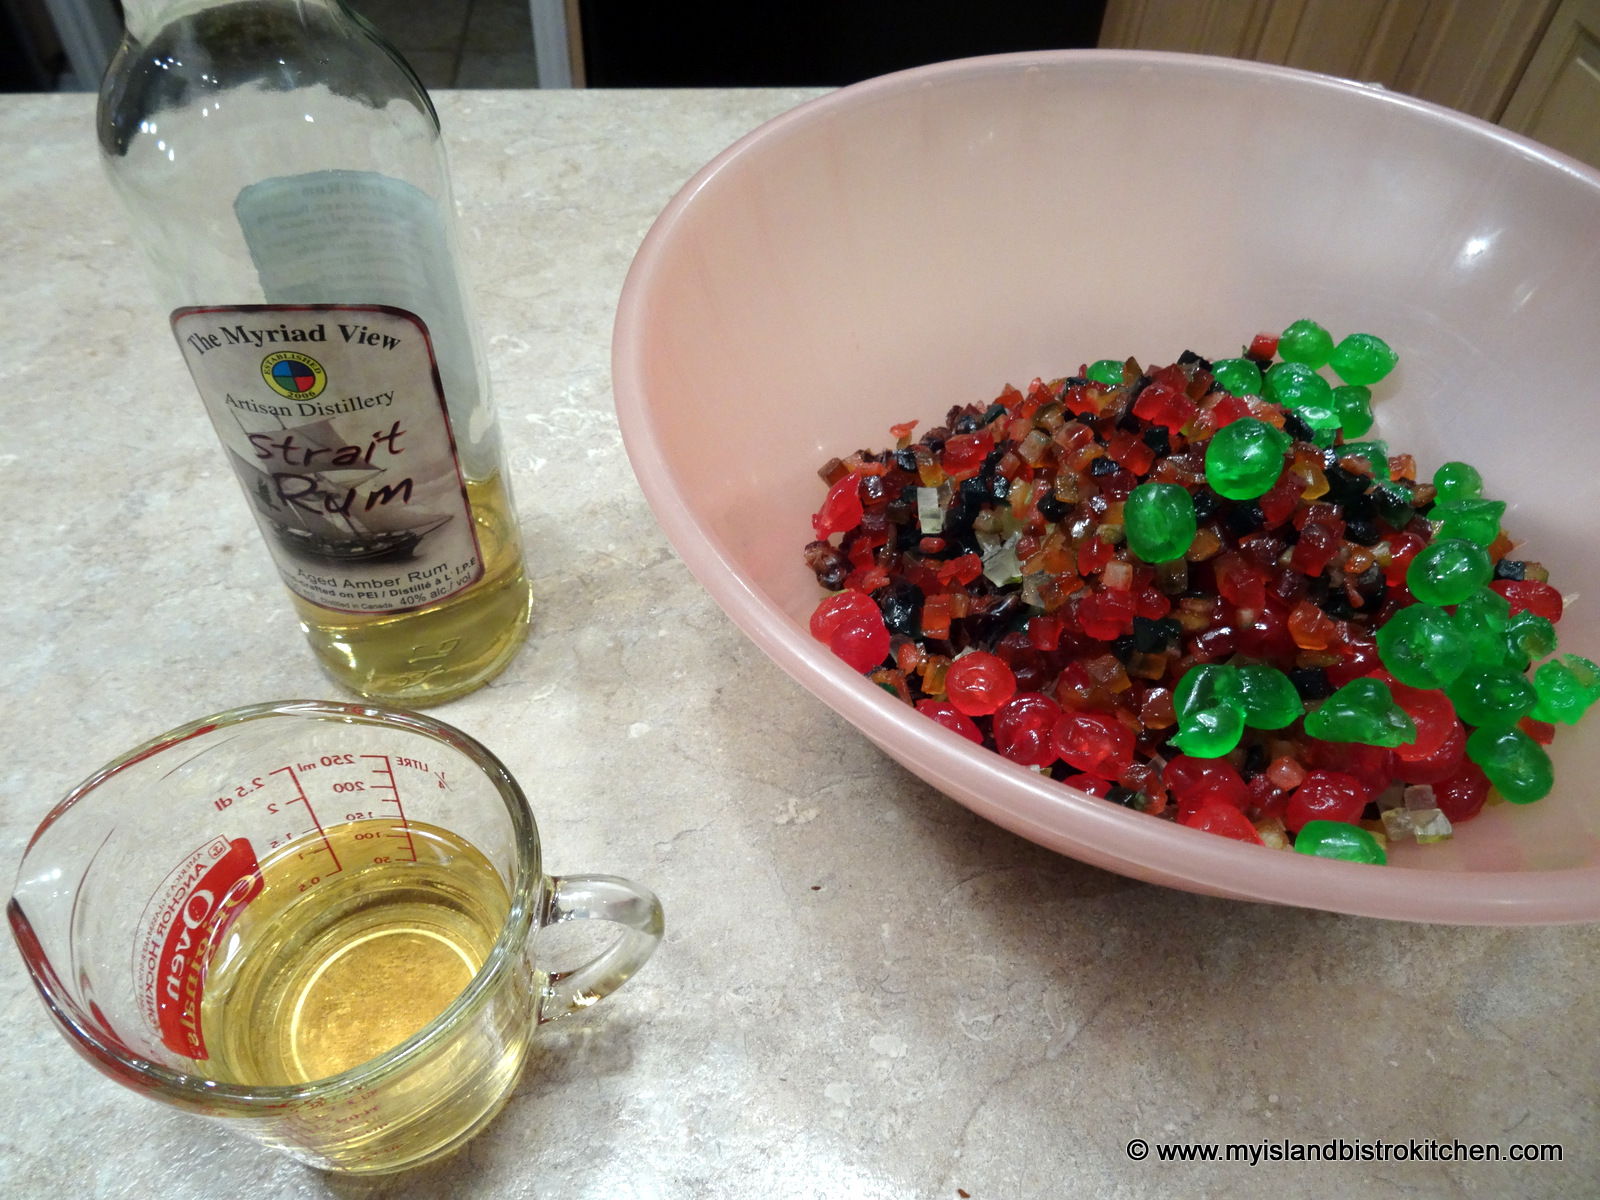
Soaking Fruit
Commonly, the glazed and dry fruit, including the raisins and currants, are soaked in liquor, with rum or brandy the most commonly used types of libation. Alternatively the fruit can be soaked in a fruit juice.
The purpose of soaking the fruit is three-fold:
1) To soften/plump/rehydrated the dried fruit – the raisins, in particular; 2) To add flavour to the cake; and 3) As a preservative (if using liquor) to extend the shelf life of the cake.
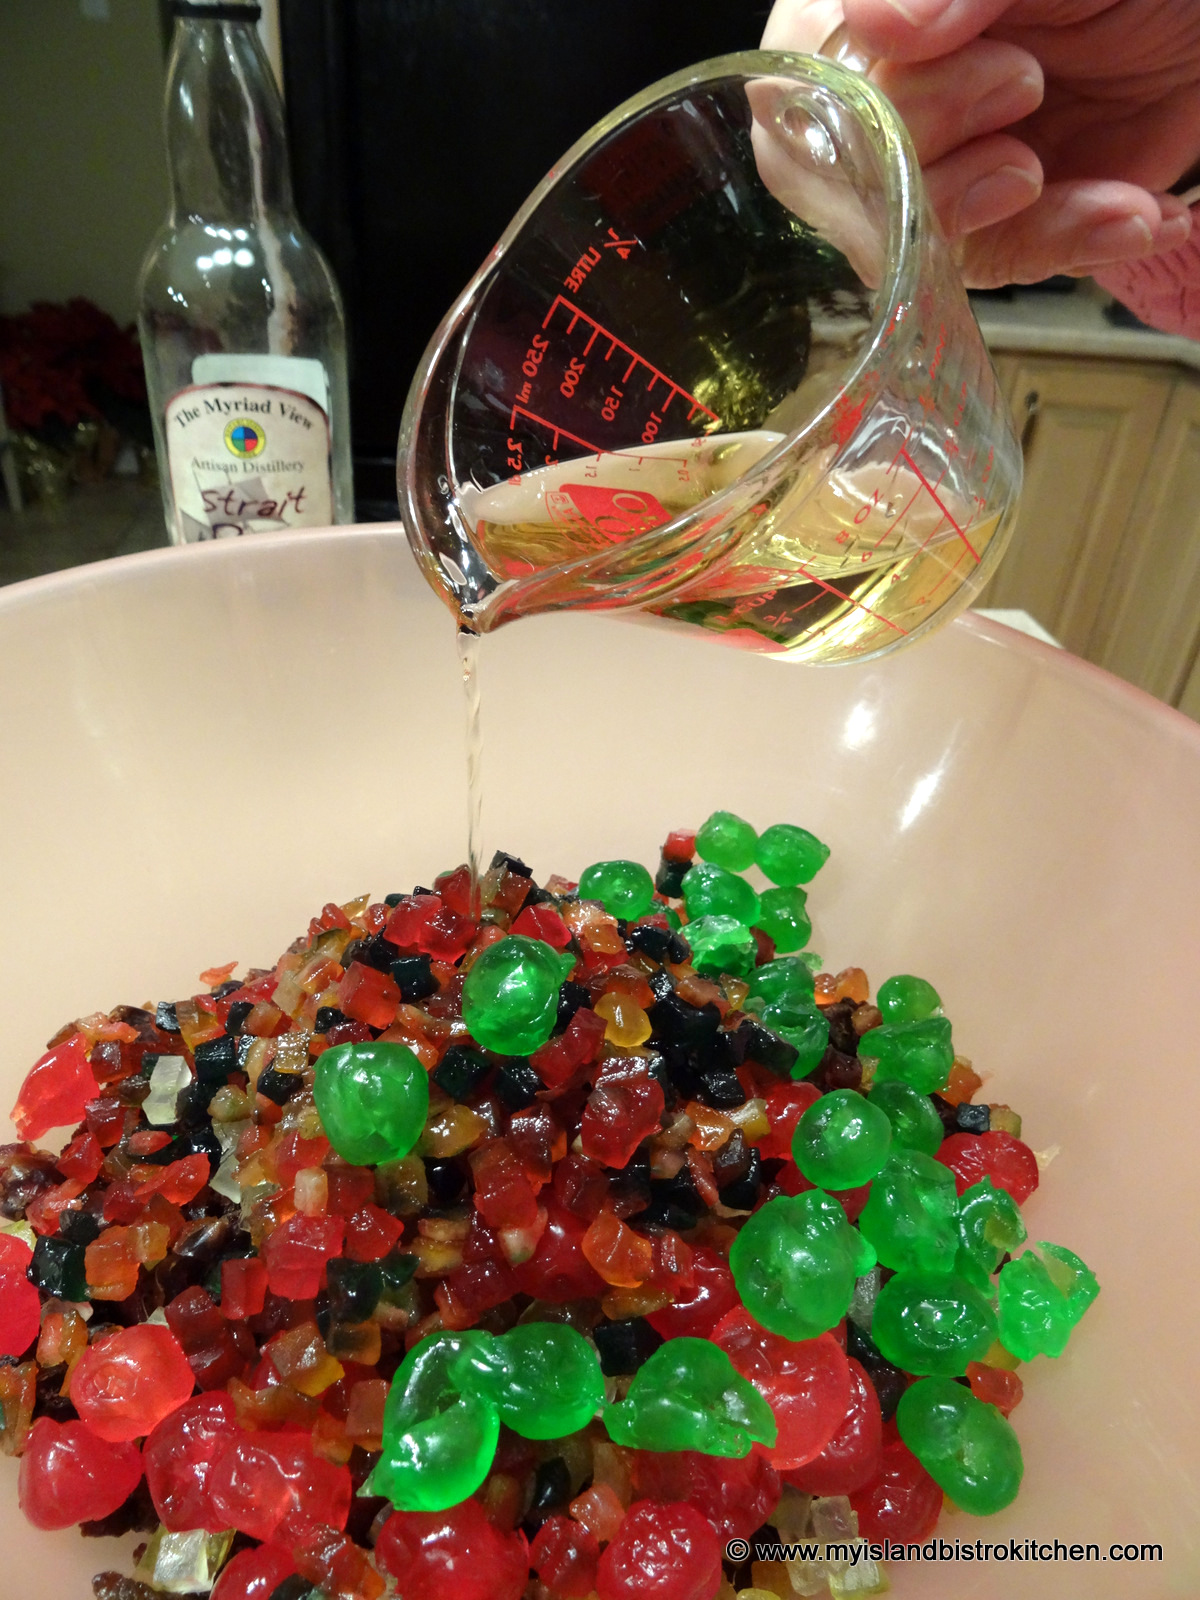
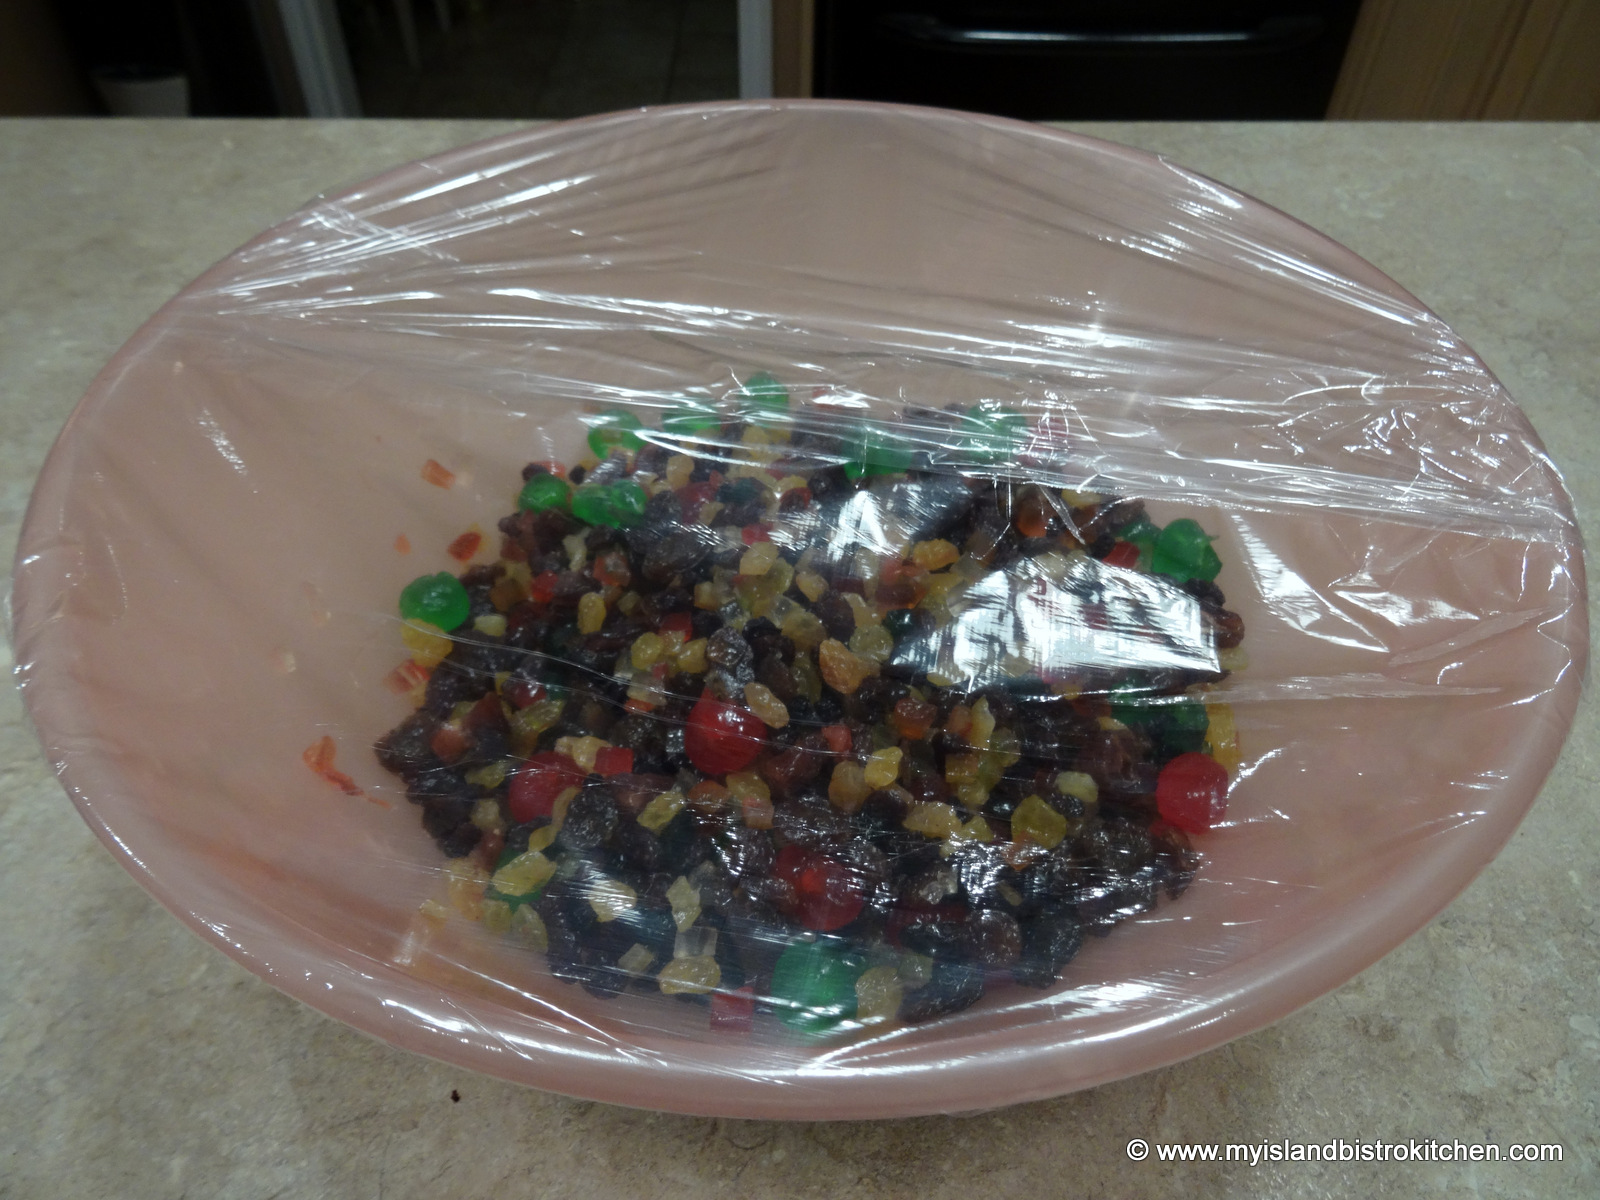
Some bakers soak the fruit for several months. I don’t find this necessary or that the cake has any significantly better flavour if made with fruit that has been soaked for months. In my opinion, the fruit will only absorb so much liquid and flavor, no matter how long it is soaked. I soak the fruit in a covered container for 24-48 hours, stirring it 3-4 times during the macerating process.
It is important to resist adding more liquor to the fruit soak than is called for in the recipe. Adding too much liquor will add too much liquid to the batter, making it too runny to hold the fruit from falling to the cake bottom and it may also cause the cake to sink in the center as it bakes, potentially causing a soggy cake.
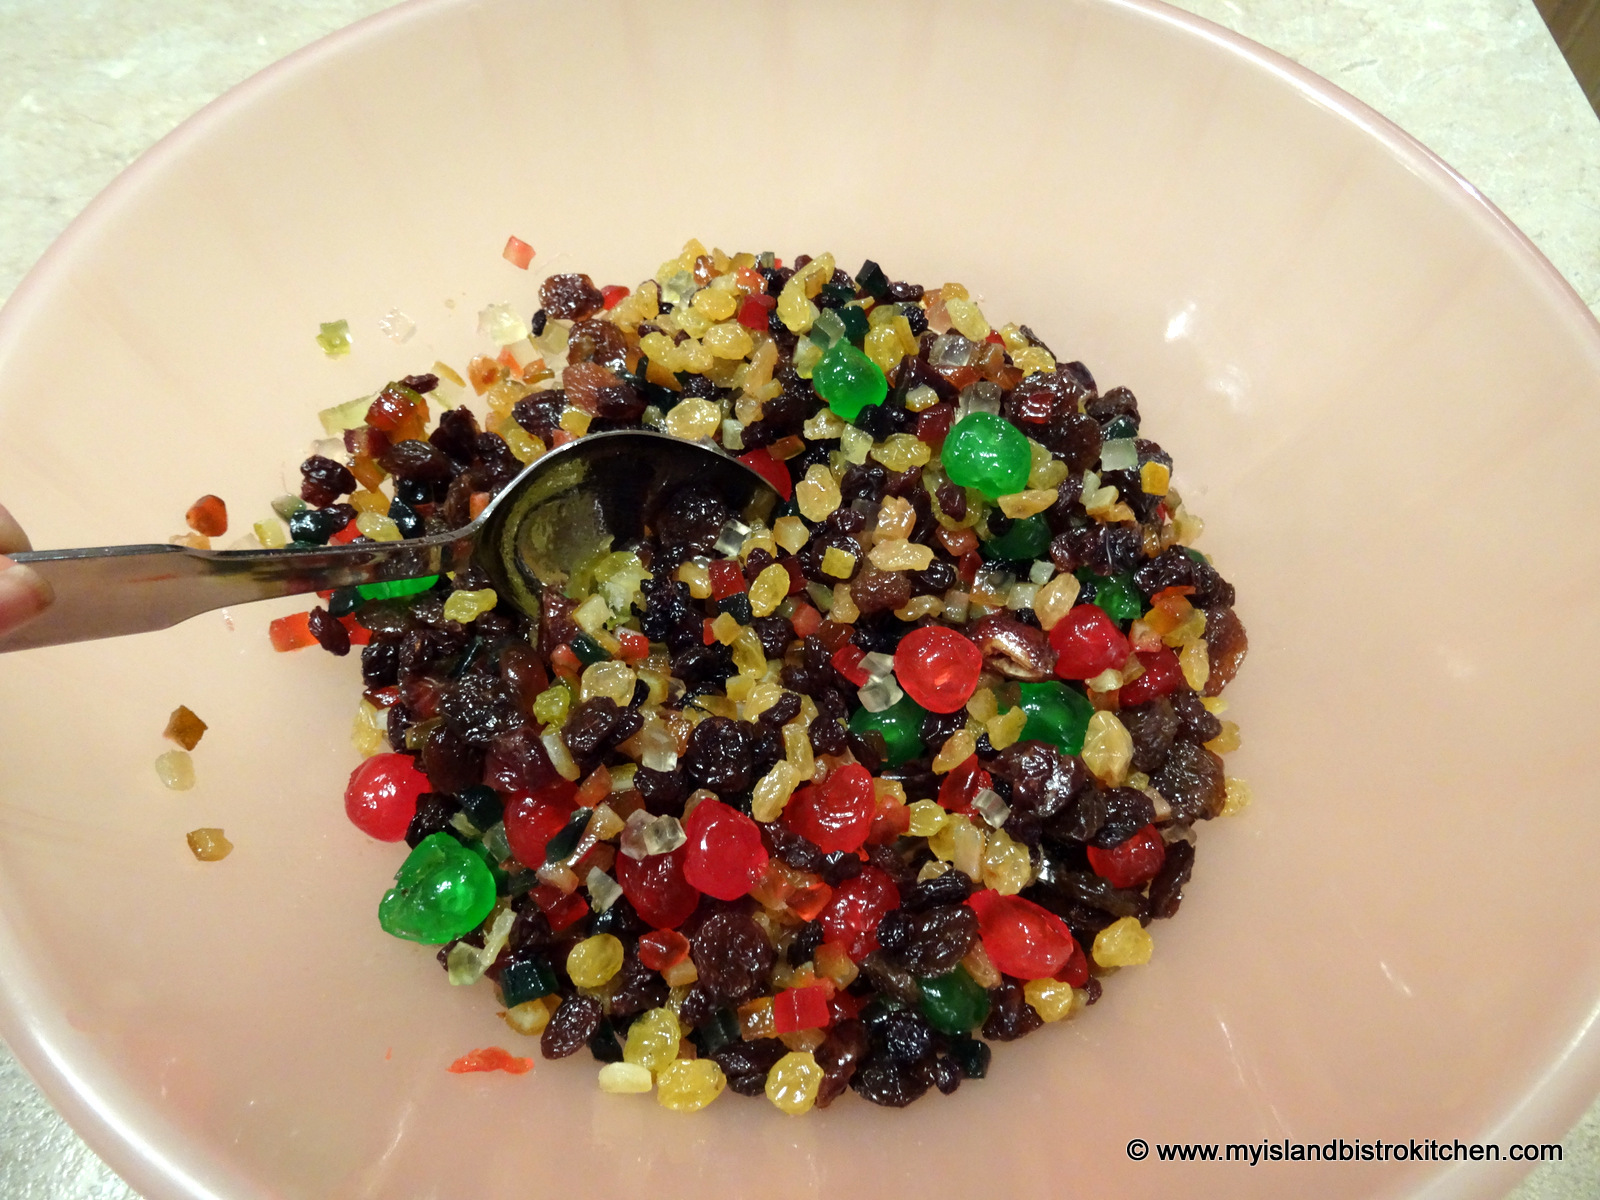
Fruit and Nut Content
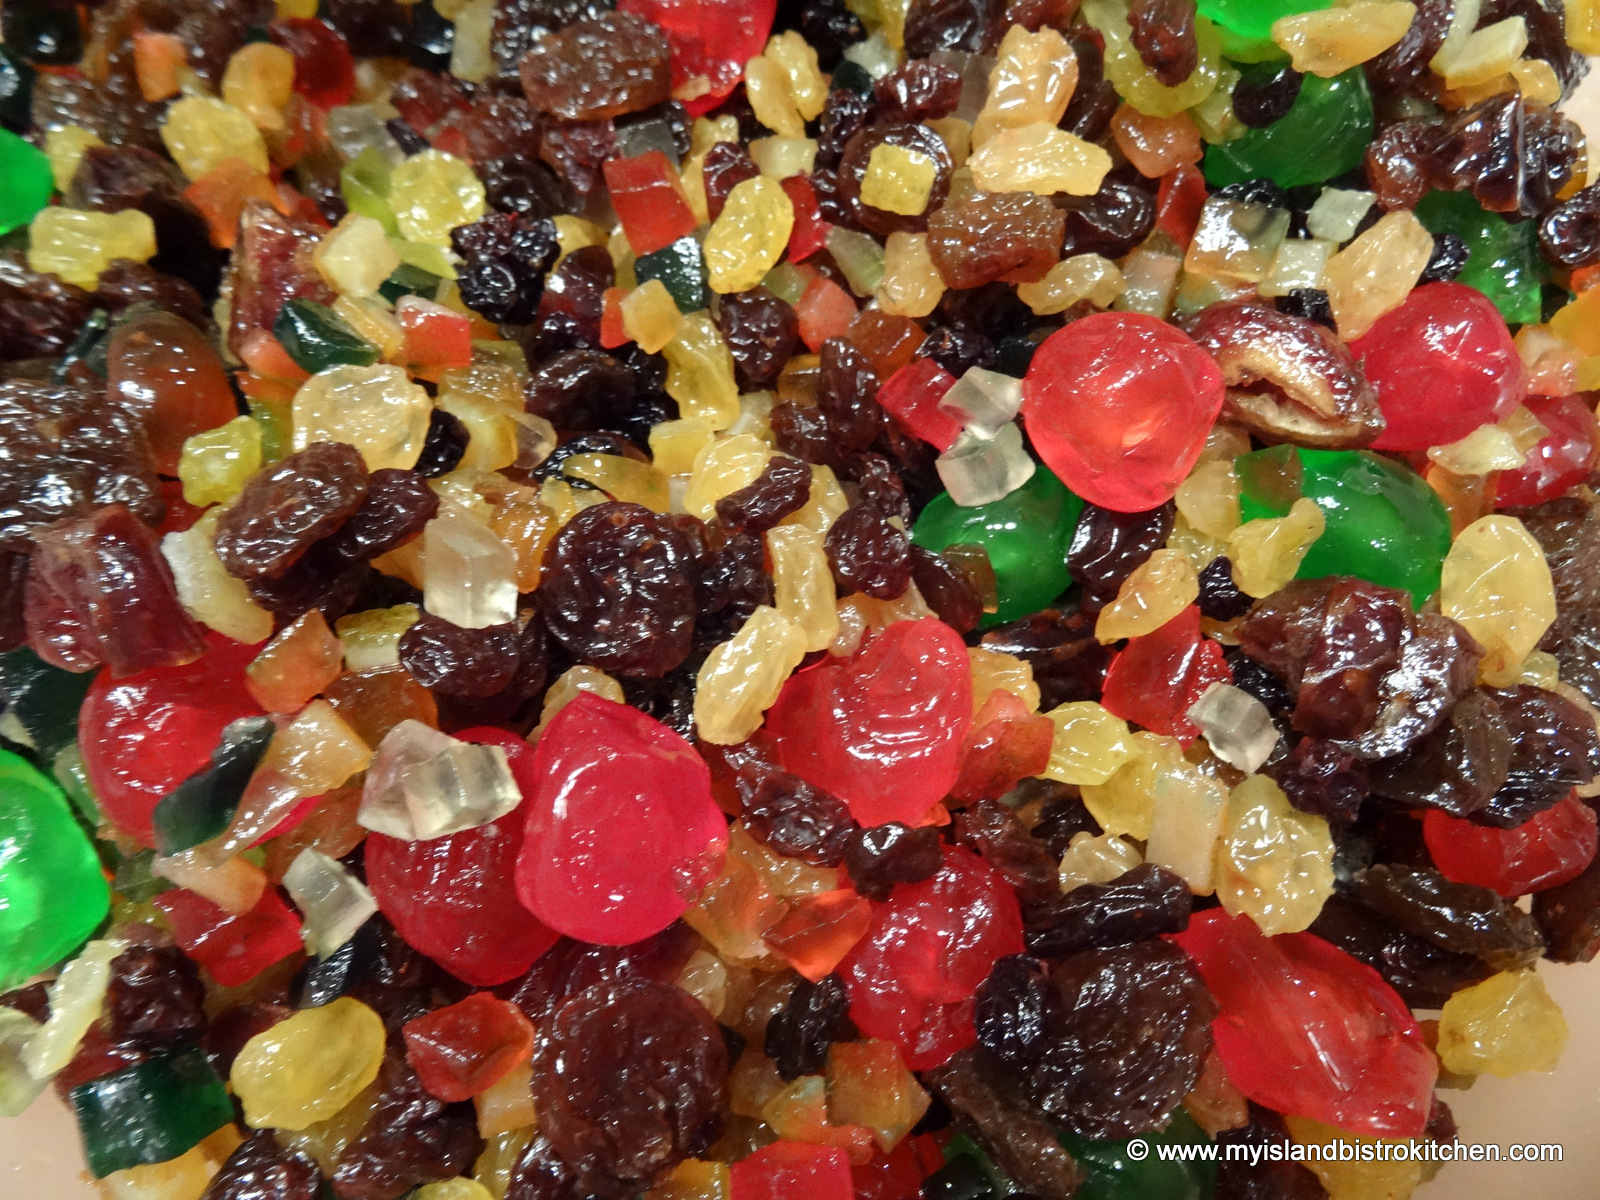
True traditional fruit cakes will have candied/glazed fruit, a mixture of raisins, and sometimes nuts. It is important that candied/glazed fruit be used and not, for example, fruit with a lot of liquid such as maraschino cherries or fresh fruit which will add too much excess liquid to the batter.
Jeweled-toned Fruit
Fruitcakes typically do contain nuts; however, my recipe below is nut-free. I find several issues with including nuts in a fruitcake:
1) Nuts, over the long term, can go rancid or, alternatively, be hard junks in an otherwise soft texture cake; 2) Chunks of nuts can make it difficult to cut the cake; and 3) Many people have nut allergies and cannot enjoy a piece of fruitcake made with nuts.
Fruitcake ingredients can be flexible which means substitute ingredients are perfectly acceptable so long as the overall weight content of the fruit that the recipe calls for is maintained. For example, my fruitcake recipe calls for 3 pounds of fruit and I have listed the weight content of each individual ingredient making up that 3-pound fruit content. If you don’t happen to like citron, for example, simply omit the 3 oz called for and replace it with another glazed fruit of the same weight.
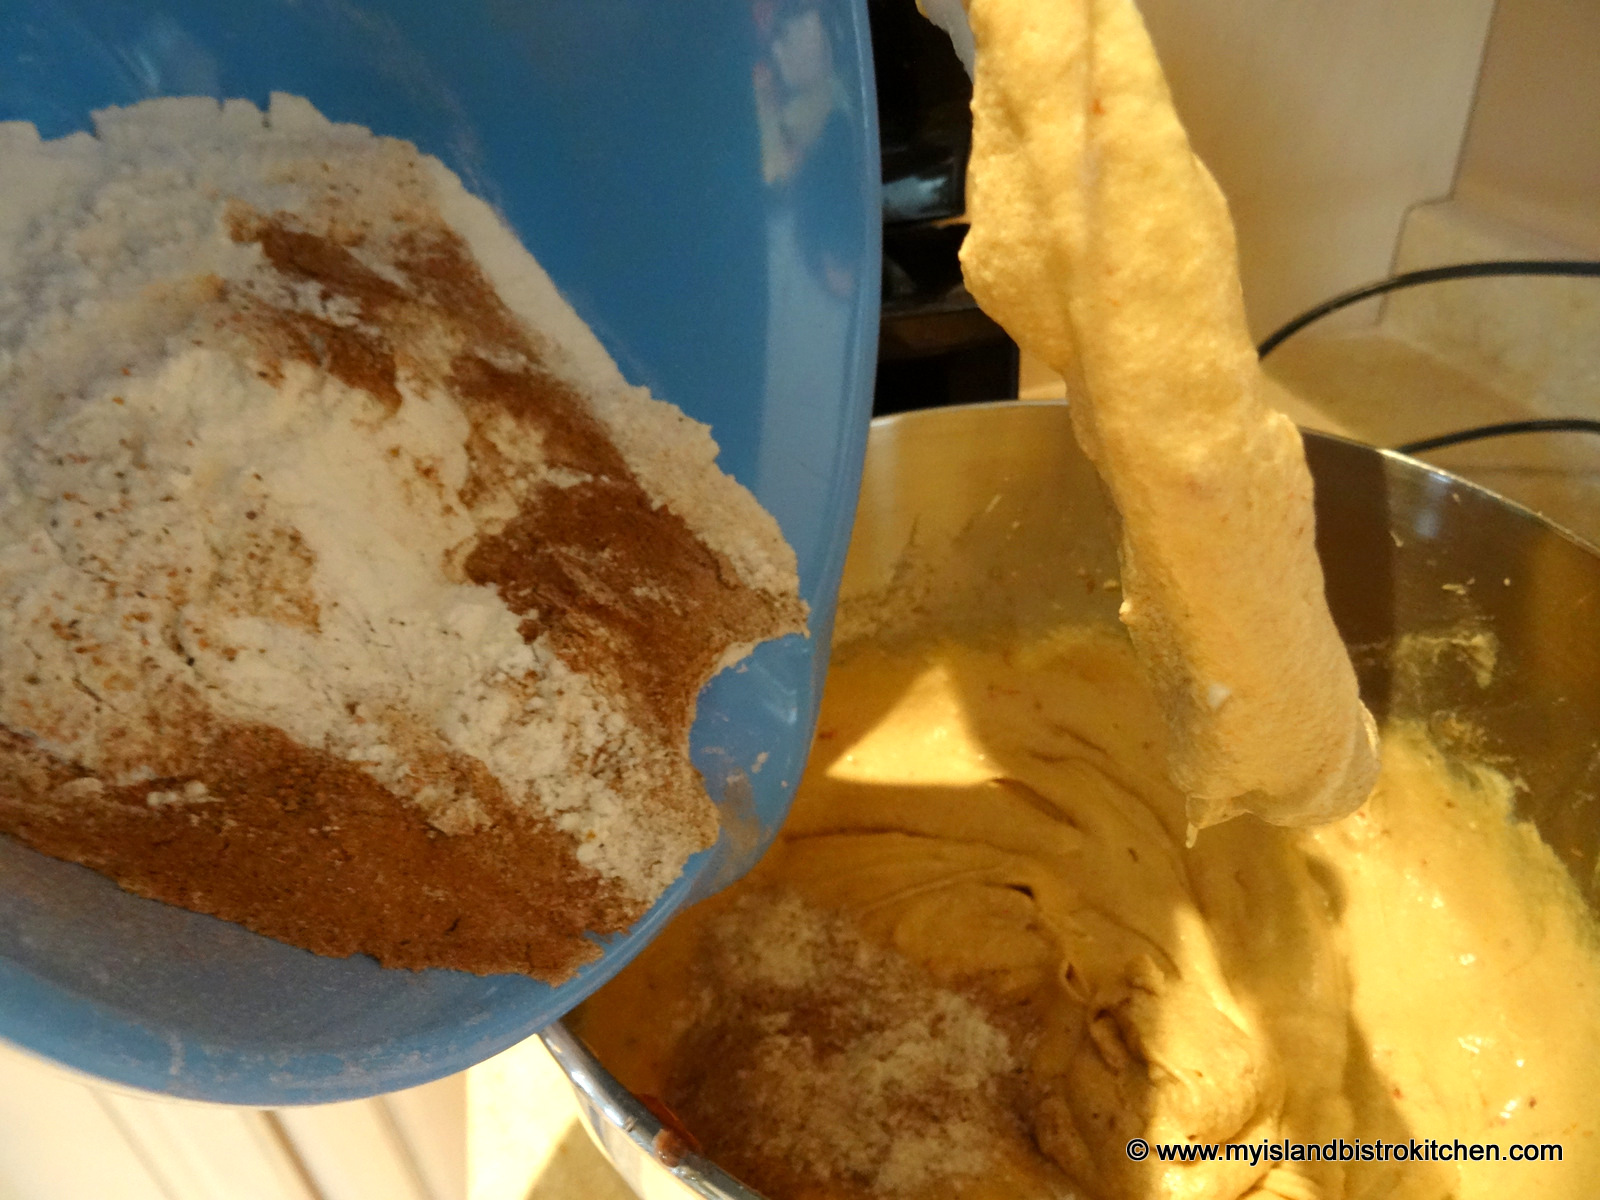
Batter
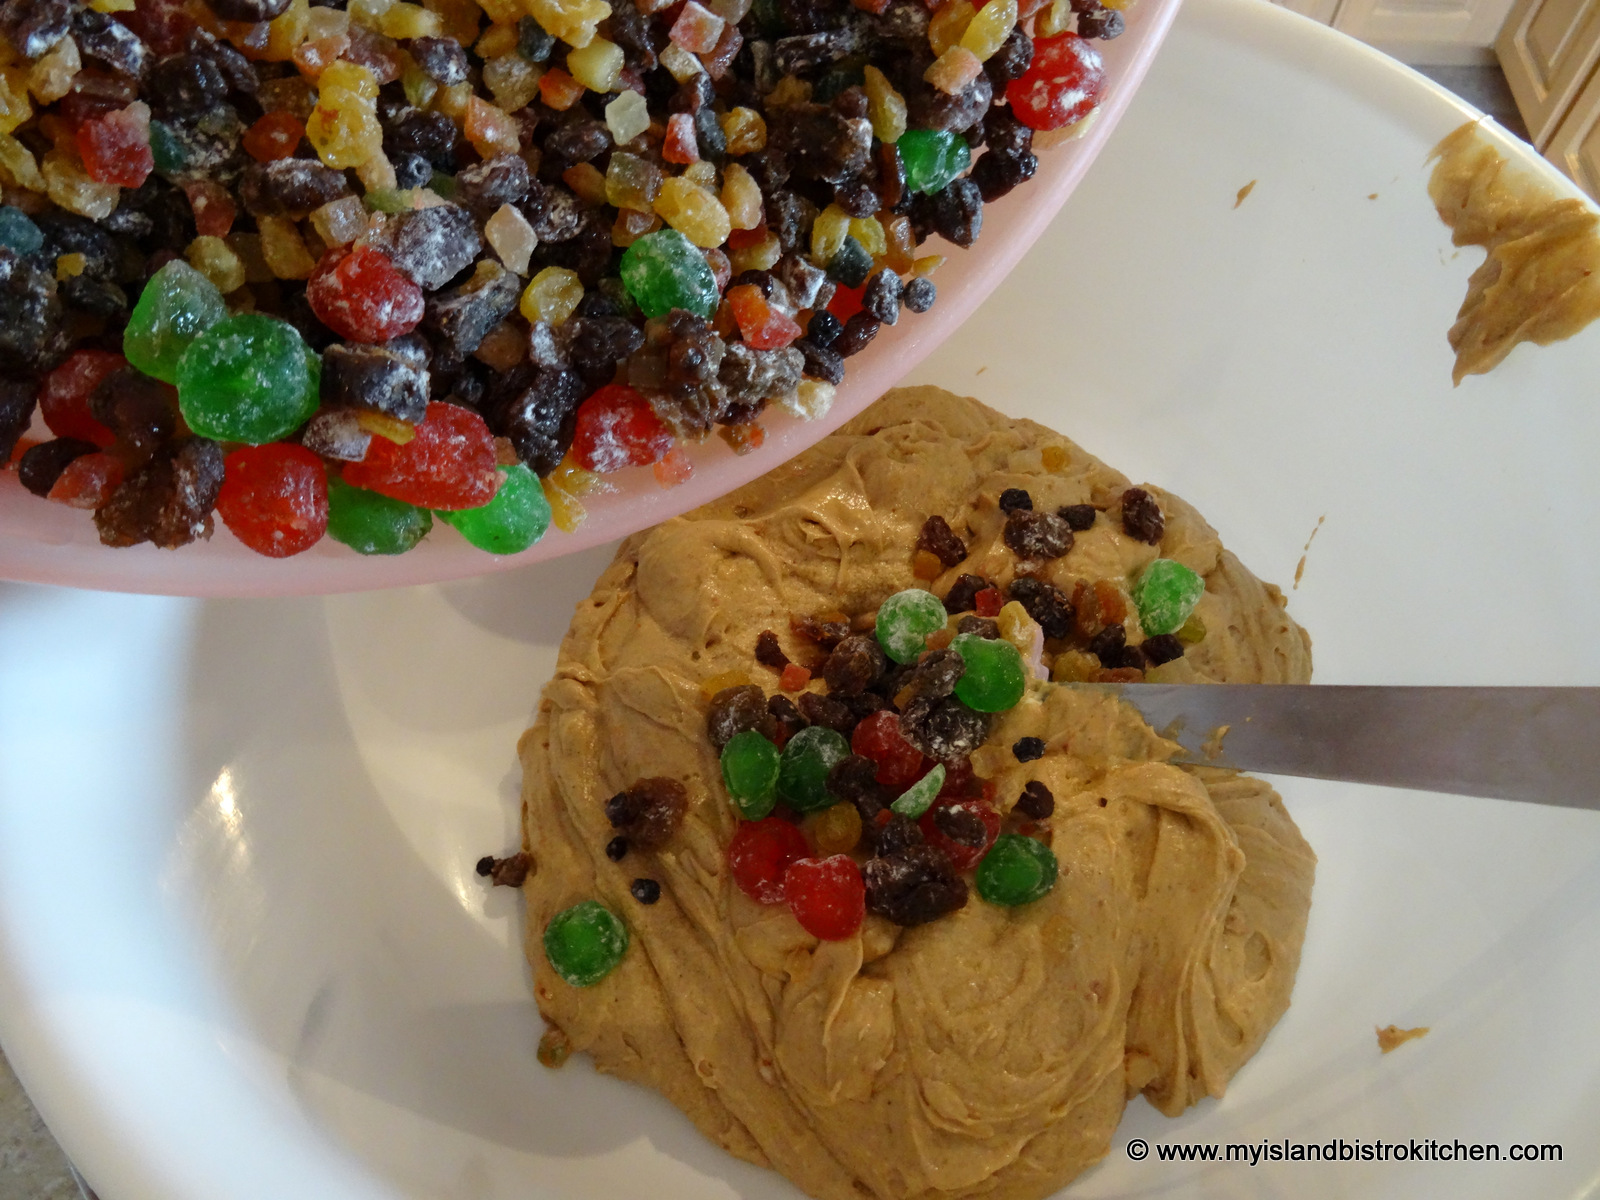
A fruit cake batter is very thick and dense and contains very little flour content. Essentially, there is just enough batter to hold the ingredients together. The reason the batter needs to be thick (as opposed to runny) is that it needs to support the heavy fruit content and keep it suspended and distributed evenly throughout the cake. Otherwise, the fruit will fall to the bottom of the cake.
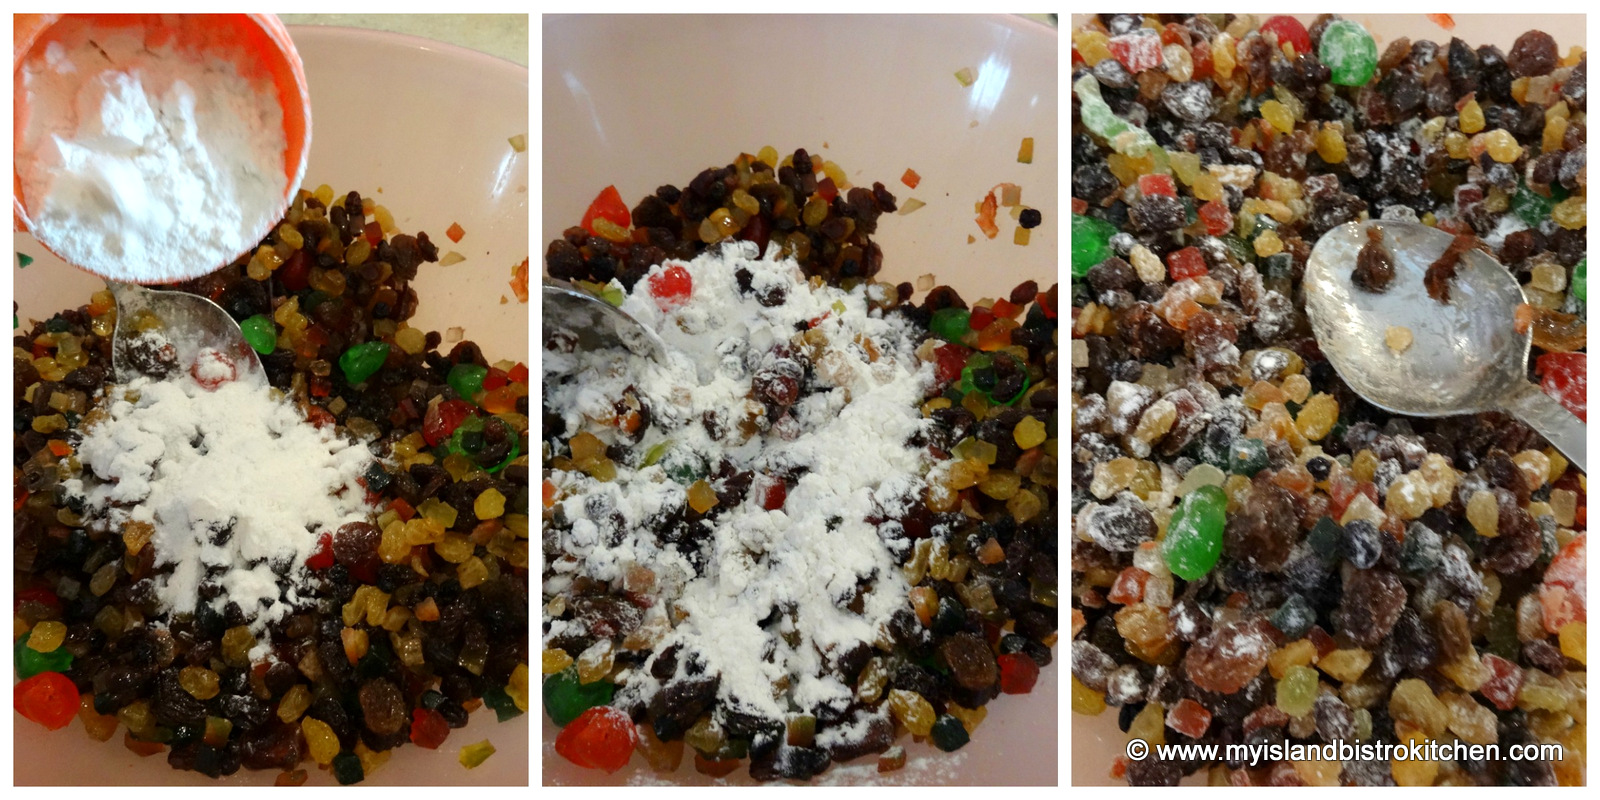
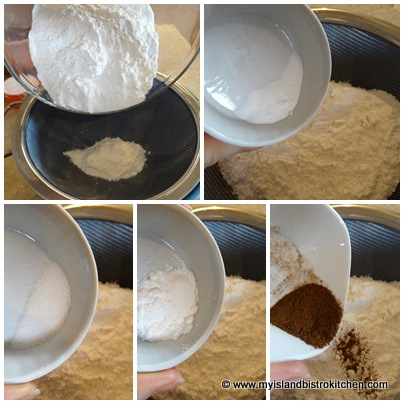
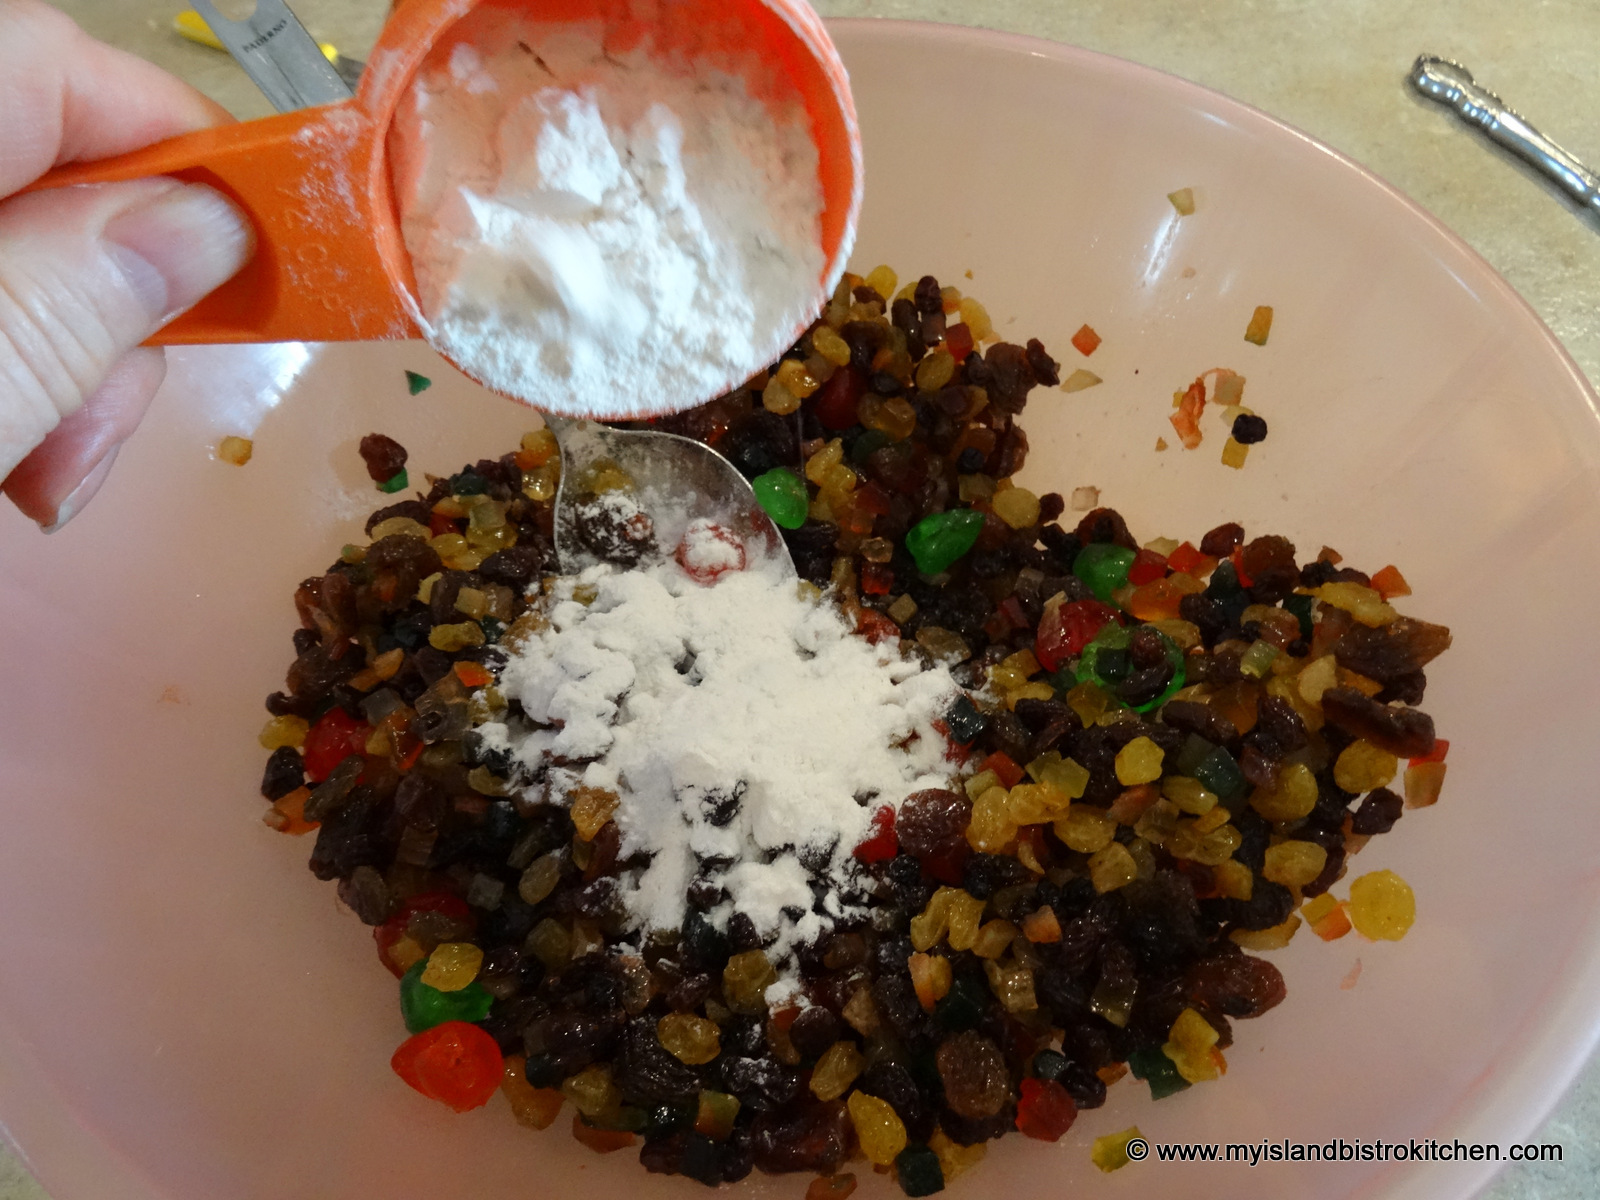
It is important to “flour” the fruit with a small amount of flour just before adding the fruit to the batter. This will also help to keep the fruit suspended throughout the cake. You will want to do this quickly and not leave the floured fruit any length of time before adding it to the batter as the flour when combined with the glaze on the fruit can turn into a gummy mess, thus defeating the purpose of flouring the fruit.
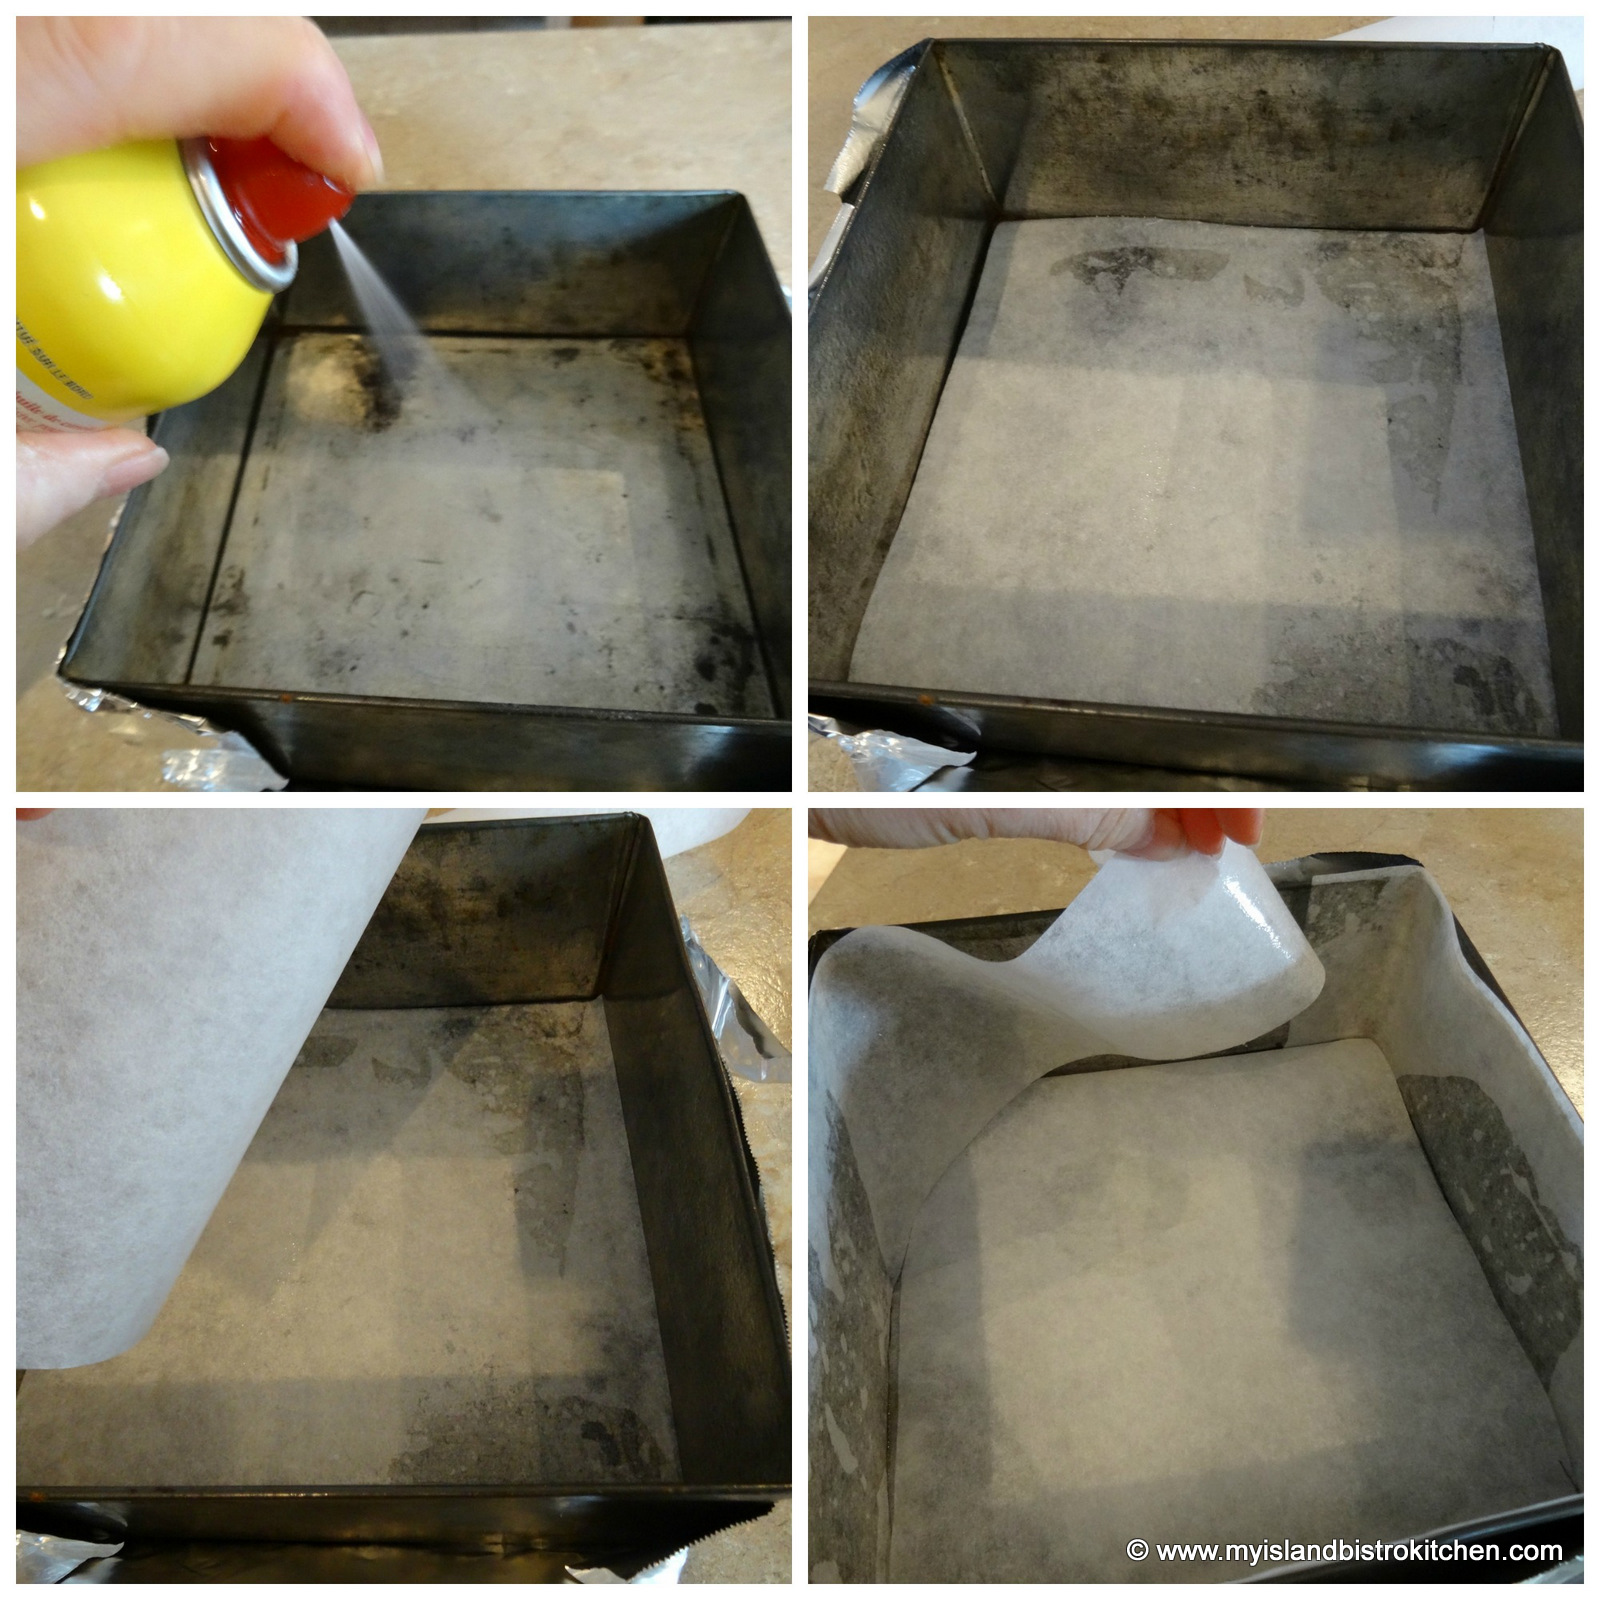
Preparing the Pan
The pan needs to be greased or sprayed with cooking oil then lined with either brown paper or parchment paper, then greased/sprayed again. I recommend lining the pan with a couple of layers of paper. Because there is very little leavening in the cake and because it is a heavy, thick cake, the pan can be fairly well filled without risk of batter running over the top.
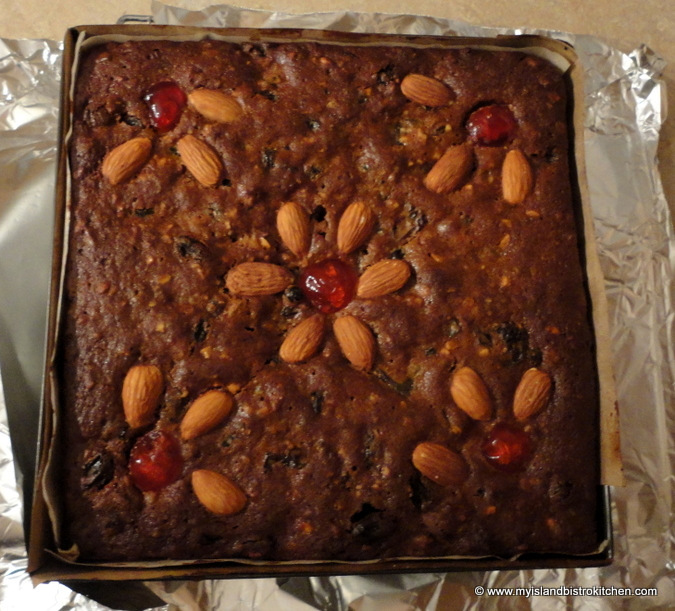
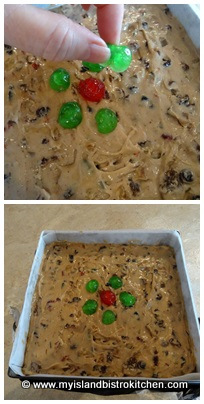
Decorating the Cake Top
There are many ways to decorate the top of a fruitcake and some are very elaborate and show-worthy. I do caution, however, about adding too much fruit to the top of the cake for decoration as glazed/candied fruits are weighty and may cause a cake to not rise properly or even to sink, especially in the center. I sometimes decorate the top of the cake as shown in the photo below but often leave it completely plain as it is easier to cut and plate.
Some bakers cover the cake with royal icing and marzipan. However, I find that the moisture from a dark fruit cake stains the icing making it less attractive.
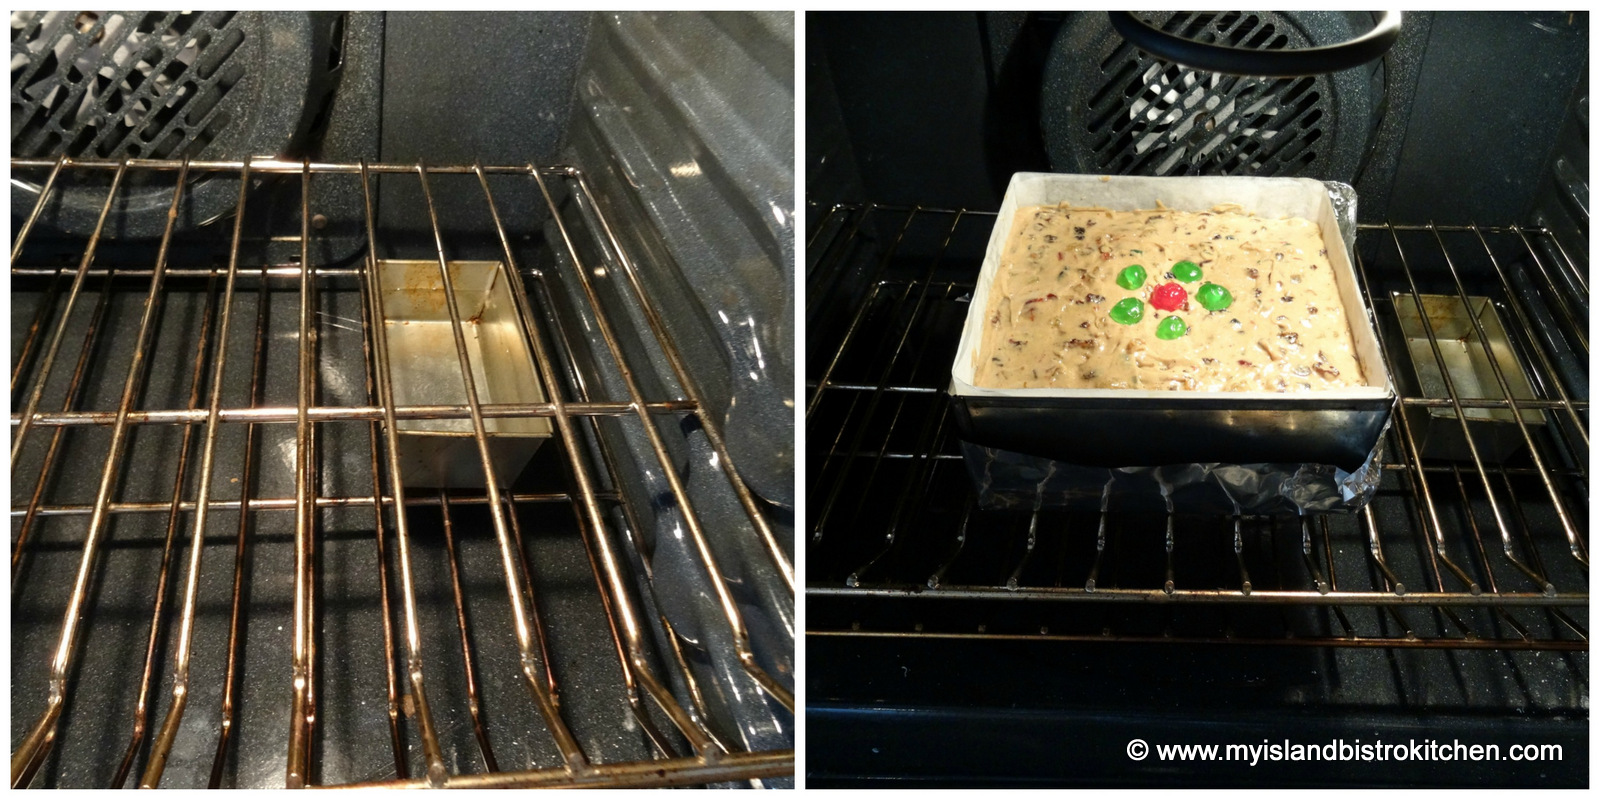
Baking the Fruitcake
Baking is always the tricky part to fruitcake making. Fruitcakes need to be baked in slow ovens – i.e., 275ºF or less for several hours. Baking at too high a temperature will result in a dry cake. Bake the fruitcake in the center of the oven rack that is positioned in the lower third of the oven. This will allow for adequate airflow needed for the cake to bake properly and evenly on all sides. Include a small pan of hot tap water on the shelf below the cake (or on the floor of the oven). The steam from the water will help to keep the cake moist as it bakes.
No matter what kind of home oven you have or how good you think the air circulation in it is, I do not recommend baking more than one cake in the oven at a time. Fruitcakes are not cheap to make and you want to create a baking environment so the cake has the best chance of success. Leaving lots of room for airflow in the oven will help the cake bake evenly and properly. If you want more than one fruitcake, I recommend making them as separate batches and on separate days.
If the cake starts to darken too much before it is baked, loosely tent a piece of tin foil over the top of the cake. However, only do this if the cake top has completely set all over as, otherwise, the tin foil will stick to the cake and pull some of the batter away from it thus ruining the look of the cake top.
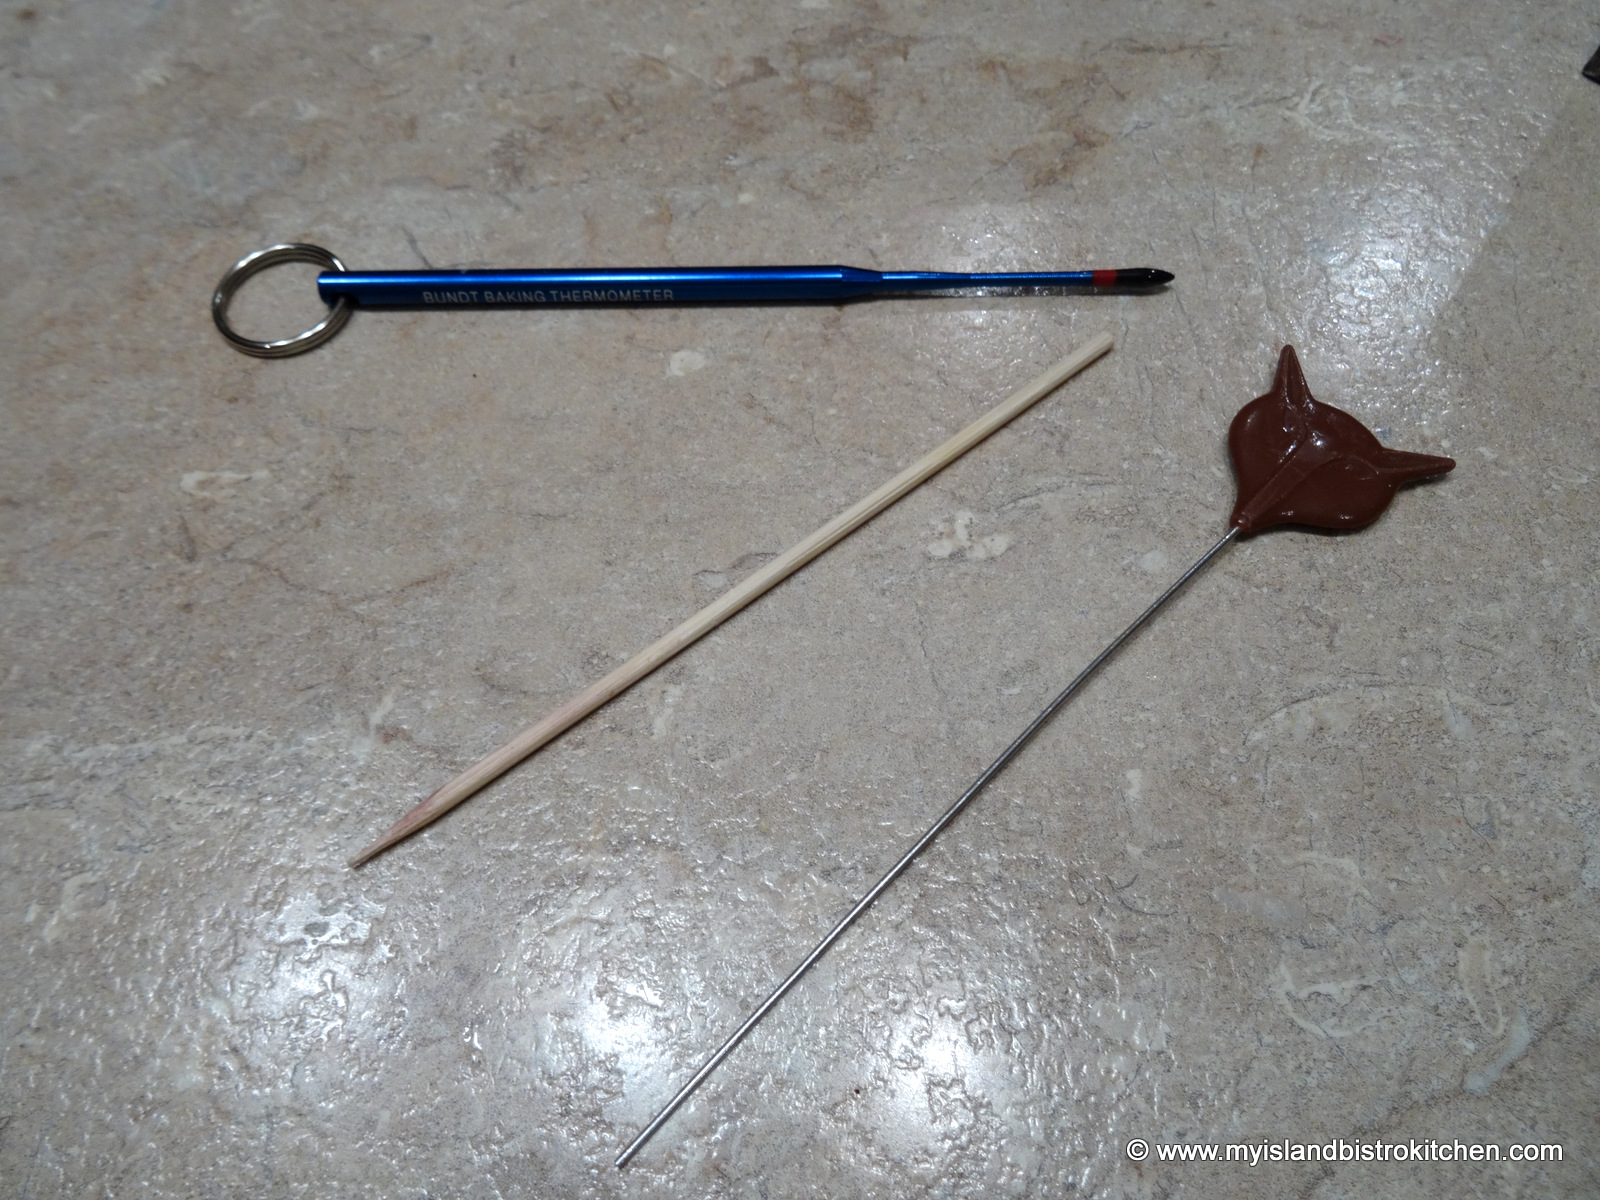
The cake is done when it is firm to the touch and a cake tester or wooden skewer inserted into the cake center comes out relatively clean but with some moisture on it. The cake should not, however, be doughy. I generally start testing my cake about ½ hour before its designated baking time is up, then check it at 15-minute intervals until it is done. The blue cake tester in the photo below is actually a cake thermometer. If the tip of the thermometer turns bright red after having been inserted into the center of the cake for 5 seconds, the cake is done.
Cake Testers
Cool the cake for at least 40 minutes or more before carefully removing it from the pan and transferring it to a wire rack to cool completely. If you are using a cake pan that does not have a removable bottom, I recommend leaving the cake in the pan longer to allow it to more completely set. Because a fruit cake is a dense cake, it will take several hours or overnight for the cake to cool completely.
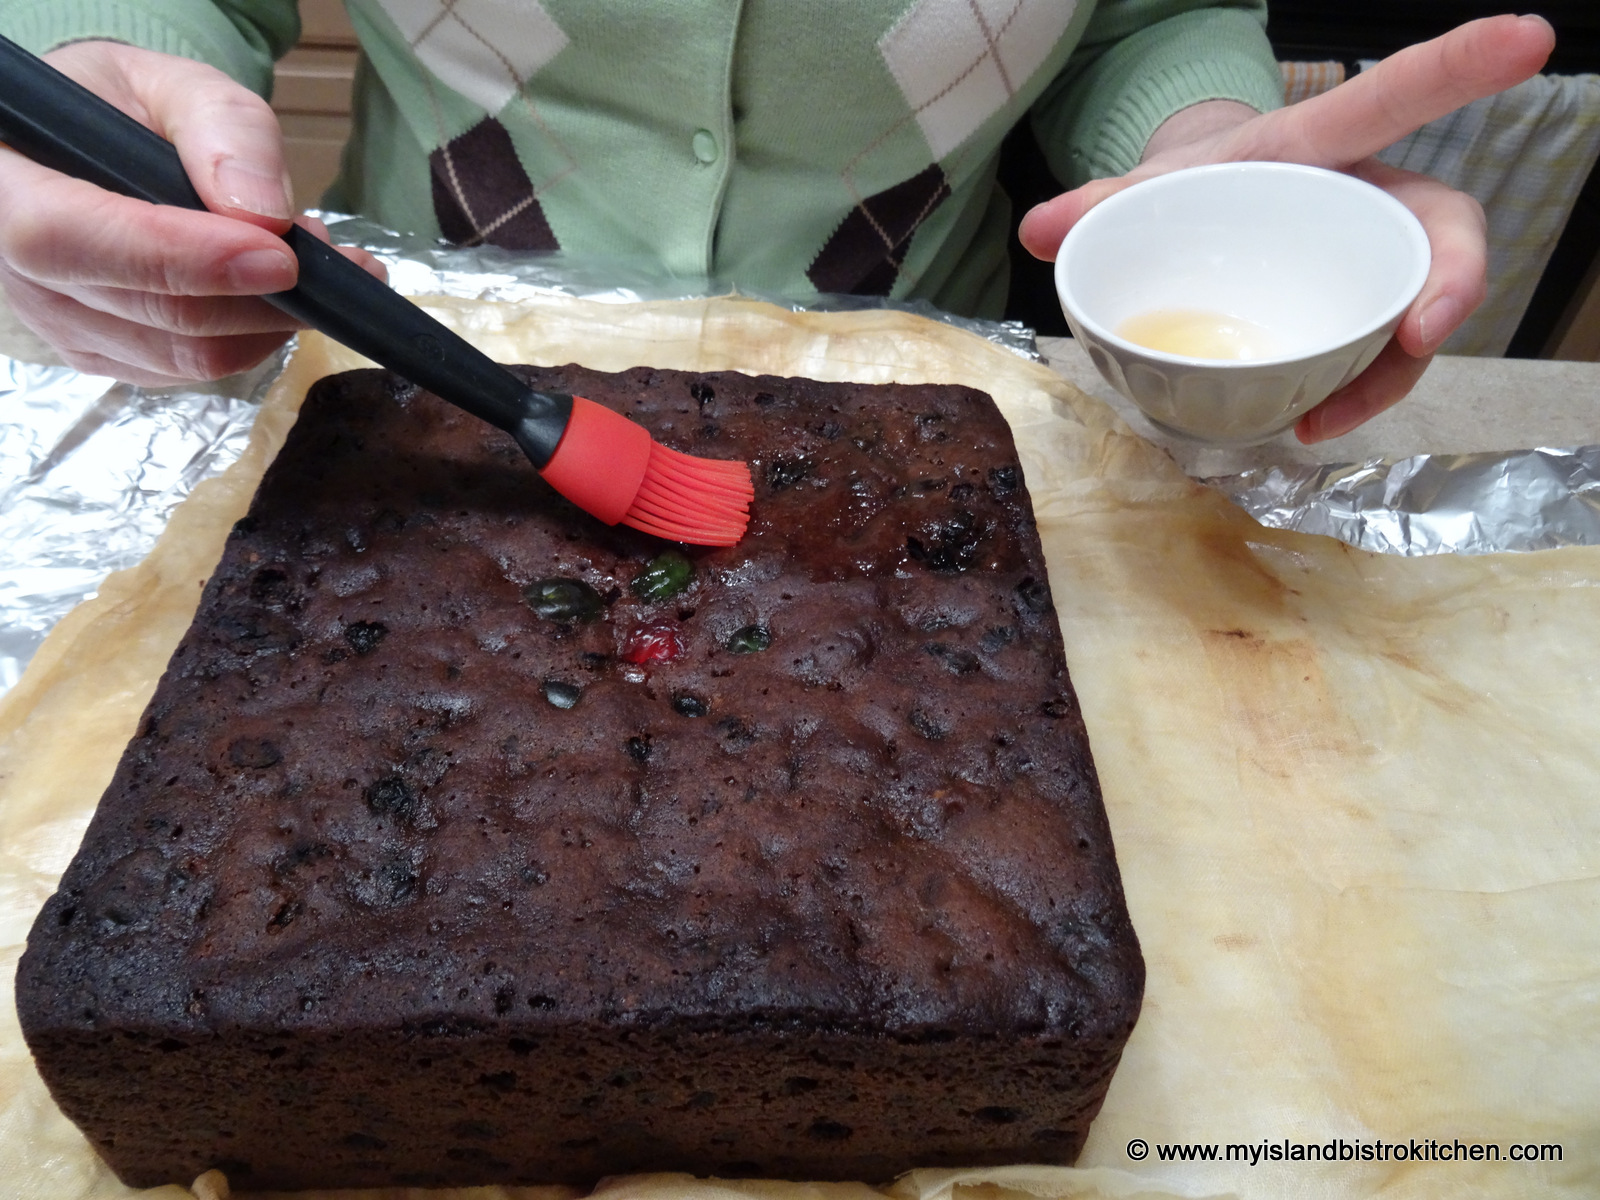
Storing and Mellowing/Ripening the Cake
Once the cake has cooled completely, I brush a light coating of rum or brandy – whatever I have used in the cake – all over the cake. This adds more flavour and helps to maintain the cake’s moisture. This is not a “sousing” exercise and the cake, because it is new and fresh will quickly absorb the liquor applied to it. Do not saturate the cake with the liquor. Simply give it a brushing all over with the liquor and leave it at that. As a weekly application of the liquor occurs, the cake will absorb the alcohol more slowly than at first application.
Even if you plan to cut the cake into pieces to share with friends and family, do not cut into the cake before it has been brushed with the alcohol and given a chance to ripen for several weeks. If you do, you have defeated the purpose of the ripening process that allows the cake’s flavor to develop. You do not want any open cut sides of the cake during this process as too much liquor will get into the cut side, potentially creating a soggy and stodgy cake. There is a clear difference between a moist cake and a soggy one. Therefore, you want to be brush the hide of the cake, not cut sides.
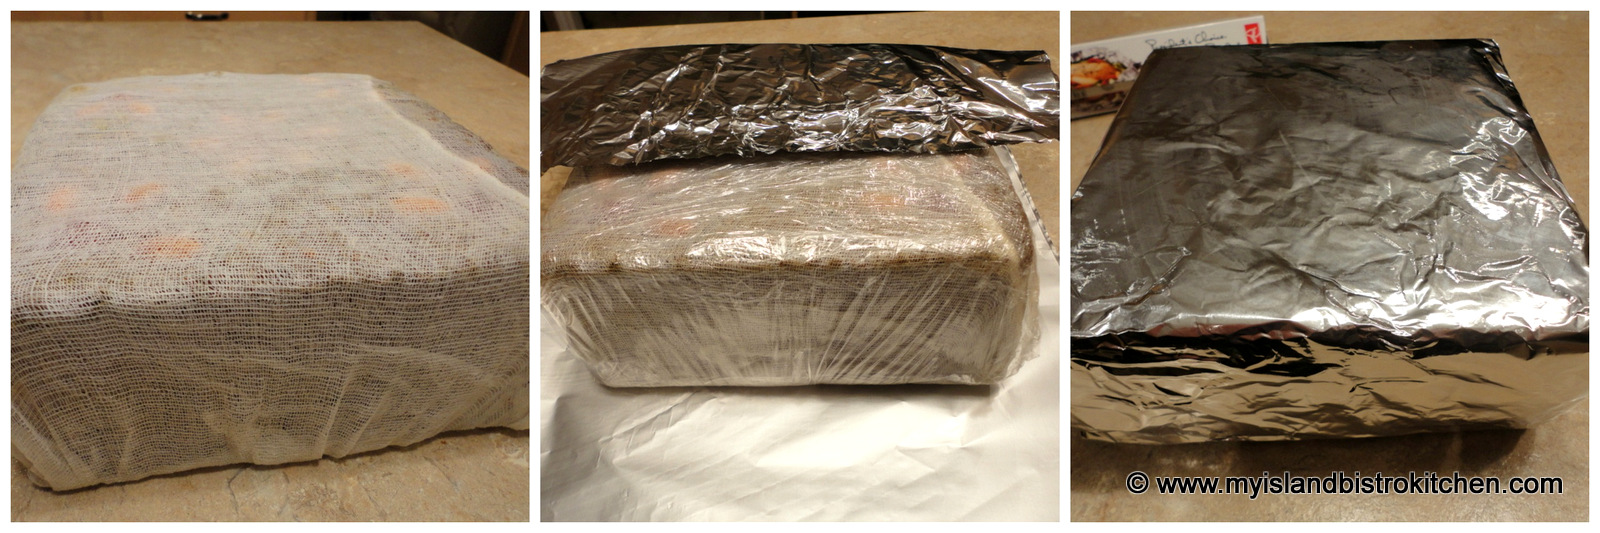
Wrap the cake in cheesecloth (which can also be soaked in liquor) followed by a double layer of plastic wrap and double of tin foil.
The cake is then placed in a sealed bag and stored it in a cool, dry place to mellow or ripen, a process of time that allows the cake’s flavours to mix and mingle. I leave the cake stored at a very cool room temperature for 3-4 weeks, giving it a weekly nightcap by brushing another light coating of the liquor all over the cake and re-wrapping it (re-soaking the cheesecloth in the liquor and wringing it out each time). The cake will, for the first while, continue to quickly absorb the liquor as soon as it is brushed on; however, that is not a license to keep adding more liquor. This application of liquor is meant to infuse flavour and keep the cake moist (but not soggy wet). The liquor-dampened cheesecloth wrapped around the cake that is tightly stored in plastic wrap will help to keep the cake moist as well. I do not apply the liquor beyond the 4-week period.
It is extremely important that the cake not be bathed or saturated with liquor for a couple of reasons. First, it will make the cake very wet and soggy which is not the hallmark texture of a good quality fruit cake. It may also cause the cake to sink down because it is so moisture-logged. When you think about it, the cake is wrapped in cheesecloth, then tightly in two layers of plastic wrap, two layers of tin foil, and sealed in a plastic bag to age. Applying too much liquor means there is no way it will evaporate and nowhere for it to go except into the cake, likely overloading it with liquid, resulting in a soggy mess.
Second, there certainly is such a thing as adding too much liquor to the cake as it will cause an offputting, potent, flavour. In essence, it will ruin the taste of the cake. Apply the old adage that less is more when applying the liquor. Use a light brushing of the liquor and the liquor-soaked cheesecloth to add any necessary flavor and moisture to the cake. I personally think that the reason some people may not like fruitcake is because they have, somewhere, been given a piece of fruitcake that was way too wet and had far too much liquor applied to it. If the first thing you taste when you bite into a piece of fruitcake is the liquor, the cake has had far too much liquor added to it, either in the cake itself or applied to it as it mellowed.
After letting the cake mellow, I remove the cheesecloth and keep the cake wrapped in plastic wrap and tin foil inside a sealed bag and store it in the refrigerator or freeze it. It’s important to let the cake ripen first at cool room temperature as it won’t mellow further once refrigerated or frozen.
Slicing the Cake
I find the fruitcake slices easier from the refrigerator than at room temperature as it is a bit firmer when chilled. I recommend using a sharp, flat-edged knife to cut the cake as a serrated knife, for example, may pull the fruit during cutting, creating a ragged, uneven edge.
Making the first cut!
I cut each slab, across the full width of the cake, a good ½” wide. It needs to be a good width in order for it to hold together as it is being sliced.
For suggested serving size, I recommend slicing each slab into pieces that are about 1¼” wide.
[Printable recipe follows at end of posting]
Dark Fruitcake
Ingredients:
7 oz seeded raisins (i.e., Lexia) 7 oz golden raisins 7 oz cup sultana raisins 3 oz dates, chopped 2 oz currants 9 oz mixed glazed fruit 4 oz red glazed cherries 4 oz green glazed cherries 3 oz citron 2 oz mixed peel ⅔ cup rum ½ cup flour
2 cups flour ½ tsp salt 1 tsp baking powder ½ tsp soda 1 tsp cinnamon ½ tsp cloves ½ tsp allspice ½ tsp mace ½ tsp nutmeg
½ lb butter ¼ cup white sugar 1½ cups brown sugar 4 extra large eggs 1 tsp vanilla 1 tsp almond flavouring 2½ tbsp molasses ½ cup strawberry jam
Method:
Measure fruit and transfer to a large bowl. Mix well. Pour ⅔ cup of rum over fruit. Stir to coat. Cover tightly with plastic wrap. Let stand for 24-48 hours to macerate the fruit, stirring occasionally.
Prepare 8-inch square fruitcake pan that is 3 inches deep and has a removable bottom: Lightly spray the bottom and sides of the pan with cooking spray. Line the pan, bottom and sides, with brown paper or parchment paper. Lightly spray the paper.
Position oven rack in lower third of oven. Preheat oven to 275°F.
Sift together the dry ingredients. Set aside.
Sifted Dry Ingredients
Using the paddle attachment on the stand mixer, cream the butter until light and fluffy.
Add the white sugar. Beat. Add the brown sugar and beat well, scraping the sides of the bowl with a spatula to ensure sugar is all incorporated.
Add the eggs, one at a time, beating well after each addition.
Add the vanilla and almond flavouring followed by the molasses. Mix thoroughly. Mix in the strawberry jam.
Add the dry ingredients and mix until combined into batter. Transfer batter to very large bowl.Sprinkle remaining ½ cup of flour (listed above in first set of ingredients) over the macerated fruit and toss ingredients lightly and quickly.
Add the floured fruit to the batter and mix thoroughly.
Transfer batter by large spoonfuls into the prepared baking pan. Use a knife to evenly spread the batter in the pan.
Add a few cherries as decorations to the top of the cake, if desired.
Place a small pan of water on the lower shelf in the oven. Bake fruitcake in the center of the oven rack (that has been positioned in the lower third of the oven) for about 5¾ hours or until cake is firm to the touch and cake tester inserted in center of cake comes out clean. Remove cake from oven and place on rack. Let cake cool in pan for about 40 minutes before carefully removing from pan and letting rest on cooling rack.
Let cake cool completely before brushing with rum and wrapping in cheesecloth, followed by plastic wrap and tin foil, then storing in a sealed plastic bag in a cool, dry area. Remove wrapping and brush cake top and sides with rum once a week. For best flavour, let cake “age” for at least 3-4 weeks before cutting and serving.
Tips and a recipe for making a delicious and traditional dark fruitcake flavored with rum and packed full of fruit. This cake is nut free.
Course Dessert
Cuisine American
My Island Bistro KitchenMy Island Bistro Kitchen
Ingredients
7ozseeded raisinsi.e., Lexia
7ozgolden raisins
7ozcup sultana raisins
3ozdateschopped
2ozcurrants
9ozmixed glazed fruit
4ozred glazed cherries
4ozgreen glazed cherries
3ozcitron
2ozmixed peel
⅔cuprum
½cupflour
2cupsflour
½tspsalt
1tspbaking powder
½tspsoda
1tspcinnamon
½tspcloves
½tspallspice
½tspmace
½tspnutmeg
½lbbutter
¼cupwhite sugar
1½cupsbrown sugar
4extra large eggs
1tspvanilla
1tspalmond flavouring
2½tbspmolasses
½cupstrawberry jam
Instructions
Measure fruit and transfer to a large bowl. Mix well. Pour ⅔ cup of rum over fruit. Stir to coat. Cover tightly with plastic wrap. Let stand for about 24 hours to macerate the fruit, stirring occasionally.
Prepare 8-inch square fruitcake pan that is 3 inches deep and has a removable bottom: Lightly spray the bottom and sides of the pan with cooking spray. Line the pan, bottom and sides, with brown paper or parchment paper. Lightly spray the paper.
Position oven rack in lower third of oven and preheat oven to 275°F.
Sift together the dry ingredients. Set aside.
Using the paddle attachment on the stand mixer, cream the butter until light and fluffy. Add the white sugar. Beat. Add the brown sugar and beat well, scraping the sides of the bowl with a spatula to ensure sugar is all incorporated.
Add the eggs, one at a time, beating well after each addition. Add the vanilla and almond flavouring followed by the molasses. Mix thoroughly. Mix in the strawberry jam.
Add the dry ingredients and mix until combined into batter. Transfer batter to very large bowl.
Sprinkle remaining ½ cup of flour over the macerated fruit and toss ingredients lightly and quickly. Add the floured fruit to the batter and mix thoroughly. Transfer batter by large spoonfuls into the prepared baking pan. Use a knife to evenly spread the batter in the pan. Add a few cherries as decorations to the top of the cake, if desired.
Place a small pan of water on the lower shelf in the oven. Place cake in the center of the oven rack (that has been positioned in the lower third of the oven) and bake fruitcake for about 5¾ hours or until cake is firm to the touch and cake tester inserted in center of cake comes out clean. Remove cake from oven and place on rack. Let cake cool in pan for about 40 minutes before carefully removing from pan and letting rest on cooling rack.
Let cake cool completely before brushing with rum and wrapping in cheesecloth, followed by plastic wrap and tin foil, then storing in a sealed plastic bag in a cool, dry area. Remove wrapping and brush cake top and sides with rum once a week. Let cake “age” for at least 3-4 weeks before cutting and serving.
Recipe Notes
Yield: 1 - 6 lb cake
NOTE: Be sure to read the entire posting that accompanies this recipe for tips on how to make the perfect fruit cake.
Copyright My Island Bistro Kitchen
If you have made this recipe and enjoyed it and/or wish to share it with your friends and family, please do so on social media but be sure to share the direct link to this posting from my website.
You may also enjoy these other Christmas cakes from My Island Bistro Kitchen:
Follow “the Bistro” on Pinterestat https://www.pinterest.ca/peibistro/ and pin the Pinterest-ready photo at the end of this posting to your favorite Pinterest boards!
The autumn got away from me and I did not get around to sharing my 2014 Thanksgiving tablesetting. When I realized it was too late to share it on my blog for the Canadian Thanksgiving in October, I knew I’d have a second chance in late November to share it in time for the American Thanksgiving. So, this one is for our American friends to the South who will celebrate their Thanksgiving tomorrow… if you haven’t already set your Thanksgiving table, this one is quick and easy!
I went with a fairly simplistic setting this year. I started with an ivory tablecloth topped with a piece of orange drapery sheer. As you have probably noticed with my tablesettings, I tend to go for plain table coverings which make other elements of the tablesetting stand out.
I also try, where possible, to use props that I already have like, for example, the tall wooden candlesticks. The warmth of the wood seemed to work well with the autumn props. Scattering a few brown pine cones pulled the color scheme together.
The focal point of the table is the small white pumpkin perched on a glass cake stand and surrounded by colored leaves. With a black marker, I simply wrote, round and round the pumpkin, all the things I am thankful for.
I used my standard gold charger plates topped with my everyday white stoneware dinnerware. A quick fold of the napkin placed in the soup bowl makes a colorful nest for the little white ornamental pumpkins which tie in with the white pumpkin centerpiece.
I love to decorate my fireplace mantles. A few white pumpkins, a garland of some colored leaves, a floral centerpiece, and a jar of mini orange pumpkins for a splash of color, and the look is complete.
This was a fairly easy, quick, and economical tablesetting to achieve. It’s suitable, obviously, for a more informal Thanksgiving dinner. My good China has a border of pink florals so really doesn’t blend well with the colors of autumn. That’s why white dinnerware is always a good choice as it goes with anything and food always looks so eye-popping when served on it!
Happy Thanksgiving to our American family and friends to the South!
Thank you for visiting “the Bistro” today. There are lots of ways to connect with “the Bistro” through social media:
Ulysses Press has offered me the opportunity to conduct a review of Dorothy Kern’s cookbook, Dessert Mash-Ups. Kern is the blogger behind “Crazy for Crust” food blog and Dessert Mash-Ups is her first cookbook.
I found this a delightful cookbook, all about desserts (what’s not to love about that speciality!). But, it’s more than that. It’s actually a teaching book that is sure to be a good reference tool for bakers, particularly those less experienced in the realm of baking. For example, there is a great section at the front of the book that provides a list of common pans any kitchen should have along with a list of useful gadgets and appliances. Additionally, the author also gives useful ingredient tips and suggestions along with storage and freezing tips. While candy making can be daunting for some, Kern takes away the trepidation by providing handy tips on candy dipping that both the novice and a more experienced candy maker would find useful. Including this type of information in the cookbook would be motivating I believe for those, perhaps less confident in candy making, to try the candy recipes in Kern’s book.
The book features over 50 recipes that are well laid out. Each recipe is introduced by a short paragraph that either comments about the recipe’s ingredients or gives the author’s personal story about, or connection to, the recipe. Step-by-step clear directions call for the ingredients in the order in which they appear on the ingredients list found on the right-hand side of each page and each recipe provides the yield along with the preparation and baking times. Where there is more than one component to a recipe (e.g., a cake, streusel, and icing), each set of ingredients is listed separately along with individual sets of directions which makes preparation easier. The directions are easy to understand, even for those less experienced with baking.
One of the things I most appreciated about the book is that, while it sometimes combines different ingredients in a recipe or “mashes” them up into something entirely different than you might think of (ever hear of lemon meringue pie fudge!), the recipes do not call for unusual ingredients that would be difficult to find.
The other bonus with this book is that each recipe is accompanied by a full-page color photograph of the finished product so you know the goal you are aiming for when making a recipe. The photographs are stunning and of high quality, making each recipe enticing to make. Of note, all food photographs in the book are the work of the author, herself.
I found the structure, content, and layout of this book well thought out with the reader in mind. The book is well organized and categorized into eight chapters: Breakfast but Better; Candy Concoctions; Cookies, Brownies, and Bars Together at Last; Pie Surprise; Cake & Cupcake Creations; New Takes on Cheesecake; Double Dips; and Holiday Mash-ups. At the beginning of each chapter, there is a page that lists all the recipes in that category along with their page numbers. There is also a useful alphabetized index at the back of the book.
Test-driving recipes
So, while a book might be lovely to look at and to leaf through, the real test comes when you make some recipes out of the book. I selected two: Payday Candy Corn Rice Krispies Treats (pp 134-135), and Rocky Road Cookie Fudge Bars (pp. 58-59). Both recipes turned out well for me with no issues and both were tasty and are ones I would repeat.
Payday Candy Corn Rice Krispies Treats
The twist on these perennial favorites is the addition of just a small amount of peanut butter, some peanuts, and the candy corn. I made them for Halloween treats and they were a hit. I also tested freezing them and found they freeze well, too. I would make them again, with or without the candy corn.
Payday Candy Corn Rice Krispies Treats from “Dessert Mash-Ups Cookbook by Dorothy Kern
Ulysses Press has given me permission to share the recipe and the book’s photograph for Rocky Road Cookie Fudge Bars along with my review of this cookbook. I made these bars and thoroughly enjoyed them.
Rocky Road Cookie Fudge Bars
Yield 36 bars Prep Time 20 minutes Bake Time 18 minutes Chill Time At least 4 hours
I’ll never forget eating rocky road ice cream when I was young. It was one of my mom’s favorite flavors, so it was always in the freezer. I’d pick out the almonds and marshmallows to save for last, because they were the best part. My love of the ice cream inspired these bars: a rich chocolate cookie bar topped with a rocky road candy that tastes like fudge. I hope it brings back memories of all your rocky road days like it does for me!
1⁄2 cup (1 stick) unsalted butter, softened 1⁄2 cup packed brown sugar 1⁄4 cup granulated sugar 1 teaspoon vanilla extract 1 large egg 1⁄3 cup unsweetened cocoa powder 1 teaspoon baking soda 1⁄4 teaspoon salt 1 cup all-purpose flour 1 (11.5-ounce) bag semisweet or milk chocolate chips 1⁄2 cup chopped walnuts or almonds 1 1⁄2 cups mini marshmallows
1. Preheat the oven to 350°F. Spray a 9 x 9-inch pan with cooking spray or line with foil and spray with cooking spray for easy cleanup.
2. In the bowl of a stand mixer fitted with the paddle attachment, cream together the butter, brown sugar, and granulated sugar. Add the vanilla and egg, and mix until smooth. Mix in the cocoa and baking soda, then add the salt and flour, and beat until well blended. Press into the prepared pan. (The batter will be sticky; it helps to spray your hands with cooking spray to keep it from sticking to you.)
3. Bake for 15 to 18 minutes, until the top just loses its sheen.
4. As soon as the bars come out of the oven (or a few minutes before), melt the chocolate chips in a large microwave- safe bowl on high for 1 1⁄2 to 2 minutes, stirring every 30 seconds until the chocolate melts and is smooth. Let it sit for about 2 minutes, then stir in the chopped nuts and mini marshmallows. Stir to coat completely.
5. Pour the marshmallow mixture on top of the hot cookie bars and spread carefully. Let set at room temperature before slicing. You can refrigerate the bars to speed hardening, but be sure to allow them to sit at room temperature for 30 minutes before slicing to avoid cracking in the chocolate. Store in an airtight container at room temperature; bars are best within 4 days.
Concluding Thoughts
The book contains a good variety of dessert recipes that would be suitable for families, potluck get-togethers, special occasions, and gift giving.
This book is a manageable size, has good flow, and is easy to read. In my view, this book would be most suitable for individuals who love to bake, have a sweet tooth, and/or those who don’t count calories!
Disclosure: I received a complimentary copy of Dessert Mash-Ups from Ulysees Press for the purposes of conducting a review of the cookbook. I received no compensation for this review and was under no obligation to provide a positive review. All opinions expressed are purely my own.
(Mostly) PEI and Maritime Food – Good Food for a Good Life!