
I love a bowl of chili, especially on a cold fall or winter day. I also like the chili to have lots of texture and flavour and to be well-filled, hearty, and not be too watery. This recipe for Chicken and Pumpkin Chili has a lovely flavour profile owing to the selection of ingredients and a curated blend of spices to complement the core ingredients. Continue reading Chicken and Pumpkin Chili
Category Archives: General
My Island Bistro Kitchen Food Blog Celebrates 7th Blogiversary

Seven years ago, today, I created My Island Bistro Kitchen Food Blog. On this, my 7th Blogiversary, I am going to take this opportunity to give a shout-out to three people who were instrumental in inspiring my love of working with food and in cultivating my culinary skills.
First, my mother. She never shooed me away when she was preparing food. I’d see the yellow melamine bowl and Rubbermaid spatula appearing and I’d immediately find my little apron and pull a kitchen chair to the counter, not wanting to miss a minute of the fun! Not once did my mother ever tell me to go off and play instead of standing at her elbow as she prepared food. Rather, she’d let me stir whatever was being made and would explain the order in which the ingredients were to be added. Once the mixture got to the point that it needed a little more muscle than I had, my mother would take over and I’d still stand by her side, watching and absorbing all the steps and learning. Sweet culinary memories.
Second, my grandmother. She was, by no means, a fancy cook but what she prepared was mighty tasty. She had a really large wooden pastry board that she’d heave on to the pantry table. I loved when it was molasses or sugar cookie baking day because I always got to cut out the cookies that Gram would bake in her wood stove oven. And, when she would be making the Christmas Scotch cookies, I’d sit in her rocking chair with the big brown crockware bowl on my knee and cream her homemade butter. I still have her floral flour sifter (still works like a charm) and her small collection of cookie cutters (she would be beyond thrilled that I kept them and still prize them). I remember well the day she coached me through making my first batch of bread at the age of 13. She was so incredibly proud that day that I wondered how we’d ever fit this petite woman through the door!
Third, my high school home economics teacher. Young and fresh out of university, we hit the jackpot when an enthusiastic home economics teacher arrived at our rural high school when I was in grade 9. Super organized and always arriving at class with a solid lesson plan, she solidified my love of learning about, and preparing, foods. I literally spent hours pouring over my class notes. And, I still have some of the teacher’s recipes from foods we made in class!
These three people may never have realized the influence they had on my lifelong love of everything culinary but each certainly played a key role. So, for that reason, I am acknowledging their role in how this food blogger and passionate home cook became a lifelong foodie.

Someone probably inspired your love of food, cooking, and/or baking. Who was your biggest influencer or culinary mentor?
To check out my previous Blogiversary celebrations, click on the links below:
First Blogiversary
Second Blogiversary
Third Blogiversary
Fourth Blogiversary
Fifth Blogiversary
Sixth Blogiversary
Did you know you can connect with My Island Bistro Kitchen through the following social media channels? Click on the hotlinks below to join “the Bistro” followers!
Facebook
Twitter
Instagram
Pinterest

10 Tips for Cutting Your Food Bill and Reducing Food Waste
With continuously rising food prices, many people find it necessary to cut corners on their grocery bill and that can be a challenge. There are several ways in which I keep my food bill in check and reduce food waste. Here are my 10 top tips:
-
Cut Back on Eating Out
It’s easy to fall into the “convenience food” trap. The old “I just don’t have time to prepare homemade food” trap comes with a hefty price – both in terms of money spent on food and in nutritional value.
It’s very easy to pick up a muffin and a coffee on the way to work, for example. However, for the price (or very little more) of those two items on one day alone, an entire batch of a dozen muffins could be made and frozen, ready for the weekday lunch bag(s).

For a visual of how much that daily coffee shop tea or coffee is costing, multiply it by 365 days – if a coffee/tea costs, for example, $3.00, a significant sum of $1095.00 a year will be spent on just one take-out coffee or tea a day (and I know some folks buy more than one a day). If you were to make your own tea or coffee, how much would it cost? How much are you shelling out for the convenience of picking up the beverage at a coffee shop? Add to that a bakeshop or coffee shop muffin that generally runs about the same price as the coffee and, again, basic multiplication will reveal another $1095.00 for just the daily muffins for a year. I can make a LOT of batches of muffins for $1095.00 a year! Together, those two simple items can run you about $2200.00 a year!

Spending $7.00+ for a bowl of soup or a salad at lunchtime adds up over a week, a month, and a year. For $7.00 (or very little more), a big batch of healthy basic homemade soup, for example, can be made and frozen in portion-sized containers, making the lunchtime meal more healthy and economical.

I do not eat out a lot. I’m not against it but it is expensive and dining out frequently makes it less of a special treat. For anyone on a restrictive diet, finding a restaurant that can accommodate the diet can be a real challenge. When I do eat out, it’s usually because I am traveling or, if at home, I am choosing to go to a nice restaurant as a special treat. If you normally eat out several times a week, consider cutting it back to, perhaps, only once a week and see the difference it will make in how much you spend on food. I never “order in” food and very rarely eat from a deli. Stopping at a supermarket deli on the way home from work is a temptation to scoot around the store and “pick up just a few items” while you are there. Suddenly, the supper stop just cost $60 instead of $15.
If you can afford these conveniences, great. However, if you need to cut your food expenditures, this might be a good place to start making adjustments. Making your own food/beverages is both cost-effective and healthier.
-
Make a Budget

Make a realistic budget for food, based on what you really need. Set aside that money from your income and stick to the budget. If you only allot so much for groceries, it will force you to shop for good bargains and to only buy what you need, not what you see and are enticed by, that if truth be told, you probably really don’t need (always the operative word).
I sometimes see shoppers using calculators as they grocery shop. This is a great idea! If you only have so much money to spend, you’ll immediately see where you are with your budget as you select items from the grocery shelves and deduct their cost from your budget. If you start to see you’re over budget, take a look through the grocery cart to see if there are any non-essentials that could perhaps return to the grocery shelf.

Keep track of what you buy and are spending on groceries. A bit tedious but, if you need to figure out where your food dollars are going, keep a record for a few months recording what you buy. Review it to see if there are non-essential items creeping into the grocery cart that could perhaps be eliminated from future grocery orders. If you are, for example, buying big name brand products to be used as ingredients for a casserole, could the dish be made with less pricey items such as store-brand ingredients? Do you really need the frozen entrée dinners or could you prepare healthy homemade meals? Do you need to pay for cheese already grated or could you buy a block of cheese on sale and grate it yourself? Do you really need to buy a bottle of salad dressing or could you make a simple healthy vinaigrette from ingredients already in your pantry? Once you get a clear picture of exactly what you are buying, you will likely identify items that can be eliminated or exchanged for more economically-priced substitutes.
-
Engage in Meal Planning
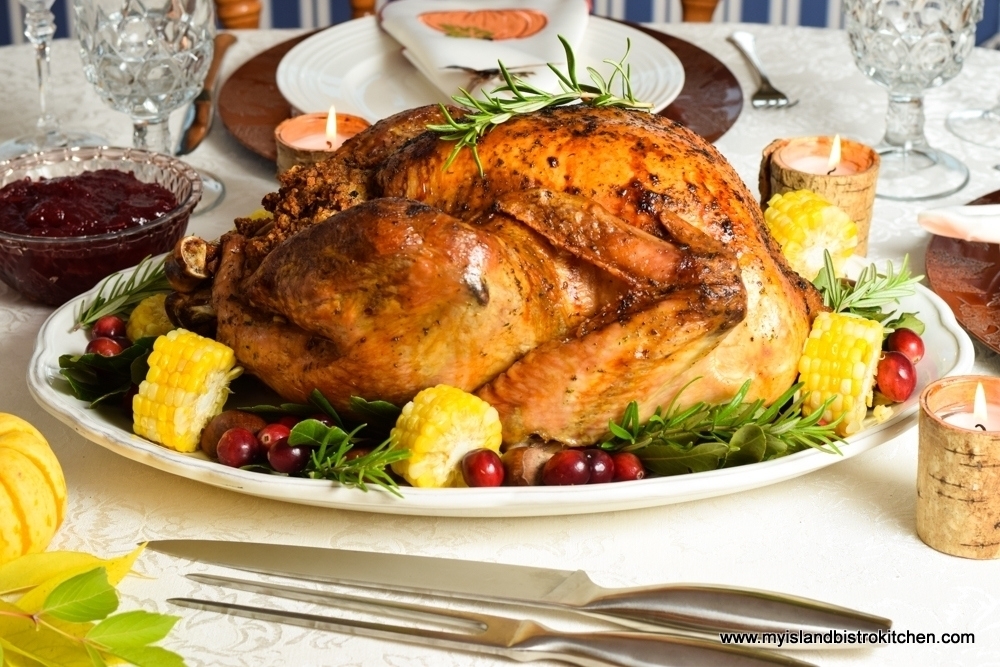
I’ve written about the merits of meal planning before. Make a list of the foods/meals your family likes to eat. Plan for leftovers. For example, if you are cooking a turkey dinner on the weekend, know ahead of time what you will use the leftover meat for so that you can extend its use.

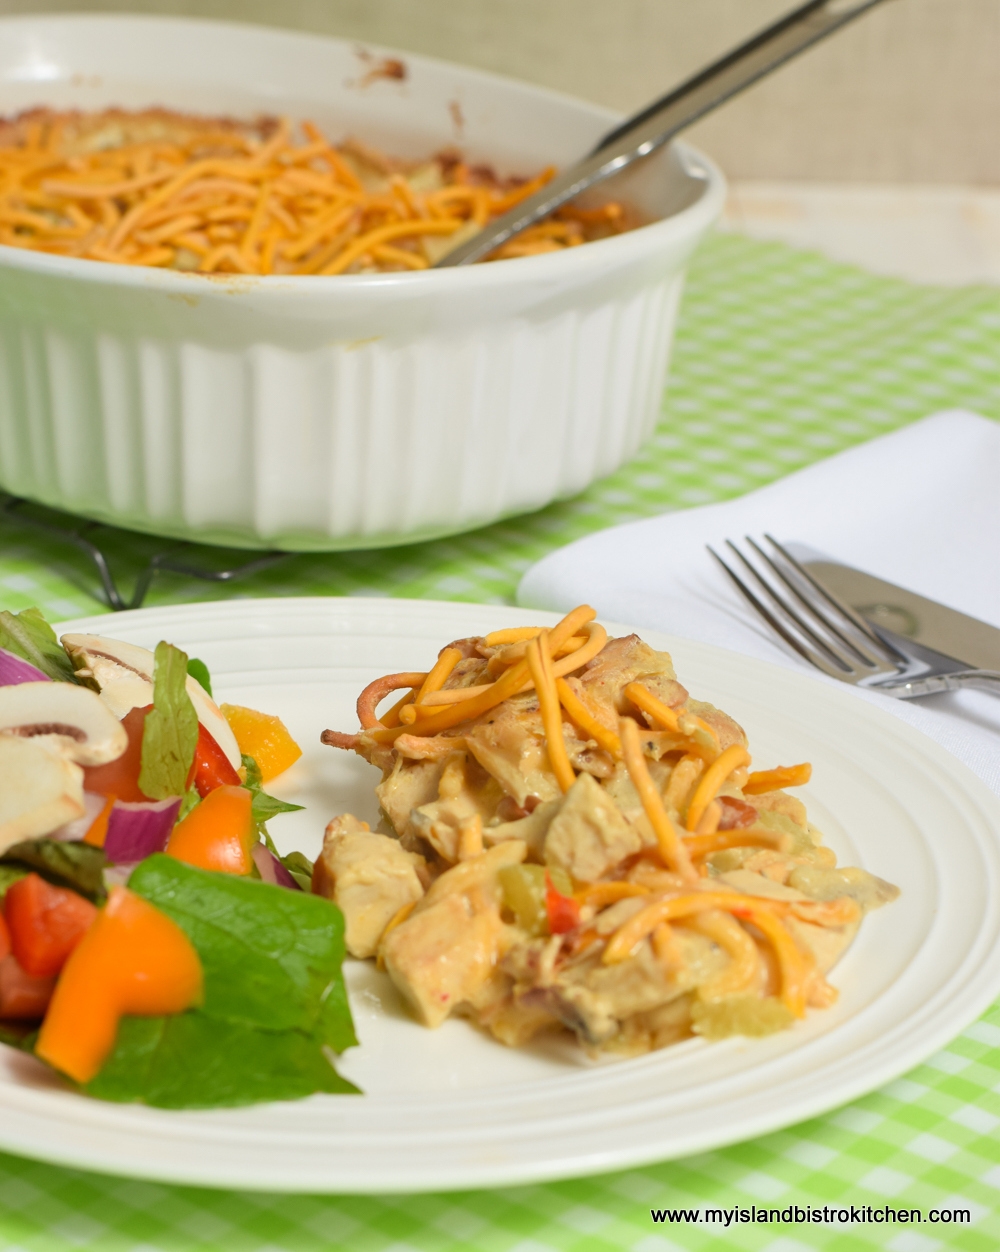
Transforming the meat into other dishes will generate more servings than simply plating the leftover meat. For example, you might make a turkey chowder that will yield several servings. You might substitute the turkey for chicken in creamed chicken and get a significant number of servings. Perhaps you’ll make a chicken chow mein casserole that will give several dinner servings.
Save the turkey carcass and make stock that can be used as the base in soups and other dishes. Extend that turkey to get as much use out of it as you can.
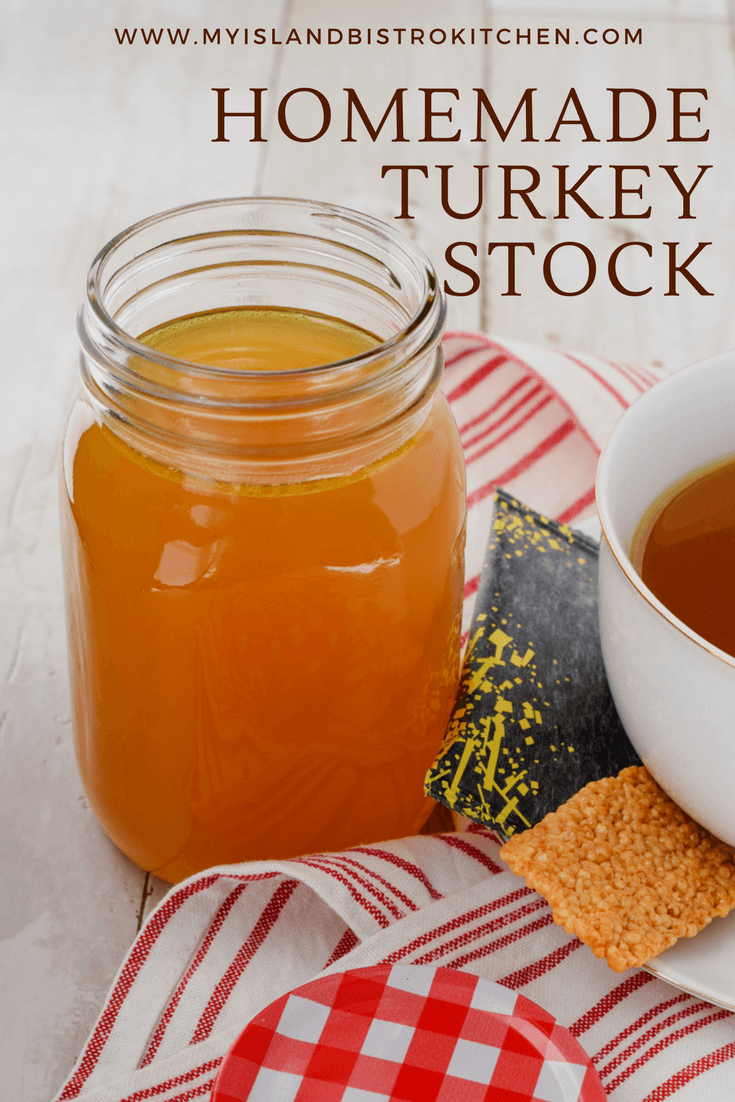
The homemade turkey stock makes a wonderful base for turkey vegetable soup in which some of the leftover turkey meat can be used.

If you are having a boiled ham dinner, save the broth and use some of the meat to make a tasty ham and lentil soup that will yield many servings.

Or, make a ham-based casserole that will generate several servings. Many of these items can be frozen in whatever serving sizes you need for your family to have on hand for weeknight dinners.

By careful planning, you’ll be amazed at how many more meals you can generate from the leftovers of just one food item.
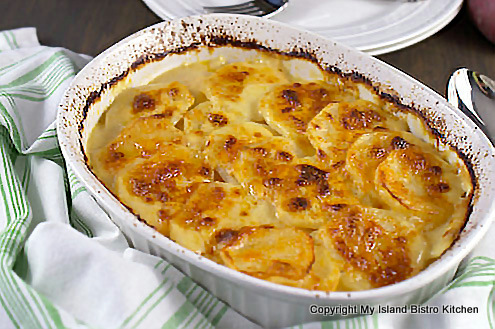
Try to make recipes that will give at least two nights’ meals. For example, if you are making scalloped potatoes to go with leftover ham, or perhaps a beef stew, double the recipe so you will have food prepped for another meal. Many dishes, like scalloped potatoes actually, in my opinion, improve their flavour over a day or two.
The same principle of extending food usage holds true with foods like chicken breasts, for example. To serve individual chicken breasts, it’s expensive. However, if they are bought at a good price, they are golden when used for meal extension. One 7 – 8oz boneless chicken breast will yield two to three sandwiches much more economically than buying sliced processed chicken at the deli.

An 8 oz chicken breast will generally yield about 1 cup, or slightly more, of diced chicken which can be used in casseroles or creamed chicken that will yield far more servings than simply putting a single full chicken breast on a plate with vegetables for just one serving at one meal.
When I know I need to prepare some make-ahead meals that will require a lot of chicken or turkey (I use them interchangeably in recipes), I have my recipes planned and I watch for turkeys on sale. I don’t go into a store and, unexpectedly, see turkeys on sale and pick them up to put in the freezer unless I know I am going to use them relatively soon. They are big to store and take up a lot of my valuable freezer space.
I always have a plan for recipes I can make if I can get a good deal on the main ingredient like meat, for example. If I’m shopping and I know I want to make, say, Irish Stew soon (or when I can get the beef on sale), I will check the meat section to see if they have any best-before today/tomorrow sales. Sometimes, good cuts of meat will be reduced by 25% or even 50% if it has same day, or next day, best-before date. There is nothing wrong with the meat and, if you can use it or make it into a recipe on the same day as purchase (or freeze it), it’s a great saving. I keep a list of ingredients of my most common make-ahead recipes on my phone so, if I can get a good deal on the meat, for example, I know what other ingredients I need to pick up at the same time to make the dish.

If you plan your meals out, you’ll be less likely to head to the deli, take-out, or restaurant for meals. Careful meal planning is a great way to stretch food ingredients out into more servings and save money.
-
Shop with a Grocery List and Only Buy What’s on the List – Use Smart Shopping Strategies

Make the grocery list before you leave home. If you don’t have a list, the tendency will be to wander the supermarket aisles aimlessly, hoping the sight of items will trigger what you should pick up. When you get to the supermarket, DO NOT go up and down every aisle! I repeat, DO NOT go up and down every single aisle. Only visit the aisles that have items on your list. Otherwise, the “browsing” will likely result in buying interesting looking items you may, or may not, use (and may not actually need) and that’s going to increase your grocery bill.
In fact, because I know the layout of the supermarkets well (most have the same basic layout), I actually make my grocery list in accordance with the store layout so I have a game plan when I hit the supermarket arena and I am not “backing and forthing” all over the store to pick up my groceries. So, my grocery list starts with any needed fruits and vegetables since that’s the zone into which I enter the supermarket, then meats, and so on, as I traverse the store. The faster I can move through a zone without revisiting it (or lingering), the less likely I am to notice something that causes me to stop and explore it and potentially buy it.
Don’t stockpile food items, even if they’re on sale – you are tying up money into items that will expire and throwing them out is a waste of money. Plus, they are taking up real estate space in the pantry and/or freezer and are likely to eventually become food waste. Most grocery items go on sale cyclically anyway so it’s not a “once in a lifetime must buy now deal”. I don’t keep a supply of canned goods on hand at all. Rather, I choose a recipe, make my ingredient list, and go shop for the specific ingredients at the time. This ensures my products are fresh and I have not tied up money in products I may, or may not, ever use. This method allows me to control my food budget better.
If you only need a few items, don’t take a shopping cart. Instead, use a small hand-carried grocery basket or, better still, if you can carry all the items in your hands, you will be less likely to pick up additional products because your arms can only hold so much. I keep a grocery basket shown in the photo below) in my car. I use this basket frequently because it will only hold so much so it helps to control my shopping. It also doubles as my carry-out container and is easier to unpack when I arrive home.

If all you need is milk, for example, pay a few cents extra and buy it at the convenience store or gas bar because it will save you money in the long run. How so? If you travel all the way to the back of a large supermarket where the milk is usually located, you will be more likely to come out with a $60+ grocery bill than the $3.00 litre of milk you were shopping for because you will be enticed by other items along the way for which you did not go to the supermarket. If you do go to the supermarket for just an item like milk (and some of us do because the supermarkets are typically the stores that carry certain types of milk for special diets), take the route through an aisle in which you have no interest in the products. For example if you don’t have pets, pet food won’t be of interest so zoom down that aisle (as opposed to, say, the chips and snack aisle). That way, you’re not tempted to pick up excess items not on your list. There’s a reason why grocery store designers place basic food necessities, like milk, at the very far back end of the store – they know shoppers have to pass by many, many items to get there and those other items are strategically placed to catch the shopper’s attention. Many shoppers will pick up items as they head to that single litre of milk they actually came into the store to buy. So, once again, the risk is that the stop for a $3.00 litre of milk may turn into a $60+ grocery bill (willpower, willpower, wherefore art thou when in a supermarket!)
-
Shop Around and Check out Sales Flyers/Price Compare Websites or Apps
If you are trying to save on your grocery bill, you will probably have to shop at more than one supermarket to get the best deals. In most cities, supermarket chains tend to set up business in very close proximity to their competitors and that’s a good thing for shoppers. For example, in Charlottetown, we have three large supermarket chains located within about a half kilometer (or less) of each other so it makes it easy to shop around. Now, if you had to drive 10-20 kilometers between them, the savings on the item(s) would have to be very significant to justify the gas and travel time. But, if the grocery stores are close to each other, savings can be found for the shrewd shopper who takes the time to find them.
Check out the weekly sales flyers to see which supermarket has the items on sale that you need (operative word here always being “need”). Or, check out price compare websites or apps to see which grocery store chain has the best price on products you need. Not all chains will price match but some will. It never hurts to ask.

There is one grocery store in my hometown which I would class as less glitzy and more basic than the others. I shop for what I can get there because it’s a smaller store which makes it easier to stick to my grocery list as there are fewer items drawing me to buy them. Another store has great regular prices on certain items so, when I need those specific products, I head first to that store and buy what I can there. For example, there is a particular brand of yogurt I like. The regular price for this item at one supermarket has, for a long time, consistently been (at time of writing) $2.97 for 500g. The exact same brand item of the same size retails at the competitors for $4.97 (note these were 2019 prices when this article was originally published). A 2.63 litre of a major brand orange juice sells for $3.97 (regular price) at one store while the competitors retail it for, on average, $7.49 – a $3.52 difference (again, the reader should note these were 2019 prices). On just these two items alone, I can save $5.52 by carefully shopping around. A third supermarket has its own name brand products that I really like and which are priced cheaper than big name brand counterparts. That’s the store I head to for those products because I don’t particularly like either of the competitors’ own store brand products.
I am not a huge user of coupons because I find they are most often for items I don’t need. However, they are a good way to save money if they are for items you do actually need. That said, as a word of caution, don’t use the coupons to buy items simply to try the products. If the items are not ones you need, then putting any money at all on to the items is adding unnecessary strain to the food budget.
While I am not against big box warehouse shopping venues, they can require a lot of willpower on the customer’s part to pass by items that aren’t on the grocery list but certainly look interesting and appear to be a good price. BUT….are they really a great price if you look at the per unit or per weight price and factor in all the considerations around them? Items typically come in very large quantities at these stores (there’s a reason why they have those jumbo-sized grocery carts that can hardly be pushed or navigated through the store). So, unless you have a very large family and lots of refrigeration and pantry space, many of the items are just simply too large for many households to store and use up before the items expire. Therefore, the questions to ask are: Do you, first of all, really need the items? Will you be able to use them all up before they expire? If you are a household of one or two people, would you really use a 10lb bag of quinoa or rice? If you end up throwing out a good portion of the food items, that constitutes food waste and a drain on the food budget and you really haven’t saved any money.
We don’t have big box grocery warehouse stores in PEI at the time of writing but a lot of Islanders frequent them off Island. Living in PEI, one has to factor into the cost of the grocery items, the Confederation Bridge toll, gas, and the time to travel to the big box warehouse stores in New Brunswick or Nova Scotia. In addition, you need to be prepared to price compare – i.e., are the “deals” really great deals or could what you need be purchased more economically, or just as economically, when the standard local supermarkets put on good sales.
One previous frequent grocery warehouse shopper told me his family recently discontinued their membership because every time they were at one of these stores (2-3 times a month, on average), they were spending at least $500 per trip on items they really did not need (but looked enticing) and they ended up throwing out a good portion of them after their expiry date had passed because they could not use up such large quantities. These shopping excursions were in addition to their regular grocery shopping at home, putting a huge unsustainable strain on their food budget.
Bottom Line: To stay on a food budget, shop around and buy only what you need and can reasonably use up before the items expire.
-
Follow Credible Well-Tested Recipes
While it’s fun to try new recipes, if you are on a strict food budget, you’ll want to ensure you choose recipes that, first of all, have ingredients you know your family will like and, second, come from a trusted source. This is because you want a recipe that has good, clear directions and that will turn out for you. The last thing you want is to have to walk the dreaded walk to the compost bin with a failed recipe and still have nothing prepped for dinner. That’s when you tend to order in or head out to a restaurant for the meal, really taxing the food budget.
Don’t choose complicated recipes with expensive ingredients, especially if you are a novice cook – it will be easy to become discouraged with home cooking if your efforts don’t meet with a satisfying tasty dish. Start basic and move toward more elaborate recipes as your cooking experience grows. There is no shortage of cookbooks and cooking magazines on the market and literally anyone can post any recipe on the internet. However, there is no guarantee that any of the recipes from these sources have actually been tested for success. Ask your friends and family for recommendations on the recipe sources they use with success and, of course, you can always check out recipes here on My Island Bistro Kitchen’s website since those recipes have been well kitchen tested several times before being published!
For those on a budget, look for recipes that call for economical ingredients and that you can get more than one meal from the recipe. While pricey food items like lobster, scallops, and steak are wonderfully tasty, they can make a serious dent in the food budget. To keep the budget in check, I recommend saving those types of items for a special treat or occasion and selecting other, more economically-priced, ingredients for everyday meals.
There are ways to turn everyday basic ingredients into very tasty, wholesome meals using seasonings, sauces, cooking techniques, and so forth. A lot of the contents in my freezers are not “gourmet” by any stretch of the definition but they are mighty tasty meals and not difficult to prepare. These include the basics like baked beans, chili, macaroni and cheese, creamed chicken, chicken and ham casseroles, soups, and so forth.
-
Buy a Big Freezer
In my opinion, one of the best investments one can make is in a big upright freezer. This allows for batch cooking make-ahead meal preparation to be done when food ingredients are in season or on sale. I freeze lots of varieties of soups, main entrées, side dishes, and desserts. This allows me to eat well, at home, and quite economically. Plus, I know what I’m eating and the foods are not full of preservatives or ingredients I can’t pronounce.

Properly package items for freezing and label and date everything. While the money has to initially be laid out for ingredients to batch cook and the prep work still has to be done, it does cut down on the grocery bill on an ongoing basis and lessens the task of meal prep on weeknights. Plus, it discourages the old fallback of stopping at the supermarket deli for dinner on the way home from work because you will know you have quality homecooked meals already prepared.
-
Batch Cook and Prepare Make-ahead Meals for the Freezer
I believe that, no matter how busy we are, we make time for whatever is a priority for us. So, if healthy, tasty, affordable eating for you and your family is important to you, you’ll put some time into healthy, economical meal preparation.
Set aside a few days and prepare several make-ahead meals for the freezer – soups for lunches, muffins for breaks, entrées for main meals, and desserts for when the sweet tooth calls.
Once I have my freezers (yes, freezers plural) filled with make-ahead meals, my ongoing grocery list just usually consists of dairy, fresh fruits and vegetables, fish, and the like. If you don’t know how to cook, or you need the motivation from others to get you going, gather together some friends to have a batch cooking session at the end of which everyone goes home with some make-ahead meals. Or, take a short cooking class. Many larger supermarkets, for example, will frequently offer evening or Saturday cooking classes. You might also check out some community colleges or local cooking schools to see what short-term cooking classes they might offer.
If you want to tackle a new recipe you are not familiar with, engage an experienced cooking mentor to help walk you through the process. Many experienced cooks will be more than willing to share their knowledge and experience in this field.
Batch cooking is my lifesaver – I don’t have to stop at the supermarket or takeout for dinner and I know what’s in my food that contains no preservatives or weird, hard-to-pronounce ingredients. Whether you are living alone, as a couple, or a family of several members, advance batch-cooking is a great meal preparation strategy. For singles or smaller households, it offers the benefit of having a variety of meals on hand from which to choose each day without having to individually prepare small-sized meals on a daily basis. For larger families, it provides healthy, home-cooked meals on busy weeknights when everyone is running in multiple directions to and from activities. If you have some others in the house, engage them in the meal preparation to lighten the load (it’s a great way to teach the younger generation how to prepare home-cooked meals, too).
-
Adjust Meal Planning According to the Seasons
Create a list of favorite recipes to make when fresh local produce (perhaps from your own garden) is available and at good prices. For example, I do a lot of soup making and freeze portion-sized containers of the soup for weekday lunches. Some of my favorite soups are tomato, cauliflower, and broccoli.
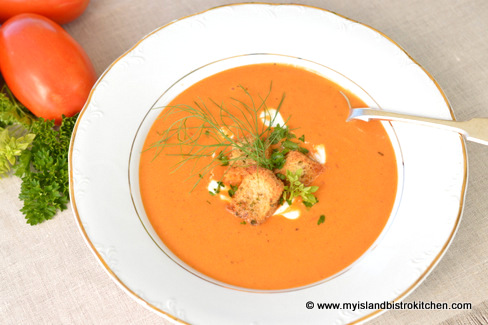
We had an abundance of tomatoes in the garden this year and making soup with them is a great way to use up the tomatoes and cut the cost of the soup significantly. I was able to find beautiful large heads of broccoli and cauliflower for .99 cents in the fall and, since they are the primary ingredients in two of my favorite soups, I was able to make double batches of cauliflower and broccoli soups for the freezer very economically – much more so than making cauliflower soup, for example, in the winter when a small head of imported cauliflower has run as high as $7.00 in recent years. The same holds true with fresh fruits. I make my Blueberry Peach Crisps, Apple Crisps, and applesauce when the fruit is fresh and at a good price. I then freeze these desserts for use throughout the year.

-
Shop Less Frequently
Just because it’s Saturday (or whatever day you typically do your main shopping) does not mean you automatically have to go grocery shopping if you really don’t need a grocery order. Make it a habit not to be stopping at the supermarket every day, or every other day, throughout the week. The more times you enter a grocery store, the harder it will be to stick to a food budget. You might try only doing focused grocery shopping every two to three weeks and, in the interim, stop to pick up the necessities like milk, at a convenience store or gas bar where there will be less items calling your attention and wallet.
Conclusion
It is a challenge, for sure, to eat well when food prices continue to rise rapidly. It does require some folks to become more creative in how to feed a family healthy meals on a budget. I believe it can be done but it does take work, dedication, commitment, organization, planning, and shopping around for the best deals possible on food items. For some folks, it may mean a lifestyle change by eating out less frequently and removing some non-essential items from the grocery cart. For others, it may mean learning how to cook economical and nutritious meals from scratch at home.
I hope you have found some of my tips helpful for controlling the grocery bill and reducing food waste. What are your strategies to stretch your food dollar?
Pin Me To Pinterest!

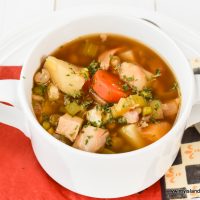
Classic Homemade Turkey Vegetable Soup
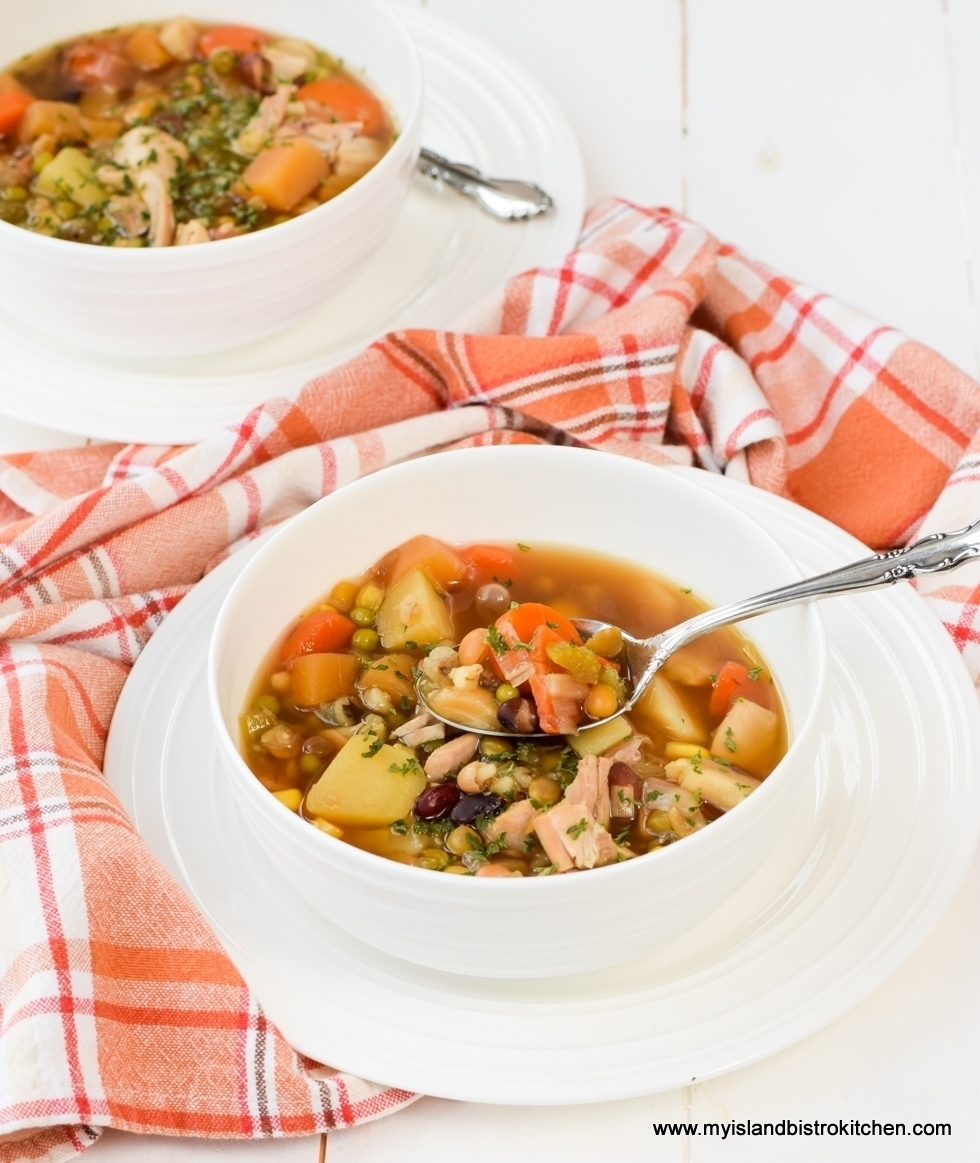
If you are a regular follower of my food blog, you will know that I do all I can to maximize the value of food products and reduce food waste. In my view, one of the best buys to extend meals is a turkey. Not only does it generate a wonderful roast turkey dinner but there is tremendous goodness left in the carcass and, often, there is more meat than can be used up as cold turkey and it can be transformed into other dishes. Or, sometimes, one just gets tired of the turkey before it is all used up so a great way to maximize it is to turn it into a delectable Turkey Vegetable Soup.

The first thing I do after a roast turkey dinner is strip off all the remaining usable meat from the turkey carcass. I will either immediately make homemade turkey stock with the carcass or freeze it in an airtight freezer bag and make the stock later. You can find my recipe for making turkey stock by clicking here. If the plan is not to make the Turkey Soup right away, I suggest setting aside 3-4 cups of the turkey meat and freezing it in an airtight freezer bag to have ready to drop in to the soup when it is later made.
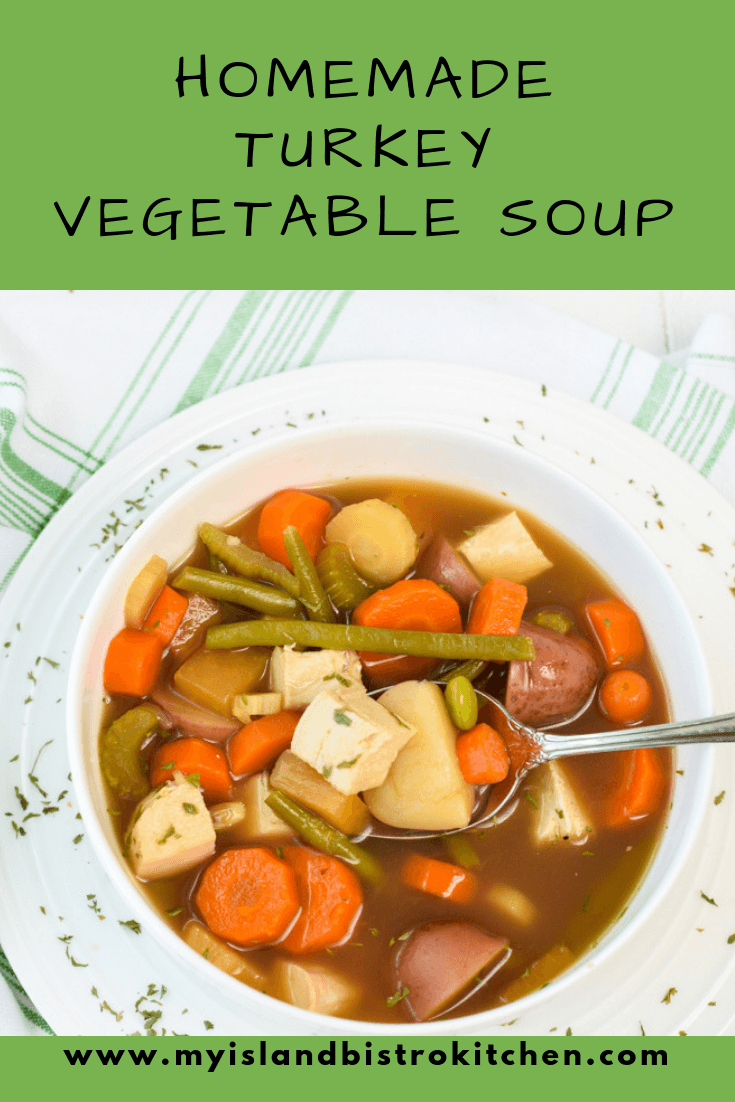
Homemade Turkey Vegetable Soup is both delicious and nutritious and my version of this wholesome soup freezes well. The recipe makes a big batch (about 18-20 servings) though it may be halved. However, if freezer space is available for the soup, it is mighty handy to have on hand for later use.
Now I do, of course, recommend that homemade turkey stock be used as the foundation for this soup because it is wholesome and free of preservatives. However, commercially-made stock/broth may be used in its place.

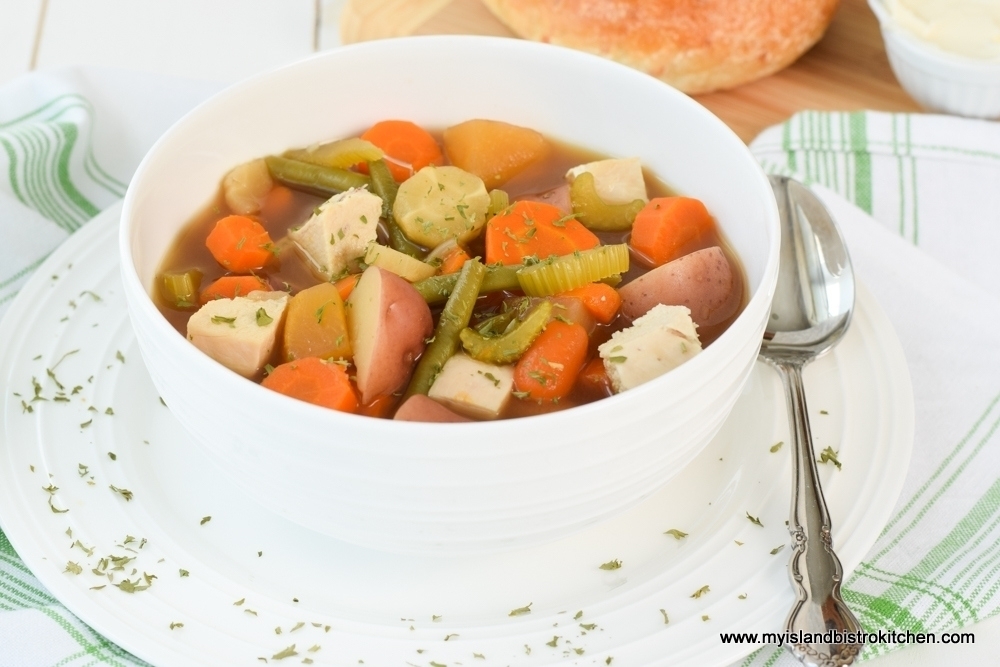
I recommend a careful reading of my recipe for this soup before beginning to make it as there are some steps involved and probably a shopping trip, too. To begin, I typically use a dry soup mix comprised of beans, lentils, split peas, pearl barley, and white rice. I buy this bulk at my local bulk food store and this mix does require a bit of pre-soaking, cooking, and standing time before it is incorporated into the soup pot. Otherwise the contents of the mix will not cook in the amount of time it takes to cook the remaining ingredients of the soup. So, time will need to be allotted for that activity. While using this mix adds fibre and bulk to the soup, the soup may be made without it and several photos in this posting show soup made without the dry soup mix. If making the soup minus the dry soup mix, simply increase slightly the quantity/amount of fresh and/or frozen vegetables called for in the recipe so that the soup is filled with goodness and is not too runny.
For this Turkey Vegetable Soup, I am not starting out with the traditional pure mirepoix because that requires that the aromatic holy trinity of carrots, celery, and onion be chopped really fine. In this soup, I want those ingredients to be left larger, in bite-size chunks. However, I do sauté them, along with the parsnip and leek for 2-3 minutes to start the release of their flavours along with the garlic.
Because I use my own homemade stock which already has some seasonings added, I don’t add huge amounts of seasonings to the soup and this is one soup that I do not like overly spiced or seasoned. One flavour booster I have found that works really well in this Turkey Vegetable Soup is dry onion soup mix so I add a couple of tablespoons along with small amounts of thyme, summer savory, turmeric, paprika, ground coriander, cloves, and nutmeg and, of course, the standard bay leaves. As always, I recommend, when making a recipe for the first time, to make it with the ingredients and amounts called for by the recipe creator. If, after you have tried it as it has been developed, you find it needs more or less of a seasoning to suit your personal taste, the adjustments can be noted and made in the next batch.
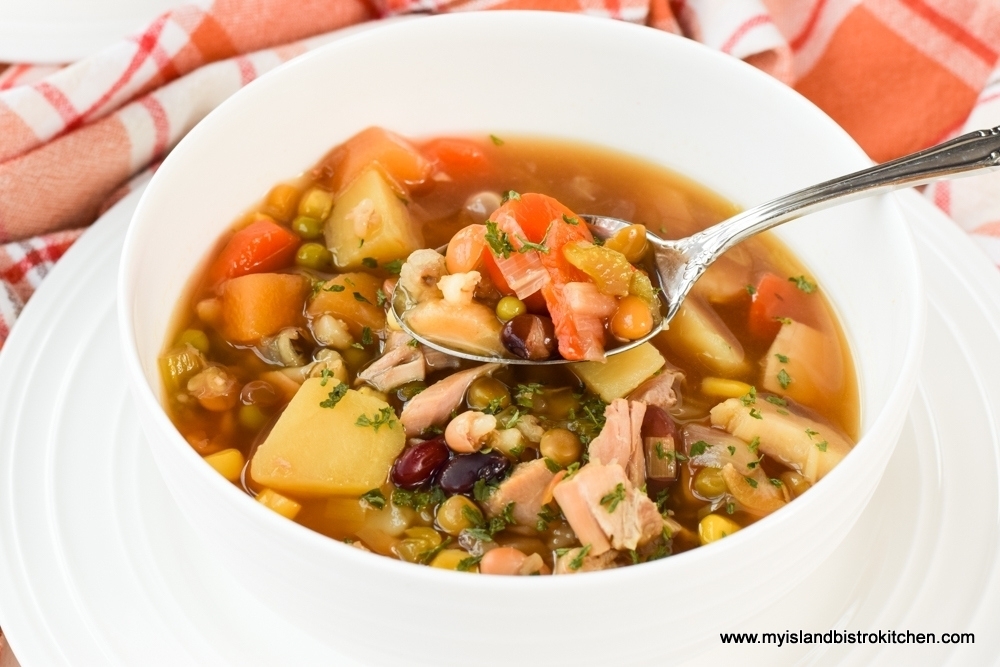
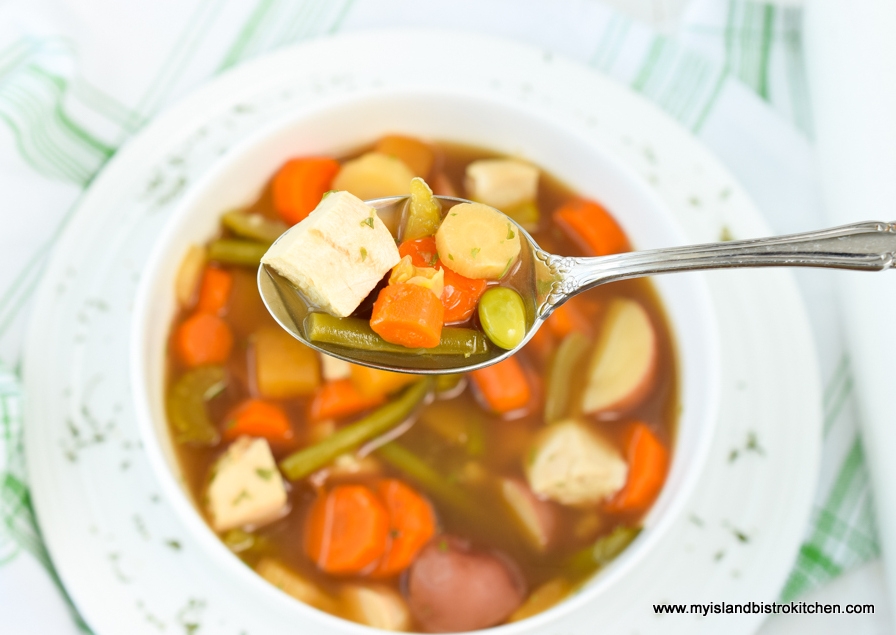
I like rutabaga so add a fair bit of it to the soup. It adds both substance and some sweetness to the soup. Sometimes, I will make this soup with peeled cubed potatoes (seen in photo above) and, other times, I will make it a little more rustic, using the mini red potatoes with their skins on (as shown in photo below). Either works.

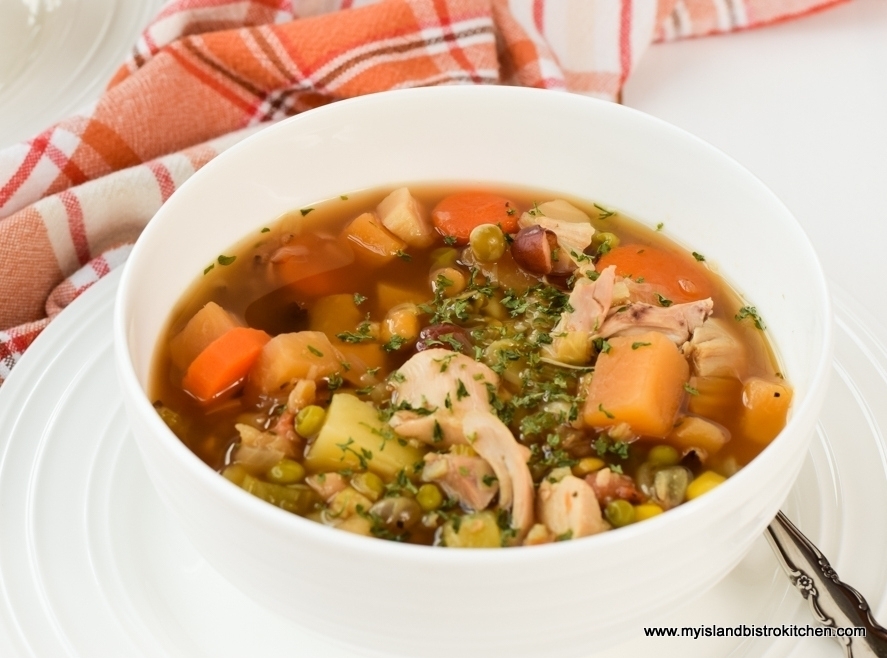
Nearer the end of the cooking process, add 1 1/2 cups of frozen vegetables. This can be either corn, peas, or mixed vegetables – any on their own or in any combination to make up 1 1/2 cups. I like the soup well filled! One nice thing about this kind of soup is that if you don’t like, for example, peas, then simply replace them with another vegetable you prefer.
The cooked turkey may either be cubed (as shown in photo above) or coarsely shredded (as seen in photo below) for this soup. Making turkey soup is a great way to use up light and/or dark meat left on the turkey. It only needs about 5 minutes in the soup for it to heat. Don’t re-cook the meat as it will become tough and it will lose its flavour.
Serve this soup piping hot with homemade bread, rolls, white biscuits, whole wheat biscuits, or favorite crackers.
[Printable recipe follows at end of posting]
The Bistro’s Homemade Turkey Vegetable Soup
Ingredients:
1 cup dry soup mix of beans, lentils, split peas, pearl barley, and white rice
3 cups cold water
3 – 4 tbsp butter
1 tbsp olive oil
1 cup onion, coarsely chopped
2 cups carrots (about 3 large), cut into bite-sized chunks
1½ cups parsnip (about 2 large), cut into bite-sized pieces
1 cup celery (1 large celery rib), sliced
1 leek (white and green parts only), sliced
5-6 cloves of garlic, minced
12 cups turkey stock
2 tbsp dry onion soup mix
1 tsp dried summer savory
¾ tsp dried thyme
¼ tsp turmeric
¼ tsp paprika
1/8 tsp ground coriander
1/8 tsp cloves
1/8 tsp nutmeg
2 bay leaves
1¾ cups rutabaga, cut into bite-sized chunks
1 lb mini red potatoes (unpeeled), halved or quartered depending on their size or, alternatively, 2 cups peeled potatoes, cubed
1½ cups frozen vegetables (peas, corn, or mixed vegetables)
3 – 4 cups cooked turkey meat, cubed or coarsely shredded
Salt and pepper, to taste
Method:
In large saucepan, soak the dry soup mix in 3 cups of cold water for 2 hours. Bring to a boil, covered, over medium-high heat. Reduce heat to low and boil gently for 2 minutes. Remove from heat and let stand 1 hour. Drain.
In large stockpot, over medium heat, melt the butter then add the olive oil. Add the onions, carrots, parsnip, celery, and leek. Sauté for 2-3 minutes, stirring briskly. Add the garlic and, stirring constantly, cook for 1 minute longer.
Add the turkey stock, cover, and bring just to the boiling point but do not boil. Add the dry onion soup mix and spices along with the bay leaves. Add the rutabaga and drained soup mix of beans, lentils, peas, etc. Cook gently, partially covered, over medium-low heat for about 30 minutes. Season with salt and pepper to taste.
Add the potatoes and cook, partially covered, for about 10-12 minutes before adding the frozen vegetables. Cook for an additional 15-20 minutes, or until vegetables are cooked. Add the cooked turkey and simmer for 5 minutes or so, just until the turkey is heated. Season with salt and pepper to taste.
Remove bay leaves and ladle soup into bowls. Soup freezes well.
Yield: Approximately 18-20 servings (1¼ cup serving size)
You may also like this recipe for My Island Bistro Kitchen’s Homemade Turkey Chowder.
The Bistro’s Homemade Turkey Vegetable Soup
Homemade turkey stock, leftover turkey, and loads of vegetables combine with light seasoning to make a delicious and nutritious turkey vegetable soup.
Servings 18
Ingredients
- 1 cup dry soup mix of beans (lentils, split peas, pearl barley, and white rice)
- 3 cups cold water
- 3 – 4 tbsp butter
- 1 tbsp olive oil
- 1 cup onion, coarsely chopped
- 2 cups carrots (about 3 large), cut into bite-sized chunks
- 1½ cups parsnip (about 2 large), cut into bite-sized pieces
- 1 cup celery (1 large celery rib), sliced
- 1 leek, white and green parts only, sliced
- 5-6 cloves of garlic, minced
- 12 cups turkey stock
- 2 tbsp dry onion soup mix
- 1 tsp dried summer savory
- ¾ tsp dried thyme
- ¼ tsp turmeric
- ¼ tsp paprika
- 1/8 tsp ground coriander
- 1/8 tsp cloves
- 1/8 tsp nutmeg
- 2 bay leaves
- 1¾ cups rutabaga, cut into bite-sized chunks
- 1 lb mini red potatoes unpeeled, halved or quartered depending on their size or, alternatively, 2 cups peeled potatoes, cubed
- 1½ cups frozen vegetables (peas, corn, or mixed vegetables)
- 3 - 4 cups cooked turkey meat, cubed or coarsely shredded
- Salt and pepper, to taste
Instructions
-
In large saucepan, soak the dry soup mix in 3 cups of cold water for 2 hours. Bring to a boil, covered, over medium-high heat. Reduce heat to low and boil gently for 2 minutes. Remove from heat and let stand 1 hour. Drain.
-
In large stockpot, over medium heat, melt the butter then add the olive oil. Add the onions, carrots, parsnip, celery, and leek. Sauté for 2-3 minutes, stirring briskly. Add the garlic and, stirring constantly, cook for 1 minute longer.
-
Add the turkey stock, cover, and bring just to the boiling point but do not boil. Add the dry onion soup mix and spices along with the bay leaves. Add the rutabaga and drained soup mix of beans, lentils, peas, etc. Cook gently, partially covered, over medium-low heat for about 30 minutes. Season with salt and pepper to taste.
-
Add the potatoes and cook, partially covered, for about 10-12 minutes before adding the frozen vegetables. Cook for an additional 15-20 minutes, or until vegetables are cooked. Add the cooked turkey and simmer for 5 minutes or so, just until the turkey is heated.
-
Remove bay leaves and ladle soup into bowls. Soup freezes well.
Recipe Notes
Yield: Approximately 18-20 servings (1¼ cup serving size)
[Copyright My Island Bistro Kitchen]
If you have made this recipe and enjoyed it and/or wish to share it with your friends and family, please do so on social media but be sure to share the direct link to this posting from my website.
Connect with My Island Bistro Kitchen on Social Media
Join the Facebook page for My Island Bistro Kitchen: https://www.facebook.com/MyIslandBistroKitchen/
Follow “the Bistro” on “X” (formerly Twitter): https://twitter.com/PEIBistro/
See the drool-worthy gallery of mouth-watering food photos from My Island Bistro Kitchen on Instagram: https://www.instagram.com/peibistro/
Follow “the Bistro” on Pinterest at https://www.pinterest.ca/peibistro/ and pin the Pinterest-ready photos found at the end of this post to your favorite Pinterest boards.
Pin Me To Pinterest!

You may also enjoy these other soup and chowder recipes from My Island Bistro Kitchen:
Turkey Chowder
Chicken Noodle Soup
The Christmas Rose Tablesetting
Christmas tablesettings are an opportunity to use the good china, if you have it, and to create stunning centerpieces. While I don’t always use fresh flowers in my tablescapes, I never underestimate the power and beauty of fresh and softly fragrant flowers. Sometimes, as is the case in this tablesetting, only the fresh flowers will effectively achieve the sophisticated tablesetting I wanted. Just make sure that whatever flowers are chosen, they are not potently fragrant as that can be offputting for some guests. Creating a beautiful holiday table is part of the equation but the other part is ensuring guests are comfortable for the meal.
To keep the tablesetting neutral and restful, I recommend chosing a color scheme and limiting it to two to three colors that complement each other well. Otherwise, the table may start to look busy. In this tablesetting, I used the blush-colored roses and a couple of shades of green with white as the table’s background. This strategy allows the focal point of the table (the centerpiece) to stand out.

This tablesetting has the overall effect of understated elegance with just a touch of whimsy and glitter. The table is uncluttered and the centerpiece, the anchor of this Christmas tablesetting, is the single tall and elegant triangular flute-shaped vase with eight votives attached. Keeping the tabletop uncluttered creates a stylish and sophisticated holiday tablesetting. It’s classy and creates a serene and restful looking tabletop for dinner guests.
Candles create an inviting atmosphere and give warmth to a tablesetting. Votives are great because they provide an elegant soft low light to the tablesetting and they are also relatively safe to use because they are low and won’t likely tip if the table is jerked accidentally by the knee of a guest. I find tall tapers to be a bit unnerving because they more easily can tip over because of their height. I rarely use them in tablesettings for this reason.
The principal flowers I have selected for the focal point centerpiece have meanings to Christmas and are steeped in legend. Whether or not any of these legends is true or not, I have no way of knowing but they do make for good conversation pieces.

The Legend of the Christmas Rose
Legend has it that a young shepherdess named Madelon, was tending her flock on the hillside as she watched the wise men and shepherds passing by with their gifts to present to the newborn King. Madelon, in tears and despairing that she had no gift to offer to the Baby Jesus, was seen by an angel who is believed to have made the snow at Madelon’s feet disappear, revealing a rose with pink-tipped petals. According to the legend, these petals were formed by the angel from the tears shed by Madelon. This flower then offered Madelon the opportunity to present a gift at the manger. The flower became known as the Christmas Rose.

So, I have used a dozen soft blush-colored roses with pink-tipped petals as the main flowers in this centerpiece.

Legend of Star of Bethlehem Flower
This is an all-white star-shaped flower. Legend suggests God thought that the beautiful Star of Bethlehem he created to guide the wise men to the Baby Jesus was too beautiful, after it served its purpose, not to do something more with. So, the star was burst into pieces and, when it scattered to the ground, it turned into white flowers that became known as the Star of Bethlehem flower.
I have included a single Star of Bethlehem stem in the center of this arrangement.

Other Components of the Floral Arrangement
To complement the pale blush color of the centerpiece, I have added the green bell-shaped Bells of Ireland and small green chrysanthemums. The Bells of Ireland are said to symbolize good luck and the chrysanthemums represent happiness, love, longevity, and joy.
The greenery in the arrangement is comprised of fir and pine.

The tiny white frothy Baby’s Breath (seen to the right in the photo below) has much symbolism. One of its symbols is said to represent the power of the Holy Spirit in the Christian faith. Baby’s Breath is a great filler flower for arrangements and I think it looks like little snowdrops.

Dinnerware
I am using my Royal Albert “Lavender Rose” china in this setting and have framed each place setting with a gold charger plate. I am a big fan of using charger plates for a couple of reasons. First, I think it gives an air of elegance and formality to the setting and, second, it keeps each placesetting clean. If food should happen to drop off of a plate, it is caught by the charger plate and means fewer stains on the table linen. Different colored chargers can also change the look of a tablesetting, particularly if the same dinnerware is frequently used for events with the same guests attending.

The placesettings are set with the components of the dinnerware that will be used in the order of the menu, starting with a cream soup, followed by the salad course and, of course, the main meal. This also gives guests a clue as to how many courses to expect at dinner.

To tie in the green color from the floral arrangement, and to add a bit of whimsy and interest to the setting, I am using these glittery clip-on birds. They add a festive air and interest to the table.

Table Linens and Napkin Fold
When I am using patterned dinnerware, as I am in this setting, I like to use a plain tablecloth — usually white — because it gives me a blank canvas from which to work and display elements of the setting. The tablecloth is a vintage Irish linen cloth.
The napkin fold I am using is a fold that is known by a couple of names: 1) the Bird of Paradise; and 2) the Sailboat fold. I will often set this fold on a plate but, for this setting, I am placing it inside the stemmed wine glasses because it replicates the triangular shape of the vase and its floral arrangement. When the floral arrangement is tall, I like to use some height at each placesetting so there is not such a visual drop in depth from the centerpiece to each placesetting. Placing this fold in the stemware glass graduates the height of elements of the tablesetting.

Glassware
I have chosen to use matching glassware in this setting as it gives a more formal look. Using glassware that has lots of cuts will add sparkle to any table.

A tasty meal is made all the more wonderful when dinner guests are presented with a beautifully set table. No matter what is on the menu, a thoughtfully set table adds a little extra holiday flair to a dinner party.

To view other holiday tablesettings from My Island Bistro Kitchen, click on the links below:
Blush Pink Holiday Tablesetting
Just Hear Those Sleigh Bells Jinglin’ Tablesetting
Glitz ‘n Glamour New Year’s Eve Tablesetting
The Warmth of the Christmas Light Tablesetting
Christmas Eve Tablesetting and Dinner
A Tartan Holiday Tablesetting
Pretty Poinsettia Tablesetting
Poinsettia Trio Tablesetting
The Holiday Table
The Pink and Green Holiday Table
Christmas at My Island Bistro Kitchen
Purple Tablesetting for the Holidays
Evergreens and Reindeer Christmas Tablesetting
Cupcake Tablescape
Twas The Night Before Christmas
Pin Me To Pinterest!

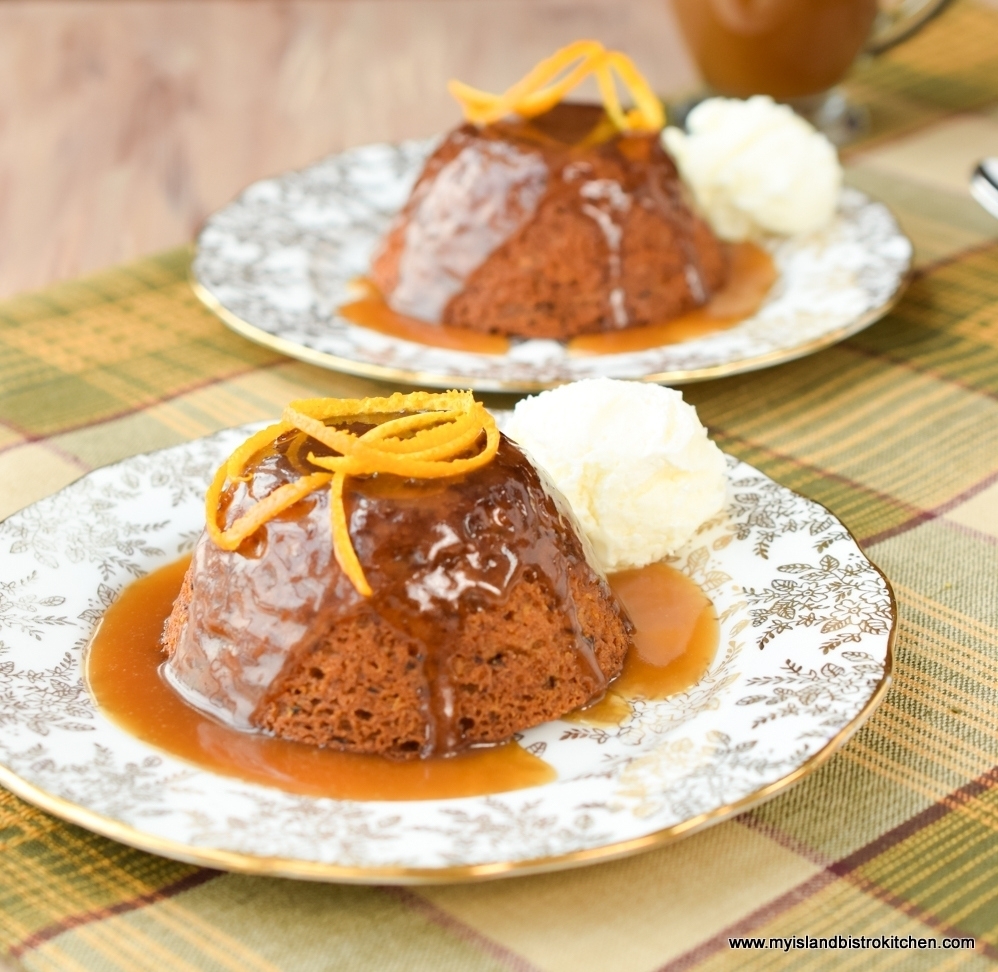
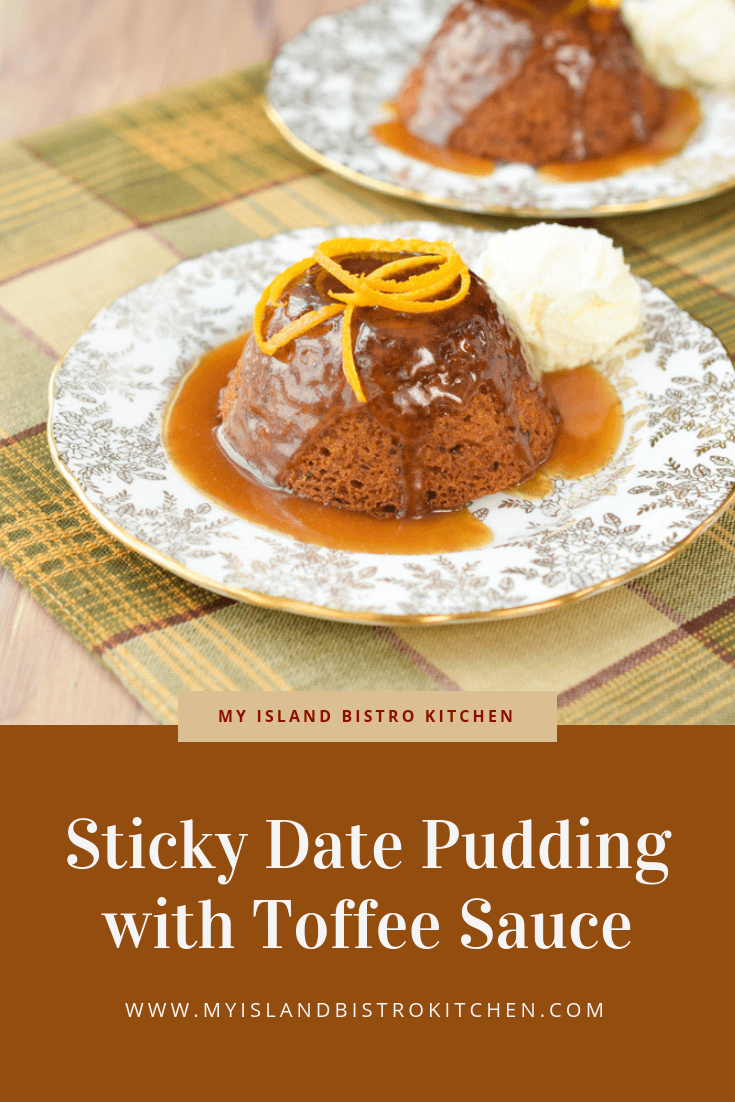
Classic Sticky Date Pudding with Toffee Sauce
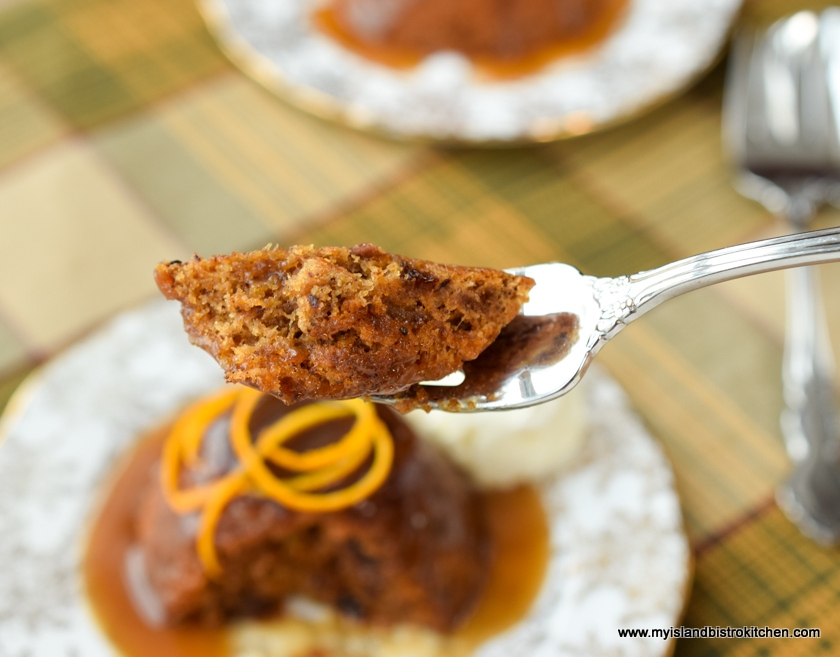
Sticky Date Pudding (aka Sticky Toffee Pudding) has a British origin and is often served as the Christmas pudding. This pudding is basically a dense, but tender, sponge cake made with cooked dates. It’s really nothing more elaborate or complicated than that.
My version of this classic pudding starts with soaking the chopped dates in rum allowing them to absorb the flavour, then slowly simmering the dates in water to soften. The dates, the primary ingredient in the pudding, add sweetness and texture to the pudding without turning it into a heavy pudding. This pudding is subtly spiced with a blend of ginger, cinnamon, and cloves.
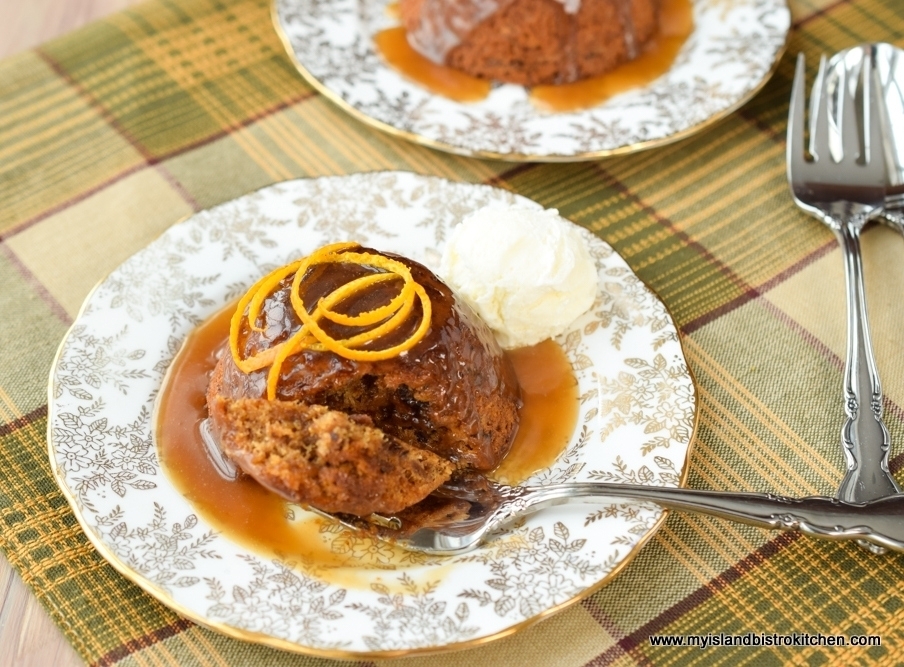
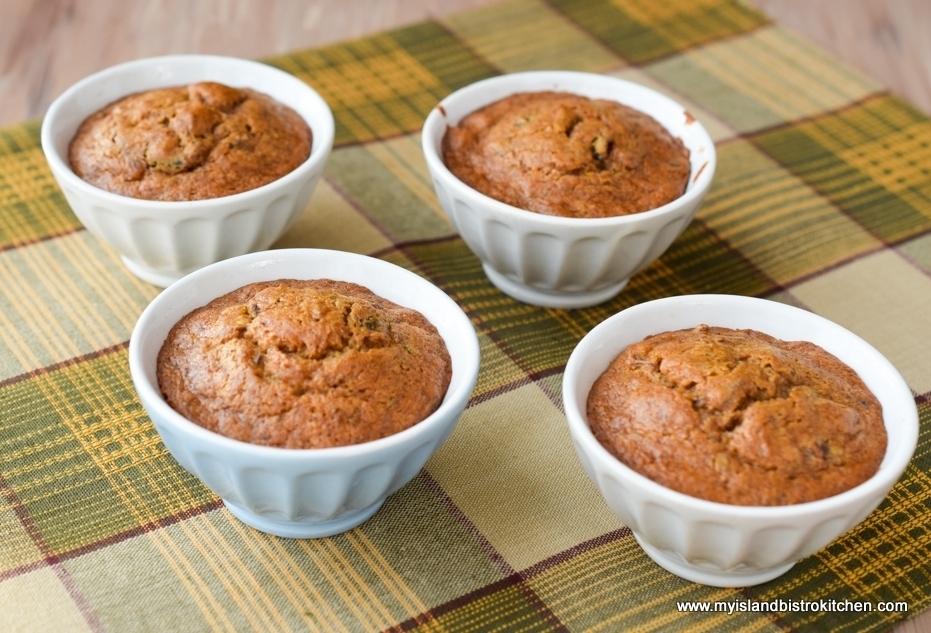
I like to make this pudding in small one-half cup size ramekins for a couple of reasons. First, I like the look of a small pudding on each plate and, second, this pudding freezes well and the ramekin-sized puddings are perfect for freezing individual servings.
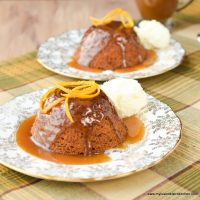
Sticky Date Pudding is most commonly served warm with a decadently rich toffee sauce made with butter, dark brown sugar, and whipping cream. I add a dash of rum to the sauce to deepen the flavour. Add a dollop of whipped cream or a scoop of vanilla or maple ice cream to really dress the pudding to the nines!
[Printable recipe follows at end of posting]
My Island Bistro Kitchen’s Sticky Date Pudding with Toffee Sauce
Ingredients for Pudding:
7 oz (about 1 1/3 cups) pitted dates, coarsely chopped
¼ cup dark rum
1 cup water
1 1/8 tsp baking soda
¼ cup butter, softened at room temperature
1/3 cup granulated sugar
1/3 cup brown sugar, firmly packed
2 large eggs, room temperature
1 tsp grated orange rind
1½ tbsp pure maple syrup
1½ tsp vanilla
1¼ cups all-purpose flour
1½ tsp baking powder
¼ tsp ground ginger
¼ tsp cinnamon
1/8 tsp cloves
1/8 tsp salt
Ingredients for Toffee Sauce:
¾ cup butter (no substitutes)
1 1/3 cups dark brown sugar
¾ cup whipping cream (35% M.F.)
2 tbsp rum
2 tsp vanilla
Method for Pudding:
In saucepan, pour rum over dates. Let stand 20 minutes, stirring a couple of times. Add the cup of water and bring the dates, rum, and water to a boil over medium-high heat. Reduce heat to simmer and boil, uncovered, gently for approximately 5 minutes, stirring once or twice. Remove from heat and add the baking soda. Stir well. Let mixture stand, uncovered, for 20 minutes, stirring occasionally to loosely break up the dates.
Position oven rack in bottom third of oven and preheat oven to 350°F.
While date mixture is cooling, cream the butter and sugars together in bowl of stand mixer fitted with paddle attachment. Beat in the eggs, one at a time, beating well after each addition. Beat in the orange rind, maple syrup and vanilla.
Sift the dry ingredients together and incorporate into the creamed mixture just until they are completely blended. Stir in the date mixture.
Grease ten (10) ½-cup ramekins and place on rimmed baking sheet. Distribute the batter evenly between the ramekins, filling each no more than about 2/3 full. Smooth tops with knife. Bake for 25 minutes, or until pudding springs back to a light touch and a cake tester inserted into center of pudding comes out clean. Run tip of pare knife around each pudding to loosen any parts that may have stuck to ramekin. Turn puddings out on to individual serving plates. Serve warm with toffee sauce and, if desired, a dollop of whipped cream or a scoop of vanilla or maple ice cream.
Method for Toffee Sauce:
Melt butter in saucepan over medium heat. Add the sugar and stir until dissolved. Add the cream and reduce heat to simmer. Cook slowly, stirring occasionally, until sauce is slightly thick, about 6-8 minutes or so. Remove from heat and stir in the rum and vanilla. Serve warm over sticky date pudding. (Sauce will thicken as it starts to cool slightly).
Yield: 10 servings
NOTE 1: Pudding may also be baked in a greased (or parchment-lined) 9” baking pan for approximately 30-35 minutes or until cake tester inserted into center of pudding comes out clean and pudding springs back to a light touch. Cut into squares and serve warm with the warm toffee sauce.
NOTE 2: This pudding freezes well so can be made ahead of when needed. Simply thaw at room temperature and reheat pudding for a few seconds in microwave.
My Island Bistro Kitchen’s Sticky Date Pudding with Toffee Sauce
A deliciously moist and delicately spiced rich date pudding best served with a rich and luscious toffee sauce.
Servings 10
Ingredients
- 7 oz about 1 1/3 cups pitted dates, coarsely chopped
- ¼ cup dark rum
- 1 cup water
- 1 1/8 tsp baking soda
- ¼ cup butter, softened at room temperature
- 1/3 cup granulated sugar
- 1/3 cup brown sugar, firmly packed
- 2 large eggs, room temperature
- 1 tsp grated orange rind
- 1½ tbsp pure maple syrup
- 1½ tsp vanilla
- 1¼ cups all-purpose flour
- 1½ tsp baking powder
- ¼ tsp ground ginger
- ¼ tsp cinnamon
- 1/8 tsp cloves
- 1/8 tsp salt
Ingredients for Toffee Sauce:
- ¾ cup butter (no substitutes)
- 1 1/3 cups dark brown sugar
- ¾ cup whipping cream, 35% M.F.
- 2 tbsp rum
- 2 tsp vanilla
Instructions
Method for Pudding:
-
In saucepan, pour rum over dates. Let stand 20 minutes, stirring a couple of times. Add the cup of water and bring the dates, rum, and water to a boil over medium-high heat. Reduce heat to simmer and boil, uncovered, gently for approximately 5 minutes, stirring once or twice. Remove from heat and add the baking soda. Stir well. Let mixture stand, uncovered, for 20 minutes, stirring occasionally to loosely break up the dates.
-
Position oven rack in bottom third of oven and preheat oven to 350°F.
-
While date mixture is cooling, cream the butter and sugars together in bowl of stand mixer fitted with paddle attachment. Beat in the eggs, one at a time, beating well after each addition. Beat in the orange rind, maple syrup and vanilla.
-
Sift the dry ingredients together and incorporate into the creamed mixture just until they are completely blended. Stir in the date mixture.
-
Grease ten (10) ½-cup ramekins and place on rimmed baking sheet. Distribute the batter evenly between the ramekins, filling each no more than about 2/3 full. Smooth tops with knife. Bake for 25 minutes, or until pudding springs back to a light touch and a cake tester inserted into center of pudding comes out clean. Run tip of pare knife around each pudding to loosen any parts that may have stuck to ramekin. Turn puddings out on to individual serving plates. Serve warm with toffee sauce and, if desired, a dollop of whipped cream or a scoop of vanilla or maple ice cream.
Method for Toffee Sauce:
-
Melt butter in saucepan over medium heat. Add the sugar and stir until dissolved. Add the cream and reduce heat to simmer. Cook slowly, stirring occasionally, until sauce is slightly thick, about 6-8 minutes or so. Remove from heat and stir in the rum and vanilla. Serve warm over sticky date pudding. (Sauce will thicken as it starts to cool slightly).
Recipe Notes
Yield: 10 servings NOTE 1: Pudding may also be baked in a greased (or parchment-lined) 9” baking pan for approximately 30-35 minutes or until cake tester inserted into center of pudding comes out clean and pudding springs back to a light touch. Cut into squares and serve warm with the warm toffee sauce. NOTE 2: This pudding freezes well so can be made ahead of when needed. Simply thaw at room temperature and reheat pudding for a few seconds in microwave.
[Copyright My Island Bistro Kitchen]
If you have made this recipe and enjoyed it and/or wish to share it with your friends and family, please do so on social media but be sure to share the direct link to this posting from my website.
Connect with My Island Bistro Kitchen on Social Media
Join the Facebook page for My Island Bistro Kitchen: https://www.facebook.com/MyIslandBistroKitchen/
Follow “the Bistro” on “X” (formerly Twitter): https://twitter.com/PEIBistro/
See the drool-worthy gallery of mouth-watering food photos from My Island Bistro Kitchen on Instagram: https://www.instagram.com/peibistro/
Follow “the Bistro” on Pinterest at https://www.pinterest.ca/peibistro/ and pin the Pinterest-ready photo at the end
You may also enjoy these other pudding recipes from My Island Bistro Kitchen:
Apple Maple Bread Pudding with Maple Liqueur Sauce
Steamed Mincemeat and Apple Pudding with Toffee Sauce
Steamed Carrot Pudding
Steamed Cranberry Pudding with Eggnog Sauce
Blueberry Bread Pudding with Grand Marnier Sauce
Plum Pudding with Brown Sugar Sauce
Pin Me To Pinterest!
The Rumrunners – Rum and Raisin Cookies
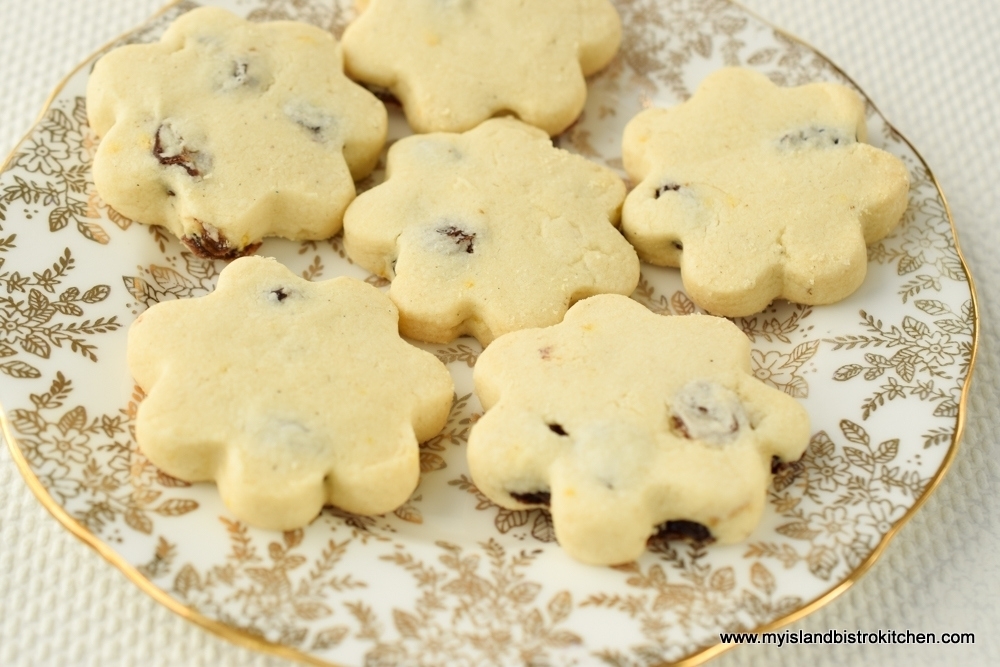
The folklore of rum running during prohibition in Prince Edward Island (PEI) is the stuff of which legends and ballads are made. In PEI, so the stories go, locals would set sail in fishing boats, under the cover of darkness, and head out to sea to meet ships from St. Pierre and Miquelon carrying rum. The locals, known as rumrunners, would buy the rum and head back to Island shores with the smuggled contraband liquor. Continue reading The Rumrunners – Rum and Raisin Cookies
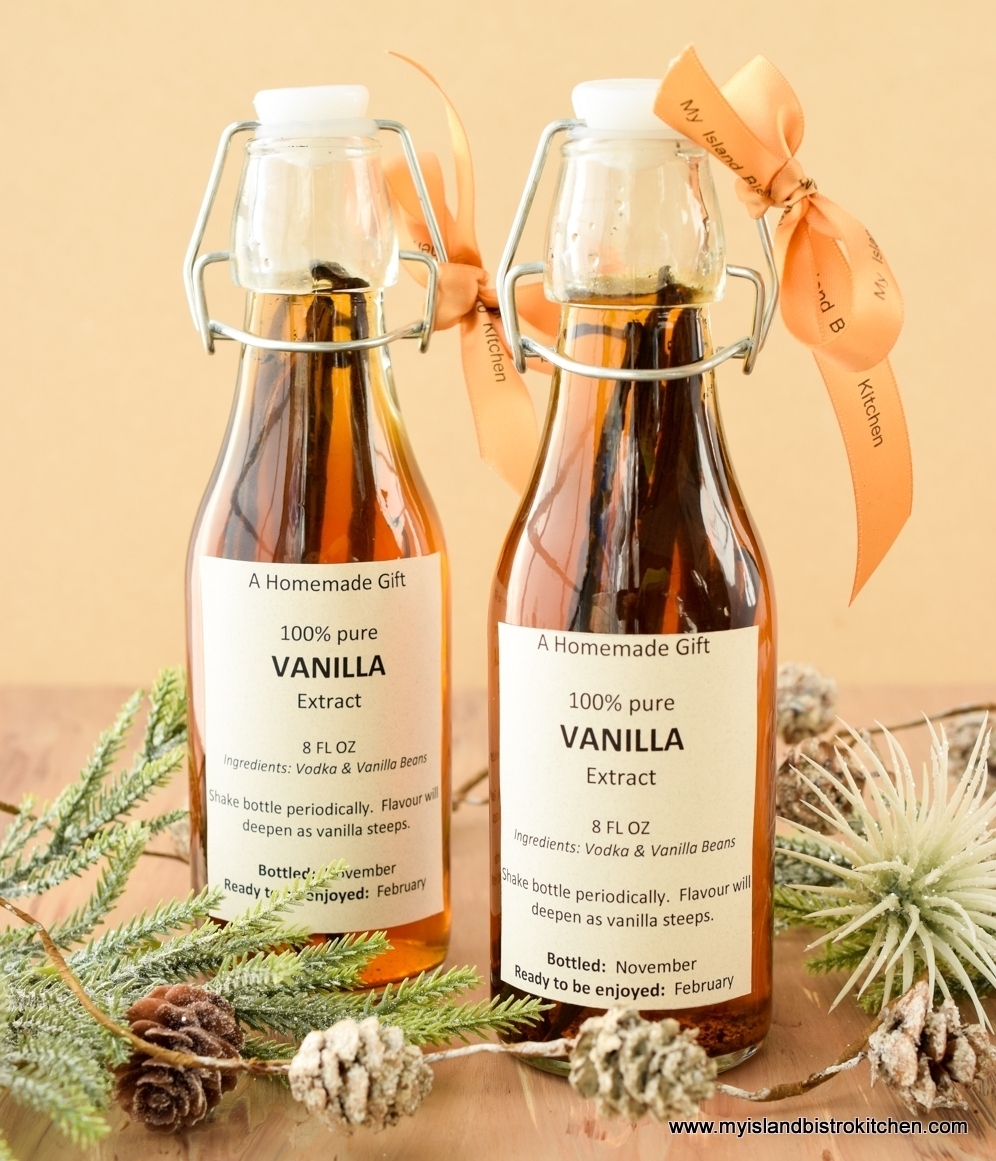
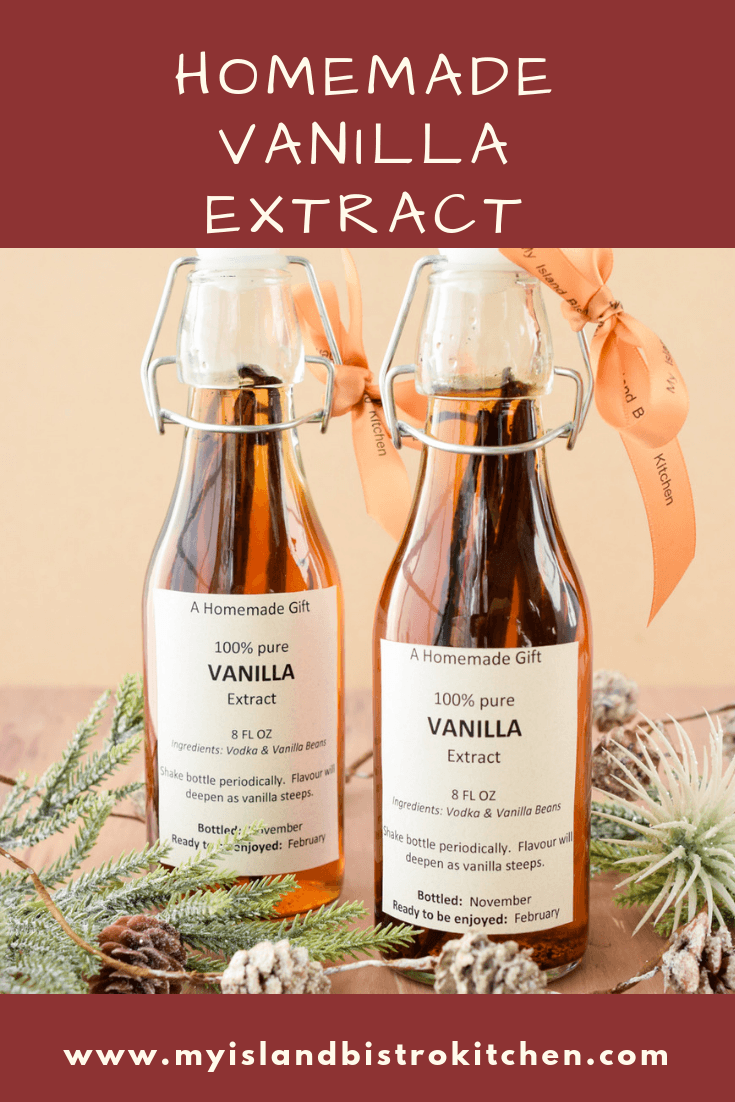
Homemade Vanilla Extract
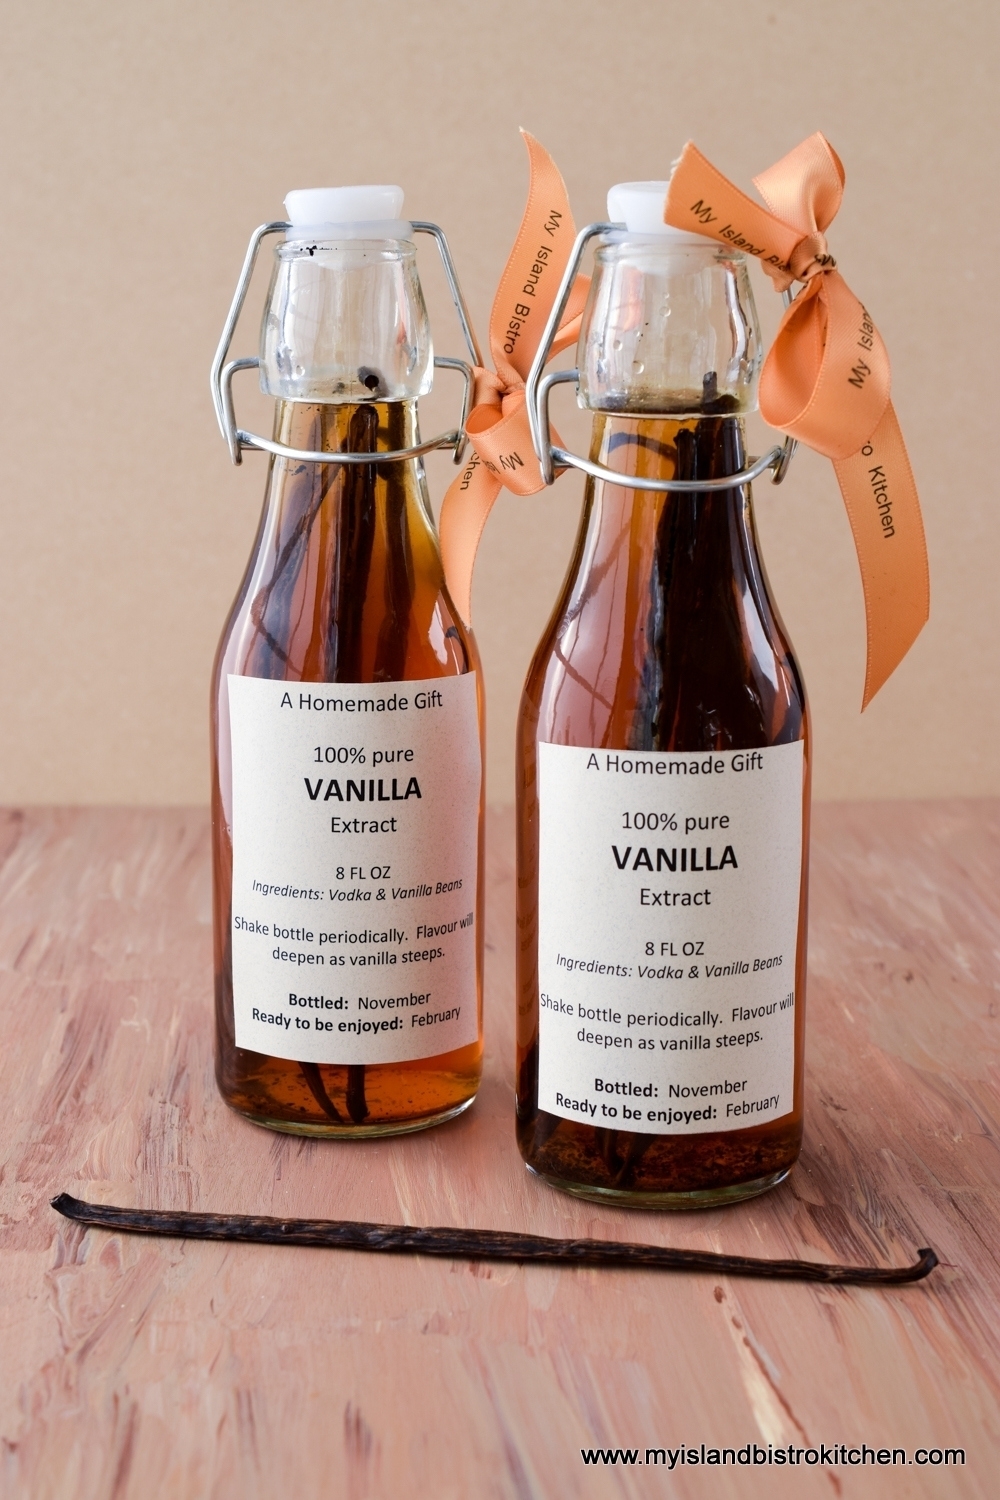
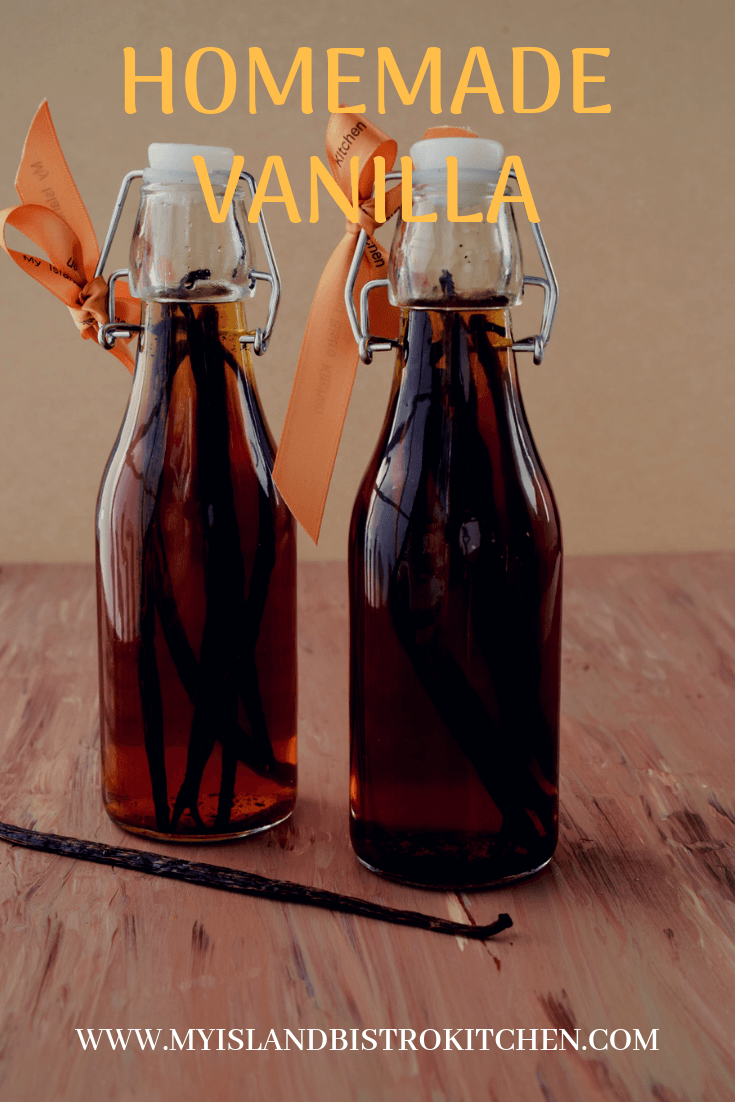
As many bakers will know, vanilla has been creeping up in price and, since it’s a key flavoring in many baked goods, it’s hard to do without it. I recently priced a 120ml bottle of pure vanilla (storebrand) here in Charlottetown and it was $17.49 at time of writing. Yikes! 120ml is not quite one-half cup and there aren’t a lot of teaspoons in a half cup. I make my own vanilla which is actually quite easy and only takes two ingredients — vanilla beans and vodka. The vanilla extract is made using whole vanilla beans that steep for several weeks, or months, in at least 35% alcohol or more.
What homemade vanilla does take is time. It takes at least one to two months for the flavour to steep from the vanilla beans placed in the vodka so you do need to plan ahead for your vanilla needs. Vanilla beans are not cheap either but, for the amount of vanilla that can be made I find, for me at least, it is the more economical way to go.
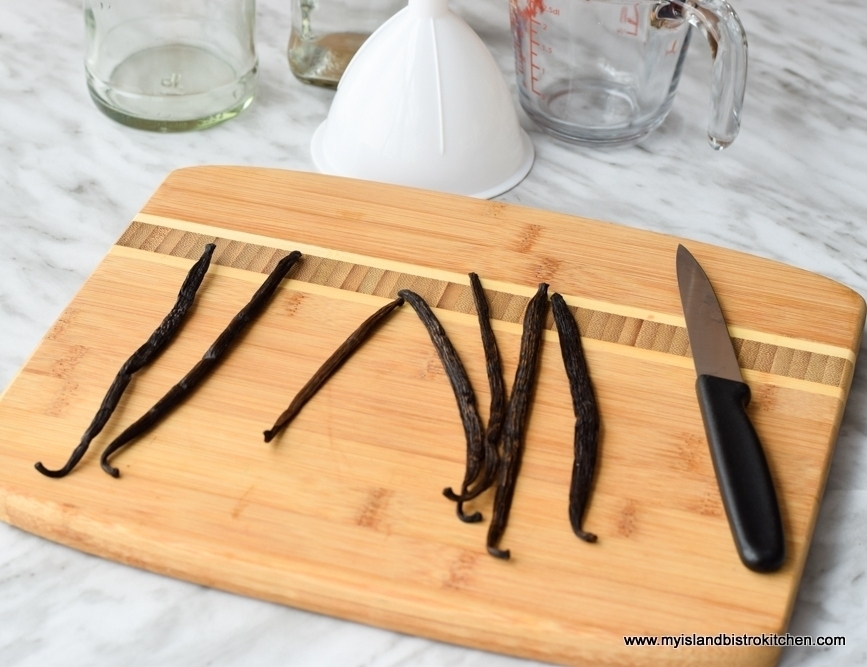
There are different varieties and grades of vanilla beans. I use the Madagascar Bourbon variety. Grade B beans, with their low moisture content, are generally considered the more suitable for extraction purposes. What beans you use, however, will largely depend on what is available in your area. Vanilla beans are usually found in the baking aisles of most large supermarkets or you can often find them at bulk and health food stores.
I use three split standard-sized vanilla beans per cup of vodka, four if the beans are somewhat smaller. More beans can be used to speed up the steeping process but, if you can wait, it’s more economical to go with fewer beans and steep them longer. Vodka is the preferred medium to use for the vanilla because it is considered to be a neutral agent with no defined strong flavour on its own. Some do use bourbon, rum, or brandy for the vanilla but, in my view, that is altering the true vanilla flavour and introducing another flavour altogether.
There is no need to buy a top-brand pricey vodka for the making of vanilla. I use a moderately priced vodka with 40% alc./vol.
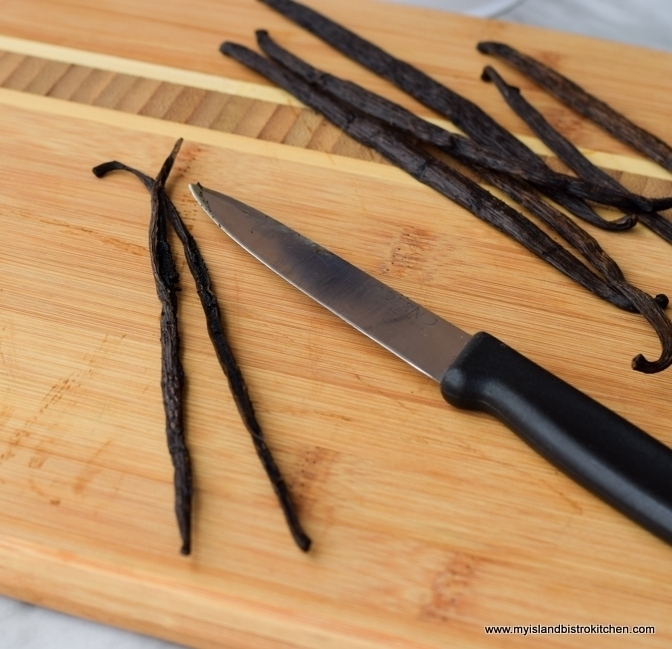
To prepare the vanilla beans, use the flat back side of a pare knife and smooth out the vanilla beans, lengthwise.
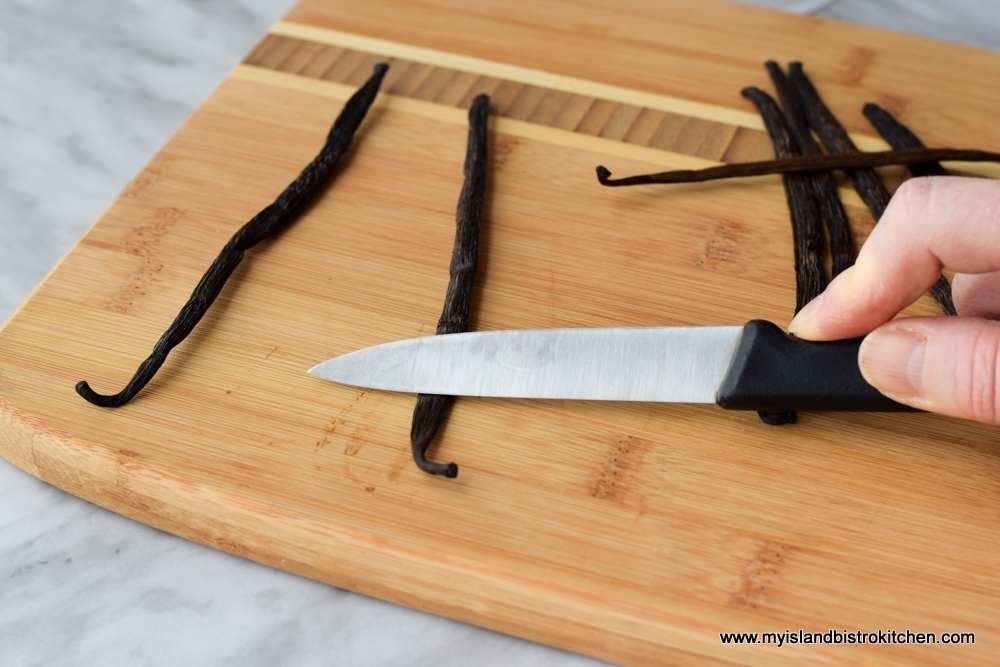
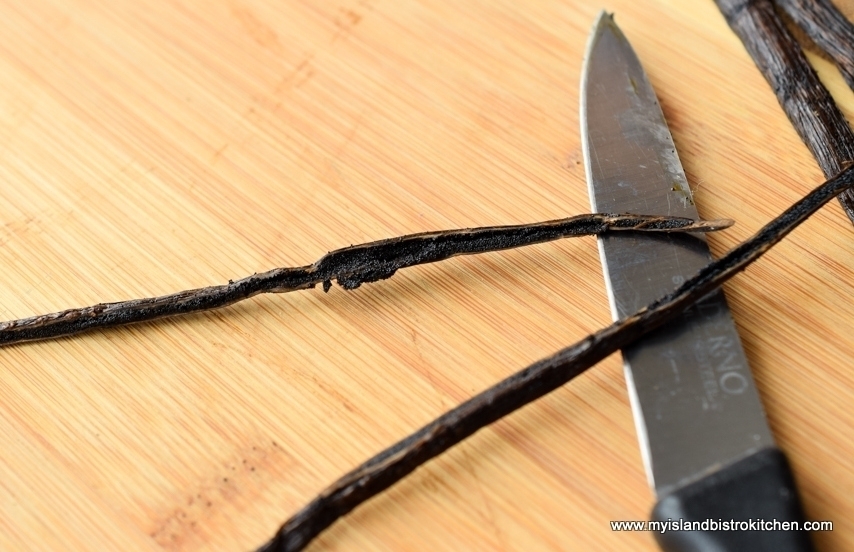
Then, with the tip of a sharp knife, slice the vanilla beans open, lengthwise, to reveal the vanilla seeds.
At this point, you can scrape the vanilla seeds out and transfer them to the decanting bottle along with the vanilla pods or you can just leave the seeds in the pods.
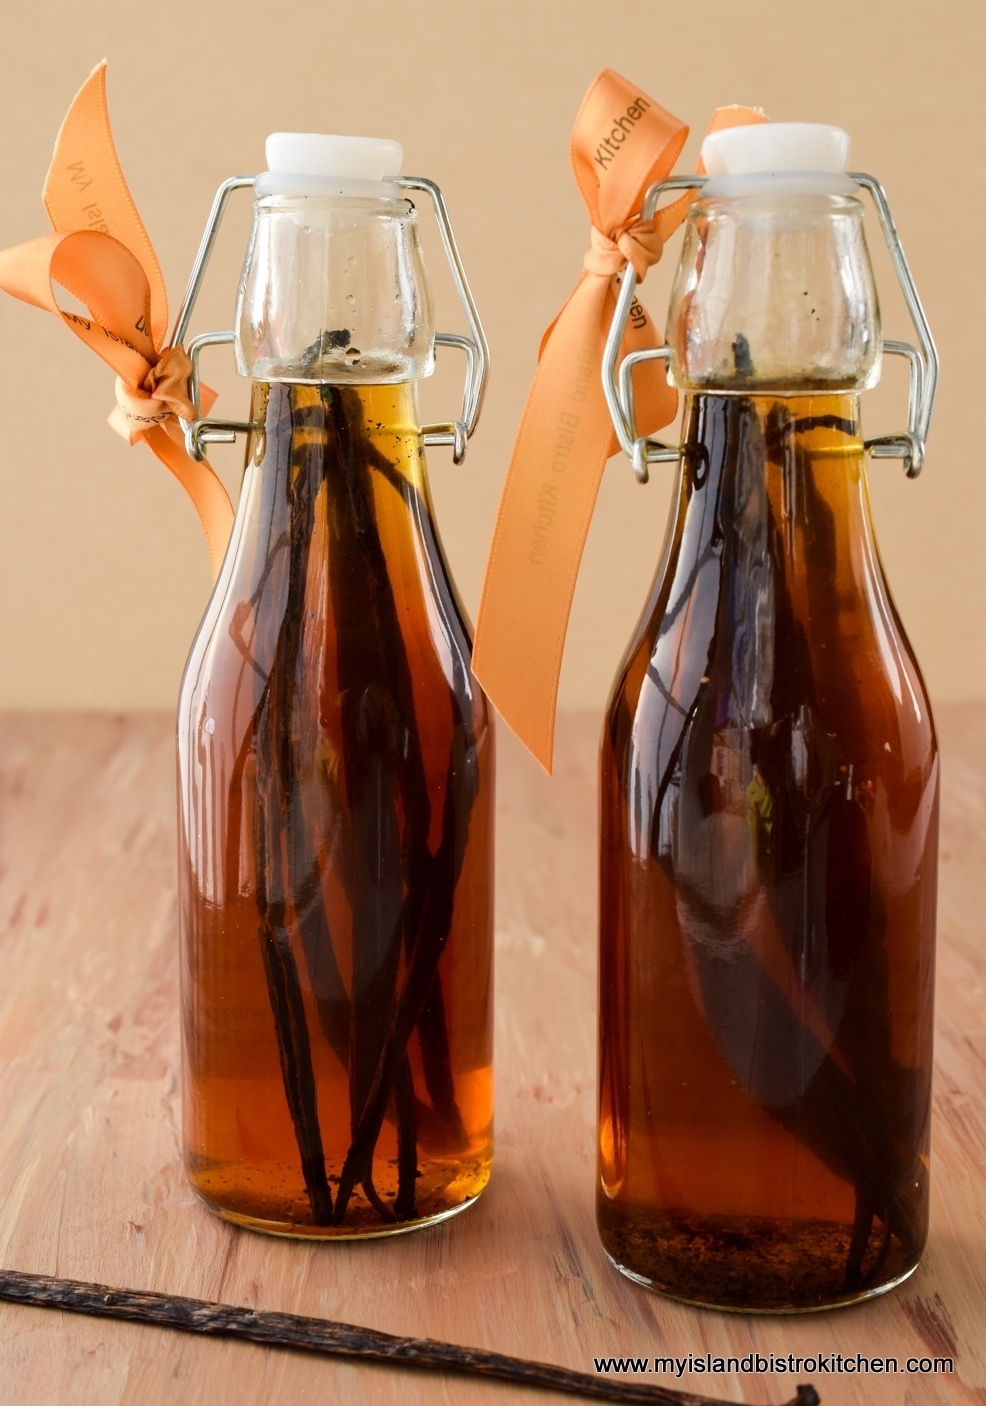
The seeds will come out of the pods anyway as the bottle is shaken and the seeds and pods steep. Place the vanilla bean pods and seeds in a sterilized bottle or jar. Add the vodka, ensuring the vanilla bean pods are submerged. You may cut the vanilla beans if they are taller than the amount of vodka in the bottle.

Cover tightly and shake the bottle well. Store in cool dark place for at least one month (and preferably two months or even longer). Shake the bottle once or twice a week during the steeping/ extraction process.
Apart from making vanilla for your own use, homemade vanilla makes a wonderful gift for the foodie on your gift list so the vanilla beans can be divided between the smaller sterilized gift-size bottles for the entire extraction/steeping process or the vanilla can be steeped in one large bottle and then later poured into smaller sterilized bottles, usually either 4oz or 8oz size. I usually make the vanilla in a large bottle because it does need to be shaken once or twice a week as it steeps and I find it easier to deal with one bottle than several.

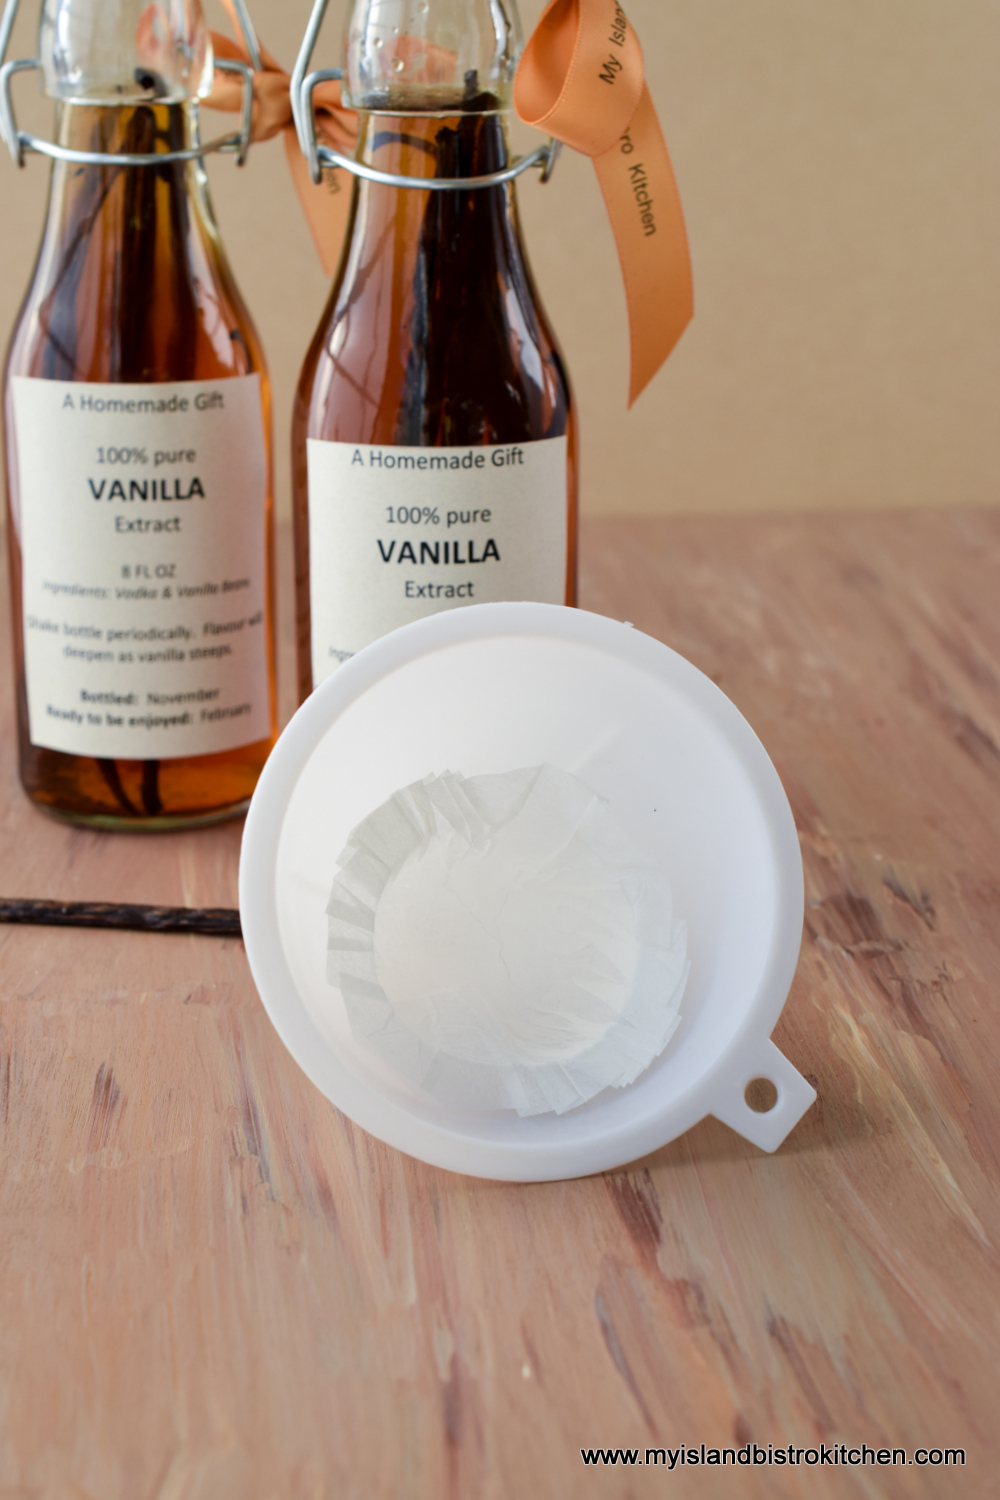
Some don’t care for the specks of vanilla seeds left in the bottle so, if a clear, speck-free, vanilla is desired, filter it through a small k-cup coffee filter like the one shown in the funnel below.
I do recommend keeping the vanilla bean pods in the bottle(s) even after the 1-2 month steeping period has ended because those beans continue to impart flavour and deeper color to the vanilla. I personally like to leave the seeds in the vanilla for the same reason. I also think the seeds make it more interesting and authentic looking If, in future, you have any vanilla bean pods left after you have used the seeds for other purposes, add those pods to the vanilla you have on hand. Additional vodka can be added to the bottle, as well, as the vanilla is used up. Continue to store the vanilla in a dark place at room temperature.
Making homemade vanilla extract is simple and easy to do. It also has the added benefit of allowing you to choose the quality of vanilla you want to make based on the kind and grade of vanilla beans you use. There are a lot of vanillas, and simulated vanillas, on the market but making your own allows you to control the quality and, depending on how much you use, it may be the more economical option. Plus, you will have the thrill of making your own vanilla and impressing those you choose to gift it to as well.
Pin Me To Pinterest!
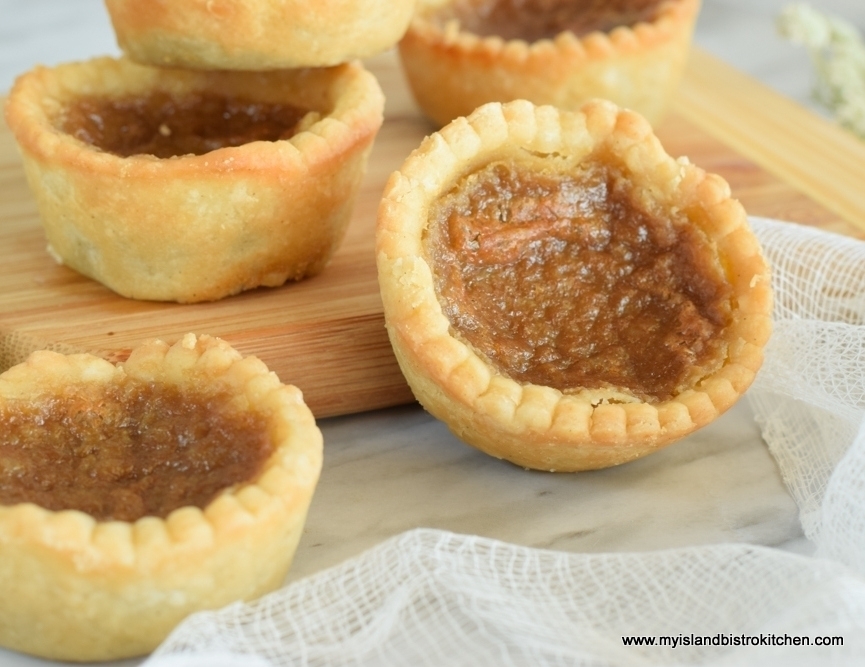
Gluten Free Butter Tarts
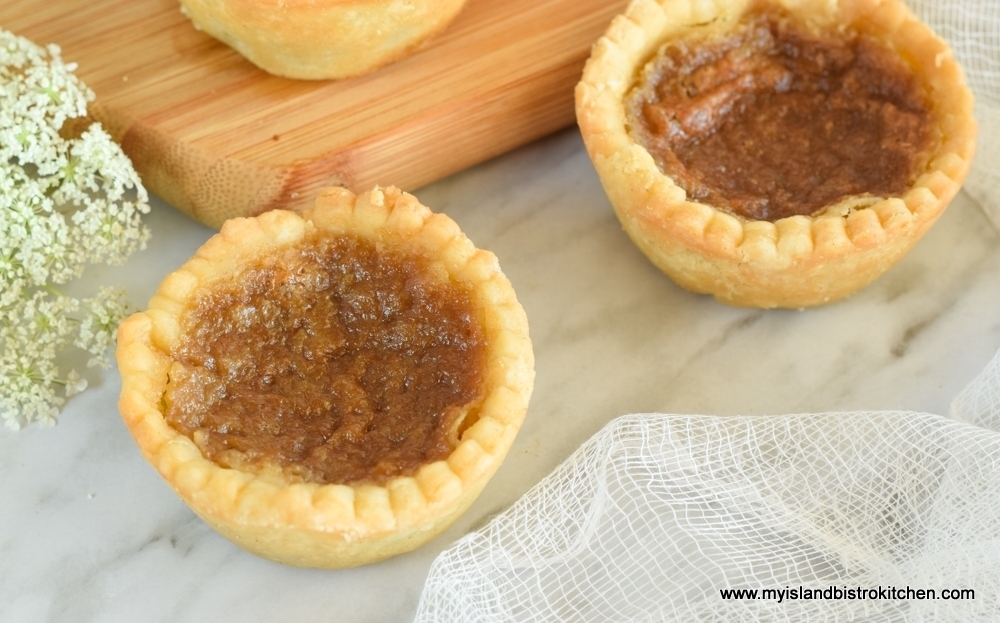
These old-fashioned butter tarts are actually both gluten free and lactose free. If you are not lactose intolerant, simply substitute regular butter and milk in the recipe.
Quite some time ago, I shared my traditional butter tart recipe. However, folks have been inquiring about a gluten-free recipe for the tarts so here it is. I won’t repeat my hints and tips for making butter tarts in this posting because the same ones hold true for the gluten-free version so I am directing readers to my original posting for butter tarts for this information.
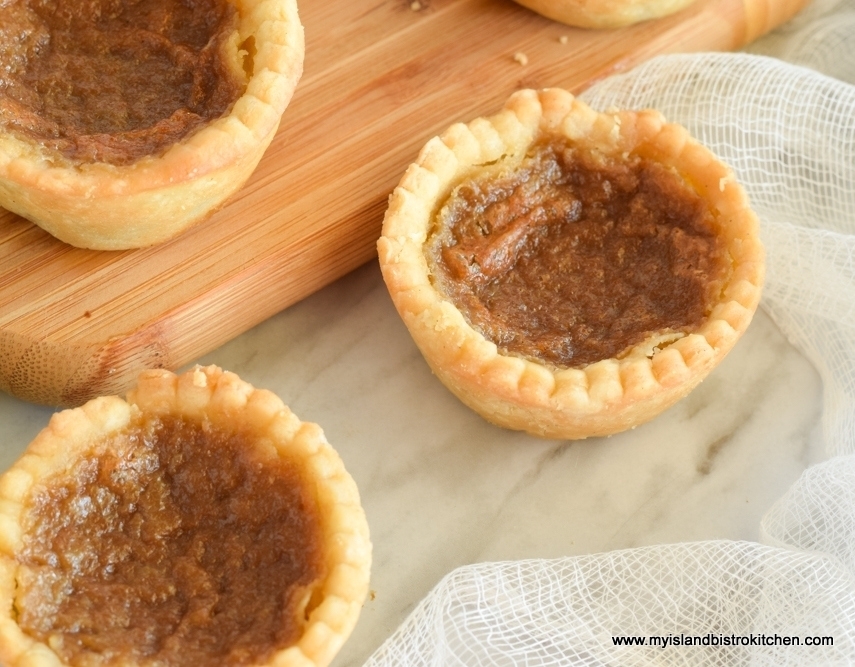
I don’t like a big glob of thick pastry in my butter tarts. As far as I am concerned, it is the gooey, sweet filling that is the star in these tarts. The pastry is involved just because it is the vessel to hold the filling. So, I use a thin rolled pastry and fit the pastry neatly and tidily into the muffin tin cups.
The pastry, nonetheless, still has to be tender and flaky because it is half the equation in these Canadian culinary delicacies. The gluten-free pastry recipe is the one that I developed and perfected first for my gluten-free apple pie, originally published to my website on January 11, 2018. It is now my go-to pastry recipe since it is perfectly tender and flaky and works well with sweet and savory pies as well as tarts.
As with my traditional butter tarts, you will find that the filling is slightly gooey but not too runny. I don’t care for tarts that, as soon as you bite into them, the filling pours out. The reason why I like a semi-solid filling is that I believe butter tarts should be able to be picked up off a plate and eaten by hand with no need for a plate and fork to catch a runny filling. This, of course, is purely a personal preference.
[Printable recipe follows at end of posting]
Gluten-Free Lactose-Free Butter Tarts
Ingredients:
For Pastry:
2 cups (276g) gluten-free 1-to-1 flour
½ tsp salt
1½ tsp sugar
¼ cup cold lactose-free butter (76g)
¼ cup cold lard (76g)
1 large egg
1 tsp white vinegar
Enough water to make 2/3 cup liquid
For Filling:
½ cup light brown sugar, firmly packed
¼ cup dark brown sugar, firmly packed
2 extra-large eggs, light beaten
3 tbsp pure maple syrup
¼ cup melted lactose-free butter (no substitutes)
2 tbsp lactose-free milk (2%MF or 3%MF)
1½ tsp pure vanilla
1 tsp white vinegar
Dash salt
Method:
For Pastry: Lightly grease 12 muffin cups. In medium-sized bowl, whisk the flour, salt, and sugar together. Cut the butter and lard into chunks and add to the flour. With a pastry cutter, cut the butter and lard into the flour until the fats resemble the size of large peas.
In a measuring cup, whisk the egg and vinegar together. Add enough cold water to measure 2/3 cup. Add the egg-vinegar-water mixture to the flour, small amounts at a time, and mix with a fork or hands. Add only enough water that the dough clings together and can be gathered into a ball (it may not take all the liquid).
Divide the dough in four pieces. Form disk shapes with each piece. Place disks in the refrigerator for about 10-15 minutes to chill. Remove one disk at a time from the refrigerator and break off chunks, about 2 oz in size, which should give ample for 4” circles to be cut for each tart. Place dough between two sheets of parchment paper (or wax paper) lightly dusted with flour. Roll pastry to desired thickness, generally between 1/16”and 1/8” thickness. Peel the top piece of parchment from the rolled out pastry. Cut out pastry circles with a floured 4” round cookie cutter.
Carefully transfer each cut out pastry circle to muffin tin cup. Fit the pastry into the cup, ensuring there are no air pockets between the pastry and the muffin cups. Repeat with chilled dough to make enough pastry circles for 12 tart shells, gathering up and re-rolling pastry scraps as necessary. Place pan of tart shells in freezer for about 12-15 minutes to chill to prevent shrinkage of pastry during baking.
For Filling: Preheat oven to 400°F. Add all ingredients, in order given, into a 4-cup measuring cup. Whisk or stir until ingredients are well blended. Remove the muffin cups from the freezer and pour filling equally into the 12 muffin cups. Bake at 400°F for 5 minutes then reduce temperature to 375°F and bake tarts for 17-19 minutes or until filling domes and appears set. Let tarts cool at least 30 minutes in muffin tins on cooling rack. Using the tip of a sharp knife, gently lift the tarts from the muffin cups.
Yield: 12 tarts

Gluten-Free Butter Tarts
These gluten-free (and lactose-free) melt-in-your-mouth pastries are filled with a delectable, slightly gooey, but not too runny, buttery rich caramel-like filling. A classic Canadian culinary delicacy.
Servings 11
Ingredients
For Pastry:
- 2 cups gluten-free 1-to-1 flour (276g)
- ½ tsp salt
- 1½ tsp sugar
- ¼ cup cold lactose-free butter (76g)
- ¼ cup cold lard (76g)
- 1 large egg
- 1 tsp white vinegar
- Enough water to make 2/3 cup liquid
For Filling:
- ½ cup light brown sugar, firmly packed
- ¼ cup dark brown sugar, firmly packed
- 2 extra-large eggs, light beaten
- 3 tbsp pure maple syrup
- ¼ cup melted lactose-free butter (no substitutes)
- 2 tbsp lactose-free milk (2%MF or 3%MF)
- 1½ tsp pure vanilla
- 1 tsp white vinegar
- Dash salt
Instructions
For Pastry:
-
Lightly grease 12 muffin cups. In medium-sized bowl, whisk the flour, salt, and sugar together. Cut the butter and lard into chunks and add to the flour. With a pastry cutter, cut the butter and lard into the flour until the fats resemble the size of large peas.
-
In a measuring cup, whisk the egg and vinegar together. Add enough cold water to measure 2/3 cup. Add the egg-vinegar-water mixture to the flour, small amounts at a time, and mix with a fork or hands. Add only enough water that the dough clings together and can be gathered into a ball (it may not take all the liquid).
-
Divide the dough in four pieces. Form disk shapes with each piece. Place disks in the refrigerator for about 10-15 minutes to chill. Remove one disk at a time from the refrigerator and break off chunks, about 2 oz in size, which should give ample for 4” circles to be cut for each tart. Place dough between two sheets of parchment paper (or wax paper) lightly dusted with flour. Roll pastry to desired thickness, generally between 1/16”and 1/8” thickness. Peel the top piece of parchment from the rolled out pastry. Cut out pastry circles with a floured 4” round cookie cutter.
-
Carefully transfer each cut out pastry circle to muffin tin cup. Fit the pastry into the cup, ensuring there are no air pockets between the pastry and the muffin cups. Repeat with chilled dough to make enough pastry circles for 12 tart shells, gathering up and re-rolling pastry scraps as necessary. Place pan of tart shells in freezer for about 12-15 minutes to chill to prevent shrinkage of pastry during baking.
For Filling:
-
Preheat oven to 400°F. Add all ingredients, in order given, into a 4-cup measuring cup. Whisk or stir until ingredients are well blended. Remove the muffin cups from the freezer and pour filling equally into the 12 muffin cups. Bake at 400°F for 5 minutes then reduce temperature to 375°F and bake tarts for 17-19 minutes or until filling domes and appears set. Let tarts cool at least 30 minutes in muffin tins on cooling rack. Using the tip of a sharp knife, gently lift the tarts from the muffin cups.
Recipe Notes
Copyright My Island Bistro Kitchen
If you have made this recipe and enjoyed it and/or wish to share it with your friends and family, please do so on social media but be sure to share the direct link to this posting from my website.
Connect with My Island Bistro Kitchen on Social Media
Join the Facebook page for My Island Bistro Kitchen: https://www.facebook.com/MyIslandBistroKitchen/
Follow “the Bistro” on “X” (formerly Twitter): https://twitter.com/PEIBistro/
See the drool-worthy gallery of mouth-watering food photos from My Island Bistro Kitchen on Instagram: https://www.instagram.com/peibistro/
Follow “the Bistro” on Pinterest at https://www.pinterest.ca/peibistro/ and pin the Pinterest-ready photo at the end
Pin Me To Pinterest!


Classic Cream of Broccoli and Cheese Soup
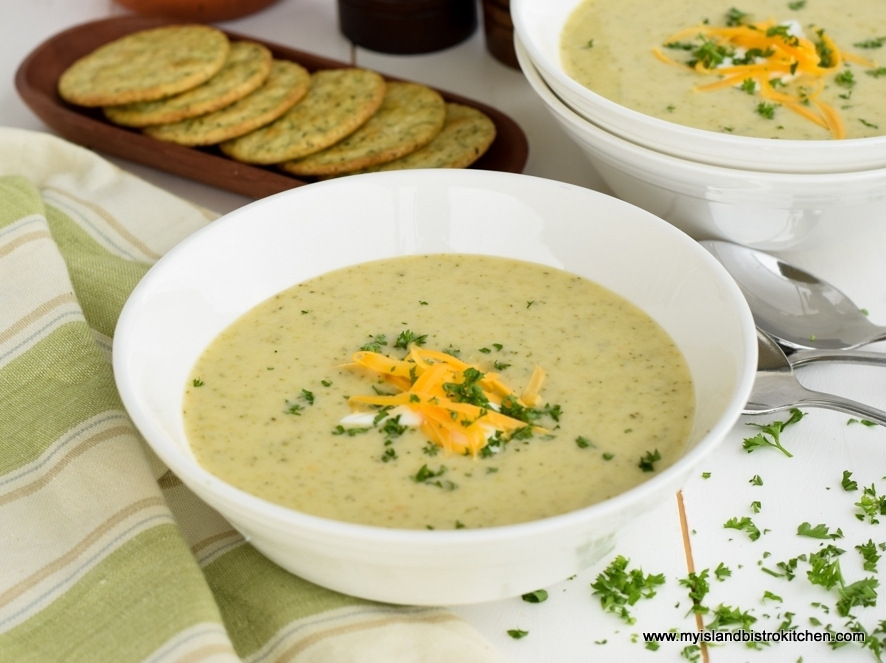
Nothing beats homemade soup! True comfort food – a bowl of hot soup, especially on a cool fall or cold winter day, warms the tummy and the soul. This Cream of Broccoli and Cheese Soup fits that bill nicely. Continue reading Classic Cream of Broccoli and Cheese Soup
On The Sandwich Board: Turkey, Pear, Brie, and Cranberry Sandwich
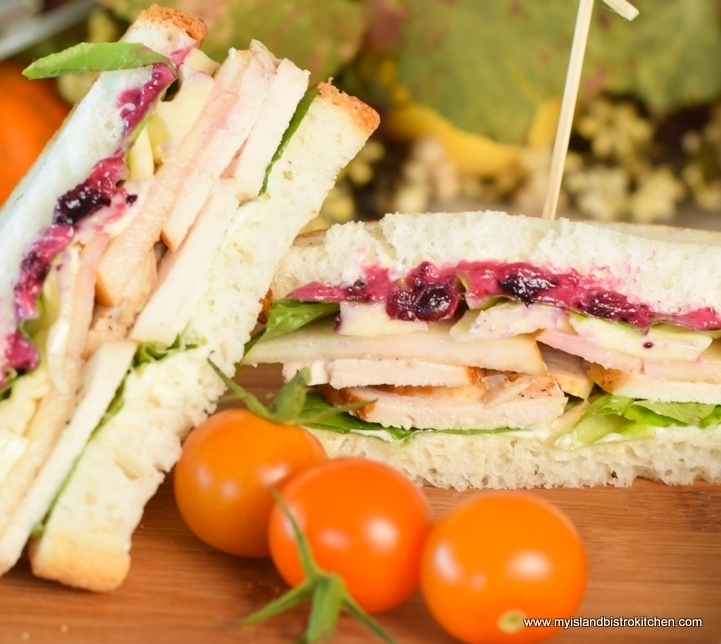
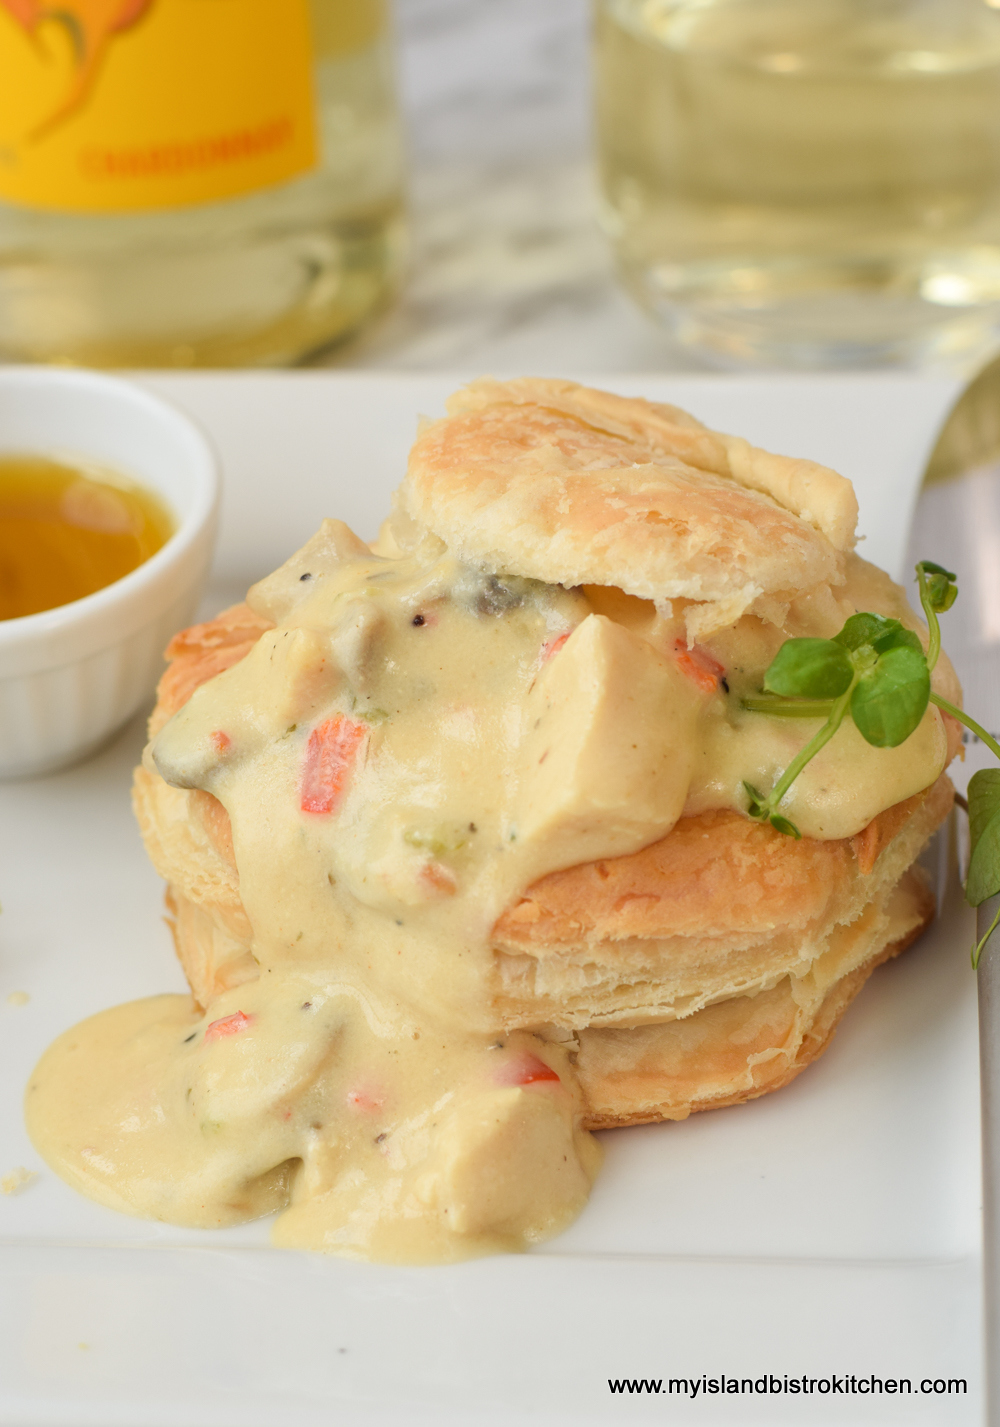
On my sandwich board today, I have a lovely gourmet Turkey, Pear, Brie, and Cranberry Sandwich and this one comes fully dressed! Note this sandwich can also be made with chicken as a substitute for turkey. Continue reading On The Sandwich Board: Turkey, Pear, Brie, and Cranberry Sandwich
An Autumnal Themed Thanksgiving Dinner
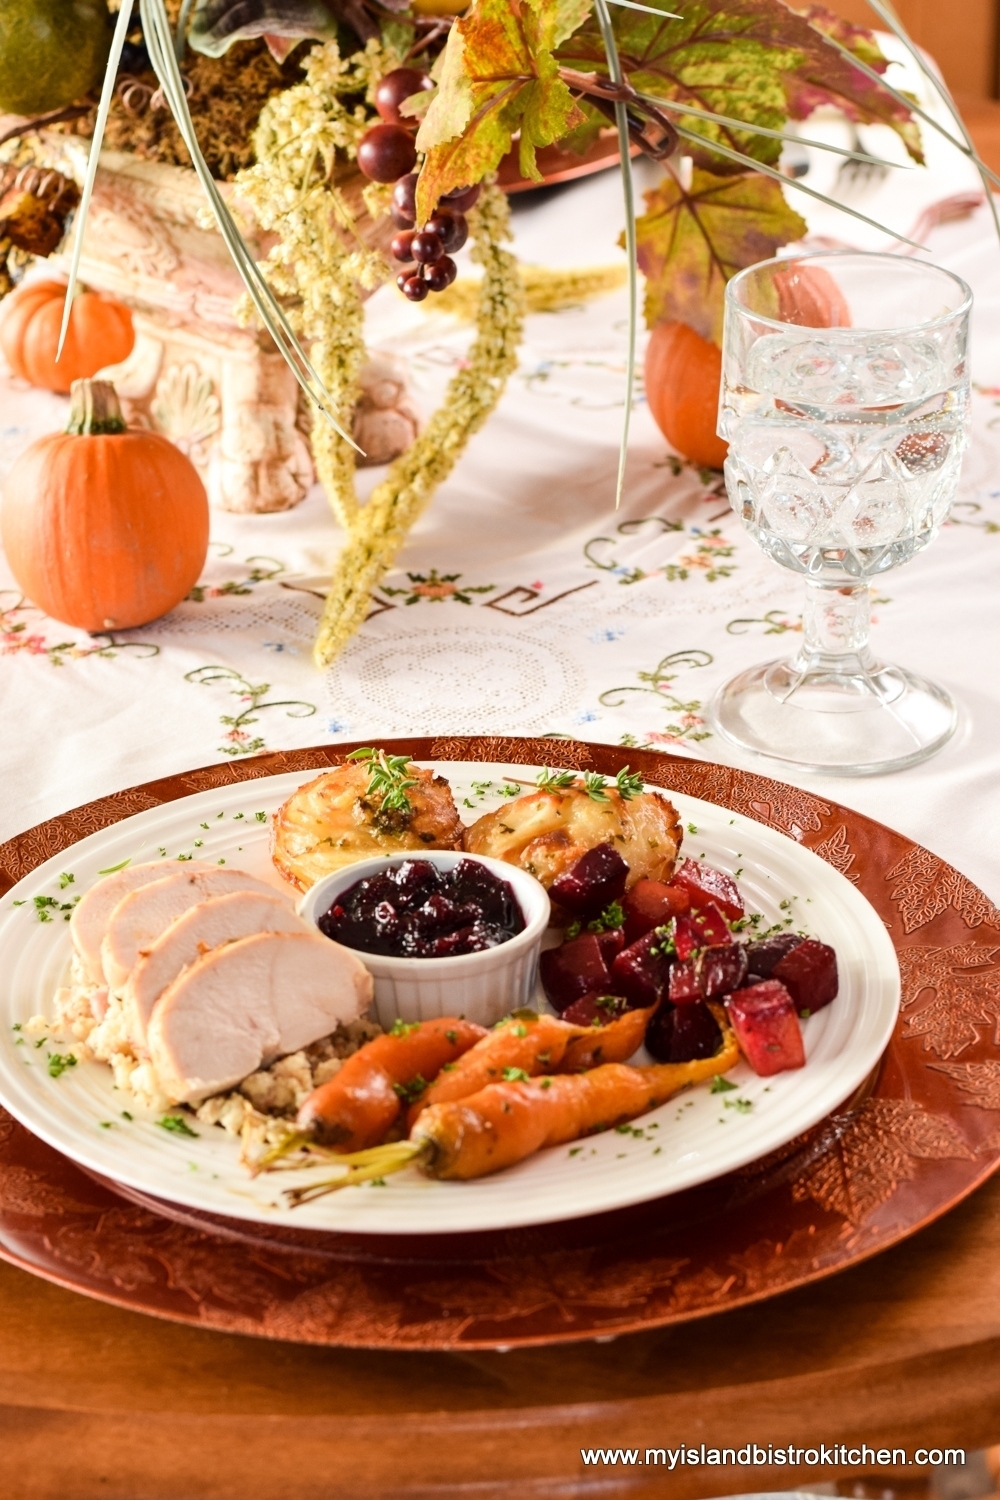
Undisputedly, a big roasted turkey is the traditional star of the Thanksgiving dinner in many North American homes. Playing the supporting roles, of course, are all the fixins’, including the variety of vegetables and gravy. This year, however, I am deviating from the norm and putting a new twist on Thanksgiving dinner, lightening it up and sizing it down for smaller households, while still staying true to some of the elements of what one would expect to be on the Thanksgiving dinner table. Here’s why I’ve shaken up the norm a bit.
Sizing Down and Lightening up the Thanksgiving Dinner
I sometimes hear people say they don’t want to cook a big turkey, or even a whole chicken, because perhaps they have a small household of only one, two, or three people and it’s just too much meat for them. And, then there is the large carcass to deal with – though I am a big proponent of using it to make great homemade stock (click here for my stock recipe). Others have indicated they don’t have a big roaster in which to roast a turkey and still some others say they don’t know how to roast a turkey to get it cooked properly. I have heard some say that, while they like a roast turkey dinner, it can be a heavy meal with rich gravy, heavily spiced stuffing, and so forth. Others may be on a restricted diet making it a challenge to, alternatively, dine out for Thanksgiving dinner. Whatever the reason, I have decided to create a Thanksgiving dinner menu suitable for the smaller household and those looking for lighter fare.
Now, it can be challenging to size everything down precisely to one or two servings and, to be frank, it’s not the most cost-effective or efficient approach to meal preparation for the smaller household. I learned that many years ago and that’s when I moved to batch cooking for the freezer which allows me to have much greater meal variety than would be the case if I was to spend time in the kitchen preparing unique daily meals for one or two. This menu, by the way, is also suitable for any autumnal dinner party and the recipes referenced are scalable to the number of servings required.
Menu Inspiration
The inspiration for the menu was drawn primarily from seasonal foods, those that would be considered to be fall flavors. While varied from the traditional Thanksgiving dinner style, I aimed to still maintain elements of a typical Thanksgiving dinner. From the gourd family comes the butternut squash for the soup. From the garden come the fresh greens, vine-ripened tomatoes, beets, and carrots. From the fields of a local farmer, come the potatoes. From the cranberry bogs and high bush blueberry field come the cranberries and blueberries. And, from a local orchard and distillery come the apples and liqueur for the dessert. In lieu of turkey, I have opted to go with chicken breasts though turkey breasts could certainly be used. The chicken breasts are smaller to roast and plate quite attractively. The steamed mussels for an appetizer have been included because, well, it’s PEI and we love our mussels any time of the year!
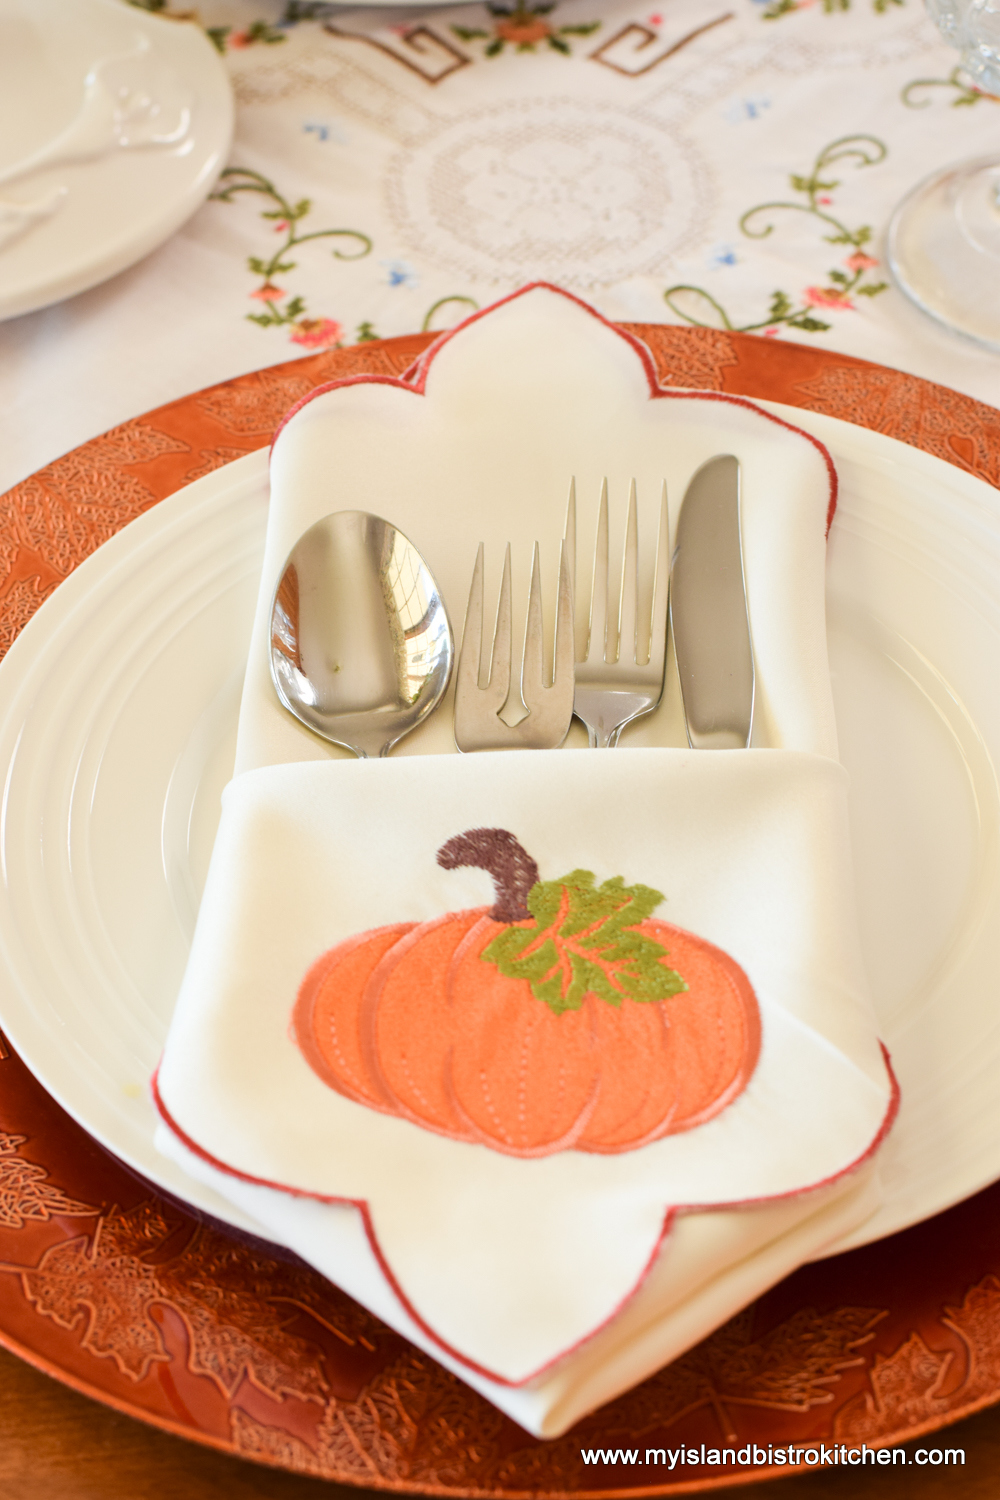
The table is set – it’s time to enjoy Thanksgiving dinner!
The Menu
Food is meant to be enjoyed and savored, not hurriedly consumed. This menu and its serving style aim for that objective.
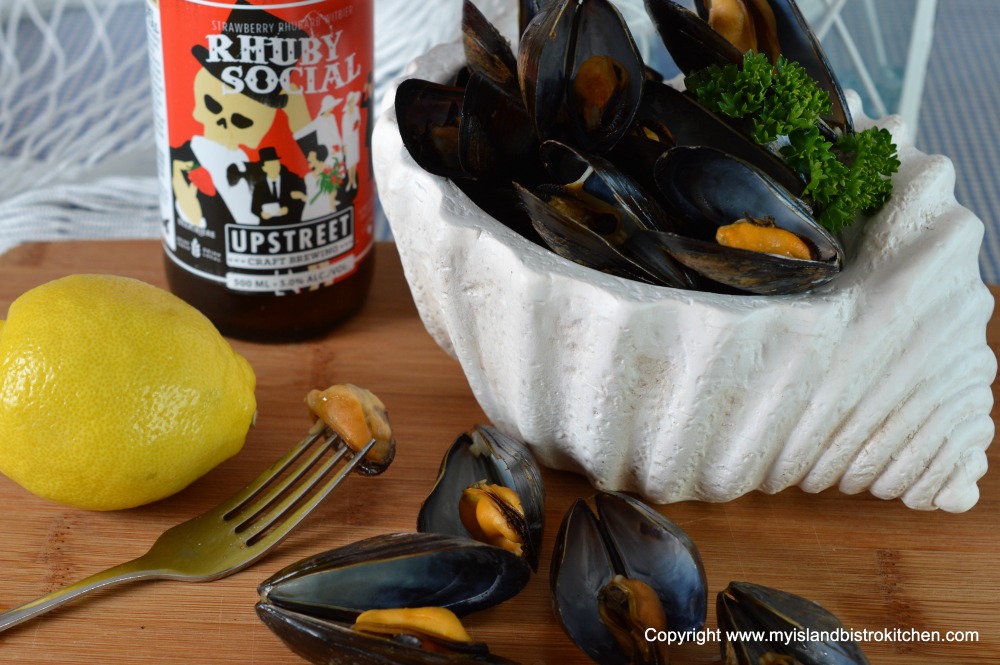
Appetizers
Island Blue Mussels steamed in Upstreet’s “Rhuby Social” beer
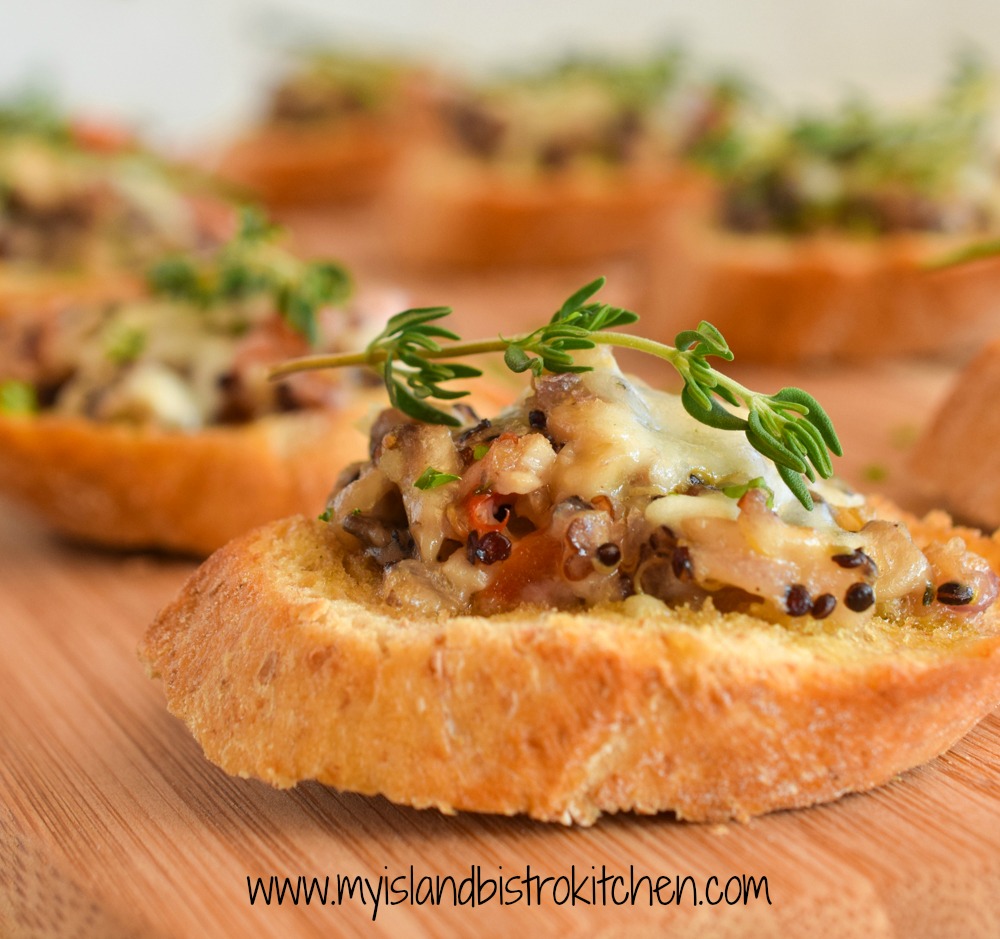
Savory Mushroom and Quinoa Crostini
Soup
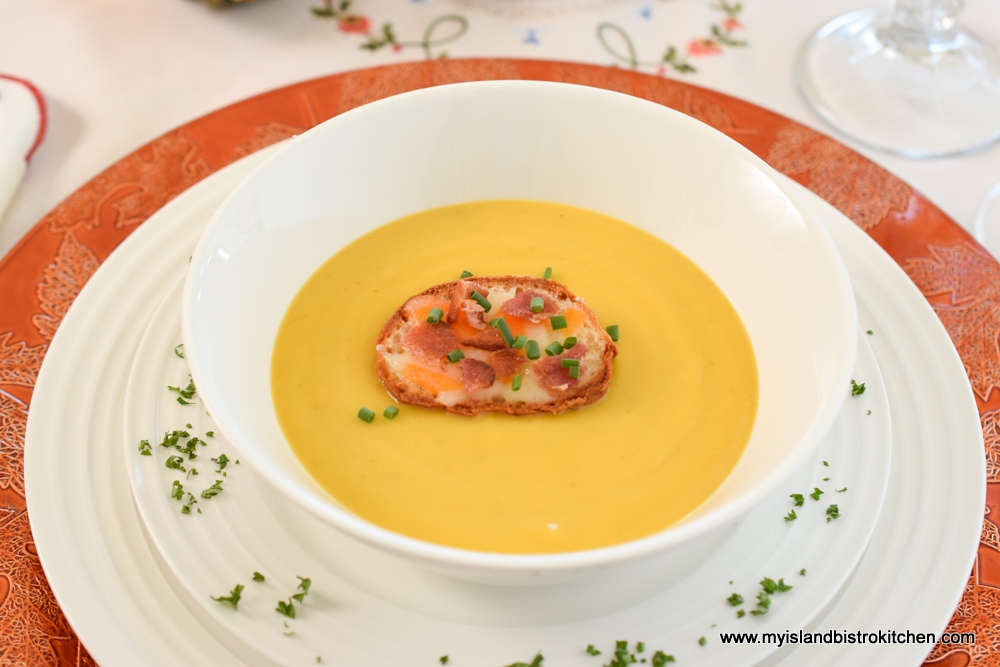
Roasted Butternut Squash Soup
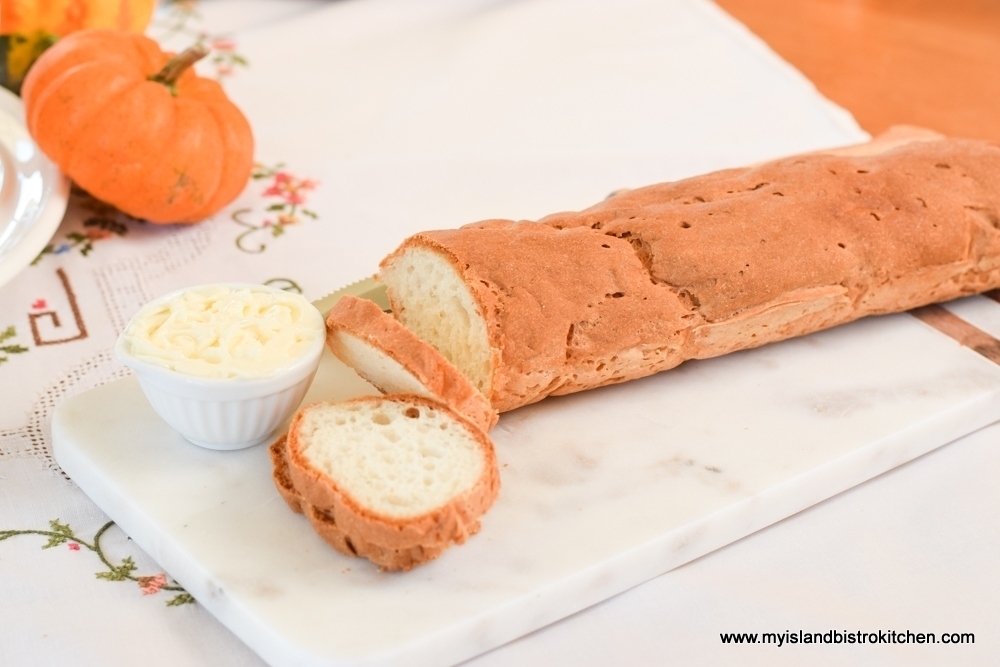
Served with a toasted baguette slice topped with cheese, bacon, and chives
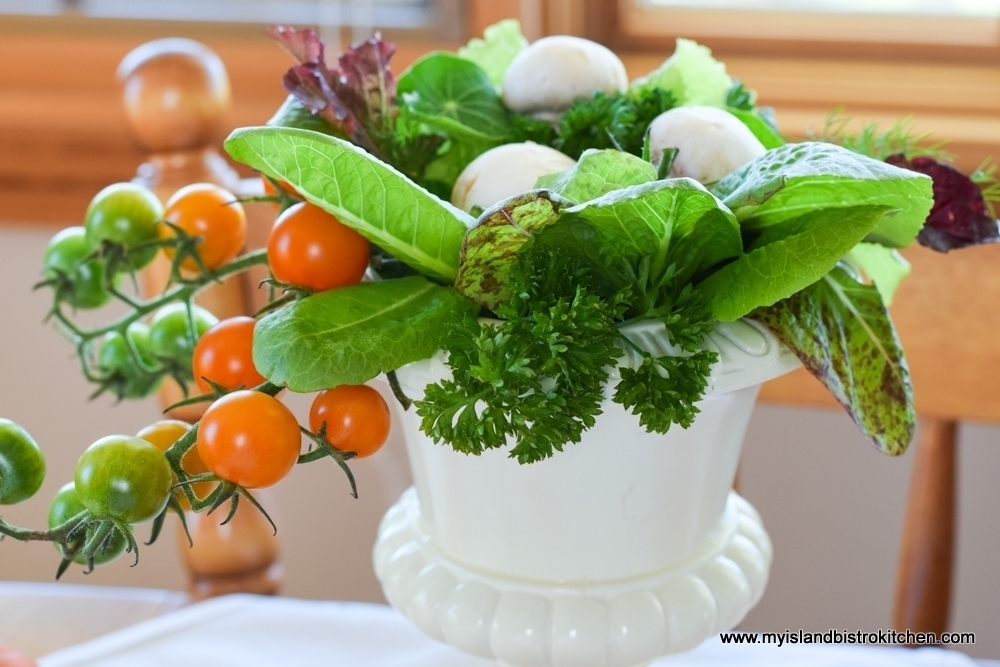
Salad
Mix of Garden Greens with Vine-ripened Mini Tomatoes and Button Mushrooms
Dressed with Raspberry Vinaigrette and served from the salad urn, tableside
Main
Roasted Chicken Breast with a dry rub of spices
Served over Sausage Bread Dressing
Accompaniments
Petite Roasted Potato Stacks
Thinly sliced potato tossed with melted butter, herbs, and cheese then roasted
Roasted Beets and Carrots
Cranberry Blueberry Sauce
Dessert
Apple-Maple Bread Pudding with Maple Sauce
Wine Pairing
Clean Slate 2016 Riesling (Germany)
The Appetizers
It’s almost bordering on the sacrilegious if either (or both) steamed mussels and oysters are not on the menu for a gathering here in PEI! Yes, we love our seafood! I’ve chosen Island Blue Mussels steamed in Upstreet’s “Rhuby Social” beer (recipe here). Steaming mussels in beer lends a wonderful flavor to the mussels. Easy and quick to prepare, these mussels are a great start to a wonderful meal.
The second appetizer I’ve chosen is the Savory Mushroom and Quinoa Crostini (recipe here). These little morsels are ever-so-tasty. This recipe is easy to reduce or increase in size, depending on the number of guests and either wheat-based or gluten-free baguettes can be used.
The Soup
Our Thanksgiving dinner this year starts with Roasted Butternut Squash Soup, a stunning golden yellow soup that is smooth and luxurious and filled with the warm flavors of fall (click here for recipe). This soup is a great way to kick off an autumnal dinner. My recipe for this soup makes 8-10 servings so, if making the soup specifically for Thanksgiving dinner in a small household, the remainder can be frozen for later enjoyment. Alternatively, the soup can be made in advance of Thanksgiving, frozen, and then the number of servings needed thawed and reheated for the dinner. I love when I can do prep work for dinners days ahead as it relieves some of the work and stress on the day of the dinner.
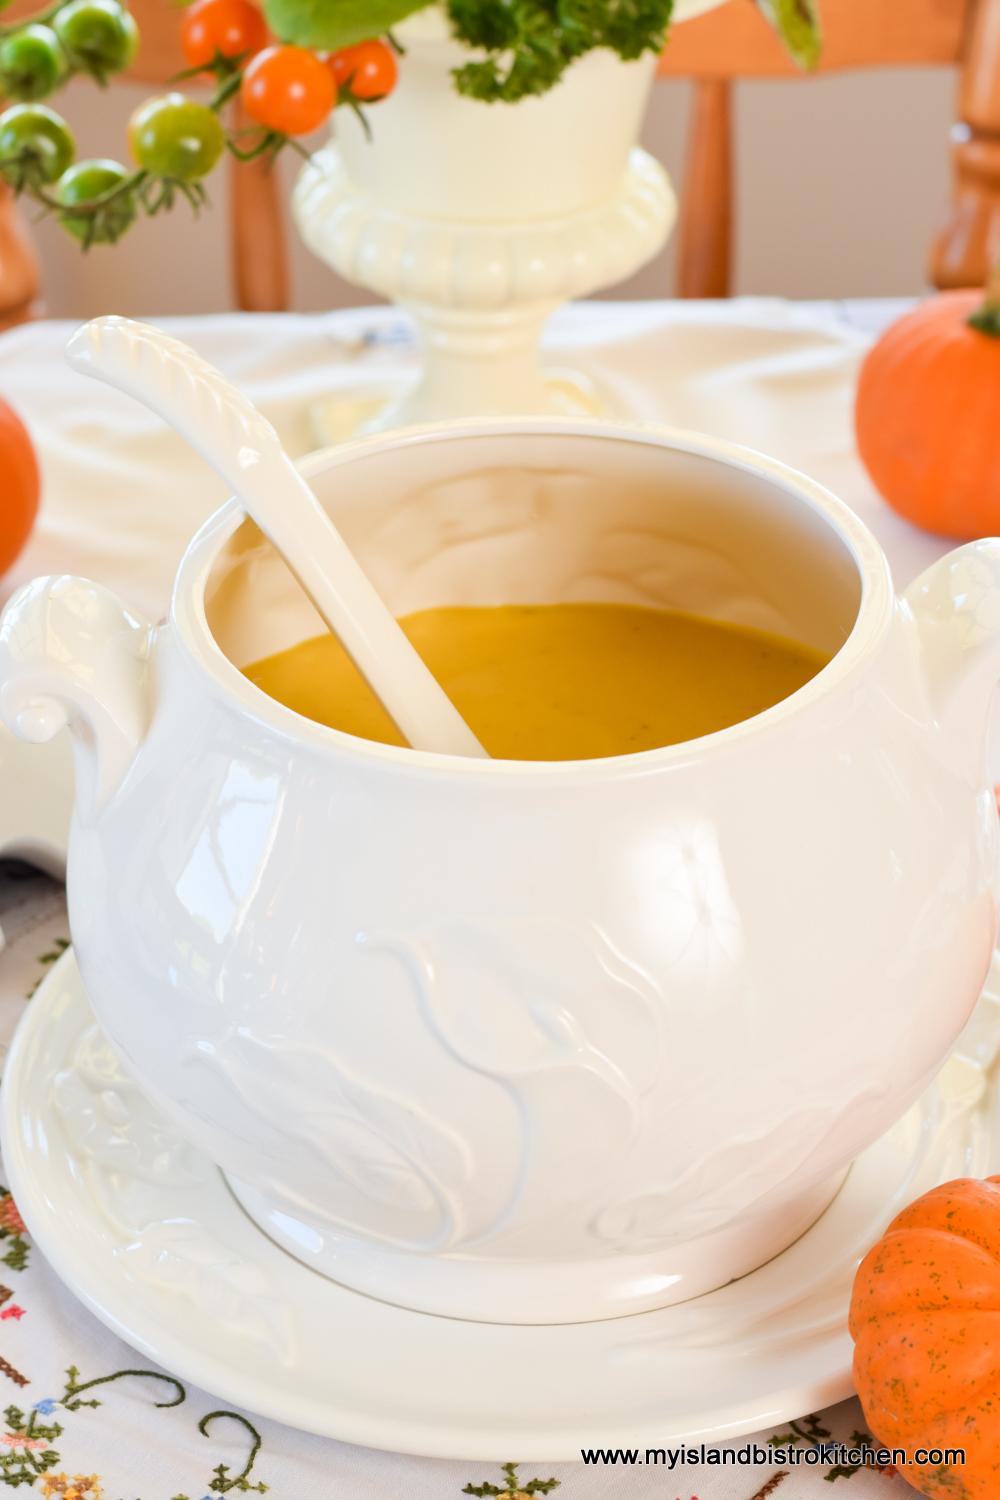
Serving the soup at the table from a soup tureen adds a lovely touch to a special meal or dinner party.
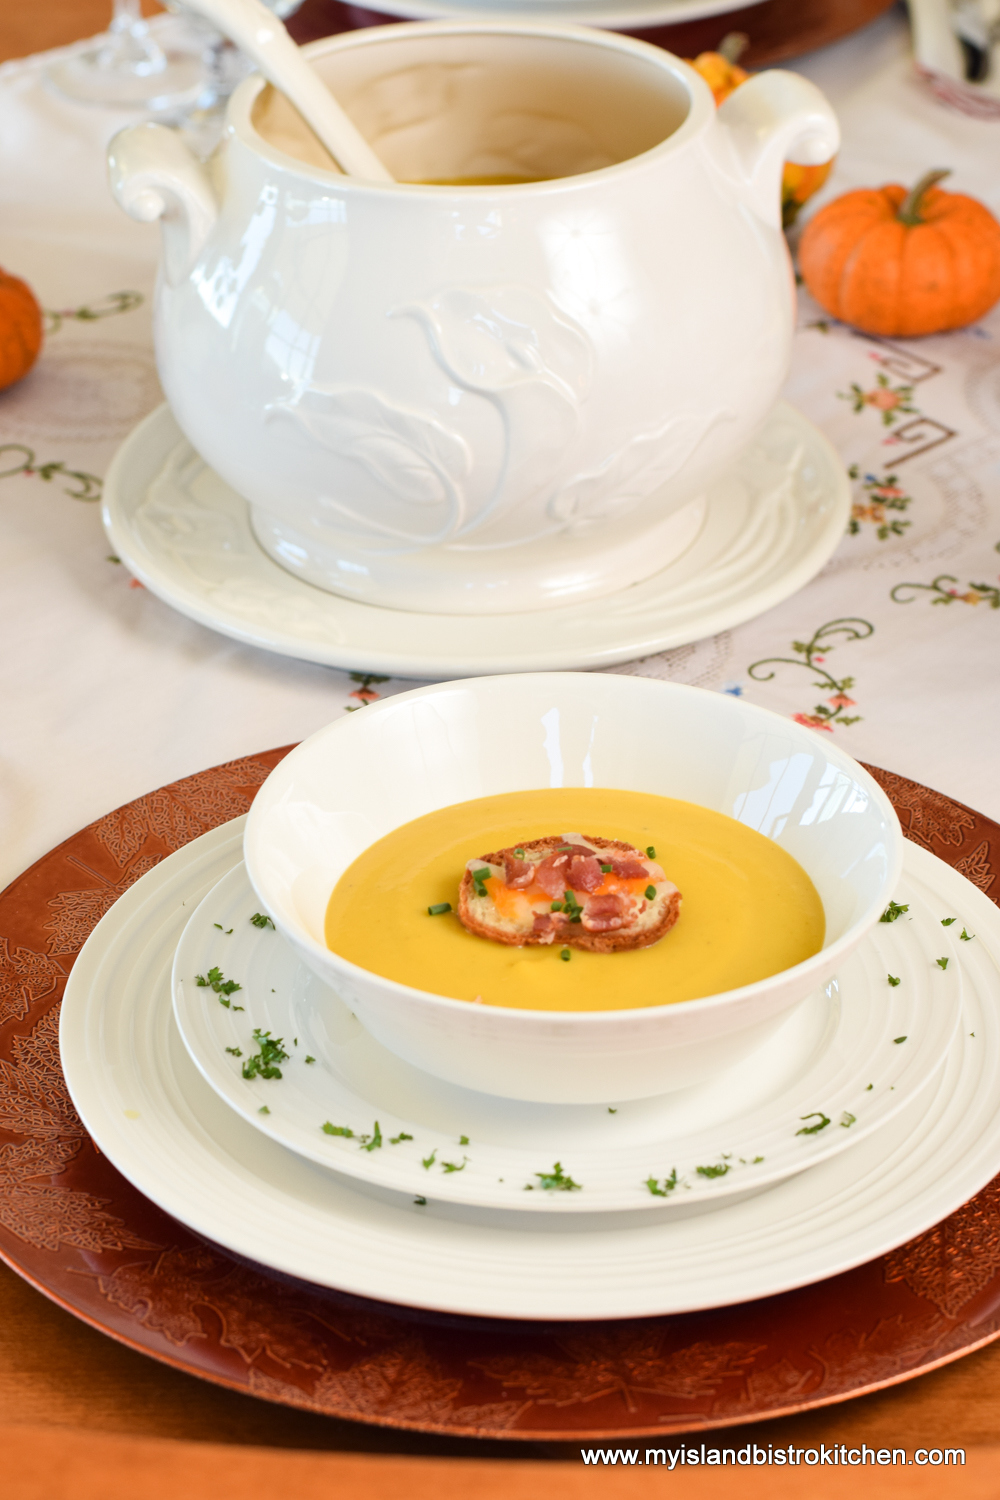
The soup tureen can also serve as a table centerpiece for the soup course.
The Salad
Our garden did fabulously this year. We grow a grand selection of lettuce that usually takes us well into the fall, sometimes until late October. Our one tomato plant with mini tomatoes has literally produced hundreds of tiny orange tomatoes this year. It was a very prolific producer and we have been blessed to have its produce right through to Thanksgiving, even if it meant blanketing it down on frost nights in order to keep it producing.

My salad bowl is a small ceramic urn-shaped planter which also serves as the table centerpiece for the salad course. It’s a great conversation piece and it elevates the status of the salad! When using a unique vessel, like this urn, for the salad ingredients to be assembled at the table, opt for few ingredients that can easily be divided between plates. It’s not always necessary to have a multitude of ingredients in a salad, particularly if it is a starter to a meal. In this salad, all I’ve used is a selection of lettuce, tiny tomatoes, and button mushrooms served with a simple raspberry vinaigrette. I like vinaigrettes because they allow the flavour of the vegetables to shine through as they are not masked by a heavy cream dressing.
Chicken Breasts
Chicken breasts sometimes get a bad rap for being dry. I think this is because they have not been properly prepared and cooked. I always brine my chicken breasts – it makes such a huge difference in both flavor and texture and no more dried out, stringy chicken. All I do is place the chicken breasts in a salt brine for 1½ – 2 hours, rinse them off, then pat them dry with paper towel followed by a light brushing of some olive oil and a sprinkle of selected dry spices. Then, into my convection oven set at 400°F they go just until they test done on my trusty meat thermometer. The high heat locks in the juices and cooks the chicken fast so it does not get a chance to dry out. The result is perfectly cooked and juicy chicken …. every time. The great thing about boneless skinless chicken breasts is it’s all meat and no waste and they slice beautifully for plating, sandwiches, etc.
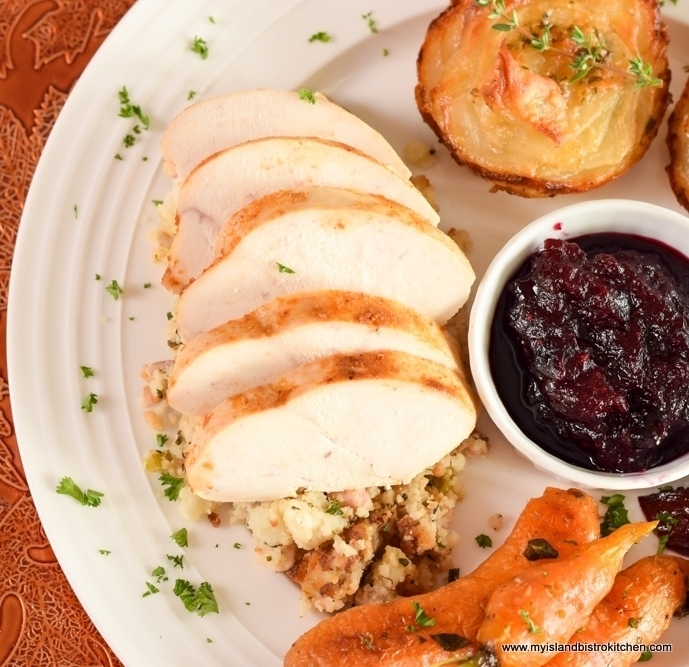
The Dressing
For my Thanksgiving dinner, I have plated the sliced chicken over sausage bread dressing – recipe here. This is not a heavily spiced dressing so it is in keeping with my “lighter” Thanksgiving dinner theme yet it still bows to the tradition of having stuffing/dressing as a side dish at dinner. In fact, I will often make this recipe and freeze it for later use when I am having some kind of chicken dish for a meal. So, this is also something that can be made ahead for this dinner and the dressing can be heated for just a few seconds in the microwave.
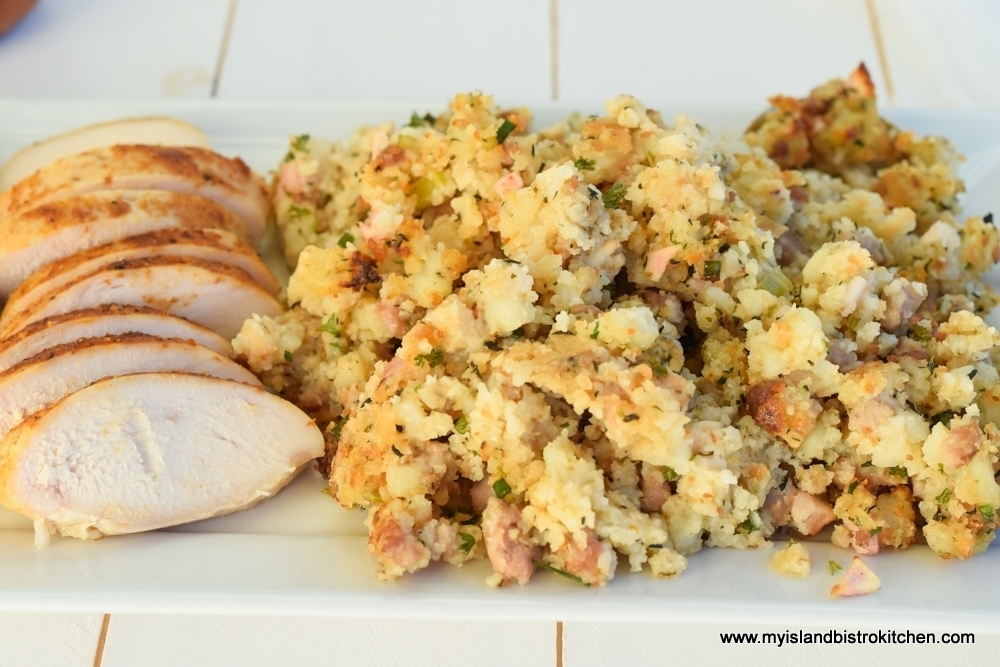
The Potatoes
Because this meal is meant to be light, the traditional gravy is absent. This meant I needed to come up with a potato side dish that did not need gravy. These Roasted Potato Stacks (recipe here), are the perfect potato side dish. These are not difficult to make and, with the butter, garlic, herbs, and cheeses, these tasty morsels are simply divine. They bake perfectly in muffin cups and plate beautifully. They are best served fresh from the oven. However, they can be pre-made, roasted, and refrigerated for up to 24 hours then reheated for a few minutes in the oven. So, again, this is a menu item that can be made in advance of the dinner. While my published recipe makes eight potato stacks (serves four), the recipe is easily halved (or, alternatively, make the whole recipe and enjoy leftovers the following day).
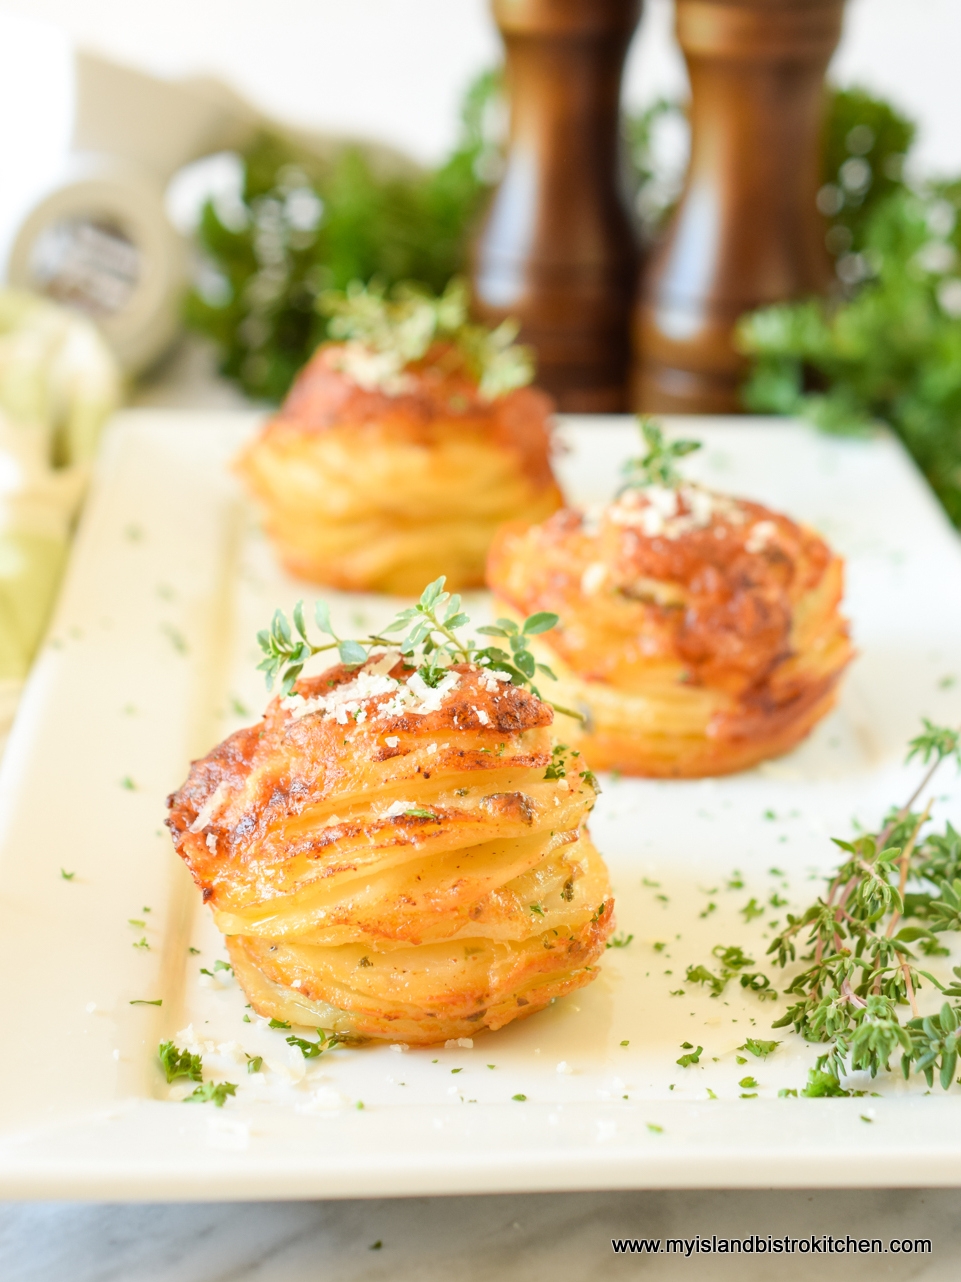
The Roasted Vegetables
For my vegetable side dishes, I decided to go really local — all the way to our backyard garden! Beets and freshly dug carrots were roasted with herbs in the oven. I love roasted vegetables because their true flavors are evident and no nutrients or flavor are washed down the drain as can be the case with boiled vegetables. The beets were tossed with a spritz or two of raspberry balsamic vinegar and the same of orange juice. The key is not to add too much liquid to the roasted vegetables that would make them soupy or lose their roasted flavor. Both the vinegar and orange juice are just meant to be flavor enhancers so very little is needed.
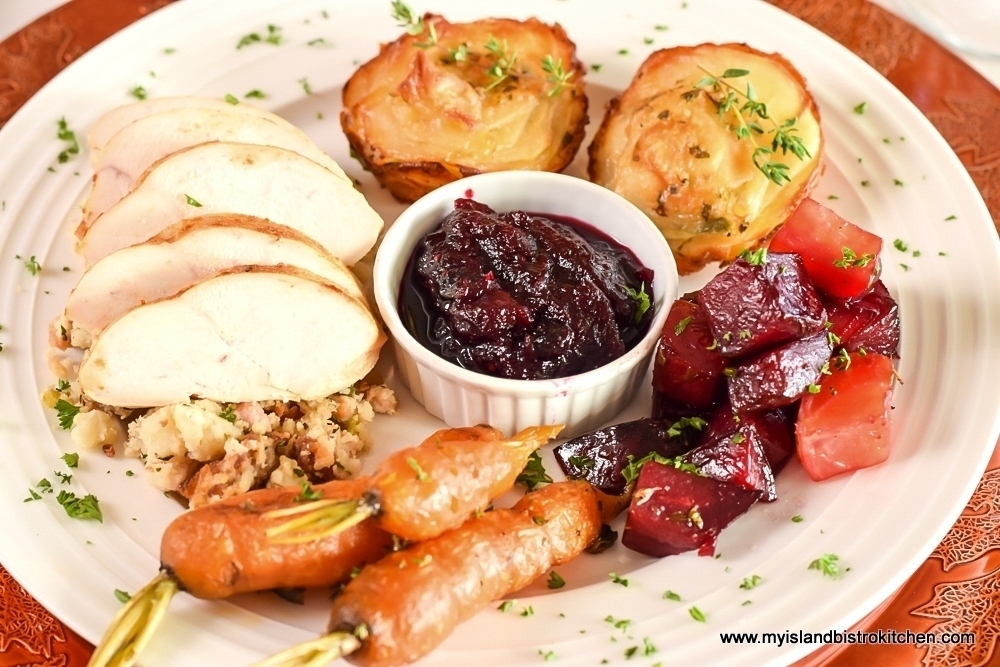
The Condiment
For the condiment, I’m serving my Cranberry Blueberry Sauce. This sauce is a beautiful deep burgundy-plum color and combines two complementary flavors. The tartness of the cranberries is enhanced by the sweetness of the high bush blueberries. Click here for my recipe.
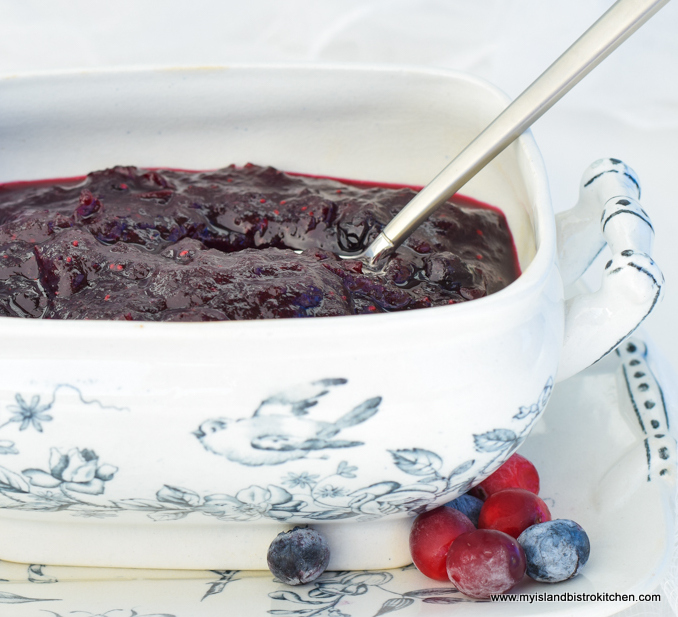
The Dessert
To bring one of the quintessential fall flavors into the menu, I am serving Apple-Maple Bread Pudding with Maple Sauce (recipe here). Both the pudding and the sauce freeze well for later use and both can be made ahead of the dinner, thawed, and reheated for dessert.

The Wine Pairing
The wine I’ve paired with this meal is Clean Slate, a 2016 Riesling from Mosel, Germany, an affordable wine that appeals to a variety of tastes. When selecting the wine for this meal, I considered the menu items, both individually and collectively. Thanksgiving dinner plates tend to have a variety of foods with flavors that span the spectrum from sweet (Cranberry-Blueberry Sauce) to the moist and gently spiced (Sausage Bread Dressing) to the herbed and roasted (the vegetables) to the slight saltiness (brined chicken breast). With that variety, it can be a challenge to select one wine that will temper and balance all the flavors and cleanse and refresh the palate between bites so that the true flavors of each of the foods can be enjoyed.
A Riesling wine is a great choice because it has low alcohol content with lots of palate-refreshing acidity along with a slight touch of sweetness to balance and complement the variety of flavors.
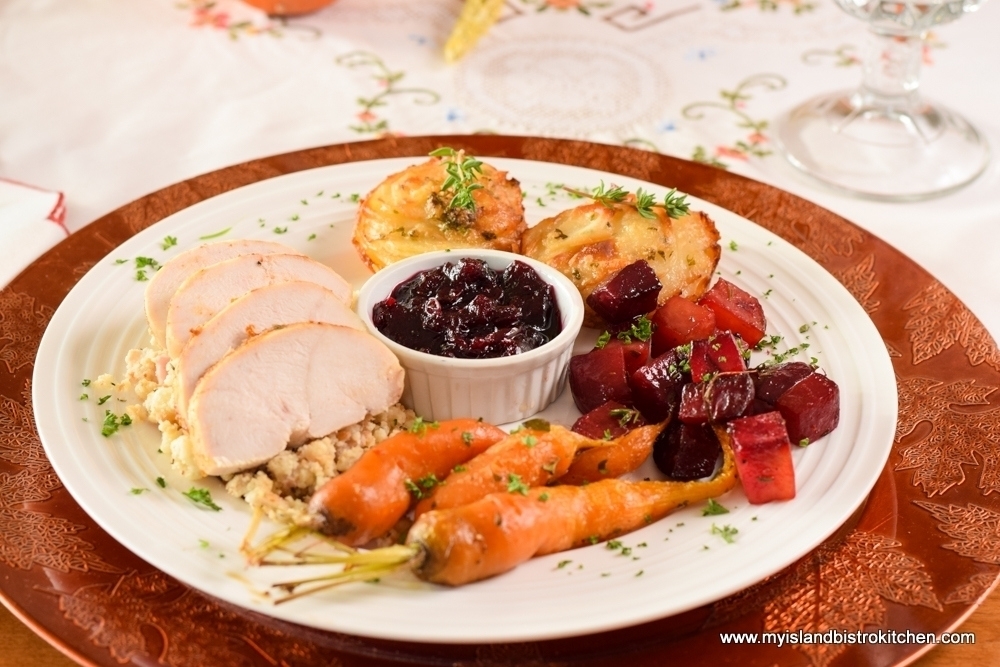
So, whether you’re looking for inspiration for a Thanksgiving dinner with a lighter fare, one that is suitable for smaller households, or for an autumnal-themed dinner party, this menu is scalable to virtually any number, big or small. All recipes referenced can be found on My Island Bistro Kitchen’s website, a one-stop destination for recipes for a tasty fall dinner.
Pin Me To Pinterest!
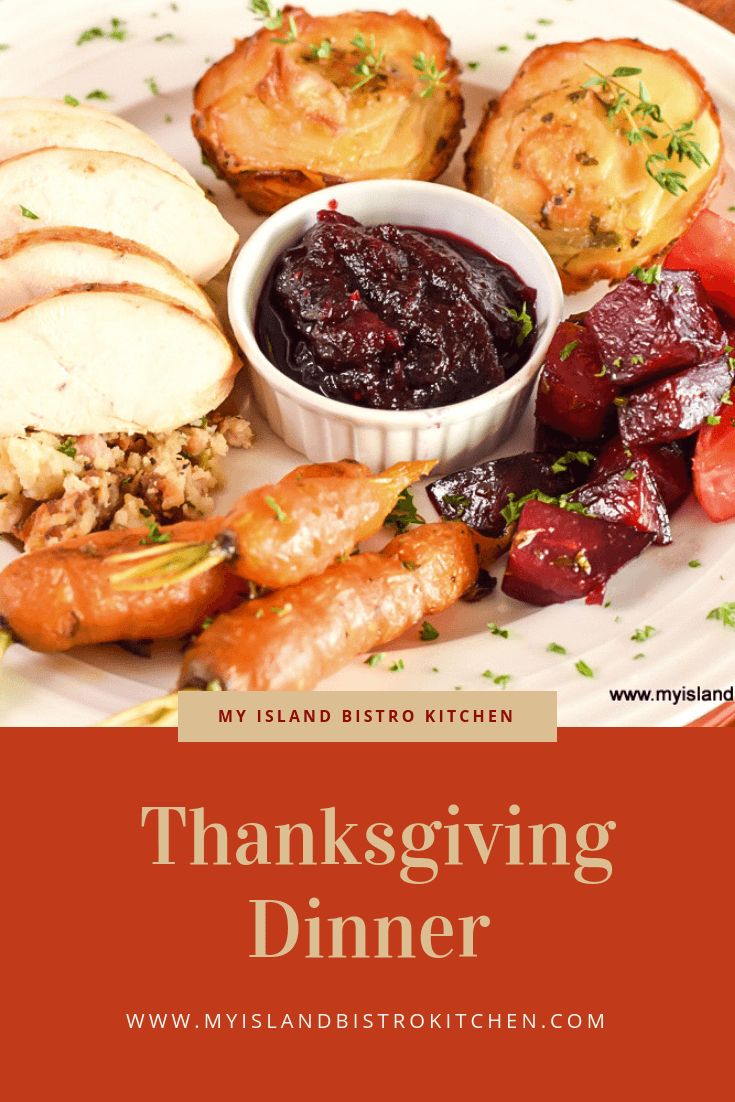
Roasted Potato Stacks
Living in a province known for its potato production, it’s almost inevitable that potatoes are served at many meals on PEI dinner tables. There are any number of ways this versatile veggie can be served and, later in this posting, you’ll find links to some of my favorite potato recipes.
Roasted Potato Stacks are my latest creation involving potatoes. They are very tasty and do plate quite attractively. They are also suitable for serving at buffets.
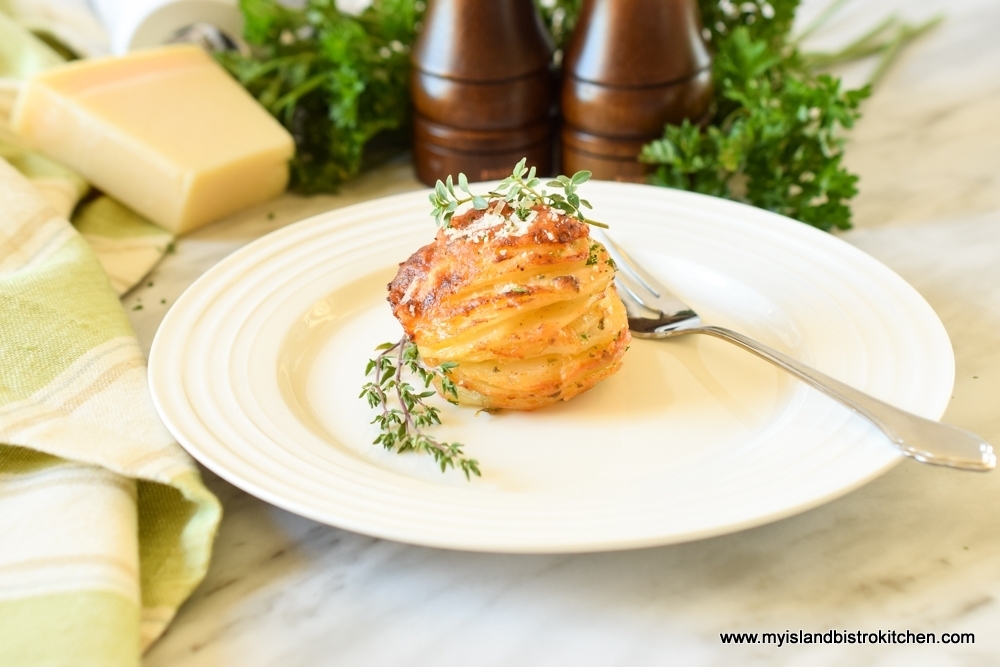
Because these potato stacks are free-standing when cooked and removed from the muffin cups, they need to be able to stand on their own when plated. The goal is also to see the individual slices of the potato. I recommend choosing potatoes that have a medium starch content, are semi-waxy, and have somewhat firm flesh such as Yukon Gold, or an all-purpose round white potato variety. These are the types of potatoes that will hold their shape after cooking and when plated and they can take the higher heat at which the stacks are roasted without falling apart or becoming mushy. Choosing potatoes that have good moisture content also helps to keep the roasted potato stacks moist. Potatoes high in starch and low in moisture don’t hold their shape as well and tend to break down easier than less starchy or waxy potatoes. For this reason, they are not as suitable for these Roasted Potato Stacks as are their semi-waxy cousins. Select potatoes, about 2” around, so that, when sliced very thinly, they will easily fit flatly in muffin tin cups.
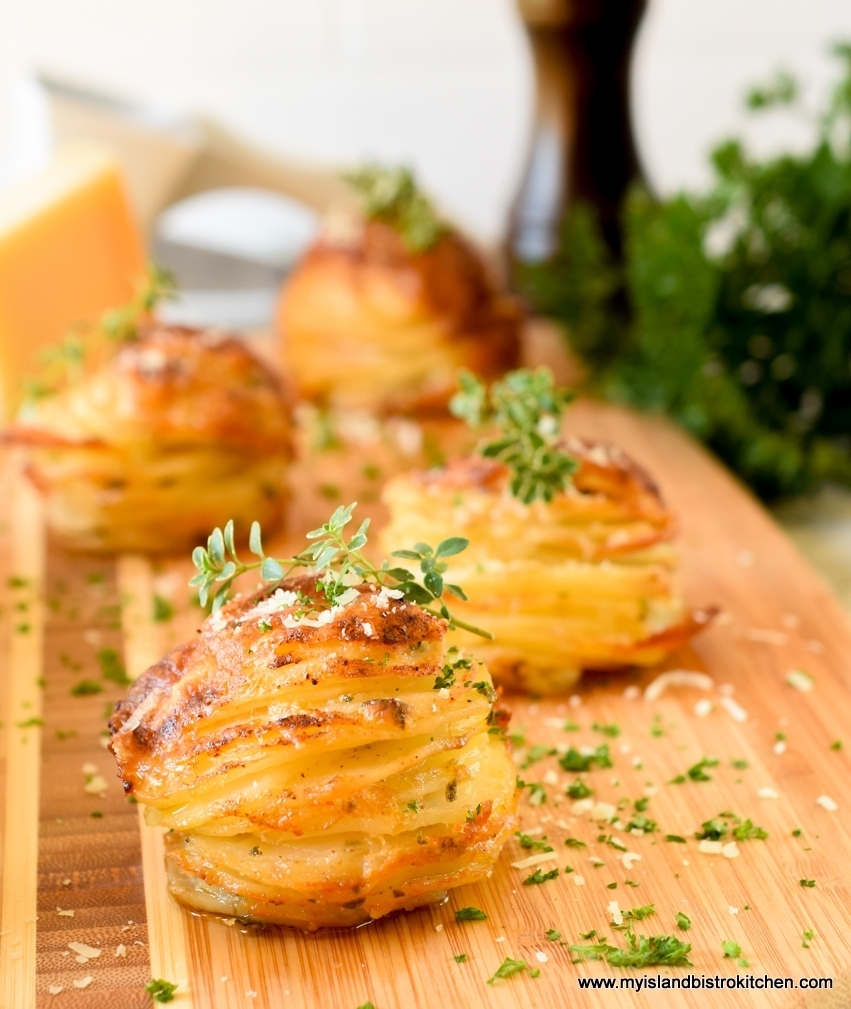
The key to making these Roasted Potato Stacks is to have the potato slices very thin and uniformly sized. I have tested my recipe with three different thicknesses of potatoes – 1/16”, 3/16”, and 1/8” and my preference is 3/16” as the layers of individual potato slices in each stack are still intact and identifiable when fully roasted but they are not so thick as to cause issues getting them cooked.
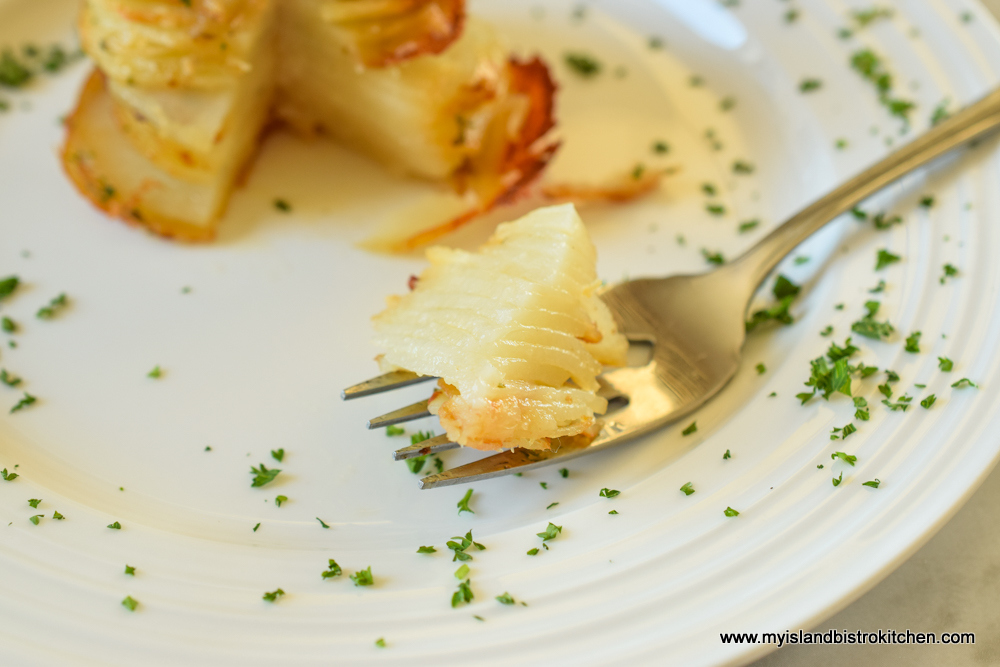
I recommend using a mandolin for quick and uniform slicing. I have a dandy hand-held mandolin that is slick and easy for this kind of work and it saves the set up of my larger mandolin or the trials, tribulations, and time to thinly slice the potatoes by hand.
Made with seasoned butter and a blend of cheeses, these delectable easy-to-make roasted potato stacks are a great side dish or appetizer.
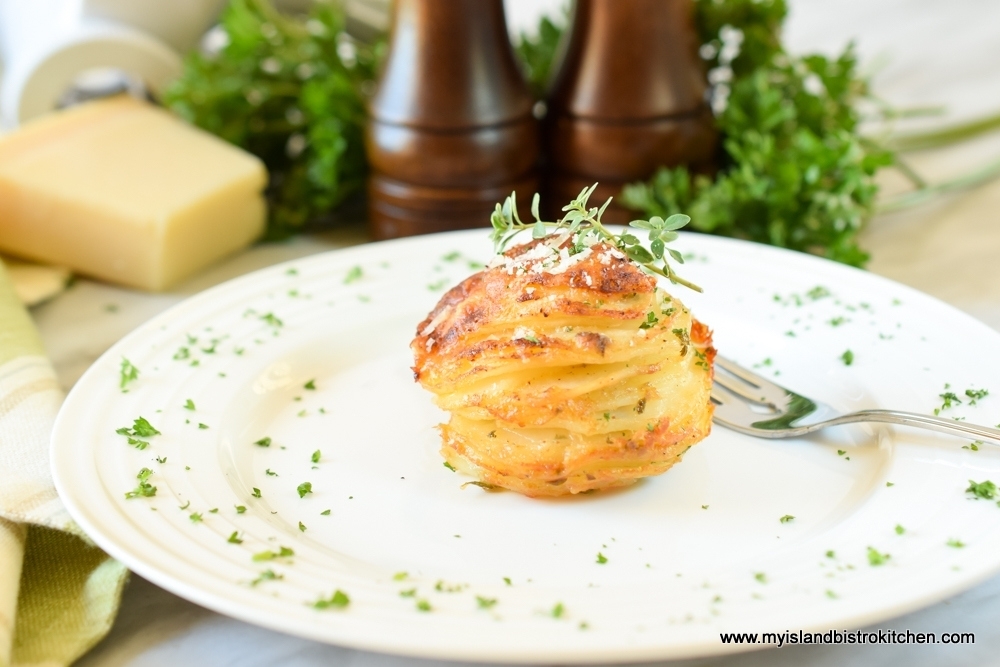
[Printable recipe follows at end of posting]
Roasted Potato Stacks
Ingredients:
2¼ lb potatoes, peeled, washed, and dried (e.g., Yukon Gold or all-purpose round white variety)
3 tbsp melted butter
1 tsp olive oil
1 tsp liquid chicken bouillon
1 tsp garlic salt
¾ tsp onion powder
2 tsp fresh lemon thyme, chopped
2 tsp fresh parsley, minced
Pinch nutmeg (optional)
½ – ¾ tsp fine sea salt
Freshly ground pepper
½ cup Parmesan cheese, finely grated
3 tbsp Cheddar Cheese, finely grated
1 tbsp whole milk or cream
3 – 4 tbsp finely grated Parmesan cheese
Paprika (for sprinkling tops of stacks)
Fresh thyme sprigs for garnish
Method:
Position oven rack in center of oven. Preheat oven to 375°F.
Butter eight (8) regular-sized non-stick muffin cups with butter. Set aside.
In small, microwave-safe bowl, melt the butter. Add the olive oil, liquid chicken bouillon, garlic salt, onion powder, thyme, parsley, nutmeg, salt, and pepper. Stir well to mix. Stir in the Parmesan and Cheddar cheeses along with the milk or cream.
Choose potatoes that are not overly starchy and that will hold their shape after cooking – e.g., Yukon Gold or an all-purpose round white variety. Select potatoes the size that, when sliced horizontally, the slices will easily fit flat into the muffin cups. Using a mandolin, slice potatoes horizontally into slices 3/16” thick. Place half the potato slices in large bowl. Add half the mixed butter, seasonings, and cheese ingredients. Using hands, toss the potatoes in the mixture until the slices are well coated. Add the remaining potato slices and butter mixture and continue mixing until the potato slices are coated with the mixture. Either create the stacks of potatoes in hands and place in buttered muffin cups or individually stack the potato slices directly in the muffin tin cups, stacking the slices as evenly as possible until they are about ¾ – 1” above the muffin cup rims. The stacks will shrink a bit during the roasting but building them a little higher than the muffin cup rim will ensure a good sized potato stack when cooked.
Roast the potato stacks for about 25 minutes, then sprinkle each stack with additional grated Parmesan cheese and a light sprinkle of paprika. Roast for 20 minutes longer, or until the tops of the potato stacks are golden and crispy, and a skewer or thin knife inserted in center of a stack indicates potatoes are tender and cooked through. Remove from oven and let rest for 5 minutes then carefully run the tip of a knife around the perimeter of each muffin cup to ensure the potato stacks are loose for easy removal. With the aid of a fork, or soup spoon, and the tip of the knife, carefully remove each potato stack and serve immediately sprinkled with additional finely-grated Parmesan cheese and fresh parsley.
Yield: 8 potato stacks (Suggested serving size – 2 stacks per person)
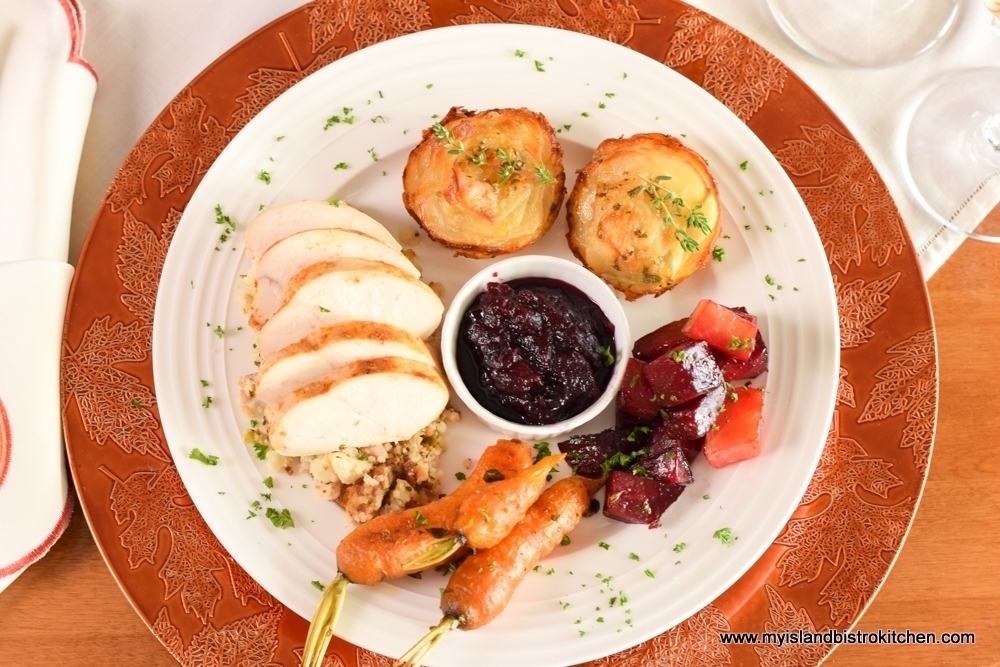
For other potato recipes from My Island Bistro Kitchen, click on the links below:
Decadent Duchess Potatoes
Twice Baked Potatoes
Best Creamy Scalloped Potatoes
Bistro Style Potato Patties
Potato Salad

Roasted Potato Stacks
Made with seasoned butter and a blend of cheeses, these easy-to-make roasted potato stacks are a great side dish or appetizer.
Cook Time 50 minutes
Resting Time 5 minutes
Servings 4
Ingredients
- 2¼ lb potatoes peeled, washed, and dried (e.g., Yukon Gold or all-purpose round white variety)
- 3 tbsp melted butter
- 1 tsp olive oil
- 1 tsp liquid chicken bouillon
- 1 tsp garlic salt
- ¾ tsp onion powder
- 2 tsp fresh lemon thyme, chopped
- 2 tsp fresh parsley, minced
- Pinch nutmeg (optional)
- ½ - ¾ tsp fine sea salt
- Freshly ground pepper
- ½ cup Parmesan cheese, finely grated
- 3 tbsp Cheddar cheese finely grated
- 1 tbsp whole milk or cream
- 3 - 4 tbsp finely grated Parmesan cheese
- Paprika for sprinkling tops of stacks
- Fresh thyme sprigs for garnish
Instructions
-
Position oven rack in center of oven. Preheat oven to 375°F.
-
Butter eight (8) regular-sized non-stick muffin cups with butter. Set aside.
-
In small, microwave-safe bowl, melt the butter. Add the olive oil, liquid chicken bouillon, garlic salt, onion powder, thyme, parsley, nutmeg, salt, and pepper. Stir well to mix. Stir in the Parmesan and Cheddar cheeses along with the milk or cream.
-
Choose potatoes that are not overly starchy and that will hold their shape after cooking – e.g., Yukon Gold or an all-purpose round white variety. Select potatoes the size that, when sliced horizontally, the slices will easily fit flat into the muffin cups. Using a mandolin, slice potatoes horizontally into slices 3/16” thick. Place half the potato slices in large bowl. Add half the mixed butter, seasonings, and cheese ingredients. Using hands, toss the potatoes in the mixture until the slices are well coated. Add the remaining potato slices and butter mixture and continue mixing until the potato slices are coated with the mixture. Either create the stacks of potatoes in hands and place in buttered muffin cups or individually stack the potato slices directly in the muffin tin cups, stacking the slices as evenly as possible until they are about ¾ - 1” above the muffin cup rims. The stacks will shrink a bit during the roasting but building them a little higher than the muffin cup rim will ensure a good sized potato stack when cooked.
-
Bake the potato stacks for about 25 minutes, then sprinkle each stack with additional grated Parmesan cheese and a light sprinkle of paprika. Bake for 20 minutes longer, or until the tops of the potato stacks are golden and crispy, and a skewer or thin knife inserted in center of a stack indicates potatoes are tender and cooked through. Remove from oven and let rest for 5 minutes then carefully run the tip of a knife around the perimeter of each muffin cup to ensure the potato stacks are loose for easy removal. With the aid of a fork, or soup spoon, and the tip of the knife, carefully remove each potato stack and serve immediately sprinkled with additional finely-grated Parmesan cheese and fresh parsley.
Recipe Notes
Yield: 8 potato stacks (Suggested serving size – 2 stacks per person)
[Copyright My Island Bistro Kitchen]
If you have made this recipe and enjoyed it and/or wish to share it with your friends and family, please do so on social media but be sure to share the direct link to this posting from my website.
Connect with My Island Bistro Kitchen on Social Media
Join the Facebook page for My Island Bistro Kitchen: https://www.facebook.com/MyIslandBistroKitchen/
Follow “the Bistro” on “X” (formerly Twitter): https://twitter.com/PEIBistro/
See the drool-worthy gallery of mouth-watering food photos from My Island Bistro Kitchen on Instagram: https://www.instagram.com/peibistro/
Follow “the Bistro” on Pinterest at https://www.pinterest.ca/peibistro/ and pin the Pinterest-ready photo at the end
Pin Me To Pinterest!
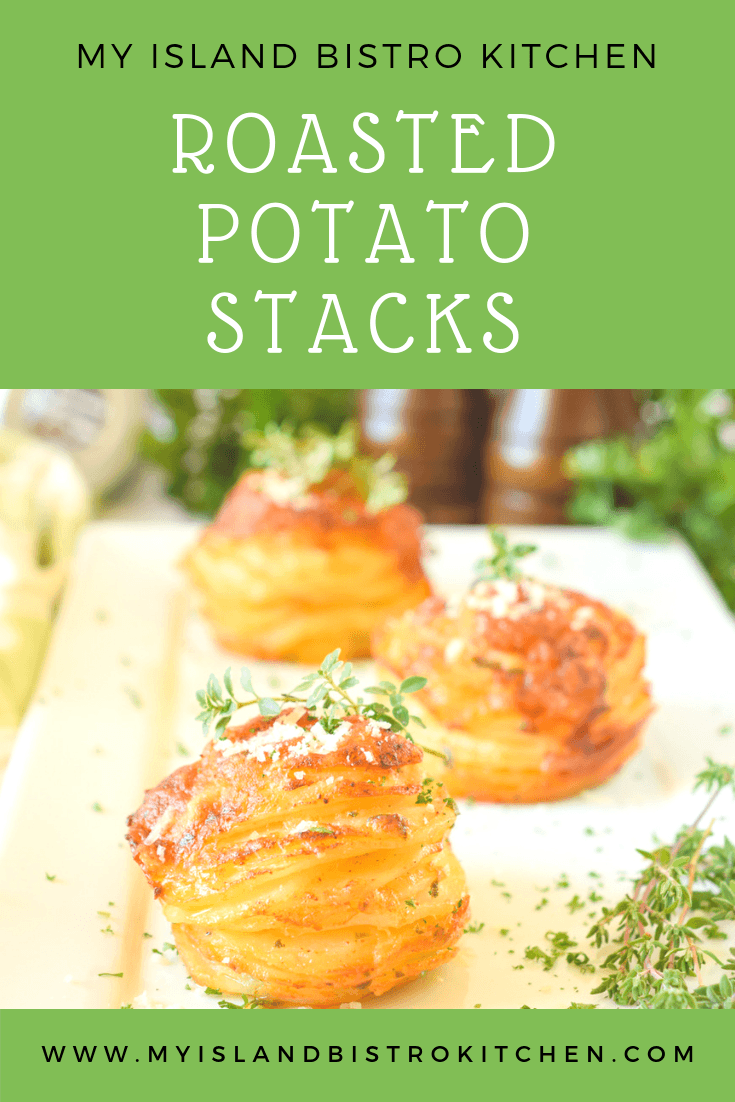
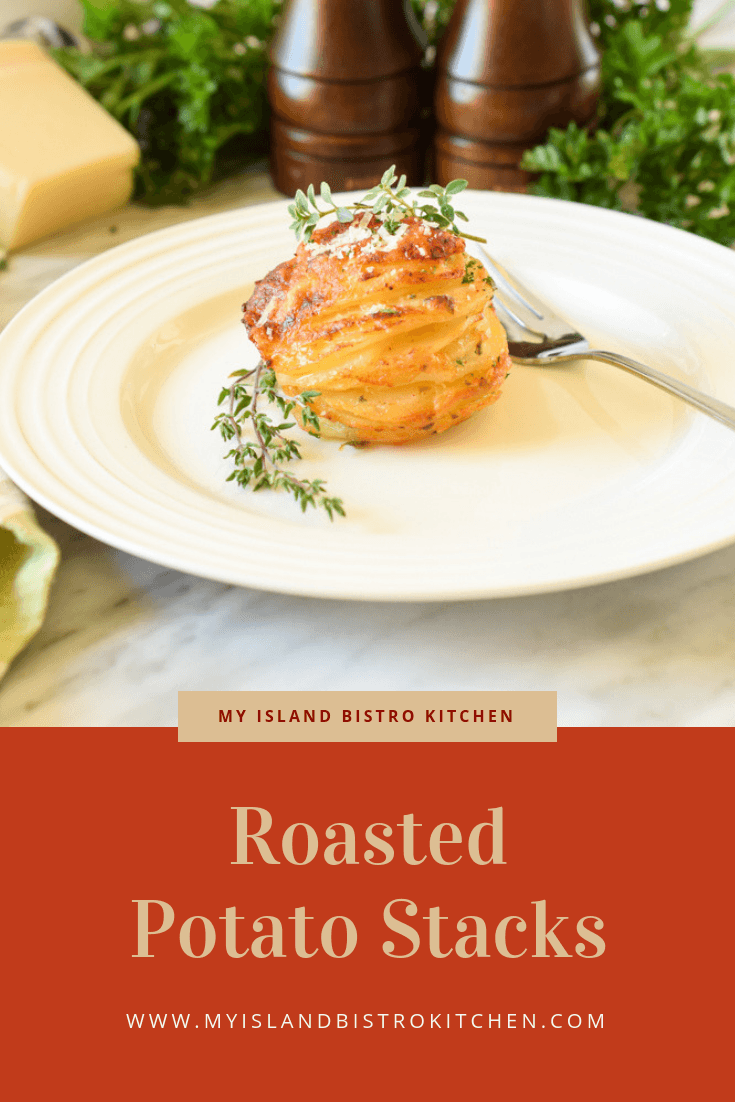
Sweet and Savory Sausage Bread Stuffing
Quite some time ago, I shared my standard “go-to” recipe for basic poultry stuffing/dressing. At the bottom of this posting, you will find the link to that recipe and an explanation for the difference (if you don’t already know) between stuffing and dressing.
In this Sweet and Savory Sausage Bread Stuffing recipe, I have jazzed up the stuffing by adding sausage meat to it. Dried cranberries can also be added so long as they have first been plumped in some warm rum (or warm chicken stock) for 10-15 minutes. Otherwise, the cranberries can be a bit hard and chewy in this stuffing. The cranberries are an optional ingredient but they do lend a pop of color and texture to the finished product. I sometimes, though not always, add them in. The sweetness in this stuffing comes from both the chopped apple and a bit of maple syrup which also adds to the moistness of the stuffing.
What gives this stuffing its unique flavour is the kind of sausage used. My local butcher shop (KJL Meats in Charlottetown) is known for its creativity in making sausages. To get the best choice, it means an early visit on Saturday mornings when they have their best selection available. I have a couple of favorites I gravitate to for bread stuffing/dressing and they are sundried tomato or honey garlic sausages. Other flavours may, of course, also be used, according to personal taste preferences. I remove the sausage casing and break up the meat then lightly scramble fry it with the aromatics (onion and celery) for 3-4 minutes, or until the meat is no longer pink.
Here, in PEI, the seasoning of choice for many folks when it comes to poultry stuffing/dressing is the herb called summer savory and that’s what I use in my stuffing/dressing recipes. In my household, it would not be considered to be stuffing/dressing unless it is made with summer savory! Old traditions prevail!

This recipe should yield approximately 4-5 cups of stuffing/dressing, depending on how dry/wet the potatoes are when cooked and the texture of the bread crumbs used. The recipe, however, is easily scalable so it can be doubled, tripled, halved, and so forth to meet the size of the chicken or turkey.
To make this recipe gluten free, simply substitute gluten-free bread crumbs in the same amount called for in this recipe and ensure that all other ingredients called for are also gluten free, including the sausage and liquid chicken bouillon. Some butchers, like KJL Meats, do make gluten-free sausages. I save all the crusts from gluten-free bread and then use my food processor to crumb them coarsely for use in stuffing and then freeze the crumbs in airtight freezer bags for use as needed.
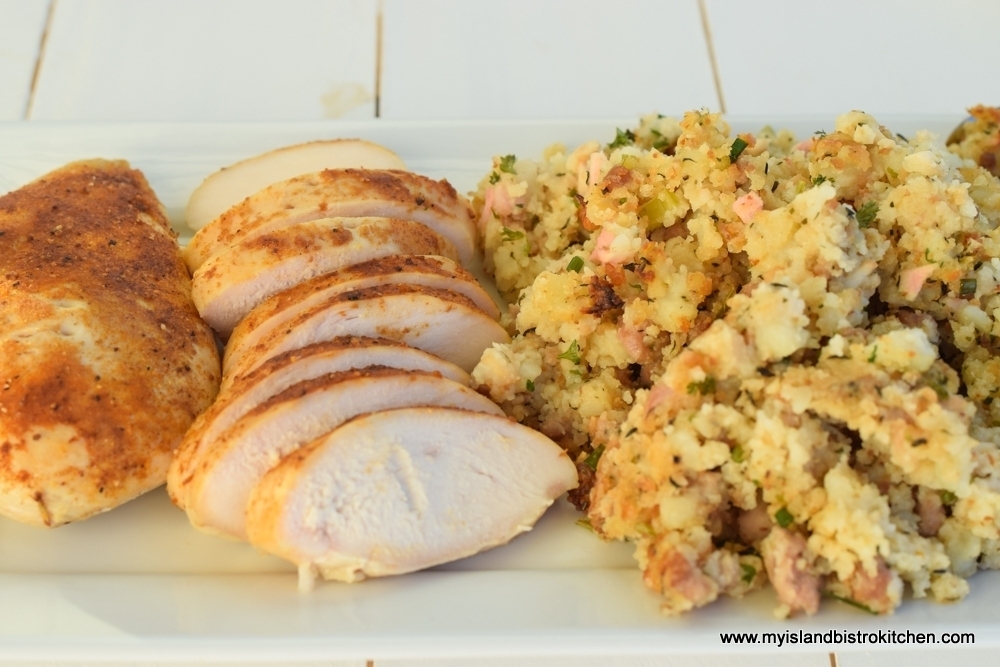
[Printable recipe follows at end of posting]
Sweet and Savory Sausage Bread Stuffing
Ingredients:
2-3 tbsp butter
2 tbsp finely chopped onion
2 tbsp finely chopped celery
4 oz honey garlic or sundried tomato sausage, casing removed
2 cups warm mashed potatoes (apx. 1 1/8 lb, uncooked)
1½ tsp summer savory
2 tsp liquid chicken bouillon
¼ cup dried cranberries, plumped in 2 tbsp warm rum or warm chicken stock (optional)
2 tbsp finely chopped apple
1 cup soft, coarse bread crumbs (apx. – see note below)
¼ cup melted butter
1 tbsp water
1 tbsp pure maple syrup
1 tbsp fresh parsley
1 tbsp chopped fresh chives
Salt and pepper, to taste
Method:
Melt butter in small frypan over medium heat. Add the onion and celery. Briskly stir the vegetables for 2-3 minutes. Break apart the sausage meat and add to the onion and celery. Scramble fry the sausage meat until no longer pink, about 3-4 minutes.
Place the warm mashed potatoes in a large bowl. Sprinkle with summer savory. Add the onion, celery, sausage, and chicken bouillon. Mix. Add the dried cranberries and chopped apple.
Mix in the bread crumbs along with the melted butter, water, maple syrup, parsley, and chives. Stir to combine. Season with salt and pepper to taste.
Loosely fill the body cavity of turkey or chicken with the stuffing. Roast turkey/chicken according to package directions for stuffed poultry and use a food thermometer to ensure that both the poultry and the stuffing have reached the safe minimum temperature.
Alternatively, make the stuffing into dressing by lightly pressing the mixture into one or two greased tinfoil-lined loaf pan(s). Cover with tin foil and bake in 350°F oven for apx. 15-20 minutes then remove tin foil and bake for 10-15 minutes longer, or until lightly browned on top. Let cool in pan(s) for at least 15 minutes then lift the tinfoil out of the loaf pan(s) and slice the dressing.
NOTE: Depending on how wet the variety of potatoes may be when cooked, additional bread crumbs may be needed to achieve the desired texture of the stuffing.
Yield: Approximately 4-5 cups
Sweet and Savory Sausage Bread Stuffing
This moist sweet and savory sausage bread stuffing is made with sausage meat, bread crumbs, summer savory, apple, cranberries and maple syrup. The perfect side dish to roast chicken or turkey dinners.
Ingredients
- 2-3 tbsp butter
- 2 tbsp finely chopped onion
- 2 tbsp finely chopped celery
- 4 oz honey garlic or sundried tomato sausage casing removed
- 2 cups warm mashed potatoes apx. 1 1/8 lb, uncooked
- 1½ tsp summer savory
- 2 tsp liquid chicken bouillon
- ¼ cup dried cranberries plumped in 2 tbsp rum or warm chicken stock (optional)
- 2 tbsp finely chopped apple
- 1 cup soft coarse bread crumbs (apx. – see note below)
- ¼ cup melted butter
- 1 tbsp water
- 1 tbsp pure maple syrup
- 1 tbsp fresh parsley
- 1 tbsp chopped fresh chives
- Salt and pepper to taste
Instructions
-
Melt butter in small frypan over medium heat. Add the onion and celery. Briskly stir the vegetables for 2-3 minutes. Break apart the sausage meat and add to the onion and celery. Scramble fry the sausage meat until no longer pink, about 3-4 minutes.
-
Place the warm mashed potatoes in a large bowl. Sprinkle with summer savory. Add the onion, celery, sausage, and chicken bouillon. Mix. Add the dried cranberries and chopped apple.
-
Mix in the bread crumbs along with the melted butter, water, maple syrup, parsley, and chives. Stir to combine. Season with salt and pepper to taste.
-
Loosely fill the body cavity of turkey or chicken with the stuffing. Roast turkey/chicken according to package directions for stuffed poultry and use a food thermometer to ensure that both the poultry and the stuffing have reached the safe minimum temperature.
-
Alternatively, make the stuffing into dressing by lightly pressing the mixture into one or two greased tinfoil-lined loaf pan(s). Cover with tin foil and bake in 350°F oven for apx. 15-20 minutes then remove tin foil and bake for 10-15 minutes longer, or until lightly browned on top. Let cool in pan(s) for at least 15 minutes then lift the tinfoil out of the loaf pan(s) and slice the dressing.
Recipe Notes
Yield: Approximately 4-5 cups
NOTE 1: Depending on how wet the variety of potatoes may be when cooked, additional bread crumbs may be needed to achieve the desired texture of the stuffing.
NOTE 2: To make this recipe gluten free, simply substitute gluten-free bread crumbs in the same amount called for in this recipe and ensure that all other ingredients called for are also gluten free, including the sausage and liquid chicken bouillon.
[Copyright My Island Bistro Kitchen]
For my basic poultry stuffing recipe, click here.
If you have made this recipe and enjoyed it and/or wish to share it with your friends and family, please do so on social media but be sure to share the direct link to this posting from my website.
Connect with My Island Bistro Kitchen on Social Media
Join the Facebook page for My Island Bistro Kitchen: https://www.facebook.com/MyIslandBistroKitchen/
Follow “the Bistro” on “X” (formerly Twitter): https://twitter.com/PEIBistro/
See the drool-worthy gallery of mouth-watering food photos from My Island Bistro Kitchen on Instagram: https://www.instagram.com/peibistro/
Follow “the Bistro” on Pinterest at https://www.pinterest.ca/peibistro/ and pin the Pinterest-ready photo found at the end of this post to your favorite Pinterest boards.
Pin Me To Pinterest!
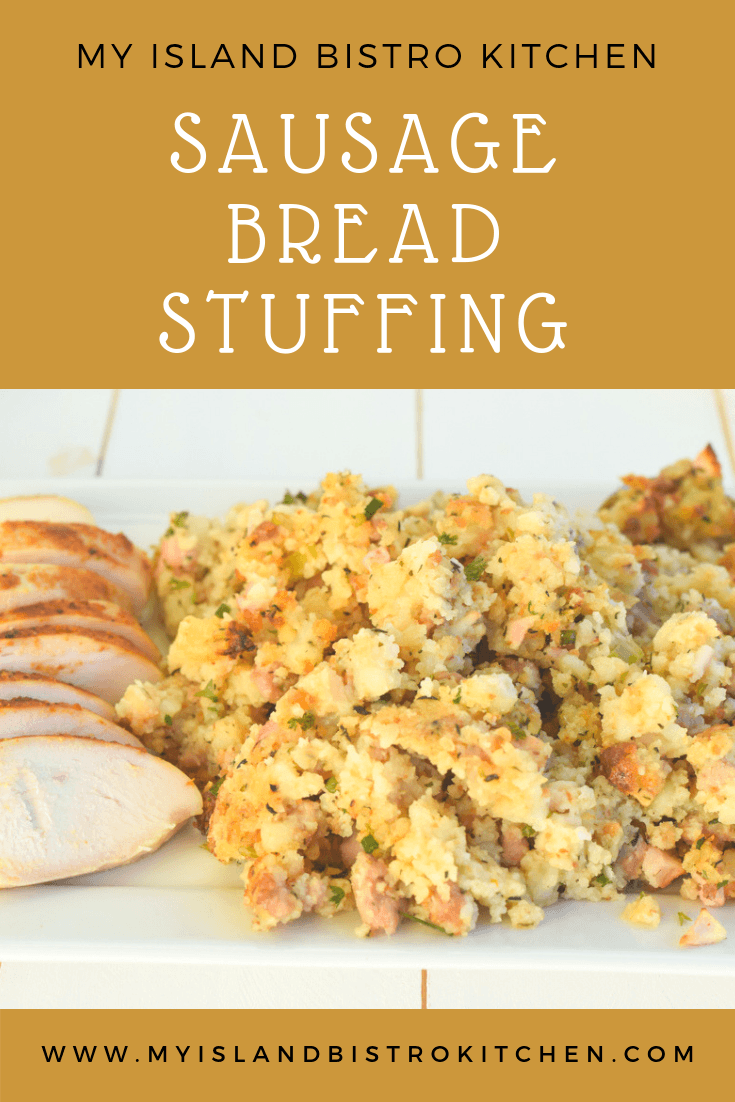
Cranberry Blueberry Sauce
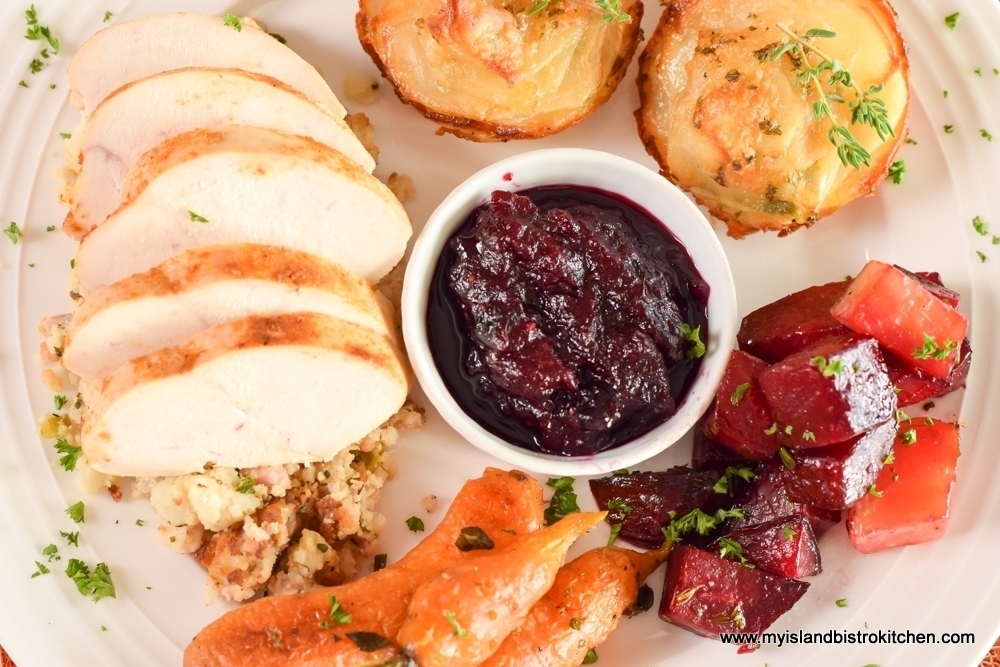
Combining the sweet and tart flavors of blueberries and cranberries makes for a delectable Cranberry Blueberry Sauce. Their flavors play well off of each other. Most will be familiar with the traditional cranberry sauce that, for many, has to be part of a roasted turkey or chicken dinner. Click here for my recipe for classic cranberry sauce. Continue reading Cranberry Blueberry Sauce
Green Tomato Marmalade Recipe
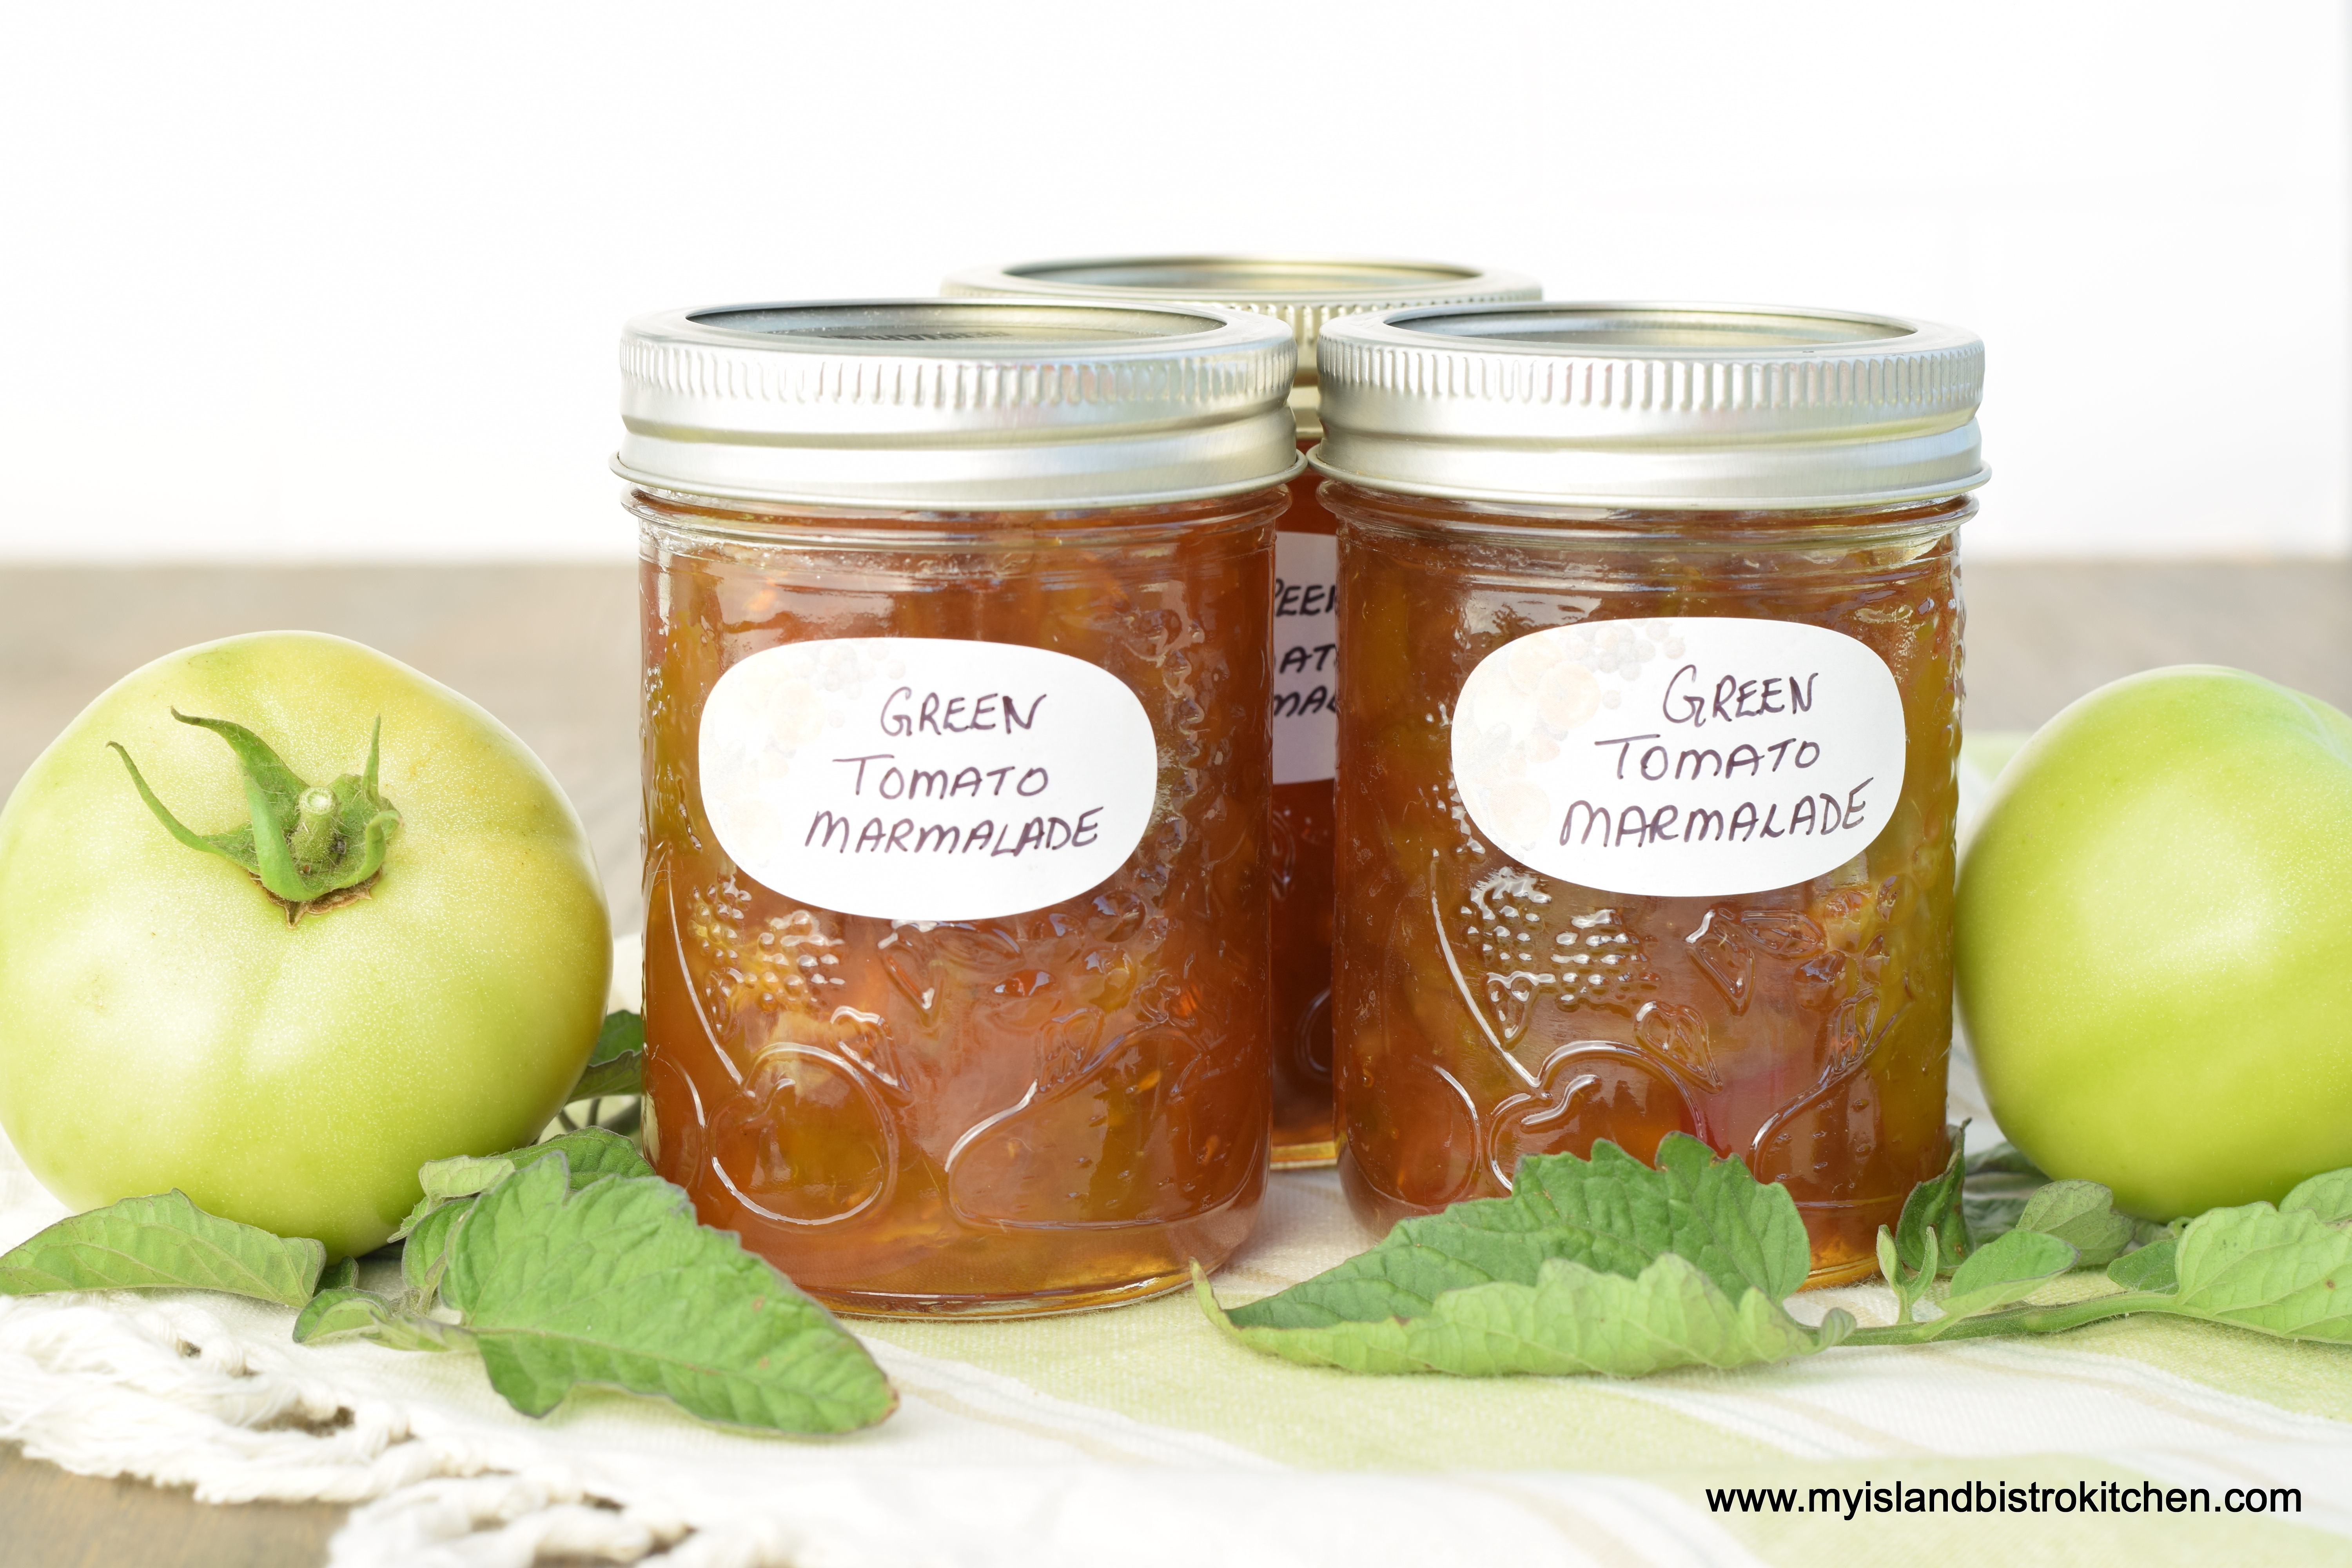
Green Tomato Marmalade is not an altogether common variety of marmalade. It’s not a typical marmalade likely to be found on many, if any, supermarket shelves. That, in my view, makes Green Tomato Marmalade all the more special because it’s more unique and exclusive! That, plus the fact it can be used as either a sweet or savory spread, makes this marmalade a worthwhile addition to your preserve inventory. Continue reading Green Tomato Marmalade Recipe
Breakfast Picnic on the Beach
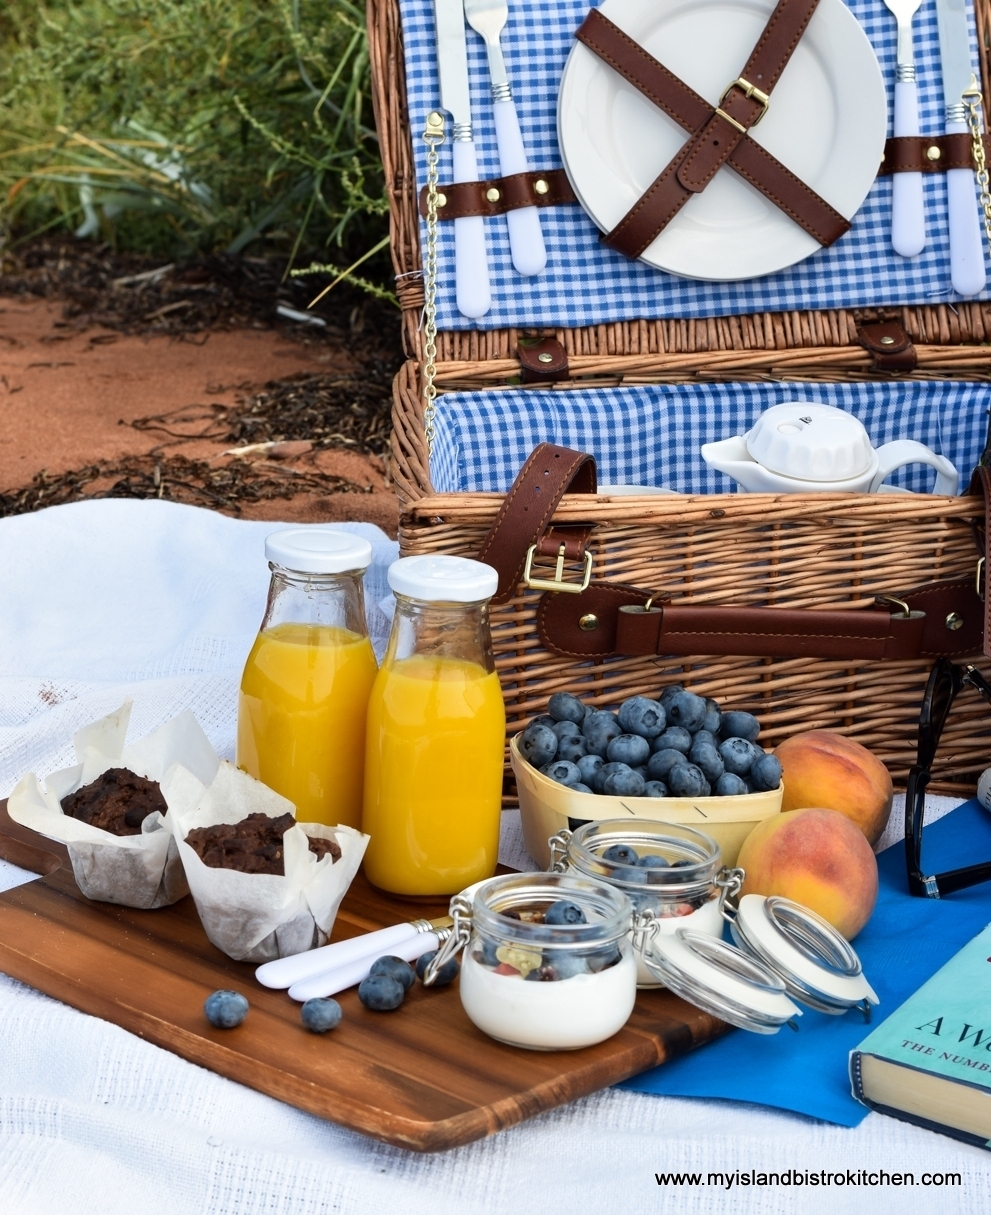
When we think of picnics, we most often think of lunch time or dinner events. Rarely, do we think of a breakfast picnic and yet it’s probably one of the easiest picnic meals to pack!
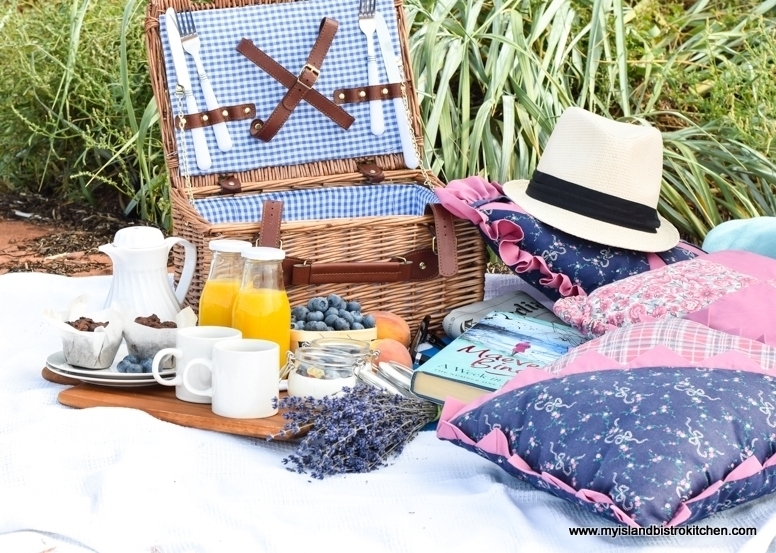
Recently, I suggested we pack up a continental breakfast and head to the beach for a morning picnic. We had just been to a nearby blueberry U-pick so, naturally, blueberries were included in the picnic.
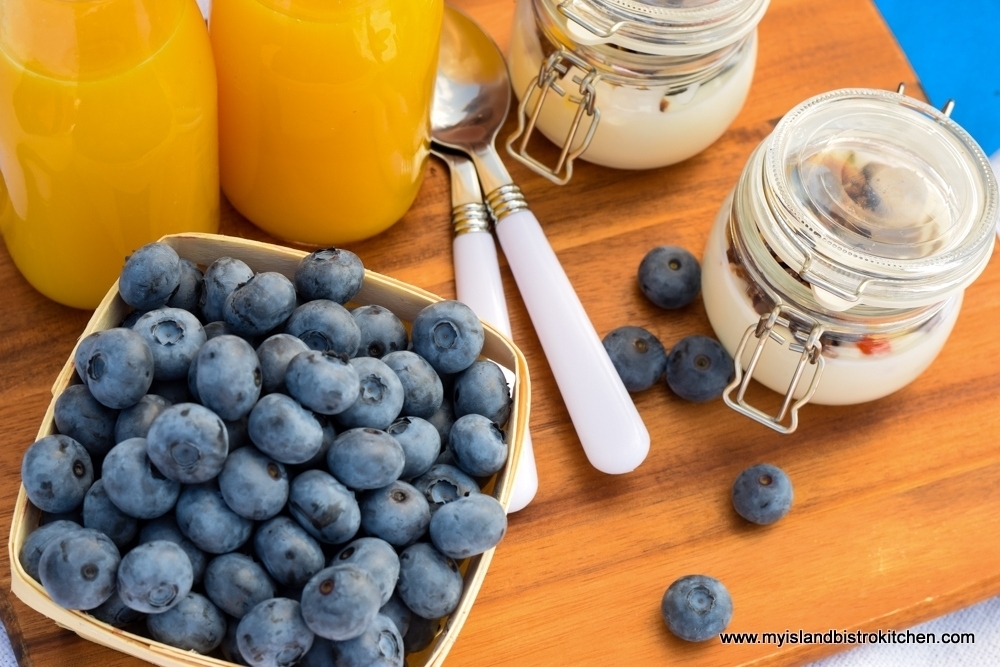
The menu was simple. Orange juice, Greek yogurt topped with homemade granola and fresh blueberries, homemade muffins, peaches, and coffee.

I love these little multi-purpose jelly jars. They are perfect for yogurt parfaits!
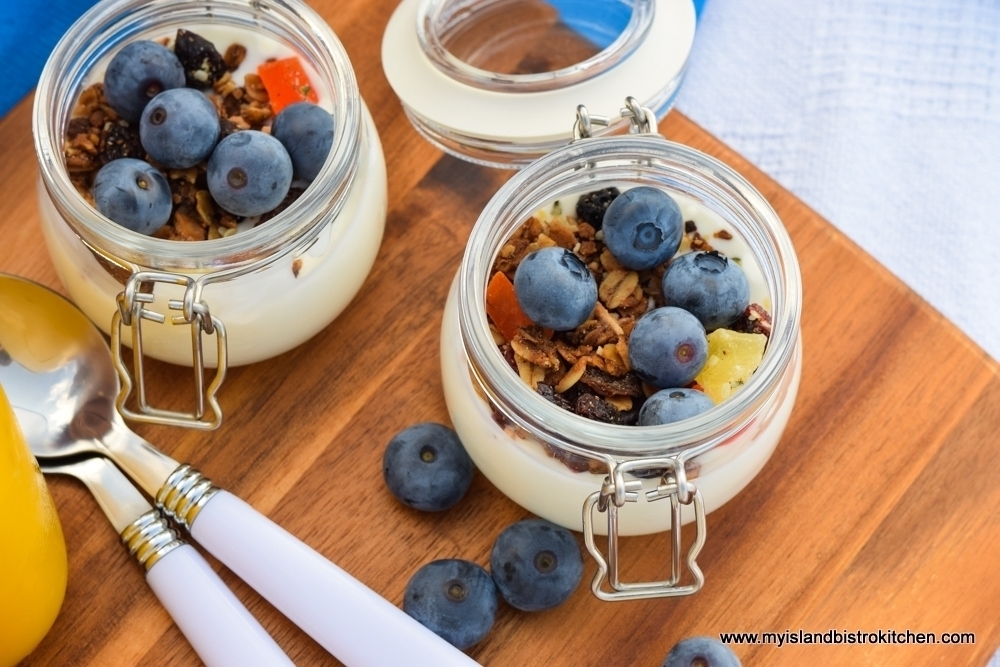
A breadboard makes an easily transportable platform upon which to set the food. I find, with beach picnics and an uneven sand base, it can be a bit of a challenge to keep the food from tipping over and spilling. However, the breadboard provides a stable, level surface eliminating the problem.
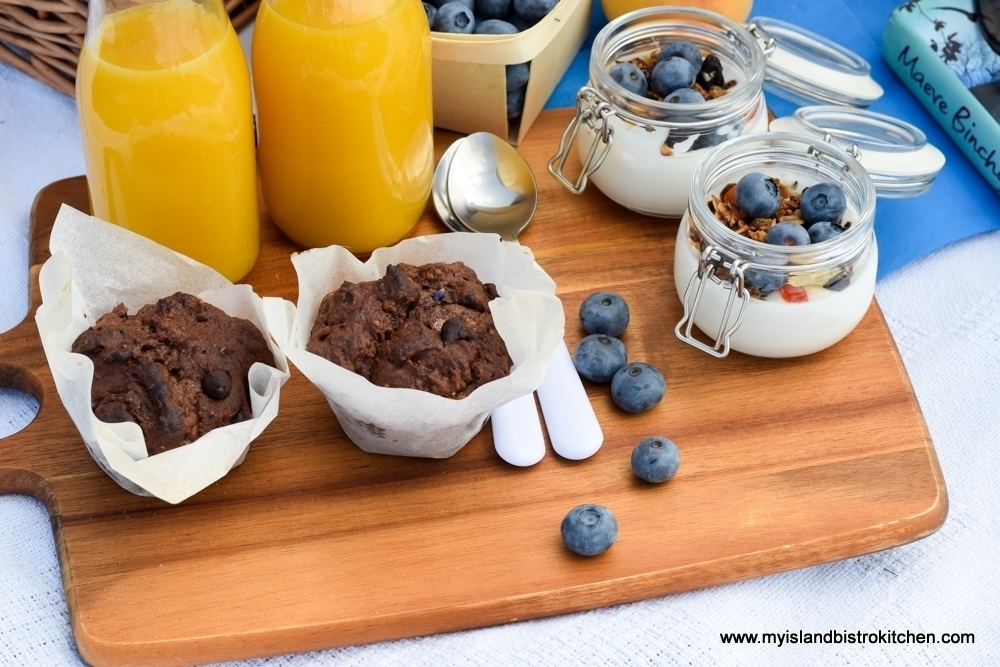
All that needs to be added is the quintessential coffee! I have a small thermos/coffee butler that holds exactly two cups of coffee and is great for these types of events.
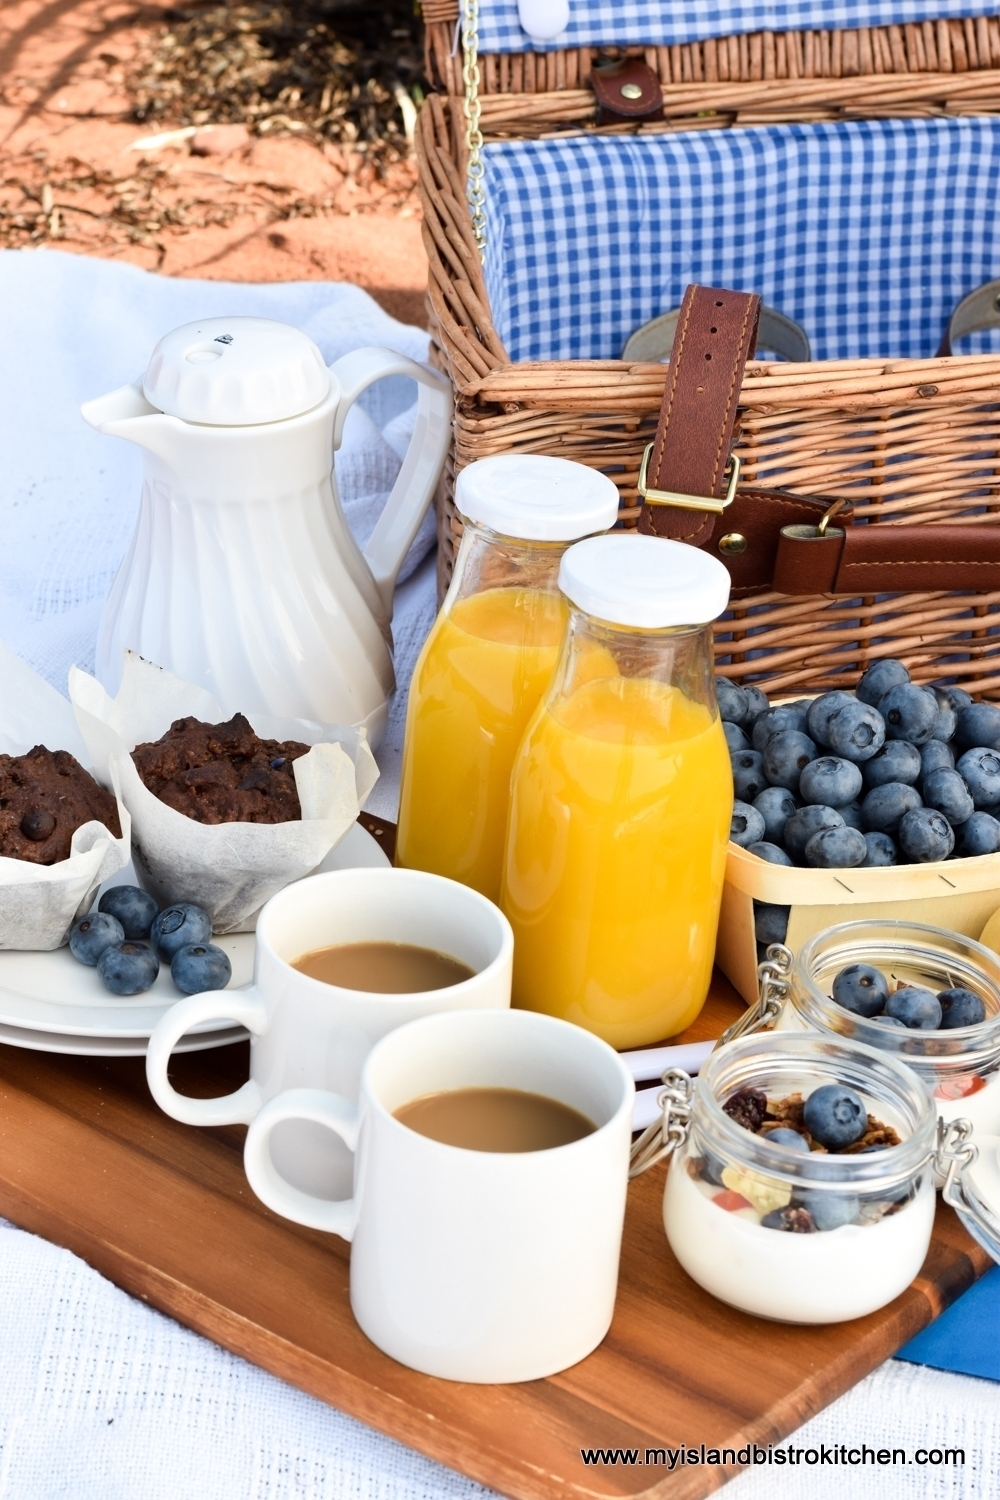
I love my wicker picnic baskets and this one came equipped with the plates, mugs, and cutlery.
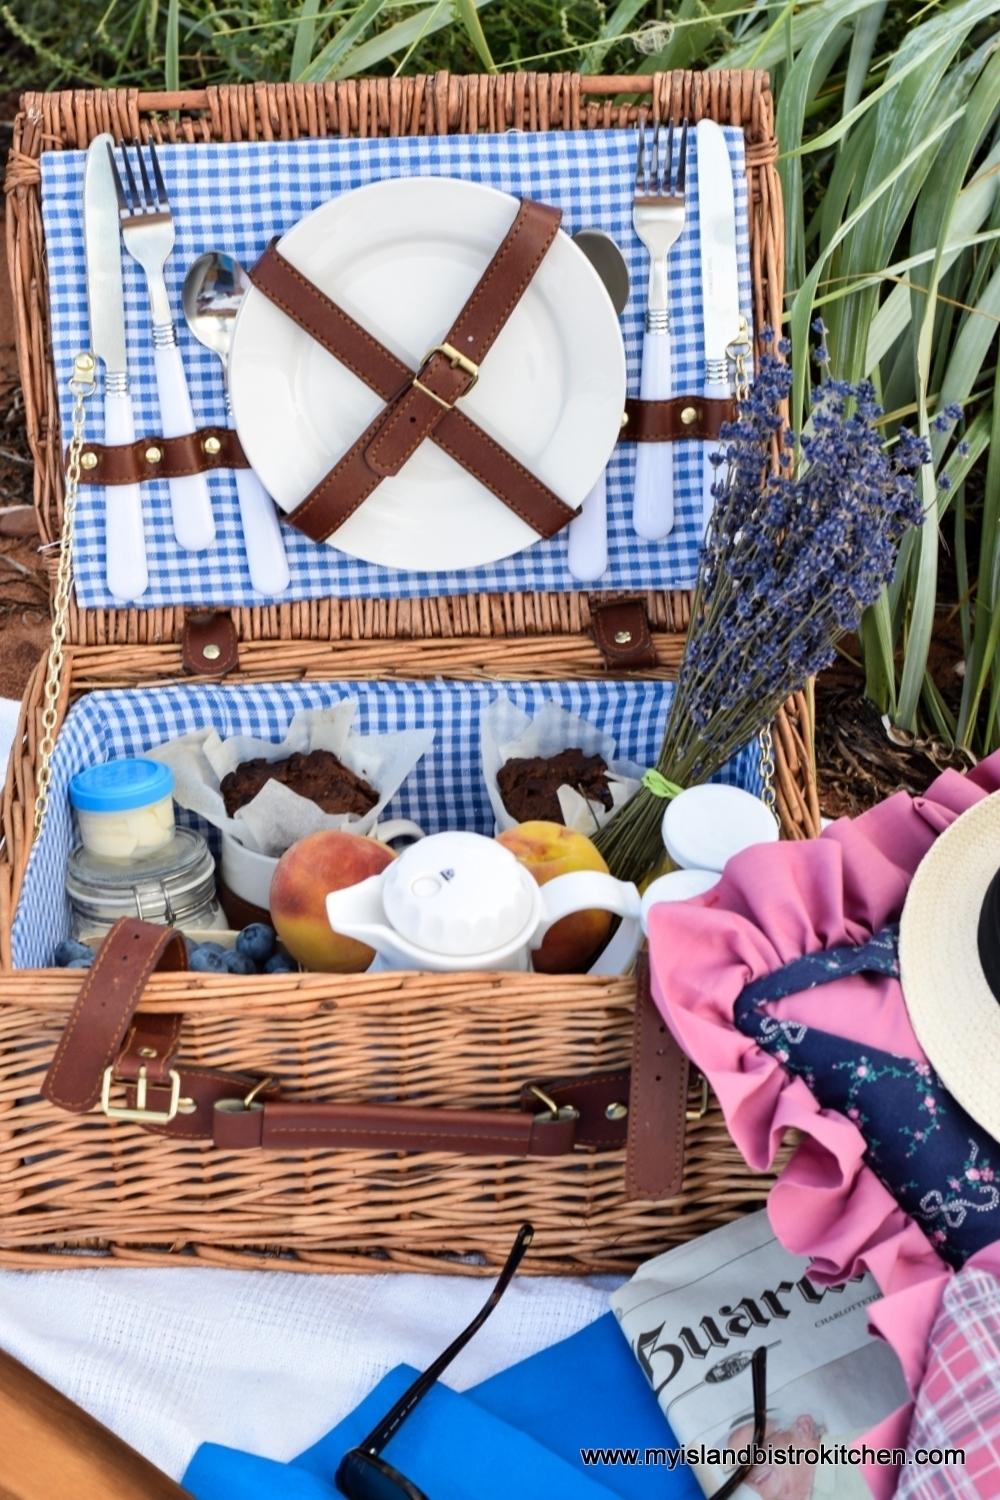
Let’s take a peek inside the picnic basket!
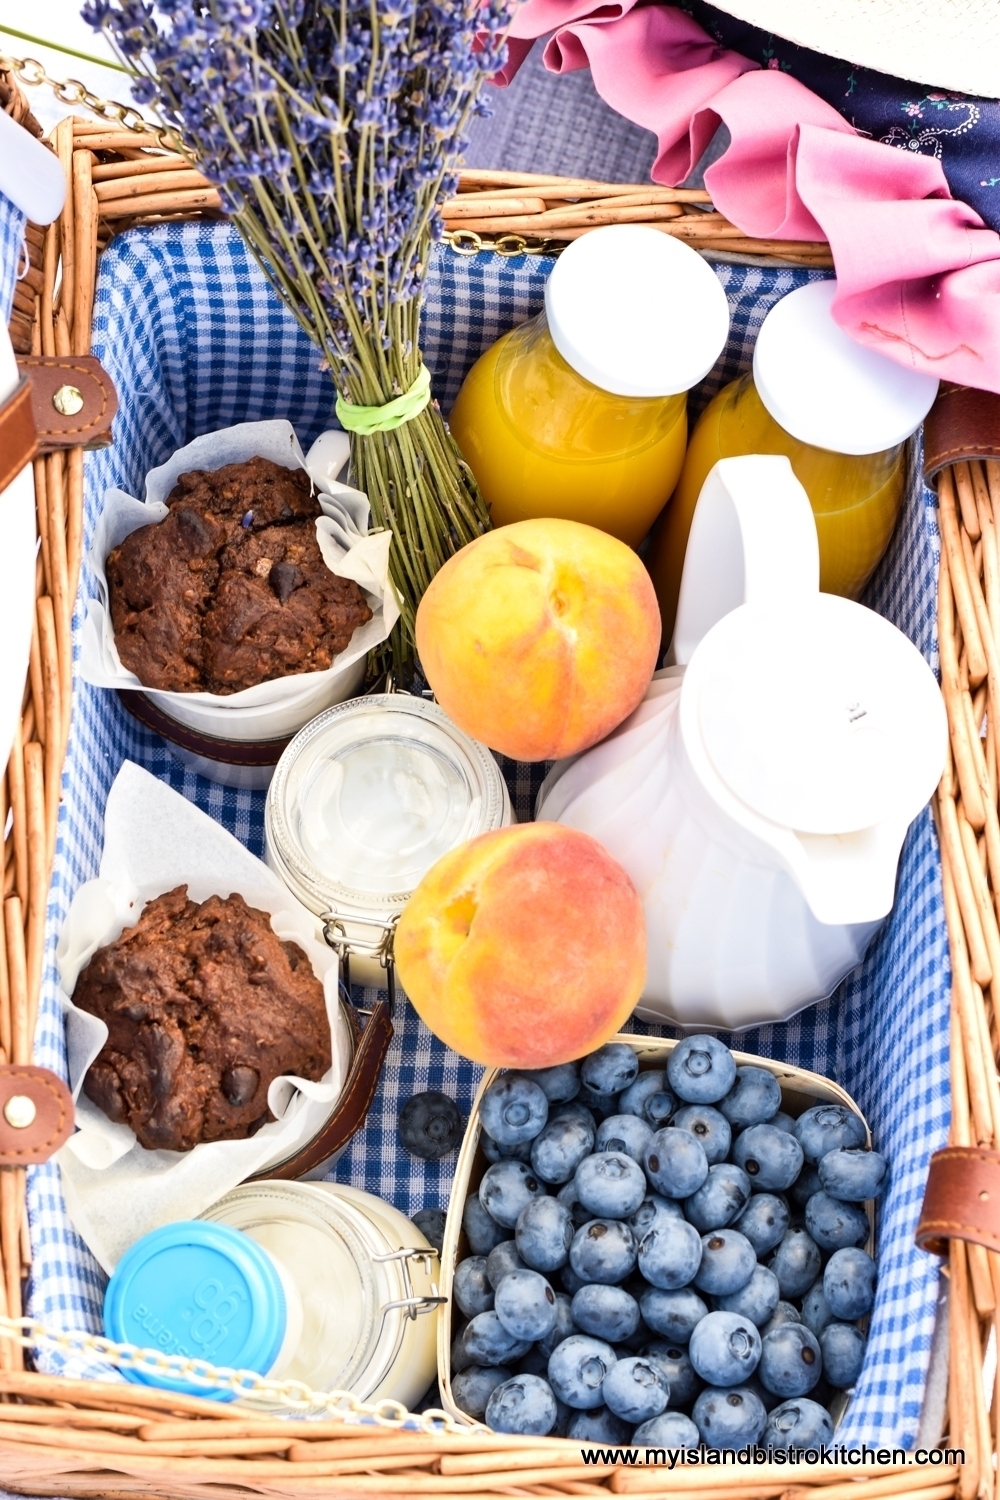
A good book for one and the morning newspaper for the other found their way to the picnic, too! No need to take along lawn chairs – an old blanket and a couple of comfy pillows will suffice.
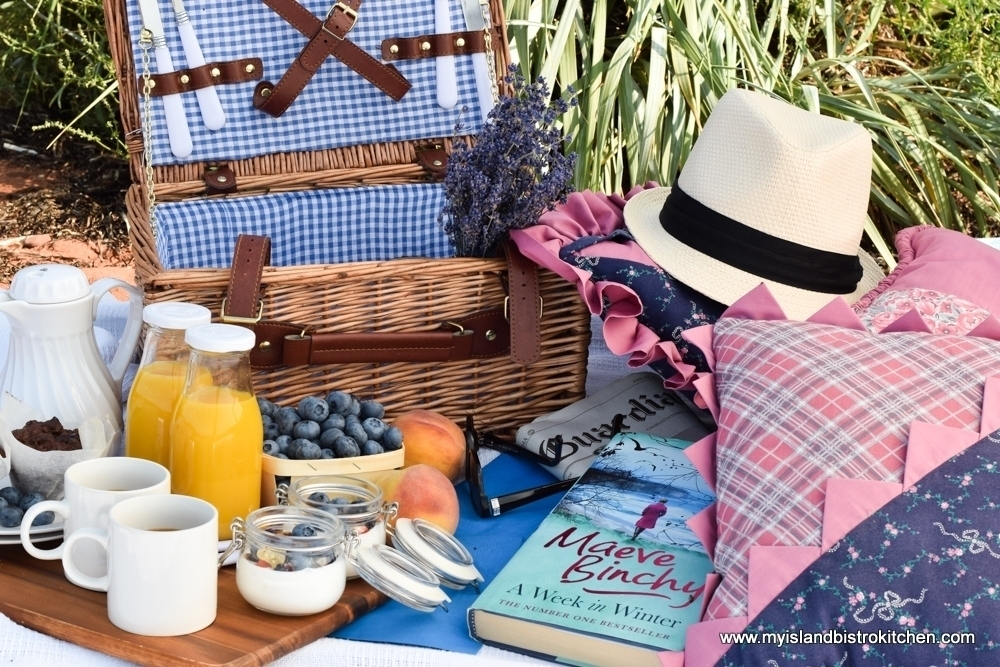
Our summers are short here in Prince Edward Island so we make the most of the lovely fine days and our close proximity to the beach. What better way to savour the last days of summer than to pack a breakfast picnic and head to the beach to enjoy breakfast with a view like this! Self-imposed time-outs can be a good thing!

Pin Me To Pinterest!

Chill Out with Great Ice Cream in PEI

It’s hard to think of summer without thinking of ice cream. Those hot, sultry summer days just seem to beg for an ice cream fix.
Here, on PEI, we have no shortage of ice cream venues to choose from. Whether you are a soft-serve ice cream fan or a hard ice cream aficionado, you’ll find lots to choose from. After a summer of research (full disclosure – the waistline may have been harmed by this initiative!), here’s the scoop on my favorite places on the Island for hard ice cream and for soft-serve ice cream. Readers will note that opinions expressed are my own based on personal experience at all venues mentioned below. None of the establishments knew I was sampling their products for this review. This is not a sponsored post and I received no compensation in any form for my reviews.
My review is broken down into two parts – hard ice cream and soft-serve ice cream. Readers will note that I was not reviewing every product sold by dairy bars and ice cream parlours. Rather I was reviewing two very specific products – hard ice cream and soft-serve ice cream. This to say that, for example, a dairy bar that specializes in, or is most known for, its soft-serve ice cream, may also serve other frozen products such as hard ice cream, too. In that example, if I was reviewing their soft-serve product, that’s all I was reviewing from that particular dairy bar. Likewise, if a business is known primarily for its hard ice cream but also sells, for example, frozen yogurt or sherbet, I only reviewed their hard ice cream product(s). Of those I sampled in 2018, what follows were my top favorites.
For Best Hard Ice Cream
Two locations that specialize in the production of the traditional hard ice cream stood out for me:
COWS Inc.
Creamery Location: 12 Milky Way (397 Capital Drive), Charlottetown, PEI
(11 Canadian locations + 1 in Beijing, China)

Churning out delectable flavours since 1983, the flagship creamery is located on the aptly-named “Milky Way” just off of one of the famous roundabouts outside Charlottetown. This venue is open year-round so locals do not have to go through withdrawal due to seasonal closures (phew!). Other COWS locations, however, may be seasonal.

Apart from the high-quality ice cream (yup, 16% butter fat), COWS is legendary for its creative and unique ice cream flavour names often involving a play on words related to anything “cow” – like Cownadian Maple, Fluff ‘n Udder, Messie Bessie, and Moo Crunch, for example.
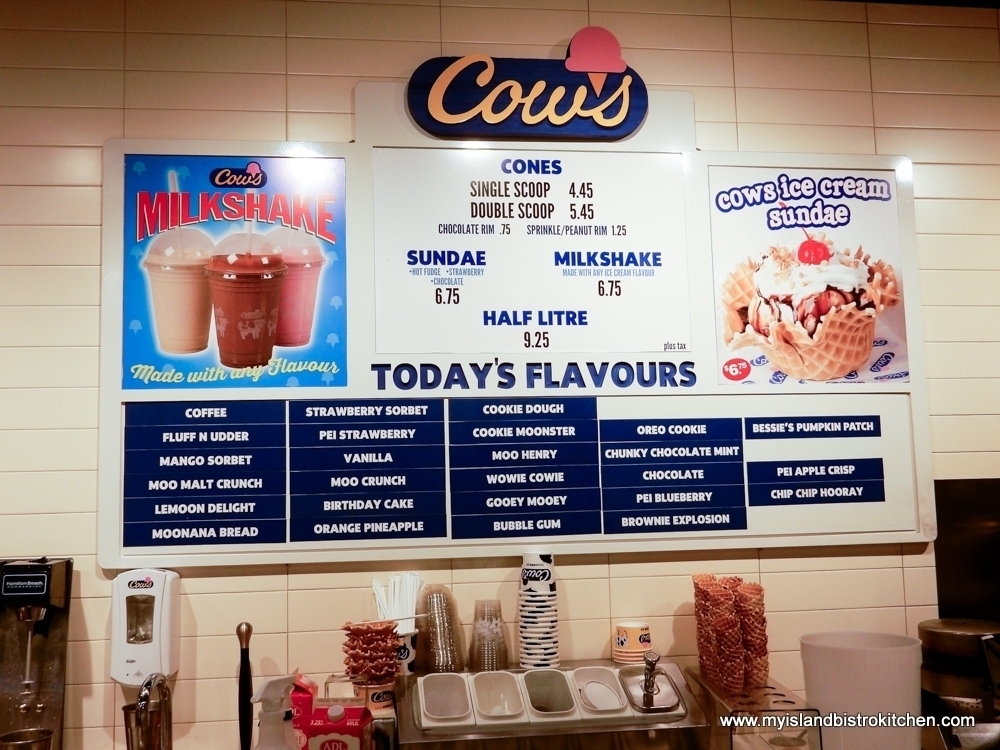
When I visit a COWS location, I go in with the best intentions to try a new flavour but, once I’m standing in front of the display case, I inevitably choose “Wowie Cowie”, a delectable concoction of vanilla ice cream, English toffee marble, chocolate flakes, and Moo Crunch. Ice cream is available in dishes or cones but their handmade waffle cones are hard to pass up! In my view, the cones are part of the “udderly” wonderful COWS ice cream experience!
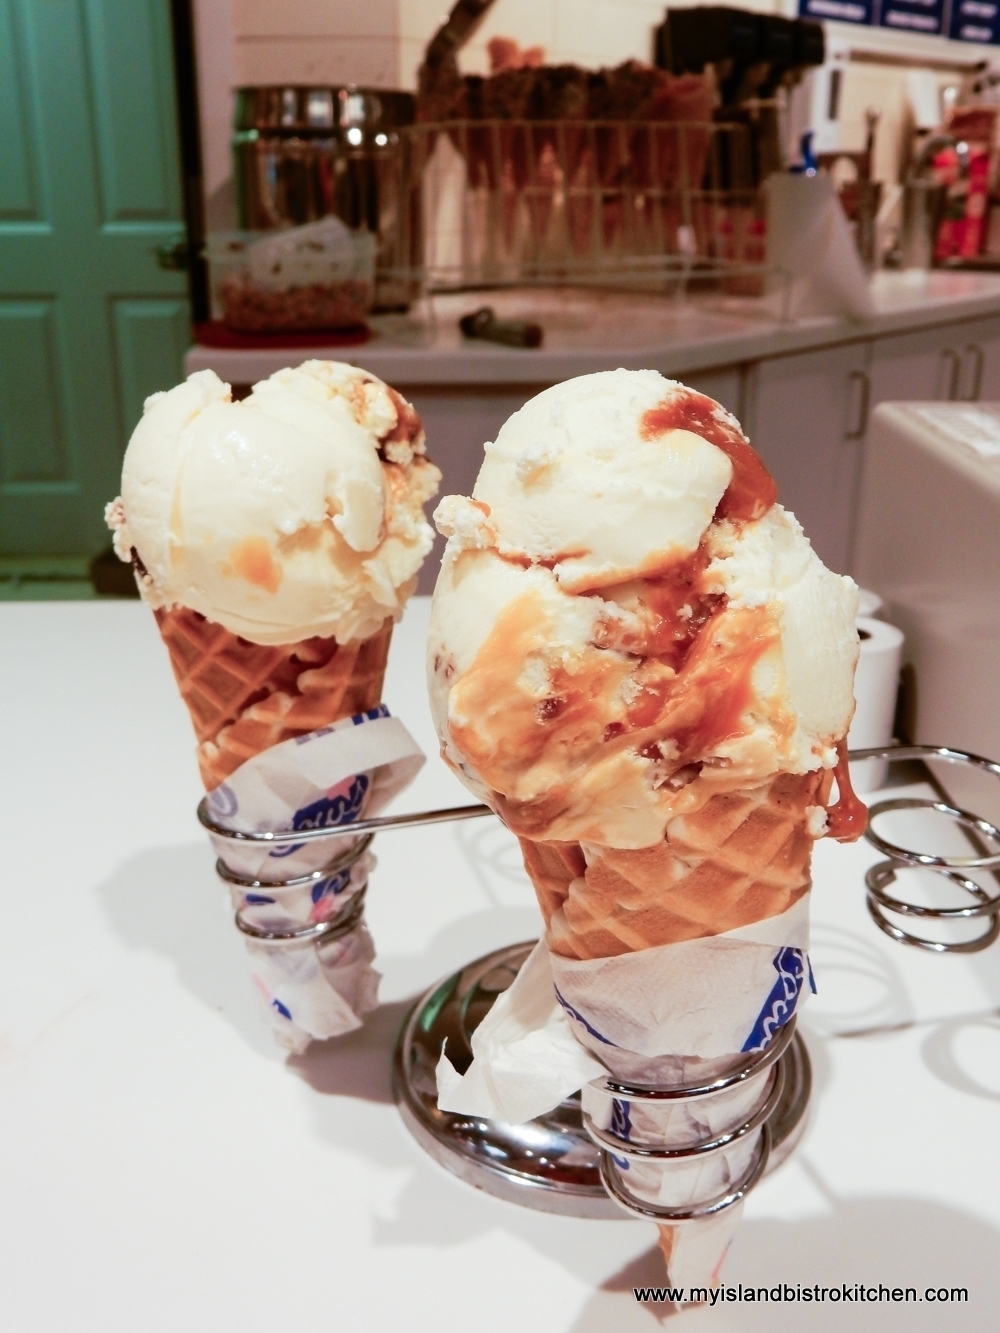
There is no indoor seating at this COWS location though there are some nearby picnic tables outside. Some COWS locations may have indoor seating available. Tours of the creamery at this location are also available.
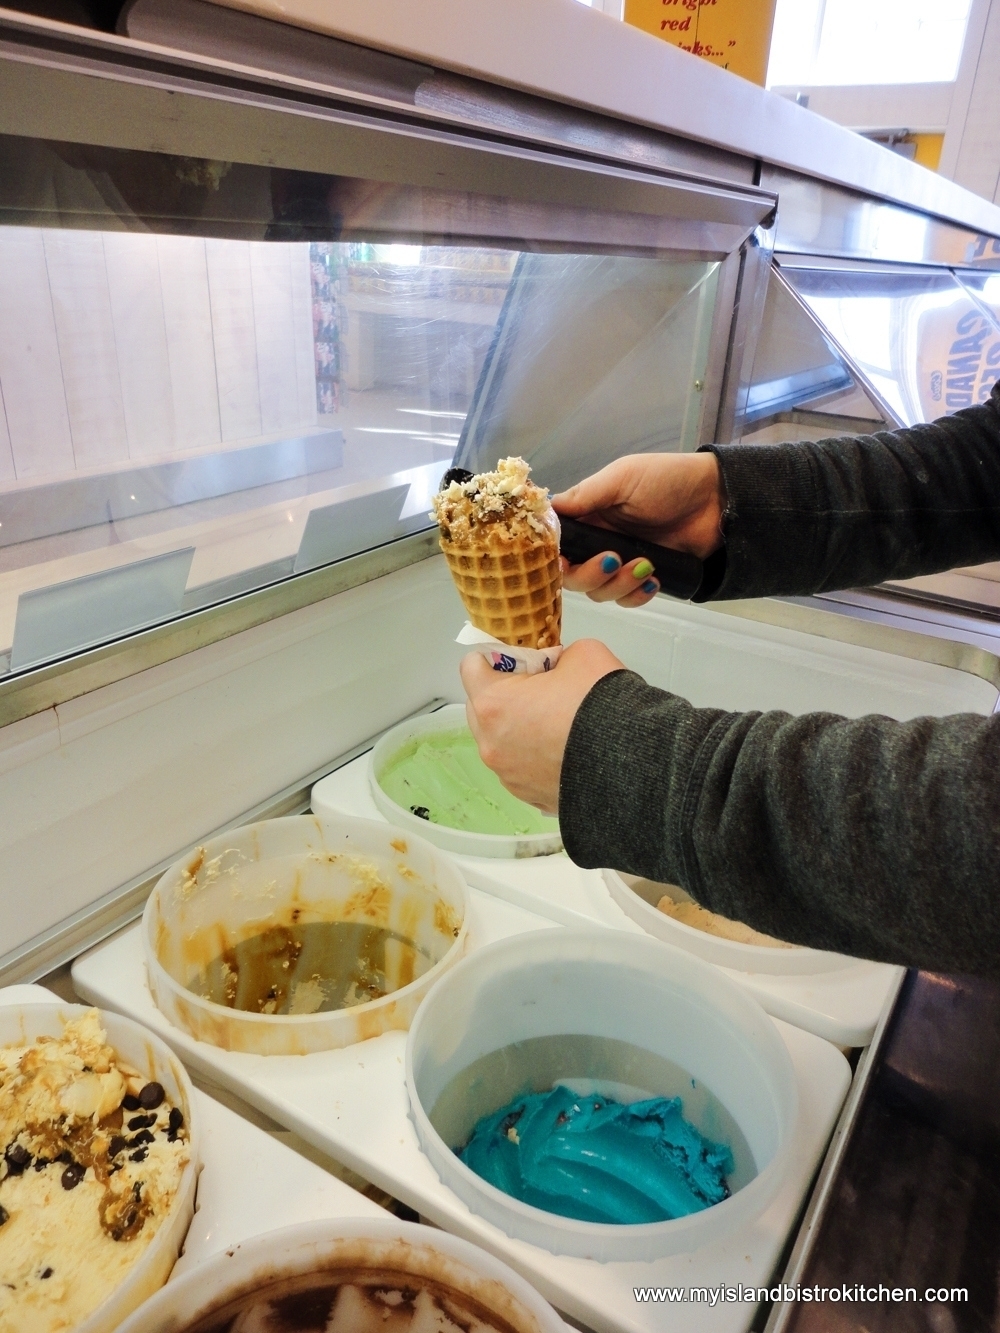
One of the things that makes COWS ice cream extra special is that it is available exclusively at COWS stores so heading to a COWS outlet just makes the experience that much extra special because you know you can’t buy it at the local supermarket. You can check out the story I earlier wrote on COWS here.
Holman’s Ice Cream Parlour
286 Fitzroy Street, Summerside, PEI

The newbies on the Island ice cream scene, this family-owned and operated ice cream parlour opened its doors in 2016 and is quickly earning a reputation for high quality homemade ice cream.

Located in a heritage home, known as the Holman Homestead, in Summerside, this ice cream parlour has fast become a favorite stop for ice cream aficionados. Much of the charm of the historical property has been maintained and gives an air of stepping back in time to a vintage ice cream parlour.

The premium homemade hard ice cream, manufactured on the premises, is made with all-natural ingredients. Several flavours of ice cream are available – my favorite is the Salted Caramel though I have heard rave reviews of their Cookies and Cream variety.

Ice cream is available in cones or dishes but, as you walk up the sidewalk toward the house, you can catch the tantalizing waft of the waffle cones being made – it’s hard not have one of those cones and they don’t disappoint!
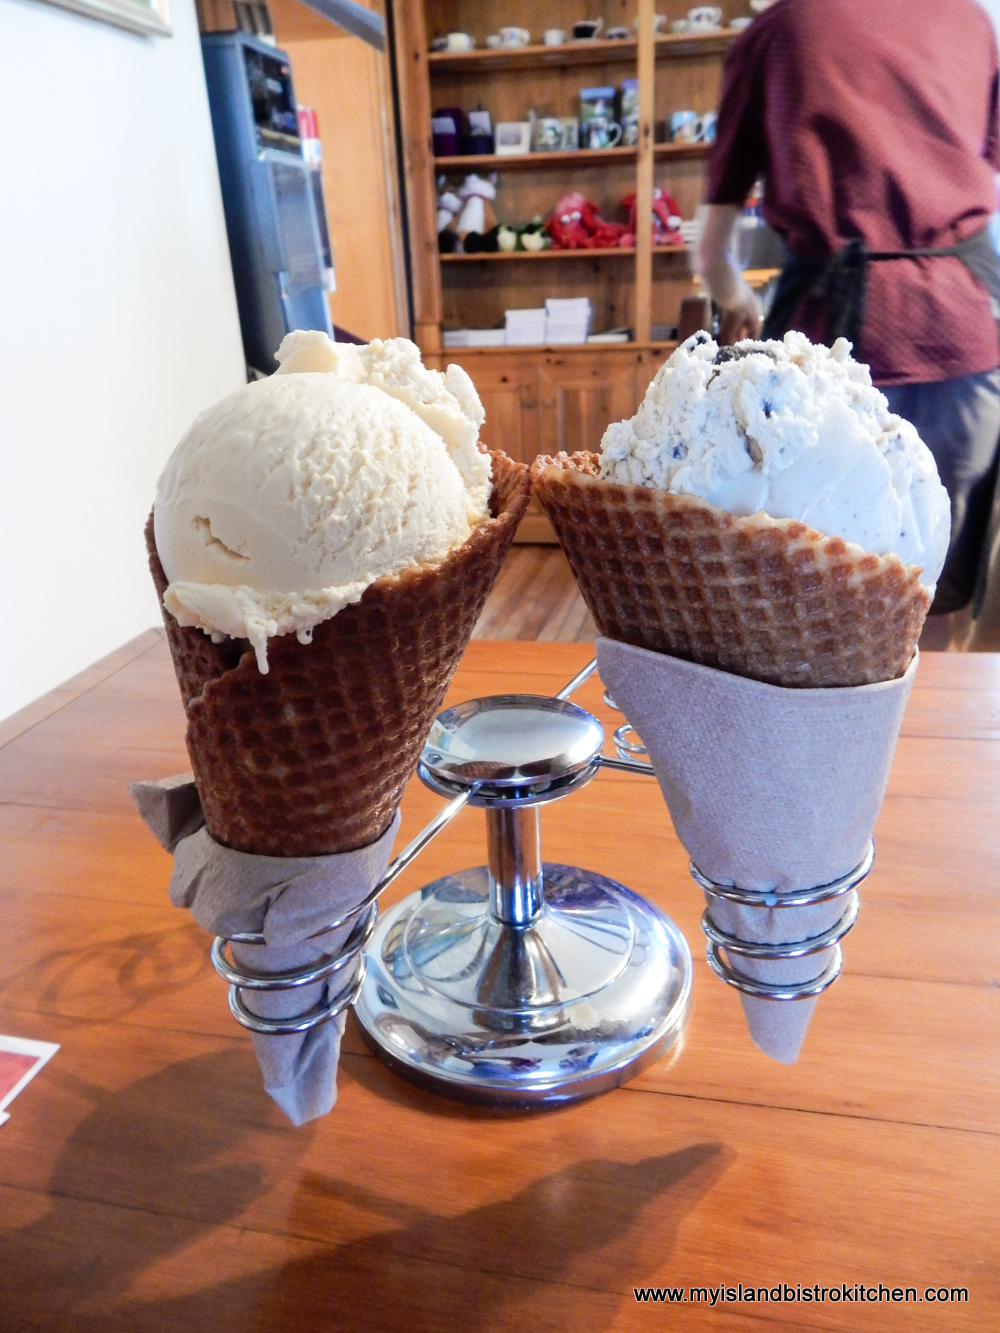
The parlour also offers sundaes, banana splits, and soda fountain floats made with their homemade ice cream.

They also make sherbets and have at least one variety of ice cream made with sheep’s milk. Service is provided by friendly staff. Eat inside or, on lovely weather days, enjoy the ice cream in the garden. The ice cream from Holman’s is made all the more special because it is only available at their Ice Cream Parlour and you won’t find it in the frozen dairy section of any supermarket. Open seasonally. (Hint – In my view, it’s worth the drive to Summerside just to have an ice cream at Holman’s! Just sayin’, this might have happened on more than one occasion….for research purposes, of course, you know….just sayin’…..)
For Best Soft-Serve Ice Cream
Two locations that are known primarily for their soft-serve ice cream particularly caught my attention.
Sunny’s Dairy Bar – New Discovery 2018
559 Water Street, Summerside, PEI
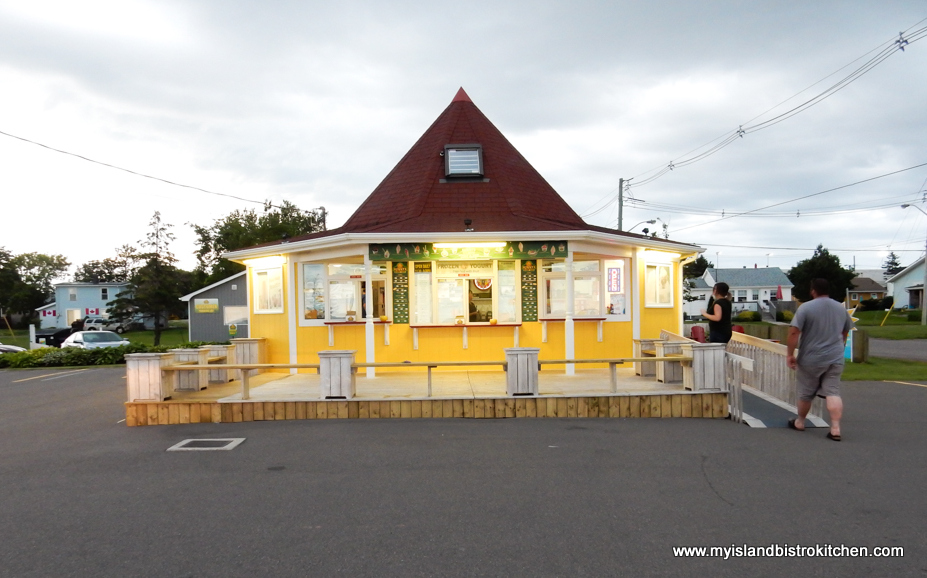
This dairy bar came recommended to me by a couple of folks who thought I should check it out. Can soft-serve ice cream really be all that different from one place to another? Yes, it can and Sunny’s proves it!
Opened in 2011, in the west end of Summerside, this is a traditional style dairy bar in that you place your order at the window and take your ice cream back to your vehicle or to the Green Shore Park across the street. There is no indoor seating.
This dairy bar was a new discovery for me this year and I will be back! I opted for a Hot Fudge Sundae, my all-time favorite. The ice cream was the creamiest and richest I have ever had and the hot fudge topping was, well …. sublime!

Sunny’s has a long list of ice cream treats on its menu, too numerous to mention here. Portion sizes are very generous. I ordered a small sundae and, as can be seen in the photo, it is a very generous helping! Open seasonally, this is definitely a place to check out for ice cream in Summerside!
Frosty Treat Dairy Bar
Two (2) locations – Original at 109 Victoria Street West and new one in 2018 at 25010 Veteran’s Memorial Highway, both in Kensington, PEI
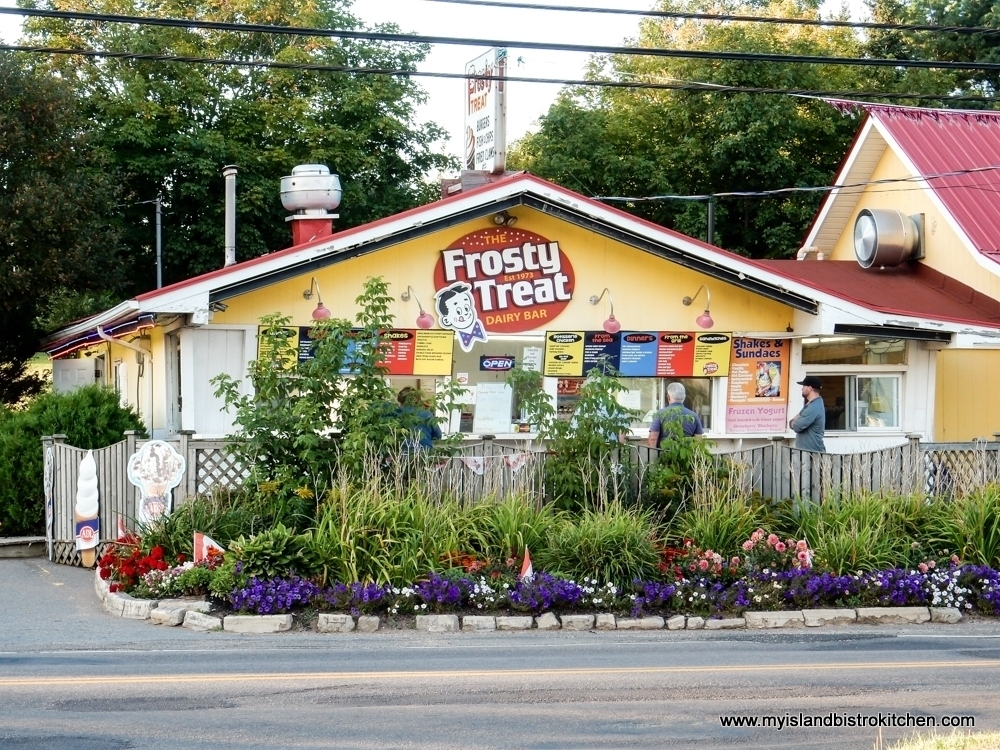
A long-time favorite with Islanders, this traditional-style dairy bar is well known for its catchy TV ads “Don’t Drive By! Drive In!” For many Islanders, it will come as no surprise as to why Frosty Treat made my list of “go-to” places for yummy ice cream in PEI. Frosty Treat has been synonymous with great soft-serve ice cream for many years and the frequent line-ups at the dairy bar window on hot summer days and evenings attest to this.
This popular ice cream bar serves up creamy soft-serve ice cream that will satisfy any craving for soft swirly ice cream. Other ice cream treats are also available on Frosty’s menu.
Frosty Treat has been a summer tradition for us for many years. Their Hot Fudge Sundae, in particular, is a perennial favorite. Open seasonally.
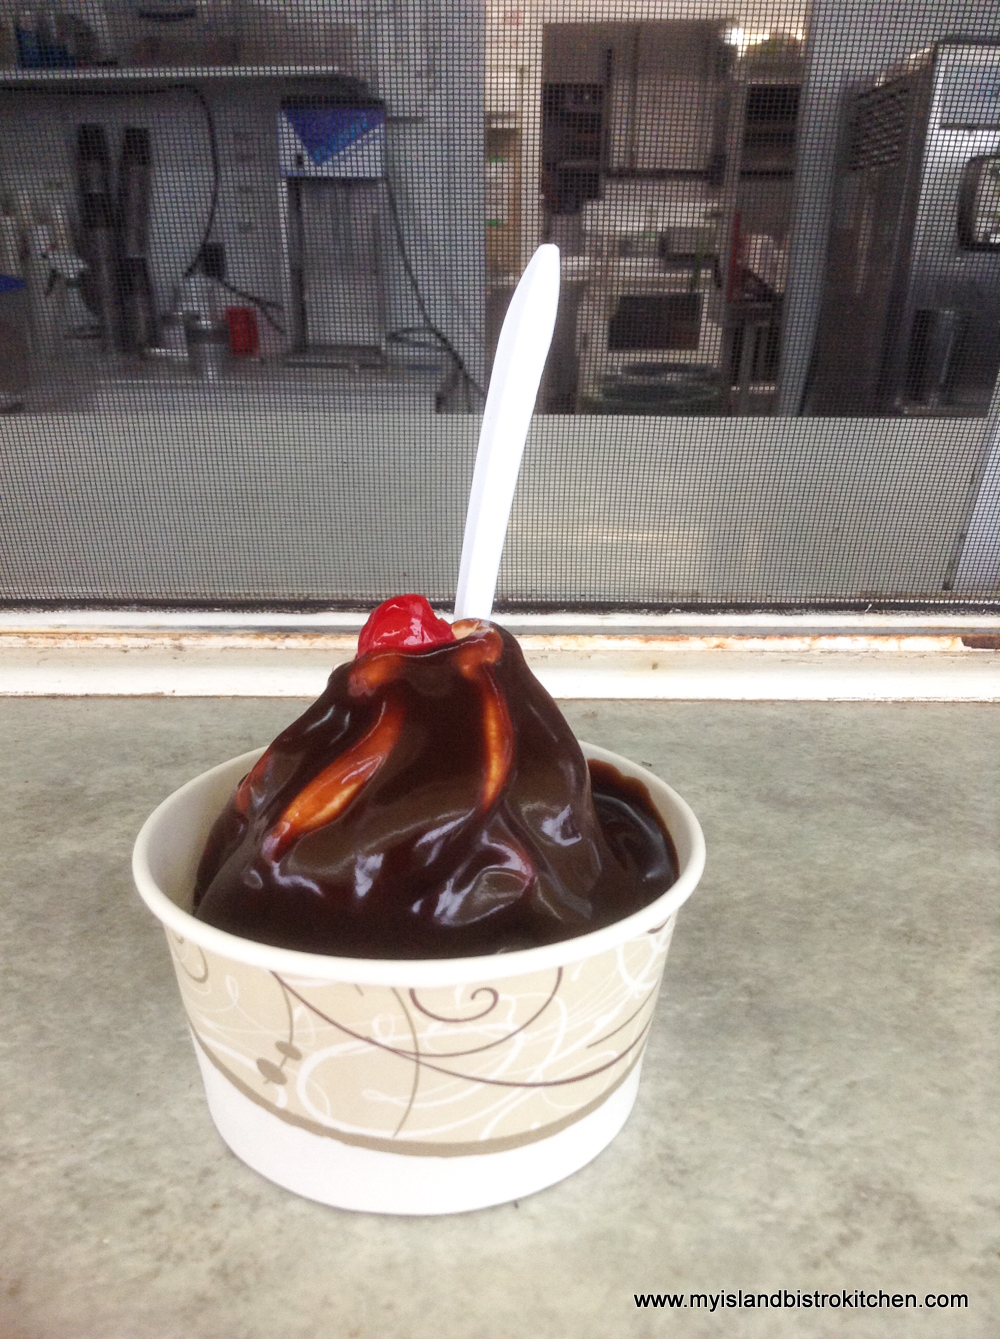
If you are in the Kensington area, “don’t drive by, drive in” to one of the Frosty Treat locations for a cool ice cream treat.

Special Mention
Somerset Ice Cream Bar – New Discovery 2018
2 Somerset Street, Kinkora, PEI

Located in the small rural village of Kinkora, midway between Charlottetown and Summerside, the Somerset Ice Cream Bar opened for business in summer 2018. What makes this ice cream bar unique, and what earned it a special mention in this article, is that its owner and operator is a young entrepreneur, still in high school (yes, you read that right)!

Many cones of generous-sized portions of creamy swirled soft-serve ice cream were served out of this new dairy bar this past summer. In traditional dairy bar style, orders are placed at the window. There is no indoor seating but there are benches on the deck around the dairy bar and limited picnic table seating. Open seasonally.
If you are traveling Rte 225 between Summerside and Charlottetown, make it a plan to stop for a tasty treat at this ice cream bar.

So, this is what the waistline could handle this summer! Again readers will note that some of these establishments also serve other types of ice cream and ice cream related treats. However, the purpose of my exercise this summer was to simply find great establishments that specialized in, or were best known for, either hard ice cream or soft-serve ice cream. Others may have differing opinions on my choices but, based on my personal experience on the days I visited the venues, I had great ice cream and service at each of these five (5) venues this year. In my view, you can’t go wrong with an ice cream treat from any of these five (5) venues. All establishments have active social media accounts (and some have websites) that you can check out for more information and hours and season of operation.

Pin Me To Pinterest!

Picnic Lunch in the Gazebo in St. Peter’s Bay, PEI
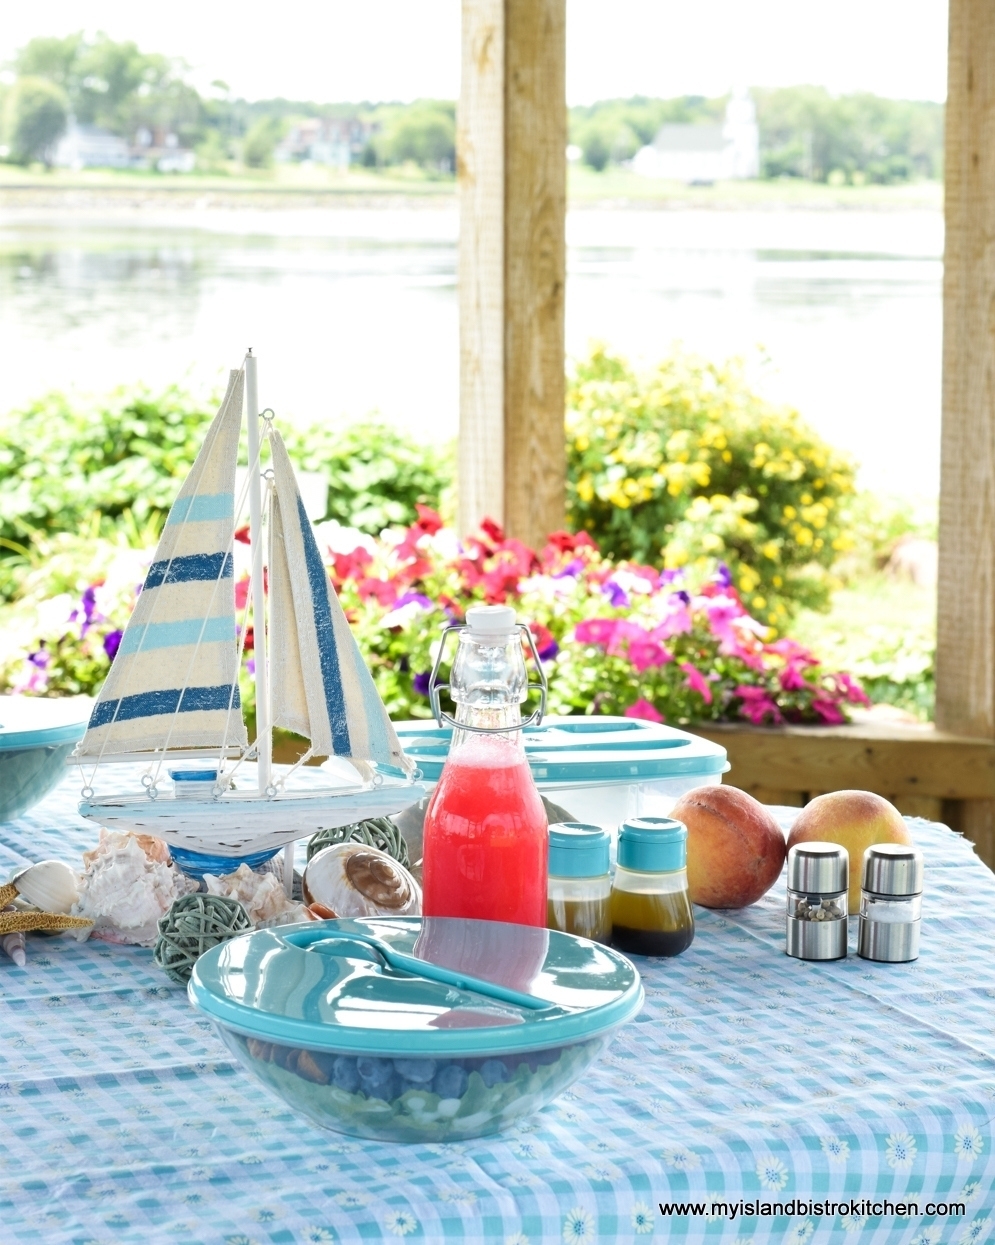
We thoroughly enjoy our home province of Prince Edward Island! Our special Island is small enough that we can get to know all parts of it quite well. In summer, especially, we do a lot of day trips all around the Island. Most times, for our day excursions, I pack a picnic lunch and we head off for the day. Sometimes, I have a particular picnic destination in mind and have a good idea if there will be a park nearby that would be suitable for a picnic and, other times, it’s totally by chance where we land at picnic time. Apart from the opportunity to dine outdoors in our all-too-short summer season here on Canada’s Atlantic Coast, transporting our own meal means we can eat wherever we are whenever we are hungry without having to try and be at a certain location where there is a restaurant which may, or may not, be able to accommodate dietary needs.
Our recent day trip took us to the north shore area of the eastern part of the Island. I love PEI lighthouses – the iconic red and white structures are dotted here and there all around the coast of the Island. I had been searching to find the St. Peter’s Bay Lighthouse for some time and was determined to find it this year. So, this was our primary destination on this particular day trip.

It wasn’t particularly easy to find this elusive lighthouse but, with assistance of an acquaintance who provided directions, I was able to locate it. Access is via a single lane red clay road with a canopy of trees. The adventure was indeed worth it!
After we enjoyed the vista surrounding the lighthouse, not to mention the beautiful beach, we decided it was time to find a place to set out our picnic.

I knew of the small park by the water in nearby St. Peter’s Bay where I had had a picnic before (click here to view those photos). What I didn’t recall was the lovely gazebo at this site. This find was a blessing since the temperature had soared to 28C by this time and it was way too hot to eat out in the open with no shelter!
When we arrived, we found the large gazebo unoccupied so immediately went about setting out our picnic lunch. Someone had planted beautiful flowers in boxes around the gazebo and that formed a ready backdrop that I could not have planned or hoped for. Bonus! See how gorgeous the flowers look in the photo below and how they fortuitously match my color scheme and complement the color of the lemonade!
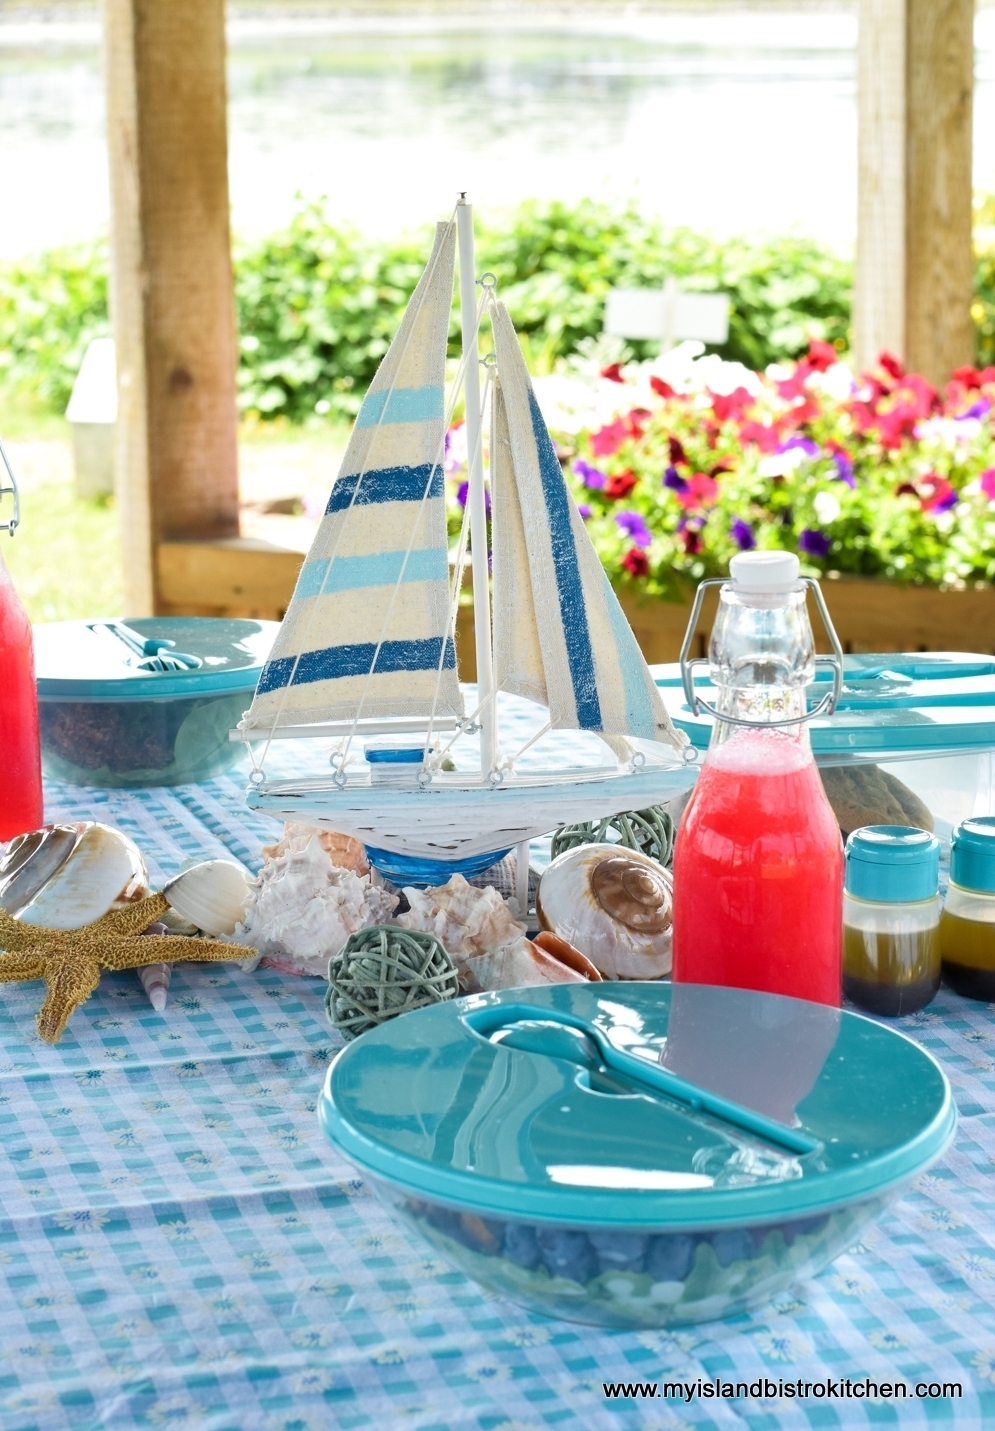
The color theme of my picnic was turquoise, always a summery color. The burst of hot pink in the drink certainly adds a punch of color!
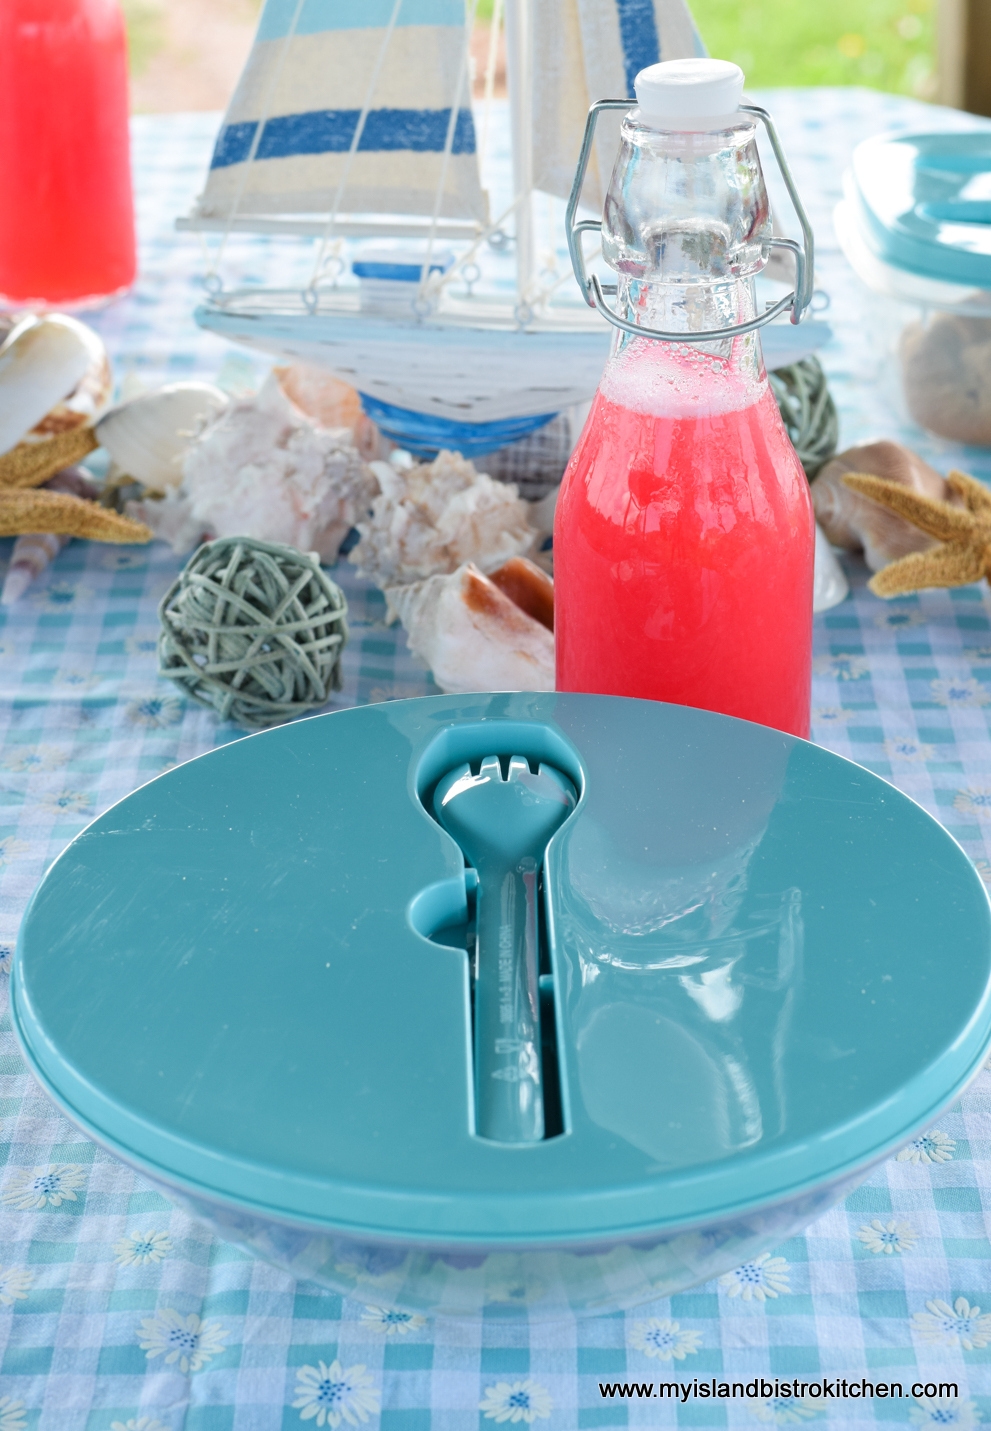
I found the bowls, matching small salad dressing containers, and rectangular dishes at Walmart. Not only are they all color-coordinated in turquoise blue but the dishes come with the needed cutlery built in, a real bonus because there is no need to remember to bring cutlery separately.
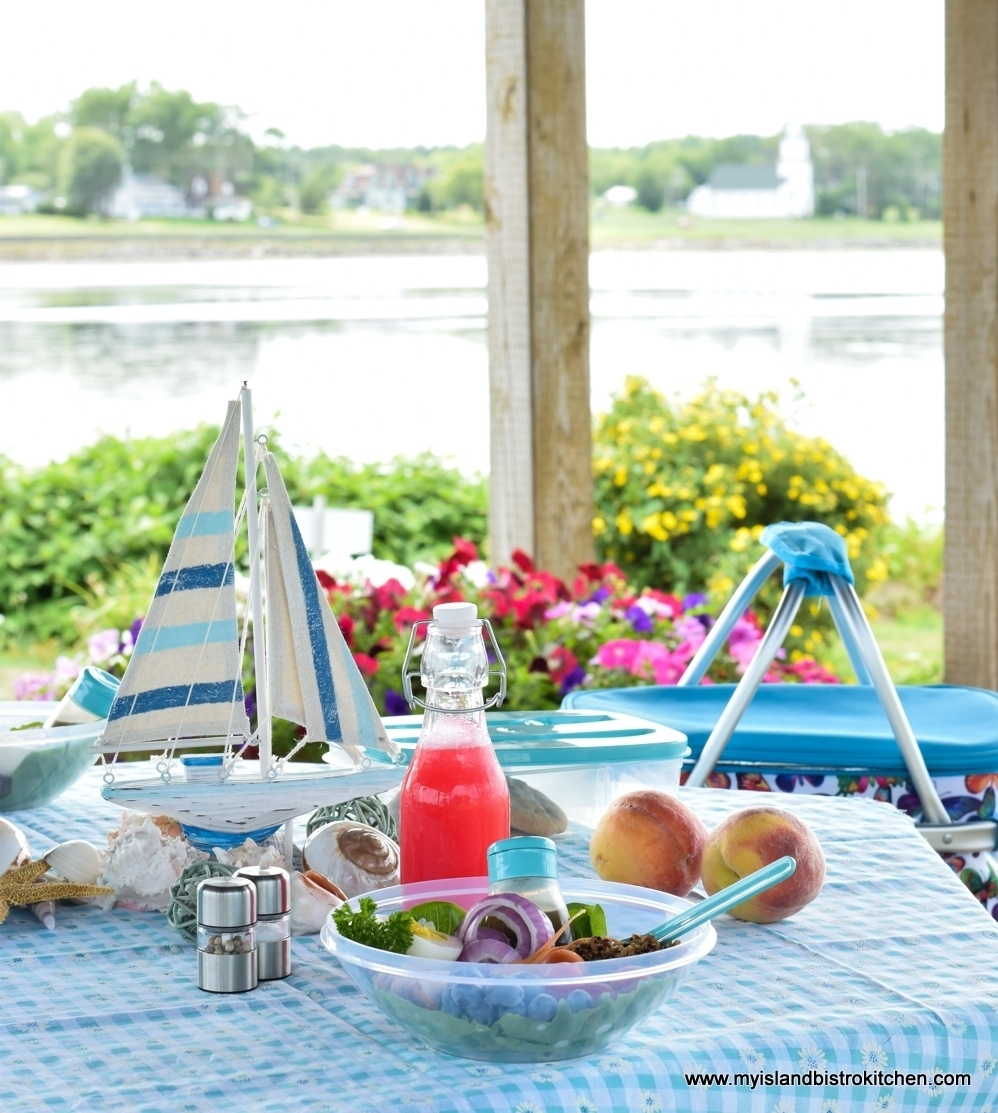
The bowls match my insulated picnic basket. A blue-checked tablecloth and checkered napkins, already part of my picnic arsenal, were found to match as well.
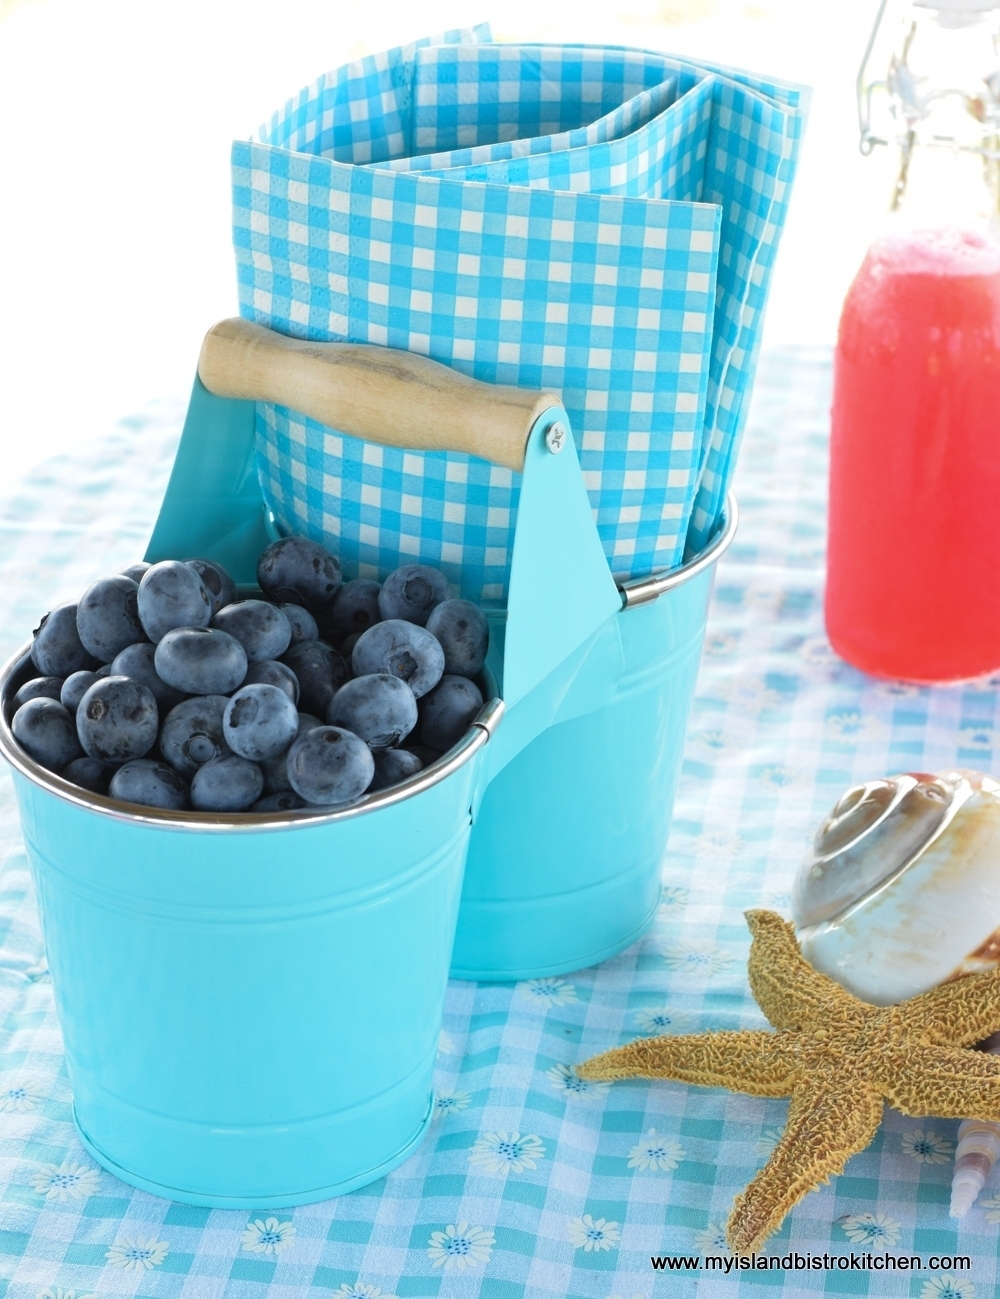
A small model sailboat in matching colors and a collection of shells formed the centerpiece for my tablescape. I figure if I am going to dine outside, I might as well go all the way and set the table attractively! It makes for a more fun and memorable picnic.
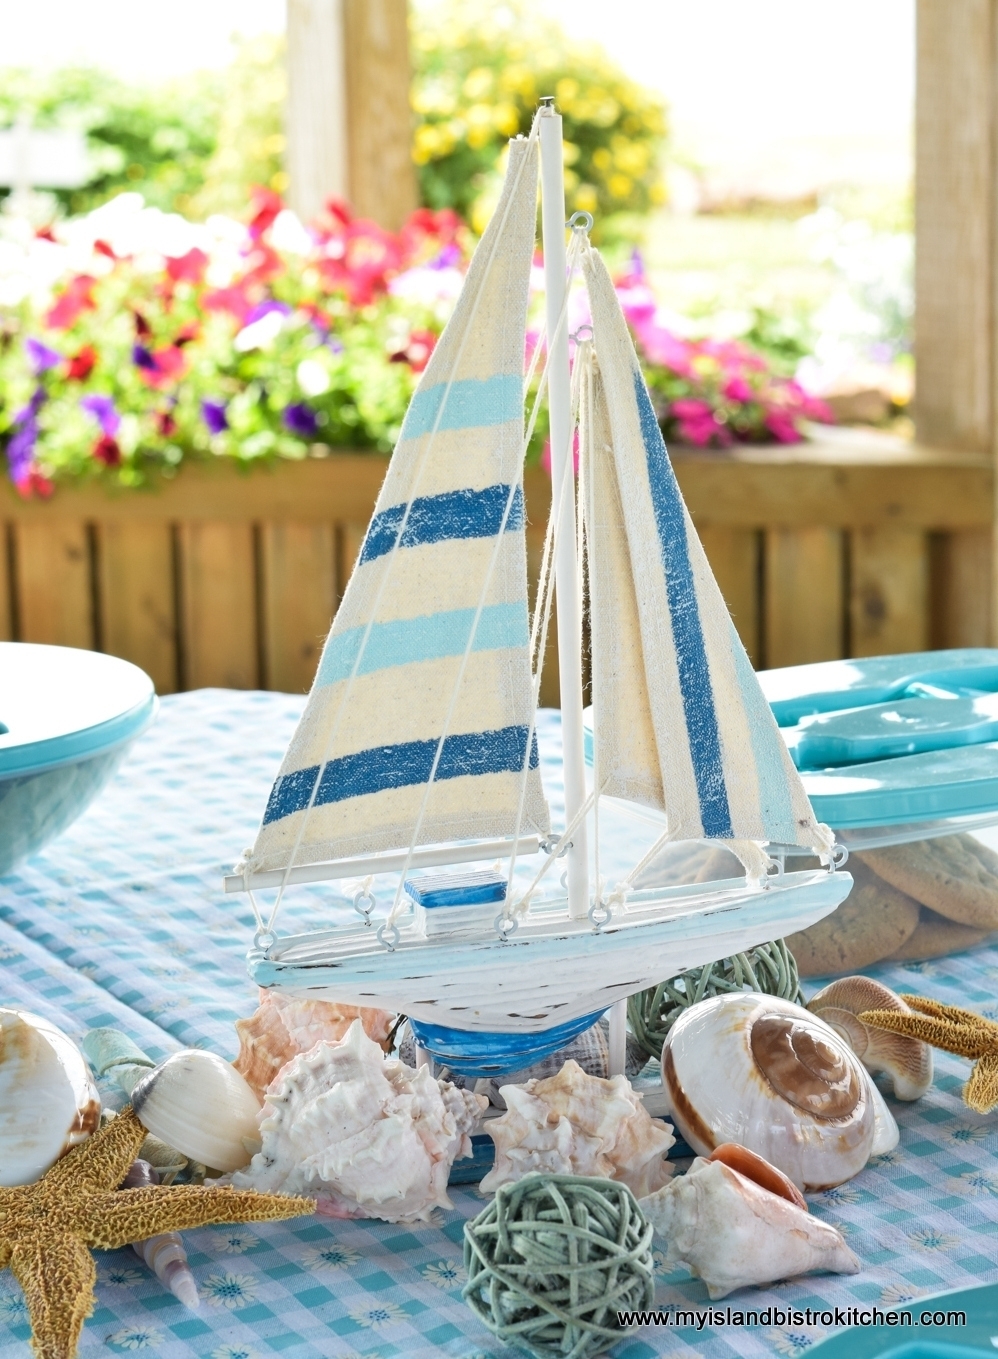
For lunch, I prepared my version of a picnic buddha bowl, ensuring it contained contents that would travel. There is no one right way to make a buddha bowl but, typically, they contain some kind of grain (preferably high fibre), veggies and fruit, a protein source, and greens. I began by layering the bowl with lettuce from our garden. Our garden has been a good producer this year so the cherry tomatoes, celery (it’s there but it’s hiding in the photo), and carrots are garden-fresh. The grain I chose to use was a tri-colored quinoa. To make the meal more substantial and to add some protein, I included a half hard boiled egg in each bowl. The addition of the red onion gives a flavor and color boost. I love how colorful and healthy this salad is!
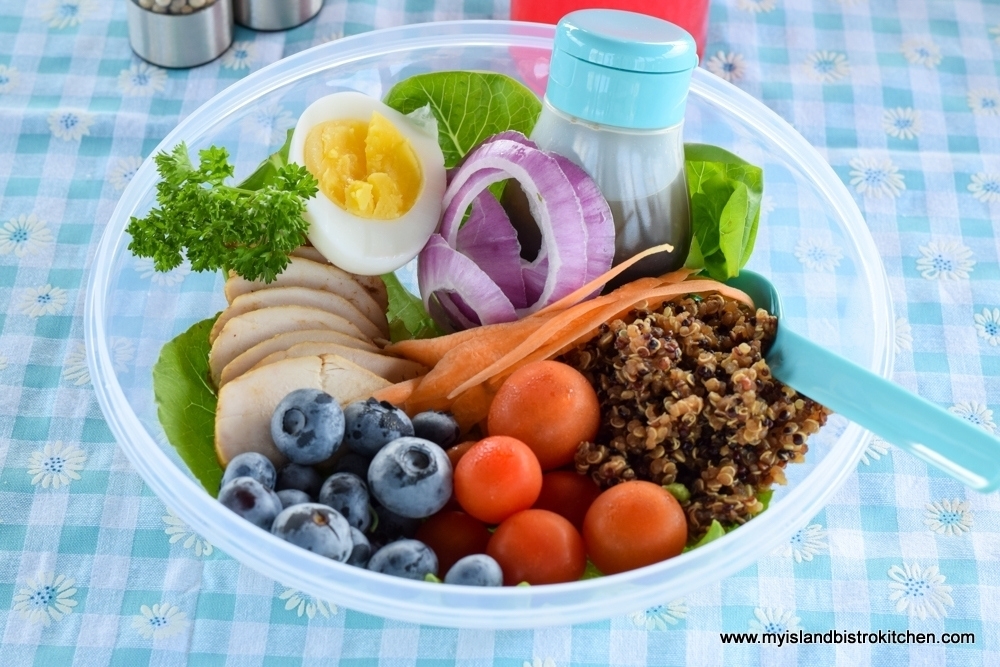
I often brine and roast boneless skinless chicken breasts for various uses and they are perfect sliced for a main meal salad or as added protein in a buddah bowl.
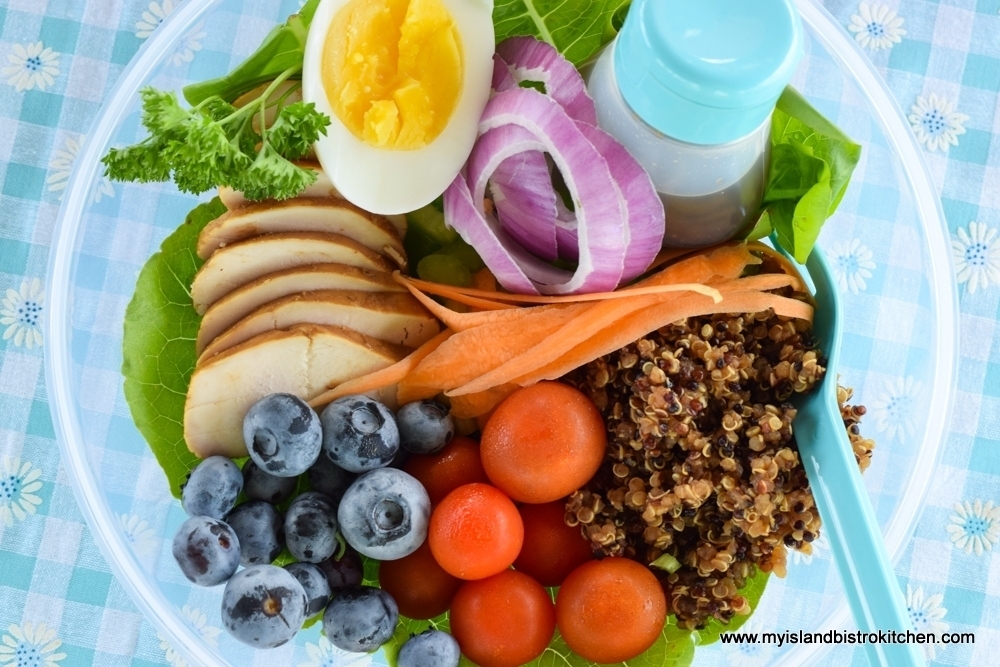
Some freshly picked blueberries from the Tryon Blueberries U-pick added a bit of color, texture, and sweetness to the salad. A simple balsamic dressing was all that was needed to finish the salad. This type of meal is great for a picnic. The meal is completely prepped at home and contained in a bowl with the dressing added at the time of serving. The meal travels well – I use several ice packs in my insulated picnic basket to keep the food good and cold. At meal time, it is simply a matter of removing the cover from each diner’s bowl and the meal is ready to go. Clean-up is super easy because the covers pop back on to the bowls and the utensils fit inside the bowls so there are no messy plates and utensils.
These high bush blueberries are great snacking berries and I often pack them in my picnic basket when the berries are in season. Today, their blue color matches my color scheme, too!
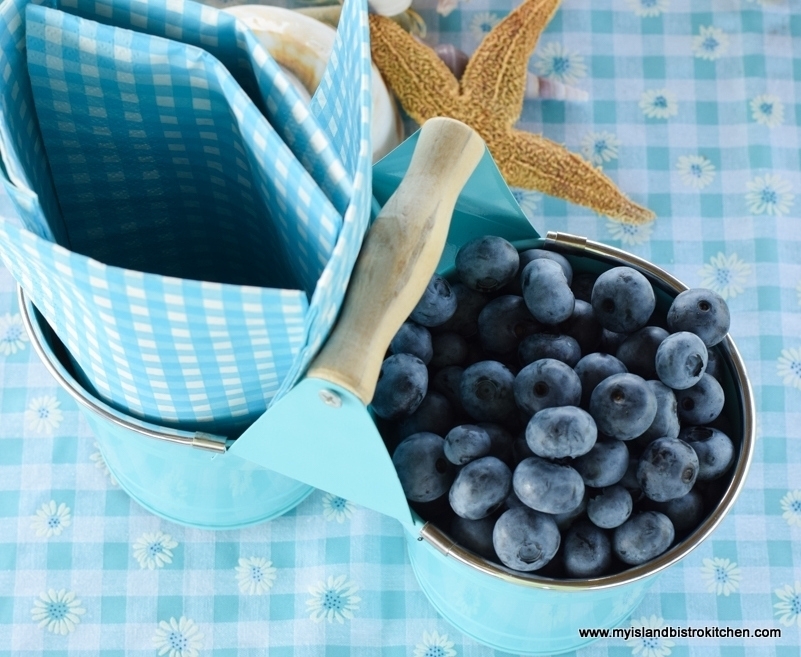
Peanut butter cookies are always a great stand-by picnic treat. They are easy to make, easy to transport, and satisfy the sweet tooth. For my recipe, click here.
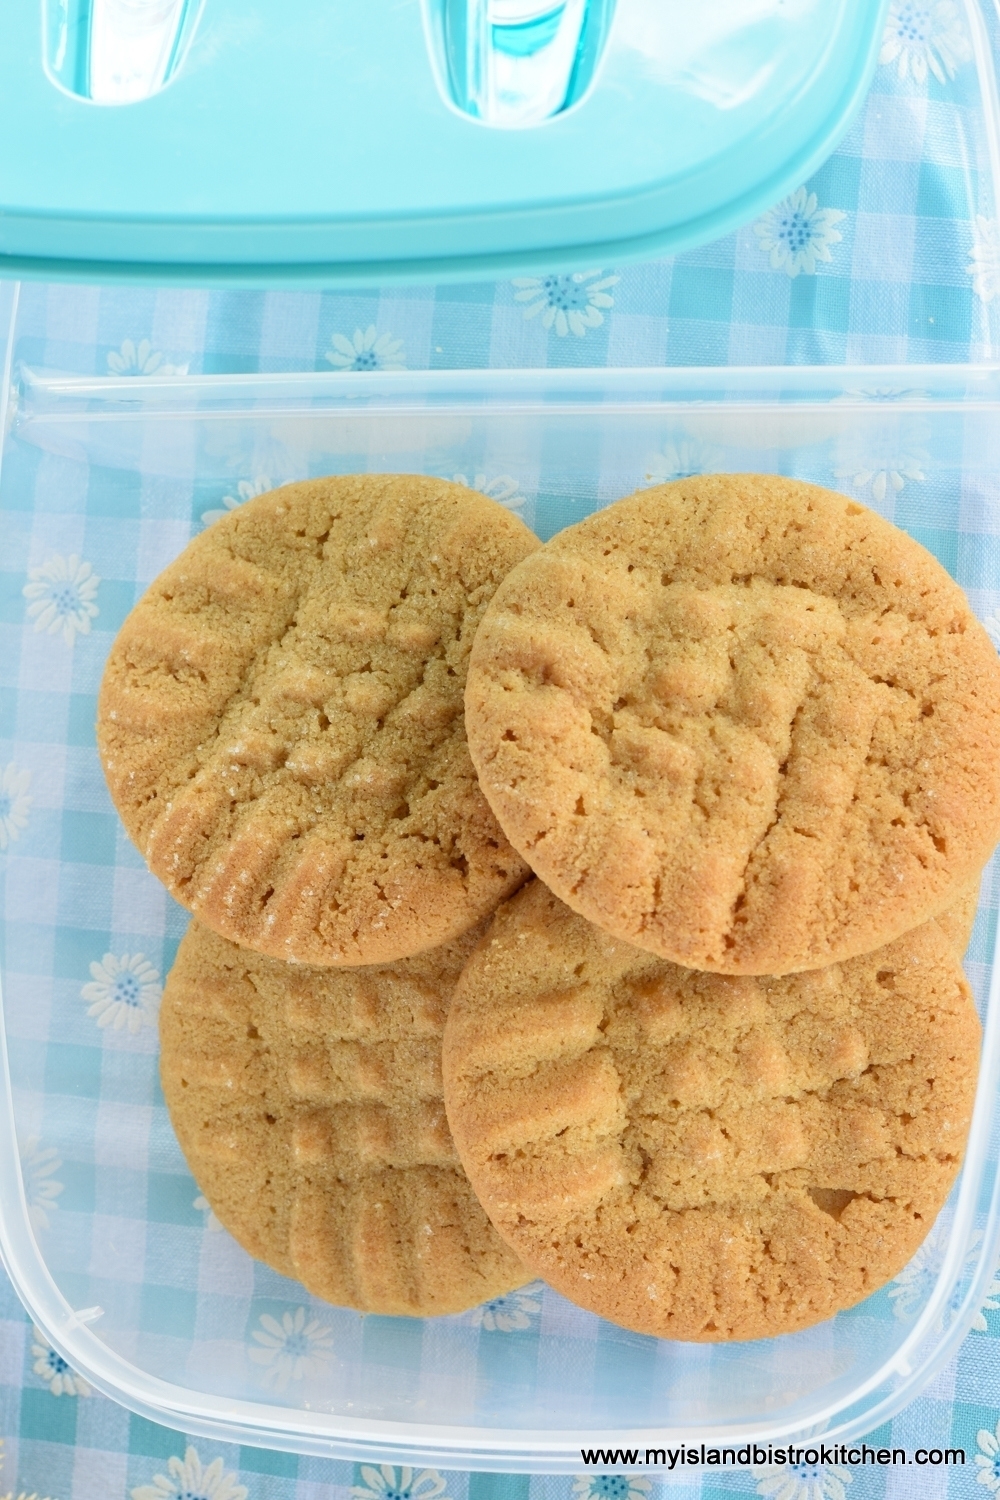
Peaches are also a great fruit to take along on picnics. I love to incorporate the flavors of summer into my picnic menus.
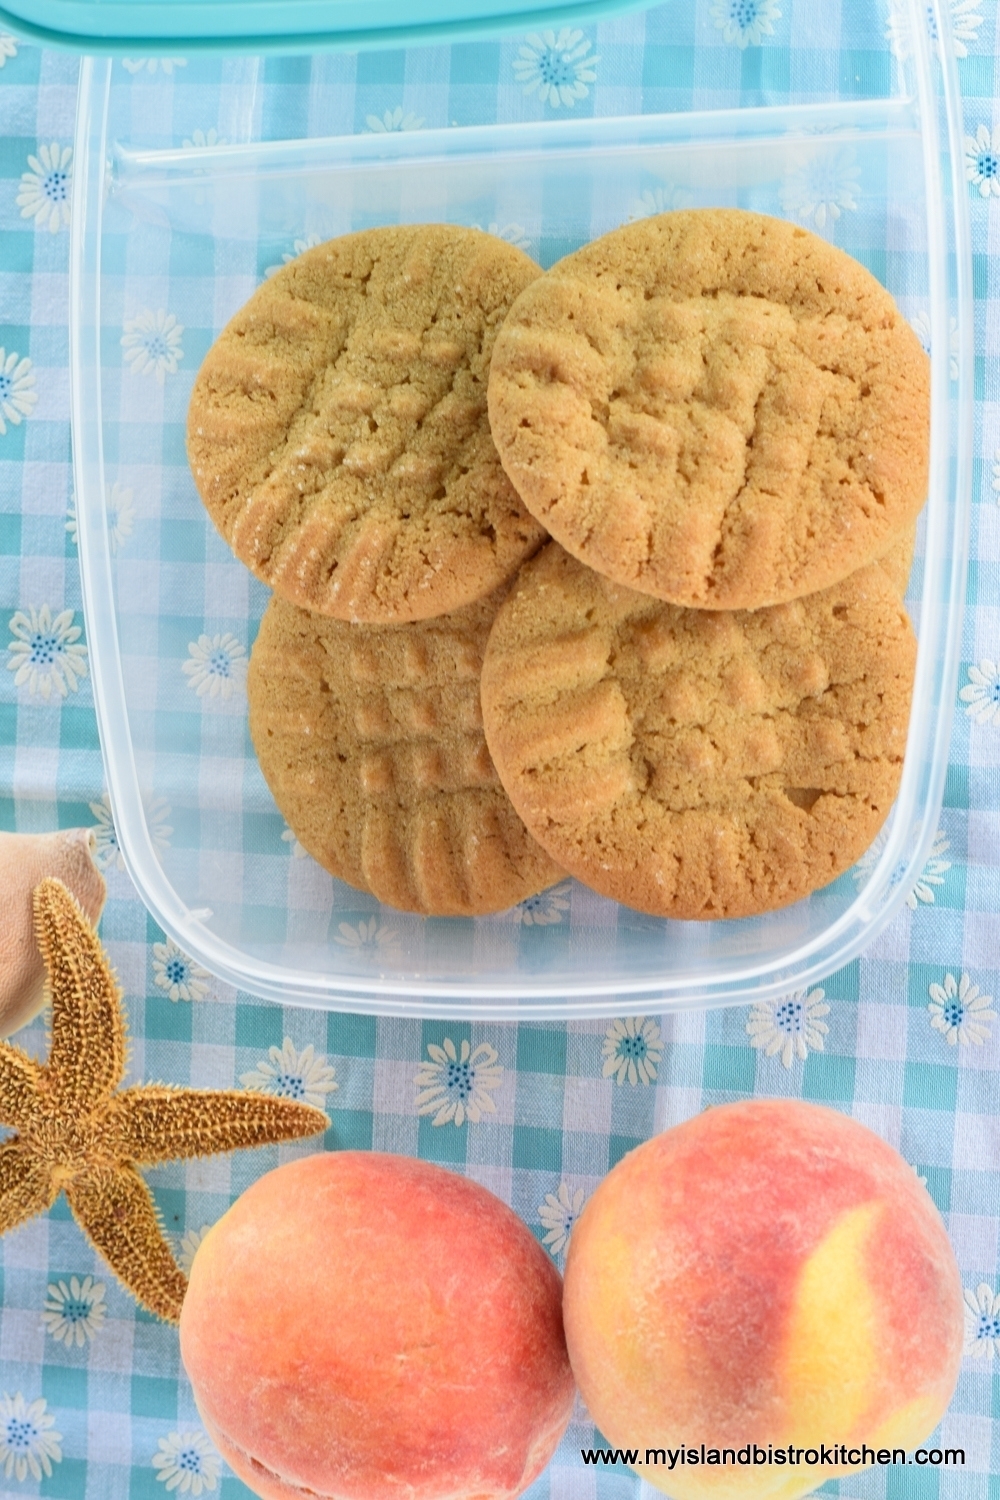
I love the little bottles in the photo below. When I made the rhubarb lemonade earlier in the summer, I froze some in these bottles to have it ready for picnics. The bottles help to keep the food cool as we travel and they quickly finish thawing completely when removed from the cooler as the picnic is being laid out. This is a super tasty (and colorful) summer drink – you can access my recipe by clicking here.
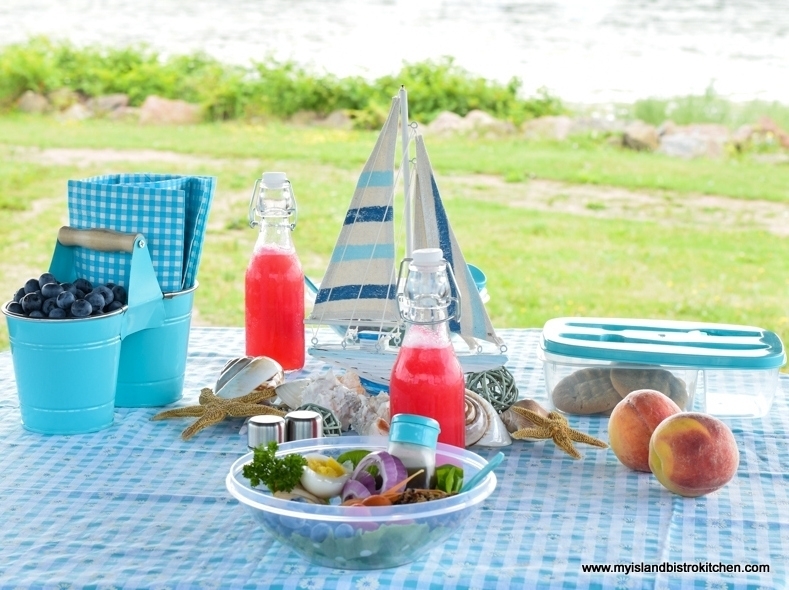
I hope you have enjoyed a peek into my picnic in the gazebo in St. Peter’s Bay, PEI! The Island has many picturesque places suitable for picnics and each comes with its own unique view.
Pin Me To Pinterest!
For other picnic inspiration from My Island Bistro Kitchen, check out these:
Picnic by the Confederation Bridge in PEI
Sliders and Salad Sunday Picnic
A PEI Picnic in the Park
Casual Summer Picnic
A Canada Day Picnic in St. Peter’s Bay, PEI
A Casual Summer Afternoon Picnic
A Beach-Themed Picnic
A Pretty Pink Picnic
Canada Day Picnic
Oh Canada! A Picnic to Celebrate Canada Day
Labour Day Picnic by the PEI Seaside with Lobster Croissants on the Menu
A Plaid Picnic on the Verandah
Locovore’s Picnic – Food Day Canada 2016
Late Summer Charcuterie Picnic
Sunday Afternoon Wine and Cheese Picnic
Old Country Rose Afternoon Tea Picnic
Cooking Classes at The Table Culinary Studio in PEI
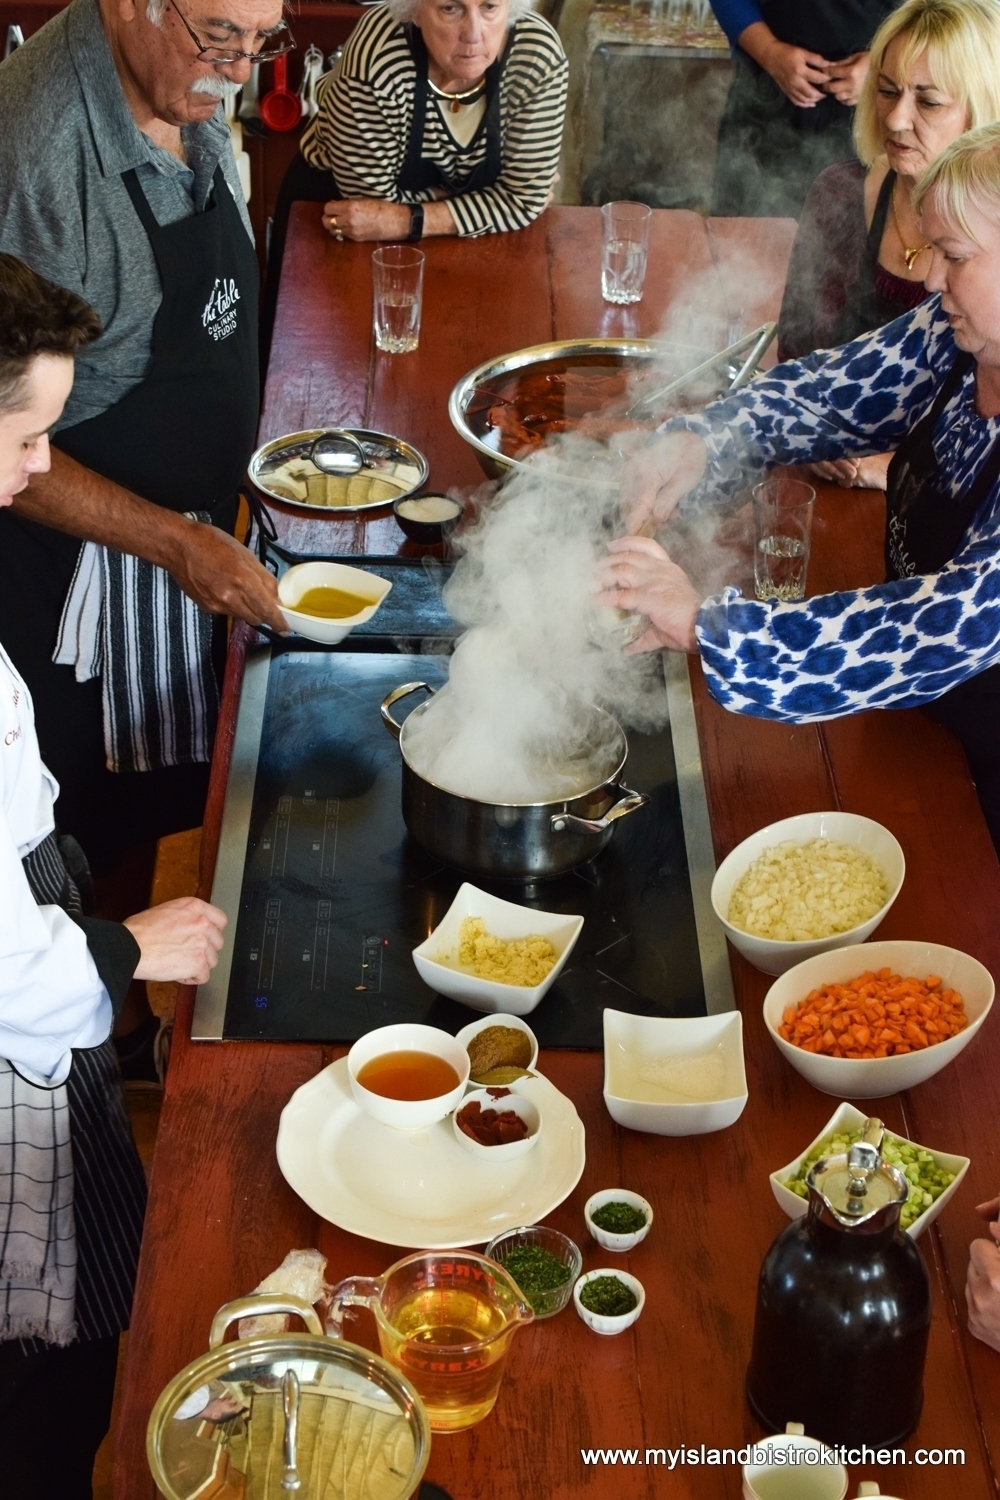
Tucked away on the Graham’s Road (Route 8), in the picturesque rural community of New London, Prince Edward Island, you will find The Table Culinary Studio that offers short (between 3.5 and 4.5 hours) cooking classes that focus primarily on cooking with fresh, local Island foods. This experience is a great way to learn about the Island food culture.
The rural setting is quintessential PEI. Fields in shades of green contrasted with the Island’s iconic red soil take visitors to the heart of some of the Island’s most fertile farm land.

Just down the road is New London Harbour, home to a small lobster fishing fleet and the grounds for other seafood like oysters, quahogs, and mussels. Not far away, quality food can be sourced from dairy and beef farms, organic farmers, beekeepers, cheesemakers, and garlic growers. Could there be a more authentic location for a PEI culinary studio!
While it is no secret that PEI has lovely scenery to enjoy, spectacular beaches and golf courses, and many attractions to keep visitors busy exploring our Island, many come to the Island knowing that PEI offers great food from the land and sea.

Our potatoes, oysters, mussels, and lobster, in particular, are shipped all over the world and these Island products are well known, respected, and sought after for their high quality.
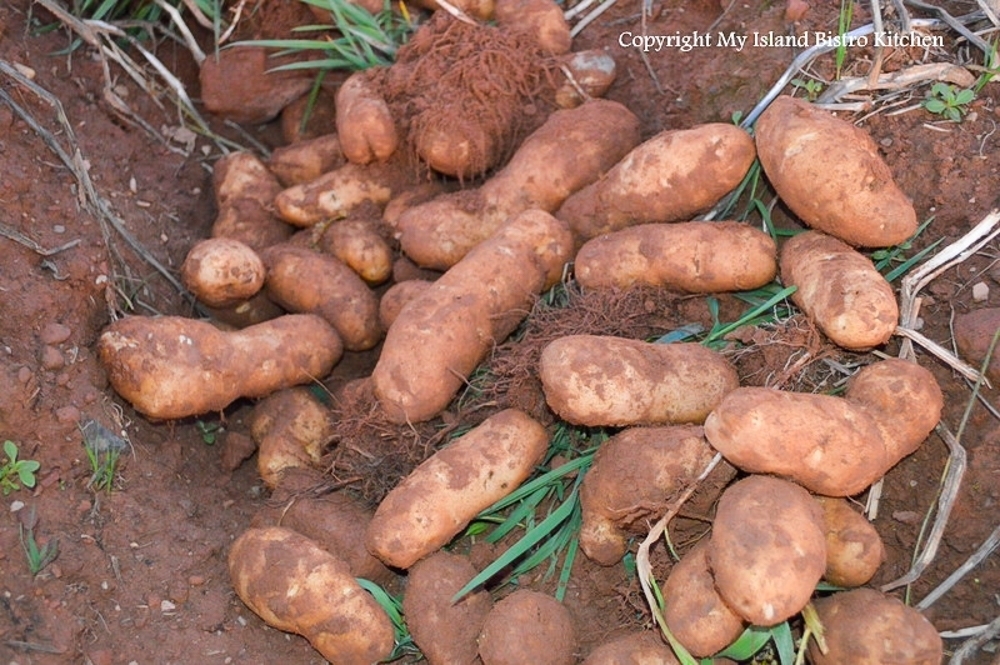
So, what better way to experience the Island foods first hand than to take a short cooking class to learn more about them and how they can be prepared.
The Table Culinary Studio (formerly Annie’s Table) has been in operation since 2012, offering an array of short cooking classes on a myriad of topics. Under new ownership in 2016, The Table, with owner/chef Derrick Hoare at the helm, continues with the tradition of engaging culinary aficionados in ways to prepare local Island foods such as lobster, oysters, mussels, scallops, beef, cheese, and so forth. The focus is very much on using fresh local ingredients that are in season and, by extension, acquainting participants with the rich Island food culture.
The Table offers a number of hands-on cooking classes that include (at the time of writing) Bounty of the Sea, Black Gold (cured garlic), Farm to Table, Marilla’s Table, Hive to Table, Let Them Eat Beef, Oyster Obsession, Say Cheese, Vivacious Vegan, Applelicious, Artisan Bread, Gluten Free Gourmet, and Helping Hands. The Table operates seasonally from May to October to coincide with the Island’s tourism season. Several of the cooking classes involve field trips to farms and other local food producers to see, first-hand, how food is grown or produced and to pick up some local ingredients to bring back to The Table to be used in the class that follows. This form of experiential tourism provides the opportunity for the learners to create wonderful memories of their vacation time in PEI, connect directly with PEI food producers, and to learn more about the Island’s food culture and the role that farming, fishing, and other food production play in the Island’s economy and way of life.
I recently participated in the “Bounty of the Sea” cooking class at The Table which is located within walking distance to the house in which famed Island authoress Lucy Maud Montgomery was born and not far by vehicle to the resort municipality of Cavendish.

But, before I take you on the adventure with me, here is a brief description of the venue and what a cooking class is like at The Table.

What makes this culinary studio unique is its venue. It is located in a small white repurposed country church, very typical of so many seen in several Island communities. Inside the church, the pews have been removed and, in their place, is a large harvest table where, in a few hours time, class participants will gather to enjoy the lavish spread of the morning’s cooking. The church’s altar has been elevated to a loft setting and the building is tastefully furnished.
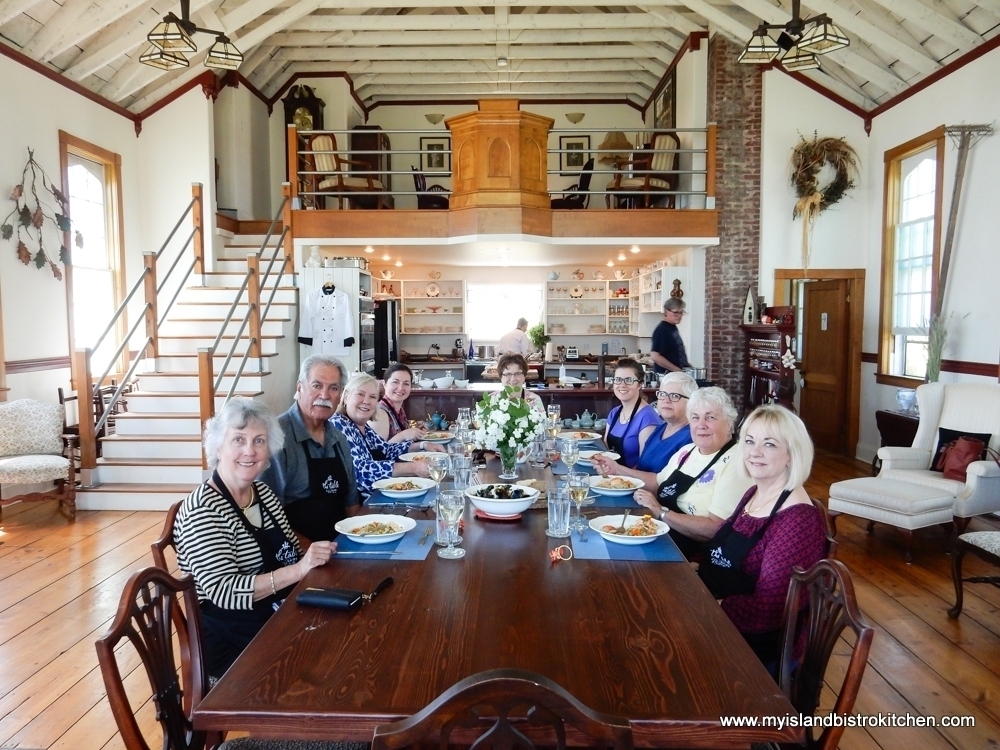
The original altar and choir loft locations have been transformed into an open teaching kitchen.
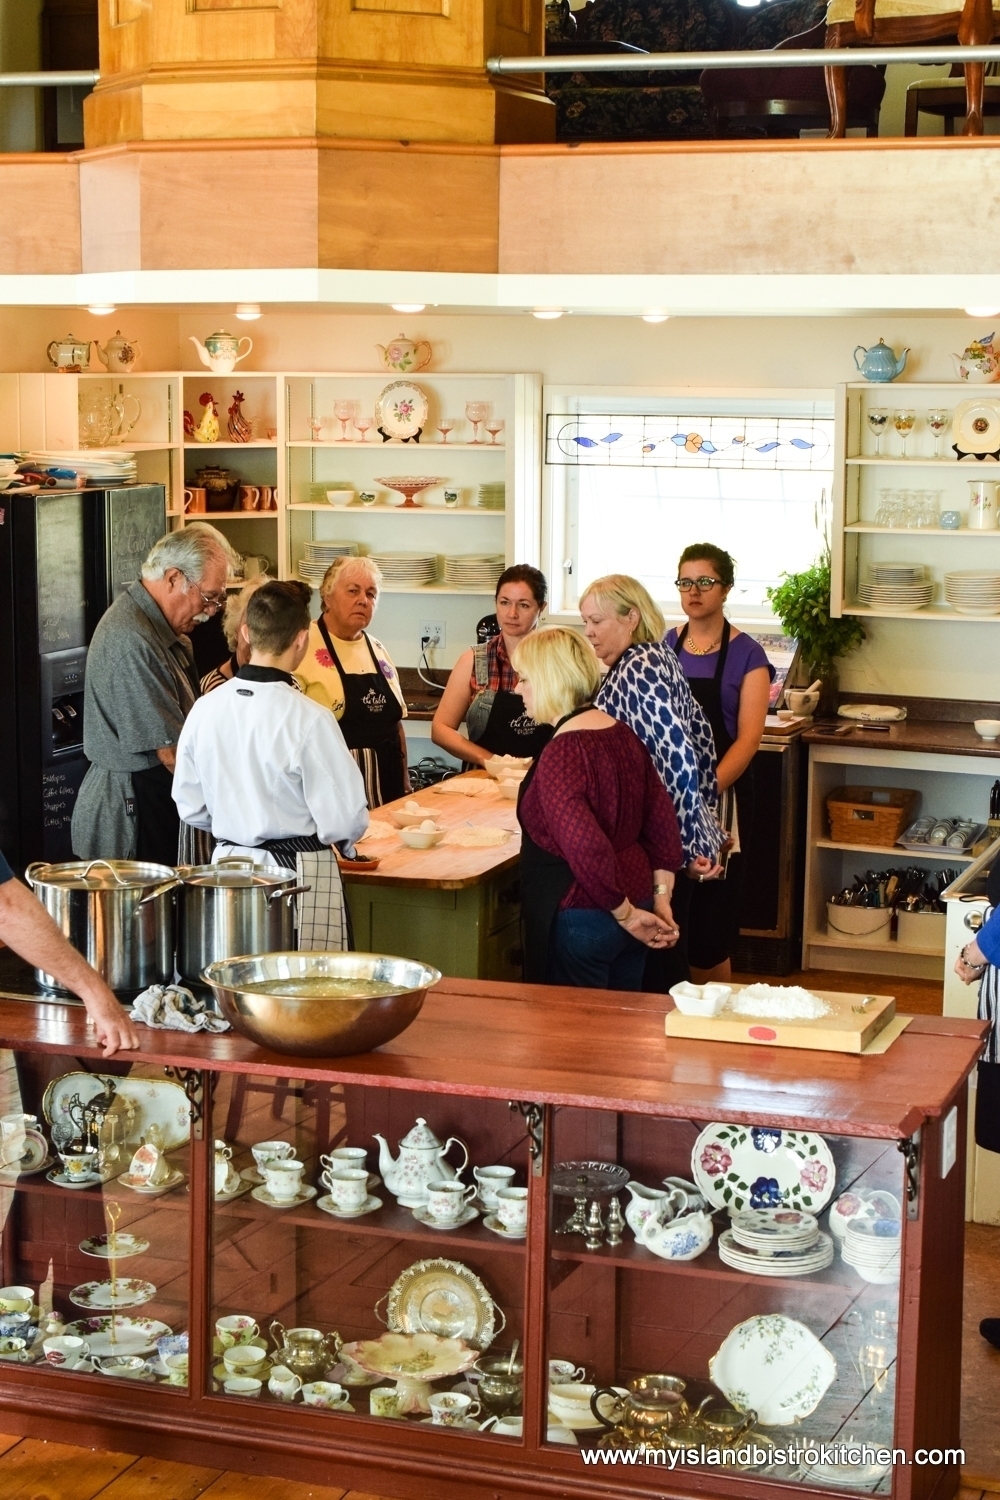
Class size is small and intimate – only a maximum of 10 participants per cooking class. This ensures that each person has a front row view as the culinary team teaches the cooking or baking techniques in the open-style kitchen. It also allows for participants to be actively engaged and participating in the cooking or baking activities.
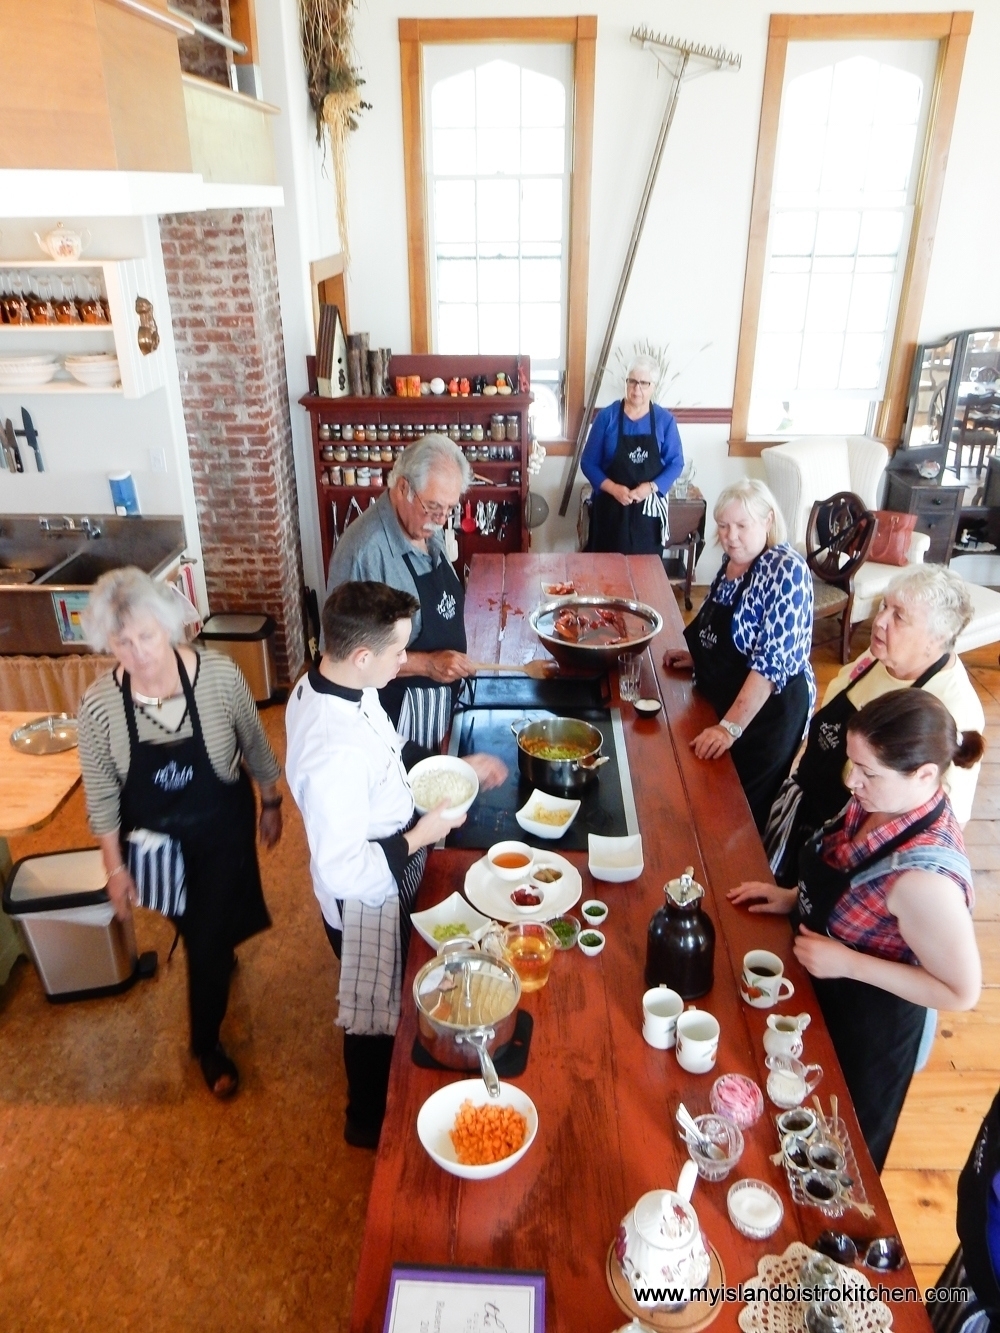
The culinary team consists of owner/chef Derrick Hoare, Executive Chef Michael Bradley, and Events Coordinator Christine Morgan. The atmosphere is unhurried and very sociable. Strangers become friends over the commonality of food. With a growing hunger for knowledge about where one’s food comes from and how it is grown, produced, or harvested, cooking classes appeal to most age demographics and skill levels. No need to worry if you are not an experienced or accomplished cook – the classes offer something for everyone, including a scrumptious meal after the class in the beautifully appointed old country church.
So, now on to my adventure as a participant in The Table’s “Bounty of the Sea” cooking class. After morning coffee upon arrival, everyone got suited up with their aprons and side towels.
The class began with Chef Derrick giving a brief talk on lobster fishing on PEI, recounting his own experiences going out on a fishing boat to learn, first-hand, about lobster fishing on the Island. Chef Michael then gave a short biology lesson on how to identify the gender of a lobster.

It’s a good thing those lobsters were banded because, if you find yourself in the unfortunate situation of having a finger caught in the claws of one, you are likely to end up with a broken finger – they’re strong!
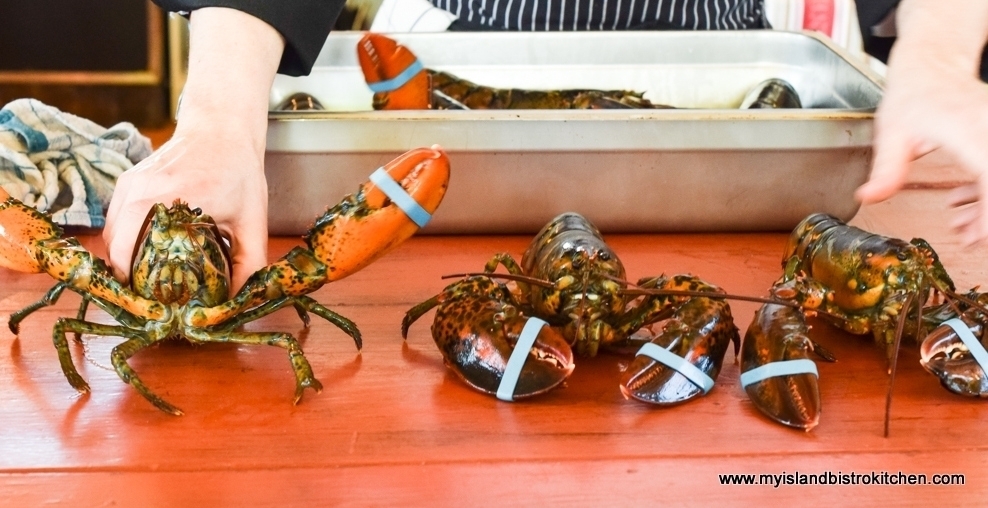
Everyone was given a lobster and instructed on how to carefully de-band them before placing them in hot water to be cooked.
Chef Derrick kept a watchful eye on the lobsters so they were removed from the pot at just the right time.
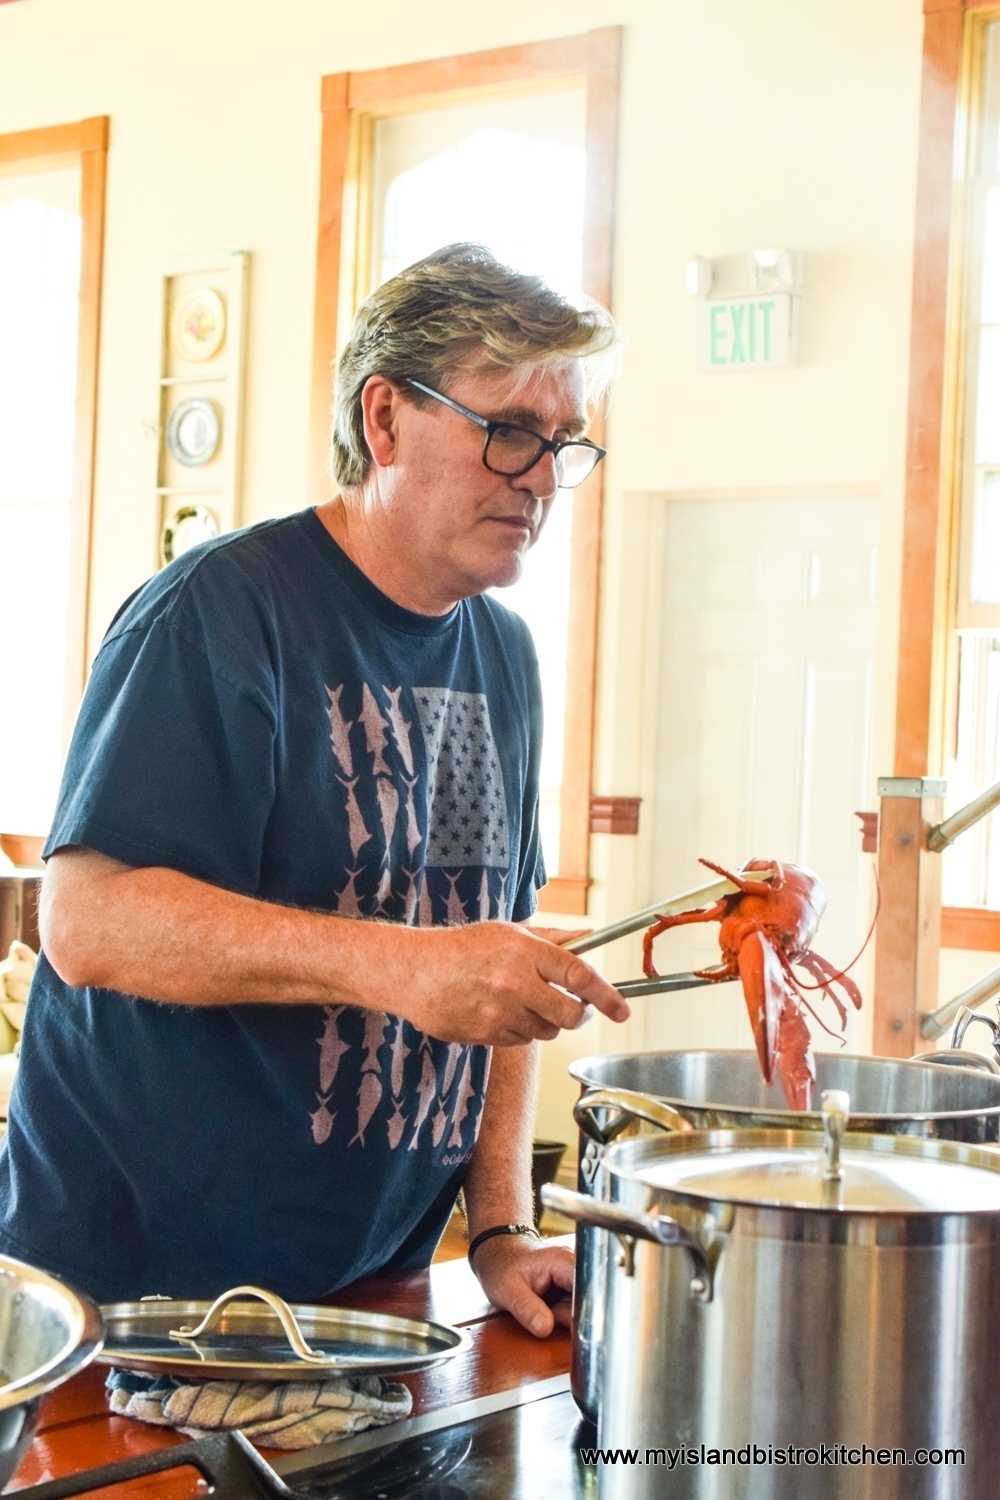
Next came the lesson on how to crack open a lobster.
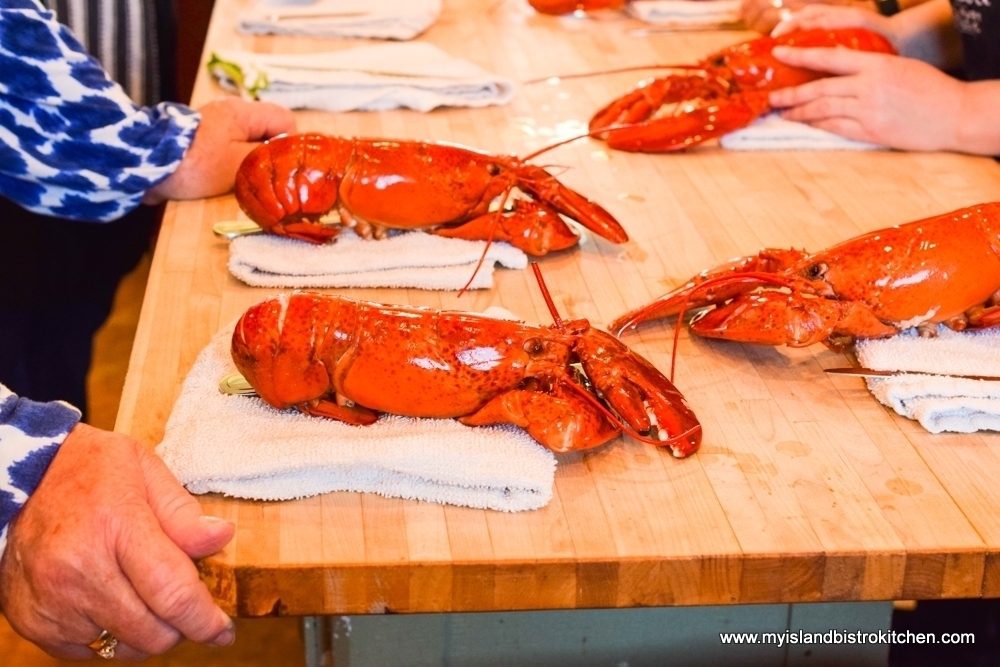
Chef Michael capably gave instructions as each student cracked open a lobster to reveal the succulent meat inside.
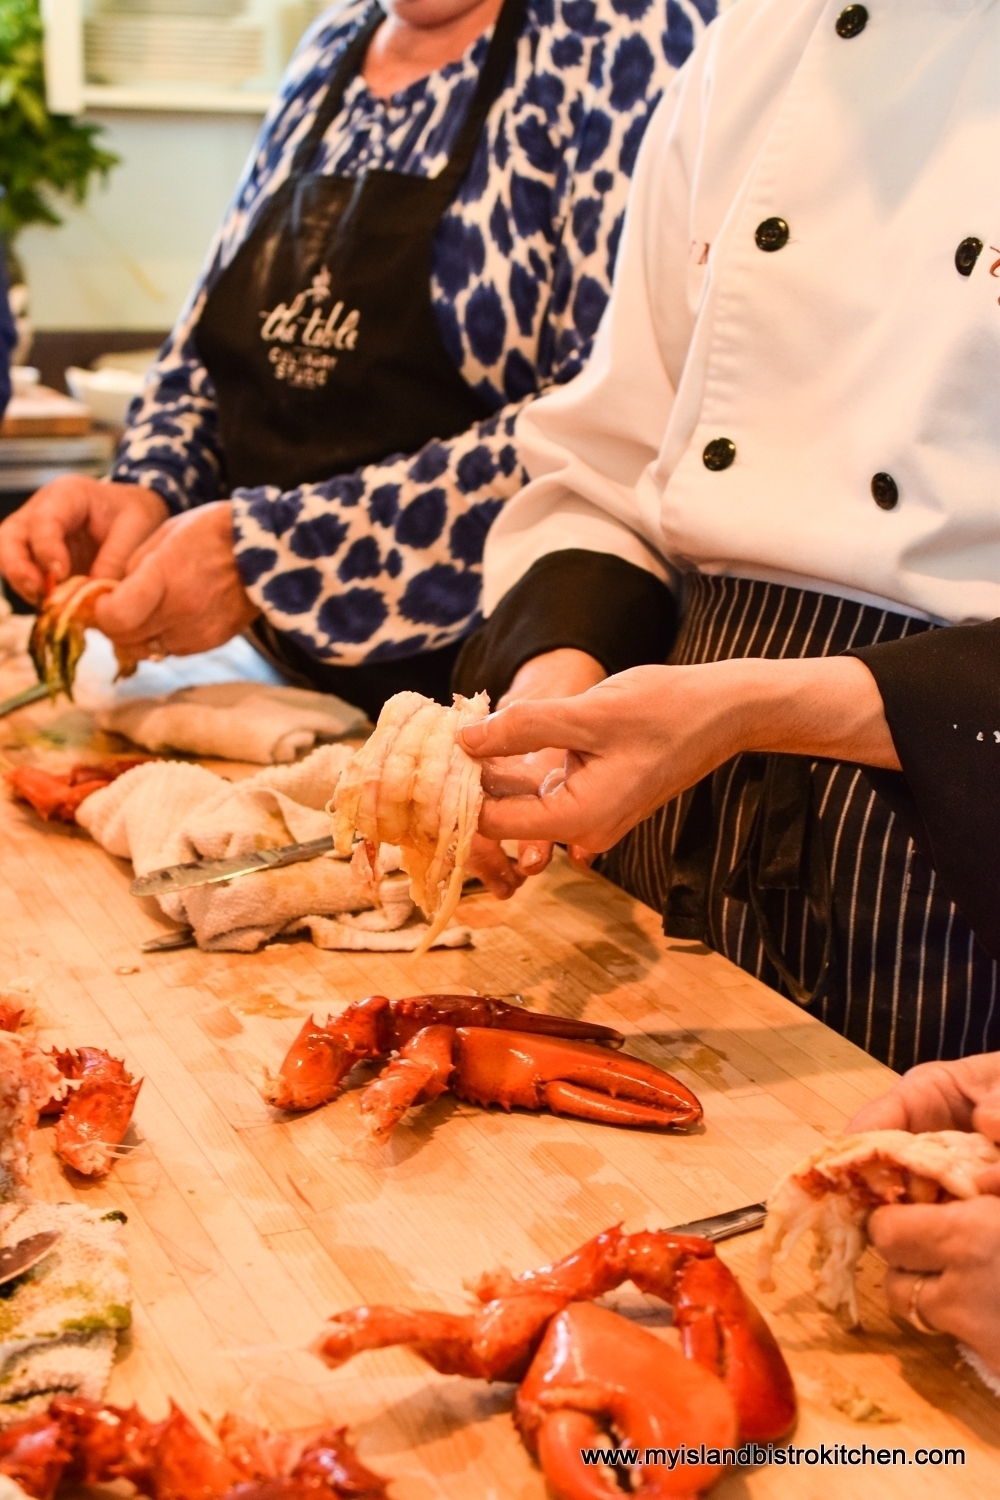
Yes, a basic table knife will do the trick!

Having never made homemade pasta before, I was particularly interested in the procedure.
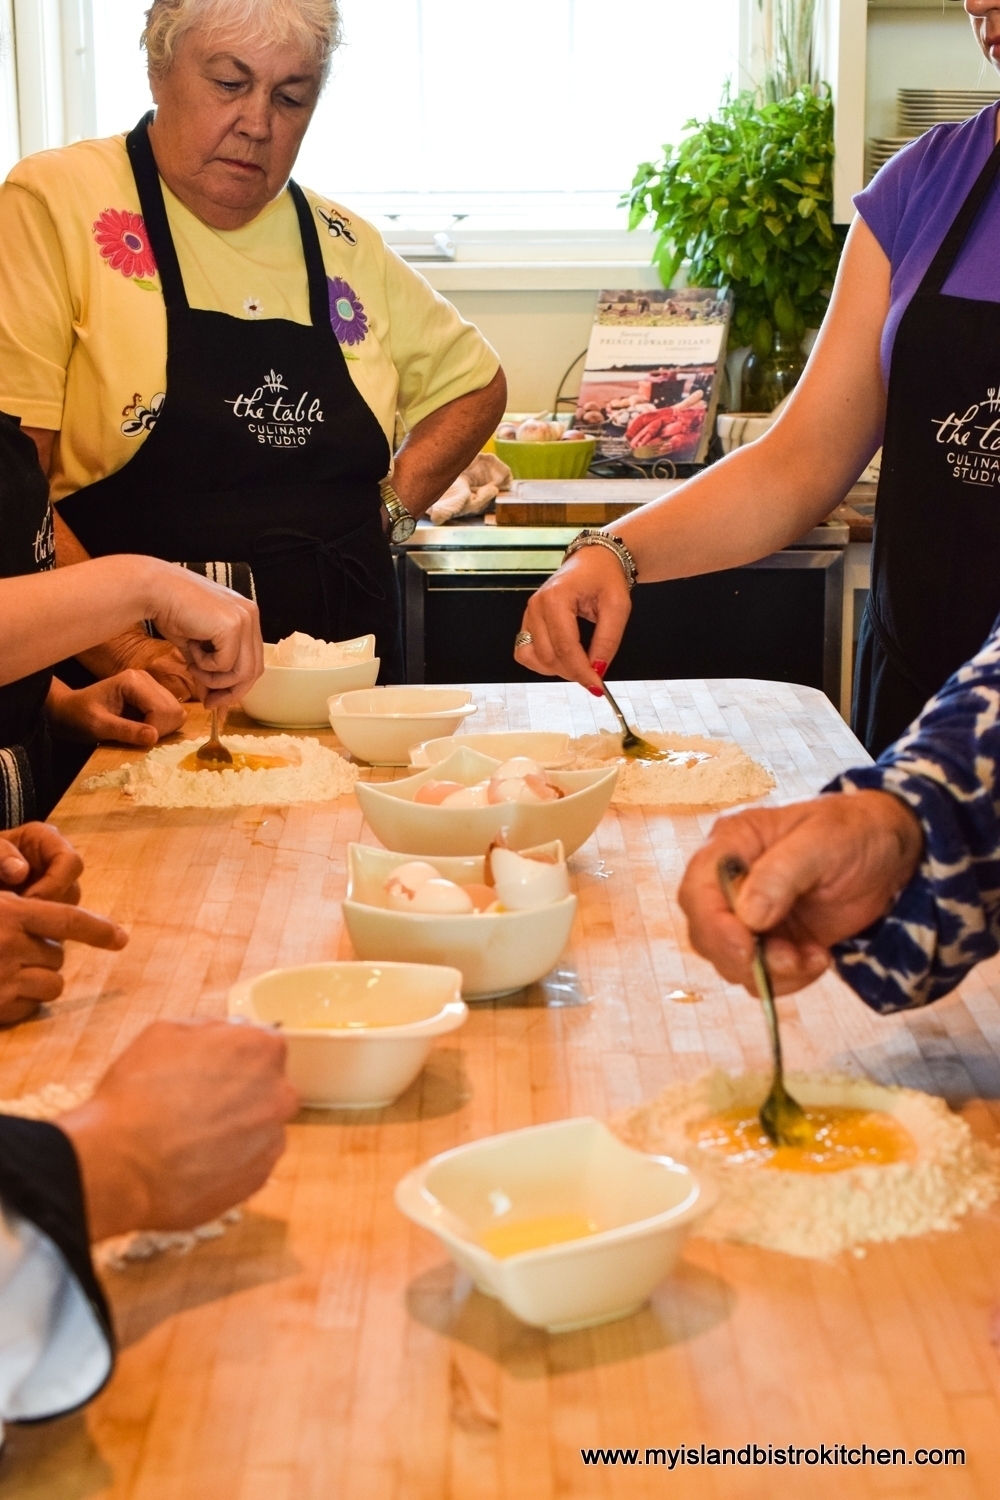
The Table is very accommodating to class participants who have dietary restrictions. On this day, there were two participants who were gluten-intolerant so a separate station on an adjacent workspace was set up for them to make the gluten-free pasta and Chef Michael alternated between the two groups giving information and instruction on pasta making.
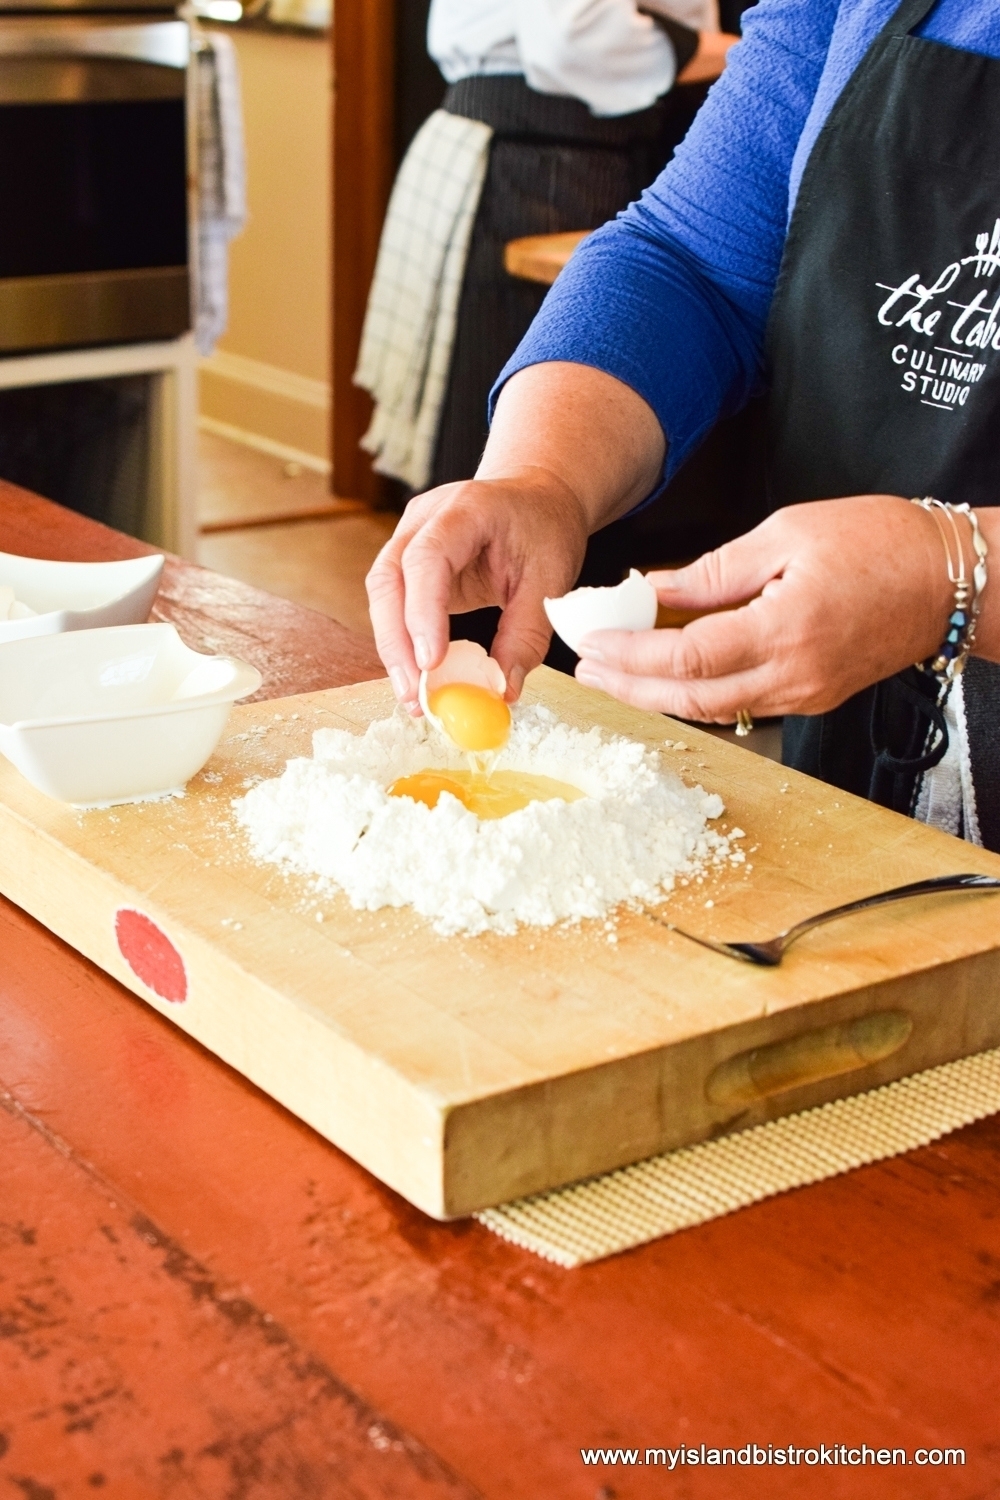
Black garlic from nearby Eureka Garlic, not far from Kensington, was used in the pasta to give a unique flavour. If you have never tasted black garlic, it’s not nearly as garlicky as you might think – I personally think it tastes like a cross between a fig and a prune. You can check out my story here on Eureka Garlic. The chopped black garlic was kneaded into the pasta dough.
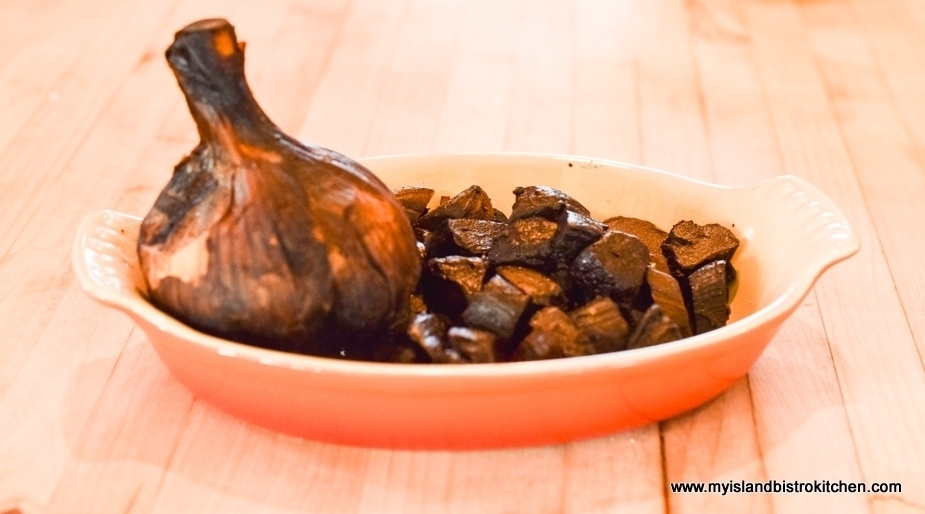
The pasta dough was cut and gathered into circles ready to be dropped into the cooking pot.
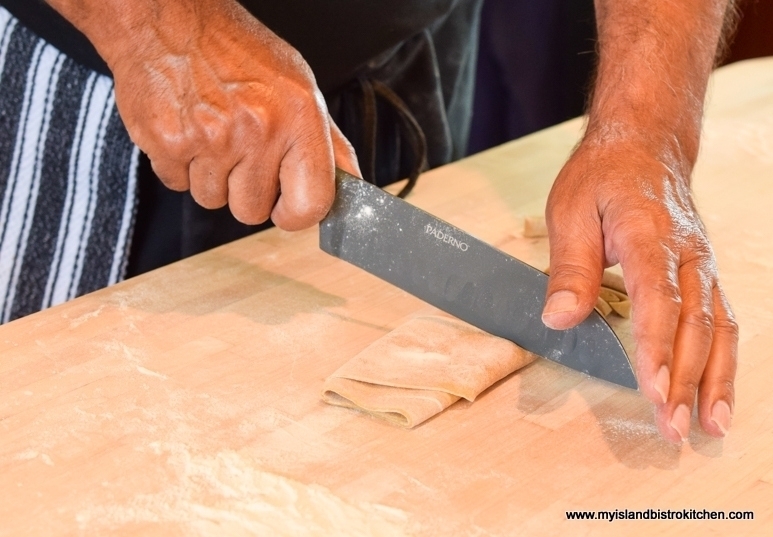
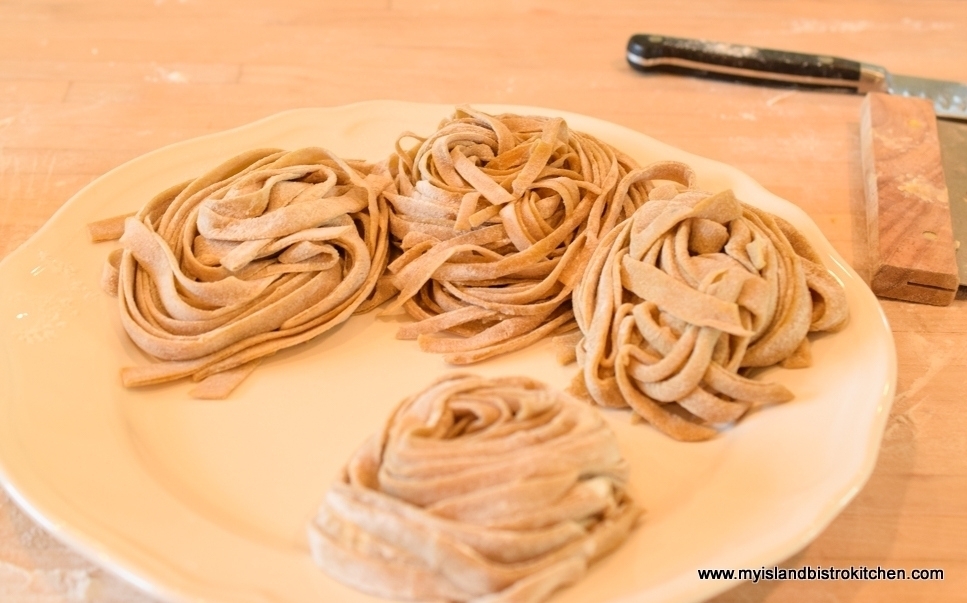
With the pasta made, we took a brief break from the food prep to listen to Christine explain how mussels are grown and harvested on PEI.
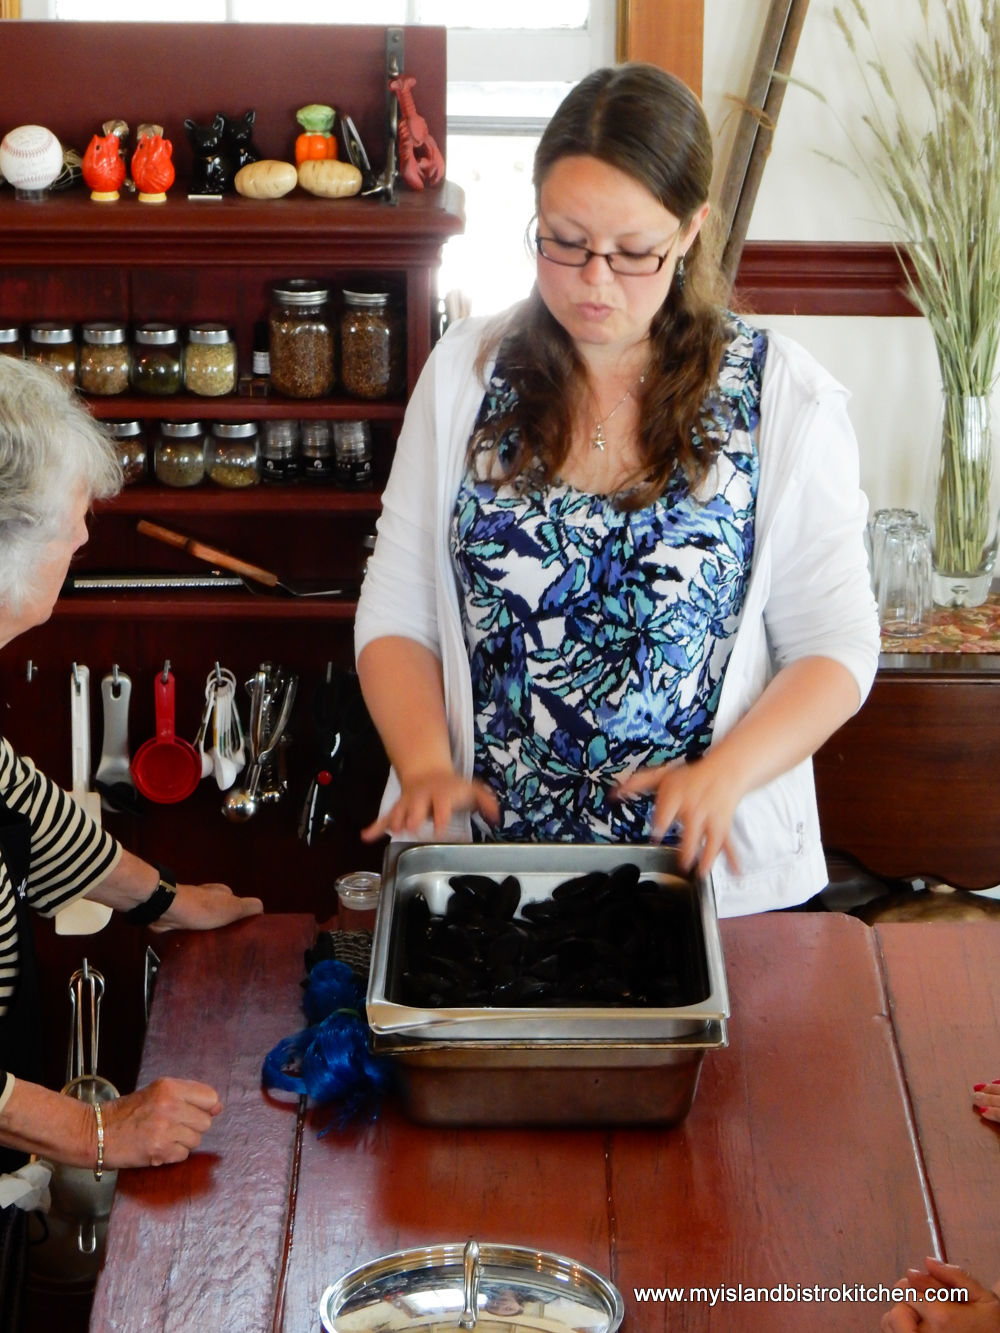
PEI mussels are world famous and they are shipped all over the world. Mussels are a common food to serve at many events, year-round, on PEI. They are easy to prepare and ever-so-tasty dipped in melted butter!
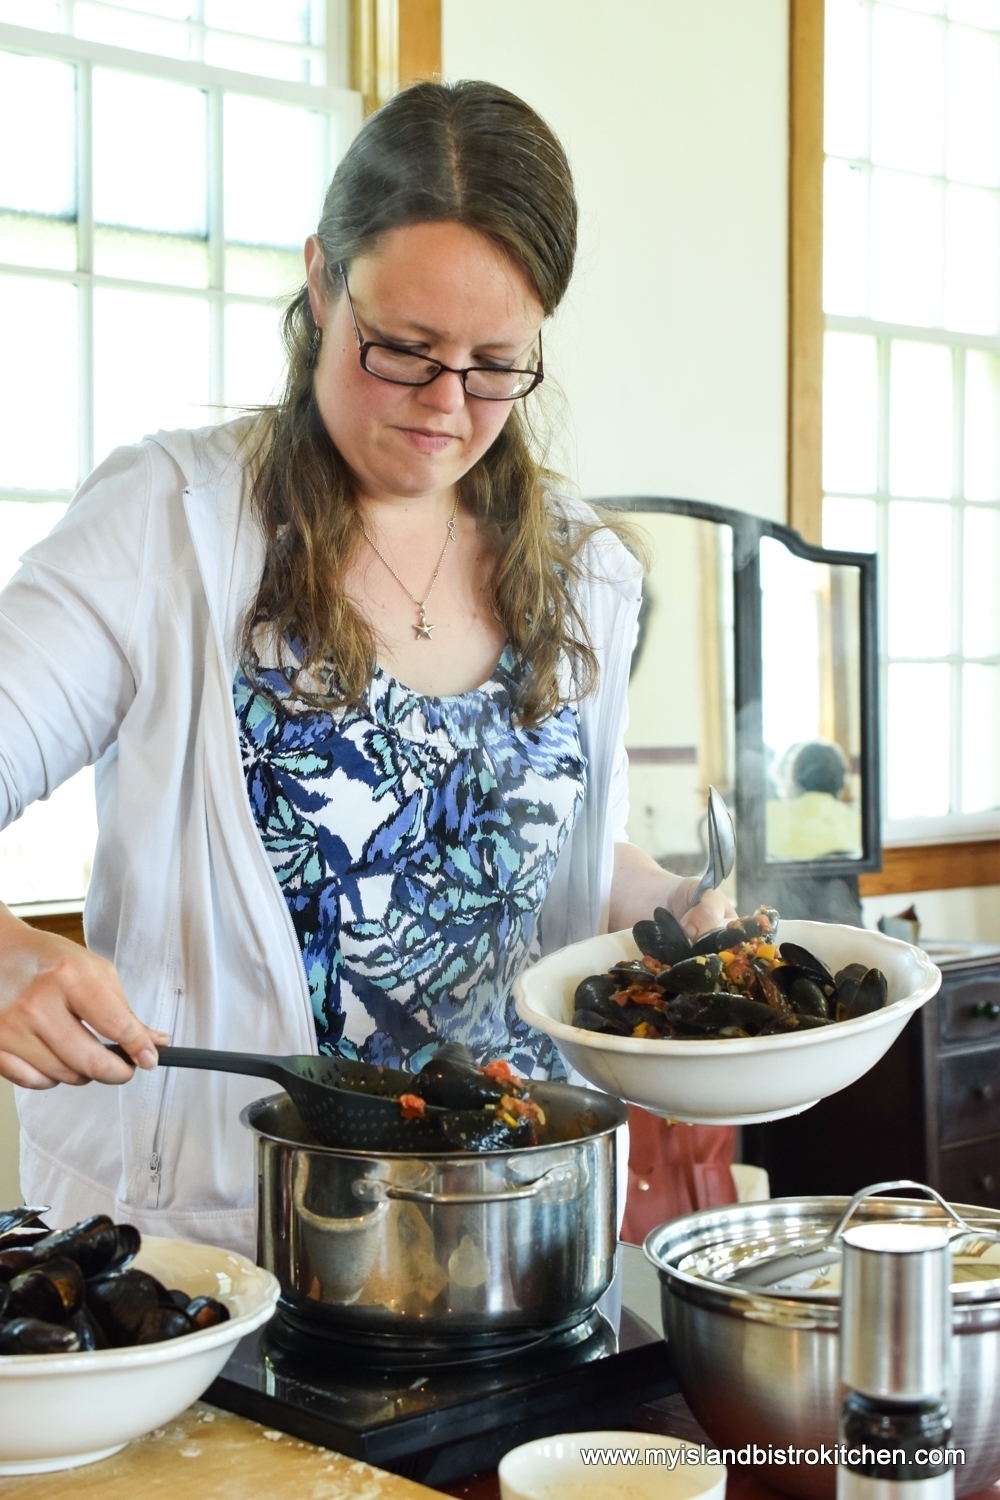
Chef Michael then guided the group in making Lobster Bisque. Once the Mirepoix started cooking, you can only imagine how tantalizing the scent was as it wafted through the old church building.
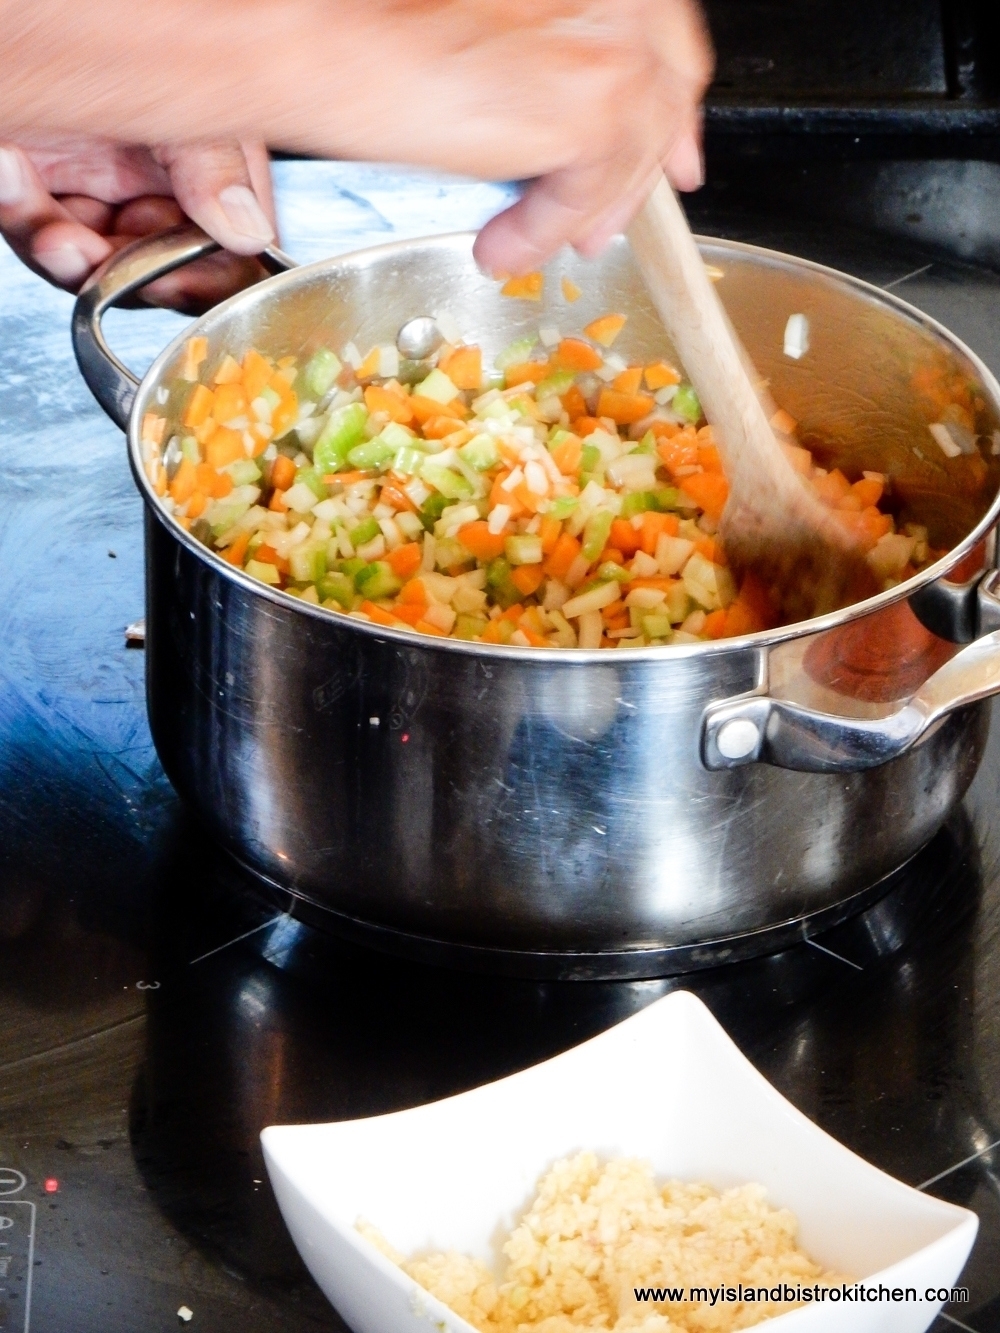
Ohhhh, that lobster is going to make a dandy lunch – can’t you just taste it!
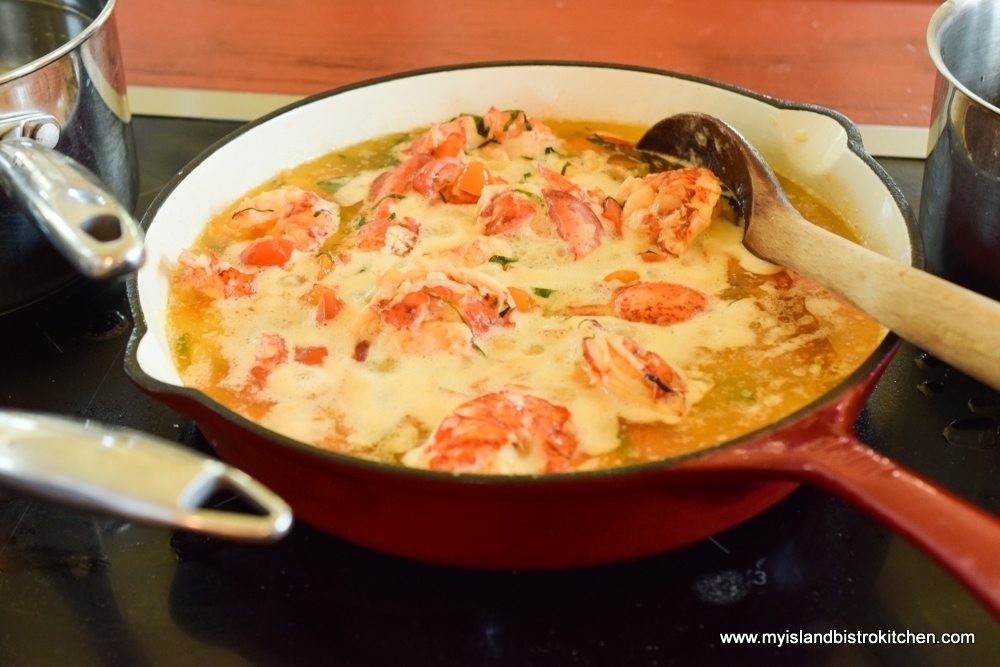
The third seafood that we learned to cook was scallops, those tasty little morsels!
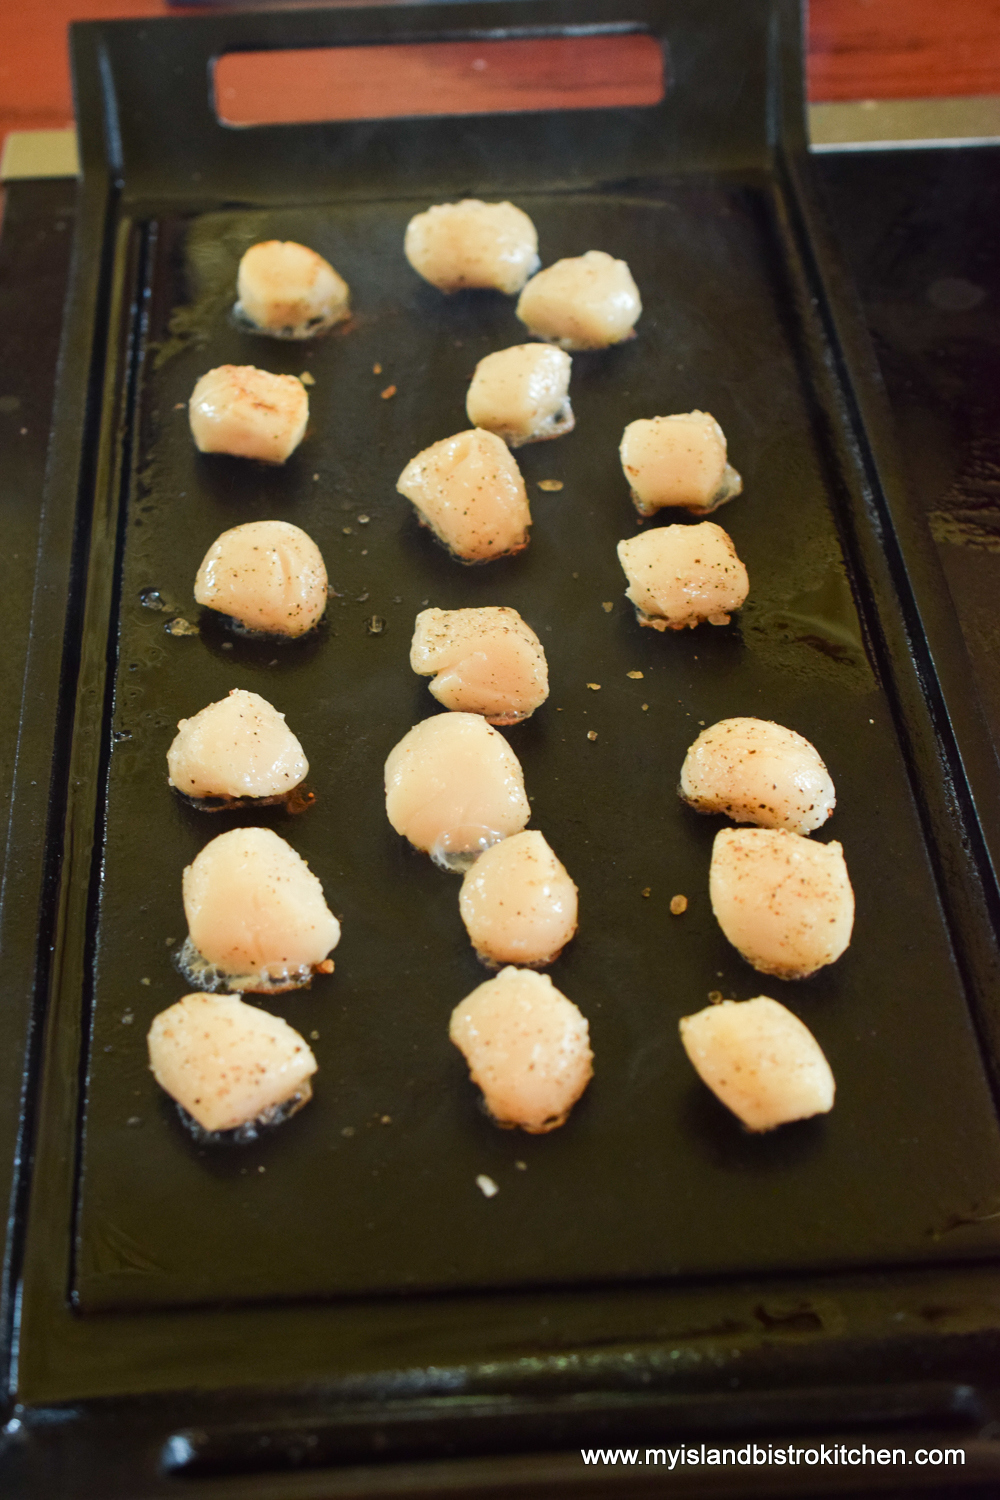
The morning went super fast and, before we knew it, it was time for lunch to be served by the culinary team.
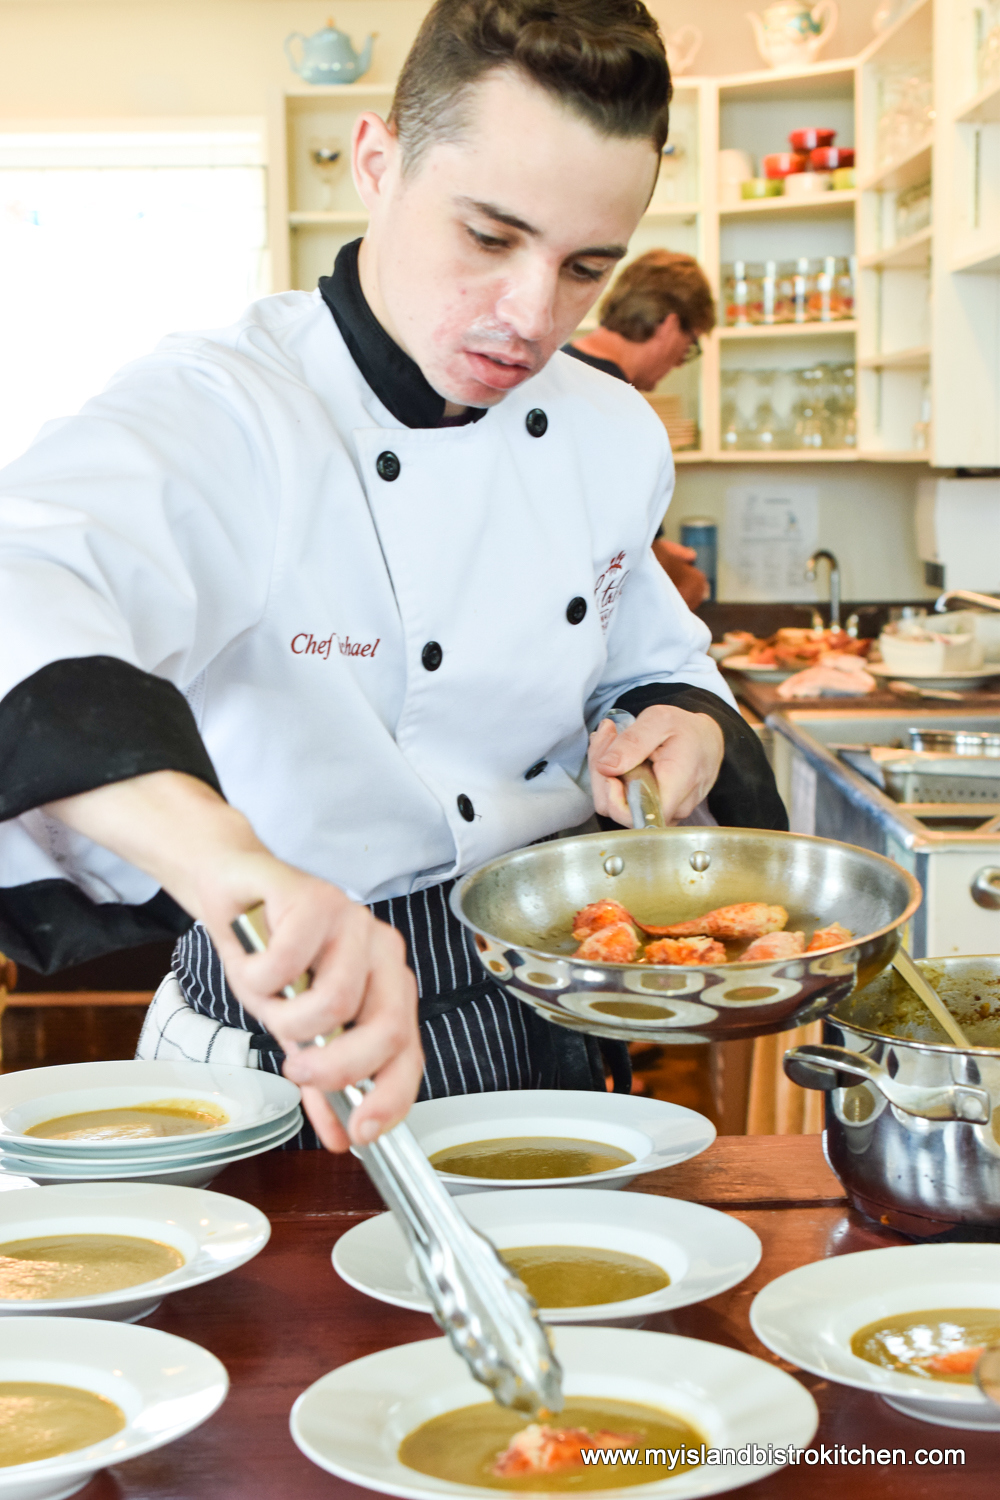
The table was beautifully set (those of you who follow my food blog regularly know how I love well-set tables). The napkin at each place setting had either a small lobster trap or lobster napkin ring.
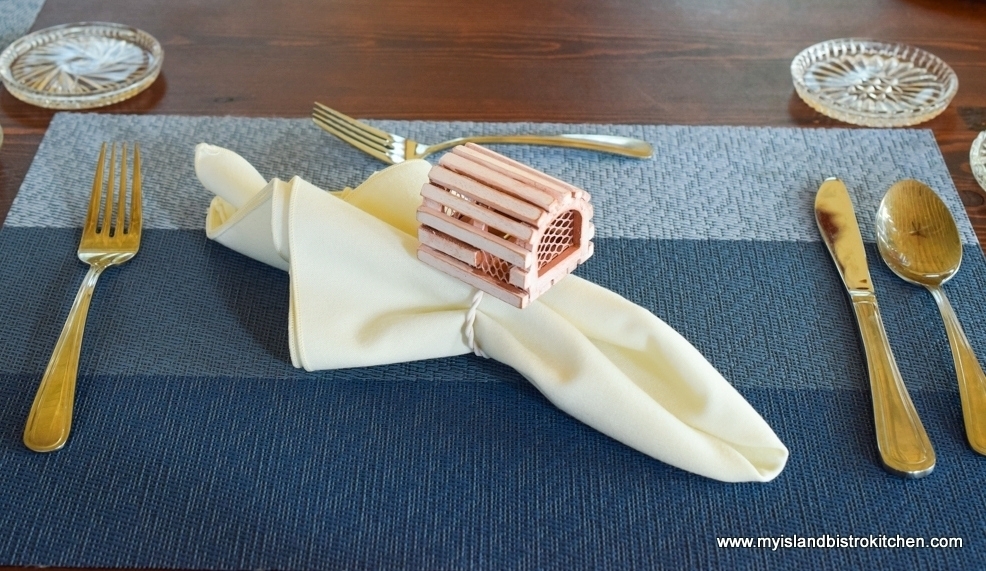
These napkin rings tied in well with the theme of the morning’s class – “Bounty of the Sea”.
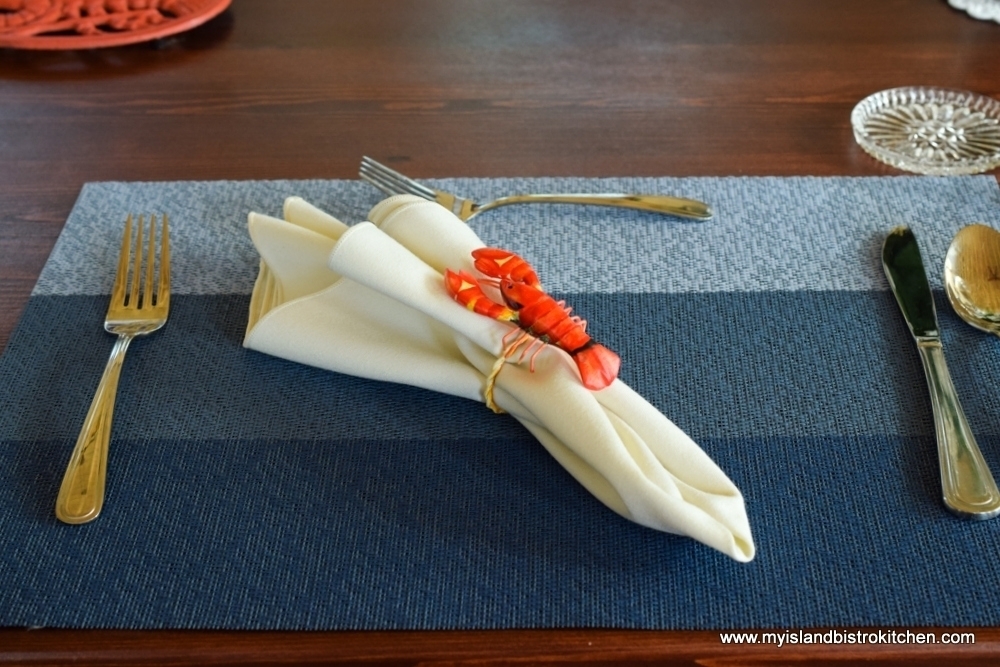
How inviting does this look! Wouldn’t you love to sit in at this table!
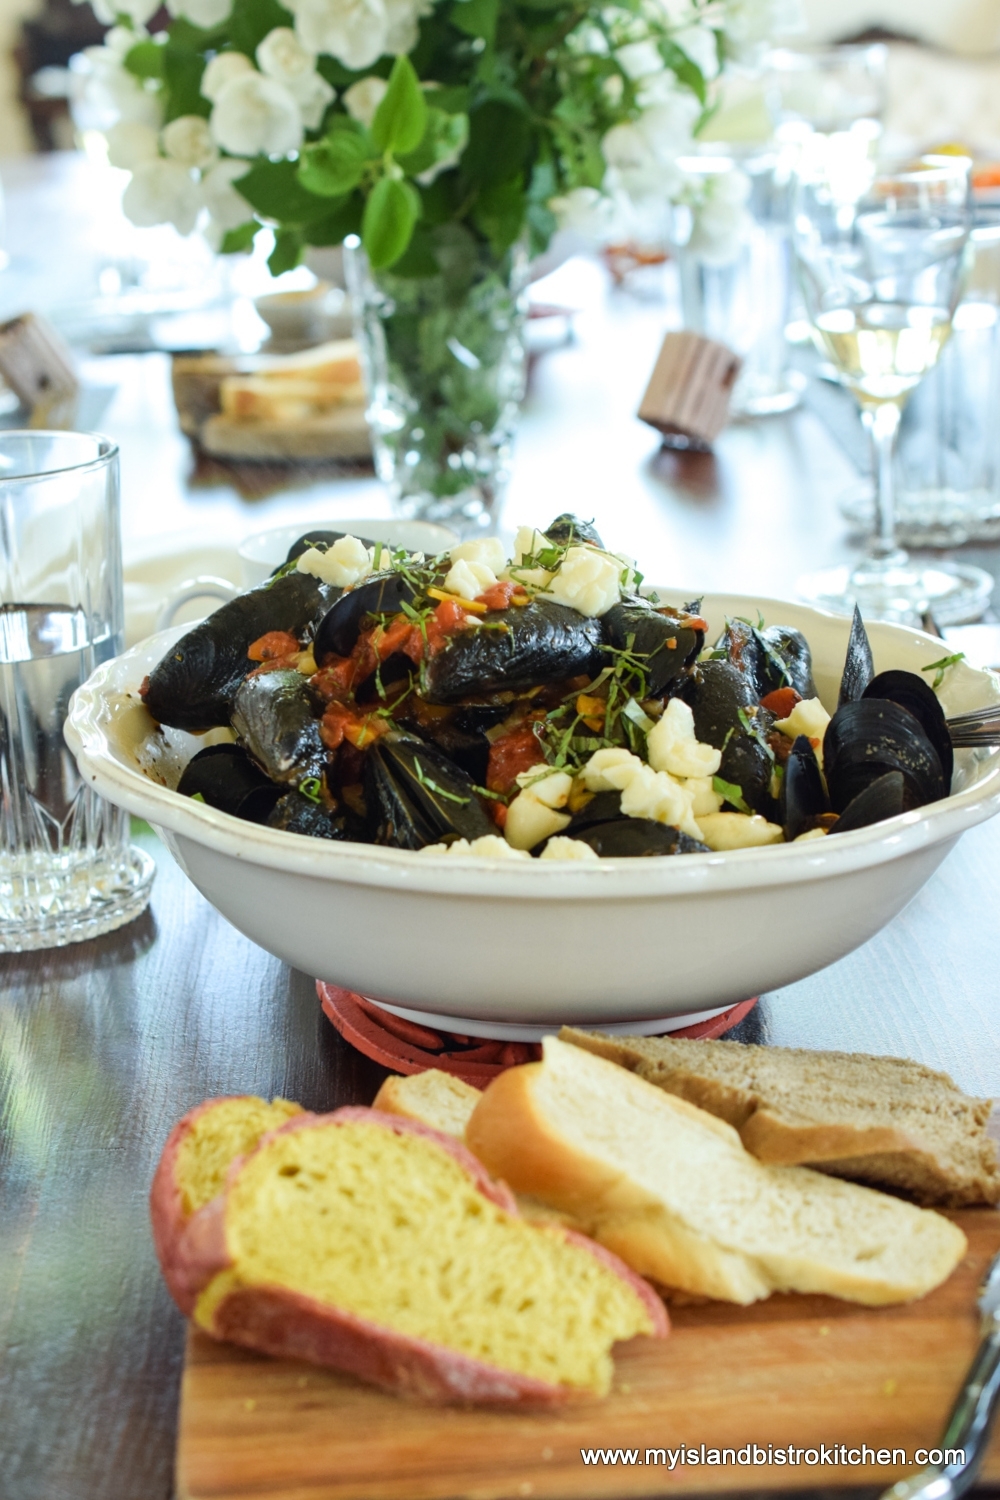
Fresh homemade sourdough bread was on the table.
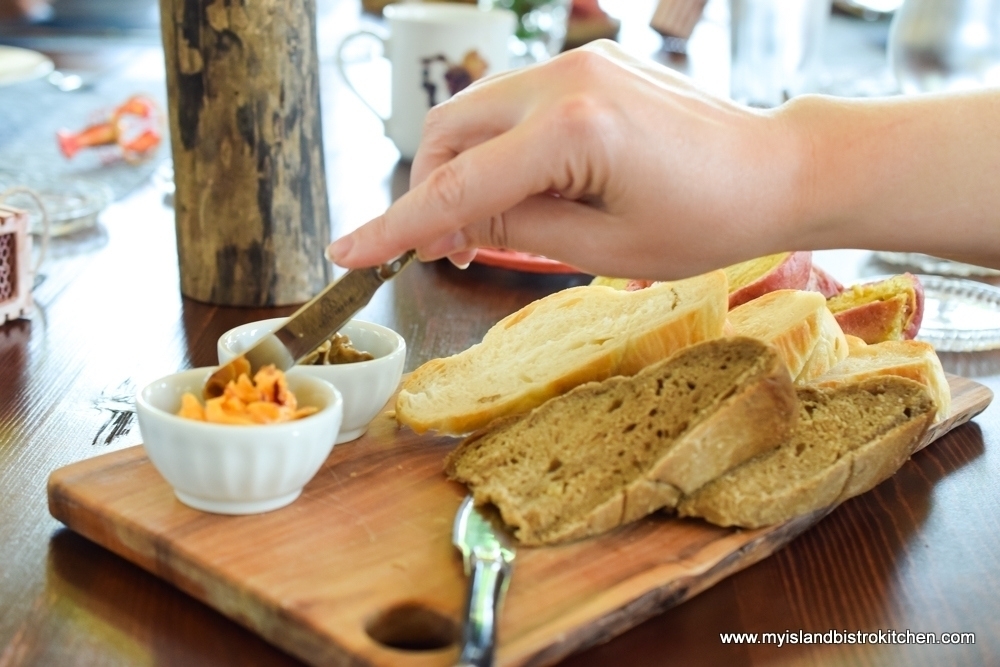
The landing at the top of the spiral staircase in the church provided a great vantage point for photography.

The group assembled at the big harvest table which is the focal point in the middle of the studio. This 12’ table was hand-crafted from old attic boards extracted from the house which The Table’s former owner restored just up the road at New London corner.

How great does this lobster bisque look with that succulent lobster claw! It tasted even better!
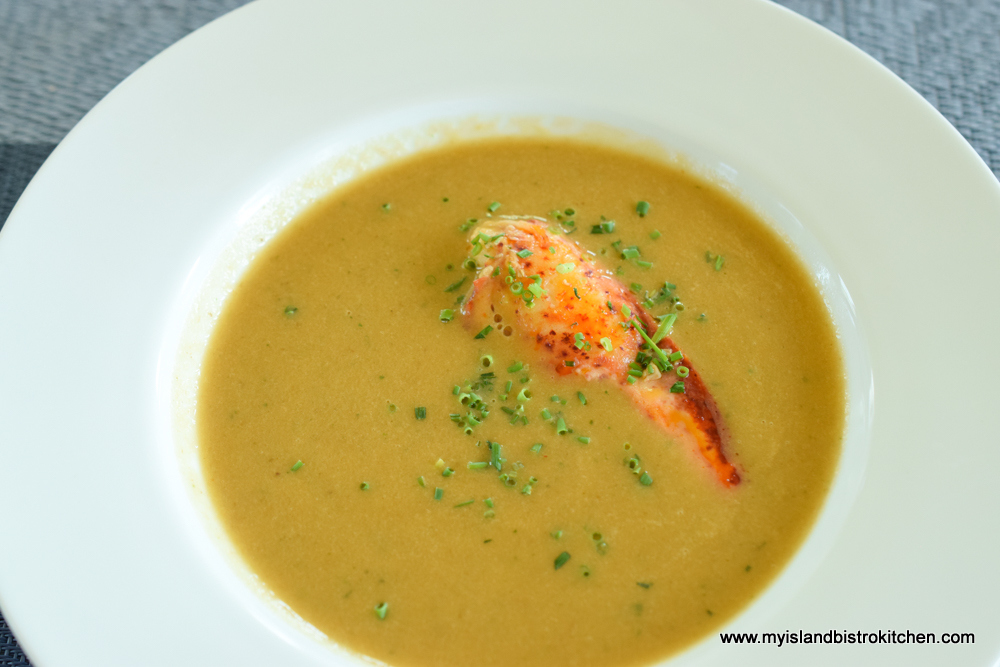
We were very anxious to taste the homemade pasta and it did not disappoint! The pasta in the photo below is gluten-free.

This was accompanied by big bowls of PEI mussels with squeaky cheese topping melting down through the mussels. If you are a mussel lover, these are hard to resist!
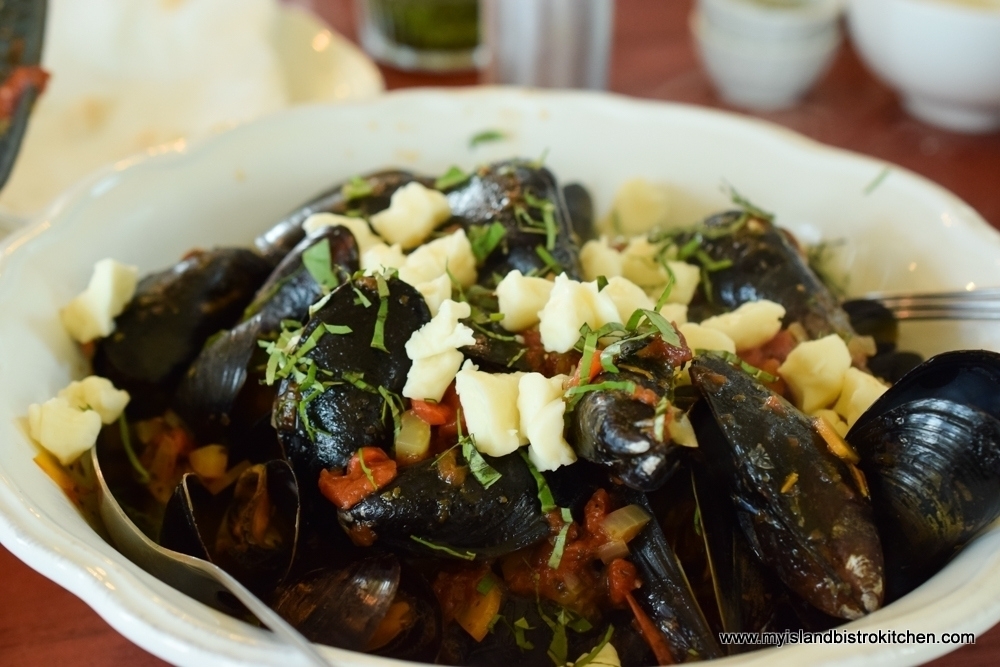
And as if we weren’t stuffed enough, out came dessert. The dessert in the photo below is a chocolate beet cake.
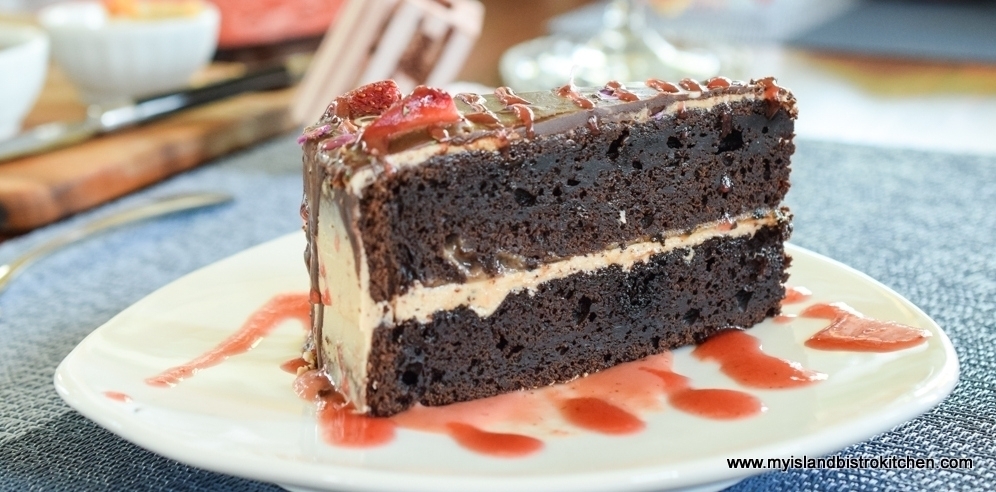
And, for the gluten-free dessert, it was a deconstructed blueberry pie which I can attest was simply yummy!
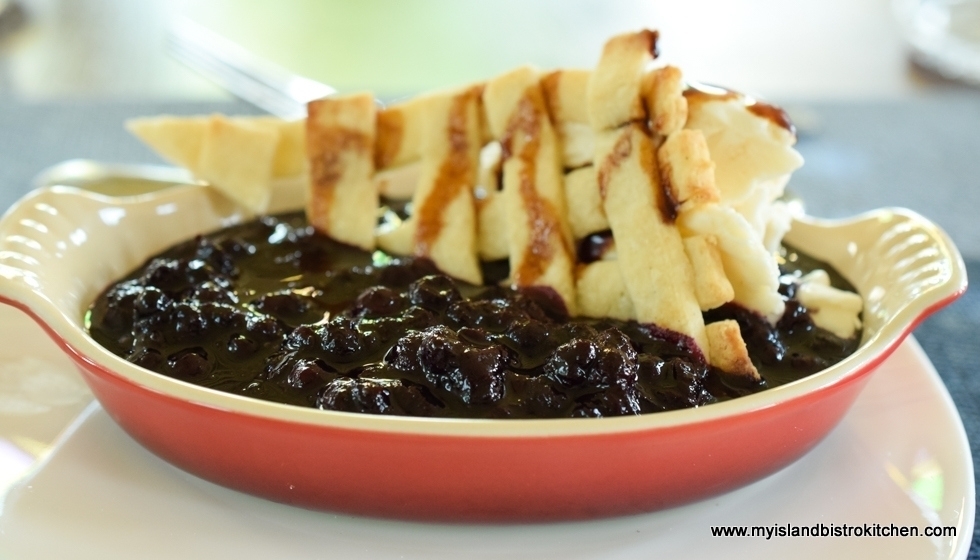
The Table is set with the right ingredients – small class size, fresh local Island foods, quality instruction, hands-on cooking, a shared meal, and a charming venue with a history of its own. If you are looking for an authentic and affordable cooking experience to allow you to more deeply engage with the local food scene and pick up some cooking tips and skills, check out course offerings at The Table. With the short half-day classes, visitors can have the best of both worlds – a cooking experience to learn more about local PEI foods in the morning followed by a delicious lunch and then the rest of the day free to explore other Island adventures and sights. For more information on cooking classes and prices, visit The Table Culinary Studio website at: http://www.thetablepei.ca/classes
The Table also offers fine dining in the evening (reservations required). Click here to read my recent story on The Table’s North Shore Surf and Turf Dinner.
Pin Me To Pinterest!
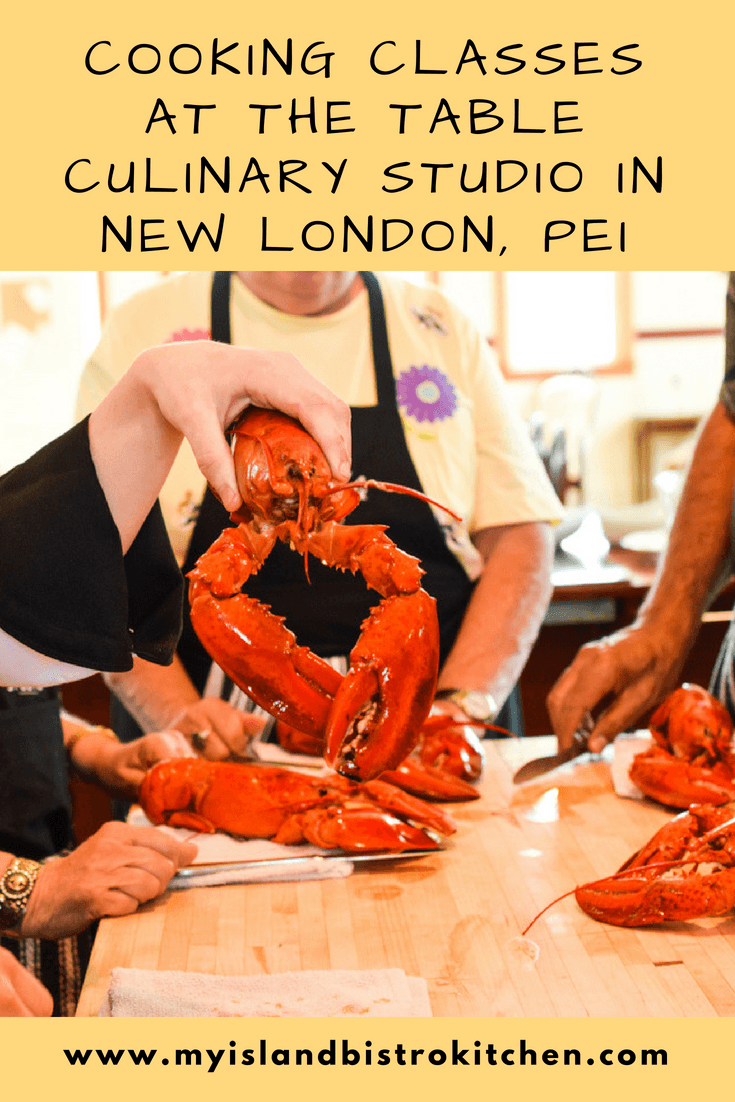
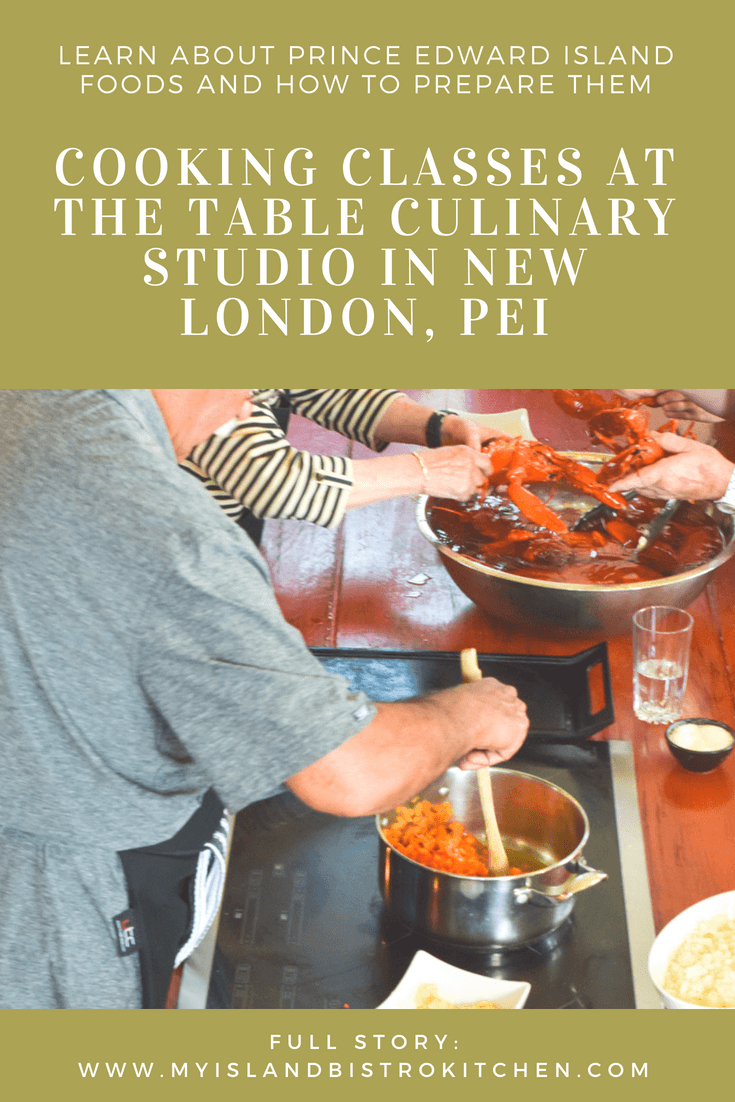
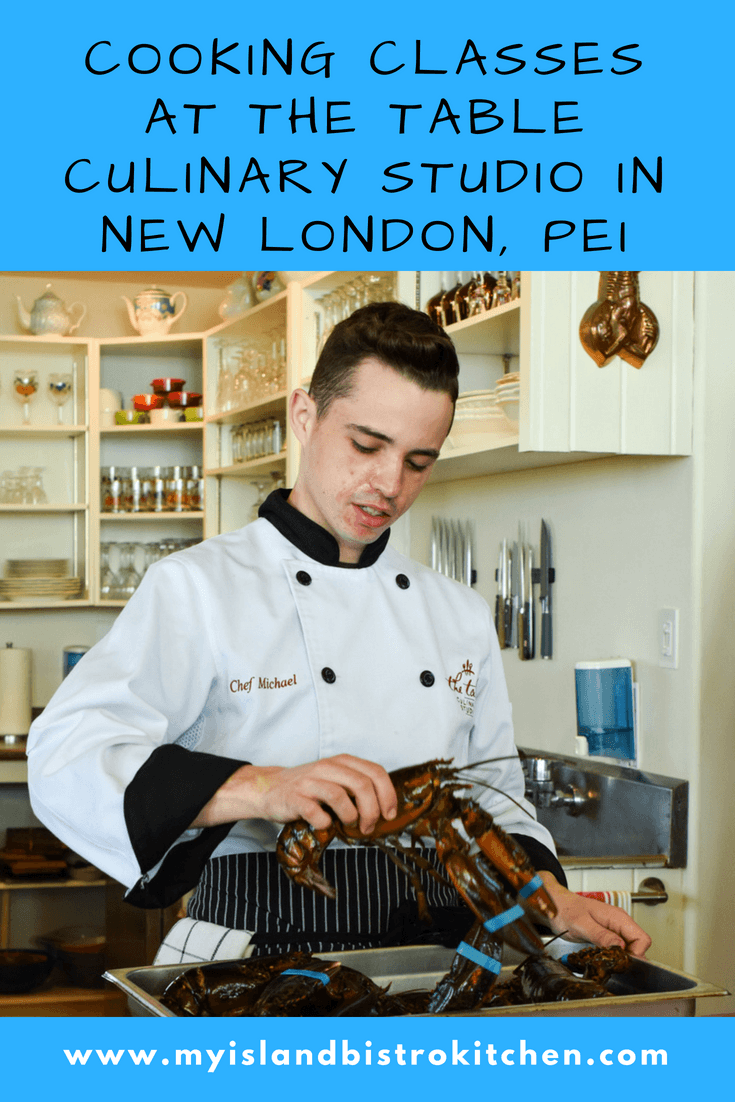
Connect with My Island Bistro Kitchen through the following social media channels:
Facebook – “My Island Bistro Kitchen”
Twitter – “PEIBistro”
Instagram – “peibistro”
My thanks to The Table Culinary Studio for the opportunity to experience their “Bounty of the Sea” cooking class and for the fine hospitality. My participation in the class was complimentary for the purpose of conducting a review of the “Bounty of the Sea” cooking class. However, this in no way influenced my opinions of the class experience. All opinions expressed in this review are purely my own.