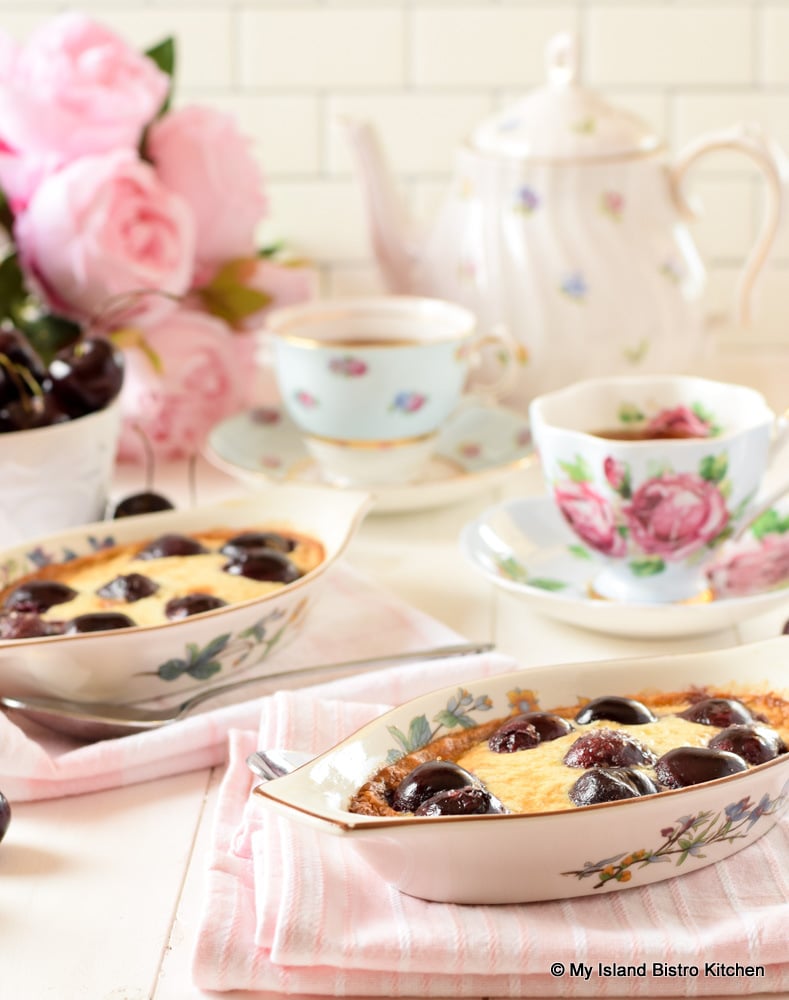
Cherry Clafoutis Baked in Individual Au Gratin Dishes
A classic dessert with French origins, Cherry Clafoutis (pronounced “kla-foo-tee“) is remarkably simple to make with the most basic of ingredients. If you can mix together the batter for pancakes or crepes and pour it over cherries in a baking dish, you can make this dessert! Continue reading Classic Cherry Clafoutis For Two→
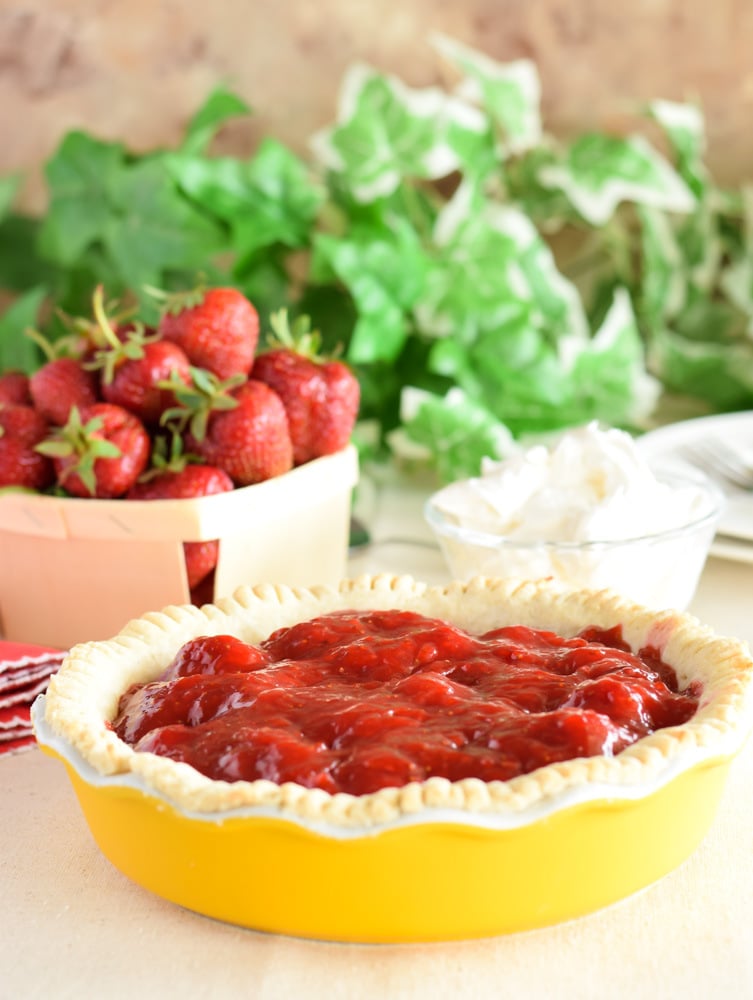
This splendid Glazed Strawberry Pie for Two is a scaled-down version of the recipe for the Strawberry Pie I originally posted in 2013. Recognizing that there are many small households (including mine) that neither need nor desire a full-sized pie, I have sized the pie down to fit a deep-dish 7” pie plate that will easily provide up to four servings – two to enjoy today and two for tomorrow! Or, for bigger appetites, the pie provides two generous servings. Continue reading Glazed Strawberry Pie For Two→
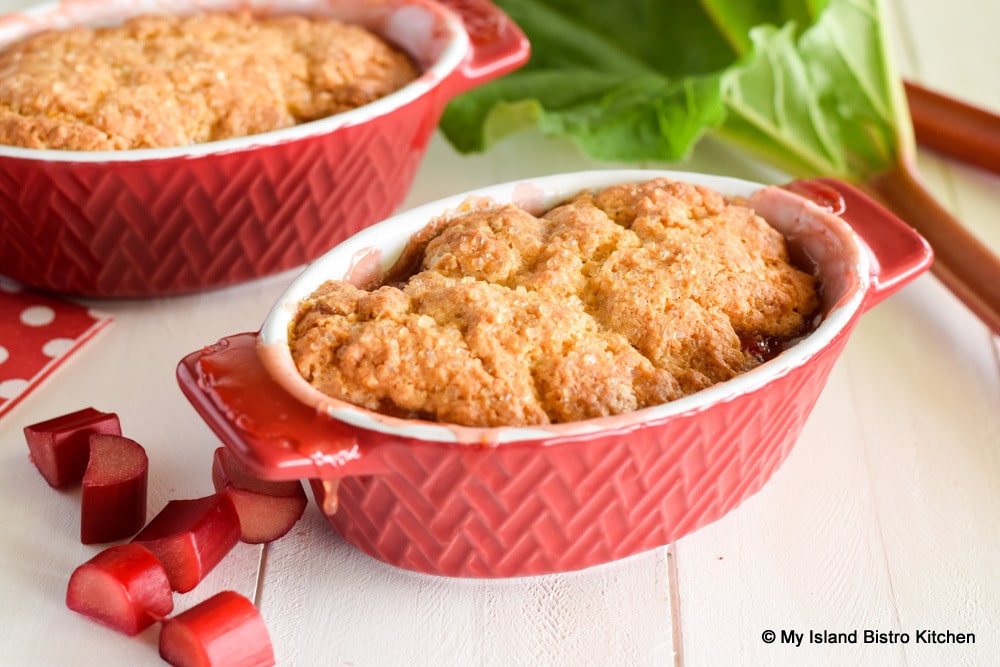
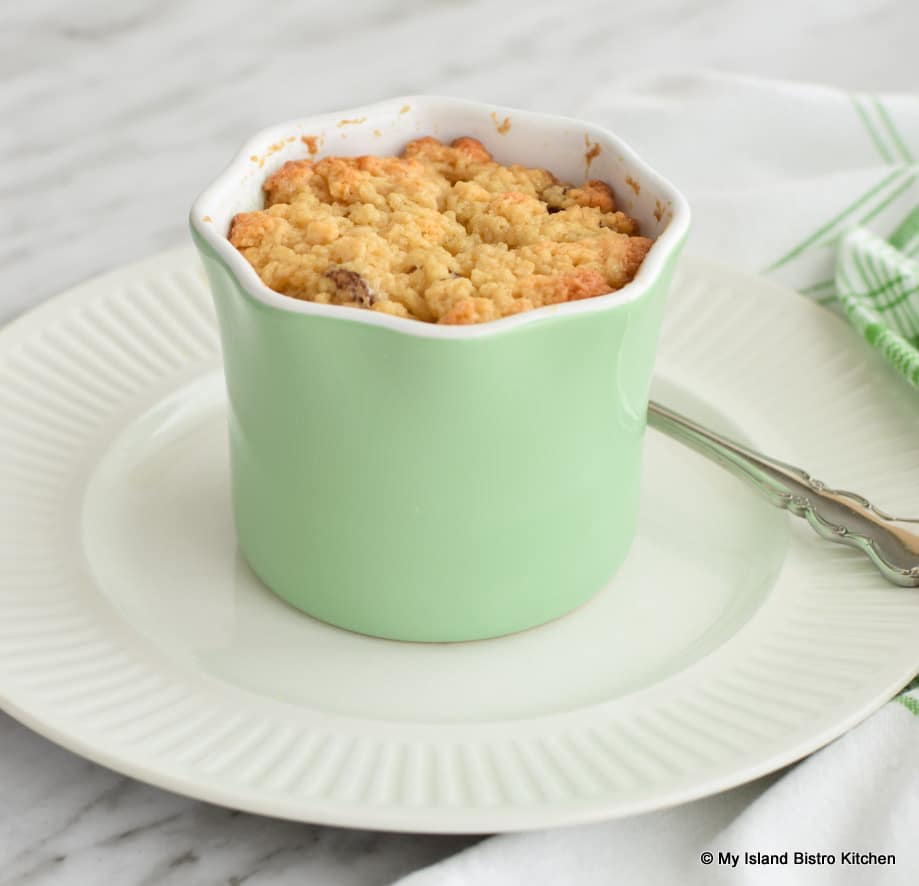
One of the things I most look forward to in spring is rhubarb from the garden. I certainly make good use of it as I find it is very versatile. Today, with the smaller household in mind, I am sharing my recipe for a delicious Rhubarb Cobbler perfectly sized just for two servings. Continue reading Rhubarb Cobbler For Two→
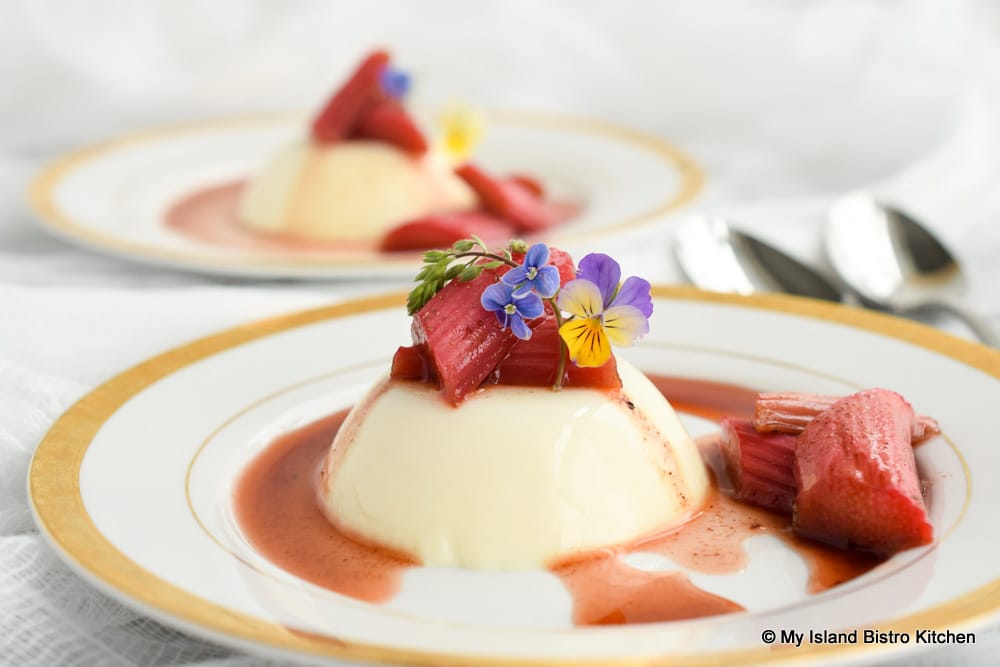
While the mention of Panna Cotta conjures up images of a fancy dessert one would expect to find in a fine restaurant, this dessert is actually quite simple to make and takes very few ingredients. It is elegant and sophisticated in its simplicity and will surely impress those lucky enough to sit around your table. Continue reading How To Make Panna Cotta→
Single-serving “mug” cakes and puddings are popular for those living alone. I haven’t published many recipes for one or two servings since the industry standard for recipe development tends to be dishes that will generate four to six servings. That, however, for singles living alone can be a problem, particularly if the dish desired is not one that can be batch cooked and frozen in individual serving sizes for later use.
Sometimes, one has a craving for something sweet but if there are not several people to eat it up, who wants a pudding that will make four to six servings when you really only want the one serving! My proportionately sized Baked Caramel Pudding is perfect when you have no one to please with a dessert but yourself! Continue reading Baked Caramel Pudding For One→
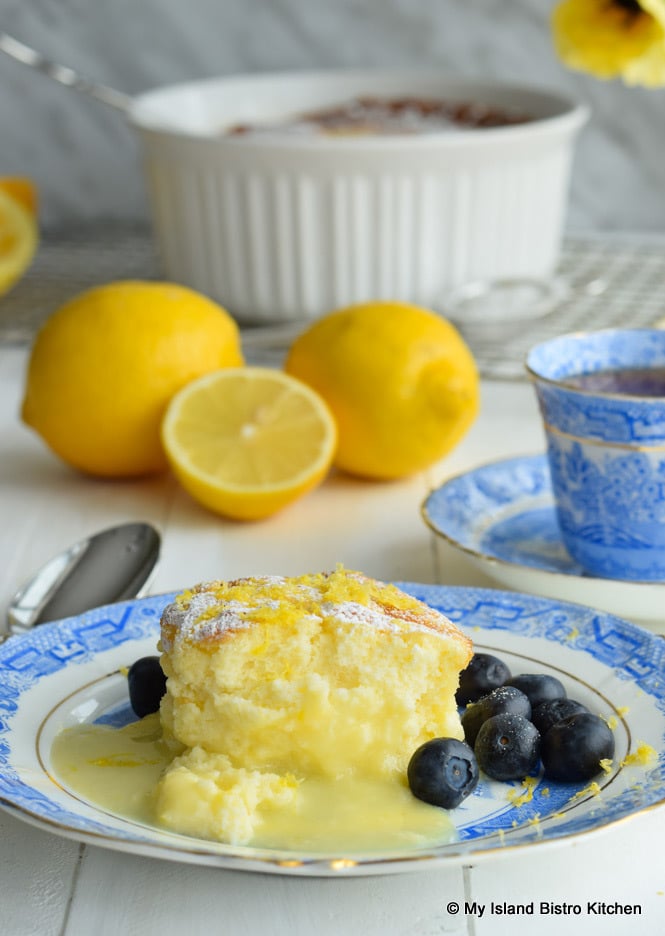
This self-saucing Lemon Sponge Pudding, baked in a bain marie, consists of a lovely lemon sauce topped with a light-as-air sponge cake. How this all transpires is actually quite magical. This is because the pudding mixture (both the sponge cake topping and the lemon sauce) are all mixed together when they go in the baking dish. During baking, the two components, like magic, separate out with a delectable creamy lemon sauce forming on the bottom beneath the light sponge cake. Continue reading Lemon Sponge Pudding Recipe→
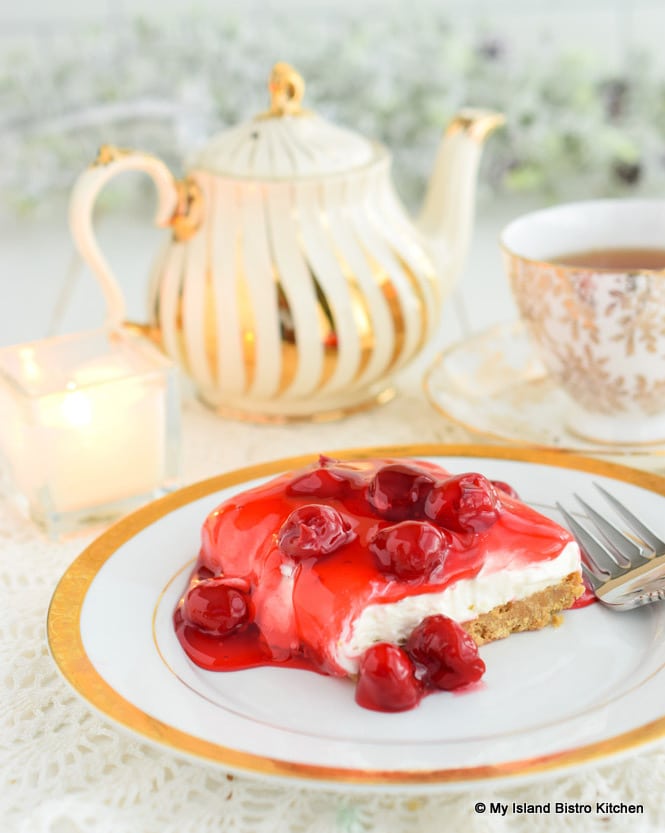
No-bake Cherry Cheesecake has long been a favorite dessert at family gatherings, potlucks, and church, office, and community events. It’s very easy to make, does not take a lot of ingredients, and is showy and super tasty. Continue reading No Bake Cherry Cheesecake→
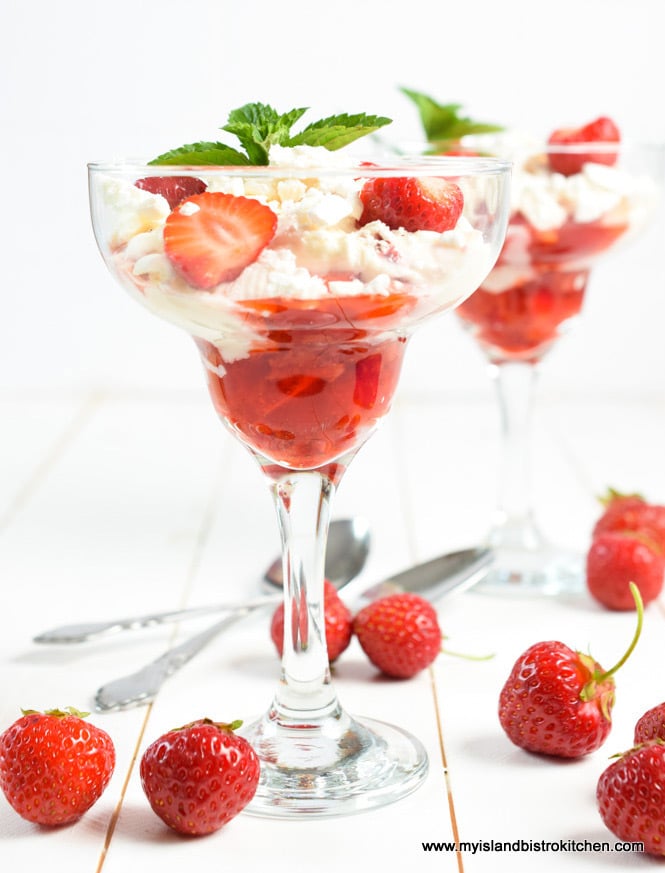
There is much folklore over the origins of Eton Mess, a parfait-like dessert that is named for the prestigious English college in Berkshire, England, across the River Thames from Windsor. Continue reading Strawberry Eton Mess Dessert→
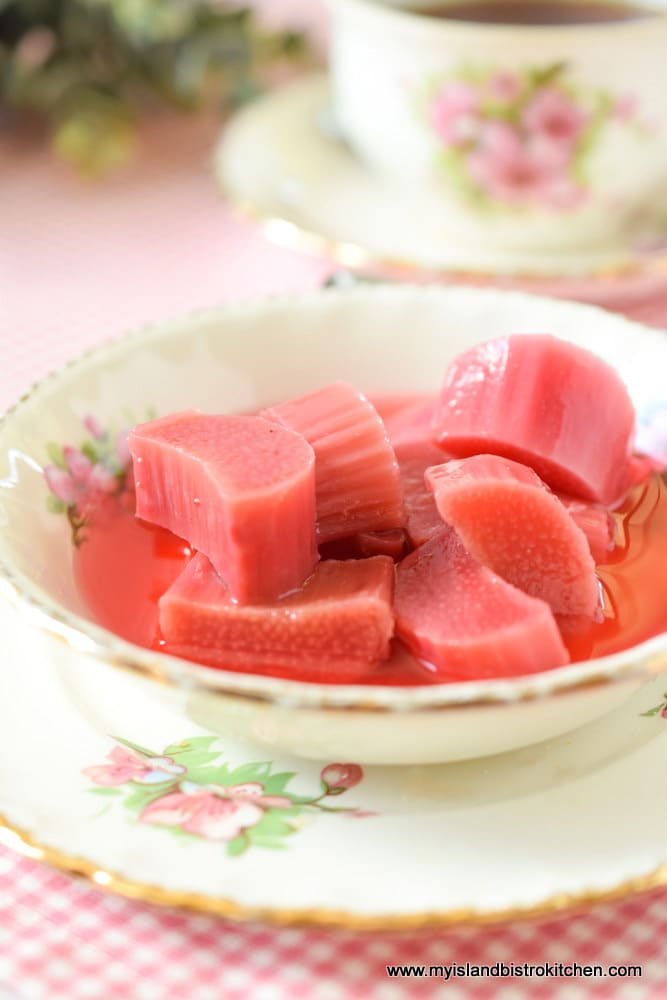
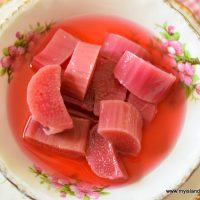
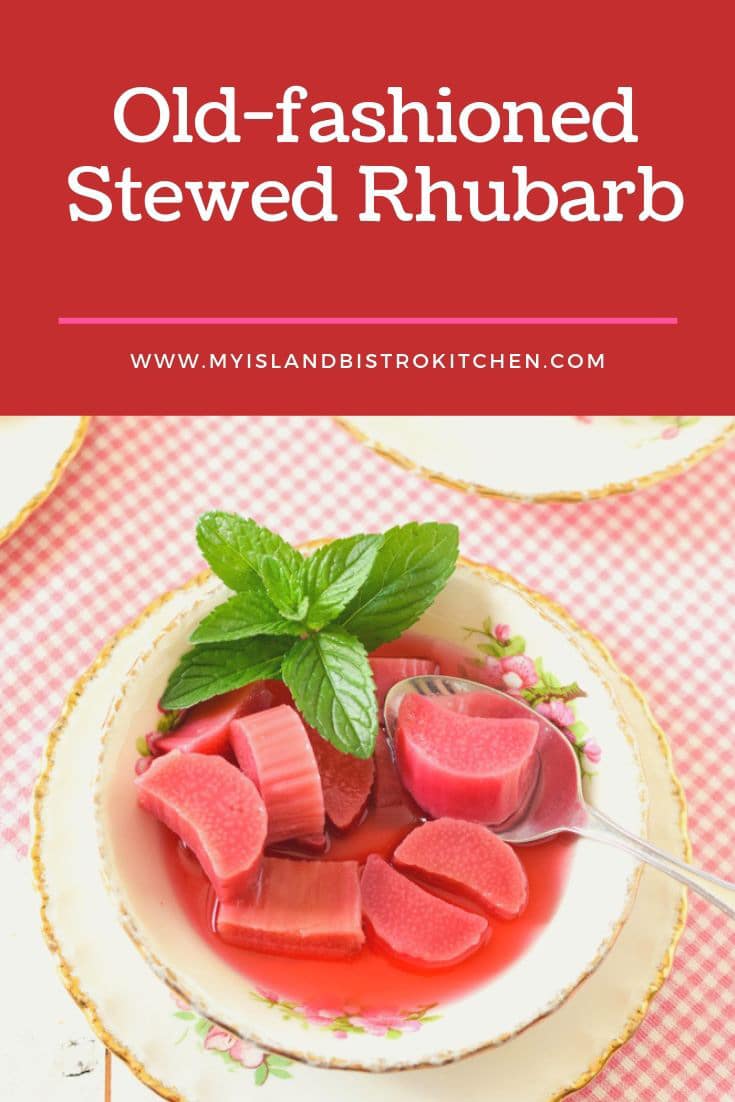
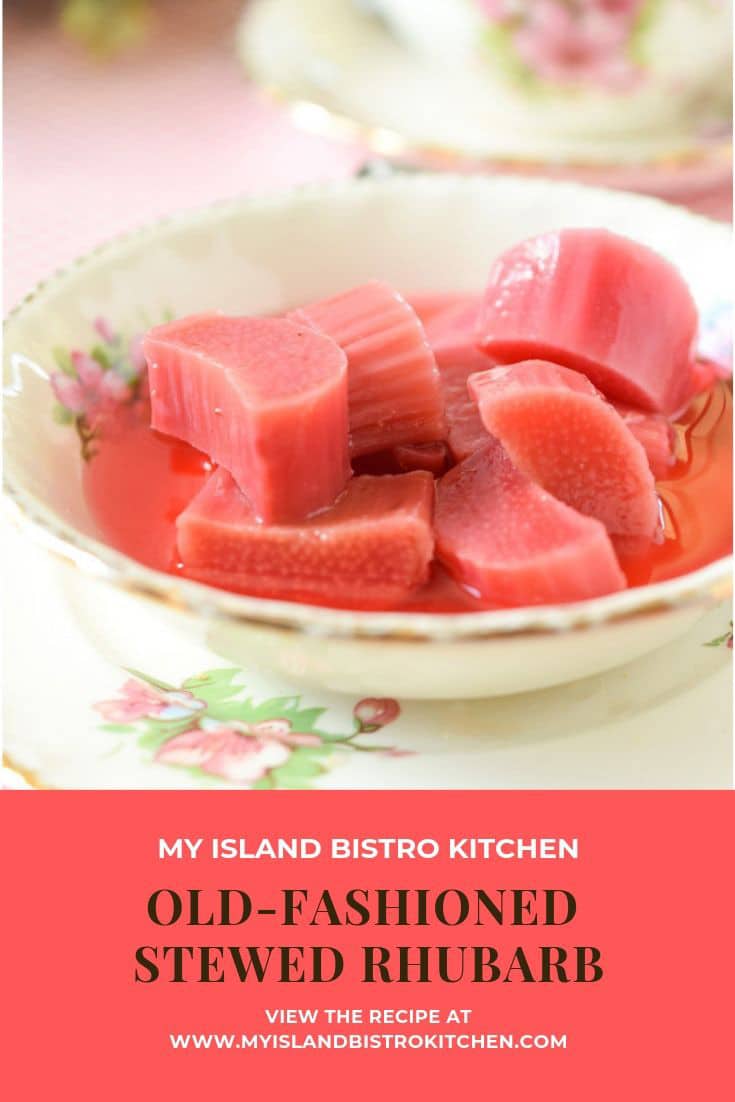
Old-fashioned stewed rhubarb is so simple to make and so tasty. During my growing up years, stewed rhubarb was a staple in the refrigerator during rhubarb season. My mother and grandmother both cooked the rhubarb slowly in a water and sugar mixture in the oven. This helped to retain the shape of the rhubarb and also its lovely rosy color. Cooking it on the stove, or in the oven at a higher temperature, would turn the rhubarb into sauce which is entirely different from this stewed rhubarb recipe.
While neither my mother or grandmother added anything to their stewed rhubarb, I add a small amount of pulp-free orange juice and a sprinkle of nutmeg which I think enhances the syrup in which the rhubarb is stewed and with which it is served.
Stewed Rhubarb
My grandmother would often serve this stewed rhubarb with biscuits made with homemade cream and slathered with homemade butter. She lived on a farm so had fresh cream daily and it was used liberally. (You can find my tea biscuit recipe here.) Stewed rhubarb would often be dessert after supper.
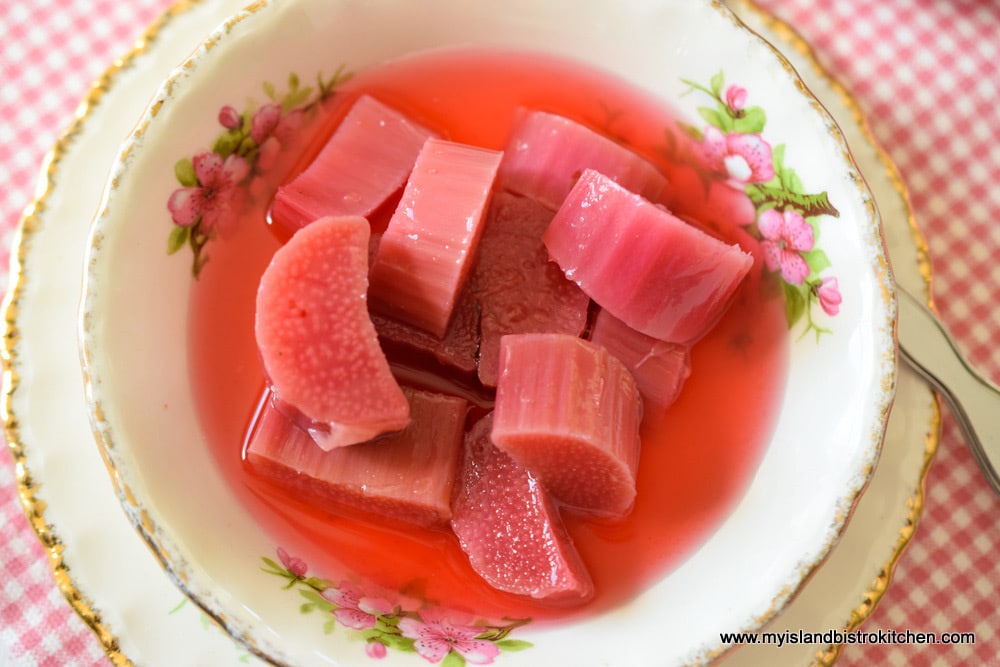
Stewed Rhubarb
I freeze a lot of rhubarb for winter usage and will often have a dish of stewed rhubarb in the fridge any time over the year because it can easily be made with frozen rhubarb.
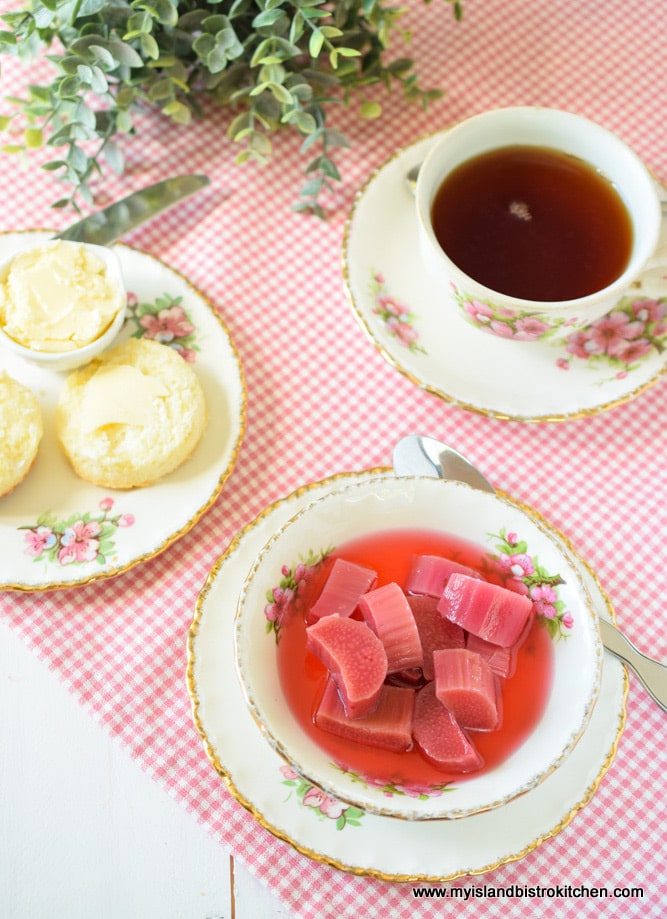
Stewed Rhubarb
Made with only five basic ingredients, it doesn’t get much simpler (or more tasty) than Old-fashioned Stewed Rhubarb.
[Printable recipe follows at end of post]
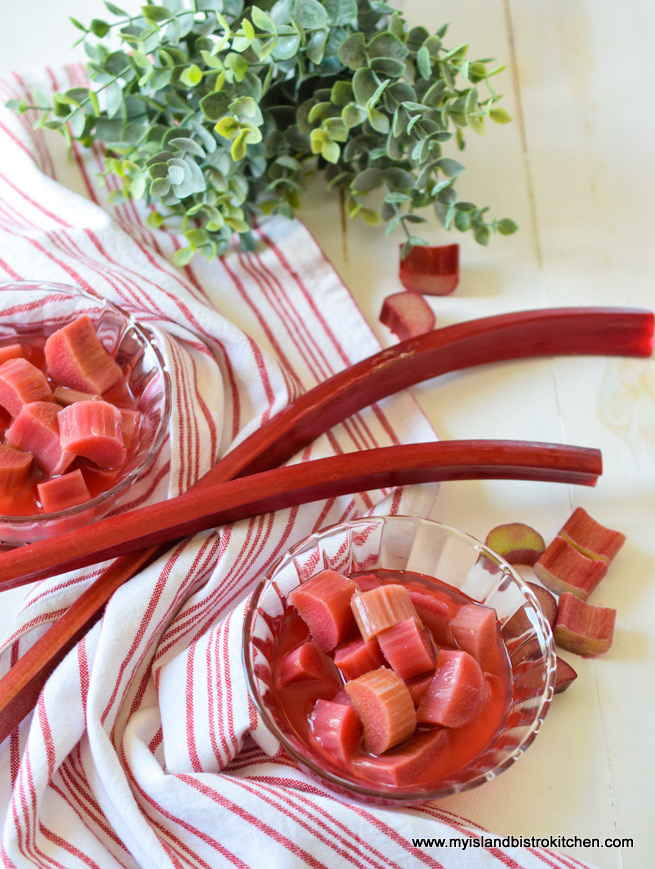
Stewed Rhubarb
Ingredients:
1 lb rhubarb, chopped into ¾“ pieces (approximately 3¾ cups chopped)
¾ cup hot water
1 cup + 1 tbsp granulated sugar
1½ tbsp pulp-free orange juice
1/8 tsp nutmeg
Method:
Preheat oven to 235°F oven.
In small saucepan over medium high heat, bring the hot water and sugar to a boil then reduce heat to simmer for 4 minutes.
Place rhubarb in casserole (apx. 2-quart size). Add the orange juice and nutmeg to the hot water and sugar mixture and pour over the rhubarb. Cover and place in oven for approximately 55-65 minutes, or until rhubarb is fork tender. Do not overcook or rhubarb will lose its shape and turn into sauce.
Yield: Apx. 5-6 servings
If you have made this recipe and enjoyed it and/or wish to share it with your friends and family, please do so on social media but be sure to share the direct link to this posting from my website.
Connect with My Island Bistro Kitchen on Social Media
Follow “the Bistro” on Pinterest at https://www.pinterest.ca/peibistro/ and pin the Pinterest-ready photo found at the end of this post to your favorite Pinterest boards.
Ruby red rhubarb stewed slowly in the oven to retain its shape and color makes a wonderful light dessert, especially when served with homemade biscuits. May be made with either fresh or frozen rhubarb.
Course
Dessert
Cuisine
Canadian
Keyword
rhubarb
Servings6
My Island Bistro KitchenMy Island Bistro Kitchen
Ingredients
1lbrhubarb,chopped into ¾“ pieces (approximately 3¾ cups chopped)
¾cuphot water
1cup+ 1 tbsp granulated sugar
1½tbsppulp-free orange juice
1/8tspnutmeg
Instructions
Preheat oven to 235°F oven.
In small saucepan over medium high heat, bring the hot water and sugar to a boil then reduce heat to simmer for 4 minutes.
Place rhubarb in casserole (apx. 2-quart size). Add the orange juice and nutmeg to the hot water and sugar mixture and pour over the rhubarb. Cover and place in oven for approximately 55-65 minutes, or until rhubarb is fork tender. Do not overcook or rhubarb will lose its shape and turn into sauce.
Recipe Notes
Yield: Apx. 5-6 servings
[Copyright My Island Bistro Kitchen]
For other great rhubarb dessert recipes from My Island Bistro Kitchen, click on the links below:
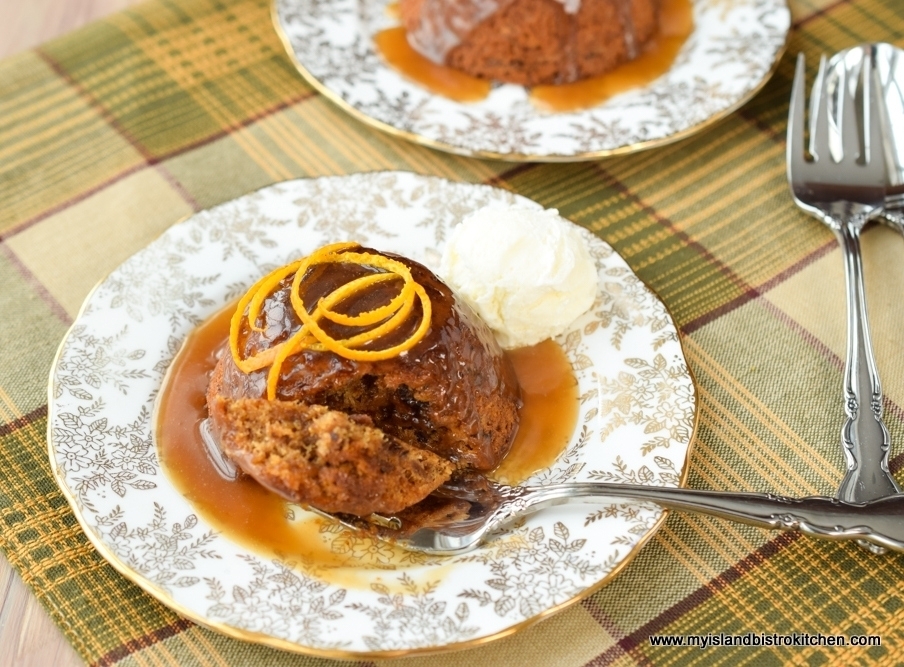
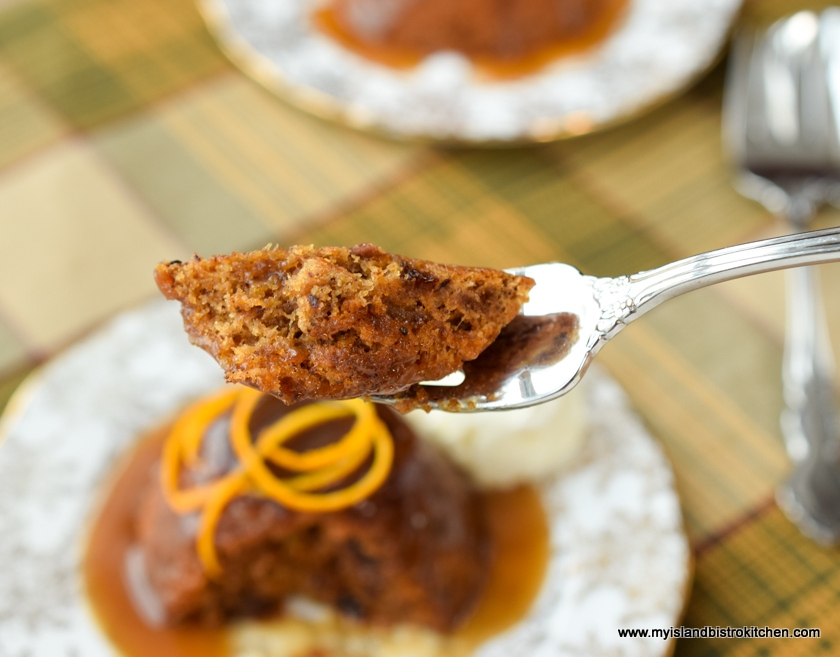
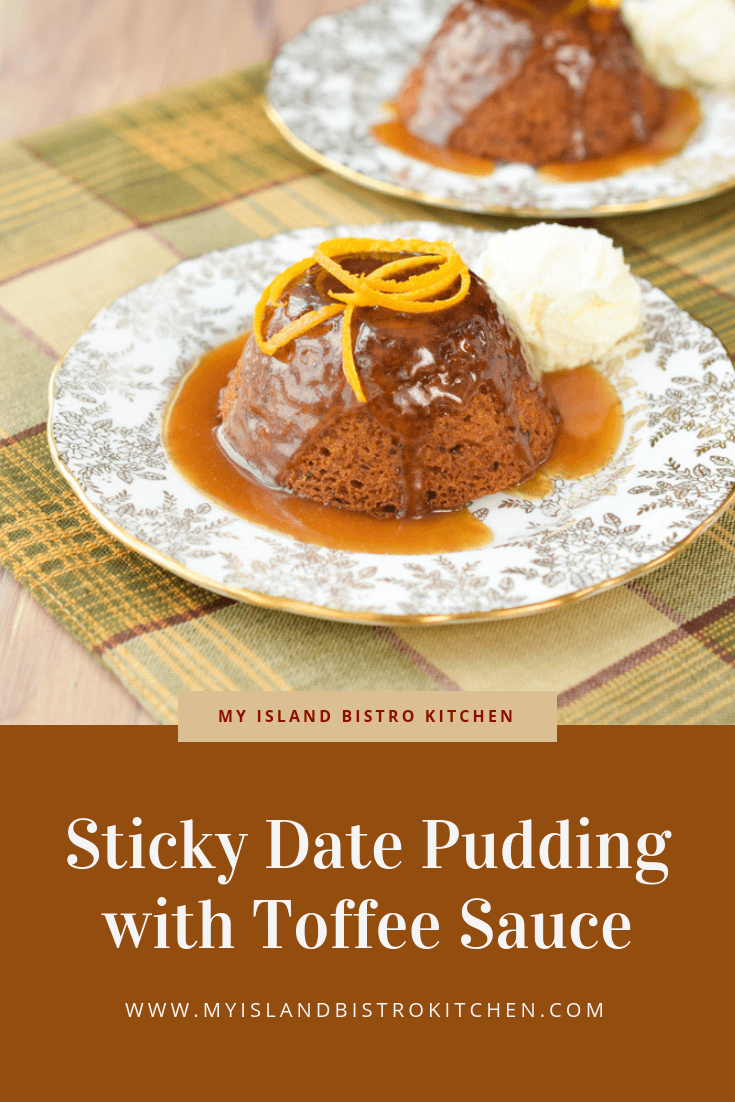
Sticky Date Pudding (aka Sticky Toffee Pudding) has a British origin and is often served as the Christmas pudding. This pudding is basically a dense, but tender, sponge cake made with cooked dates. It’s really nothing more elaborate or complicated than that.
My version of this classic pudding starts with soaking the chopped dates in rum allowing them to absorb the flavour, then slowly simmering the dates in water to soften. The dates, the primary ingredient in the pudding, add sweetness and texture to the pudding without turning it into a heavy pudding. This pudding is subtly spiced with a blend of ginger, cinnamon, and cloves.
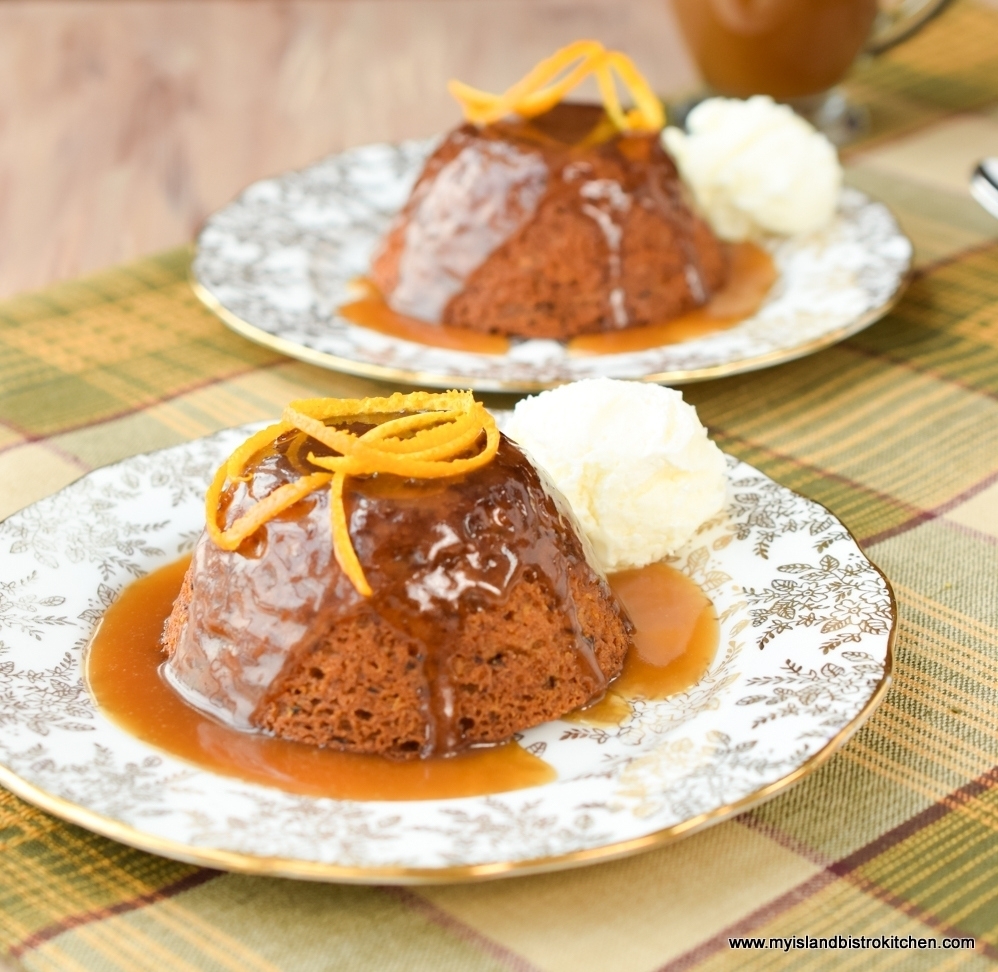
Sticky Date Pudding with Toffee Sauce
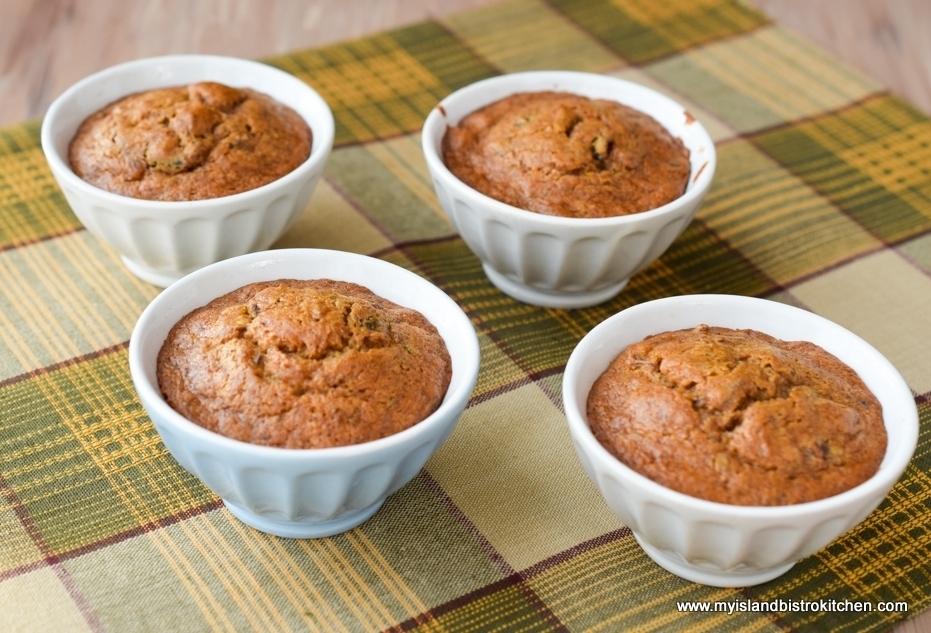
I like to make this pudding in small one-half cup size ramekins for a couple of reasons. First, I like the look of a small pudding on each plate and, second, this pudding freezes well and the ramekin-sized puddings are perfect for freezing individual servings.
Sticky Date Pudding
Sticky Date Pudding is most commonly served warm with a decadently rich toffee sauce made with butter, dark brown sugar, and whipping cream. I add a dash of rum to the sauce to deepen the flavour. Add a dollop of whipped cream or a scoop of vanilla or maple ice cream to really dress the pudding to the nines!
Sticky Date Pudding
[Printable recipe follows at end of posting]
My Island Bistro Kitchen’s Sticky Date Pudding with Toffee Sauce
Ingredients for Pudding:
7 oz (about 1 1/3 cups) pitted dates, coarsely chopped
¼ cup dark rum
1 cup water
1 1/8 tsp baking soda
¼ cup butter, softened at room temperature
1/3 cup granulated sugar
1/3 cup brown sugar, firmly packed
2 large eggs, room temperature
1 tsp grated orange rind
1½ tbsp pure maple syrup
1½ tsp vanilla
¾ cup butter (no substitutes)
1 1/3 cups dark brown sugar
¾ cup whipping cream (35% M.F.)
2 tbsp rum
2 tsp vanilla
Method for Pudding:
In saucepan, pour rum over dates. Let stand 20 minutes, stirring a couple of times. Add the cup of water and bring the dates, rum, and water to a boil over medium-high heat. Reduce heat to simmer and boil, uncovered, gently for approximately 5 minutes, stirring once or twice. Remove from heat and add the baking soda. Stir well. Let mixture stand, uncovered, for 20 minutes, stirring occasionally to loosely break up the dates.
Position oven rack in bottom third of oven and preheat oven to 350°F.
While date mixture is cooling, cream the butter and sugars together in bowl of stand mixer fitted with paddle attachment. Beat in the eggs, one at a time, beating well after each addition. Beat in the orange rind, maple syrup and vanilla.
Sift the dry ingredients together and incorporate into the creamed mixture just until they are completely blended. Stir in the date mixture.
Grease ten (10) ½-cup ramekins and place on rimmed baking sheet. Distribute the batter evenly between the ramekins, filling each no more than about 2/3 full. Smooth tops with knife. Bake for 25 minutes, or until pudding springs back to a light touch and a cake tester inserted into center of pudding comes out clean. Run tip of pare knife around each pudding to loosen any parts that may have stuck to ramekin. Turn puddings out on to individual serving plates. Serve warm with toffee sauce and, if desired, a dollop of whipped cream or a scoop of vanilla or maple ice cream.
Method for Toffee Sauce:
Melt butter in saucepan over medium heat. Add the sugar and stir until dissolved. Add the cream and reduce heat to simmer. Cook slowly, stirring occasionally, until sauce is slightly thick, about 6-8 minutes or so. Remove from heat and stir in the rum and vanilla. Serve warm over sticky date pudding. (Sauce will thicken as it starts to cool slightly).
Yield: 10 servings
NOTE 1: Pudding may also be baked in a greased (or parchment-lined) 9” baking pan for approximately 30-35 minutes or until cake tester inserted into center of pudding comes out clean and pudding springs back to a light touch. Cut into squares and serve warm with the warm toffee sauce.
NOTE 2: This pudding freezes well so can be made ahead of when needed. Simply thaw at room temperature and reheat pudding for a few seconds in microwave.
In saucepan, pour rum over dates. Let stand 20 minutes, stirring a couple of times. Add the cup of water and bring the dates, rum, and water to a boil over medium-high heat. Reduce heat to simmer and boil, uncovered, gently for approximately 5 minutes, stirring once or twice. Remove from heat and add the baking soda. Stir well. Let mixture stand, uncovered, for 20 minutes, stirring occasionally to loosely break up the dates.
Position oven rack in bottom third of oven and preheat oven to 350°F.
While date mixture is cooling, cream the butter and sugars together in bowl of stand mixer fitted with paddle attachment. Beat in the eggs, one at a time, beating well after each addition. Beat in the orange rind, maple syrup and vanilla.
Sift the dry ingredients together and incorporate into the creamed mixture just until they are completely blended. Stir in the date mixture.
Grease ten (10) ½-cup ramekins and place on rimmed baking sheet. Distribute the batter evenly between the ramekins, filling each no more than about 2/3 full. Smooth tops with knife. Bake for 25 minutes, or until pudding springs back to a light touch and a cake tester inserted into center of pudding comes out clean. Run tip of pare knife around each pudding to loosen any parts that may have stuck to ramekin. Turn puddings out on to individual serving plates. Serve warm with toffee sauce and, if desired, a dollop of whipped cream or a scoop of vanilla or maple ice cream.
Method for Toffee Sauce:
Melt butter in saucepan over medium heat. Add the sugar and stir until dissolved. Add the cream and reduce heat to simmer. Cook slowly, stirring occasionally, until sauce is slightly thick, about 6-8 minutes or so. Remove from heat and stir in the rum and vanilla. Serve warm over sticky date pudding. (Sauce will thicken as it starts to cool slightly).
Recipe Notes
Yield:10 servings NOTE 1: Pudding may also be baked in a greased (or parchment-lined) 9” baking pan for approximately 30-35 minutes or until cake tester inserted into center of pudding comes out clean and pudding springs back to a light touch. Cut into squares and serve warm with the warm toffee sauce. NOTE 2: This pudding freezes well so can be made ahead of when needed. Simply thaw at room temperature and reheat pudding for a few seconds in microwave.
[Copyright My Island Bistro Kitchen]
If you have made this recipe and enjoyed it and/or wish to share it with your friends and family, please do so on social media but be sure to share the direct link to this posting from my website.
Connect with My Island Bistro Kitchen on Social Media
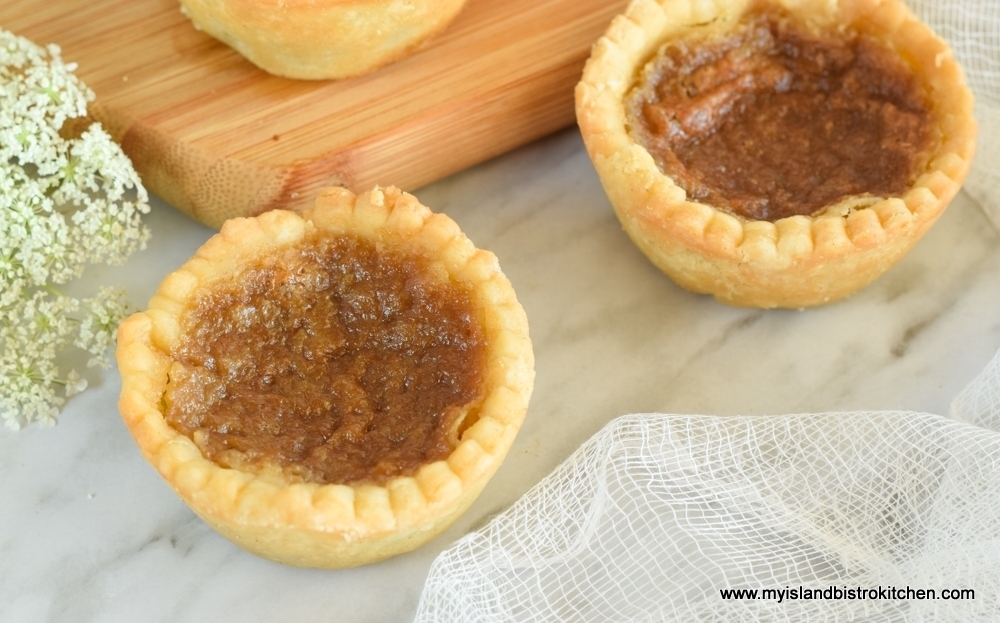
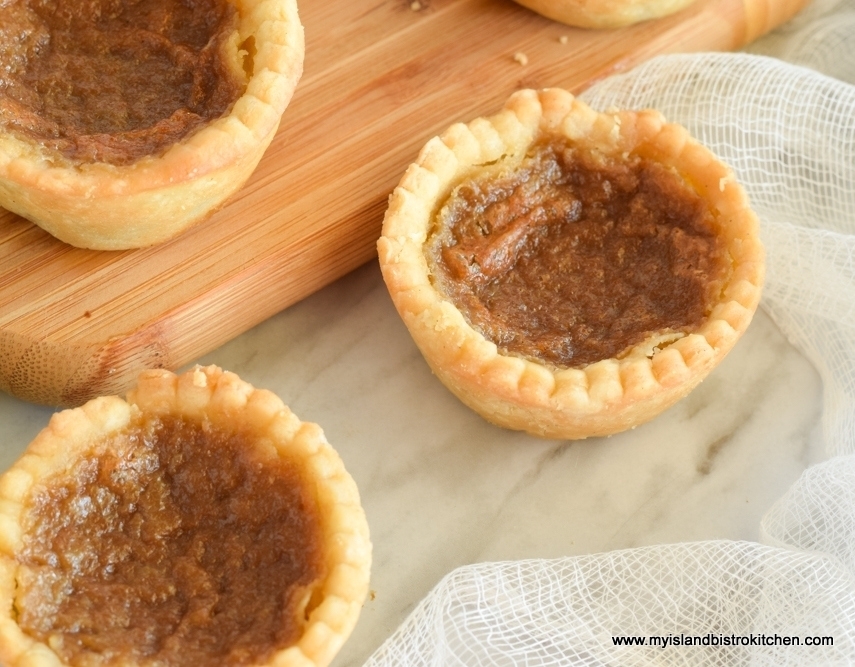
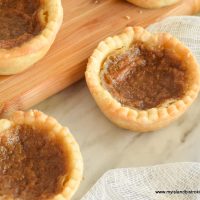
These old-fashioned butter tarts are actually both gluten free and lactose free. If you are not lactose intolerant, simply substitute regular butter and milk in the recipe.
Quite some time ago, I shared my traditional butter tart recipe. However, folks have been inquiring about a gluten-free recipe for the tarts so here it is. I won’t repeat my hints and tips for making butter tarts in this posting because the same ones hold true for the gluten-free version so I am directing readers to my original posting for butter tarts for this information.
Gluten-Free and Lactose-Free Butter Tarts
I don’t like a big glob of thick pastry in my butter tarts. As far as I am concerned, it is the gooey, sweet filling that is the star in these tarts. The pastry is involved just because it is the vessel to hold the filling. So, I use a thin rolled pastry and fit the pastry neatly and tidily into the muffin tin cups.
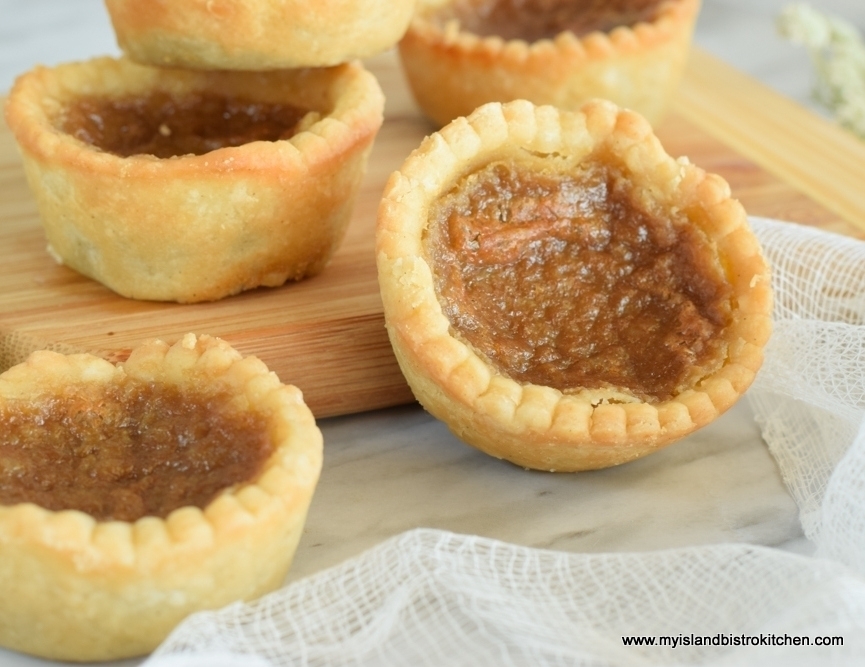
The pastry, nonetheless, still has to be tender and flaky because it is half the equation in these Canadian culinary delicacies. The gluten-free pastry recipe is the one that I developed and perfected first for my gluten-free apple pie, originally published to my website on January 11, 2018. It is now my go-to pastry recipe since it is perfectly tender and flaky and works well with sweet and savory pies as well as tarts.
As with my traditional butter tarts, you will find that the filling is slightly gooey but not too runny. I don’t care for tarts that, as soon as you bite into them, the filling pours out. The reason why I like a semi-solid filling is that I believe butter tarts should be able to be picked up off a plate and eaten by hand with no need for a plate and fork to catch a runny filling. This, of course, is purely a personal preference.
Gluten-Free and Lactose-Free Butter Tarts
[Printable recipe follows at end of posting]
Gluten-Free Lactose-Free Butter Tarts
Ingredients:
For Pastry:
2 cups (276g) gluten-free 1-to-1 flour
½ tsp salt
1½ tsp sugar
¼ cup cold lactose-free butter (76g)
¼ cup cold lard (76g)
1 large egg
1 tsp white vinegar
Enough water to make 2/3 cup liquid
For Filling:
½ cup light brown sugar, firmly packed
¼ cup dark brown sugar, firmly packed
2 extra-large eggs, light beaten
3 tbsp pure maple syrup
¼ cup melted lactose-free butter (no substitutes)
2 tbsp lactose-free milk (2%MF or 3%MF)
1½ tsp pure vanilla
1 tsp white vinegar
Dash salt
Method:
For Pastry: Lightly grease 12 muffin cups. In medium-sized bowl, whisk the flour, salt, and sugar together. Cut the butter and lard into chunks and add to the flour. With a pastry cutter, cut the butter and lard into the flour until the fats resemble the size of large peas.
In a measuring cup, whisk the egg and vinegar together. Add enough cold water to measure 2/3 cup. Add the egg-vinegar-water mixture to the flour, small amounts at a time, and mix with a fork or hands. Add only enough water that the dough clings together and can be gathered into a ball (it may not take all the liquid).
Divide the dough in four pieces. Form disk shapes with each piece. Place disks in the refrigerator for about 10-15 minutes to chill. Remove one disk at a time from the refrigerator and break off chunks, about 2 oz in size, which should give ample for 4” circles to be cut for each tart. Place dough between two sheets of parchment paper (or wax paper) lightly dusted with flour. Roll pastry to desired thickness, generally between 1/16”and 1/8” thickness. Peel the top piece of parchment from the rolled out pastry. Cut out pastry circles with a floured 4” round cookie cutter.
Carefully transfer each cut out pastry circle to muffin tin cup. Fit the pastry into the cup, ensuring there are no air pockets between the pastry and the muffin cups. Repeat with chilled dough to make enough pastry circles for 12 tart shells, gathering up and re-rolling pastry scraps as necessary. Place pan of tart shells in freezer for about 12-15 minutes to chill to prevent shrinkage of pastry during baking.
For Filling: Preheat oven to 400°F. Add all ingredients, in order given, into a 4-cup measuring cup. Whisk or stir until ingredients are well blended. Remove the muffin cups from the freezer and pour filling equally into the 12 muffin cups. Bake at 400°F for 5 minutes then reduce temperature to 375°F and bake tarts for 17-19 minutes or until filling domes and appears set. Let tarts cool at least 30 minutes in muffin tins on cooling rack. Using the tip of a sharp knife, gently lift the tarts from the muffin cups.
These gluten-free (and lactose-free) melt-in-your-mouth pastries are filled with a delectable, slightly gooey, but not too runny, buttery rich caramel-like filling. A classic Canadian culinary delicacy.
Course
Dessert
Keyword
butter tarts
Servings11
My Island Bistro KitchenMy Island Bistro Kitchen
Ingredients
For Pastry:
2cupsgluten-free 1-to-1 flour(276g)
½tspsalt
1½tspsugar
¼cupcold lactose-free butter(76g)
¼cupcold lard(76g)
1large egg
1tspwhite vinegar
Enough water to make 2/3 cup liquid
For Filling:
½cuplight brown sugar,firmly packed
¼cupdark brown sugar,firmly packed
2extra-large eggs,light beaten
3tbsppure maple syrup
¼cupmelted lactose-free butter(no substitutes)
2tbsplactose-free milk(2%MF or 3%MF)
1½tsppure vanilla
1tspwhite vinegar
Dash salt
Instructions
For Pastry:
Lightly grease 12 muffin cups. In medium-sized bowl, whisk the flour, salt, and sugar together. Cut the butter and lard into chunks and add to the flour. With a pastry cutter, cut the butter and lard into the flour until the fats resemble the size of large peas.
In a measuring cup, whisk the egg and vinegar together. Add enough cold water to measure 2/3 cup. Add the egg-vinegar-water mixture to the flour, small amounts at a time, and mix with a fork or hands. Add only enough water that the dough clings together and can be gathered into a ball (it may not take all the liquid).
Divide the dough in four pieces. Form disk shapes with each piece. Place disks in the refrigerator for about 10-15 minutes to chill. Remove one disk at a time from the refrigerator and break off chunks, about 2 oz in size, which should give ample for 4” circles to be cut for each tart. Place dough between two sheets of parchment paper (or wax paper) lightly dusted with flour. Roll pastry to desired thickness, generally between 1/16”and 1/8” thickness. Peel the top piece of parchment from the rolled out pastry. Cut out pastry circles with a floured 4” round cookie cutter.
Carefully transfer each cut out pastry circle to muffin tin cup. Fit the pastry into the cup, ensuring there are no air pockets between the pastry and the muffin cups. Repeat with chilled dough to make enough pastry circles for 12 tart shells, gathering up and re-rolling pastry scraps as necessary. Place pan of tart shells in freezer for about 12-15 minutes to chill to prevent shrinkage of pastry during baking.
For Filling:
Preheat oven to 400°F. Add all ingredients, in order given, into a 4-cup measuring cup. Whisk or stir until ingredients are well blended. Remove the muffin cups from the freezer and pour filling equally into the 12 muffin cups. Bake at 400°F for 5 minutes then reduce temperature to 375°F and bake tarts for 17-19 minutes or until filling domes and appears set. Let tarts cool at least 30 minutes in muffin tins on cooling rack. Using the tip of a sharp knife, gently lift the tarts from the muffin cups.
Recipe Notes
Copyright My Island Bistro Kitchen
If you have made this recipe and enjoyed it and/or wish to share it with your friends and family, please do so on social media but be sure to share the direct link to this posting from my website.
Connect with My Island Bistro Kitchen on Social Media
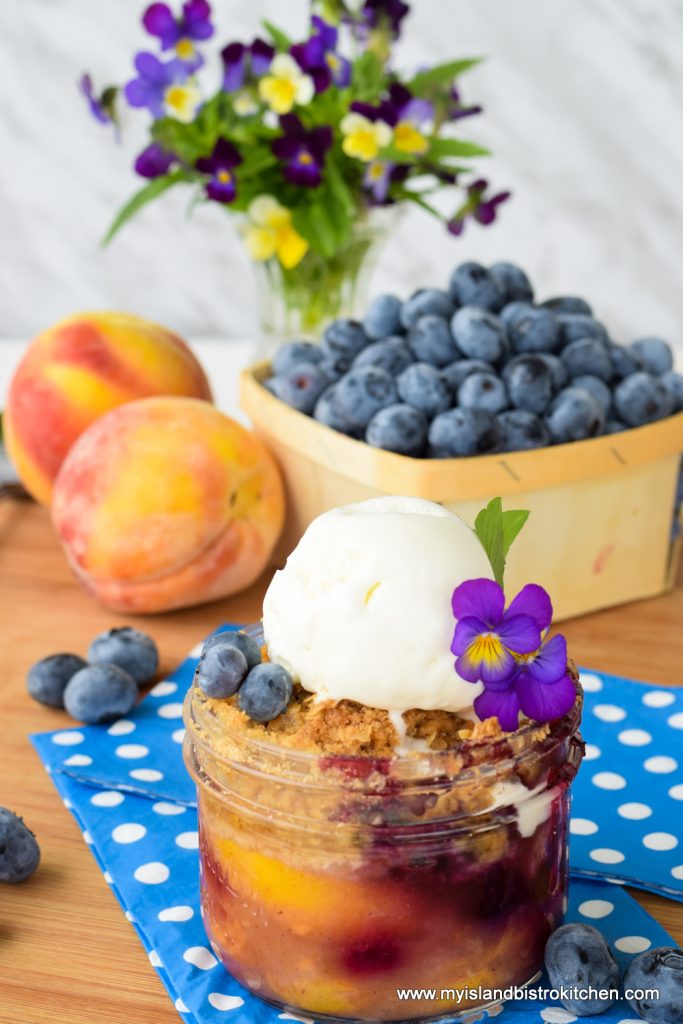
There are so many options for summertime desserts. I try to use fresh fruits in desserts throughout the summer season and often look for combinations that will work well together. Some fruits just naturally complement each other, like blueberries and peaches, for example. Together, they make a fabulous Peach Blueberry Crisp! Continue reading Perfect Peach Blueberry Crisp Recipe→
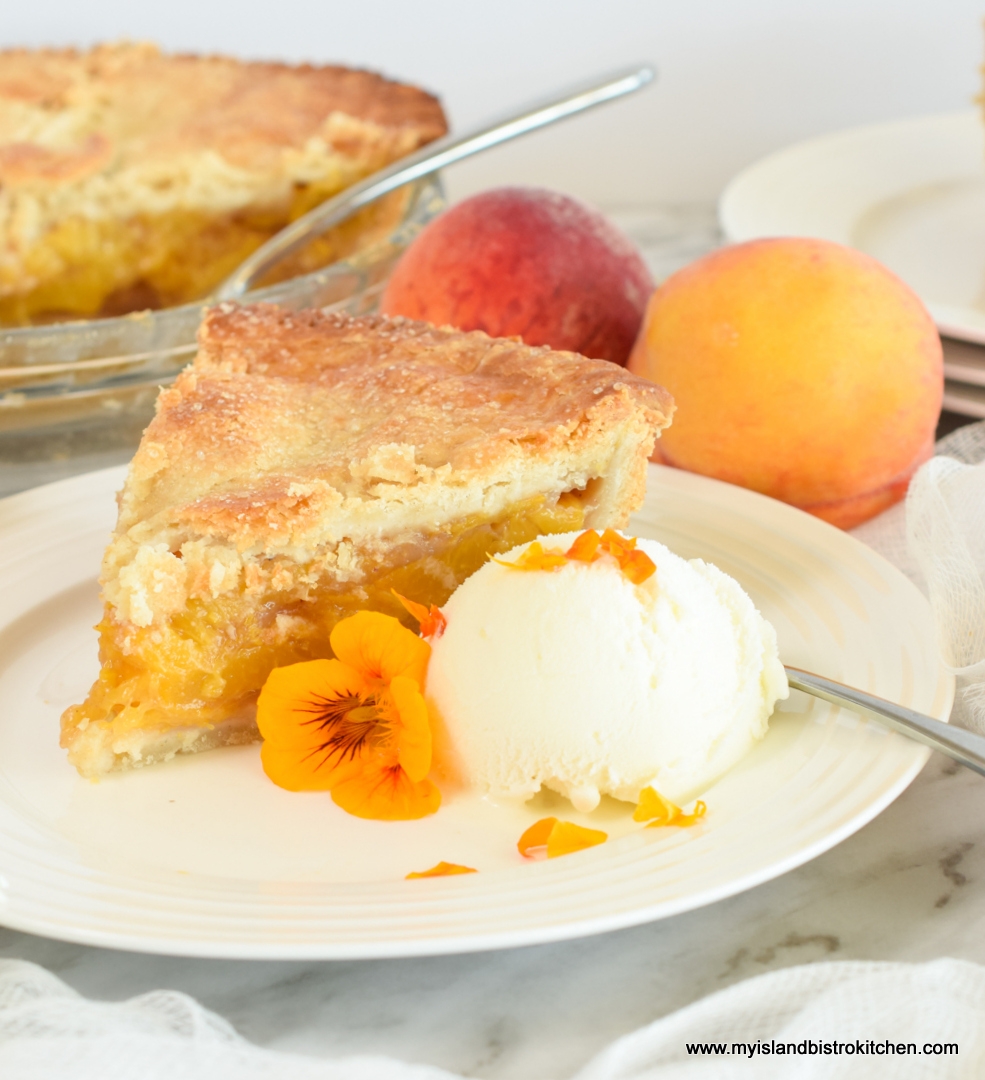
One of the things I most look forward to in summer is all the fresh produce. I especially love all the seasonal fruits and berries because they make grand pies and pastry making is one of my favorite baking activities. In August, we eagerly await the wonderful peaches that come from the Niagara region – the baskets of large yellow/orange plump, juicy peaches. One of the first things I make with the fresh peaches is a Classic Peach Pie. Continue reading Classic Peach Pie Recipe→
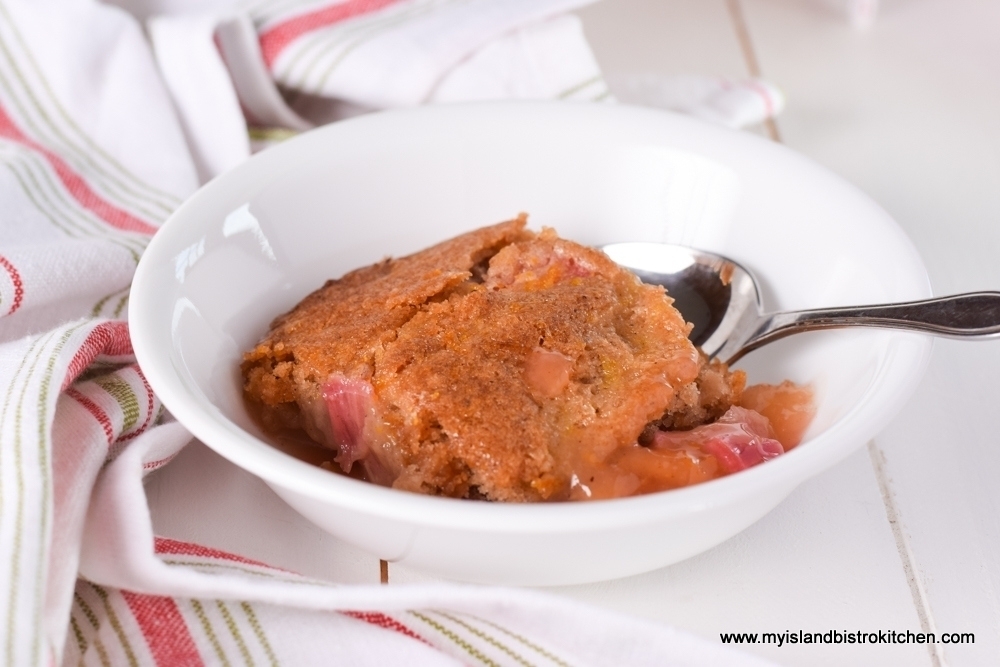
Today, I am sharing my recipe for a real old-fashioned type of dessert – Rhubarb Pudding Cake. The cake is “self-saucing” which means that the delectable sauce forms underneath the simple cake batter as the cake bakes. It’s an “all-in-one” pudding and cake! It may not be the most extravagant looking dessert but it sure is mighty tasty! If you are a rhubarb lover, you will love this dessert. Continue reading Old-fashioned Rhubarb Pudding Cake→
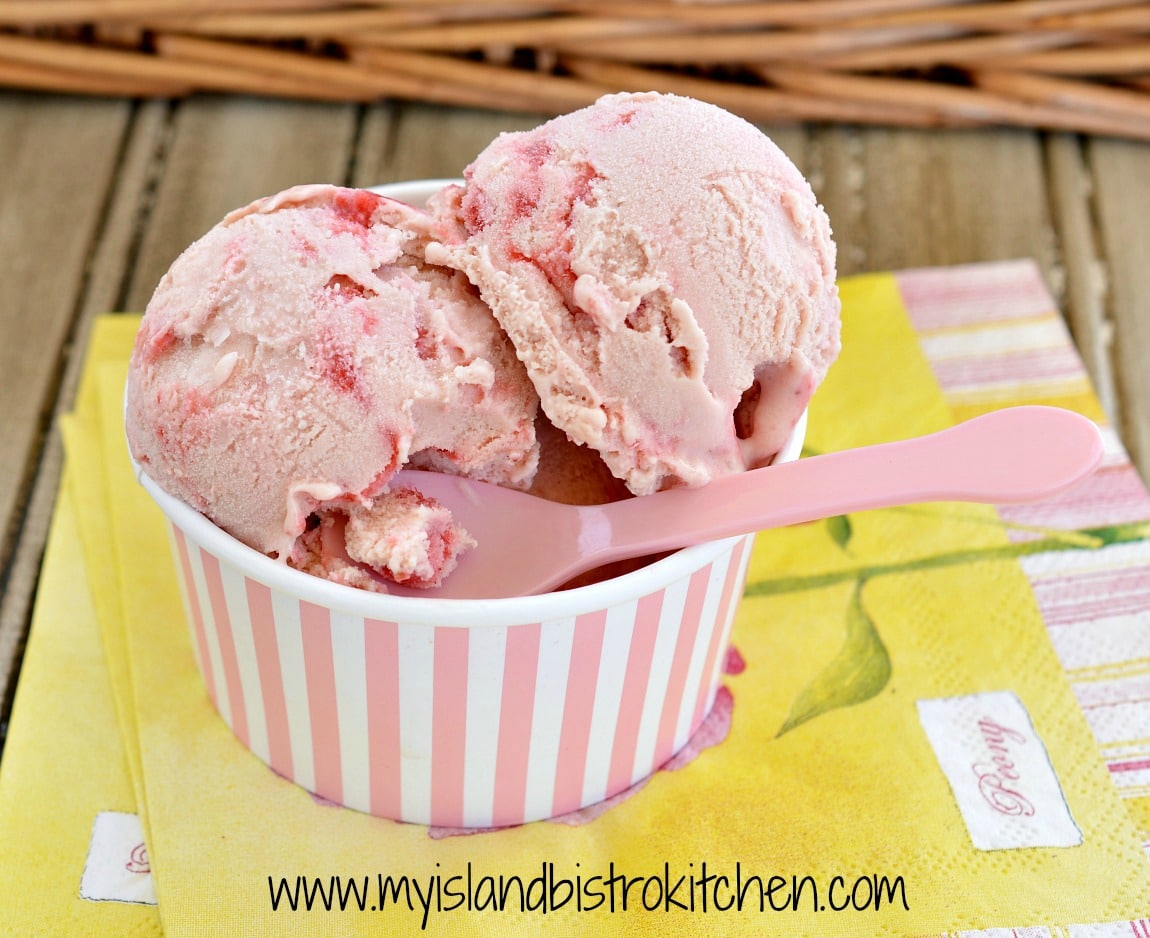
Summer just would not be summer without ice cream and what better way to enjoy it than to combine two of the season’s best flavors – strawberry and rhubarb – into homemade Strawberry Rhubarb Ripple Ice Cream! Continue reading Old-fashioned Strawberry Rhubarb Ripple Ice Cream→
This Carrot Pudding is an old-fashioned steamed pudding made with very plain, simple ingredients – it doesn’t get much more plain than grated carrots and shredded potato! Continue reading Steamed Carrot Pudding Recipe→
There are so many ways to make rice pudding. Some use the stove-top method, others (like me) use the oven. Some bake the rice pudding directly in the oven but I prefer the hot water bath method for reasons explained below.
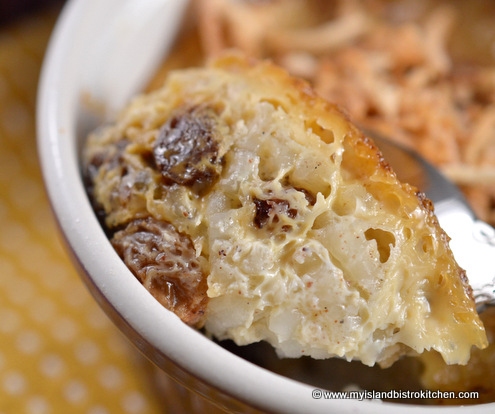
For rice pudding, I prefer a short grain rice such as Arborio which is what I have used in this pudding. Arborio rice (often used in risotto) is named after the Italian town where it is grown. What makes it my preference for rice pudding is that, when cooked, it has lovely round pearl-like grains that hold their shape and don’t turn to “mush”. This rice also has a high starch level and that helps to self-thicken the pudding as it bakes and also contributes to its creamy texture.
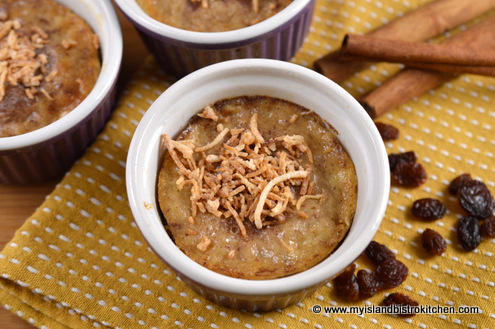
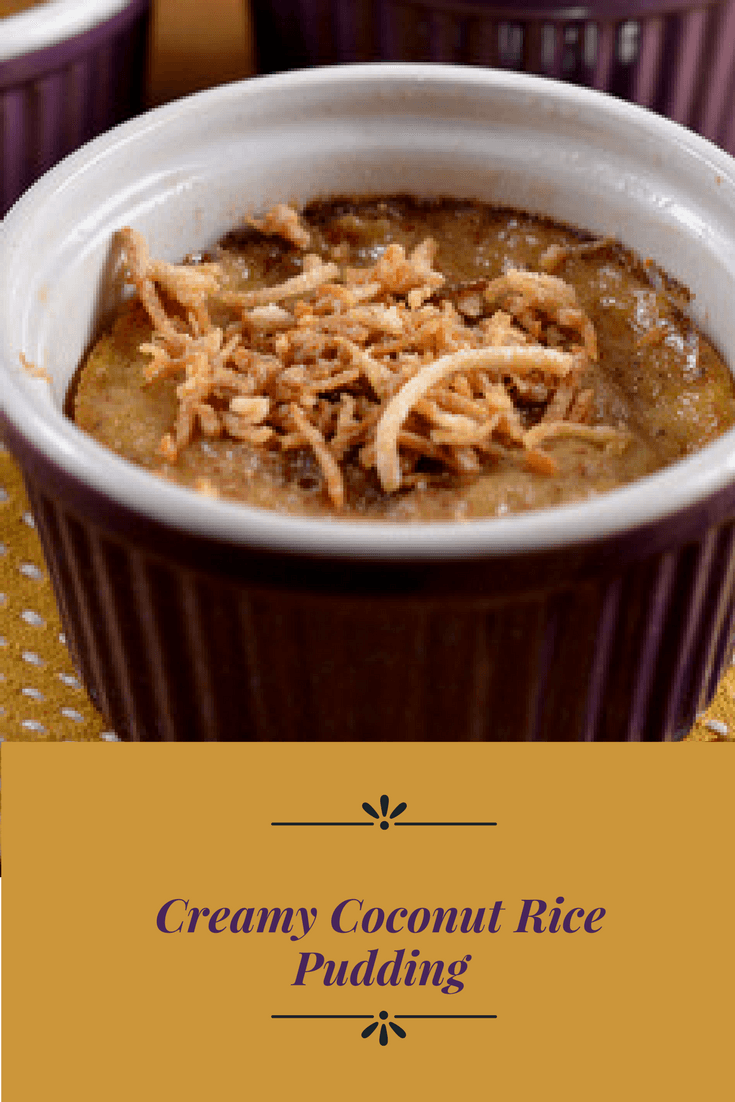
Creamy Coconut Rice Pudding
This pudding is true comfort food. The addition of coconut milk gives the pudding a subtle hint of coconut but not so strong that it detracts from the basic flavour we expect to find in an old-fashioned rice pudding. I think the texture of the coconut milk also helps to keep the custard creamy.
I have used a maple syrup that was infused with cinnamon, nutmeg, and cloves. This does add a bit of discrete flavor to the pudding but, certainly, plain maple syrup would work just fine. I have added a blend of three spices – cardamon, nutmeg, and cinnamon – but again, not in large quantities because I don’t want the pudding to be overly spiced. I just want it to be delicately flavored.
Raisins, a traditional addition to rice puddings, do need to be “plumped” before adding them to the pudding as, otherwise, they don’t become very soft in the custard. It’s not very pleasing to the palette to bite into hard, dry raisins amidst a soft creamy custard. For this recipe, I have soaked the 1/3 cup of raisins in about 1 tablespoon of Amaretto by placing these two ingredients in a small covered dish for at least 45 minutes. Shaking the dish periodically helps to ensure that all raisins are coated with the liqueur. In fact, you could leave them soaking for a couple of hours (the raisins will just be extra happy if you do so!).
Rice pudding custard is actually quite delicate and, for greatest success, it is best if the egg proteins are protected from direct hot heat and from fast baking. Because the pudding is made with an egg-milk custard, it is therefore, in my opinion, best if it is baked slowly in a hot water bath. This is simply a method of baking whereby the pudding dish(es) are placed inside a larger pan into which hot water is poured up to about half way on the pudding dishes or even up to the level of the custard in the ramekins. However, the water should not be so deep that the pudding dishes start to float. They need to sit stable in the water as the pudding bakes.
The benefits of baking this pudding in a hot water bath are several. First, the hot water adds steam and moisture to the oven which will prevent the puddings from drying out and cracking on the top as they bake. Second, any custard mixture of milk and eggs has the potential to curdle – that’s when the milk-egg mixture separates from the solids (in this case, the rice and raisins). Because it is a slower method of baking and the hot water provides an even heat source, the hot water bath method helps to prevent the risk of curdled custard. The hot water also helps the custard to bake evenly, both its outside edges as well as its center. Without the hot water baking method, the custard could bake quicker on the outside edges of the pudding than in the center and part of the pudding would be dried out. Lastly, the slow baking combined with an oven of moist heat will help to keep the pudding creamy in texture as opposed to “rubbery”.
I place the 9″x13″x2″ pan with the ramekins in it on the oven shelf and just ever-so-slightly pull the shelf out, just enough that I can safely pour the hot water into the larger baking pan without getting a burn. I find this is a safer method than filling the pan with the hot water and transporting it to the oven. The water needs to be kept at the same level during the baking process so, since it naturally evaporates, you may need to add more hot water as the pudding bakes.
Bake the puddings for approximately 1 hour or until pudding top edges are set, centers are still a little “jiggly”, and the puddings are golden-colored. A knife inserted in or near the centre of the pudding should come out clean if the pudding is done. Don’t overbake the pudding as it will dry out and be less creamy. Remove ramekins from water bath and let them stand on a wire rack to set for approximately 10 minutes before serving.
Adding toasted coconut to the top of this pudding is optional but the crunchiness and flavour are an added touch. Toasting coconut is simple. The coconut gets spread thinly on a baking sheet and baked in a 350° F oven for about 8-9 minutes. It is important to watch that the coconut does not burn and it should be turned once or twice during the toasting process to ensure even color.
Creamy Coconut Rice Pudding
Creamy Coconut Rice Pudding
Ingredients:
1¼ cups cooked Arborio rice
1/3 cup raisins, soaked in 1 tbsp Amaretto
½ cup coconut milk
¾ cup whole milk
1 extra-large egg, lightly beaten
2 tbsp granulated sugar
2 tbsp maple syrup
¼ tsp salt
½ tsp vanilla
1/8 tsp cardamom
1/8 tsp nutmeg
¼ tsp cinnamon
¼ cup shredded coconut (sweetened or unsweetened), toasted (optional)
Method:
In small covered dish, soak raisins in Amaretto for at least 45 minutes to plump them, shaking or stirring occasionally to ensure all raisins are coated with the liqueur.
In large bowl, whisk together the coconut and whole milk, egg, sugar, maple syrup, salt, vanilla, and spices. Add rice and raisins and stir gently. Divide mixture between 6 prepared ramekins and place in 9”x13”x2” pan. Pour hot water into pan up to half-way on the sides of the ramekins or even up to about the level of the custard in the dishes. However, make sure the ramekins are not floating in the water.
Bake for approximately 1 hour or until pudding top edges are set, centers are still a little “jiggly” and puddings are golden-colored. A knife inserted in or near the centre of the pudding should come out clean if the pudding is done. Remove ramekins from water bath and let stand on wire rack to set for approximately 10 minutes before serving. To serve, top each with toasted coconut, if desired.
[To toast coconut: Spread coconut on baking sheet and bake in 350° F oven for 8-9 minutes, stirring once or twice, until coconut is lightly tanned in color.]
Yield: 6 servings.
—————————————————————————-
Thank you for visiting “the Bistro” today. If you enjoyed this posting and recipe, please share it on your social media websites.
Connect with “the Bistro” through the following social media:
A delicate coconut-flavored creamy baked rice pudding with subtle spice flavoring
Ingredients
1¼ cups cooked Arborio rice
1/3 cup raisins, soaked in 1 tbsp Amaretto
½ cup coconut milk
¾ cup whole milk
1 extra-large egg, lightly beaten
2 tbsp granulated sugar
2 tbsp maple syrup
¼ tsp salt
½ tsp vanilla
1/8 tsp cardamom
1/8 tsp nutmeg
¼ tsp cinnamon
¼ cup shredded coconut (sweetened or unsweetened), toasted (optional)
Instructions
In small covered dish, soak raisins in Amaretto for at least 45 minutes to plump them, shaking or stirring occasionally to ensure all raisins are coated with the liqueur.
In large bowl, whisk together the coconut and whole milk, egg, sugar, maple syrup, salt, vanilla, and spices. Add rice and raisins and stir gently. Divide mixture between 6 prepared ramekins and place in 9”x13”x2” pan. Pour hot water into pan up to half-way on the sides of the ramekins or even up to about the level of the custard in the dishes. However, make sure the ramekins are not floating in the water.
Bake for approximately 1 hour or until pudding top edges are set, centers are still a little “jiggly” and puddings are golden-colored. A knife inserted in or near the centre of the pudding should come out clean if the pudding is done. Remove ramekins from water bath and let stand on wire rack to set for approximately 10 minutes before serving. To serve, top each with toasted coconut, if desired.
[To toast coconut: Spread coconut on baking sheet and bake in 350°F oven for 8-9 minutes, stirring once or twice, until coconut is lightly tanned in color.]
As Christmas approaches and temperatures dip (at least for those of us who live in colder climates), my thoughts tend to turn to substantial “comfort” foods — visions of roast turkey, stuffing and gravy, cranberry sauce, fluffy mashed potatoes, and lots of root vegetables (such as carrots and turnip) enter my head. And then, of course, there are the dessert options. Traditionally, in my family, the main Christmas meal of roast turkey is followed by a rich steamed plum pudding served with a brown sugar sauce. You can get my recipe for plum pudding here.
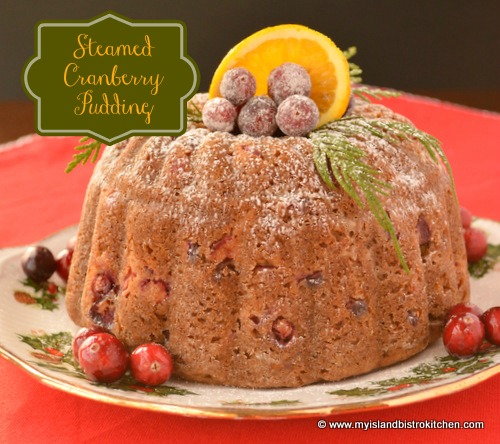
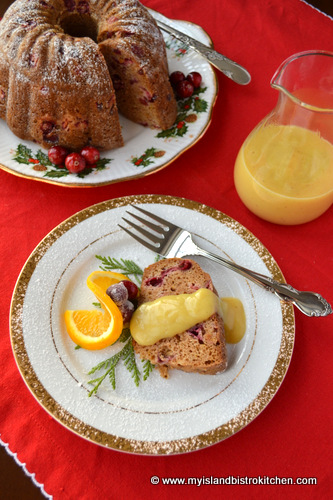
However, there are other options for steamed pudding, particularly for those who prefer something a little lighter than the rich plum pudding. So, I am sharing my recipe for steamed cranberry pudding which is divine when served with a decadent eggnog sauce (recipe follows).
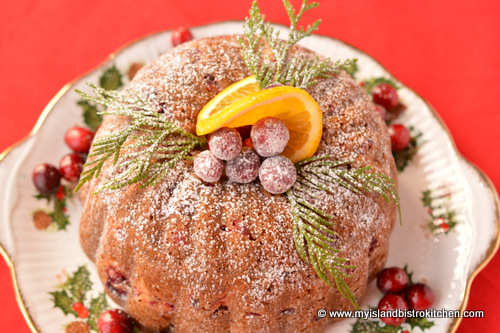
Steamed Cranberry Pudding with Eggnog Sauce
This cranberry pudding is super easy to make and, when paired with a smooth and silky eggnog sauce….well….you might want to have a second pudding on hand for those who have room for seconds!
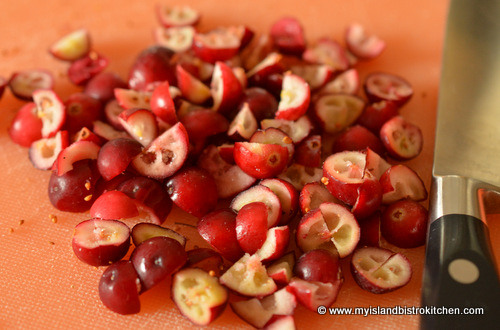
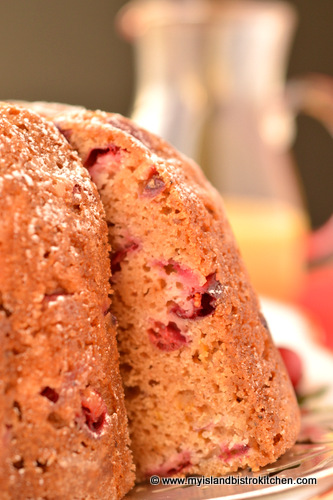
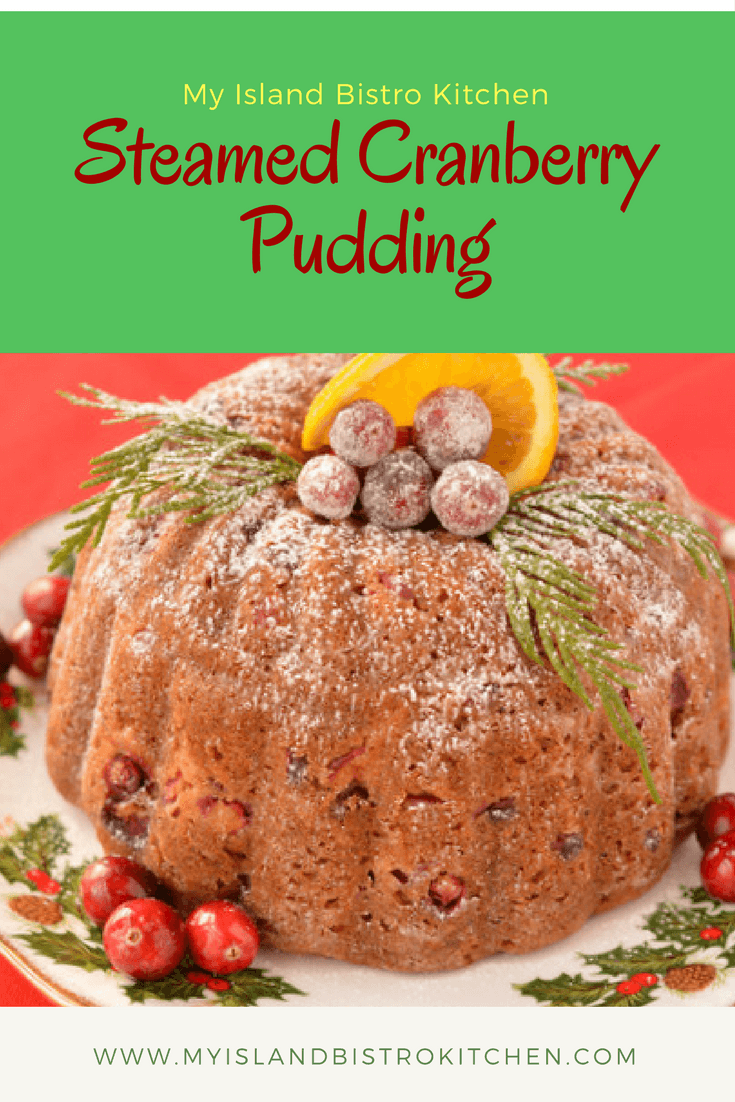
This pudding is not highly spiced. It has just enough cinnamon, nutmeg, and cloves to give it subtle flavour. Either fresh or frozen cranberries may be used. In order to release their flavour, the cranberries should be coarsely chopped into about 2-3 pieces each for this pudding. Tossing the cut berries in some sugar while the batter is being prepared further draws out their flavour.
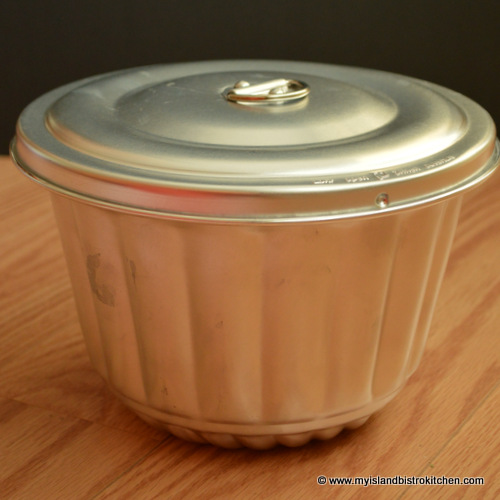
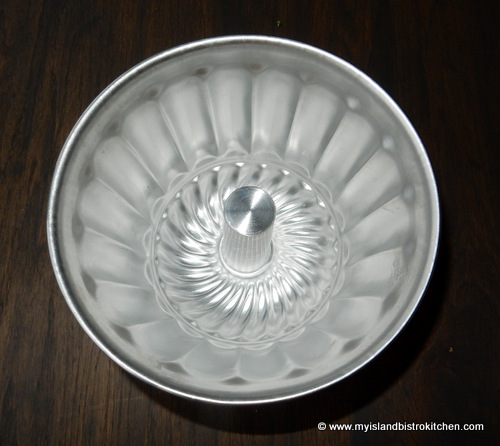
If you don’t have a steamed pudding mould like the one in the photo below, you can use clean tin cans or even a metal bowl. Simply spoon the batter into the cans or bowl, cover with a double thickness of heavy-duty tin foil, and secure it with string. The important thing is that, whatever vessel is used, it has a tight cover for the steaming process since the steam is what cooks the pudding and maintains the moisture without leaving the pudding wet and soggy. I used a standard 8-cup mould but I believe a 6-cup mould would suffice for this pudding.
Steamed Pudding Mould
The advantages of using a pudding mould specially designed for steaming puddings is that it comes with its own cover and it also has a funnel in the center which helps the pudding to cook evenly and without falling. This, of course, is in addition to the attractive shape of the pudding when it is unmoulded and plated.
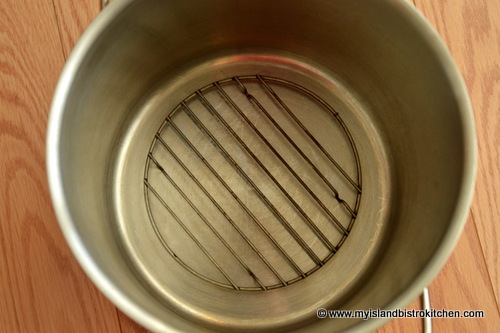
To steam this pudding, a large stock pot will be needed – one that allows enough room for the pudding mould to sit in the center of the pot and has at least 1 1/2 ” – 2 ” space all around the mould. A small wire rack that fits into the pot will also be required. This is what the mould needs to sit on as the pudding steams.
It’s important that the mould (or bowl or tin cans) not touch the bottom or sides of the pot as the water needs to circulate all around the pot (including underneath the pudding mould) in order for the pudding to cook evenly. Once the pudding mould is set on the wire rack, carefully pour in enough boiling water to come up to about the half-way point on the pudding mould. This is the level of water that must be maintained throughout the entire steaming process so additional boiling water may need to be added as the pudding steams. Once the boiling water has been added to the stock pot, cover the large pot with a lid and bring the water back to a full boil then immediately reduce the heat to a gentle boil.
Generally speaking, you’ll need to allot at least 1 1/2 – 2 hours for the pudding to steam over medium-low heat. This, however, is only an estimate and the true test is when a cake tester inserted into the center of the pudding comes out clean. I recommend removing the lid from the pudding mould and checking the pudding with a cake tester at the 1 1/2-hour point and then, if not cooked, about every 10 minutes after until the tester comes out clean. When the pudding is cooked, remove it from its water bath and place the mould on a wire rack. Let the pudding rest in the mould for about 20 minutes then remove the lid from the mould and transfer the pudding to a serving plate.
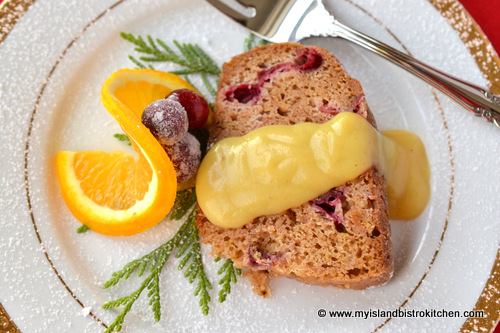
Steamed Cranberry Pudding
While this pudding would be well complimented by a traditional brown sugar sauce, it is particularly tasty served with a rich eggnog sauce. For ultimate flavour, the eggnog sauce is best served lukewarm, rather than piping hot, and can actually even be served quite cool. Because of the sauce’s richness, not a lot of the sauce is needed per serving. If you are an eggnog lover, you will love this sauce which would be equally good served over a bread pudding, too.
Steamed Cranberry Pudding
Steamed Cranberry Pudding
Ingredients:
1 1/3 cups coarsely chopped cranberries, fresh or frozen
½ cup butter
¾ cup granulated sugar (reserve ¼ cup for tossing with cranberries)
1 egg
1 tsp vanilla
2 tsp grated orange rind
1½ cups flour
1 tsp baking powder
1 tsp baking soda
¼ tsp salt
½ tsp cinnamon
¼ tsp nutmeg
1/8 tsp cloves
Grease 6- or 8-cup pudding mould or spray with cooking spray.
Toss the coarsely chopped cranberries with ¼ cup of the sugar, ensuring the cut sides of the berries are coated. Set aside.
Cream butter and remaining sugar in large bowl. Beat in egg and vanilla. Add grated orange rind.
In separate bowl, sift the flour, baking powder, soda, salt, and spices.
In small bowl, whisk together eggnog, milk, and Cointreau.
Add dry ingredients to the butter-sugar-egg mixture alternately with the wet ingredients, starting and ending with the dry ingredients.
Lastly, fold in the cranberries. Transfer batter to prepared pudding mould. Cover tightly with lid. Place mould on wire rack in large pot and fill pot with boiling water to about half way up the side of the mould. Cover steamer pot with lid and bring the water to a full boil then immediately reduce the heat to a gentle boil. Steam the pudding over medium-low heat for approximately 1½ hours or until cake tester inserted into centre of pudding comes out clean. (NOTE: Add more water to pot as necessary to maintain the water level at about the half-way point on the pudding mould during the entire steaming process.) Remove mould from water bath and place on wire rack and let rest for 20 minutes then turn pudding out onto serving dish and serve warm with Eggnog Sauce (recipe below).
In small bowl, combine the sugar, cornstarch, and nutmeg.
Pour eggnog into large microwaveable-safe bowl. Whisk in dry ingredients until smooth. Cook on HIGH until mixture is thickened to desired consistency, stirring after each 1½ minutes. Remove from microwave and stir in vanilla, Cointreau, and butter. (Note: Sauce will thicken slightly more as it cools.)
Sauce is best served lukewarm, spooned over individual slices of Steamed Cranberry Pudding.
A tasty steamed pudding served with smooth and silky eggnog sauce
Ingredients
For Pudding:
1 1/3 cups coarsely chopped cranberries, fresh or frozen
½ cup butter
¾ cup granulated sugar (reserve ¼ cup for tossing with cranberries)
1 egg
1 tsp vanilla
2 tsp grated orange rind
1½ cups flour
1 tsp baking powder
1 tsp baking soda
¼ tsp salt
½ tsp cinnamon
¼ tsp nutmeg
1/8 tsp cloves
2 tbsp prepared eggnog
2 tbsp milk
1 tbsp Cointreau
Eggnog Sauce Ingredients:
2/3 cup sugar
1½ - 2 tbsp cornstarch
¼ tsp nutmeg
2 cups prepared eggnog
2 tsp vanilla
3 tbsp Cointreau
2 tbsp butter
Instructions
Grease 6- or 8-cup pudding mould or spray with cooking spray.
Toss the coarsely chopped cranberries with ¼ cup of the sugar, ensuring the cut sides of the berries are coated. Set aside.
Cream butter and remaining sugar in large bowl. Beat in egg and vanilla. Add grated orange rind.
In separate bowl, sift flour, baking powder, soda, salt, and spices.
In small bowl, whisk together eggnog, milk, and Cointreau.
Add dry ingredients to the butter-sugar-egg mixture alternately with the wet ingredients, starting and ending with the dry ingredients.
Lastly, fold in the cranberries. Transfer batter to prepared pudding mould. Cover tightly with lid. Place mould on wire rack in large pot and fill pot with boiling water to about half way up the side of the mould. Cover steamer pot with lid and bring the water to a full boil then immediately reduce the heat to a gentle boil. Steam the pudding over medium-low heat for approximately 1½ hours or until cake tester inserted into centre of pudding comes out clean. (NOTE: Add more water to pot as necessary to maintain the water level at about the half-way point on the pudding mould during the entire steaming process.) Remove mould from water bath and place on wire rack and let rest for 20 minutes then turn pudding out onto serving dish and serve warm with Eggnog Sauce (recipe below).
Eggnog Sauce:
In small bowl, combine the sugar, cornstarch, and nutmeg.
Pour eggnog into large microwaveable-safe bowl. Whisk in dry ingredients until smooth. Cook on HIGH until mixture is thickened to desired consistency, stirring after each 1½ minutes. Remove from microwave and stir in vanilla, Cointreau, and butter. (Note: Sauce will thicken slightly more as it cools.)
Sauce is best served lukewarm, spooned over individual slices of Steamed Cranberry Pudding.
If you have made this recipe and enjoyed it and/or wish to share it with your friends and family, please do so on social media but be sure to share the direct link to this posting from my website.
Connect with My Island Bistro Kitchen on Social Media
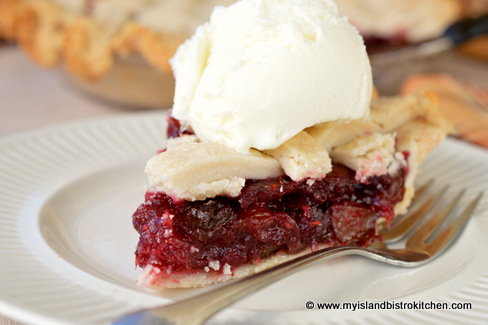
I’m not sure of the origins of Mock Cherry Pie but my grandmother made a version of this delight when I was a small child. Sometimes called cranberry pie, it’s not an altogether common pie (at least in my circles) these days but it is very tasty and colorful with its deep ruby red color. It lends itself well to a lattice top crust but is often made with a standard full top crust. Continue reading Mock Cherry Pie→
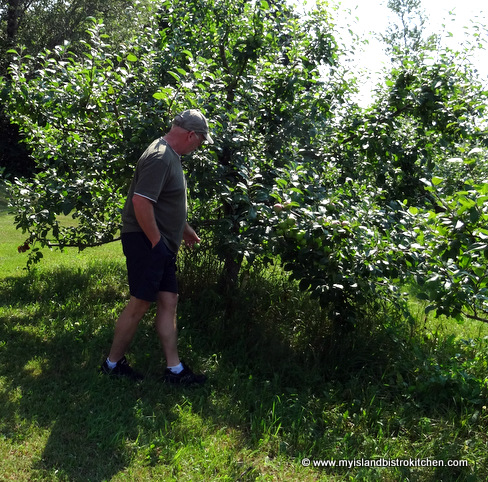
Today, I’m taking you on a tour with me to Beamish Organic Apple Orchard and Deep Roots Distillery in Warren Grove, PEI. Owner, Mike Beamish, has been growing apples since 1990 when he started with 200 trees on his hobby farm near Charlottetown.
Mike Beamish Checking on his Apple Crop
Mike’s goal was always to grow apples organically although he did initially grow them using conventional methods in the early years because it was difficult to find non-chemical controls for some pests. Once more research was done and non-chemical controls were available to growers, Beamish transitioned his orchard to be organic in 2003 following the standard three-year period to be certified organic. During the three-year period, no chemical applications can be used. Beamish is certified under Atlantic Certified Organics (ACO), a certification body which is accredited with the Canadian federal government. This body enforces the national organic standards such as buffer zone requirements from surrounding farms using conventional farming methods and it provides a list of approved substances that can be used in organic farming. The orchard is subject to annual audits by the ACO to ensure only approved substances and organic farming practices are used. Certified organic farmers are required to keep records of any products or substances used and the farmers must be re-certified each year.
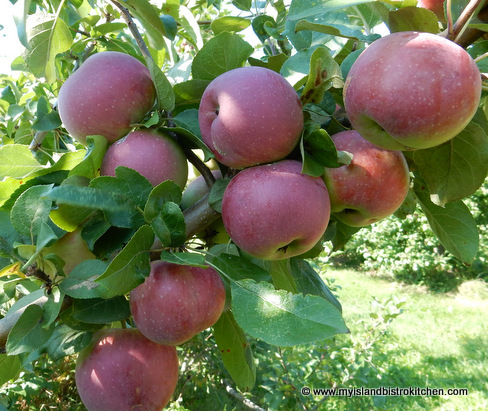
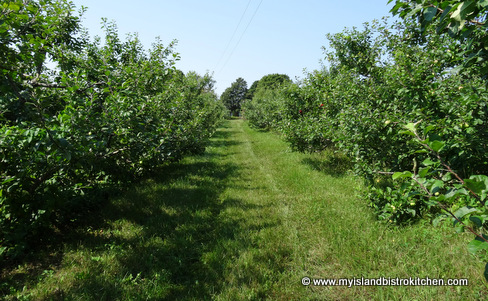
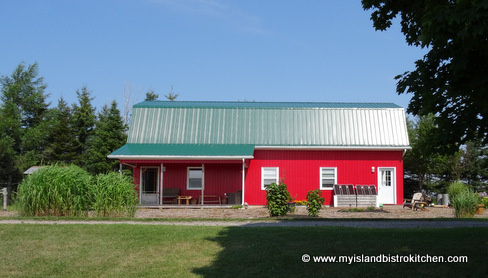
Beamish Organic Apple Orchard, Warren Grove, PEI
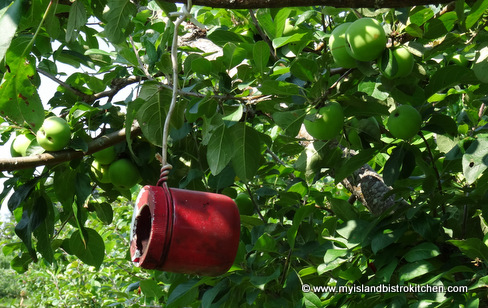
Growing apples organically does come with its challenges since farmers don’t have access to the traditional chemical treatments non-organic apple growers can use. Beamish says the biggest challenges are dealing with pests such as bugs and rodents, disease in the trees and apples, and ensuring soil nutrition. Any products applied to the ground or trees must be certified organic products only. He counters these challenges by buying and applying organic compost around the trees, installing little ground fences around each tree to deter rodents, and hanging certified organic products in the trees to fend off pests such as moths, apple fruit flies, and railroad worms.
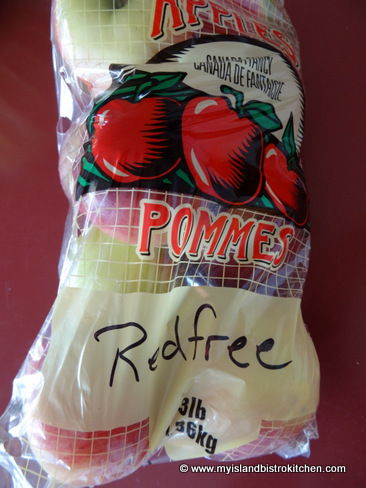
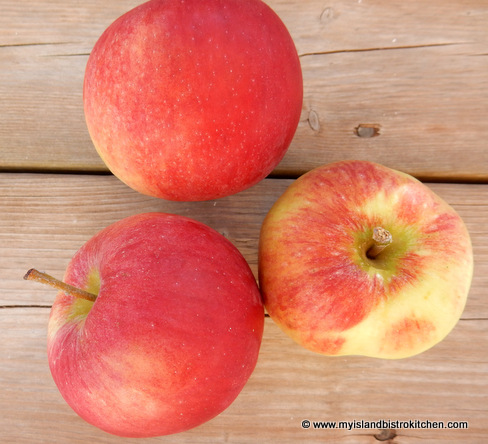
At one point, the Beamish Orchard had 800 apple trees; however, Island winters can be harsh and, in 1999, the orchard cut back to 500 trees in its U-pick orchard. The orchard currently has about 300 apple-producing trees. Beamish grows four varieties of apples – Red Free, Novamac, Liberty, and Freedom. The biggest seller are the Red Free, an early variety ready in mid-September.
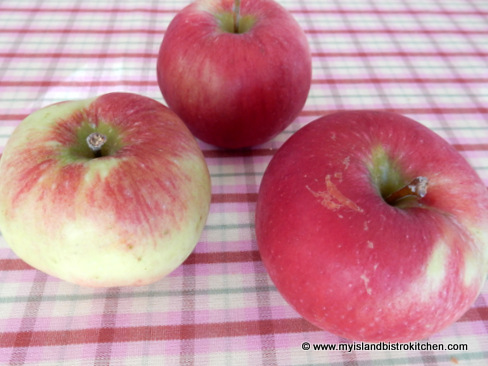
The Red Free variety is particularly good for cooking as these apples keep their shape and, because they are non-acidic, there is no need for a lot of sugar.
Red Free Apples
This year (2015) will mark the first year that the Beamish Orchard will not operate as a U-pick. They will still have apples for sale at the farm but, because they have reduced the number of trees in the orchard, there will not be enough apples to operate a U-pick. In addition, Beamish has also created another usage of his apple crop as he has started a distillery.
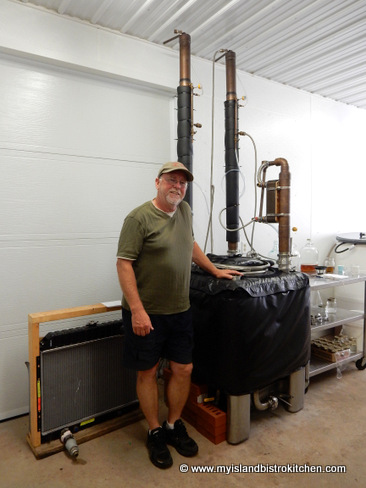
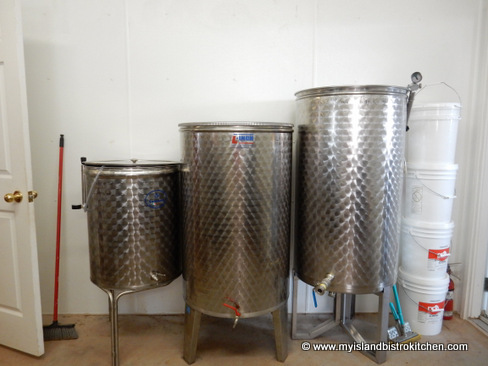
Deep Roots Distillery, Warren Grove, PEI
When Beamish retired three years ago from Holland College, he was looking for a retirement activity. Since he already had a ready supply of apples, he began making sweet apple cider and selling it at the Farmers Market in Charlottetown. His interest in distilling grew so he pursued a course hosted by the Bio-Food-Tech Centre in Charlottetown that focused on the science of distilling. In addition, he received some technical assistance from the New Brunswick Community College in Grand Falls. In June, 2014, Beamish obtained his license to distill and it wasn’t long before he began producing liquor, using local raw products whenever possible.
Mike Beamish at his Warren Grove, PEI, Distillery – “Deep Roots”
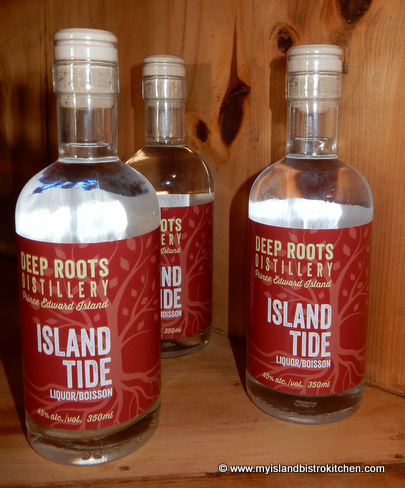
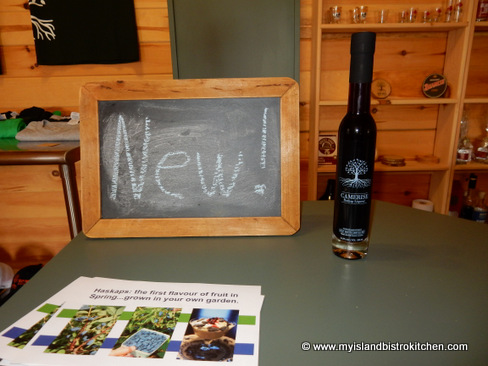
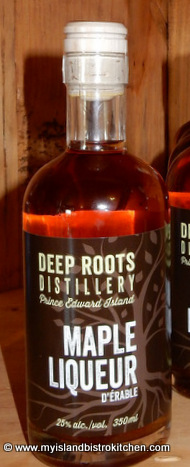
Today, Beamish has four products on the market: Island Tide (a cane-sugar spirit), Blueberry Eau de Vie, Maple Liqueur, and his newest, Camerise Haskap Liqueur.
Deeproots Distillery Products
Beamish says the Island Tide liquor moonshine, with an alcohol content of 45%, is a cross between rum and vodka and would be best suited for martinis and mojitas. Historically, much of the moonshine made in PEI was made from cane-sugar. However, with more modern distilling techniques, it is somewhat smoother than what some folks may remember!
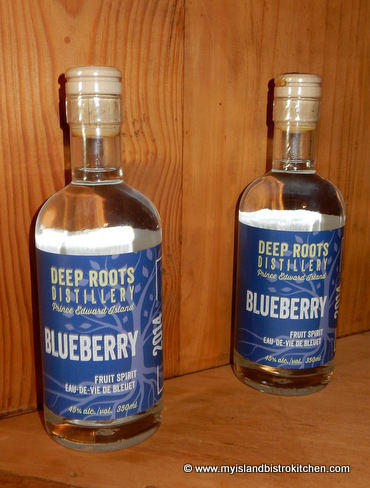
Mike Beamish says the Blueberry Eau de Vie does not have a strong blueberry taste but rather has the essence of blueberry. It has 45% alcohol content and is best served as an after dinner beverage over ice or in a fruit-based cocktail.
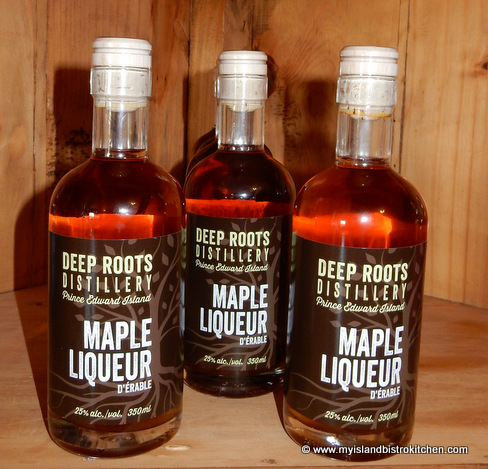
The Maple Liqueur is made from New Brunswick maple syrup and, with 25% alcohol, is stronger than most liqueurs. It is also suitable as an after dinner drink or served over vanilla ice cream or in baking.
The Camerise Haskap Liqueur is a new product from the distillery and has just been released this summer.
This liqueur, with 26.5% alcohol, is made with haskap berries which come from Phyto Cultures Inc. in nearby Clyde River. This liqueur is developed using a method by which the alcohol is infused with the whole haskap berries which sit in the alcohol for four months before being crushed. The Camerise Haskap Liqueur also is an after dinner drink and is meant to be served straight over ice.
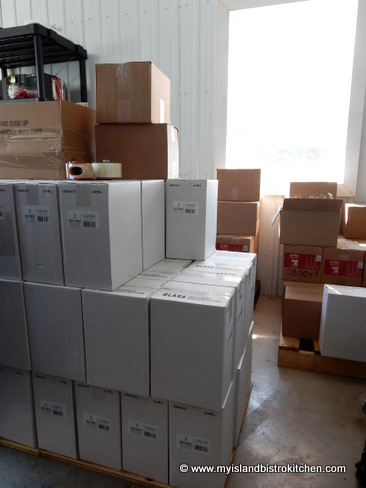
Producing liquor is government-regulated and the products have to be analyzed by a certified lab in the same way as any big brand liquors.
Boxes of product ready for shipping
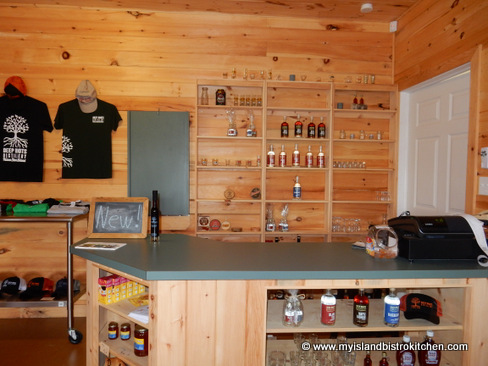
The products are labelled under the Deep Roots Distillery label and can be purchased at the Charlottetown Farmers Market and at the Distillery located at 2100 North York River Road, Route 248, in Warren Grove just outside Charlottetown. You can also find them on the shelves of many local liquor stores on the Island.
Sales Outlet at Deep Roots Distillery, Warren Grove, PEI
Tours of the apple orchards and the distillery are available for a nominal fee and Mike welcomes visitors to learn more about his organic apple orchard and new distillery. For more information, and hours of operation, visit the websites for Beamish Organic Apple Orchard and Deep Root Distillery.
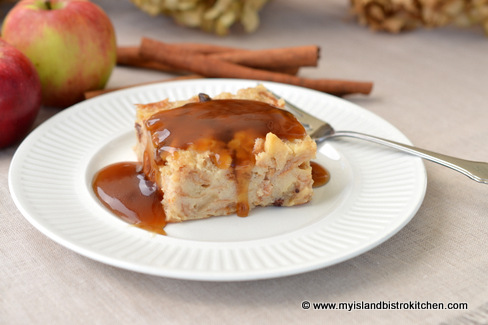
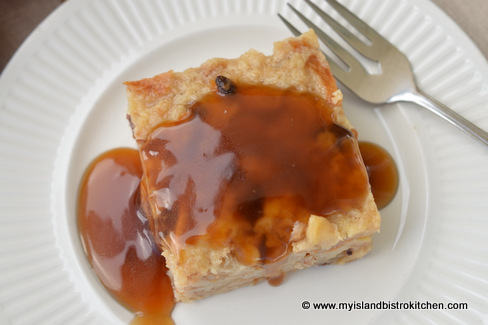
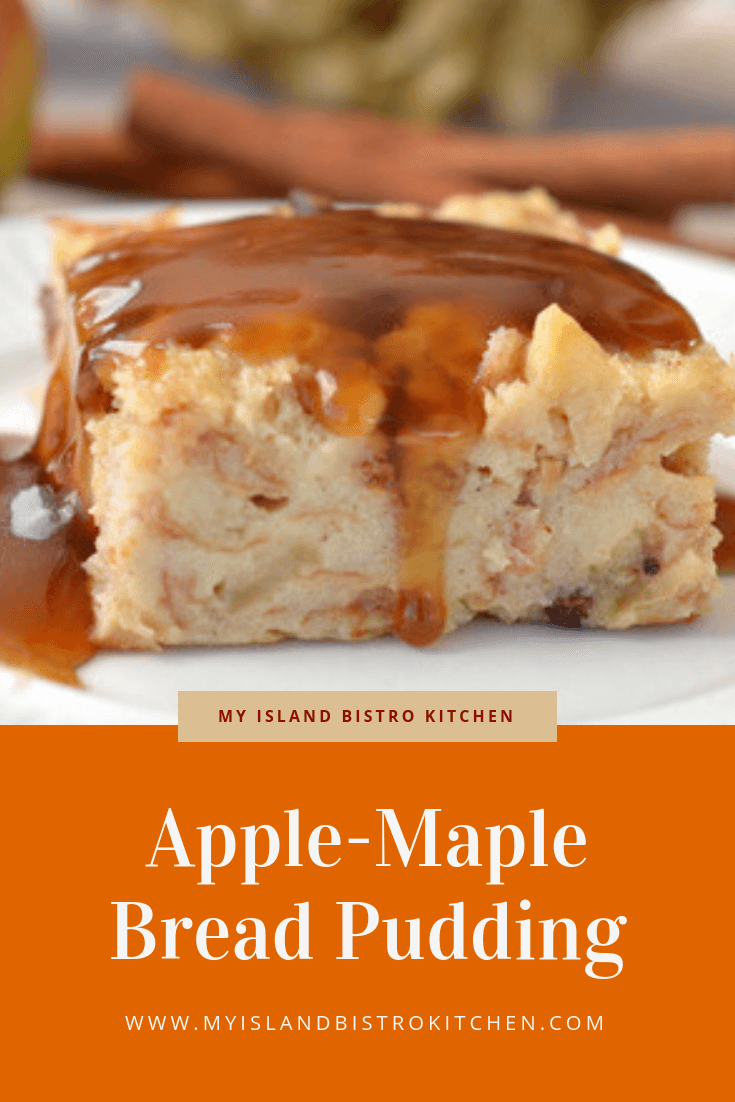
Apple-Maple Bread Pudding
As is my standard practice when I visit a local food producer, I develop a recipe using the producer’s product(s). In my Apple-Maple Bread Pudding with Maple Sauce, I have used the Red Free apples from the Beamish Orchard along with the Deep Roots Distillery Maple Liqueur.
Red Free Apples
The Red Free apples are great in this recipe because they keep their shape and don’t go to “mush” or a sauce-like consistency in the pudding which would make it too soggy. The key is to sauté the apples enough that they are softened before adding them to the pudding batter. Adding some maple liqueur as the apples sauté provides additional flavour.
It’s a matter of opinion as to whether a bread pudding should be baked in a hot water bath or not. I have made bread puddings both in a water bath and without and, to be frank, don’t see any appreciable difference in quality of the baked pudding. So, for this recipe, I did not use the hot water bath baking method and the pudding was lovely and moist.
Apple-Maple Bread Pudding
Apple-Maple Bread Pudding
Ingredients:
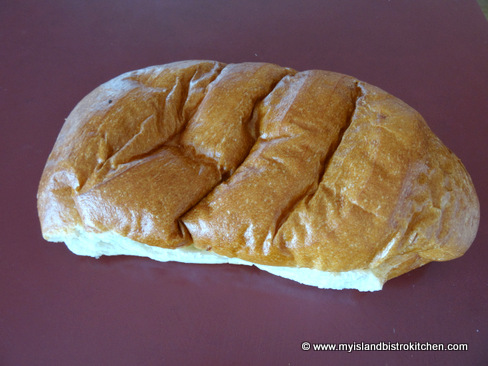
1 – 1 lb loaf French bread
3 cups whole milk
1 cup less 1½ tbsp Blend/cream (10%)
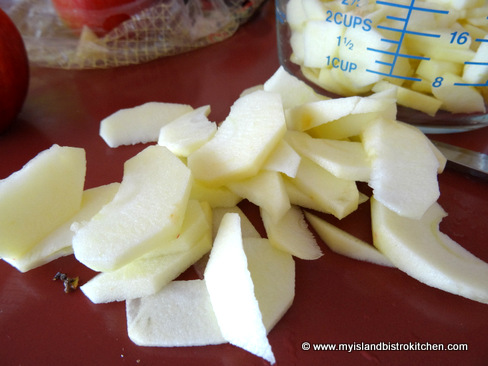
2½ cups thinly sliced baking apples (about 3 medium-sized apples)
½ tbsp butter
1 tbsp brown sugar
1 tbsp maple liqueur
3 extra-large eggs
1 cup white sugar
1/3 cup maple syrup
3 tbsp melted butter
2 tsp vanilla
3/4 tsp cinnamon
1/8 tsp nutmeg
1/8 tsp allspice
Pinch cardamom
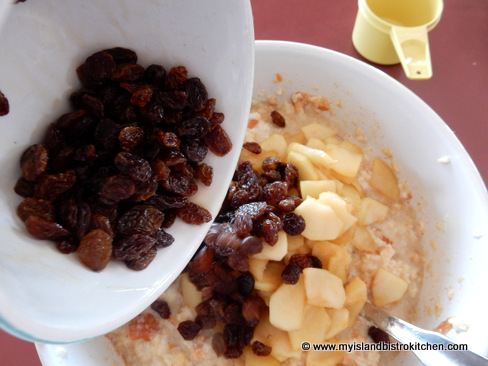
¾ cup raisins soaked in 1½ tbsp maple liqueur
Method:
Assemble ingredients.
Preheat oven to 325°F.
Grease or line 9”x13” pan with greased tin foil.
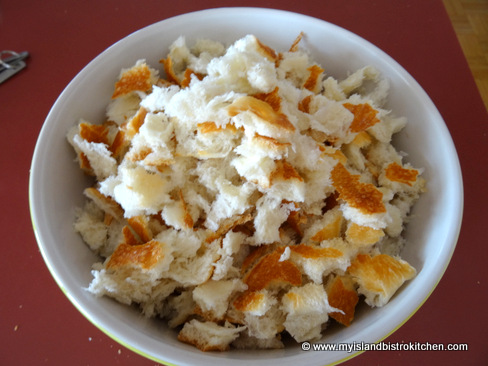
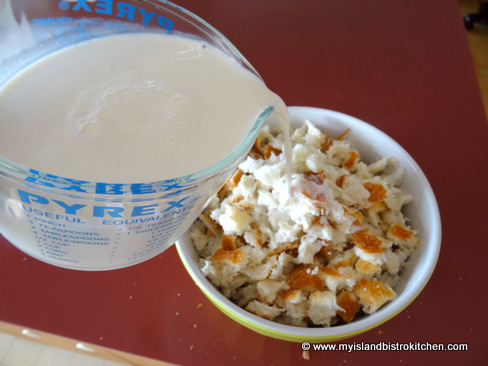
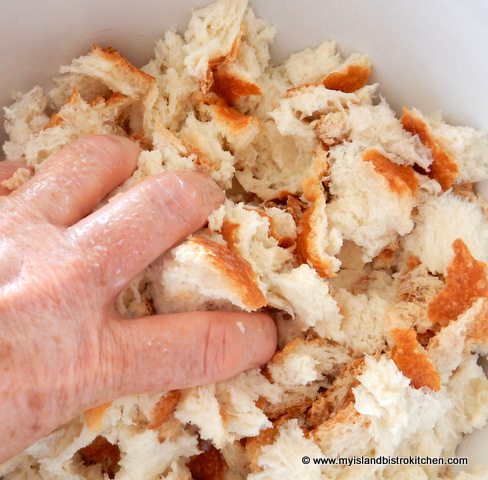
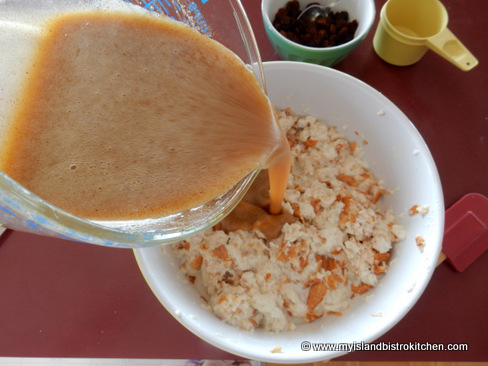
In large bowl, break the French bread into small pieces, crusts and all.
Pour the milk and blend (cream) over the bread.
Cover and let sit for 30 minutes then handcrush mixture until well blended.
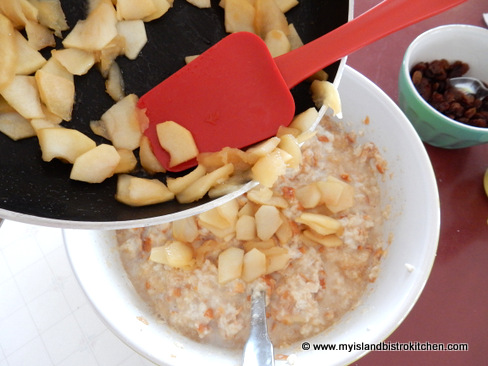
Meanwhile, peel, core, and thinly slice the apples.
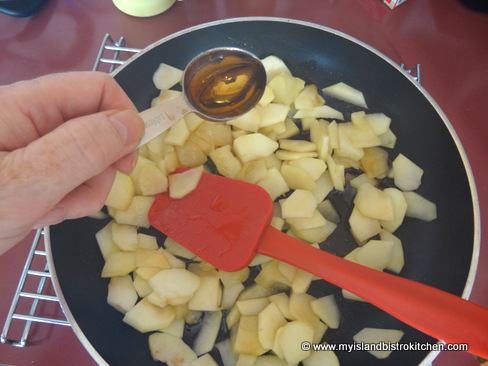
Melt butter in saucepan over medium heat. Add the apples and sauté for about 2 minutes. Sprinkle with brown sugar and sauté apples for another minute. Remove pan from heat and add liqueur. Return to heat and sauté the apples for 5-7 minutes, or until they are softened and a golden color.
In medium-sized bowl, beat the eggs well. Add the sugar and beat again. Beat in the maple syrup, melted butter, and vanilla. Add the spices and stir well. Pour over bread-milk mixture in large bowl and mix well.
Lastly, gently fold in the sautéd apples along with the raisins.
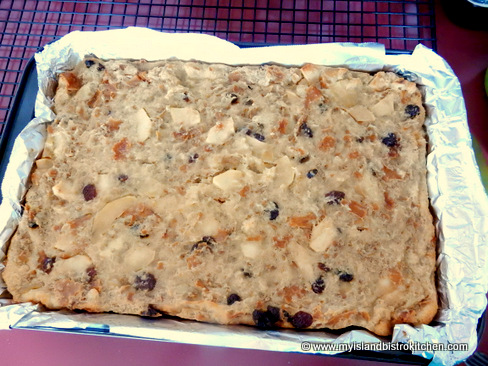
Pour mixture into prepared pan. Smooth batter evenly in pan.
Bake for about 50-60 minutes or until it springs back to a light touch and/or a cake tester (or knife) inserted into 2-3 places in the pudding comes out clean.
Remove pudding from oven and transfer pudding pan to a cooling rack to rest for 20 minutes. Slice into 12 pieces and serve warm with maple sauce (recipe below), crème anglaise, or ice cream.
Yield:12 servings
Maple Sauce
Ingredients:
1 cup brown sugar
3 tbsp cornstarch
dash of salt
2 cups boiling water
2 tbsp maple syrup
2 tbsp maple liqueur
2 tsp vanilla
¼ cup butter
Method:
In saucepan, mix the brown sugar, cornstarch, and salt together well. Add the boiling water, maple syrup, maple liqueur, and vanilla together. Mix well. Add butter. Cook until sauce boils and reaches desired consistency. Serve hot over Apple-Maple Bread Pudding.
Yield:Apx. 2½ cups
Maple Sauce on Apple-Maple Bread Pudding
—————————————————————————-
Thank you for visiting “the Bistro” today. If you enjoyed this posting and recipe, please share it on your social media websites.
Connect with “the Bistro” through the following social media:
Join My Island Bistro Kitchen on Facebook
Follow “the Bistro’s” tweets on Twitter
Follow “the Bistro” on Pinterest
Follow “the Bistro” on Instagram
Apple and maple flavours combine to make a delectable bread pudding
Ingredients
Pudding:
1 – 1 lb loaf French bread
3 cups whole milk
1 cup less 1½ tbsp Blend/cream (10%)
2½ cups thinly sliced baking apples (about 3 medium-sized apples)
½ tbsp butter
1 tbsp brown sugar
1 tbsp maple liqueur
3 extra large eggs
1 cup white sugar
1/3 cup maple syrup
3 tbsp melted butter
2 tsp vanilla
3/4 tsp cinnamon
1/8 tsp nutmeg
1/8 tsp allspice
Pinch cardamom
¾ cup raisins soaked in 1½ tbsp maple liqueur
Sauce:
1 cup brown sugar
3 tbsp cornstarch
dash of salt
2 cups boiling water
2 tbsp maple syrup
2 tbsp maple liqueur
2 tsp vanilla
¼ cup butter
Instructions
Assemble ingredients.
Preheat oven to 325°F.
Grease or line 9”x13” pan with greased tin foil.
In large bowl, break the French bread into small pieces, crusts and all. Pour the milk and blend (cream) over the bread. Cover and let sit for 30 minutes then handcrush mixture until well blended.
Meanwhile, peel, core, and thinly slice the apples. Melt butter in saucepan over medium heat. Add the apples and sauté for about 2 minutes. Sprinkle with brown sugar and sauté apples for another minute. Remove pan from heat and add liqueur. Return to heat and sauté the apples for 5-7 minutes, or until they are softened and a golden color.
In medium-sized bowl, beat the eggs well. Add the sugar and beat again. Beat in the maple syrup, melted butter, and vanilla. Add the spices and stir well. Pour over bread-milk mixture in the large bowl and mix well.
Lastly, gently fold in the sautéed apples along with the raisins. Pour mixture into prepared pan. Smooth batter evenly in pan.
Bake for about 50-60 minutes or until it springs back to a light touch and/or a cake tester (or knife) inserted into 2-3 places in the pudding comes out clean.
Remove pudding from oven and transfer pudding pan to a cooling rack to rest for 20 minutes. Slice into 12 pieces and serve warm with maple sauce, crème anglaise, or ice cream.
To make the maple sauce, combine the brown sugar, cornstarch, and salt together in saucepan. Add the boiling water, maple syrup, maple liqueur, and vanilla together. Mix well. Add butter. Cook until sauce boils and reaches desired consistency. Serve hot over Apple-Maple Bread Pudding.