Category Archives: Recipes

Gluten Free Butter Tarts

Butter Tarts
Gluten-free and Lactose-Free Butter Tarts

These old-fashioned butter tarts are actually both gluten free and lactose free.  If you are not lactose intolerant, simply substitute regular butter and milk in the recipe.

Quite some time ago, I shared my traditional butter tart recipe.  However, folks have been inquiring about a gluten-free recipe for the tarts so here it is. I won’t repeat my hints and tips for making butter tarts in this posting because the same ones hold true for the gluten-free version so I am directing readers to my original posting for butter tarts for this information.

Butter Tarts
Gluten-Free and Lactose-Free Butter Tarts

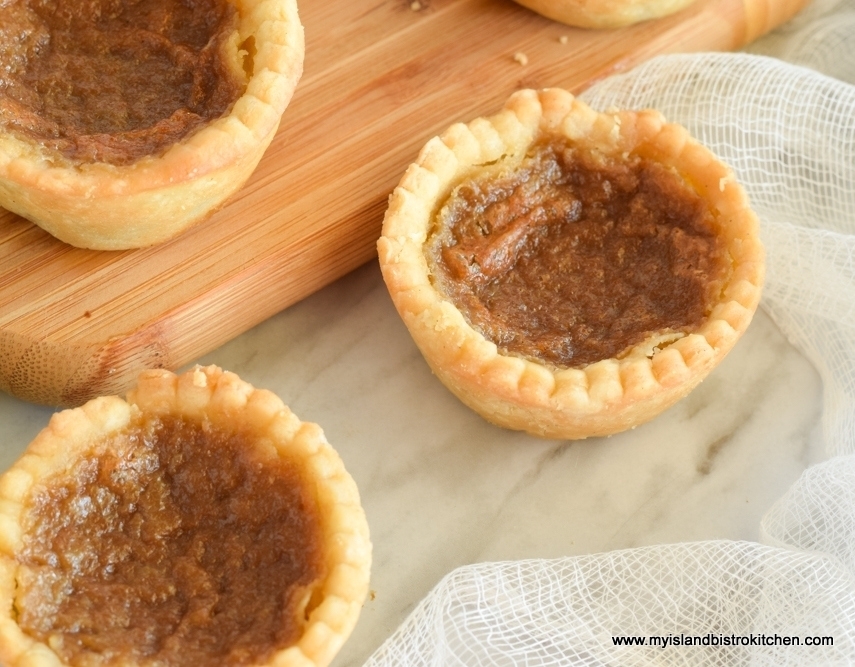
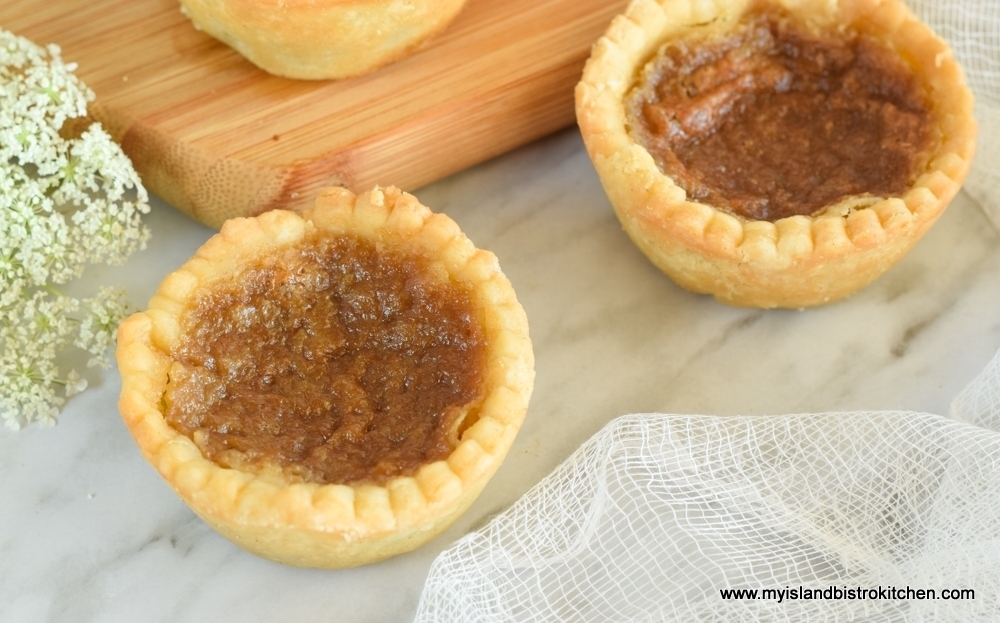
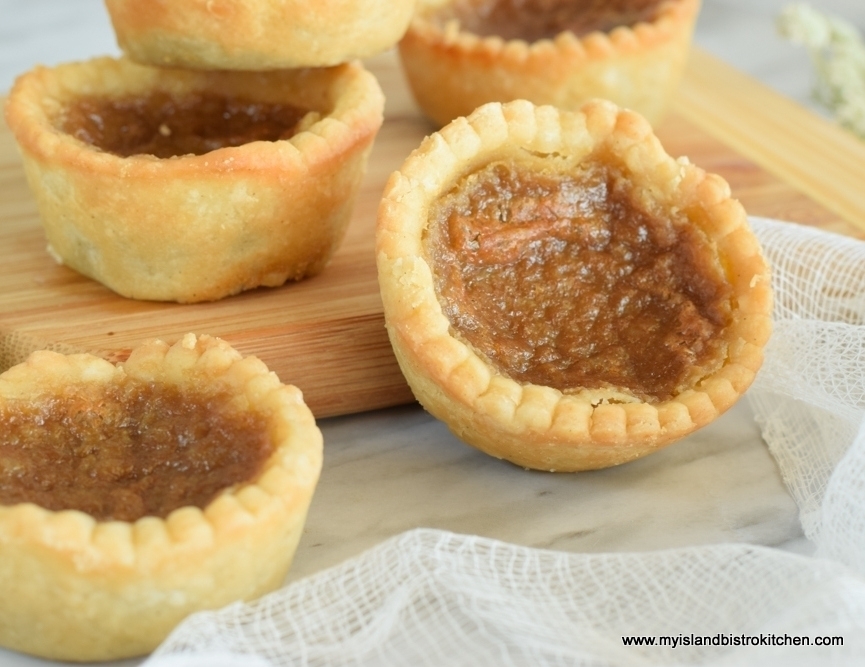
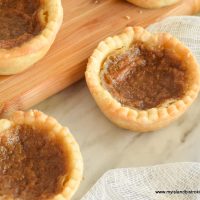
I don’t like a big glob of thick pastry in my butter tarts. As far as I am concerned, it is the gooey, sweet filling that is the star in these tarts.  The pastry is involved just because it is the vessel to hold the filling. So, I use a thin rolled pastry and fit the pastry neatly and tidily into the muffin tin cups.

The pastry, nonetheless, still has to be tender and flaky because it is half the equation in these Canadian culinary delicacies.  The gluten-free pastry recipe is the one that I developed and perfected first for my gluten-free apple pie, originally published to my website on January 11, 2018.  It is now my go-to pastry recipe since it is perfectly tender and flaky and works well with sweet and savory pies as well as tarts.

As with my traditional butter tarts, you will find that the filling is slightly gooey but not too runny.  I don’t care for tarts that, as soon as you bite into them, the filling pours out.  The reason why I like a semi-solid filling is that I believe butter tarts should be able to be picked up off a plate and eaten by hand with no need for a plate and fork to catch a runny filling.  This, of course, is purely a personal preference.

Butter Tarts
Gluten-Free and Lactose-Free Butter Tarts

[Printable recipe follows at end of posting]

Gluten-Free Lactose-Free Butter Tarts

Ingredients:

For Pastry:

2 cups (276g) gluten-free 1-to-1 flour
½ tsp salt
1½ tsp sugar

¼ cup cold lactose-free butter (76g)
¼ cup cold lard (76g)

1 large egg
1 tsp white vinegar
Enough water to make 2/3 cup liquid

For Filling:
½ cup light brown sugar, firmly packed
¼ cup dark brown sugar, firmly packed
2 extra-large eggs, light beaten
3 tbsp pure maple syrup
¼ cup melted lactose-free butter (no substitutes)
2 tbsp lactose-free milk (2%MF or 3%MF)
1½ tsp pure vanilla
1 tsp white vinegar
Dash salt

Method:

For Pastry:  Lightly grease 12 muffin cups.  In medium-sized bowl, whisk the flour, salt, and sugar together.  Cut the butter and lard into chunks and add to the flour.  With a pastry cutter, cut the butter and lard into the flour until the fats resemble the size of large peas.

In a measuring cup, whisk the egg and vinegar together.  Add enough cold water to measure 2/3 cup.  Add the egg-vinegar-water mixture to the flour, small amounts at a time, and mix with a fork or hands.  Add only enough water that the dough clings together and can be gathered into a ball (it may not take all the liquid).

Divide the dough in four pieces.  Form disk shapes with each piece. Place disks in the refrigerator for about 10-15 minutes to chill. Remove one disk at a time from the refrigerator and break off chunks, about 2 oz in size, which should give ample for 4” circles to be cut for each tart.  Place dough between two sheets of parchment paper (or wax paper) lightly dusted with flour. Roll pastry to desired thickness, generally between 1/16”and 1/8” thickness. Peel the top piece of parchment from the rolled out pastry. Cut out pastry circles with a floured 4” round cookie cutter.

Carefully transfer each cut out pastry circle to muffin tin cup. Fit the pastry into the cup, ensuring there are no air pockets between the pastry and the muffin cups. Repeat with chilled dough to make enough pastry circles for 12 tart shells, gathering up and re-rolling pastry scraps as necessary.  Place pan of tart shells in freezer for about 12-15 minutes to chill to prevent shrinkage of pastry during baking.

For Filling:  Preheat oven to 400°F.  Add all ingredients, in order given, into a 4-cup measuring cup.  Whisk or stir until ingredients are well blended.  Remove the muffin cups from the freezer and pour filling equally into the 12 muffin cups. Bake at 400°F for 5 minutes then reduce temperature to 375°F and bake tarts for 17-19 minutes or until filling domes and appears set.   Let tarts cool at least 30 minutes in muffin tins on cooling rack.  Using the tip of a sharp knife, gently lift the tarts from the muffin cups.

Yield:  12 tarts

Gluten-Free Butter Tarts

These gluten-free (and lactose-free) melt-in-your-mouth pastries are filled with a delectable, slightly gooey, but not too runny, buttery rich caramel-like filling. A classic Canadian culinary delicacy.

Course Dessert
Keyword butter tarts
Servings 11
My Island Bistro Kitchen My Island Bistro Kitchen

Ingredients

For Pastry:

  • 2 cups gluten-free 1-to-1 flour (276g)
  • ½ tsp salt
  • tsp sugar
  • ¼ cup cold lactose-free butter (76g)
  • ¼ cup cold lard (76g)
  • 1 large egg
  • 1 tsp white vinegar
  • Enough water to make 2/3 cup liquid

For Filling:

  • ½ cup light brown sugar, firmly packed
  • ¼ cup dark brown sugar, firmly packed
  • 2 extra-large eggs, light beaten
  • 3 tbsp pure maple syrup
  • ¼ cup melted lactose-free butter (no substitutes)
  • 2 tbsp lactose-free milk (2%MF or 3%MF)
  • tsp pure vanilla
  • 1 tsp white vinegar
  • Dash salt

Instructions

For Pastry:

  1. Lightly grease 12 muffin cups. In medium-sized bowl, whisk the flour, salt, and sugar together. Cut the butter and lard into chunks and add to the flour. With a pastry cutter, cut the butter and lard into the flour until the fats resemble the size of large peas.
  2. In a measuring cup, whisk the egg and vinegar together. Add enough cold water to measure 2/3 cup. Add the egg-vinegar-water mixture to the flour, small amounts at a time, and mix with a fork or hands. Add only enough water that the dough clings together and can be gathered into a ball (it may not take all the liquid).
  3. Divide the dough in four pieces. Form disk shapes with each piece. Place disks in the refrigerator for about 10-15 minutes to chill. Remove one disk at a time from the refrigerator and break off chunks, about 2 oz in size, which should give ample for 4” circles to be cut for each tart. Place dough between two sheets of parchment paper (or wax paper) lightly dusted with flour. Roll pastry to desired thickness, generally between 1/16”and 1/8” thickness. Peel the top piece of parchment from the rolled out pastry. Cut out pastry circles with a floured 4” round cookie cutter.
  4. Carefully transfer each cut out pastry circle to muffin tin cup. Fit the pastry into the cup, ensuring there are no air pockets between the pastry and the muffin cups. Repeat with chilled dough to make enough pastry circles for 12 tart shells, gathering up and re-rolling pastry scraps as necessary. Place pan of tart shells in freezer for about 12-15 minutes to chill to prevent shrinkage of pastry during baking.

For Filling:

  1. Preheat oven to 400°F. Add all ingredients, in order given, into a 4-cup measuring cup. Whisk or stir until ingredients are well blended. Remove the muffin cups from the freezer and pour filling equally into the 12 muffin cups. Bake at 400°F for 5 minutes then reduce temperature to 375°F and bake tarts for 17-19 minutes or until filling domes and appears set. Let tarts cool at least 30 minutes in muffin tins on cooling rack. Using the tip of a sharp knife, gently lift the tarts from the muffin cups.

Recipe Notes

Copyright My Island Bistro Kitchen

If you have made this recipe and enjoyed it and/or wish to share it with your friends and family, please do so on social media but be sure to share the direct link to this posting from my website.

Connect with My Island Bistro Kitchen on Social Media

Join the Facebook page for My Island Bistro Kitchen:  https://www.facebook.com/MyIslandBistroKitchen/

Follow “the Bistro” on “X” (formerly Twitter)https://twitter.com/PEIBistro/

See the drool-worthy gallery of mouth-watering food photos from My Island Bistro Kitchen on Instagramhttps://www.instagram.com/peibistro/

Follow “the Bistro” on Pinterest at https://www.pinterest.ca/peibistro/ and pin the Pinterest-ready photo at the end

Pin Me To Pinterest!
Butter Tarts
Gluten-Free Butter Tarts

Classic Cream of Broccoli and Cheese Soup

Classic Cream of Broccoli and Cheese Soup

Nothing beats homemade soup!  True comfort food – a bowl of hot soup, especially on a cool fall or cold winter day, warms the tummy and the soul. This Cream of Broccoli and Cheese Soup fits that bill nicely. Continue reading Classic Cream of Broccoli and Cheese Soup

On The Sandwich Board: Turkey, Pear, Brie, and Cranberry Sandwich

Turkey Sandwich
Turkey, Pear, Brie, and Cranberry Sandwich

On my sandwich board today, I have a lovely gourmet Turkey, Pear, Brie, and Cranberry Sandwich and this one comes fully dressed!  Note this sandwich can also be made with chicken as a substitute for turkey. Continue reading On The Sandwich Board: Turkey, Pear, Brie, and Cranberry Sandwich

Roasted Potato Stacks

Potato Stacks
Roasted Potato Stacks

Living in a province known for its potato production, it’s almost inevitable that potatoes are served at many meals on PEI dinner tables.  There are any number of ways this versatile veggie can be served and, later in this posting, you’ll find links to some of my favorite potato recipes.

Roasted Potato Stacks are my latest creation involving potatoes. They are very tasty and do plate quite attractively. They are also suitable for serving at buffets.

Potato Stacks
Roasted Potato Stacks

Because these potato stacks are free-standing when cooked and removed from the muffin cups, they need to be able to stand on their own when plated. The goal is also to see the individual slices of the potato. I recommend choosing potatoes that have a medium starch content, are semi-waxy, and have somewhat firm flesh such as Yukon Gold, or an all-purpose round white potato variety. These are the types of potatoes that will hold their shape after cooking and when plated and they can take the higher heat at which the stacks are roasted without falling apart or becoming mushy.  Choosing potatoes that have good moisture content also helps to keep the roasted potato stacks moist.  Potatoes high in starch and low in moisture don’t hold their shape as well and tend to break down easier than less starchy or waxy potatoes. For this reason, they are not as suitable for these Roasted Potato Stacks as are their semi-waxy cousins.  Select potatoes, about 2” around, so that, when sliced very thinly, they will easily fit flatly in muffin tin cups.

Potato Stacks
Roasted Potato Stacks

The key to making these Roasted Potato Stacks is to have the potato slices very thin and uniformly sized.  I have tested my recipe with three different thicknesses of potatoes – 1/16”, 3/16”, and 1/8” and my preference is 3/16” as the layers of individual potato slices in each stack are still intact and identifiable when fully roasted but they are not so thick as to cause issues getting them cooked.

Potato Stack
Roasted Potato Stack

I recommend using a mandolin for quick and uniform slicing.  I have a dandy hand-held mandolin that is slick and easy for this kind of work and it saves the set up of my larger mandolin or the trials, tribulations, and time to thinly slice the potatoes by hand.

Made with seasoned butter and a blend of cheeses, these delectable easy-to-make roasted potato stacks are a great side dish or appetizer. 

Potato Stack
Roasted Potato Stack

[Printable recipe follows at end of posting]

Roasted Potato Stacks

Ingredients:

2¼ lb potatoes, peeled, washed, and dried (e.g., Yukon Gold or all-purpose round white variety)
3 tbsp melted butter
1 tsp olive oil
1 tsp liquid chicken bouillon
1 tsp garlic salt
¾ tsp onion powder
2 tsp fresh lemon thyme, chopped
2 tsp fresh parsley, minced
Pinch nutmeg (optional)
½ – ¾ tsp fine sea salt
Freshly ground pepper
½ cup Parmesan cheese, finely grated
3 tbsp Cheddar Cheese, finely grated
1 tbsp whole milk or cream

3 – 4 tbsp finely grated Parmesan cheese
Paprika (for sprinkling tops of stacks)

Fresh thyme sprigs for garnish

Method:

Position oven rack in center of oven.  Preheat oven to 375°F.

Butter eight (8) regular-sized non-stick muffin cups with butter.  Set aside.

In small, microwave-safe bowl, melt the butter.  Add the olive oil, liquid chicken bouillon, garlic salt, onion powder, thyme, parsley, nutmeg, salt, and pepper.  Stir well to mix.  Stir in the Parmesan and Cheddar cheeses along with the milk or cream.

Choose potatoes that are not overly starchy and that will hold their shape after cooking – e.g., Yukon Gold or an all-purpose round white variety.  Select potatoes the size that, when sliced horizontally, the slices will easily fit flat into the muffin cups. Using a mandolin, slice potatoes horizontally into slices 3/16” thick.  Place half the potato slices in large bowl.  Add half the mixed butter, seasonings, and cheese ingredients.  Using hands, toss the potatoes in the mixture until the slices are well coated. Add the remaining potato slices and butter mixture and continue mixing until the potato slices are coated with the mixture. Either create the stacks of potatoes in hands and place in buttered muffin cups or individually stack the potato slices directly in the muffin tin cups, stacking the slices as evenly as possible until they are about ¾ – 1” above the muffin cup rims. The stacks will shrink a bit during the roasting but building them a little higher than the muffin cup rim will ensure a good sized potato stack when cooked.

Roast the potato stacks for about 25 minutes, then sprinkle each stack with additional grated Parmesan cheese and a light sprinkle of paprika.  Roast for 20 minutes longer, or until the tops of the potato stacks are golden and crispy, and a skewer or thin knife inserted in center of a stack indicates potatoes are tender and cooked through.  Remove from oven and let rest for 5 minutes then carefully run the tip of a knife around the perimeter of each muffin cup to ensure the potato stacks are loose for easy removal.  With the aid of a fork, or soup spoon, and the tip of the knife, carefully remove each potato stack and serve immediately sprinkled with additional finely-grated Parmesan cheese and fresh parsley.

Yield:  8 potato stacks (Suggested serving size – 2 stacks per person)

Potato Stacks
Plated Roasted Potato Stacks

For other potato recipes from My Island Bistro Kitchen, click on the links below:

Decadent Duchess Potatoes
Twice Baked Potatoes
Best Creamy Scalloped Potatoes
Bistro Style Potato Patties
Potato Salad

Roasted Potato Stacks

Made with seasoned butter and a blend of cheeses, these easy-to-make roasted potato stacks are a great side dish or appetizer.
Course Side Dish
Cuisine American
Cook Time 50 minutes
Resting Time 5 minutes
Servings 4
My Island Bistro Kitchen My Island Bistro Kitchen

Ingredients

  • lb potatoes peeled, washed, and dried (e.g., Yukon Gold or all-purpose round white variety)
  • 3 tbsp melted butter
  • 1 tsp olive oil
  • 1 tsp liquid chicken bouillon
  • 1 tsp garlic salt
  • ¾ tsp onion powder
  • 2 tsp fresh lemon thyme, chopped
  • 2 tsp fresh parsley, minced
  • Pinch nutmeg (optional)
  • ½ - ¾ tsp fine sea salt
  • Freshly ground pepper
  • ½ cup Parmesan cheese, finely grated
  • 3 tbsp Cheddar cheese finely grated
  • 1 tbsp whole milk or cream
  • 3 - 4 tbsp finely grated Parmesan cheese
  • Paprika for sprinkling tops of stacks
  • Fresh thyme sprigs for garnish

Instructions

  1. Position oven rack in center of oven. Preheat oven to 375°F.
  2. Butter eight (8) regular-sized non-stick muffin cups with butter. Set aside.
  3. In small, microwave-safe bowl, melt the butter. Add the olive oil, liquid chicken bouillon, garlic salt, onion powder, thyme, parsley, nutmeg, salt, and pepper. Stir well to mix. Stir in the Parmesan and Cheddar cheeses along with the milk or cream.
  4. Choose potatoes that are not overly starchy and that will hold their shape after cooking – e.g., Yukon Gold or an all-purpose round white variety. Select potatoes the size that, when sliced horizontally, the slices will easily fit flat into the muffin cups. Using a mandolin, slice potatoes horizontally into slices 3/16” thick. Place half the potato slices in large bowl. Add half the mixed butter, seasonings, and cheese ingredients. Using hands, toss the potatoes in the mixture until the slices are well coated. Add the remaining potato slices and butter mixture and continue mixing until the potato slices are coated with the mixture. Either create the stacks of potatoes in hands and place in buttered muffin cups or individually stack the potato slices directly in the muffin tin cups, stacking the slices as evenly as possible until they are about ¾ - 1” above the muffin cup rims. The stacks will shrink a bit during the roasting but building them a little higher than the muffin cup rim will ensure a good sized potato stack when cooked.
  5. Bake the potato stacks for about 25 minutes, then sprinkle each stack with additional grated Parmesan cheese and a light sprinkle of paprika. Bake for 20 minutes longer, or until the tops of the potato stacks are golden and crispy, and a skewer or thin knife inserted in center of a stack indicates potatoes are tender and cooked through. Remove from oven and let rest for 5 minutes then carefully run the tip of a knife around the perimeter of each muffin cup to ensure the potato stacks are loose for easy removal. With the aid of a fork, or soup spoon, and the tip of the knife, carefully remove each potato stack and serve immediately sprinkled with additional finely-grated Parmesan cheese and fresh parsley.

Recipe Notes

Yield: 8 potato stacks (Suggested serving size – 2 stacks per person)


[Copyright My Island Bistro Kitchen]


If you have made this recipe and enjoyed it and/or wish to share it with your friends and family, please do so on social media but be sure to share the direct link to this posting from my website.

Connect with My Island Bistro Kitchen on Social Media

Join the Facebook page for My Island Bistro Kitchen:  https://www.facebook.com/MyIslandBistroKitchen/

Follow “the Bistro” on “X” (formerly Twitter)https://twitter.com/PEIBistro/

See the drool-worthy gallery of mouth-watering food photos from My Island Bistro Kitchen on Instagramhttps://www.instagram.com/peibistro/

Follow “the Bistro” on Pinterest at https://www.pinterest.ca/peibistro/ and pin the Pinterest-ready photo at the end

Pin Me To Pinterest!
Potato Stacks
Roasted Potato Stacks

Classic Roasted Butternut Squash Soup

Classic Roasted Butternut Squash Soup

When days are cooler, or downright cold, there is nothing better to warm the tummy than a bowl of comfort soup.  One of the soups I place in that category is homemade Roasted Butternut Squash Soup.  Full of flavour with a lovely velvety texture, Roasted Butternut Squash Soup has a rich natural golden-yellow color that can’t be beat!  This is a showstopper soup on both the taste and appetizing color fronts, the latter of which is drawn from the orange, fleshy pulp of the squash. Continue reading Classic Roasted Butternut Squash Soup

Cranberry Blueberry Sauce

Cranberry Blueberry Sauce

Combining the sweet and tart flavors of blueberries and cranberries makes for a delectable Cranberry Blueberry Sauce.  Their flavors play well off of each other. Most will be familiar with the traditional cranberry sauce that, for many, has to be part of a roasted turkey or chicken dinner.  Click here for my recipe for classic cranberry sauce. Continue reading Cranberry Blueberry Sauce

Green Tomato Marmalade Recipe

Marmalade
Green Tomato Marmalade

Green Tomato Marmalade is not an altogether common variety of marmalade. It’s not a typical marmalade likely to be found on many, if any, supermarket shelves. That, in my view, makes Green Tomato Marmalade all the more special because it’s more unique and exclusive! That, plus the fact it can be used as either a sweet or savory spread, makes this marmalade a worthwhile addition to your preserve inventory. Continue reading Green Tomato Marmalade Recipe

Perfect Peach Blueberry Crisp Recipe

Summer Dessert
Peach Blueberry Crisp

There are so many options for summertime desserts.  I try to use fresh fruits in desserts throughout the summer season and often look for combinations that will work well together.  Some fruits just naturally complement each other, like blueberries and peaches, for example. Together, they make a fabulous Peach Blueberry Crisp! Continue reading Perfect Peach Blueberry Crisp Recipe

Classic Peach Pie Recipe

Peach Pie
Classic Peach Pie

One of the things I most look forward to in summer is all the fresh produce. I especially love all the seasonal fruits and berries because they make grand pies and pastry making is one of my favorite baking activities.  In August, we eagerly await the wonderful peaches that come from the Niagara region – the baskets of large yellow/orange plump, juicy peaches. One of the first things I make with the fresh peaches is a Classic Peach Pie. Continue reading Classic Peach Pie Recipe

Old-fashioned Rhubarb Pudding Cake

Rhubarb Pudding Cake
Old-fashioned Rhubarb Pudding Cake

Today, I am sharing my recipe for a real old-fashioned type of dessert – Rhubarb Pudding Cake. The cake is “self-saucing” which means that the delectable sauce forms underneath the simple cake batter as the cake bakes. It’s an “all-in-one” pudding and cake! It may not be the most extravagant looking dessert but it sure is mighty tasty! If you are a rhubarb lover, you will love this dessert. Continue reading Old-fashioned Rhubarb Pudding Cake

Deli-style Gluten-Free Rhubarb Granola Muffins

I love the produce our garden generates and its earliest treat is rhubarb.  It is so versatile and I make lots of recipes using rhubarb.  Today, a treat for my gluten-free diet followers — a new recipe for Deli-style Gluten-free Rhubarb Granola Muffins. Continue reading Deli-style Gluten-Free Rhubarb Granola Muffins

Island Summer Blush Cocktail

Island Summer Blush Cocktail

My newly-created Island Summer Blush Cocktail is packed full of flavours that speak of springtime and early summer — rhubarb, lime, clementine, elderflower liqueur, and fizzy Prosecco.

Island Summer Blush Cocktail

One of the key ingredients in this drink is my homemade rhubarb cordial.  I have been making this cordial for many years and I continually find new ways to use it.  We have a good-sized patch of rhubarb and, each spring, I make batches of this cordial and, what I don’t use at the time, I freeze for use at other times of the year.  Click here for my rhubarb cordial recipe.

Rhubarb Cordial
Rhubarb Cordial

My choice of elderflower liqueur was inspired by the royal wedding of Prince Harry and Meghan Markle on May 19, 2018. Prior to the wedding, it was announced that the flavours of the wedding cake would be lemon and elderflower.  I combined those two flavours and developed my own recipe for a lemon and elderflower cake, the recipe for which you can find by clicking here. I then thought I would create a cocktail, using elderflower liqueur, to commemorate the royal event and thus was born the Island Summer Blush Cocktail.

Island Summer Blush Cocktail

Elderflower liqueur is made with the delicate starry white elderflower blossoms. It has complex notes and a somewhat seductive fragrance.  I would describe this liqueur as a layered fusion of floral, tropical, and citrus notes. It certainly has exotic character and  reminds me of a floral summer bouquet with fruity notes.  Its light, floral profile makes it a great match for sharper flavours like rhubarb and citrus fruits. It marries well with sparkling wines and lends itself to a multitude of cocktail concoctions.

Island Summer Blush Cocktail

This cocktail is easy to make. Simply combine the rhubarb cordial (no substitutes), clementine and lime juices, and elderflower liqueur in a cocktail shaker. Fill the shaker with ice cubes then shake the mixture for 15-20 seconds or until condensation forms on the outside of the shaker indicating the mixture is super cold.  Strain the mixture into your fancy glass of choice then add the Prosecco.  Carefully tilt the glass slightly and slowly pour in the grenadine along the side of the glass. The grenadine should sink to the bottom of the glass giving the cocktail that lovely layered look.  Garnish with a wedge of clementine.

Island Summer Blush Cocktail

The beautiful natural color of this cocktail reminds me of a blushing bride so, made with my Island rhubarb, flavoured with the elderflower flavour made trendy by the 2018 royal wedding, this is my Island Summer Blush Cocktail.  A perfect spring and summer cocktail to leisurely enjoy.

Island Summer Blush Cocktail

[Printable recipe follows at end of posting]

Island Summer Blush Cocktail

Ingredients:

1.5 oz Rhubarb Cordial
1 oz freshly squeezed clementine juice (about 2 clementines)
½ oz Elderflower Liqueur
1 tsp freshly squeezed lime juice
2 oz Prosecco
2 tsp Grenadine

Method:

Pour Rhubarb Cordial, clementine juice, Elderflower Liqueur, and lime juice into shaker and fill with ice cubes.  Shake for about 15-20 seconds then strain into glass.  Top with Prosecco.  Tip glass slightly and slowly pour Grenadine in down the side of the glass.  Garnish with a clementine wedge. Serve immediately.

Serves:  1

Island Summer Blush Cocktail

This Island Summer Blush Cocktail is a beautiful balance of sharp and sweet flavours. With a blend of rhubarb cordial, elderflower liqueur, citrus fruit juices, grenadine, and Prosecco, this is a lovely cocktail to especially enjoy in summer.

Course Drinks
Cuisine American
Servings 1
My Island Bistro Kitchen My Island Bistro Kitchen

Ingredients

  • 1.5 oz Rhubarb Cordial
  • 1 oz freshly squeezed clementine juice (about 2 clementines)
  • ½ oz Elderflower Liqueur
  • 1 tsp freshly squeezed lime juice
  • 2 oz Prosecco
  • 2 tsp Grenadine

Instructions

  1. Pour Rhubarb Cordial, clementine juice, Elderflower Liqueur, and lime juice into shaker and fill with ice cubes. Shake for about 15-20 seconds then strain into glass. Top with Prosecco. Tip glass slightly and slowly pour Grenadine in down the side of the glass. Garnish with a clementine wedge. Serve immediately.

Recipe Notes


For my recipe for Rhubarb Cordial, follow this link: http://myislandbistrokitchen.com/2013/06/24/rhubarb-cordial/


Pin Me to Pinterest!

Island Summer Blush Cocktail

Lemon Elderflower Cake Recipe

Lemon Elderflower Cake

The inspiration for this springtime Lemon Elderflower Cake was drawn from the announcement of the lemon and elderflower flavours for the May 2018 wedding cake of Prince Harry and Meghan Markle. I suspect, after this wedding, that elderflower will be the trendy new flavour for many recipes – either of the eating or drinking kind.

When I had the idea to make this cake, I questioned whether I could find elderflower liqueur (which is what I wanted to use) anywhere on PEI.  However, a visit to a local liquor store revealed that they had had numerous requests to bring in elderflower liqueur in the past couple of months to the point that they decided to carry it to see if it was a product that would sell.  I am told the bottles of St. Germain Elderflower Liqueur from France are selling well. I suspect people are curious about the flavour of elderflower, especially after it was announced as one of the flavours for the royal wedding cake.

Elderflower liqueur, made with the starry white elderflower blossoms, is rather difficult to describe. It has a somewhat seductive fragrance that I would describe as a layered fusion of floral and citrus notes perhaps from the lemon and grapefruit family. I think I can also detect hints of summer fruits like pears and peaches. It certainly has exotic character and would remind me of a floral summer bouquet with notes of fruit.

Lemon Elderberry Cake

Nothing says springtime more than a lemon cake. I have blended freshly squeezed lemon juice with the flavour of elderflower liqueur to layer some flavour into a basic white cake and transform it into a tasty homemade Lemon Elderflower Cake. This is a true old-fashioned homemade cake that has a dense texture and moist crumb.

Lemon Elderflower Cake

I have chosen to fill the cake layers with decadent lemon curd. I make this curd regularly and it makes a dandy cake filling.  For the icing, I have taken my standard buttercream recipe and flavoured it with the elderflower liqueur to tie the flavour of the icing and cake together.

Lemon Elderberry Cake
Lemon Elderberry Cake filled with lemon curd and smothered in elderberry-flavoured buttercream icing

This batter is sufficient for either two standard layer cake pans, either 8” or 9” in diameter.  However, for the cake in the photos, I used 6” round pans and layered three of them together.  The recipe will yield four 6” cakes but four is too high for the cake to cut easily and stay together well enough to plate attractively.  Save the fourth cake for a future use – it is divinely lovely served with crushed strawberries, ice cream, and a dollop of whipped cream. Just sayin’!   What follows is the method for a three-tier 6” cake.  If you choose to make the cake in either 8” or 9” round pans, just be aware that the baking times may need to be adjusted slightly from what the recipe indicates for the 6” cakes. With variances in ovens, I always recommend checking the cakes for doneness five minutes before the recipe indicates the cakes should be baked then checking them every five minutes thereafter until a cake tester inserted into the center of the cakes comes out clean – the true indicator that the cakes are baked.

I chose not to color the batter yellow with gel food coloring.  I purposely left the cake white because I wanted the bright yellow lemon curd to stand out between the layers of the cake.  If, however, it takes a yellow color to make the cake look like a lemon cake for you, by all means, add small amounts of yellow gel food coloring until you get the desired intensity of color.

Lemon Elderberry Cake

I am a huge proponent of the insulated baking strips placed around the cake pans to keep the cakes from baking unevenly and forming a dome as they bake. These strips come under various brand names. Mine are from Wilton and I swear by them.  Simply soak them in water for a few minutes then squeeze out the water and wrap a strip around each cake pan just before it goes in the oven.  I find the cakes bake much more evenly and there is less waste when it comes to leveling the cakes to prepare them for stacking together to form a tiered cake.  Some small amount of leveling is likely still going to be necessary but not nearly as much as baking the cakes without the insulated strips.

It was not so long ago that all the rage in cake decorating was the use of fondant.  Every one was anxious for the satiny smooth perfect finish.  Then, the naked cake appeared on the scene and it had very little icing, giving a more rustic and casual look to a cake.  While the naked cakes are still popular, particularly for folks who don’t want a lot of sugar icing, the current trend (at time of writing) is that tasty old-fashioned buttercream icing is back in style and piled on the cake in no particular fashion. This is great for people who are not particularly skilled with cake decorating because it is perfectly acceptable to have imperfections and uneven spreading of the icing. It’s meant to look homemade and casual.

When filling a cake with lemon curd or jam, it is advisable to pipe a ring of icing all around each layer of cake before adding the filling.  This will create a dam to prevent the filling from seeping through the icing on the side of the cake.  Pipe the icing ring about ½ inch in from the cake edge then spread the filling inside the dam.

Lemon Elderflower Cake

I also strongly recommend crumb coating the cake with a thin layer of the icing and then placing it in the refrigerator for 25-30 minutes to set.  This will seal the cake and make the final layer of icing crumb- free.

Fresh Freesia, Wax Flowers, and Italian Ruscus Adorn the top of Lemon Elderberry Cake

In keeping with a spring theme, I chose to decorate this cake with fresh bright yellow-colored freesia, some small wax flowers, and some Italian ruscus.

Yellow Freesia, Pink Wax Flowers, and Italian Ruscus Cake Topper for Lemon Elderberry Cake

[Printable recipe follows at end of posting]

Lemon Elderflower Cake

Ingredients:

¾ cup butter, room temperature
1¾ cups + 1 tbsp granulated sugar
2 large eggs, room temperature
4 large egg whites, room temperature
¼ cup freshly squeezed lemon juice, strained
1 tbsp finely grated lemon rind
1 tsp vanilla

3 cups cake flour
4 tsp baking powder
½ tsp baking soda
½ tsp salt

¾ cup + 2 tbsp milk
2 tbsp Elderflower liqueur

Icing:
¾ cup butter, room temperature
¾ cup shortening, room temperature
¾ tsp almond flavouring
¾ tsp vanilla
2 tbsp water
3 tbsp Elderflower Liqueur
1½ lbs icing sugar, sifted
Dash of salt (optional)

½ – 2/3 cup Lemon Curd

Method:

Cake:  Preheat oven to 350°F.  Line four 6”x2” pans with parchment circles on the bottoms and line the sides of each pan with a long continuous strip of parchment paper. Spray pans lightly with cooking spray to hold the parchment in place. Spray parchment-lined pans lightly with cooking spray.

In bowl of stand mixer fitted with paddle attachment, cream butter then slowly add the sugar.  Beat until mixture is light and fluffy.  Add the whole eggs, one at a time, beating well after each addition.  Repeat with the egg whites, adding one at a time.  Add the lemon juice, grated lemon rind, and vanilla. Beat well.

Sift the cake flour, baking powder, baking soda, and salt together.  In a one-cup measuring cup, combine the milk and Elderflower Liqueur.  Add the dry ingredients to the creamed butter-sugar mixture alternately with the liquid ingredients in three additions, starting and ending with the dry ingredients, and beating well after each addition.  Beat one additional minute on medium speed.

Transfer batter equally among the pans and bake for approximately 30-35 minutes, or until cake tester inserted into center of cakes comes out clean. It is recommended to check cakes the first time around the 25-minute baking point, then check them every five minutes until they test done. Cool cakes on wire cake racks for 10 minutes before removing from pans. Cool completely before frosting cakes.

Icing:  In bowl of stand mixer fitted with paddle attachment, cream the butter and shortening together until blended and creamy.  Beat in the almond flavouring, vanilla, water, and liqueur.  Gradually add the icing sugar, a cup at a time, beating well after each addition.

Assembly:  Use three of the four cakes.  Reserve fourth for another use. Level each cake to the same height.  Brush off loose crumbs from each cake. Place one cake on cake plate or cake stand.  Spoon about ¾ cup icing into icing bag fitted with round tip.  Pipe a circle of icing around cake edge, about ½“ in from the outside edge, to form a dam.  Spoon lemon curd inside the dam.  Place second layer of cake over filling and repeat with icing circle and lemon curd filling.  Crumb coat the cake with a thin layer of the icing (this will look messy and that’s okay).  Place cake in refrigerator to set for 25-30 minutes then remove and ice the cake with a thicker layer of icing.  Decorate as desired.  Refrigerate until use. (Freeze any leftover icing for a future use.)

Yield:  One 3-layer 6” cake (or one  8” or 9”  2-layer cake)

Note:  The baking times given are for the 6” cakes.  This cake may be made in two 8” or 9” round pans; however, baking times may need to be adjusted.

Lemon Elderflower Cake

Made with real lemon and a hint of elderberry liqueur, this Lemon Elderberry Cake is deliciously moist with its lemon curd filling and elderberry-flavoured buttercream icing.

Course Dessert
Cuisine American
Servings 10
My Island Bistro Kitchen My Island Bistro Kitchen

Ingredients

Cake:

  • ¾ cup butter room temperature
  • cups + 1 tbsp granulated sugar
  • 2 large eggs room temperature
  • 4 large egg whites room temperature
  • ¼ cup freshly squeezed lemon juice strained
  • 1 tbsp finely grated lemon rind
  • 1 tsp vanilla
  • 3 cups cake flour
  • 4 tsp baking powder
  • ½ tsp baking soda
  • ½ tsp salt
  • ¾ cup + 2 tbsp milk
  • 2 tbsp Elderflower Liqueur

Icing:

  • ¾ cup butter room temperature
  • ¾ cup shortening room temperature
  • ¾ tsp almond flavouring
  • ¾ tsp vanilla
  • 2 tbsp water
  • 3 tbsp Elderflower Liqueur
  • lbs icing sugar sifted
  • Dash of salt optional
  • ½ - 2/3 cup Lemon Curd

Instructions

Cake:

  1. Preheat oven to 350°F. Line four 6”x2” pans with parchment circles on the bottoms and line the sides of each pan with a long continuous strip of parchment paper. Spray pans lightly with cooking spray to hold the parchment in place. Spray parchment-lined pans lightly with cooking spray.
  2. In bowl of stand mixer fitted with paddle attachment, cream butter then slowly add the sugar. Beat until mixture is light and fluffy. Add the whole eggs, one at a time, beating well after each addition. Repeat with the egg whites, adding one at a time. Add the lemon juice, grated lemon rind, and vanilla. Beat well.
  3. Sift the cake flour, baking powder, baking soda, and salt together. In a one-cup measuring cup, combine the milk and Elderflower Liqueur. Add the dry ingredients to the creamed butter-sugar mixture alternately with the liquid ingredients in three additions, starting and ending with the dry ingredients, and beating well after each addition. Beat one additional minute on medium speed.

  4. Transfer batter equally among the pans and bake for approximately 30-35 minutes, or until cake tester inserted into center of cakes comes out clean. It is recommended to check cakes the first time around the 25-minute baking point, then check them every five minutes until they test done. Cool cakes on wire cake racks for 10 minutes before removing from pans. Cool completely before frosting cakes.

Icing:

  1. In bowl of stand mixer fitted with paddle attachment, cream the butter and shortening together until blended and creamy. Beat in the almond flavouring, vanilla, water, and liqueur. Gradually add the icing sugar, a cup at a time, beating well after each addition.

Assembly:

  1. Use three of the four cakes. Reserve fourth for another use. Level each cake to the same height. Brush off loose crumbs from each cake. Place one cake on cake plate or cake stand. Spoon about ¾ cup icing into icing bag fitted with round tip. Pipe a circle of icing around cake edge, about ½“ in from the outside edge, to form a dam. Spoon lemon curd inside the dam. Place second layer of cake over filling and repeat with icing circle and lemon curd filling. Crumb coat the cake with a thin layer of the icing (this will look messy and that’s okay). Place cake in refrigerator to set for 25-30 minutes then remove and ice the cake with a thicker layer of icing. Decorate as desired. Refrigerate until use. (Freeze any leftover icing for a future use.)

Recipe Notes

Note: The baking times given are for the 6” cakes. This cake may be made in two 8” or 9” round pans; however, baking times may need to be adjusted.


Pin Me to Pinterest!

Lemon Elderflower Cake

Chicken and Mushroom Vol-au-vent Recipe

Creamed Chicken
Chicken and Mushroom Vol-au-vent

One of my favorite recipes is Chicken and Mushroom Vol-au-vent. Some may know this as “creamed chicken”.  I actually make up a large batch of this delectable dish and freeze it in serving-sized portions.  It makes a quick and easy meal when all that has to be done is bake the frozen patty shells, heat up the creamed mixture, and toss a green salad. Continue reading Chicken and Mushroom Vol-au-vent Recipe

Chocolate Biscuit Cake

If you are a chocolate lover, this Chocolate Biscuit Cake is for you!  What’s not to love about cookies and chocolate bar chunks encased in a rich ganache then smothered with a decadent chocolate ganache glaze!

Biscuit Cake
Chocolate Biscuit Cake


I am giving alternate instructions for making a gluten-free version of the cake and want to point out, at the offset, if you are making the gluten-free version, ensure that all ingredients called for in the recipe (not just the cookies and chocolate bars) are, in fact, gluten free.

The Chocolate Biscuit Cake is said to be a favorite teatime treat of Her Majesty Queen Elizabeth II. It’s also said to be a favorite of Prince William who chose it as his groom’s cake at his April 2011 wedding to Katherine Middleton.  There are many versions and recipes for this cake which is sometimes referred to as “refrigerator cake” because it is a no-bake cake that is set by refrigeration.


Biscuit Cake
Chocolate Biscuit Cake

Traditionally, the cake is made with biscuits (the British term for what is known as “cookies” in North America). The sturdy, crisp Digestive cookies are the traditional ingredients. These would be found in the cookie aisles of the larger supermarkets, under brand names such as McVities, Christie, and others. The label on the package will say “Digestives”. The Digestives are very plain-flavored and thin.

Digestive Biscuits
McVitie’s Digestive Biscuits

Sometimes, rich tea biscuits may also be added to the cake and they will be labeled as “Rich Tea Biscuits”. They are similar to the Digestives, just a little bit sweeter.

Rich Tea Biscuits
McVitie’s Rich Tea Biscuits

I wanted to make my version of the Chocolate Biscuit Cake gluten free and could not find any gluten-free commercially-made Digestive cookies locally.  So, I improvised, knowing I’d need a “sturdy” cookie that would not become soggy or break apart in the cake as the warm ganache was added. I took my gluten-free Snickerdoodle recipe (click here for that recipe), halved it, using a medium egg instead of the extra-large egg the recipe calls for, omitted the nutmeg and cardamom, and did not roll the cookies in the spice-sugar mixture.  I made the cookies the night before making the cake, baked them an extra 2 minutes to crisp them up, and left them on the counter overnight. This resulted in a hard, crisp, sturdy cookie that could hold its own in the cake. I weighed out the cookies to get 8 oz and it took 13 of the Snickerdoodles which were made the size indicated in my recipe.

Cookies
Gluten Free Snickerdoodle Cookies

It’s really important to use crisp, not soft and chewy, cookies in this recipe as the cookies have to be able to stand up to being tossed with the chocolate ganache and packed into the pan without being broken into unrecognizable crumbs or becoming soggy.  They are meant to give a crunchy texture to the cake. Break up the cookies by hand, not by food processor, into bite-sized chunks. Using a food processor will chop them up too fine and result in crumbs.  You want to see actual chunks of cookies (er, biscuits!) in the cake. The photo below shows the size of the cookie chunks I used in the cake.


Chopped Cookies for Biscuit Cake

The photo below demonstrates how the cookies and chocolate bar chunks are visible in the finished cake.

Biscuit Cake
Chocolate Biscuit Cake

I used crisp and crunchy Butterfinger chocolate bars in the recipe instead of using all cookies for the ingredients.  I chose the Butterfinger bars because their label said they were gluten-free and also because I really like this bar and it is crunchy enough to remain intact in the cake. This added extra flavour and crunch and made the cake just a bit more interesting. If, however, you wish not to add chocolate bars to the cake, simply replace the 6 oz called for with that weight of additional cookies, either more Digestives or some Rich Tea Biscuits (or, for the gluten-free version, more gluten-free Snickerdoodles).

A good quality dark chocolate is needed for this recipe because it is a huge ingredient in the cake and ganache glaze and you really taste the properties of the chocolate in the ganache – don’t compromise on this ingredient.  If you are making a gluten-free version of the cake, be sure to check the package label on the chocolate to ensure that it contains no trace of wheat because, as I discovered, some packages do say the chocolate contains, may contain, or may have been in contact with wheat.

Biscuit Cake
Chocolate Biscuit Cake

Biscuit Cake is traditionally made with golden syrup which I could not source locally so I substituted amber corn syrup with success.  I also added one medium-sized egg as a binder for the ingredients. Not all Biscuit Cakes call for an egg as an ingredient but I think it adds to, and helps stabilize, the texture of the ganache in the cake.

Adding the chocolate liqueur is optional but it really does add a dimension of deeper flavour.  If you’re going to have an extravagant “death by chocolate” cake experience, you might as well go all the way!

Chocolate Biscuit Cake

Some Biscuit Cake recipes call for additional ingredients like raisins, nuts, and dried fruit. I don’t add those to my cake because, to me, that’s taking away from a Biscuit Cake and moving it more to a non-baked fruit cake. And, I don’t think the cake needs these ingredients – this, of course, is a personal preference.

The easiest pan to use for this recipe is the 6” round springform pan (3” deep) because it makes it so easy to unmold the cake. Line the bottom and sides of the pan with parchment paper to facilitate the removal of the cake from the pan.  I recommend using a separate circle of parchment for the pan bottom and one long continuous strip of parchment to go around the sides of the pan. This is recommended over simply cutting a large piece of parchment paper and squashing it into the pan which will result in uneven nooks, crannies, and wrinkles into which the batter can escape. This will cause the cake to have an uneven appearance when unmolded.

If you don’t have a small springform pan, other pans (e.g., a non-springform 6” round pan (3” deep) or a 6”x9”x3″ loaf pan) can be used.  However, the pan will need to be lined such that the liner gives “handles” with which to lift the cake from the pan since the sides of the pan will not spring open for easy removal. For example, you might line the pan with plastic wrap, leaving enough excess that it could be used to lift the cake from the pan.  The cake mixture is likely to have cooled enough by this point that it is safe to pack it into a plastic wrap lined pan. However, if in doubt, I’d suggest lining the plastic wrapped pan with parchment paper so the cake is not in direct contact with the plastic wrap.


Chocolate Biscuit Cake

My preference, when preparing the chocolate ganache for the cake itself, is to use a double boiler or, if you don’t have one, a heatproof bowl over a pot of simmering water. I find this gives greater control and less risk of scorching the ingredients which could occur if heated over direct heat. It’s important to let this ganache cool for about 10 minutes before mixing it into the cookie and chocolate bar mixture because a really hot mixture will melt the chocolate on the Butterfinger bars thus losing that texture and it may cause even the most sturdy of cookies to become soggy. Cover the pan with plastic wrap secured with an elastic band. Refrigerate the cake for at least 3 hours to let it set, then unmold it to a serving plate.

The chocolate for the ganache glaze is chopped a bit finer than that needed for the ganache in the cake. The reason it needs to be a bit smaller is because the hot whipping cream mixture is used to melt the chocolate, off heat, and smaller pieces will melt easier and faster.  The chocolate does not, however, need to be chopped super fine for this. After the hot whipping cream has been poured over the chocolate and let stand for 3-5 minutes, give the mixture a good stir.  To make the ganache silky smooth, I recommend using a hand-held immersion blender. After letting the ganache sit for 12-15 minutes to cool slightly so it does not melt the cake, simply pour it over the top of the cake, letting the glaze run down the sides. Don’t worry about getting the ganache glaze perfectly smooth on the sides – it’s not fondant and imperfections are perfectly fine on this cake! Using an offset spatula or a dinner knife, spread the ganache so it covers the top and sides of the cake. Refrigerate for at least an hour before cutting and serving the cake.

Serve this delectable cake with just the plain ganache glaze or decorate as desired.

Chocolate Biscuit Cake

While it may sound like a stretch to be able to get 12 servings from a 6” cake, this Chocolate Biscuit Cake is very rich so small pieces per serving will suffice!

Chocolate Biscuit Cake

What a delightful decadent treat!

Biscuit Cake
Chocolate Biscuit Cake

[Printable recipe follows at end of post]

Chocolate Biscuit Cake

Cake:
8 oz high quality dark chocolate, coarsely chopped
8 oz Digestive cookies (such as McVities) or, to make the cake gluten-free, 8 oz of My Island Bistro Kitchen’s Gluten-free Snickerdoodle cookies, broken into chunks by hand
6 oz Butterfinger Bars, broken or chopped into chunks

½ cup butter (no substitutes)
3 tbsp whipping cream (35%M.F.)
½ cup amber corn syrup
1 medium-sized egg, lightly beaten
2 tbsp chocolate liqueur (optional)

Chocolate Ganache Glaze:
6 oz dark chocolate, coarsely chopped
2/3 cup whipping cream (35%M.F.)
2 tbsp butter (no substitutes)
1½ tbsp chocolate liqueur (optional)

Method:
Cake:  Prepare 6” springform pan (3” deep) by lining bottom with a circle of parchment paper and lining the sides of the pan with a long continuous strip of parchment paper.

Coarsely chop the chocolate. Set aside.

In large, heatproof bowl, break up the cookies, by hand, into bite-sized chunks.  Do the same for the Butterfinger bars, using a knife, if necessary to break up the crisp bars. Gently toss the cookies and chocolate bars together.

On cooktop, in top of double boiler over simmering water, melt the butter.  When the butter is about half melted, whisk in the whipping cream, corn syrup, and slightly beaten egg.  Stir in the 8 oz of coarsely chopped chocolate until it is melted.  Remove from heat and stir in the chocolate liqueur.  Cool for approximately 10 minutes.

Pour the slightly cooled chocolate mixture over the broken cookies and chocolate bar chunks.  Stir gently until the mixture is coated with chocolate, trying not to further break up the cookies and bars.

Transfer mixture to the prepared pan and gently pack mixture into the pan.  Using an offset spatula, or a dinner knife, smooth the top of the cake as best possible.  Cover pan with plastic wrap secured with an elastic band. Refrigerate for at least 3 hours.

Prepare Chocolate Ganache Glaze as follows.

Chocolate Ganache Glaze: Chop the 6 oz dark chocolate into small chunks and place in a heatproof bowl.

In small, heavy-bottomed saucepan, over medium heat, bring the whipping cream and butter just to the boiling point, stirring to prevent scorching.  Pour the hot cream over the chocolate pieces, tilting and swirling the bowl to ensure all the chocolate is covered with the cream.  Add the chocolate liqueur.  Let stand 3-5 minutes to allow the hot cream to melt the chocolate. Stir. Using a hand-held immersion blender, blend the mixture just until all the chocolate is smooth and no chocolate chunks remain.

Let ganache stand for 12-15 minutes. Meanwhile, unmold cake and transfer to serving plate. Pour the slightly cooled ganache over the cake, letting the ganache drip down the sides.  Use an offset spatula, or knife, spread the ganache over top and sides of cake. Refrigerate for about an hour to set.

Serve cake plain or decorate as desired.

Yield:  Apx. 12 servings

Chocolate Biscuit Cake

A decadent no-bake cake that features crumbled biscuits (cookies) and chocolate bar chunks in a rich chocolate ganache
Course Dessert
Servings 12
My Island Bistro Kitchen My Island Bistro Kitchen

Ingredients

Cake:

  • 8 oz high quality dark chocolate coarsely chopped
  • 8 oz Digestive cookies such as McVities or, to make the cake gluten-free, 8 oz of My Island Bistro Kitchen’s Gluten-free Snickerdoodle cookies, broken into chunks by hand
  • 6 oz Butterfinger Bars broken or chopped into chunks
  • ½ cup butter no substitutes
  • 3 tbsp whipping cream 35%M.F.
  • ½ cup amber corn syrup
  • 1 medium-sized egg lightly beaten
  • 2 tbsp chocolate liqueur optional

Chocolate Ganache Glaze:

  • 6 oz dark chocolate coarsely chopped
  • 2/3 cup whipping cream 35%M.F.
  • 2 tbsp butter no substitutes
  • tbsp chocolate liqueur optional

Instructions

Cake:

  1. Prepare 6” springform pan (3” deep) by lining bottom with a circle of parchment paper and lining the sides of the pan with a long continuous strip of parchment paper.
  2. Coarsely chop the chocolate. Set aside.
  3. In large, heatproof bowl, break up the cookies, by hand, into bite-sized chunks. Do the same for the Butterfinger bars, using a knife, if necessary to break up the crisp bars. Gently toss the cookies and chocolate bars together.
  4. On cooktop, in top of double boiler over simmering water, melt the butter. When the butter is about half melted, whisk in the whipping cream, corn syrup, and slightly beaten egg. Stir in the 8 oz of coarsely chopped chocolate until it is melted. Remove from heat and stir in the chocolate liqueur. Cool for approximately 10 minutes.
  5. Pour the slightly cooled chocolate mixture over the broken cookies and chocolate bar chunks. Stir gently until the mixture is coated with chocolate, trying not to further break up the cookies and bars.
  6. Transfer mixture to the prepared pan and gently pack mixture into the pan. Using an offset spatula, or a dinner knife, smooth the top of the cake as best possible. Cover pan with plastic wrap secured with an elastic band. Refrigerate for at least 3 hours.
  7. Prepare Chocolate Ganache Glaze as follows.

Chocolate Ganache Glaze:

  1. Chop the 6 oz dark chocolate into small chunks and place in a heatproof bowl.
  2. In small, heavy-bottomed saucepan, over medium heat, bring the whipping cream and butter just to the boiling point, stirring to prevent scorching. Pour the hot cream over the chocolate pieces, tilting and swirling the bowl to ensure all the chocolate is covered with the cream. Add the chocolate liqueur. Let stand 3-5 minutes to allow the hot cream to melt the chocolate. Stir. Using a hand-held immersion blender, blend the mixture just until all the chocolate is smooth and no chocolate chunks remain.
  3. Let ganache stand for 12-15 minutes. Meanwhile, unmold cake and transfer to serving plate. Pour the slightly cooled ganache over the cake, letting the ganache drip down the sides. Use an offset spatula, or knife, spread the ganache over top and sides of cake. Refrigerate for about an hour to set.
  4. Serve cake plain or decorate as desired.

Recipe Notes

Be sure to read the accompanying blog post to this recipe as it gives hints and tips on making this Chocolate Biscuit Cake

Click this link for My Island Bistro Kitchen's GF Snickerdoodle Cookie recipe: Gluten Free Snickerdoodle Cookie Recipe

[Copyright My Island Bistro Kitchen]

If you have made this recipe and enjoyed it and/or wish to share it with your friends and family, please do so on social media but be sure to share the direct link to this posting from my website.

Connect with My Island Bistro Kitchen on Social Media

Join the Facebook page for My Island Bistro Kitchen:  https://www.facebook.com/MyIslandBistroKitchen/

Follow “the Bistro” on “X” (formerly Twitter)https://twitter.com/PEIBistro/

See the drool-worthy gallery of mouth-watering food photos from My Island Bistro Kitchen on Instagramhttps://www.instagram.com/peibistro/

Follow “the Bistro” on Pinterest at https://www.pinterest.ca/peibistro/ and pin the Pinterest-ready photo found at the end of this post to your favorite Pinterest boards.

PIN ME TO PINTEREST!
Chocolate Biscuit Cake


Biscuit Cake
Chocolate Biscuit Cake


Chocolate Biscuit Cake