Category Archives: Recipes

Classic Raspberry Linzer Cookies

Linzer Cookies
Classic Raspberry Linzer Cookies

Today, I am featuring Classic Raspberry Linzer Cookies.  These cookies, so-named for the Austrian Linzer Torte they replicate, are simply two shortbread-type cookies sandwiched together with jam.  The cookies are commonly filled with raspberry jam which produces a very showy cookie. These cookies are traditionally found on sweet trays at Christmas but they are wonderful any time of the year.  So, there is no need to wait for Christmas to enjoy them! You can legitimately actually have two cookies without feeling guilty when you eat one of these sandwich cookies – bonus!
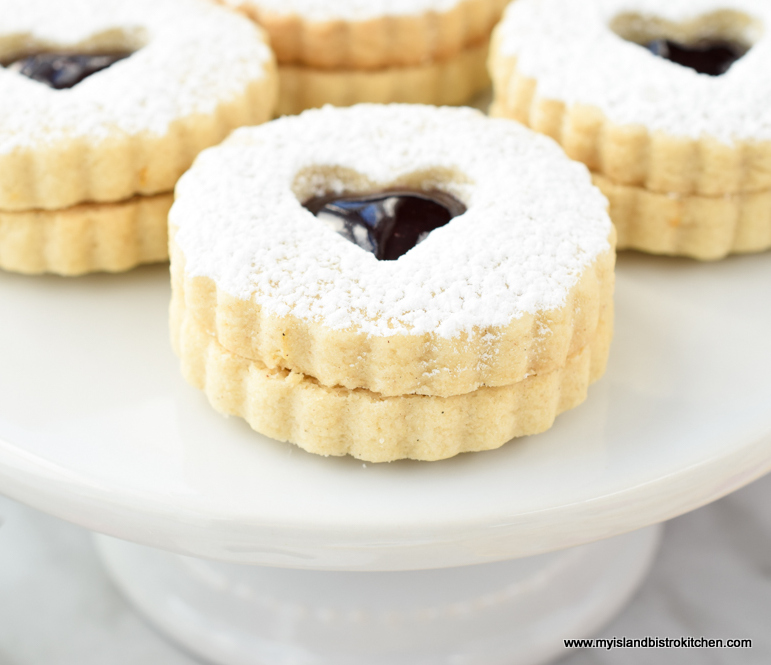
Raspberry Linzer Cookies

The Linzer Torte, said to be the oldest cake recipe in the world and dating back to the late 1600s, is believed to have originated in the City of Linz in Austria.  Made with a rich buttery crust of primarily butter, flour, and ground nuts, the torte was traditionally filled with black currant preserves and topped with a lattice crust that allowed the preserves to shine through.

Linzer cookies are a take on the Linzer Torte put into a cookie format.  Two cookies are sandwiched together with jam and the top cookie is generously dusted with powdered sugar making it very showy. To keep the jam filling visible, a simple cut-out is made in the top cookie.
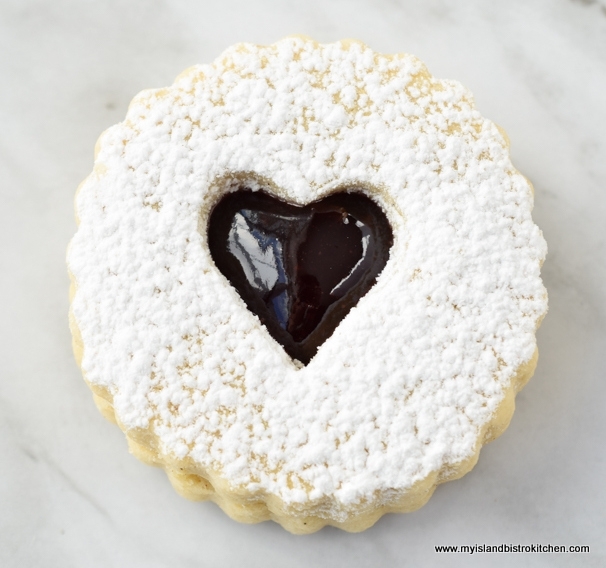
Linzer Cookies
Raspberry Linzer Cookies

The ingredients for the cookies are fairly basic and the texture closely resembles shortbread.  That is to say, the cookies have a short, crisp, yet tender texture.

Linzer Cookies
Texture of Linzer Cookies

While Linzer Cookies are obviously different than a torte, several of the ingredients are the same – butter, flour, and ground almonds.  I add small amounts of cinnamon, cardamom, and cloves but in such small amounts that the flavours are very subtle. Some grated orange rind, vanilla, and almond flavoring are the only other injections of flavour into the rich buttery dough.

Linzer Cookies
Classic Raspberry Linzer Cookies

To make these cookies gluten free, replace the 2¼ cups all-purpose flour with an equal amount of gluten-free 1-to-1 baking flour.
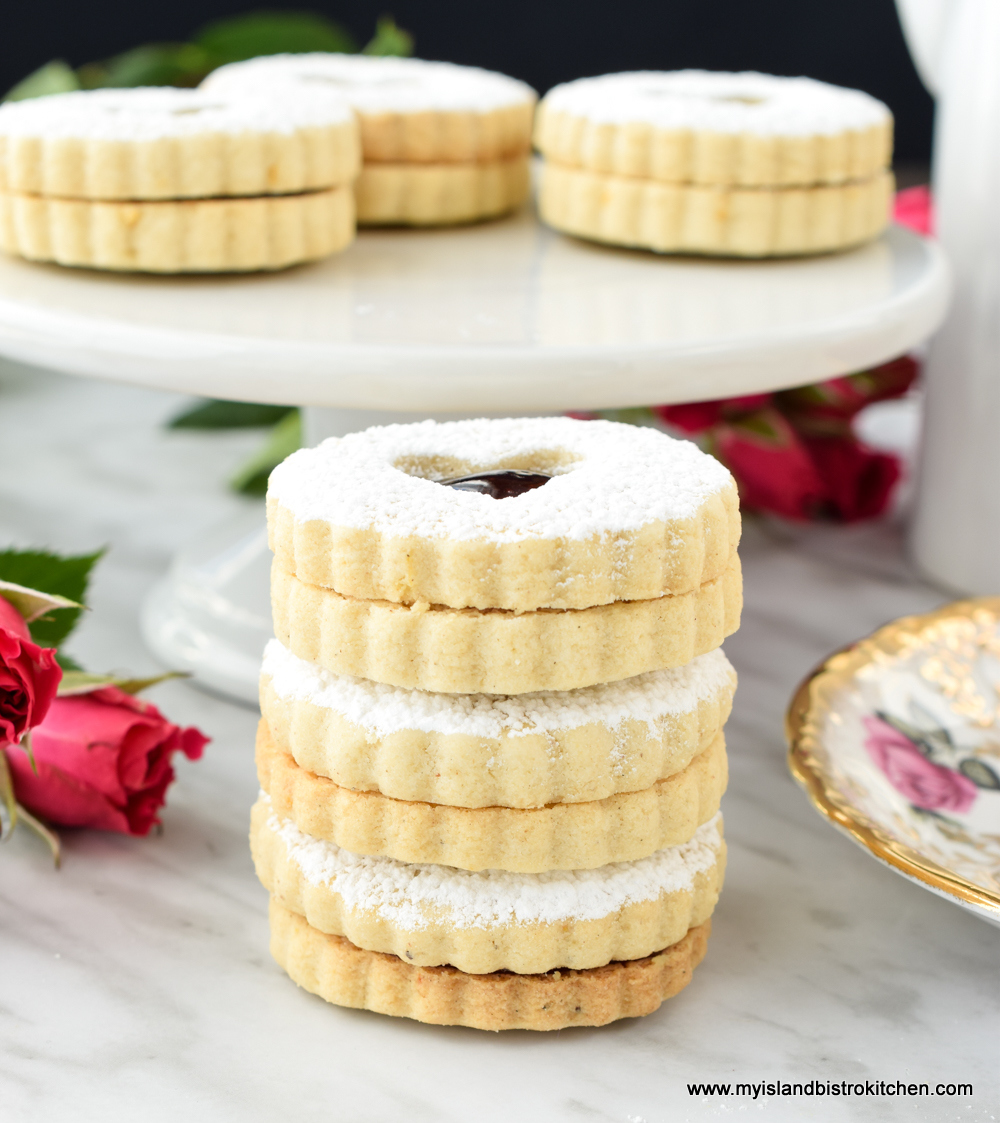
Linzer Cookies
Raspberry Linzer Cookies

Tips for Making Linzer Cookies

  • Make sure all ingredients are at room temperature.
  • Do not overmix or overhandle the dough. Just mix it enough so it will cling together.
  • Divide the dough in half and form each half into a disc. Wrap the discs, separately, in plastic wrap and chill the dough for 35-45 minutes or until dough is firm enough to roll out.  This will make the dough less sticky and easier to handle. The dough can be made up to a day ahead but it will need to be removed from the refrigerator for several minutes before rolling it out as it will be far too hard to allow the dough to be rolled out without it cracking or breaking apart.
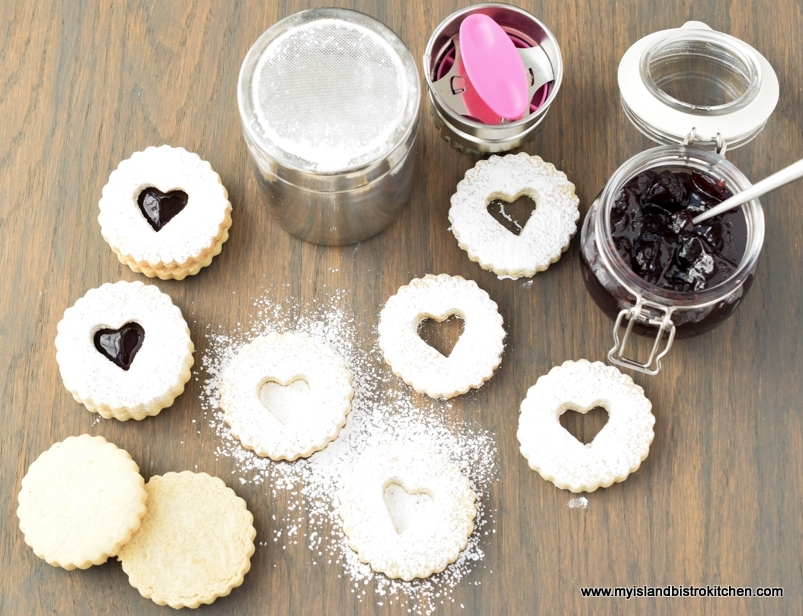
  • Special Linzer cookie cutters (seen at top of photo below) exist for cutting out these two-part cookies. These cutters have a plunger attachment that allows different interchangeable cut-out inserts to be used to cut out small shapes, like hearts, circles, and diamonds, in the centers of cookies.  This cut-out, of course, allows the pretty jam or preserves to show through. If you don’t have a Linzer cutter, simply cut out the shape of the cookie with any 2” cookie cutter and then use a small 1” cookie cutter to cut out the center hole in half the cookie batch.  Many sets of nesting cookie cutters have various sizes of cutters suitable for this purpose.
Linzer Cookies
Raspberry Linzer Cookies


  • Work with one dough disc at a time. Roll the dough to about 1/8” thick.  Two cookies will be sandwiched together so about 1/8” thickness is thick enough for each cookie half.  Make sure you cut out an even number of whole cookies and cookies with the cut-outs so you will have matched pairs.
  • The cookies, once cut out and placed 1” apart on parchment-lined baking sheets need to go back into the refrigerator for about 20 minutes. This is an important step because the fat in the chilled cookies will take longer to melt once the cookies are placed in the oven than would room-temperature cookies. The chilling will mean the cookies will spread less as they bake and we want these cookies to hold their shape perfectly, especially the cut-out centers in the top cookies.
  • Do not overbake the cookies. Bake them for 11-13 minutes, just until the cookies are set and have a light golden color.
  • Dust the cut-out cookie tops with powdered sugar BEFORE placing them over the filled cookie bottoms (a small fine wire mesh sieve works well for this or a small metal mesh-topped can can also be used (seen in photo above)). If you wait to sugar-coat the cookies until after they have been assembled, the sugar will cover the jam filling and cause it to become cloudy and lose its clear, shimmery appearance.
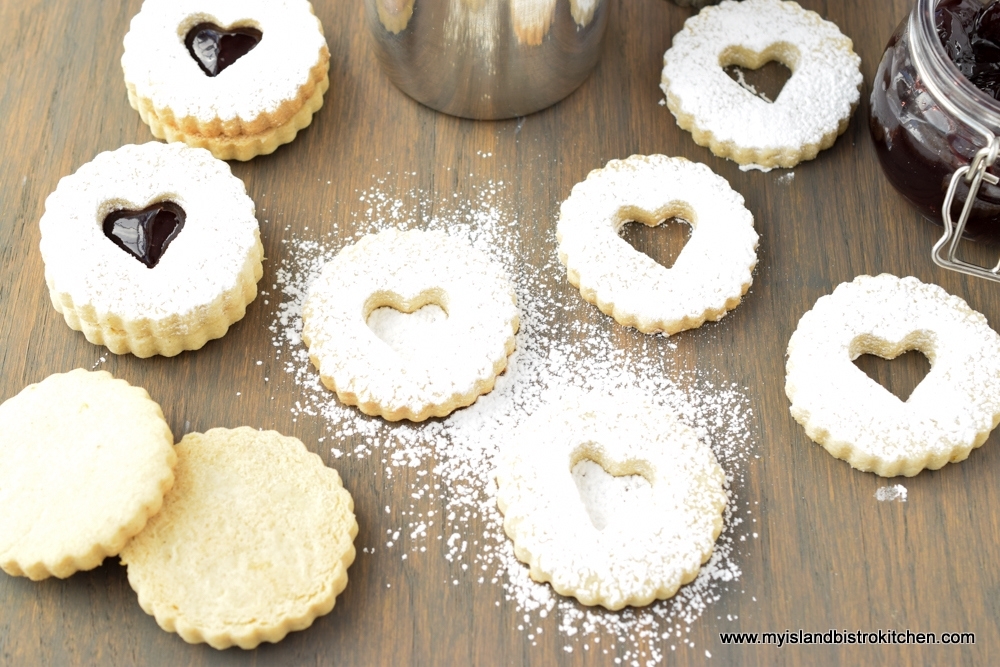
Linzer Cookies
Sugar-dusted Cookie Tops for Linzer Cookies


  • Any red jam or black currant jam can be used in these cookies. My preference is to use raspberry as the flavour blends well with the ground almonds and the orange flavoring in the cookies.  I do recommend, whatever type of jam is used, that it be seedless. Do not spread the jam right to the outside edge of the bottom cookies as the jam will ooze out.  Keep the jam in the center of the cookie bottoms.  When the top cookie is placed on the jam-filled bottom, it will spread the jam further out in the cookie.  No jam should be visible on the outside edges of Linzer cookies.  If a bit more jam is desired in the cookies, use a tiny coffee spoon to carefully drop a bit more jam into the center of the assembled sandwich cookies.
Linzer Cookies
Classic Raspberry Linzer Cookies


  • It is not recommended to freeze the assembled cookies for a couple of reasons. First, the jam is likely to soak into the cookies, especially as they thaw.  This will cause the cookies to lose their crisp texture.  Second, it takes up more container and freezer space to freeze the cookies in single layers so that the powdered sugar does not fall off the cookies or transfer onto the jam-filled centers, marring the look of the cookies.
  • Store filled cookies in airtight container in refrigerator for up to 3-4 days.
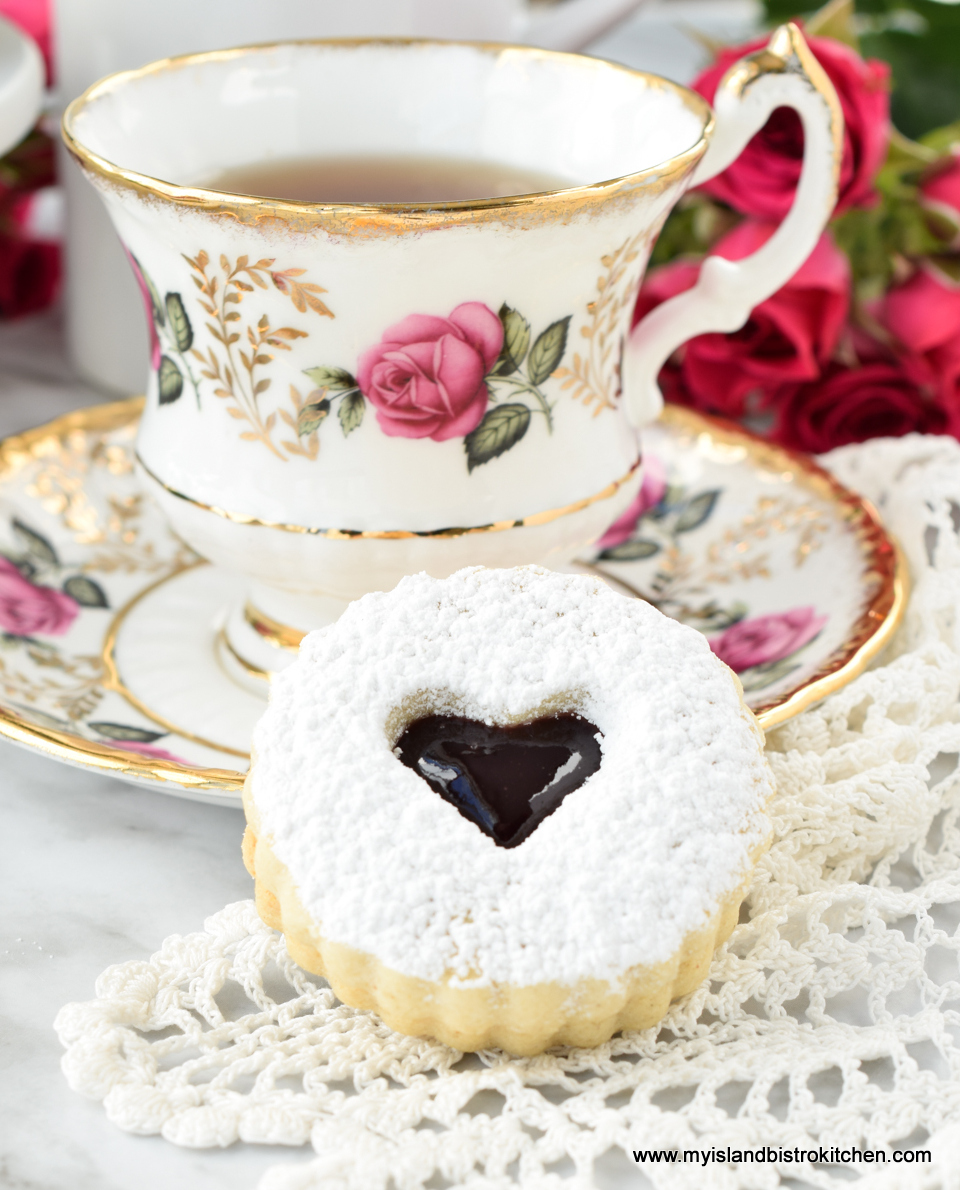
Linzer Cookies
Classic Raspberry Linzer Cookies

[Printable recipe follows at end of posting]

Classic Raspberry Linzer Cookies

Ingredients:

2¼ cups all-purpose flour (to make them gluten free, substitute an equal amount of gluten-free 1-to-1 baking flour
¾ cup finely ground almonds
1 tbsp cornstarch
¾ tsp baking powder
¼ tsp cinnamon
¼ tsp cardamom
Pinch cloves

1 cup butter, room temperature (no substitutes)
2/3 cup granulated sugar
3 tbsp powdered sugar (aka icing sugar or confectioner’s sugar)
2 large egg yolks, room temperature
1 tsp vanilla
¼ tsp almond flavoring
1 tsp finely grated orange rind

Seedless raspberry jam (1/2  – ¾ cup)

Additional powdered sugar for dusting cookies

Method:

Sift dry ingredients together.  Set aside.

In bowl of stand mixer fitted with paddle attachment, cream the butter at medium speed until fluffy and pale yellow.  Slowly add the sugars and cream well for 2-3 minutes, scraping the sides of the bowl as necessary. Reduce speed to low and add the egg yolks, one at a time, beating well after each addition.  Add the vanilla and almond flavoring as well as the grated orange rind. Mix to combine well.

With mixer set on low speed, gradually blend in the dry ingredients, mixing just until dry ingredients are fully incorporated.  Do not overmix.  Turn dough on to a lightly floured surface and gather the dough, working it just enough that it clings together.  Divide the dough into two equal portions and form each half into a round disc.  Wrap discs separately in plastic wrap and refrigerate for 35-45 minutes, or until firm enough to roll.

On lightly floured surface, roll a dough disc into 1/8” thickness.  Using a 2” Linzer cookie cutter (either straight edged or fluted), cut cookies from one half the dough.  Gather dough scrapes and continue cutting out the cookies until the dough is used up. These will be the cookie bottoms. Roll out remaining dough disc in the same manner for the cookie tops.  To cut out the cookie tops, use the same Linzer cutter but fitted with one of the insert shapes to cut out a small 1” shape in the center of each cookie. Repeat until an equal number of cookies with cut out centers have been cut as there are whole cookies. If you do not have a Linzer cookie cutter, use any 2” cookie cutter and a 1” cutter of any shape for the center cut-out of half the cookies.

Place cookies about 1” apart on parchment-lined baking sheets.  Refrigerate cookies for about 20 minutes.

Meanwhile, preheat oven to 350°F. Bake cookies on the middle oven rack for 11-13 minutes, or just until cookies are set and a light golden color. Do not overbake. Remove cookies from oven and cool on baking sheet for about 3-4 minutes then, using a flat lifter/spatula, transfer them to a wire rack to cool completely.

To assemble sandwich cookies, place the cookie halves that have the cut-out centers on a cutting board (these will be the top cookies).  Dust the cookies generously with sifted powdered sugar, covering the cookies with an even coating of the sugar.  On the flat side (i.e., the underneath side) of the whole cookies, spread about 1 – 1½ teaspoons jam in the center of each cookie, being careful not to spread the jam all the way to the cookie edges (stay within ¼” of the cookie edge).  Place the cut-out sugar-dusted cookie tops over the jam-spread bottom cookies to create the sandwich. If desired, use a tiny spoon to carefully add a bit more jam into the center cut-out of each cookie.

Store cookies in an airtight container in the refrigerator for up to 3-4 days.  To freeze cookies, package unassembled cookies between layers of parchment paper in an airtight container.  Bring cookies to room temperature before filling with jam and assembling as above described.

Yield:  Approximately 26 sandwiched cookies.

Classic Raspberry Linzer Cookies

Sugar-dusted jam-filled Linzer Cookies have a tender and crisp texture and buttery flavour complemented by ground almonds and subtle spice seasonings.

Course Dessert
Keyword Linzer Cookies
Servings 26
My Island Bistro Kitchen My Island Bistro Kitchen

Ingredients

  • cups all-purpose flour (to make them gluten free substitute an equal amount of gluten-free 1-to-1 baking flour
  • ¾ cup finely ground almonds
  • 1 tbsp cornstarch
  • ¾ tsp baking powder
  • ¼ tsp cinnamon
  • ¼ tsp cardamom
  • Pinch cloves
  • 1 cup butter room temperature (no substitutes)
  • 2/3 cup granulated sugar
  • 3 tbsp powdered sugar aka icing sugar or confectioner’s sugar
  • 2 large egg yolks room temperature
  • 1 tsp vanilla
  • ¼ tsp almond flavoring
  • 1 tsp finely grated orange rind
  • Seedless raspberry jam 1/2 – ¾ cup
  • Additional powdered sugar for dusting cookies

Instructions

  1. Sift dry ingredients together. Set aside.
  2. In bowl of stand mixer fitted with paddle attachment, cream the butter at medium speed until fluffy and pale yellow. Slowly add the sugars and cream well for 2-3 minutes, scraping the sides of the bowl as necessary. Reduce speed to low and add the egg yolks, one at a time, beating well after each addition. Add the vanilla and almond flavoring as well as the grated orange rind. Mix to combine well.
  3. With mixer set on low speed, gradually blend in the dry ingredients, mixing just until dry ingredients are fully incorporated. Do not overmix. Turn dough on to a lightly floured surface and gather the dough, working it just enough that it clings together. Divide the dough into two equal portions and form each half into a round disc. Wrap discs separately in plastic wrap and refrigerate for 35-45 minutes, or until firm enough to roll.
  4. On lightly floured surface, roll a dough disc into 1/8” thickness. Using a 2” Linzer cookie cutter (either straight edged or fluted), cut cookies from one half the dough. Gather dough scrapes and continue cutting out the cookies until the dough is used up. These will be the cookie bottoms. Roll out remaining dough disc in the same manner for the cookie tops. To cut out the cookie tops, use the same Linzer cutter but fitted with one of the insert shapes to cut out a small 1” shape in the center of each cookie. Repeat until an equal number of cookies with cut out centers have been cut as there are whole cookies. If you do not have a Linzer cookie cutter, use any 2” cookie cutter and a 1” cutter of any shape for the center cut-out of half the cookies.
  5. Place cookies about 1” apart on parchment-lined baking sheets. Refrigerate cookies for about 20 minutes.
  6. Meanwhile, preheat oven to 350°F. Bake cookies on the middle oven rack for 11-13 minutes, or just until cookies are set and a light golden color. Do not overbake. Remove cookies from oven and cool on baking sheet for about 3-4 minutes then, using a flat lifter/spatula, transfer them to a wire rack to cool completely.
  7. To assemble sandwich cookies, place the cookie halves that have the cut-out centers on a cutting board (these will be the top cookies). Dust the cookies generously with sifted powdered sugar, covering the cookies with an even coating of the sugar. On the flat side (i.e., the underneath side) of the whole cookies, spread about 1 – 1½ teaspoons jam in the center of each cookie, being careful not to spread the jam all the way to the cookie edges (stay within ¼” of the cookie edge). Place the cut-out sugar-dusted cookie tops over the jam-spread bottom cookies to create the sandwich. If desired, use a tiny spoon to carefully add a bit more jam into the center cut-out of each cookie.
  8. Store cookies in an airtight container in the refrigerator for up to 3-4 days. To freeze cookies, package unassembled cookies between layers of parchment paper in an airtight container. Bring cookies to room temperature before filling with jam and assembling as above described.

Recipe Notes

Yield: Approximately 26 sandwiched cookies.


[Copyright My Island Bistro Kitchen]

If you have made this recipe and enjoyed it and/or wish to share it with your friends and family, please do so on social media but be sure to share the direct link to this posting from my website.

Connect on social media with My Island Bistro Kitchen:

Join the Facebook page for My Island Bistro Kitchen:  https://www.facebook.com/MyIslandBistroKitchen/

Follow “the Bistro” on “X” (formerly Twitter)https://twitter.com/PEIBistro/

See the drool-worthy gallery of mouth-watering food photos from My Island Bistro Kitchen on Instagramhttps://www.instagram.com/peibistro/

Follow “the Bistro” on Pinterest at https://www.pinterest.ca/peibistro/

Pin The Photos Below To Your Favorite Pinterest Boards!

Linzer Cookies
Classic Raspberry Linzer Cookies


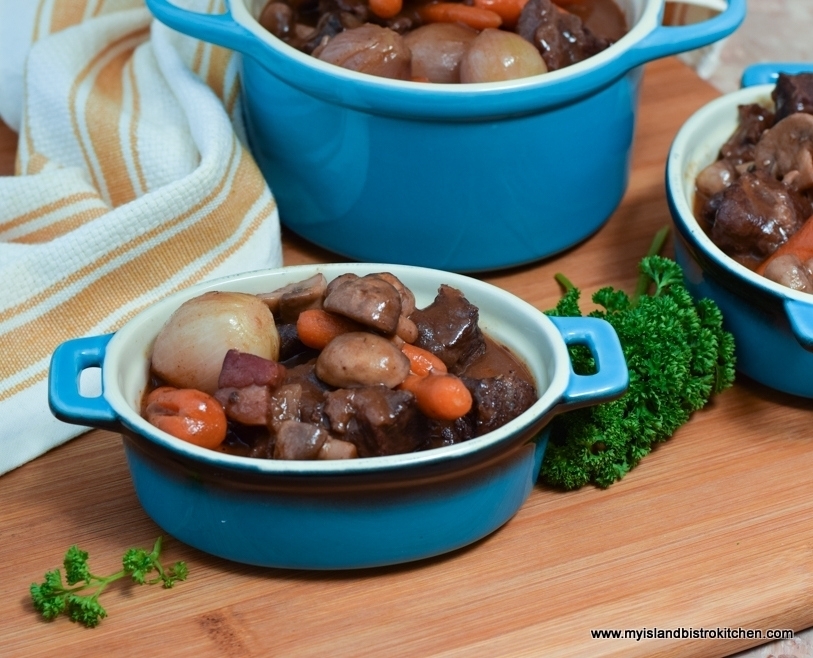
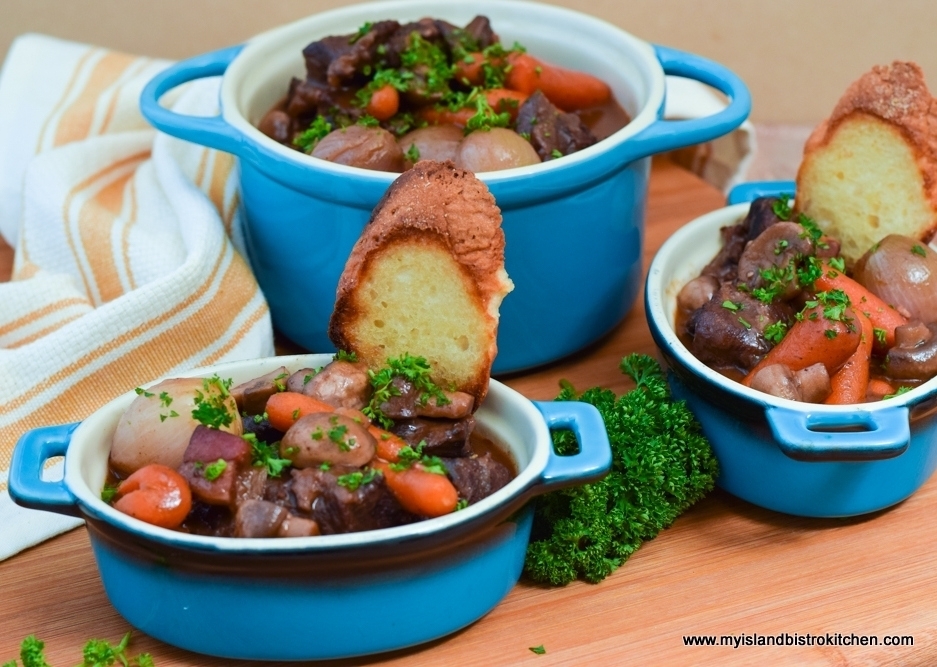
How to Make Bistro Style Beef Bourguignon

Beef Bourguignon
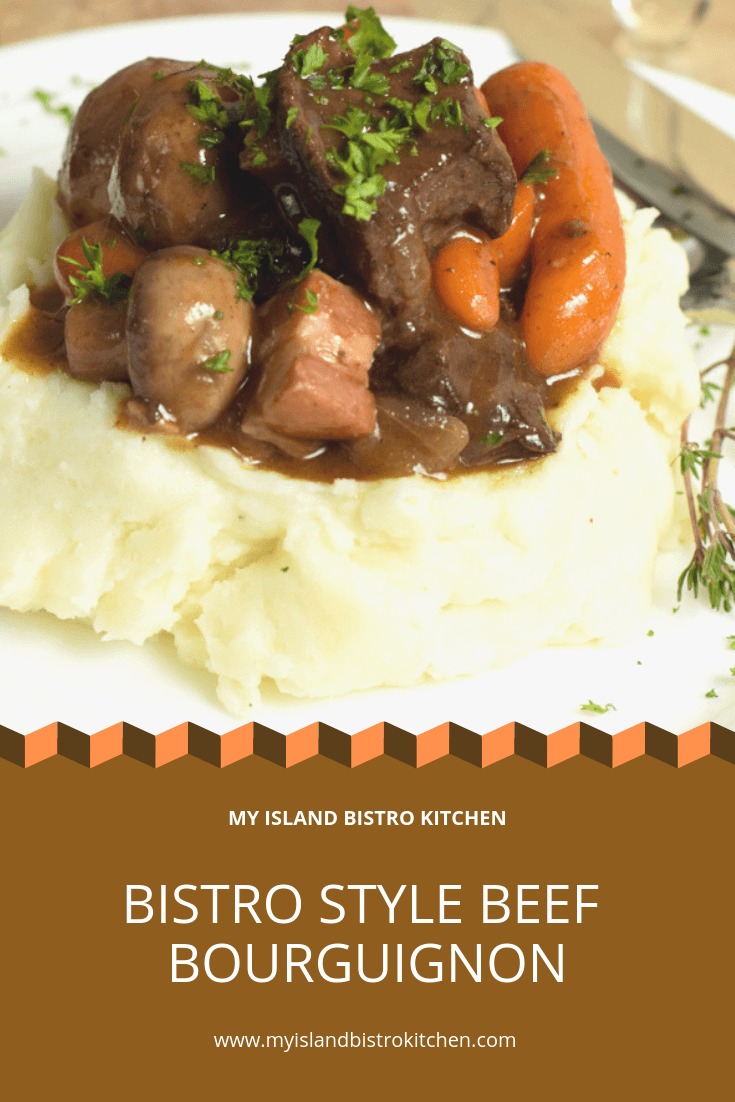
Bistro Style Beef Bourguignon

Doesn’t the mere sound of the name Beef Bourguignon conjure up the notion that it is some exotic dish you would expect to find in a French bistro?  Guess what?  You can easily make this classic French cuisine dish at home! Simple ingredients, economical cuts of beef, and time are all that is required.

Braising

Made with basic ingredients, what makes Beef Bourguignon so wonderful is the cooking method known as braising.  Used in many recipes, braising is simply using a long, slow, moist heat method of cooking tougher cuts of meat in a liquid such as red wine and/or beef stock to tenderize the meat.

This method of cooking is great to use for cuts of meat known to be on the tougher side because the combination of moist heat, low cooking temperature, lengthy cooking time, and a flavorful liquid breaks down the connective tissues (collagen) in the meat, melting it into a silky gelatin. This results in divinely tender and succulent meat that will easily break apart with a fork.

Cuts of meat suitable for braising are cuts of muscular meats like chuck or beef cheeks, for example.  These cuts from the highly exercised parts of the animal are ones known to have lots of collagen that, like magic, when cooked long and slow, turn tough cuts of meat into soft gelatin that will break apart with the touch of a fork. If you don’t need a knife to cut the meat, you have yourself a dandy Beef Bourguignon!  Using more premium cuts of beef will not become more fork tender than the cheaper cuts in this dish so, save your money, and buy the economical cuts.

Braising can be done on the cooktop over low heat but oven braising will provide more even heating and will reduce the risk of burning the meat.  Braising on the stovetop will result in more heat directly hitting the bottom of the pot specifically as opposed to oven braising where the heat is more evenly distributed to all sides of the cooking vessel.

Beef Bourguignon is not difficult to make but there are several steps involved and some time has to be dedicated to it.  It’s not a dish you would start for dinner after arriving home from work at 5:00pm.

There are many versions of this dish and various ways in which to prepare it.  What follows is the method that works well for me.

Choosing the Meat

Both pork and beef are used in this dish.

Pork

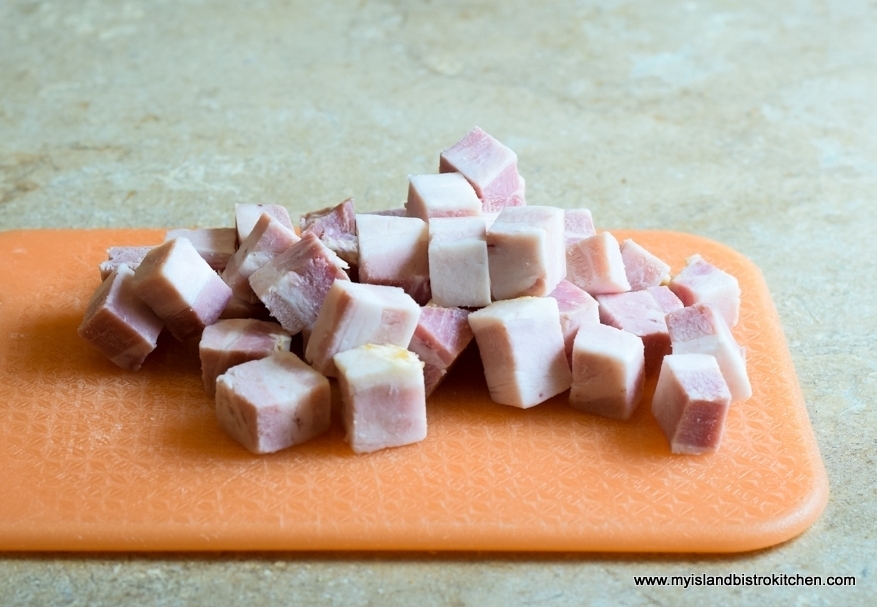
Pork lardons add a lovely texture and layer of flavour richness to Beef Bourguignon..  Lardon is another name for thick, fatty salt pork, much thicker than the thin bacon strips found, pre-packaged, in supermarkets.  While the lardons, themselves, lend wonderful texture and flavor to the dish, it is their rendered fat that is prized for the rich flavour it gives to the beef as it is seared before it is braised.

Lardons
Pork Lardons

I recommend using the lardons over the thin bacon because the thickness of the lardons allows them to keep their shape when fried.  You may need to go directly to a butcher shop (as opposed to a standard supermarket) to get the lardons.  I went to a local butcher, KJL Meats, here in Charlottetown and, as soon as I said what I was making, the butcher knew exactly what I was looking for and he actually cut the lardons into suitably-sized chunks for me!

The lardons are cooked until the fat in them has been rendered out. That flavorful fat is then used to sear the beef, keeping all the wonderful flavor in the dish.

Lardons
Pork Lardons

Beef

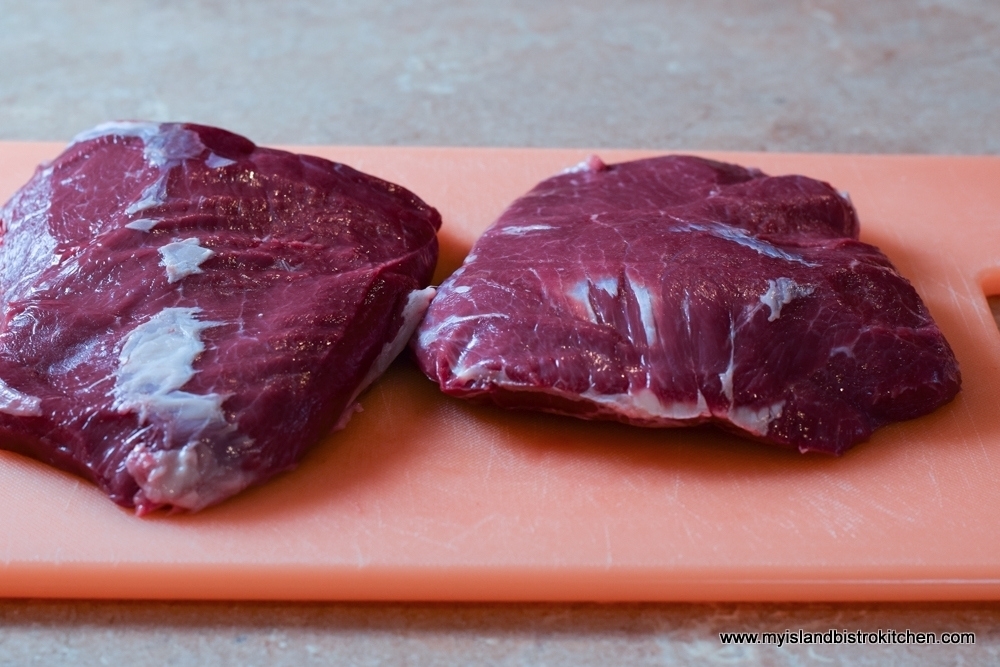
 As mentioned, one of the best things about Beef Bourguignon is that economical cuts of beef are used.  My preference is to use beef cheeks for this recipe though chuck also works very well.  Some marbling in the meat is also beneficial as the slow cooking process will melt the fat and turn it into a melt-in-your-mouth gelatin. The transformation is absolutely amazing!

To get exactly what I want for meat, I go directly to a local butcher – it’s local PEI beef and it’s fresh.  The meat in the photographs came from MacQuarrie’s Meats in Milton, on the outskirts of Charlottetown. Depending on where you live and what your local butchers keep on hand, you may need to pre-order specific cuts, such as beef cheeks, from your local butcher.

Beef Cheeks
Beef Cheeks

If there happens to be any excess hard fat or tendons still visible on the meat, remove them.  Pat the meat dry with paper towel – this will help the cornstarch or flour stick to the meat when it is dredged before being seared.  Season the meat with sea salt and freshly ground pepper.

Beef Cheeks
Beef Cheeks cut for Beef Bourguignon

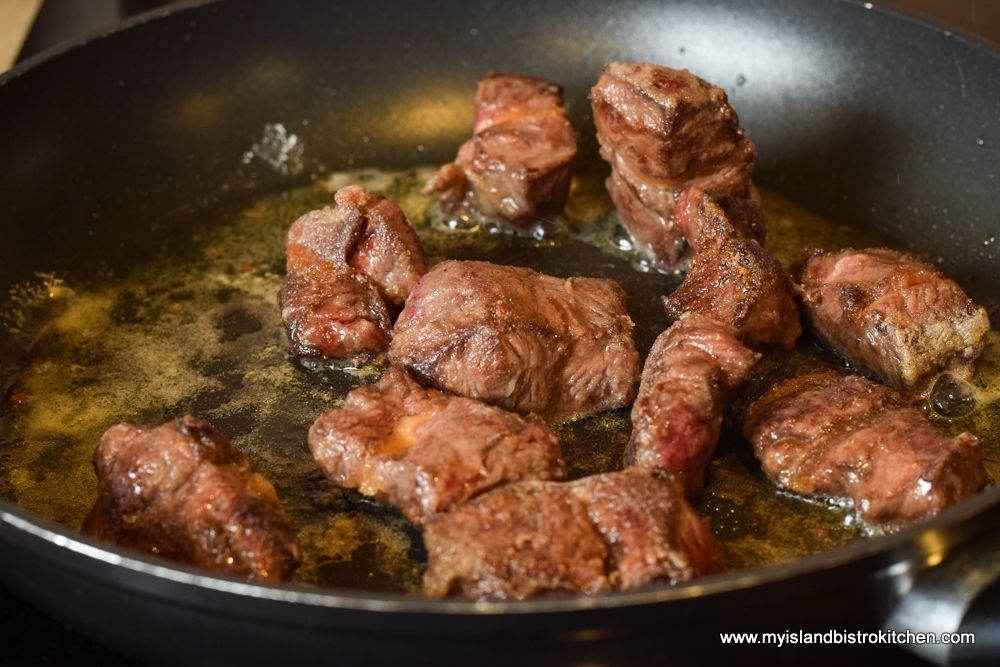
Cut the meat into rather large chunks – approximately 2” pieces.  This is meant to be a rustic dish and cutting the meat any smaller may cause the meat to dry out faster and it won’t have the same presentation as if the chunks are larger.  Once the meat is dredged in the cornstarch or flour, sear it over medium-high heat in the lardon fat.

Searing Beef for Beef Bourguignon

Searing the meat before simmering it in the cooking liquid is known as brown braising. This will add depth of flavour as the meat caramelizes while a brown crust forms on the beef. This ‘browning” will not only add flavor but it will help produce a rich brown sauce.  Don’t try to speed up the process by over-crowding all the meat pieces into the pan at once.  Work in batches and leave some space between the chunks of meat so they brown nicely. The aim of this process is to sear the meat, not steam it or cook it all the way through.

Searing Beef for Beef Bourguignon

Making the Bouquet Garni

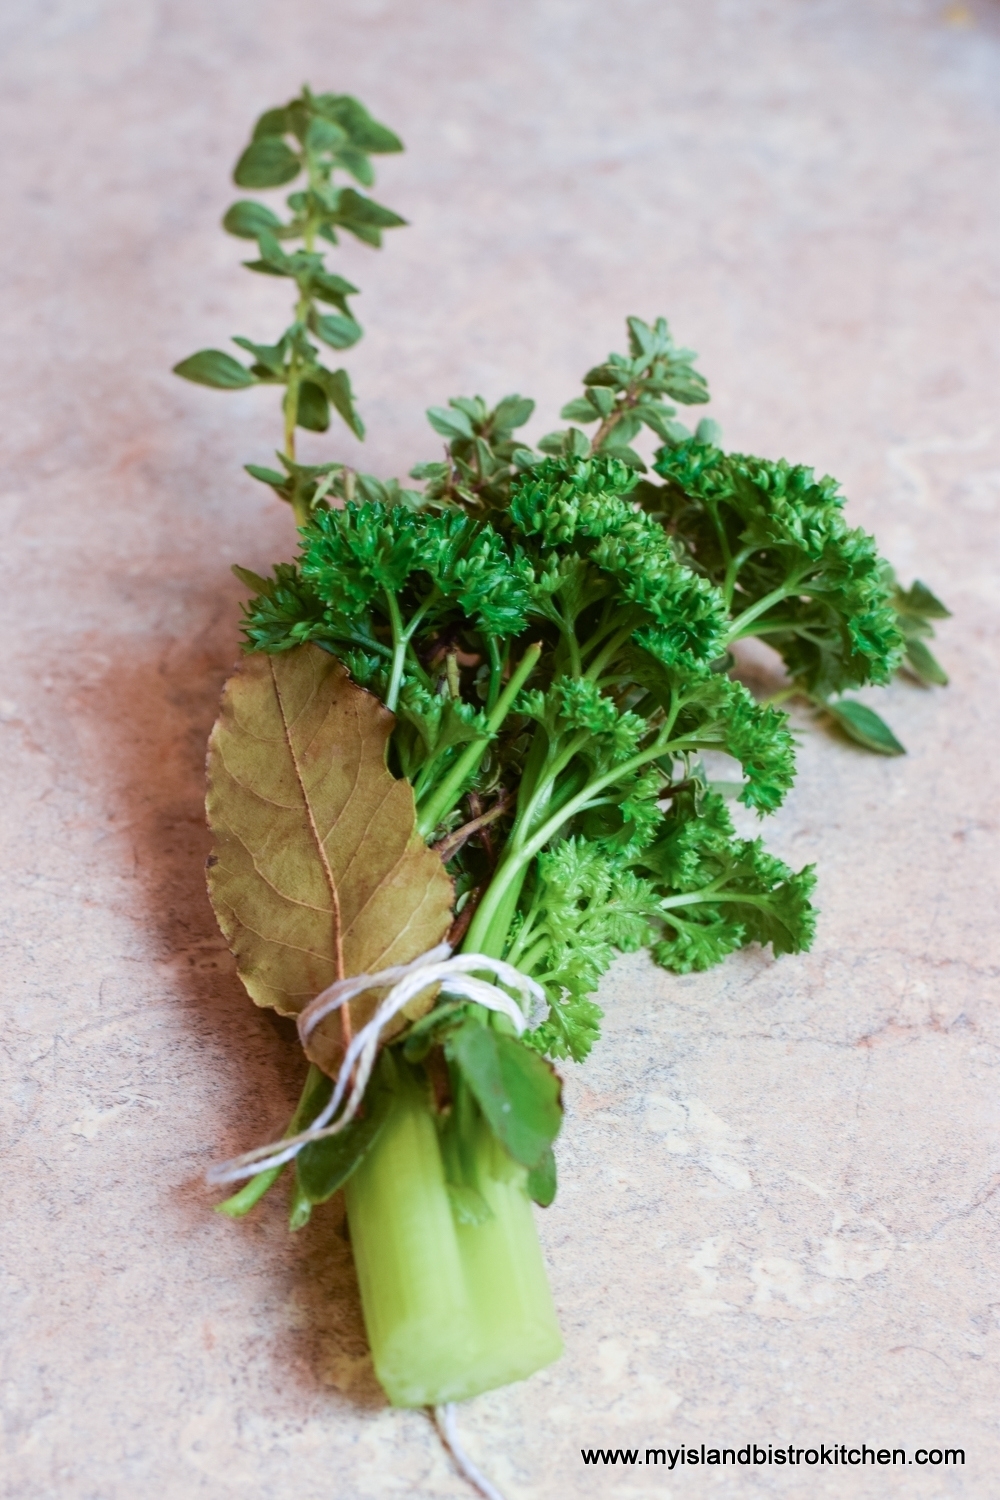
Fresh herbs really do make the difference in this dish. You will need two to three sprigs each of fresh thyme and parsley along with two dried bay leaves.  These are easily tied together with kitchen string/twine.  Insert 4 whole cloves into the center of a 6” strip of celery and tie the herbs to the celery.  This bouquet will get dropped into the braising liquid to flavour it as the meat cooks.

Bouquet Garni
Bouquet Garni

When the Bourguignon is cooked, the bouquet garni is removed and discarded.

Preparing the Braising Liquid

Once the meat has been seared, there will be caramelized brown bits (known as fond) left in the pan.  This bears wonderful flavour and will help to color the braising liquid.  Deglaze the pan with either red wine, brandy, or beef stock, scraping up the flavorful brown bits. I find the brandy adds a layer of flavour complexity, richness, and depth to this dish.

Some basic aromatics always form a good basis for any braising dish.  Cook some coarsely chopped onion in some olive oil and butter.  Butter (which gives fabulous flavour) tends to burn easily which causes some flavour deterioration.  Olive oil, however, does not burn so quickly so heating it first then adding the butter prevents the butter from burning and yet still gives the dish some buttery flavour.  Add some garlic and just a bit of tomato paste and then, of course the red wine which, next to the beef, is the signature ingredient in Beef Bourguignon. It’s really not Beef Bourguignon if there is no red wine in this dish!

The acidic properties in the red wine not only add flavour to the dish but, importantly, soften muscle fibres and generate melt-in-your-mouth quality meat.  I recommend using a dry red wine. While technically any dry red wine will work in this dish, I like to use a Pinot Noir that has earthy notes to it – it tends to be a wine that goes well with all sorts of red meat.  There is no need to go with the best wine on the market for this dish but I do suggest using one you would be prepared to drink. When I am pairing a wine to drink with Beef Bourguignon, I use the same wine at the table as has been used in the Bourguignon.  Don’t use a supermarket “cooking wine” for Beef Bourguignon.  No, just don’t do it!

Beef Bourguignon
Bistro Style Beef Bourguignon

Slowly boiling the wine for 4-5 minutes will burn off the raw alcohol.  This dish is not meant to reek of the wine; rather, the role of the wine is, yes, partly to flavour the sauce in a good way but, more importantly, to tenderize the meat.

Any beef stock can be used in this dish, either homemade (click here for my recipe) or purchased.  Adding the beef stock (as opposed to only using wine), adds a layer of flavour.  In my opinion, using only wine would make the resulting sauce too strong.  If the first taste I get from Beef Bourguignon is a heavy wine taste, that tells me too much wine was used in the braising liquid. The hallmark of a well-prepared dish is the subtle layers of flavours that build the overall flavour profile and one flavour should not dominate the others in a negative way.

With braising, the braising liquid should not entirely cover the meat; rather, it should cover no more than about one-half to two-thirds of the meat. If you “swim” the meat, that’s a stew and, unlike with the braising method, tough cuts of meat will not tenderize using a stewing method. In addition, adding too much liquid will dilute the sauce and flavour.  It’s also important that the braising liquid just simmer, not boil. Check the Bourguignon as it braises.  If it is actively bubbling/vigorously boiling, reduce the oven temperature.

Keep the pot covered tightly to keep the moist heat in. Otherwise, the braising liquid will evaporate and the meat will be subject to some drying. Dutch ovens are often used for braising because they have the width for the contents to evenly cook and they have tight fitting covers. Other cooking vessels with tight-fitting lids, such as a high-sided casserole dish, will work equally well.  The important thing is to use a vessel that allows the sauce to surround, not completely submerge, the meat.

There are many schools of thought on what the “correct” braising temperature should be.  I am not sure there is one. My preference is around 275°F.  The aim is to keep the braising liquid from actively boiling because the premise behind braising is to let the meat cook very slowly allowing it to tenderize.  High temperatures can result in dryer meat. Additionally, since my recipe calls for a starch thickener for the braising liquid, a high cooking temperature will break down the starch causing it to lose its thickening power resulting in a watery thin sauce.  As a general rule of thumb, or frame of reference, the sauce should be thick enough to coat the back of a spoon.

Vegetables

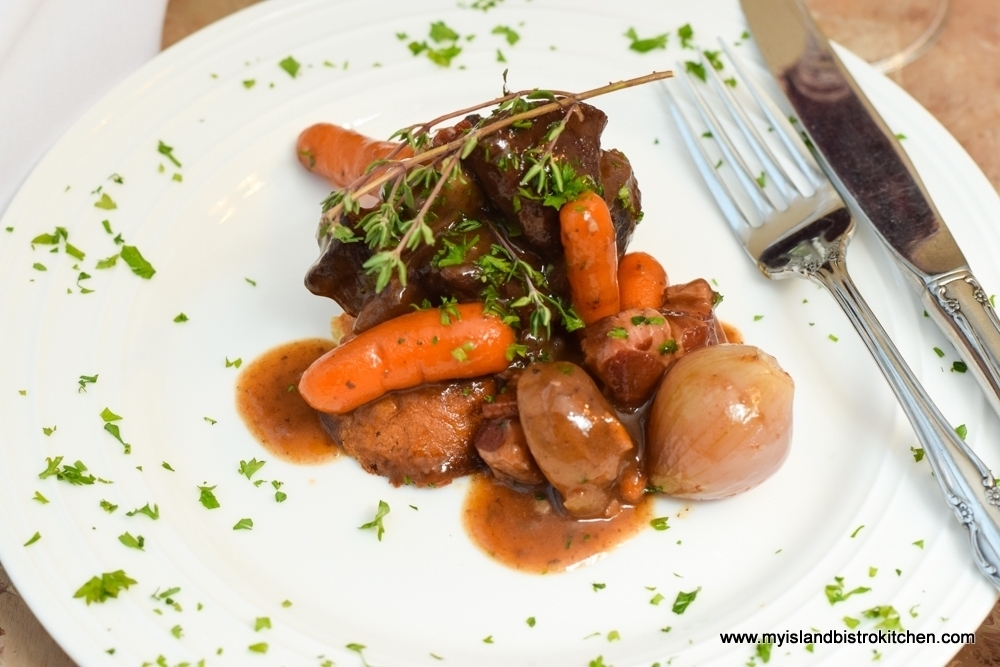
Beef Bourguignon does not contain a lot of vegetables, or varieties of vegetables.  Typically, it only has carrots, mushrooms, and either tiny pearl onions or shallots.  It’s all about the beef in this dish and the other additions serve only as flavour contributors that, themselves, absorb the wonderful savory flavours in the braising liquid.  There are enough vegetables in the Bourguignon, however, that it generally is not necessary to add a side of vegetables (except perhaps mashed potatoes) to serve with the Bourguignon.

 Beef Bourguignon
Bistro Style Beef Bourguignon

Serving Suggestions

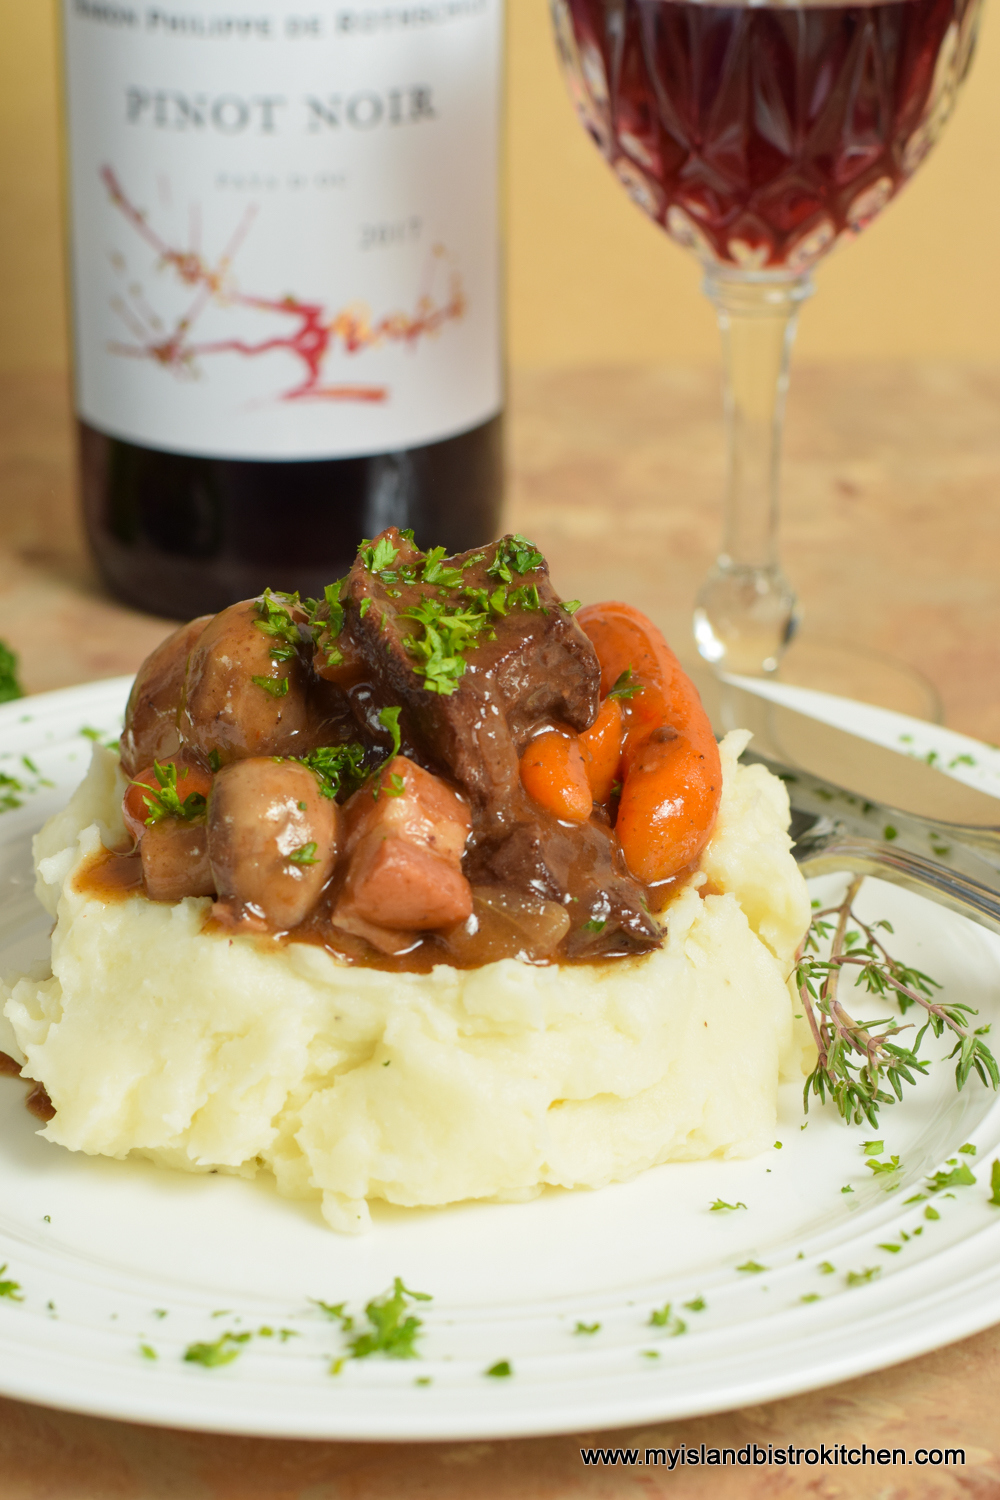
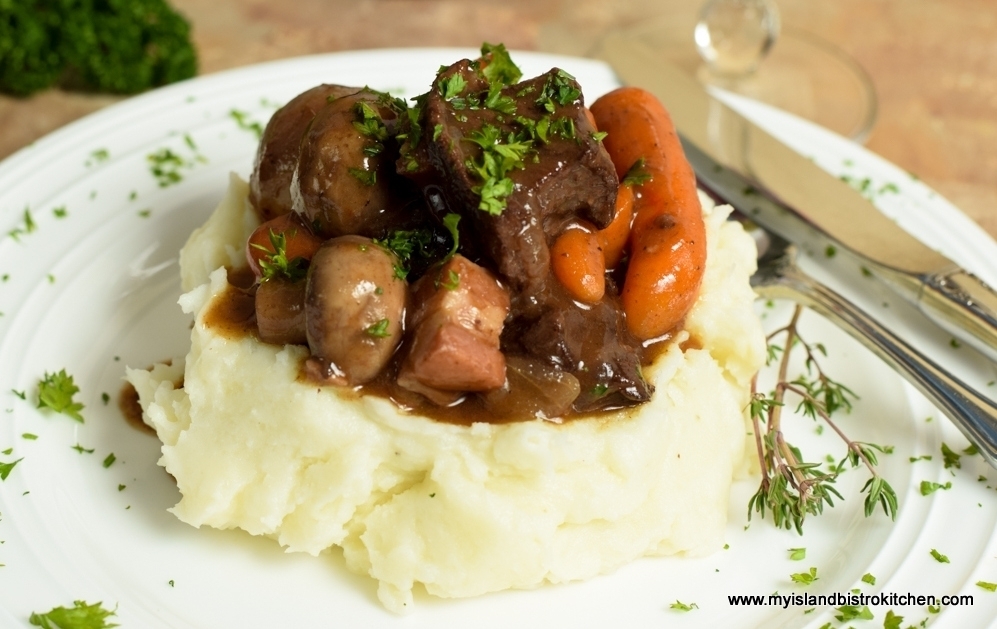
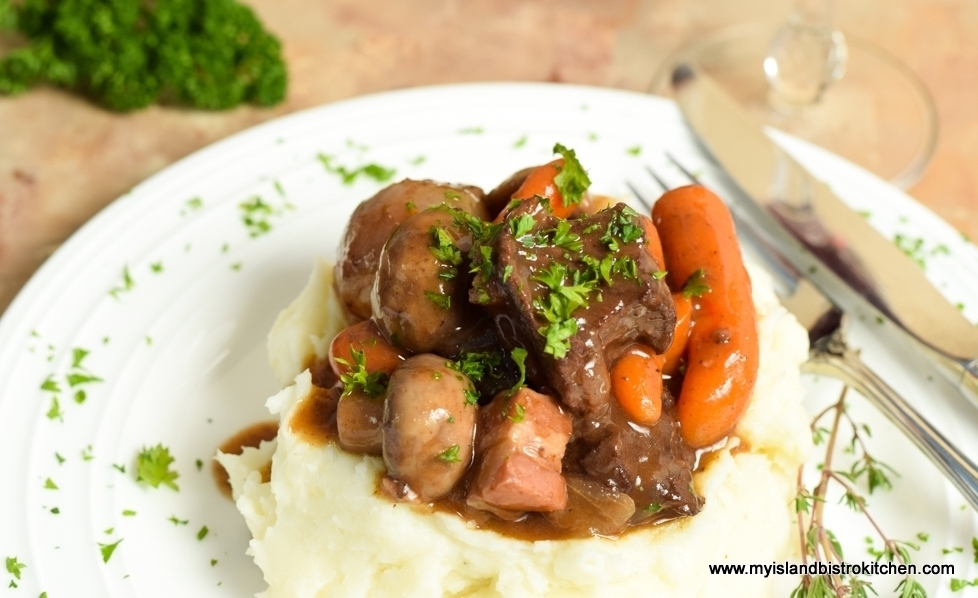
My favorite way to serve Beef Bourguignon is with whipped mashed potatoes seasoned with butter and garlic. The wonderfully rich sauce from the Bourguignon pairs very well with the potatoes.

Bistro Style Beef Bourguignon Served with Whipped Garlic Seasoned Mashed Potatoes

Beef Bourguignon can also be served on, or with, plain toast or garlic bread which can be used to soak up the flavorful sauce. You want to capture every last bite of this delectable sauce!

 Beef Bourguignon
Bistro Style Beef Bourguignon


This dish freezes well and is part of my batch cooking repertoire.  It reheats well in the microwave.

Beef Bourguignon
Bistro Style Beef Bourguignon

The recipe for Beef Bourguignon may look a bit complicated but it really is not if the process is organized.  Read through the recipe and plan your work and you can produce restaurant-quality food at home.  Measure out all the ingredients and do all the chopping and ingredient preparation before beginning the actual cooking.

[Printable recipe follows at end of post]

Beef Bourguignon

Ingredients:

For the bouquet garni:
3 sprigs fresh thyme
3 sprigs fresh parsley
2 large dried bay leaves
4 whole cloves
6” piece of celery rib

2 tsp olive oil
7 oz bacon lardons, cut into chunks approximately ¼“ – 1/3“ thick x 1” long

1½ – 2 lbs beef cheeks or beef chuck
3 tbsp cornstarch or flour
Fine sea salt
Freshly ground pepper

1½ tbsp brandy (or red wine)

1 tbsp olive oil
½ tbsp butter
½ cup onion, coarsely chopped
2 tbsp tomato paste
2 cloves garlic, chopped
1 2/3 cup dry red wine
1½ cups warm beef stock

1 tbsp cornstarch or flour
2 – 2½ tbsp beef stock (or water)

1 tbsp butter
½ tbsp olive oil
12 oz baby carrots
8 – 10 small shallots or pearl onions

1 tbsp olive oil
1 tbsp butter
8 oz small button mushrooms, halved or quartered (depending on size of mushrooms)
½ cup dry red wine

Method:

Make a bouquet garni consisting of 3 sprigs each of fresh thyme and parsley tied with kitchen string/twine along with 2 large bay leaves.  Insert 4 whole cloves into center of a 6” piece of celery rib. Tie the herbs and bay leaves to the celery rib. Set aside.

Heat 2 tsp olive oil in sauté pan over medium heat.  Add the bacon lardons.  Cook over medium-low heat for approximately 12-15 minutes, until lardons are crisp and brown and the fat has been rendered from the lardons.  Remove the lardons with a slotted spoon and transfer to paper towel-lined bowl or plate. Reserve the rendered fat in the pan.

Pat beef dry with paper towel. Season the beef with salt and pepper and cut into chunks approximately 2” in size, removing any excess fat, tendons, and sinew.

Place the cornstarch or flour and the sea salt and pepper into small plastic bag.  Shake well to mix.  Set aside.

Increase the heat under the sauté pan containing the lardon fat to medium-high.  Working in small batches, two to three chunks at a time, dredge the beef chunks in the cornstarch or flour mixture, shaking off any excess.  Place the beef chunks in the hot pan, leaving space between each chunk.  Sear the meat.  Using tongs, turn the meat to brown all sides.  Do not overcook – just cook long enough to brown the beef, a minute or two per side.  Transfer the seared meat to a 4-quart Dutch oven, casserole dish, or small roaster.

Preheat oven to 275°F.

With the pan (in which the beef was seared) off the heat, add either 1½ tbsp brandy, red wine, or beef stock and stir. Return pan to medium-low heat and deglaze the pan by using a wooden spoon to scrape up any caramelized brown bits remaining in the pan after the meat was seared. Once all the brown bits have been loosened and mixed in with the deglazing liquid, add 1 tablespoon of olive oil then the ½ tablespoon of butter.  Add the chopped onions and, over medium heat and stirring constantly, sauté until the onions begin to become translucent.  Add the tomato paste and chopped garlic and stir to prevent burning, about 20-30 seconds.

Remove pan from heat and add 1 2/3 cups red wine to the onion-garlic mixture.  Increase heat to high, return pan to heat, and bring mixture to a boil then immediately reduce heat to a slow boil.  Boil slowly for 4-5 minutes to boil off the raw alcohol in the wine.  Add the beef stock.  Cook over low heat 2-3 minutes. Stir in half of the bacon lardons, reserving the remainder.

Transfer the onion, wine, beef stock, and lardon mixture to the casserole containing the seared meat.  Add the prepared bouquet garni, pressing it gently into the braising liquid. The liquid should cover approximately one-half to two-thirds of the meat.  Place lid on casserole dish and transfer it to the preheated oven and cook for about 2½ hours.  If the braising liquid is still very thin at the 2½ hour point, add about 1 tablespoon of cornstarch or flour whisked together with 2 – 2½ tablespoons water or beef stock and some of the hot braising liquid to temper the mixture.  Stir into braising liquid gently. Regardless whether additional thickening agent is added, return the casserole to oven to cook for 30 more minutes, or until meat is tender to the touch of a fork.

Meanwhile, add 1 tbsp olive oil and 1 tbsp butter to a clean sauté pan placed over medium high heat.  Add the carrots and whole shallots or pearl onions.  Stir fry for about 5 minutes until the carrots are slightly beginning to soften and both the carrots and onions are lightly tanned with color.  Add the stir-fried vegetables to the meat casserole.  Return the lid to the casserole and continue slow cooking for approximately 20 minutes.  After the 20 minutes, if the braising liquid still does not coat the back of a spoon, add an additional ½ to 1 tablespoon cornstarch or flour mixed with 2 tablespoons beef stock or water and a little hot braising liquid, whisked together.

In clean sauté pan, over medium-high heat, heat 1 tbsp olive oil and 1 tbsp butter.  Add the mushrooms and stir fry for 2 minutes.  Sprinkle with salt and pepper and add the remaining lardons.  Stir fry for 2-3 minutes longer then reduce heat to medium-low and add ½ cup red wine. Cook for 4-5 minutes longer at a very slow boil.  Transfer mixture to the casserole and cook for 45 minutes longer, or until carrots are cooked and the beef breaks apart easily with the light pressure from a fork. Remove and discard the bouquet garni.  Serve with whipped garlic potatoes, toasted French bread, or a crusty bread.

Yield:  Apx. 8 servings

If you have made this recipe and enjoyed it and/or wish to share it with your friends and family, please do so on social media but be sure to share the direct link to this posting from my website.

Connect with My Island Bistro Kitchen on Social Media

Join the Facebook page for My Island Bistro Kitchen:  https://www.facebook.com/MyIslandBistroKitchen/

Follow “the Bistro” on “X” (formerly Twitter)https://twitter.com/PEIBistro/

See the drool-worthy gallery of mouth-watering food photos from My Island Bistro Kitchen on Instagramhttps://www.instagram.com/peibistro/

Follow “the Bistro” on Pinterest at https://www.pinterest.ca/peibistro/ and pin the Pinterest-ready photo found at the end of this post to your favorite Pinterest boards.

Beef Bourguignon

One of the best French classic dishes, Beef Bourguignon is made with beef, pork, carrots, onions, and mushrooms all braised and slow cooked in a rich red wine and beef stock sauce
Course Main Course
Cuisine French
Keyword Beef Bourguignon
Servings 8
My Island Bistro Kitchen My Island Bistro Kitchen

Ingredients

  • 3 sprigs fresh thyme
  • 3 sprigs fresh parsley
  • 2 large dried bay leaves
  • 4 whole cloves
  • 6 ” piece of celery rib
  • 2 tsp olive oil
  • 7 oz bacon lardons, cut into chunks approximately ¼“ – 1/3“ thick x 1” long
  • 1½ - 2 lbs beef cheeks or beef chuck
  • 3 tbsp cornstarch or flour
  • Fine sea salt
  • Freshly ground pepper
  • tbsp brandy, or red wine
  • 1 tbsp olive oil
  • ½ tbsp butter
  • ½ cup onion, coarsely chopped
  • 2 tbsp tomato paste
  • 2 cloves garlic, chopped
  • 1 2/3 cup dry red wine
  • cups warm beef stock
  • 1 tbsp cornstarch or flour
  • 2 – 2½ tbsp beef stock, or water
  • 1 tbsp butter
  • ½ tbsp olive oil
  • 12 oz baby carrots
  • 8 – 10 small shallots or pearl onions
  • 1 tbsp olive oil
  • 1 tbsp butter
  • 8 oz small button mushrooms, halved or quartered (depending on size of mushrooms)
  • ½ cup dry red wine

Instructions

  1. Make a bouquet garni consisting of 3 sprigs each of fresh thyme and parsley tied with kitchen string/twine along with 2 large bay leaves. Insert 4 whole cloves into center of a 6” piece of celery rib. Tie the herbs and bay leaves to the celery rib. Set aside.
  2. Heat 2 tsp olive oil in sauté pan over medium heat. Add the bacon lardons. Cook over medium-low heat for approximately 12-15 minutes, until lardons are crisp and brown and the fat has been rendered from the lardons. Remove the lardons with a slotted spoon and transfer to paper towel-lined bowl or plate. Reserve the rendered fat in the pan.
  3. Pat beef dry with paper towel. Season the beef with salt and pepper and cut into chunks approximately 2” in size, removing any excess fat, tendons, and sinew.
  4. Place the cornstarch or flour and the sea salt and pepper into small plastic bag. Shake well to mix. Set aside.
  5. Increase the heat under the sauté pan containing the lardon fat to medium-high. Working in small batches, two to three chunks at a time, dredge the beef chunks in the cornstarch or flour mixture, shaking off any excess. Place the beef chunks in the hot pan, leaving space between each chunk. Sear the meat. Using tongs, turn the meat to brown all sides. Do not overcook – just cook long enough to brown the beef, a minute or two per side. Transfer the seared meat to a 4-quart Dutch oven, casserole dish, or small roaster.
  6. Preheat oven to 275°F.
  7. With the pan (in which the beef was seared) off the heat, add either 1½ tbsp brandy, red wine, or beef stock and stir. Return pan to medium-low heat and deglaze the pan by using a wooden spoon to scrape up any caramelized brown bits remaining in the pan after the meat was seared. Once all the brown bits have been loosened and mixed in with the deglazing liquid, add 1 tablespoon of olive oil then the ½ tablespoon of butter. Add the chopped onions and, over medium heat and stirring constantly, sauté until the onions begin to become translucent. Add the tomato paste and chopped garlic and stir to prevent burning, about 20-30 seconds.

  8. Remove pan from heat and add 1 2/3 cups red wine to the onion-garlic mixture.  Stir. Increase heat to high, return pan to heat, and bring mixture to a boil then immediately reduce heat to a slow boil. Boil slowly for 4-5 minutes to boil off the raw alcohol in the wine. Add the beef stock. Cook over low heat 2-3 minutes. Stir in half of the bacon lardons, reserving the remainder.

  9. Transfer the onion, wine, beef stock, and lardon mixture to the casserole containing the seared meat. Add the prepared bouquet garni, pressing it gently into the braising liquid. The liquid should cover approximately one-half to two-thirds of the meat. Place lid on casserole dish and transfer it to the preheated oven and cook for about 2½ hours. If the braising liquid is still very thin at the 2½ hour point, add about 1 tablespoon of cornstarch or flour whisked together with 2 – 2½ tablespoons water or beef stock and some of the hot braising liquid to temper the mixture. Stir into braising liquid gently. Regardless whether additional thickening agent is added, return the casserole to oven to cook for 30 more minutes, or until meat is tender to the touch of a fork.
  10. Meanwhile, add 1 tbsp olive oil and 1 tbsp butter to a clean sauté pan placed over medium high heat. Add the carrots and whole shallots or pearl onions. Stir fry for about 5 minutes until the carrots are slightly beginning to soften and both the carrots and onions are lightly tanned with color. Add the stir-fried vegetables to the meat casserole. Return the lid to the casserole and continue slow cooking for approximately 20 minutes. After the 20 minutes, if the braising liquid still does not coat the back of a spoon, add an additional ½ to 1 tablespoon cornstarch or flour mixed with 2 tablespoons beef stock or water and a little hot braising liquid, whisked together.
  11. In clean sauté pan, over medium-high heat, heat 1 tbsp olive oil and 1 tbsp butter. Add the mushrooms and stir fry for 2 minutes. Sprinkle with salt and pepper and add the remaining lardons. Stir fry for 2-3 minutes longer then reduce heat to medium-low and add ½ cup red wine. Cook for 4-5 minutes longer at a very slow boil. Transfer mixture to the casserole and cook for 45 minutes longer, or until carrots are cooked and the beef breaks apart easily with the light pressure from a fork. Remove and discard the bouquet garni. Serve with whipped garlic potatoes, toasted French bread, or a crusty bread.

Recipe Notes

Yield: Apx. 8 servings


[Copyright My Island Bistro Kitchen]


Pin Me to Pinterest!
Beef Bourguignon
Bistro Style Beef Bourguignon


Chicken and Pumpkin Chili

I love a bowl of chili, especially on a cold fall or winter day.  I also like the chili to have lots of texture and flavour and to be well-filled, hearty, and not be too watery.  This recipe for Chicken and Pumpkin Chili has a lovely flavour profile owing to the selection of ingredients and a curated blend of spices to complement the core ingredients. Continue reading Chicken and Pumpkin Chili

Classic Homemade Turkey Vegetable Soup

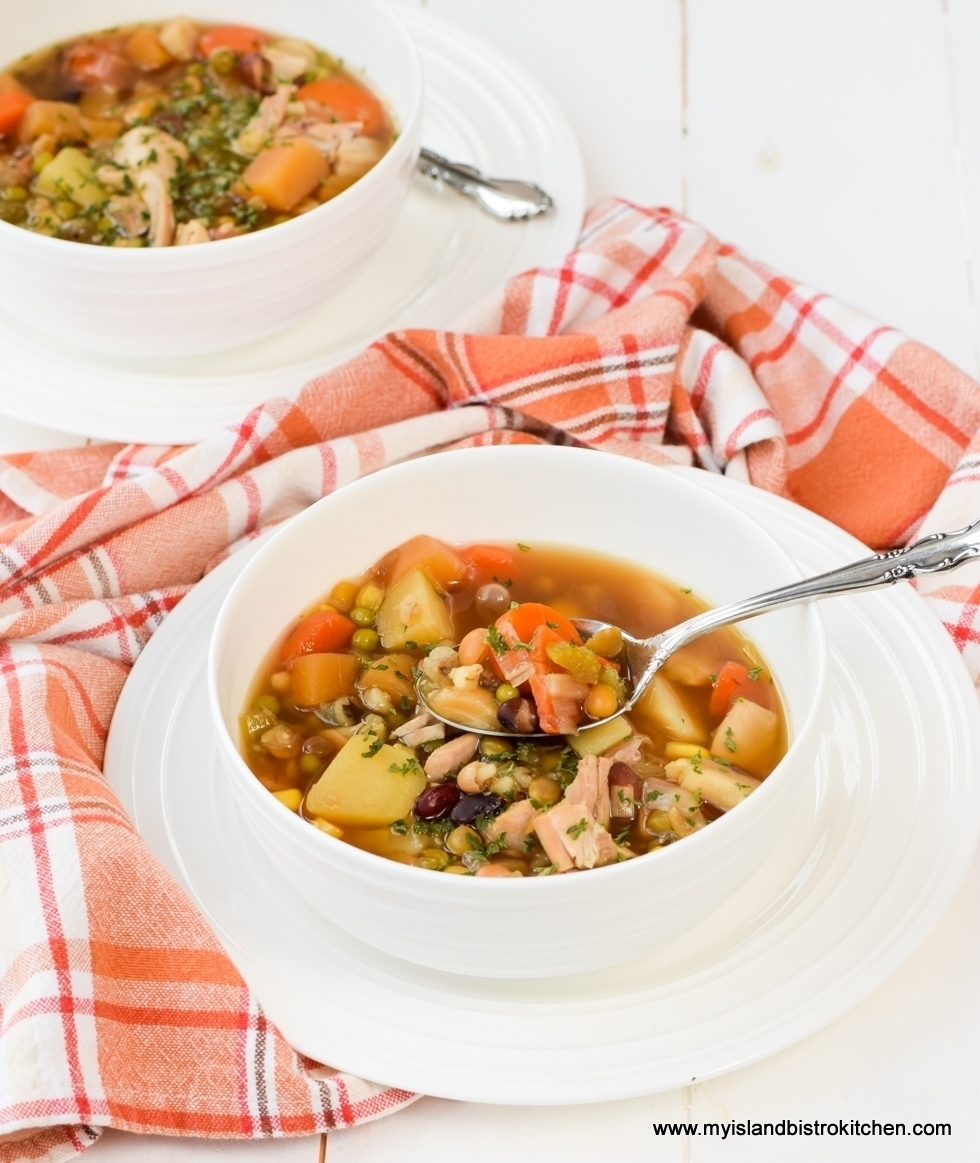
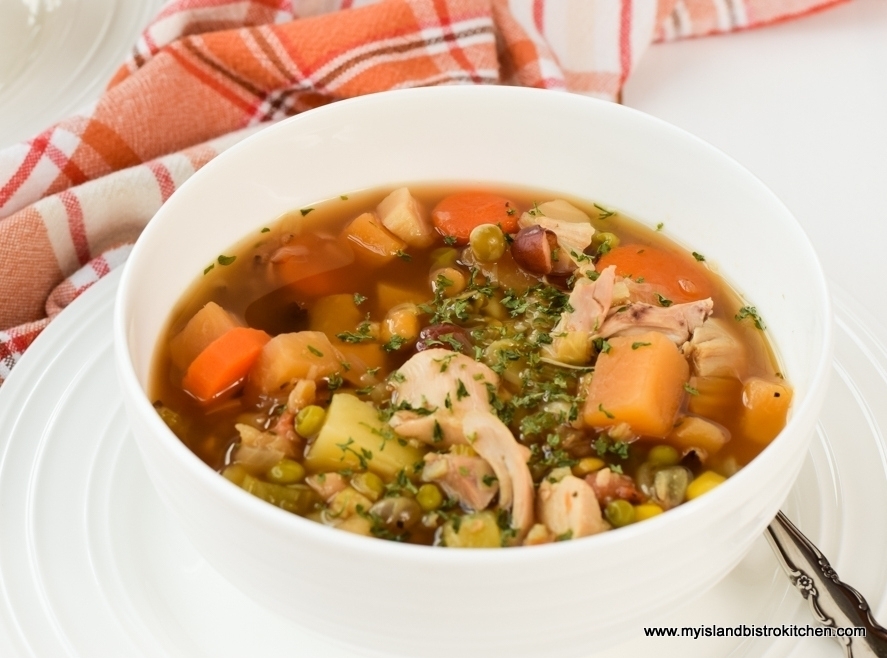
Homemade Turkey Vegetable Soup

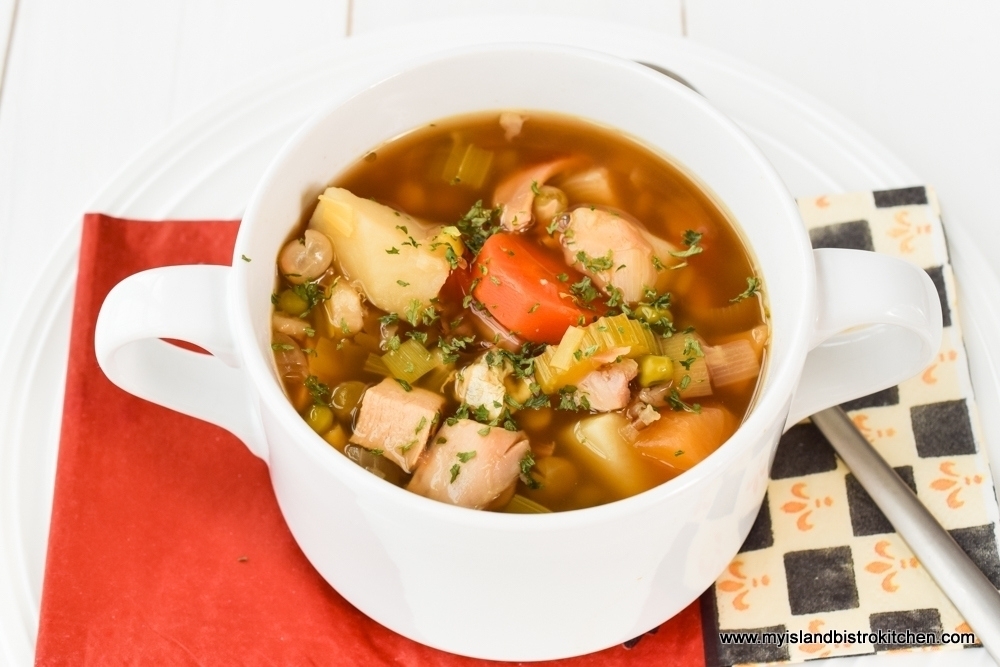
If you are a regular follower of my food blog, you will know that I do all I can to maximize the value of food products and reduce food waste.  In my view, one of the best buys to extend meals is a turkey.  Not only does it generate a wonderful roast turkey dinner but there is tremendous goodness left in the carcass and, often, there is more meat than can be used up as cold turkey and it can be transformed into other dishes.  Or, sometimes, one just gets tired of the turkey before it is all used up so a great way to maximize it is to turn it into a delectable Turkey Vegetable Soup.

Turkey Soup
Homemade Turkey Vegetable Soup

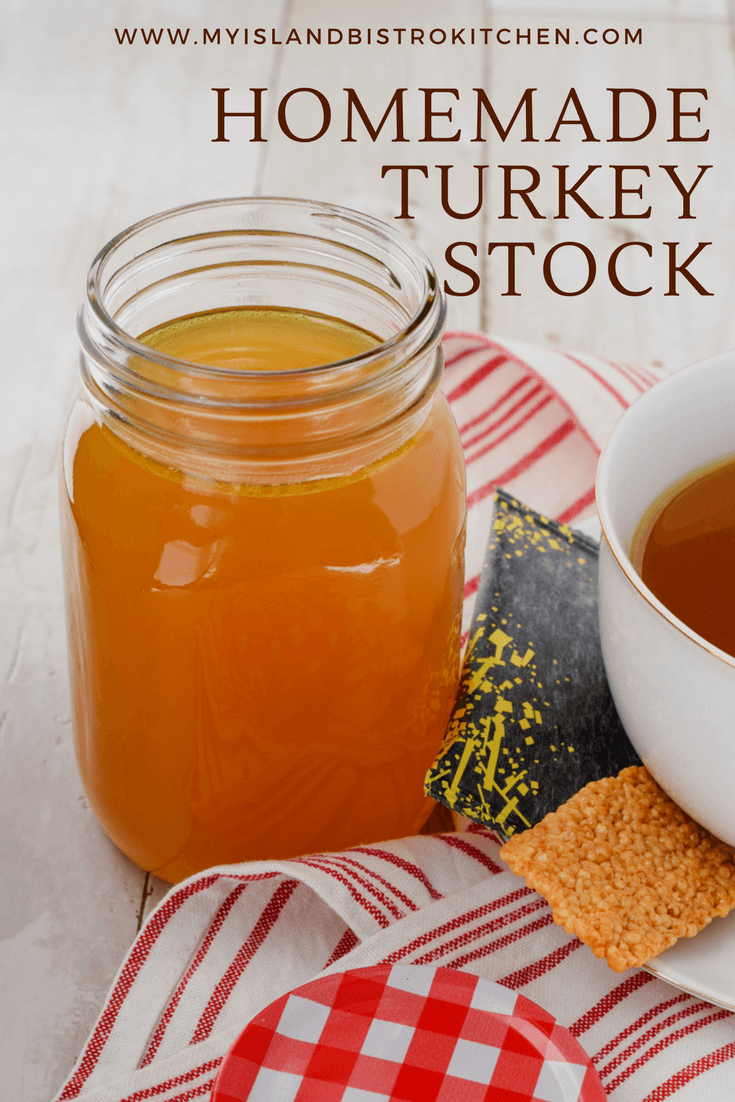
The first thing I do after a roast turkey dinner is strip off all the remaining usable meat from the turkey carcass.  I will either immediately make homemade turkey stock with the carcass or freeze it in an airtight freezer bag and make the stock later.  You can find my recipe for making turkey stock by clicking here. If the plan is not to make the Turkey Soup right away, I suggest setting aside 3-4 cups of the turkey meat and freezing it in an airtight freezer bag to have ready to drop in to the soup when it is later made.

Homemade Turkey Stock

Homemade Turkey Vegetable Soup is both delicious and nutritious and my version of this wholesome soup freezes well.  The recipe makes a big batch (about 18-20 servings) though it may be halved.  However, if freezer space is available for the soup, it is mighty handy to have on hand for later use.

Now I do, of course, recommend that homemade turkey stock be used as the foundation for this soup because it is wholesome and free of preservatives.  However, commercially-made stock/broth may be used in its place.

Turkey Soup
Homemade Turkey Vegetable Soup

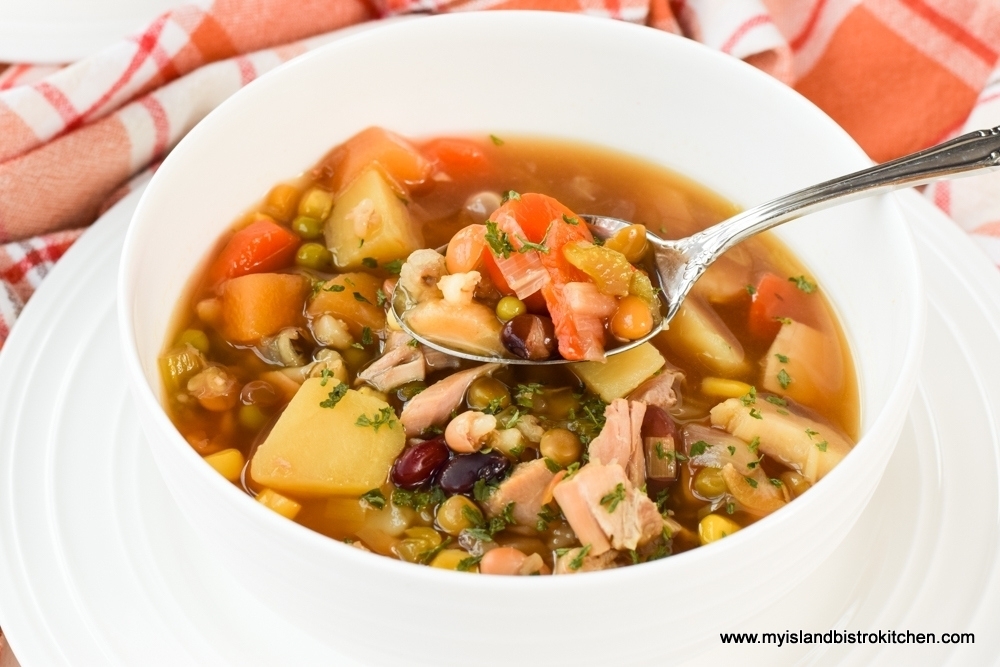
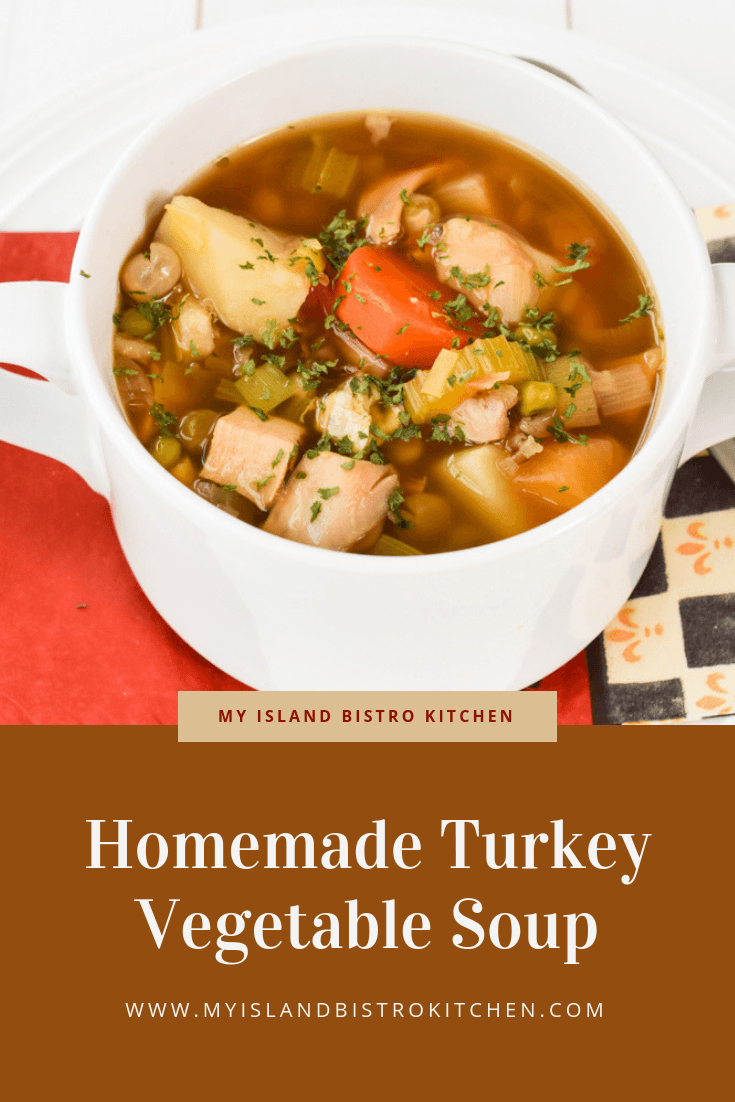
I recommend a careful reading of my recipe for this soup before beginning to make it as there are some steps involved and probably a shopping trip, too.  To begin, I typically use a dry soup mix comprised of beans, lentils, split peas, pearl barley, and white rice.  I buy this bulk at my local bulk food store and this mix does require a bit of pre-soaking, cooking, and standing time before it is incorporated into the soup pot.  Otherwise the contents of the mix will not cook in the amount of time it takes to cook the remaining ingredients of the soup. So, time will need to be allotted for that activity.  While using this mix adds fibre and bulk to the soup, the soup may be made without it and several photos in this posting show soup made without the dry soup mix. If making the soup minus the dry soup mix, simply increase slightly the quantity/amount of fresh and/or frozen vegetables called for in the recipe so that the soup is filled with goodness and is not too runny.

For this Turkey Vegetable Soup, I am not starting out with the traditional pure mirepoix because that requires that the aromatic holy trinity of carrots, celery, and onion  be chopped really fine.  In this soup, I want those ingredients to be left larger, in bite-size chunks.  However, I do sauté them, along with the parsnip and leek for 2-3 minutes to start the release of their flavours along with the garlic.

Turkey Soup
Homemade Turkey Vegetable Soup

Because I use my own homemade stock which already has some seasonings added, I don’t add huge amounts of seasonings to the soup and this is one soup that I do not like overly spiced or seasoned.  One flavour booster I have found that works really well in this Turkey Vegetable Soup is dry onion soup mix so I add a couple of tablespoons along with small amounts of thyme, summer savory, turmeric, paprika, ground coriander, cloves, and nutmeg and, of course, the standard bay leaves. As always, I recommend, when making a recipe for the first time, to make it with the ingredients and amounts called for by the recipe creator.  If, after you have tried it as it has been developed, you find it needs more or less of a seasoning to suit your personal taste, the adjustments can be noted and made in the next batch.

Turkey Soup
Homemade Turkey Vegetable Soup

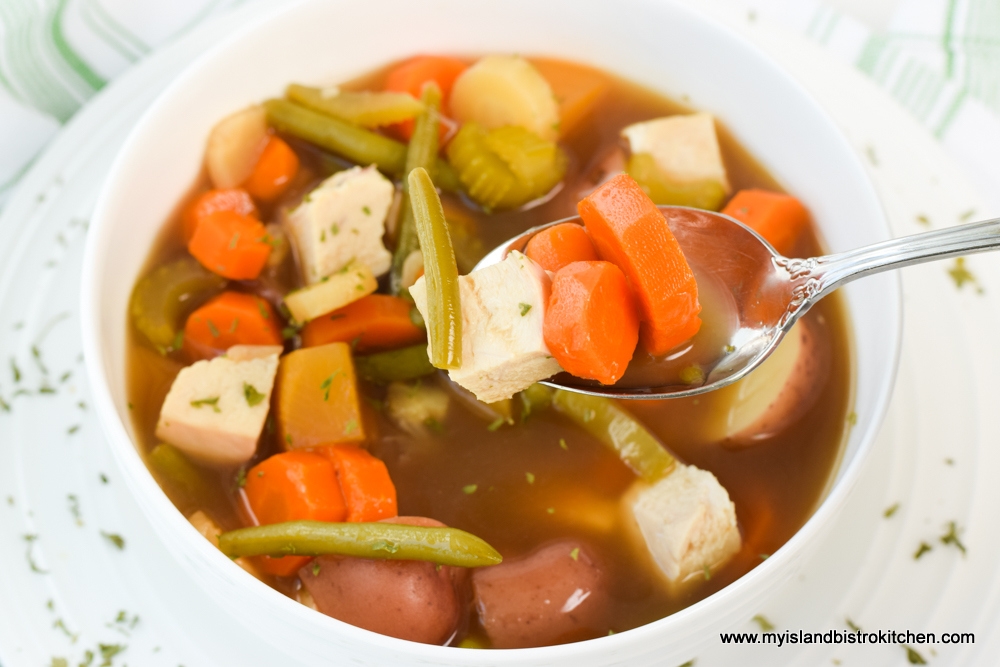
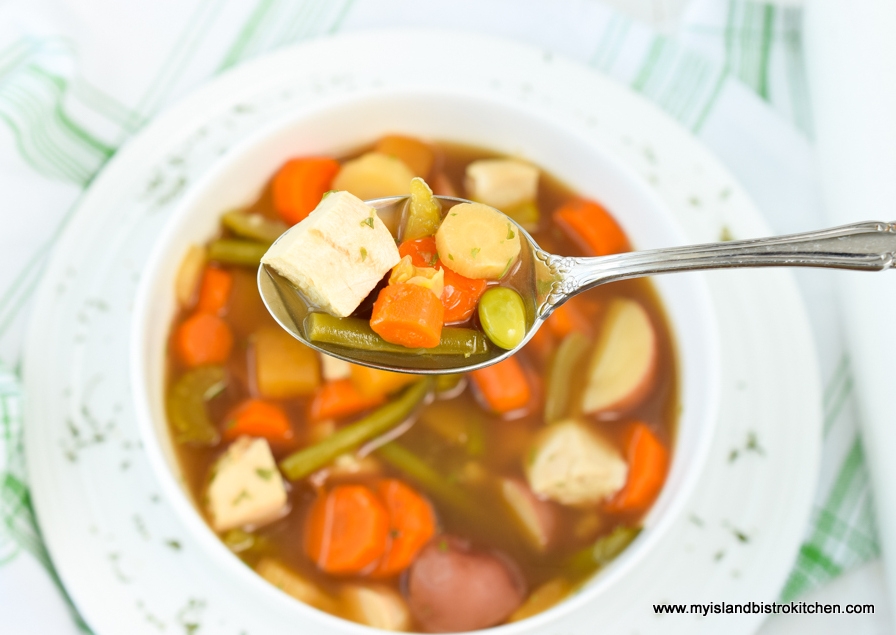
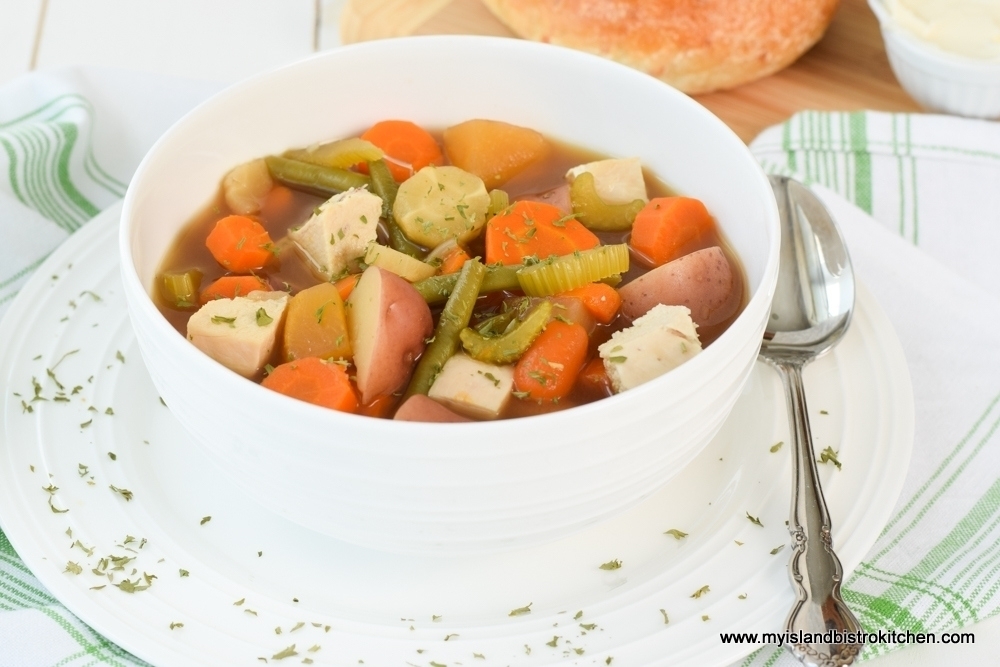
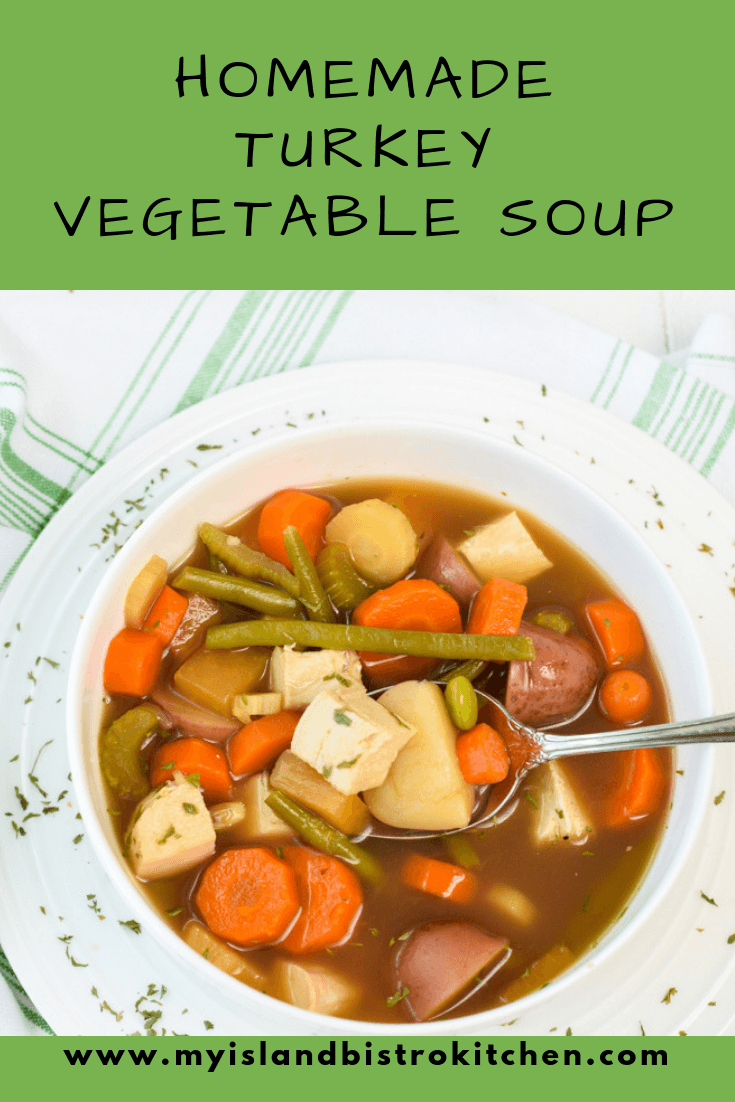
I like rutabaga so add a fair bit of it to the soup. It adds both substance and some sweetness to the soup. Sometimes, I will make this soup with peeled cubed potatoes (seen in photo above) and, other times, I will make it a little more rustic, using the mini red potatoes with their skins on (as shown in photo below). Either works.

Turkey Soup
Turkey Vegetable Soup

Nearer the end of the cooking process, add 1 1/2 cups of frozen vegetables.  This can be either corn, peas, or mixed vegetables – any on their own or in any combination to make up 1 1/2 cups.  I like the soup well filled! One nice thing about this kind of soup is that if you don’t like, for example, peas, then simply replace them with another vegetable you prefer.

The cooked turkey may either be cubed (as shown in photo above) or coarsely shredded (as seen in photo below) for this soup.  Making turkey soup is a great way to use up light and/or dark meat left on the turkey.  It only needs about 5 minutes in the soup for it to heat.  Don’t re-cook the meat as it will become tough and it will lose its flavour.

Turkey Soup
Homemade Turkey Vegetable Soup

Serve this soup piping hot with homemade bread, rolls, white biscuits, whole wheat biscuits, or favorite crackers.

[Printable recipe follows at end of posting]

The Bistro’s Homemade Turkey Vegetable Soup

Ingredients:

1 cup dry soup mix of beans, lentils, split peas, pearl barley, and white rice
3 cups cold water

3 – 4 tbsp butter
1 tbsp olive oil
1 cup onion, coarsely chopped
2 cups carrots (about 3 large), cut into bite-sized chunks
1½ cups parsnip (about 2 large), cut into bite-sized pieces
1 cup celery (1 large celery rib), sliced
1 leek (white and green parts only), sliced
5-6 cloves of garlic, minced

12 cups turkey stock

2 tbsp dry onion soup mix
1 tsp dried summer savory
¾ tsp dried thyme
¼ tsp turmeric
¼ tsp paprika
1/8 tsp ground coriander
1/8 tsp cloves
1/8 tsp nutmeg
2 bay leaves

1¾ cups rutabaga, cut into bite-sized chunks

1 lb mini red potatoes (unpeeled), halved or quartered depending on their size or, alternatively, 2 cups peeled potatoes, cubed

1½ cups frozen vegetables (peas, corn, or mixed vegetables)

3 – 4 cups cooked turkey meat, cubed or coarsely shredded

Salt and pepper, to taste

Method:

In large saucepan, soak the dry soup mix in 3 cups of cold water for 2 hours.  Bring to a boil, covered, over medium-high heat.  Reduce heat to low and boil gently for 2 minutes.  Remove from heat and let stand 1 hour.  Drain.

In large stockpot, over medium heat, melt the butter then add the olive oil.  Add the onions, carrots, parsnip, celery, and leek.  Sauté for 2-3 minutes, stirring briskly.  Add the garlic and, stirring constantly, cook for 1 minute longer.

Add the turkey stock, cover, and bring just to the boiling point but do not boil.  Add the dry onion soup mix and spices along with the bay leaves.  Add the rutabaga and drained soup mix of beans, lentils, peas, etc. Cook gently, partially covered, over medium-low heat for about 30 minutes. Season with salt and pepper to taste.

Add the potatoes and cook, partially covered, for about 10-12 minutes before adding the frozen vegetables.  Cook for an additional 15-20 minutes, or until vegetables are cooked.  Add the cooked turkey and simmer for 5 minutes or so, just until the turkey is heated. Season with salt and pepper to taste.

Remove bay leaves and ladle soup into bowls.  Soup freezes well.

Yield:  Approximately 18-20 servings (1¼ cup serving size)

You may also like this recipe for My Island Bistro Kitchen’s Homemade Turkey Chowder.


The Bistro’s Homemade Turkey Vegetable Soup

Homemade turkey stock, leftover turkey, and loads of vegetables combine with light seasoning to make a delicious and nutritious turkey vegetable soup.
Course Soup
Cuisine American
Keyword Turkey Soup
Servings 18
My Island Bistro Kitchen My Island Bistro Kitchen

Ingredients

  • 1 cup dry soup mix of beans (lentils, split peas, pearl barley, and white rice)
  • 3 cups cold water
  • 3 – 4 tbsp butter
  • 1 tbsp olive oil
  • 1 cup onion, coarsely chopped
  • 2 cups carrots (about 3 large), cut into bite-sized chunks
  • cups parsnip (about 2 large), cut into bite-sized pieces
  • 1 cup celery (1 large celery rib), sliced
  • 1 leek, white and green parts only, sliced
  • 5-6 cloves of garlic, minced
  • 12 cups turkey stock
  • 2 tbsp dry onion soup mix
  • 1 tsp dried summer savory
  • ¾ tsp dried thyme
  • ¼ tsp turmeric
  • ¼ tsp paprika
  • 1/8 tsp ground coriander
  • 1/8 tsp cloves
  • 1/8 tsp nutmeg
  • 2 bay leaves
  • cups rutabaga, cut into bite-sized chunks
  • 1 lb mini red potatoes unpeeled, halved or quartered depending on their size or, alternatively, 2 cups peeled potatoes, cubed
  • cups frozen vegetables (peas, corn, or mixed vegetables)
  • 3 - 4 cups cooked turkey meat, cubed or coarsely shredded
  • Salt and pepper, to taste

Instructions

  1. In large saucepan, soak the dry soup mix in 3 cups of cold water for 2 hours. Bring to a boil, covered, over medium-high heat. Reduce heat to low and boil gently for 2 minutes. Remove from heat and let stand 1 hour. Drain.
  2. In large stockpot, over medium heat, melt the butter then add the olive oil. Add the onions, carrots, parsnip, celery, and leek. Sauté for 2-3 minutes, stirring briskly. Add the garlic and, stirring constantly, cook for 1 minute longer.
  3. Add the turkey stock, cover, and bring just to the boiling point but do not boil. Add the dry onion soup mix and spices along with the bay leaves. Add the rutabaga and drained soup mix of beans, lentils, peas, etc. Cook gently, partially covered, over medium-low heat for about 30 minutes. Season with salt and pepper to taste.
  4. Add the potatoes and cook, partially covered, for about 10-12 minutes before adding the frozen vegetables. Cook for an additional 15-20 minutes, or until vegetables are cooked. Add the cooked turkey and simmer for 5 minutes or so, just until the turkey is heated.

  5. Remove bay leaves and ladle soup into bowls. Soup freezes well.

Recipe Notes

Yield: Approximately 18-20 servings (1¼ cup serving size)


[Copyright My Island Bistro Kitchen]


If you have made this recipe and enjoyed it and/or wish to share it with your friends and family, please do so on social media but be sure to share the direct link to this posting from my website.

Connect with My Island Bistro Kitchen on Social Media

Join the Facebook page for My Island Bistro Kitchen:  https://www.facebook.com/MyIslandBistroKitchen/

Follow “the Bistro” on “X” (formerly Twitter)https://twitter.com/PEIBistro/

See the drool-worthy gallery of mouth-watering food photos from My Island Bistro Kitchen on Instagramhttps://www.instagram.com/peibistro/

Follow “the Bistro” on Pinterest at https://www.pinterest.ca/peibistro/ and pin the Pinterest-ready photos found at the end of this post to your favorite Pinterest boards.

Pin Me To Pinterest!
Turkey Soup
Homemade Turkey Vegetable Soup

You may also enjoy these other soup and chowder recipes from My Island Bistro Kitchen:

Turkey Chowder
Chicken Noodle Soup


Classic Sticky Date Pudding with Toffee Sauce

Sticky Toffee Pudding
Sticky Date Pudding with Toffee Sauce

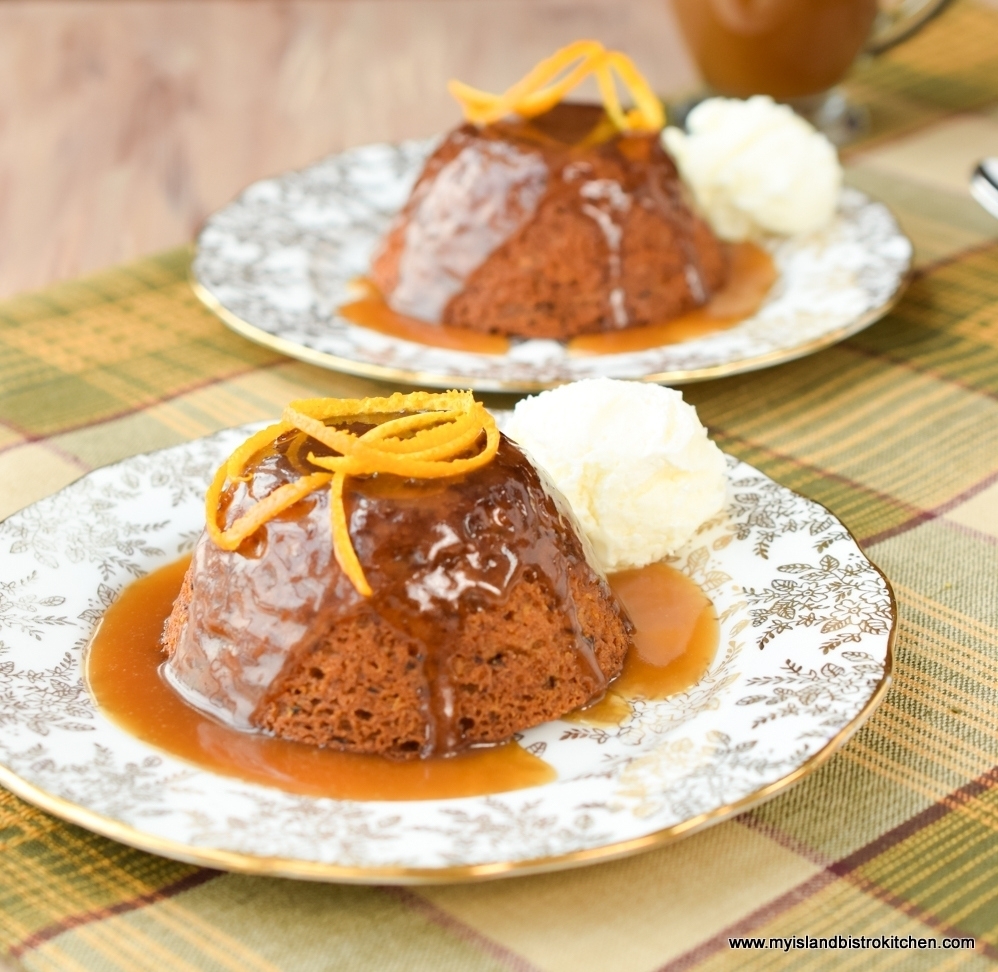
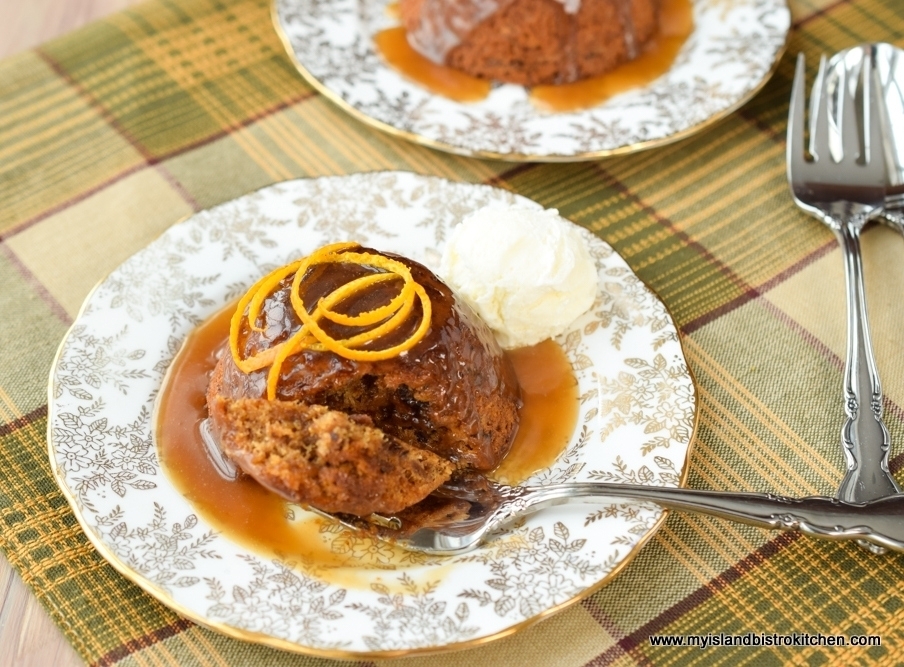
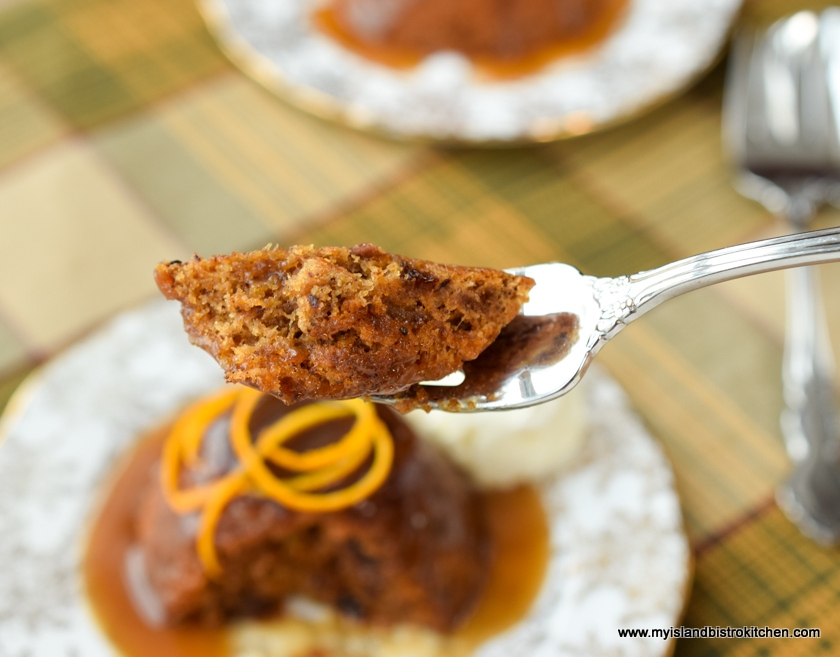
Sticky Date Pudding (aka Sticky Toffee Pudding) has a British origin and is often served as the Christmas pudding.  This pudding is basically a dense, but tender, sponge cake made with cooked dates.  It’s really nothing more elaborate or complicated than that.

My version of this classic pudding starts with soaking the chopped dates in rum allowing them to absorb the flavour, then slowly simmering the dates in water to soften.  The dates, the primary ingredient in the pudding, add sweetness and texture to the pudding without turning it into a heavy pudding.  This pudding is subtly spiced with a blend of ginger, cinnamon, and cloves.

Sticky Toffee Pudding
Sticky Date Pudding with Toffee Sauce

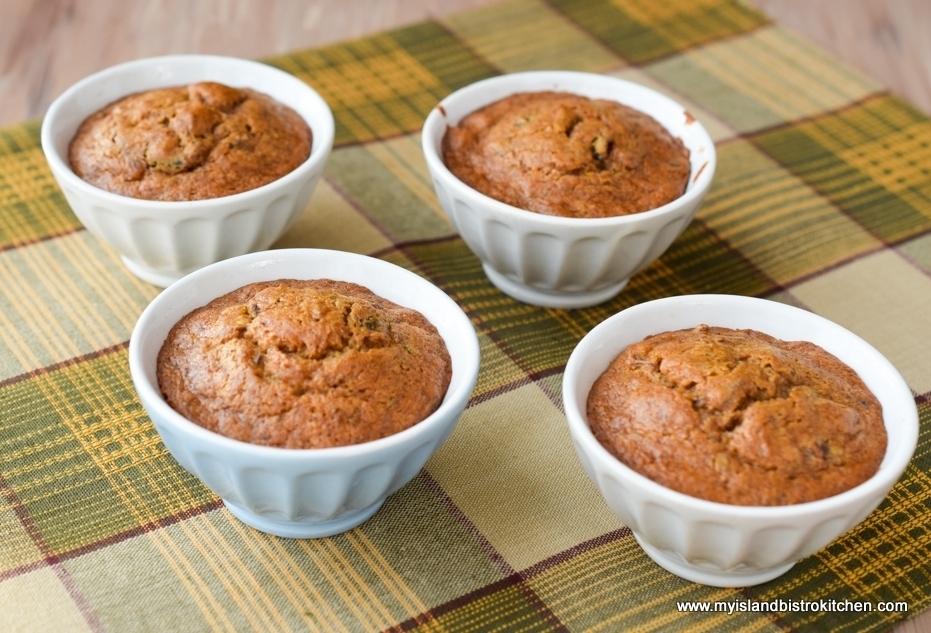
I like to make this pudding in small one-half cup size ramekins for a couple of reasons.  First, I like the look of a small pudding on each plate and, second, this pudding freezes well and the ramekin-sized puddings are perfect for freezing individual servings.

Sticky Date Pudding
Sticky Date Pudding

Sticky Date Pudding is most commonly served warm with a decadently rich toffee sauce made with butter, dark brown sugar, and whipping cream.  I add a dash of rum to the sauce to deepen the flavour.  Add a dollop of whipped cream or a scoop of vanilla or maple ice cream to really dress the pudding to the nines!
Sticky Toffee Pudding
Sticky Date Pudding


[Printable recipe follows at end of posting]

My Island Bistro Kitchen’s Sticky Date Pudding with Toffee Sauce

Ingredients for Pudding:

7 oz (about 1 1/3 cups) pitted dates, coarsely chopped
¼ cup dark rum
1 cup water
1 1/8 tsp baking soda

¼ cup butter, softened at room temperature
1/3 cup granulated sugar
1/3 cup brown sugar, firmly packed
2 large eggs, room temperature
1 tsp grated orange rind
1½ tbsp pure maple syrup
1½ tsp vanilla

1¼ cups all-purpose flour
1½ tsp baking powder
¼ tsp ground ginger
¼ tsp cinnamon
1/8 tsp cloves
1/8 tsp salt

Ingredients for Toffee Sauce:

¾ cup butter (no substitutes)
1 1/3 cups dark brown sugar
¾ cup whipping cream (35% M.F.)
2 tbsp rum
2 tsp vanilla

Method for Pudding:

In saucepan, pour rum over dates.  Let stand 20 minutes, stirring a couple of times.  Add the cup of water and bring the dates, rum, and water to a boil over medium-high heat.  Reduce heat to simmer and boil, uncovered, gently for approximately 5 minutes, stirring once or twice.  Remove from heat and add the baking soda. Stir well.  Let mixture stand, uncovered, for 20 minutes, stirring occasionally to loosely break up the dates.

Position oven rack in bottom third of oven and preheat oven to 350°F.

While date mixture is cooling, cream the butter and sugars together in bowl of stand mixer fitted with paddle attachment.  Beat in the eggs, one at a time, beating well after each addition.  Beat in the orange rind, maple syrup and vanilla.

Sift the dry ingredients together and incorporate into the creamed mixture just until they are completely blended.  Stir in the date mixture.

Grease ten (10) ½-cup ramekins and place on rimmed baking sheet.  Distribute the batter evenly between the ramekins, filling each no more than about 2/3 full. Smooth tops with knife. Bake for 25 minutes, or until pudding springs back to a light touch and a cake tester inserted into center of pudding comes out clean. Run tip of pare knife around each pudding to loosen any parts that may have stuck to ramekin.  Turn puddings out on to individual serving plates. Serve warm with toffee sauce and, if desired, a dollop of whipped cream or a scoop of vanilla or maple ice cream.

Method for Toffee Sauce:

Melt butter in saucepan over medium heat.  Add the sugar and stir until dissolved. Add the cream and reduce heat to simmer.  Cook slowly, stirring occasionally, until sauce is slightly thick, about 6-8 minutes or so.  Remove from heat and stir in the rum and vanilla. Serve warm over sticky date pudding.  (Sauce will thicken as it starts to cool slightly).

Yield:  10 servings

NOTE 1:  Pudding may also be baked in a greased (or parchment-lined) 9” baking pan for approximately 30-35 minutes or until cake tester inserted into center of pudding comes out clean and pudding springs back to a light touch. Cut into squares and serve warm with the warm toffee sauce.

NOTE 2:  This pudding freezes well so can be made ahead of when needed. Simply thaw at room temperature and reheat pudding for a few seconds in microwave.

My Island Bistro Kitchen’s Sticky Date Pudding with Toffee Sauce

A deliciously moist and delicately spiced rich date pudding best served with a rich and luscious toffee sauce.
Course Dessert
Servings 10
My Island Bistro Kitchen My Island Bistro Kitchen

Ingredients

  • 7 oz about 1 1/3 cups pitted dates, coarsely chopped
  • ¼ cup dark rum
  • 1 cup water
  • 1 1/8 tsp baking soda
  • ¼ cup butter, softened at room temperature
  • 1/3 cup granulated sugar
  • 1/3 cup brown sugar, firmly packed
  • 2 large eggs, room temperature
  • 1 tsp grated orange rind
  • tbsp pure maple syrup
  • tsp vanilla
  • cups all-purpose flour
  • tsp baking powder
  • ¼ tsp ground ginger
  • ¼ tsp cinnamon
  • 1/8 tsp cloves
  • 1/8 tsp salt

Ingredients for Toffee Sauce:

  • ¾ cup butter (no substitutes)
  • 1 1/3 cups dark brown sugar
  • ¾ cup whipping cream, 35% M.F.
  • 2 tbsp rum
  • 2 tsp vanilla

Instructions

Method for Pudding:

  1. In saucepan, pour rum over dates. Let stand 20 minutes, stirring a couple of times. Add the cup of water and bring the dates, rum, and water to a boil over medium-high heat. Reduce heat to simmer and boil, uncovered, gently for approximately 5 minutes, stirring once or twice. Remove from heat and add the baking soda. Stir well. Let mixture stand, uncovered, for 20 minutes, stirring occasionally to loosely break up the dates.
  2. Position oven rack in bottom third of oven and preheat oven to 350°F.
  3. While date mixture is cooling, cream the butter and sugars together in bowl of stand mixer fitted with paddle attachment. Beat in the eggs, one at a time, beating well after each addition. Beat in the orange rind, maple syrup and vanilla.
  4. Sift the dry ingredients together and incorporate into the creamed mixture just until they are completely blended. Stir in the date mixture.
  5. Grease ten (10) ½-cup ramekins and place on rimmed baking sheet. Distribute the batter evenly between the ramekins, filling each no more than about 2/3 full. Smooth tops with knife. Bake for 25 minutes, or until pudding springs back to a light touch and a cake tester inserted into center of pudding comes out clean. Run tip of pare knife around each pudding to loosen any parts that may have stuck to ramekin. Turn puddings out on to individual serving plates. Serve warm with toffee sauce and, if desired, a dollop of whipped cream or a scoop of vanilla or maple ice cream.

Method for Toffee Sauce:

  1. Melt butter in saucepan over medium heat. Add the sugar and stir until dissolved. Add the cream and reduce heat to simmer. Cook slowly, stirring occasionally, until sauce is slightly thick, about 6-8 minutes or so. Remove from heat and stir in the rum and vanilla. Serve warm over sticky date pudding. (Sauce will thicken as it starts to cool slightly).

Recipe Notes

Yield: 10 servings NOTE 1: Pudding may also be baked in a greased (or parchment-lined) 9” baking pan for approximately 30-35 minutes or until cake tester inserted into center of pudding comes out clean and pudding springs back to a light touch. Cut into squares and serve warm with the warm toffee sauce. NOTE 2: This pudding freezes well so can be made ahead of when needed. Simply thaw at room temperature and reheat pudding for a few seconds in microwave.


[Copyright My Island Bistro Kitchen]

If you have made this recipe and enjoyed it and/or wish to share it with your friends and family, please do so on social media but be sure to share the direct link to this posting from my website.

Connect with My Island Bistro Kitchen on Social Media

Join the Facebook page for My Island Bistro Kitchen:  https://www.facebook.com/MyIslandBistroKitchen/

Follow “the Bistro” on “X” (formerly Twitter)https://twitter.com/PEIBistro/

See the drool-worthy gallery of mouth-watering food photos from My Island Bistro Kitchen on Instagramhttps://www.instagram.com/peibistro/

Follow “the Bistro” on Pinterest at https://www.pinterest.ca/peibistro/ and pin the Pinterest-ready photo at the end

You may also enjoy these other pudding recipes from My Island Bistro Kitchen:

Apple Maple Bread Pudding with Maple Liqueur Sauce
Steamed Mincemeat and Apple Pudding with Toffee Sauce
Steamed Carrot Pudding
Steamed Cranberry Pudding with Eggnog Sauce
Blueberry Bread Pudding with Grand Marnier Sauce
Plum Pudding with Brown Sugar Sauce 

Pin Me To Pinterest!
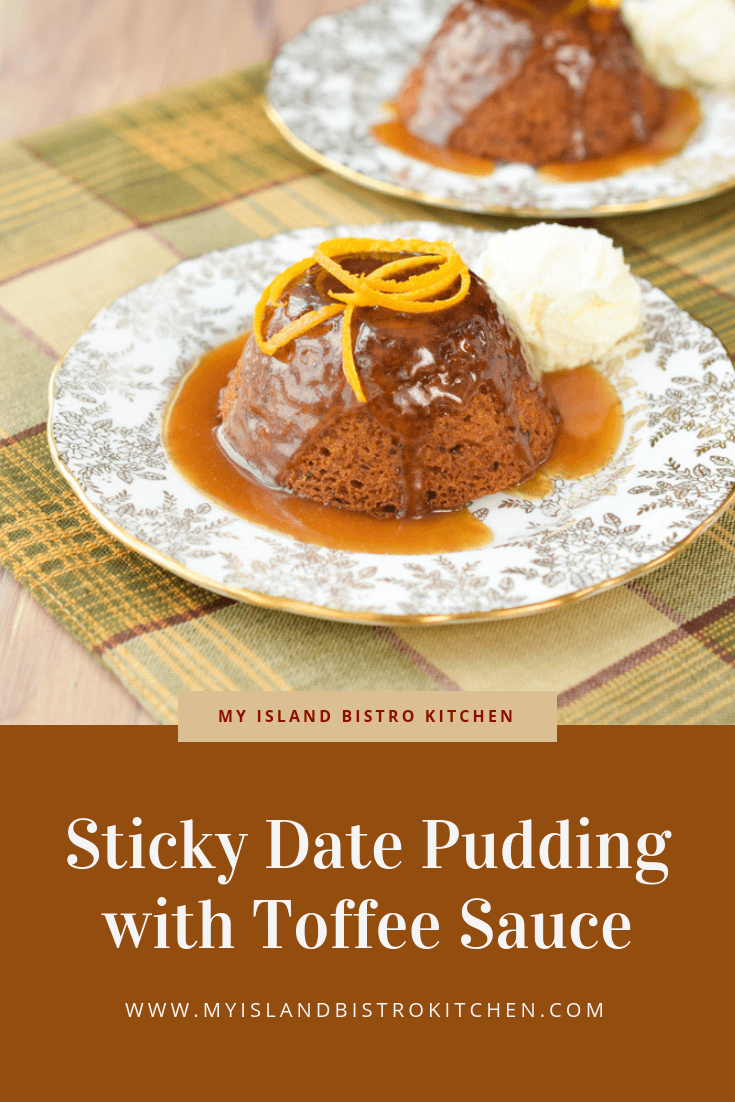
Sticky Date Pudding
Sticky Date Pudding

The Rumrunners – Rum and Raisin Cookies

Rum and Raisin Cookies
The Rumrunners – Rum and Raisin Cookies


The folklore of rum running during prohibition in Prince Edward Island (PEI) is the stuff of which legends and ballads are made.  In PEI, so the stories go, locals would set sail in fishing boats, under the cover of darkness, and head out to sea to meet ships from St. Pierre and Miquelon carrying rum.  The locals, known as rumrunners, would buy the rum and head back to Island shores with the smuggled contraband liquor. Continue reading The Rumrunners – Rum and Raisin Cookies

Homemade Vanilla Extract

Homemade Pure Vanilla Extract

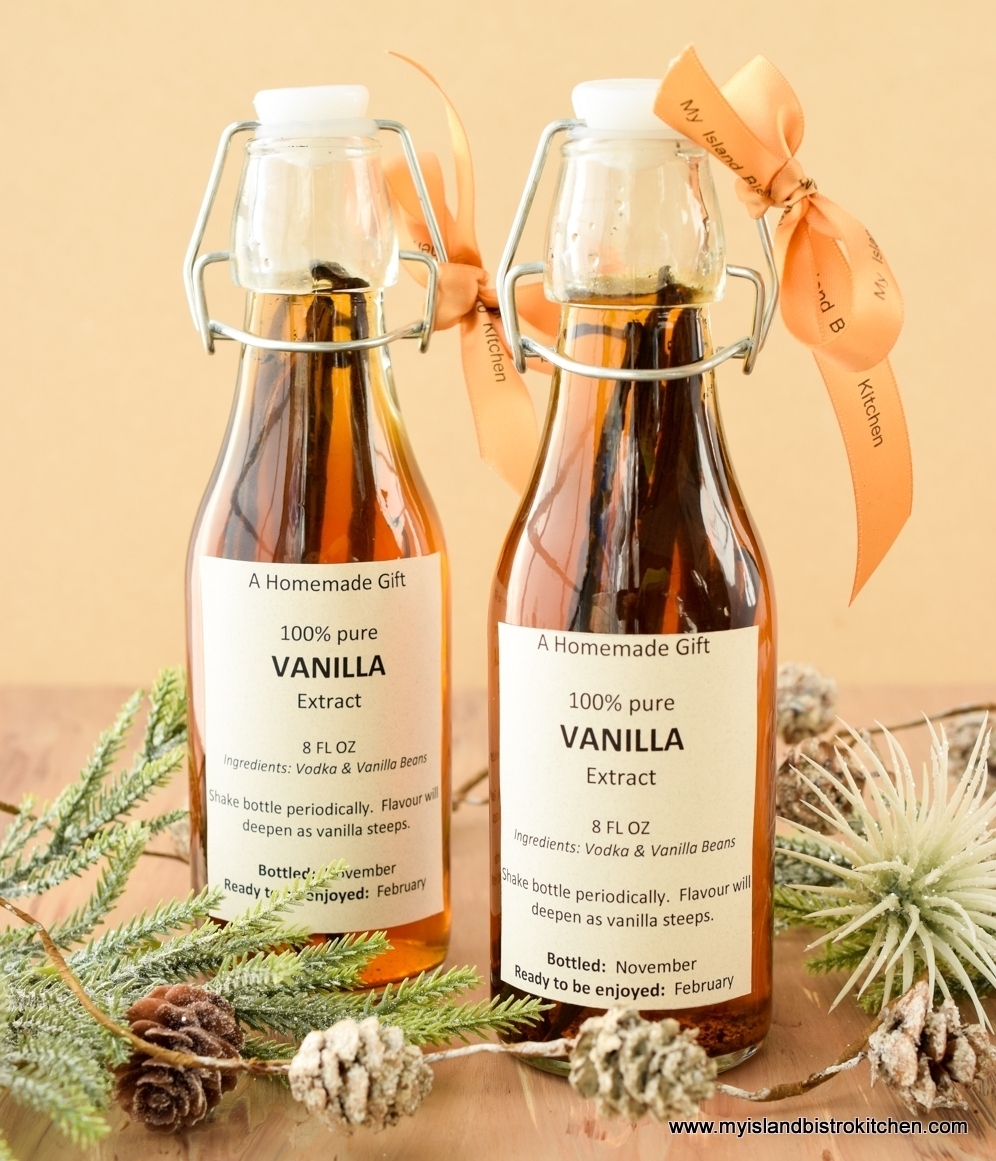
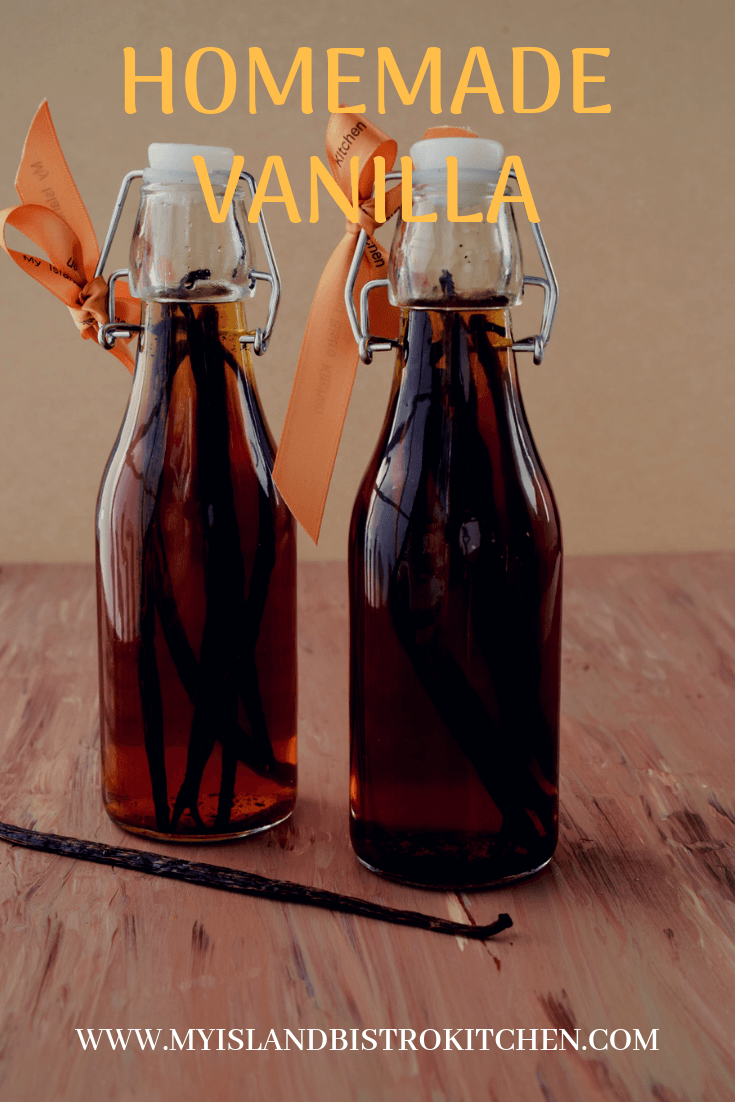
As many bakers will know, vanilla has been creeping up in price and, since it’s a key flavoring in many baked goods, it’s hard to do without it.  I recently priced a 120ml bottle of pure vanilla (storebrand) here in Charlottetown and it was $17.49 at time of writing. Yikes! 120ml is not quite one-half cup and there aren’t a lot of teaspoons in a half cup.  I  make my own vanilla which is actually quite easy and only takes two ingredients — vanilla beans and vodka. The vanilla extract is made using whole vanilla beans that steep for several weeks, or months, in at least 35% alcohol or more.
Vanilla Beans
Vanilla Beans

What homemade vanilla does take is time.  It takes at least one to two months for the flavour to steep from the vanilla beans placed in the vodka so you do need to plan ahead for your vanilla needs.  Vanilla beans are not cheap either but, for the amount of vanilla that can be made I find, for me at least, it is the more economical way to go.

There are different varieties and grades of vanilla beans. I use the Madagascar Bourbon variety. Grade B beans, with their low moisture content, are generally considered the more suitable for extraction purposes.   What beans you use, however, will largely depend on what is available in your area.  Vanilla beans are usually found in the baking aisles of most large supermarkets or you can often find them at bulk and health food stores.

I use three split standard-sized vanilla beans per cup of vodka, four if the beans are somewhat smaller.  More beans can be used to speed up the steeping process but, if you can wait, it’s more economical to go with fewer beans and steep them longer.  Vodka is the preferred medium to use for the vanilla because it is considered to be a neutral agent with no defined strong flavour on its own.  Some do use bourbon, rum, or brandy for the vanilla but, in my view, that is altering the true vanilla flavour and introducing another flavour altogether.

There is no need to buy a top-brand pricey vodka for the making of vanilla.  I use a moderately priced vodka with 40% alc./vol.

To prepare the vanilla beans, use the flat back side of a pare knife and smooth out the vanilla beans, lengthwise.

Vanilla Beans
Vanilla Beans

Then, with the tip of a sharp knife, slice the vanilla beans open, lengthwise, to reveal the vanilla seeds.

Vanilla Beans
Vanilla Beans

At this point, you can scrape the vanilla seeds out and transfer them to the decanting bottle along with the vanilla pods or you can just leave the seeds in the pods.

Vanilla Bean Seeds
Vanilla Bean Seeds

The seeds will come out of the pods anyway as the bottle is shaken and the seeds and pods steep. Place the vanilla bean pods and seeds in a sterilized bottle or jar.  Add the vodka, ensuring the vanilla bean pods are submerged. You may cut the vanilla beans if they are taller than the amount of vodka in the bottle.

Making Homemade Vanilla

Cover tightly and shake the bottle well.  Store in cool dark place for at least one month (and preferably two months or even longer).  Shake the bottle once or twice a week during the steeping/ extraction process.

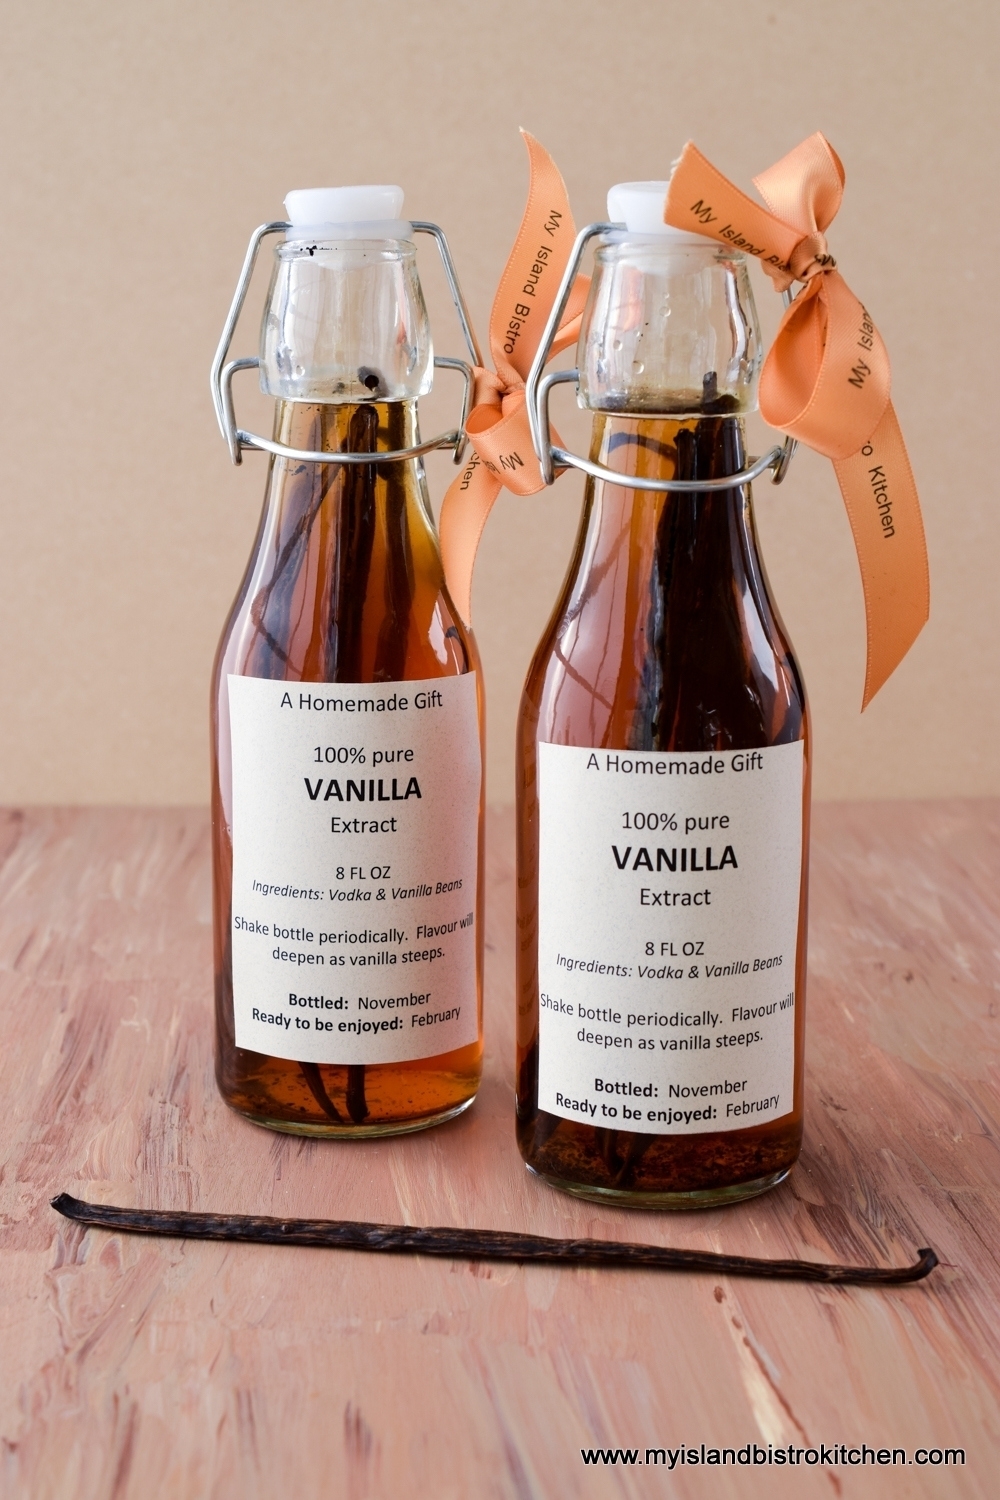
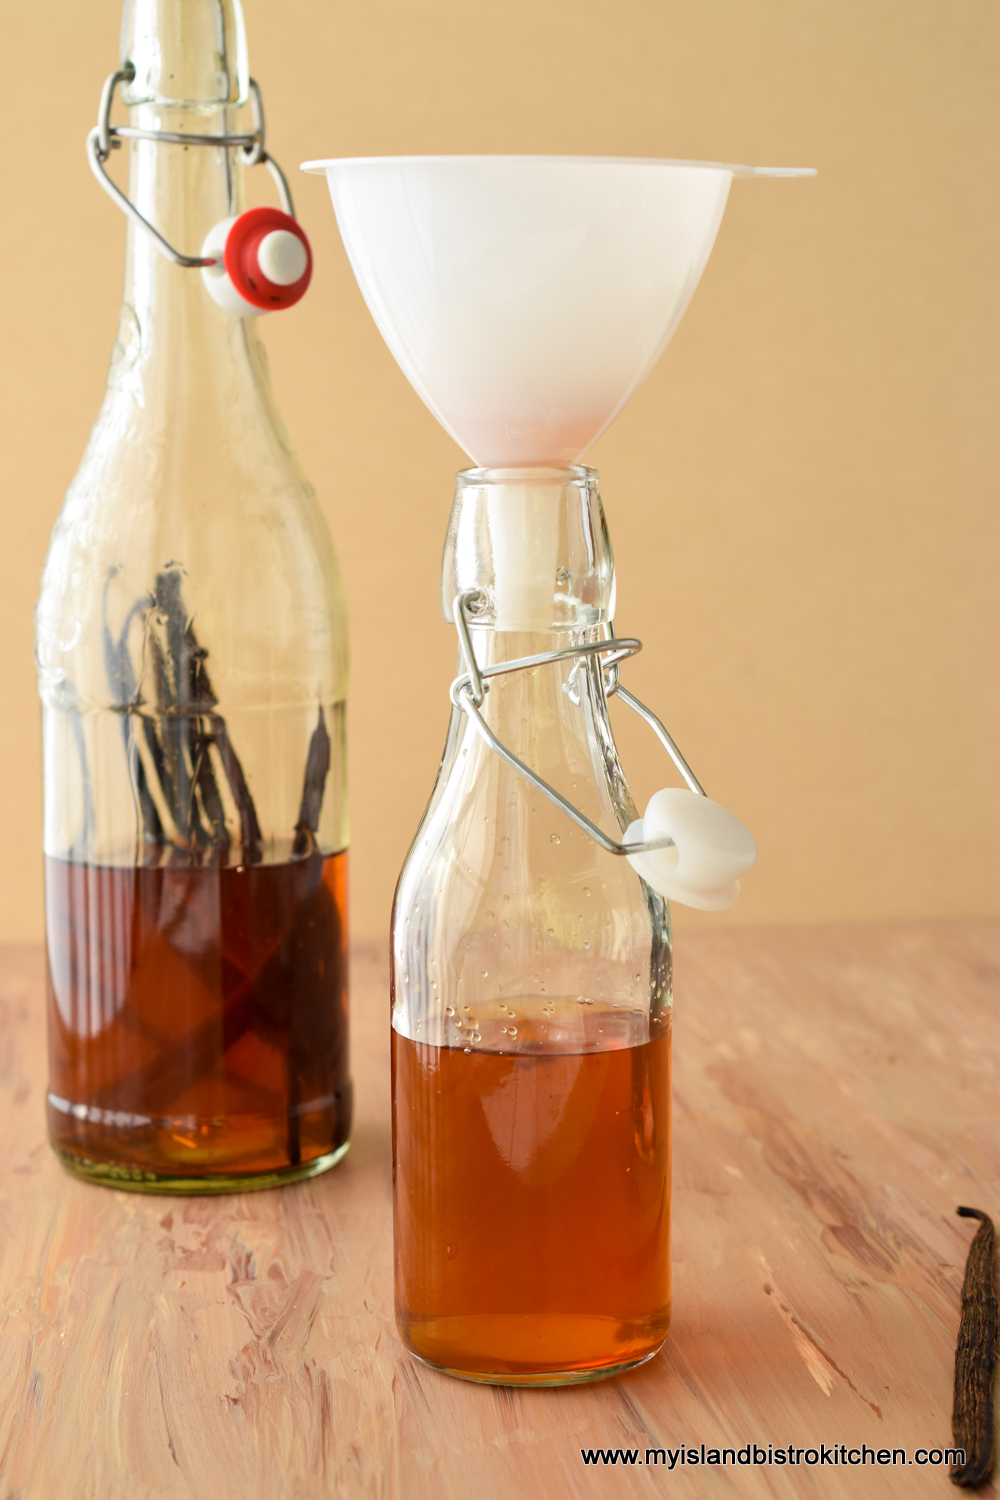
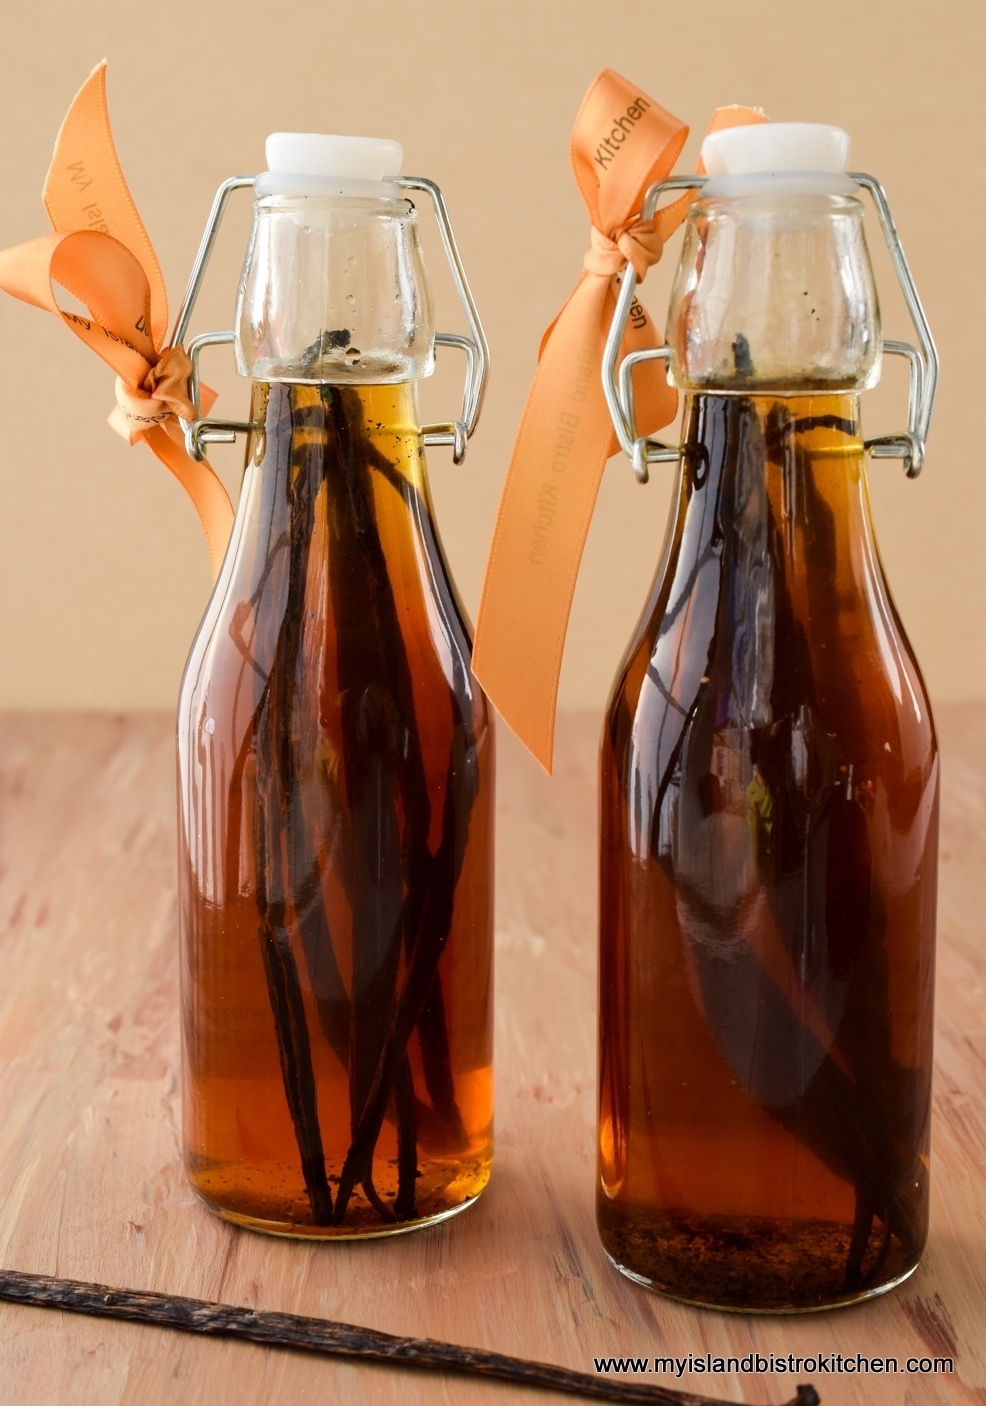
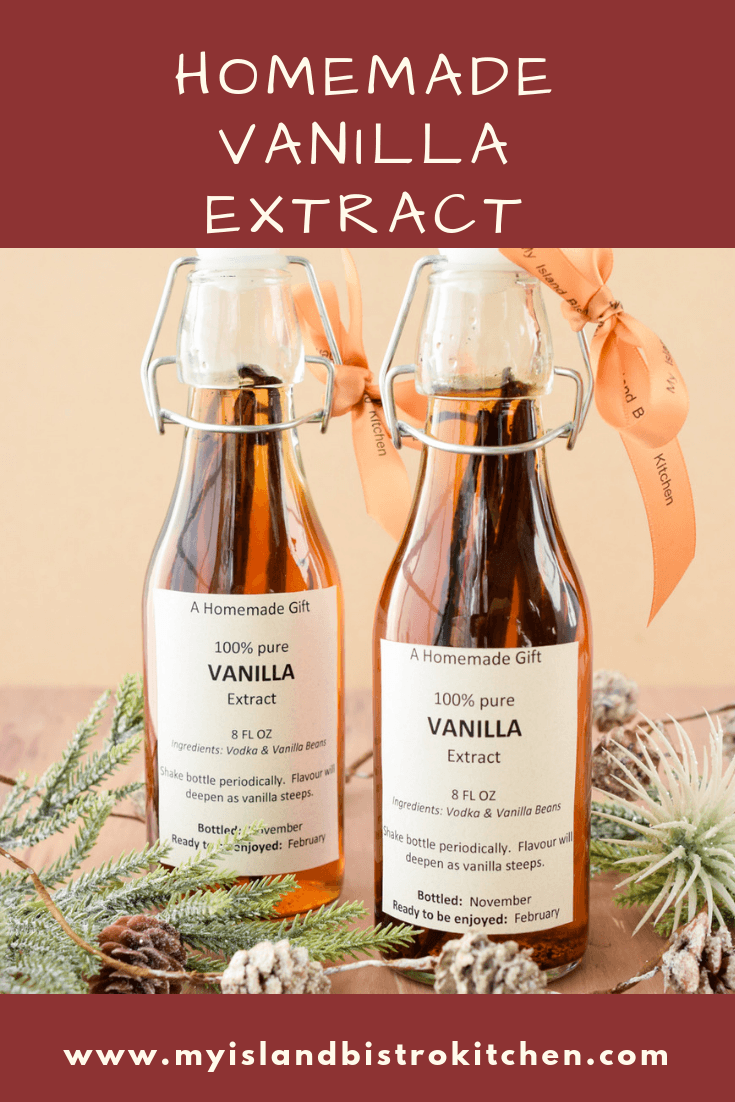
Apart from making vanilla for your own use, homemade vanilla makes a wonderful gift for the foodie on your gift list so the vanilla beans can be divided between the smaller sterilized gift-size bottles for the entire extraction/steeping process or the vanilla can be steeped in one large bottle and then later poured into smaller sterilized bottles, usually either 4oz or 8oz size.  I usually make the vanilla in a large bottle because it does need to be shaken once or twice a week as it steeps and I find it easier to deal with one bottle than several.

Homemade Vanilla

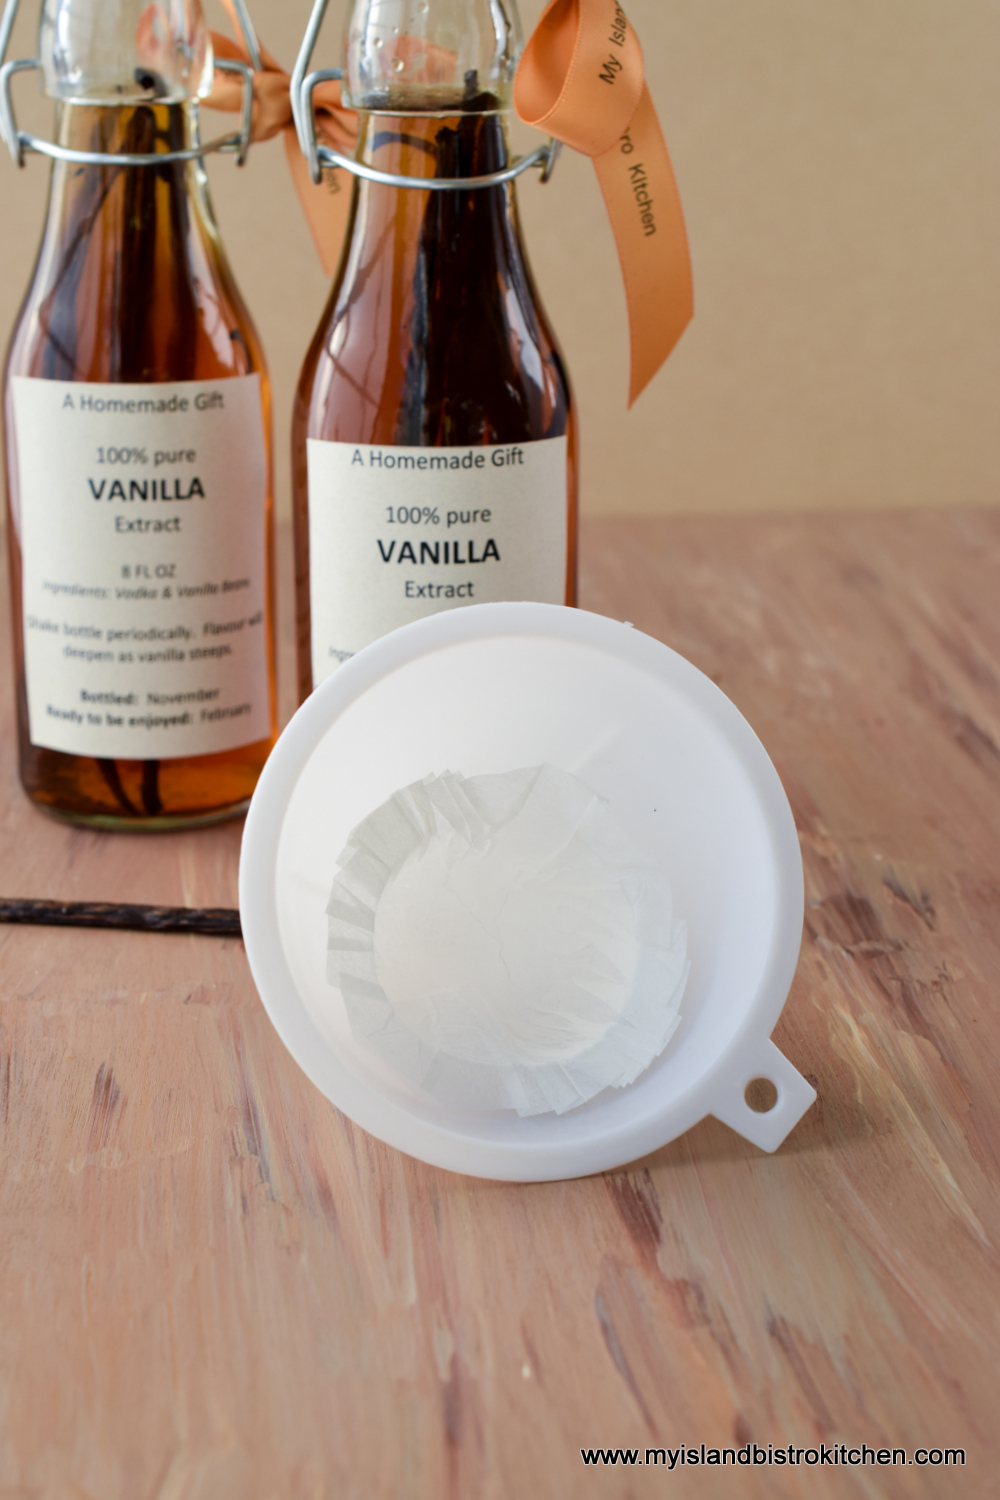
Some don’t care for the specks of vanilla seeds left in the bottle so, if  a clear, speck-free, vanilla is desired, filter it through a small k-cup coffee filter like the one shown in the funnel below.

Filtering Vanilla Extract

I do recommend keeping the vanilla bean pods in the bottle(s) even after the 1-2 month steeping period has ended because those beans continue to impart flavour and deeper color to the vanilla.  I personally like to leave the seeds in the vanilla for the same reason. I also think the seeds make it more interesting and authentic looking  If, in future, you have any vanilla bean pods left after you have used the seeds for other purposes, add those pods to the vanilla you have on hand.  Additional vodka can be added to the bottle, as well, as the vanilla is used up. Continue to store the vanilla in a dark place at room temperature.

Homemade Vanilla
Homemade Vanilla

Making homemade vanilla extract is simple and easy to do. It also has the added benefit of allowing you to choose the quality of vanilla you want to make based on the kind and grade of vanilla beans you use. There are a lot of vanillas, and simulated vanillas, on the market but making your own allows you to control the quality and, depending on how much you use, it may be the more economical option. Plus, you will have the thrill of making your own vanilla and impressing those you choose to gift it to as well.

Homemade Vanilla
Homemade Vanilla


Pin Me To Pinterest!
Vanilla
Homemade Vanilla Extract
Vanilla
Homemade Vanilla Extract

Classic Nanaimo Bars

Nanaimo Squares
Nanaimo Bars

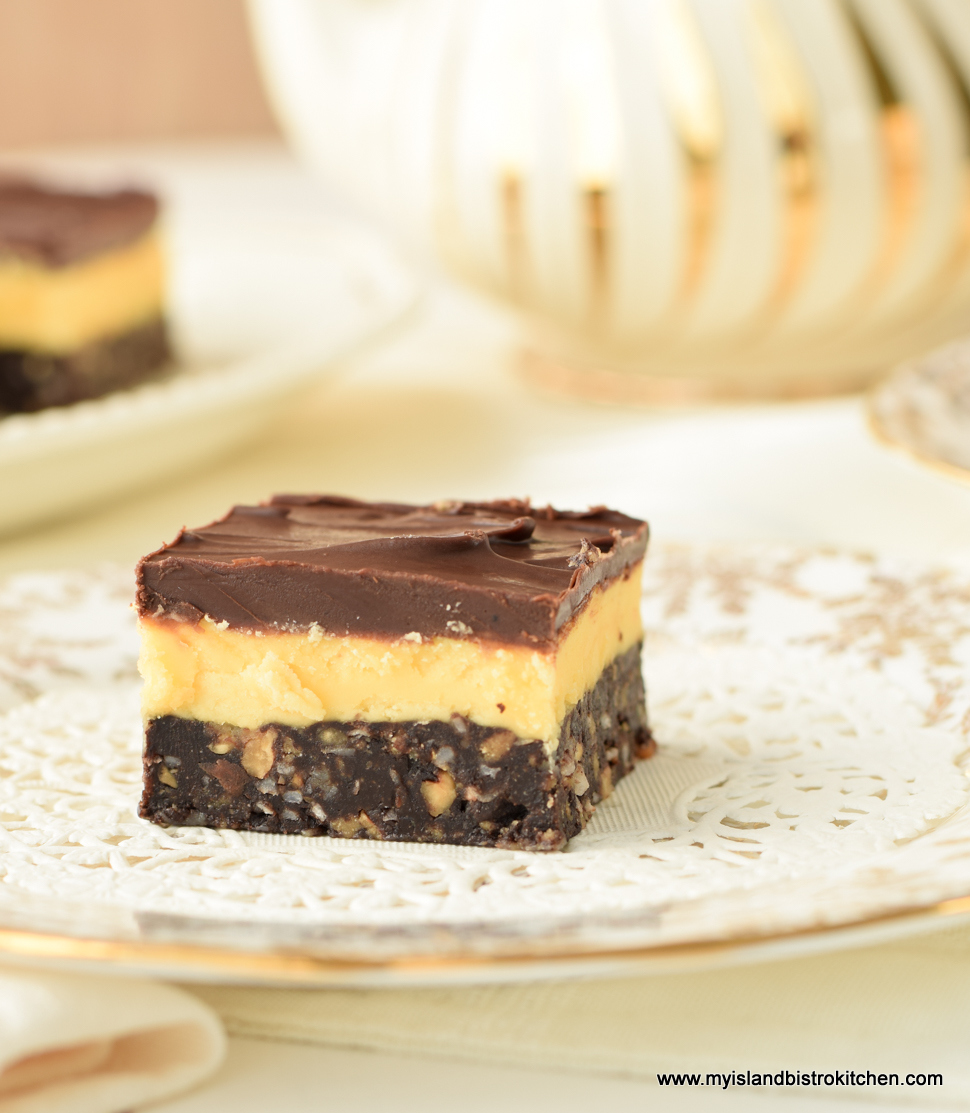
These delightful no-bake bars are almost like candy!  Bar none, these classic Nanaimo Bars are my all-time favorite bars.  They consist of three layers:  1) a chocolate base consisting of graham wafer crumbs, nuts, cocoa, and coconut; 2) a soft yellow-colored custard-flavored filling made primarily with icing sugar and custard powder; and 3) a rich chocolate ganache topping. Continue reading Classic Nanaimo Bars

How to Make Homemade Applesauce

Applesauce
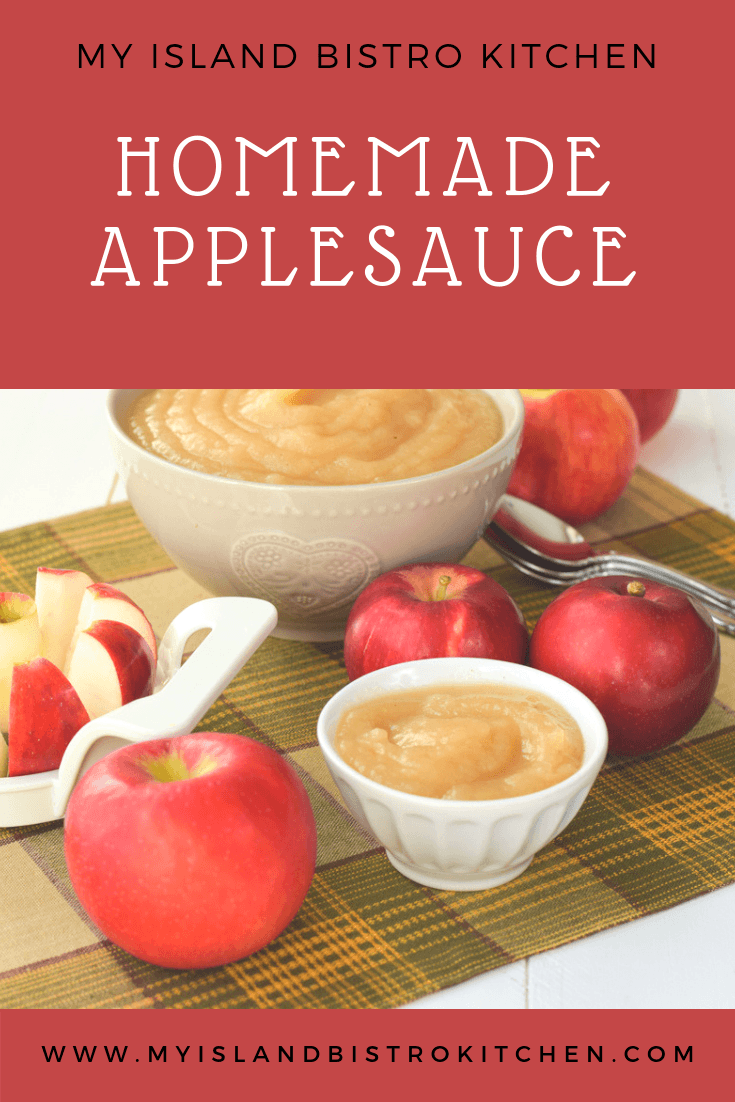
Homemade Applesauce

A true old-fashioned comfort food, homemade applesauce is so simple to make and, best of all, it does not take a lot of ingredients or any unusual ones.  I like to make a big batch of applesauce in the fall when the local apples are fresh in-season and when I can buy, bulk, the different varieties of apples.

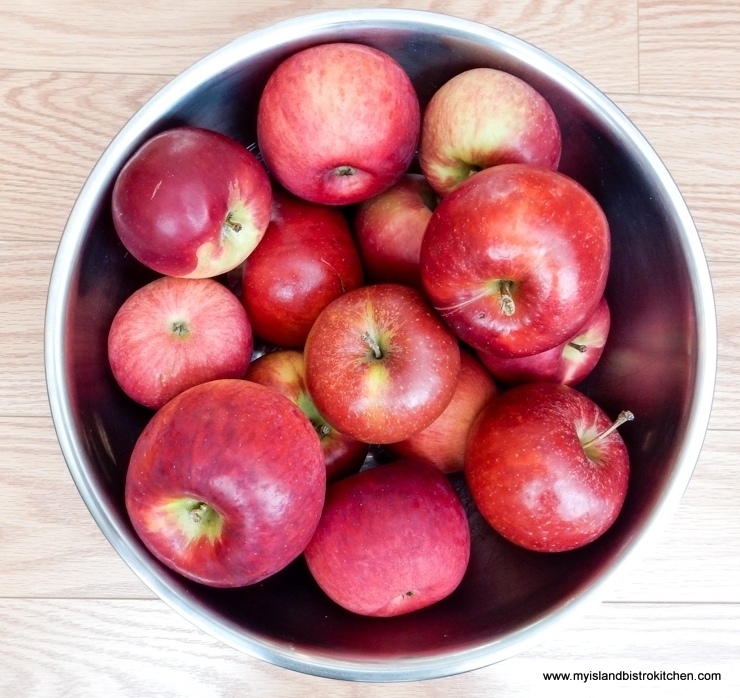
Apples
Mixture of Apples for Applesauce

While I have often made good applesauce using only one variety of apple, I have discovered that blending several varieties, each with its own properties, adds wonderful flavour to the sauce.  I like to use at least three varieties, and sometimes four, in my applesauce so I choose varieties known for their sweet, tart, and tangy properties because their flavours play well off of each other.  In the sauce in the photographs in this posting, I have used four varieties – Cortland from the sweet category, Jonagold and MacIntosh from the tart group and, to add a tangy dimension, I added some Honeycrisp.

Applesauce
Homemade Applesauce

You don’t want to use too much liquid when cooking the apples – basically, just enough to keep the apples from scorching as they cook.  The apples, themselves, will release their juices as they cook.  Using too much liquid will make for a very runny, soupy sauce that will lack good consistency. While the applesauce can be made with a little water, using apple juice really kicks the apple flavour of the sauce up a notch.  I use brown sugar in my applesauce and also add some pure maple syrup because I like a rich applesauce and both of these ingredients contribute to the lovely color of the sauce.  I don’t add much in the way of spices because it’s the apple flavour I am looking for.  So, just a small amount of cinnamon and nutmeg is all I add.

Applesauce
Homemade Applesauce

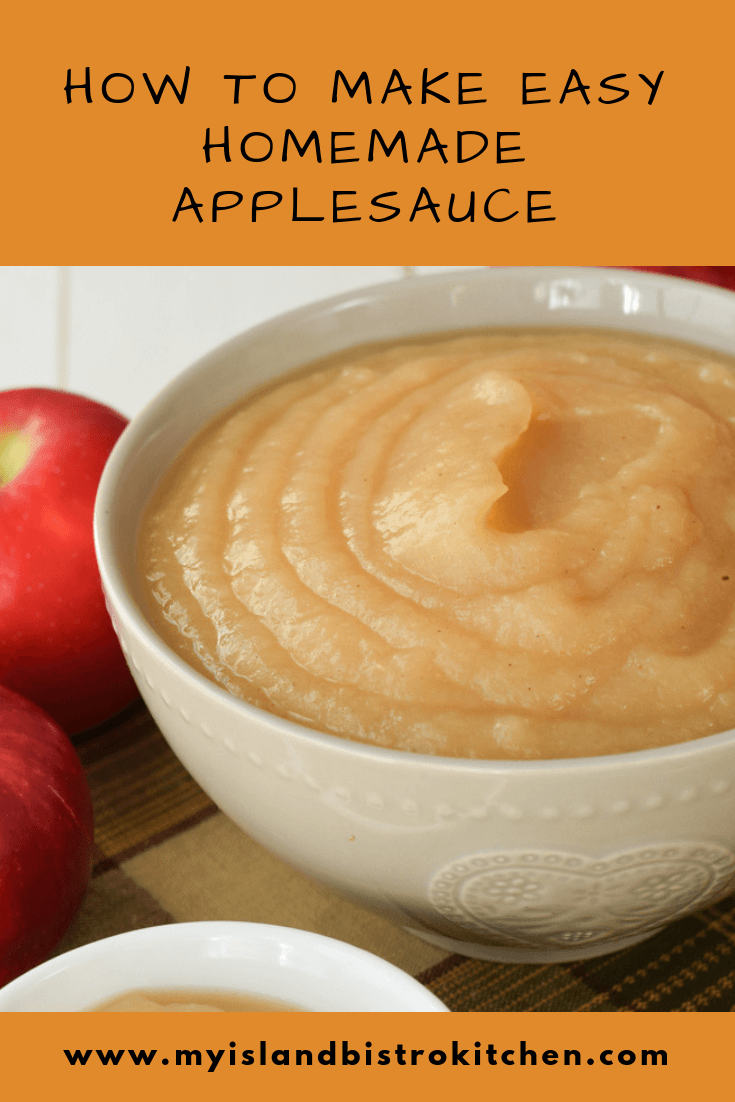
Let the apples simmer away on the stove until they are perfectly soft and mushy.  For chunky style applesauce, simply mash the cooked apples with a potato masher.  If you like a smoother sauce (like the the sauce photographed here), let the apple mixture cool for a bit and then purée it to desired consistency using either an immersion or regular countertop blender.

Applesauce
Homemade Applesauce

This applesauce freezes very well in airtight freezer containers. It’s delightful on its own with a good chunk of cheddar cheese and biscuits warm from the oven.  Applesauce has a multitude of uses, including as an ingredient in my Gluten-Free Blueberry Muffins. Of course, it’s a dandy side to porkchop dishes, as well.

Applesauce
Homemade Applesauce with an Extra Sprinkle of Cinnamon

[Printable recipe follows at end of posting]

Homemade Applesauce

Ingredients:

5 lbs apples (e.g., any combination of Cortlands, Jonagold, MacIntosh, Honeycrisp varieties)
1 tbsp lemon juice
¾ cup apple juice (or water)
1/3 cup brown sugar, firmly packed
3 tbsp pure maple syrup
1/8 tsp salt
½ tsp cinnamon
¼ tsp nutmeg

Method:

Wash, peel, and core apples.  Cut apples into four wedges and then cut each wedge into three to four smaller wedges, depending on the size of apples.

Place apples in large stockpot, sprinkling with lemon juice and tossing gently with a large spoon to coat with the lemon juice.  Add remaining ingredients and stir well.  Place stockpot over medium-high heat and bring mixture to a boil, stirring frequently.  Reduce heat to low and cook, covered, and stirring occasionally, for 25-30 minutes, or until apples have completely softened.

Remove from heat and mash apples with a potato masher for chunky-style sauce. For smoother sauce, let apples cool for several minutes and use an immersion blender (or regular countertop blender) to purée apple mixture to desired consistency.

Refrigerate sauce, covered, for up to 3-4 days or freeze in airtight freezer containers for longer storage.

Yield:  Apx. 7 cups

Homemade Applesauce

A combination of sweet and tart varieties of apples are the basis for this delicious homemade applesauce that is simple to make and freezes well.
Course Side Dish
Cuisine American
Keyword applesauce
Prep Time 10 minutes
Cook Time 30 minutes
Total Time 40 minutes
My Island Bistro Kitchen My Island Bistro Kitchen

Ingredients

  • 5 lbs apples e.g., any combination of Cortlands, Jonagold, MacIntosh, Honeycrisp varieties
  • 1 tbsp lemon juice
  • ¾ cup apple juice or water
  • 1/3 cup brown sugar, firmly packed
  • 3 tbsp pure maple syrup
  • 1/8 tsp salt
  • ½ tsp cinnamon
  • ¼ tsp nutmeg

Instructions

  1. Wash, peel, and core apples. Cut apples into four wedges and then cut each wedge into three to four smaller wedges, depending on the size of apples.
  2. Place apples in large stockpot, sprinkling with lemon juice and tossing gently with a large spoon to coat with the lemon juice. Add remaining ingredients and stir well. Place stockpot over medium-high heat and bring mixture to a boil, stirring frequently. Reduce heat to low and cook, covered, and stirring occasionally, for 25-30 minutes, or until apples have completely softened.
  3. Remove from heat and mash apples with a potato masher for chunky-style sauce. For smoother sauce, let apples cool for several minutes and use an immersion blender (or regular countertop blender) to purée apple mixture to desired consistency.
  4. Refrigerate sauce, covered, for up to 3-4 days or freeze in airtight freezer containers for longer storage.

Recipe Notes

Yield: Apx. 7 cups

Pin Me To Pinterest!

Applesauce

Gluten Free Butter Tarts

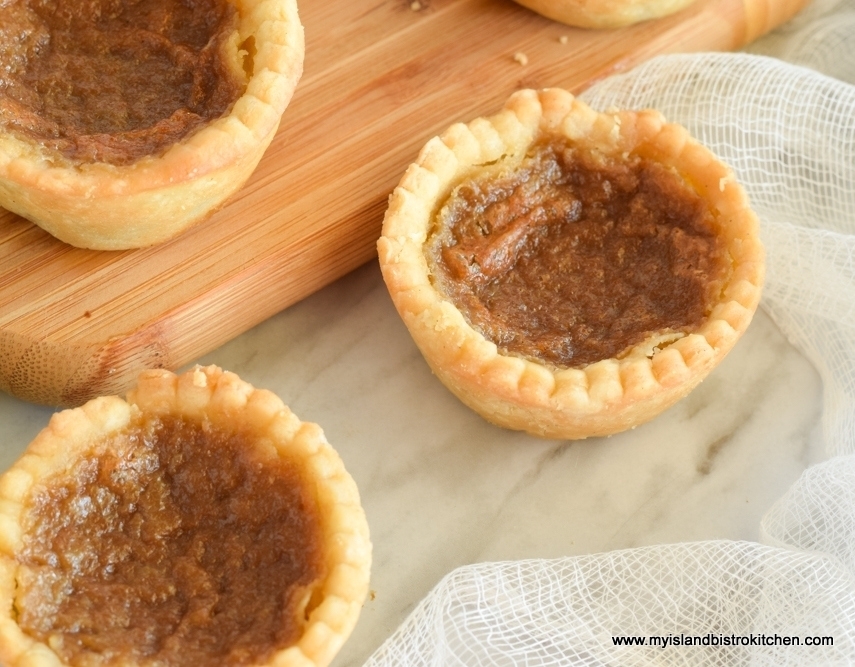
Butter Tarts
Gluten-free and Lactose-Free Butter Tarts

These old-fashioned butter tarts are actually both gluten free and lactose free.  If you are not lactose intolerant, simply substitute regular butter and milk in the recipe.

Quite some time ago, I shared my traditional butter tart recipe.  However, folks have been inquiring about a gluten-free recipe for the tarts so here it is. I won’t repeat my hints and tips for making butter tarts in this posting because the same ones hold true for the gluten-free version so I am directing readers to my original posting for butter tarts for this information.

Butter Tarts
Gluten-Free and Lactose-Free Butter Tarts

I don’t like a big glob of thick pastry in my butter tarts. As far as I am concerned, it is the gooey, sweet filling that is the star in these tarts.  The pastry is involved just because it is the vessel to hold the filling. So, I use a thin rolled pastry and fit the pastry neatly and tidily into the muffin tin cups.

The pastry, nonetheless, still has to be tender and flaky because it is half the equation in these Canadian culinary delicacies.  The gluten-free pastry recipe is the one that I developed and perfected first for my gluten-free apple pie, originally published to my website on January 11, 2018.  It is now my go-to pastry recipe since it is perfectly tender and flaky and works well with sweet and savory pies as well as tarts.

As with my traditional butter tarts, you will find that the filling is slightly gooey but not too runny.  I don’t care for tarts that, as soon as you bite into them, the filling pours out.  The reason why I like a semi-solid filling is that I believe butter tarts should be able to be picked up off a plate and eaten by hand with no need for a plate and fork to catch a runny filling.  This, of course, is purely a personal preference.

Butter Tarts
Gluten-Free and Lactose-Free Butter Tarts

[Printable recipe follows at end of posting]

Gluten-Free Lactose-Free Butter Tarts

Ingredients:

For Pastry:

2 cups (276g) gluten-free 1-to-1 flour
½ tsp salt
1½ tsp sugar

¼ cup cold lactose-free butter (76g)
¼ cup cold lard (76g)

1 large egg
1 tsp white vinegar
Enough water to make 2/3 cup liquid

For Filling:
½ cup light brown sugar, firmly packed
¼ cup dark brown sugar, firmly packed
2 extra-large eggs, light beaten
3 tbsp pure maple syrup
¼ cup melted lactose-free butter (no substitutes)
2 tbsp lactose-free milk (2%MF or 3%MF)
1½ tsp pure vanilla
1 tsp white vinegar
Dash salt

Method:

For Pastry:  Lightly grease 12 muffin cups.  In medium-sized bowl, whisk the flour, salt, and sugar together.  Cut the butter and lard into chunks and add to the flour.  With a pastry cutter, cut the butter and lard into the flour until the fats resemble the size of large peas.

In a measuring cup, whisk the egg and vinegar together.  Add enough cold water to measure 2/3 cup.  Add the egg-vinegar-water mixture to the flour, small amounts at a time, and mix with a fork or hands.  Add only enough water that the dough clings together and can be gathered into a ball (it may not take all the liquid).

Divide the dough in four pieces.  Form disk shapes with each piece. Place disks in the refrigerator for about 10-15 minutes to chill. Remove one disk at a time from the refrigerator and break off chunks, about 2 oz in size, which should give ample for 4” circles to be cut for each tart.  Place dough between two sheets of parchment paper (or wax paper) lightly dusted with flour. Roll pastry to desired thickness, generally between 1/16”and 1/8” thickness. Peel the top piece of parchment from the rolled out pastry. Cut out pastry circles with a floured 4” round cookie cutter.

Carefully transfer each cut out pastry circle to muffin tin cup. Fit the pastry into the cup, ensuring there are no air pockets between the pastry and the muffin cups. Repeat with chilled dough to make enough pastry circles for 12 tart shells, gathering up and re-rolling pastry scraps as necessary.  Place pan of tart shells in freezer for about 12-15 minutes to chill to prevent shrinkage of pastry during baking.

For Filling:  Preheat oven to 400°F.  Add all ingredients, in order given, into a 4-cup measuring cup.  Whisk or stir until ingredients are well blended.  Remove the muffin cups from the freezer and pour filling equally into the 12 muffin cups. Bake at 400°F for 5 minutes then reduce temperature to 375°F and bake tarts for 17-19 minutes or until filling domes and appears set.   Let tarts cool at least 30 minutes in muffin tins on cooling rack.  Using the tip of a sharp knife, gently lift the tarts from the muffin cups.

Yield:  12 tarts

Gluten-Free Butter Tarts

These gluten-free (and lactose-free) melt-in-your-mouth pastries are filled with a delectable, slightly gooey, but not too runny, buttery rich caramel-like filling. A classic Canadian culinary delicacy.

Course Dessert
Keyword butter tarts
Servings 11
My Island Bistro Kitchen My Island Bistro Kitchen

Ingredients

For Pastry:

  • 2 cups gluten-free 1-to-1 flour (276g)
  • ½ tsp salt
  • tsp sugar
  • ¼ cup cold lactose-free butter (76g)
  • ¼ cup cold lard (76g)
  • 1 large egg
  • 1 tsp white vinegar
  • Enough water to make 2/3 cup liquid

For Filling:

  • ½ cup light brown sugar, firmly packed
  • ¼ cup dark brown sugar, firmly packed
  • 2 extra-large eggs, light beaten
  • 3 tbsp pure maple syrup
  • ¼ cup melted lactose-free butter (no substitutes)
  • 2 tbsp lactose-free milk (2%MF or 3%MF)
  • tsp pure vanilla
  • 1 tsp white vinegar
  • Dash salt

Instructions

For Pastry:

  1. Lightly grease 12 muffin cups. In medium-sized bowl, whisk the flour, salt, and sugar together. Cut the butter and lard into chunks and add to the flour. With a pastry cutter, cut the butter and lard into the flour until the fats resemble the size of large peas.
  2. In a measuring cup, whisk the egg and vinegar together. Add enough cold water to measure 2/3 cup. Add the egg-vinegar-water mixture to the flour, small amounts at a time, and mix with a fork or hands. Add only enough water that the dough clings together and can be gathered into a ball (it may not take all the liquid).
  3. Divide the dough in four pieces. Form disk shapes with each piece. Place disks in the refrigerator for about 10-15 minutes to chill. Remove one disk at a time from the refrigerator and break off chunks, about 2 oz in size, which should give ample for 4” circles to be cut for each tart. Place dough between two sheets of parchment paper (or wax paper) lightly dusted with flour. Roll pastry to desired thickness, generally between 1/16”and 1/8” thickness. Peel the top piece of parchment from the rolled out pastry. Cut out pastry circles with a floured 4” round cookie cutter.
  4. Carefully transfer each cut out pastry circle to muffin tin cup. Fit the pastry into the cup, ensuring there are no air pockets between the pastry and the muffin cups. Repeat with chilled dough to make enough pastry circles for 12 tart shells, gathering up and re-rolling pastry scraps as necessary. Place pan of tart shells in freezer for about 12-15 minutes to chill to prevent shrinkage of pastry during baking.

For Filling:

  1. Preheat oven to 400°F. Add all ingredients, in order given, into a 4-cup measuring cup. Whisk or stir until ingredients are well blended. Remove the muffin cups from the freezer and pour filling equally into the 12 muffin cups. Bake at 400°F for 5 minutes then reduce temperature to 375°F and bake tarts for 17-19 minutes or until filling domes and appears set. Let tarts cool at least 30 minutes in muffin tins on cooling rack. Using the tip of a sharp knife, gently lift the tarts from the muffin cups.

Recipe Notes

Copyright My Island Bistro Kitchen

If you have made this recipe and enjoyed it and/or wish to share it with your friends and family, please do so on social media but be sure to share the direct link to this posting from my website.

Connect with My Island Bistro Kitchen on Social Media

Join the Facebook page for My Island Bistro Kitchen:  https://www.facebook.com/MyIslandBistroKitchen/

Follow “the Bistro” on “X” (formerly Twitter)https://twitter.com/PEIBistro/

See the drool-worthy gallery of mouth-watering food photos from My Island Bistro Kitchen on Instagramhttps://www.instagram.com/peibistro/

Follow “the Bistro” on Pinterest at https://www.pinterest.ca/peibistro/ and pin the Pinterest-ready photo at the end

Pin Me To Pinterest!
Butter Tarts
Gluten-Free Butter Tarts

On The Sandwich Board: Turkey, Pear, Brie, and Cranberry Sandwich

Turkey Sandwich
Turkey, Pear, Brie, and Cranberry Sandwich

On my sandwich board today, I have a lovely gourmet Turkey, Pear, Brie, and Cranberry Sandwich and this one comes fully dressed!  Note this sandwich can also be made with chicken as a substitute for turkey. Continue reading On The Sandwich Board: Turkey, Pear, Brie, and Cranberry Sandwich

Roasted Potato Stacks

Potato Stacks
Roasted Potato Stacks

Living in a province known for its potato production, it’s almost inevitable that potatoes are served at many meals on PEI dinner tables.  There are any number of ways this versatile veggie can be served and, later in this posting, you’ll find links to some of my favorite potato recipes.

Roasted Potato Stacks are my latest creation involving potatoes. They are very tasty and do plate quite attractively. They are also suitable for serving at buffets.

Potato Stacks
Roasted Potato Stacks

Because these potato stacks are free-standing when cooked and removed from the muffin cups, they need to be able to stand on their own when plated. The goal is also to see the individual slices of the potato. I recommend choosing potatoes that have a medium starch content, are semi-waxy, and have somewhat firm flesh such as Yukon Gold, or an all-purpose round white potato variety. These are the types of potatoes that will hold their shape after cooking and when plated and they can take the higher heat at which the stacks are roasted without falling apart or becoming mushy.  Choosing potatoes that have good moisture content also helps to keep the roasted potato stacks moist.  Potatoes high in starch and low in moisture don’t hold their shape as well and tend to break down easier than less starchy or waxy potatoes. For this reason, they are not as suitable for these Roasted Potato Stacks as are their semi-waxy cousins.  Select potatoes, about 2” around, so that, when sliced very thinly, they will easily fit flatly in muffin tin cups.

Potato Stacks
Roasted Potato Stacks

The key to making these Roasted Potato Stacks is to have the potato slices very thin and uniformly sized.  I have tested my recipe with three different thicknesses of potatoes – 1/16”, 3/16”, and 1/8” and my preference is 3/16” as the layers of individual potato slices in each stack are still intact and identifiable when fully roasted but they are not so thick as to cause issues getting them cooked.

Potato Stack
Roasted Potato Stack

I recommend using a mandolin for quick and uniform slicing.  I have a dandy hand-held mandolin that is slick and easy for this kind of work and it saves the set up of my larger mandolin or the trials, tribulations, and time to thinly slice the potatoes by hand.

Made with seasoned butter and a blend of cheeses, these delectable easy-to-make roasted potato stacks are a great side dish or appetizer. 

Potato Stack
Roasted Potato Stack

[Printable recipe follows at end of posting]

Roasted Potato Stacks

Ingredients:

2¼ lb potatoes, peeled, washed, and dried (e.g., Yukon Gold or all-purpose round white variety)
3 tbsp melted butter
1 tsp olive oil
1 tsp liquid chicken bouillon
1 tsp garlic salt
¾ tsp onion powder
2 tsp fresh lemon thyme, chopped
2 tsp fresh parsley, minced
Pinch nutmeg (optional)
½ – ¾ tsp fine sea salt
Freshly ground pepper
½ cup Parmesan cheese, finely grated
3 tbsp Cheddar Cheese, finely grated
1 tbsp whole milk or cream

3 – 4 tbsp finely grated Parmesan cheese
Paprika (for sprinkling tops of stacks)

Fresh thyme sprigs for garnish

Method:

Position oven rack in center of oven.  Preheat oven to 375°F.

Butter eight (8) regular-sized non-stick muffin cups with butter.  Set aside.

In small, microwave-safe bowl, melt the butter.  Add the olive oil, liquid chicken bouillon, garlic salt, onion powder, thyme, parsley, nutmeg, salt, and pepper.  Stir well to mix.  Stir in the Parmesan and Cheddar cheeses along with the milk or cream.

Choose potatoes that are not overly starchy and that will hold their shape after cooking – e.g., Yukon Gold or an all-purpose round white variety.  Select potatoes the size that, when sliced horizontally, the slices will easily fit flat into the muffin cups. Using a mandolin, slice potatoes horizontally into slices 3/16” thick.  Place half the potato slices in large bowl.  Add half the mixed butter, seasonings, and cheese ingredients.  Using hands, toss the potatoes in the mixture until the slices are well coated. Add the remaining potato slices and butter mixture and continue mixing until the potato slices are coated with the mixture. Either create the stacks of potatoes in hands and place in buttered muffin cups or individually stack the potato slices directly in the muffin tin cups, stacking the slices as evenly as possible until they are about ¾ – 1” above the muffin cup rims. The stacks will shrink a bit during the roasting but building them a little higher than the muffin cup rim will ensure a good sized potato stack when cooked.

Roast the potato stacks for about 25 minutes, then sprinkle each stack with additional grated Parmesan cheese and a light sprinkle of paprika.  Roast for 20 minutes longer, or until the tops of the potato stacks are golden and crispy, and a skewer or thin knife inserted in center of a stack indicates potatoes are tender and cooked through.  Remove from oven and let rest for 5 minutes then carefully run the tip of a knife around the perimeter of each muffin cup to ensure the potato stacks are loose for easy removal.  With the aid of a fork, or soup spoon, and the tip of the knife, carefully remove each potato stack and serve immediately sprinkled with additional finely-grated Parmesan cheese and fresh parsley.

Yield:  8 potato stacks (Suggested serving size – 2 stacks per person)

Potato Stacks
Plated Roasted Potato Stacks

For other potato recipes from My Island Bistro Kitchen, click on the links below:

Decadent Duchess Potatoes
Twice Baked Potatoes
Best Creamy Scalloped Potatoes
Bistro Style Potato Patties
Potato Salad

Roasted Potato Stacks

Made with seasoned butter and a blend of cheeses, these easy-to-make roasted potato stacks are a great side dish or appetizer.
Course Side Dish
Cuisine American
Cook Time 50 minutes
Resting Time 5 minutes
Servings 4
My Island Bistro Kitchen My Island Bistro Kitchen

Ingredients

  • lb potatoes peeled, washed, and dried (e.g., Yukon Gold or all-purpose round white variety)
  • 3 tbsp melted butter
  • 1 tsp olive oil
  • 1 tsp liquid chicken bouillon
  • 1 tsp garlic salt
  • ¾ tsp onion powder
  • 2 tsp fresh lemon thyme, chopped
  • 2 tsp fresh parsley, minced
  • Pinch nutmeg (optional)
  • ½ - ¾ tsp fine sea salt
  • Freshly ground pepper
  • ½ cup Parmesan cheese, finely grated
  • 3 tbsp Cheddar cheese finely grated
  • 1 tbsp whole milk or cream
  • 3 - 4 tbsp finely grated Parmesan cheese
  • Paprika for sprinkling tops of stacks
  • Fresh thyme sprigs for garnish

Instructions

  1. Position oven rack in center of oven. Preheat oven to 375°F.
  2. Butter eight (8) regular-sized non-stick muffin cups with butter. Set aside.
  3. In small, microwave-safe bowl, melt the butter. Add the olive oil, liquid chicken bouillon, garlic salt, onion powder, thyme, parsley, nutmeg, salt, and pepper. Stir well to mix. Stir in the Parmesan and Cheddar cheeses along with the milk or cream.
  4. Choose potatoes that are not overly starchy and that will hold their shape after cooking – e.g., Yukon Gold or an all-purpose round white variety. Select potatoes the size that, when sliced horizontally, the slices will easily fit flat into the muffin cups. Using a mandolin, slice potatoes horizontally into slices 3/16” thick. Place half the potato slices in large bowl. Add half the mixed butter, seasonings, and cheese ingredients. Using hands, toss the potatoes in the mixture until the slices are well coated. Add the remaining potato slices and butter mixture and continue mixing until the potato slices are coated with the mixture. Either create the stacks of potatoes in hands and place in buttered muffin cups or individually stack the potato slices directly in the muffin tin cups, stacking the slices as evenly as possible until they are about ¾ - 1” above the muffin cup rims. The stacks will shrink a bit during the roasting but building them a little higher than the muffin cup rim will ensure a good sized potato stack when cooked.
  5. Bake the potato stacks for about 25 minutes, then sprinkle each stack with additional grated Parmesan cheese and a light sprinkle of paprika. Bake for 20 minutes longer, or until the tops of the potato stacks are golden and crispy, and a skewer or thin knife inserted in center of a stack indicates potatoes are tender and cooked through. Remove from oven and let rest for 5 minutes then carefully run the tip of a knife around the perimeter of each muffin cup to ensure the potato stacks are loose for easy removal. With the aid of a fork, or soup spoon, and the tip of the knife, carefully remove each potato stack and serve immediately sprinkled with additional finely-grated Parmesan cheese and fresh parsley.

Recipe Notes

Yield: 8 potato stacks (Suggested serving size – 2 stacks per person)


[Copyright My Island Bistro Kitchen]


If you have made this recipe and enjoyed it and/or wish to share it with your friends and family, please do so on social media but be sure to share the direct link to this posting from my website.

Connect with My Island Bistro Kitchen on Social Media

Join the Facebook page for My Island Bistro Kitchen:  https://www.facebook.com/MyIslandBistroKitchen/

Follow “the Bistro” on “X” (formerly Twitter)https://twitter.com/PEIBistro/

See the drool-worthy gallery of mouth-watering food photos from My Island Bistro Kitchen on Instagramhttps://www.instagram.com/peibistro/

Follow “the Bistro” on Pinterest at https://www.pinterest.ca/peibistro/ and pin the Pinterest-ready photo at the end

Pin Me To Pinterest!
Potato Stacks
Roasted Potato Stacks

Classic Roasted Butternut Squash Soup

Classic Roasted Butternut Squash Soup

When days are cooler, or downright cold, there is nothing better to warm the tummy than a bowl of comfort soup.  One of the soups I place in that category is homemade Roasted Butternut Squash Soup.  Full of flavour with a lovely velvety texture, Roasted Butternut Squash Soup has a rich natural golden-yellow color that can’t be beat!  This is a showstopper soup on both the taste and appetizing color fronts, the latter of which is drawn from the orange, fleshy pulp of the squash. Continue reading Classic Roasted Butternut Squash Soup

Cranberry Blueberry Sauce

Combining the sweet and tart flavors of blueberries and cranberries makes for a delectable cranberry blueberry sauce.  Their flavors play well off of each other. Most will be familiar with the traditional cranberry sauce that, for many, has to be part of a roasted turkey or chicken dinner.  Click here for my recipe for classic cranberry sauce. Continue reading Cranberry Blueberry Sauce

Green Tomato Marmalade Recipe

Marmalade
Green Tomato Marmalade

Green Tomato Marmalade is not an altogether common variety of marmalade. It’s not the “garden” variety of typical marmalades likely to be found on many supermarket shelves, or at least not in my neck of the woods anyway.  That, in my view, makes Green Tomato Marmalade all the more special because it’s more unique and exclusive!

Marmalade
Green Tomato Marmalade

But, wait, in another sense, Green Tomato Marmalade is very much a “garden” variety of marmalade in that it is a great way to make use of the usual abundance of green tomatoes many gardeners end up with in their gardens in late summer or early fall and are wondering what they can do with them so they aren’t wasted.

Variations of green tomato jam and marmalade have been around for years.  I expect many homemakers of years ago made one or the other (either the jam or marmalade) because they would have likely had lots of tomatoes in the garden so it was an economical ingredient to use and to have as a spread for bread or biscuits over the winter.  Those homemakers were frugal and resourceful as there were no big supermarkets with a large selection of jams and marmalades we see today and, in some cases, families were large and did not have a lot of money. So, consequently, they figured out ways to feed their families economically, making good use of food they grew themselves.

Green Tomato Marmalade
Green Tomato Marmalade on Toast

Green Tomato Marmalade is one of those food items I would class as “don’t knock it till you’ve tried it”.  This marmalade is both sweet and savory, making it a versatile product to have on the pantry shelf.  Combining the green tomatoes with citrus flavours (orange and lemon) and some crushed pineapple for sweetness balance and texture, this marmalade is versatile and can be used just as one would use orange marmalade, for example – spread on toast, biscuits, and scones.  Green Tomato Marmalade can also be eaten as a savory condiment with cheese, charcuterie, and cracker boards.

Green Tomato Marmalade
Green Tomato Marmalade with Brie and Crackers

Almost any variety of medium/large tomatoes can be used for this marmalade. Tiny Tims variety or grape tomatoes, however, do not work well in this recipe because they are way too small to work with and are full of seeds.

Tomatoes
Green Tomatoes

My advice would be to try to find a variety that does not have a lot of seeds as the tomatoes will yield more tomato meat per pound for the marmalade and the tomatoes will be a lot easier to prepare.  This is because the seeds and the watery/gelatinous sack that are inside the tomatoes need to be removed for this marmalade.  Leaving them in will result in two things: 1) Too much water in the marmalade causing issues getting it to jell; and 2) tomatoes are tremendously seedy and all those seeds just simply do not look appetizing in the finished product and are a nightmare for anyone who cannot digest seeds well. The odd few seeds may make their way in to the marmalade and are not, generally, a problem for most but the intent is to remove as many seeds as possible from the tomatoes.

Green Tomatoes
Green Tomato Wedges

Cut each tomato in half, then each half into several wedges.  Scoop, or cut, out and discard the watery gelatinous sack and its seeds.

Green Tomatoes
Preparing Tomatoes for Green Tomato Marmalade

Cut up the remaining tomato pieces into small, bite-sized chunks.  These don’t need to be minced, by any means, but they need to be small enough to get cooked properly and to look appealing when spread on toast or biscuits.

Chopped Green Tomatoes
Chopped Green Tomatoes for Marmalade

The addition of lemon and orange (and their zests) is what, in my opinion, makes this a marmalade as marmalades traditionally contain citrus fruit.  This recipe calls for a small amount of crushed pineapple.  This adds an element of sweetness, flavour, and texture.  There is no need to drain the pineapple in a sieve or colander but, instead, use a slotted spoon to scoop the pineapple out of the can and let some of the juice drip off for a few seconds before measuring the pineapple.  There will still be juice in the pineapple and up to a couple of tablespoons of juice will be fine.  Any more and, like the watery part of tomatoes, it would add too much liquid to the marmalade content, potentially causing issues getting it to jell. Adding a small piece of cinnamon stick injects a subtle hint of cinnamon to the marmalade. However, it is not recommended to leave the cinnamon stick in the marmalade for the entire cooking process because it can result in too intense and excessive cinnamon flavour which is not the intent with this marmalade.

Marmalade
Green Tomato Marmalade

Care must be taken to ensure the marmalade does not scorch as it slowly cooks.  With the sugar content, scorching is always a risk.  Once a jam or marmalade has scorched, there is no fixing it and it’s a batch destined for the green compost cart.  Stirring the marmalade fairly regularly as it cooks will help it to thicken and prevent scorching (as will keeping it at a low boil and using a heavy bottomed stock pot).  It’s all about heat control. If desired, a few cut up red maraschino cherries can be added for color at the end of the cooking process.

Patience is required to make marmalade – it takes time for it to set, which can be upwards of two hours.  Getting the marmalade at the right jelling stage is the key part of marmalade making.  Temperatures for finished marmalade can range from 217°F to 222°F  and the temperature at which the marmalade is taken off the stove will determine how runny or thick it is. Undercooking the marmalade will result in a very runny product while overcooking it will make it too thick and sticky to spread on anything and it will become very dark in color.  I boil my marmalade slowly until it reaches a sustained temperature of 220°F on the candy thermometer. I find, at that stage, it has a lovely thick, yet still spreadable consistency. Marmalade is meant to be thicker than jam but still needs to be spreadable.

Marmalade
Green Tomato Marmalade

I could not get along without my candy/food thermometer for accurately checking food temperature.  If, however, you do not have a candy thermometer, a “wrinkle” test of the marmalade on a cold saucer can also be used to test the marmalade for doneness (see notes at the end of the recipe below for how to conduct this test).

Half-pint bottles, like those shown in the photo at the beginning of this posting, are perfectly sized for marmalade. The bottles must be washed in hot, soapy water and rinsed thoroughly before being sterilized in boiling water for 10 minutes.  Fill the sterilized jars with the marmalade to within ¼“ of the jar rim.  Seal with the heated lids secured with the bands that came with the jars.  Process the half-pint bottles in a hot water bath for 10 minutes to give them shelf stability for several months – if the Green Tomato Marmalade lasts that long! (Note the marmalade in the tiny jelly jars in the photos below have been transferred, for cracker board presentation purposes, from the half-pint bottles in which they were bottled and processed in the hot water bath – they were not processed in these jelly jars which I have not tested in a hot water bath process.)

Marmalade
Green Tomato Marmalade

The lemons, orange, and crushed pineapple turn the bright green tomatoes into a superb marmalade of glorious golden amber color. Don’t expect this marmalade to taste like tomatoes as might be expected.  Rather, it has a surprisingly sweet and savory blend of flavours that make it a tasty and luxurious marmalade for which a multitude of creative uses can be found.

Give it a try!

Green Tomato Marmalade

Ingredients:

4 lbs green tomatoes, cored, seeded, and diced or cut into small chunks (should equal apx. 9½ – 10 cups cut up)
2½ lbs granulated sugar
1½ lemons, chopped + zest
1 orange, chopped + zest
10 oz crushed pineapple with some of its juice
2” piece of cinnamon stick
4 oz maraschino cherries, chopped (optional)

Method:

Wash tomatoes.  Cut into sections and remove the stem end, core, seeds, and the watery/gelatinous sack around the seeds.  Dice, or cut the tomato pieces into small chunks. Place in large bowl and add the sugar.  Let stand for three hours to draw the juice from the tomatoes and allow the sugar to dissolve.  Stir two to three times.

Wash the lemons and orange well.  Zest the lemons and oranges.  Remove any seeds and cut lemons and orange into small pieces.

Transfer tomato–sugar mixture and the liquid to a medium-sized stock pot. Add the chopped lemons and orange and the zest, along with the crushed pineapple.  Add the piece of cinnamon stick. Bring to a boil over medium high temperature, stirring to prevent scorching.  Immediately lower the temperature and cook, uncovered, at a slow gentle boil until mixture reads 220°F, sustained, on a candy thermometer*.  Stir mixture regularly to prevent scorching. Be patient, this can take upwards of 2 hours. Remove the cinnamon stick after about an hour.  When marmalade has reached its temperature, remove from heat and stir in the maraschino cherries, if using.

While the marmalade is cooking, fill a large pot of water, about ¾ full.  Place 6 half-pint jars, upright, into the water.  Ensure the jars are fully submerged, are each filled with water, and that the water is at least an inch over the tops of the jars.  Cover, bring to a boil, and boil for 10 minutes. Turn off heat and leave the jars in the hot water while the marmalade finishes cooking.

Meanwhile, fill the canner about one-third to one-half full of water. Cover and bring to a boil to have it ready for the filled jars.

When the marmalade is cooked, use a jar lifter to remove the hot jars from the water.  Using a canning funnel, pour marmalade into sterilized jars, leaving about ¼” headroom in each jar.  Wipe the jar rims with a clean cloth. Seal jars with heated lids and fingertip-tightened ring bands.

Place jars in hot water bath wire basket, ensuring jars do not touch each other or fall over. Carefully lower basket into canner of hot water. Ensure the water level is at least 1” above the tops of jars, adding more boiling water as necessary. Cover with canner lid. Increase the heat to return the water to a rolling boil then decrease the heat to just keep the water at a rolling boil but not boiling over. Process half-pint jars in the hot water bath for 10 minutes, adjusting time for altitude. Start timing the processing from the point where a full rolling boil is reached after basket of jars has been added to the canner. At the end of the processing time, turn off heat and remove canner lid. Using a jar lifter, carefully remove the jars, one at a time, and transfer them to a wire rack to cool completely. Listen for the “pop” or “ping” sound as the bottles seal over the next few minutes or hours. The lids of properly sealed jars will curve downward.  Let jars rest, undisturbed, on wire rack for 12 hours. Store in cool, dark place. Refrigerate marmalade once opened.

Yield:  Apx. 6 half-pint bottles

*If you don’t have a candy thermometer, place 2-3 freezer-safe saucers in freezer. To test for doneness, place a small amount of marmalade on chilled saucer and swirl saucer around. Let marmalade sit, untouched, for about a minute, then gently push your finger through the marmalade.  If the marmalade holds its shape (i.e., does not immediately run back together after the finger has been removed from the marmalade), it is set and ready to bottle.  If not, continue to cook mixture, repeating the “chill” test about every 3 minutes or so (always removing the pot from the heat while conducting the chill test) until the marmalade passes the “chill” test.  Do not overcook as it will result in a very thick marmalade, dark in color.

Green Tomato Marmalade

Lemons, orange, and crushed pineapple turn green tomatoes into a glorious golden amber-colored sweet and savory spread for toast, biscuits, scones, or crackers.
Cuisine American
My Island Bistro Kitchen My Island Bistro Kitchen

Ingredients

  • 4 lbs green tomatoes cored, seeded, and diced or cut into small chunks (should equal apx. 9½ - 10 cups cut up)
  • lbs granulated sugar
  • lemons chopped + zest
  • 1 orange chopped + zest
  • 10 oz crushed pineapple with some of its juice
  • 2 ” piece of cinnamon stick
  • 4 oz maraschino cherries chopped (optional)

Instructions

  1. Wash tomatoes. Cut into sections and remove the stem end, core, seeds, and the watery/gelatinous sack around the seeds. Dice, or cut the tomato pieces into small chunks. Place in large bowl and add the sugar. Let stand for three hours to draw the juice from the tomatoes and allow the sugar to dissolve. Stir two to three times.
  2. Wash the lemons and orange well. Zest the lemons and oranges. Remove any seeds and cut lemons and orange into small pieces.
  3. Transfer tomato–sugar mixture and the liquid to a medium-sized stock pot. Add the chopped lemons and orange and the zest, along with the crushed pineapple. Add the piece of cinnamon stick. Bring to a boil over medium high temperature, stirring to prevent scorching. Immediately lower the temperature and cook, uncovered, at a slow gentle boil until mixture reads 220°F, sustained, on a candy thermometer*. Stir mixture regularly to prevent scorching. Be patient, this can take upwards of 2 hours. Remove the cinnamon stick after about an hour. When marmalade has reached its temperature, remove from heat and stir in the maraschino cherries, if using.
  4. While the marmalade is cooking, fill a large pot of water, about ¾ full. Place 6 half-pint jars, upright, into the water. Ensure the jars are fully submerged, are each filled with water, and that the water is at least an inch over the tops of the jars. Cover, bring to a boil, and boil for 10 minutes. Turn off heat and leave the jars in the hot water while the marmalade finishes cooking.

  5. Meanwhile, fill the canner about one-third to one-half full of water. Cover and bring to a boil to have it ready for the filled jars.
  6. When the marmalade is cooked, use a jar lifter to remove the hot jars from the water. Using a canning funnel, pour marmalade into sterilized jars, leaving about ¼” headroom in each jar. Wipe the jar rims with a clean cloth. Seal jars with heated lids and fingertip-tightened ring bands.
  7. Place jars in hot water bath wire basket, ensuring jars do not touch each other or fall over. Carefully lower basket into canner of hot water. Ensure the water level is at least 1” above the tops of jars, adding more boiling water as necessary. Cover with canner lid. Increase the heat to return the water to a rolling boil then decrease the heat to just keep the water at a rolling boil but not boiling over. Process half-pint jars in the hot water bath for 10 minutes, adjusting time for altitude. Start timing the processing from the point where a full rolling boil is reached after basket of jars has been added to the canner. At the end of the processing time, turn off heat and remove canner lid. Using a jar lifter, carefully remove the jars, one at a time, and transfer them to a wire rack to cool completely. Listen for the “pop” or “ping” sound as the bottles seal over the next few minutes or hours. The lids of properly sealed jars will curve downward.  Let jars rest, undisturbed, on wire rack for 12 hours. Store in cool, dark place. Refrigerate marmalade once opened.
  8. Yield: Apx. 6 half-pint bottles
  9. *If you don’t have a candy thermometer, place 2-3 freezer-safe saucers in freezer. To test for doneness, place a small amount of marmalade on chilled saucer and swirl saucer around. Let marmalade sit, untouched, for about a minute, then gently push your finger through the marmalade. If the marmalade holds its shape (i.e., does not immediately run back together after the finger has been removed from the marmalade), it is set and ready to bottle. If not, continue to cook mixture, repeating the “chill” test about every 3 minutes or so (always removing the pot from the heat while conducting the chill test) until the marmalade passes the “chill” test. Do not overcook as it will result in a very thick marmalade, dark in color.

Recipe Notes

After marmalade has completely cooled, if there are any jars on which the lids have not curved downward, refrigerate those jars and use the marmalade within a month.

For more great jam, jelly, and maramalade recipes from My Island Bistro Kitchen, click on the links below:

Peach Marmalade
Rhubarb Marmalade
Crabapple Jelly
Blueberry and Grand Marnier Jam
Gooseberry Jam
Zucchini Jam
Pumpkin Jam 

Pin Me To Pinterest!

Marmalade
Green Tomato Marmalade

Perfect Peach Blueberry Crisp Recipe

Summer Dessert
Peach Blueberry Crisp

There are so many options for summertime desserts.  I try to use fresh fruits in desserts throughout the summer season and often look for combinations that will work well together.  Some fruits just naturally complement each other, like blueberries and peaches, for example. Together, they make a fabulous Peach Blueberry Crisp!

Summer Berries
PEI Blueberries

We eagerly await the arrival of the peaches from the Niagara region as this is not a fruit commonly grown on PEI (though I know of one farmer who has been testing them with our growing season and did have some crop in 2017).

Peaches
Peaches

I live not far from a high bush blueberry u-pick and, in August, we have a steady diet of these lovely berries.

Blueberries
High Bush Blueberries

After I have had lots of the peaches and berries on their own, I tend to start looking for other ways in which to use them.

Summer Crisp Dessert
Perfect Peach and Blueberry Crisp

For this dessert, I have combined the blueberries with the peaches to create this lovely summer crisp dessert.  Much as I love the traditional apple crisp (click here for my recipe), I have to say that I think this one might just edge out the apple crisp for my favorite.  The peach and blueberry flavours work very well together.  In order to keep the color of the filling from being too dark, I use peaches as the predominant fruit and a much lesser amount of the blueberries as the secondary fruit to tease the tastebuds.

Use peaches that are fully ripe. They will be easier to peel and slice if they are dipped into hot water then immediately into ice cold water.  Slice the peaches into wedges about ½” – ¾” thick. You want to see lovely identifiable slices of peaches in the filling for presentation.

Blueberries
High Bush Blueberries

I like the use of the high bush blueberries in this dessert because they are large enough that they give a real flavour burst when they meet the palate.

I use cornstarch for the filling thickener instead of flour.  I find, especially for light-colored fruits, the cornstarch will allow for a more clear/transparent filling than will flour which will sometimes create a more murky or cloudy filling. In my view, the cornstarch renders a more silky textured filling. The addition of some cinnamon and nutmeg makes this a very aromatic dessert. It smells simply divine when it is baking!

Summer Desserts
Peach Blueberry Crisp

The streusel topping is easy to make and just takes standard pantry ingredients.  Chopped pecans can be added to the topping but they are optional.

This dessert can be made in either a baking pan or a casserole that has an 8-cup capacity as this will allow the crisp to cook evenly and, hopefully, not bubble out during baking.  I do, however, place a foil-lined baking sheet either directly under the baking pan(s) or on the rack below to catch any drips that may occur during baking.

Peach Blueberry Crisp

This dessert can be made in individual oven-safe baking dishes as well.

Peach Blueberry Crisp

I often serve this dessert plain but it can be dressed up with a dollop of whipped cream or a scoop of vanilla ice cream.

Summer Dessert
Peach Blueberry Crisp

[Printable recipe follows at end of posting]

Peach and Blueberry Crisp

Ingredients:

Streusel Topping:
¾ cup all-purpose flour (to make it gluten-free, use an equal amount of gluten-free 1-to-1 baking flour)
¾ cup light brown sugar
¾ cup quick rolled oats (to make it gluten-free, use the small-flake gluten-free rolled oats)
½ tsp baking soda
½ tsp salt
¼ tsp cinnamon
½ cup cold butter (no substitutes)
1/3 cup chopped pecans (optional)

Filling:
2 lbs fresh peaches
1 cup high bush blueberries
1½ tbsp lemon juice
½ tsp vanilla
2 tbsp light brown sugar
2 tbsp granulated sugar
3 tbsp cornstarch
¾ tsp cinnamon
Pinch nutmeg
Pinch salt

Method:

Streusal Topping:
In medium-sized bowl, combine, the flour, brown sugar, rolled oats, baking soda, salt, and cinnamon.  Mix well.  Cut in the cold butter with a pastry blender until mixture is crumbly.  Add the chopped pecans if using.  Cover and refrigerate until peach and blueberry filling is prepared.

Filling:  
Place oven rack in center of oven and preheat oven to 375°F.

Score an “X” about an inch long into the bottom of each peach. Dip peaches in hot water for apx. 1 – 1½  minutes then immediately dip them into a bowl of ice water for 20-30 seconds to shock them and stop them from cooking. Peel peaches and slice each peach into wedges ½” – ¾ thick”. This should equal approximately 5 cups cut peaches. Sprinkle peaches with lemon juice and toss gently to coat the peaches. Sprinkle with vanilla. Add the blueberries. Stir gently.

In small bowl, mix the brown and white sugars with the cornstarch, cinnamon, and salt. Mix into the peaches and blueberries, being careful not to break down the peach wedges.

Grease 8-cup capacity casserole dish or baking pan (or 6 – 8 small individual oven-safe serving-sized baking dishes).  Transfer filling to baking dish.  Sprinkle evenly with the streusel topping.

Bake for approximately 30 minutes or until topping is browned and juices from filling are bubbling.  Remove from oven and let crisp stand for 30-35 minutes before serving.  Add a dollop of whipped cream or a scoop of vanilla ice cream, if desired.

Yield:  6 – 8 servings

Peach and Blueberry Crisp

This summer crisp features plump blueberries and sweet peaches covered with a delicious buttery streusel topping. Serve plain or with a dollop of whipped cream or a scoop of vanilla ice cream.
Course Dessert
Cuisine American
Keyword Blueberry and Peach Crisp, Peach Blueberry Crisp, Summer Dessert
Servings 8
My Island Bistro Kitchen My Island Bistro Kitchen

Ingredients

Streusel Topping:

  • ¾ cup all-purpose flour to make it gluten-free, use an equal amount of gluten-free 1-to-1 baking flour
  • ¾ cup light brown sugar
  • ¾ cup quick rolled oats to make it gluten-free, use the small-flake gluten-free rolled oats
  • ½ tsp baking soda
  • ½ tsp salt
  • ¼ tsp cinnamon
  • ½ cup cold butter no substitutes
  • 1/3 cup chopped pecans optional

Filling:

  • 2 lbs fresh peaches
  • 1 cup high bush blueberries
  • tbsp lemon juice
  • ½ tsp vanilla
  • 2 tbsp light brown sugar
  • 2 tbsp granulated sugar
  • 3 tbsp cornstarch
  • ¾ tsp cinnamon
  • Pinch nutmeg
  • Pinch salt

Instructions

Streusal Topping:

  1. In medium-sized bowl, combine, the flour, brown sugar, rolled oats, baking soda, salt, and cinnamon. Mix well. Cut in the cold butter with a pastry blender until mixture is crumbly. Add the chopped pecans if using. Cover and refrigerate until peach and blueberry filling is prepared.

Filling:

  1. Place oven rack in center of oven and preheat oven to 375°F.
  2. Score an “X” about an inch long into the bottom of each peach. Dip peaches in hot water for apx. 1 - 1½ minutes then immediately dip them into a bowl of ice water for 20-30 seconds to shock them and stop them from cooking. Peel peaches and slice each peach into wedges ½” - ¾ thick”. This should equal approximately 5 cups cut peaches. Sprinkle peaches with lemon juice and toss gently to coat the peaches. Sprinkle with vanilla. Add the blueberries. Stir gently.
  3. In small bowl, mix the brown and white sugars with the cornstarch, cinnamon, and salt. Mix into the peaches and blueberries, being careful not to break down the peach wedges.
  4. Grease 8-cup capacity casserole dish or baking pan (or 6 - 8 small individual oven-safe serving-sized baking dishes). Transfer filling to baking dish. Sprinkle evenly with the streusel topping.
  5. Bake for approximately 30 minutes or until topping is browned and juices from filling are bubbling. Remove from oven and let crisp stand for 30-35 minutes before serving. Add a dollop of whipped cream or a scoop of vanilla ice cream, if desired.

Recipe Notes

Yield: 6 - 8 servings


Pin Me To Pinterest!

Summer Dessert
Peach and Blueberry Crisp


Peach and Blueberry Crisp

Classic Peach Pie Recipe

Peach Pie
Classic Peach Pie

One of the things I most look forward to in summer is all the fresh produce. I especially love all the seasonal fruits and berries because they make grand pies and pastry making is one of my favorite baking activities.  In August, we eagerly await the wonderful peaches that come from the Niagara region – the baskets of large yellow/orange plump, juicy peaches. One of the first things I make with the fresh peaches is a classic peach pie.

Ontario Peaches
Peaches

Today, my feature recipe is the classic fresh peach pie, simply sublime when served with a scoop of fine vanilla ice cream.  This is a perfect end to a lovely summer dinner. It’s like summer sunshine in a pie!

Classic Peach Pie
Classic Peach Pie

This recipe calls for about 2 pounds of peaches so, depending on their size, this translates into about 6-7 good-sized peaches. Choose peaches that are ripe, have a slight “give” to them when their flesh is gently pressed, and are free from blemishes, cuts, and bruises.  The peaches will be easier to peel if they are placed in hot water for about a minute then immediately dipped into ice cold water to stop them from cooking and to cool them enough to handle as they are peeled.

Peaches
Peaches

Peaches are very juicy but all that juice can make for a very “soupy” pie.  A soupy pie presents problems cutting and plating it. It’s not very appetizing to see a pie that has broken apart and gone “splat” on a plate! But, there is a remedy to prevent the pie becoming too soupy.  I recommend draining the cut peaches in a colander for 10-12 minutes.  The ones I drained for this pie released 2/3 cup of peach juice, far too much for a slice of pie to stay intact when cut.  The peaches will still release more juice as the pie bakes. What I do is reserve 2½ – 3 tablespoons of the peach juice and put it in to the filling to keep the pie from becoming too dense and dry.  I find this is just the right amount to give the consistency and texture of pie I am seeking, still lovely and juicy but not too solid.

Classic Peach Pie
Classic Peach Pie

The pie is not difficult to make and does not take any uncommon ingredients.  I do add a bit of lemon juice (which helps to slow down the peaches from turning brown) and a small amount of almond flavouring along with some cinnamon and nutmeg.  The addition of some finely grated orange peel goes well with the peach flavour but does not mask or overtake it – after all, we want the natural peach flavour to be the star in this pie.  The peaches are plenty sweet on their own so don’t require much additional sweetener.  I do add a small amount of granulated and brown sugar but not a whole lot because the pie would be sickeningly sweet. The addition of a small amount of brown sugar lends some richness to the filling. I do not use all brown sugar in this recipe because it will result in the lovely peach color being diminished.  Hence, the reason why I use a combination of both white and brown sugars.

Peach Pie
Classic Peach Pie

I use cornstarch as the thickener in this pie as I find it results in a more translucent filling than does flour which can become pasty and cause certain pie fillings (especially light-colored ones like peach pie) to have a cloudy appearance. The drained peaches are mixed with the dry ingredients and the reserved peach juice.  I recommend letting the mixed filling sit for about 5 minutes to give the sugars time to break down and blend well into the filling. After the filling has set for 5 minutes, gently stir it being careful not to break apart the peach wedges. This will ensure the dry ingredients are well blended and distributed throughout the filling.

For my pastry recipe along with hints and tips on making pie pastry, click here.  This pie lends itself well to either a full top crust or a lattice top, whichever you prefer.  To make this pie gluten-free, click here for my gluten-free pastry recipe.  The photos of the pie in this posting are made with this tender, flaky, and flavorful gluten-free crust.

Peach Pie
Classic Peach Pie

Make sure the oven rack is placed in the lower third of the oven.  This helps the bottom crust to bake better and prevents the top crust from browning too quickly.  If, however, the crust starts to brown too fast, simply loosely tent the tin foil over the pie as it continues to bake.

Peach Pie
Classic Peach Pie


[Printable recipe follows at end of posting]

Peach Pie

Ingredients:

Pastry for a two-crust pie to fit 9” pie plate

Approximately 2 pounds fresh peaches (about 6 – 7 large peaches), peeled and sliced into wedges about ½” to ¾” thick [This should equal 4½ – 5 cups sliced ripe peaches]
1½ tbsp lemon juice

1/3 cup + 1 tbsp granulated sugar
¼ cup light brown sugar, lightly packed
¼ cup cornstarch
½ tsp cinnamon
¼ tsp nutmeg
1/8 tsp salt
¾ tsp finely grated orange peel
1/8 tsp almond flavouring
1 large egg, lightly beaten
2 tbsp butter

1½ – 2 tsp cane sugar (optional for decoration)

Method:

Score an “X” about an inch long into the bottom of each peach. Dip peaches in hot water for 1 minute then immediately dip them into a bowl of ice water for 20-30 seconds to shock them and stop them from cooking. Peel peaches.

Place colander over deep bowl.  Cut the peaches into halves or quarters.  Gently pull the sections apart and remove and discard the stones.  Cut the peaches into wedges, lengthwise, between ½” and ¾“ thick and place in colander.  Sprinkle peaches with lemon juice and toss very gently to coat with the juice to prevent the peaches from rapidly browning.  Let the peaches drip for about 10-12 minutes to remove excess juice that would make the pie “soupy”.  Reserve 2½ – 3 tbsp of the peach juice and discard any remaining juice. Transfer the peaches to a large bowl.

In separate bowl, combine the sugars, cornstarch, cinnamon, nutmeg, salt, and grated orange rind. Mix well. Add the dry ingredients to the peaches and toss very gently to coat the peaches.  Add the almond flavoring to the 2½ – 3 tablespoons of reserved peach juice and sprinkle over the peaches.  Stir gently to mix ingredients. Let stand for 5 minutes then stir carefully again to ensure all ingredients are incorporated and equally distributed. Be careful not to break apart the peach wedges.

Roll out pastry into a circle approximately 12” – 13” round and about 1/8“ thick. Transfer pastry to a lightly greased 9” pie plate, fitting the dough over the bottom and sides of the plate, ensuring there are no air pockets.  Trim pastry flush with edge of pie plate.  Roll out top crust to same thickness.

Brush the bottom crust in the pie plate with a light coating of the beaten egg to keep the crust from getting soggy.  Reserve the remainder of the egg.

Transfer the peach filling to the prepared pie plate fitted with the pastry dough. Cut the butter into chunks and distribute on top of the filling.

Add ¾ tsp water to remaining beaten egg.  Brush the bottom crust edge all around the pie plate lightly with the egg-water mixture. Place top pie crust over peach filling. Trim excess pastry from the pie plate around the pie plate edge.  Press the edge of the pastry all around the pie plate rim with tines of a fork to adhere the top crust to bottom crust. Cut a “X” (or 2-3 slits) about 2” long in center of top crust to allow steam to escape as the pie bakes.  For additional venting, prick the pie in several places with the tines of the fork.  Lightly brush egg wash over top crust of pie.  If desired, sprinkle with 1½ – 2 tsp cane sugar.

Place pie in refrigerator for 30 minutes to allow filling to settle and to chill pastry to reduce shrinkage while it bakes.

Place oven rack in bottom third of oven.  Preheat oven to 425°F.  Place chilled pie on tinfoil-lined baking sheet to catch any drips should filling bubble out as pie bakes.  Transfer chilled pie to oven.  Bake for 15 minutes then reduce oven temperature to 375°F.  Bake for about 45 minutes or until crust is baked and golden brown and pie shows signs that filling is bubbling.  Check pie after it has been in the oven for about 30-35 minutes – if top crust is browning too quickly, loosely tent pie with tin foil.

Remove pie from the oven and transfer to wire rack to cool completely (minimum of 4 hours for the filling to set) before cutting and serving with a scoop of fine vanilla ice cream.

Yield:  1 – 9” double-crusted pie

Peach Pie

This classic homemade peach pie is like summer in a pie with its fresh ripe peaches encased in tender flaky pastry. Serve the pie with your favorite vanilla ice cream.
Course Dessert
Cuisine American
Servings 8
My Island Bistro Kitchen My Island Bistro Kitchen

Ingredients

  • Pastry for a two-crust pie to fit 9” pie plate
  • Approximately 2 pounds fresh peaches about 6 - 7 large peaches, peeled and sliced into wedges about ½” to ¾” thick [This should equal 4½ - 5 cups sliced ripe peaches]
  • tbsp lemon juice
  • 1/3 cup + 1 tbsp granulated sugar
  • ¼ cup light brown sugar, lightly packed
  • ¼ cup cornstarch
  • ½ tsp cinnamon
  • ¼ tsp nutmeg
  • 1/8 tsp salt
  • ¾ tsp finely grated orange peel
  • 1/8 tsp almond flavouring
  • 1 large egg, lightly beaten
  • 2 tbsp butter
  • 1½ - 2 tsp cane sugar optional for decoration

Instructions

  1. Score an “X” about an inch long into the bottom of each peach. Dip peaches in hot water for 1 minute then immediately dip them into a bowl of ice water for 20-30 seconds to shock them and stop them from cooking. Peel peaches.
  2. Place colander over deep bowl. Cut the peaches into halves or quarters. Gently pull the sections apart and remove and discard the stones. Cut the peaches into wedges, lengthwise, between ½” and ¾“ thick and place in colander. Sprinkle peaches with lemon juice and toss very gently to coat with the juice to prevent the peaches from rapidly browning. Let the peaches drip for about 10-12 minutes to remove excess juice that would make the pie “soupy”. Reserve 2½ - 3 tbsp of the peach juice and discard any remaining juice. Transfer the peaches to a large bowl.
  3. In separate bowl, combine the sugars, cornstarch, cinnamon, nutmeg, salt, and grated orange rind. Mix well. Add the dry ingredients to the peaches and toss very gently to coat the peaches. Add the almond flavoring to the 2½ - 3 tablespoons of reserved peach juice and sprinkle over the peaches. Stir gently to mix ingredients. Let stand for 5 minutes then stir carefully again to ensure all ingredients are incorporated and equally distributed. Be careful not to break apart the peach wedges.
  4. Roll out pastry into a circle approximately 12” - 13” round and about 1/8“ thick. Transfer pastry to a lightly greased 9” pie plate, fitting the dough over the bottom and sides of the plate, ensuring there are no air pockets. Trim pastry flush with edge of pie plate. Roll out top crust to same thickness.
  5. Brush the bottom crust in the pie plate with a light coating of the beaten egg to keep the crust from getting soggy. Reserve the remainder of the egg.
  6. Transfer the peach filling to the prepared pie plate fitted with the pastry dough. Cut the butter into chunks and distribute on top of the filling.
  7. Add ¾ tsp water to remaining beaten egg. Brush the bottom crust edge all around the pie plate lightly with the egg-water mixture. Place top pie crust over peach filling. Trim excess pastry from the pie plate around the pie plate edge. Press the edge of the pastry all around the pie plate rim with tines of a fork to adhere the top crust to bottom crust. Cut a “X” (or 2-3 slits) about 2” long in center of top crust to allow steam to escape as the pie bakes. For additional venting, prick the pie in several places with the tines of the fork. Lightly brush egg wash over top crust of pie. If desired, sprinkle with 1½ - 2 tsp cane sugar.
  8. Place pie in refrigerator for 30 minutes to allow filling to settle and to chill pastry to reduce shrinkage while it bakes.
  9. Place oven rack in bottom third of oven. Preheat oven to 425°F. Place chilled pie on tinfoil-lined baking sheet to catch any drips should filling bubble out as pie bakes. Transfer chilled pie to oven. Bake for 15 minutes then reduce oven temperature to 375°F. Bake for about 45 minutes or until crust is baked and golden brown and pie shows signs that filling is bubbling. Check pie after it has been in the oven for about 30-35 minutes - if top crust is browning too quickly, loosely tent pie with tin foil.
  10. Remove pie from the oven and transfer to wire rack to cool completely (minimum of 4 hours for the filling to set) before cutting and serving with a scoop of fine vanilla ice cream.

Recipe Notes

Yield: 1 - 9” double-crusted pie


For other great pie recipes from My Island Bistro Kitchen, click on the links below:

Rustic Apple Pie
Blueberry Cream Cheese Pie
Raspberry Cream Cheese Pie
Strawberry-Rhubarb Pie
Squash Pie
Glazed Strawberry Pie
Rustic Rhubarb Pie
Coconut Cream Pie
Mock Cherry Pie
Gluten-free Apple Pie


How to Make Dill Pickles

Pickles
Dill Pickles

Dill pickles are one of the easiest pickles to make. Cold-packed into hot sterilized jars, this recipe transforms tiny 3” – 4” cucumbers into tangy pickles that, for any dill lover, are the quintessential pickles to accompany many sandwiches and burgers.

This recipe is sized with the smaller household in mind. Many don’t have large storage capacity for big batches of pickles such as our ancestors made and stored in their cold rooms or cellars. Yet other households are comprised of only one or two people so they don’t need large batches of pickles but still want to have a taste of homemade goodness that comes from home preserving.

Dill Pickles
Dill Pickles

Freshness Counts with Pickling Cucumbers!

As with any pickle recipe, freshness of ingredients is key. That means the cucumbers should, ideally, be processed the same day they are picked from the vine or, certainly, within 24 hours. Otherwise, the cucumbers start to lose their flavour and get soft and punky and, as we all know, dill pickles are meant to have crunch.

Use Pickling Vinegar

It is very important to use vinegar which is made especially for the pickling process. It will usually have 7% acidity, making it stronger than table vinegar. This helps to preserve the pickles longer. Most large grocery stores will stock this vinegar, especially around “pickling time” in late summer or fall. The container should state that it is “pickling vinegar”.

Pickling Vinegar

Use Pickling Salt, Not Table Salt, in Pickles

One of the biggest tips I have for pickling is to never use table salt in the pickling process. Always use proper pickling salt. This is a coarse salt specifically for pickling and it will be marked as such on the package label. Apart from it being way too salty for pickling, iodized table salt can cause some discoloration of the cucumbers and will likely form a cloudy brine. The brine should be bright and clear. Table salt, because of its fine texture is too easily absorbed into the cucumbers, resulting in overly salty pickles. I can always tell if someone has used table salt in making pickles just by simply looking at the bottles of pickles – the contents of those bottles just do not have an appetizing look to them.

Coarse/Pickling Salt

Preparing the Jars 

The jars should be examined to ensure they are free of cracks, chips, and nicks. They should then be washed, rinsed, and sterilized. I sterilize mine in a pot of boiling hot water on the stove. Use a jar lifter to place the jars, upright in the water, holding each one steady until it fills with water. Bring the water back to a boil, reduce the heat slightly to prevent boil-overs, and boil the jars gently for 10 minutes from this point. Turn the heat to simmer and leave the jars in the water until they are ready to be filled with the cucumbers. The jars must be kept hot because, once filled, they will be going into a hot water bath and cold jars meeting up with boiling water will crack.

Making the Brine

The process I use to make my dill pickles is quite simple. This involves making a simple brine of equal parts of pickling vinegar and water along with some pickling salt, a bit of sugar, and some pickling spices. To keep the brine clear, bundle the pickling spice into a double (or triple) layer of cheesecloth. Gather up this little sachet and tie with string. Once this brine has simmered for about 15 minutes, discard the spice sachet and bayleaf. The brine is then ready to be poured over the cucumbers.

Spice Sachet
Preparing the Spice Sachet
Pickling Spice Sachet

Preparing the Cucumbers and Filling the Jars

The small 3” – 4” dill-sized cucumbers can be left whole or they can be sliced in two (or even quartered) lengthwise or they can be sliced into “coins”. Just note that the pickles are likely to have more crunch if the cucumbers are left whole. Make sure to trim the blossom end of each cucumber by 1/8” – these blossom tips have enzymes that can lead to limp, punky pickles. Pricking each cucumber 3-4 times with the tines of a fork will help the vinegar brine penetrate the cucumbers better resulting in more flavorful pickles.

Dill Pickles
Dill Pickles

The point where you start to place ingredients into the jars is the point where it is necessary to work along quickly because the jars cannot be allowed to get cold before they go into the hot water bath. Ensuring all ingredients and pickling equipment are laid out before starting the process and following a set order will help this process move along quickly.  Further along in this posting, you will find an outline of the step-by-step sequence I follow to quickly get the jars filled while they are still hot and then into the hot water bath.

A slightly smashed garlic clove along with some mustard seed and a whole clove are first placed in the bottom of each jar. Where, in the jars, the small bunch of feathery dill fronds and the umbrella-shaped seed head of the dill plant are placed is a matter of personal preference. I like to place the dill fronds on one side of the jar and the seed head on the opposite side. These can, of course, be placed on the bottom of the jar or the feathery dill fronds on the bottom and the dill head on top of the cucumbers. The taste will be the same. However, if you like your jars to have a nice appearance that immediately signifies they are dill pickles, placing the fronds and dill head so they are visible will do the trick!

Ensure the cucumbers are tightly packed, compactly, into the jars but not so tight that they are squished. Once all the ingredients are placed in the jar, pour the hot brine into each jar, leaving ½” head space at the top of each jar.  A chopstick, or small non-metal spatula, is useful to remove any air bubbles that may appear and more of the brine may need to be added, as necessary, to bring it to about ½“ from the jar rim.

Add a Grape Leaf to Keep the Dills Crunchy

I add a grape leaf on top of the cucumbers in each jar. This is an old trick to keep the cucumbers crisp – the tannin-rich grape leaves have enzymes that help to keep the cucumbers crunchy. Some say, with the removal of the blossom ends of the cucumbers, it is not necessary to add the grape leaves to the jars but I have access to them so I add them and my dill pickles always turn out super crunchy.

Heat the Jar Lids and Metal Ring Bands

Always use brand new metal jar lids; never re-use them for pickling purposes as their seal is only meant for single use. Check the metal ring bands (which can be re-used multiple times) to ensure they have no dents or nicks in them and there is no rust. The jar lids are heated in hot simmering water, just until they are hot and the gaskets softened —  3 – 4 minutes should do it. Heating the lids too long or in rapidly boiling water will weaken the rubber on them causing them not to seal properly. Wipe each jar rim with a clean, damp cloth before applying the lids, rubber side down, to the jar tops. Tighten the metal ring bands, fingertip tight. At this point, the dills are ready, without delay, for their hot water bath.

Heating Jar Lids
Heating Jar Lids

The Hot Water Bath

Processing the jars of dills stabilizes the contents for longer shelf life. Make sure the hot water canner is ready to go with the boiling water in it by the time you fill the jars. Load the filled jars into the metal basket that comes with the canner. The jars should remain upright during the hot water bath process and they should not touch each other. Once the basket is lowered into the boiling water, ensure the water level is at least 1” above the jar tops. Add more boiling water, if necessary, to bring the water to this level.

I recommend following your canner manufacturer’s instructions for the canning process as the length of time the jars need to be processed will depend on the altitude of your locale. Here on PEI, I process my half-pint jars of dills for 10 minutes and I start the timing from the time the hot water returns to a full rolling boil after the basket of jars has been placed in the canner of hot water. Once the 10 minutes is up, remove the jars, one by one, with a jar lifter and place them on a wire rack to finish cooling completely.

Listen for the “pop” or “ping” sound as the bottles seal. Sometimes, this will take place almost immediately and sometimes it can take a few hours. The lids of properly sealed jars will curve downward. Let the jars rest, undisturbed, on the wire cooling rack for 12 hours. Then, let the sealed jars stand in a cool, dark place for 6 weeks before opening. This gives time for the dill flavour to develop fully.

Dill Pickles
Dill Pickles

The Sequence

To help organize your work to make these pickles, I offer the following suggested order for the sequence so that the steps happen when they should and the hot jars do not have a chance to cool before they are filled and placed in the hot water bath.

  1. Fill the hot water canner with hot tap water, place it on the stove, and start the heating process to get it to the boiling point. Starting with hot tap water will reduce the amount of time it takes to get the large canner of water to a boil. Make sure the water is at the boiling point before the wire basket of filled bottles is placed in the canner.
  2. Heat a pot of boiling water to sterilize the jars. Wash jars. Boil them gently for at least 10 minutes. Keep them, at simmer level, in the hot water until they are needed for filling.
  3. Wash and cut blossom ends from cucumbers and prick each with tines of a fork, 3-4 times.
  4. Gather spices for the jars and prepare garlic cloves.
  5. Start making the brine.
  6. Make a quick trip to the garden to pick the fresh dill heads and fronds.
  7. As the brine is nearing completion, remove the sterilized jars from the hot water and place the garlic, spices, dill fronds and dill head in each jar. Pack in the cucumbers.
  8. Heat lids in small pan of hot water. Boil extra water in case it is needed to top up hot water canner to 1” above jar tops.
  9. Pour brine over cucumbers, remove air bubbles with a chopstick (or small non-metal spatula), and top up with more brine, as necessary. Add the grape leaf to top of each jar. Wipe the jar rims with clean damp cloth.
  10. Place lids and metal ring bands on jars. Place jars in canner basket and lower into canner of hot water. Add any additional water necessary to bring water level to 1” above jar lids. Cover. Bring canner water back to full rolling boil. Start timing the canning time from this point.
  11. Have wire rack set out for bottles as they come out of the canner.

Note: The garlic clove is likely to turn a blue-green-gray color. Don’t be alarmed by this – it’s just the effect of the acid from the vinegar coming into contact with the garlic.

Dill Pickles
Dill Pickles
[Printable recipe follows at end of posting]

Dill Pickles

Ingredients:

2 lbs – 3” – 4” pickling cucumbers, freshly picked and washed

1 tbsp pickling salt
1¼ cups + 1 tbsp pickling vinegar
1¼ cups + 1 tbsp water
2 tbsp granulated sugar
½ tbsp pickling spice, gathered into double (or triple) layer of cheesecloth and tied into spice sachet
1 bay leaf

3 – 4 whole cloves
1 tsp mustard seed, divided equally among the jars
3 – 4 small garlic cloves, slightly smashed
Fresh dill heads, one per jar along with small bunches of feathery dill fronds
Grape leaves, medium-sized, 1 per jar

3 – 4 half-pint jars, lids, and metal ring bands (the number of jars needed will depend on the size of the cucumbers, whether they are sliced or left whole, and how compactly they are fit into the jars)
1 chopstick

Method:

Wash and trim 1/8“ from blossom end of each cucumber. Prick cucumbers 3-4 times with tines of a fork. Leave cucumbers whole or cut into two or four spears, lengthwise (or slice into “coins”). Fill the canner with hot tap water and heat to boiling point while making the brine. Begin sterilizing the jars in large pot of hot water to have them ready when brine is heated.

To make the brine, combine the pickling salt, vinegar, water, sugar, pickling spice sachet, and bay leaf in small stockpot. Bring to a boil over medium-high heat. Immediately reduce heat to low and cook brine, uncovered, for 15 minutes, stirring periodically. Remove from heat and discard pickling sachet and bay leaf.

Place 1 whole clove, ¼ to 1/3 teaspoon mustard seed (divide the teaspoon of seeds equally between number of jars used), and 1 small slightly smashed garlic clove in each hot, sterilized jar. Place a small bunch of feathery dill fronds along one side of the jar and one umbrella-shaped dill head on the opposite side of the jar. Fill the jars with the cucumbers, packing tightly (but not squashing them), and keeping the dill fronds and dill head in place against the sides of the jars.

Pour the hot brine into each jar, filling to within ½ inch from jar rim (head space). Use a chopstick (or small non-metal spatula) to remove any air bubbles that may have formed in the brine. Add more brine, if necessary, to bring it to ½“ from the jar rim. Add 1 grape leaf to top of each jar, pressing it below the surface of the brine, to keep cucumbers crisp. Wipe each jar rim with a clean, damp cloth. Seal the jars with heated lids. Screw on metal ring bands, fingertip tight.

Place jars in hot water bath basket, ensuring jars do not touch each other or fall over. Lower basket into canner of hot water. Ensure the water level is at least 1″ above the jar tops, adding more water as necessary. Cover with canner lid. Increase the heat to return the water to a rolling boil then decrease the heat to just keep the water at a rolling boil but not boiling over. Process half-pint jars in the hot water bath for 10 minutes, adjusting time for altitude. Start timing the processing from the point where a full rolling boil is reached after basket of jars has been added to the canner. Turn off heat and remove canner lid. Using a jar lifter, carefully remove the jars, one at a time, and transfer them to a wire rack to cool completely. Listen for the “pop” or “ping” sound as the bottles seal over the next few minutes or hours. The lids of properly sealed jars will curve downward. Let jars rest, undisturbed, on wire rack for 12 hours. For maximum dill flavour, let sealed jars stand in cool, dark place for 6 weeks before opening.

Yield:  Approximately 3- 4 half-pint jars

Dill Pickles

These easy-to-make dill pickles combine dill, garlic, and pickling spices to transform tiny cucumbers into crunchy pickles that, with their tangy flavour, are a great accompaniment to many sandwiches and burgers.
My Island Bistro Kitchen My Island Bistro Kitchen

Ingredients

  • 2 lbs – 3” - 4” pickling cucumbers, freshly picked and washed
  • 1 tbsp pickling salt
  • cups + 1 tbsp pickling vinegar
  • cups + 1 tbsp water
  • 2 tbsp granulated sugar
  • ½ tbsp pickling spice, gathered into double (or triple) layer of cheesecloth and tied into spice sachet
  • 1 bay leaf
  • 3 - 4 whole cloves
  • 1 tsp mustard seed, divided equally among the jars
  • 3 – 4 small garlic cloves, slightly smashed
  • Fresh dill heads, one per jar along with small feathery dill fronds
  • Grape leaves, medium-sized, 1 per jar
  • 3 – 4 half-pint jars lids, and metal ring bands (the number of jars needed will depend on the size of the cucumbers, whether they are sliced or left whole, and how compactly they are fit into the jars)
  • 1 chopstick (or small non-metal spatula)

Instructions

  1. Wash and trim 1/8“ from blossom end of each cucumber. Prick cucumbers 3-4 times with tines of a fork. Leave cucumbers whole or cut into two or four spears, lengthwise (or slice into “coins”). Fill the canner with hot tap water and heat to boiling point while making the brine. Begin sterilizing the jars in large pot of hot water to have them ready when brine is heated.
  2. To make the brine, combine the pickling salt, vinegar, water, sugar, pickling spice sachet, and bay leaf in small stockpot. Bring to a boil over medium-high heat. Immediately reduce heat to low and cook brine, uncovered, for 15 minutes, stirring periodically. Remove from heat and discard pickling sachet and bay leaf.
  3. Place 1 whole clove, ¼ to 1/3 teaspoon mustard seed (divide teaspoon of mustard seed equally between number of jars used), and 1 small slightly smashed garlic clove in each hot, sterilized jar. Place a small bunch of feathery dill fronds along one side of the jar and one umbrella-shaped dill head on the opposite side of the jar. Fill the jars with the cucumbers, packing tightly (but not squashing them), and keeping the dill fronds and dill head in place against the sides of the jars.

  4. Pour the hot brine into each jar, filling to within ½ inch from jar rim (head space). Use a chopstick (or small non-metal spatula) to remove any air bubbles that may have formed in the brine. Add more brine, if necessary, to bring it to ½“ from the jar rim. Add 1 grape leaf to top of each jar, pressing it below the surface of the brine, to keep cucumbers crisp. Wipe each jar rim with a clean, damp cloth. Seal the jars with heated lids. Screw on metal ring bands, fingertip tight.

  5. Place jars in hot water bath basket, ensuring jars do not touch each other or fall over. Lower basket into canner of hot water. Ensure the water level is at least 1" above the jar tops, adding more water as necessary. Cover with canner lid. Increase the heat to return the water to a rolling boil then decrease the heat to just keep the water at a rolling boil but not boiling over. Process half-pint jars in the hot water bath for 10 minutes, adjusting time for altitude. Start timing the processing from the point where a full rolling boil is reached after basket of jars has been added to the canner. At the end of the processing time, turn off heat and remove canner lid. Using a jar lifter, carefully remove the jars, one at a time, and transfer them to a wire rack to cool completely. Listen for the “pop” or “ping” sound as the bottles seal over the next few minutes or hours. The lids of properly sealed jars will curve downward. Let jars rest, undisturbed, on wire rack for 12 hours. For maximum dill flavour, let sealed jars stand in cool, dark place for 6 weeks before opening.

Recipe Notes

Yield: Approximately 3- 4 half-pint jars

Be sure to read blog posting that accompanies this recipe for more information on the procedure to make dill pickles.

For other great pickle, relish, and chow recipes from My Island Bistro Kitchen, click on the links below:

Mustard Pickles
Bread and Butter Pickles
Pickled Beets
Mustard Beans
Green Tomato Chow
Rhubarb Relish

Pin Me To Pinterest!

Dill Pickles
Dill Pickles

Sensational Strawberry Lemonade Recipe

Lemonade
Strawberry Lemonade

One of the wonderful things about lemonade is that it can be served simply as is or it can be flavoured with fruits in season such as I am doing today by making strawberry lemonade. How fabulous is that natural red color in the lemonade!

Lemonade
Strawberry Lemonade

This strawberry lemonade is great on a scorching hot day when you need to stay hydrated and crave a thirst-quenching drink.  The lemonade starts with the making of a simple syrup of water and sugar.  This gives the drink that lovely silky smooth texture which could not be gotten by simply combining sugar with cold water – no matter how much you stir it, sugar and cold water will never fully mix and you will be left with a grainy texture drink.  By boiling the sugar and water to make the syrup, you are sure the sugar is fully dissolved.  I find using super-fine sugar (which you may know as caster sugar, instant dissolving sugar, or berry sugar) is the best to use to make simple syrup although regular granulated sugar may also be used. Typically, a simple syrup for drinks is made with a 1:1 ratio of sugar to water.  However, I find that that is too much sugar for my taste in this lemonade so I use 1 cup of the superfine sugar to 1 1/2 cups water.

For this recipe, purée the strawberries, add some water to them along with freshly squeezed lemon juice and the simple syrup.  In order to get rid of the hundreds of little tiny strawberry seeds and to have a clear drink, the mixture will need to be strained through a very fine wire mesh sieve.  You’ll be amazed at how many seeds strawberries have!

Lemonade
Strawberry Lemonade over Ice

This is a delightful summertime drink served over ice and it has an absolutely fabulously rich colour that is all natural thanks to the ruby red strawberries.  To add a bit of fizz to the drink, mix half a glass with the lemonade and half with your favorite clear soda (lemon-lime is especially good). Add ice and garnish with a fresh strawberry and/or lemon wedge or wheel.

Lemonade
Strawberry Lemonade

This is often a drink I make to take along on picnic outings. It’s handy to have frozen because, as it thaws on the way to the picnic location, it also helps to keep the food cold.

[Printable recipe follows at end of posting]

Strawberry Lemonade

Ingredients:

1½ cup water
1 cup super-fine sugar (aka caster sugar or instant dissolving sugar)

1 cup freshly squeezed lemon juice
2 tbsp coarsely grated lemon rind

3 cups strawberries, sliced
2 cups water
Pinch salt

Method:

For the simple syrup:  In small saucepan, combine the 1 1/2 water and 1 cup sugar together.  Bring to a boil over medium heat, stirring constantly, until the sugar is completely dissolved.  Reduce heat to medium-low and boil gently for 3-4 minutes, stirring occasionally.  Remove from heat and cool to room temperature (apx. 30-40 minutes). Add the lemon juice and lemon rind. Let mixture stand for at least an hour (or up to three hours) to allow the flavors to blend.  Strain mixture twice through a fine mesh sieve to remove the lemon pulp and rind.  Discard the pulp and rind.

For the strawberry purée:  Place strawberries in large blender.  Purée until smooth.  Slowly add in the 2 cups of water, continuing to pulse/purée until mixture is smooth.  Slowly add the strained simple syrup with lemon juice and a pinch of salt.  Purée until all ingredients are well combined.  Strain mixture through very fine wire mesh sieve to remove the strawberry seeds.

To assemble:  Transfer lemonade to a large jug or bottle.  Chill.

To serve:  Stir the chilled lemonade. Fill a tall glass approximately one-half full of ice cubes and add the lemonade.  Garnish with a fresh strawberry or lemon wheel, if desired.  Another serving suggestion includes filling a glass half full of strawberry lemonade and topping with clear soda such as lemon-lime.

Lemonade will keep, covered, in the refrigerator for 3-4 days. Freezes well.

Yield:  Approximately 6½ – 7 cups

Strawberry Lemonade

This “summer in a bottle” lemonade makes the most of fresh in-season strawberries and is a colorful, refreshing, and thirst-quenching summertime sipper when served over ice.
Course Drinks
Cuisine American
Keyword Lemonade
Servings 8
My Island Bistro Kitchen My Island Bistro Kitchen

Ingredients

  • cup water
  • 1 cup super-fine sugar (aka caster sugar or instant dissolving sugar)
  • 1 cup freshly squeezed lemon juice
  • 2 tbsp coarsely grated lemon rind
  • 3 cups strawberries, sliced
  • 2 cups water
  • Pinch salt

Instructions

  1. For the simple syrup: In small saucepan, combine the 1½ water and 1 cup sugar together. Bring to a boil over medium heat, stirring constantly, until sugar is completely dissolved. Reduce heat to medium-low and boil gently for 3-4 minutes, stirring occasionally. Remove from heat and cool to room temperature (apx. 30-40 minutes). Add the lemon juice and lemon rind. Let mixture stand for at least an hour (or up to three hours) to allow the flavors to blend. Strain mixture twice through a fine mesh sieve to remove the lemon pulp and rind. Discard the pulp and rind.
  2. For the strawberry purée: Place strawberries in large blender. Purée until smooth. Slowly add in the 2 cups of water, continuing to pulse/purée until mixture is smooth. Slowly add the strained simple syrup with lemon juice and a pinch of salt. Purée until all ingredients are well combined. Strain mixture through very fine wire mesh sieve to remove the strawberry seeds.
  3. To assemble: Transfer lemonade to a large jug or bottle. Chill.
  4. To serve: Stir the chilled lemonade. Fill a tall glass approximately one-half full of ice cubes and add the lemonade. Garnish with a fresh strawberry or lemon wheel, if desired. Another serving suggestion includes filling a glass half full of strawberry lemonade and topping with clear soda such as lemon-lime.
  5. Lemonade will keep, covered, in the refrigerator for 3-4 days. Freezes well. Yields approximately 6 1/2 - 7 cups lemonade.


For other great Lemonade recipes from My Island Bistro Kitchen, click on the following links:

Lemonade
Blueberry Lemonade
Rhubarb Lemonade

Pin Me To Pinterest!

Lemonade
Strawberry Lemonade