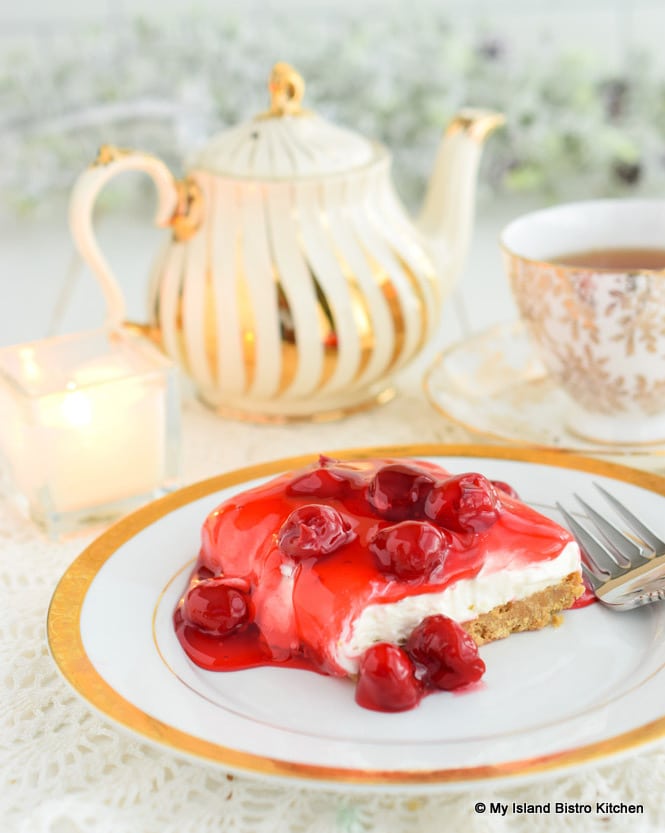
No-bake Cherry Cheesecake has long been a favorite dessert at family gatherings, potlucks, and church, office, and community events. It’s very easy to make, does not take a lot of ingredients, and is showy and super tasty. Continue reading No Bake Cherry Cheesecake→
Here is my suggested meal plan for the upcoming week which is Week 6 in our meal planning series. If you want to check out previous weeks’ meal plans, hotlinks to them are included at the end of this posting. Continue reading Meal Planning – Week 6→
This Classic Banana Bread is super moist and tasty. Best of all, it’s really easy to make and, apart from the bananas, takes only standard pantry ingredients. It’s the perfect way to use up extra ripe bananas since Banana Bread is best made with overripe bananas. They have so much flavor and add the extra moisture for which banana bread is known. Continue reading Classic Banana Bread Recipe→
Here is my suggested meal plan for the upcoming week which is Week 5 in our meal planning series. If you want to check out previous weeks’ meal plans, hotlinks to them are included at the end of this posting.
As with previous meal plans I have published, I’ve provided a list of the main ingredients for each recipe that, for the most part, would probably involve a shopping trip to the supermarket for most. However, as always, read each recipe thoroughly and carefully to create your own list as I have not listed what I consider to be “staple” items like regular milk, butter, eggs, flour, sugar, butter/shortening, oil, spices, etc.
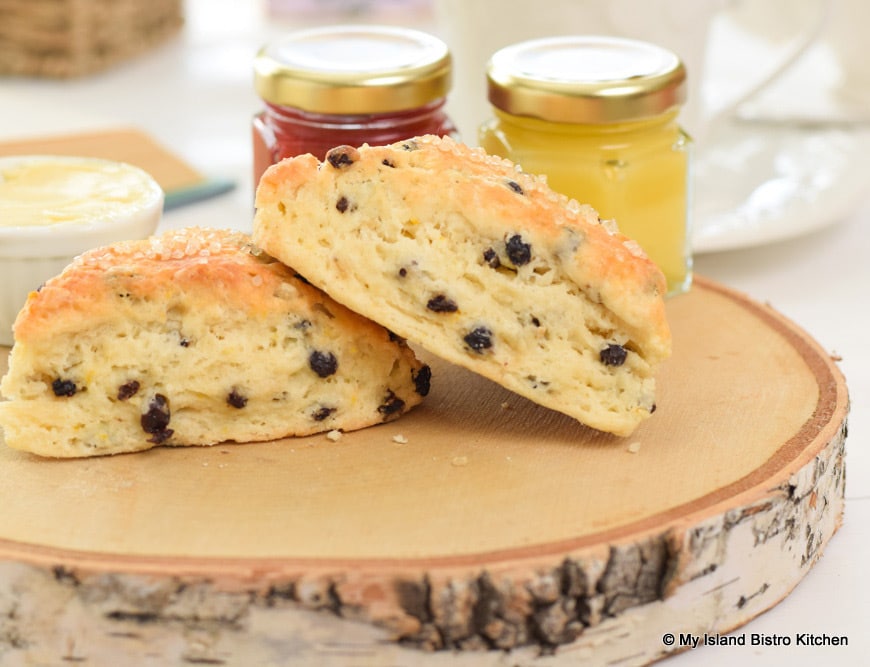
Warm, buttery-rich scones straight from the oven. Can’t you just conjure up the mouthwatering scent! These Currant and Orange Scones are light and flaky and have an internal crumb that is moist, soft, and tender. Continue reading Currant and Orange Scones→
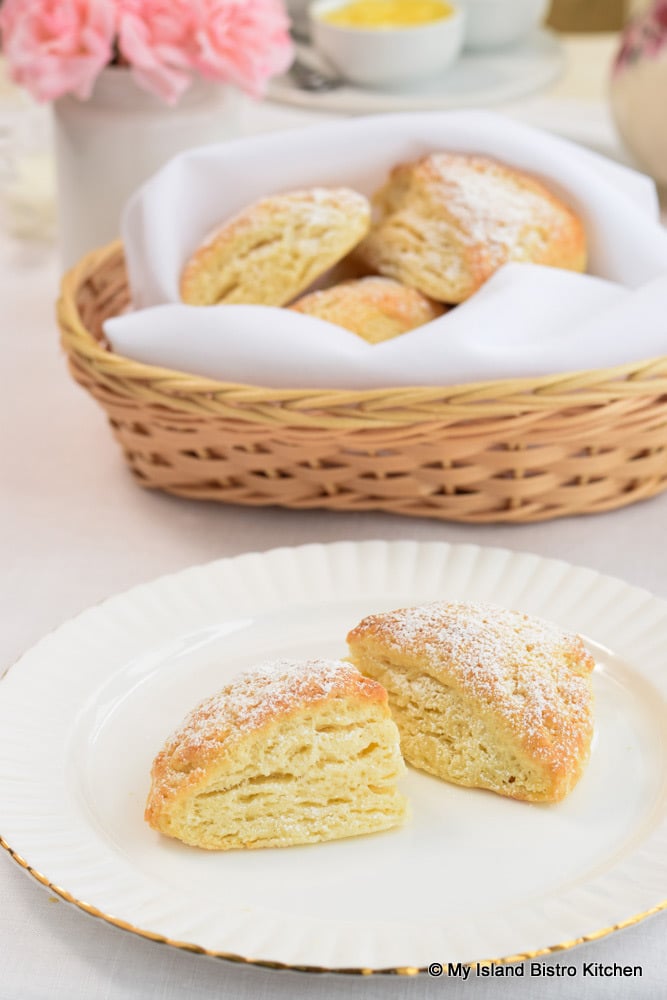
There is just something absolutely delightful about fresh scones still warm from the oven. Ever so much better they are when slathered with a dollop of either clotted cream or English double cream and a favorite jam or fruit curd such as lemon curd, for example. This posting today is all about how to make perfect scones. Continue reading How To Make Perfect Scones→
Today marks my 8th Blogiversary. Eight years since I began My Island Bistro Kitchen food blog. My, how time does fly!
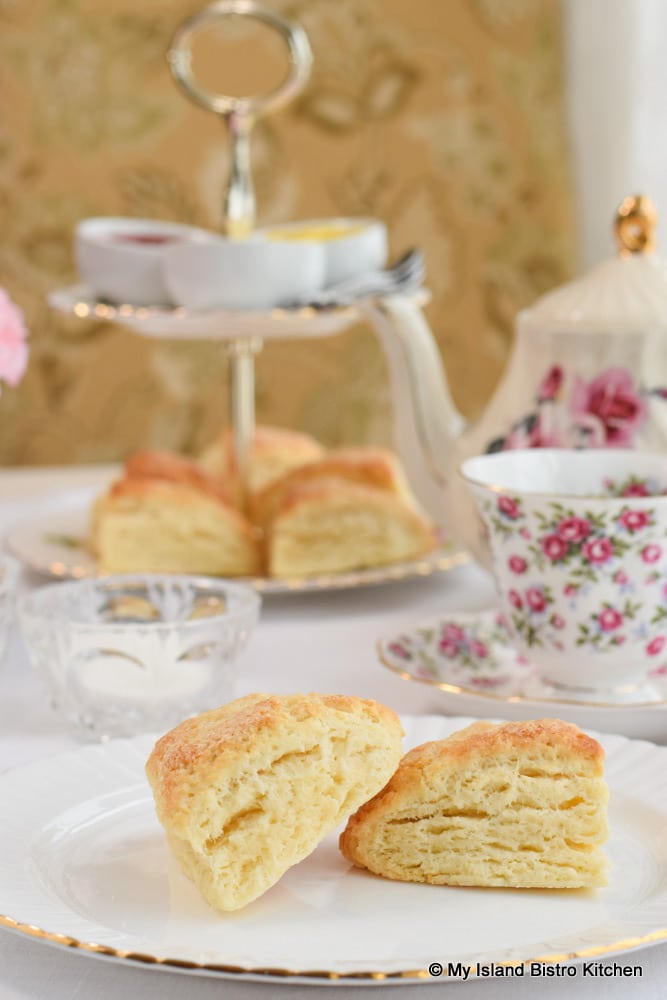
In previous years, I marked this day with some kind of special sweet treat. You can check those out by clicking on the links at the end of this posting. It has occurred to me that I have never celebrated the occasion with a simple Cream Tea. And, regular followers of my blog will know I love anything related to a tea event! So, a Cream Tea it is to celebrate my 8th Blogiversary! Continue reading A Cream Tea to Celebrate 8th Blogiversary→
I am not a fan of muffins that have a cake-type texture. I like the muffins, whether wheat-based or gluten-free, to be deli-or café-style, hearty, and generously sized. That’s exactly how I have created these tasty Gluten-free Blueberry Zucchini Muffins to be! Continue reading Gluten-free Blueberry Zucchini Muffins→
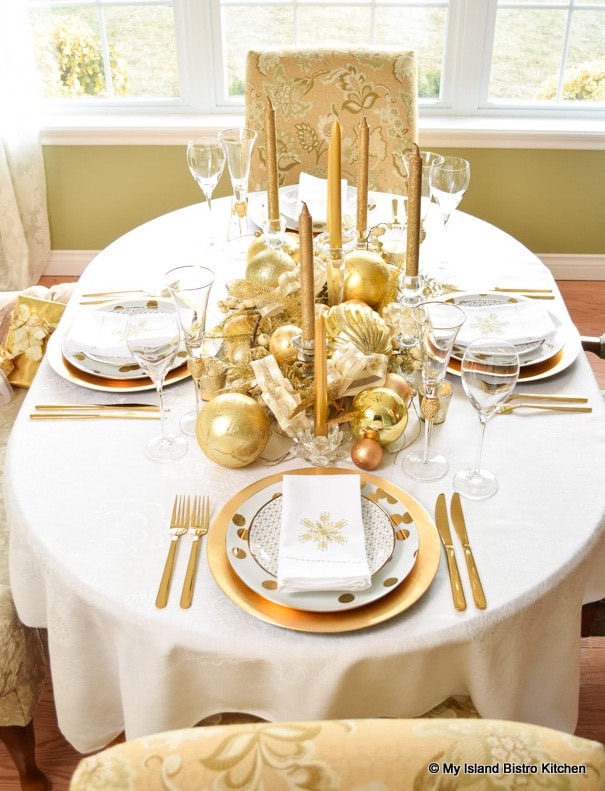
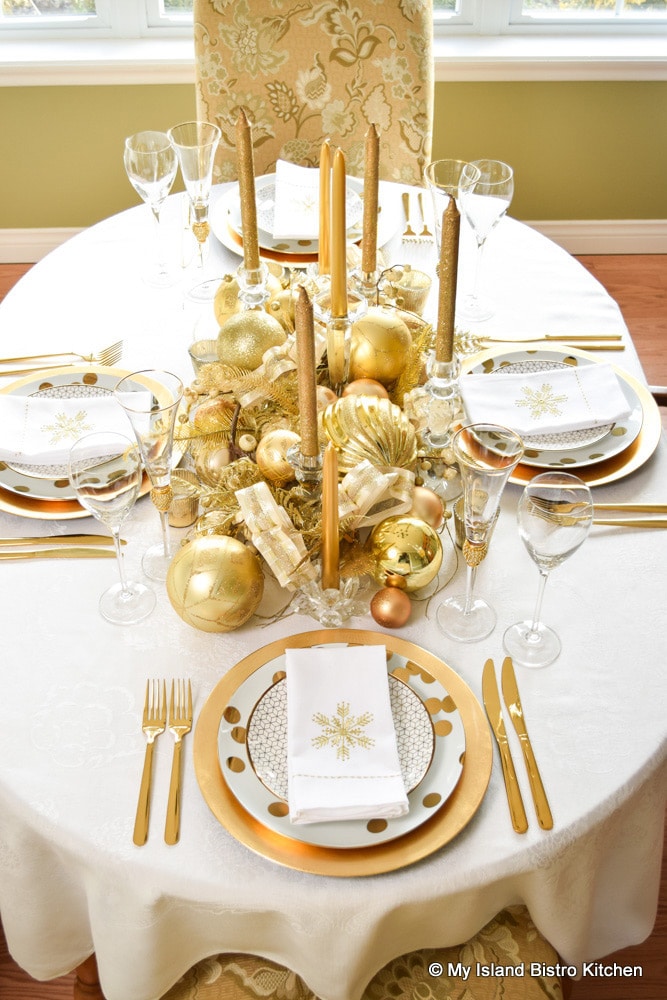
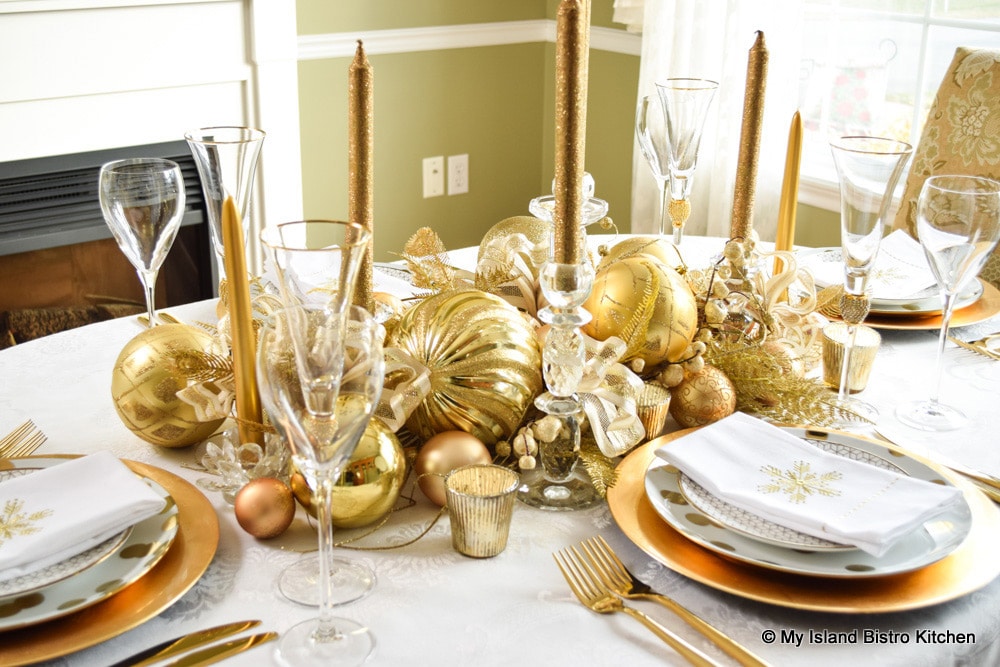
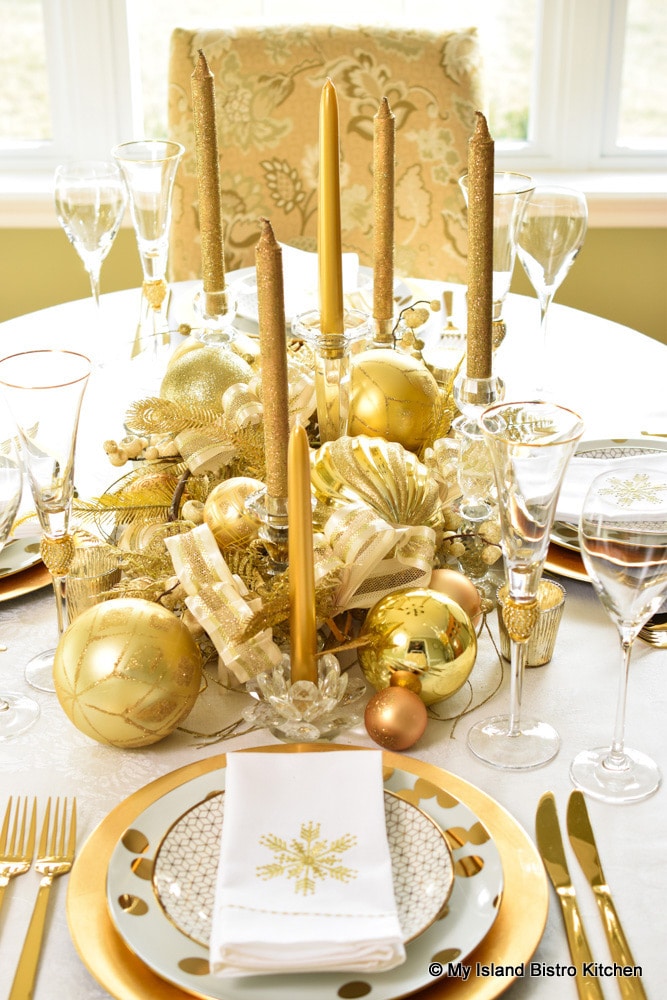
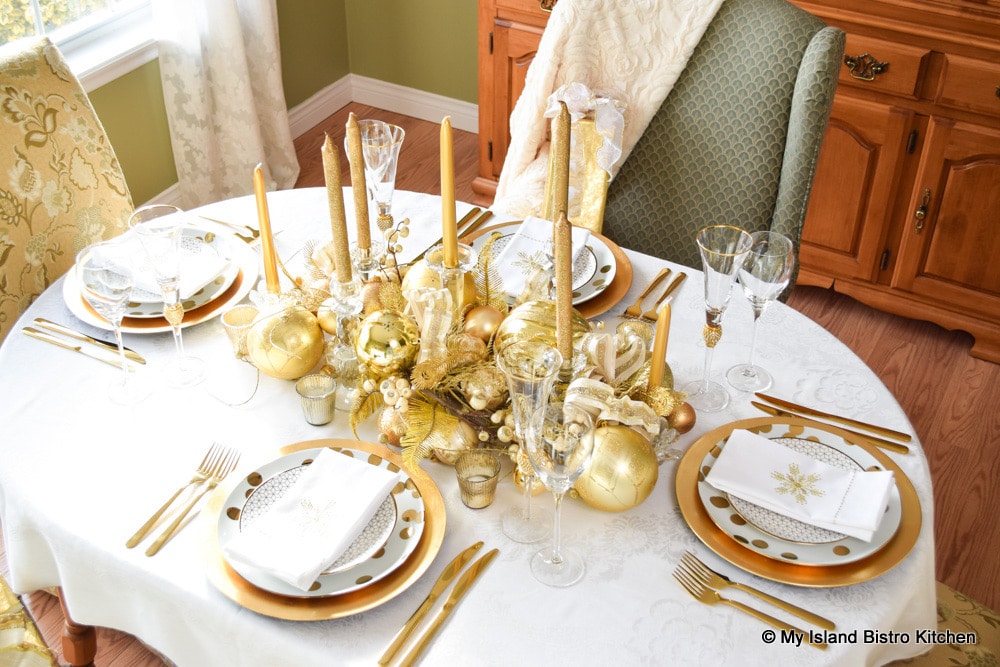
Christmas is, in my opinion, a time of the year when a tablesetting can be well glitzed and glammed up. If you want to add opulence and glamour to a holiday tablesetting, go with gold. It shines, it sparkles, it shimmers and glows in all kinds of light, and it has such warm tones. This is my Glamorous Gold Plated Christmas Tablesetting.
The Christmas color theme in my dining room is gold. It appears on my tabletop tree and in my mantle design. Therefore, for continuity, my table carries the same singular color theme.
The Backdrop
Basic white is most often the blank canvas I start with when constructing my tablesettings. It’s neutral and, in the case of this gold-plated tablesetting, it provides a wonderful plain backdrop to let the metallics form the focal point of the table. Had I left my maple table bare, the gold-colored centerpiece would not have stood out as dramatically as it does against the white backdrop. Conversely, had I used a patterned tablecloth, it would have been very busy and cluttery looking and the effect of the centerpiece would have been completely lost.
Glamorous Gold-Plated Christmas Tablesetting
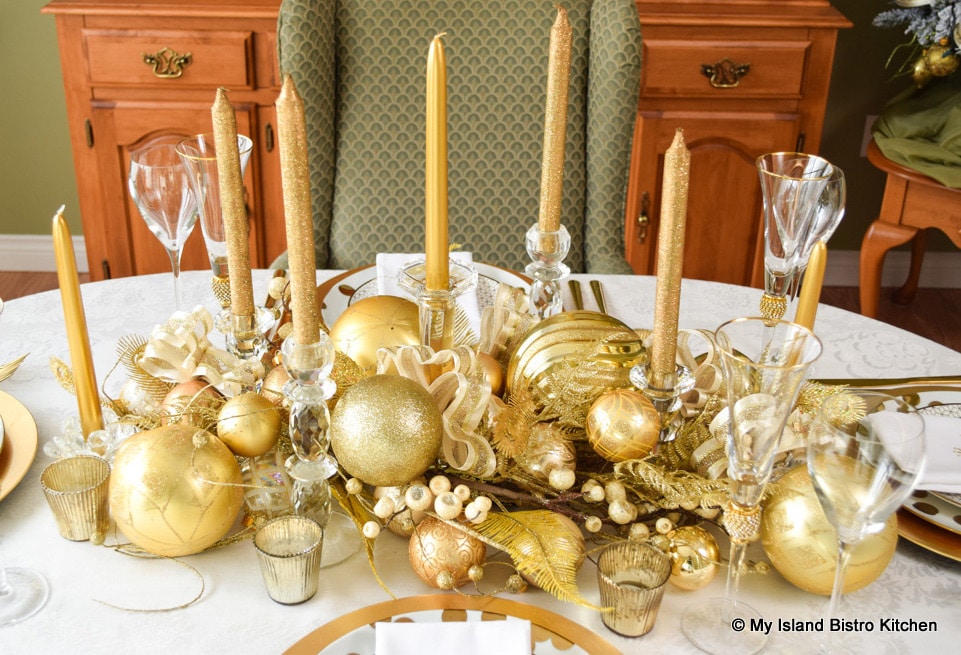
The Centerpiece
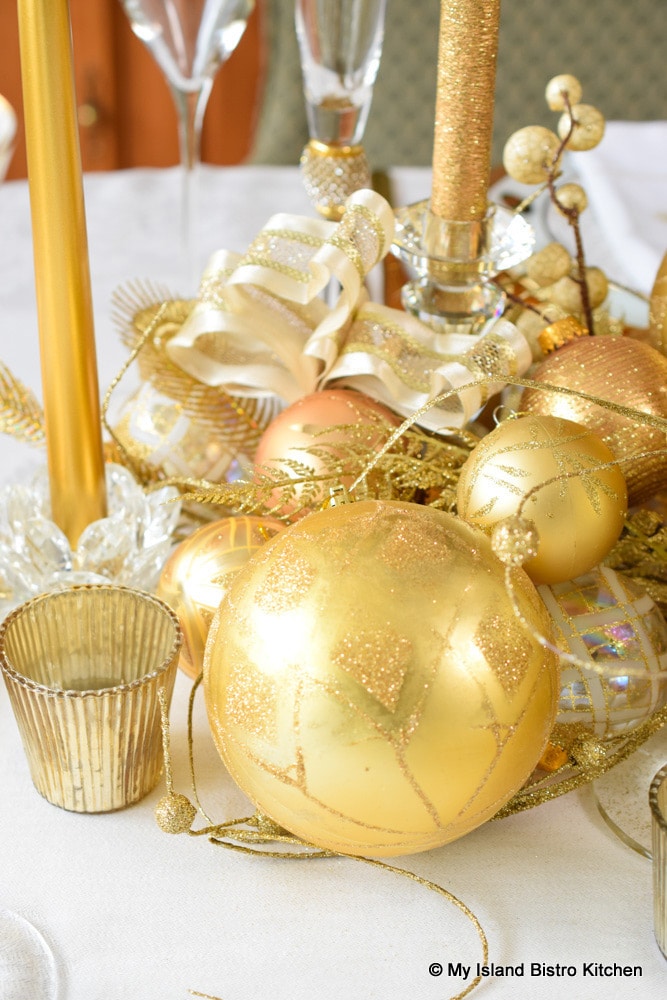
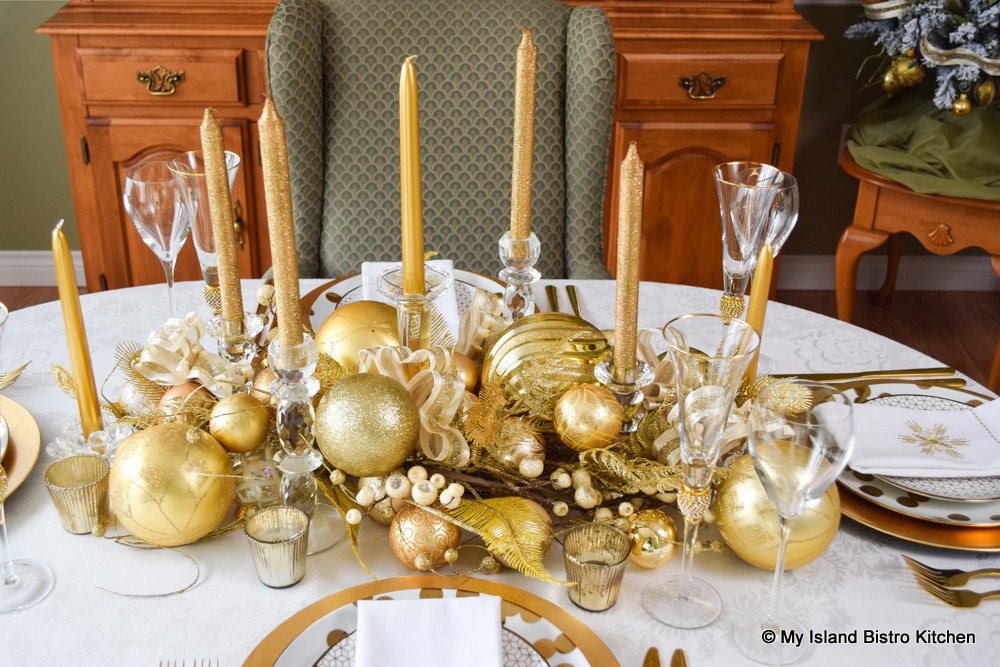
Nothing was bought new specifically for this centerpiece. I have had all the Christmas balls, baubles, twigs, feathers, and berries for years and they have been used for many different purposes at previous holidays. So, I simply went shopping in my own storehouse!
When constructing the centerpiece, piece by piece, on the table, make sure it is completed before setting the individual place settings. Otherwise, you would be reaching over high glassware, potentially knocking them over and it would just be plain awkward. And, of course, if there is glitter involved or greenery needles, those would find their way on to the plates and into the glasses where food and drink will be served. So, the individual placesettings would be the last aspect of the tablesetting to be completed.
For this setting, I have chosen one large gold ball and then added three or four other different sized balls of a scale that will fit the size of my dining table. This type of centerpiece is scalable meaning it can be made somewhat larger to suit a longer table. It is important to keep the elements in the centerpiece to scale both to the other components of the centerpiece as well as to the size of table itself.
Glamorous Gold Plated Christmas Tablesetting
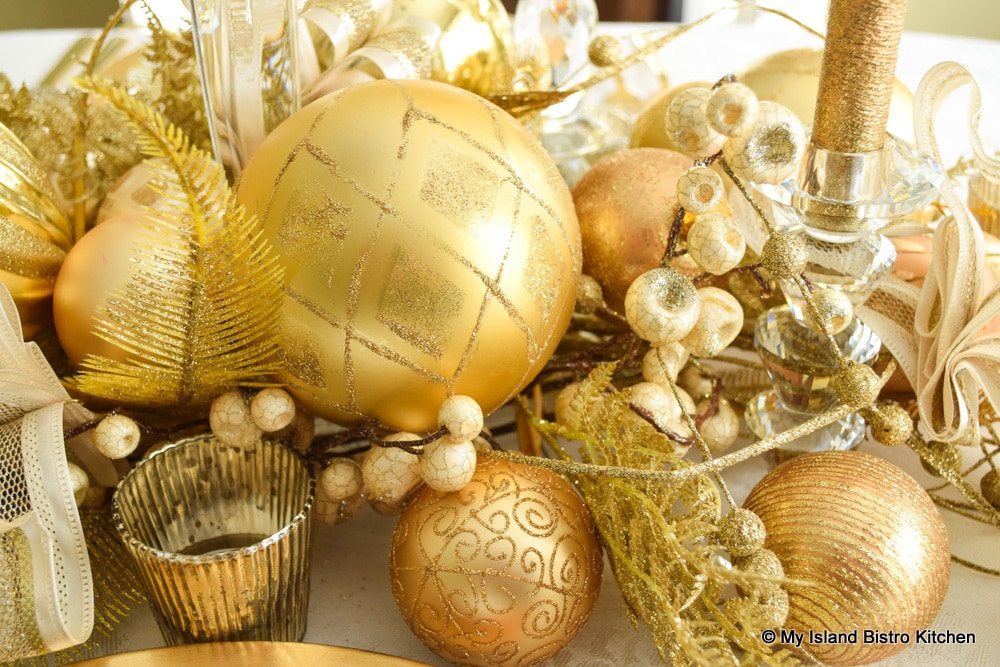
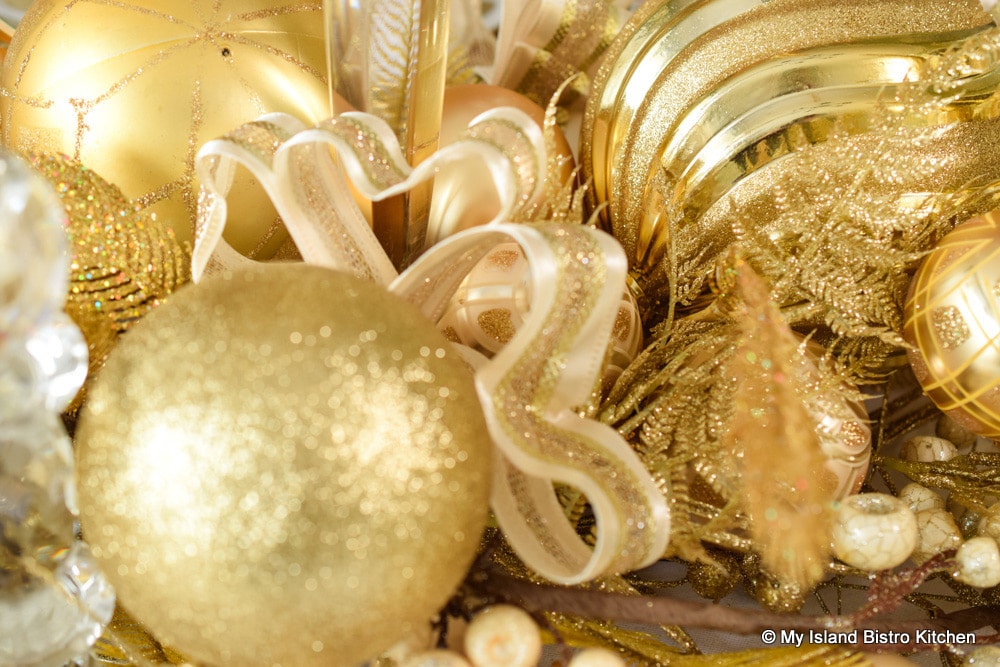
I have used balls/baubles with different textures with some having designs and others perfectly plain. So, in the centerpiece, I have included balls that are plain satin-finished, glittery, pearlized, and matte finish. The balls are in various shades and hues of gold. This adds wonderful texture and interest to the centerpiece plus their finishes play well off each other and they all react to light differently.
Use a Variety of Balls in Various Textures and Shades of Gold in Centerpiece
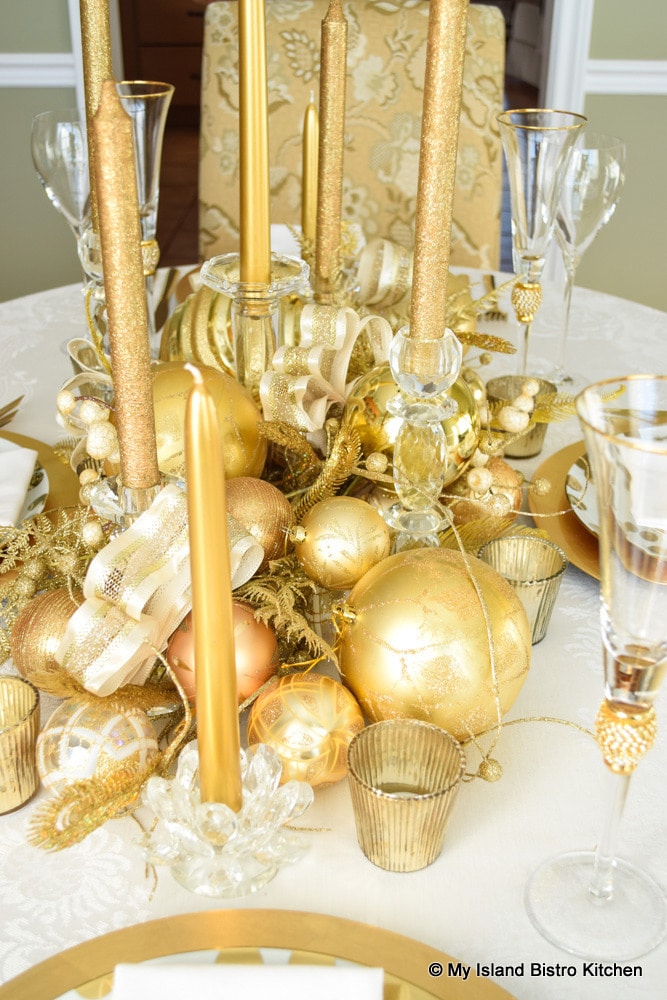
I had some gold twigs that I used to create a base for the balls. To achieve the luxe look, I did not want to introduce any greenery or other color into the centerpiece, save for a bit of ivory in the berries and on ribbon.
The twigs serve the purpose of providing a nest for the balls so they do not roll out of place. I then started with placement of the large ball, followed by the next sized balls, and so on until I achieved the aesthetic look I was going for, filling in any gaps with smaller balls. Some gold-colored feathers and ivory berries were added for interest. Finally, I strategically placed some pretty ribbon bows of ivory and glittery gold in various places throughout the centerpiece arrangement. By doing this, I addressed any remaining gaps and made the centerpiece look full and luxurious.
Glamorous Gold-Plated Christmas Table Centerpiece
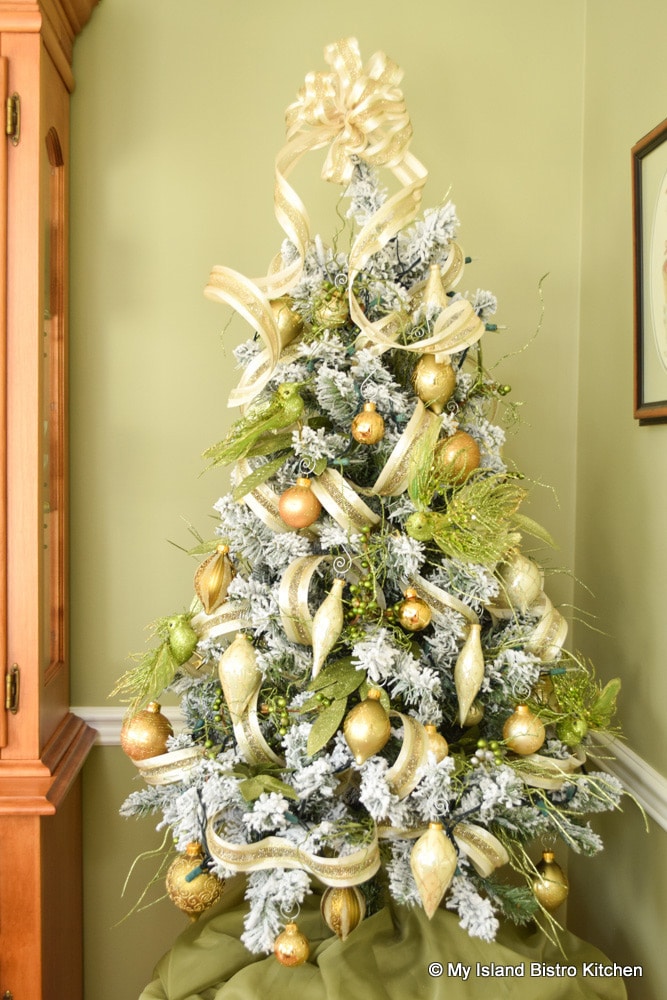
The ribbon corresponds with that on my dining room tabletop tree. Tabletop trees are so adorable and I find they are particularly suitable for dining rooms.
Beribboned Tabletop Christmas Tree
Candles
As those of you who are regular visitors to my website will know, I am not a huge fan of taper candles. I find they are a bit precarious for my liking for use on dining tables. For that reason, I typically use the more stable pillar candles in tablesettings. However, in this case, the table has a very elegant and glamorous theme so the tall, slender tapers do work better than the larger pillar candles. The tapers give height and elegance to the table and, because they are slender, they do not obstruct diners’ view of each other. And, of course, tapers burn down faster than pillars so they become even lower as the meal progresses.
Glamorous Gold-Plated Christmas Table Centerpiece
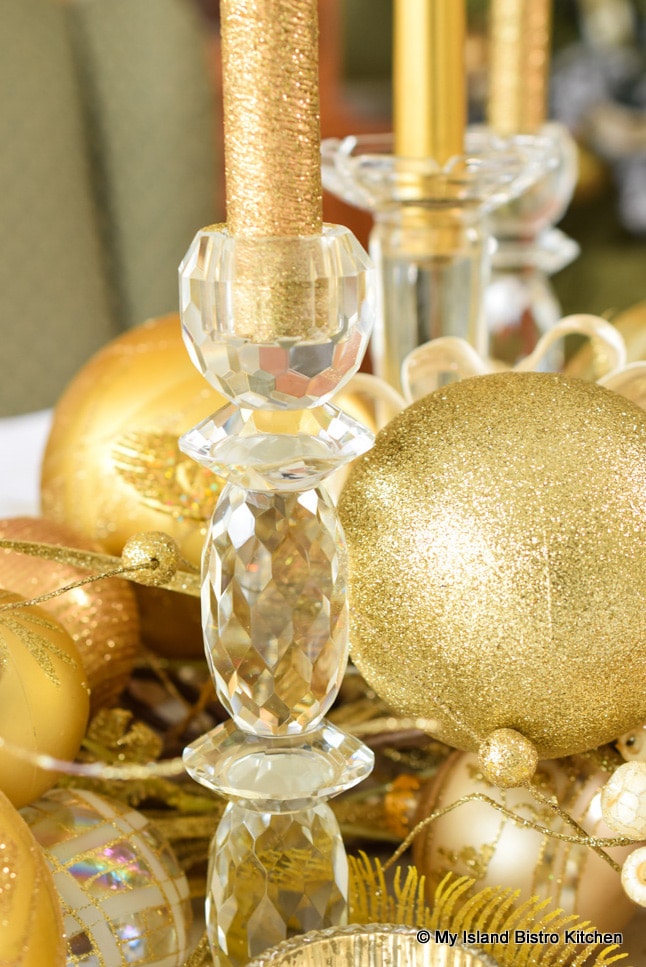
I have a collection of glass candlesticks in various shapes and sizes and many are cut glass with prisms that really do play well to light. This makes them really sparkle on a table, further adding glitz to the tablescape. It is not necessary to have the candlesticks all matching and I do recommend using ones that vary in height as that contributes to layers of lighting when the candles are lit. Using clear glass candlesticks keeps the focus on the gold in the centerpiece and gives it an airy look. In other words, the candlesticks accent, and do not compete with, the gold centerpiece.
Cut Glass Candlesticks Reflect Light and Give an Airy Look to the Centerpiece
I have used two types of gold tapers in this centerpiece. Some candles have a glittery finish while others have a polished, satin finish. This adds interest to the centerpiece and does not make it look so matchy-matchy or that it all came out of a box, pre-assembled in a factory. These are the types of details that give a centerpiece a custom-designed look.
Different Textured Tapers Add Interest to Table Centerpiece
Varying the height of the tapers as well as the candlesticks, also adds light from different levels of the centerpiece. If I can, I try to add about three layers of light to a centerpiece like this – high, medium, and low – so that the centerpiece is really glowing from all angles. Of course, using an odd number of candles makes the centerpiece more pleasing to the eye.
Smaller gold-colored votives are nestled in around the edges of the centerpiece. To keep the votives clean and free from wax build-up inside, I have used small tealights that are already encased in little tin holders. They still add lots of light from the lowest level of the centerpiece. In the photo later on in this post that shows the dinnerware up close, the tea light in a votive can be seen.
Glamorous Gold Plated Christmas Tablesetting
I do not recommend using scented candles in a tablesetting as they can be quite overpowering and interfere with the enjoyment of the scent of a good meal. Also, anyone with scent allergies can find scented candles distressing. It’s important to always consider the comfort of dinner guests.
Linens
My fall-back for table linen is often a vintage Irish linen tablecloth which is what I have used in this setting. I am not a fan of busy tablecloth designs or seasonally-themed ones. Tablecloths with Christmas designs, for example, may be pretty but they typically require plain dinnerware so they are not too busy for the eye. Additionally, they can really only be used at Christmas and must be stored for the rest of the year.
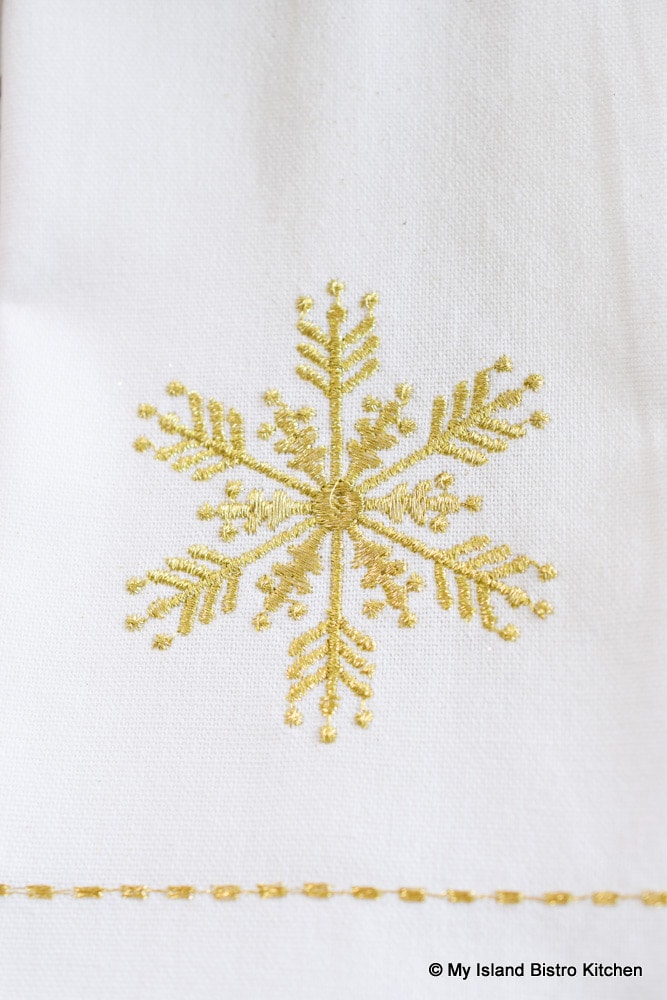
My preference is to go with non-seasonal neutral tablecloths. If I want to have a seasonal design in table textile, I will usually opt for seasonally-themed napkins, like the cotton napkins with the gold snowflake motif shown in the photo below. Because the thread in the motif pattern is glittery, the napkins blend well with this tablesetting.
Snowflake Motif Napkins
I find the best way to fold napkins that have motifs is to use a simple flat fold. Trying to fold this style of napkin into an intricate or fancy fold would result in the motif and its effect being lost.
Snowflake Motif Napkins
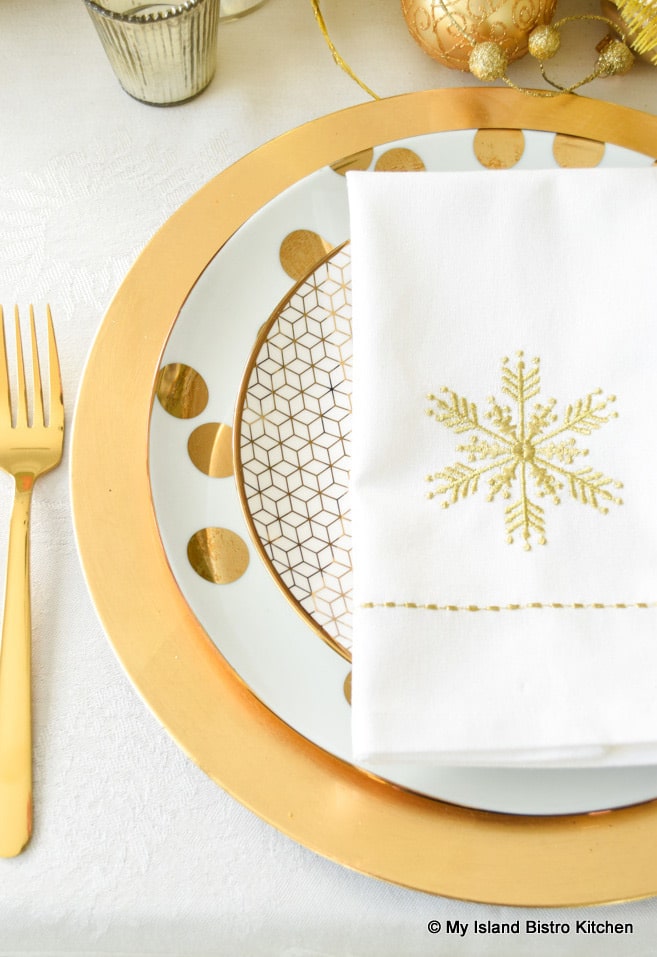
For that reason, I simply laid the flat-folded napkin over the salad plate so it becomes the focal point of each individual placesetting. Simple yet elegant.
Snowflake Motif Napkin
Dinnerware and Flatware
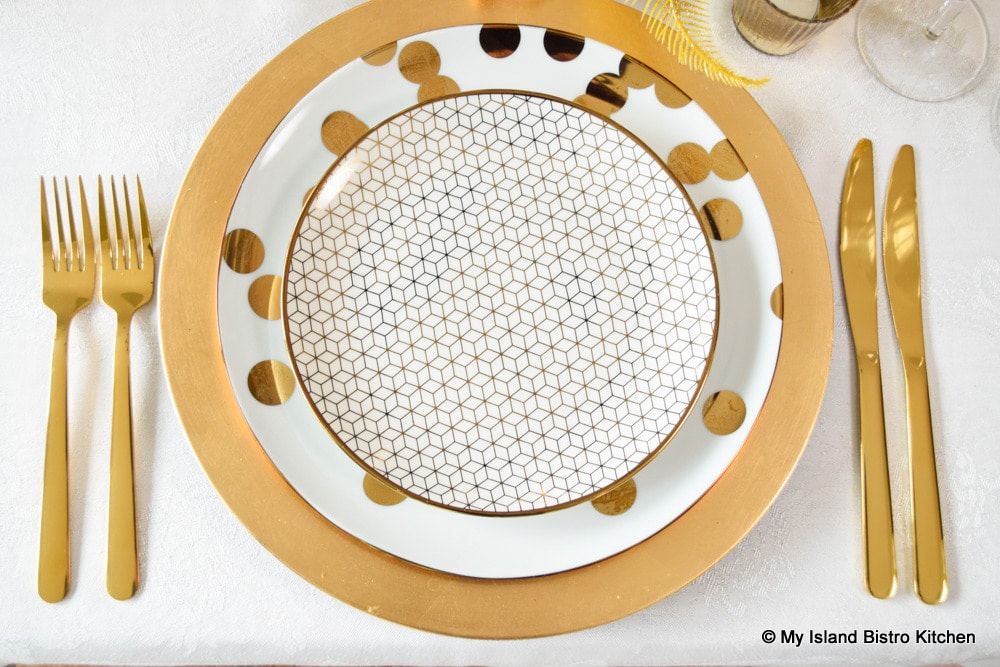
Plain gold charger plates frame each placesetting. The gold color connects the placesettings to the centerpiece. Chargers are an easy and simple way to glam up a tablesetting plus they serve a useful purpose in keeping the tablecloth clean should any food escape the dinnerware. We all know it happens from time to time!
Glamorous Gold Plated Christmas Tablesetting
I have chosen dinnerware with a significant amount of gold metallic color for this setting as it ties in with the gold theme and does not introduce another color. The contemporary metallic gold polka dot porcelain dinner plates add some pizzazz to each placesetting. The gold-edged salad plates are in a coordinating design. It is not always necessary (and sometimes it is too much) to have completely matching dinnerware. Mixing dinnerware designs is another great way to create a customized tablesetting look.
So long as the color scheme remains the same and the patterns do not clash, coordinating plates can contribute to a glamorous tablesetting. When mixing dinnerware patterns, it’s a good idea to have one plate with a fairly large design (like the polka dot dinnerplate) and the second plate to have a much smaller design (like the salad plate).
Gold Polka Dot Porcelain Dinner Plates and Coordinating Salad Plates
Because there is so much gold color on the table, I did not want to introduce silverware. I have, therefore, opted to use a very simple design of gold-colored stainless steel flatware. I think it is more pleasing to the eye as it holds and carries the gold theme. It is elegant in its simplicity of design.
Gold-colored Stainless Steel Flatware
Glassware
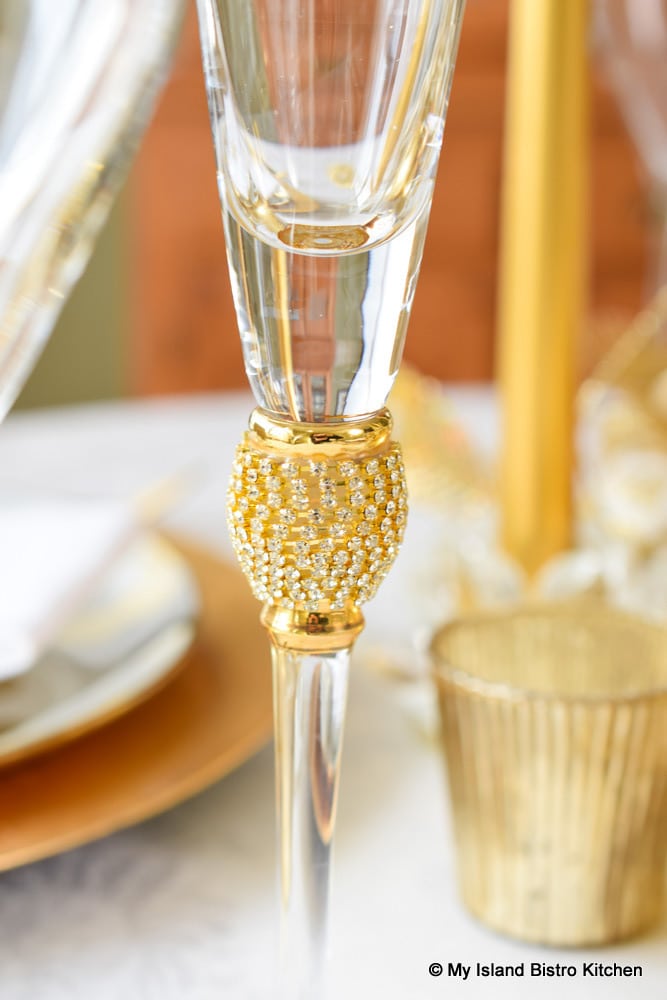
The super tall gold and rhinestone decorated champagne flutes add grand glitter and glam to this tablesetting giving it a totally festive look and feel. When you see glasses like this, you just know it’s party time!
Sparkly Champagne Flutes
Because the flutes are very tall, I used my tallest wine glasses for proportion. They are about 9″ tall and are perfectly plain tulip-shaped stemware. Using tall stemware in this type of setting balances out the height of the tapers.
Glamorous Gold Plated Christmas Tablesetting
Consider How the Table Looks in Different Lighting Situations
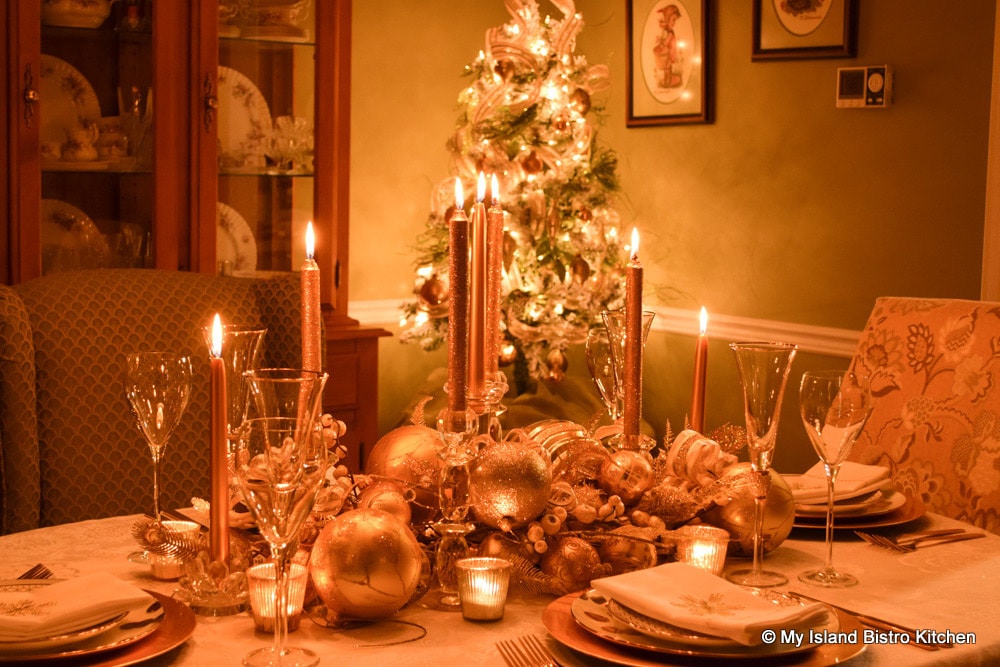
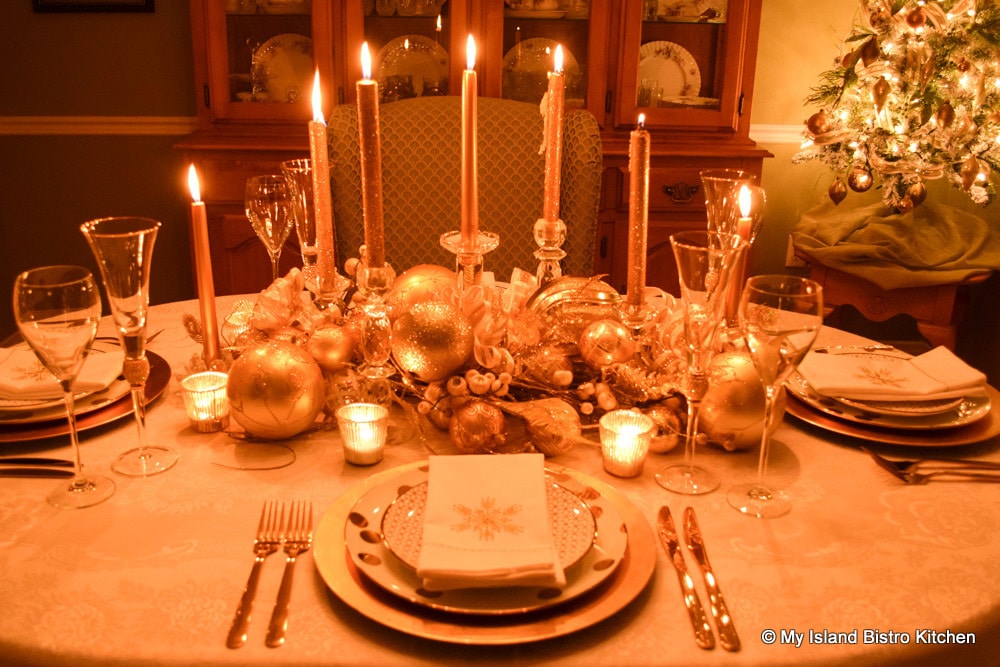
When constructing a tablesetting, it is important to consider how it looks in different lighting situations in which it will be used. For example, if the dining event is in the evening, you want the table to sparkle in the candlelight. Notice how the tablesetting takes on a different hue and ambience with just the Christmas tree lights and the lit candles on the table.
Glamorous Gold Plated Christmas Tablesetting at Night
The tablesetting becomes much more dramatic when lit for evening dining. Layers of candlelight bathe the table in soft glowing light and the tea lights in the votives provide great highlights to the setting. It is best to avoid harsh overhead lighting of tablescapes that have bright gold or silver as it can be quite hard on the eye and distracting.
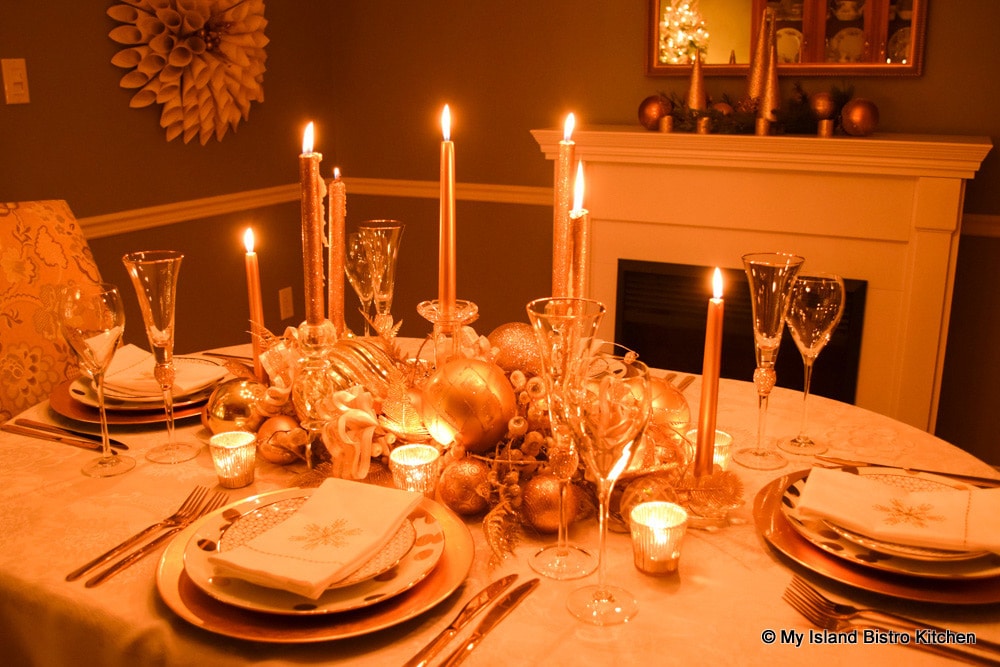
Glamorous Gold Plated Christmas Tablesetting at Night
This tablesetting will easily carry me through the entire holiday period up to and including New Year’s. There are no flowers to water or wilt and I can easily exchange my plain white dishes for the patterned dinnerware and use other glassware to change up the look without having to touch the centerpiece (unless, of course, it is to replace the candles that have melted their way down in the candlesticks).
Glamorous Gold Plated Christmas Tablesetting at Night
A beautifully set table sets the tone for a wonderful meal. Using a single color palette that looks polished and sophisticated helps to create an elegant and glamorous tablesetting.
Glamorous Gold Plated Christmas Tablesetting
I hope you have enjoyed a glimpse into my custom-designed holiday tablesetting.
To view other Christmas-themed tablesettings from My Island Bistro Kitchen, click on the links below:
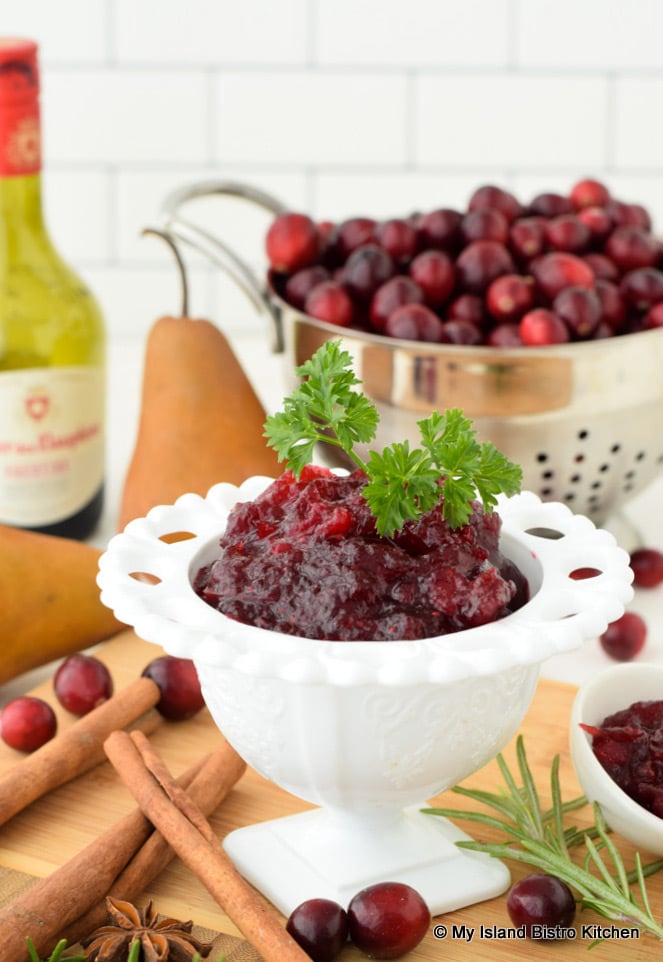
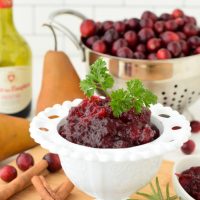
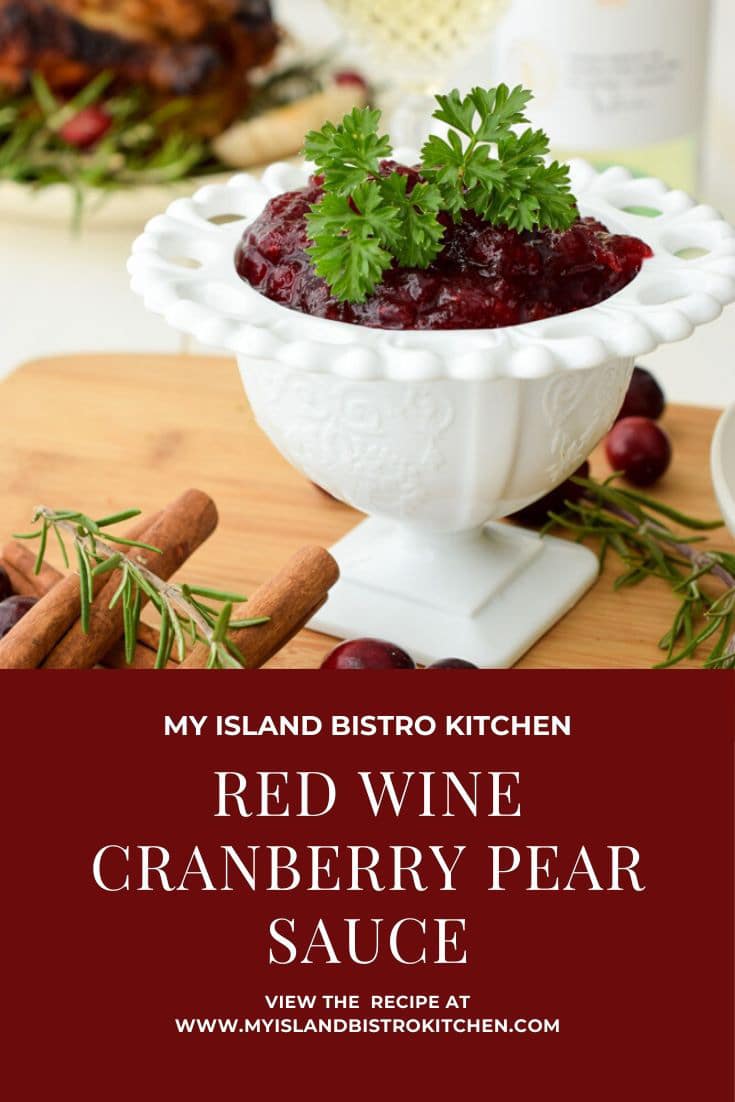
Homemade cranberry sauce is so easy to make and tastes fabulous. This Red Wine Cranberry Pear Sauce has a wonderful blend of flavors that complement each other nicely.
Pears and cranberries pair well together with the sweetness of the pears balancing the tartness of the cranberries. The addition of red wine adds a layer to the flavor profile of the sauce and, let’s just say, amps it up a bit! However, even though red wine is a key ingredient in this sauce, more wine is not necessarily more in this case. One-third cup of wine is adequate as adding too much wine can quickly overtake the cranberry flavor and become too strong and overpowering.
Red Wine Cranberry Pear Sauce
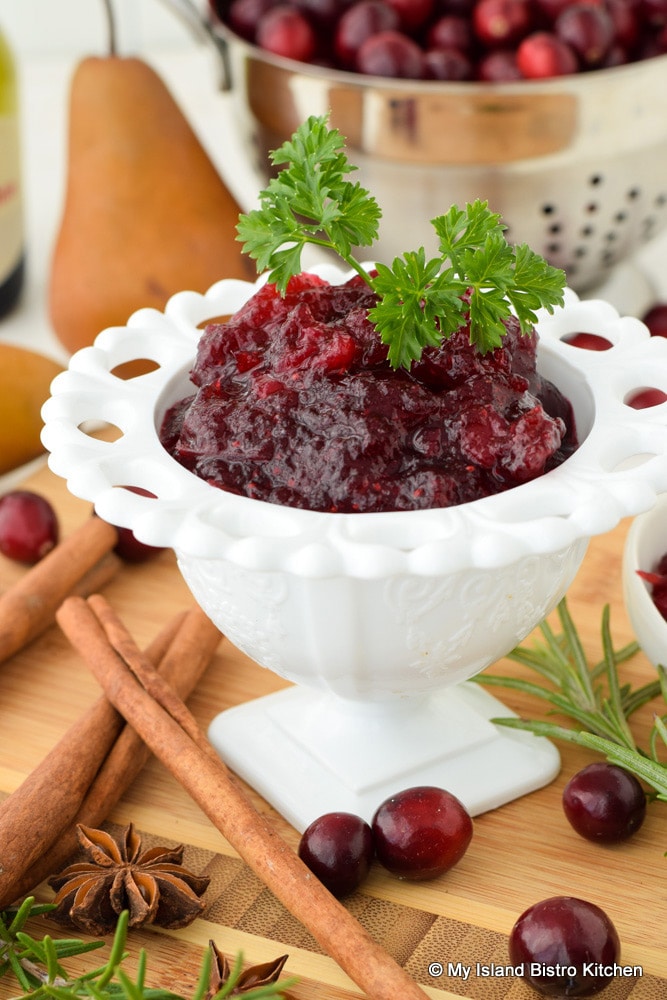
Essentially, this sauce begins with boiling water and sugar together, much in the same way as making a simple syrup. Some red wine (any kind you would drink will do) is then added along with the cranberries, pear, citrus marmalade, and some pure maple syrup for an extra dash of sweetness. Stirring the sauce as it cooks helps it to thicken so it is not watery.
During the last half of the cooking process, a pinch of cardamom, a piece of cinnamon stick, and a star anise pod are added for a boost of flavor. The cinnamon stick and star anise are then discarded once the sauce comes off the stove as their function of infusing flavor into the sauce is complete. Continue to stir the sauce as it cools because this will really help it thicken.
This sauce keeps in the refrigerator for up to five days. It freezes very well so is great to have on hand in the freezer.
Red Wine Cranberry Pear Sauce
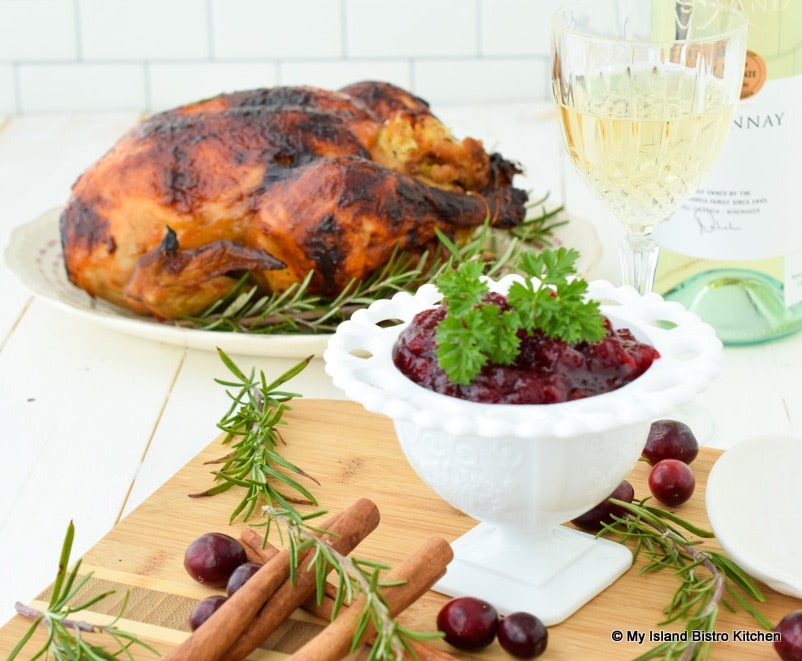
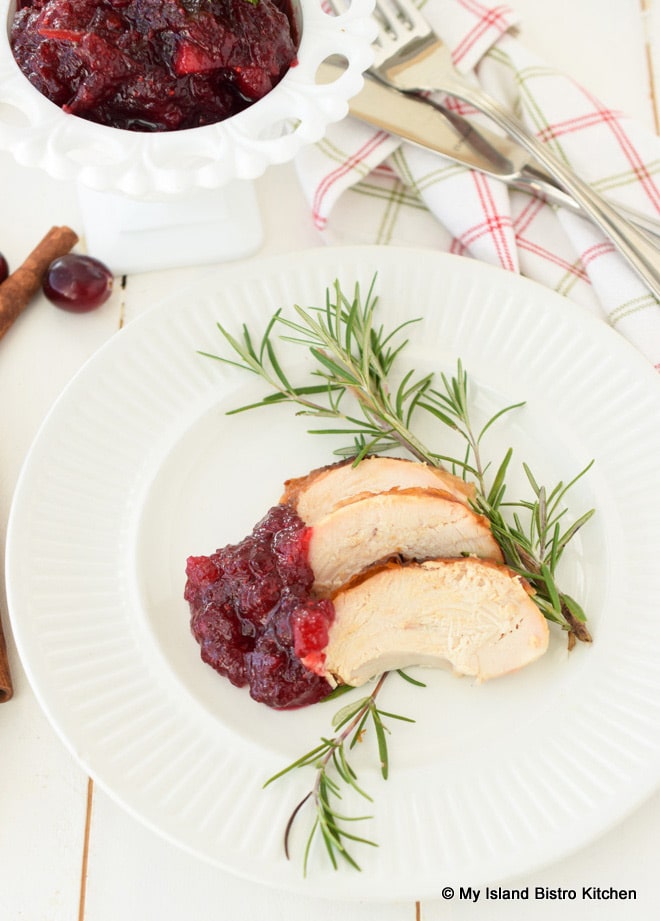
Cranberry Sauce complements any poultry dish.
Red Wine Cranberry Pear Sauce
With its stunning rich ruby-red color, this delectable sauce is a fine condiment to any holiday dinner.
Red Wine Cranberry Pear Sauce
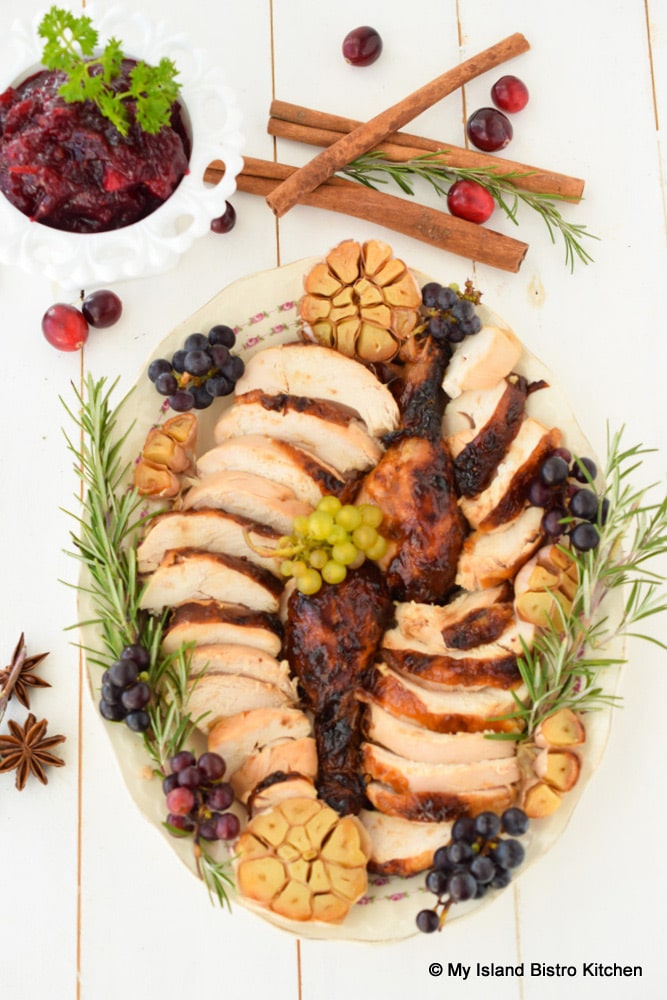
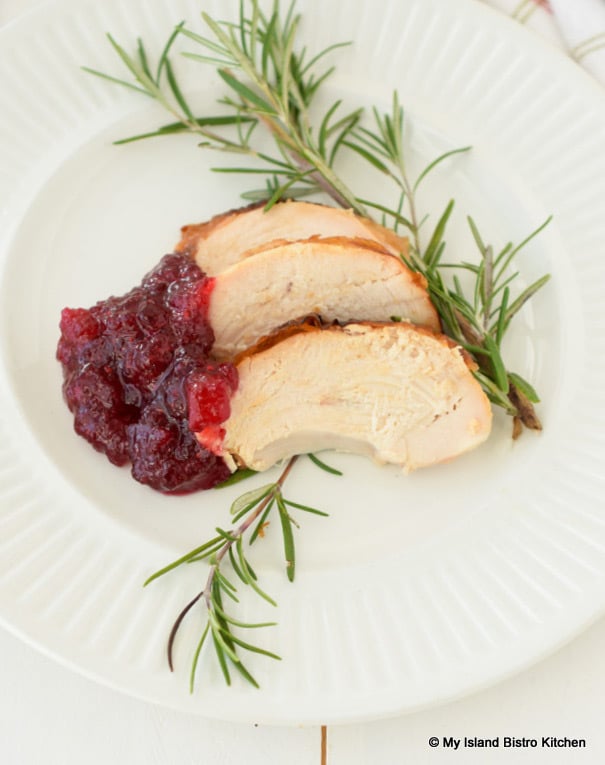
Complete your next roast chicken or roast turkey dinner with this sauce as a condiment.
Red Wine Cranberry Pear Sauce with Roast Chicken
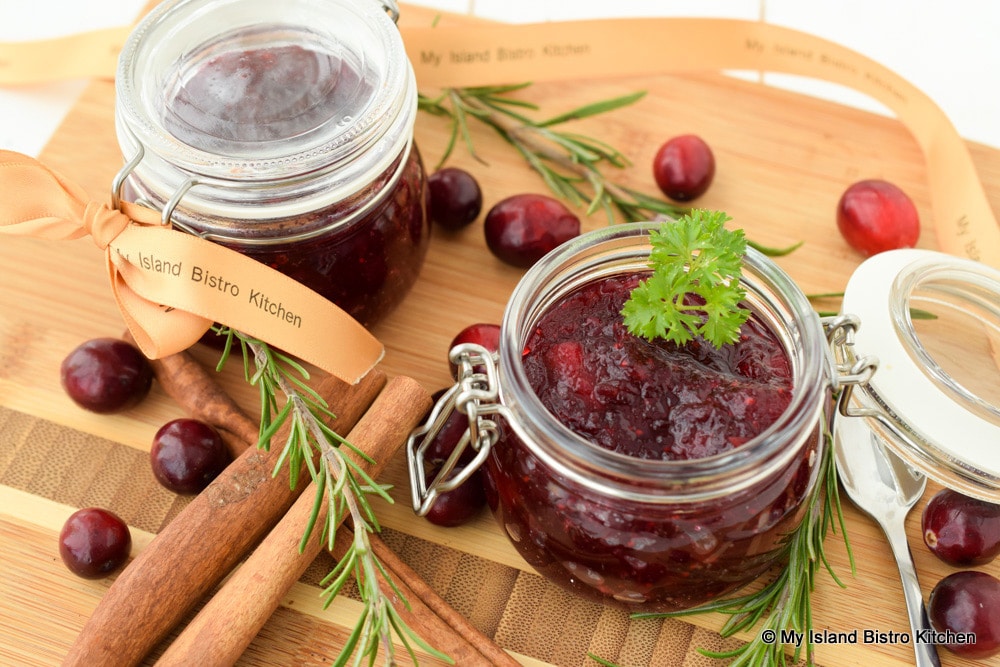
Make some extra and share this sauce as gifts with others. A jar of this tasty sauce makes a fine host/hostess gift, too.
Cranberry Pear Sauce Is Great for Gift-giving
[Printable recipe follows at end of post]
Red Wine Cranberry Pear Sauce
Ingredients:
¾ cup granulated sugar
¼ cup brown sugar, lightly packed
2/3 cup water
1/3 cup red wine
2 cups cranberries, fresh or frozen
1 Bosc pear, peeled and cut into small pieces
2 tbsp citrus marmalade
2 tbsp maple syrup
Pinch cardamom
1½” chunk cinnamon stick
1 star anise
Method:
In medium-sized heavy-bottomed saucepan, bring sugars and water to boil over medium-high heat. Reduce heat to medium and boil, uncovered, for 5 minutes, stirring occasionally.
Add red wine, cranberries, chopped pear, marmalade, and maple syrup. Increase heat to medium-high to return mixture to boil then reduce heat to medium-low. Stir mixture frequently throughout the cooking process, for about 8 minutes. Then, add the cardamom, cinnamon stick, and star anise. Continue to cook mixture, uncovered, stirring frequently while cooking it for another 7-10 minutes, or until sauce thickens (it will thicken somewhat more as it is stirred during the cooling process).
Remove saucepan from heat and discard the chunk of cinnamon stick and the star anise. Stir sauce several times as it cools as this will help it to thicken.
Store sauce, tightly covered, in refrigerator for up to 5 days or freeze for longer storage. Serve sauce cold or at room temperature alongside roasted poultry.
Yield: Apx. 2 cups
If you have made this recipe and enjoyed it and/or wish to share it with your friends and family, please do so on social media but be sure to share the direct link to this posting from my website.
For other cranberry sauce recipes from My Island Bistro Kitchen, click on the links below:
This tasty Red Wine Cranberry Pear Sauce is easy to make and is a superb condiment to any poultry dish. A delicious and spirited twist to the Classic Cranberry Sauce.
Course
Condiment
Cuisine
Canadian
Keyword
cranberry sauce, red wine cranberry pear sauce
My Island Bistro KitchenMy Island Bistro Kitchen
Ingredients
¾cupgranulated sugar
¼cupbrown sugar, lightly packed
2/3cupwater
1/3cupred wine
2cupscranberries, fresh or frozen
1Bosc pear, peeled and cut into small pieces
2tbspcitrus marmalade
2tbspmaple syrup
Pinchcardamom
1½” chunk cinnamon stick
1star anise
Instructions
In medium-sized heavy-bottomed saucepan, bring sugars and water to boil over medium-high heat. Reduce heat to medium and boil, uncovered, for 5 minutes, stirring occasionally.
Add red wine, cranberries, chopped pear, marmalade, and maple syrup. Increase heat to medium-high to return mixture to boil then reduce heat to medium-low. Stir mixture frequently throughout the cooking process, for about 8 minutes. Then, add the cardamom, cinnamon stick, and star anise. Continue to cook mixture, uncovered, stirring frequently while cooking it for another 7-10 minutes, or until sauce thickens (it will thicken somewhat more as it is stirred during the cooling process).
Remove saucepan from heat and discard the chunk of cinnamon stick and the star anise. Stir sauce several times as it cools as this will help it to thicken.
Store sauce, tightly covered, in refrigerator for up to 5 days or freeze for longer storage. Serve sauce cold or at room temperature alongside roasted poultry.
A number of years ago, I made these snowmen and, this year, thought they should be part of a casual holiday tablesetting that is aptly named “Snowmen and Snowballs“. So, here they are, all dressed in their finery to preside over the dinner table! Continue reading Snowmen and Snowballs Tablesetting→
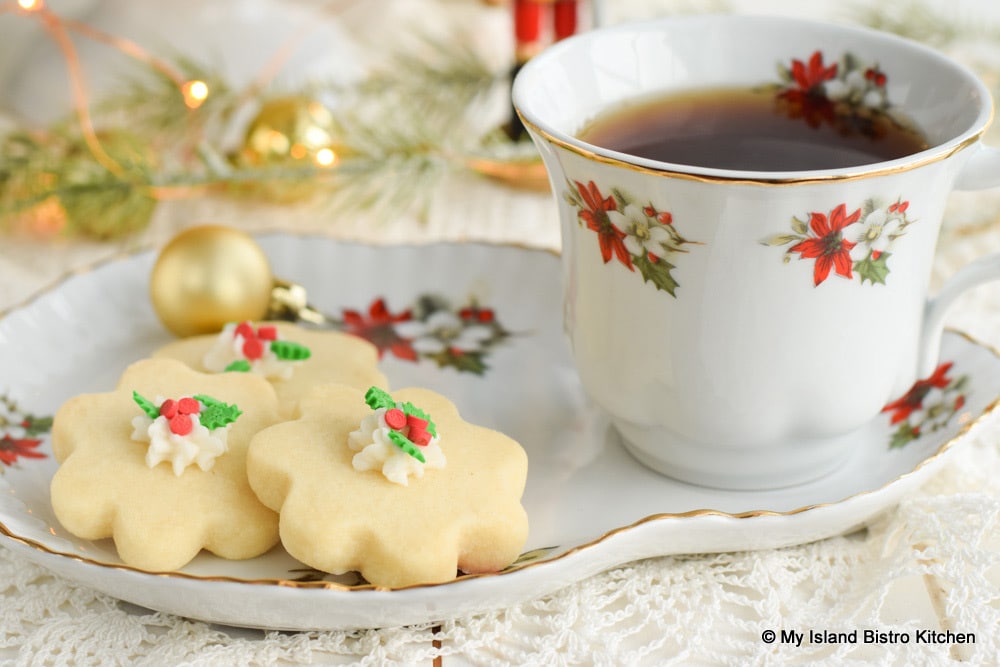
These hearty Cranberry and Eggnog Cookies are good any time but they are especially good at Christmas. This is because they combine traditional flavors of the season – eggnog, dried cranberries, orange rind, pecans, and the warm spices we associate with Christmas – cinnamon, nutmeg, allspice, and cloves. Continue reading Cranberry and Eggnog Drop Cookies→
Scotch Cookies (sometimes called “Scotch Cakes”), close cousins of Shortbread, are a must-have Christmas tradition in many PEI households. They are a very common addition to holiday sweet plates. I am often asked if I have a recipe for Scotch Cookies and this is it. Continue reading The Bistro’s Scotch Cookies→
These Coconut Date and Cherry Squares are one of the easiest squares to make as there is only the one layer. Simply place the coconut, dates, cherries, and pecans in a large bowl. Stir in sweetened condensed milk and transfer mixture to a baking pan. How easy is that! Continue reading Coconut Date and Cherry Square→
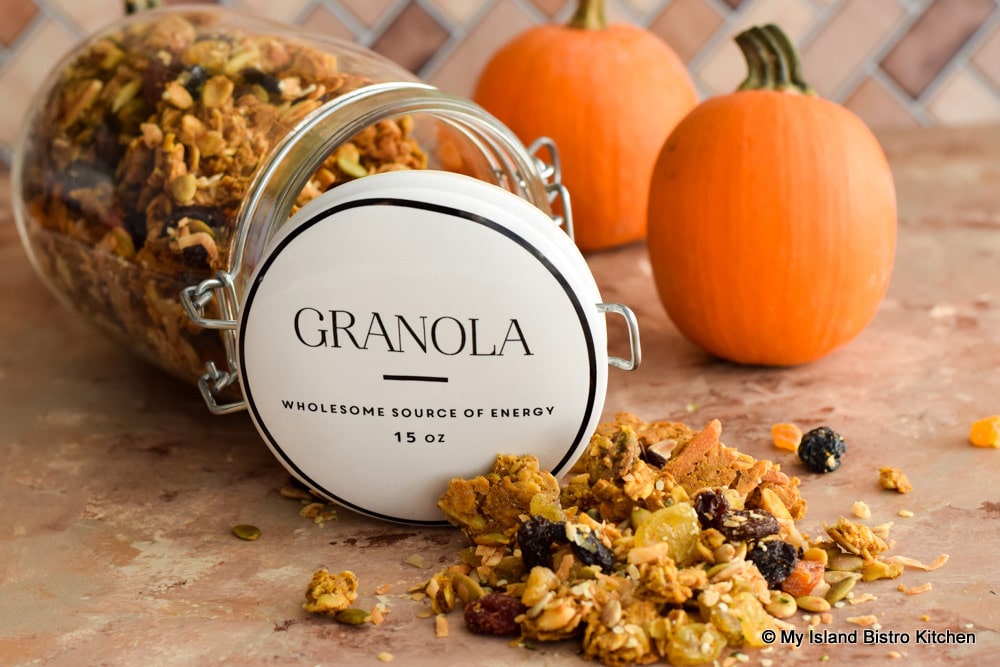
Oh, the divine tantalizing scent in the house when this homemade Pumpkin Spice Granola is baking in the oven! The combination of pumpkin purée and warm spices like cinnamon, nutmeg, allspice, cloves, and ginger make this a winner! If you want a clean, healthy breakfast cereal, or snack food, free of preservatives and additives, this granola is for you. Continue reading Pumpkin Spice Granola→
So, we all know how beautiful a decorated roast turkey on a platter looks and many of us associate this with the ideal Thanksgiving. The reality is, however, that many households are small and either don’t need, or want, a large turkey. The responsibility of getting a turkey properly cooked can be somewhat daunting. Yet, who among us does not want to celebrate Thanksgiving in a somewhat traditional manner and have the heavenly scent of turkey roasting in the oven.
To show how the traditional elements can be incorporated into a small-scale Thanksgiving dinner, I have prepared a dinner for two. This meal is easily scalable meaning it can be multiplied to serve the number of guests you have.
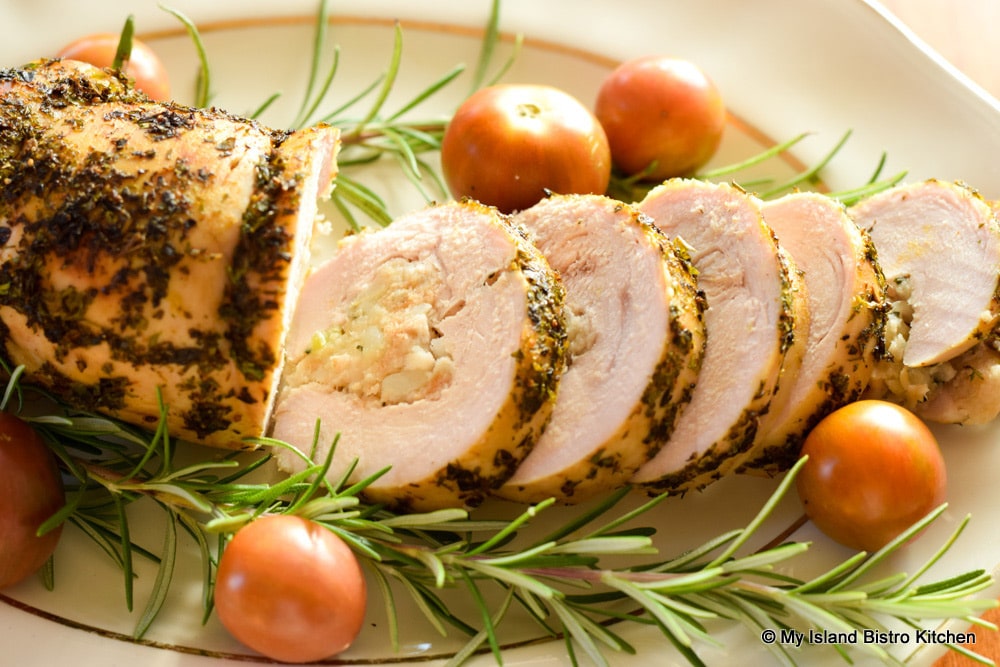
I still wanted turkey but I wanted something manageable in size and meat that would cook quickly and without having to have a large roaster. That’s where fresh boneless turkey breasts come in. They are available in all sizes, ranging from the small 1-pounders. These cook quickly, especially in a convection oven, and you still get the same wonderful scent in the house as the turkey breast roasts. The other benefit to a boneless turkey breast is that it is all pure meat. There is no large carcass to deal with and the meat slices so perfectly for stylish plating.
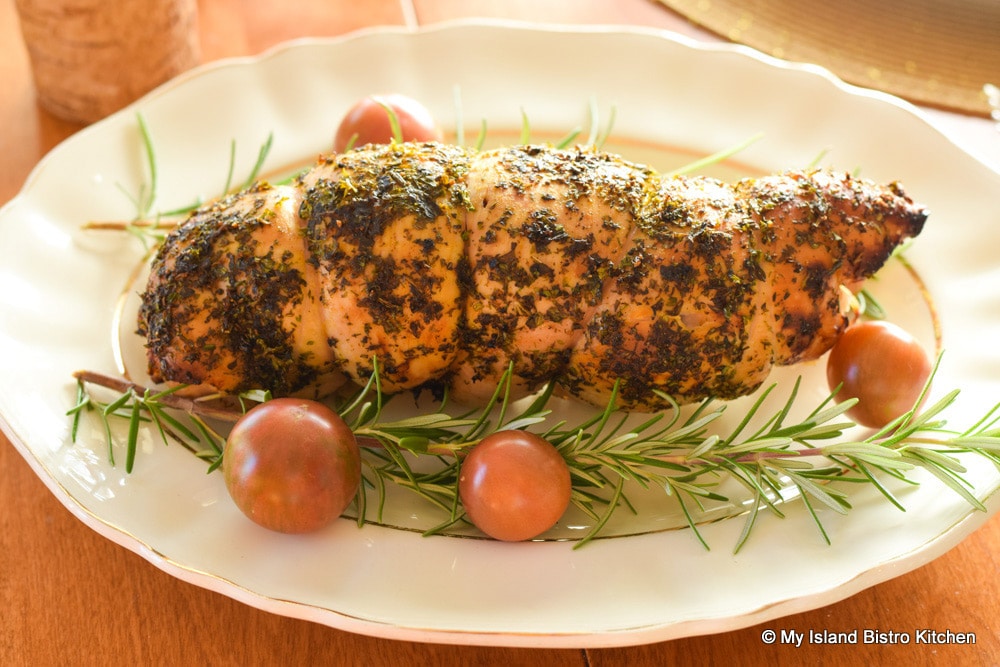
Stuffed Roasted Turkey Breast
I brine my chicken and turkey. It makes such a difference to the flavor and texture of the meat. All I do to brine a fresh turkey breast is let it sit for a few hours submerged in a salt-water brine. After brining, I pound it somewhat thin, roll some of my stuffing into the breast, and tie it securely. I then brush the entire meat with melted butter mixed with olive oil and sprinkle it lightly with paprika. I head to the garden and pick some fresh parsley, rosemary, dill, oregano, and thyme (or whatever blend of herbs I happen to have at the time). Chopped really fine, these herbs are then sprinkled over the meat which is set on a rack in a small roasting pan.
Roasted Turkey Breast
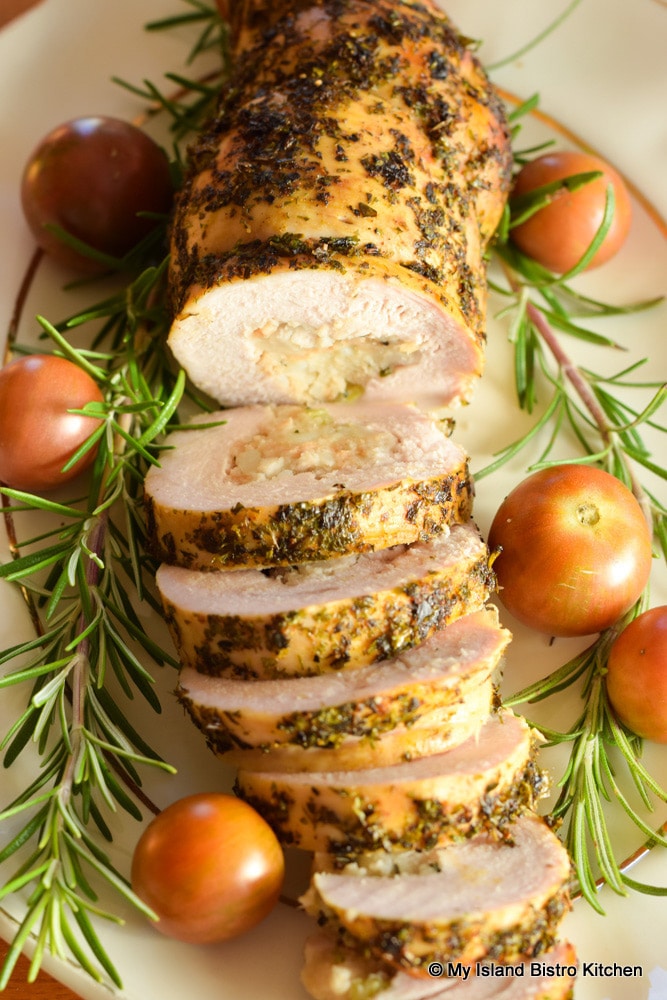
I am a huge proponent of using a meat thermometer. This ensures my meat is always cooked properly and stays tender and juicy. I cook the turkey breast in my convection oven till it tests done on the meat thermometer. After the turkey comes out of the oven, I loosely tent it with tinfoil for about 20 minutes or so before proceeding to carve it. Comes out perfectly cooked and juicy every time. Easy-peasy.
Sliced Stuffed Turkey Breast
For gravy lovers, the downside to roasting turkey breast is that there are virtually no drippings from the meat which can be used to make gravy. This is easily enough remedied, however, by making the gravy using poultry stock which is what I have done here from some homemade turkey stock I had in the freezer.
Stuffed Roasted Turkey Breast with Pan Gravy
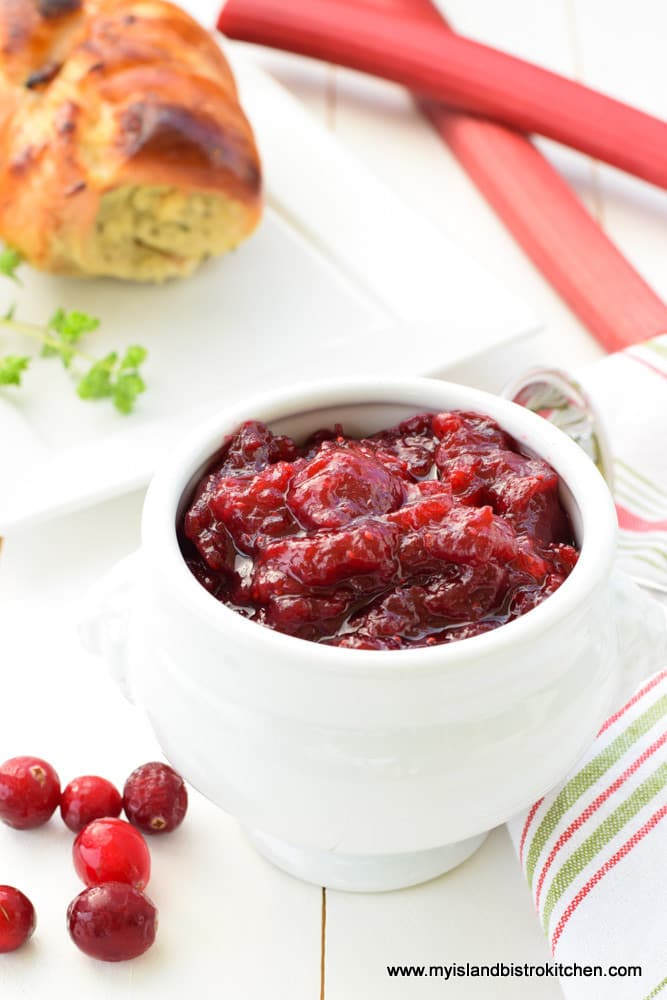
Whether it’s a meal for 2 or 22, I always recommend doing as much of the prep work ahead of time as possible. In this case, I made the Rhubarb-Cranberry Sauce the day before and refrigerated it. This is my newest cranberry sauce and it combines two wonderful flavors beautifully. Either fresh or frozen cranberries and rhubarb can be used for the sauce. It has the most glorious jewel-toned color and fabulous flavor. The sauce pairs particularly well with turkey.
Cranberry Rhubarb Sauce
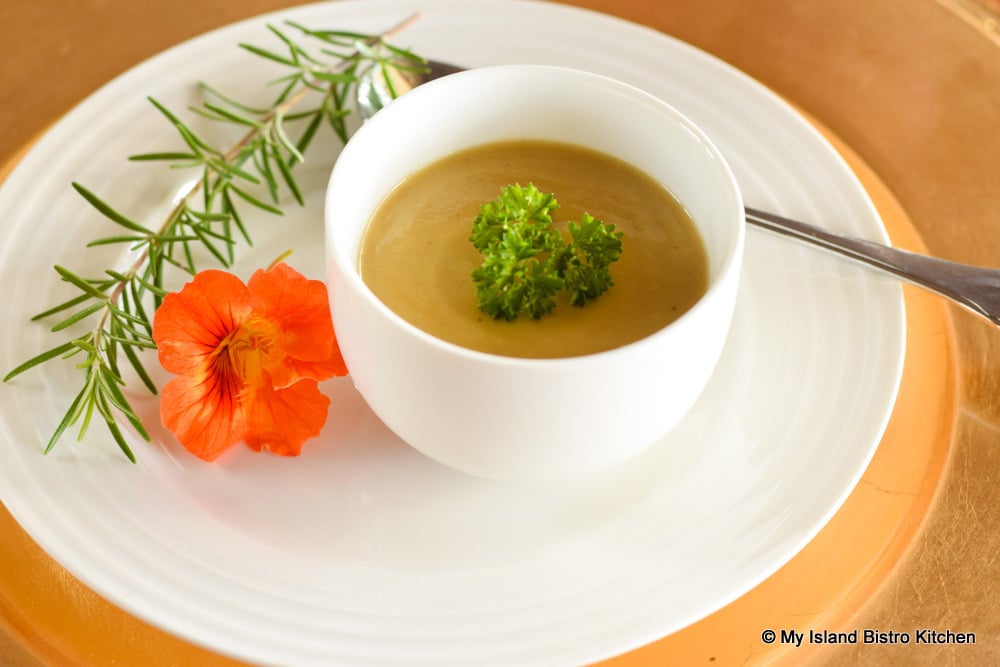
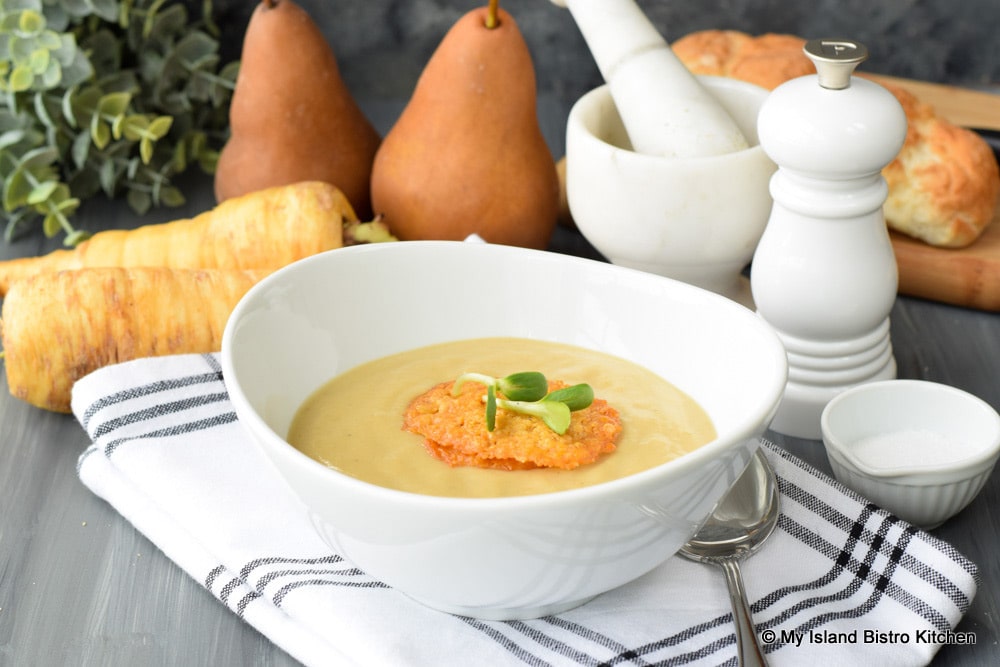
For the soup course, I am also featuring my newest soup recipe, Roasted Parsnip and Pear Soup. For Thanksgiving, I try to use seasonal produce like parsnips and pears. This soup freezes well so can be made ahead, thawed, and reheated in the microwave. Or, a batch of it can be made specifically for Thanksgiving and the leftover frozen.
Roasted Parsnip and Pear Soup
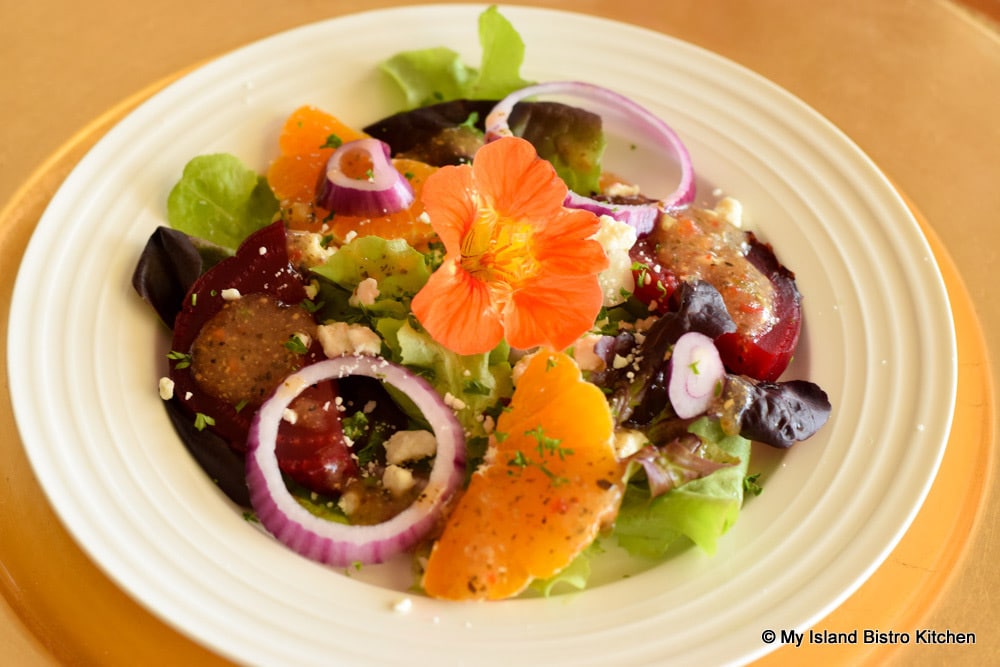
For the salad course, I have gone with a really simple salad, most of which came from our backyard garden – fresh lettuce, beets, red onion, and nasturtium flowers. I roasted the beets (though they could be boiled instead). So, on a bed of lettuce, I placed slices of beets and added some mandarin orange sections and slices of red onion. This was topped with crumbled feta cheese and the salad was served with a simple vinaigrette and topped with a colorful and edible nasturtium.
Roasted Beets and Mandarin Orange Salad
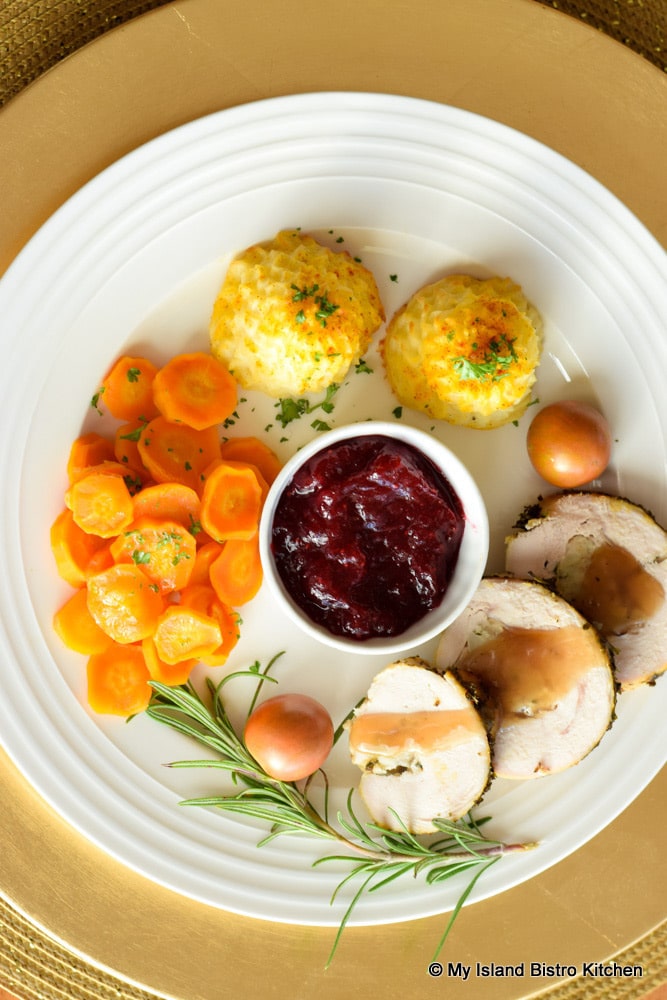
Because I have included both a soup and salad course, it is not necessary to have a number of different vegetables on the plate. Here, I have included the decadent Duchess Potatoes and colorful carrots which, though basic, add a wonderful pop of color to the plate.
Plated Thanksgiving Dinner
My wine pairing with this Thanksgiving Dinner is a 2016 Riesling from Thirty Bench Winemakers in the Niagara Peninsula. A Reisling is a good choice as it has lots of palate-refreshing acidity along with a slight touch of sweetness to balance and complement the variety of flavors in the dinner.
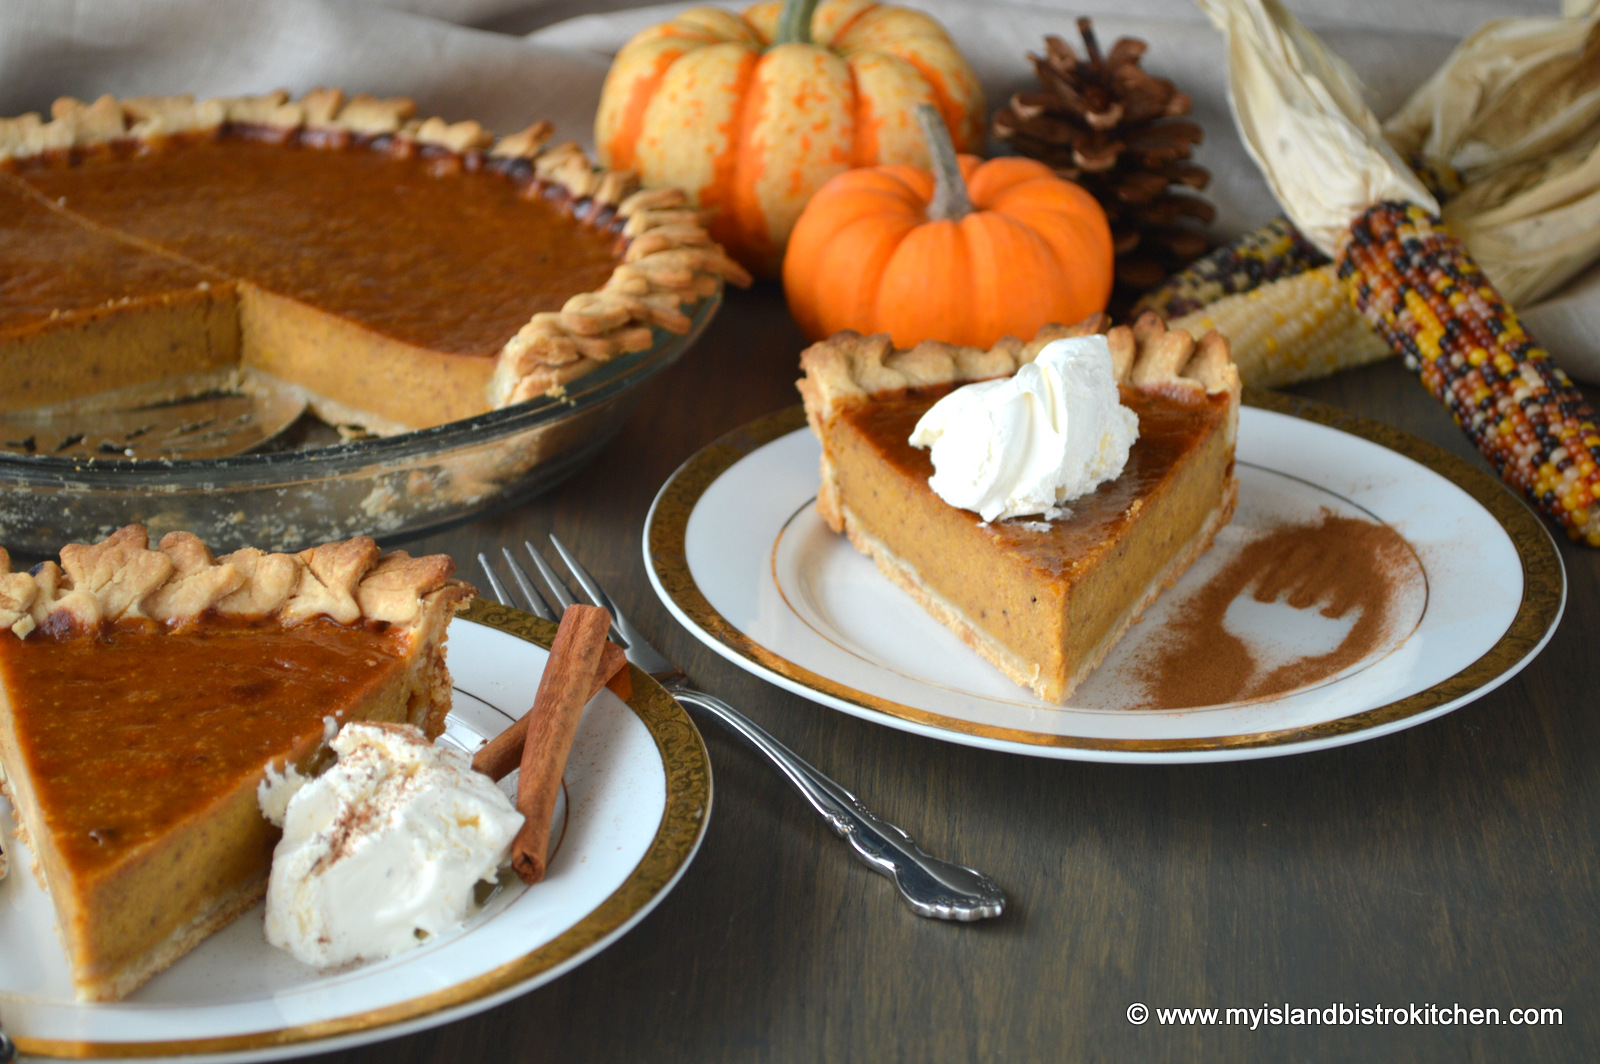
For dessert, it’s Squash Pie. I always maintain that, while similar to pumpkin, squash pie has a richer, deeper flavour.
Squash Pie
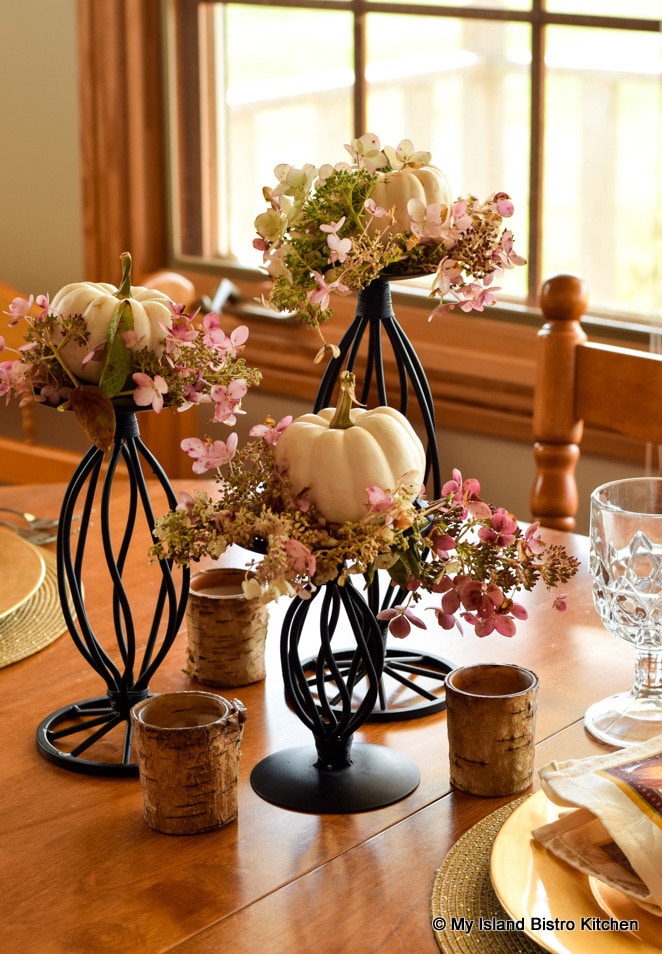
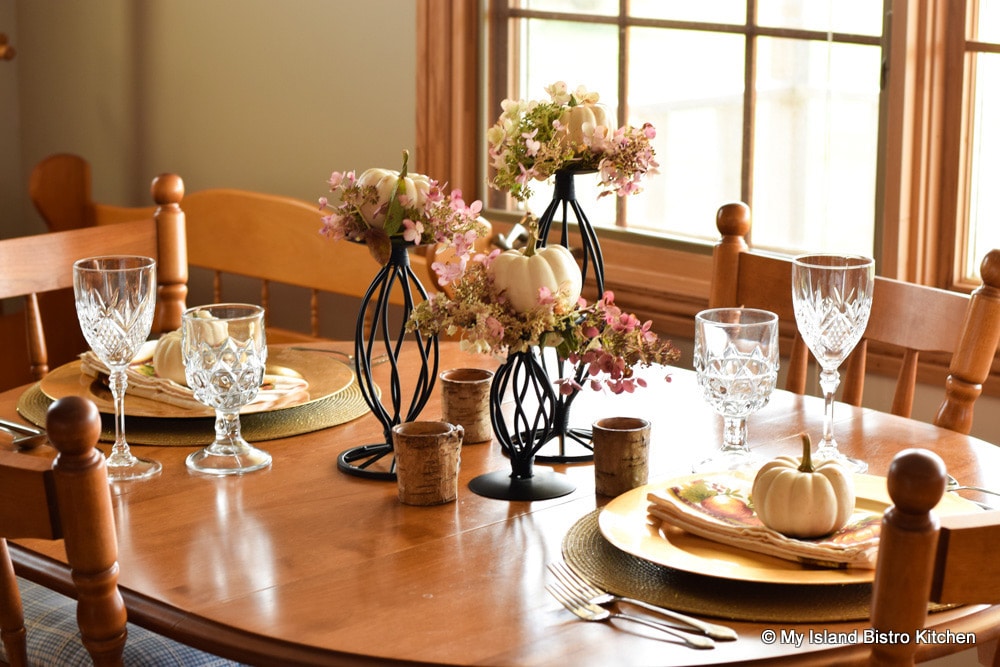
I have opted for a very simple tablesetting and I have used items I already own in its construction. Miniature white pumpkins were placed on three candlesticks of varying heights. Some hydrangea plucked from my hedge formed a colorful, yet soft-colored, base for the pumpkins. I used three small votives at the base of the arrangement to give a glow of soft light.
Thanksgiving Centerpiece
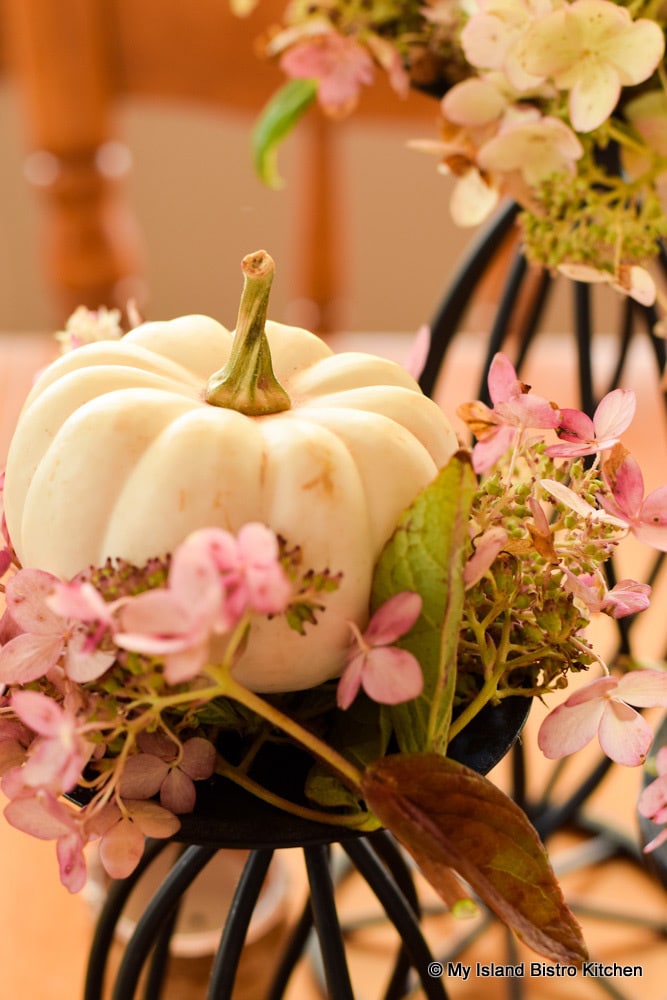
Here’s a closer peek.
Thanksgiving Centerpiece
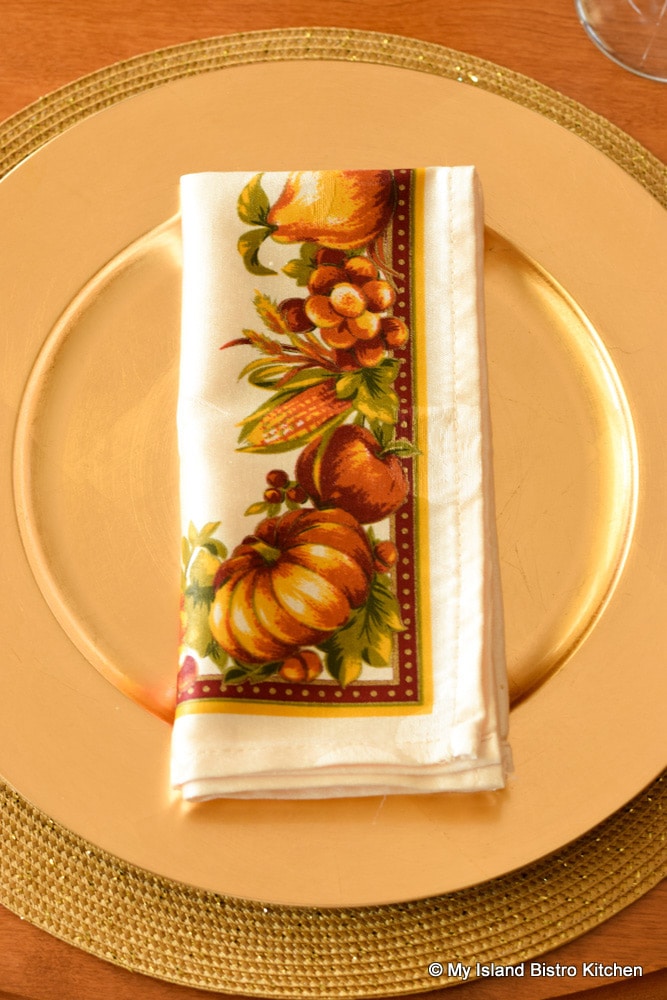
I intentionally left the tabletop bare because the deep maple wood provides a warm looking canvas for an autumn meal. Each placesetting was framed with gold charger plates sitting on gold-colored round placemats. This keeps the tablesetting muted but yet has the warm tones of fall.
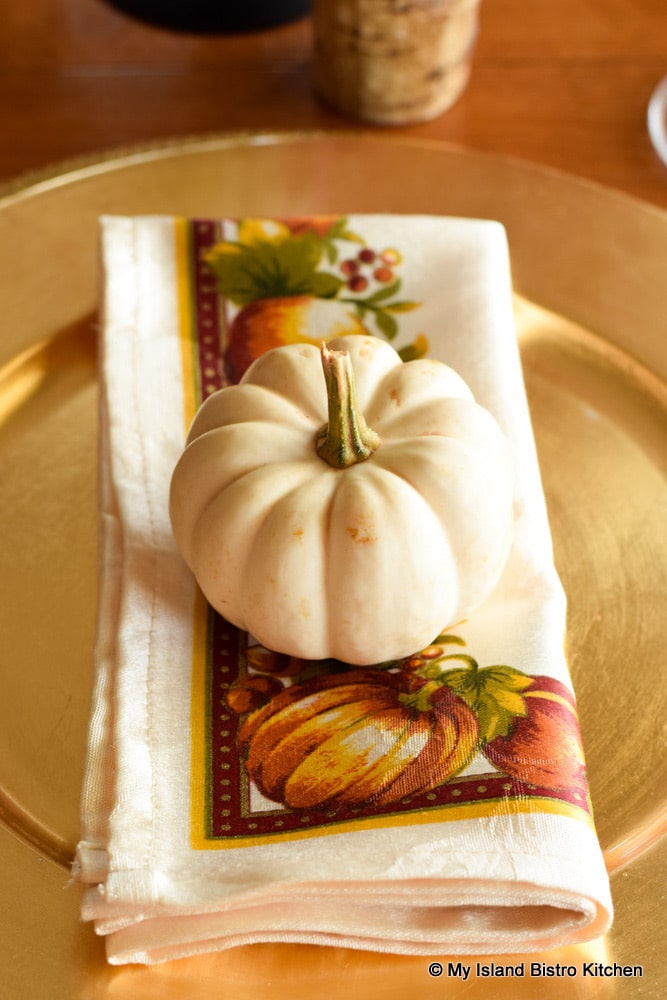
To draw the connection of the pumpkin-focused centerpiece down to the placesettings, I simply placed a small pumpkin atop the napkin at each place.
Thanksgiving Placesetting
When the napkins have a lot of colorful border design on them, like these, it is sometimes best to just fold them flat on the plate so that the design is visible. Otherwise, the design may be lost in a napkin fold and not be as effective.
Thanksgiving Napkin
Glassware does not need to match. Here, I have chosen two different vintage pieces from my collection for the wine and water glasses. The tablesetting is clean, simple, and uncluttered. Best of all, it only took a few minutes to create, used items I already had, and the tiny pumpkins cost me less than $4.
Thanksgiving Tablesetting for Two
I am a big fan of using white dinnerware as it goes with everything and food always looks so appetizing on a white background.
Roast Turkey Dinner
So, regardless the size of your household, there are options to preparing a tasty Thanksgiving Dinner that still includes the elements we expect to see in a Thanksgiving dinner.
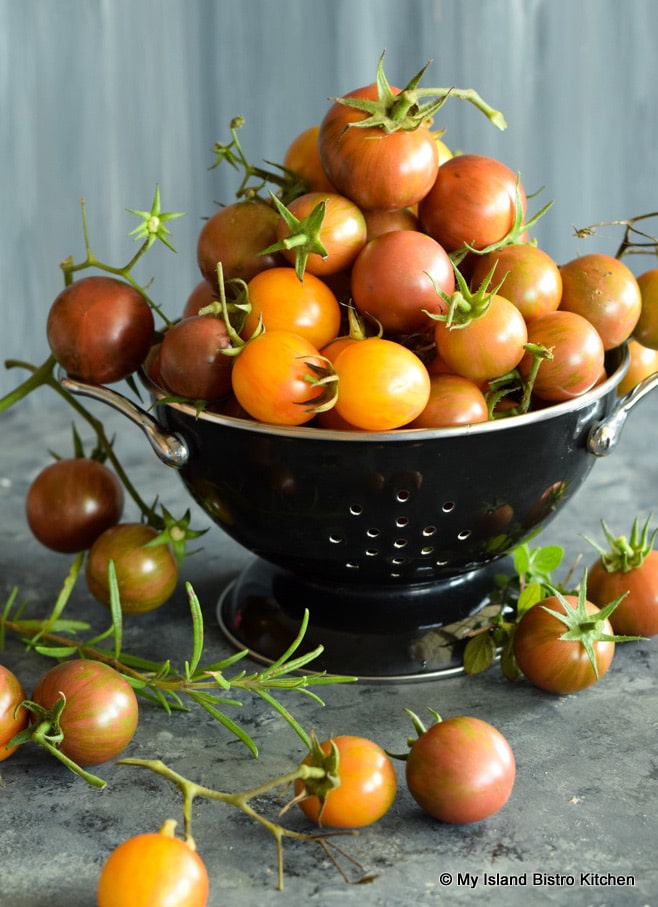
Every year, we grow cherry tomatoes in the garden. They are prolific producers and there is no way we can use up the pounds and pounds of tomatoes they produce. This time of the year, they can’t even be given away because it seems everybody has an over-abundance of them in their gardens. So, what to do with them? Turn them into a rich, thick, and flavorful Roasted Cherry Tomato Sauce! Continue reading Roasted Cherry Tomato Sauce→
Today’s featured recipe from my kitchen is Roasted Parsnip and Pear Soup. The combination of the somewhat nutty flavor of the parsnips pairs well with the sweetness of the Bosc Pears. They balance each other well in this savory soup. Continue reading Roasted Parsnip and Pear Soup Recipe→
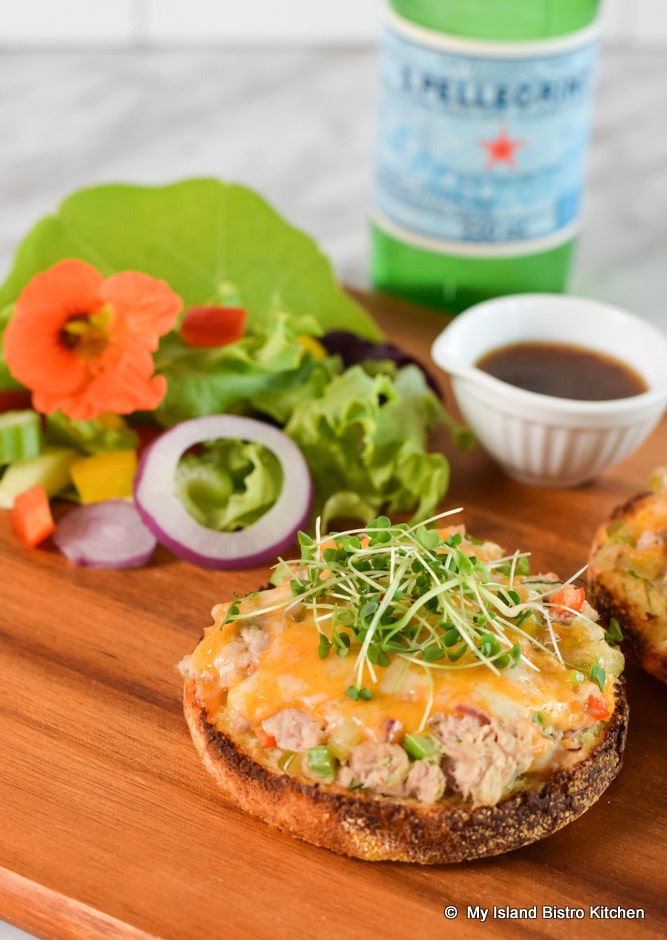
When I want a quick and easy light meal, I will often make these Classic Tuna Melts. They are super easy to make and are wonderfully tasty. It’s amazing what can be done with a simple can of tuna and a few staple ingredients! Continue reading Classic Tuna Melts Recipe→
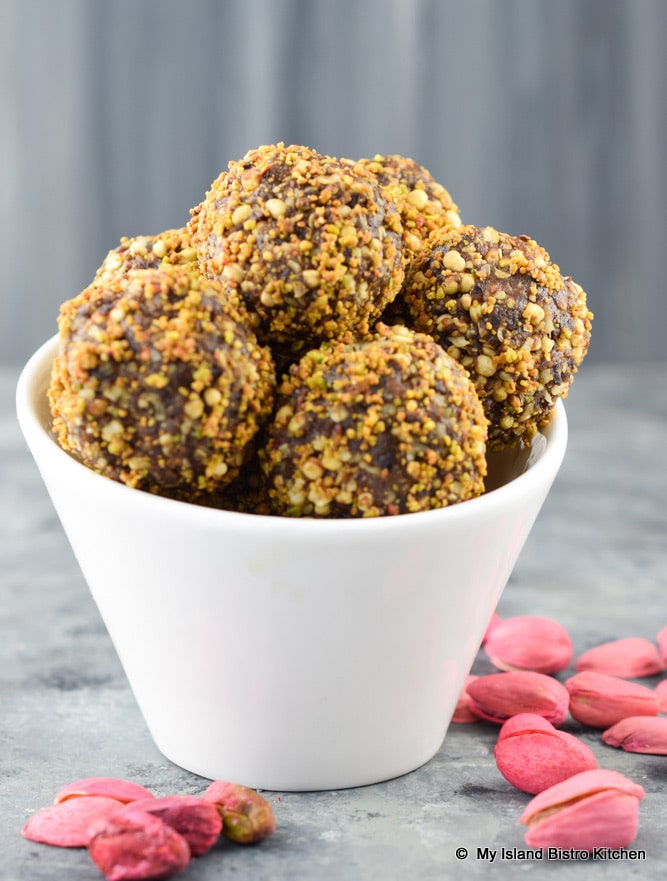
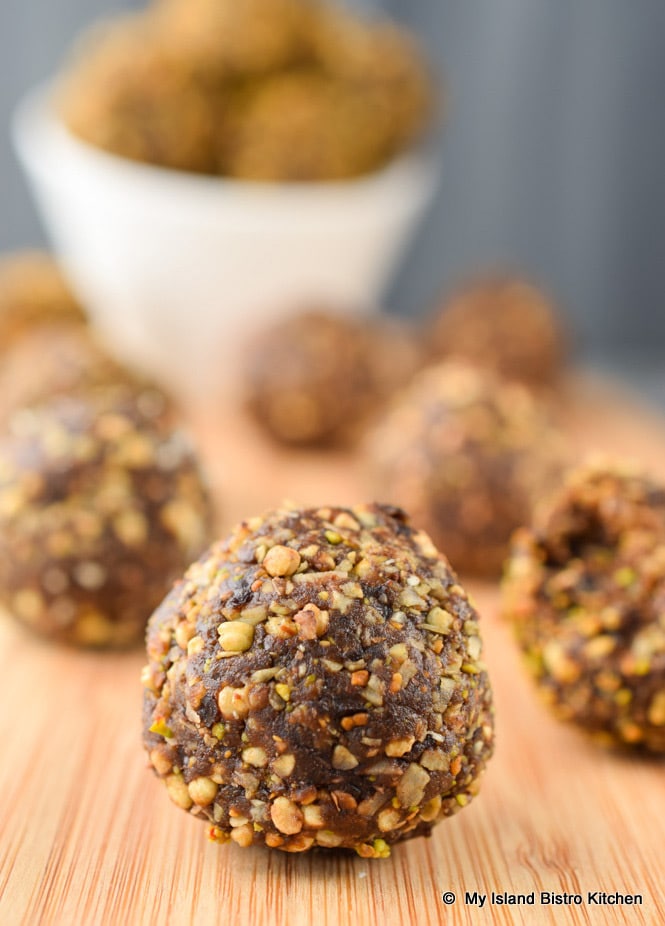
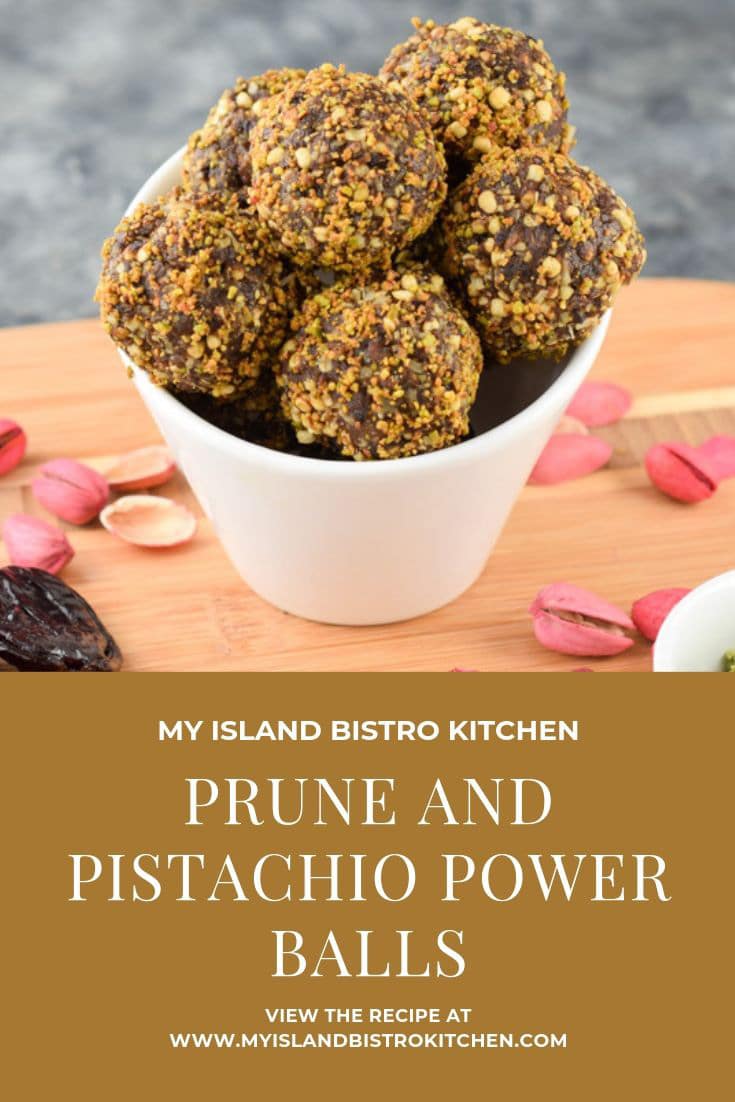
Power balls (sometimes called energy balls, energy bites, or bliss balls) are a super tasty, portable, and convenient on-the-go snack. They are great for the lunch bags and they are the perfect pre- or post-workout snack.
Made with a blend of carefully selected ingredients, these tasty Prune and Pistachio Power Balls provide a great energy boost, particularly during the mid-afternoon slump when energy typically starts to wane for many.
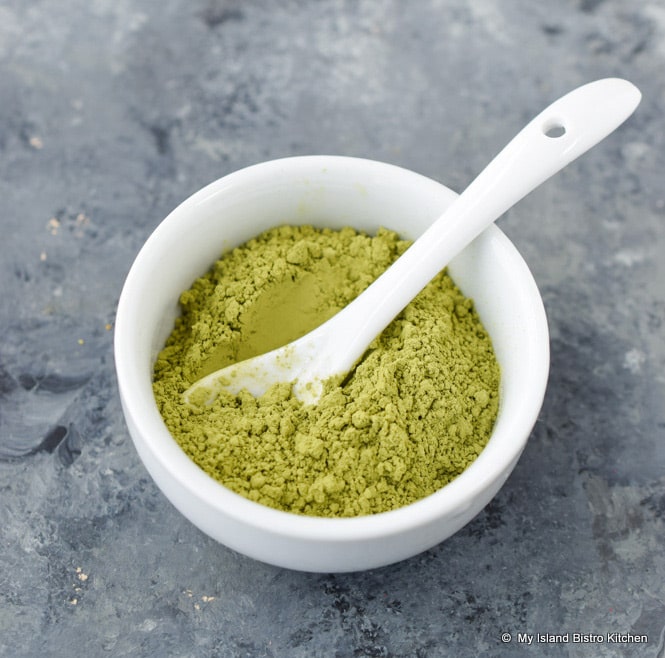
Apart from the usual pantry staples, I bought all of the ingredients for the balls at my local bulk food store. It’s an ideal store for recipes like this one that call for small amounts of ingredients, such as green tea matcha powder, that some people might not have in their cupboards.
Green Tea Matcha Powder
It saves money, too, since you only need to buy what the specific recipe calls for and, in some cases, the ingredients might not be ones the home cook would use up if an entire package or bottle had to be purchased.
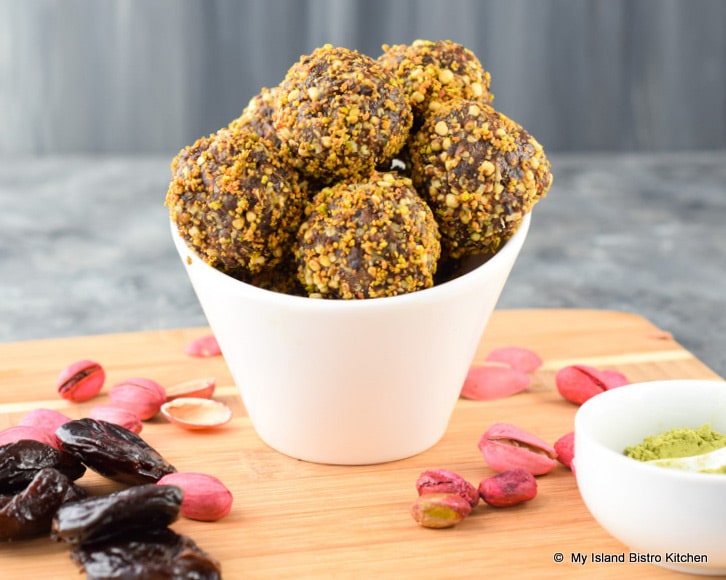
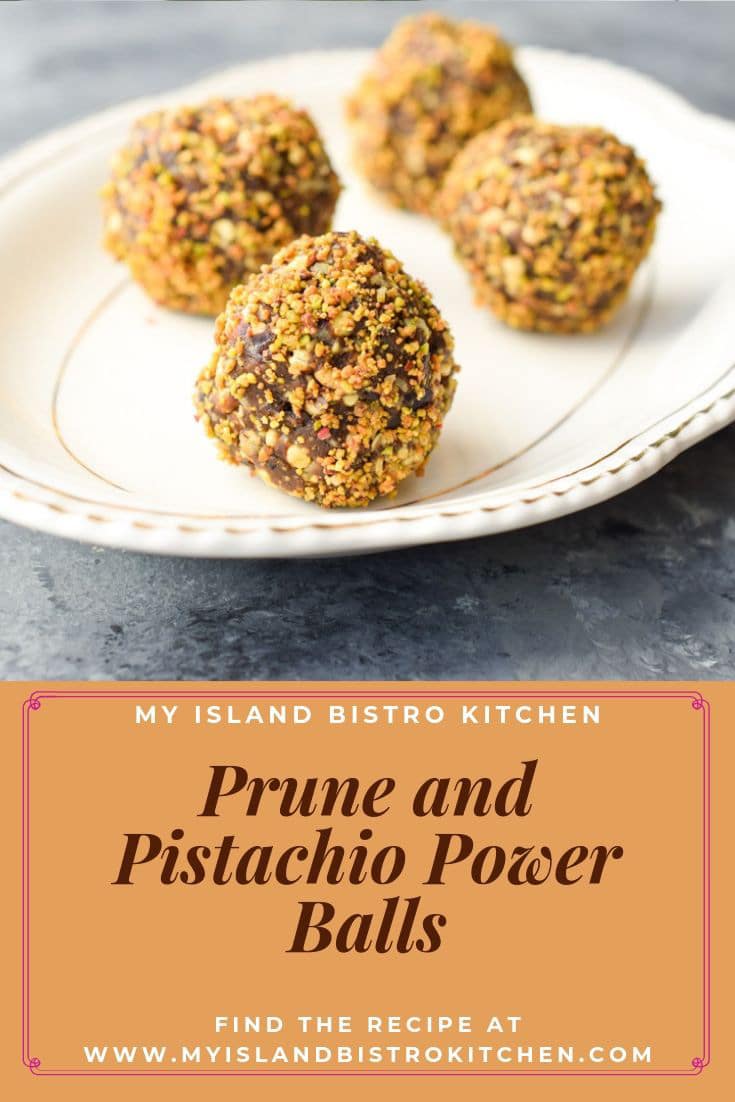
Prune and Pistachio Power Balls
These power balls freeze well and are great to have in the freezer for on-the-go snacks. Check out my posting for Peanut Butter Coconut Energy Bites for an explanation of the four main sets of ingredients typically found in these types of balls. In that posting, you will also find my tips for making energy balls.
Prune and Pistachio Power Balls
[Printable Recipe Follows at end of Posting]
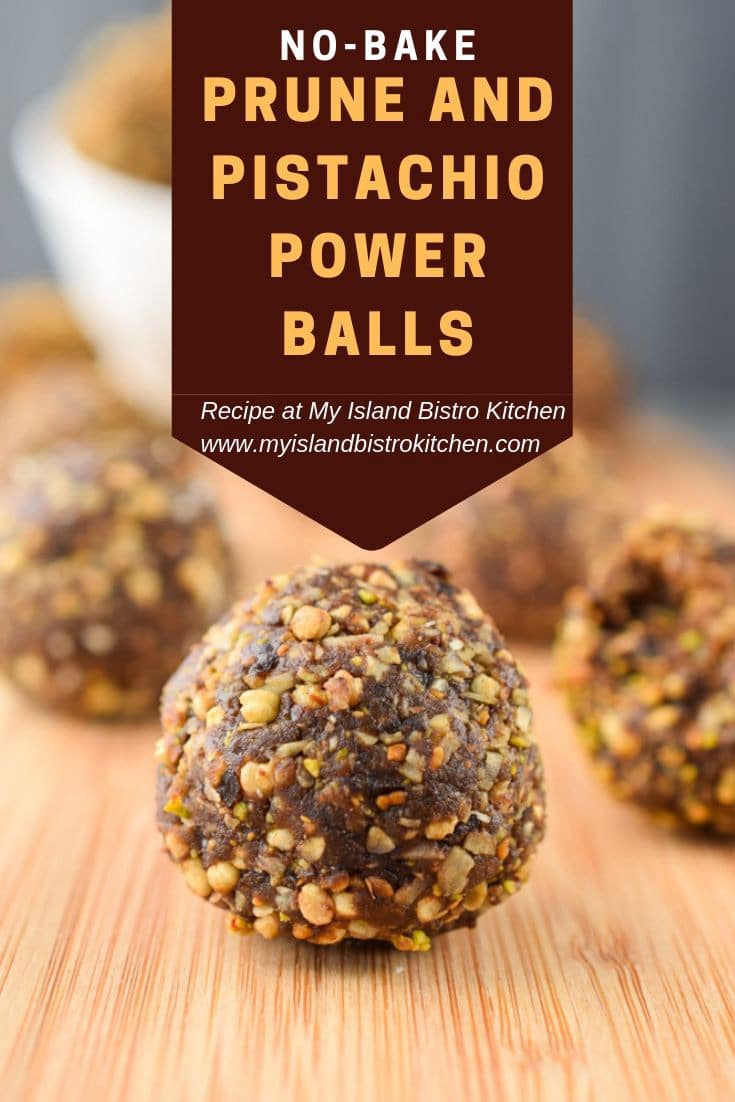
Prune and Pistachio Power Balls
Ingredients:
6 oz dried prunes, coarsely chopped (apx 1 cup chopped)
½ cup quick rolled oats (gluten-free, if required)
1/3 cup sunflower butter
½ cup pistachios, shelled and finely ground (apx. 4 oz unshelled)
1 tbsp ground chia seeds
1 tbsp cocoa
2 tsp chocolate whey protein powder
1½ tsp green tea matcha powder
pinch fine sea salt
2 tbsp maple syrup
1 tbsp coconut oil
1 tsp vanilla
2/3 cup puffed quinoa cereal
½ cup sweetened shredded coconut
Additional finely chopped pistachios for rolling balls (optional)
Method:
Pulse prunes in food processor until they become paste-like or clump into a ball. Add the rolled oats, sunflower butter, pistachios, ground chia seeds, cocoa, chocolate whey protein powder, green tea matcha powder, salt, maple syrup coconut oil, and vanilla. Pulse mixture until ingredients are completely blended.
Add the puffed quinoa cereal and coconut and pulse just until combined. If mixture seems too dry, two to three teaspoons of water may be blended into ingredients. Place mixture in the refrigerator for about 20 minutes to chill.
Roll mixture by hand into bite-sized balls. For frame of reference, each ball should weigh approximately 27 grams. Roll balls in finely chopped pistachio nuts, if desired. Place balls on parchment-lined baking sheet and freeze for 20-25 minutes to firmly set. Store balls, in single layers separated by waxed paper, in airtight container for up to five days in the refrigerator or freeze up to three months for longer storage.
Yield: Apx. 18 balls
If you have made this recipe and enjoyed it and/or wish to share it with your friends and family, please do so on social media but be sure to share the direct link to this posting from my website.
Prune and Pistachio Power Balls make a convenient on-the-go portable snack. These little balls of power are also the perfect pre- or post-workout snack.
Course
Snack
Keyword
energy balls, energy bites, power balls
Servings18
My Island Bistro KitchenMy Island Bistro Kitchen
Ingredients
6ozdried prunes, coarsely chopped (apx 1 cup chopped)
½cupquick rolled oats (gluten-free, if required)
1/3cupsunflower butter
½cuppistachios, shelled and finely ground (apx. 4 oz unshelled)
1tbspground chia seeds
1tbspcocoa
2tspchocolate whey protein powder
1½tspgreen tea matcha powder
pinchfine sea salt
2tbspmaple syrup
1tbspcoconut oil
1tspvanilla
2/3cuppuffed quinoa cereal
½cupsweetened shredded coconut
Additional finely chopped pistachios for rolling balls (optional)
Instructions
Pulse prunes in food processor until they become paste-like or clump into a ball. Add the rolled oats, sunflower butter, pistachios, ground chia seeds, cocoa, chocolate whey protein powder, green tea matcha powder, salt, maple syrup coconut oil, and vanilla. Pulse mixture until ingredients are completely blended.
Add the puffed quinoa cereal and coconut and pulse just until combined. If mixture seems too dry, two to three teaspoons of water may be blended into ingredients. Place mixture in the refrigerator for about 20 minutes to chill.
Roll mixture by hand into bite-sized balls. For frame of reference, each ball should weigh approximately 27 grams. Roll balls in finely chopped pistachio nuts, if desired. Place balls on parchment-lined baking sheet and freeze for 20-25 minutes to firmly set. Store balls, in single layers separated by waxed paper, in airtight container for up to five days in the refrigerator or freeze up to three months for longer storage.
Recipe Notes
Yield: Apx. 18 balls
[Copyright My Island Bistro Kitchen]
(Mostly) PEI and Maritime Food – Good Food for a Good Life!