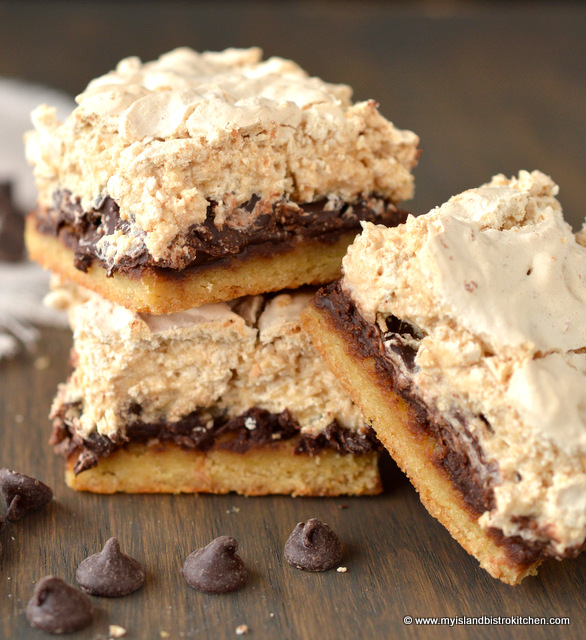
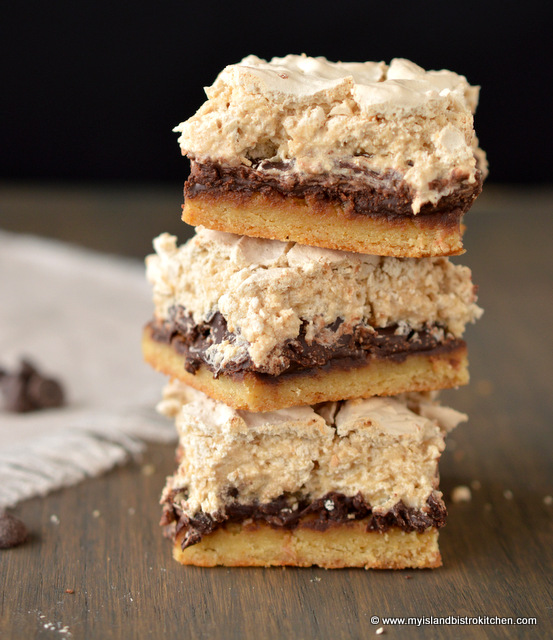
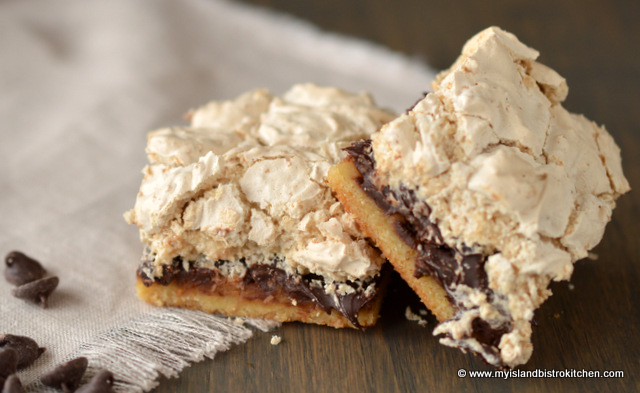
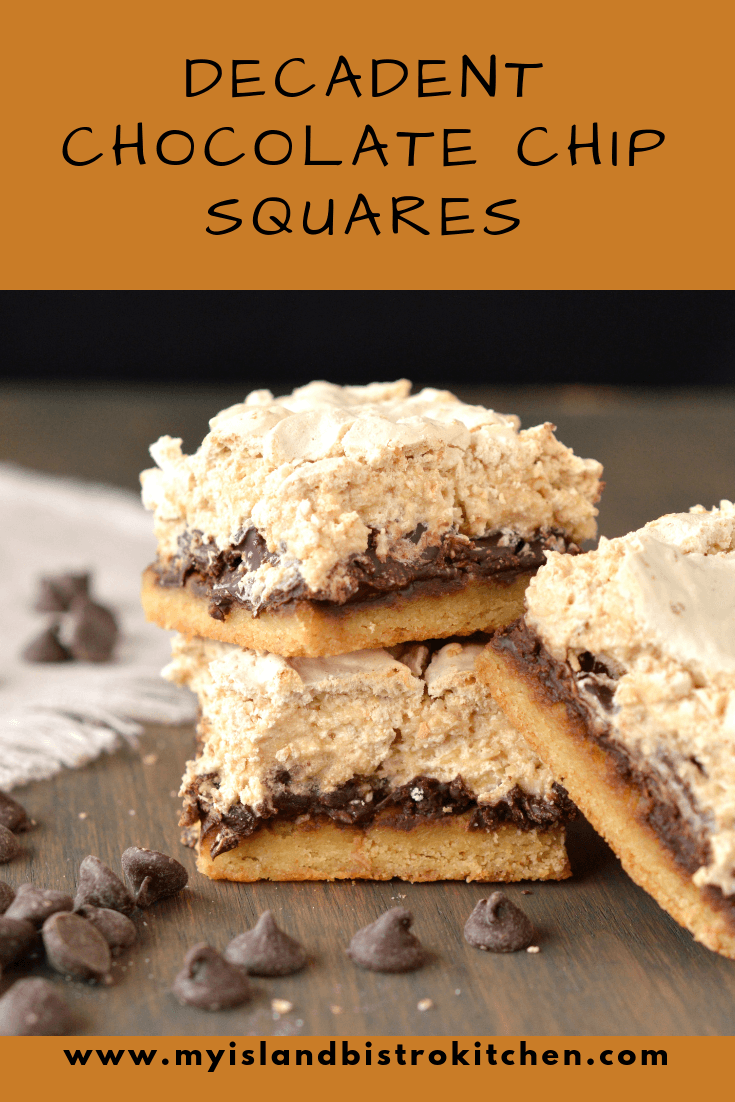
This is one of my most favorite squares! I have been making this recipe for years. It’s good any time of the year and is often found in my summer picnic basket. With its rich, gooey chocolate center and a slightly crunchy topping, it’s a real treat for sure, especially for chocolate lovers.
Decadent Chocolate Chip Squares
Decadent Chocolate Chip Squares
Ingredients:
Base:
1 cup all-purpose flour
1 tsp baking powder
Pinch salt
⅓ cup butter, softened
⅓ cup brown sugar, packed
2 egg yolks
10 oz. chocolate chips
Topping:
2 egg whites, beaten stiff
⅛ tsp cream of tartar
1 cup brown sugar, lightly packed
1 tsp vanilla
½ cup macaroon coconut
Method:
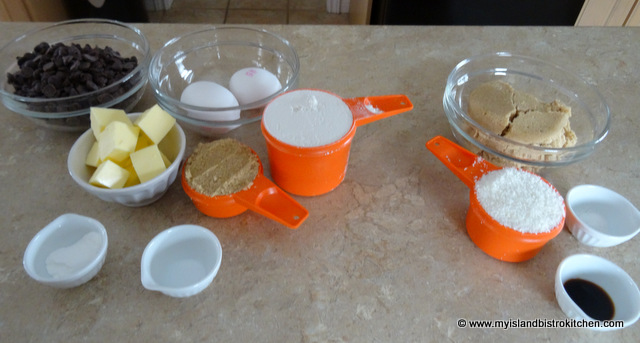
Assemble ingredients.
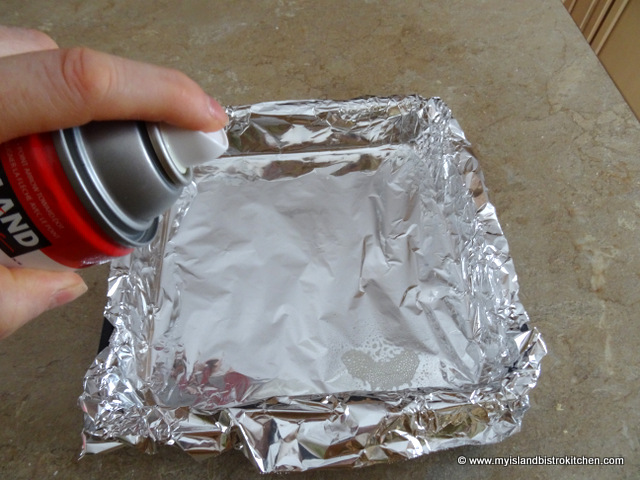
Prepare 9” square pan by lining with tin foil and spraying with cooking oil.
Preheat oven to 350°F.
Base:
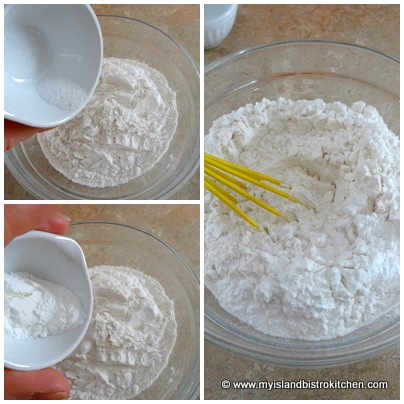
In small bowl, whisk together the flour, baking powder, and salt. Set aside.
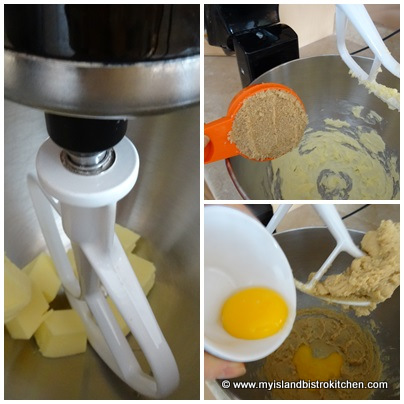
Cream butter and brown sugar together. Add egg yolks, one at a time, beating well after each addition.
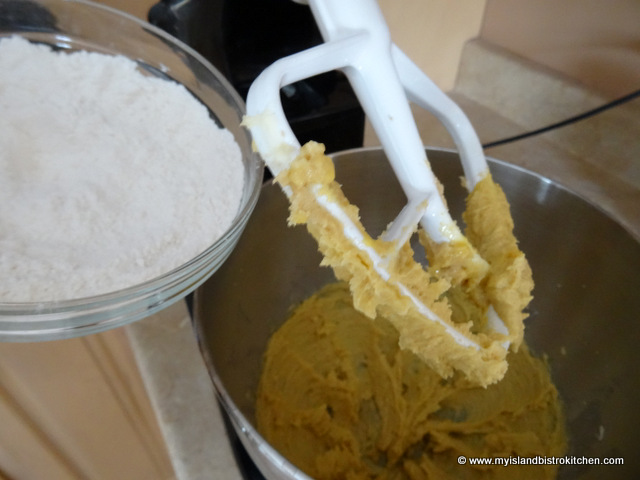
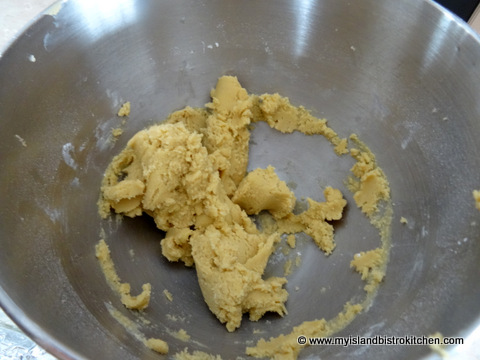
Add dry ingredients and stir just until dry ingredients are incorporated.
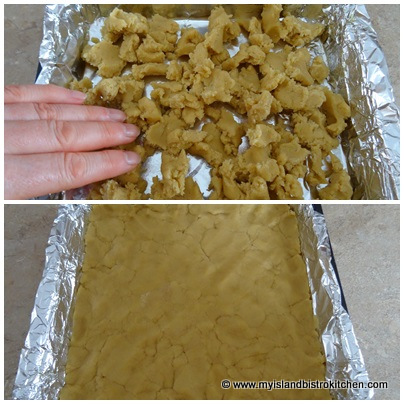
Evenly press dough into prepared pan.
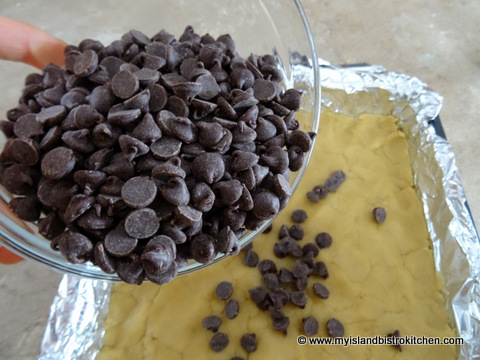
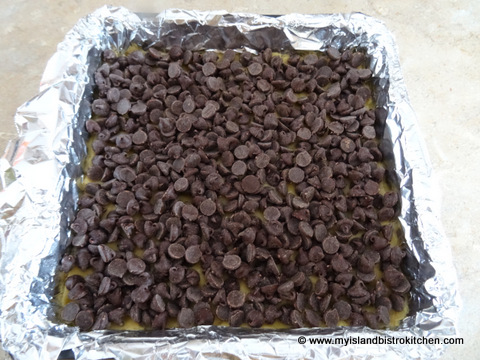
Evenly sprinkle the chocolate chips over the dough. Set aside.
Topping:
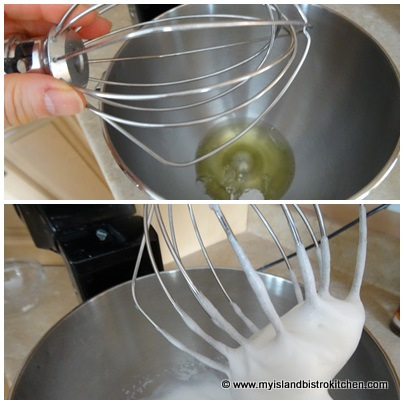
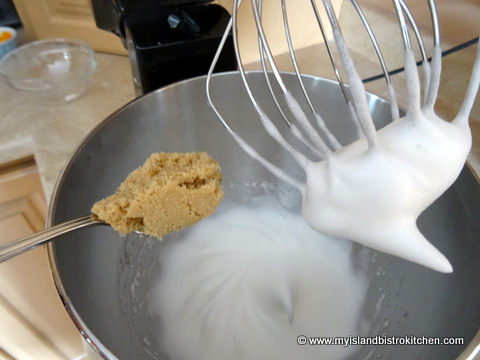
In clean mixer bowl, beat the two egg whites with the cream of tartar until soft peaks form.
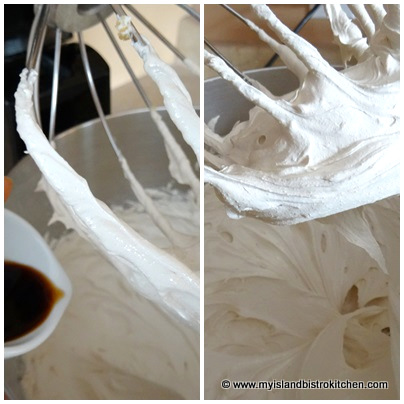
Beat in the brown sugar, adding a tablespoon at a time.
Add the vanilla.
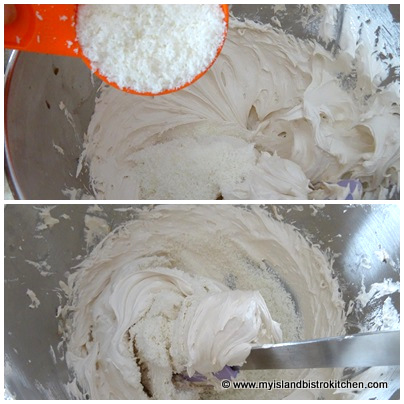
Fold in the coconut.
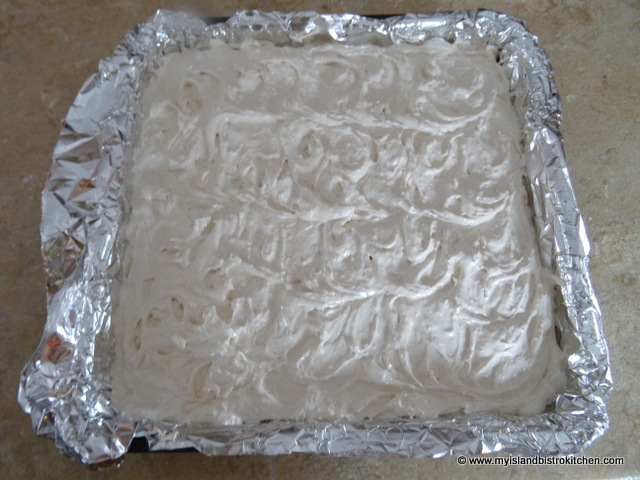
Spread the topping evenly over the chocolate chips.
Bake for 30-35 minutes or until topping is browned. Remove from oven and place pan on wire cooling rack. Let cool completely. Lift tin foil and square from the pan and cut into squares.
Prepare 9” square pan by lining with tin foil and spraying with cooking oil.
Preheat oven to 350°F.
Base:
In small bowl, whisk together the flour, baking powder, and salt. Set aside.
Cream butter and brown sugar together. Add egg yolks, one at a time, beating well after each addition. Add dry ingredients and stir just until dry ingredients are incorporated.
Evenly press dough into prepared pan. Evenly sprinkle the chocolate chips over the dough. Set aside.
Topping:
In clean mixer bowl, beat the two egg whites with the cream of tartar until soft peaks form. Beat in the brown sugar, adding a tablespoon at a time. Add the vanilla. Fold in the coconut.
Spread the topping evenly over the chocolate chips.
Bake for 30-35 minutes or until topping is browned. Remove from oven and place pan on wire cooling rack. Let cool completely. Lift tin foil and square from the pan and cut into squares.
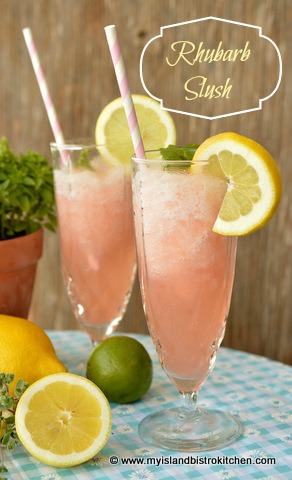
I love to develop summertime drinks! This recipe for Rhubarb Slush uses rhubarb as the base for this tasty slush drink. The addition of a mix of freshly squeezed citrus juices, sweet pineapple juice, and frozen lemonade concentrate make this a flavorful beverage. Continue reading Rhubarb Slush→
I am always developing ideas for ways I can make use of rhubarb. We have a long-established rhubarb patch at the end of the garden that always produces large beautiful red stalks. It was planted circa 1993-94 and is the German Wine variety. Because of its rich red color, it lends itself to colorful dishes. While we freeze lots of rhubarb for winter usage, I try to make good use of it while it is fresh. There’s just something so satisfying in being able to go to the garden to pick a few stalks of rhubarb just as I need them for a dish I am making.
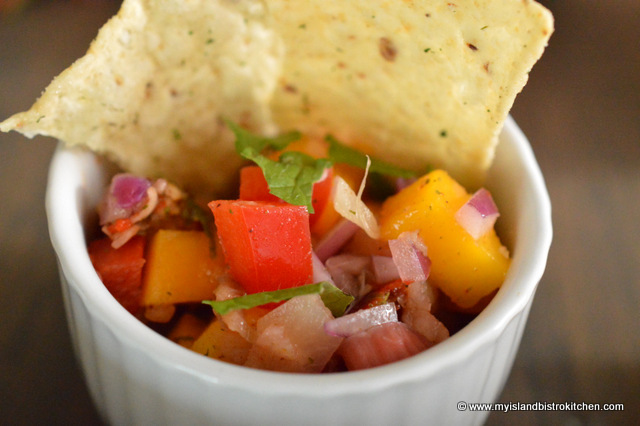
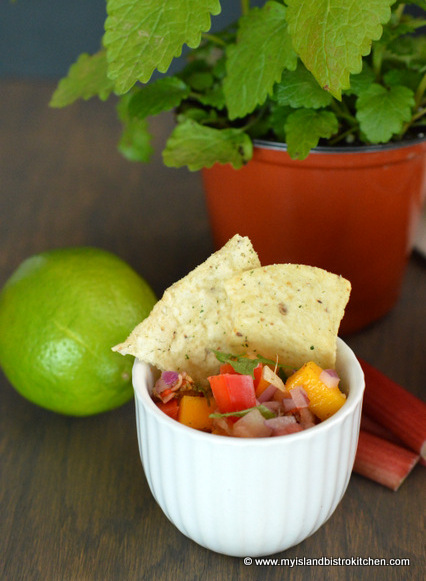
Rhubarb Salsa
Today, I am sharing the recipe I developed for Rhubarb Salsa. There are two types of salsa –fresh and processed (bottled) that has been properly canned. This is a fresh salsa. Fresh salsa is meant to be used shortly after it has been mixed up. Ingredients in a fresh salsa are raw and the juices that emanate from the fruit and vegetables will be water thin. The ingredients will have vibrant color and flavor, never soggy or dull. This is in contrast to a processed salsa where the ingredients will be cooked and the salsa will have a thicker consistency, almost sauce-like in texture. A cooked salsa will have a longer shelf life than the fresh salsa.
So, today, we are making a fresh salsa using rhubarb. This recipe has not been tested for safe canning acidity levels and, therefore, canning is not recommended.
As you know, there has to be some kind of base for the salsa – something that gives it its bulk, if you will. For example, in many salsas, that tends to be a tomato base. In my recipe, which is a sweet salsa, I am using rhubarb as the base. Use young, thin rhubarb stalks for this recipe. Continue reading Rhubarb Salsa→
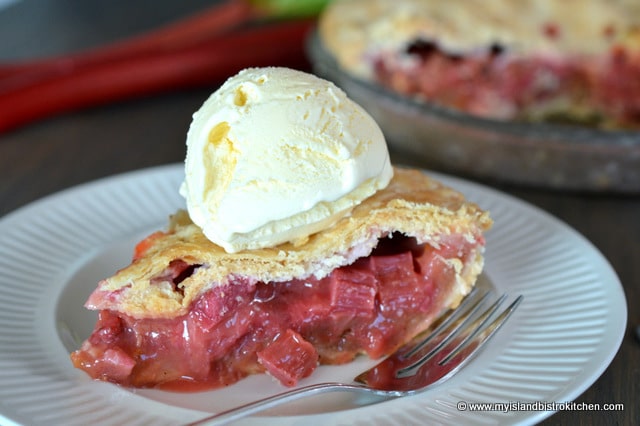
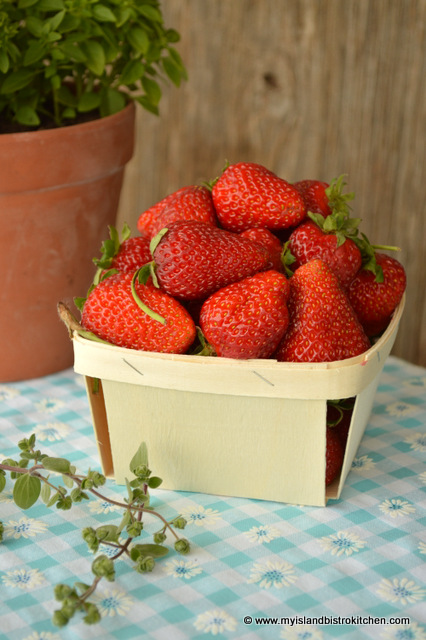
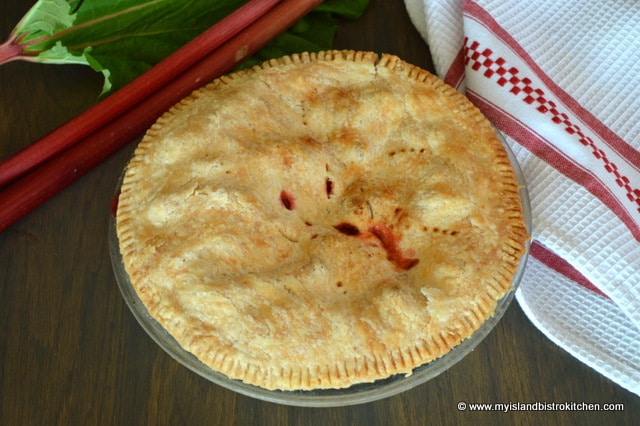
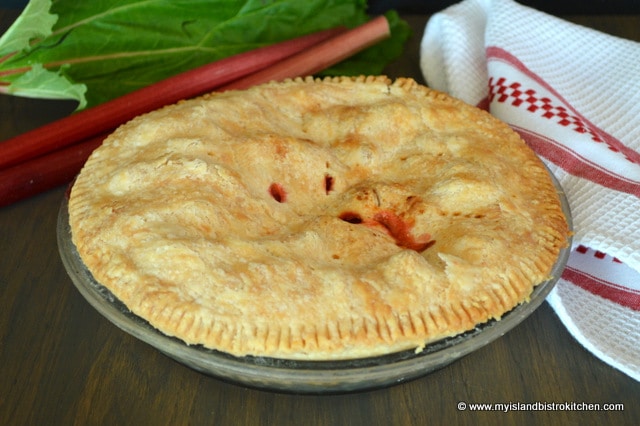
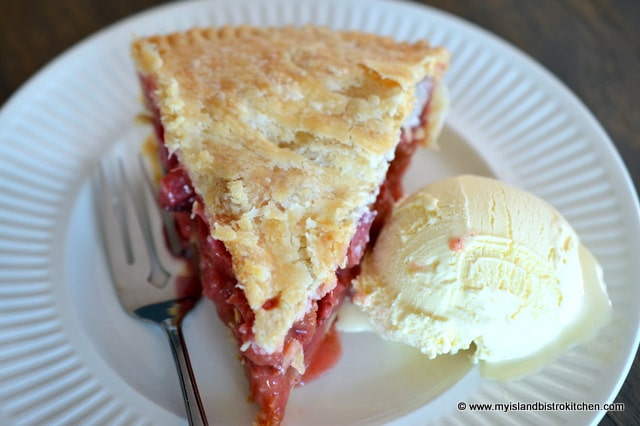
Strawberries and rhubarb are always a winning combination as their flavors and textures play off well against each other. On PEI, there is a very short window of opportunity to have both fresh rhubarb and Island strawberries available at the same time. So, if you are lucky enough to have both available, now is the time to make this delicious Strawberry Rhubarb Pie!
While it is possible to use frozen rhubarb in the strawberry rhubarb pie recipe I am sharing, the strawberries do need to be fresh, not frozen, since frozen berries will release too much moisture into the pie filling.
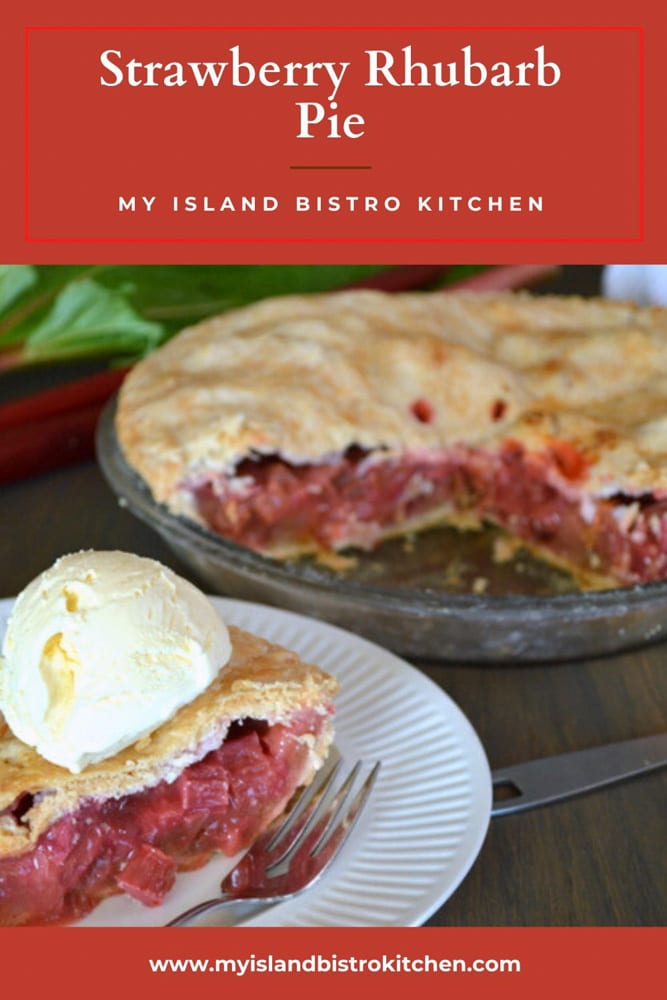
Strawberry-Rhubarb Pie
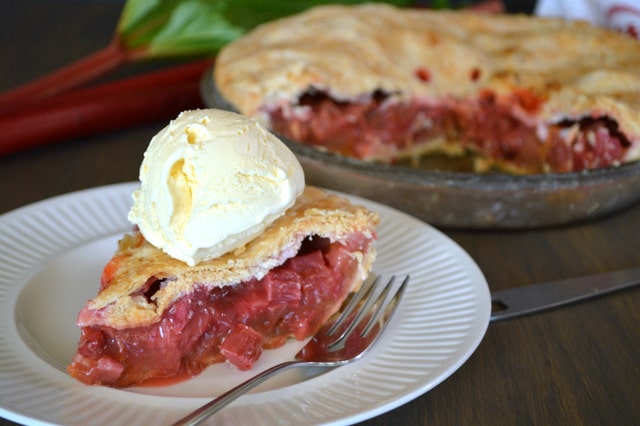
Lightly spiced, this pie is a summertime treat, especially when served with a scoop of high-quality French vanilla ice cream. This is a double crust pie and you can find my pastry recipe by clicking here.
1¼ cups white sugar
¼ cup cornstarch
¼ tsp salt
1 tsp cinnamon
¼ tsp ginger
Pinch nutmeg
1½ tsp grated orange rind
1 egg, lightly beaten
1 tbsp orange juice
1 tbsp butter cut into pieces
Method:
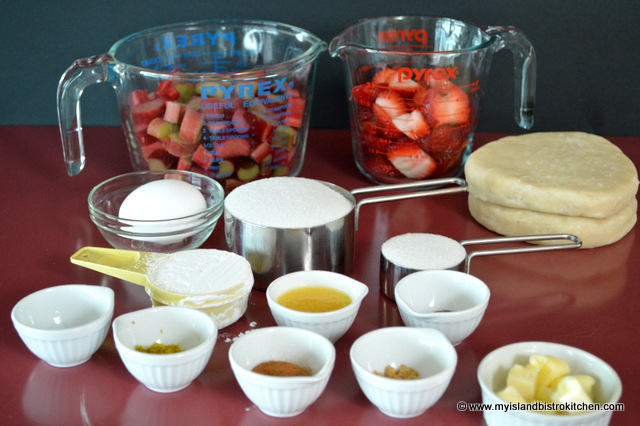
Assemble ingredients.
Preheat oven to 425°F.
Grease 9” pie plate. Roll out pastry and line pie plate, trimming pastry to fit.
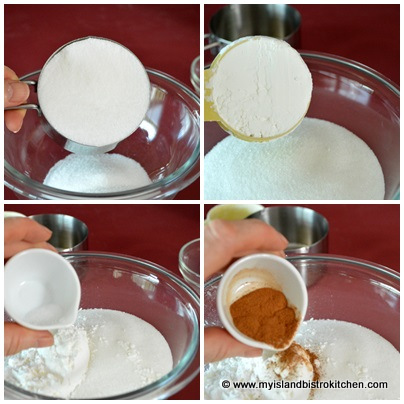
In small bowl, mix sugar, cornstarch, salt, spices, and grated orange rind.
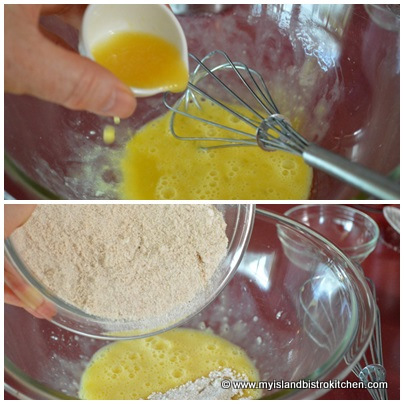
In separate bowl, beat egg with orange juice. Blend in dry ingredients.
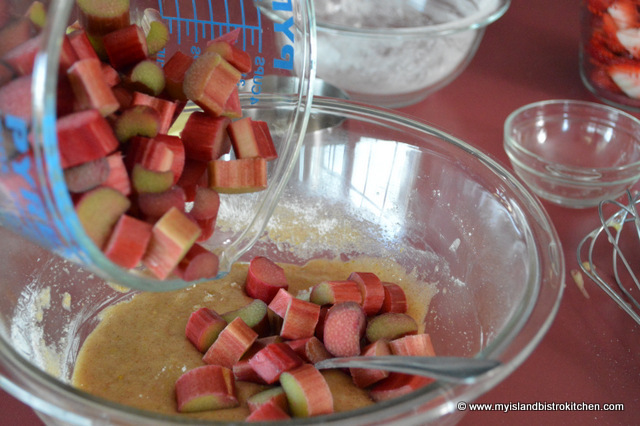
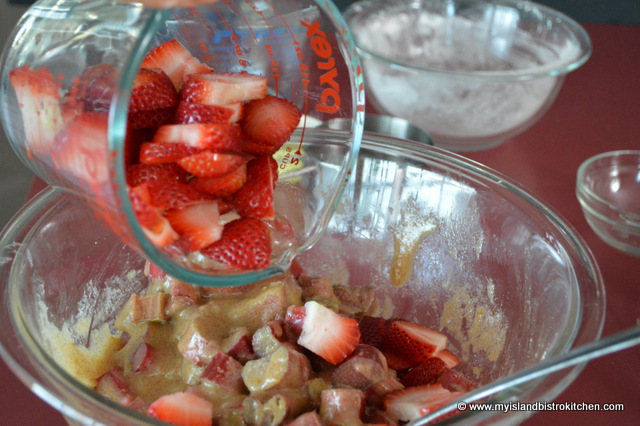
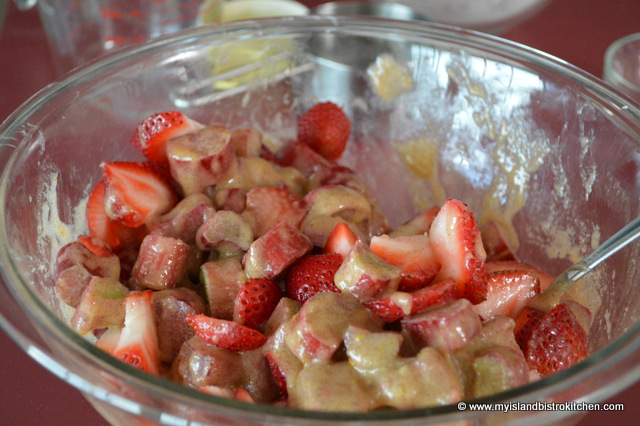
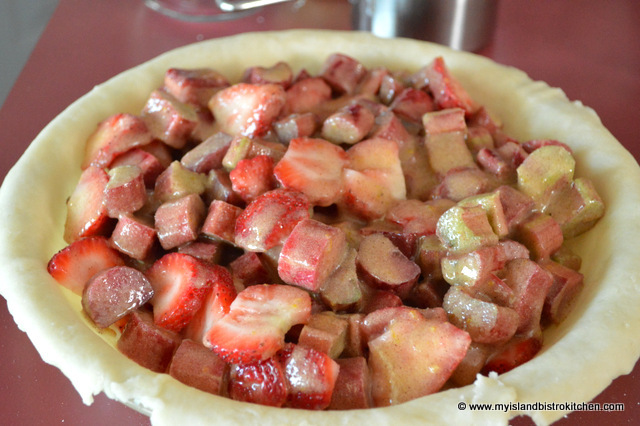
Add rhubarb and strawberries and stir gently to mix.
Transfer filling to prepared pie crust.
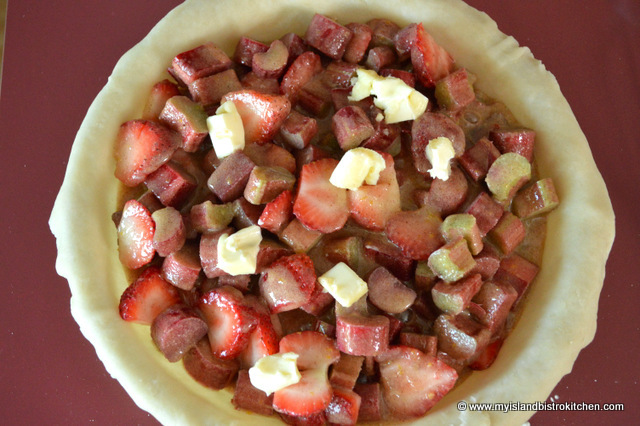
Dot with butter.
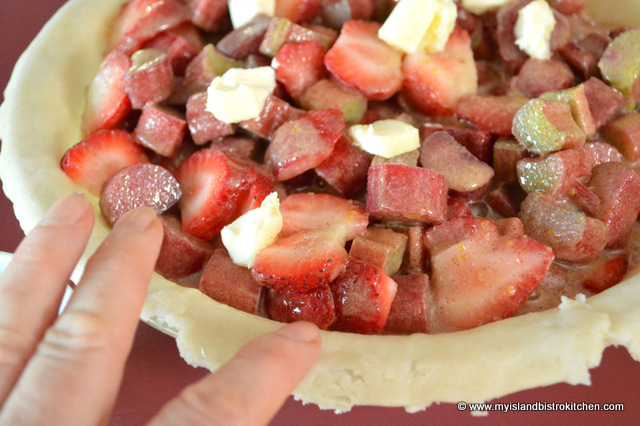
Dampen edges of pie pastry with a finger dipped in water.
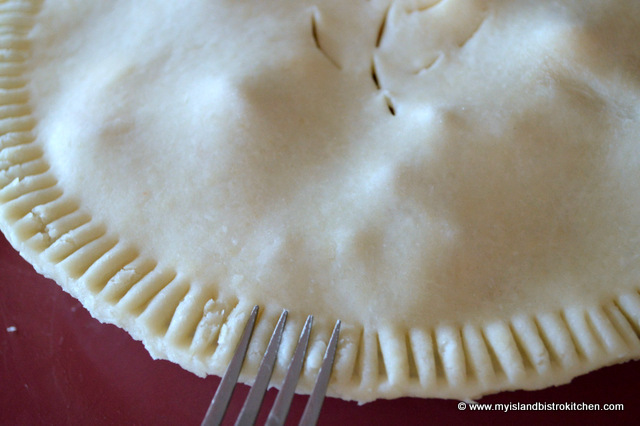
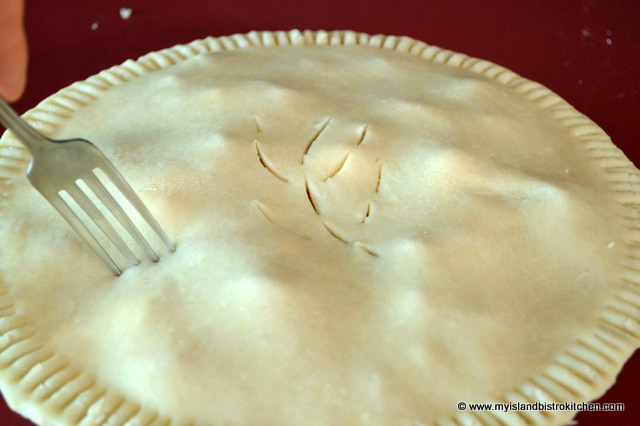
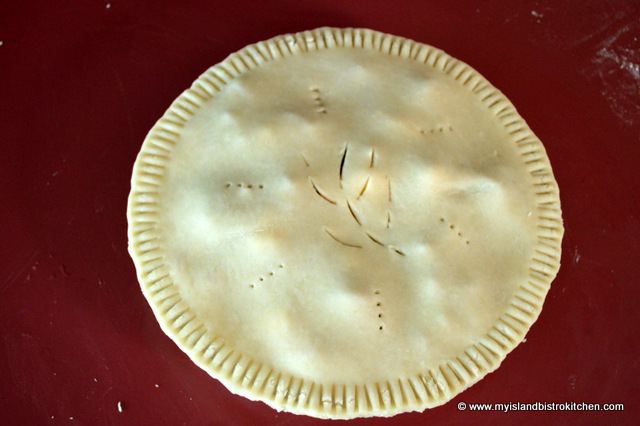
Roll out remaining pastry for top crust. Place over filling and trim to fit. Crimp or press edges of pastry together with fork tines to seal.
Cut slits in top of pastry and prick with fork tines in several places to allow steam to escape as the pie bakes.
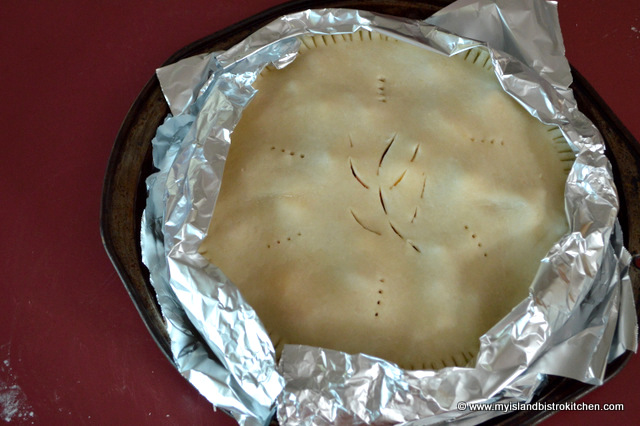
Circle edge of pie with a collar of tin foil to prevent over-browning. Remove this collar after 35 minutes of baking to allow edges to bake and brown.
Place pie on rimmed baking sheet to catch any drips. Bake 15 minutes at 425°F then decrease temperature to 375°F and bake for approximately 45 minutes longer or until pastry is golden brown and fruit is cooked.
Remove pie from oven and cool completely before slicing and serving.
Yield: One pie, apx. 8 servings
Strawberry-Rhubarb Pie
If you have made this recipe and enjoyed it and/or wish to share it with your friends and family, please do so on social media but be sure to share the direct link to this posting from my website.
A lightly spiced double-crusted pie that combines two of summer's best flavours.
Ingredients
Pastry for 2-crust 9” pie
3 cups rhubarb, cut into ½” pieces
1½ cups fresh strawberries, sliced
1¼ cups white sugar
¼ cup cornstarch
¼ tsp salt
1 tsp cinnamon
¼ tsp ginger
Pinch nutmeg
1½ tsp grated orange rind
1 egg, lightly beaten
1 tbsp orange juice
1 tbsp butter cut into pieces
Instructions
Assemble ingredients. Preheat oven to 425°F.
Grease 9” pie plate. Roll out pastry and line pie plate, trimming pastry to fit.
In small bowl, mix sugar, cornstarch, salt, spices, and grated orange rind.
In separate bowl, beat egg with orange juice. Blend in dry ingredients. Add rhubarb and strawberries and stir gently to mix. Transfer filling to prepared pie crust. Dot with butter.
Dampen edges of pie pastry with a finger dipped in water. Roll out remaining pastry for top crust. Place over filling and trim to fit. Crimp or press edges of pastry together with fork tines to seal. Cut slits in top of pastry and prick with fork tines in several places to allow steam to escape as the pie bakes.
Circle edge of pie with a collar of tin foil to prevent over-browning. Remove this collar after 35 minutes of baking to allow edges to bake and brown.
Place pie on rimmed baking sheet to catch any drips. Bake 15 minutes at 425°F then decrease temperature to 375°F and bake for approximately 45 minutes longer or until pastry is golden brown and fruit is cooked.
Remove pie from oven and cool completely before slicing and serving.
Follow “the Bistro” on Pinterest at https://www.pinterest.ca/peibistro/ and pin the Pinterest-ready photo found at the end of this post to your favorite Pinterest boards.
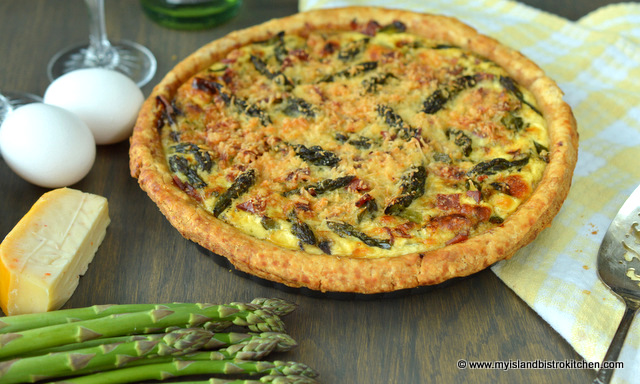
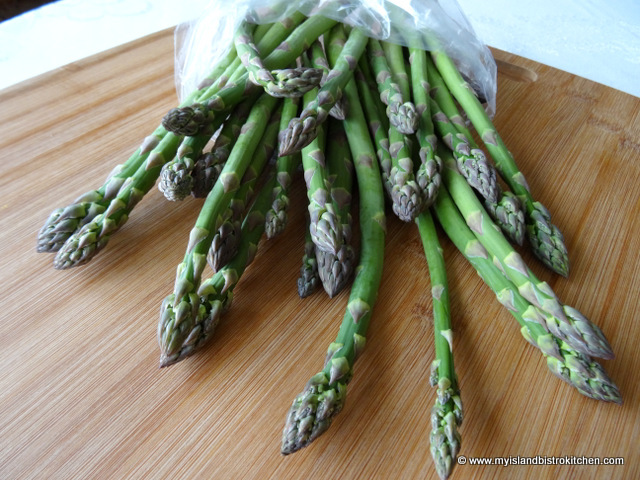
One of the first local veggies to appear in PEI each year is asparagus. This vegetable is very versatile and is often used not only for its earthy flavor but also for its presentation. With its long straight stems with a texture tip end, asparagus turns a bright green color when cooked so it plates well and makes a meal attractive.
This year, I created an Asparagus Quiche that can be eaten warm or at room temperature which makes it a good buffet or picnic food. Pair it with a good green salad (perhaps dressed with my Rhubarb Vinaigrette) and it is suitable for brunch, lunch, or an informal supper. Continue reading Asparagus Quiche→
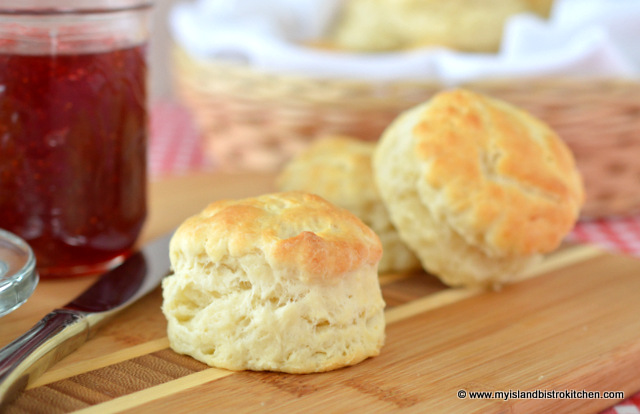
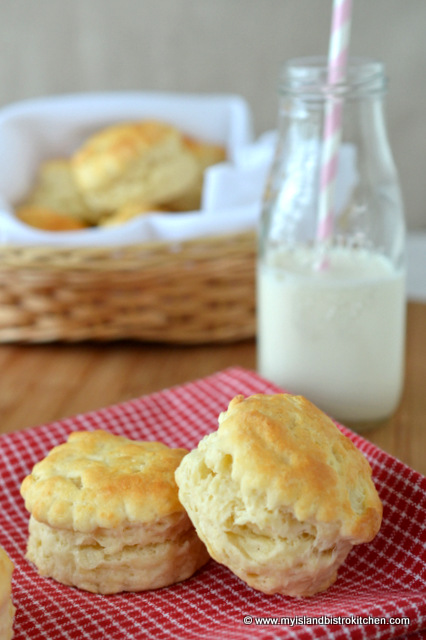
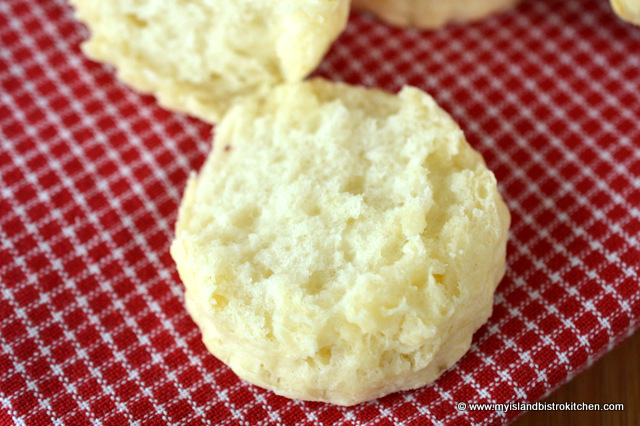
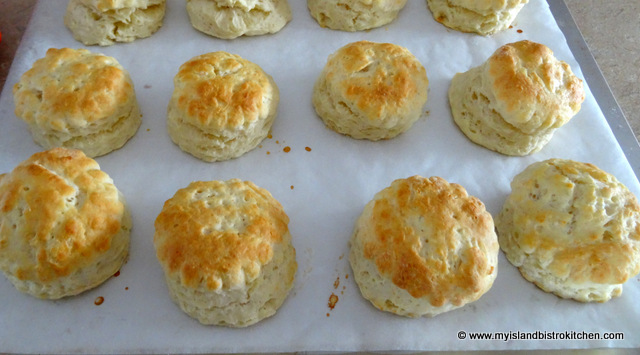
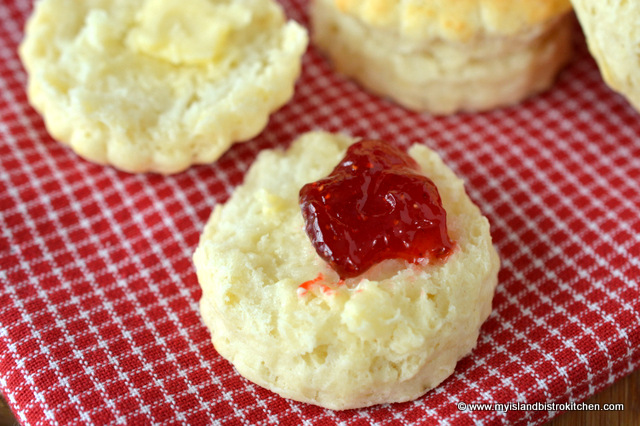
Do you love the smell of tea biscuits baking in the oven? It’s one of my favorite kitchen scents.
My first recollection of biscuits dates back to visiting a grandmother. She made the best biscuits, added a good slather of peanut butter to the warm, fresh-out-of-the-oven biscuits, and served them with a tall glass of cold milk to a wee gal patiently sitting on a high stool at her elbow by the cupboard. I suspect her biscuit recipe was just made from memory and wasn’t written or recorded anywhere. Isn’t it funny how some foods remind us of certain people and bring back great recollections!
Biscuits are not hard to make and they require only pantry staple ingredients — essentially, flour, leavening, salt, shortening/butter, and liquid – usually dairy (i.e., milk, whipping cream, or buttermilk). What makes biscuit recipes differ is usually the quantity of ingredients used, the type of dairy used as liquid and, sometimes, there will be some additions to the basic ingredients – for example, some recipes call for cream of tartar, a small amount of sugar, or even an egg.
I often hear people say they can’t make biscuits because they always turn out hard as bricks. I suspect this is quite likely due to over-kneading the dough. Biscuit dough should be kneaded as little as possible, just enough to gather up the dough and have it hold together to cut out the biscuits. Usually, only 8-10 kneads is all that is required. I have published lots of tips and hints for making biscuits in a post containing my Buttermilk Biscuit recipe which you can access by clicking here. If you are new to biscuit making or have experienced issues with making satisfactory biscuits in the past, you may find some of the hints and tips in that post useful.
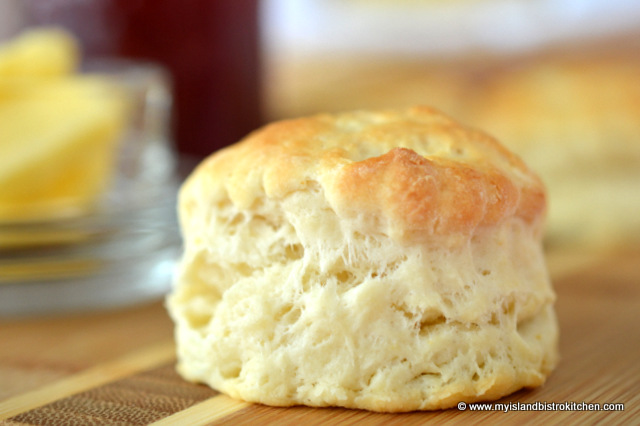
Texture of biscuit
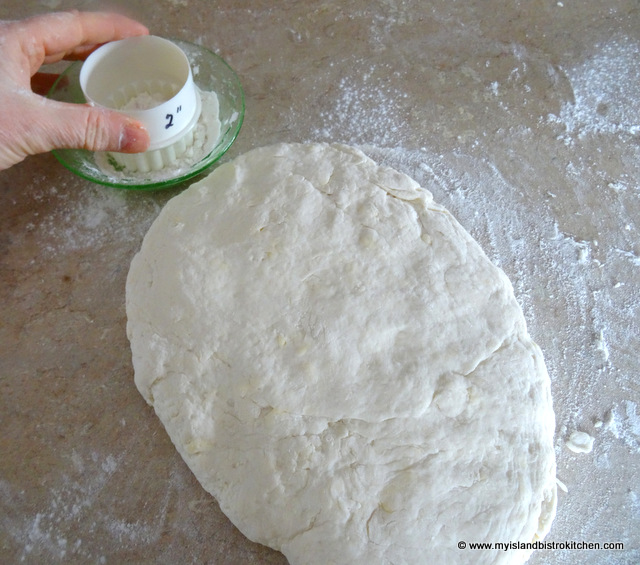
The dough can be rolled out with a rolling pin or simply patted to the desired thickness, which is what I do. I find about 1″ thick dough yields a good depth of biscuit. I use a 2″ crinkled-edge cookie cutter for mine but a straight edge cutter works just as well.
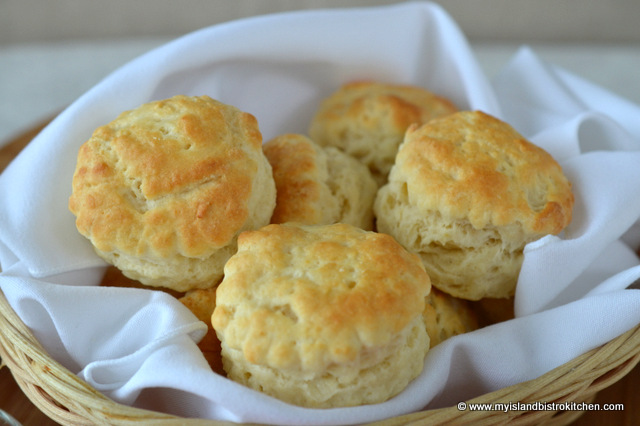
Over the years, I have tried many biscuit recipes, some yielding good results, others not so much. As the old saying goes, if you can’t find something already suitable, develop your own so that’s what I have done to create my own biscuit recipe that has come from many kitchen testing trials to arrive at the right selection and amount of ingredients to yield the flavour and texture I was looking for.
[Printable recipe follows at end of post]
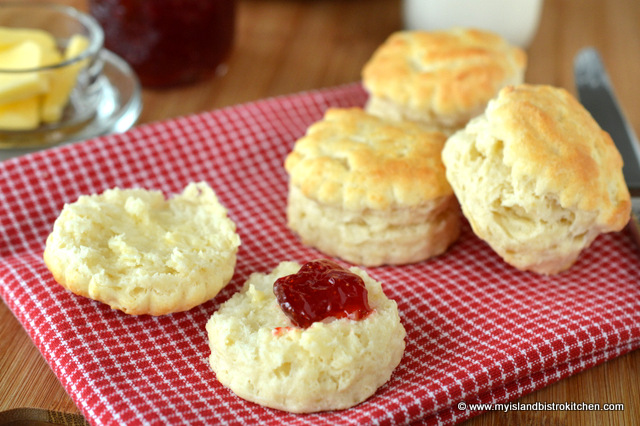
My Island Bistro Kitchen’s Tea Biscuits
Ingredients:
2¼ cups all-purpose flour
1 tbsp sugar
4 tsp baking powder
¾ tsp salt
½ tsp cream of tartar
¼ cup cold unsalted butter
⅔ cup whipping cream
¾ cup whole milk
1-2 tbsp milk for brushing on top of biscuits
Method:
Assemble ingredients.
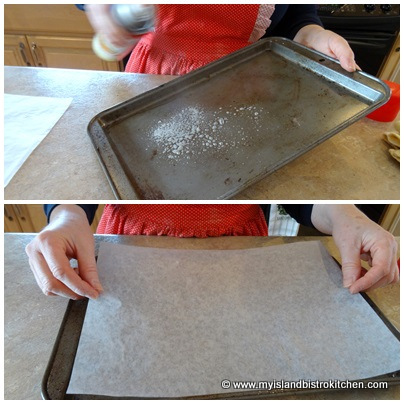
Preheat oven to 425°F. Line large baking sheet with parchment paper.
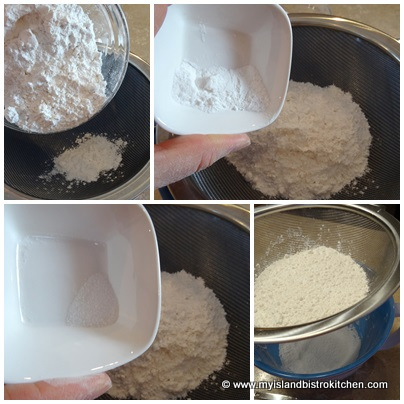
In large bowl, whisk together the flour, sugar, baking powder, salt, and cream of tartar.
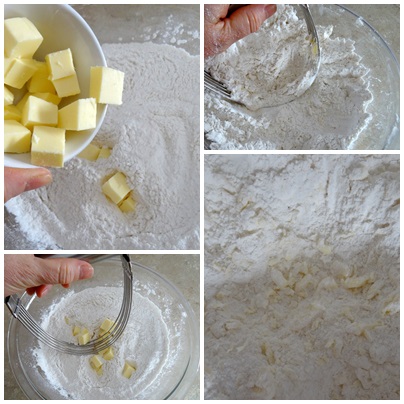
Using a pastry cutter, cut in the butter until mixture resembles coarse crumbs. Make a well in the center of the ingredients.
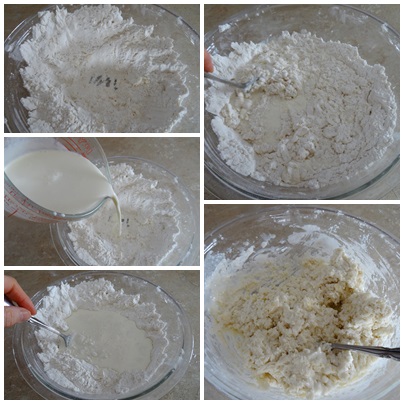
In large measuring cup, mix together the whipping cream and milk. Pour into well in dry ingredients. Mix together just until flour mixture is incorporated. Do not overmix. Mixture will be a soft, moist batter.
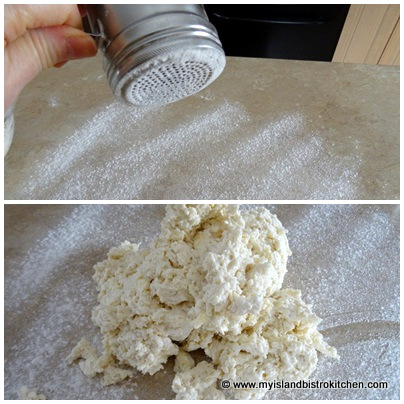
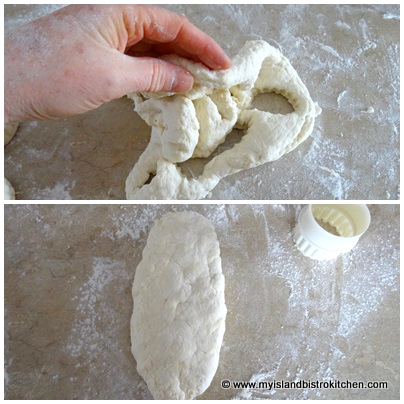
Let batter stand in bowl for just a minute or so then turn out onto a floured surface. Knead dough 8-10 times, just until it holds together enough to cut out the biscuits. Do not over-knead.
Roll or pat to desired thickness – I suggest about 1” thick will yield a good depth of finished biscuit.
Using a 2” round floured cookie cutter, cut out biscuits. Dip the cookie cutter in flour before cutting out each biscuit.
Gather up remaining dough, pat down to about 1” thick, and cut out the rest of the biscuits.
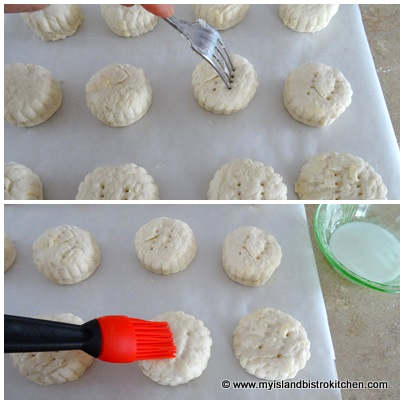
Using a small spatula, transfer the biscuits to prepared baking sheet, placing them about 2” apart. If desired, prick tops of biscuits with fork tines and lightly brush with milk.
Bake for 14-16 minutes or until lightly browned on top.
Preheat oven to 425°F. Line baking sheet with parchment paper.
In large bowl, whisk together the flour, sugar, baking powder, salt, and cream of tartar.
Using a pastry cutter, cut in the butter until mixture resembles coarse crumbs.
Make a well in the center of the ingredients.
In large measuring cup, mix together the whipping cream and milk. Pour into well in dry ingredients. Mix together just until flour mixture is incorporated. Do not overmix. Mixture will be a soft, moist batter.
Let batter stand in bowl for just a minute or so, then turn out onto a floured surface.
Knead dough 8-10 times. Do not over-knead.
Roll or pat to desired thickness, about 1” thick.
Using a floured 2” round cookie cutter, cut out biscuits. Dip cutter in flour before cutting out each biscuit.
Gather up remaining dough, pat down to about 1” thick, and cut out biscuits.
Using a small spatula, transfer the biscuits to prepared baking sheet, placing them about 2” apart. If desired, prick tops of biscuits with fork tines and lightly brush with milk.
Bake for 14-16 minutes or until lightly browned on top.
If you have made this recipe and enjoyed it and/or wish to share it with your friends and family, please do so on social media but be sure to share the direct link to this posting from my website.
Connect with My Island Bistro Kitchen on Social Media
Follow “the Bistro” on Pinterest at https://www.pinterest.ca/peibistro/ and pin the Pinterest-ready photo at the end of this posting to your favorite Pinterest boards!
I can find endless uses for cranberries – they are one of my favorite berries. The cranberries in today’s recipe came from Mikita Farms in Farmington, near Souris, PEI. You can see the photos of them wet harvesting the cranberries last fall by clicking here. I bought a huge bag of cranberries because they freeze really well and I make a multitude of recipes with them throughout the year.
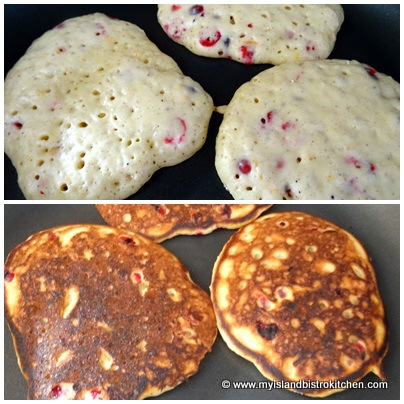
In this recipe, I use the cranberries in pancakes. I have combined and blended four key ingredients in this recipe to give the pancakes a rich flavour – eggnog, mashed banana, grated orange rind, and cranberries. The berries can either be fresh or frozen. I simply chop the berries in half before stirring them into the pancake batter.
Cranberry-Banana Pancakes
Ingredients:
1 extra large egg
2½ tbsp cooking oil
½ cup eggnog
½ cup whole milk
½ tsp vanilla
2 tbsp mashed banana
1 cup flour
1 tbsp baking powder
2½ tbsp sugar
¼ tsp salt
¼ tsp cinnamon
⅛ tsp nutmeg
1½ tsp grated orange rind
¾ cup chopped cranberries, fresh or frozen
Method:
Assemble ingredients.
In medium-sized bowl, whisk together the egg, oil, eggnog, milk, and vanilla. Add the mashed banana.
In separate bowl, combine flour, baking powder, salt, sugar, cinnamon, nutmeg, and grated orange rind.
Whisk the dry ingredients together to mix thoroughly.
Stir flour mixture into wet ingredients. Stir just until combined.
Stir in cranberries.
Let batter sit for apx. 5 minutes before cooking pancakes. Batter will be lumpy.
Heat non-stick frying pan over medium-high heat. Use paper towel to lightly grease pan with oil.
Pour apx. ⅓ cup of batter into hot frying pan and cook pancakes until surface bubbles appear and the top appears dry and set. Gently lift the edge of a pancake – if it is lightly browned, flip the pancakes over with a wide spatula. Cook 1-2 minutes until pancake is lightly browned underneath.
Transfer pancakes to a heatproof plate or cookie sheet and place in oven set to warming temperature to keep pancakes warm while cooking remaining pancakes.
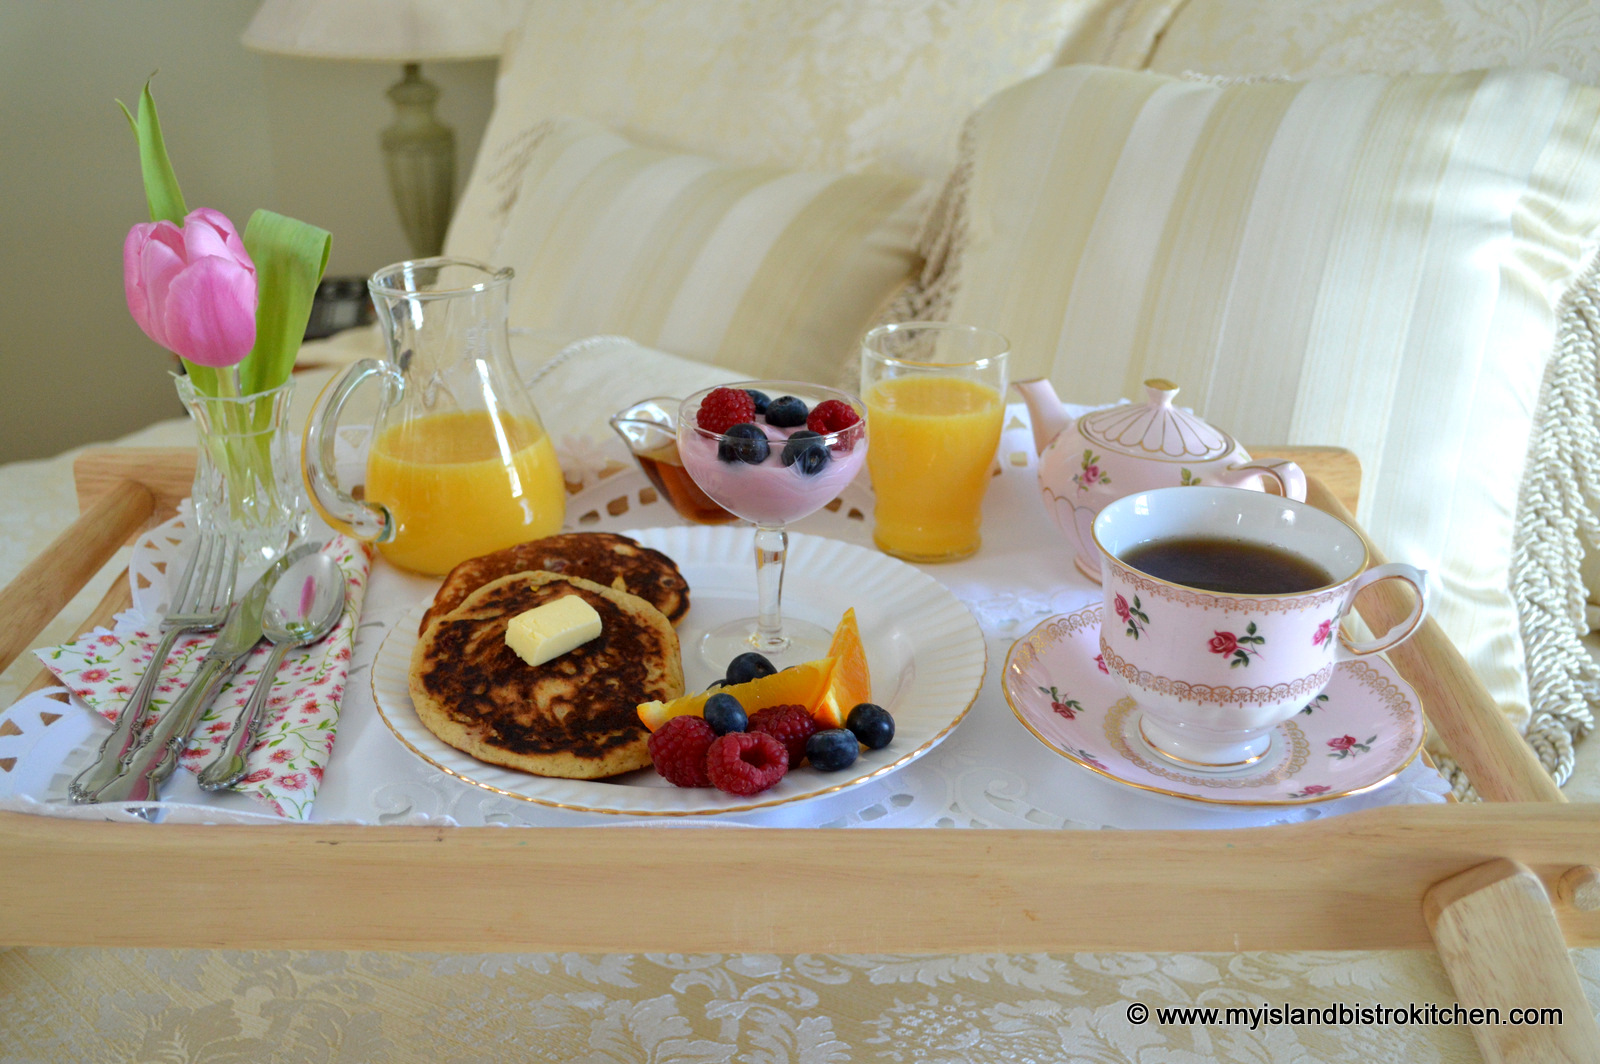
Serve with a pat of butter, maple syrup, or your favourite topping and fresh fruit.
Yield: Apx. 8 – 5” pancakes
If you have made this recipe and enjoyed it and/or wish to share it with your friends and family, please do so on social media but be sure to share the direct link to this posting from my website.
Connect with My Island Bistro Kitchen on Social Media
In medium-sized bowl, whisk together the egg, oil, eggnog, milk, and vanilla. Add the mashed banana.
In separate bowl, combine flour, baking powder, salt, sugar, cinnamon, nutmeg, and grated orange rind. Mix well.
Stir flour mixture into wet ingredients. Stir just until combined. Stir in cranberries. Let batter sit for apx. 5 minutes before cooking pancakes. Batter will be lumpy.
Heat non-stick frying pan over medium-high heat. Use paper towel to lightly grease pan with oil.
Pour apx. 1/3 cup of batter into hot frying pan and cook pancakes until surface bubbles appear and the top appears dry and set. Gently lift the edge of a pancake – if it is lightly browned, flip the pancakes over with a wide spatula. Cook 1-2 minutes until pancake is lightly browned underneath.
Transfer pancakes to a heatproof plate or cookie sheet and place in oven set to warming temperature to keep pancakes warm while cooking remaining pancakes.
Serve with a pat of butter, maple syrup, or your favourite topping and fresh fruit.
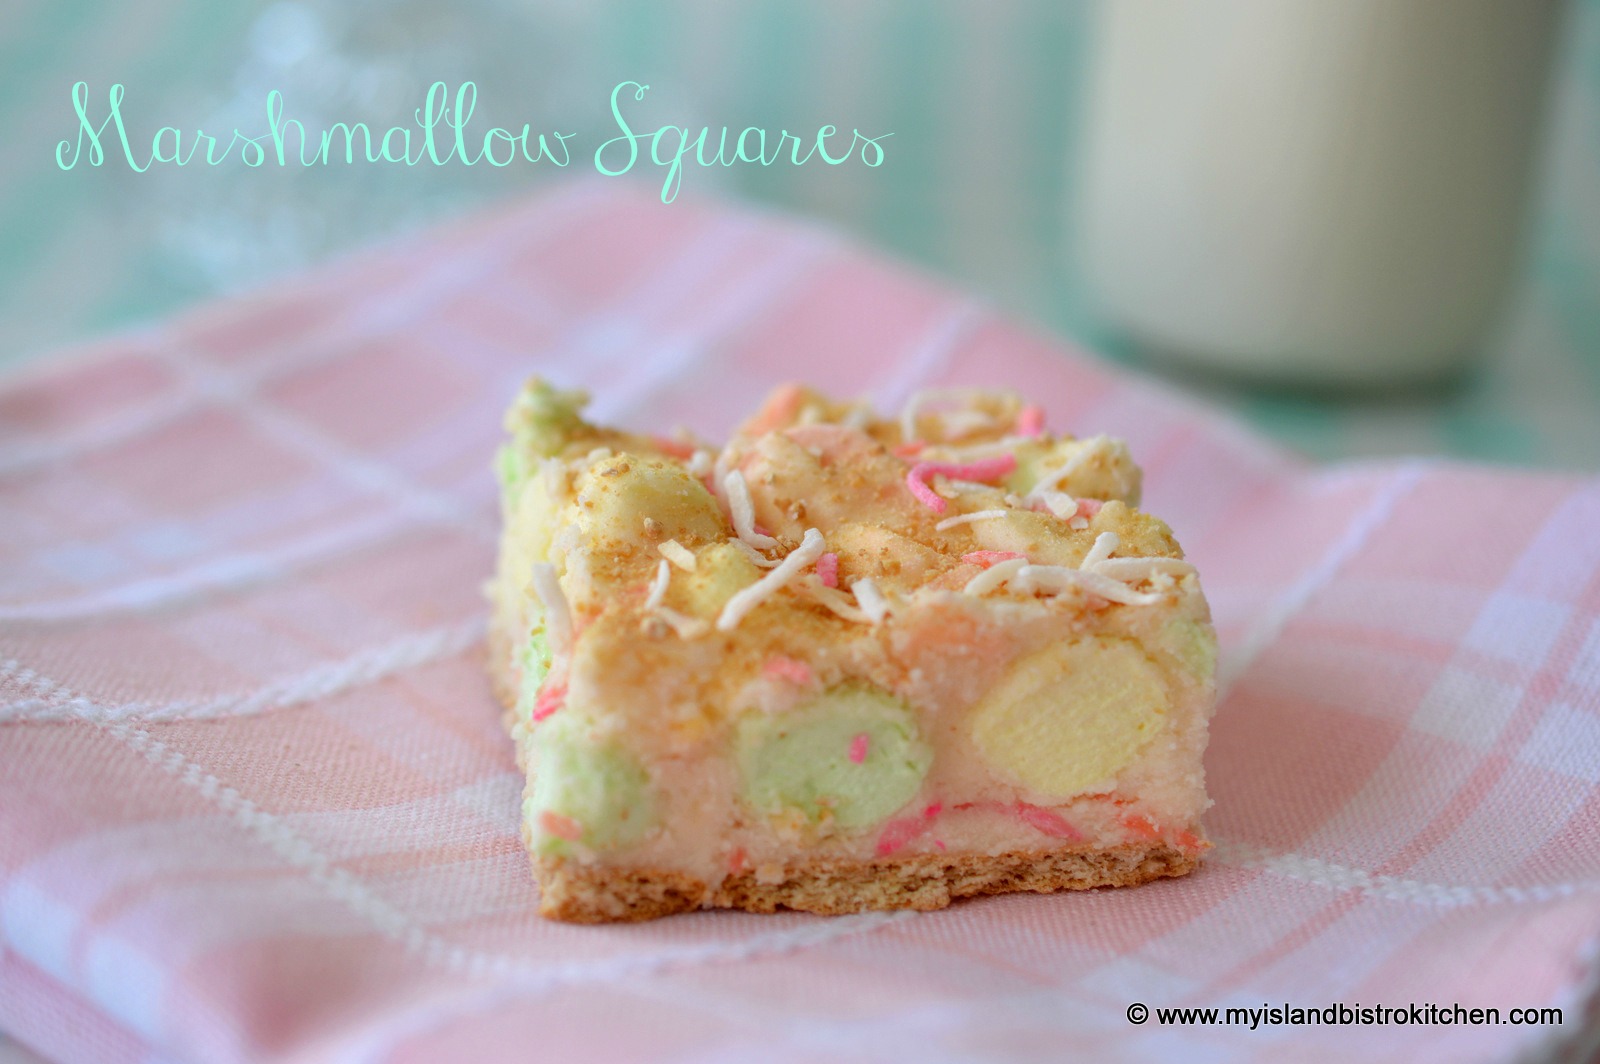
Today, I am sharing a sweet treat with you. In fact, it’s so sweet, it’s almost more like candy than it is a square. This No-Bake Marshmallow Square is one of the easiest squares to make and it requires few ingredients and no cooking or baking. Continue reading Marshmallow Squares→
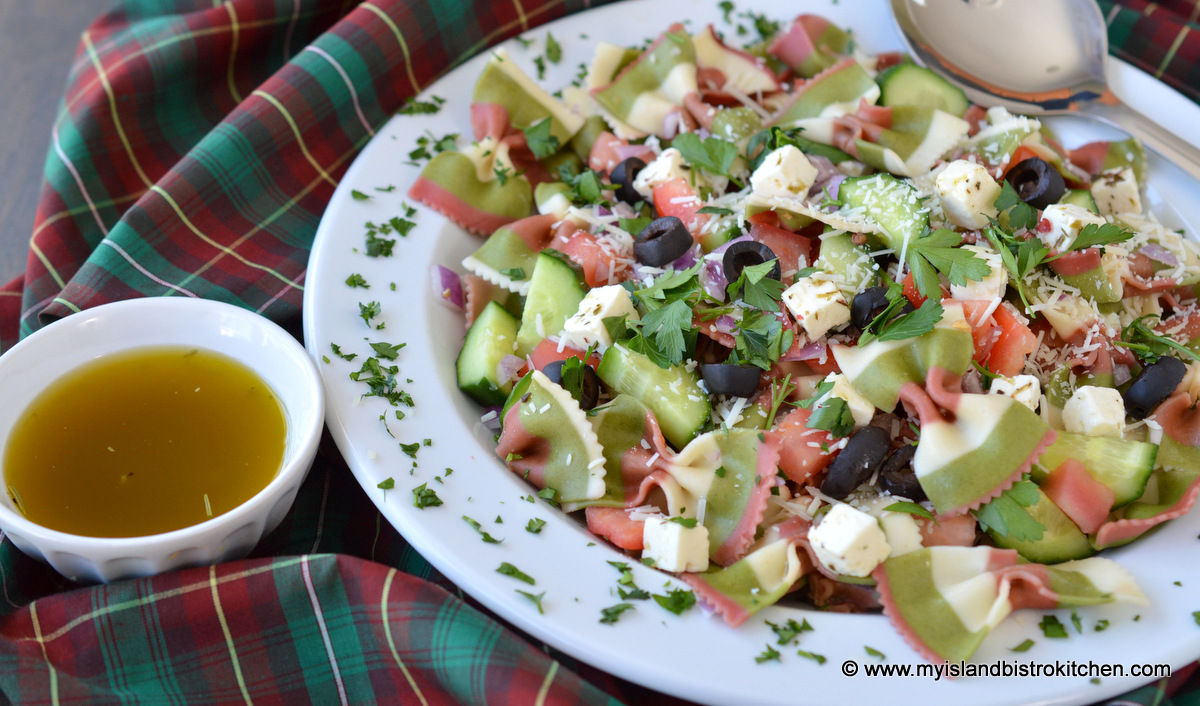
National Tartan Day is celebrated each year on April 6th which coincides with the signing of the Scottish Declaration of Independence — the Declaration of Arbroath — in 1320. It is a day of observance to recognize and celebrate the Scottish heritage and the contributions of the Scots and their descendents to Canada’s history, development, and culture. You can read more about Tartan Day and its origins here.
I wondered what the focus of my posting would be for this year’s Tartan Day. Lo and behold, didn’t I find bow tie pasta in shades of the Prince Edward Island tartan – red, green, and ivory! Mind you, the colors are not an exact or perfect match but I think they are close enough to work in a colorful pasta salad with herb dressing. Continue reading Pasta Salad in Shades of the PEI Tartan→
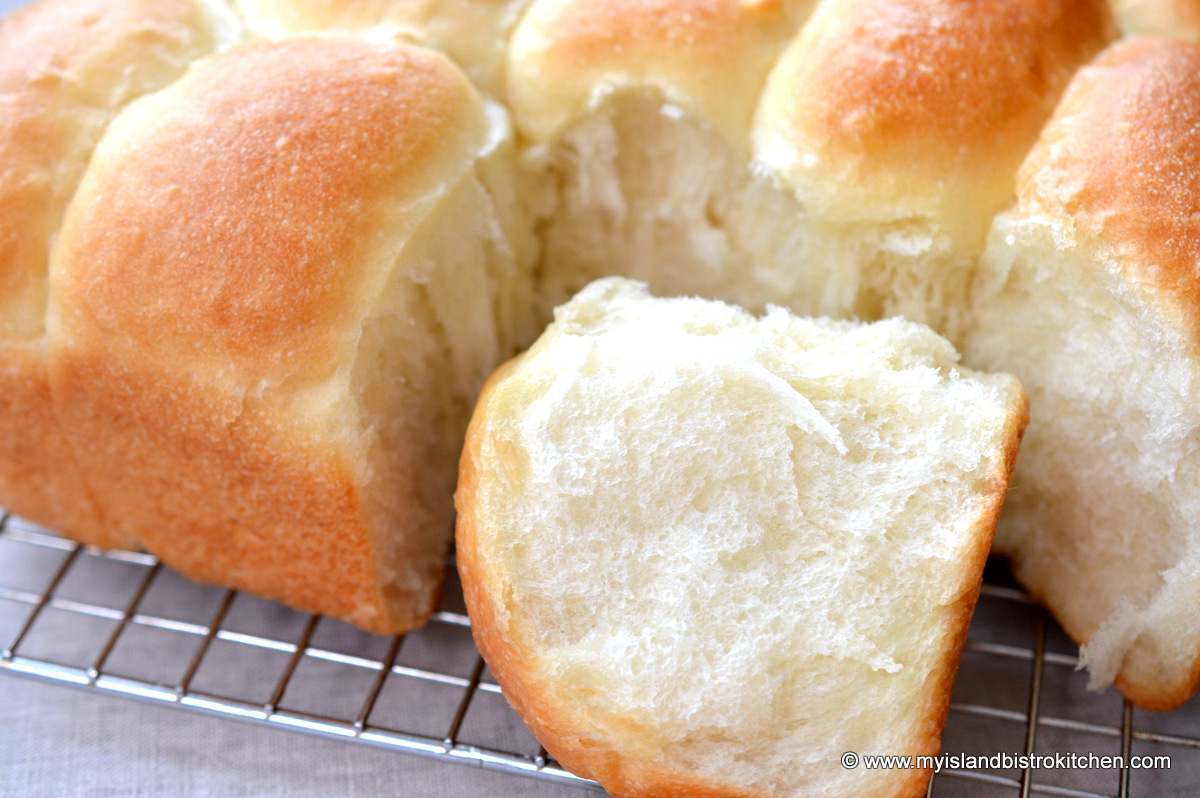
There is something so homey and cozy about homemade bread and rolls! And, of course, the scent throughout the house of them baking makes the taste buds jump in anticipation of a hot roll, or slice of bread, fresh from the oven and slathered in melting butter. Continue reading Pan Rolls→
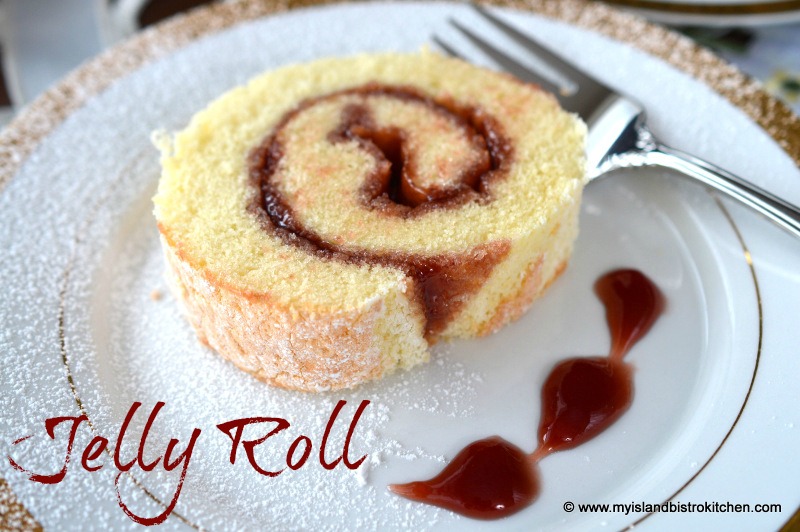
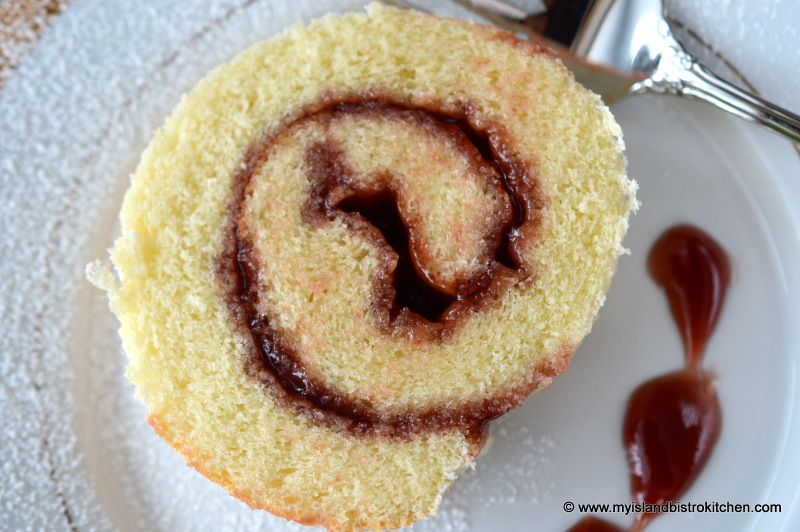
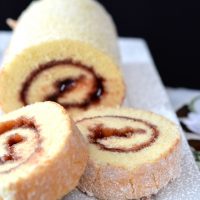
I grew up with jelly rolls being regularly made in my home. They’re a quick dessert, best eaten on the day they are made. This is because a jelly roll is really a sponge-type cake and, when the jam or jelly is spread on it, it tends to seep into the cake and after several hours can become somewhat soggy. Jelly rolls don’t take a lot of ingredients. So long as you have basic baking supplies and some jam or jelly, you can make a jelly roll.
Here are my tips for making jelly rolls:
1. Use cake and pastry flour as it gives a finer texture than all-purpose flour.
2. Don’t let the cake cool for too long before spreading it with jam or jelly as it may crack as you try to roll the jelly roll up. About 15-20 minutes cooling time is about right. If you put the jam or jelly on the cake when it is still too warm, though, it will cause it to seep into the cake too quickly, creating a soggy jelly roll.
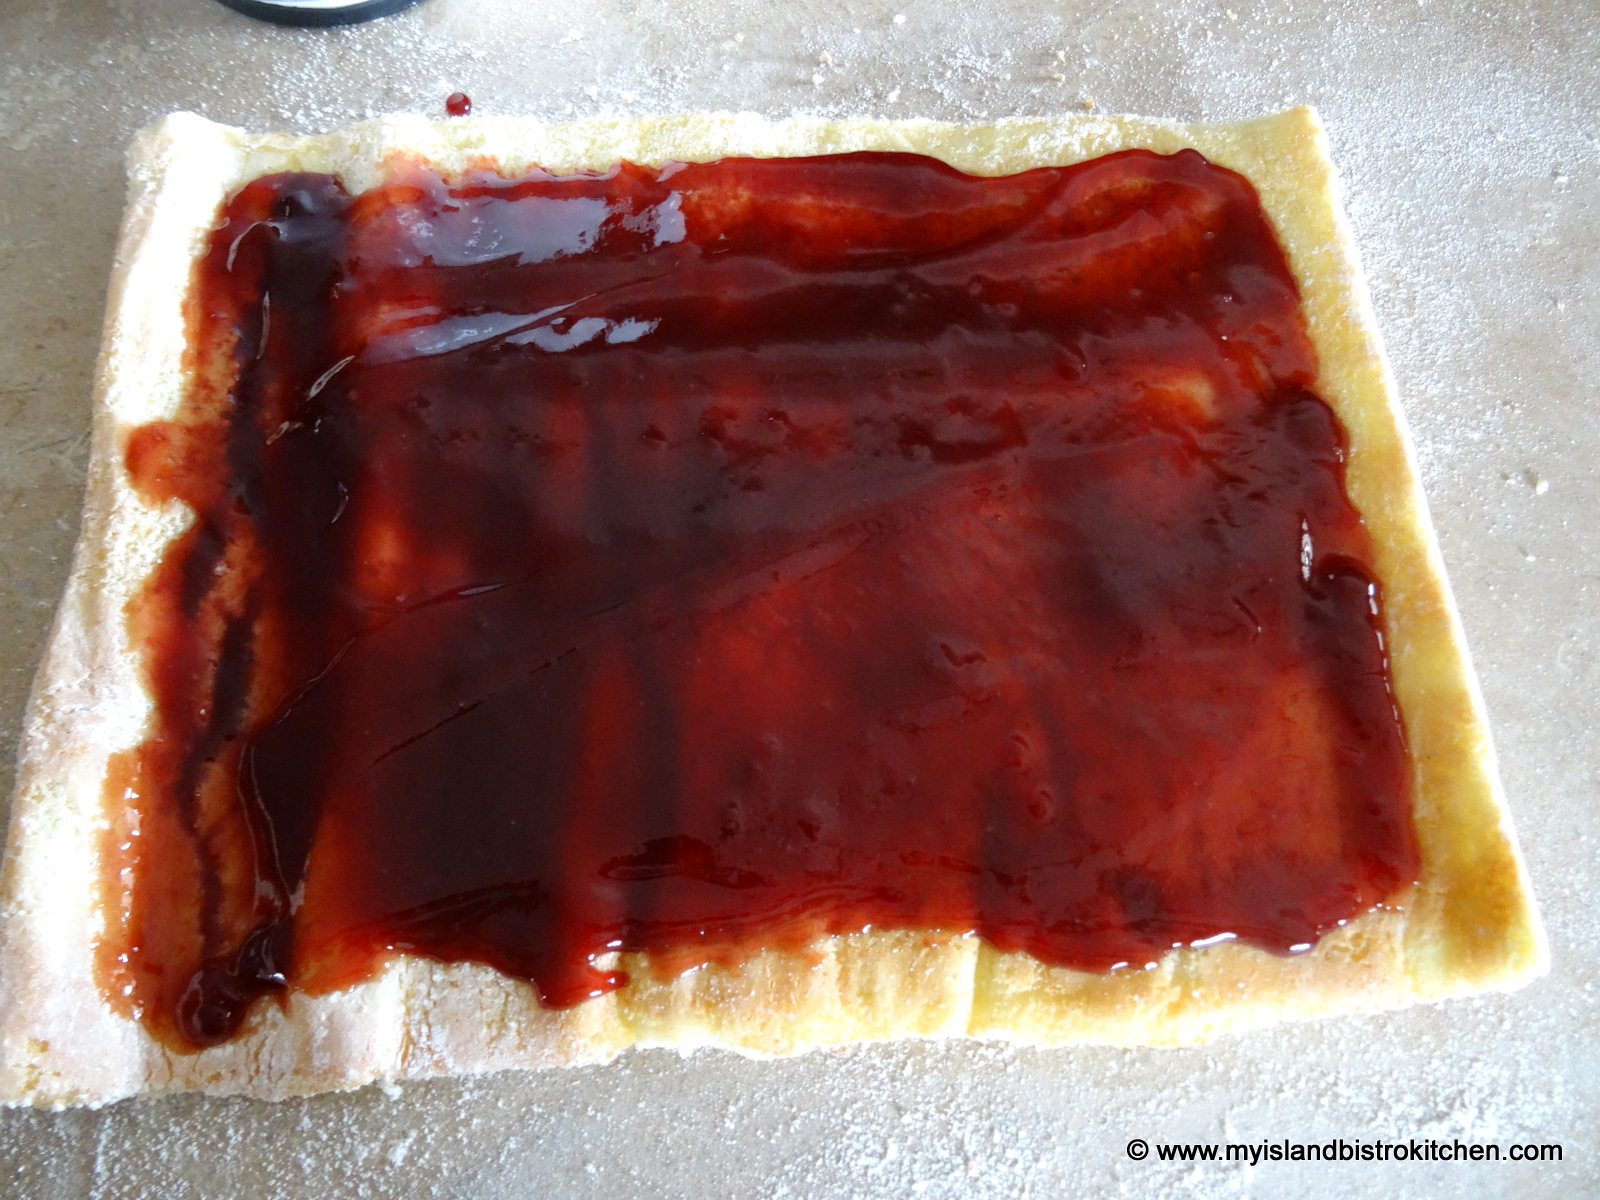
3. Use a good quality jam or jelly. If using jam, choose one that does not have big chunks of fruit in it; otherwise, it will make it more difficult to slice and plate presentation will not be optimal. I prefer colorful red jams and ones that are seedless – for example, seedless raspberry jam.
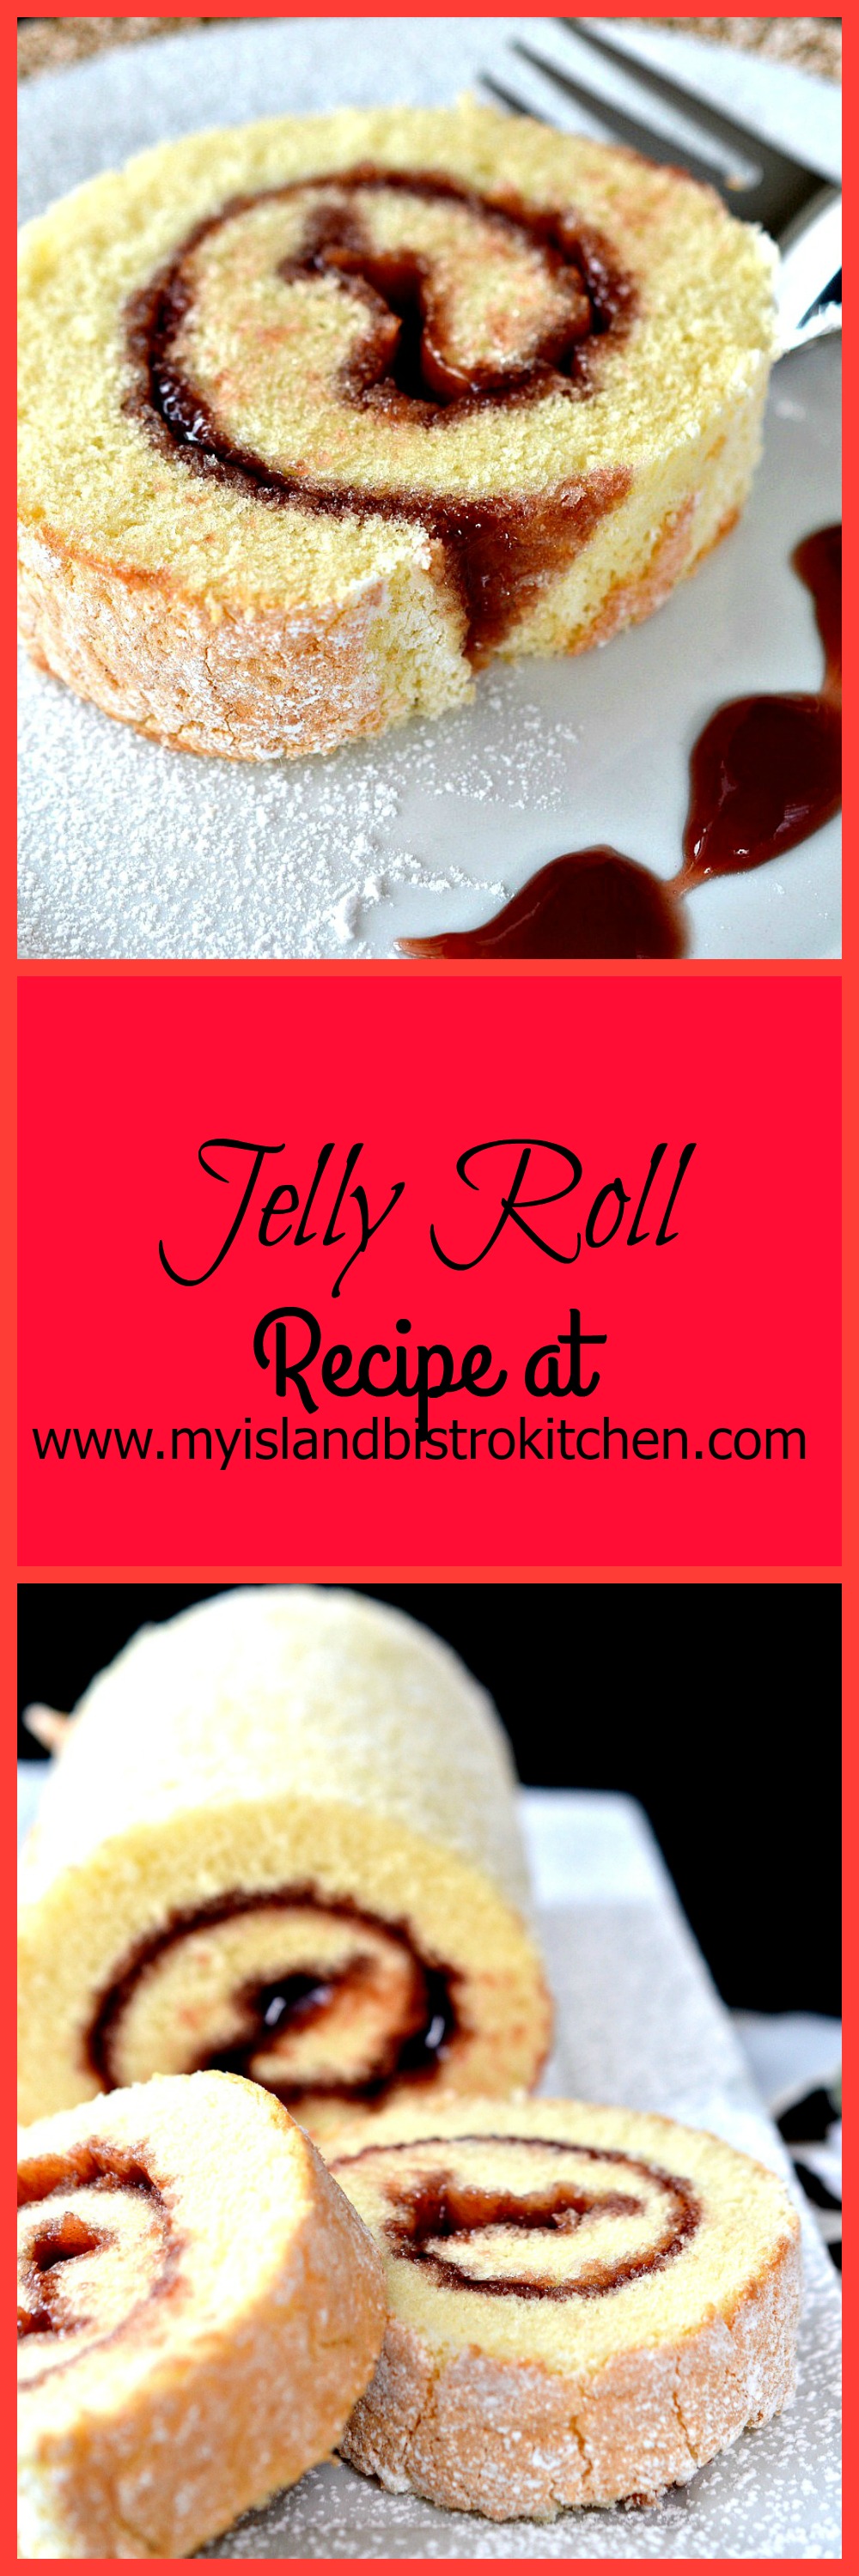
4. The jelly roll may be dusted with either granulated sugar or icing sugar. However, icing sugar stands up better than granulated sugar which tends to dissolve into the cake more quickly.
Jelly Roll
Ingredients:
1 cup + 3 tbsp cake and pastry flour
1¼ tsp baking powder
¼ tsp salt
4 large eggs
1 cup sugar
1 tsp vanilla
¼ tsp almond flavouring
2 tbsp cold water
¾ – 1 cup jam or jelly
Icing sugar for dusting
Method:
Preheat oven to 400°F.
Grease, or spray cooking oil on 10”x15” rimmed baking sheet, ensuring sides are well-greased. Line bottom of pan with parchment paper. Lightly spray parchment paper with cooking oil.
Sift flour, baking powder, and salt together. Set aside.
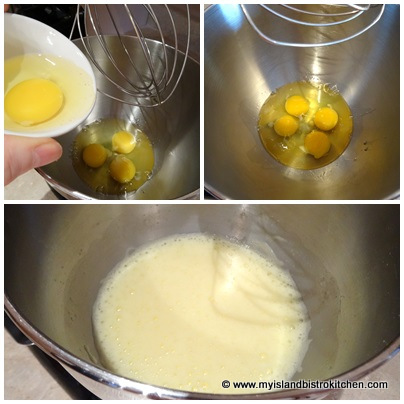
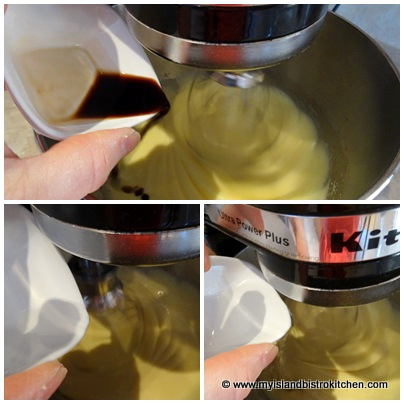
Beat eggs until frothy.
Slowly and steadily add the sugar and beat until light-colored and slightly thickened.
Beat in vanilla, almond flavouring, and water.
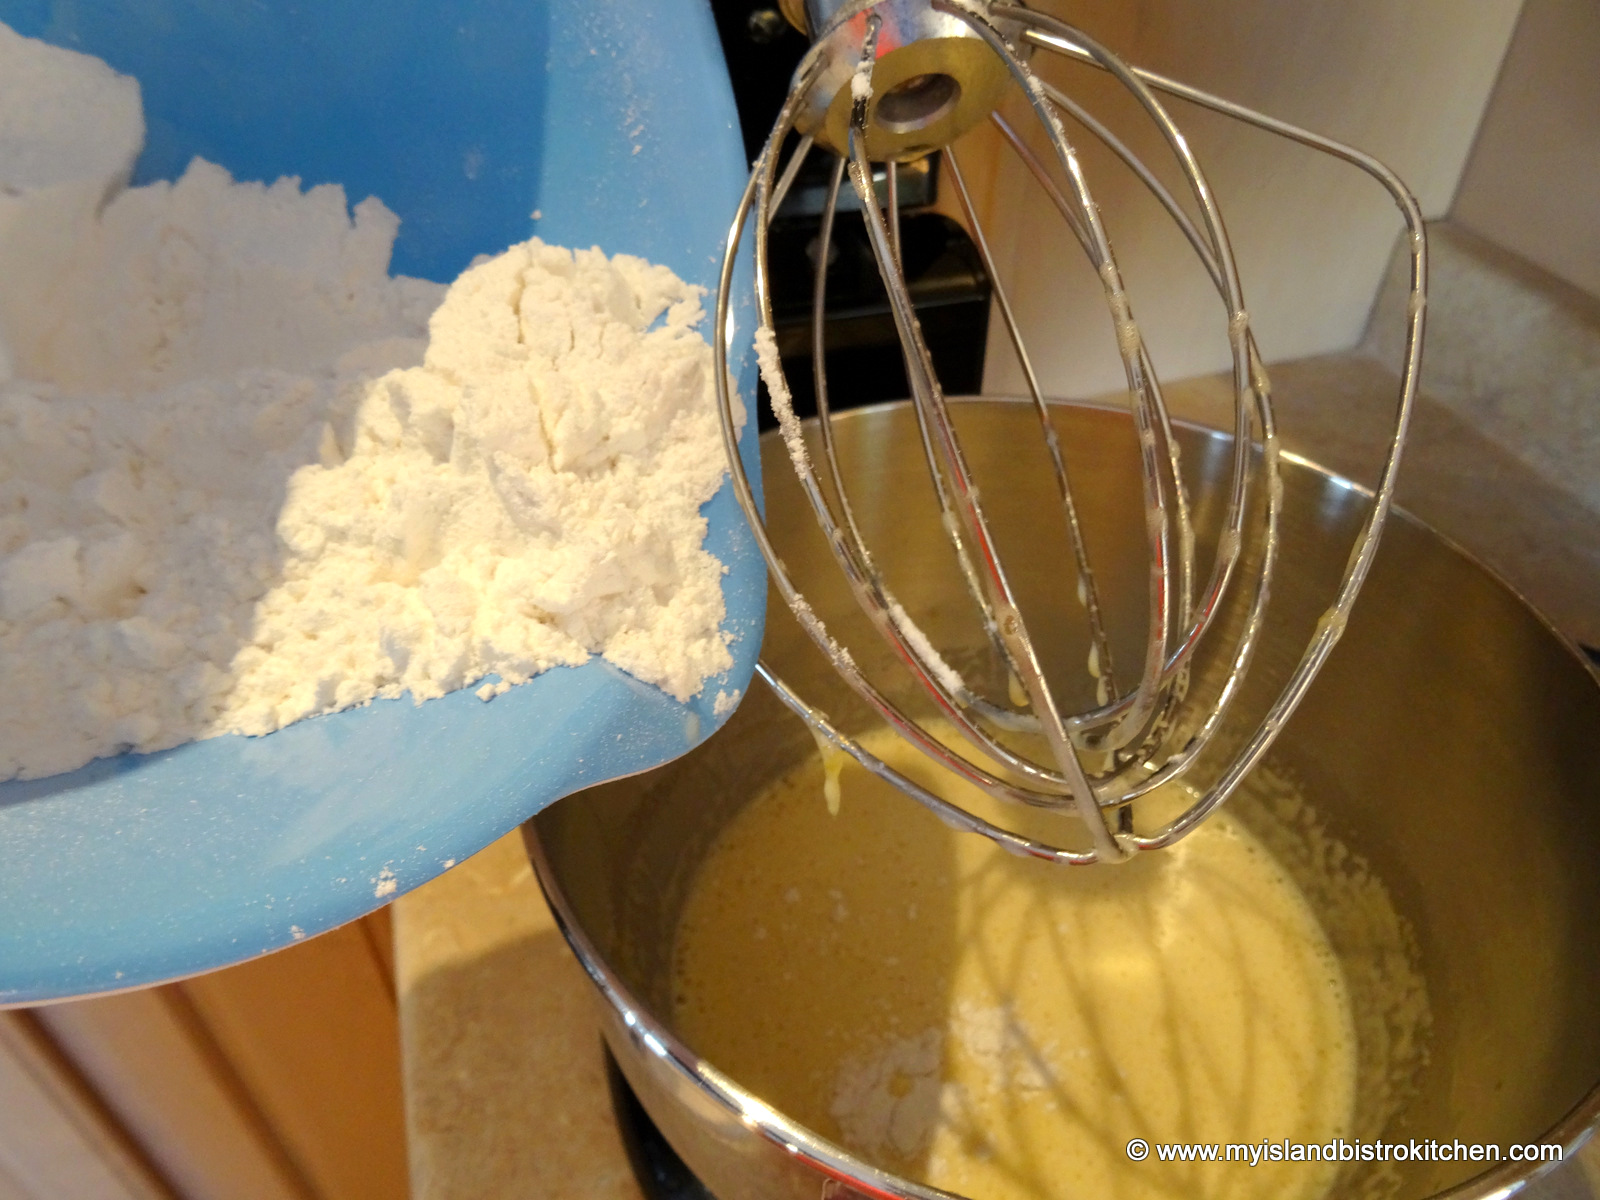
Add the sifted dry ingredients to the egg-sugar mixture. Stir just until incorporated.
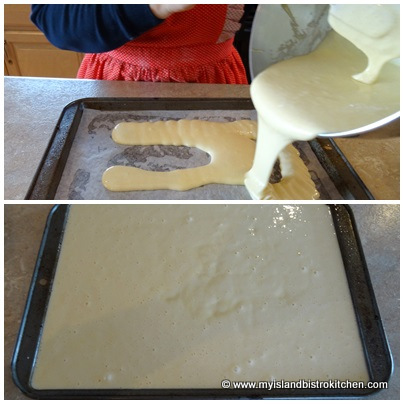
Pour batter into prepared pan.
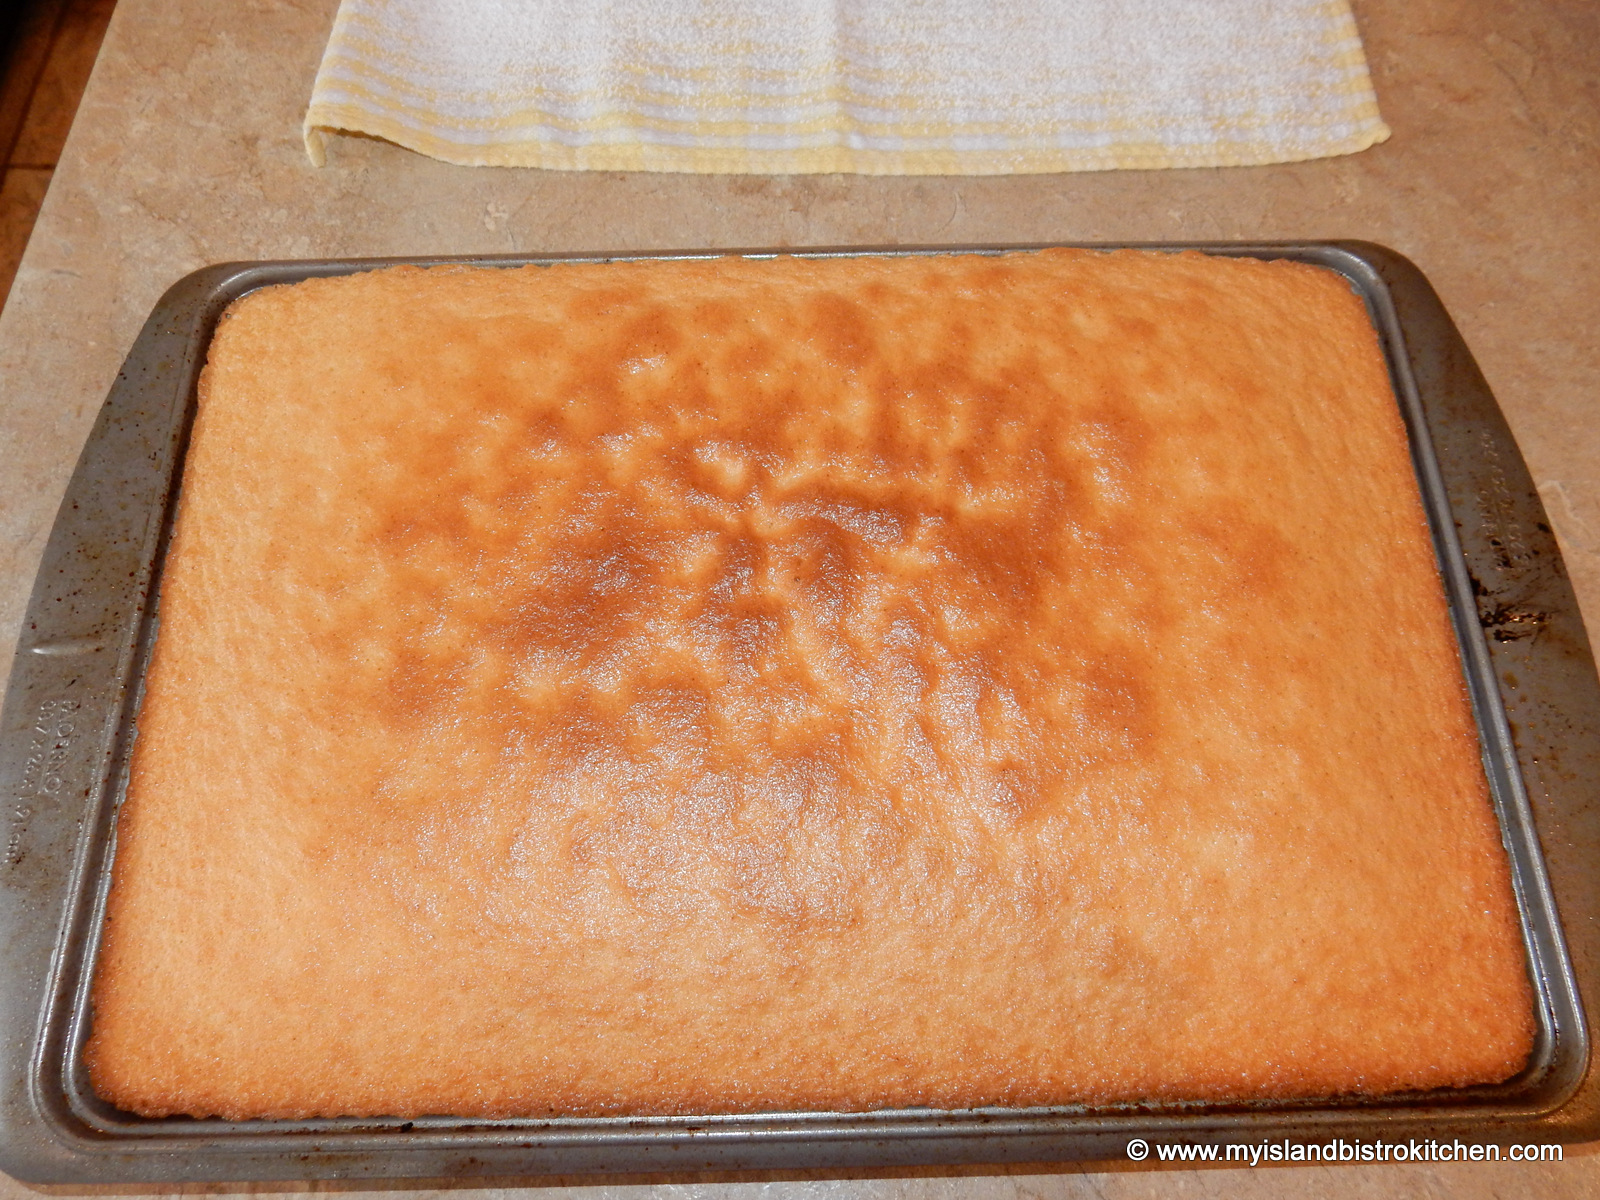
Bake 9-12 minutes or until cake tester inserted into cake comes out clean and cake springs back to a light touch. Do not overbake.
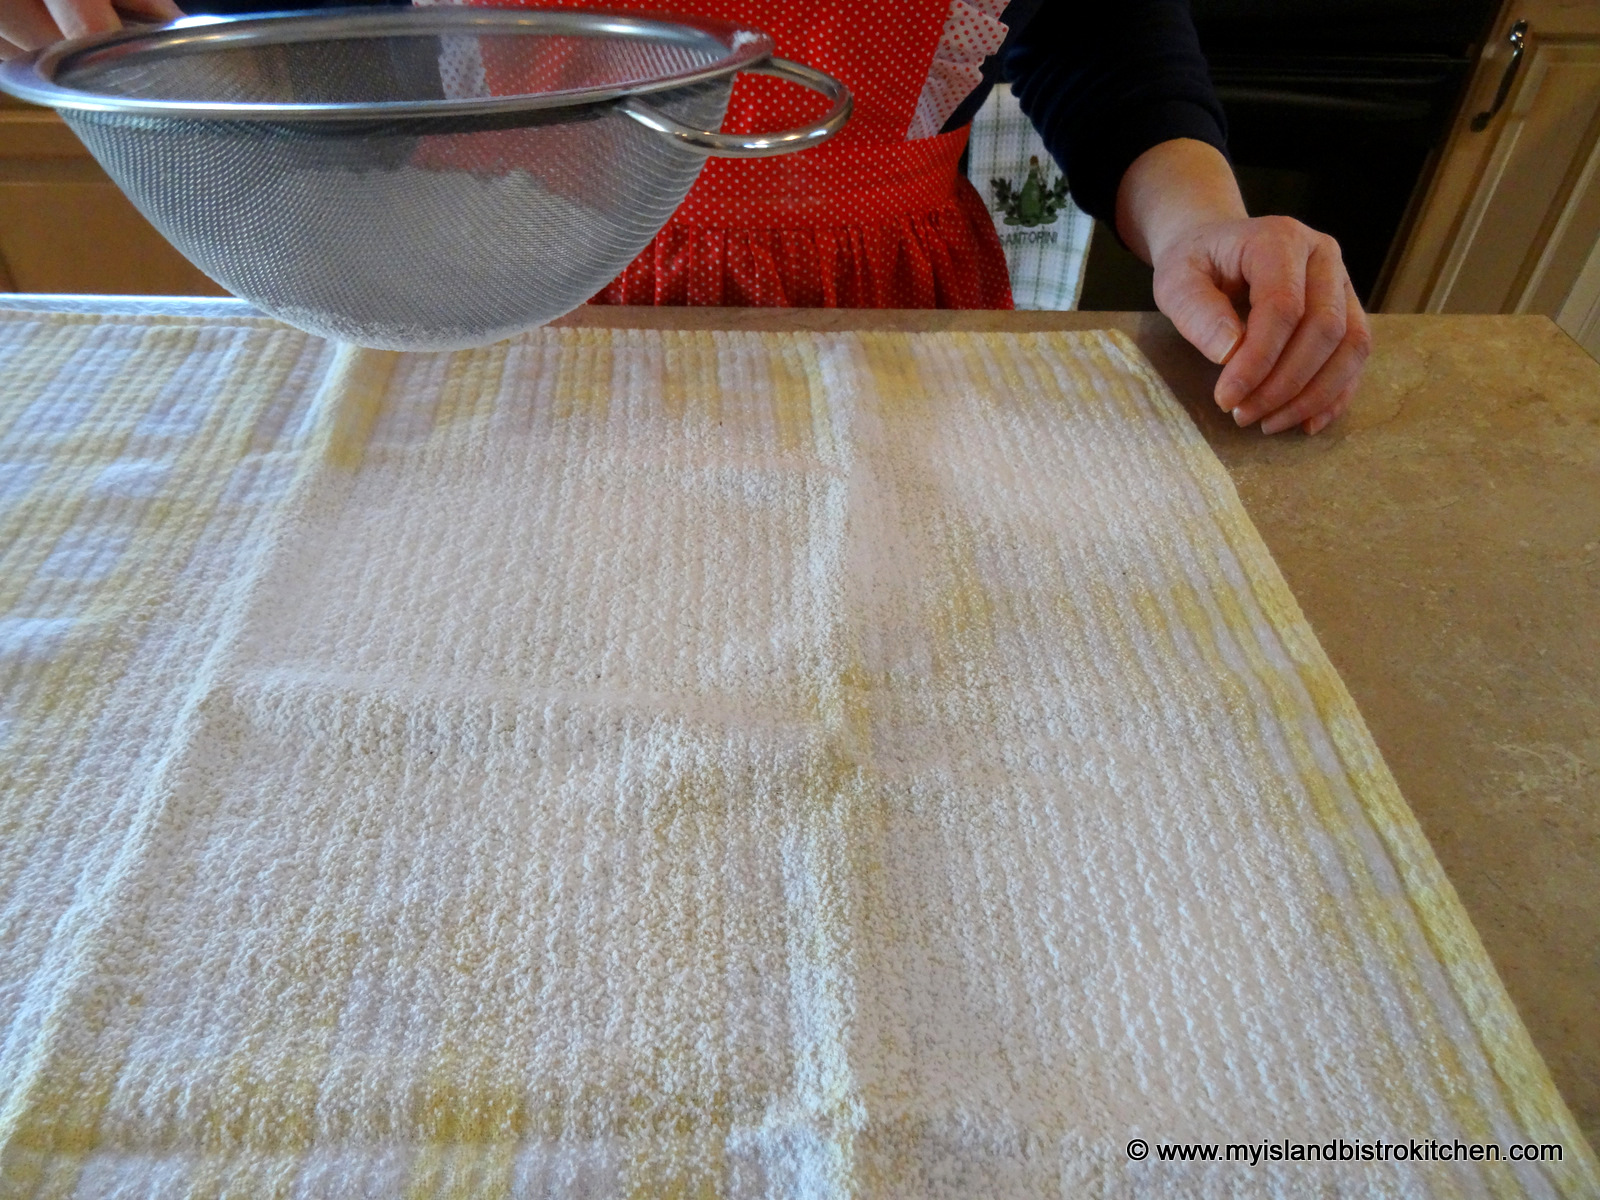
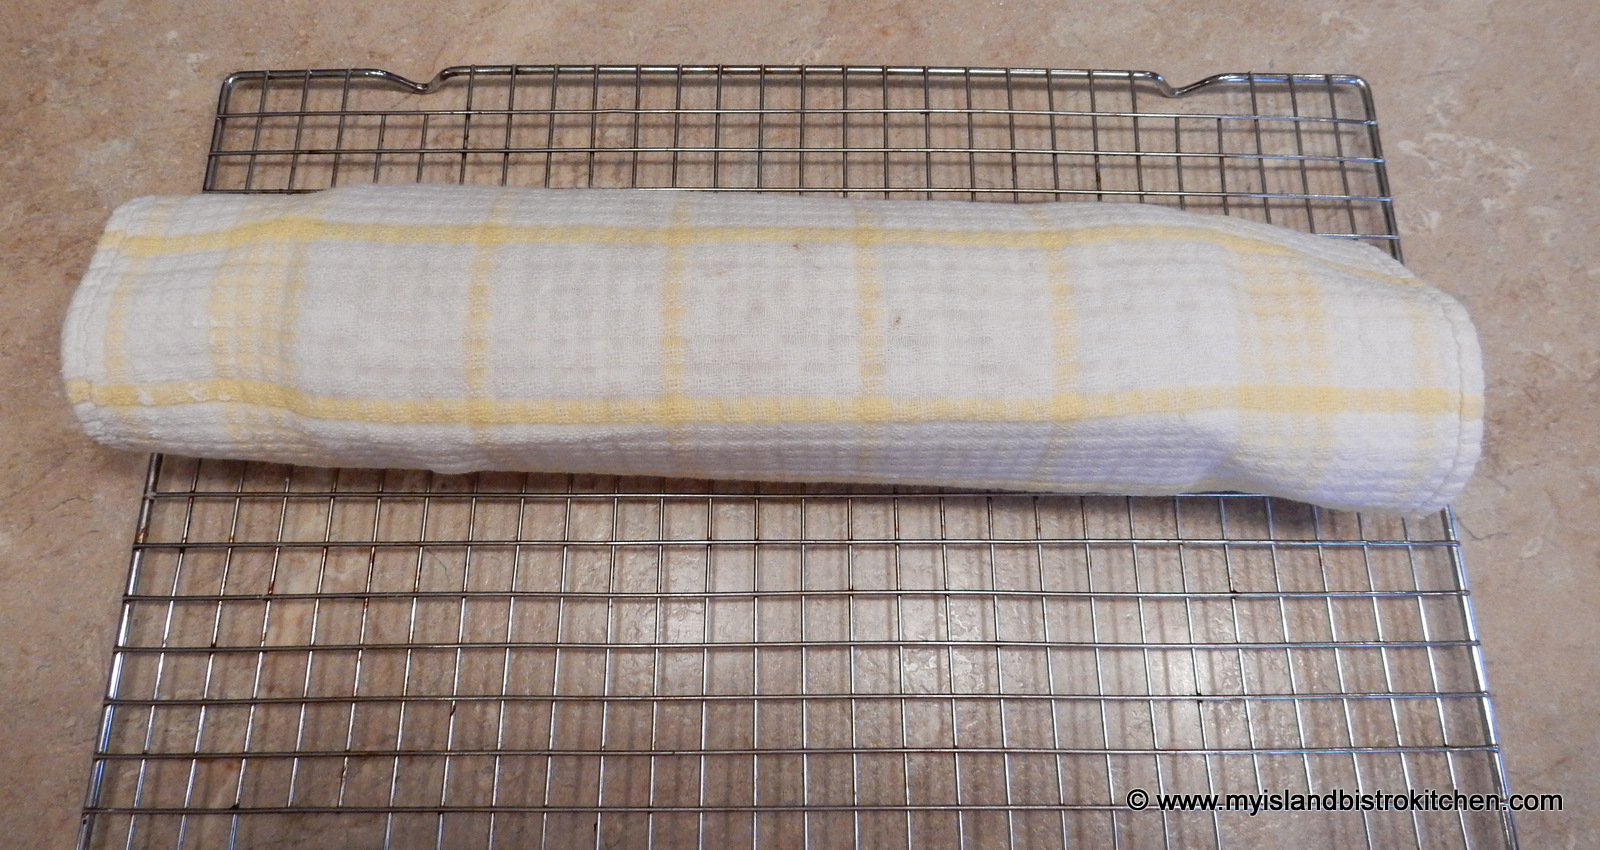
While cake is baking, lay a clean tea towel on counter and generously sprinkle with sifted icing sugar.
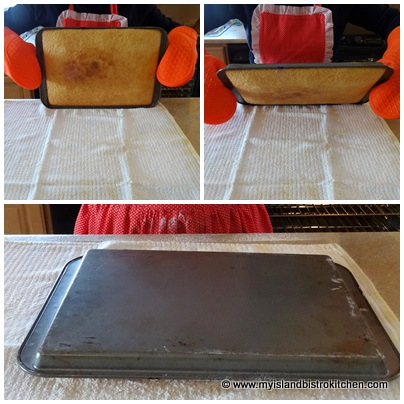
Remove cake from oven and run knife around all four edges to loosen cake from pan sides. Invert baked cake on sugar-dusted tea towel.
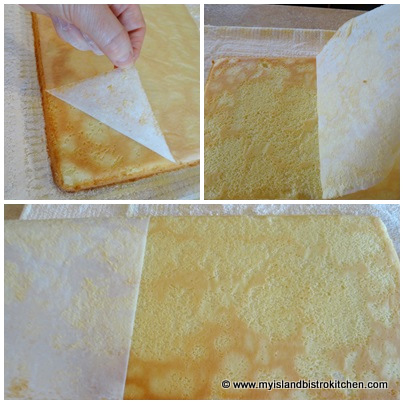
Peel off parchment paper, being careful not to tear cake.
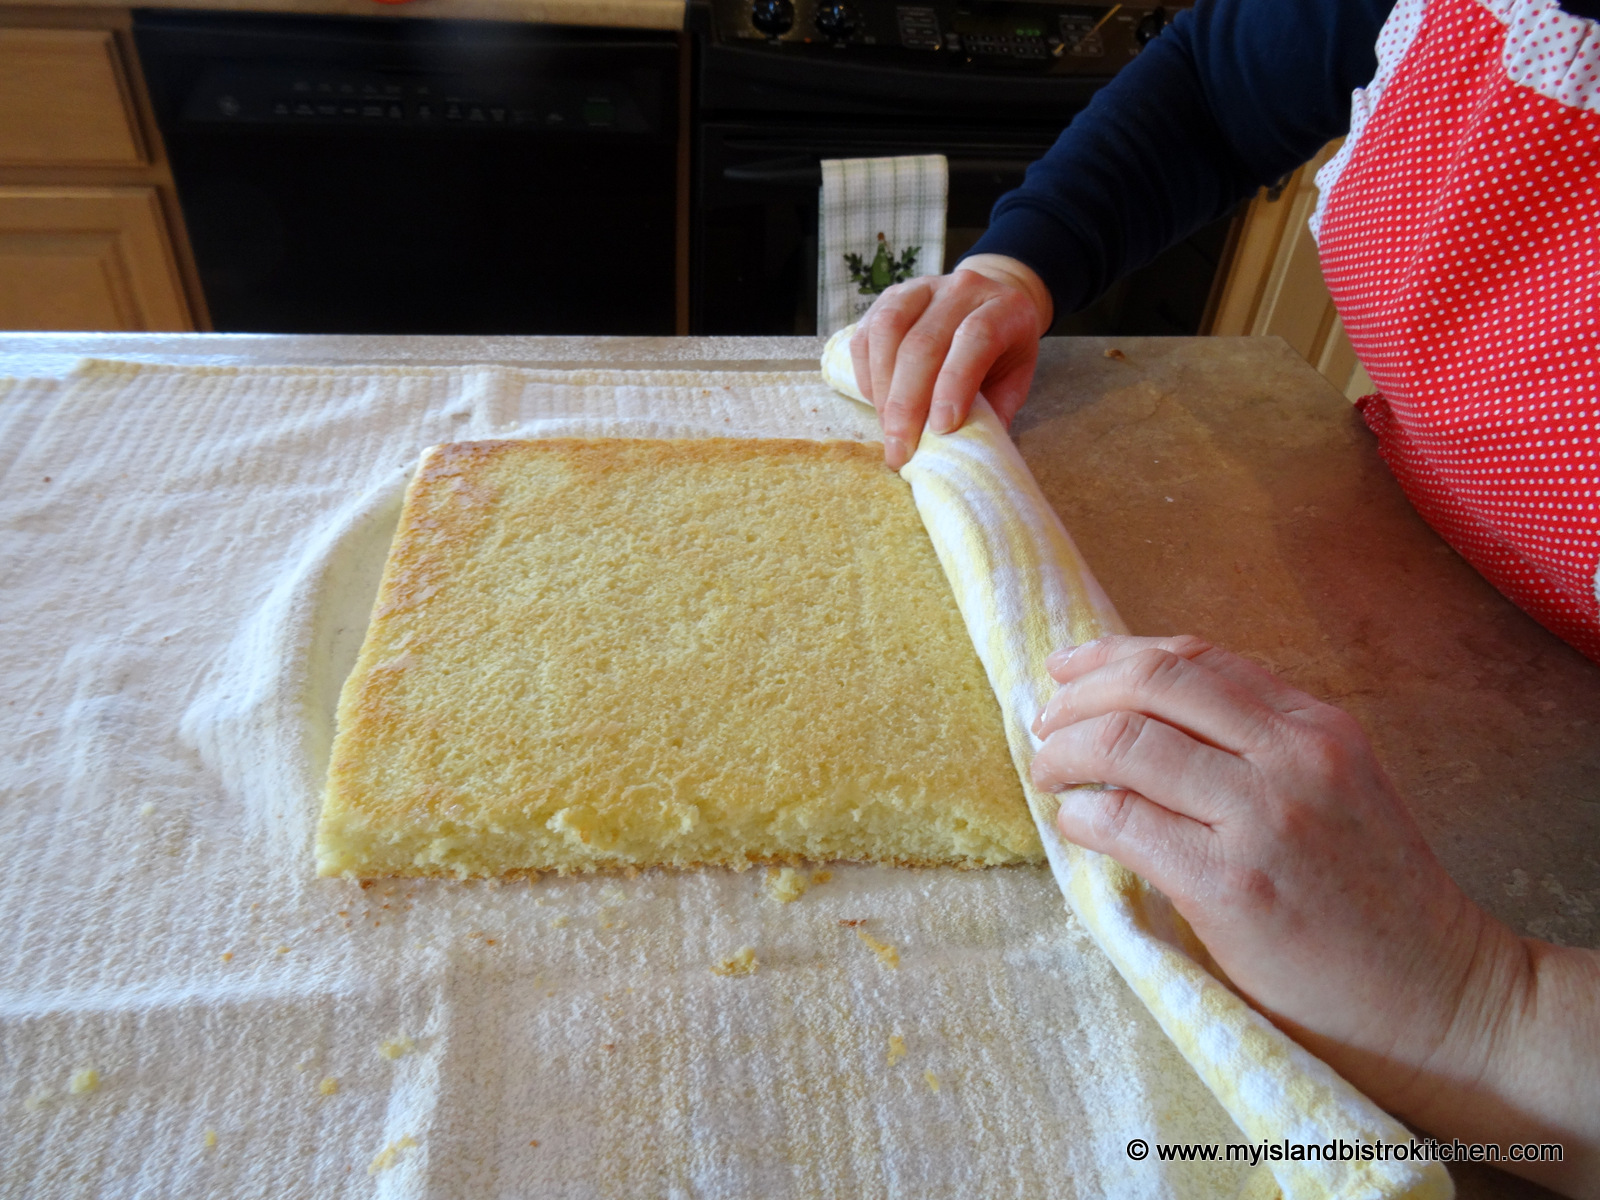
Trim off outside edges of cake.
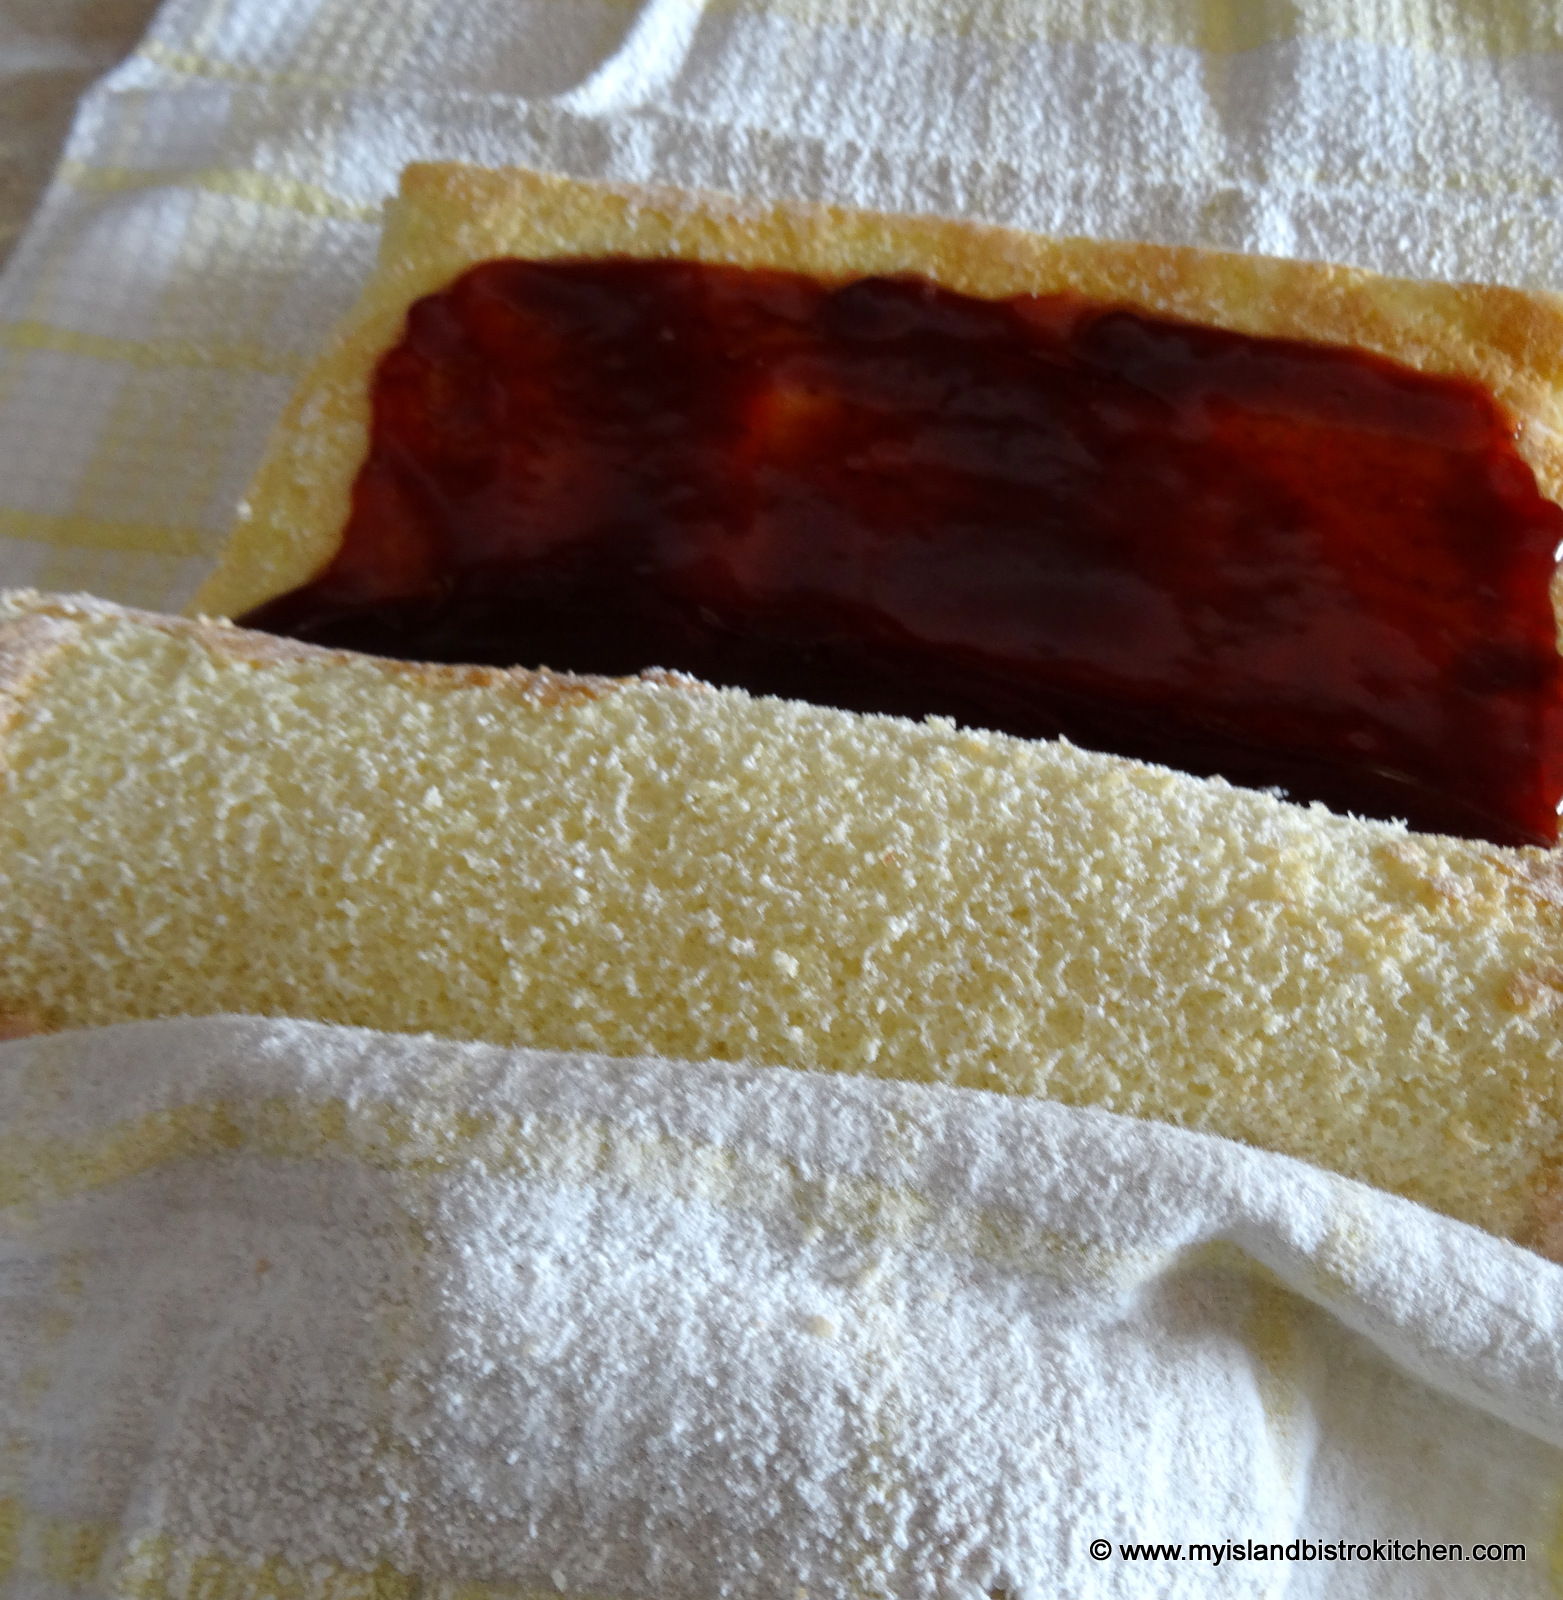
Rolling from the narrow end of the cake, roll up cake and tea towel together.
Transfer to wire rack and cool for about 15-20 minutes.
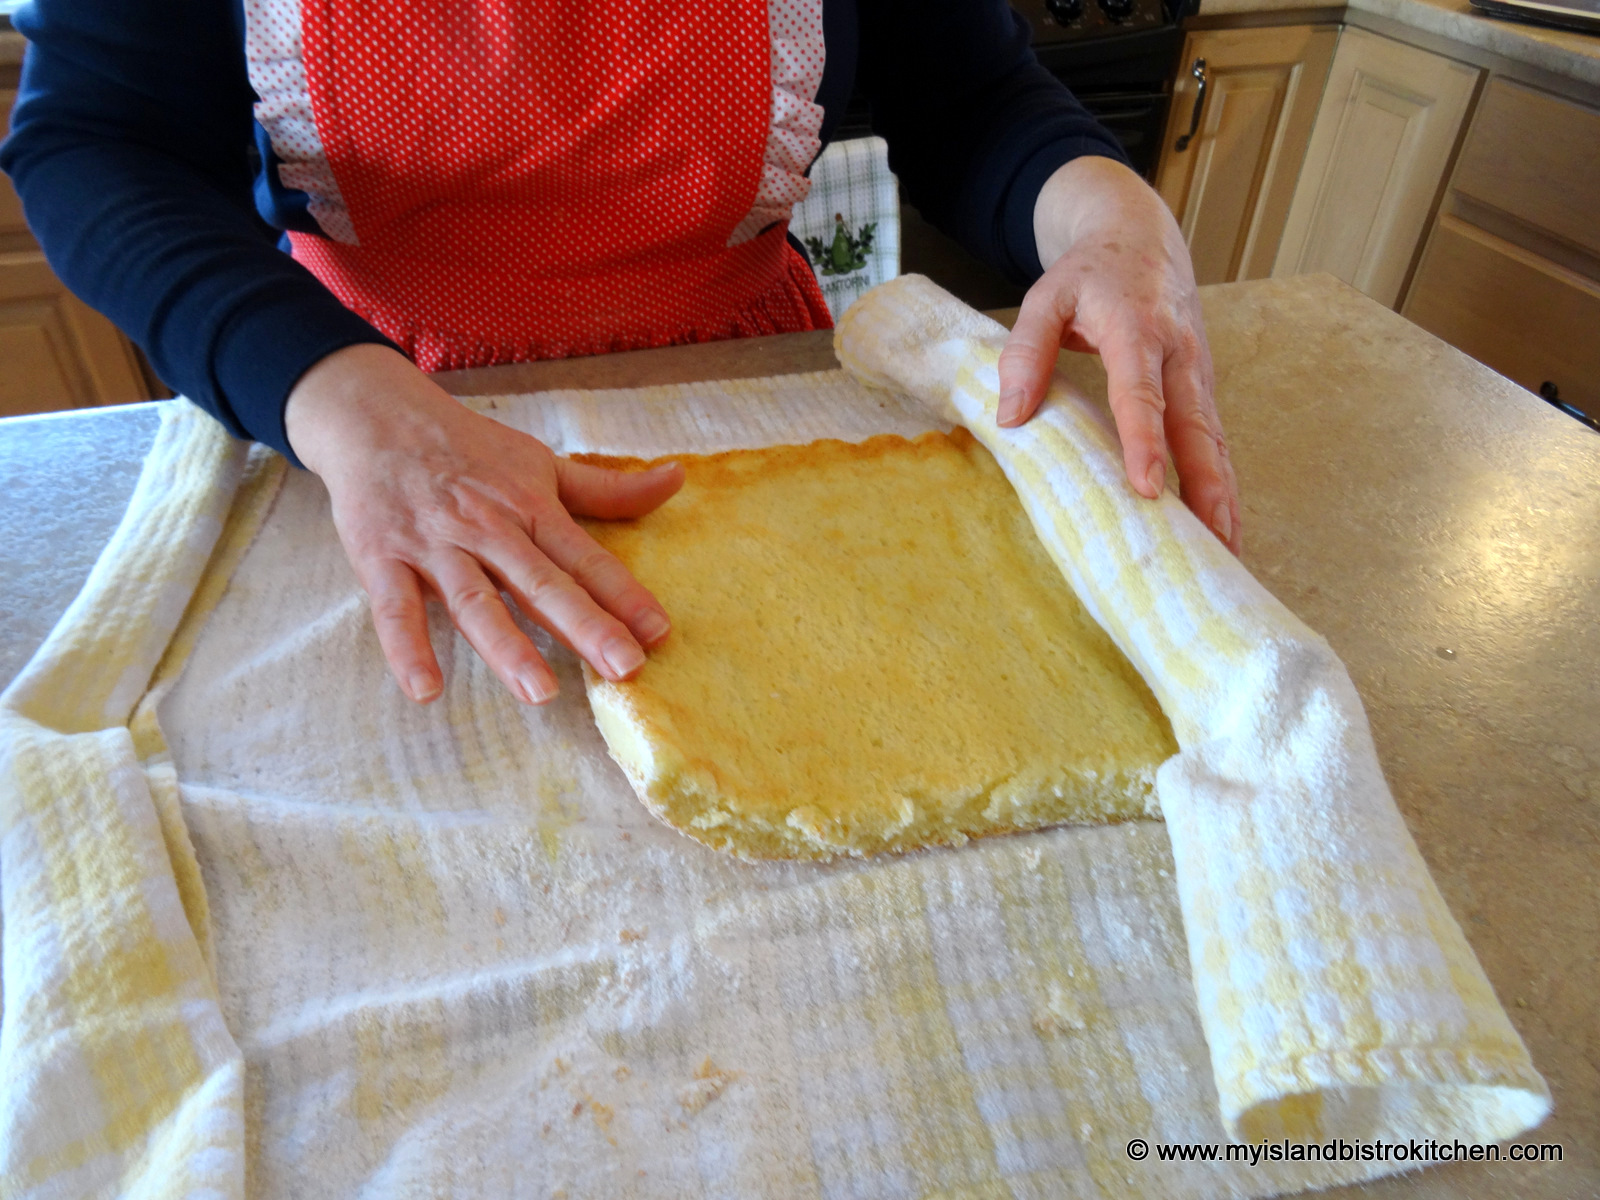
Carefully unroll the cake.
Spread cake with jam or jelly, leaving about ½” on sides of cake free of jam or jelly.
Using the tea towel as a guide, re-roll the filled cake.
Refrigerate for at least 30 minutes. Dust with icing sugar, cut, and serve.
Yield:Apx. 10-12 servings
If you have made this recipe and enjoyed it and/or wish to share it with your friends and family, please do so on social media but be sure to share the direct link to this posting from my website.
Connect with My Island Bistro Kitchen on Social Media
Follow “the Bistro” on Pinterest at https://www.pinterest.ca/peibistro/ and pin the Pinterest-ready photo found at the end of this post to your favorite Pinterest boards.
A Jelly Roll is an impressive dessert made with a thin sponge cake spread with a favorite jam or jelly and then rolled up, dusted with icing sugar, and sliced.
Course
Dessert
Keyword
jelly roll
Servings10
My Island Bistro KitchenMy Island Bistro Kitchen
Ingredients
1cup+ 3 tbsp cake flour
1¼tspbaking powder
¼tspsalt
4large eggs
1cupsugar
1tspvanilla
¼tspalmond flavouring
2tbspcold water
¾ - 1cupjam or jelly
Icing sugar for dusting
Instructions
Preheat oven to 400°F.
Grease, or spray cooking oil on 10”x15” rimmed baking sheet, ensuring sides are well-greased. Line bottom of pan with parchment paper. Lightly spray parchment paper with cooking oil.
Sift flour, baking powder, and salt together. Set aside.
Beat eggs until frothy. Slowly and steadily add the sugar and beat until light-colored and slightly thickened. Beat in vanilla, almond flavouring, and water.
Add the sifted dry ingredients to the egg-sugar mixture. Stir just until incorporated.
Pour batter into prepared pan. Bake 9-12 minutes or until cake tester inserted into cake comes out clean and cake springs back from a light touch. Do not overbake.
While cake is baking, lay a clean tea towel on counter and generously sprinkle with sifted icing sugar. Remove cake from oven and run knife around all four edges to loosen cake from pan sides. Invert baked cake on sugar-dusted tea towel. Peel off parchment paper being careful not to tear cake.
Trim off outside edges of cake. Rolling from the narrow end of the cake, roll up cake and tea towel together. Transfer to wire rack and cool for about 15 minutes. Carefully unroll the cake and spread with jam or jelly, leaving about ½” on sides of cake free of jam or jelly. Re-roll. Refrigerate for at least 30 minutes. Dust with icing sugar, cut, and serve.
Recipe Notes
Yield: Apx. 10-11 servings
NOTE: Be sure to read the accompanying blog post to this recipe as it contains tips for making the jelly roll successfully as well as step-by-step photos of the method used to make the jelly roll.
[Copyright My Island Bistro Kitchen]
Try one of these Jellies or Fruit Curds in your next Jelly Roll:
In October, I traveled to Farmington, near Souris, PEI, to watch the wet harvesting of cranberries at Mikita Farms. One of the recipes I developed with the Mikita Farm cranberries is for Cranberry-Banana Eggnog Muffins. Continue reading Cranberry-Banana Eggnog Muffins→
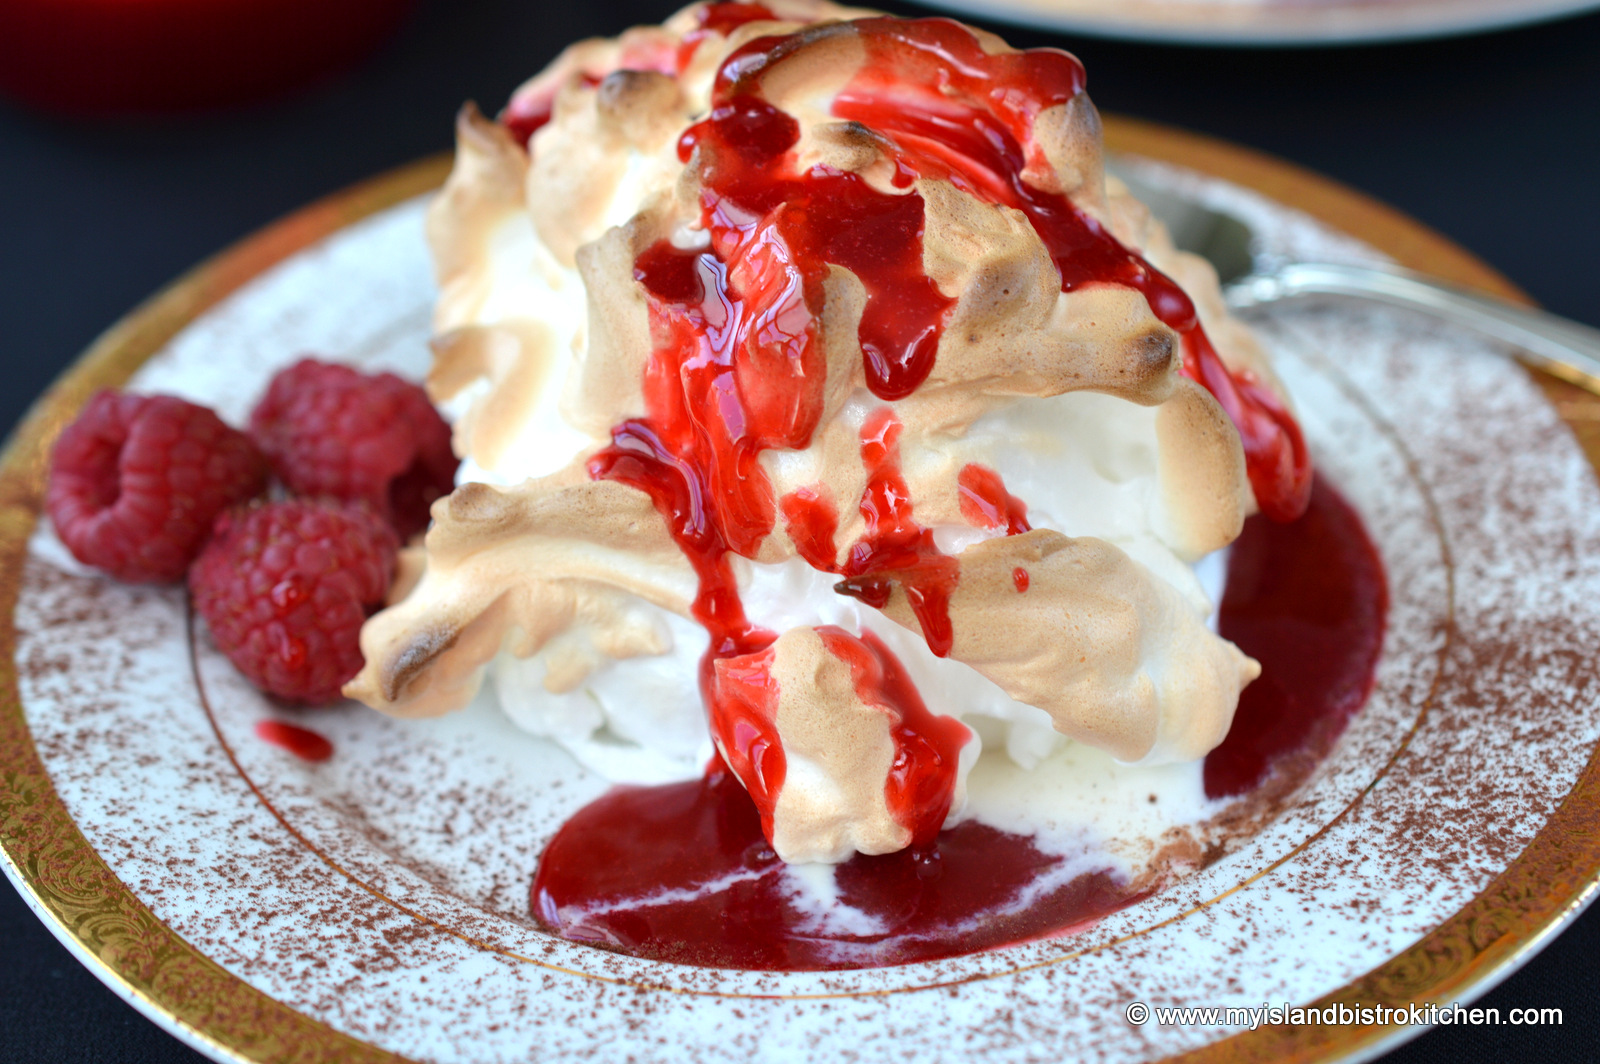
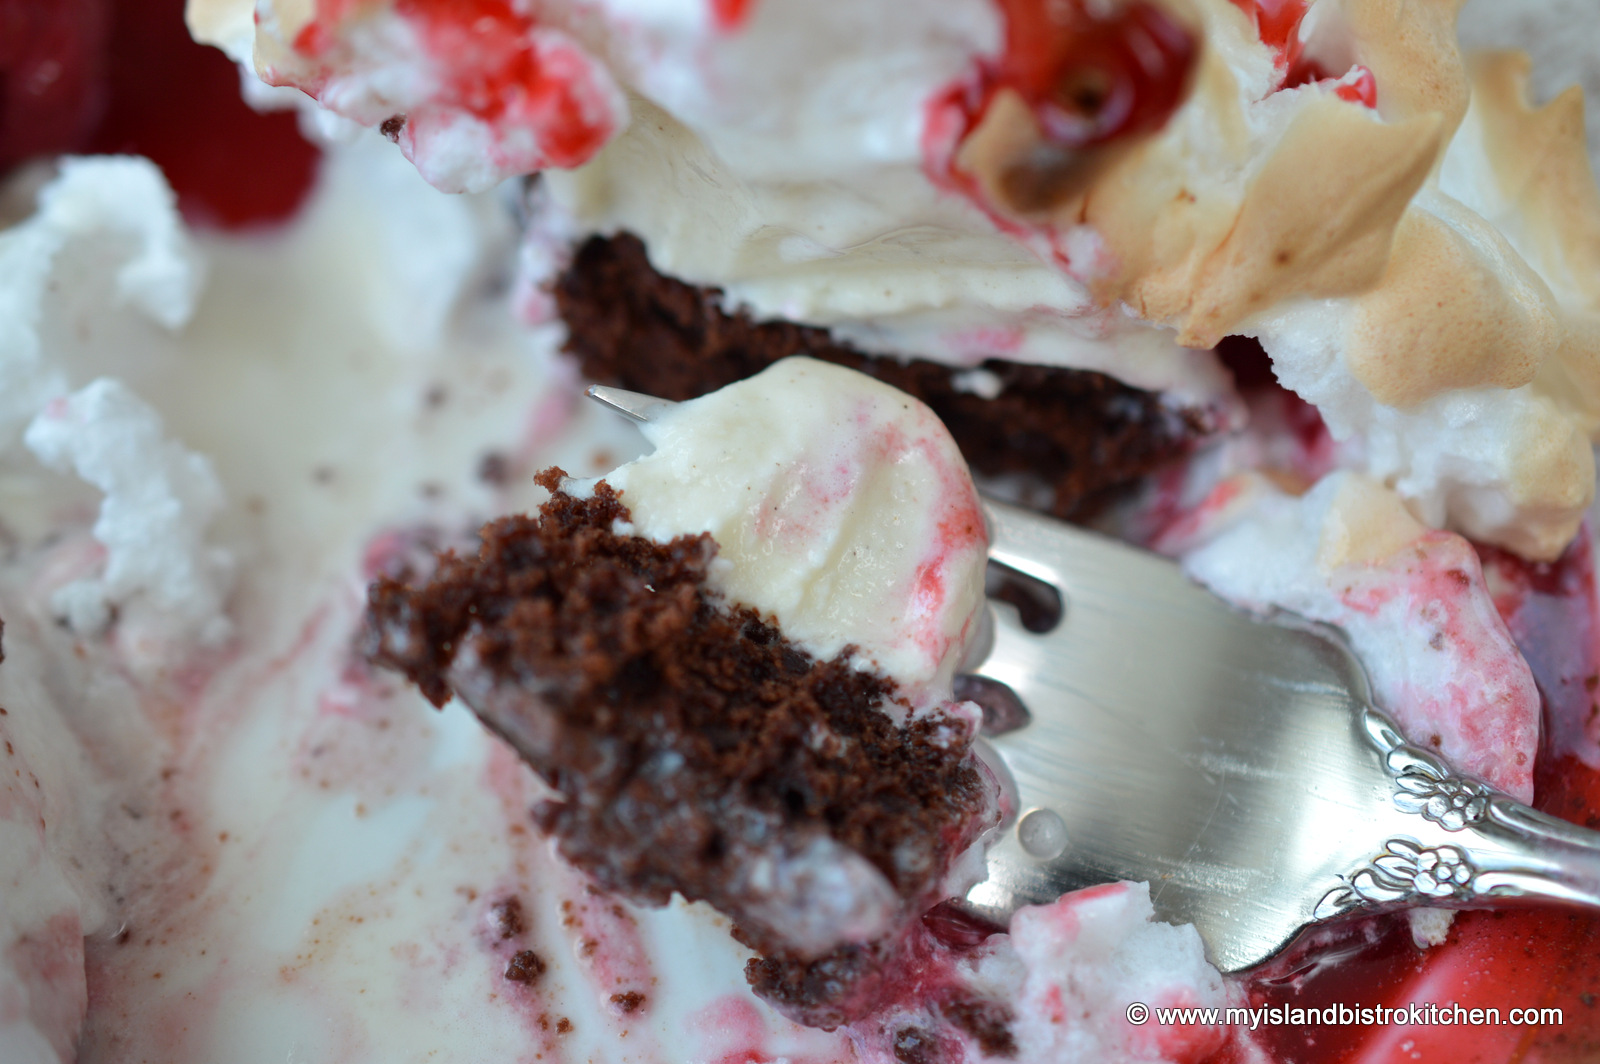
One of my all-time favorite desserts is Baked Alaska. I first had Baked Alaska on a cruise many, many years ago and I have loved it ever since. Many people think Baked Alaska is difficult to make but I don’t find it is. It does, however, take a little planning and time since it is prepared in stages. Baked Alaska can be made as a large dessert to serve several or it can be tailored down to serve one or two. My recipe is for two individual servings, perfect for a special intimate dinner such as Valentine’s Day, or anytime as a nice treat.
There are options for the cake base of a Baked Alaska. Brownies or pound cake are my preferences and they can be either bought or homemade. I like brownies because the dark contrast is eye-appealing with a light-colored ice cream. Whatever base is used, it needs to be cut out with a 2” cookie cutter and it should have a depth of about ½” to ¾ “. Now, at first glance, this might appear to be a rather miniscule dessert but, as you’ll soon discover, the meringue adds a lot of volume to the Baked Alaska.
Choice of ice cream is important for the Baked Alaska. Choose a high quality ice cream with a high percentage cream content for this dessert because it will freeze hard. Some of the lower fat or cheaper ice creams tend to be softer and, because this ice cream is going into a 475° oven, it needs to be able to stand up for itself! Any flavour of ice cream of your choosing will work. My favorites are vanilla, coffee, or strawberry. Let the ice cream soften slightly at room temperature for 5-7 minutes before scooping it out. You want to try and get as perfectly a round scoop as you can because this is what will give the Alaska its dome shape.
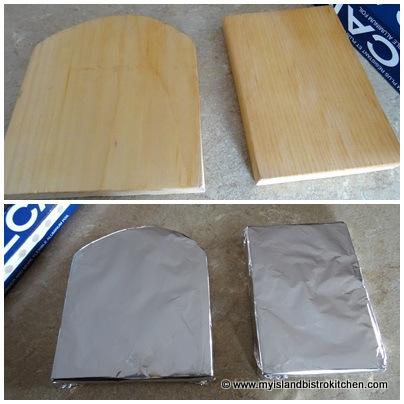
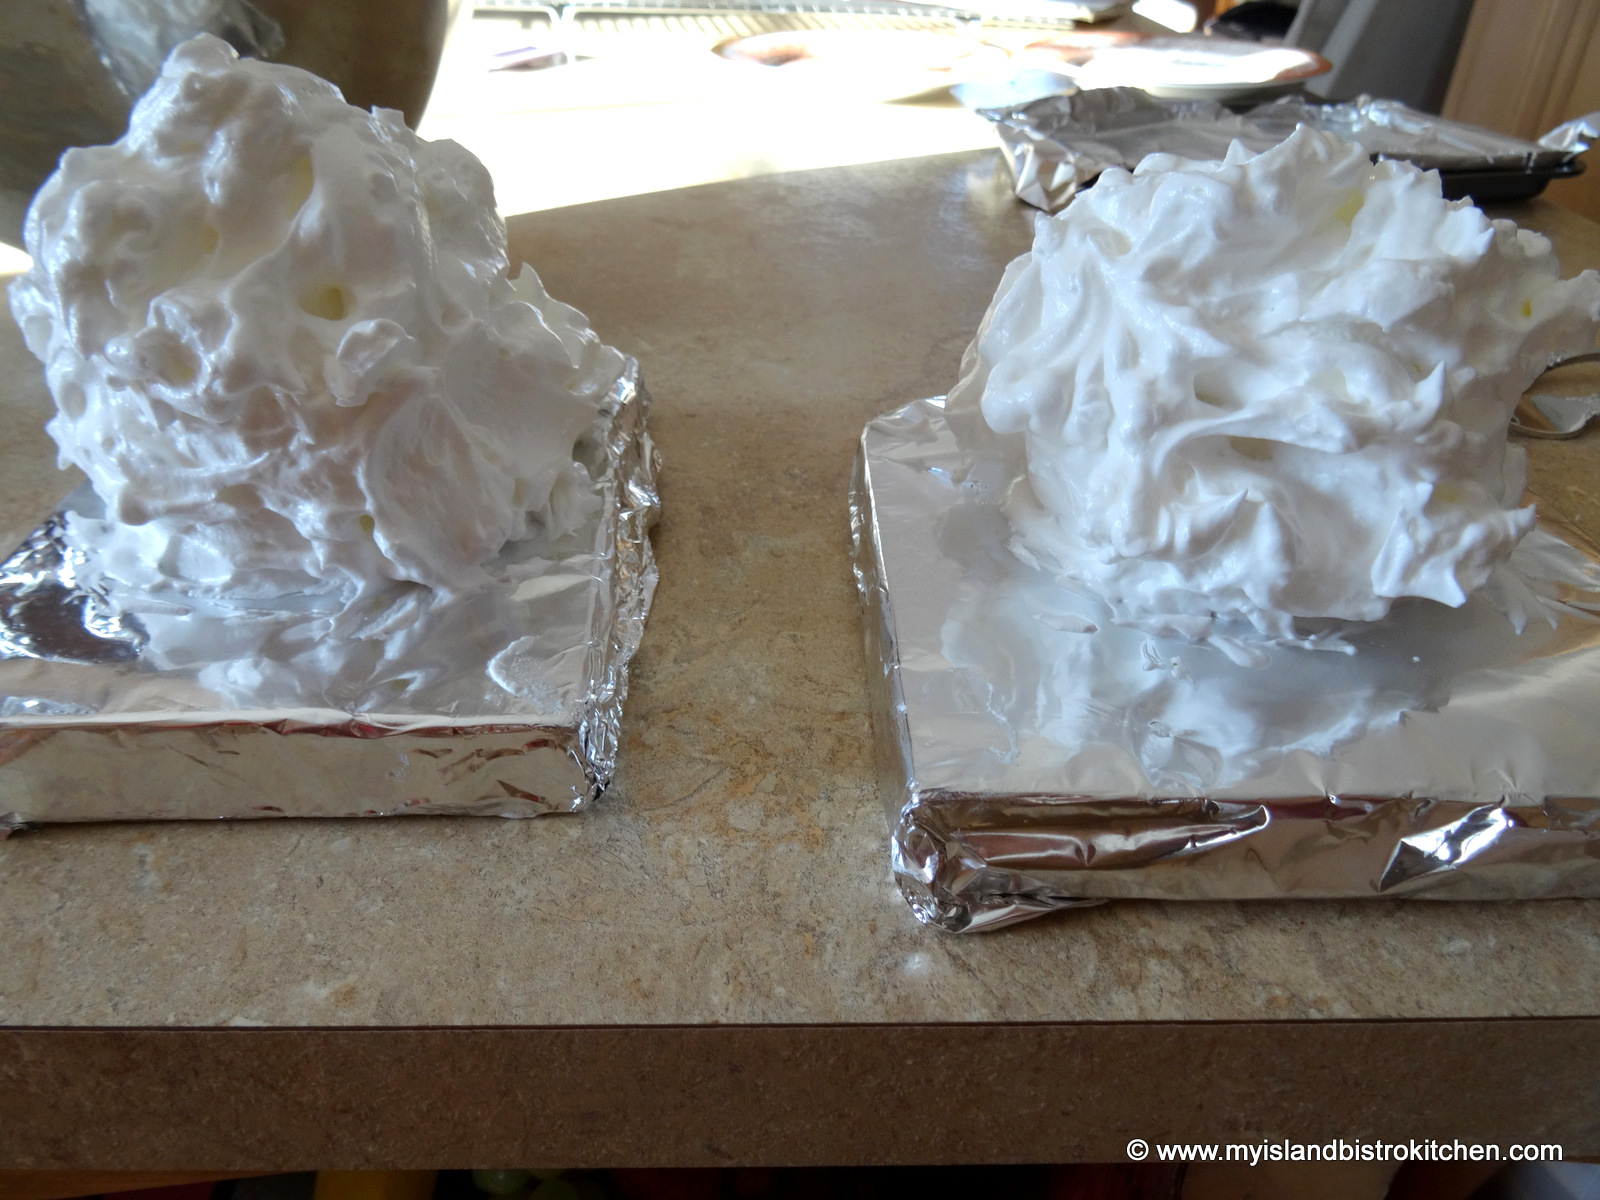
It’s important that both the cake base and the scoop of ice cream be frozen super hard so plan ahead to have them frozen for at least two hours or longer before serving time. I use a couple of small pieces of wooden boards covered with tin foil on which to bake the Alaskas because the boards don’t heat as fast as a metal cookie sheet would which could cause the Alaskas to start to melt down too quickly in the oven. The idea is to keep the Baked Alaskas as cold as possible. The Alaskas are only put in the oven for 2-3 minutes solely to tan the meringue.
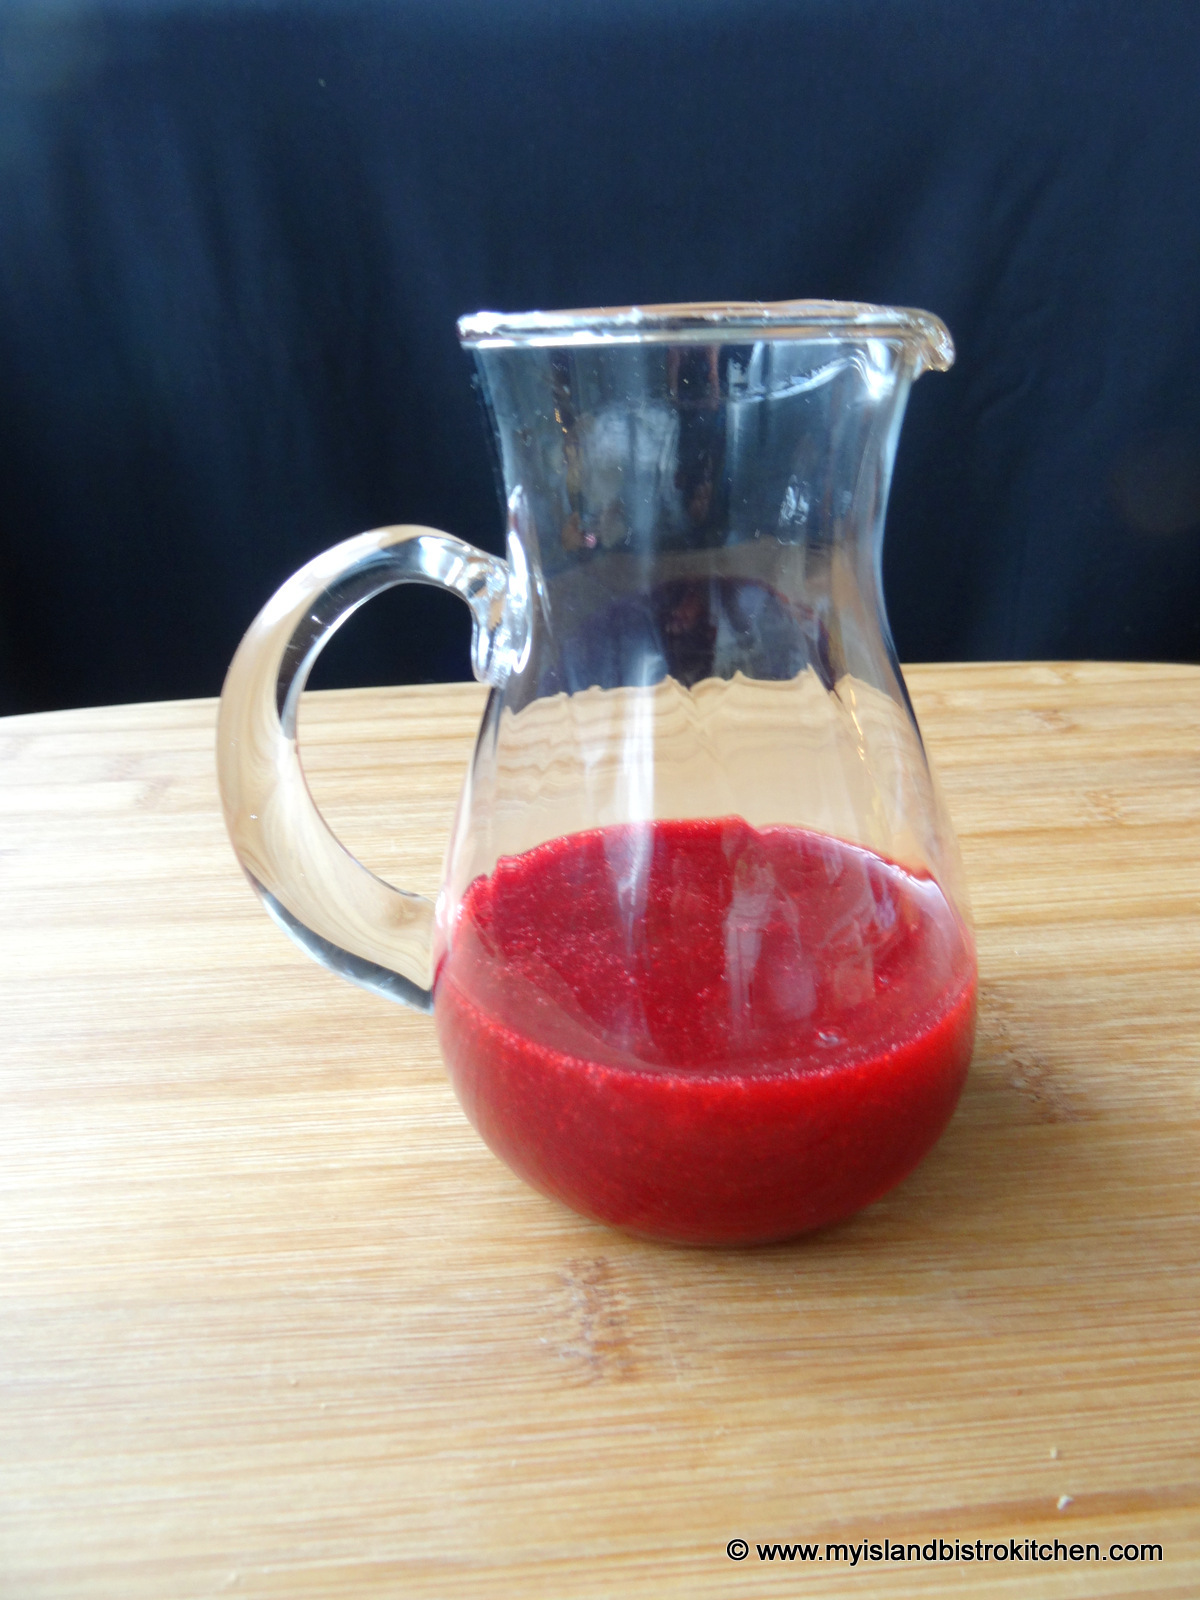
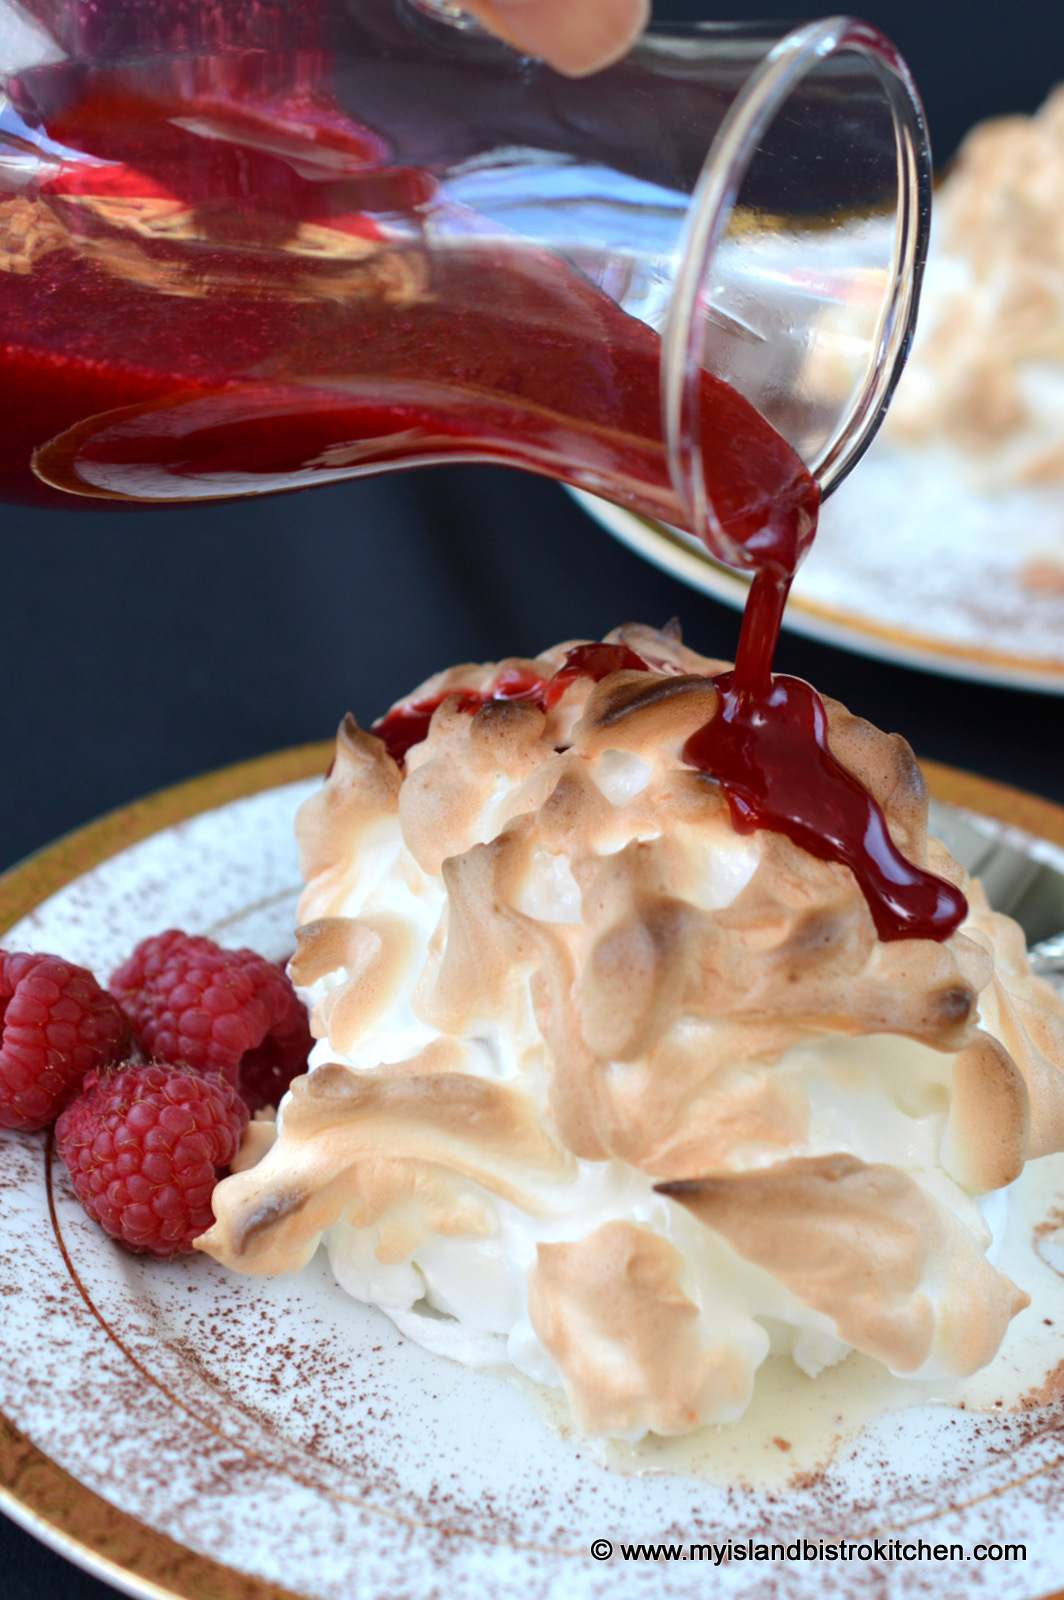
The Raspberry Coulis can be made a day or two ahead and kept refrigerated.
I find I have greater success with whipping egg whites for the meringue when they are at room temperature. Allow the separated egg whites to come to room temperature for about 30-40 minutes before whipping.
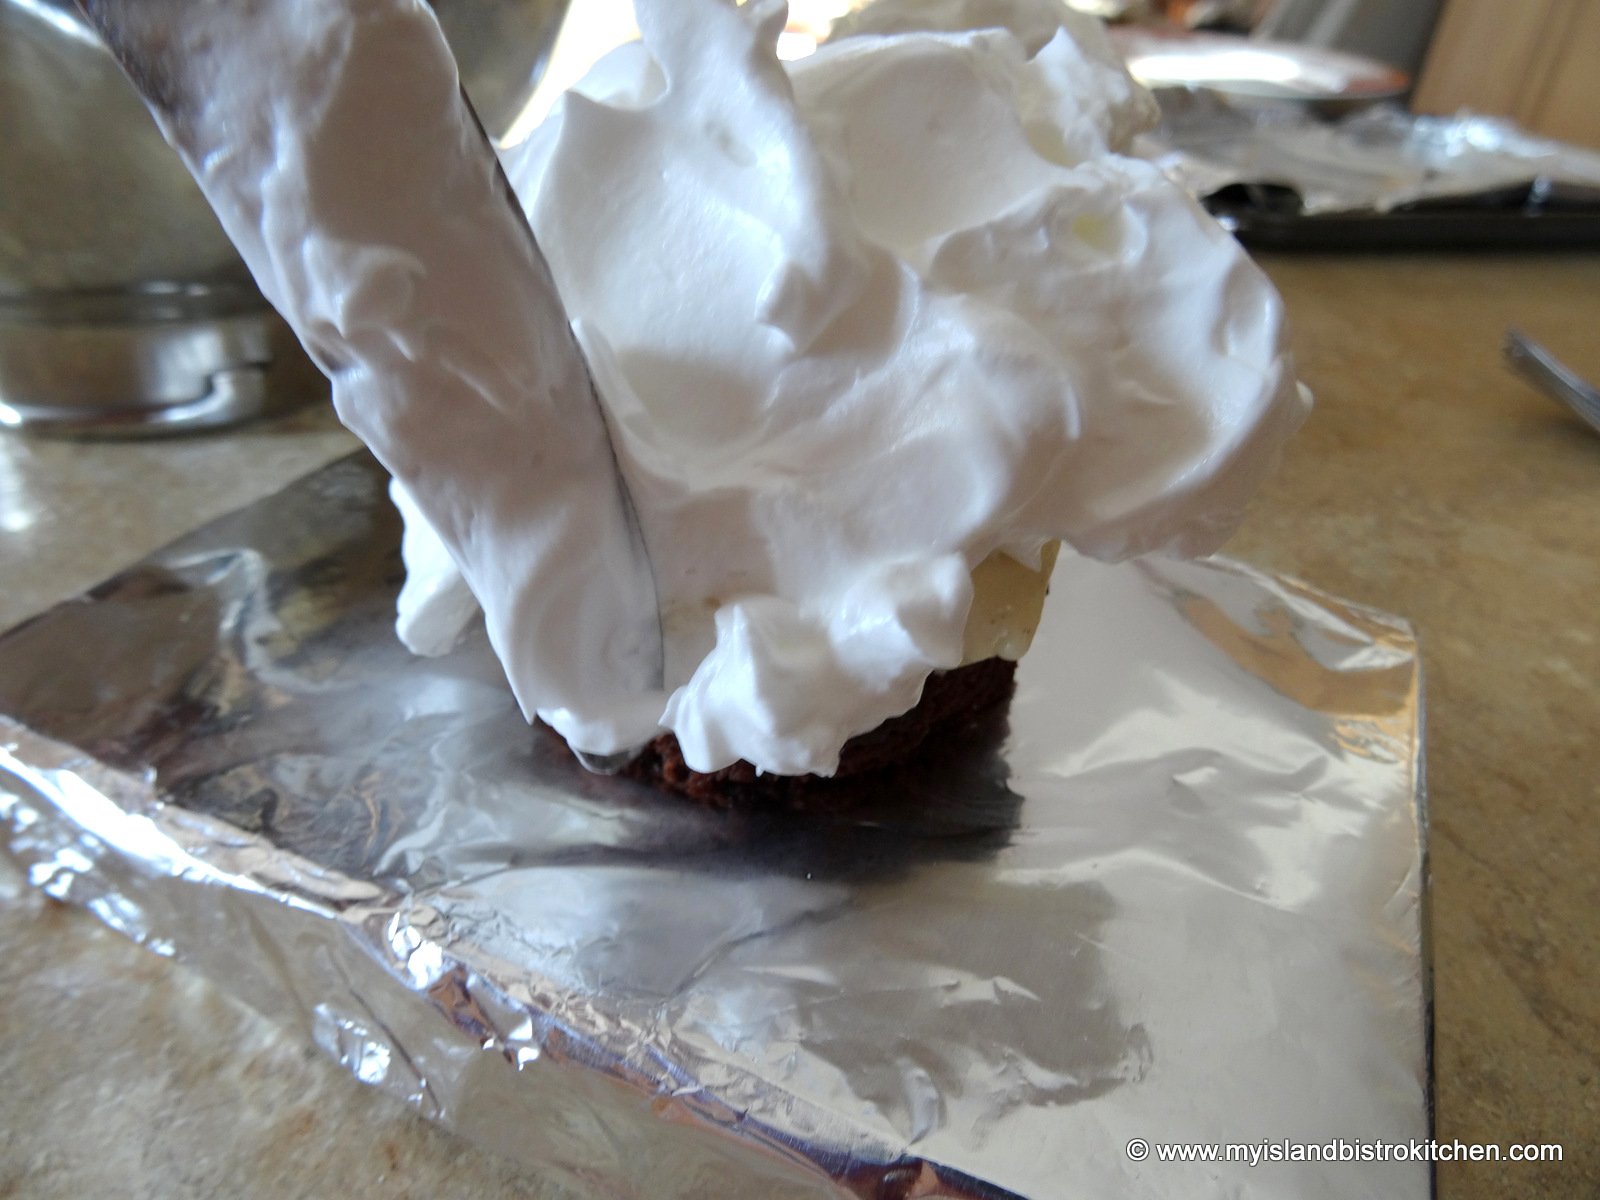
It’s super important to completely cover the ice cream and base with the meringue as, otherwise, heat will reach the ice cream which will simply melt and ooze out of the Alaska when placed in the oven. The meringue acts as an insulator of sorts which prevents the ice cream from melting for the 2-3 minutes it is in the oven. I have found that even the smallest gap in the meringue will cause the ice cream to melt in even the short time it is in the oven. Work as quickly as you can to apply the meringue so that the ice cream does not soften and melt.
Individual Baked Alaskas with Raspberry Coulis
Raspberry Coulis:
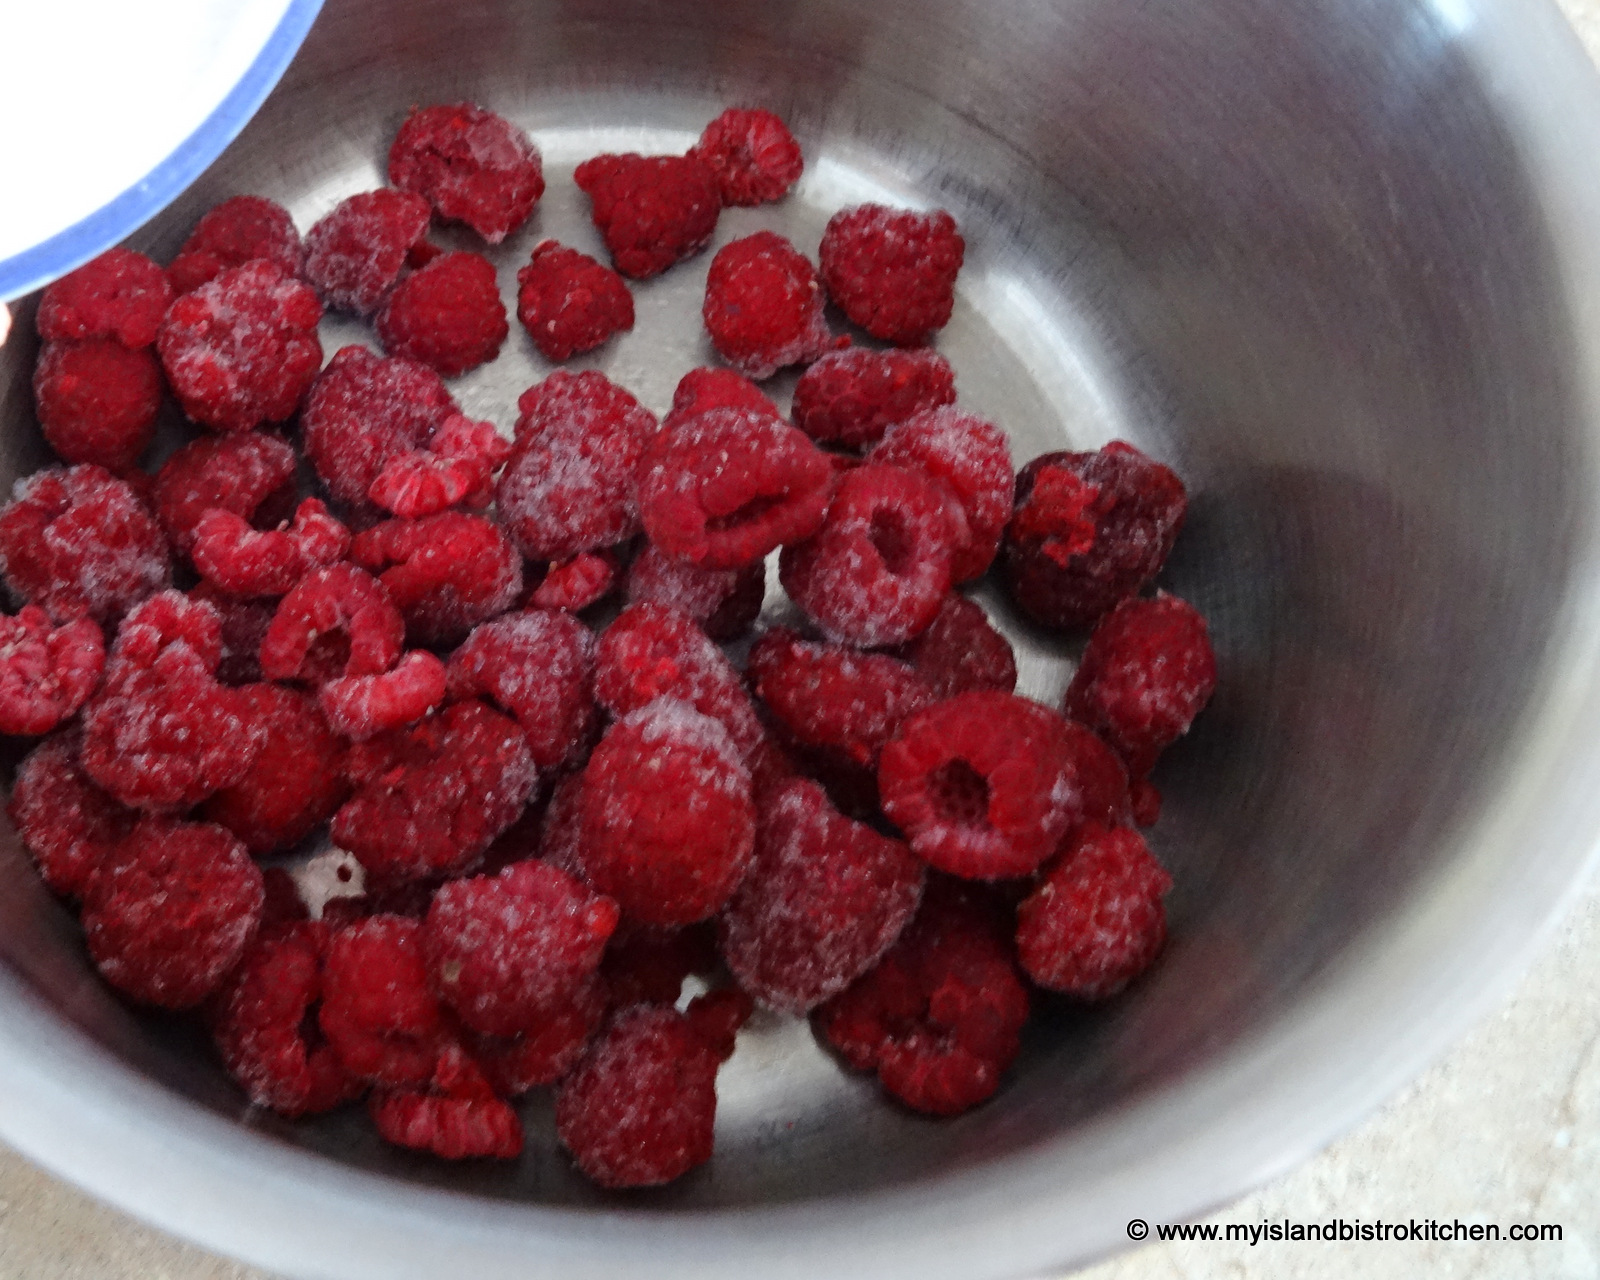
1¼ cups raspberries, fresh or frozen
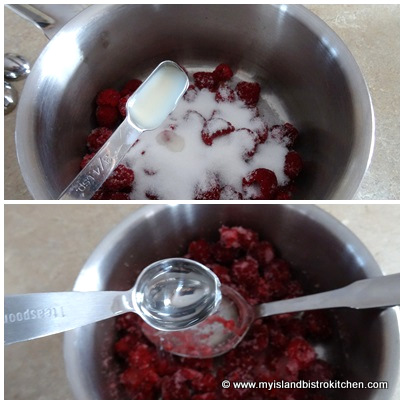
⅓ cup sugar
¾ tsp lemon juice
1 tsp water
In medium-sized saucepan, combine all ingredients.
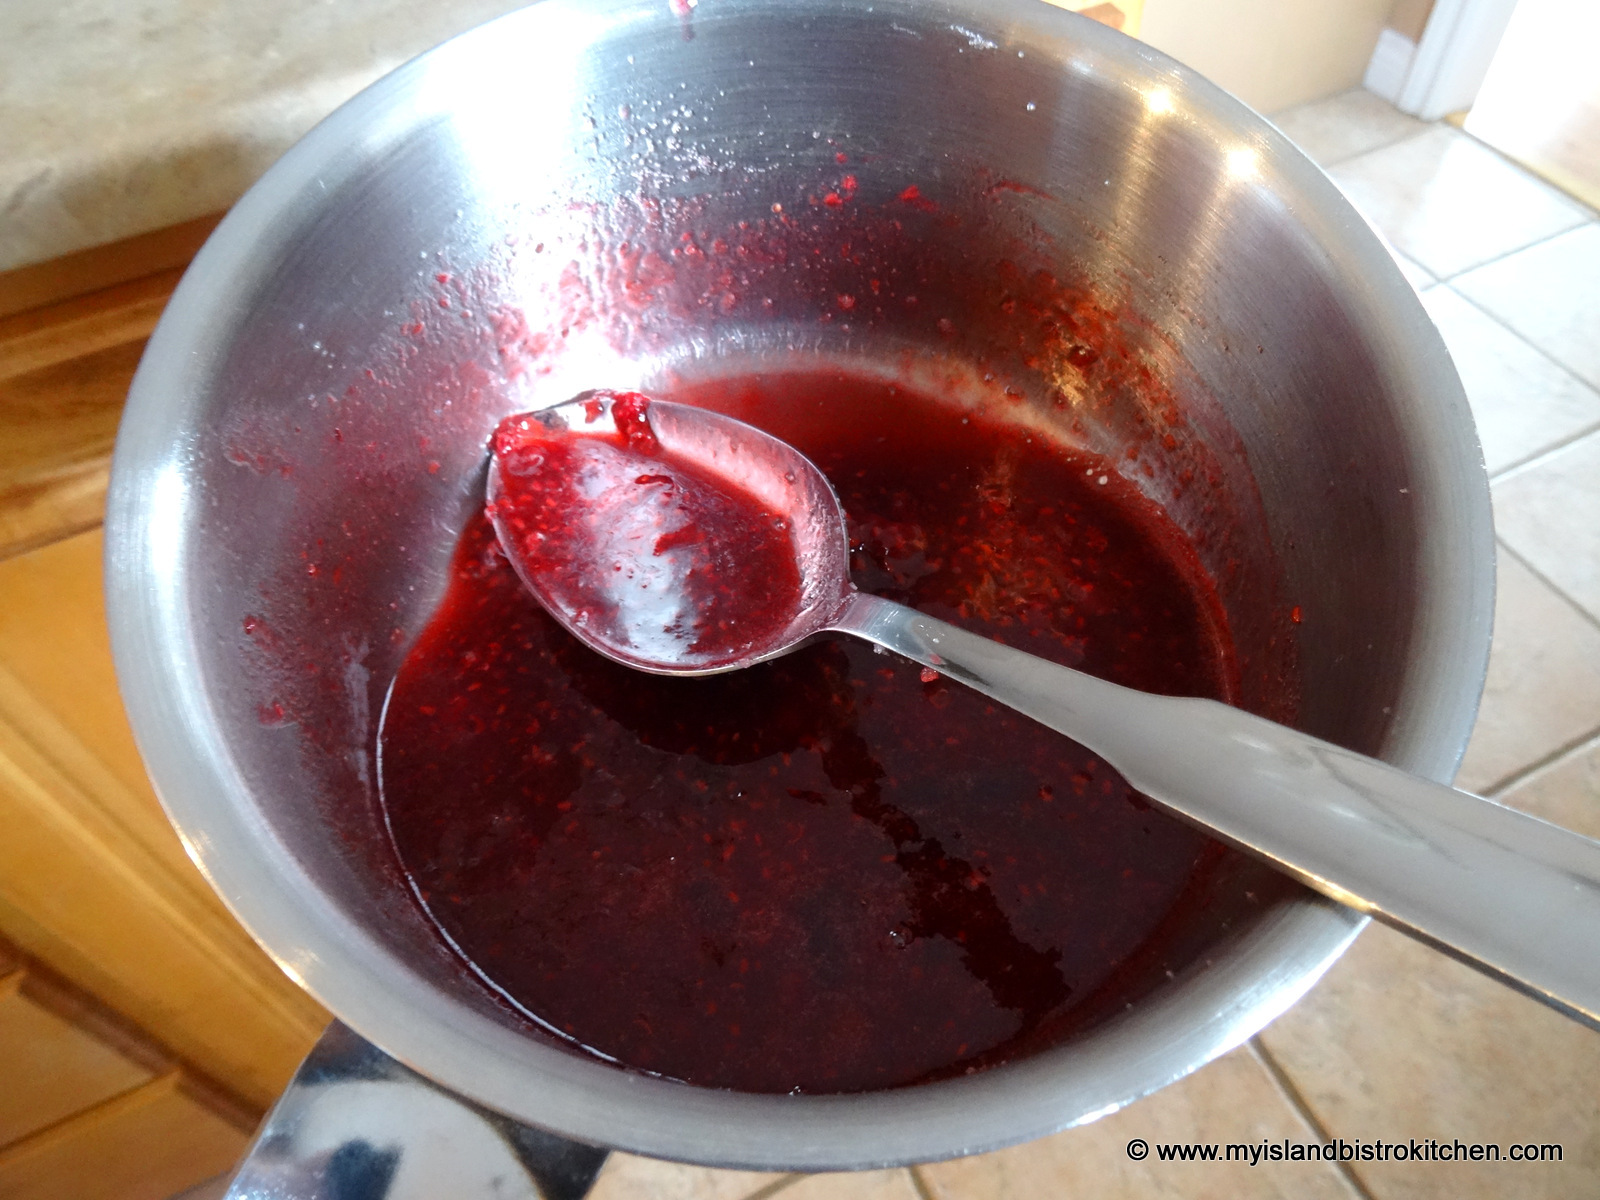
Cook over medium heat, stirring constantly until raspberries have broken down and released their juices.
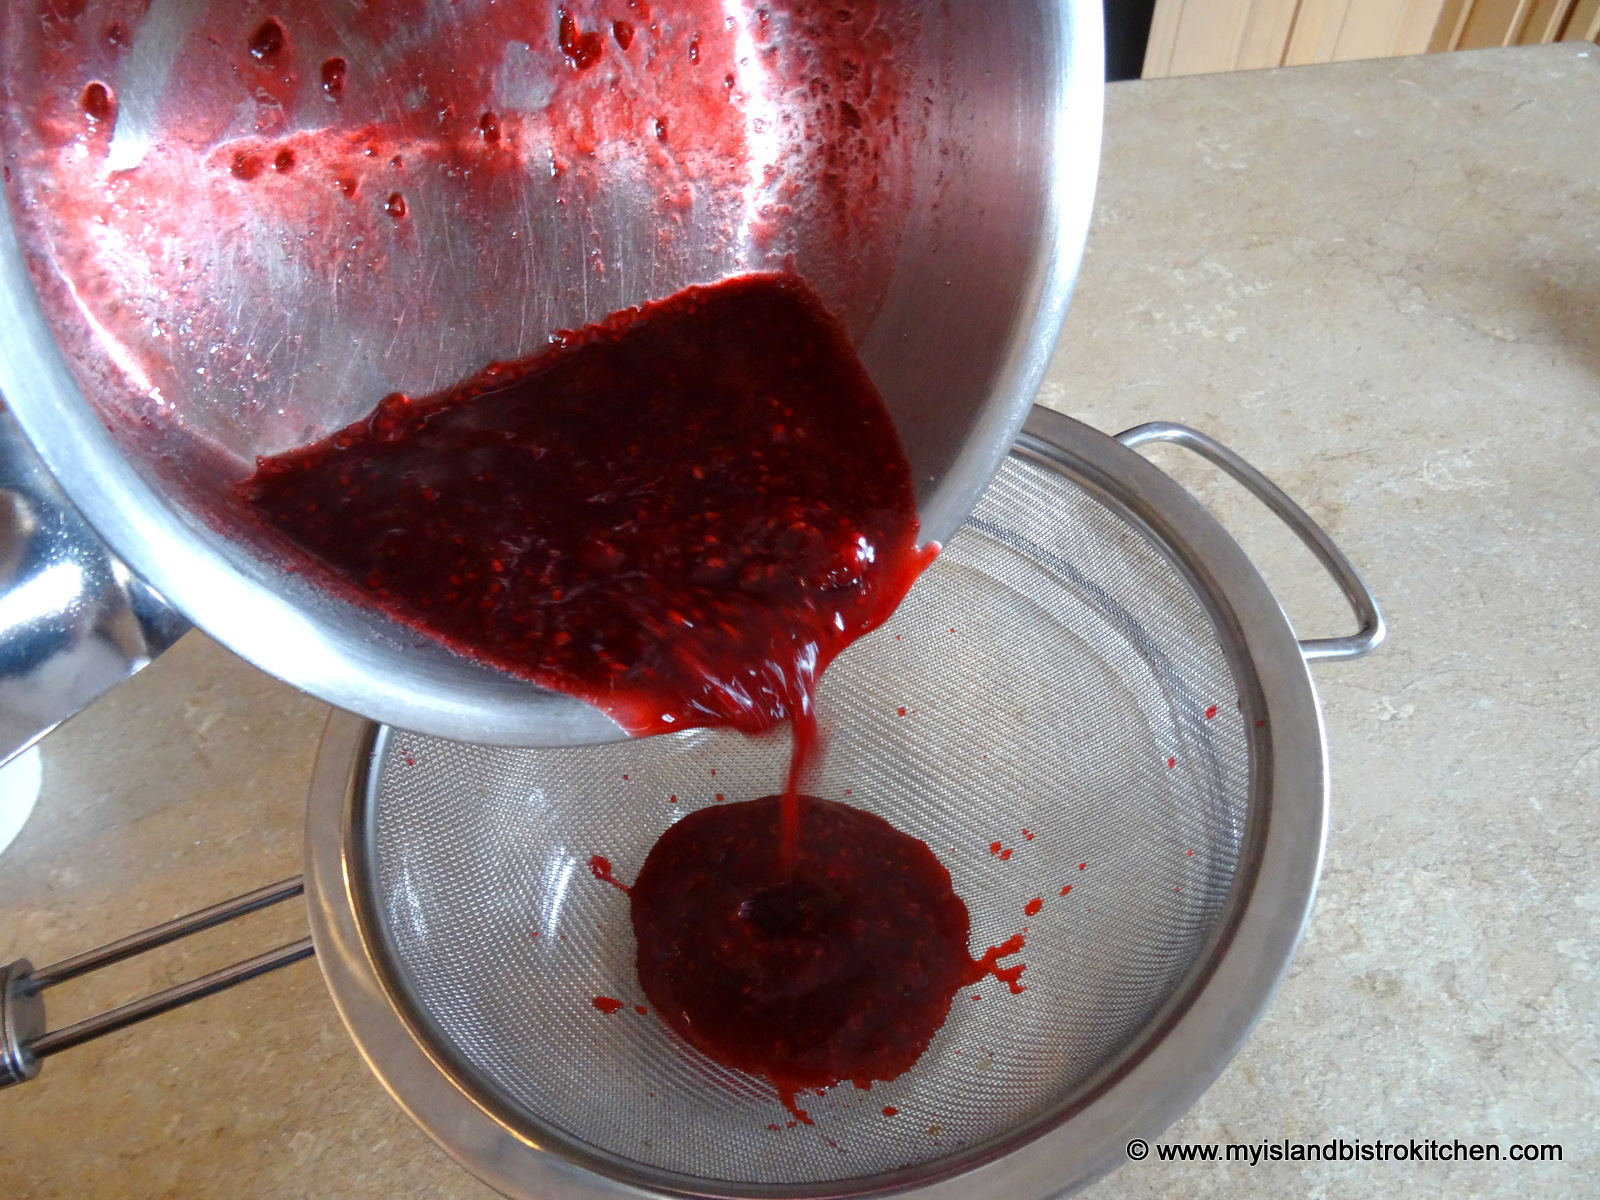
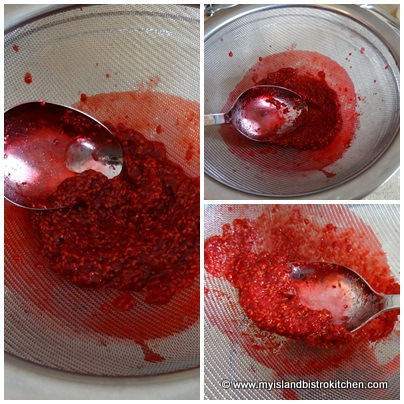
Remove from heat and pour mixture into a fine sieve over a bowl.
Press mixture with the back of a spoon to extract as much juice as possible. Discard raspberry seeds left in the sieve.
Cover coulis tightly with plastic wrap and refrigerate until well chilled.
Yield: ½ cup
Baked Alaskas:
2 pieces of brownie cut into 2” circles and sliced ½“ – ¾” thick.
2 round scoops of ice cream, your favourite flavour
Meringue:
2 large egg whites, room temperature
⅛ tsp salt
⅛ tsp cream of tartar
¼ cup sugar
½ tsp almond flavouring
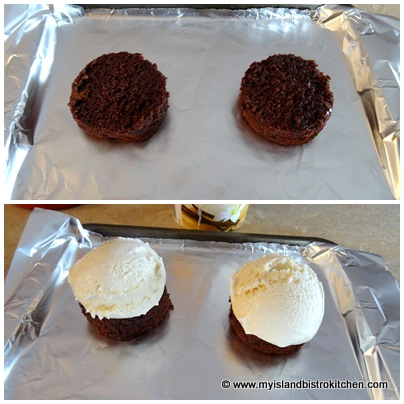
Line a small rimmed baking sheet with tin foil. Using the rimmed baked sheet allows for easy transport to and from the freezer and keeps the Alaska bases from accidentally sliding off. Place the brownie circles on the baking sheet and top each with a scoop of ice cream. Place in freezer for at least 2 hours, until very firm.
At the same time, cover two small boards with tin foil and place in freezer.
When ready to prepare the dessert, place oven rack about 8” from broiler and preheat oven to 475°F.
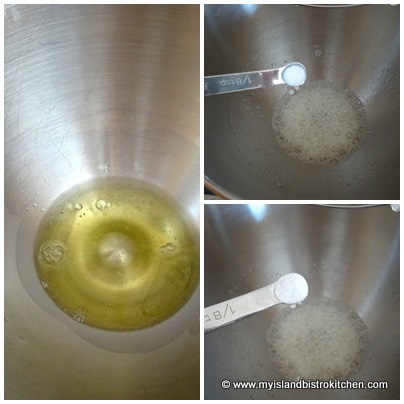
In bowl of stand mixer, beat egg whites just until frothy then add the salt and cream of tartar.
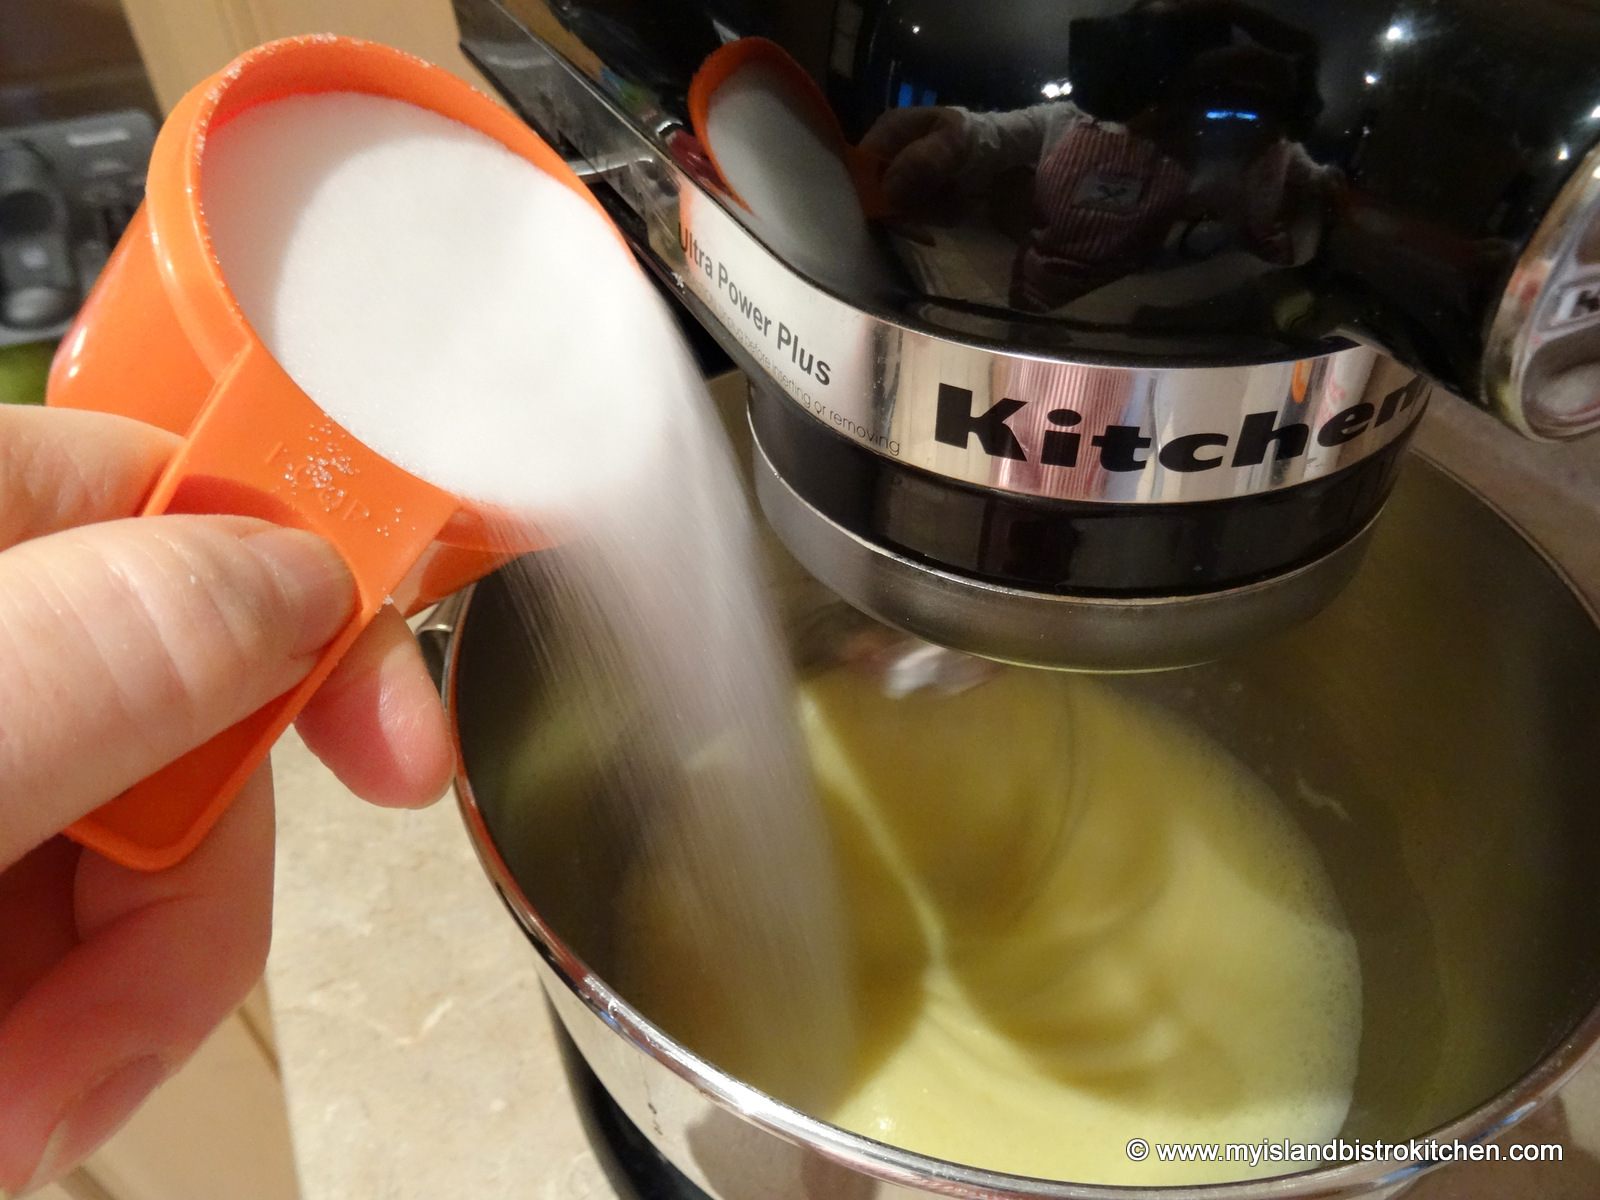
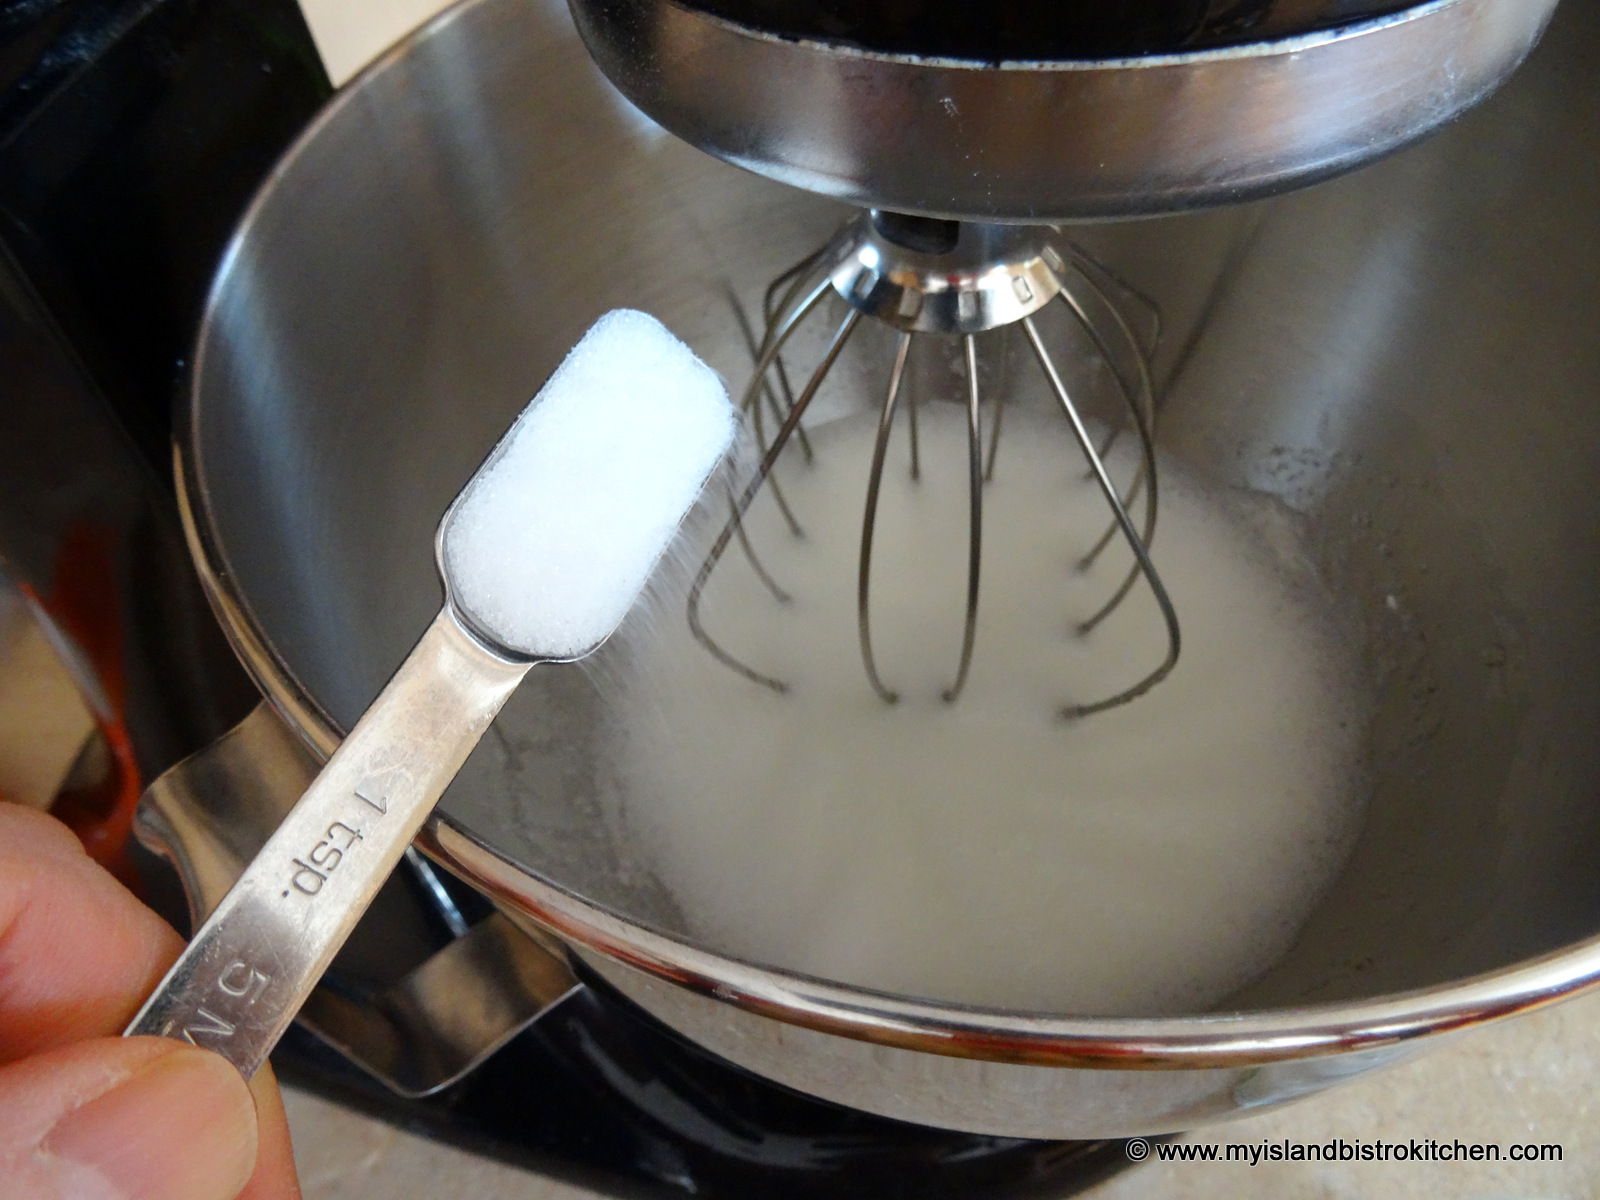
While beating the egg whites, add the sugar slowly, about a teaspoon at a time.
Continue to beat the egg whites until stiff peaks form when wire whisk is lifted from the egg whites.
Add the almond flavoring and beat for 10-15 seconds longer.
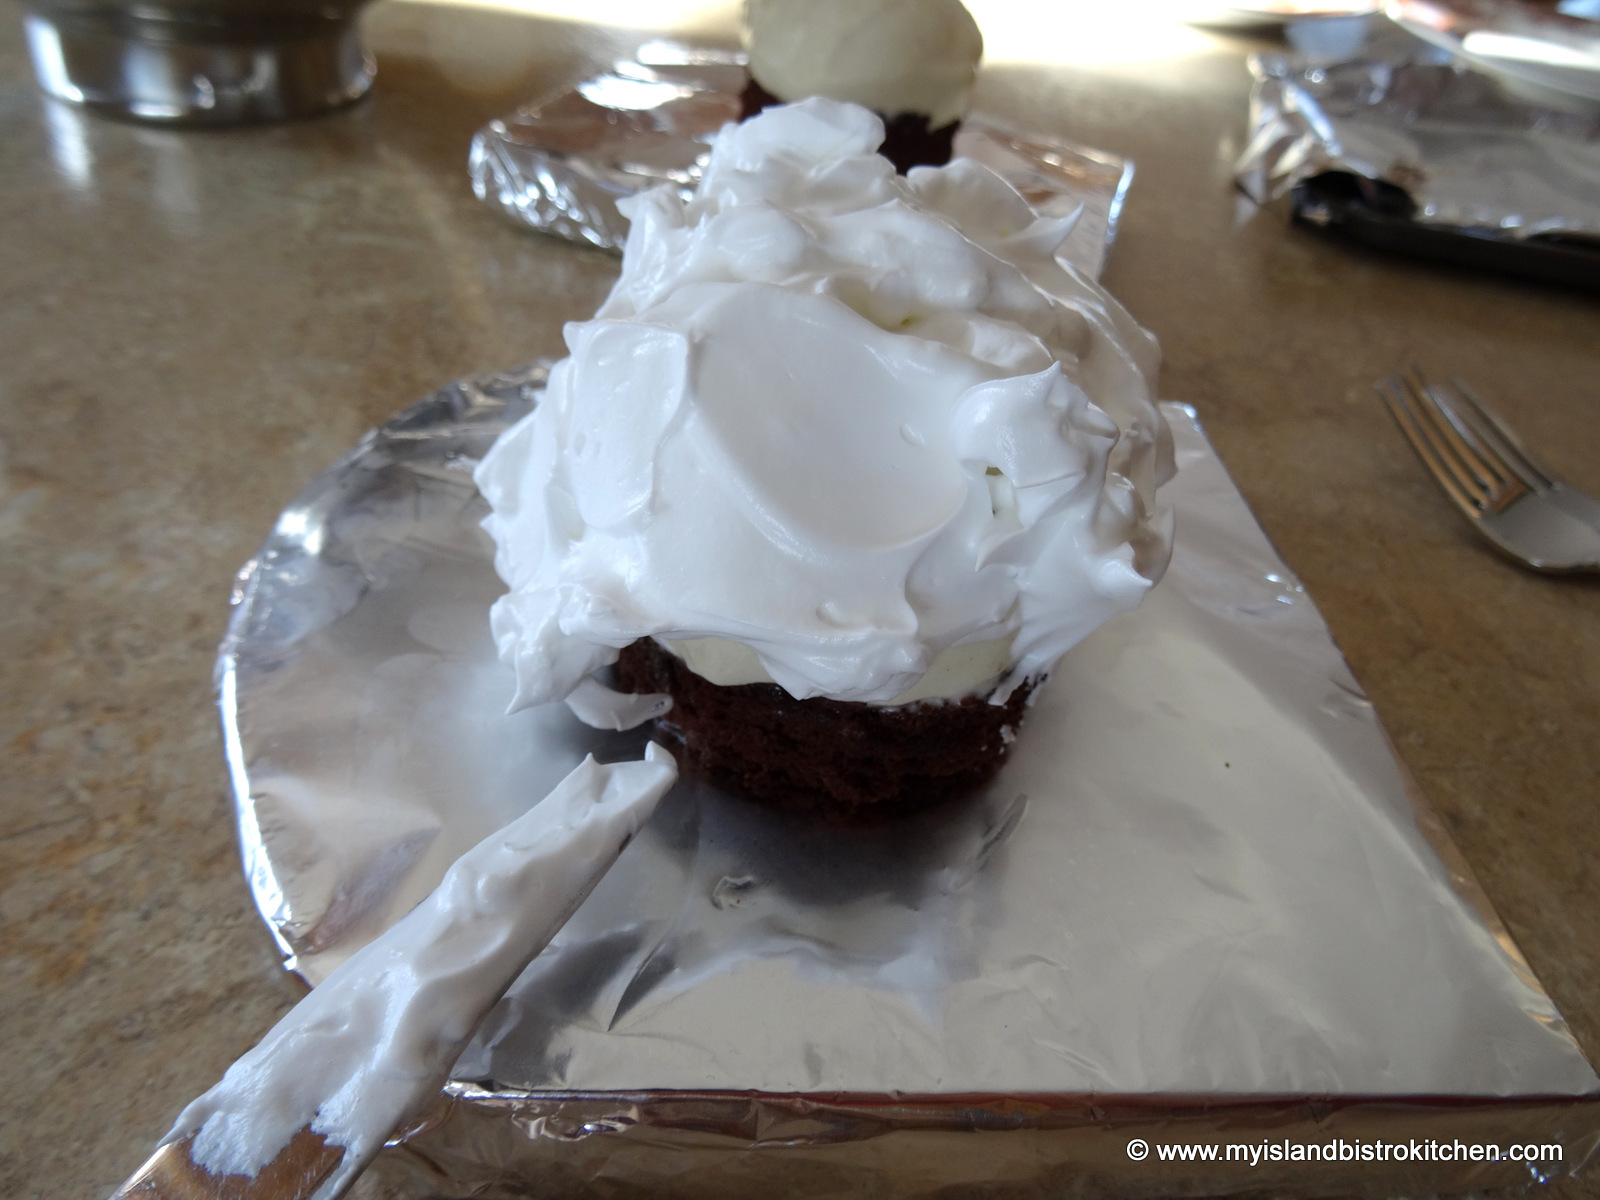
Remove brownie and ice cream rounds along with the foil-covered boards from the freezer. Transfer the brownie and ice cream rounds to the foil-covered boards. Quickly cover the ice cream and brownie completely with the meringue.
With the tip of a knife, twirl the meringue into decorate tips.
Place the Alaskas on a rimmed baking sheet for ease of transfer to and from oven. Bake in the pre-heated oven until the meringue browns, about 2-3 minutes.
Remove from oven and plate. Drizzle with Raspberry Coulis and garnish with fresh raspberries. Serve immediately.
Serves: 2
——————
Thank you for visiting “the Bistro” today. There are lots of ways to connect with “the Bistro” through social media:
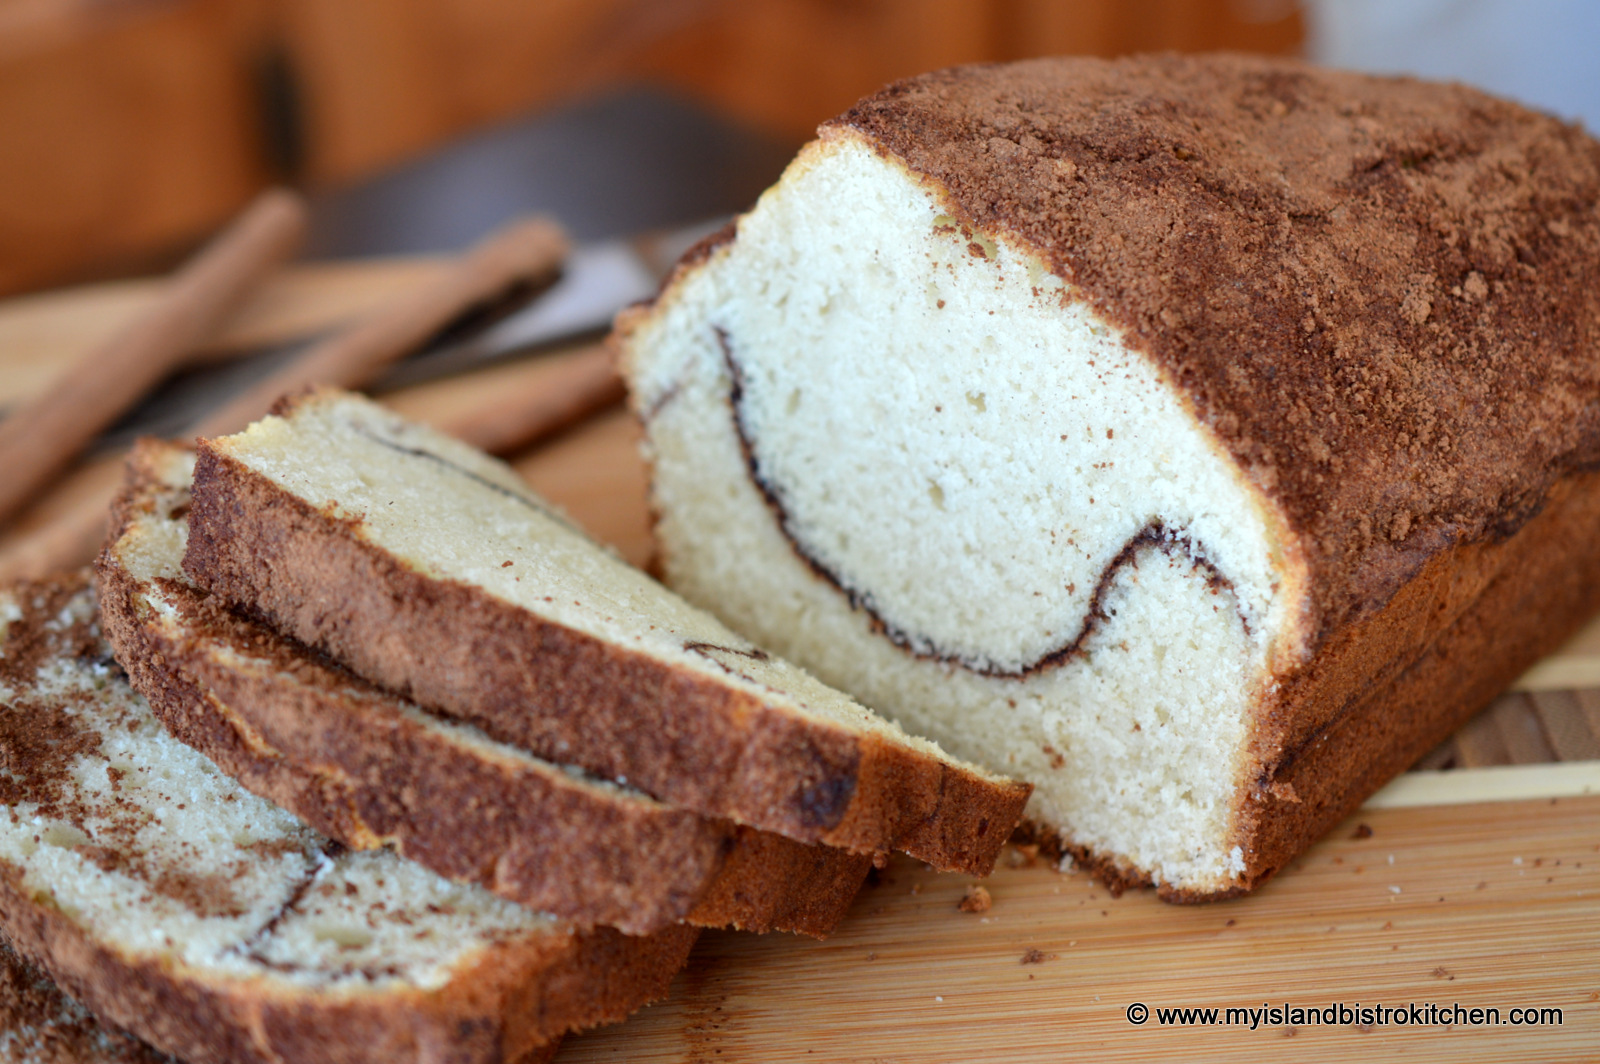
Did you ever get the urge to bake (often on a storm day, for example) and realize that every recipe you look at requires a shopping trip to the supermarket? Well, here’s my answer to that dilemma. Today’s recipe is Cinnamon Quick Bread that takes no more than pantry staples. So long as you have basic baking supplies, you can whip this tasty sweet bread up in no time. Continue reading Cinnamon Quick Bread→
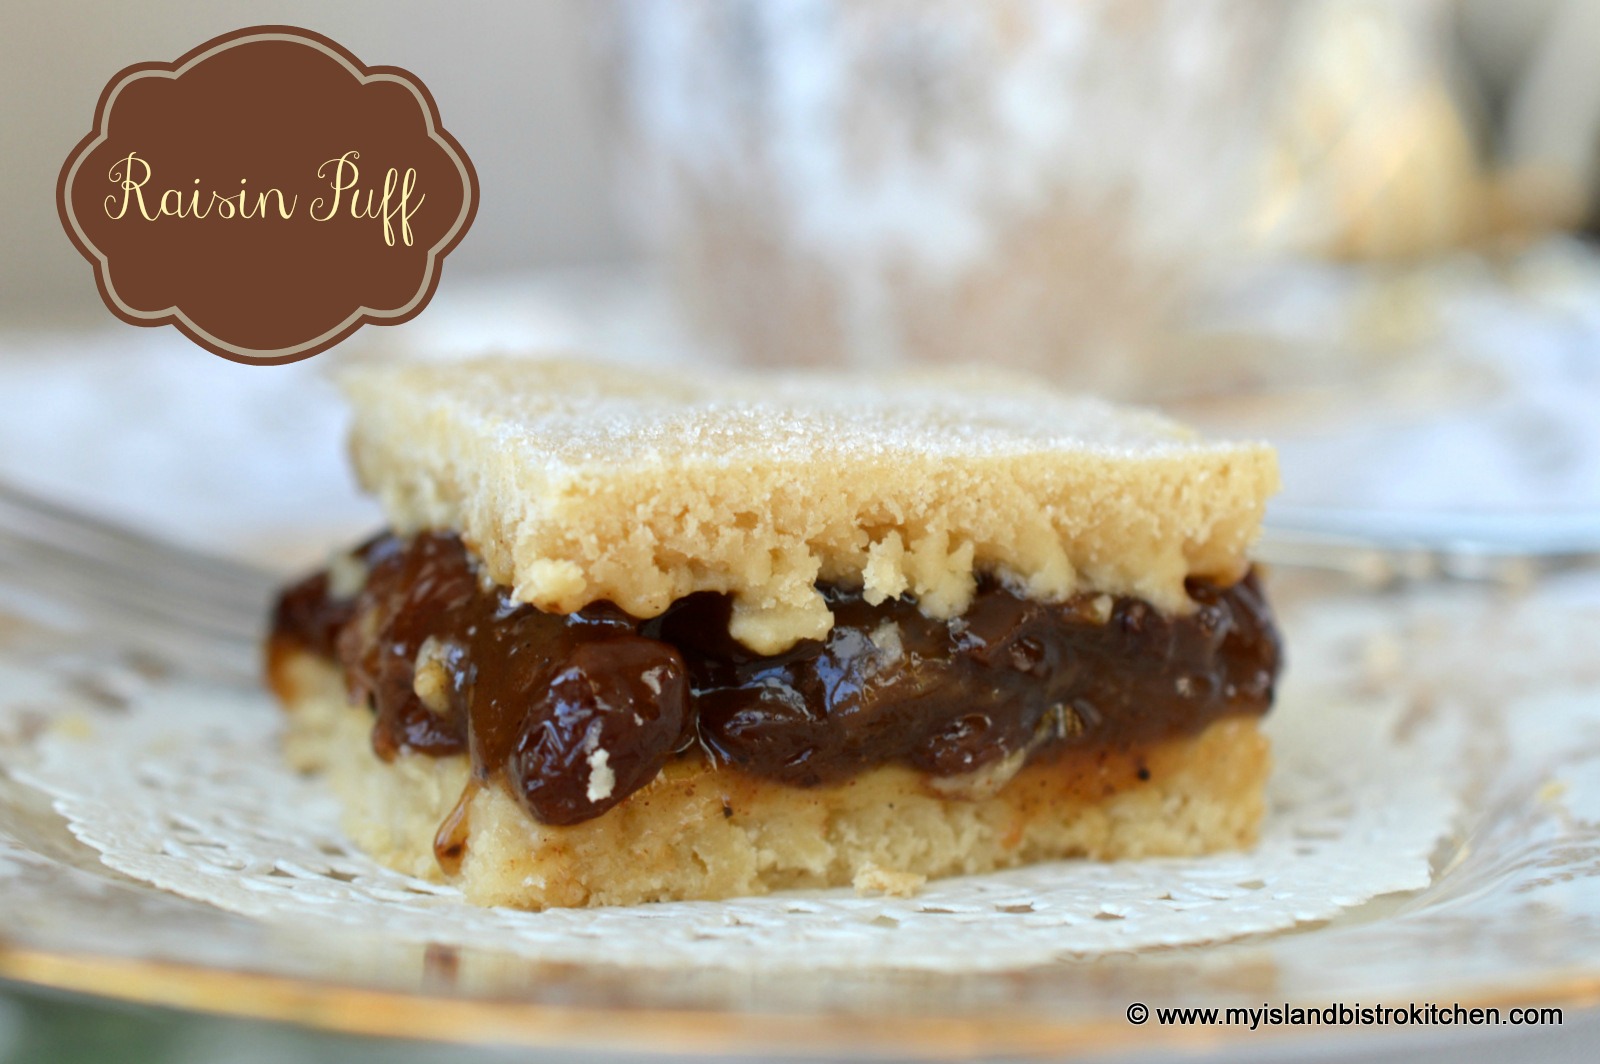
Today, I’m sharing the recipe for a real old-fashioned vintage dessert. Some of you may remember your mother or grandmother making Raisin Puff (aka Plum Puff) dessert or, perhaps, you have made it yourself. Continue reading Raisin Puff (aka Plum Puff)→
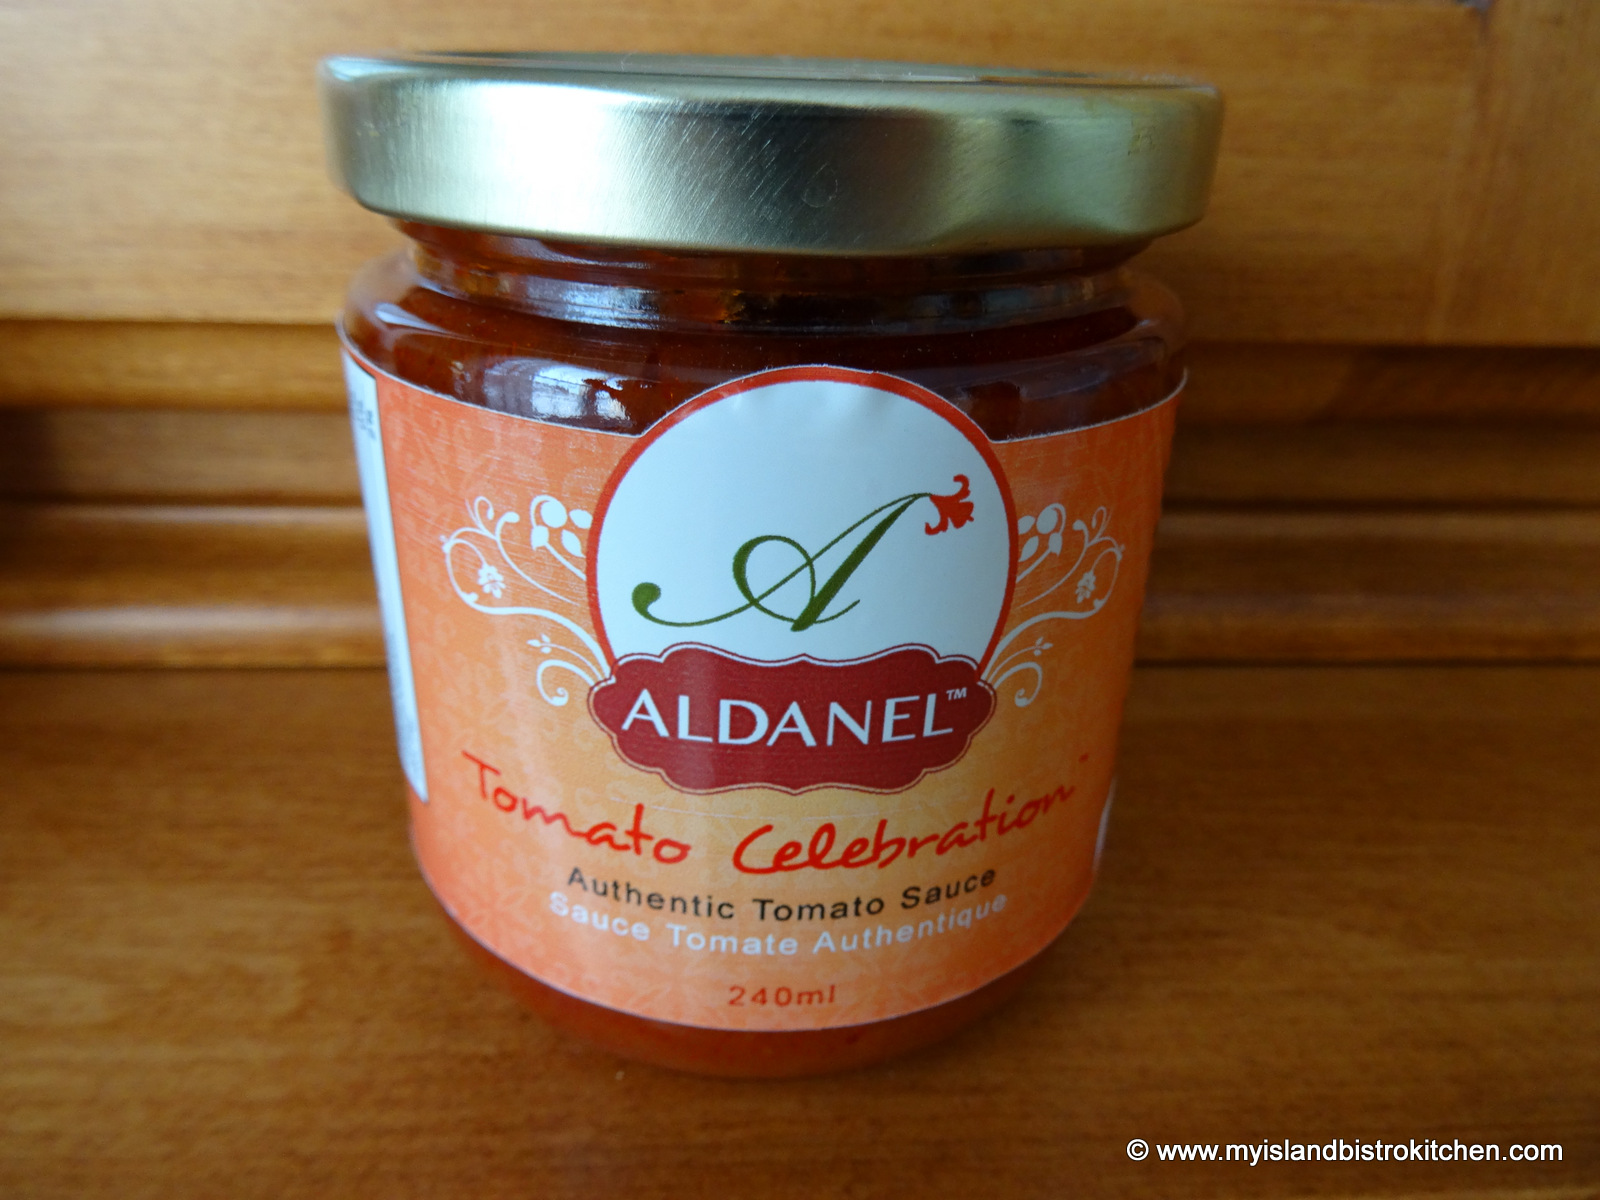
I was recently contacted by Laure Solange Tchamdja, President and CEO of Aldanel Authentic Foods, of Charlottetown, PEI, to let me know about her new line of tomato sauces being produced right here on PEI. I sat down for a chat with Tchamdja to find out more about the sauces.
In October, 2013, Tchamdja began producing tomato sauce. The company manufactures five varieties of their tomato-based sauces, all sold in 240ml bottles: Tomato Celebration, Spinach Carnival, Chili Tango, Carrot Symphony, and Rouge Poivron. Over the period of some nine months in the lab, the BioFood Technology plant on the UPEI campus in Charlottetown helped Tchamdja convert her family recipe into a commercial product suitable for the retail market. As the company does not presently have its own manufacturing plant, the sauces are produced at the BioFood Technology plant on the UPEI campus in Charlottetown.
Tchamdja wanted to create a tomato sauce product that is safe and healthy, not too spicy, and that would help working women, young professionals, and students prepare healthy meals at home. She says her products are versatile and multipurpose and one does not have to be a chef to use them. They can be used directly from the bottle as pasta sauces, added to soups and vegetables, used as a condiment for meat and fish, as a sauce for pizza, on nachos, and even as marinades for meat and fish. So, the product can be used as is without having to cook it again or it can be used as an ingredient in a recipe. Tchamdja says her products are all natural with no preservatives and are low in sugar.
Initially, Tchamdja sold her tomato sauces at local PEI shops such as Riverview Country Market. She has since expanded her markets to include Sobey’s and Co-op Supermarkets, Pete’s Frootique in Halifax, and Winners and Home Sense stores in Eastern Canada.
The products are sold under the Aldanel™ label, the letters for which are formed from those found in the names of her children. Depending on the retailer, prices per 240 ml bottle range from $4.49 to $5.99 (as of the time of writing).
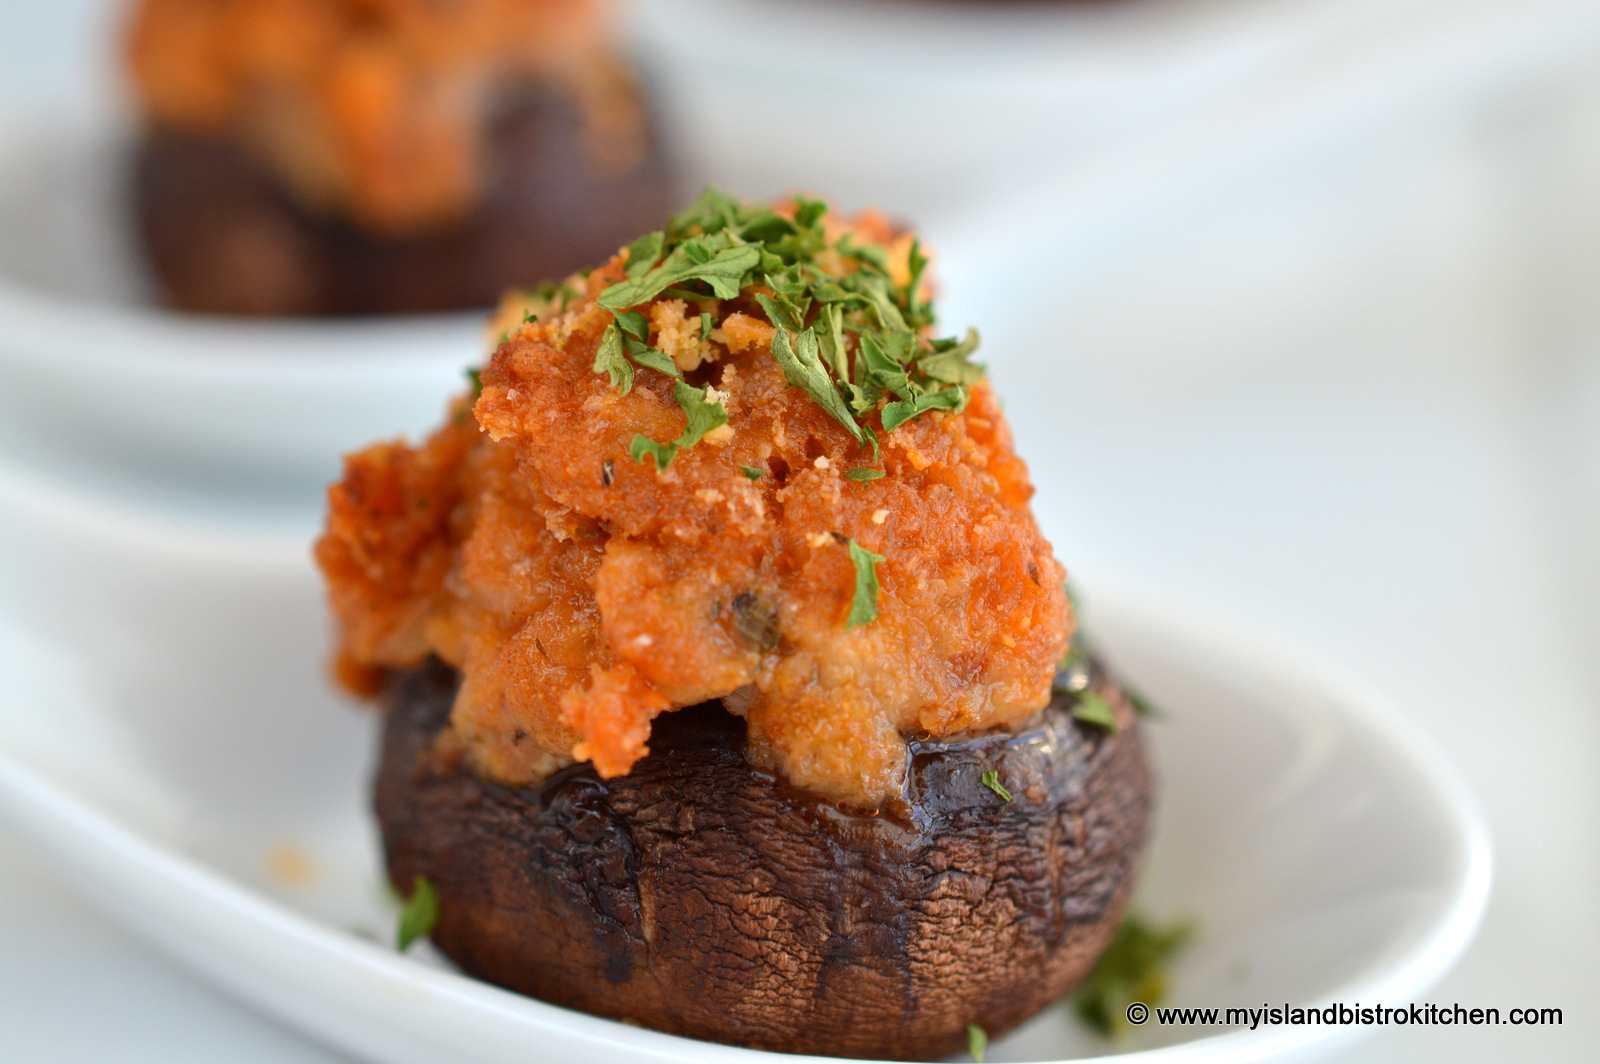
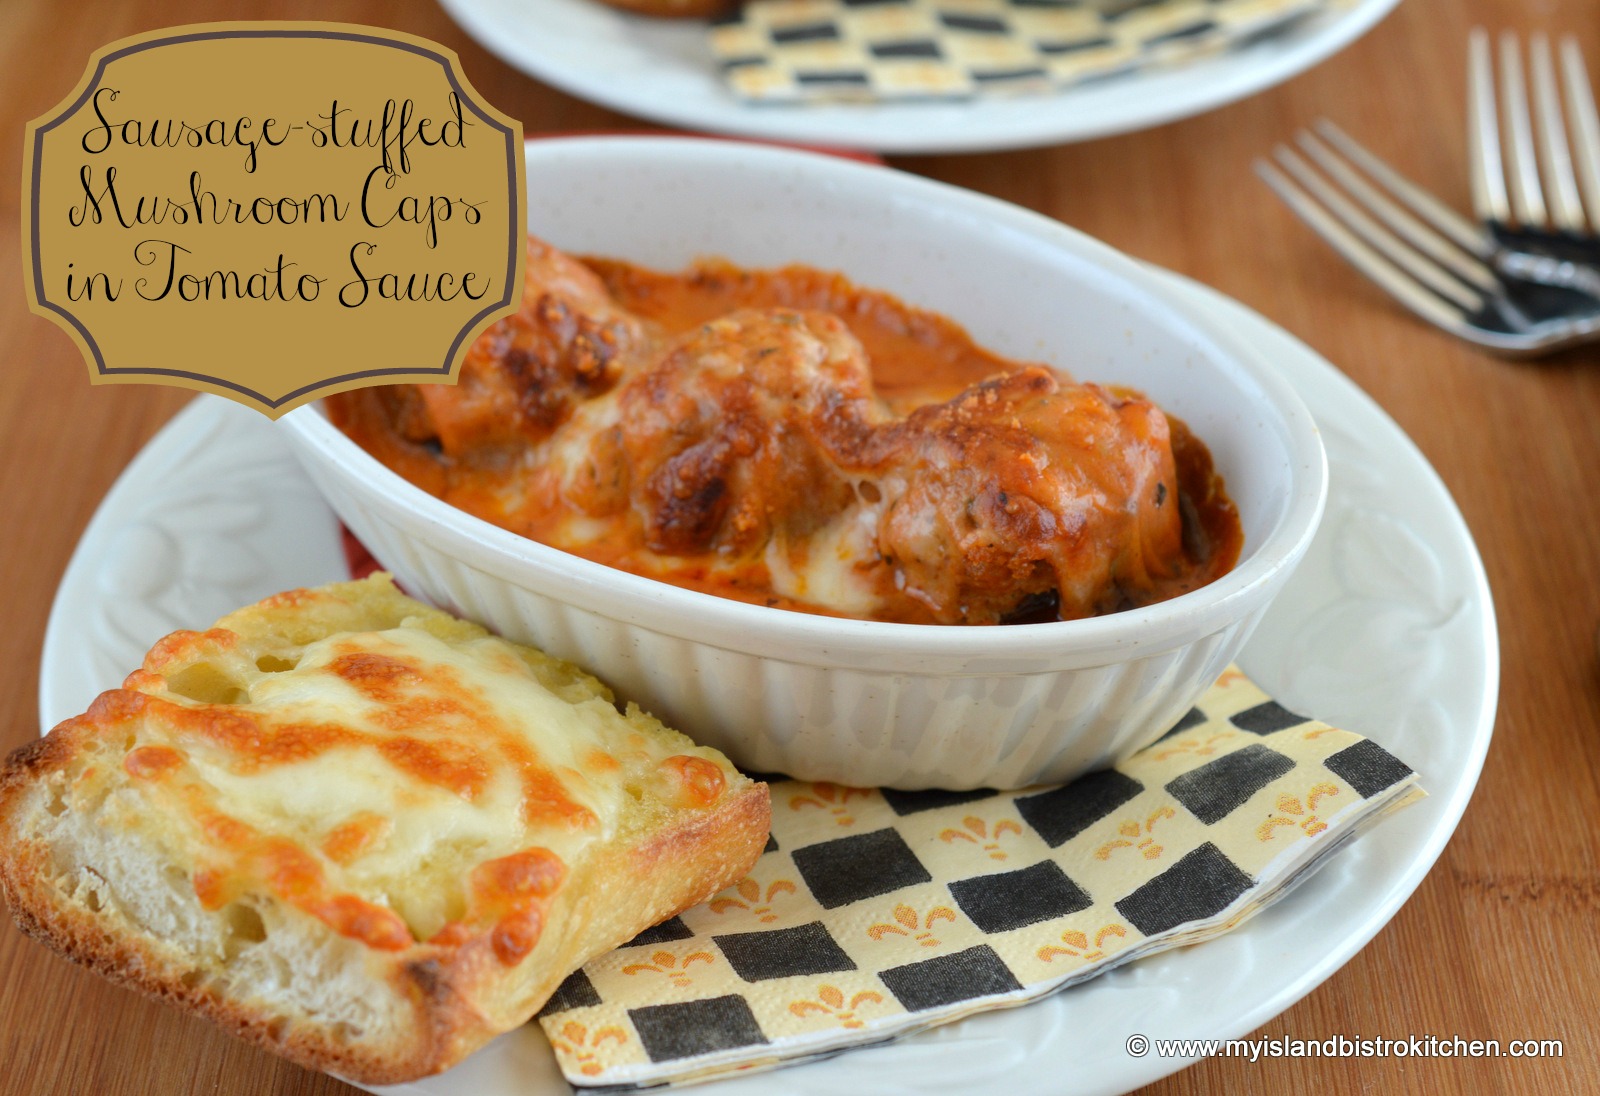
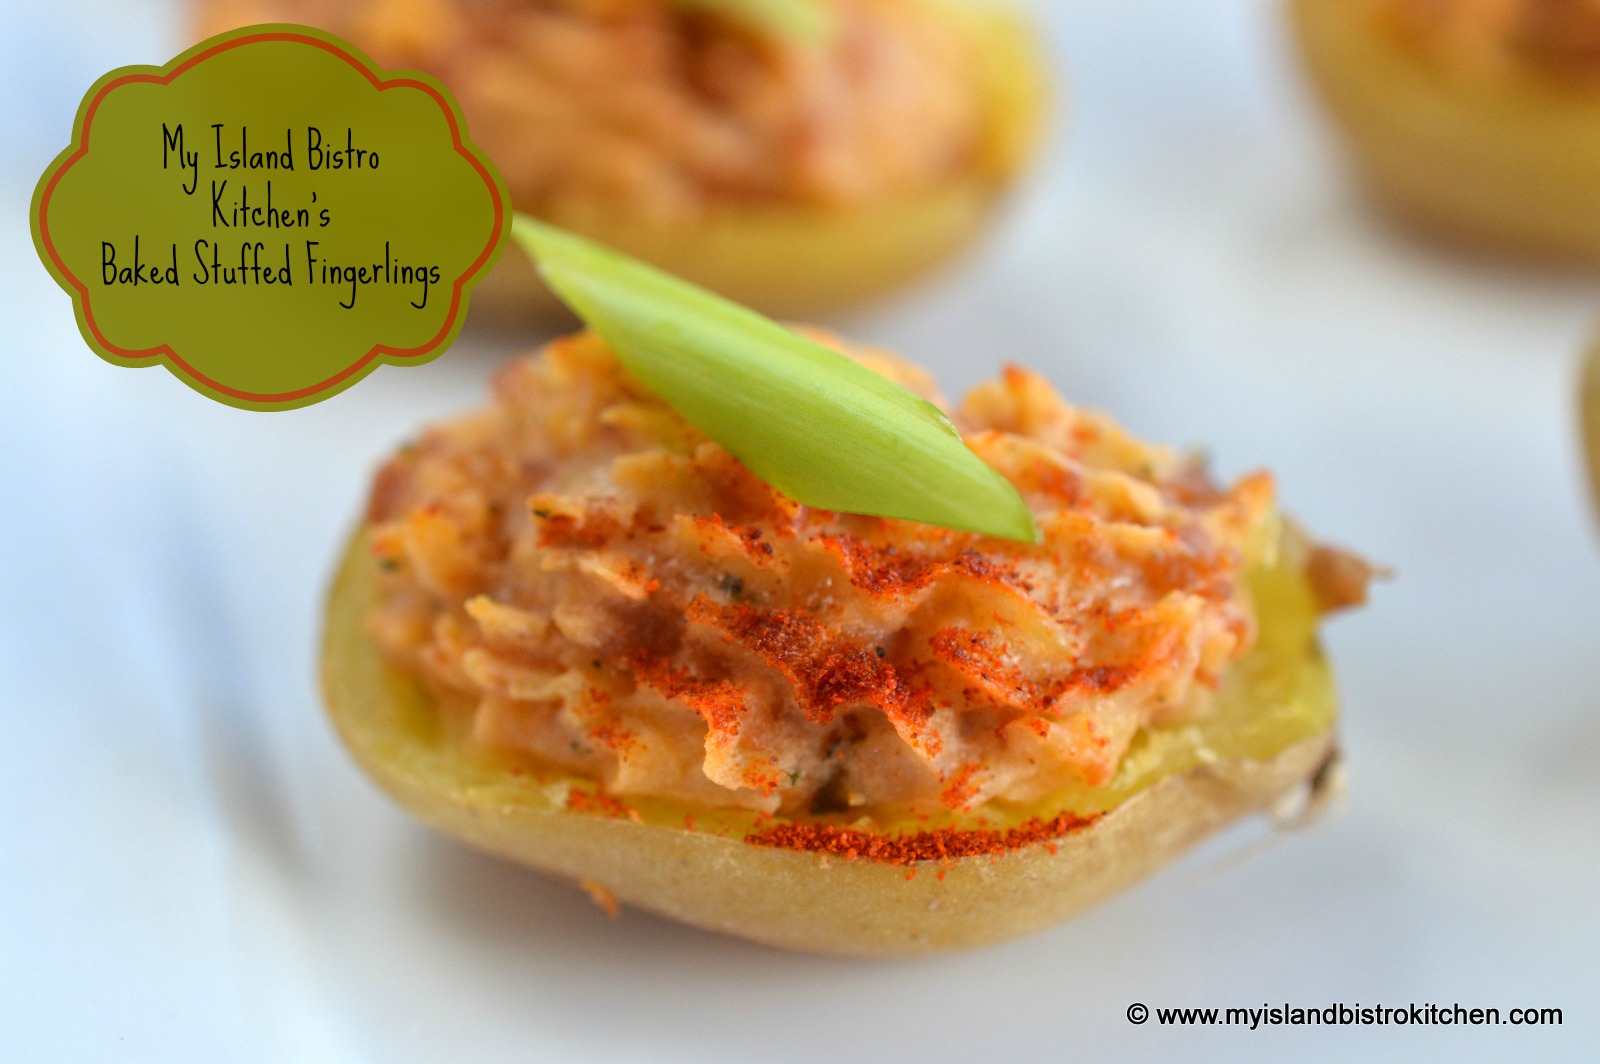
Tchamdja offered me some complimentary samples of her Tomato Celebration sauce to try. Tchamdja is correct – I found the sauce to be a versatile ingredient in several dishes. I have used it as a pizza sauce and found it very tasty. I have also used it in a recipe I created for baked stuffed fingerling hors d’oeuvres. And, I have used it as an ingredient in the following recipes for sausage-stuffed cremini mushroom caps.
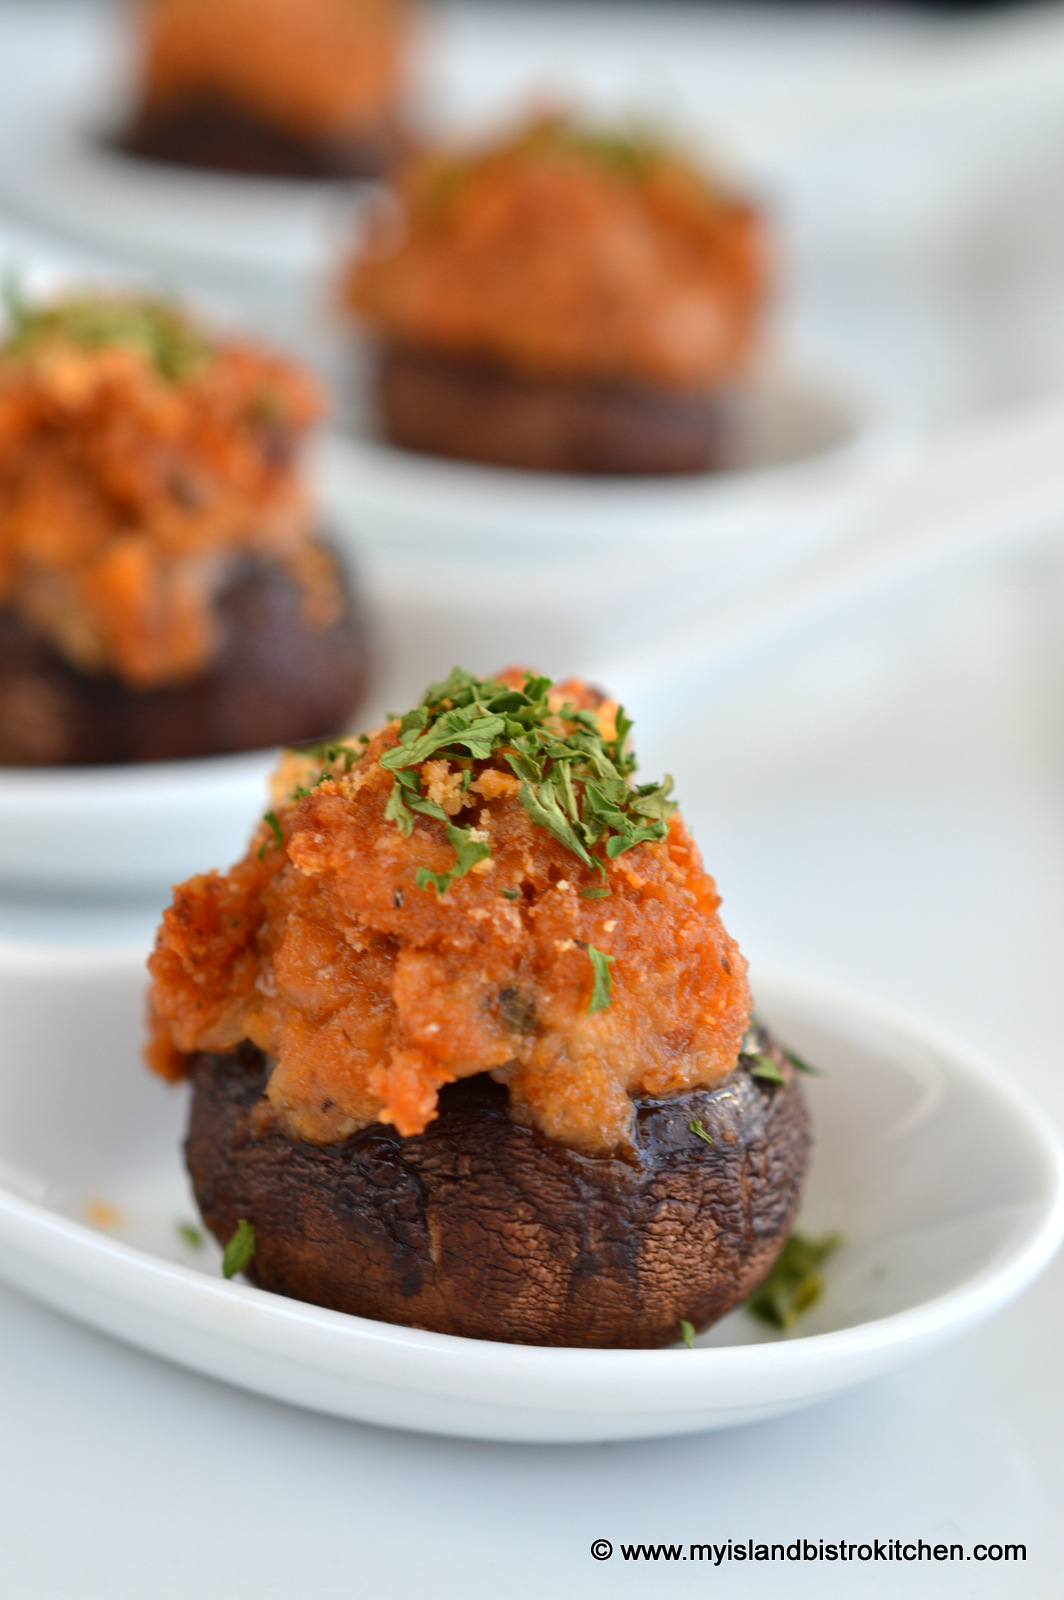
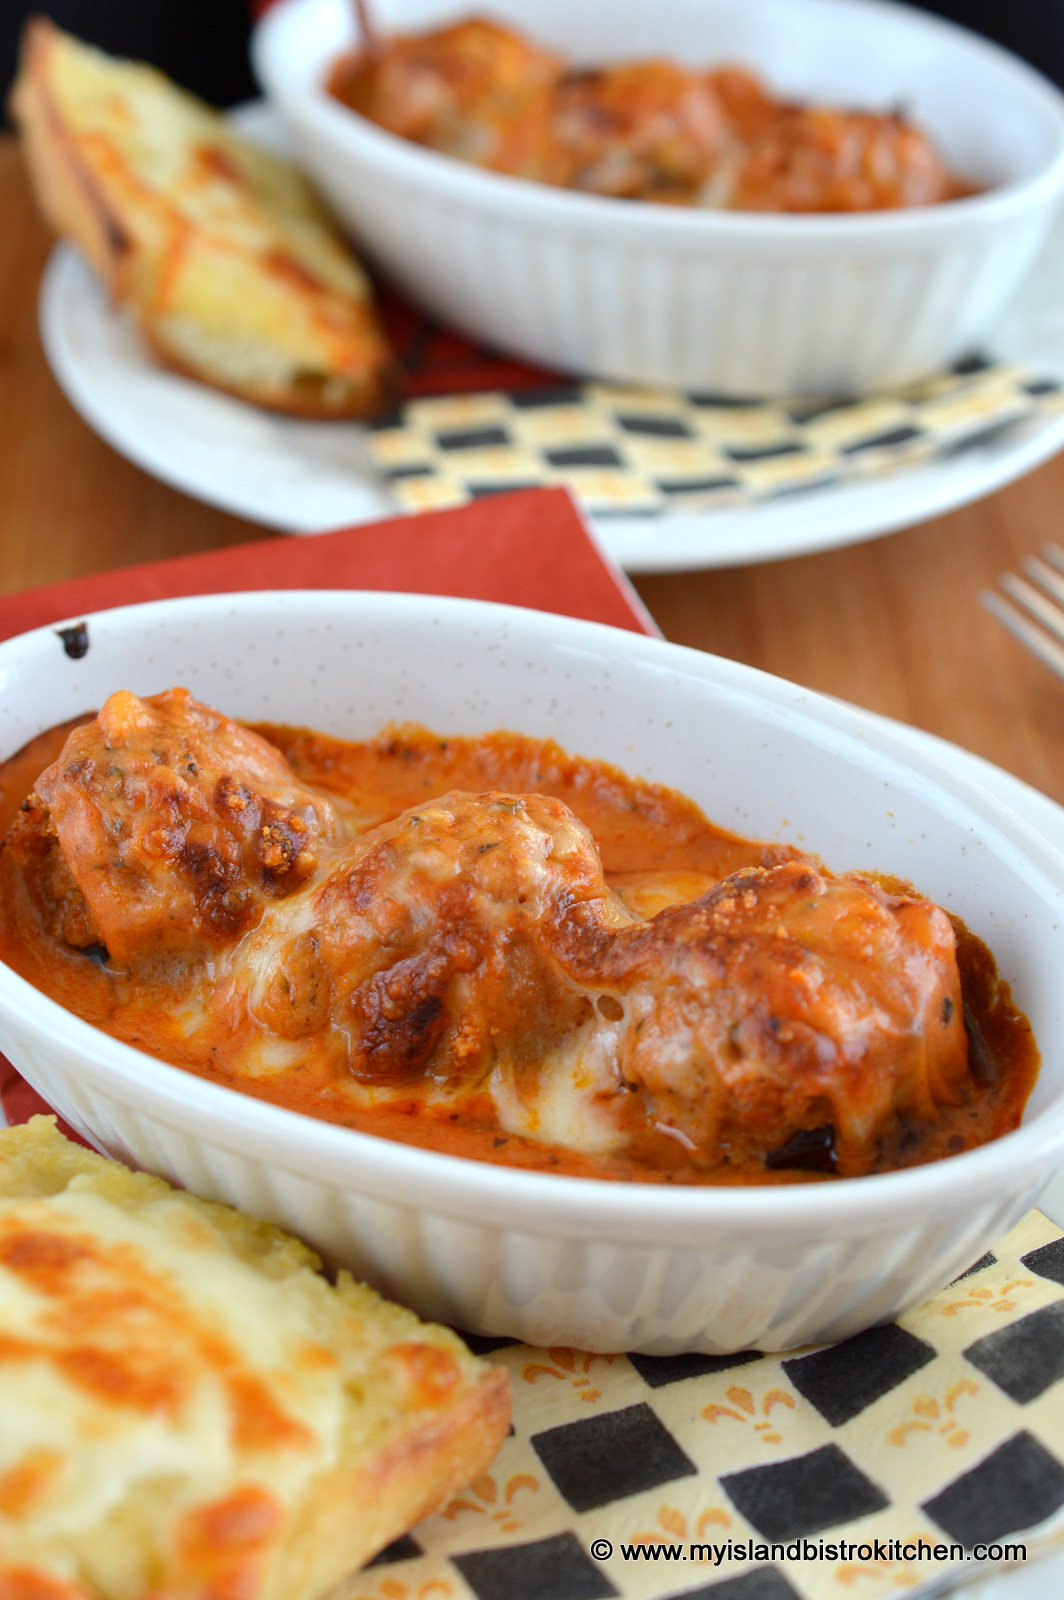
My recipe for stuffed mushrooms is suitable for hors d’oeuvres or, add a tomato sauce, and they turn into an appetizer.
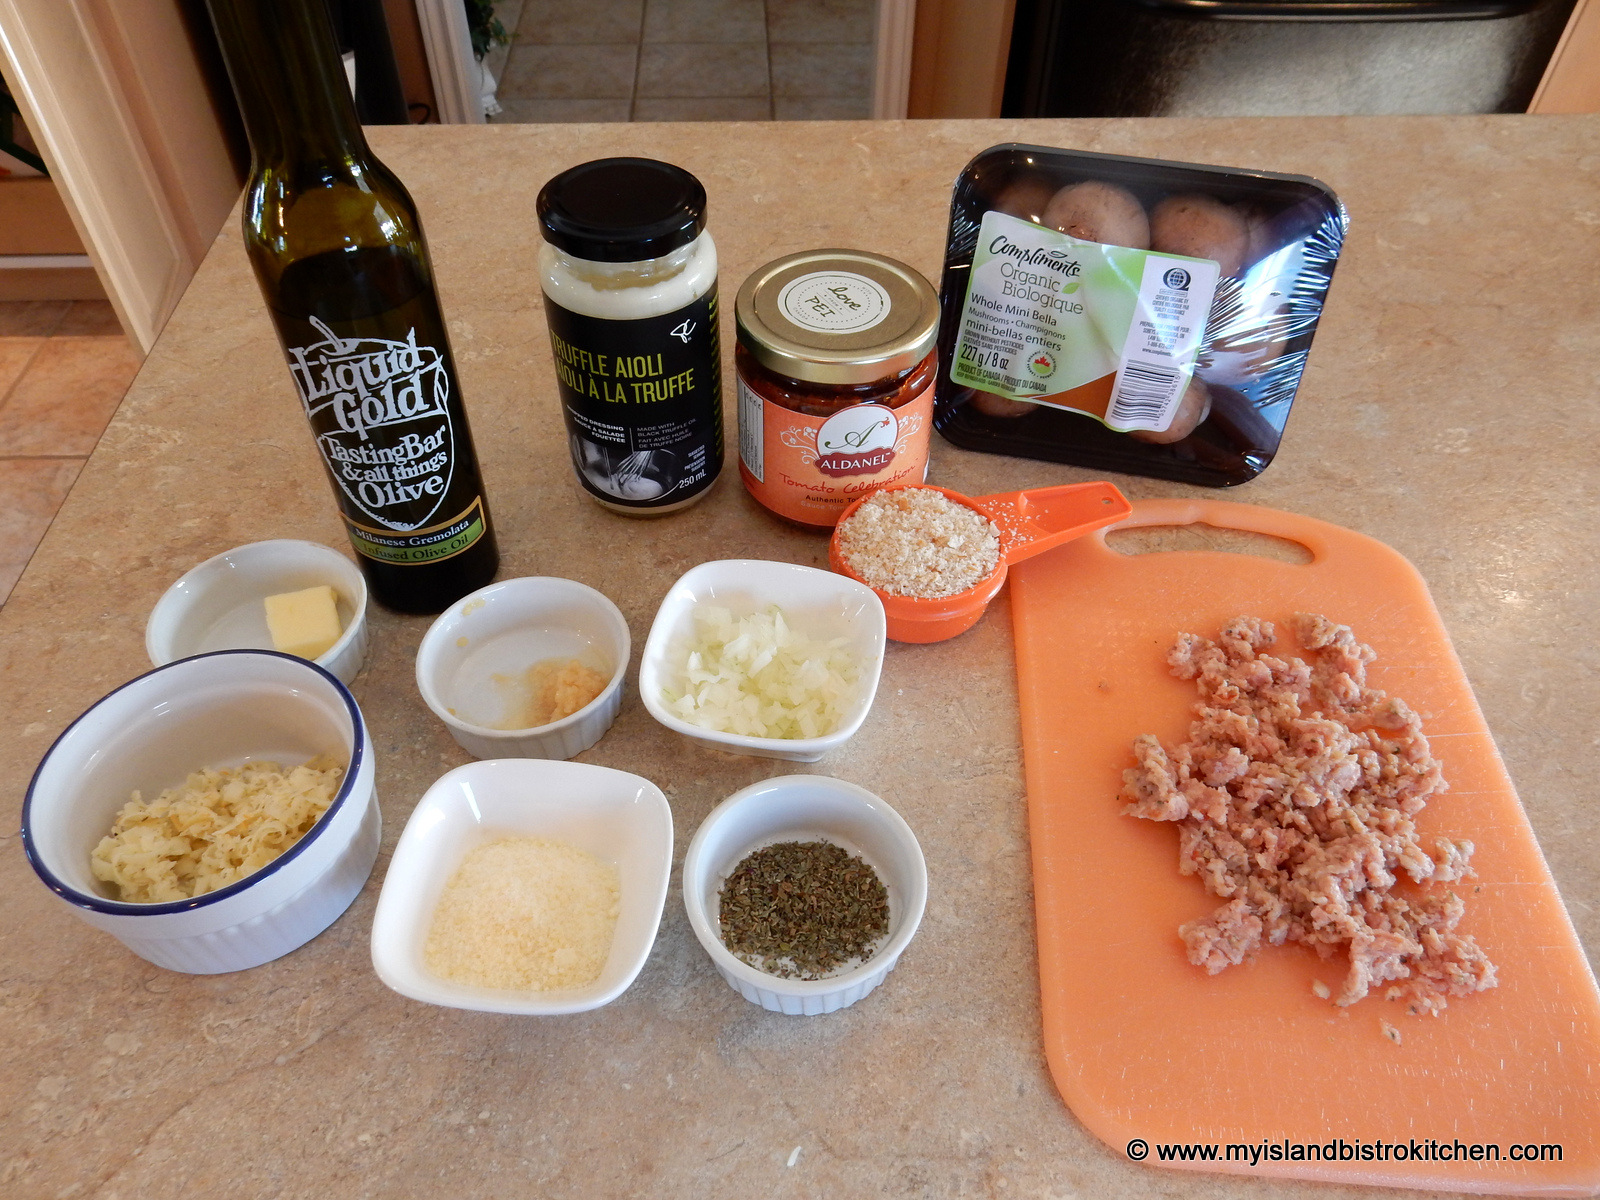
I have chosen to use cremini mushrooms but white button mushrooms would also work. As well, any kind of sausage can be used – I have chosen to use sun-dried tomato sausage from KJL Meats here in Charlottetown. The herb and garlic Gouda cheese I used is from Glasgow Glen Farm in New Glasgow, PEI. The tomato sauce that I am featuring in both recipes is Aldanel’s “Tomato Celebration” variety but any of their other sauces would work well, too.
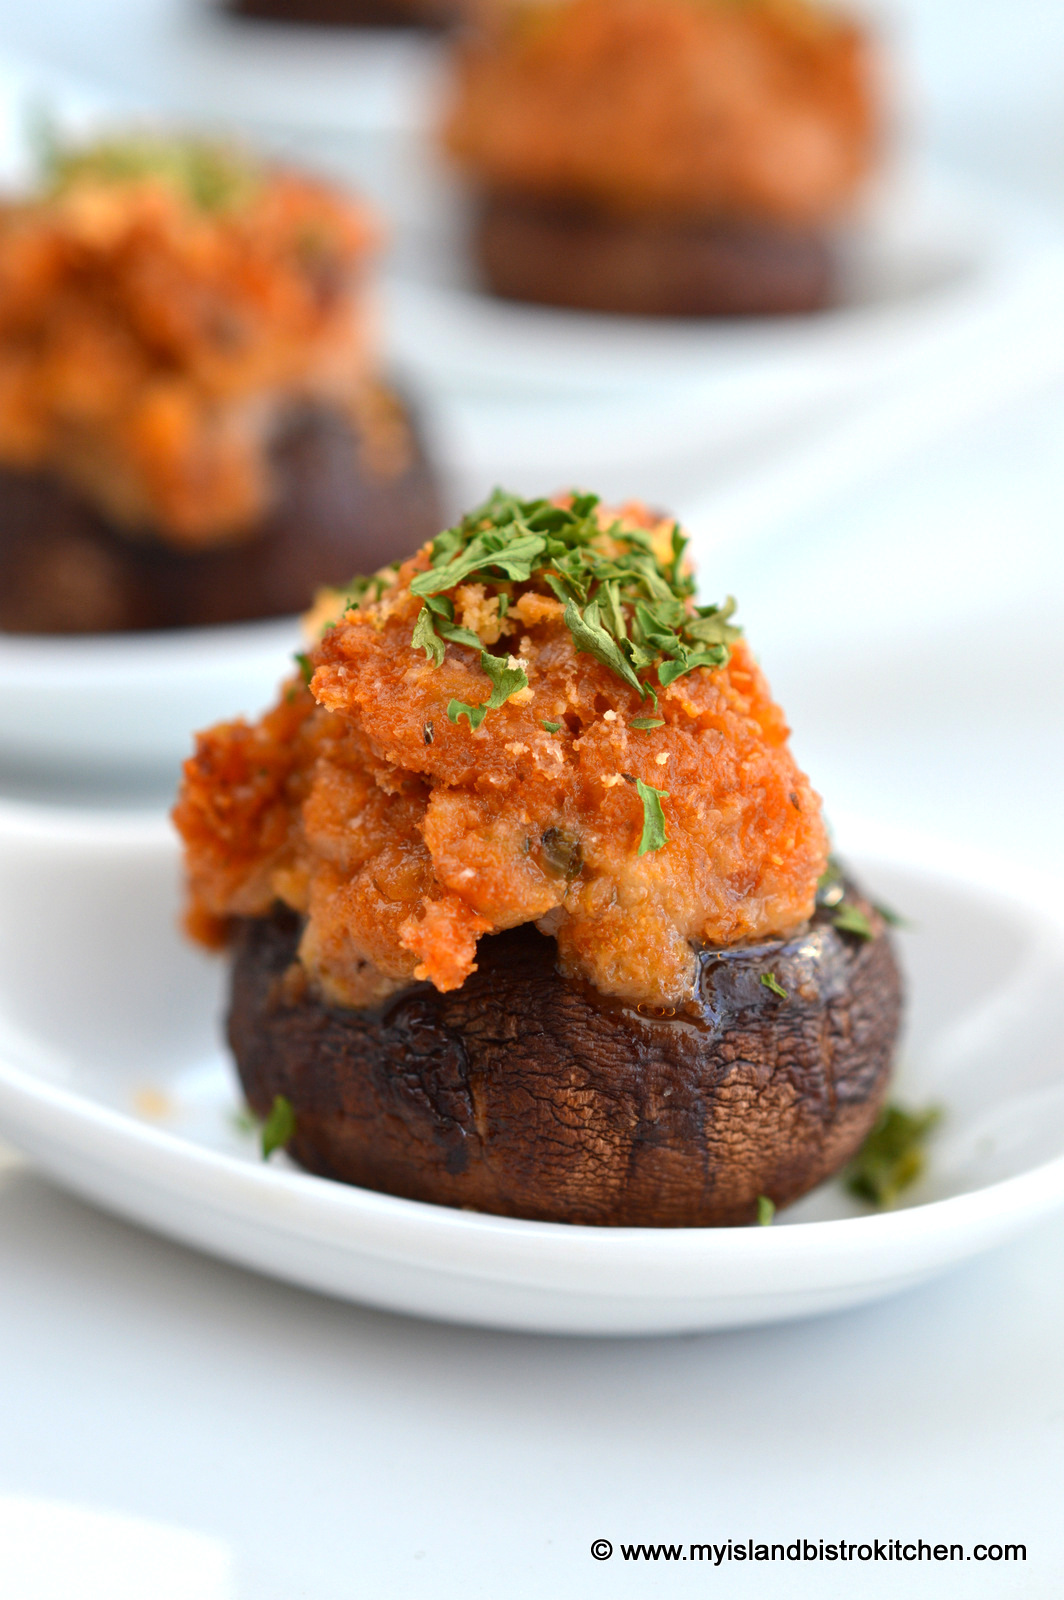
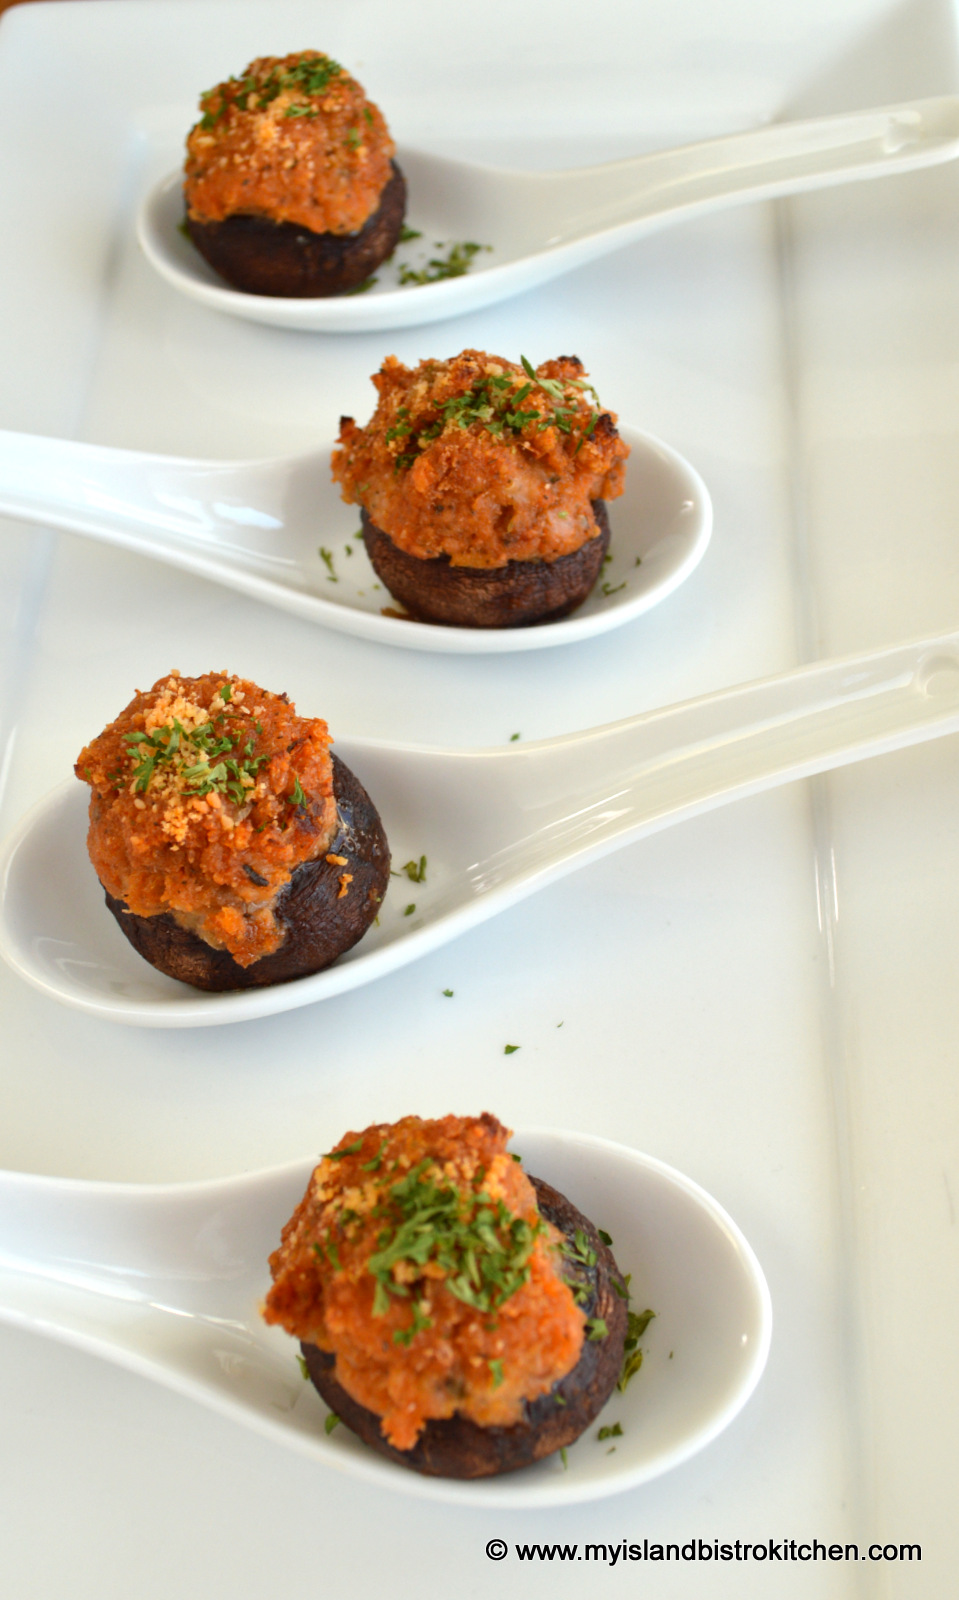
Sausage-stuffed Cremini Mushroom Caps
Stuffed Cremini Mushroom Caps (Hors d’oeuvres)
1 tsp olive oil
½ tsp butter
12 medium-sized cremini mushrooms, washed, dried, and de-stemmed (reserve the stems)
2 cloves of garlic, minced
1½ tbsp onion, finely chopped
2 oz. sun-dried tomato sausage, removed from casing and loosely broken up
2 tbsp Ardanel™ tomato sauce
2 tsp truffle aioli
½ tsp basil
½ cup fine breadcrumbs
2 tbsp shredded Gouda cheese
1 tbsp finely grated Parmesan cheese
Salt and pepper, to taste
Method:
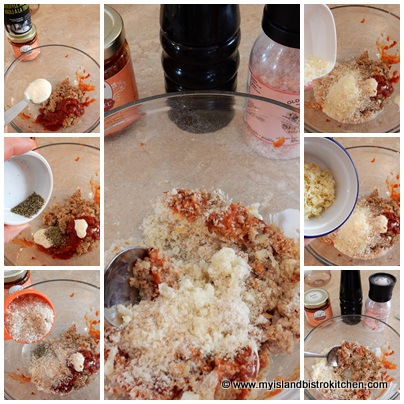
Assemble ingredients.
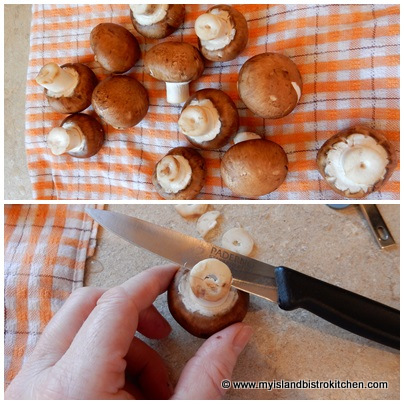
Trim and discard ends from mushroom stems.
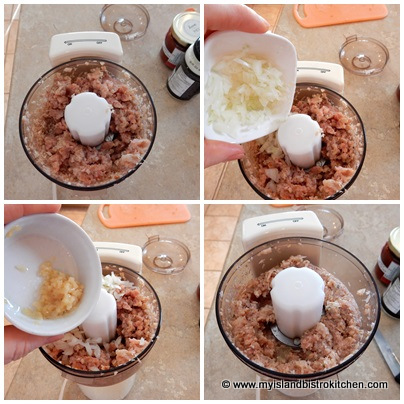
Remove the stems from the mushroom caps and place mushroom stems into bowl of small food processor. Pulse until mixture is finely chopped.
Add garlic, onion, and sausage and pulse just until mixture is combined.
Preheat oven to 375ºF.
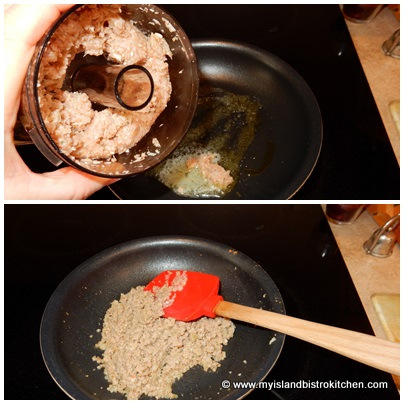
Heat oil in small frypan. Add butter.
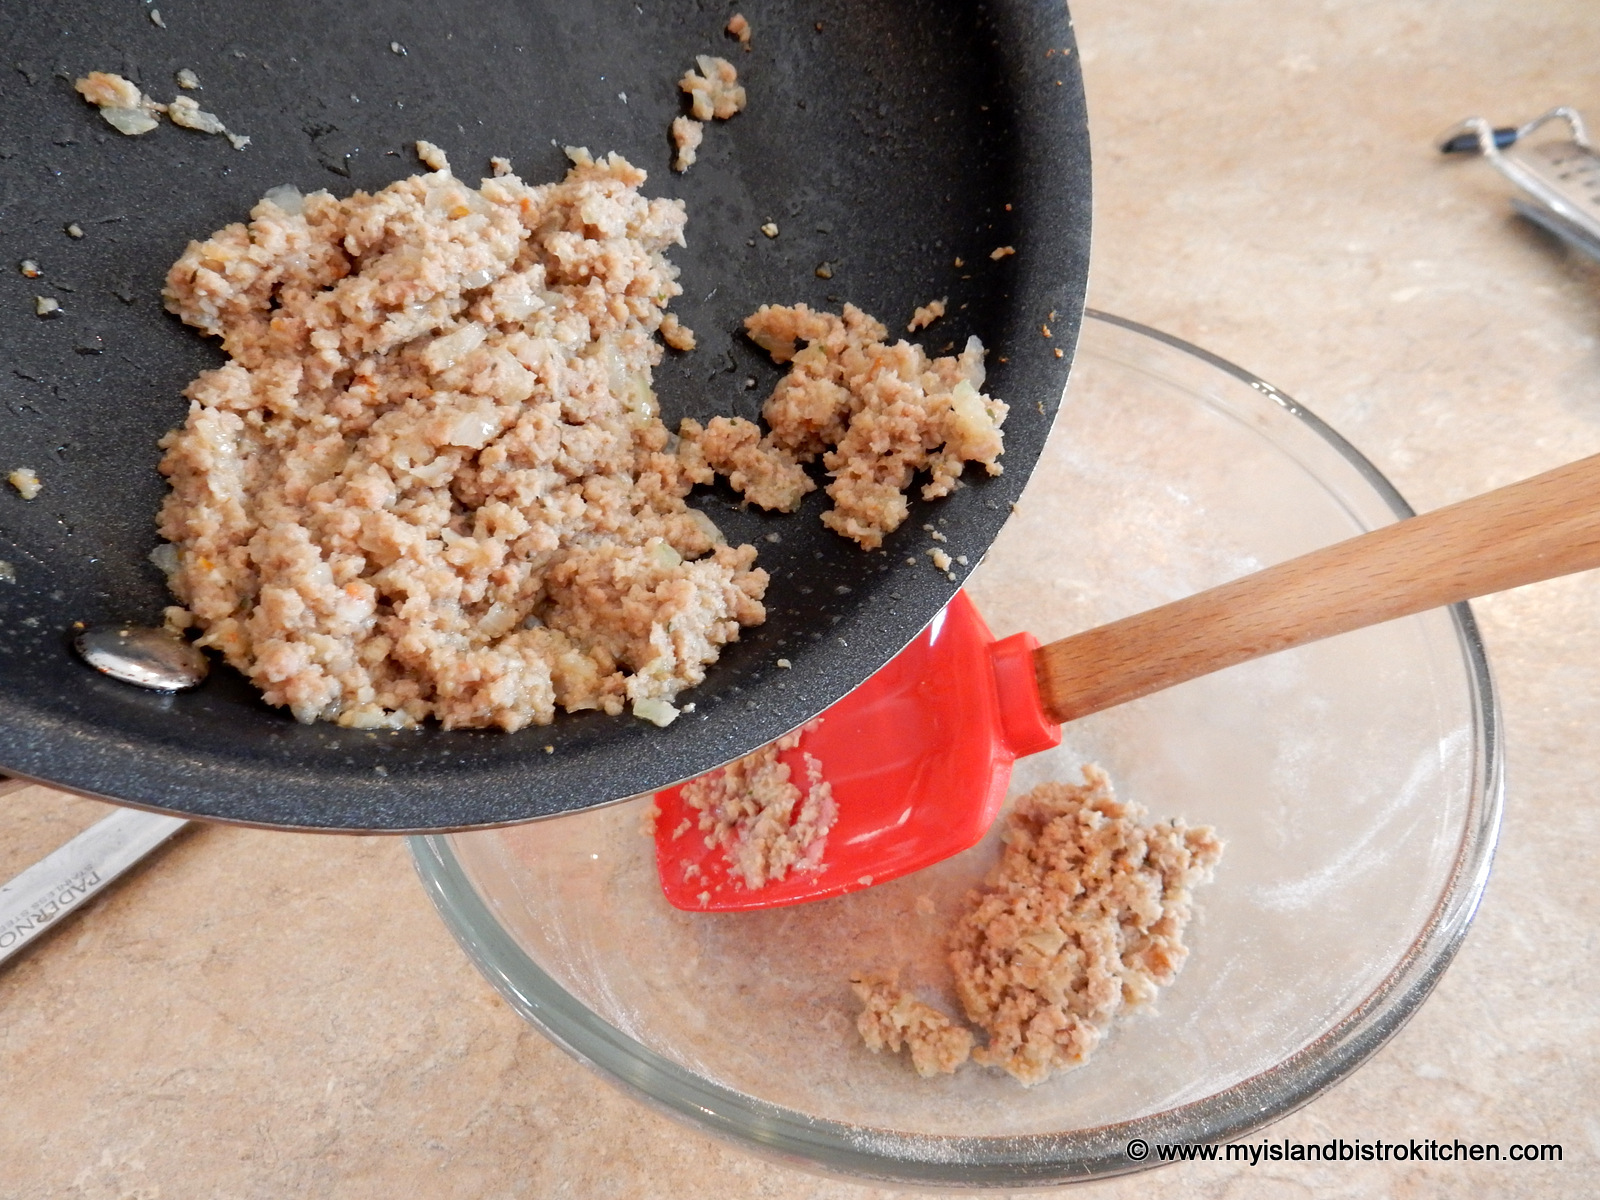
Add mushroom-sausage mixture and cook over medium heat for 4-5 minutes, or until sausage meat is no longer pink.
Transfer mixture to small bowl.
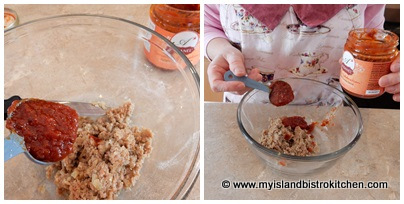
Add the tomato sauce.
Add truffle aioli, basil, breadcrumbs, and cheeses along with salt and pepper to taste.
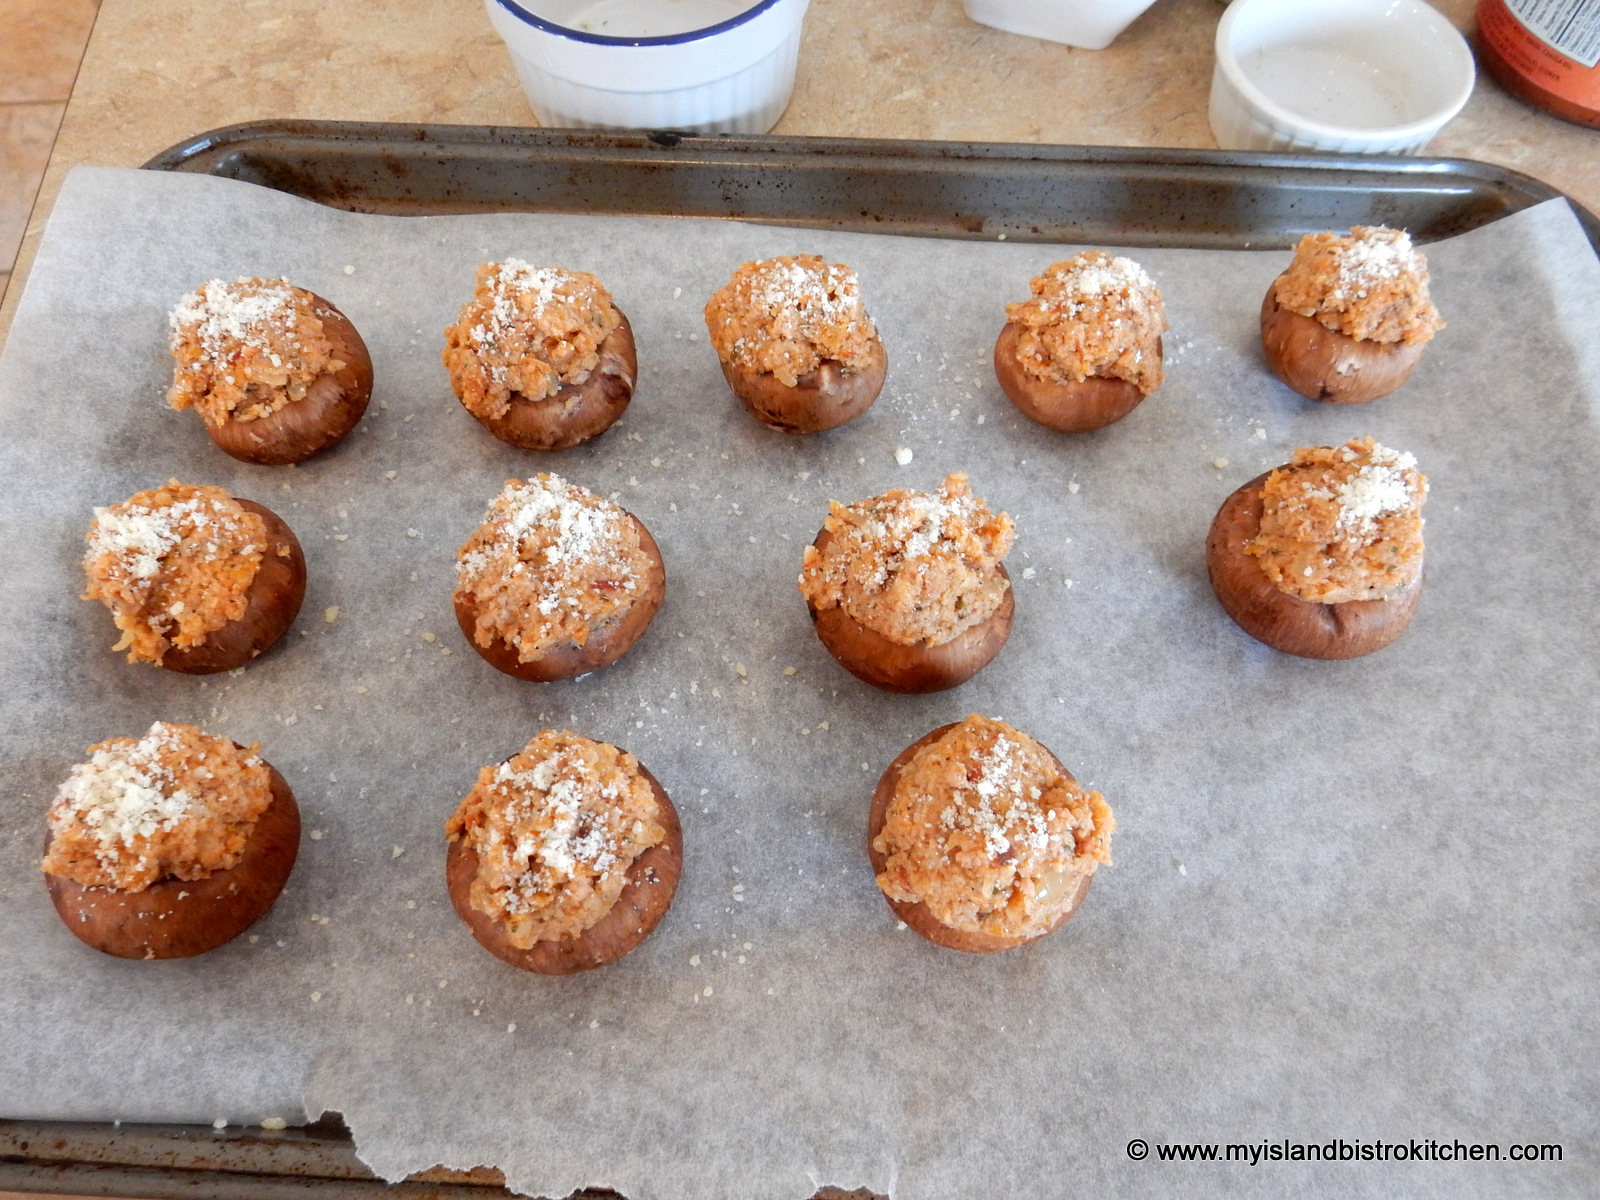
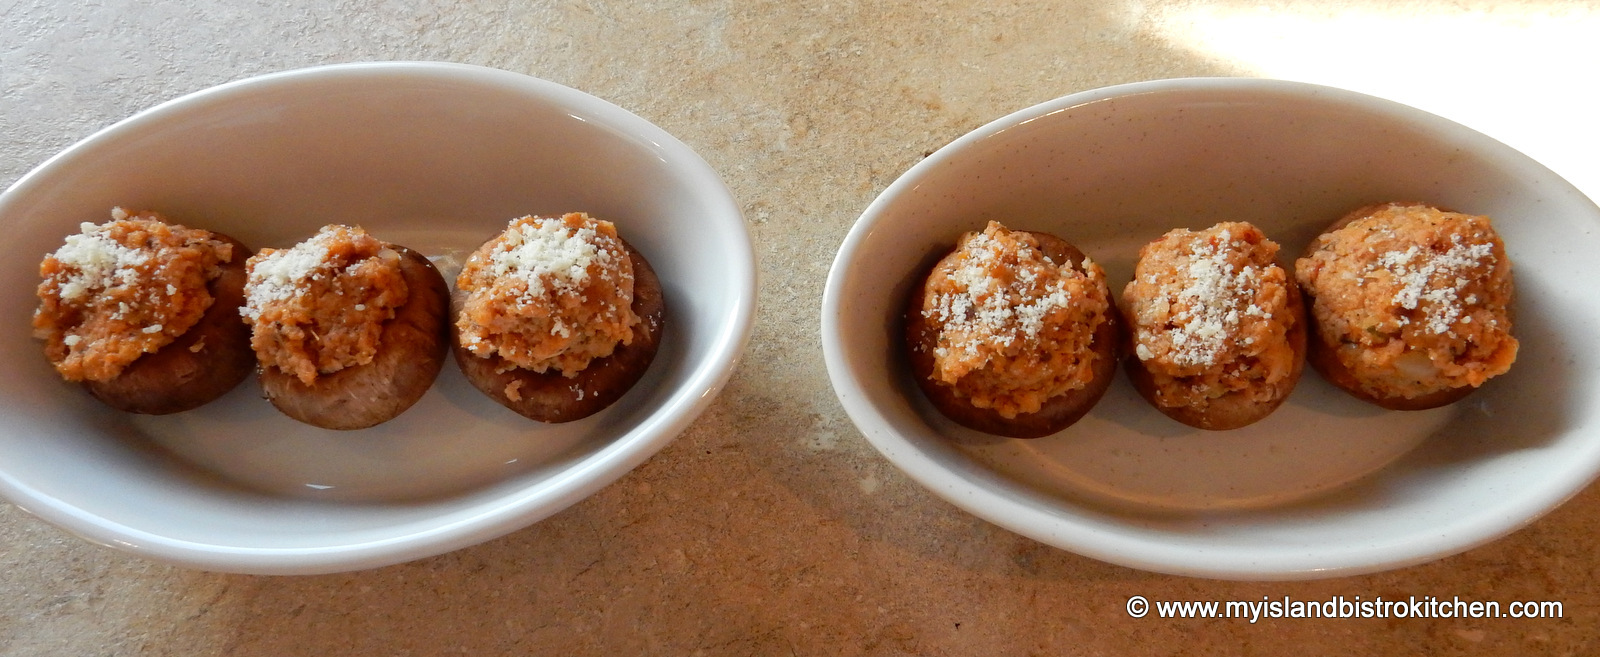
Place mushroom caps on parchment-lined baking sheet. Stuff each mushroom cap with mixture, slightly mounding the top. Sprinkle with finely grated Parmesan cheese.
Bake for about 12 minutes. Garnish with fresh chives, sliced green onion, or parsley, if desired. Serve immediately.
Yield:12 hors d’oeuvres
Sausage-stuffed Cremini Mushroom Caps
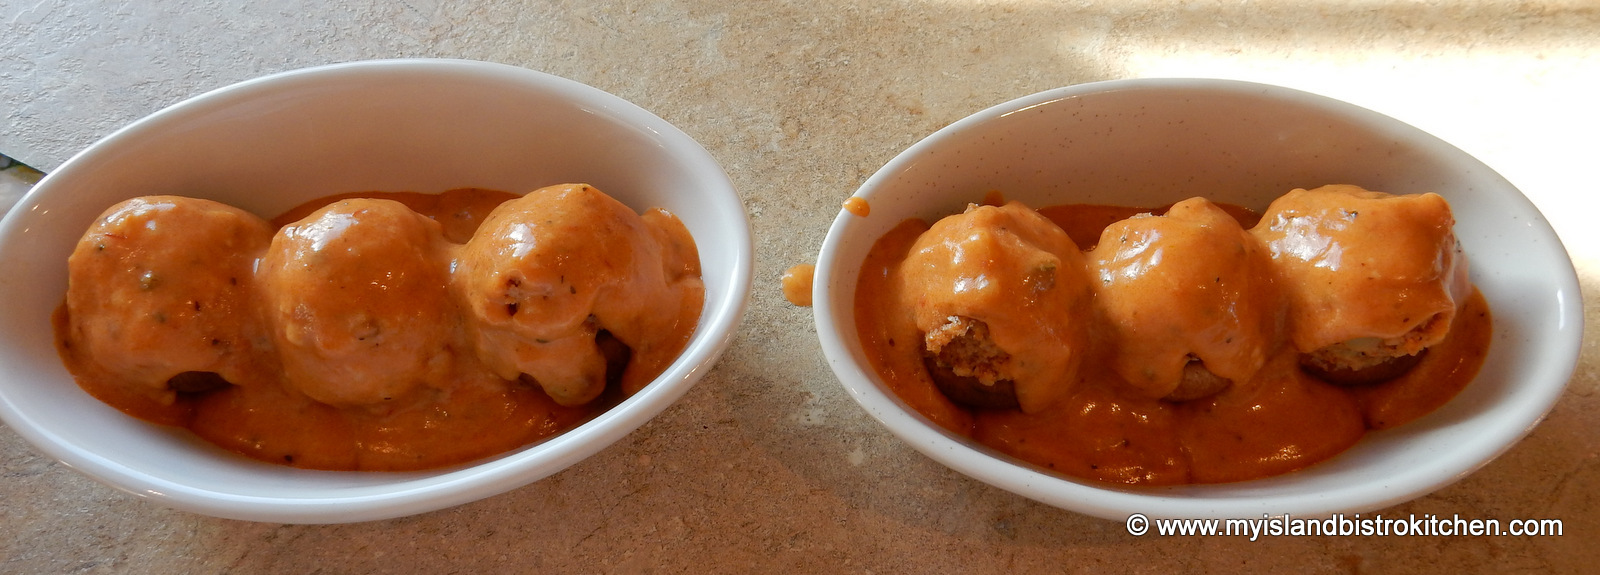
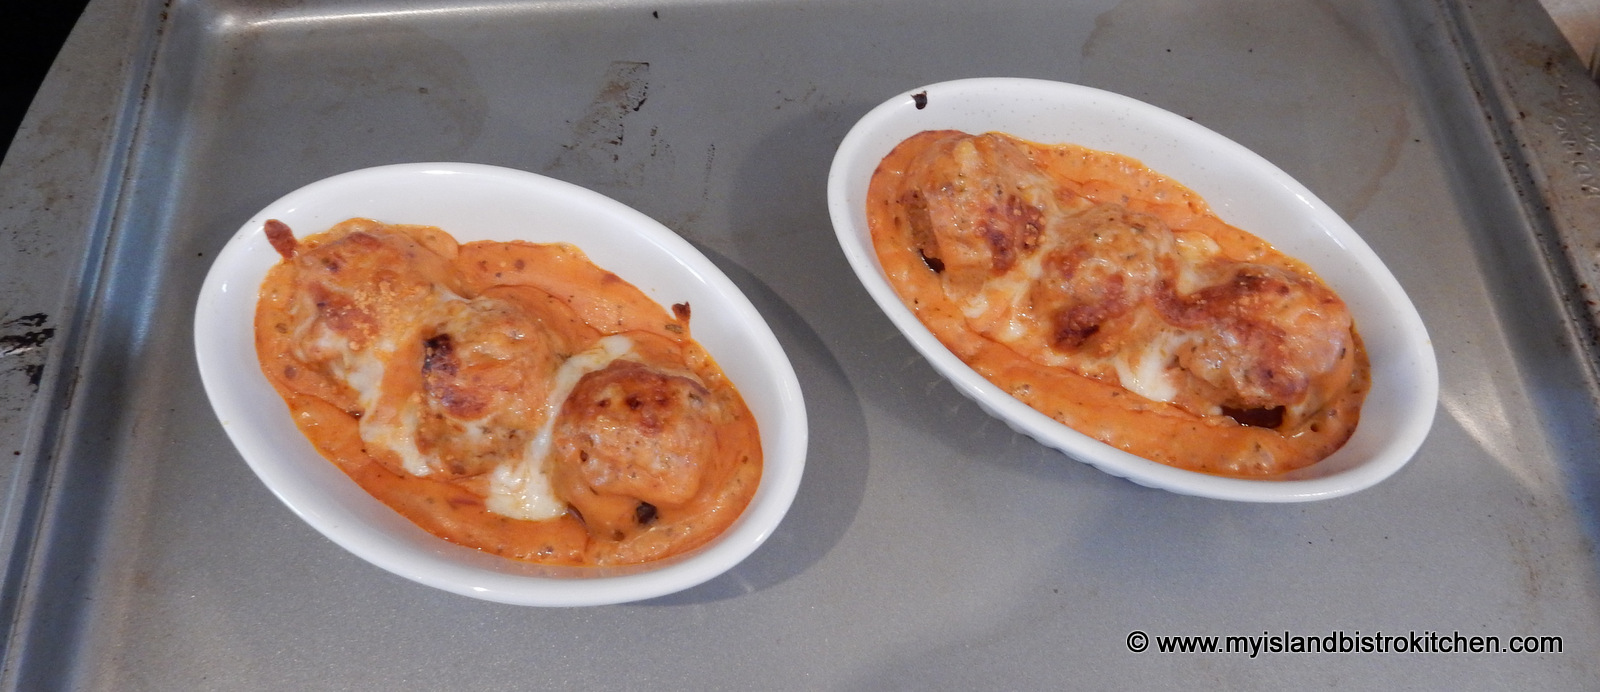
Stuffed Cremini Mushroom Caps with Tomato Sauce (Appetizer)
½ tbsp butter
1½ tbsp flour
½ cup chicken or vegetable broth
½ cup light cream or milk
¼ cup Ardanel™ tomato sauce
½ tsp Italian seasoning
¼ cup finely grated Parmesan cheese
½ cup shredded Mozarella cheese
Method:
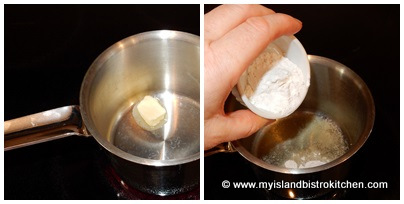
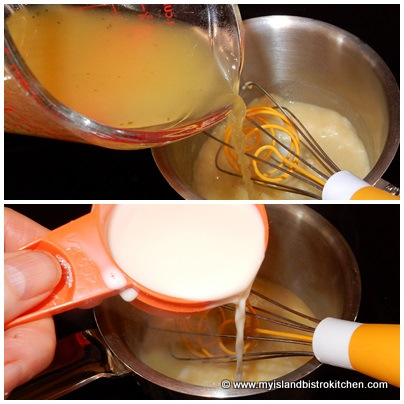
Over medium heat, melt butter. Stir in flour.
Whisk in the broth and milk until mixture is smooth.
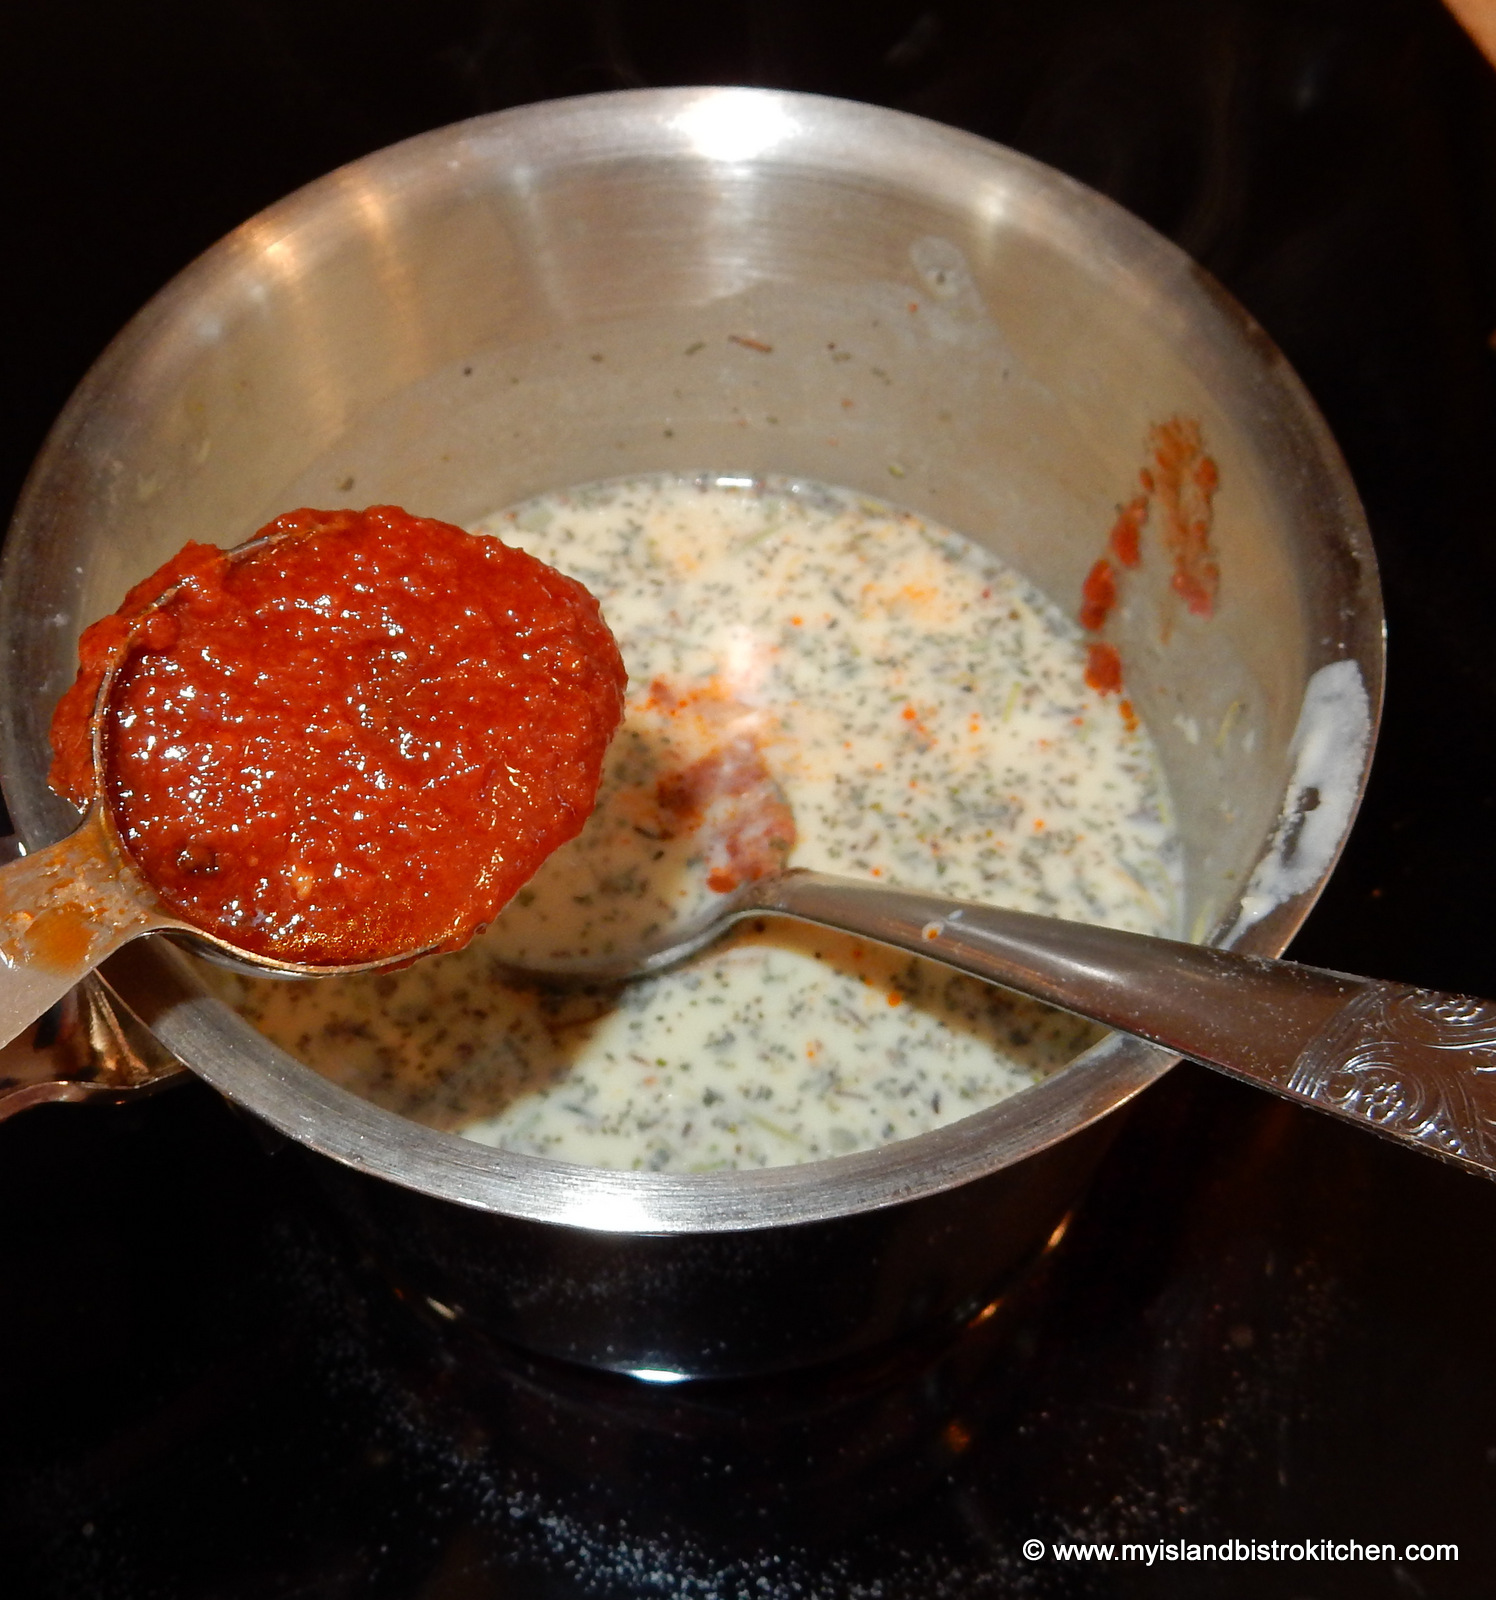
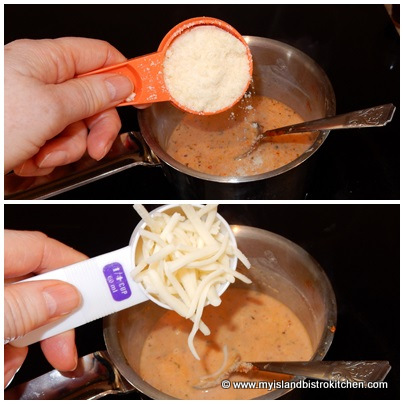
Stir briskly until mixture starts to thicken then add the tomato sauce, Italian seasoning, and cheeses.
Stir until cheese is melted and sauce is thickened to desired consistency.
Grease four oven-safe appetizer-sized baking dishes. Place three stuffed mushrooms into each dish.
Pour the sauce over the mushrooms, dividing it equally between the four dishes.
Sprinkle with shredded mozzarella cheese.
Broil on high for about 5-6 minutes, until cheese is melted and sauce is bubbling. Serve immediately.
Yield:4 appetizer servings
Sausage-stuffed Cremini Mushroom Caps in Tomato Sauce
To learn more about the Aldanel tomato sauce products, visit their website.
This recipe is also being submitted for the Foodie Pages CHEF’S BOX Challenge.
———————–
Thank you for visiting “the Bistro” today. There are lots of ways to connect with “the Bistro” through social media:
I love miniature potatoes. They’re fun to work with. They make wonderful hors d’oeuvres, are the perfect size for roasting, and are the ideal size to drop into soups just the way they are without cutting them up.
Through the Food Bloggers of Canada association of which I am a member, an opportunity arose this fall to take little creamer potatoes produced by the Little Potato™ Company of Alberta and create an original recipe using the potatoes. Coming into the Christmas party season, I immediately saw them as potential hors d’oeuvres.
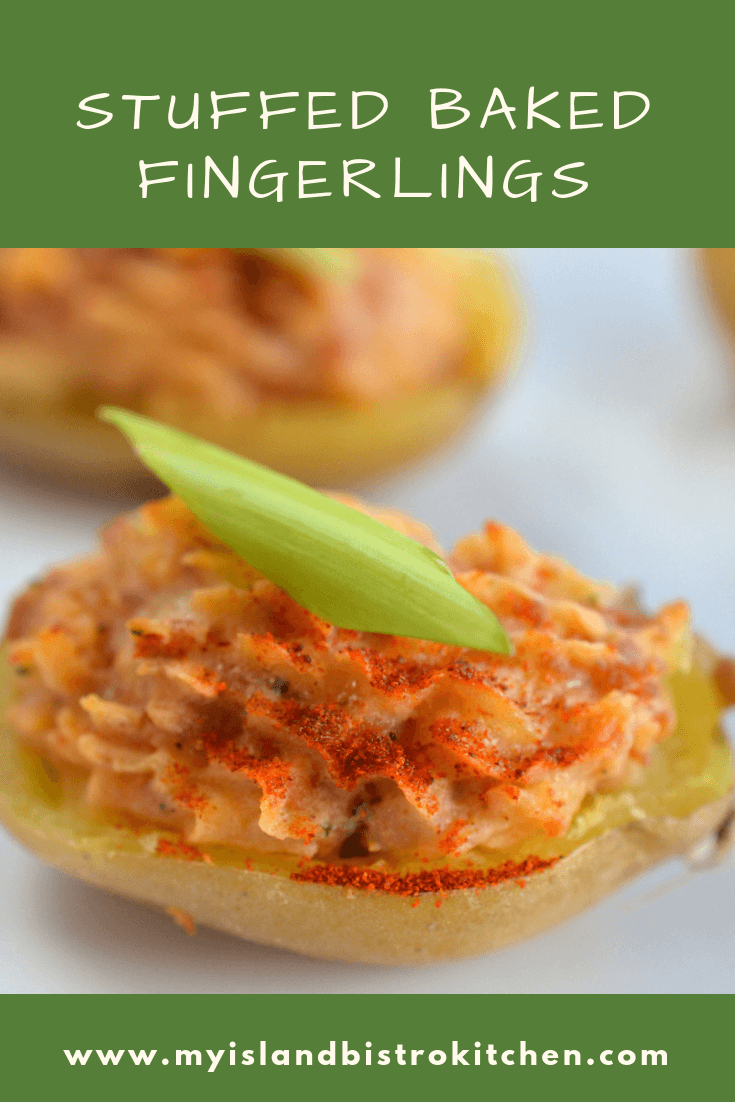
Stuffed Baked Fingerlings
The Little Potato™ Company grew their first acre of tiny potatoes in 1996. A father and daughter team, Jacob Van der Schaaf and Angela Santiago, planted, weeded, and harvested the first crop by hand. It was a success and soon Angela began marketing the potatoes at Farmers Markets and to restaurants.
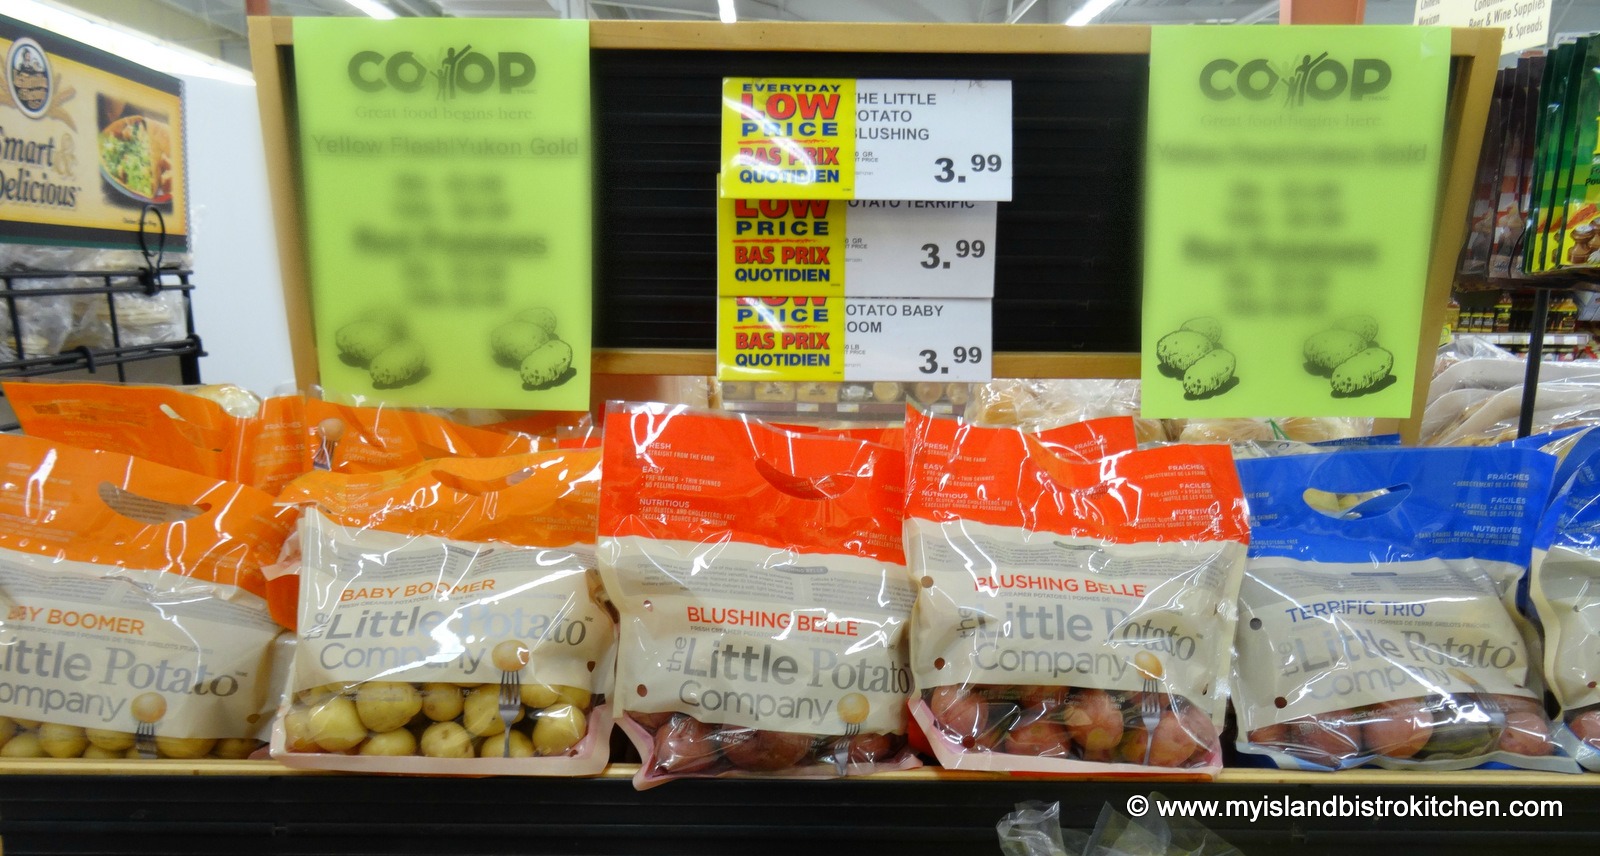
The tiny potatoes grew in such popularity that production expanded and, today, the Little Potato™ Company grows six varieties of the little gems which are available at grocery stores across North America. To learn more about The Little Potato™ Company and their various varieties of miniature potatoes, visit their website. You can also find them on Facebook.
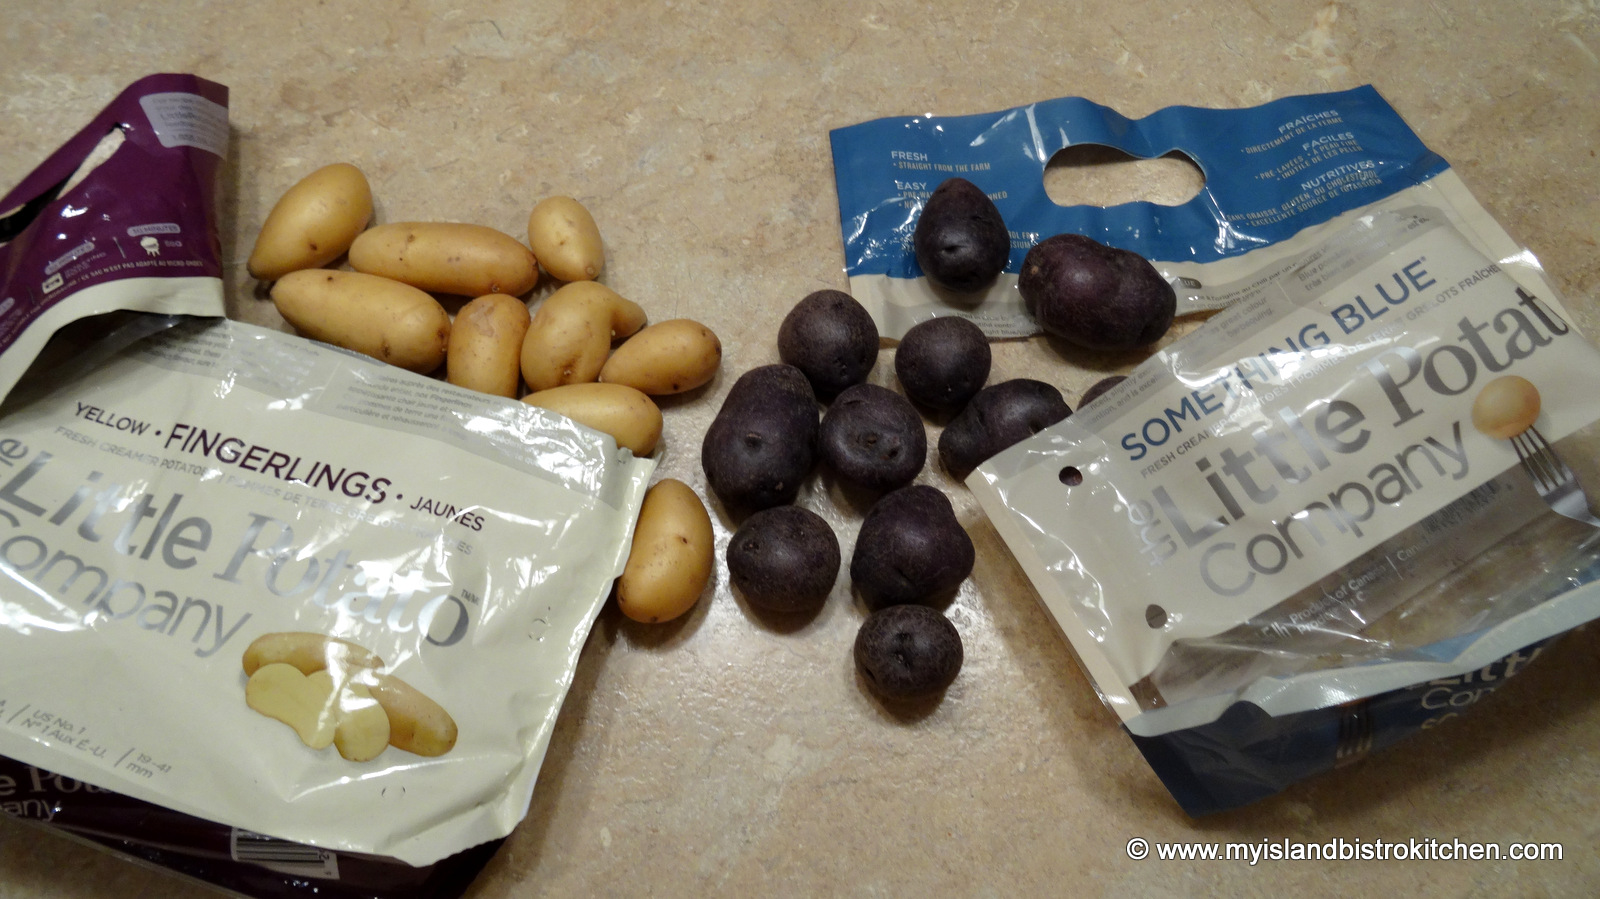
The Little Potato Company varieties of potatoes available at the Co-op Food Market on Walker Avenue in Charlottetown, PEI
Two bags each of Little Potato™ Company yellow fingerlings and Something Blue® mini potatoes arrived via UPS at my door one evening. I was thrilled that the oblong fingerlings were sent since they are the perfect shape and size to use when making miniature stuffed baked potato hors d’oeuvres. The recipe I have created especially for these little creamer potatoes can also be used to stuff mini round potatoes as well but the shape of the fingerlings really lends them to being stuffed attractively.
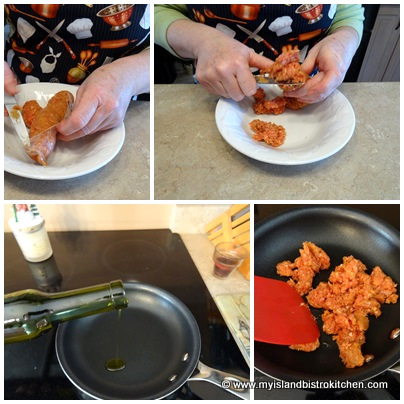
Any flavour of sausage can be used in this recipe. My choice is sweet Italian but, if you like hot flavours, then chipotle would be a good option. The sausage needs to be removed from its casing and it is important to break up the sausage meat really well as it is being scramble-fried because it is going to be piped through a pastry bag. Also, its purpose is to add flavour to the filling and a large chunk of sausage is not desirable in a tiny hors d’oeuvre.
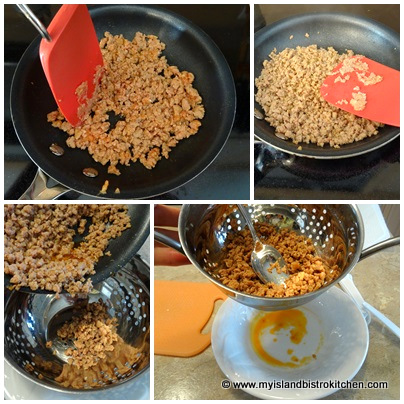
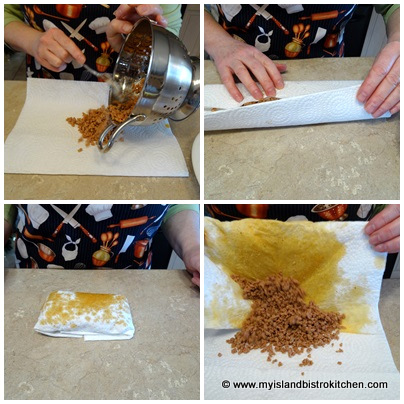
It’s also necessary to extract as much fat as possible from the cooked sausage as the fat can drip through the potato skin and make a messy hors d’oeuvre. To remove the fat, let the cooked sausage drain in a colander for about 15 minutes then wrap the meat in paper towel, repeating the process a couple of times, if necessary, to remove the excess fat.
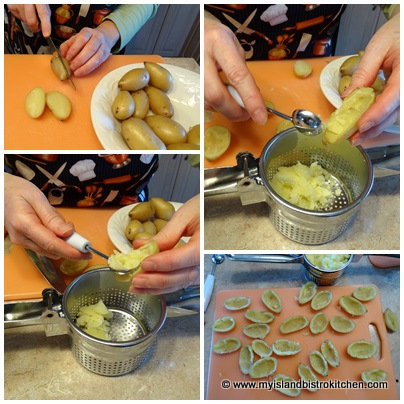
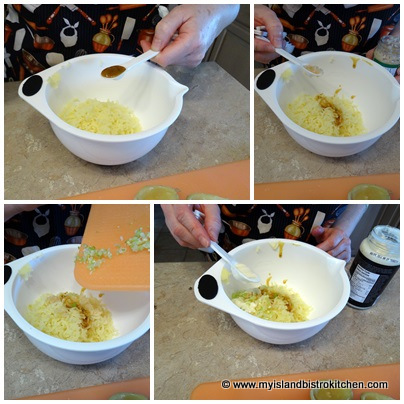
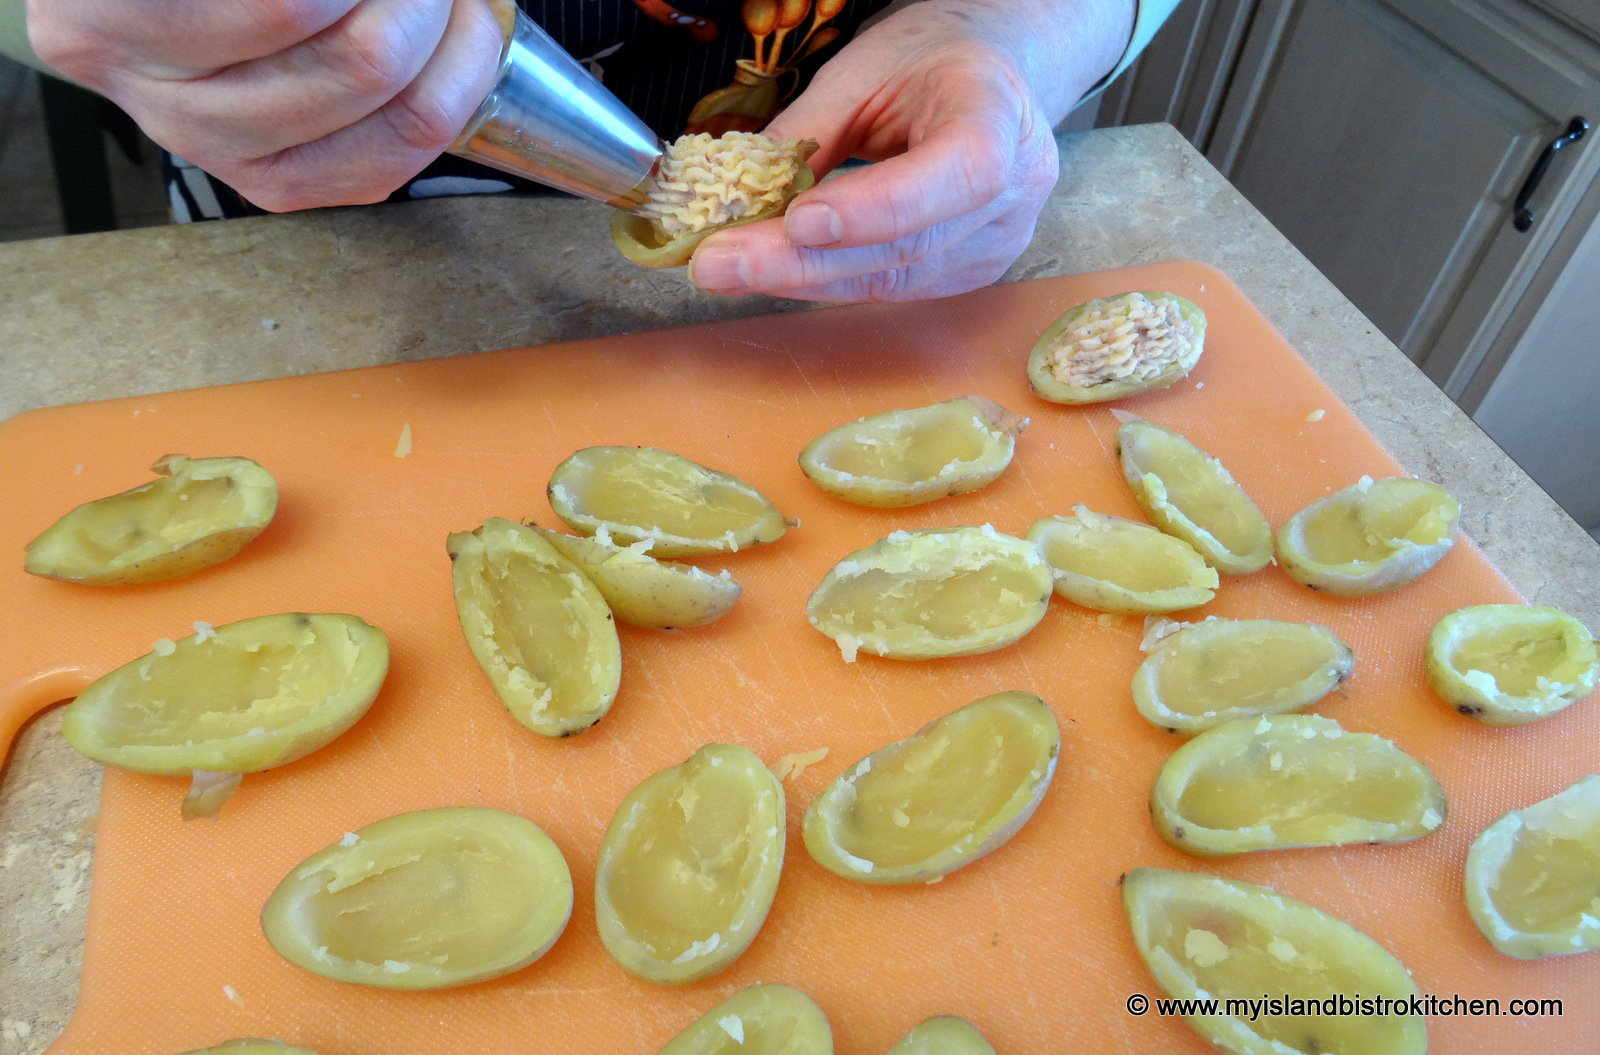
The little fingerlings take about 15 minutes to cook. Once they are removed from the boiling water, just barely let them cool enough that they can be handled. Slice each fingerling in half, horizontally. Then, using a melon baller, remove the potato pulp, leaving about a 1/16th inch thick wall of potato in each half to give the potato shape. Transfer the potato pulp to a potato ricer.
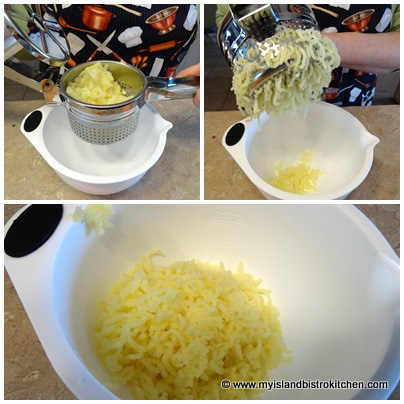
Press the potato through the ricer into a small bowl. The potatoes can be mashed instead of ricing but the potato ricer gives a smoother, finer texture that is completely lump-free.
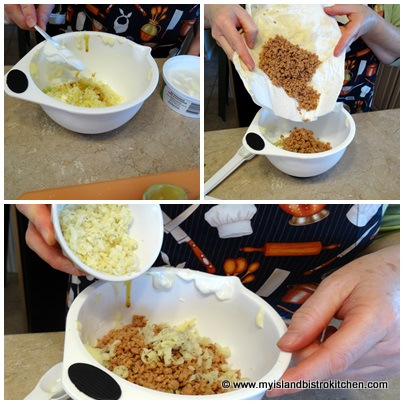
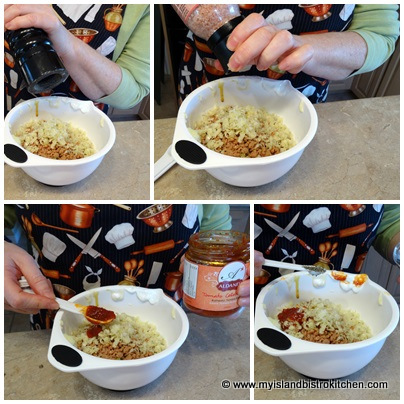
Add the remainder of the ingredients to the riced potato and mix well.
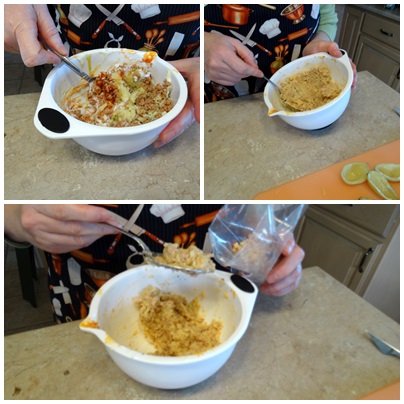
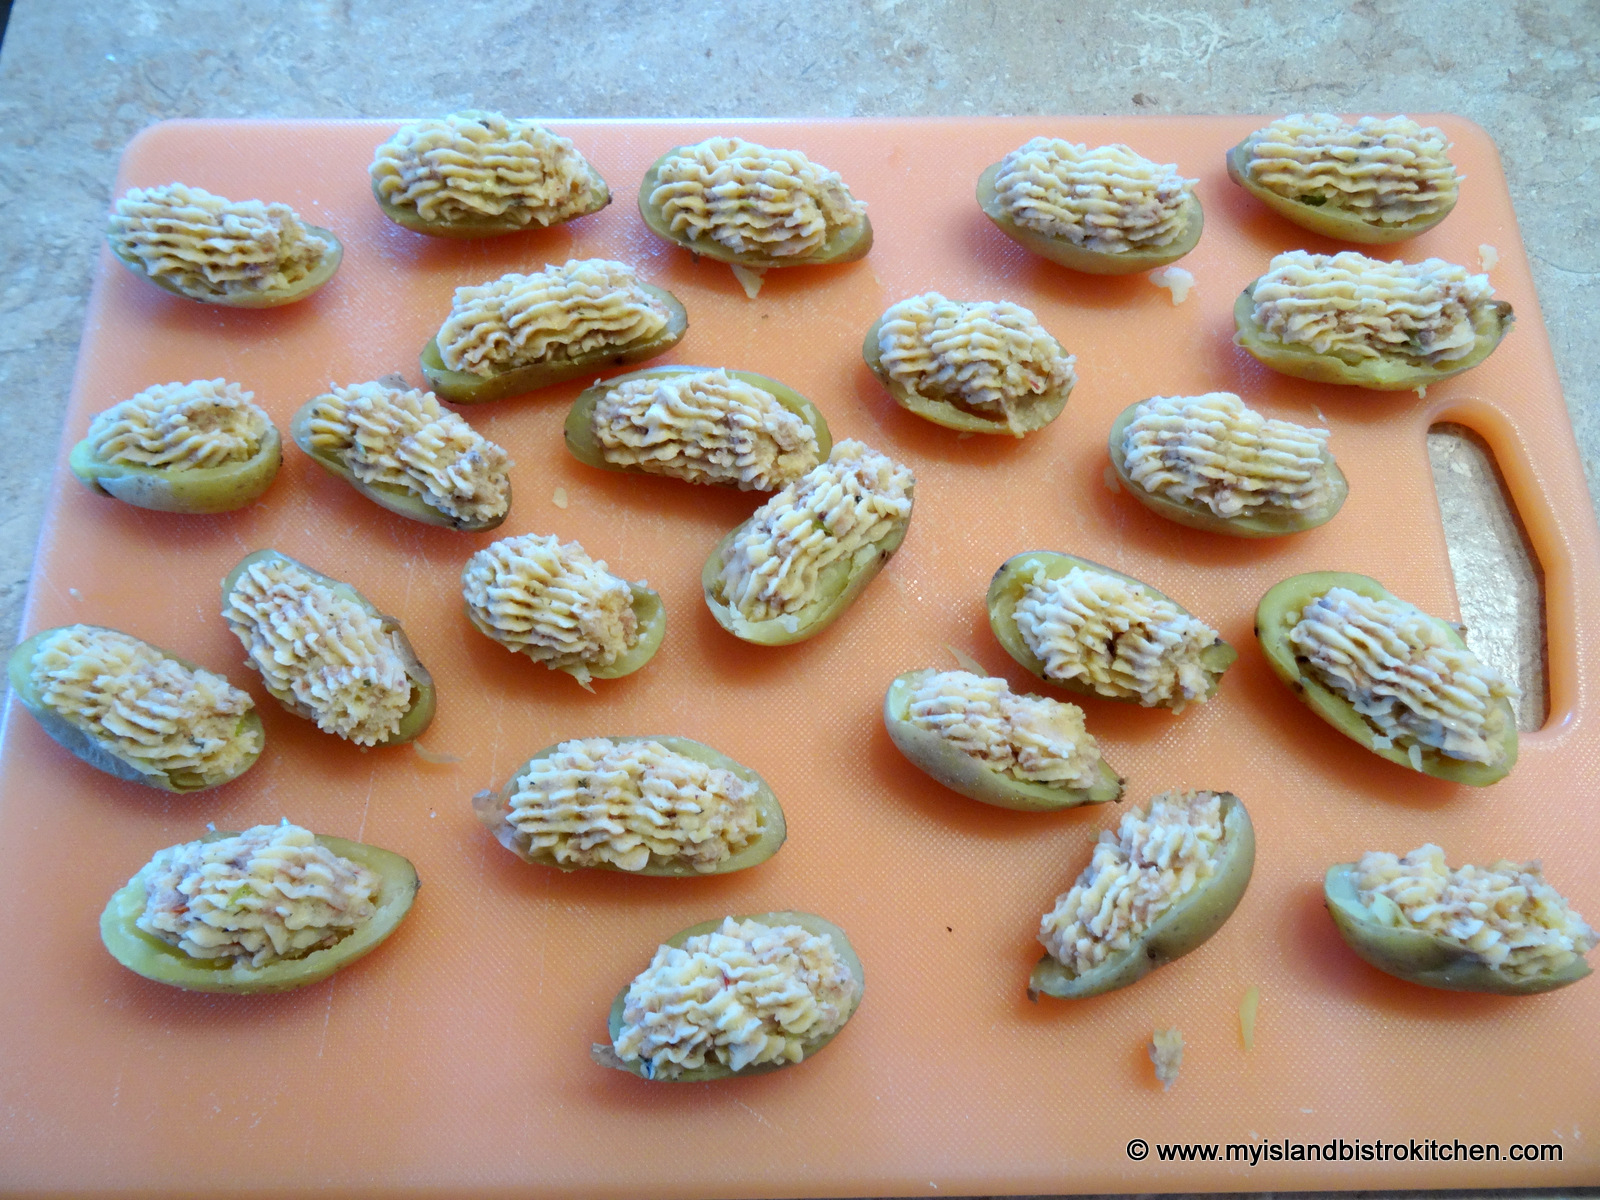
The filling can be transferred to the potatoes with a spoon but a piping bag and Wilton tip 8B makes the job quicker, easier, and will give a neater presentation.
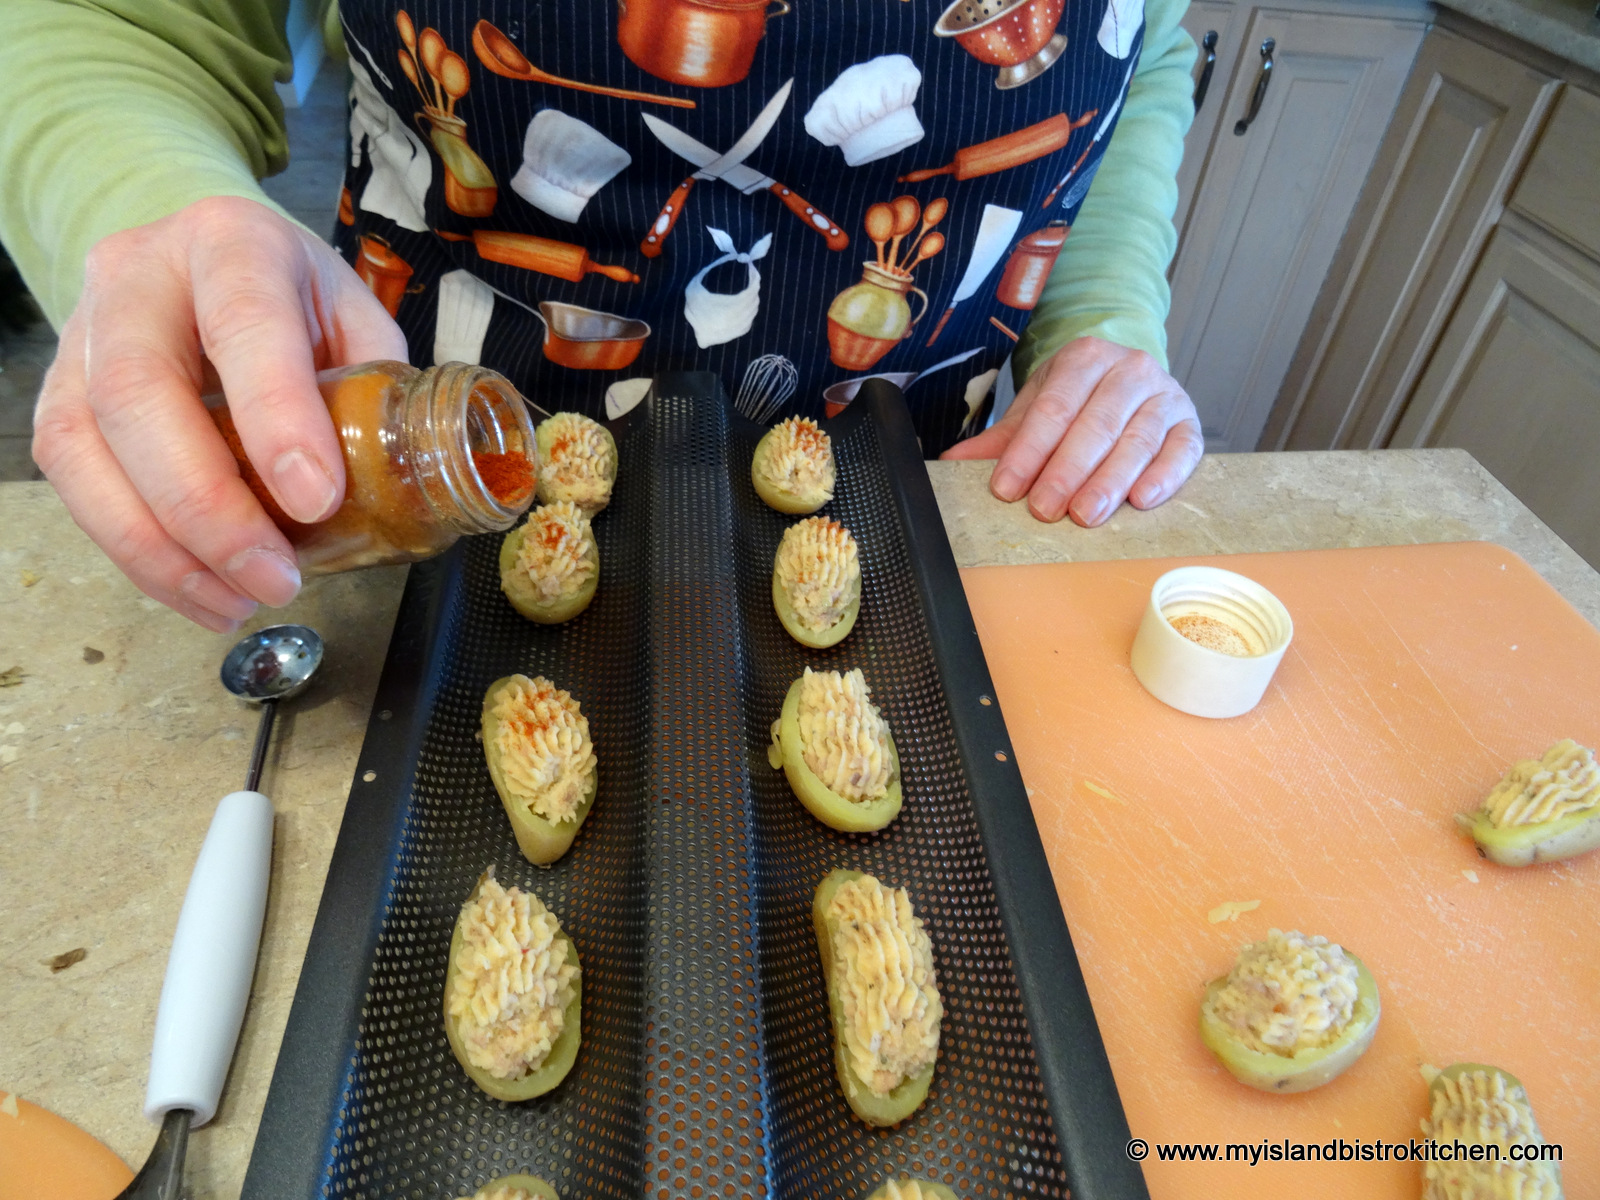
Add a sprinkle of paprika, and pop these little hors d’oeuvres into a 375ºF oven for about 12 minutes. Use either a parchment-lined baking sheet to bake the stuffed potatoes or, if you have a baguette pan, it works really well, too.
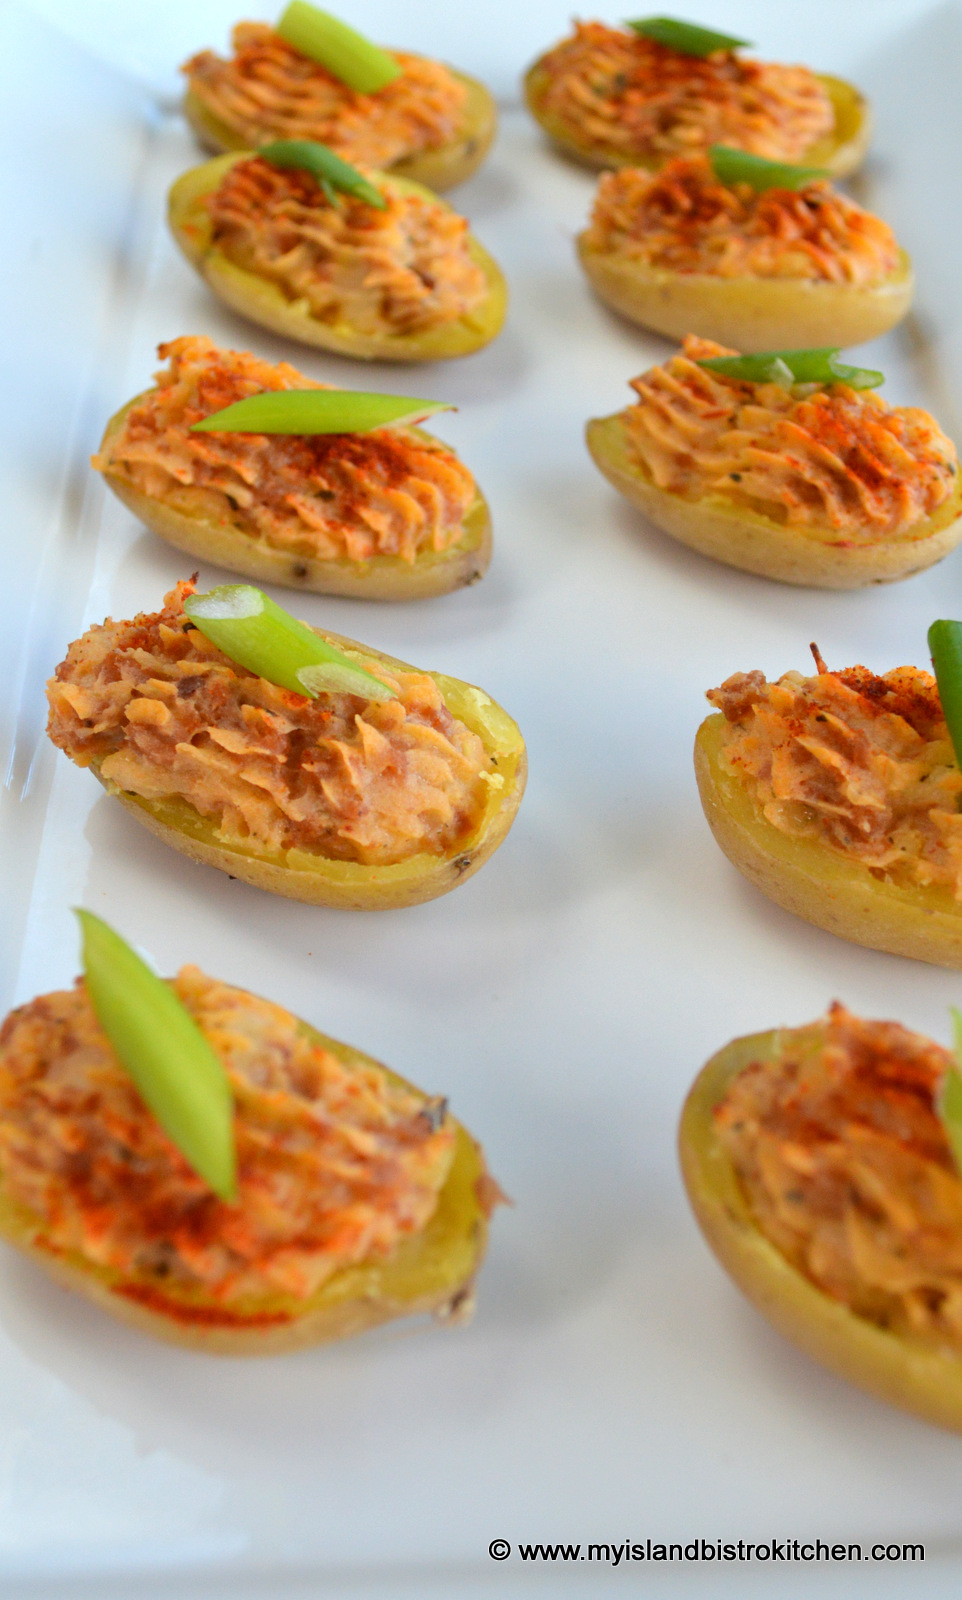
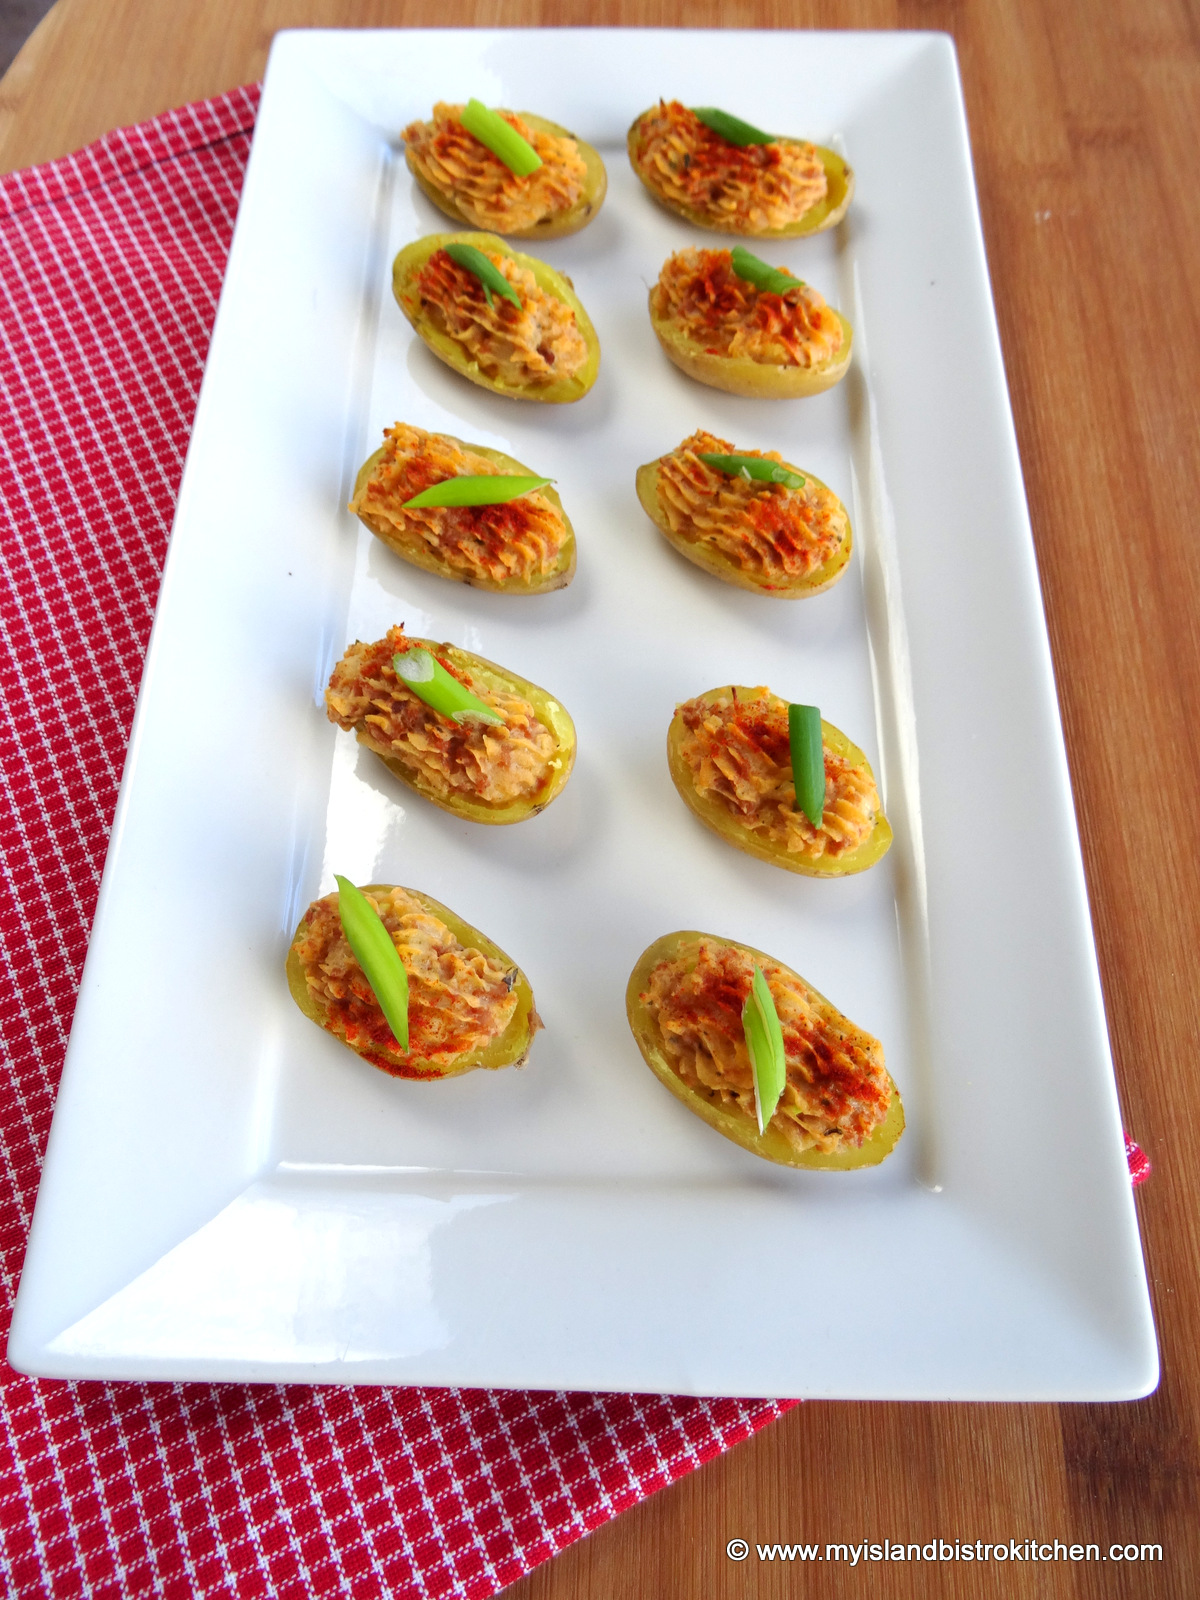
Garnish, if desired, with a sliver of green onion or chopped chives, then serve to the delight of guests at your next party.
Baked Stuffed Fingerling Hors d’oeuvres made with potatoes from The Little Potato Company
12 Little PotatoCompany fingerling creamer potatoes
½ tsp liquid chicken bouillon
½ tsp minced garlic
1 green onion, finely chopped
1½ tsp truffle aioli
2 tbsp sour cream
3 tbsp Gouda cheese, finely grated
1½ tsp tomato sauce
⅛ tsp basil
Salt and pepper, to taste
Paprika
Slivers of green onion tops or chopped chives for garnish
Method:
Heat olive oil in small frypan. Remove sausage from casing and crumble. Add to hot oil. With the end of a flat, heat-resistant lifter or spatula, continue to break up the sausage as it cooks. Scramble fry until sausage is brown, approximately 7-10 minutes. Transfer sausage to a colander and let fat drip out for about 10-15 minutes. Then, roll the cooked sausage in paper towel to remove any remaining fat. Set aside.
Cook fingerling potatoes in boiling water for about 15 minutes or until fork tender. Remove from heat.
Preheat oven to 375ºF.
As soon as the potatoes are just cool enough to handle, cut each in half, horizontally. Using a melon baller, remove the potato pulp from the skin, leaving about a 1/16th inch thick wall of potato in each half to give the potato shape. Transfer potato pulp to a potato ricer. Press pulp through ricer into small bowl. Add remaining ingredients and mix until incorporated.
Transfer mixture to a pastry bag fitted with Wilton tip 8B. Pipe filling into each fingerling half. Sprinkle with paprika. Place mini stuffed potatoes on a parchment-lined baking sheet or in the cradle of a baguette pan. Bake in preheated oven for about 12 minutes. Remove and garnish with a sliver of green onion or chopped chives. Serve hot.
Yield:24 hors d’oeuvres
Pin Me To Pinterest!
Disclosure: The potatoes used in this recipe were provided to me, free of charge, from The Little Potato™ Company for the purposes of sampling them and creating a recipe with them. The recipe for Baked Stuffed Fingerlings in this posting is an original recipe developed by me in my home kitchen.
——————————–
Thank you for visiting “the Bistro” today. There are lots of ways to connect with “the Bistro” through social media:
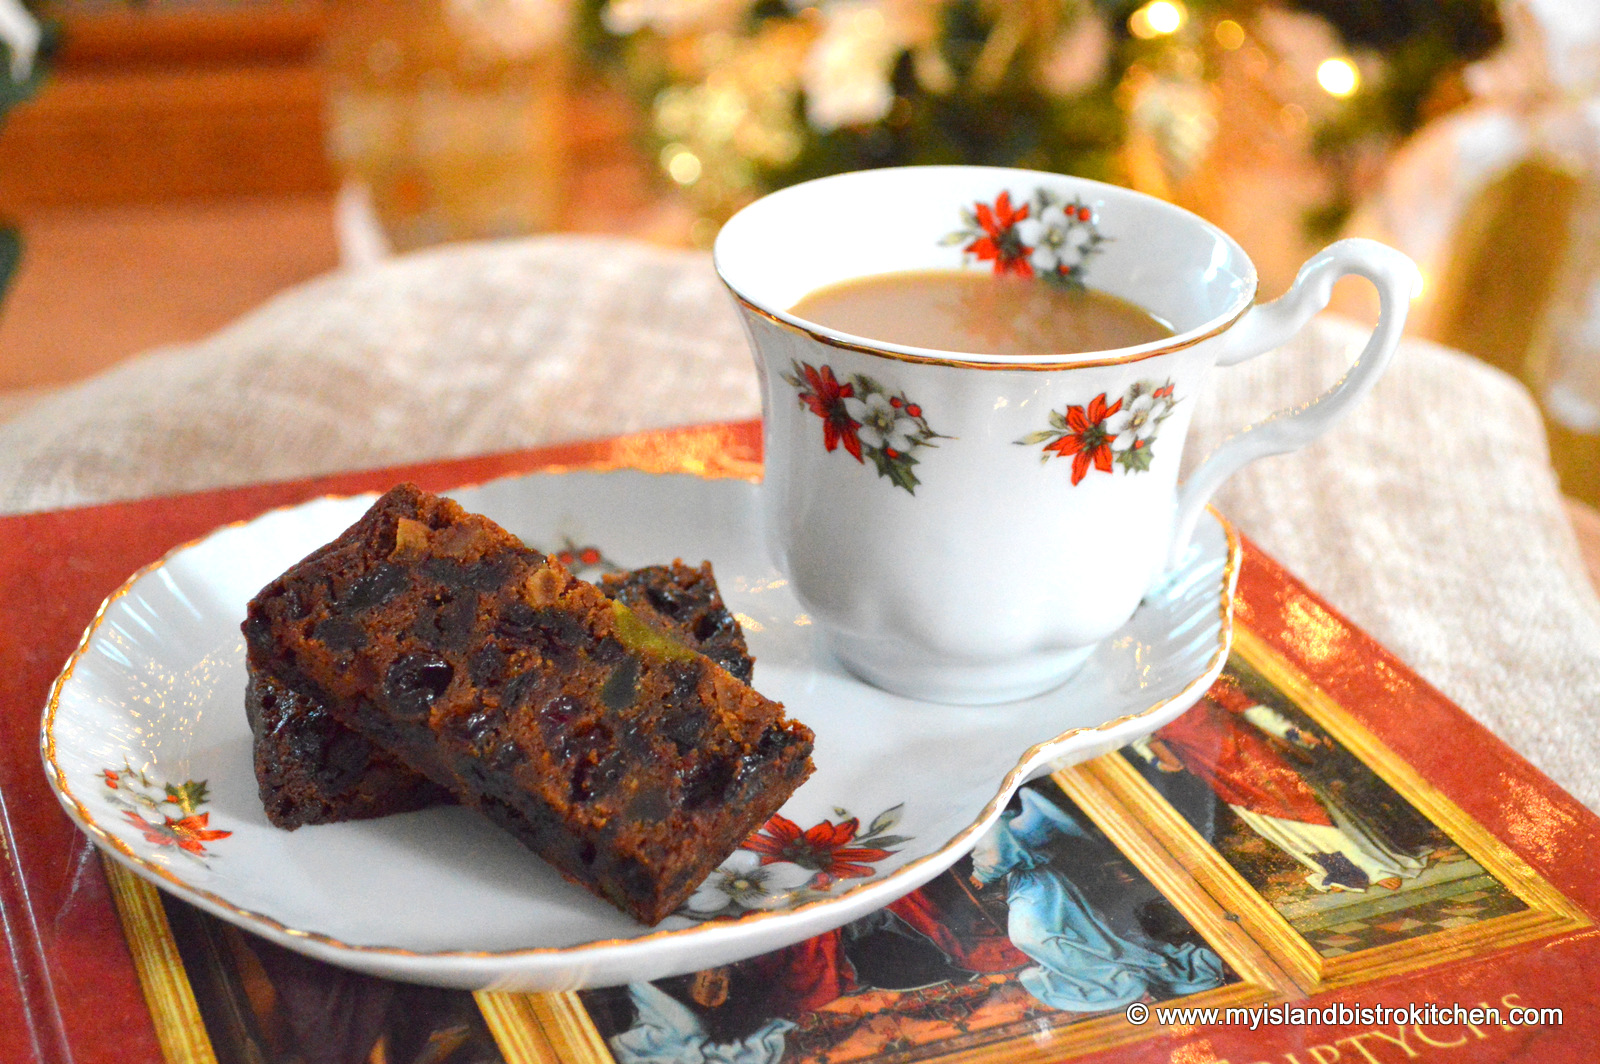
Fruitcakes. People either love them or loathe them and there seems to be no middle ground. I personally favour them and they have long been a part of my annual Christmas traditions. Continue reading Dark Fruitcake→
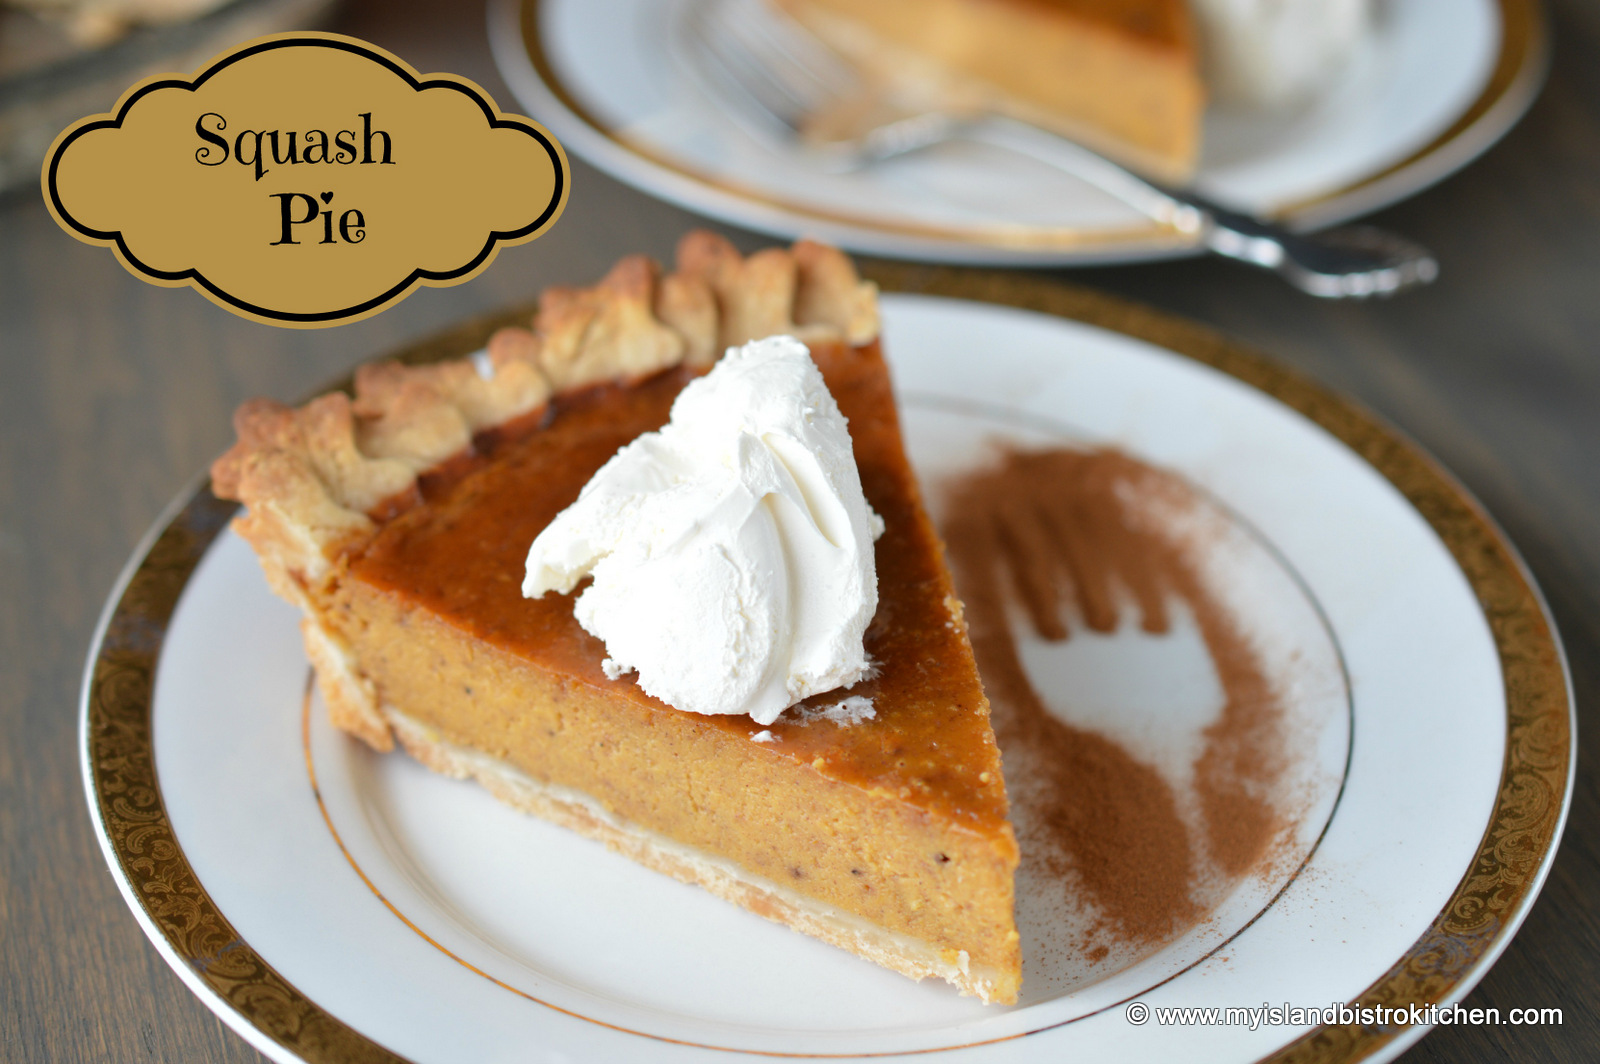
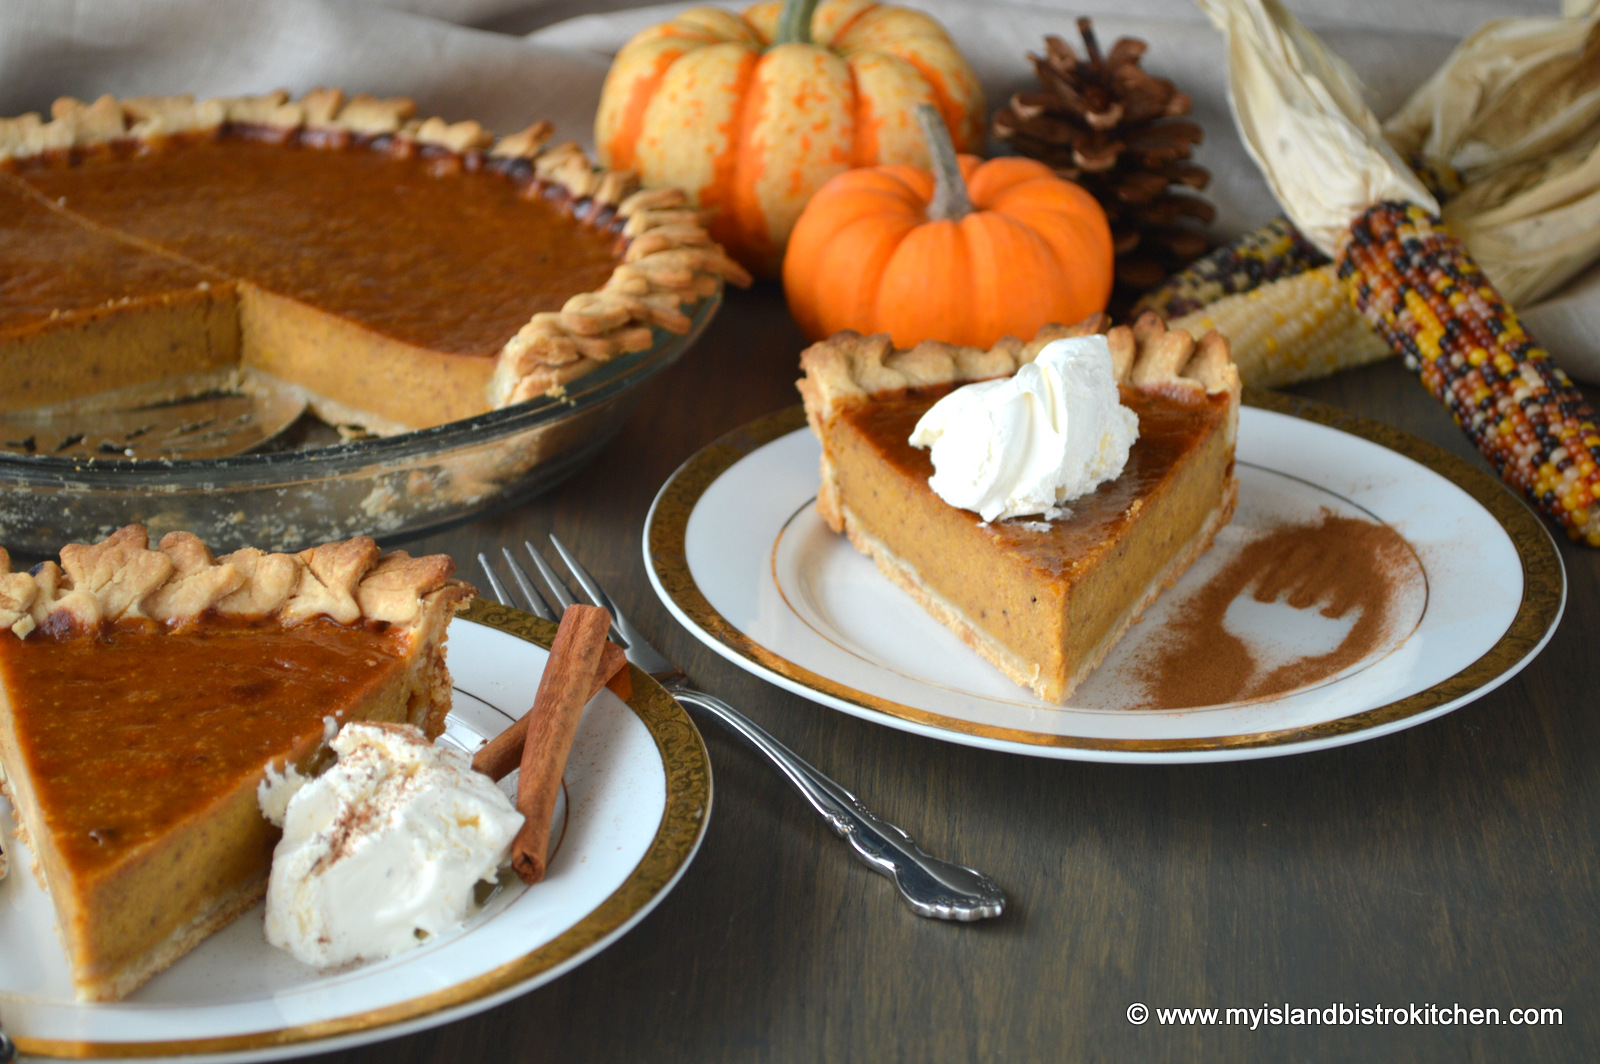
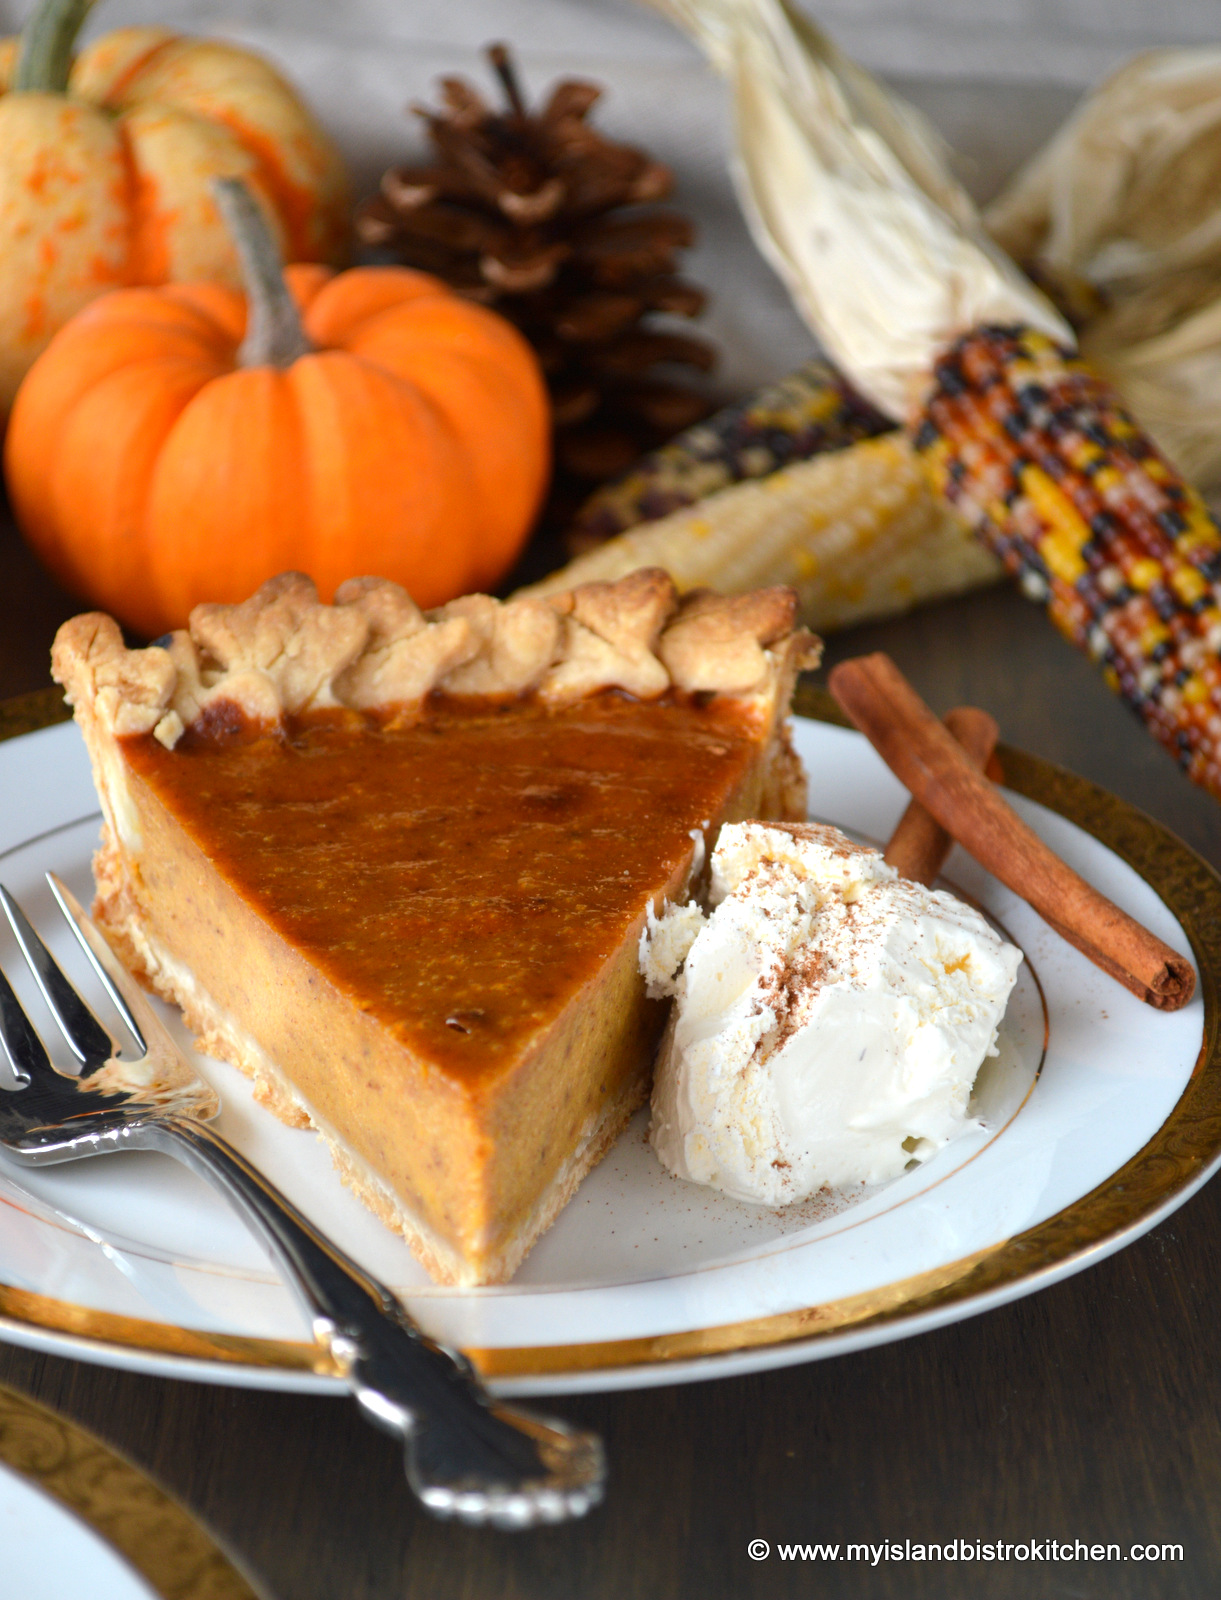
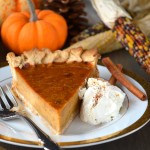
Move over pumpkin! Your cousin, squash, makes better pies!
Growing up, it was more common in our household to have squash rather than pumpkin pie. My ancestors always claimed squash makes a better, more tasty pie and I have to agree. Squash gives a richer pie with a depth of flavour that I don’t find characteristic of pumpkin.
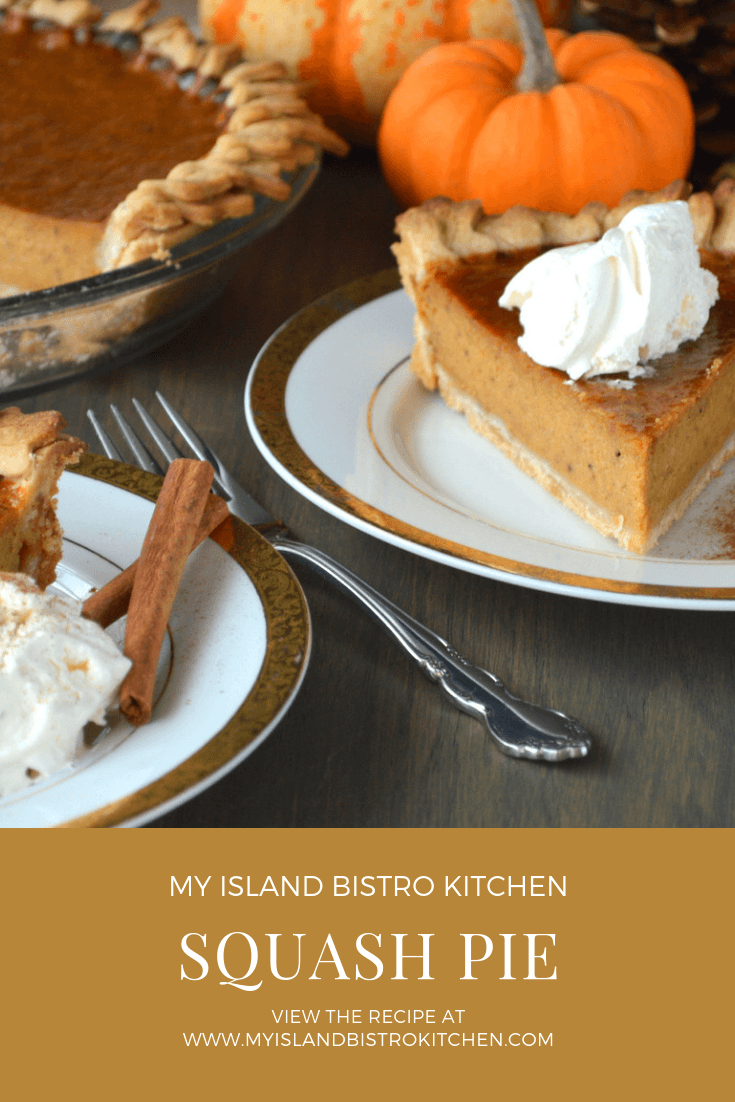
Squash Pies
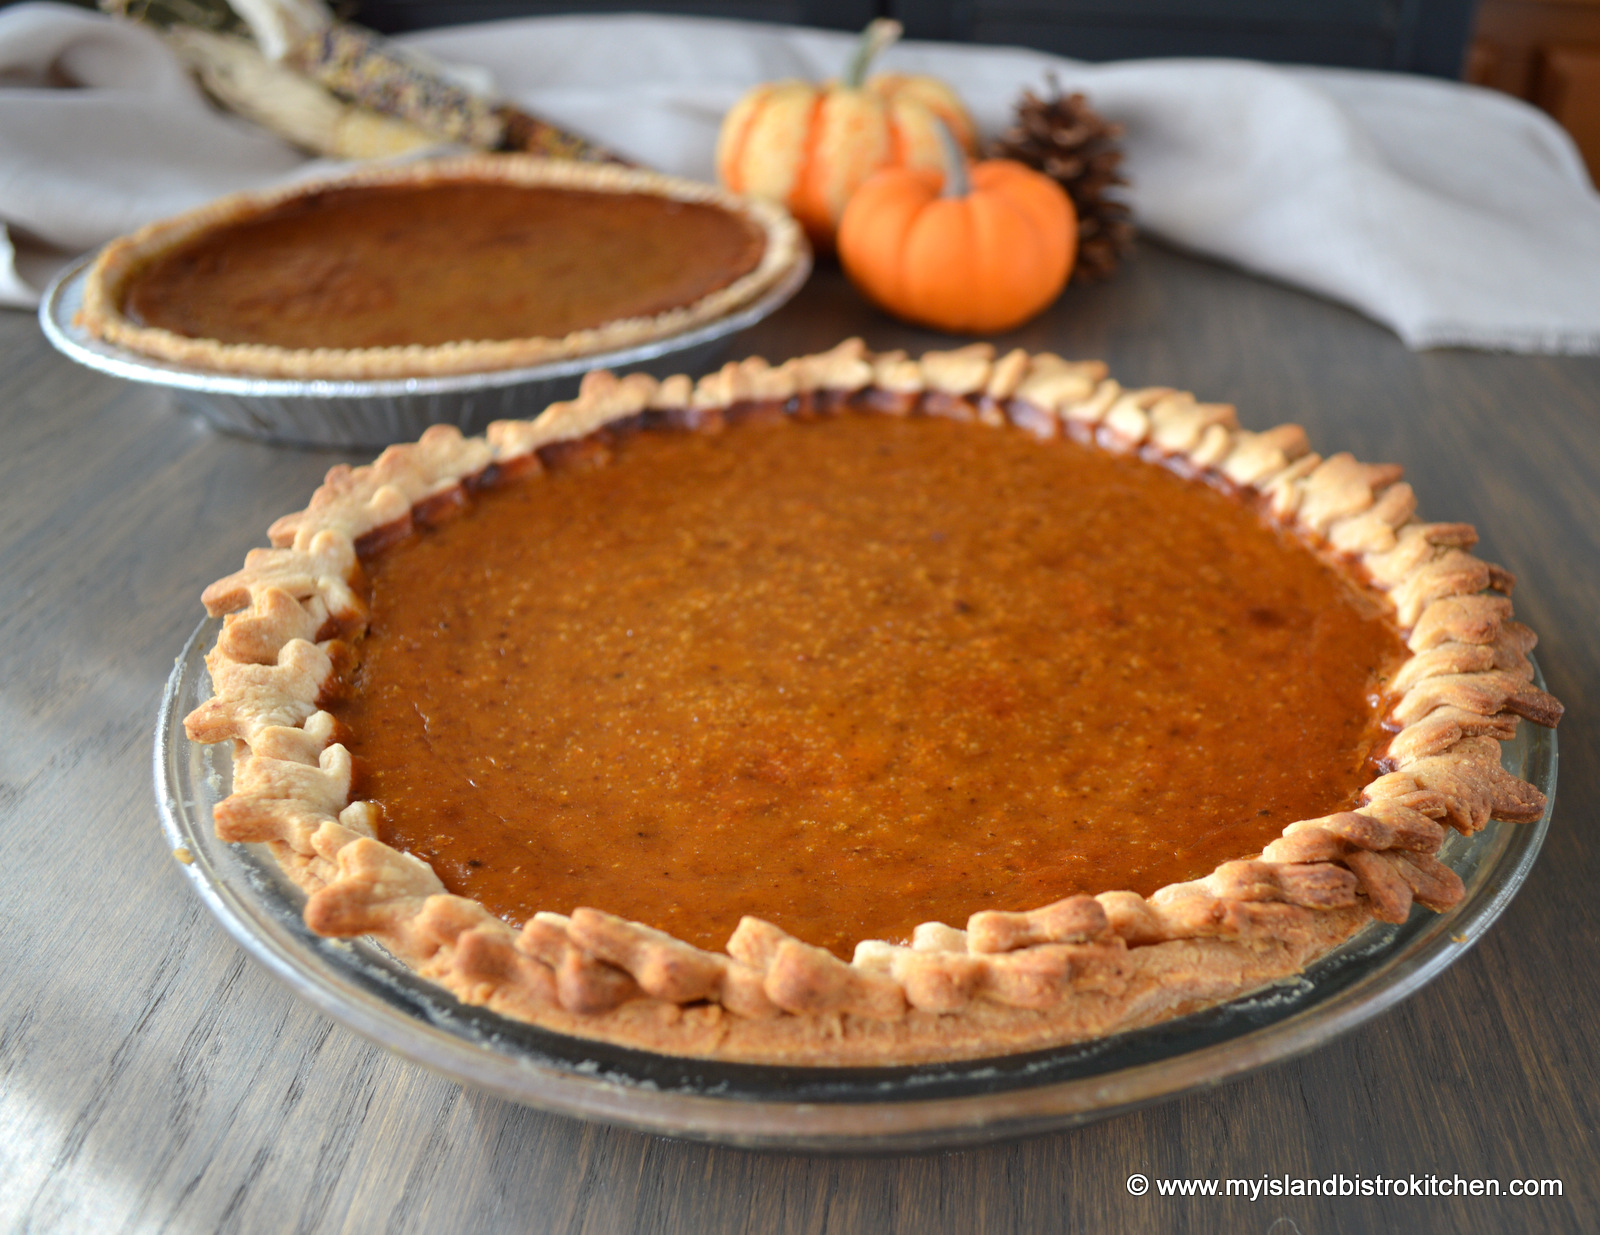
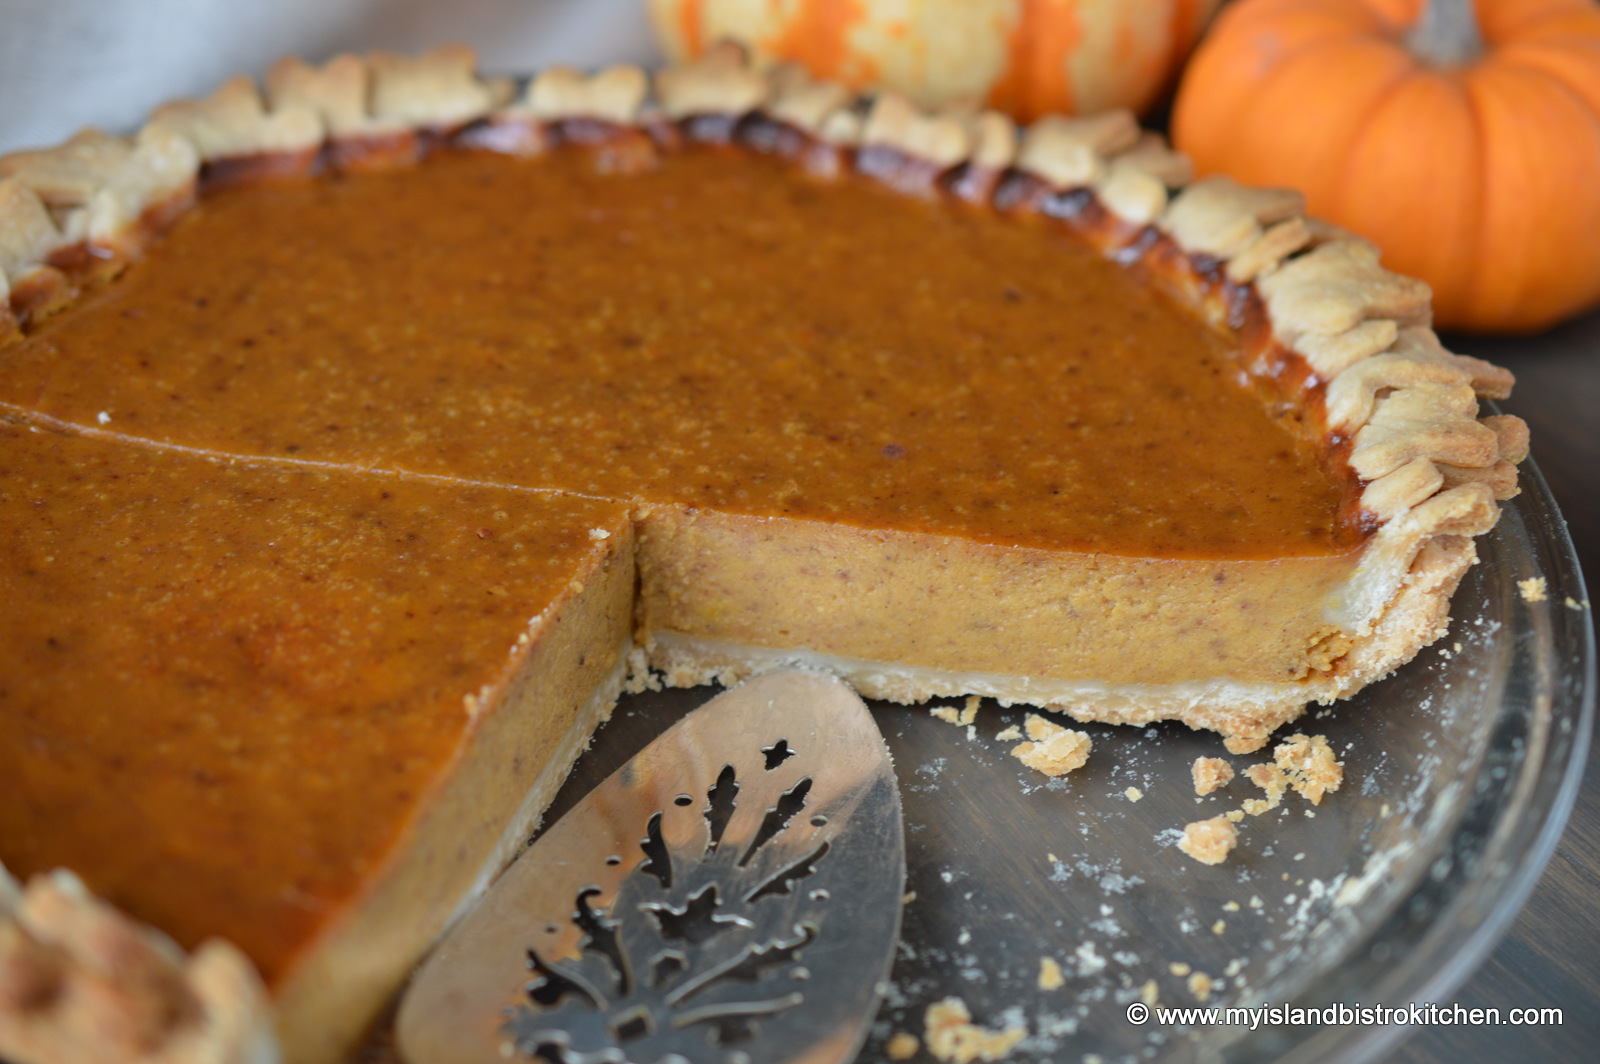
There are several different kinds of squash that can be used for pie making but my preference is the tall vase-or bell-shaped butternut squash. Butternut squash is considered a variety of winter squash. Though harvested in autumn, butternut squash is generally available in supermarkets through the winter months because of the squash’s long “keeping” quality. I’m guessing it is their availability through the winter months that has earned them the term “winter” squash since they certainly wouldn’t be harvested in the winter in our cold and frosty northeastern climate! With its mildly nutty flavour, butternut squash has a natural sweetness to it. The pulp of the butternut squash is bright orange in color and, while it loses that color when made in to a pie, it turns to a lovely caramel color.
Squash Pie
My grandmother always cooked her squash in a pot with some water on the stovetop. However, squash already has a high moisture content and adding more water to the mix can make it difficult to get the cooked squash sufficiently drained that you don’t end up with a soupy texture pie. My preference is to, instead, roast the squash as it reduces the moisture level and I find it also gives the squash an even deeper, richer flavour.
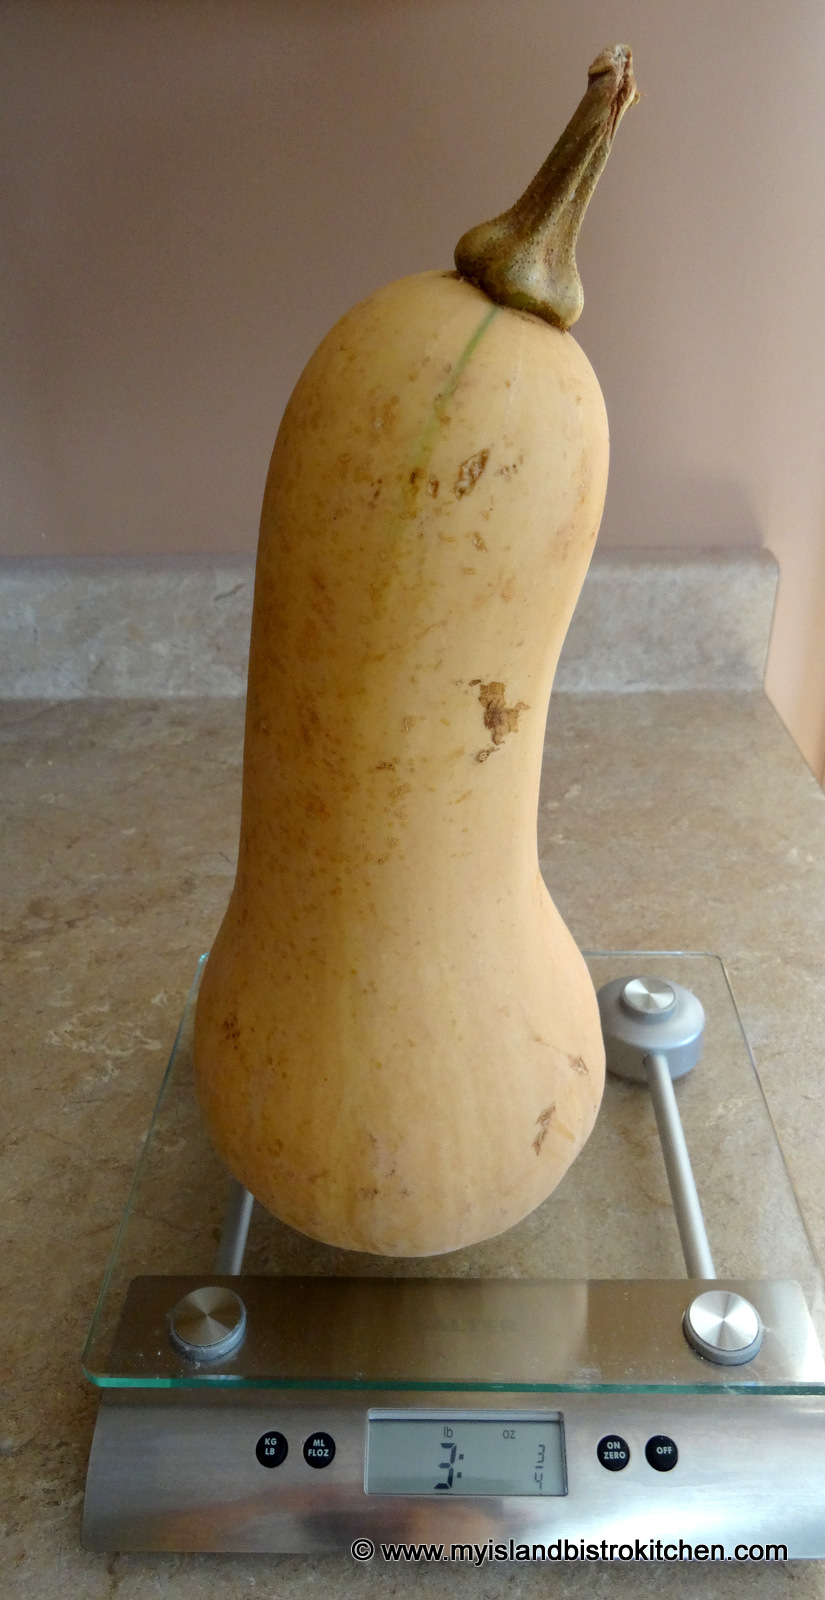
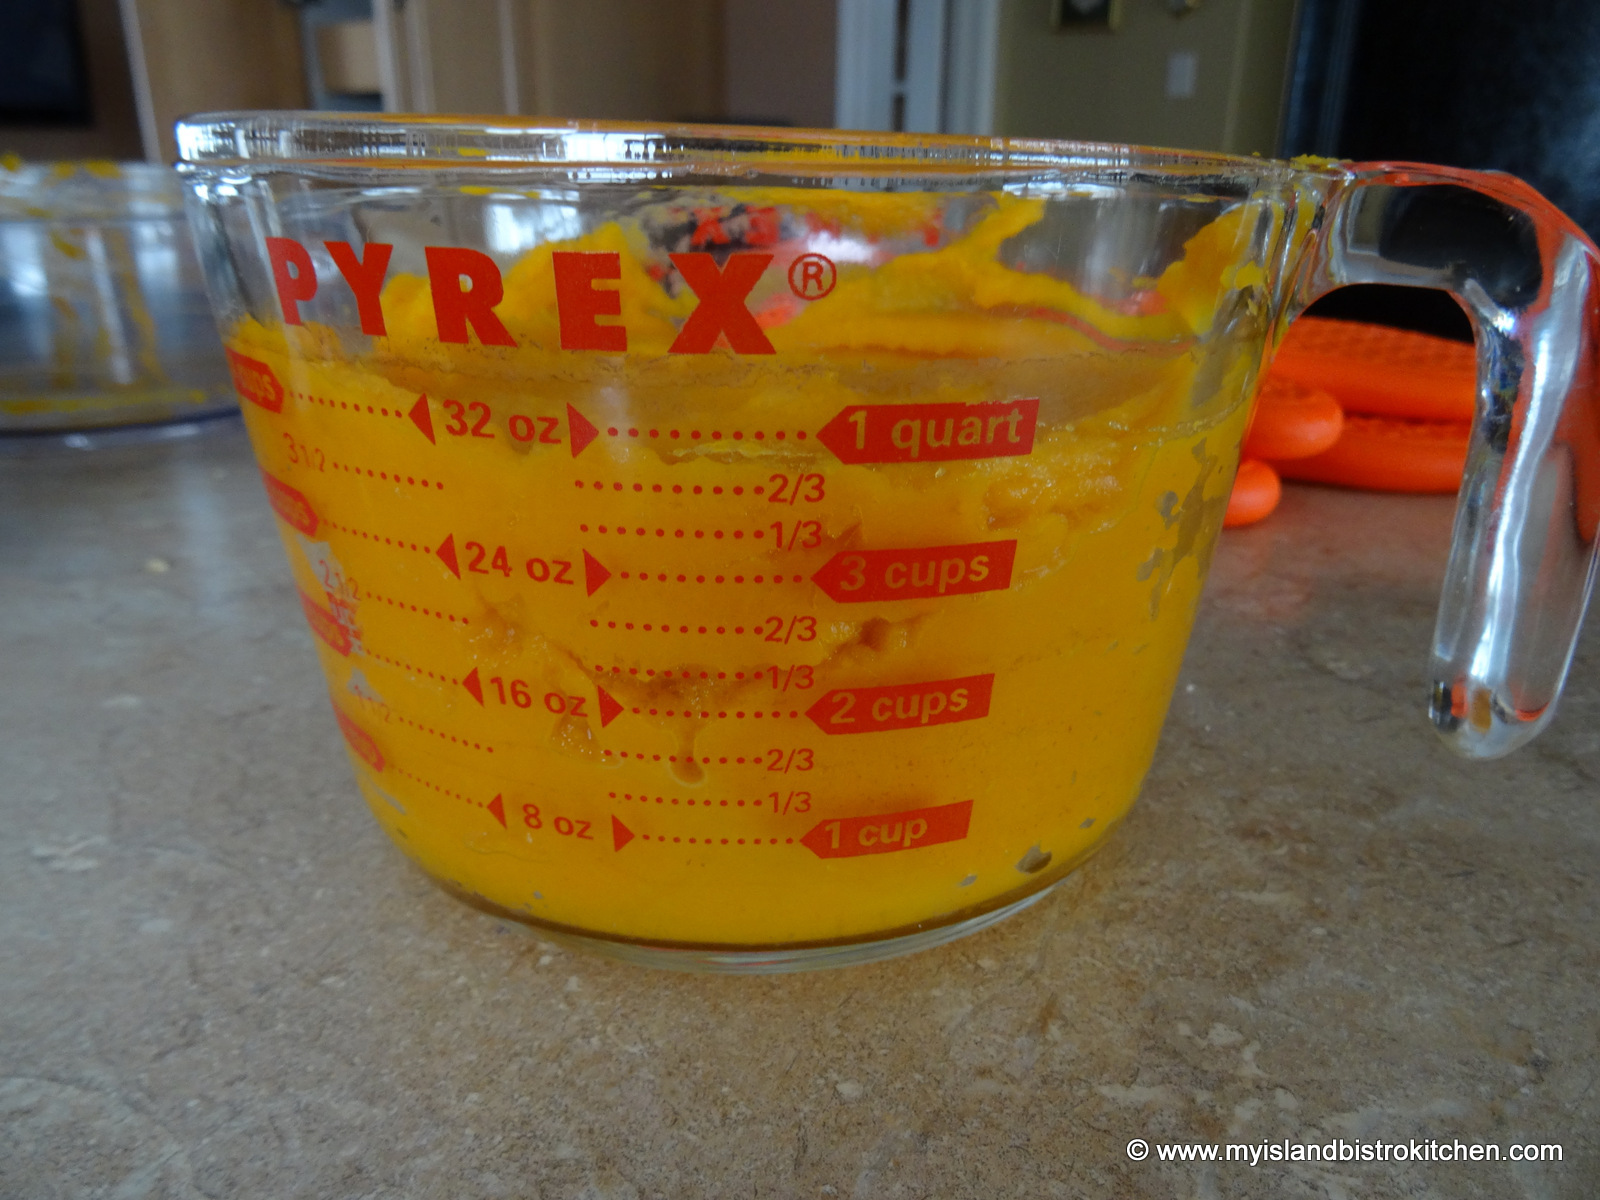
For my squash pie recipe (found at the end of this posting), 2 cups of puréed squash is needed. I used a butternut squash weighing 3 pounds which yielded 4 cups of purée, enough for 2 – 10″ pies. So, if all you want is one pie, try to find a squash that weighs 1½ to 1¾ pounds.
Butternut Squash
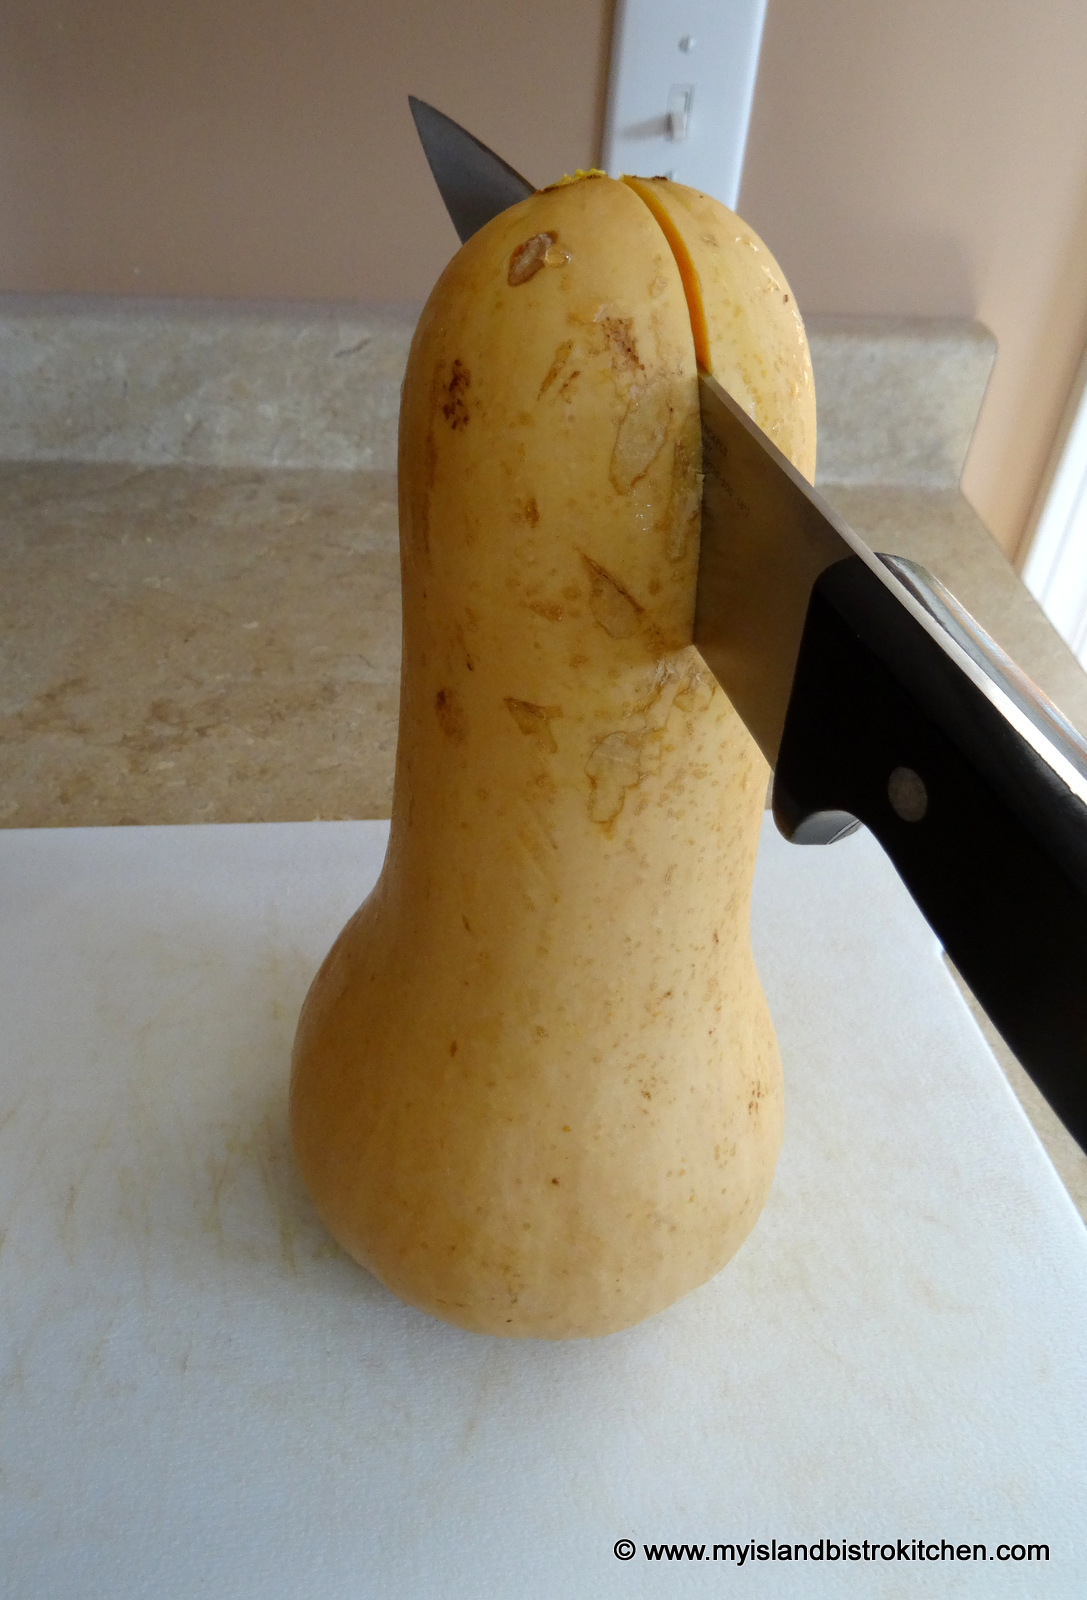
To roast the squash, I simply began by cutting the squash in half, starting at the top narrow end, slicing all the way through to the bottom.
With a spoon, remove the seeds.
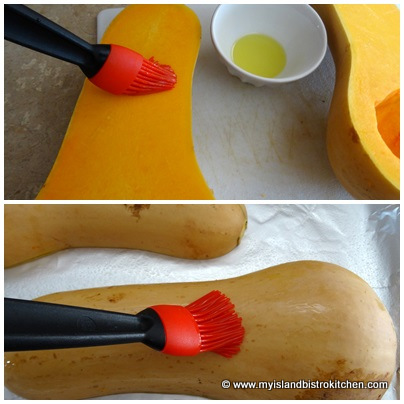
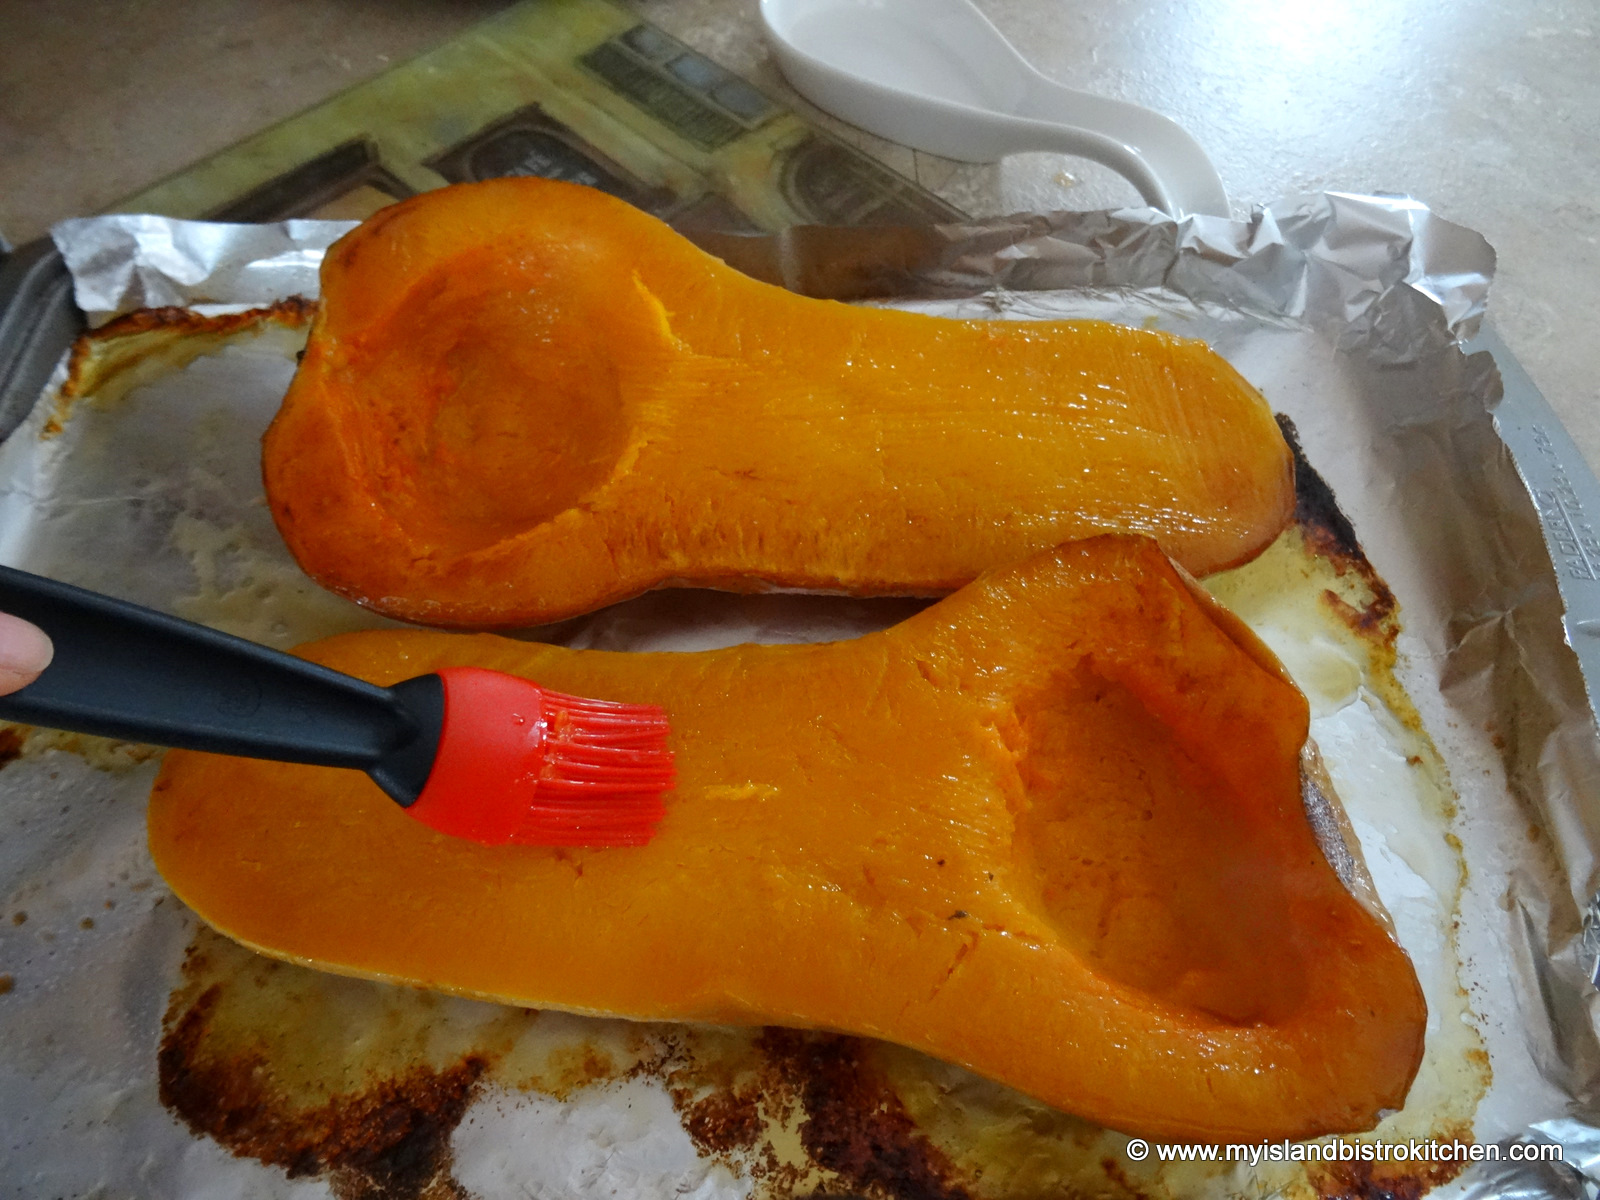
With a soft brush, apply a thin layer of olive oil to both the flesh and skin sides of the squash.
Place squash, flesh side down, on a greased, foil-lined, rimmed baking sheet. Bake in preheated 425°F oven for about a half hour. Remove the squash from the oven and, with a large lifter, carefully flip the pieces over, applying another light brushing of olive oil to the flesh side. Return the squash to the oven for about another half hour or so, until the flesh of the squash is very soft. Remove from oven.
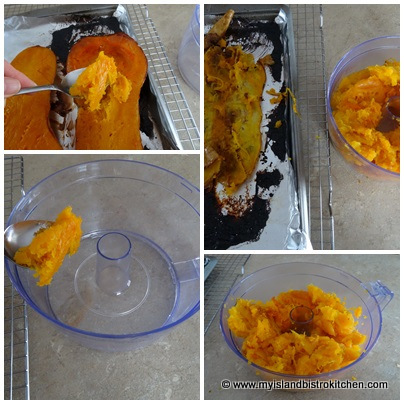
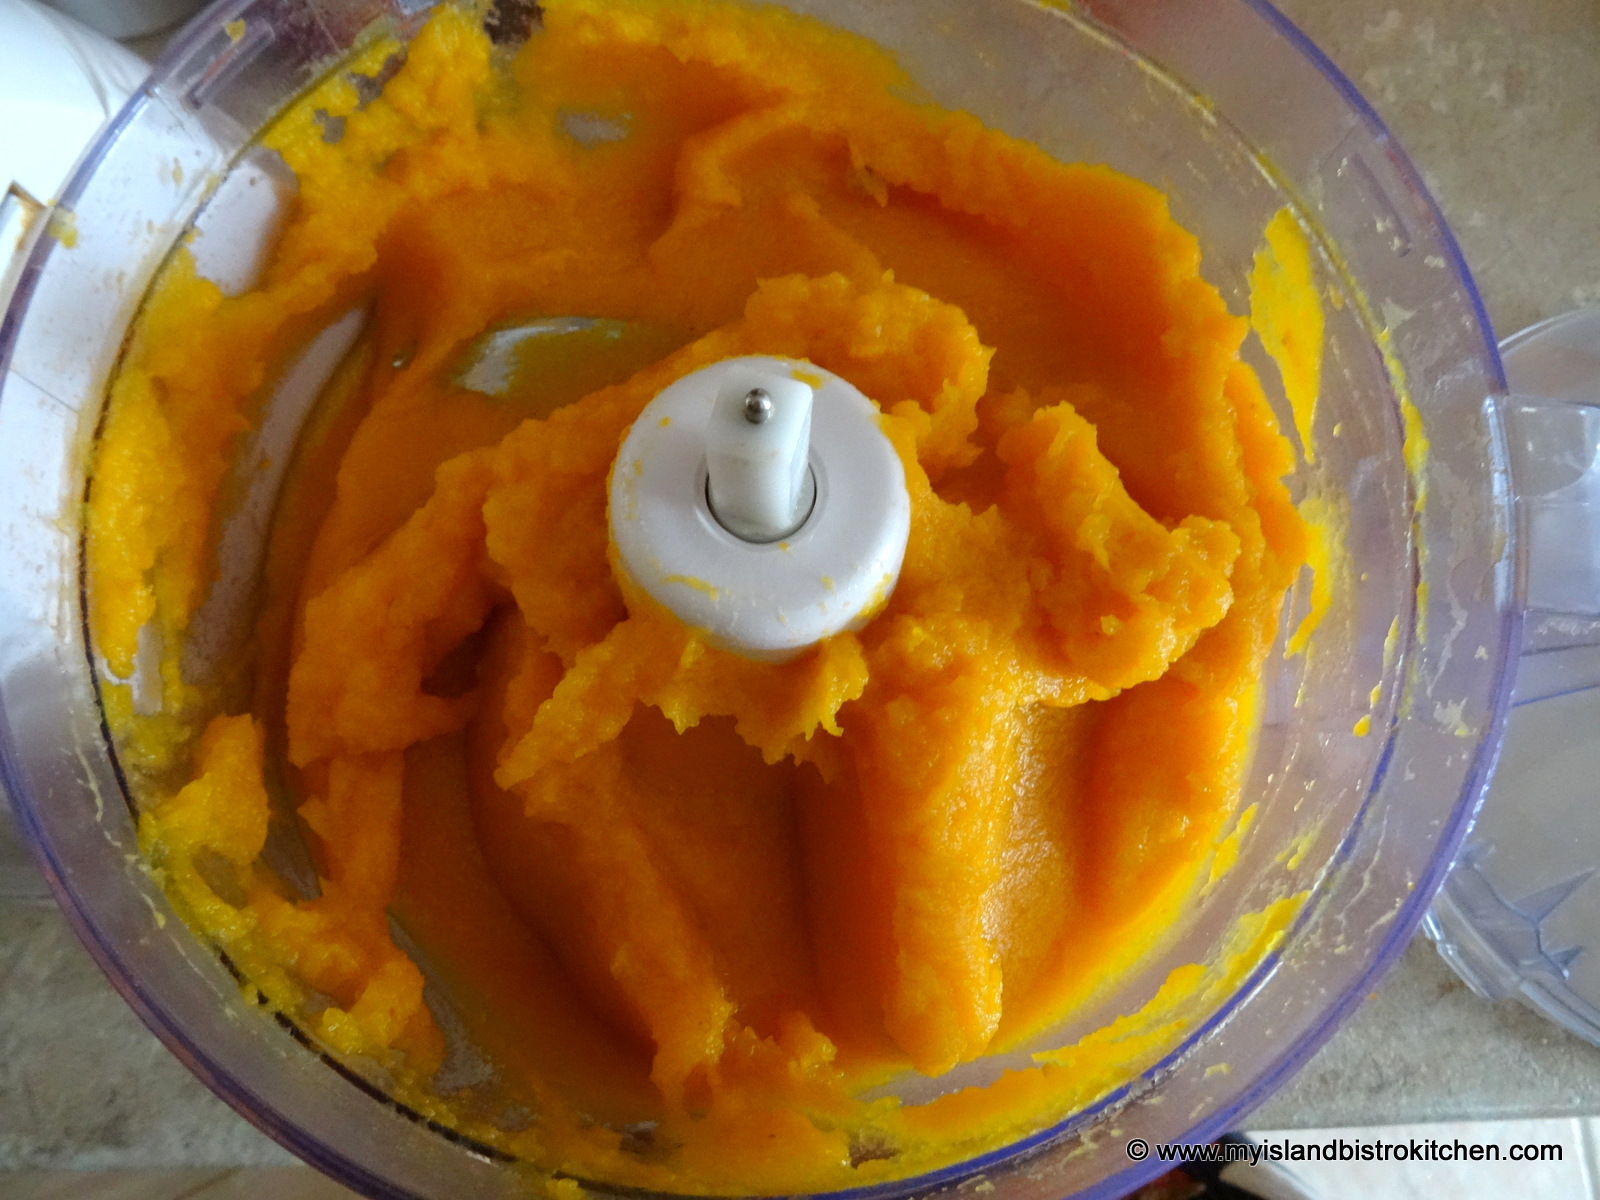
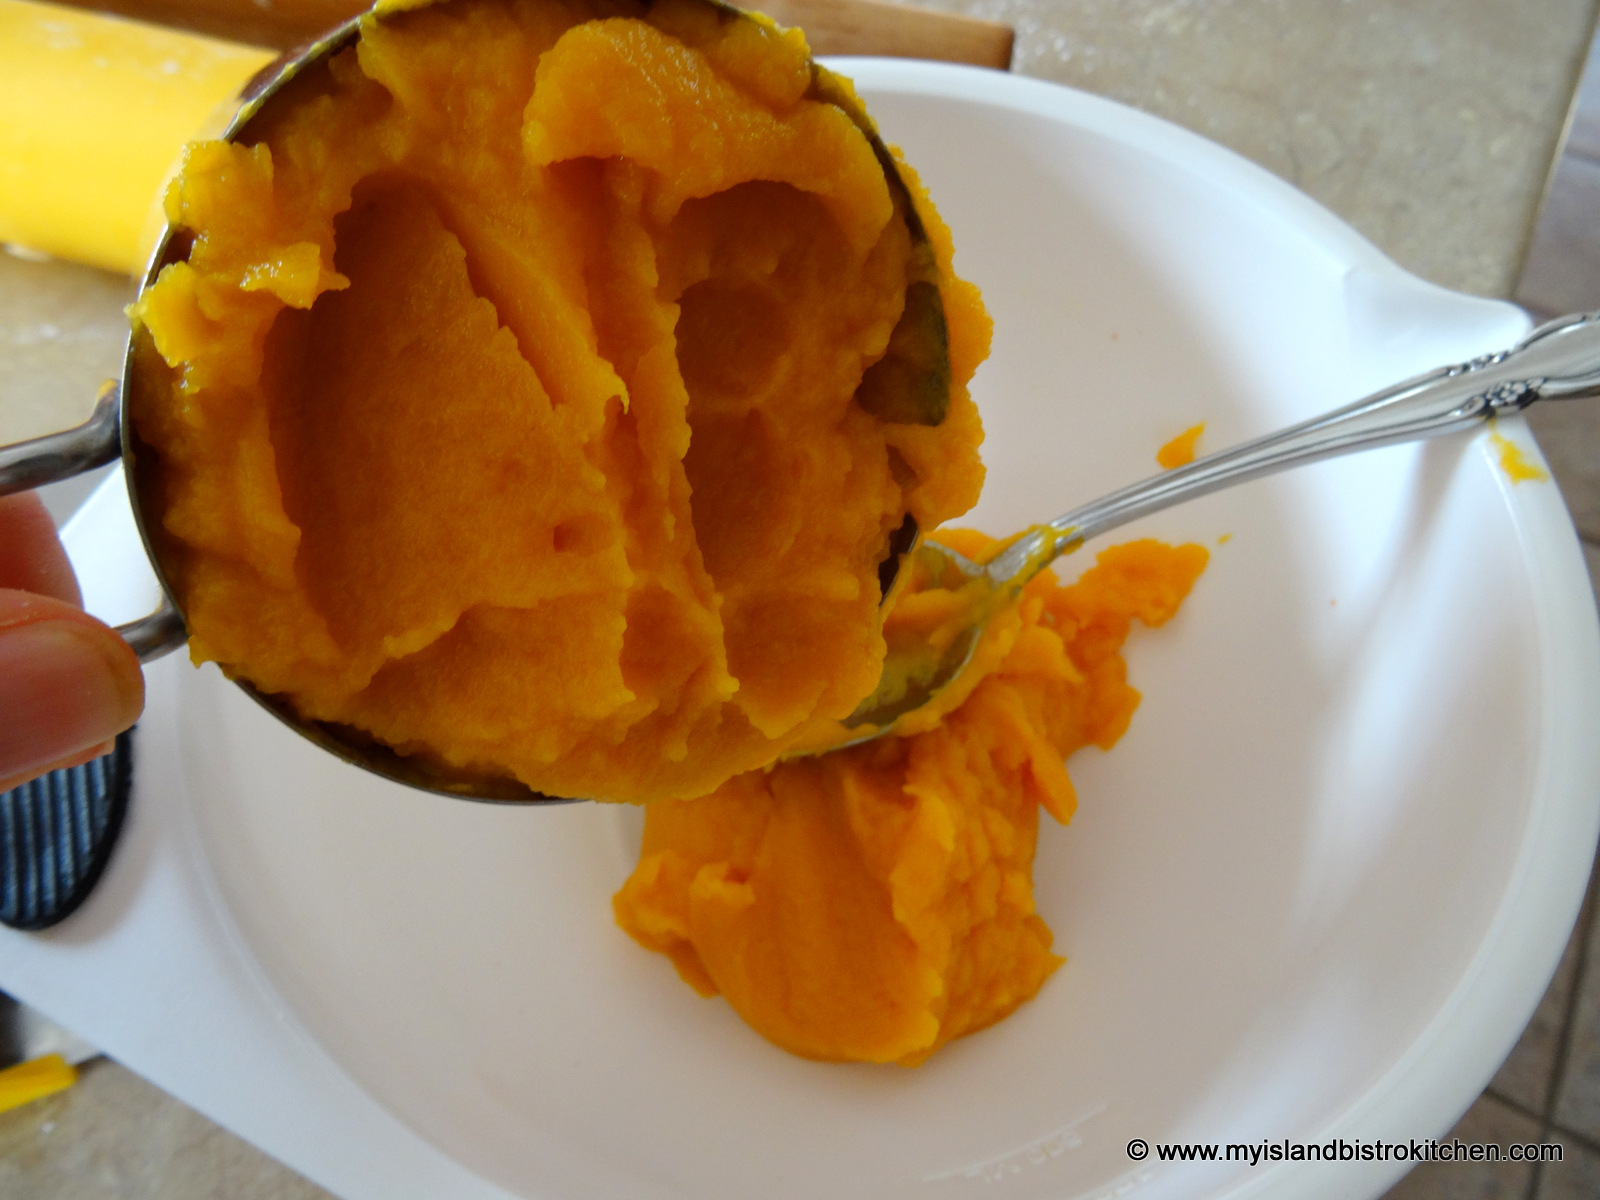
As soon as the squash has just cooled enough to handle, scoop the flesh from the skin of the squash and put it in the bowl of a food processor.
Process until the squash is puréed smooth.
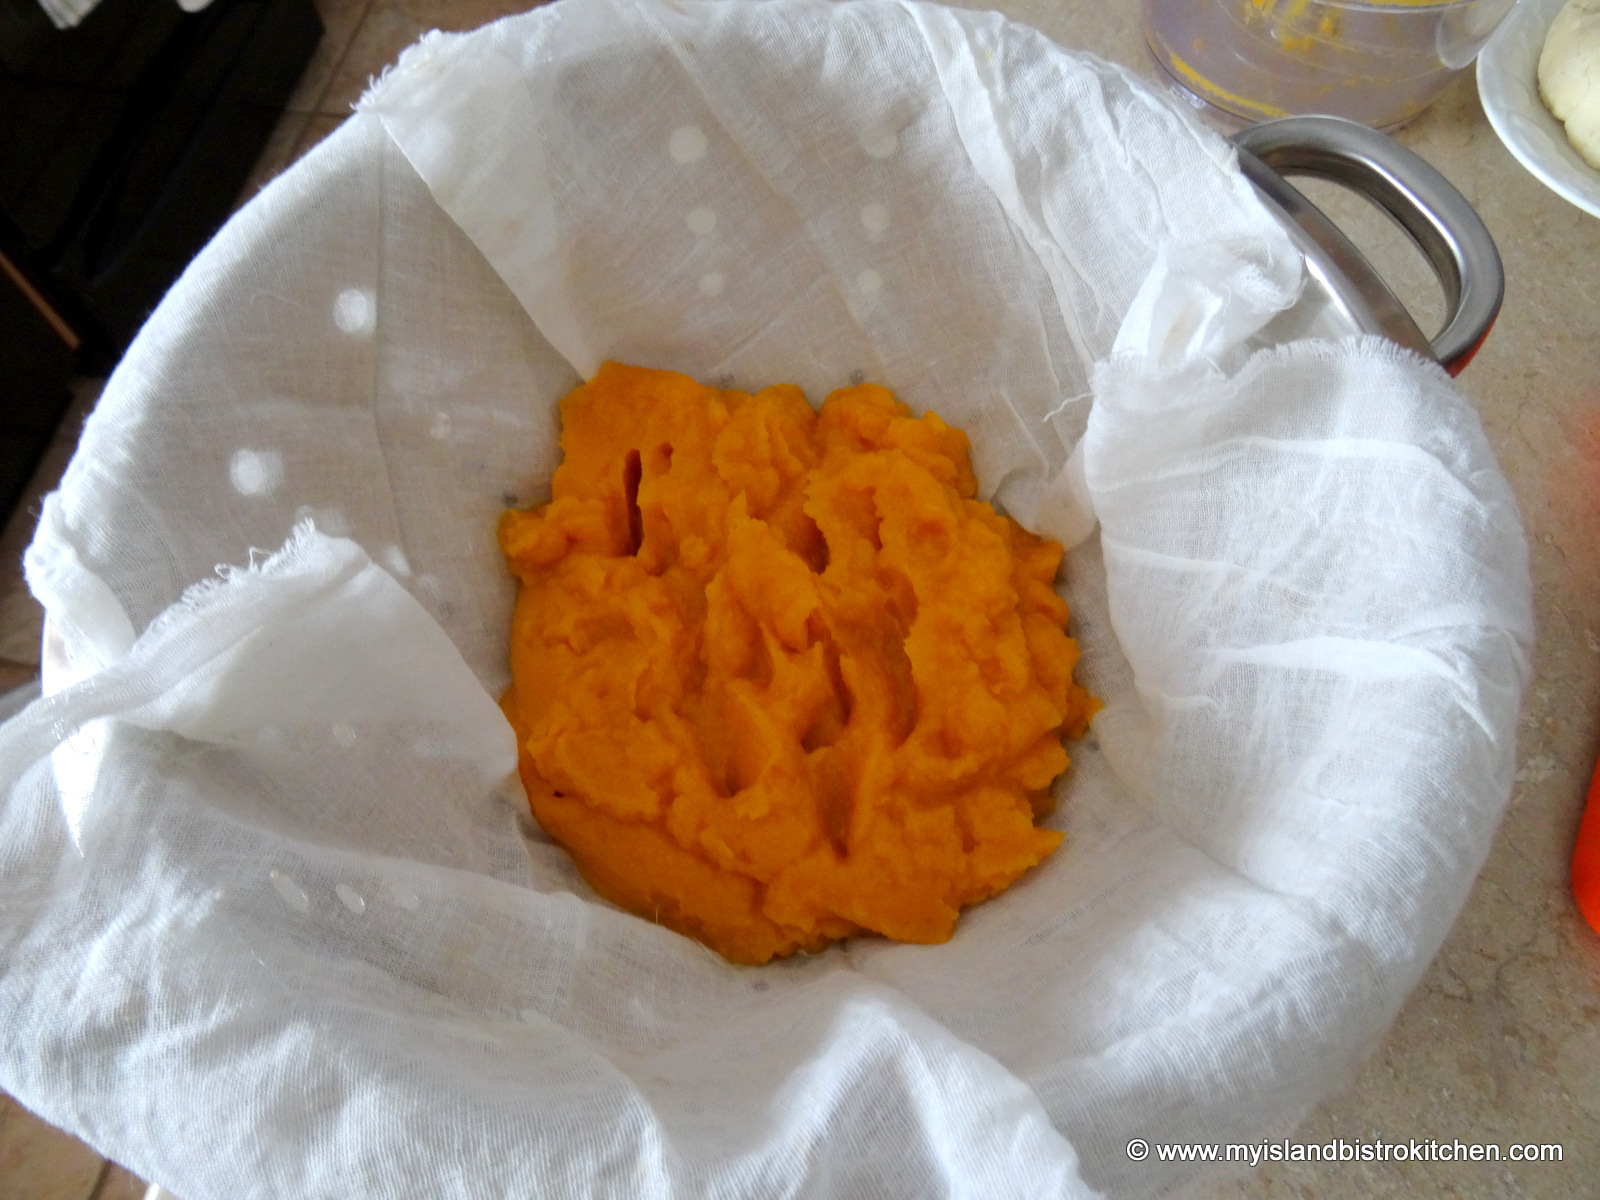
Then, transfer the purée to a cheesecloth-lined colander fitted over a large bowl or pot and leave it to drip for about an hour or so. The goal is to remove as much remaining liquid as possible. I find it helps to stir the mixture two to three times and to press down the mixture with the back of a large spoon to extract the liquid.
To make one pie, transfer 2 cups of the purée to a medium-sized bowl.
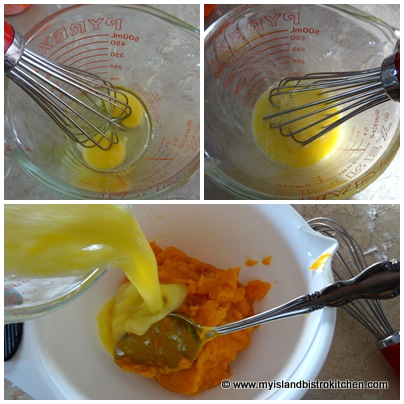
Add the slightly-beaten eggs.
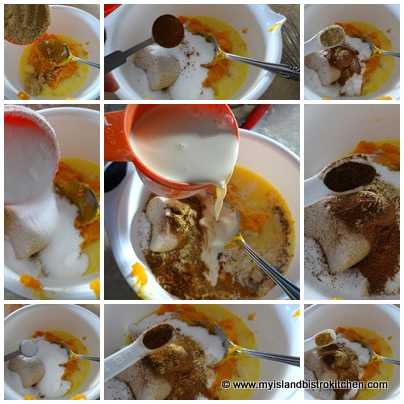
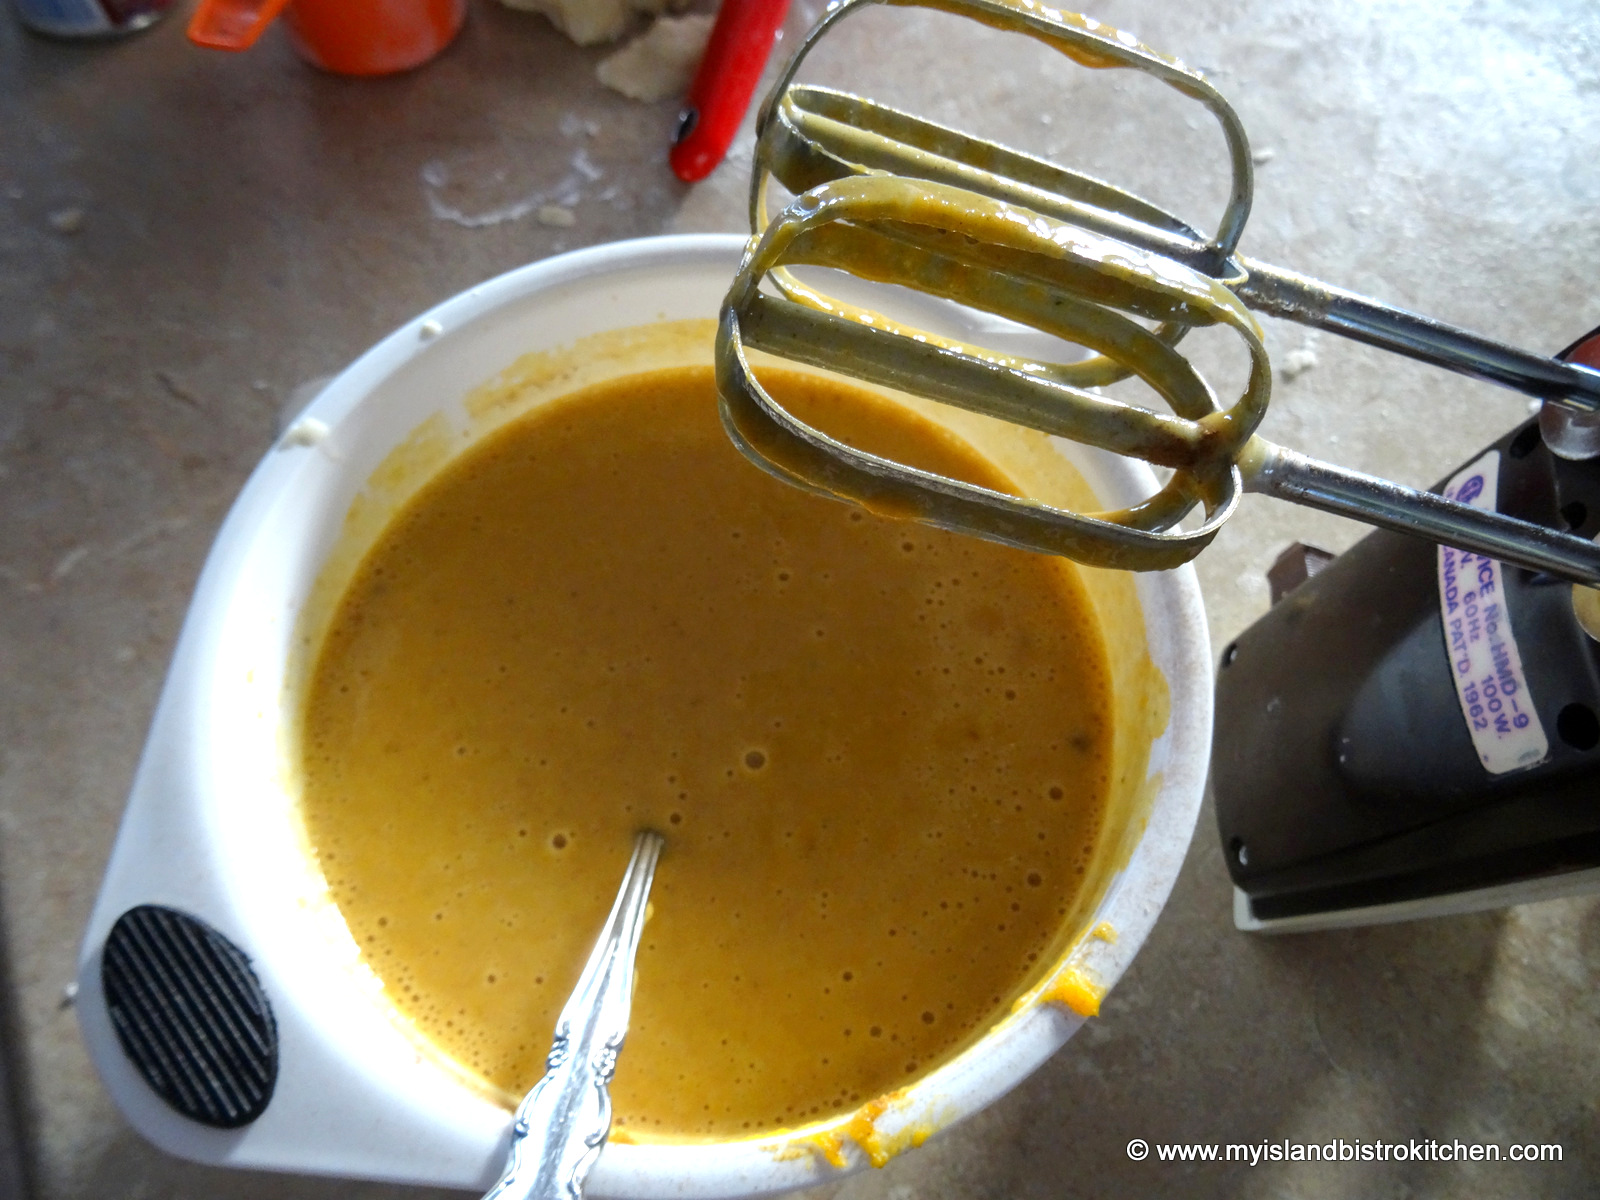
Next, add the sugars, salt, spices, and evaporated milk.
Mix the ingredients well – I use a hand mixer.
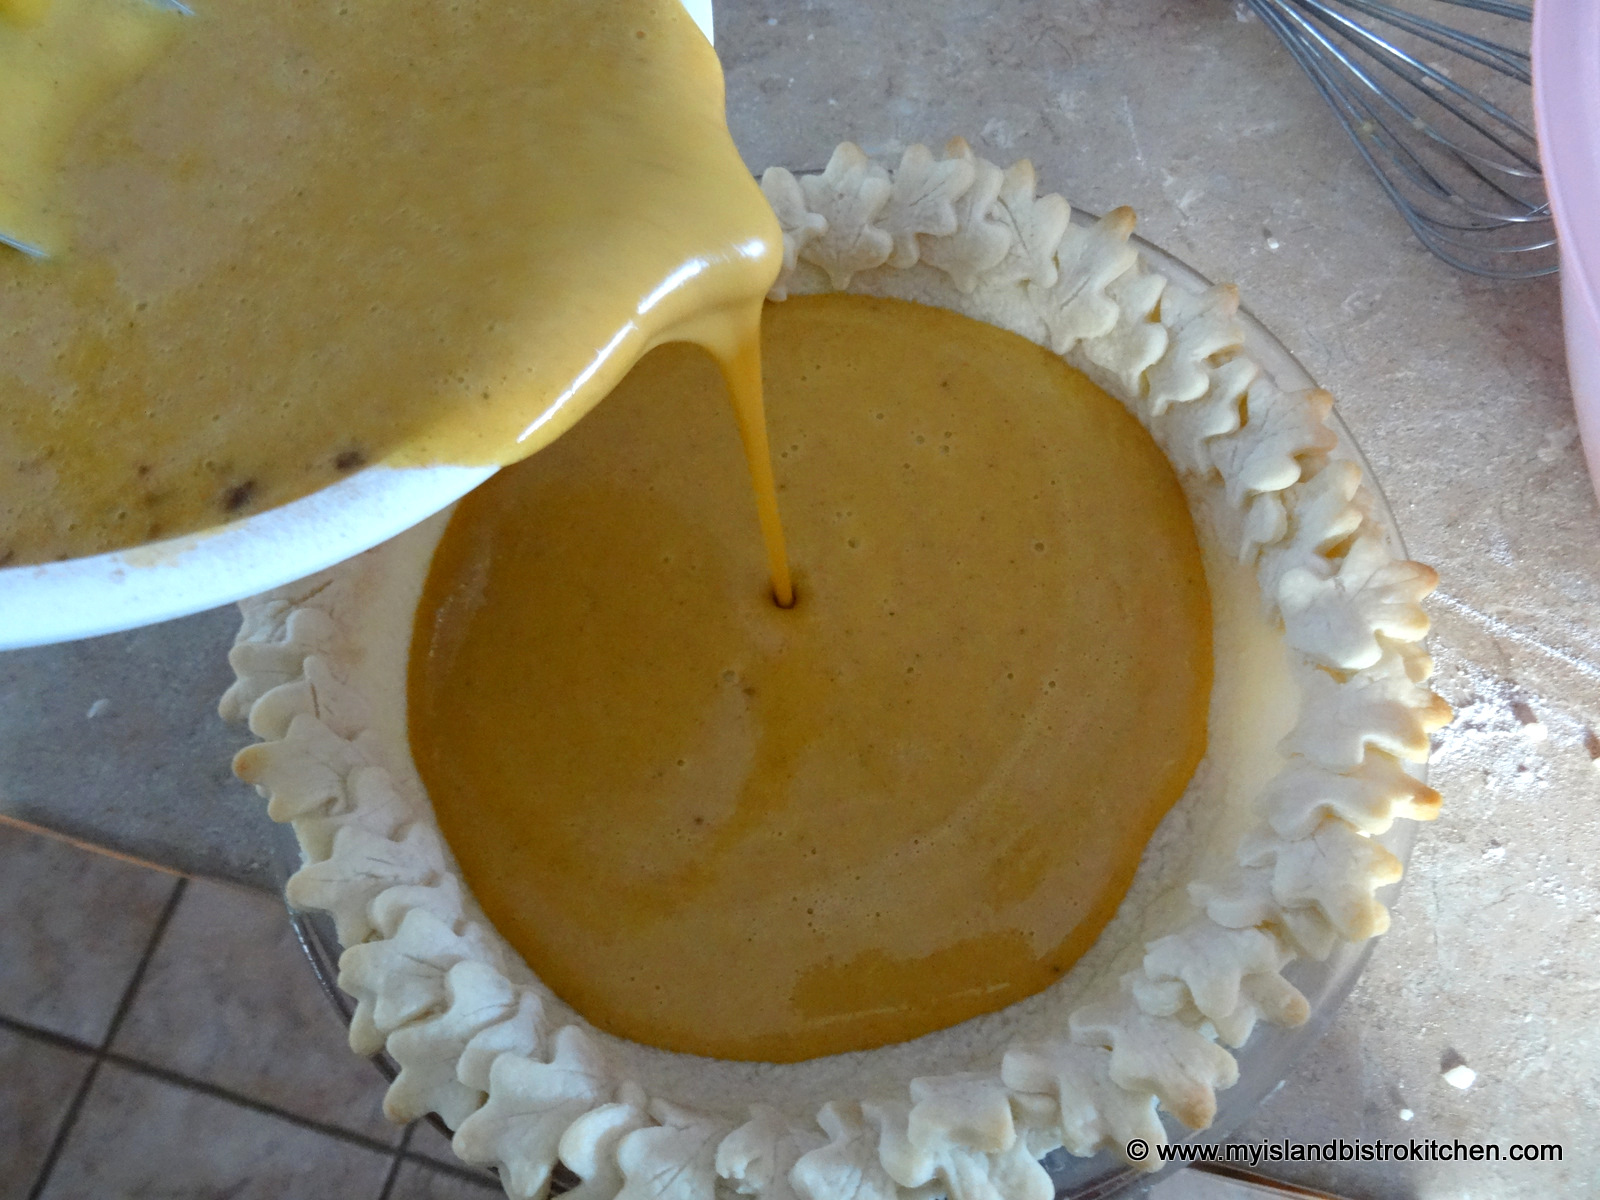
Pour the filling into the prepared pie crust. Although not necessary, I sometimes (but not always) pre-bake the crust for about 10 minutes to set it. If you do this, be sure to use pie weights to ensure the crust does not bubble up, creating air pockets underneath.
I find it useful to place the pie on a rimmed baking sheet for easy transport into the oven. The filling is very liquid at this point and it is very easy to spill it or slosh it up over the sides of the crust edges. In fact, sometimes, I only partially fill the pie, then set it on the oven rack and finish filling it there.
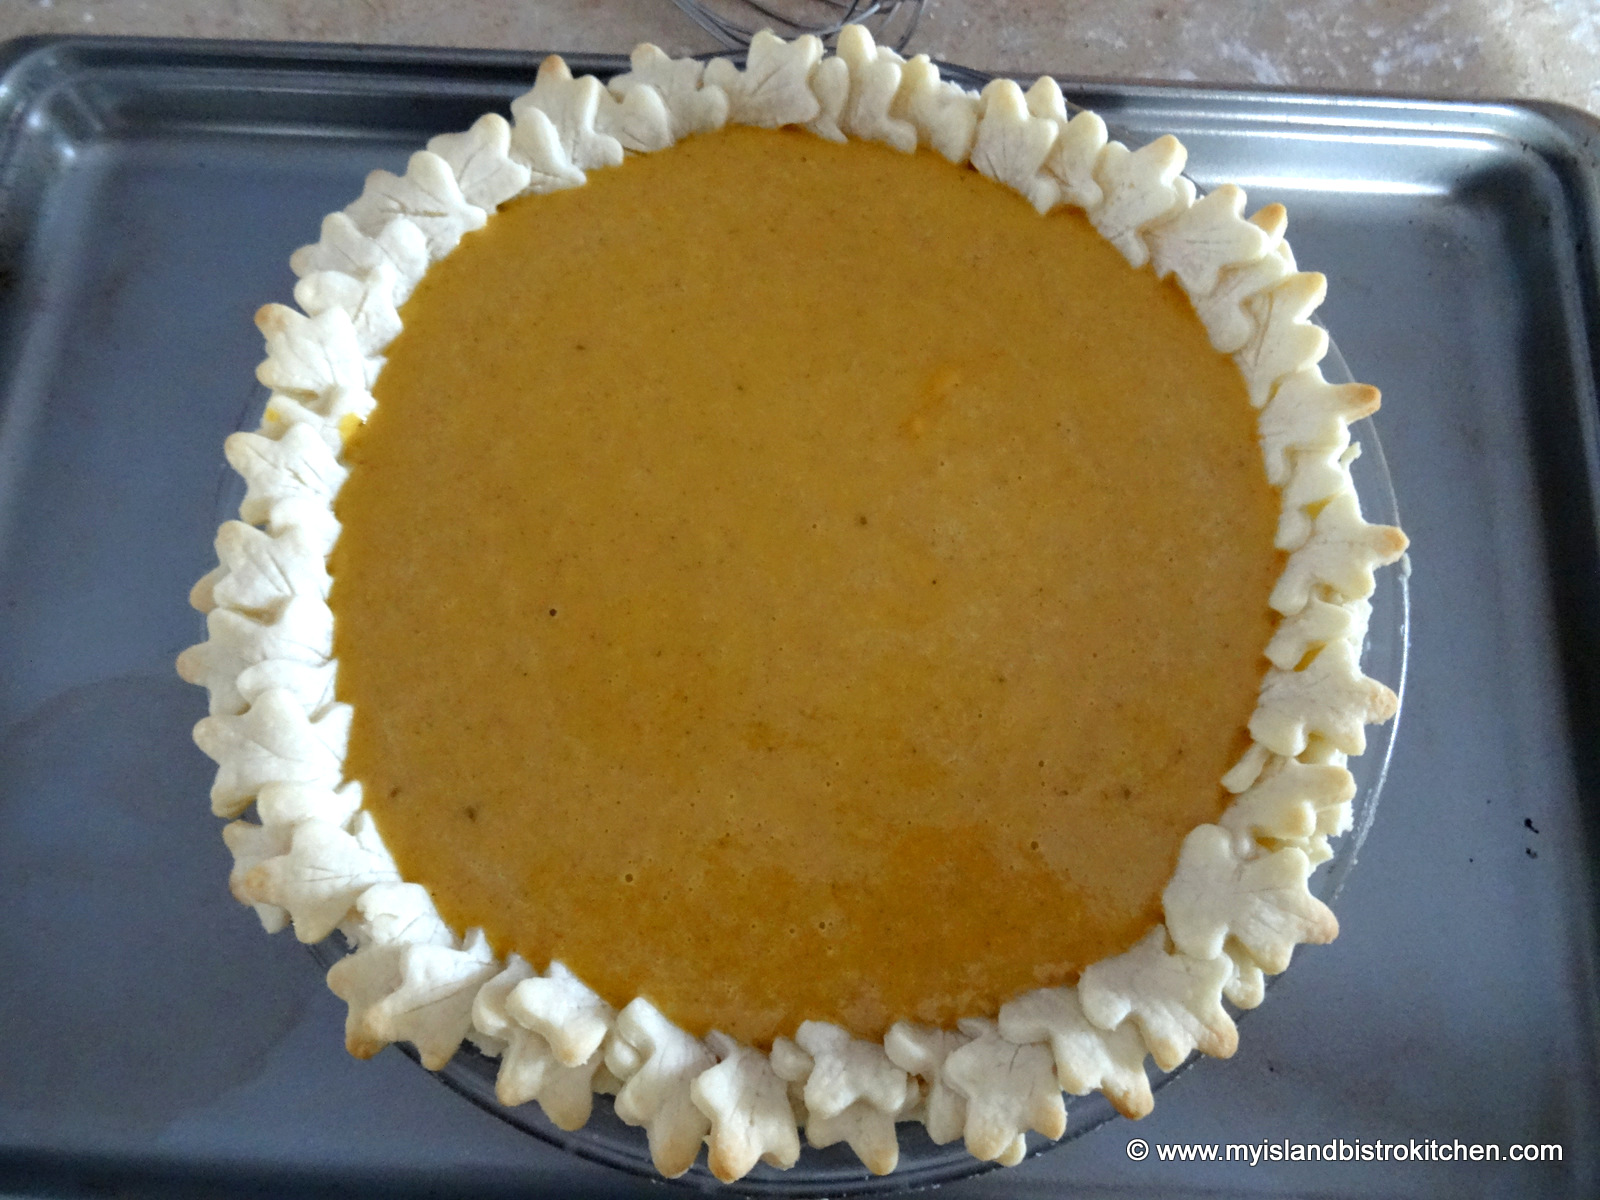
It helps to start baking the pie at 375°F for the first 15 minutes to give it a quick set then lower the temperature to 350°F and bake for another 1¼ hours longer or until a knife, or a toothpick, inserted into the center of the pie comes out clean.
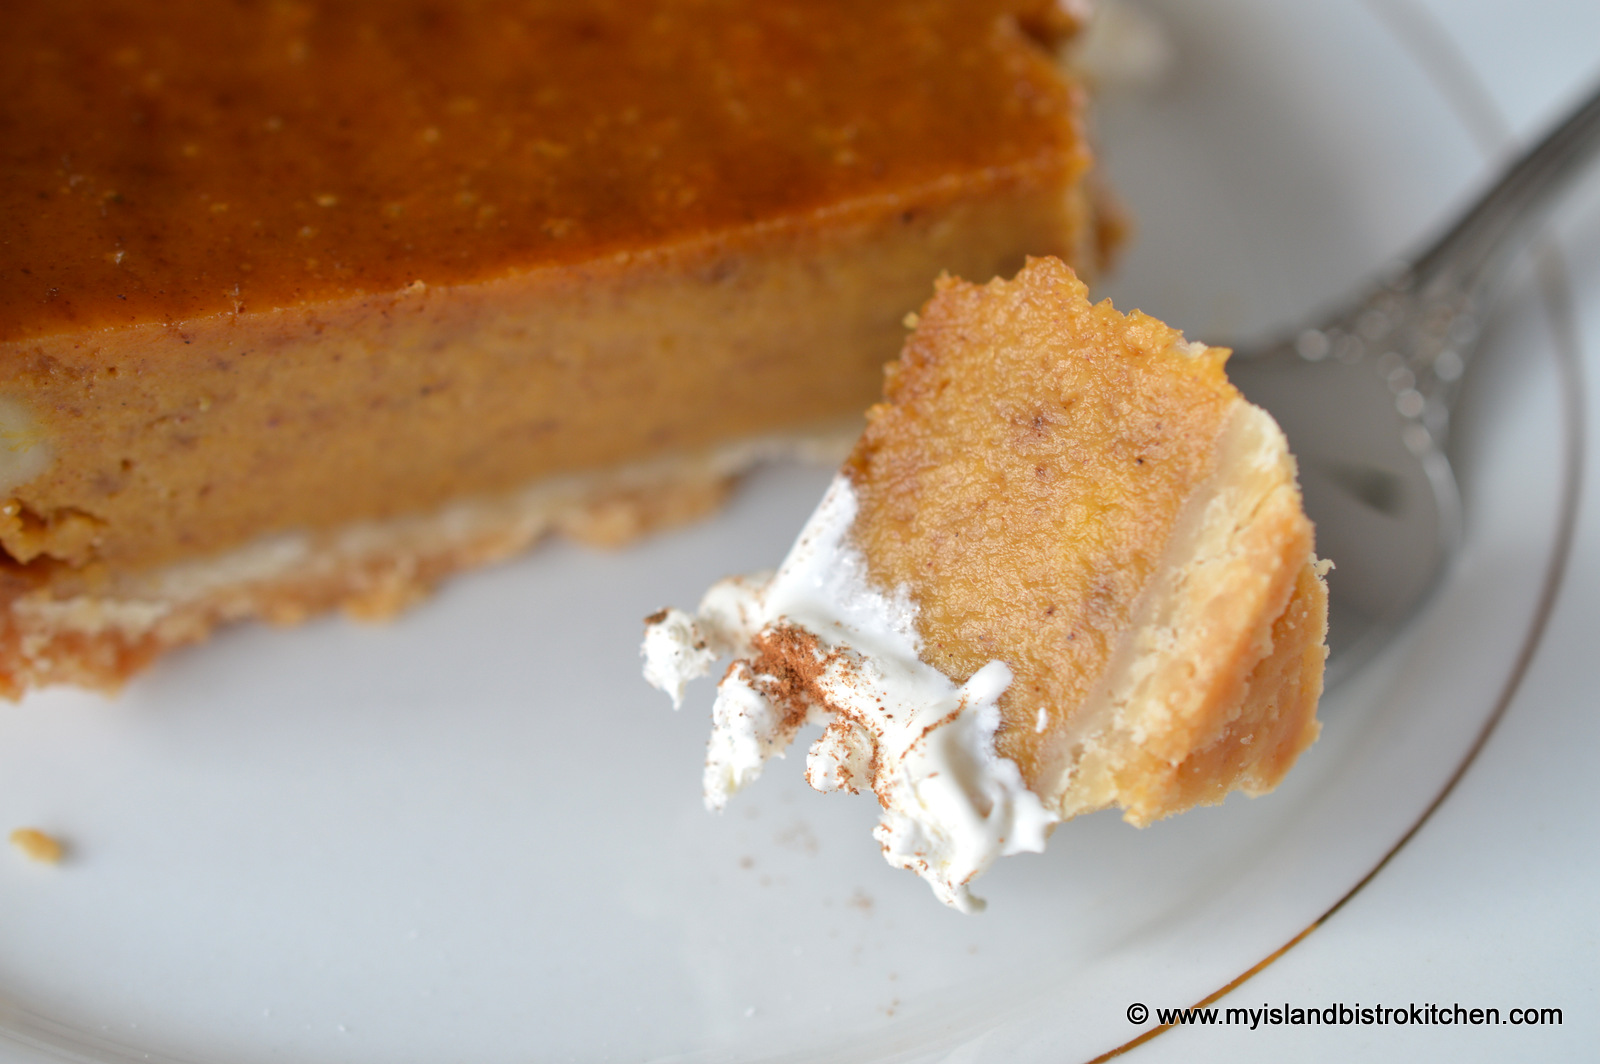
The pie should be thoroughly cooled and allowed to set before cutting.
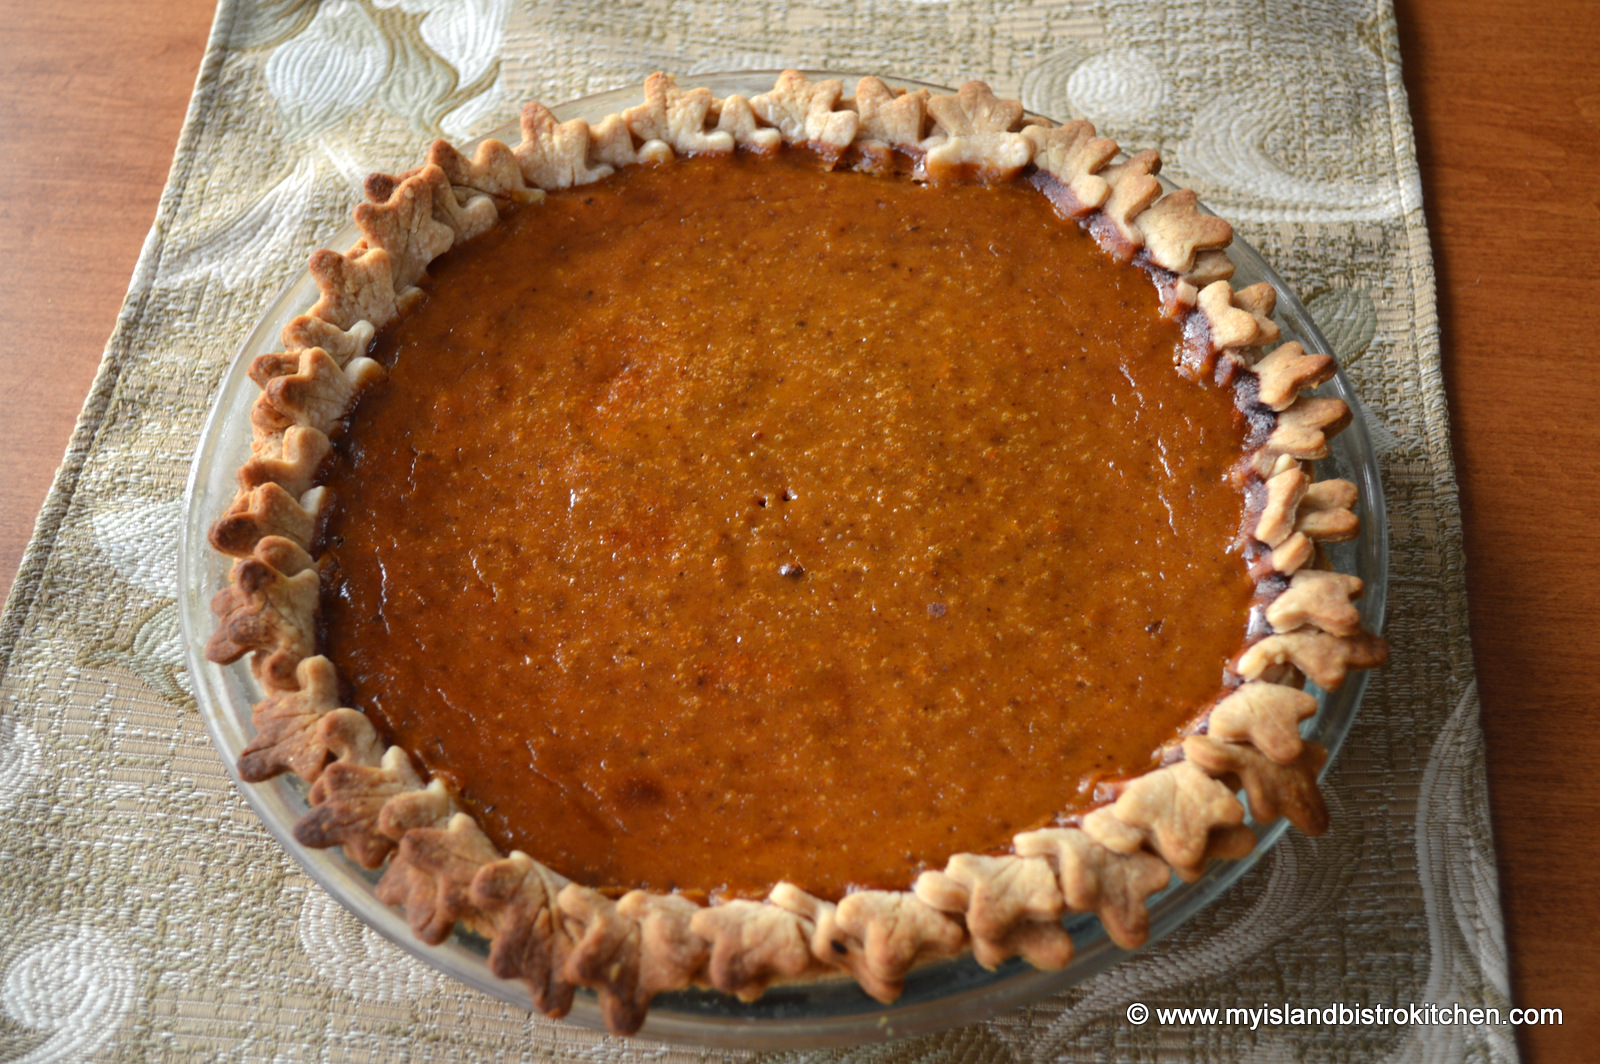
Squash Pie
For tips and hints on making pie pastry and a recipe for pastry, clickhere.
Squash Pie
1½ – 1¾ lb butternut squash
Pastry for deep 10-inch single crust pie
For the pie filling:
2 cups squash purée
2 extra large eggs, slightly beaten
⅔ cup brown sugar, lightly packed
⅓ cup white sugar
¼ tsp salt
1 tsp cinnamon
½ tsp ginger
¼ tsp cloves
¼ tsp mace
⅛ tsp nutmeg
1⅔ cup evaporated milk
To roast the squash:
Preheat oven to 425°F.
Line large rimmed baking sheet with tin foil. Spray with cooking oil.
Cut the squash in half from top to bottom. Remove and discard seeds. Lightly brush olive oil on both sides of squash. Place squash, flesh side down, on baking sheet. Roast for about 30 minutes then remove from oven and carefully flip the squash halves over. Apply a light brushing of olive oil on the flesh side of the squash. Return squash to oven and continue roasting for another 20-30 minutes or until squash is very soft.
To prepare the squash purée:
Line a large colander with cheesecloth. Set aside.
Remove squash from oven. As soon as the squash has just cooled enough to handle, scoop the flesh from the squash and place it in the bowl of a food processor. Purée the squash until it is very smooth.
Transfer the purée to the cheesecloth-lined colander. Let sit for about an hour to allow any excess water to drain from the purée. From time to time, stir the purée and, with a large spoon, press out the moisture from the purée.
To make the pie filling:
Preheat oven to 375°F.
Transfer purée to a medium-sized bowl and add the eggs, sugars, salt, spices, and milk. With a mixer (either a hand or stand mixer), mix ingredients thoroughly. Pour mixture into prepared pie shell. Place on rimmed baking sheet.
Bake pie in lower third of oven at 375°F for 15 minutes then lower temperature to 350°F and continue baking pie for about 1¼ hours longer or until knife or toothpick inserted in center of pie comes out clean.
Let pie cool completely before cutting.
Serve with a dollop of whipped cream and a sprinkle of cinnamon.
Yield:8-10 servings
Squash Pie
If you have made this recipe and enjoyed it and/or wish to share it with your friends and family, please do so on social media but be sure to share the direct link to this posting from my website.
Similar in taste to Pumpkin Pie, this Squash Pie is made with butternut squash and has a lovely deep flavour with spices similar to those used in pumpkin pie.
Course
Dessert
Keyword
pie, squash pie
Servings8
My Island Bistro KitchenBarbara - My Island Bistro Kitchen
Ingredients
1½ - 2lbbutternut squash
Pastry for deep 10-inch single crust pie
For the pie filling:
2cupssquash purée
2extra-large eggs, slightly beaten
⅔cupbrown sugar, lightly packed
⅓cupwhite sugar
¼tspsalt
1tspcinnamon
½tspginger
¼tspcloves
¼tspmace
⅛tspnutmeg
1⅔cupevaporated milk
Instructions
To roast the squash:
Preheat oven to 425°F.
Line large rimmed baking sheet with tin foil. Spray with cooking oil.
Cut the squash in half vertically. Remove and discard seeds. Lightly brush olive oil on both sides of squash. Place squash, flesh side down on baking sheet. Roast for about 30 minutes then remove from oven and carefully flip the squash halves over. Return squash to oven and continue roasting for another 20-30 minutes or until squash is very soft.
To prepare the squash purée:
Line a large colander with damp cheesecloth.
Remove squash from oven. As soon as the squash has cooled enough to handle, scoop the flesh from the squash and place it in the bowl of a food processor. Purée the squash until it is very smooth.
Transfer the purée to the cheesecloth-lined colander. Let sit for about an hour to allow any excess water to drain from the purée. From time to time, stir the purée and, with a large spoon, press out the moisture from the purée.
To make the pie filling:
Preheat oven to 375°F.
Transfer purée to a medium-sized bowl and add the eggs, sugars, salt, spices, and milk. With a mixer (either a hand or stand mixer), mix ingredients thoroughly. Pour mixture into prepared pie shell. Place on rimmed baking sheet.
Bake pie in lower third of oven at 375°F for 15 minutes then lower temperature to 350°F and continue baking pie for about 1¼ hours longer or until knife inserted in center of pie comes out clean.
Let pie cool completely before cutting.
Serve with a dollop of whipped cream and a sprinkle of cinnamon.