Cherry Loaf Recipe

Cherry Loaf
Cherry Loaf

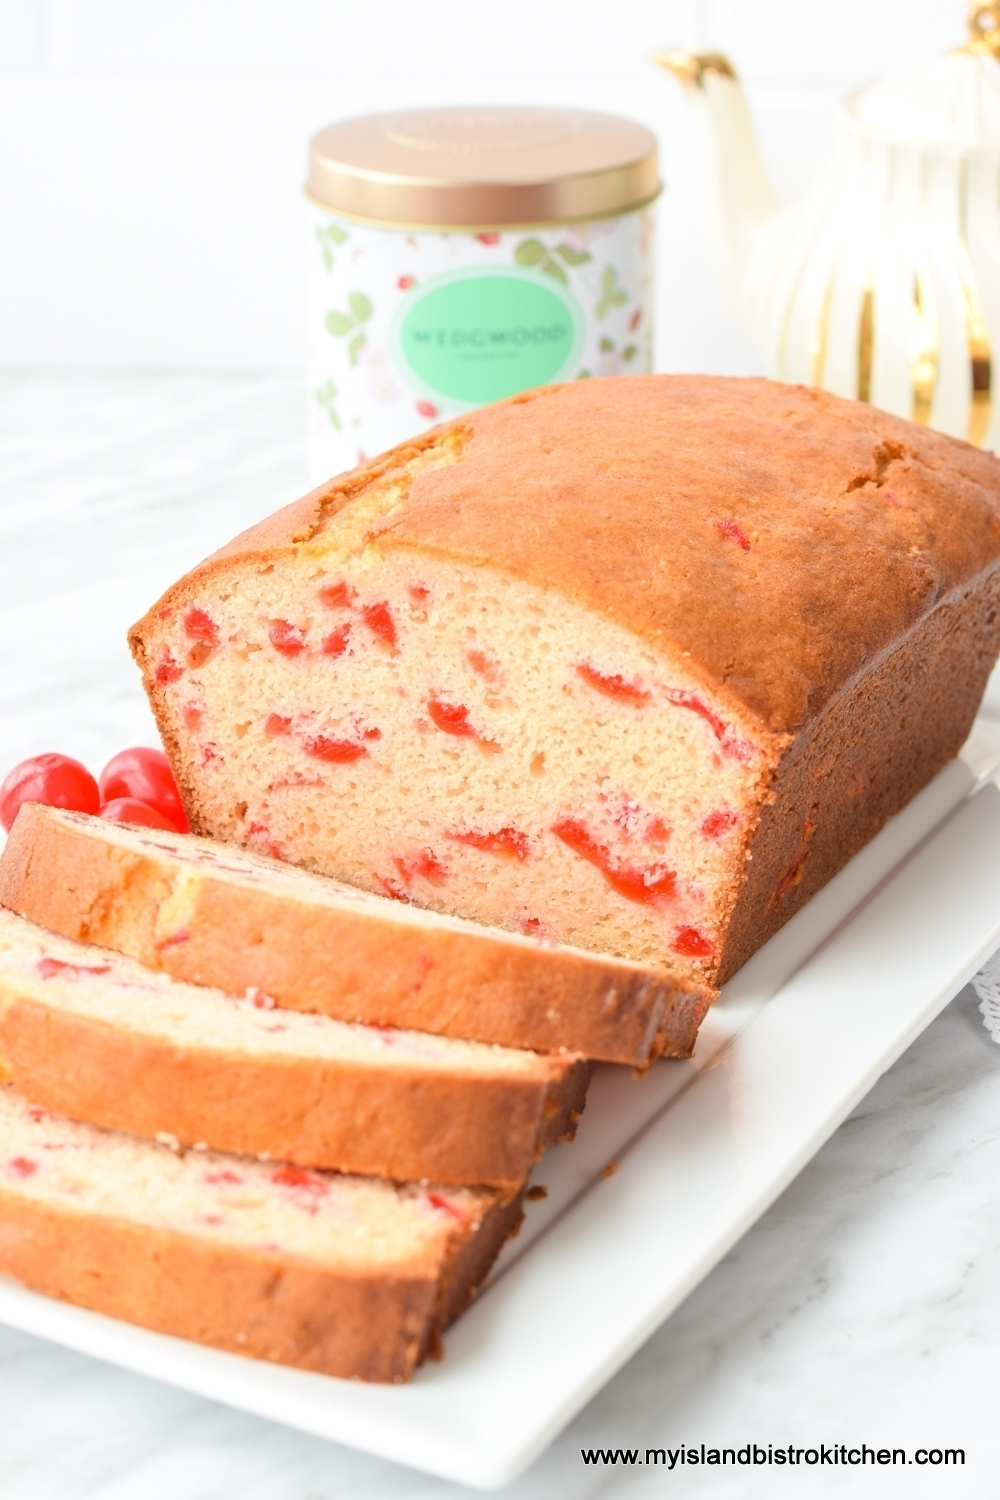
This Cherry Loaf recipe is as pretty as it is tasty, speckled with maraschino cherries that, themselves, lend great flavour to the loaf.

Quick breads, leavened with baking powder, and sometimes soda, are an easy alternative to muffins – but, they’re born of the same family!  They are quick to make (because there is no yeast involved) and are great additions to breakfast, brunch, and coffeebreaks.

There are two methods for making quick breads.

Creaming Method – This method calls for the solid fat product (shortening, butter, or margarine) to be softened at room temperature for 25-30 minutes (not microwaved which can change its properties and can cause it to quickly become liquefied). The fat is then beaten/creamed, either by hand if you are prepared to devote some elbow grease to the process, or by electric mixer on low speed. The sugar is then added and creamed with the fat product until the mixture is a pale or light colour and the texture is airy or fluffy. This “creaming’ process whips air into the batter which allows air pockets (or bubbles) to form (and expand during baking) that, in addition to leavening agents such as baking powder and soda, help the cake or loaf to rise.

The room temperature eggs are then added, one at a time.  Adding the eggs, with this technique, allows them time to, individually and slowly, mix in well with the creamed fat and sugar mixture and limit the possibility of them curdling.  The watery eggs and the fat product don’t naturally mix well, or bind, together (same principle as trying to mix water and oil together).  If all the eggs called for in the recipe are added all at once, they become more than what the fat-sugar mixture can handle at the same time and the ingredients separate and look curdled or scrambled. Adding the eggs slowly allows them to be better incorporated with the fat-sugar mixture.

With the creamed method, the liquid ingredients are combined together in one bowl or measuring cup and the dry ingredients are whisked together in a separate bowl.  The dry ingredients are added to the creamed mixture alternately with the wet ingredients, beginning and ending with the dry ingredients (three additions of dry to two additions of wet ingredients). While the stand mixer should be fitted with the paddle attachment for the creaming method, it’s important not to over-beat the batter once the flour and liquid ingredients have been added because that will cause gluten to form and a loaf with a tough crumb is likely to result. Beat only until all the ingredients are incorporated and the batter is smooth.

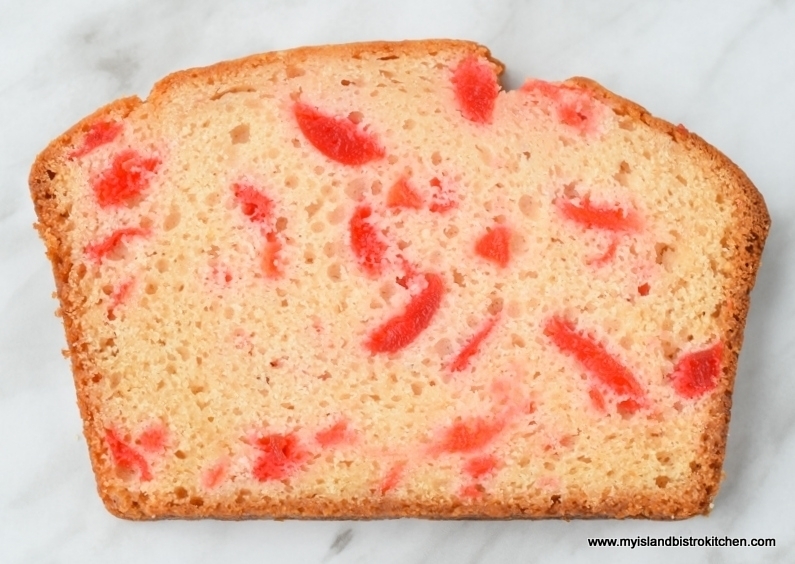
This method will yield a moist texture loaf with a fine crumb (lots of tiny holes of fairly uniform size), reminiscent of a  dense cake texture.
Cherry Loaf
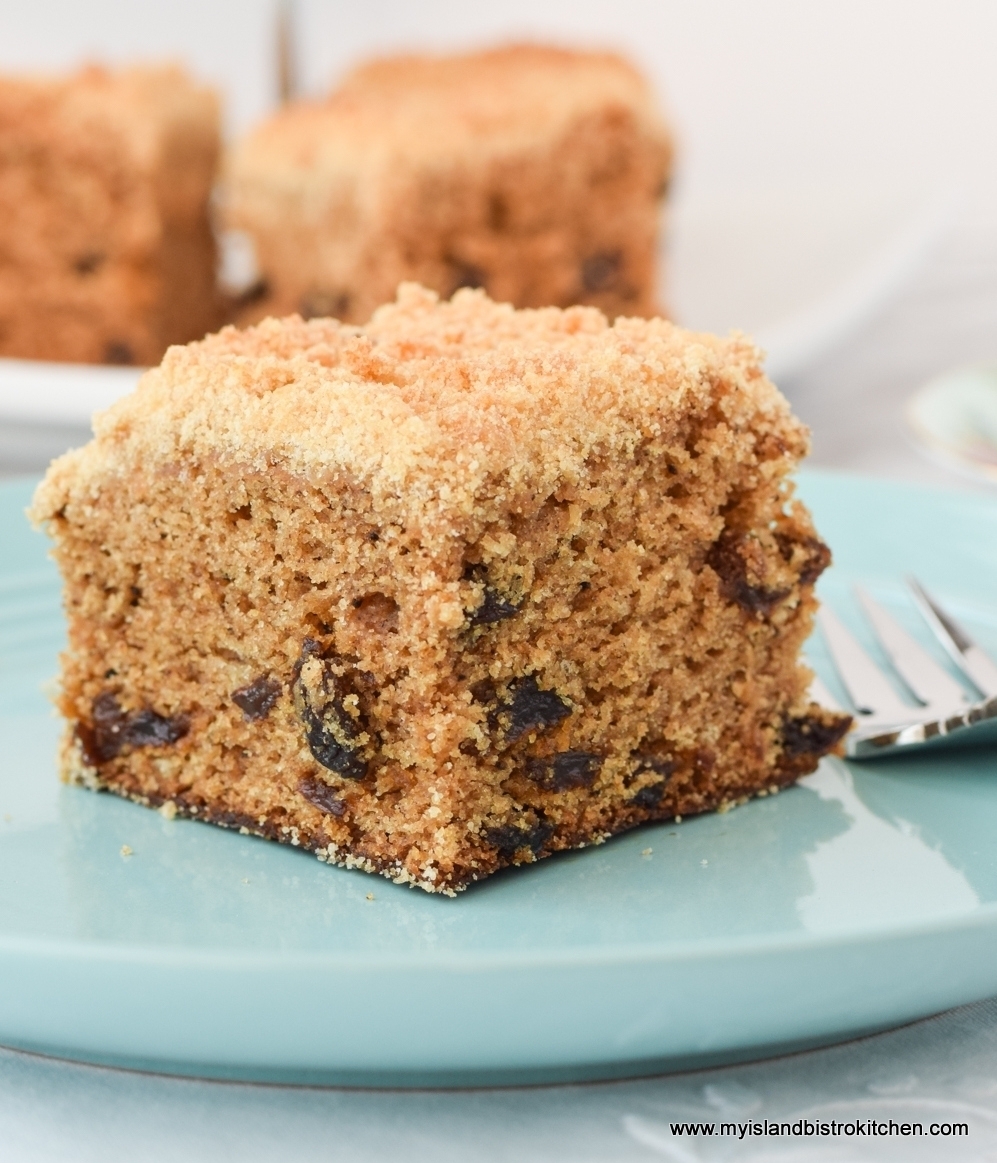
Slice of Cherry Loaf

Muffin Method – This method calls for the dry ingredients to be whisked together well in one bowl.  All the liquid ingredients are mixed in a separate bowl with oil or a fat that has been liquefied (and, often, the sugar is mixed in with the liquid ingredients).  The liquid ingredients are then simply added to the dry ingredients and stirred together just until the ingredients are barely combined.

Because no creaming of butter and sugar is involved in this method, the loaf will not have the added advantage of the air pockets being formed by this process to help the loaf to rise. In this method, the loaf will rely solely on leavening agents (baking powder, soda) to rise. The batter will often be lumpy  which is okay (it will even out on its own during baking) and it’s important not to overmix the batter trying to get it smooth as this will activate the development of gluten that will result in a tough crumb.

For this method, stir the mixture by hand because an electric mixer will overmix the batter. This method will often yield a slightly drier texture (than the creaming method does) with a larger, coarser crumb in the loaf, closely resembling the texture of muffins, hence the name “muffin method”.

The muffin method is commonly used to mix up waffles and pancakes as well.
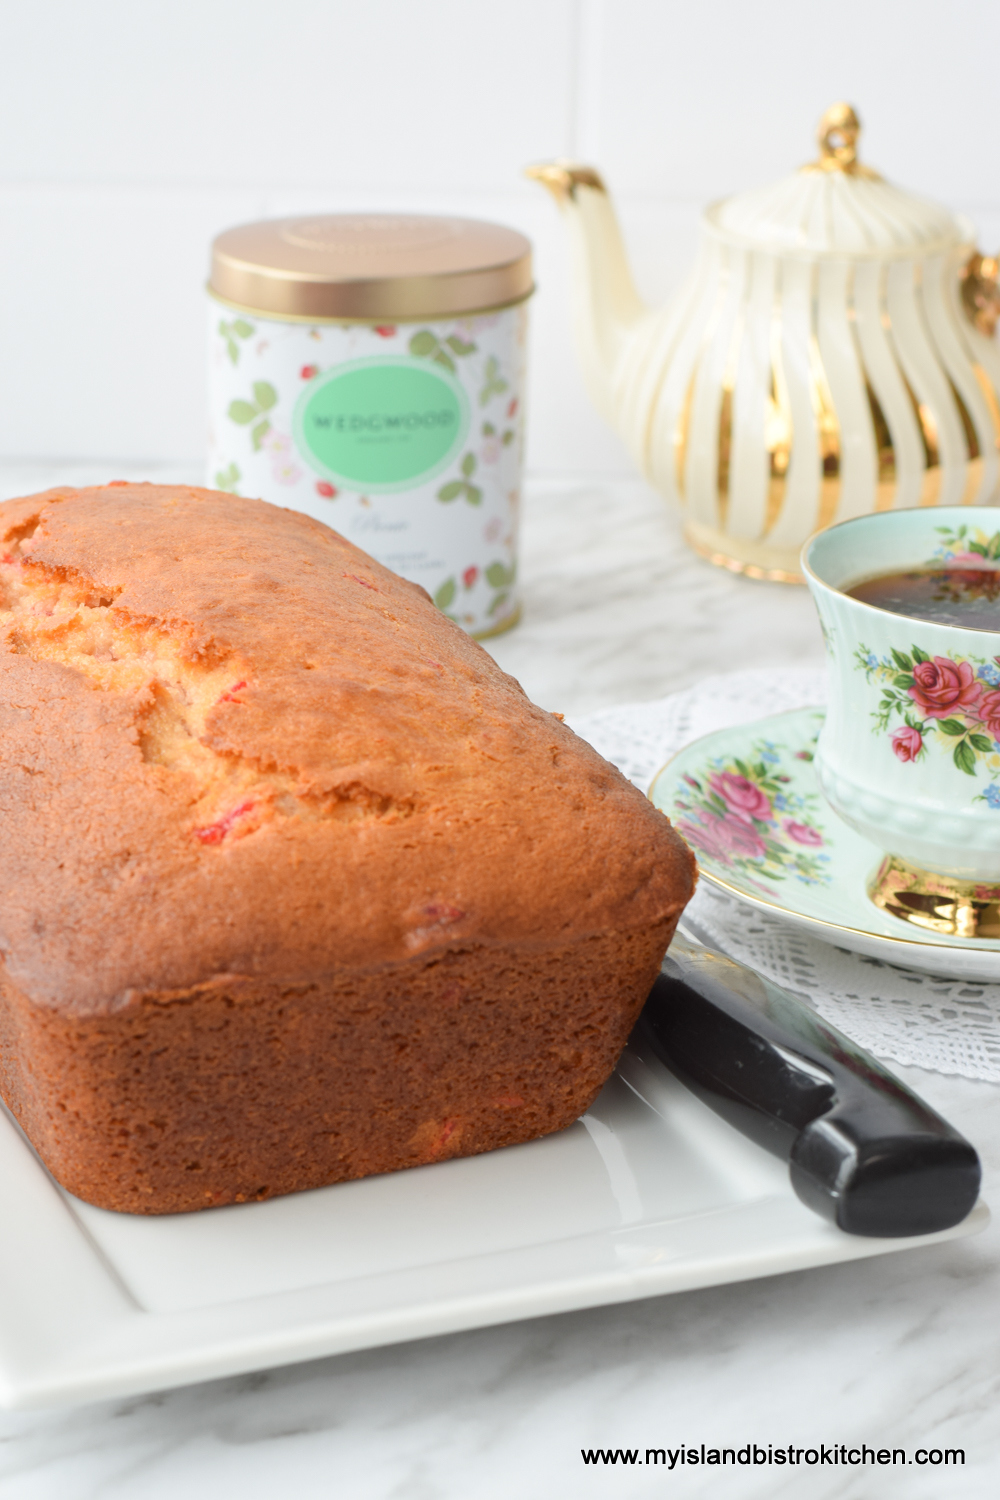
Cherry Loaf
Cherry Loaf

My recipe for Cherry Loaf uses the creamed method because I want a delicate, refined texture in this particular loaf.
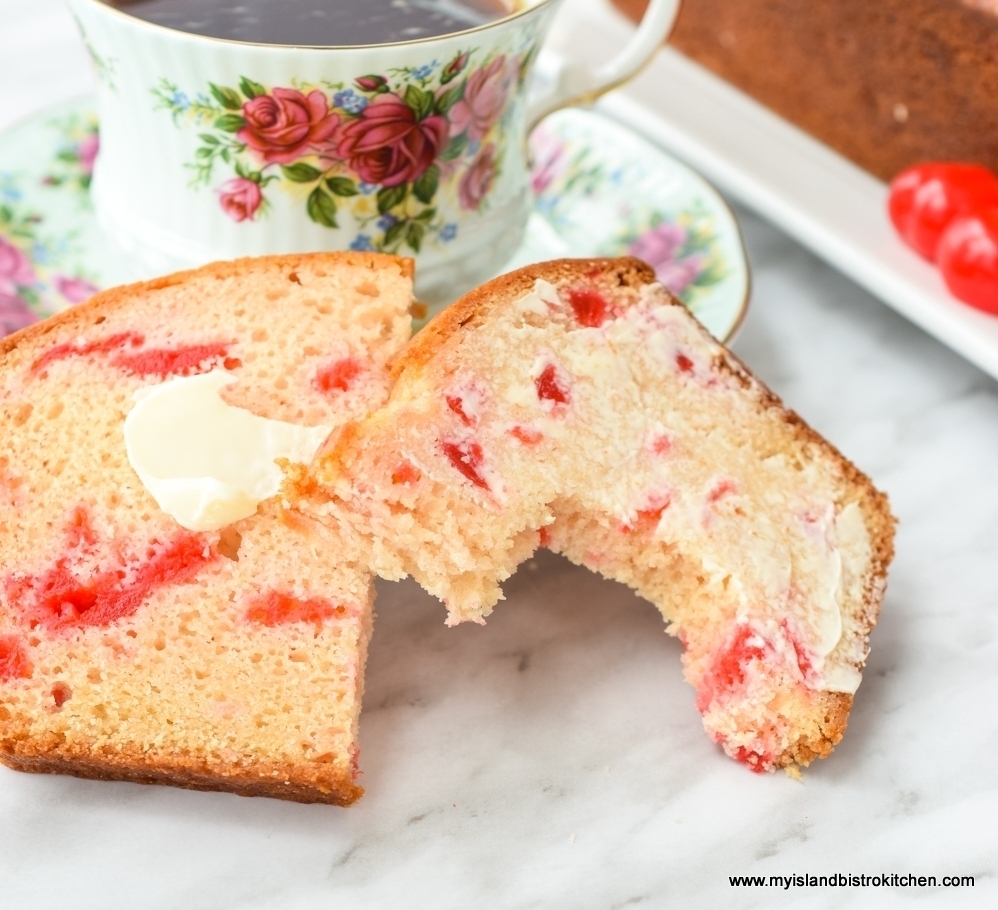
Cherry Loaf
Cherry Loaf

All ingredients should be at room temperature for about 25-30 minutes before mixing the batter.  The ingredients blend better if they are at room temperature. If you think of nice soft butter or shortening being hit with cold eggs or milk, it’s obvious that the ingredients will simply clump together rather than blend in well. The result will be a loaf that does not have the best texture possible.

There is a choice of fat product in this loaf – either shortening, butter, or margarine will yield a good loaf.  Butter, however, will obviously give the most flavor 😉

This loaf calls for maraschino cherries.  These are the best option for this loaf because they are soft and beautifully bright colored.  Dried cherries are too chewy and coarse and will not create the lovely red-dotted speckles throughout the loaf.  Maraschino cherries, however, are wet and if they are not blotted dry, they will add too much excess moisture to the loaf.  I recommend blotting the cherries with a paper towel, cutting them, and blotting them again.  The idea is not to dry them out but, rather, to remove the excess moisture.
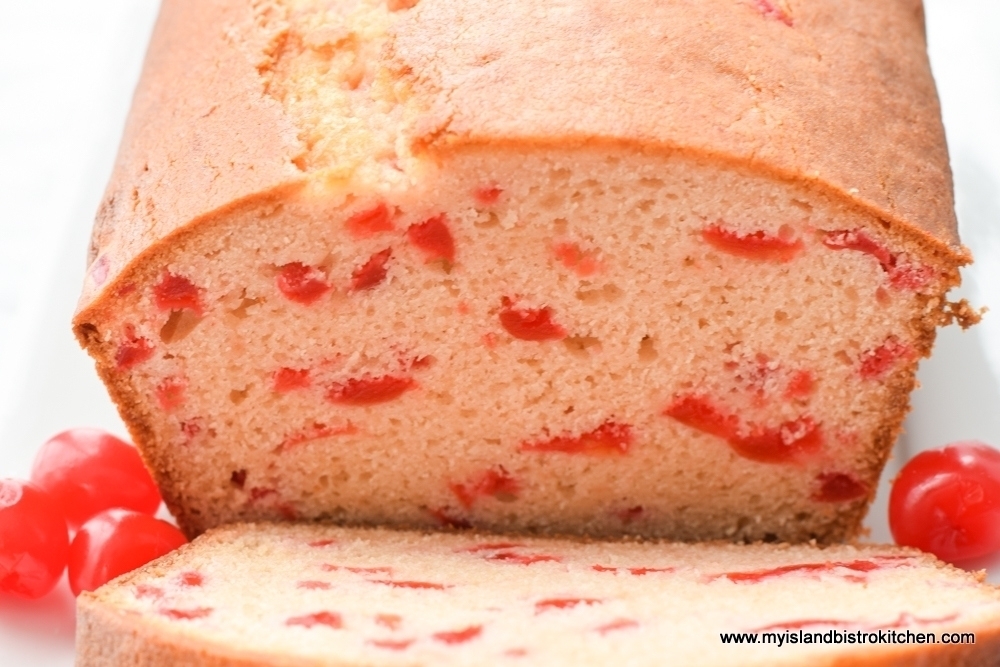
Cherry Loaf
Cherry Loaf

[Printable recipe follows at end of posting]

Cherry Loaf

Ingredients:

1/3 cup shortening, butter, or margarine
¾ cup granulated sugar
¼ cup brown sugar, lightly packed
2 large eggs, room temperature

2/3 cup milk, room temperature
1½ tbsp orange juice, room temperature
2½ tbsp maraschino cherry juice, room temperature
1 tsp vanilla
¼ tsp almond flavouring

2¼ cups all-purpose flour
2 tsp baking powder
¼ tsp baking soda
¼ tsp salt
¾ cup maraschino cherries, well-drained, blotted dry, and coarsely chopped

Method:

Bring shortening, butter, or margarine, eggs, milk, and orange and maraschino cherry juices to room temperature approximately 25-30 minutes before preparing batter.

Remove cherries from their juice and, using paper towel, blot them dry.  Cut up cherries and blot again on paper towel to remove the excess moisture. Set aside.

Preheat oven to 350°F.  Grease 9”x5”x3” loaf pan.

In 1-cup measuring cup, or small bowl, combine the milk, orange juice, cherry juice, vanilla, and almond flavouring. Stir to mix.

In medium-sized bowl, combine the flour, baking powder, baking soda, and salt. Whisk together well.

In bowl of stand mixer fitted with paddle attachment and on low speed, cream the shortening, butter, or margarine well.  Gradually add the granulated sugar, then the brown sugar.  Increase mixer speed to medium and beat until ingredients are pale-colored and mixture has an airy/fluffy texture. Stop mixer, as necessary, to scrape bowl with rubber spatula to ensure the ingredients are evenly incorporated.

Add the eggs, one at a time, beating well after each addition and using the spatula, as necessary, to scrape sides of bowl.

Add the flour mixture alternately with the milk mixture, starting and ending with the dry ingredients (three additions of dry ingredients with two additions of wet ingredients).  Periodically scrape sides of bowl with spatula to ensure all ingredients are combined. Do not overmix.

Remove bowl from mixer stand and stir in the cherries by hand, just until they are blended in.

Transfer batter to prepared pan and, using a knife, smooth the top of the loaf.  Bake for approximately 1 hour or until cake tester inserted into center of loaf comes out clean. If loaf starts to brown, it may be loosely tented with tin foil after about 45 minutes of baking; ensure loaf top is completely set before allowing the tin foil to touch it as it will peel off the top of the loaf. Let loaf rest in pan for 10 minutes then turn out on to wire rack to cool completely before cutting.

Yield:  One loaf, 14 slices (sliced approximately ½” thick)

Notes:  Loaf is best made the day before it is needed.  Let cool completely on wire rack then place in airtight plastic bag and store in refrigerator overnight to allow the flavours time to blend and the loaf to soften.  Loaf freezes well.

Cherry Loaf

This flavourful cherry loaf is an easy-to-make moist quick bread that is speckled with colorful maraschino cherries

Course Snack
Cuisine American
Servings 14
My Island Bistro Kitchen My Island Bistro Kitchen

Ingredients

  • 1/3 cup shortening, butter, or margarine
  • 3/4 cup granulated sugar
  • 1/4 cup brown sugar, lightly packed
  • 2 large eggs, room temperature
  • 2/3 cup milk, room temperature
  • 1 1/2 tbsp orange juice, room temperature
  • 2 1/2 tbsp maraschino cherry juice, room temperature
  • 1 tsp vanilla
  • 1/4 tsp almond flavouring
  • 2 1/4 cups all-purpose flour
  • 2 tsp baking powder
  • 1/4 tsp baking soda
  • 1/4 tsp salt
  • 3/4 cup maraschino cherries, well-drained, blotted dry, and coarsely chopped

Instructions

  1. Bring shortening, butter, or margarine, eggs, milk, and orange and maraschino cherry juices to room temperature approximately 25-30 minutes before preparing batter.
  2. Remove cherries from their juice and, using paper towel, blot them dry. Cut up cherries and blot again on paper towel to remove the excess moisture. Set aside.
  3. Preheat oven to 350°F. Grease 9”x5”x3” loaf pan.
  4. In 1-cup measuring cup, or small bowl, combine the milk, orange juice, cherry juice, vanilla, and almond flavouring. Stir to mix.
  5. In medium-sized bowl, combine the flour, baking powder, baking soda, and salt. Whisk together well.
  6. In bowl of stand mixer fitted with paddle attachment and on low speed, cream the shortening, butter, or margarine well. Gradually add the granulated sugar, then the brown sugar. Increase mixer speed to medium and beat until ingredients are pale-colored and mixture has an airy/fluffy texture. Stop mixer, as necessary, to scrape bowl with rubber spatula to ensure the ingredients are evenly incorporated.
  7. Add the eggs, one at a time, beating well after each addition and using the spatula, as necessary, to scrape sides of bowl.
  8. Add the flour mixture alternately with the milk mixture, starting and ending with the dry ingredients (three additions of dry ingredients with two additions of wet ingredients). Periodically scrape sides of bowl with spatula to ensure all ingredients are combined. Do not overmix.
  9. Remove bowl from mixer stand and stir in the cherries by hand, just until they are blended in.
  10. Transfer batter to prepared pan and, using a knife, smooth the top of the loaf. Bake for approximately 1 hour or until cake tester inserted into center of loaf comes out clean. If loaf starts to brown, it may be loosely tented with tin foil after about 45 minutes of baking; ensure loaf top is completely set before allowing the tin foil to touch it as it will peel off the top of the loaf. Let loaf rest in pan for 10 minutes then turn out on to wire rack to cool completely before cutting.

Recipe Notes

Notes: Loaf is best made the day before it is needed. Let cool completely on wire rack then place in airtight plastic bag and store in refrigerator overnight to allow the flavours time to blend and the loaf to soften. Loaf freezes well.


[Copyright My Island Bistro Kitchen]

For other quick bread recipes from My Island Bistro Kitchen, click on the links below:

Classic Banana Bread
Orange Date and Spice Loaf
Cranberry Orange Eggnog Loaf
Blueberry Quick Bread
Green Tomato Quick Bread
Strawberry Rhubarb Quick Bread
Cinnamon Sweet Bread
Glazed Lemon Pecan Sweet Bread

If you have made this recipe and enjoyed it and/or wish to share it with your friends and family, please do so on social media but be sure to share the direct link to this posting from my website.

Connect with My Island Bistro Kitchen on Social Media

Join the Facebook page for My Island Bistro Kitchen:  https://www.facebook.com/MyIslandBistroKitchen/

Follow “the Bistro” on “X” (formerly Twitter)https://twitter.com/PEIBistro/

See the drool-worthy gallery of mouth-watering food photos from My Island Bistro Kitchen on Instagramhttps://www.instagram.com/peibistro/

Follow “the Bistro” on Pinterest at https://www.pinterest.ca/peibistro/ and pin the Pinterest-ready photo found at the end of this post to your favorite Pinterest boards.

Pin Me To Pinterest!
Cherry Loaf
Cherry Loaf


Aw, Shucks! The Merroir of PEI Malpeque Oysters

PEI Malpeque Oysters

Prince Edward Island is well-known for its variety of high quality shellfish – think lobster, mussels, and oysters, in particular.  Today, however, my blog posting is all about the world-famous PEI Malpeque oysters. According to the PEI Government website (https://www.princeedwardisland.ca/en/information/agriculture-and-fisheries/oysters ), the Island is Canada’s second largest oyster producing province and is the largest oyster producing province in the Atlantic region. It’s not uncommon in my travels to find PEI Malpeque Oysters on a restaurant menu.  No matter the variety or brand of oysters from PEI, or what part of the Island they are fished or farmed, they are generally all referred to as “Malpeques”.  How that came to be is, itself, an interesting story.

PEI oysters have a long history with the government issuing leases for oyster fishing back as far as the mid-1800s to those wishing to fish oysters from the ocean seabed.  The oysters were made famous at the 1900 Paris World Fair where, in an oyster-tasting contest, they were crowned the world’s best oysters. The oysters were simply named for Malpeque Bay on the Island’s north shore from where the winning oysters were fished.

However, the oyster industry on PEI was stricken in 1915 when disease wiped out about 90% of the Island’s oyster population. Miraculously, however, the oysters in Malpeque Bay survived.  Seed (which is basically a tiny version of an adult oyster) from these oysters was gathered and spread throughout other bodies of water around the Island and the oyster industry rebounded. To this day, over 100 years later, all oysters produced on PEI are considered to be direct descendants of oysters from Malpeque Bay. So, that’s why all PEI oysters, regardless from what part of the Island they come, or what variety or brand they are, are called “Malpeques”.  Who knew PEI oysters had lineage and a family tree! So, while there is one species – the Malpeques – there can be any number of varieties and brands. A little more about the varieties of “Malpeques” a bit later.

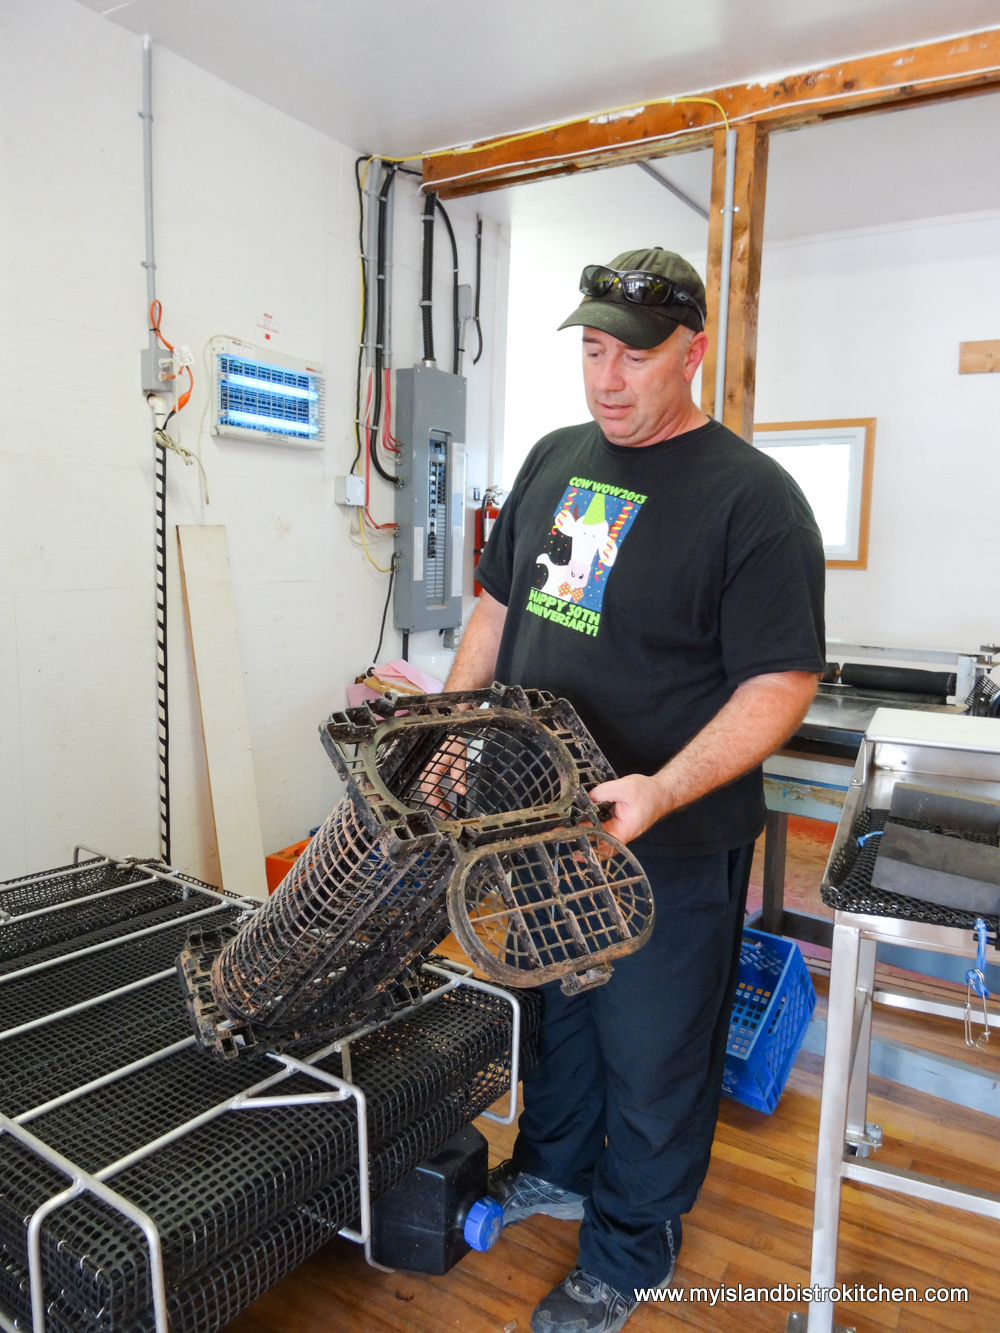
To find out more about the oyster industry on PEI, I paid a visit to the Raspberry Point Oyster Co., one of the Island’s largest oyster growing operators, processors, and exporters.  At the company’s hub operations center in Bayview near Cavendish on PEI’s north shore, I caught up with James Power, oyster connoisseur and manager of the Raspberry Point Oyster Co.

James Power, Manager, Raspberry Point Oyster Co., PEI

James lives and breathes oysters and you would be hard pressed to find anyone any more passionate about the oyster industry than James.  And, with good reason.  Oyster sales are brisk for the Raspberry Point Oyster Co., growing year over year.  James tells me that more than 10M oysters are cultured annually from the company’s farming operations in New London Bay, Rustico, and Oyster Bed Bridge/Rustico Bay. While the majority (about 90%) of their sales are in North America (with Montreal, Toronto, and Boston accounting for about 75% of sales), they regularly ship internationally all over the world that includes weekly shipments to the Netherlands as well as regular shipments to places like Belgium, France, Hong Kong, China, and Singapore. Small wonder, then, why it’s generally not too surprising to find PEI oysters on restaurant menus in all corners of the world!

Both oyster fishing and oyster farming exist on PEI.  The traditional method of oyster fishing is done through the use of manually-operated large wooden tongs.

Oyster Fishing on PEI

If you travel around the shores, bays, rivers, and estuaries of PEI, a common sight from spring to fall will be dozens of little dories each manned by a lone fisher using long wooden tongs with rakes at the ends to scoop up the oysters. These are independent local oyster fishers who buy licenses from the federal government allowing them to fish wild oysters on any public fishing grounds.

Oyster Fishing
Oyster Fishing

These oysters are known as bottom culture oysters that are slow to mature taking, on average, 5-7 years to grow to the desired market size of 3” – 3½“.  Bottom culture oysters grow slowly because there is less natural food available to them. Oysters harvested by these small independent fishers are sold to oyster processing plants.

Oyster Fishing in Summerside, PEI

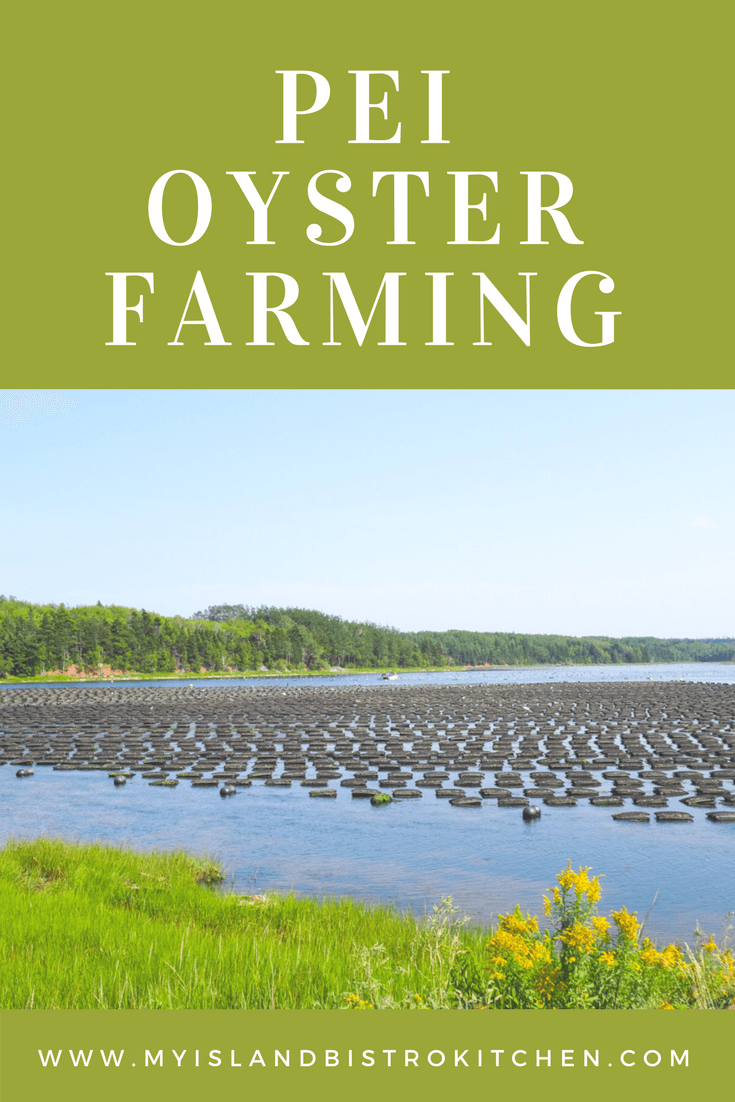
The other method of producing oysters is to raise, culture, or grow the oysters, a practice commonly known as “oyster farming” and that’s the method used by large commercial growers for mass production needed to meet demands from around the world. Growers lease ground, that is not public fishing ground, in which to grow their oysters.

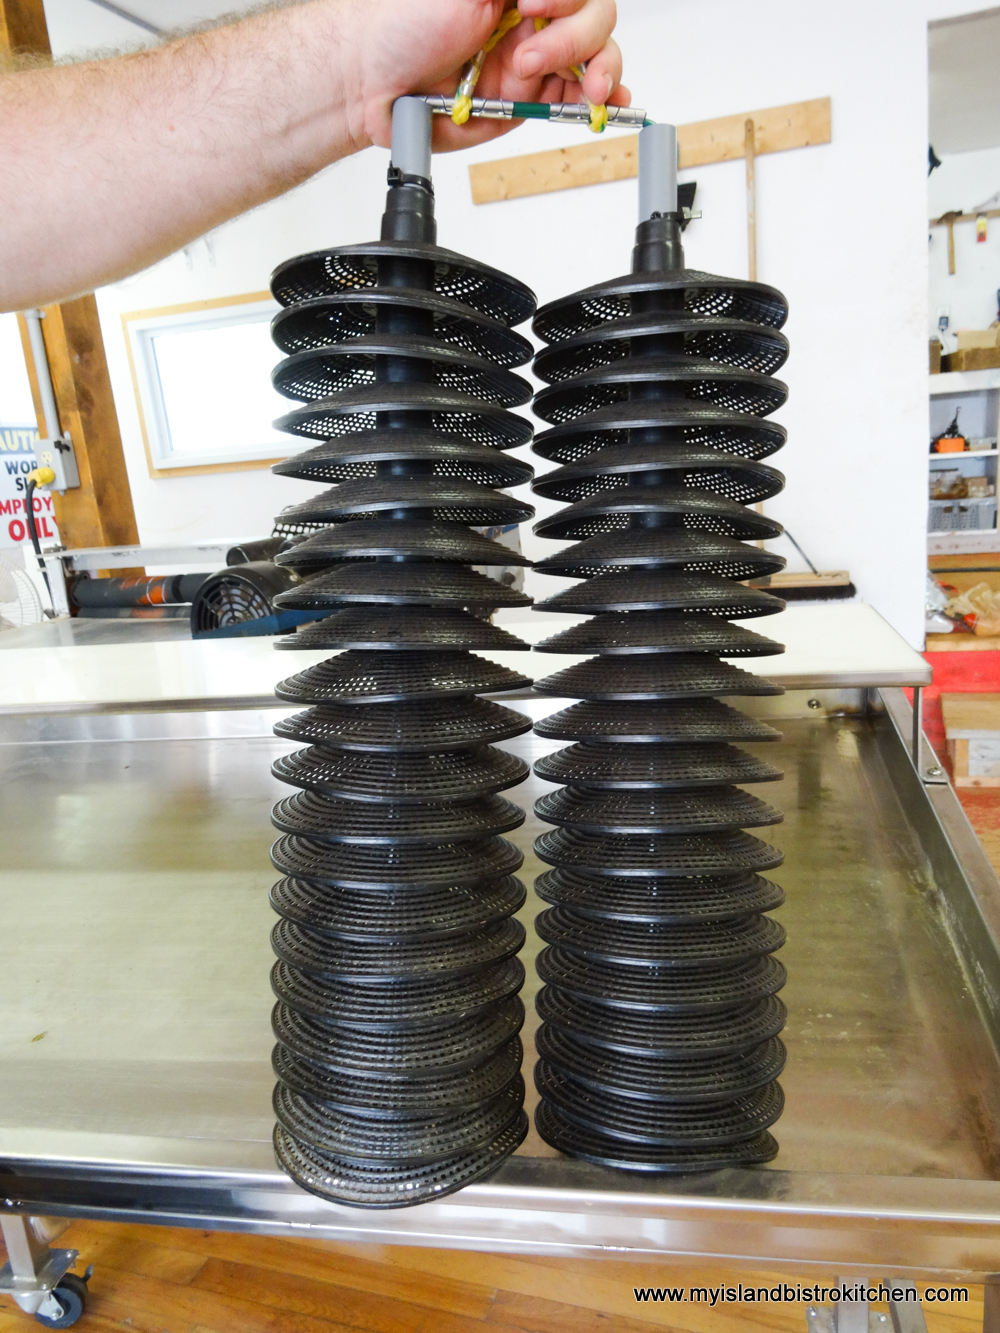
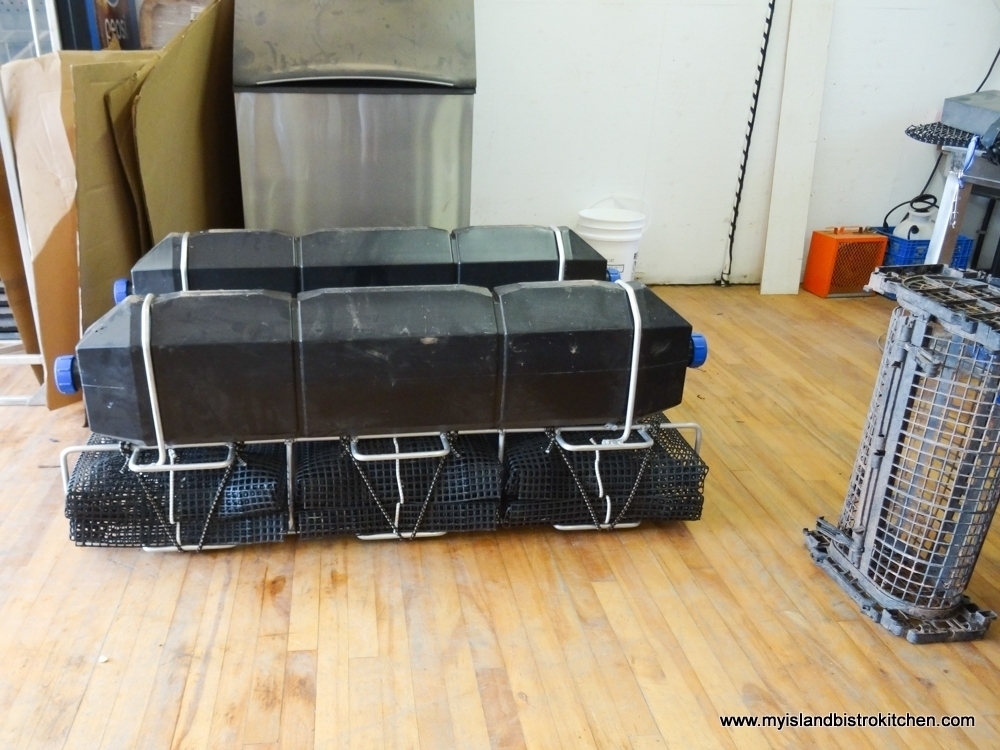
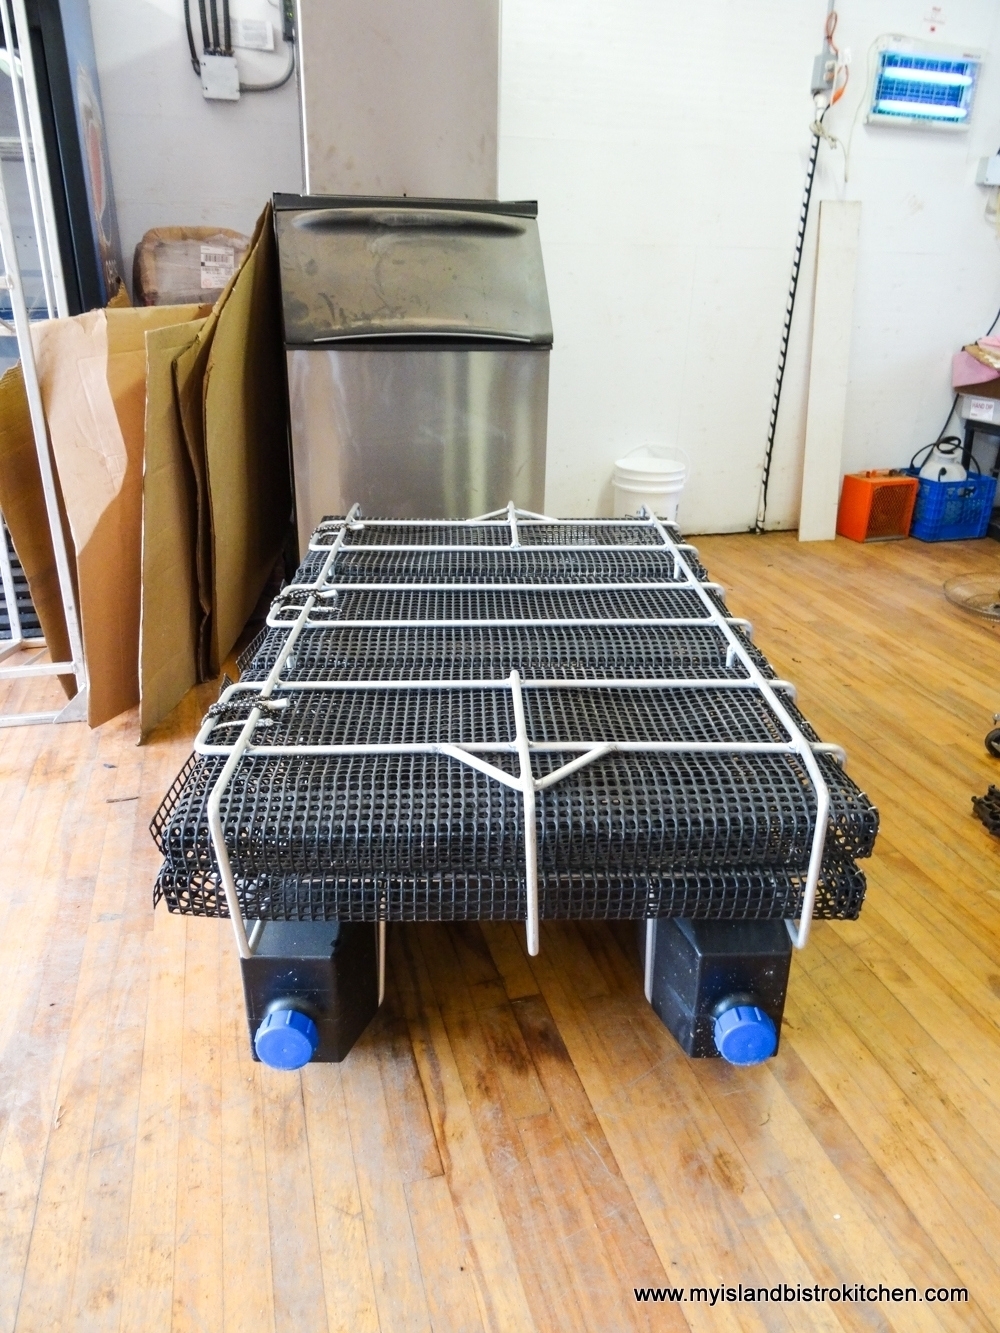
There are two methods of oyster aquaculture – bottom culture and off-bottom (sometimes known as top, floating, or surface culture) and Raspberry Point Oyster Co. uses both methods. With bottom culture oysters, grown in water depth between 3’ and 8’, the grower spreads the oyster seed on the seabed. James says their top culture oysters are grown in water that is between 8’ and 15’ deep.  The oyster seed is purchased from hatcheries and from oyster farmers who catch wild spat, or larvae in collectors like the ones in the photo below. Once the oysters are big enough, they will be transferred to netted bags to grow, safe from predators like starfish and crabs.

Oyster Spat Collectors

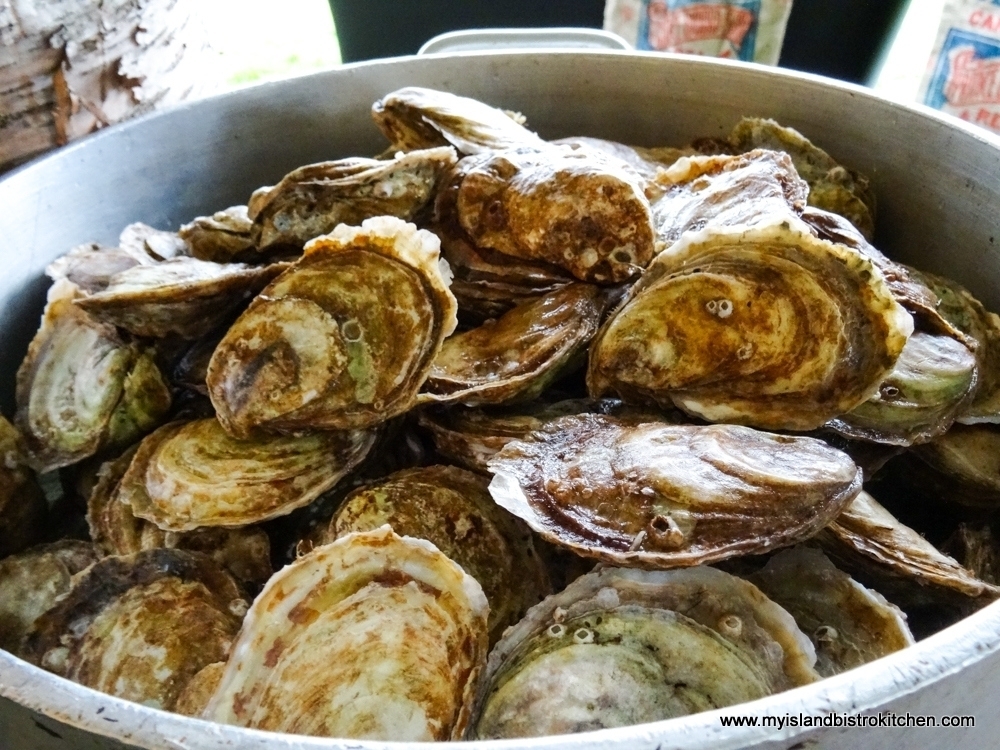
All oysters at Raspberry Point Oyster Co. are started as top culture in floating mesh bags and then some are moved to bottom culture areas. The type of culture (bottom or top) used is often chosen on the basis of local growing conditions. Some parts of leased areas are too shallow for top culture and others might have too soft a seabed for bottom culture oysters. Using the two methods of farming, therefore, allows the Raspberry Point Oyster Co. to maximize the growing areas in their leases and also allows oysters to develop with different flavours, colors (they range from brown/white, gray to green), and appearance. Generally, the larger oyster seed is spread on the seabed because the oysters’ advanced size makes it more difficult for crabs and starfish to get at them.

Colors and Textures of PEI Oysters
Colors, Shapes, and Textures of PEI Oysters

When the bottom culture oysters have grown to market size, specialized oyster harvesters that use water pressure, scoop up the oysters.  The oysters come up from the seabed on to an escalator and those that are of the desired size are harvested while ones not quite of sufficient size are returned to the seabed bottom to allow them to continue to grow.  Bottom culture oysters usually take 5-7 years to grow to market size and this is because there is usually less water flow and food on the sea bed than is available for surface culture oysters. Oyster farmers do not need to provide special food for their oysters as the bivalves draw all the necessary nutrients from their seawater habitat along with naturally occurring plankton and plant life.  So long as the mollusks have clean water and care is taken to limit their predators access, oysters will grow naturally on their own.

The other method of growing oysters is top culture, often referred to as surface or floating culture. With advances in oyster growing technology and methods, today’s floating aquaculture speeds up the rate of maturation allowing for top culture oysters to be grown in about 3-5 years.  There is usually more constant water flow as the result of wave action during tidal changes and more natural food supplies nearer the water’s surface so oysters grown as top culture in floating bags just at or under the water surface are able to grow to market size sooner.  Top culture oyster farming involves growing the oysters in mesh bags that float in basket-like cages around the water surface level.

Floating Cage for Top Culture Oysters

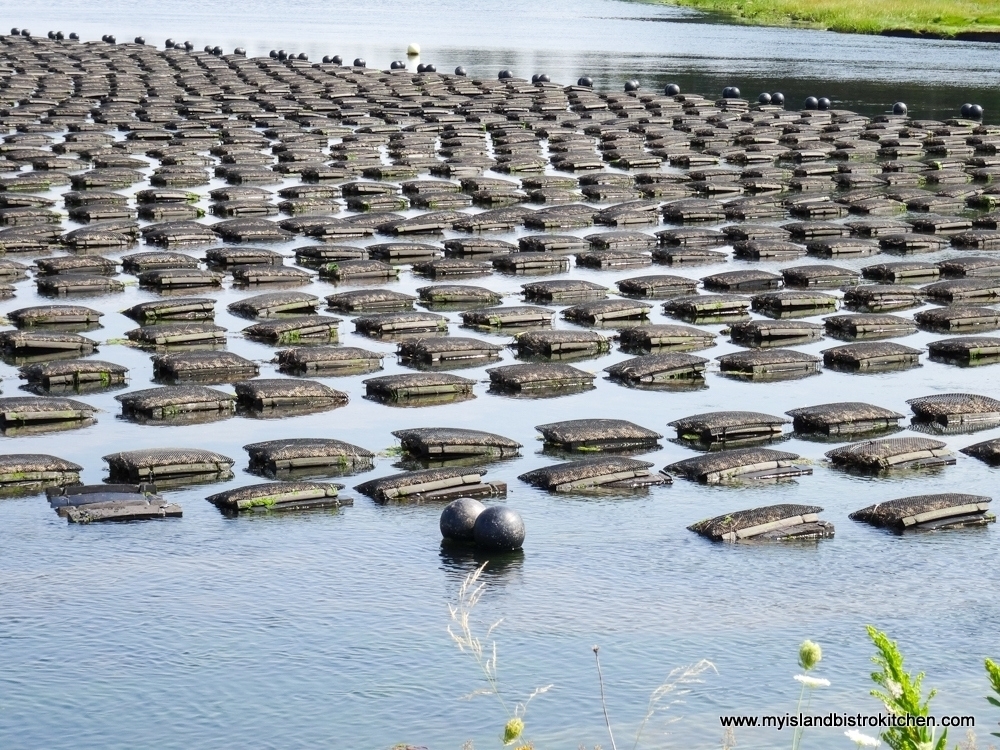
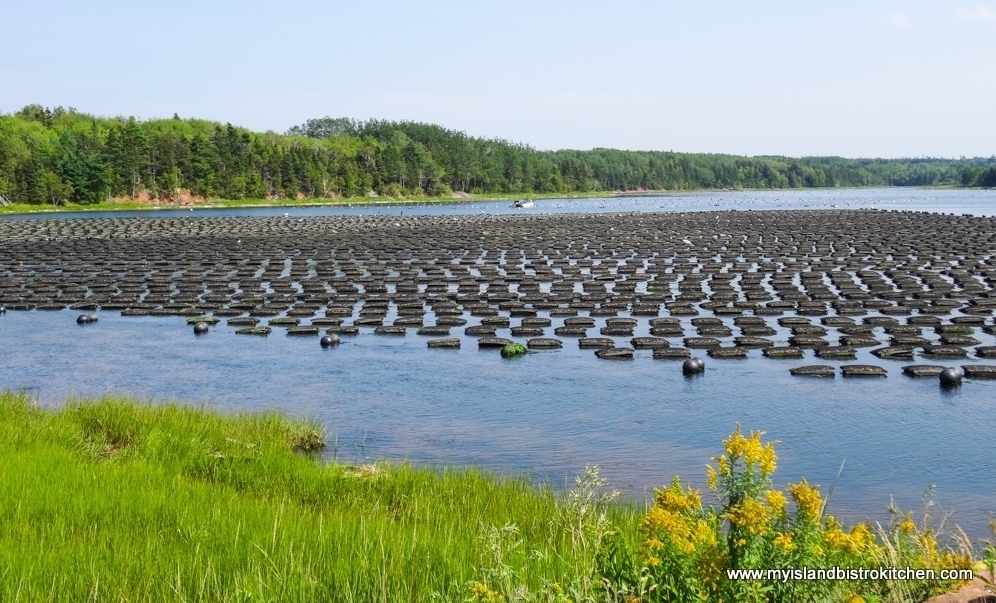
The baskets are constructed so that the water is able to flush through, bringing food to the mollusks and keeping them cleaner than those grown in the mud on the seabed bottom. The baskets are regularly flipped and the water flow and waves rock the baskets and chip away, or manicure, the rough edges of the oysters, giving them a more desirable looking shell. This also allows for seaweed, barnacles, and other organisms that find their way into the baskets to be exposed to sunlight and dry out and not become an infestation to the growing oysters. The bags inside the floating baskets also help to protect the oysters against predators. So, if you see rows of these floating cages in a body of water around the Island, you’ll know they’re filled with growing oysters.

Floating Cages of Oysters in New London Bay, PEI

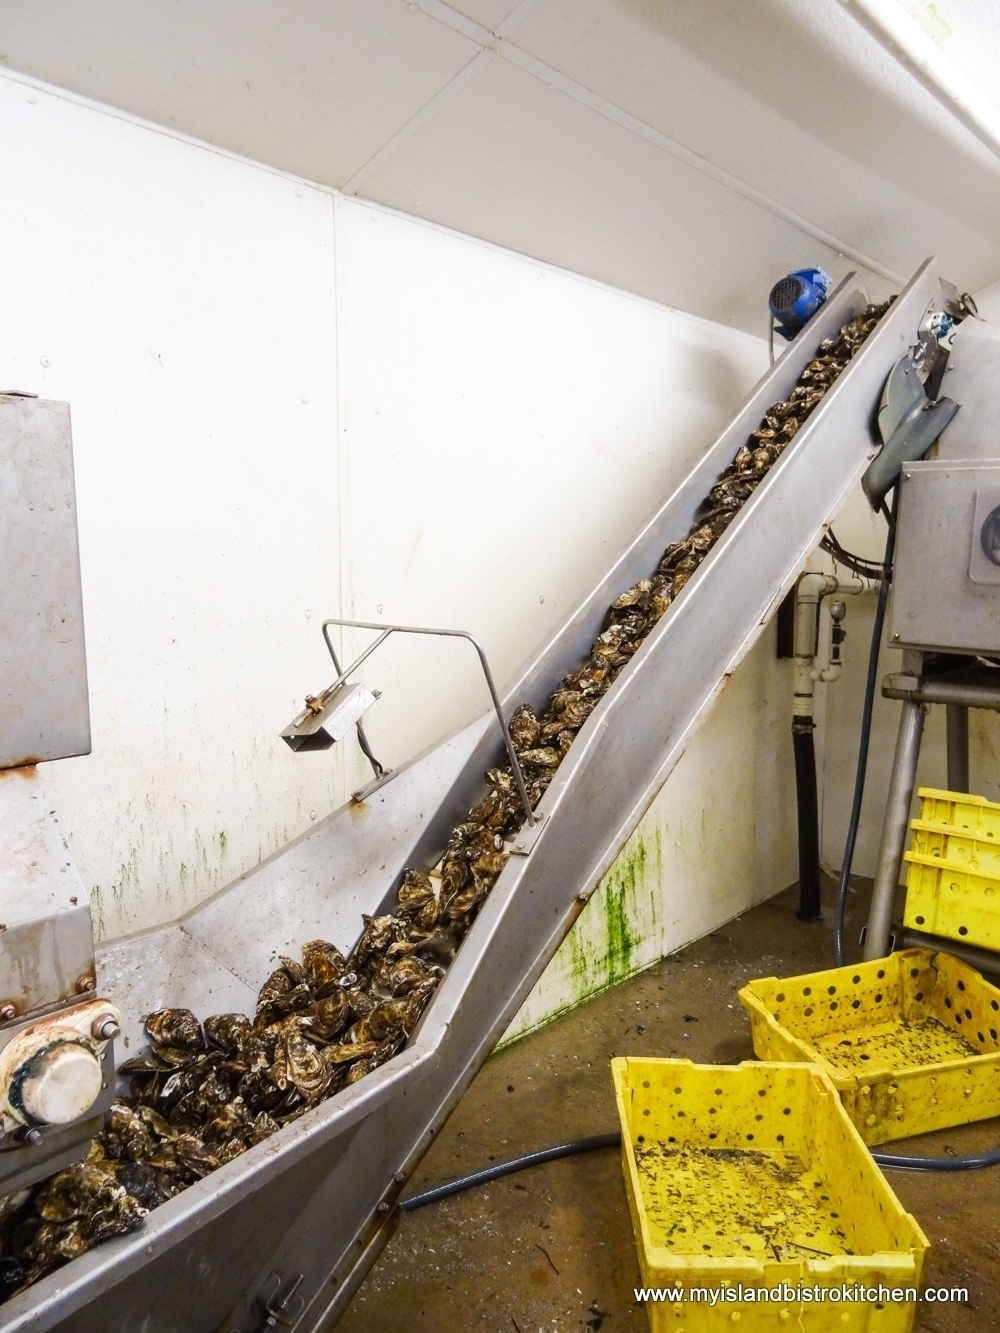
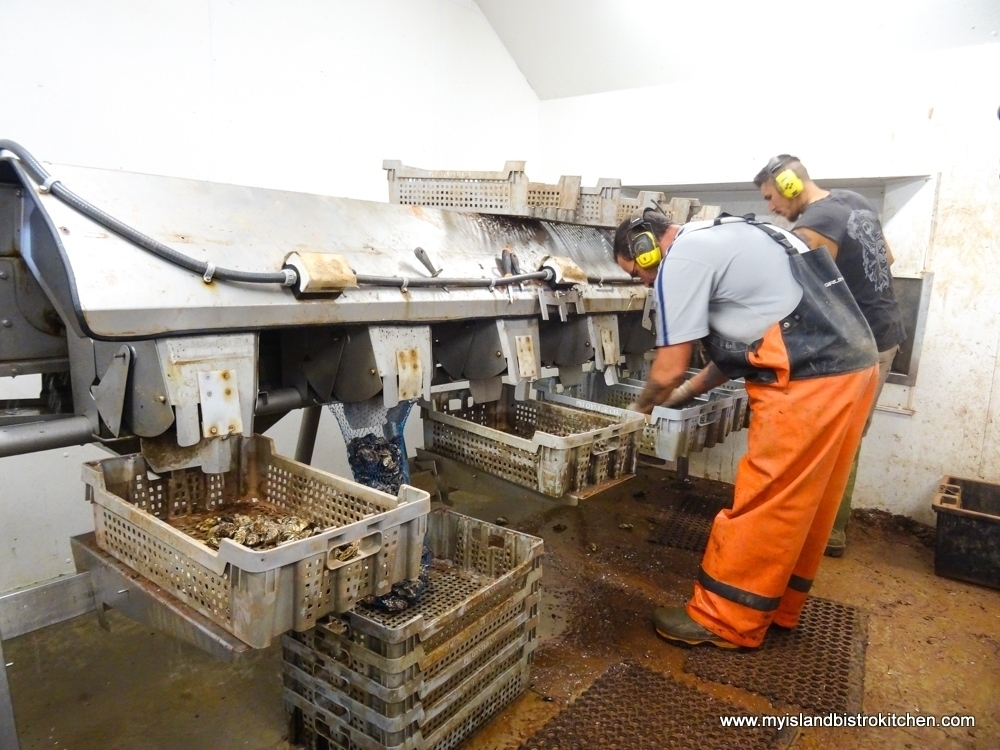
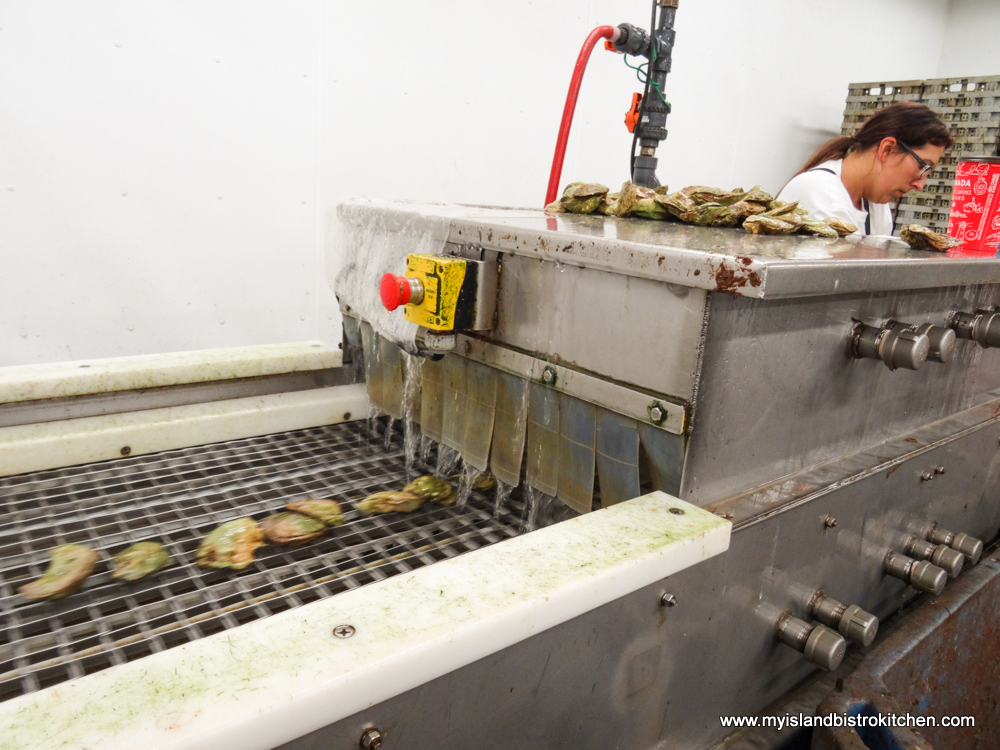
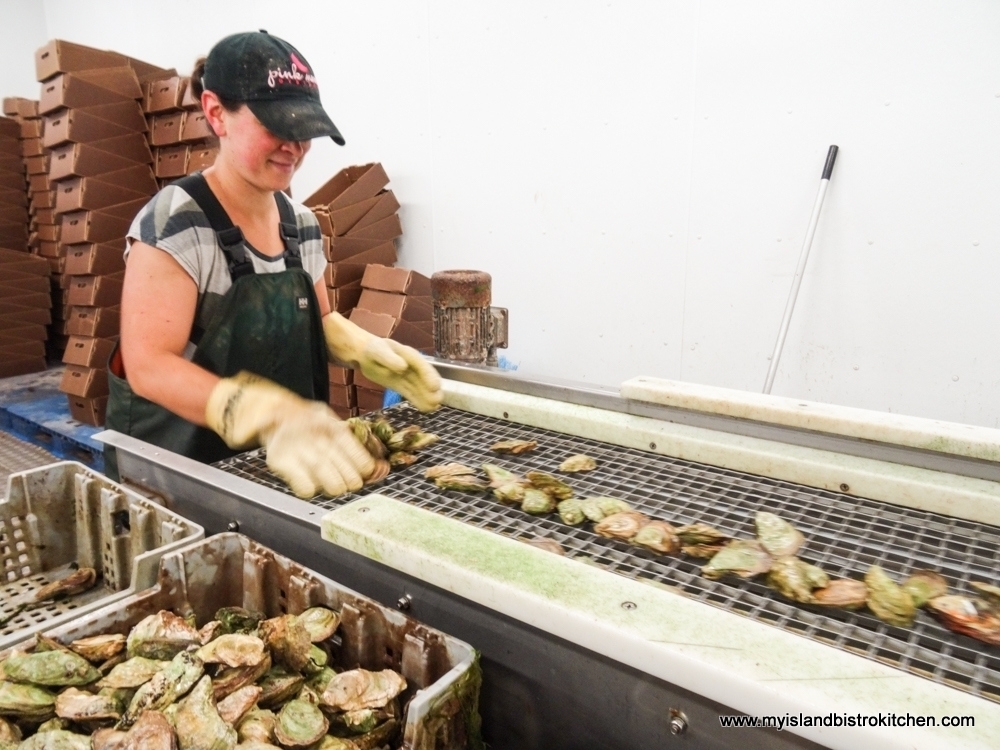
Once oysters, either bottom or top cultures, have reached their market size, they are brought into the processing plant where they are culled, graded for size and shape, washed, counted, boxed, and are shipped to customers around the world.

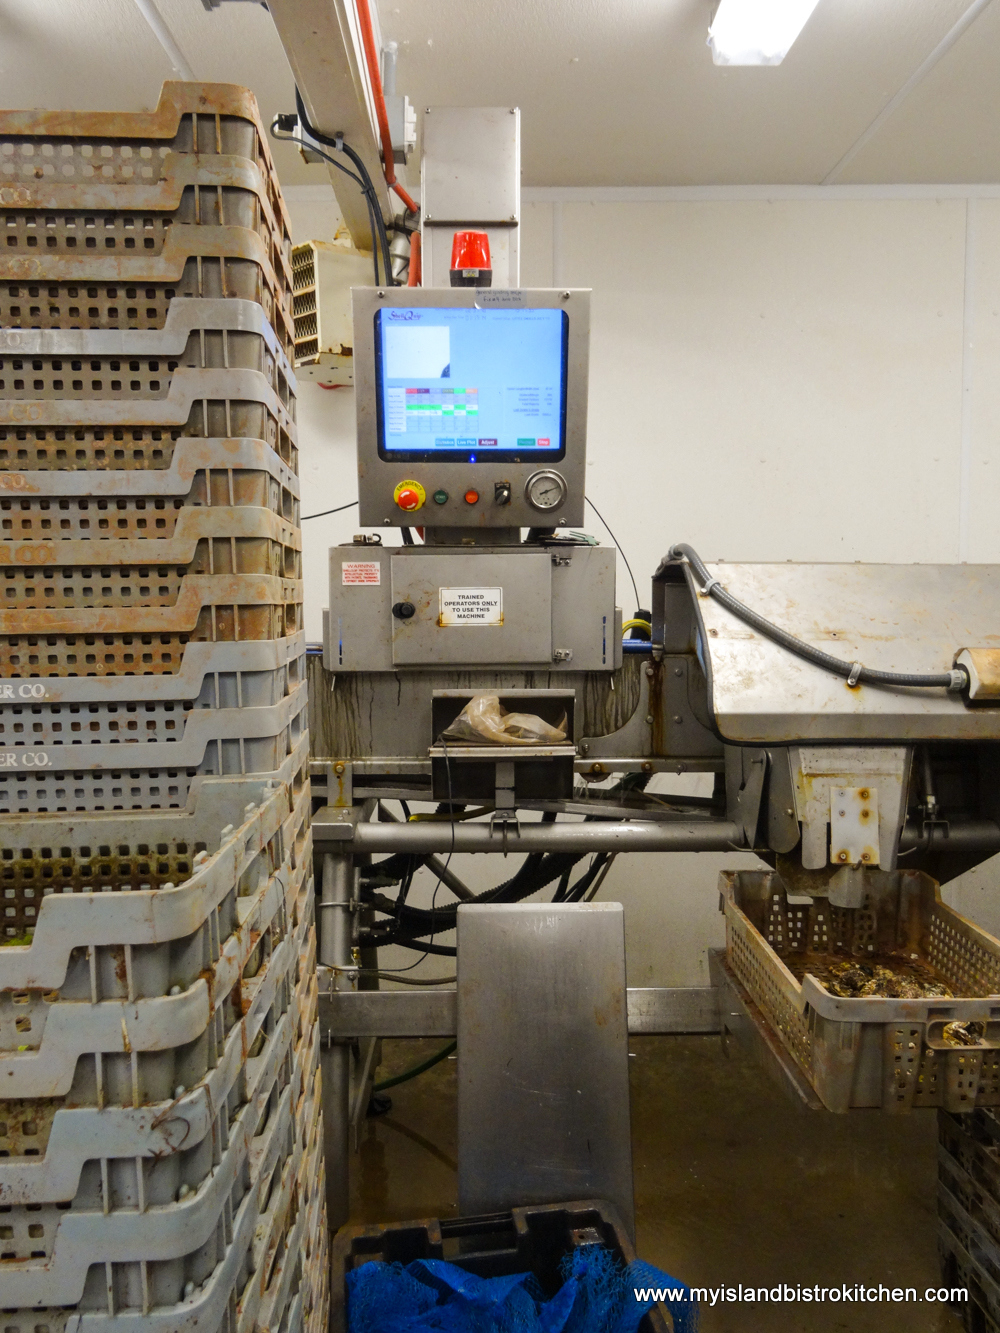
Oysters Arriving at the Processing Plant
Grading and Sorting Oysters
Washing the Oysters
Washing the Oysters
Quality Controlling the Oysters Just Before They Are Boxed for Shipping
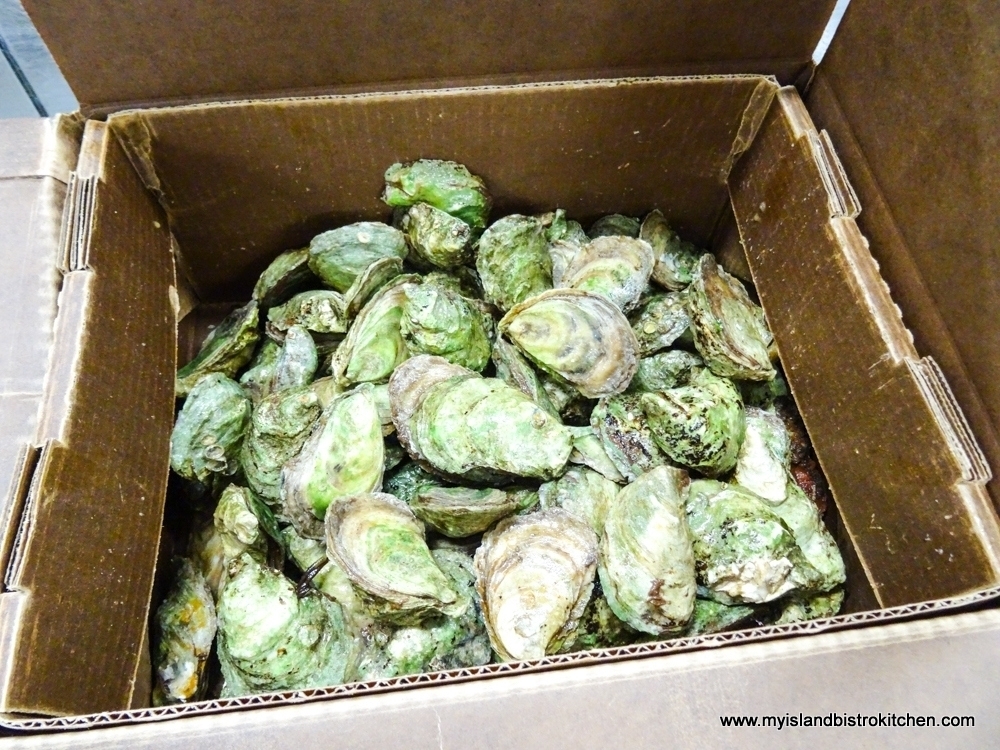
A Box of "Lucky Limes" Oysters from Raspberry Point Oyster Company in PEI
A Box of “Lucky Limes” Oysters from Raspberry Point Oyster Co. in PEI
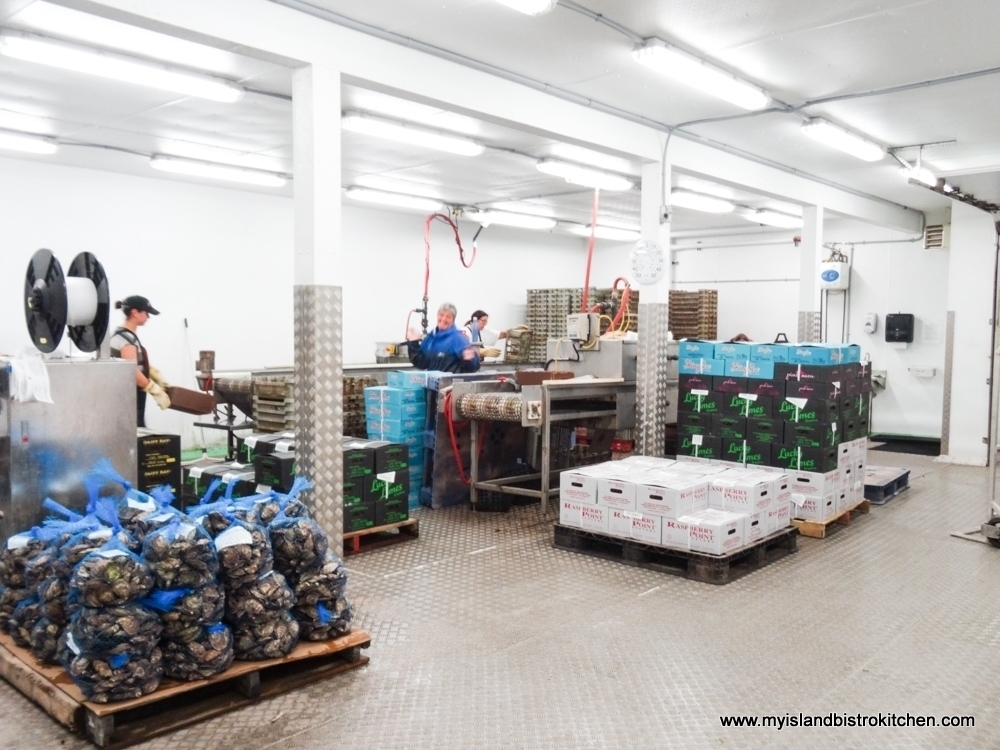
Inside the Processing Plant at Raspberry Point Oyster Company, Bayview, PEI
Bags of Oysters at the Raspberry Point Oyster Co.
Inside the Cold Storage Room at Raspberry Point Oyster Co. in Bayview, PEI

Because this industry is now year-round, oysters not needed for immediate shipment are put into trays like the ones shown to the left in the photo below and placed back out into shallow water until needed.

Oyster Trays
Oyster Trays

Since they are already graded, counted, and sorted by variety, they can quickly be retrieved and shipped when orders come in year-round.

The barge in the photo below is returning to shore with a load of trays filled with graded and sorted oysters which will soon be on their way somewhere in the world to fill orders!

Barge Returning to Shore with a Load of Oysters Ready for Market
Offloading Oysters Ready for Market

Oysters like cold water but, in PEI’s cold winters, they can’t stay up near the water’s surface where they would freeze. So, for top culture/surface grown oysters, the Raspberry Point Oyster Co. sinks aluminum cages filled with oysters into 15’ – 20’ of water each winter. At the time of writing, the company prepared upwards of 1000 aluminum cages that they filled and sunk with 7000 graded and sorted oysters per cage at the end of November. Locations of cages are marked by a metal pole and the oyster harvesters head out over the ice to retrieve the oysters to fill winter shipments, making the Island’s oyster farming a year-round industry.

Preparing to Saw Through Ice to Retrieve Oyster Cages (Photo submitted by James Power, Raspberry Point Oyster Co.)

Sometimes, the ice is so thick that workers have to use a high-powered saw (shown in photo above) to cut through the thick ice so that tethered divers can dive in and locate the cages and hook them up to a hydraulic lift that will pull them out of the water.

Diving Under the Ice to Retrieve Oyster Cages Sunk for the Winter (Photo Submitted by James Power, Raspberry Point Oyster Co.)
Retrieved Oyster Cage Filled with Oysters Ready for Market (Photo Submitted by James Power, Raspberry Point Oyster Co.)

The oysters are then hauled on a sled towed behind a four-wheeler or, if the ice is sufficiently thick, by a truck, back to the processing and shipping plant.

The varieties of oysters on PEI are often (though not always) named for the body of water in which they are grown. The Raspberry Point Oyster Co. draws its name from a little point of land on the Homestead Trail in nearby Cavendish.  Readers from outside PEI will likely associate the Cavendish name as the setting for famed authoress Lucy Maud Montgomery’s famous Anne of Green Gables series of books. A number of years ago, Scott and Charles Linkletter, the owners of Raspberry Point’s forerunner company, The PEI Oyster Company, had a lease to fish oysters in this area so they renamed the company to the Raspberry Point Oyster Co. Today, still owned and operated by the Linkletter family, Raspberry Point Oyster Co. has six varieties of Malpeque oysters on the market:

  • Raspberry Point – Bearing the company name, this variety of 3” oysters is grown as bottom culture in leases in New London Bay. The Raspberry Point variety is the company’s most popular oyster.
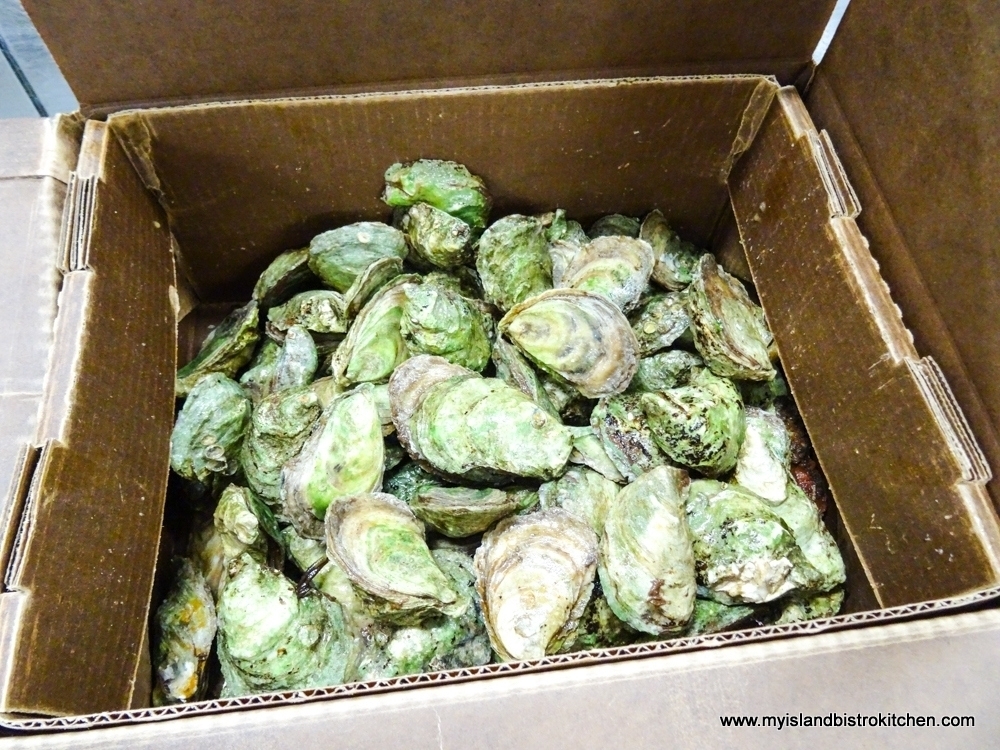
  • Lucky Limes – These are 3” oysters, also bottom grown in a lease along the Homestead Trail in New London Bay. The water in this area is filled with algae and that’s what turns the oyster shells green, thus the “lime” in the name.

    Box of Lucky Lime Variety of Oysters from Raspberry Point Oyster Co.
    Box of Lucky Lime Variety of Oysters from Raspberry Point Oyster Co.
  • Shiny Sea – At 2½“ in size, these are considered to be the “baby brother” of the larger 3” Raspberry Point variety. These bottom cultures are also grown in New London Bay.
  • Pickle Point – These are top-culture oysters as they are grown nearer the water’s surface in floating bags in New London Bay.
  • Daisy Bay – These 3” oysters are top-culture, or surface culture, grown in North Rustico.
  • Irish Point – Considered to be cocktail size oysters, these 2½“ oysters are also surface cultures and are grown in North Rustico.

Controls are in place to ensure sustainability of the Island’s oyster industry. Only so many leases are granted by the government to avoid overfishing.  The mollusks, themselves, help to ensure their species continue to survive as they act as great filters to clean the water of toxins by filtering algae and phytoplankton from the water.

According to James, the nature of the water flow and the shape of the seed oyster will basically determine the final shape of the oyster. While James will say that the perfect oyster is very much an individual’s own taste, he says the perfect shaped oyster, in his opinion, is a rounded tear-drop shape that is 3” long by 2” wide. The perfect flavour should consist of a clean, salty taste and a sweet finish.  The meat should be a little bit, but not too, fatty because nothing should interfere with the natural salty taste.

Power says oysters are like terroir is to wine – the flavour of each variety is built on the content of the bay or stream in which the oysters are grown and each oyster will look and taste a little different from the next one.  Since the oysters are coming from the sea and the French word for sea is “mer”, perhaps the term “merroir”, as some have coined it, might be the best description! Power says true oyster connoisseurs can identify the different flavour profiles in raw oysters.  Oysters grown in waters that have more of a rock base may have a mineral-rich flavour (though none of Raspberry Point oysters have this terroir/merroir) while others grown elsewhere may have a slight vegetable taste picked up from whatever vegetation or algae may be in their water habitat.

Power also says the oyster meat and flavour change with the seasons.  In summer, the oysters are thin and salty – the bivalves are more interested in reproduction than getting fat so keeping their svelte figure is obviously their concern!  In the fall (September – October), the waters are getting colder and the oysters will start building up fat for the cold winter months.  When the water temperature gets down to 5°C, the oysters shut down and hibernate inside their hard shells, living off the fat they built up in the fall. So, if you are eating oysters that come from icy waters, they’re likely to be quite plump and perhaps just a little sweeter.  In the spring, the oysters still stay fat but, as the snow melts, it dilutes the natural salt in the water so the oysters will taste less salty.

Oysters are low in fat, high in protein, and are a good source of iron and zinc.  They are also a source of, amongst others, Vitamins B12 and C along with Thiamin, Magnesium, and Phosphorus.

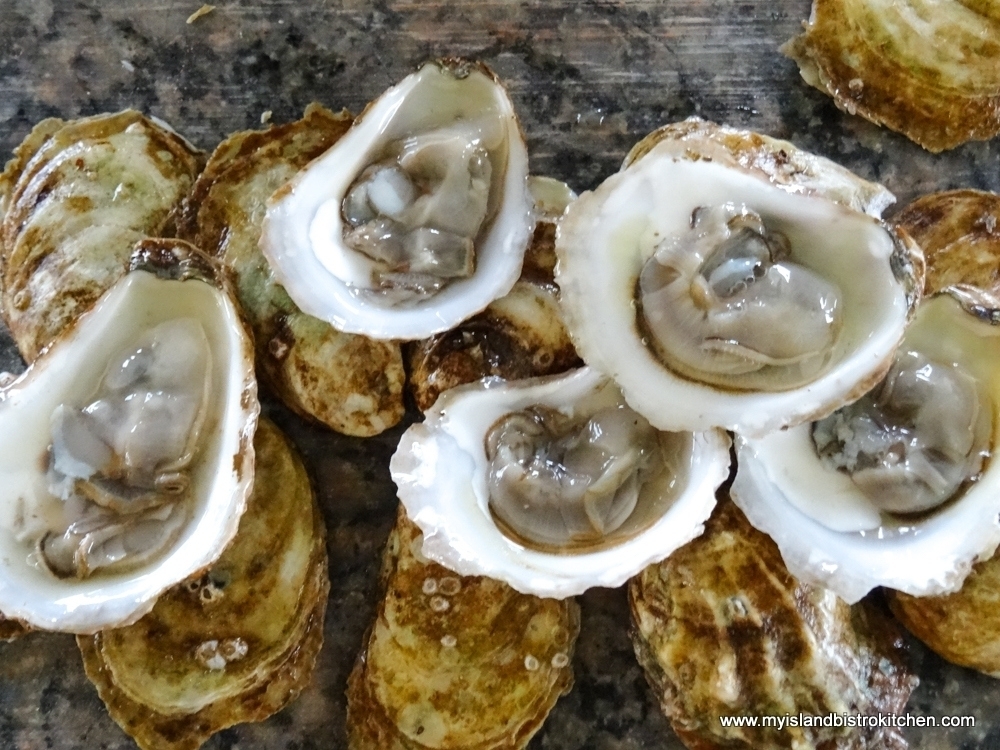
PEI Oysters
PEI Oysters

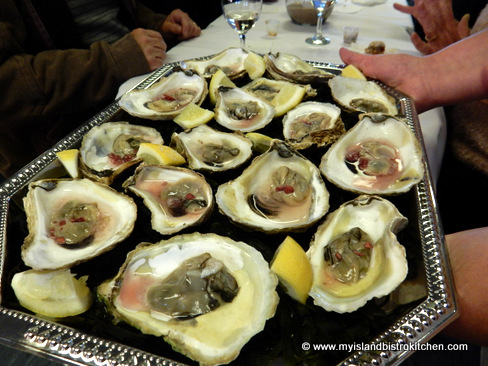
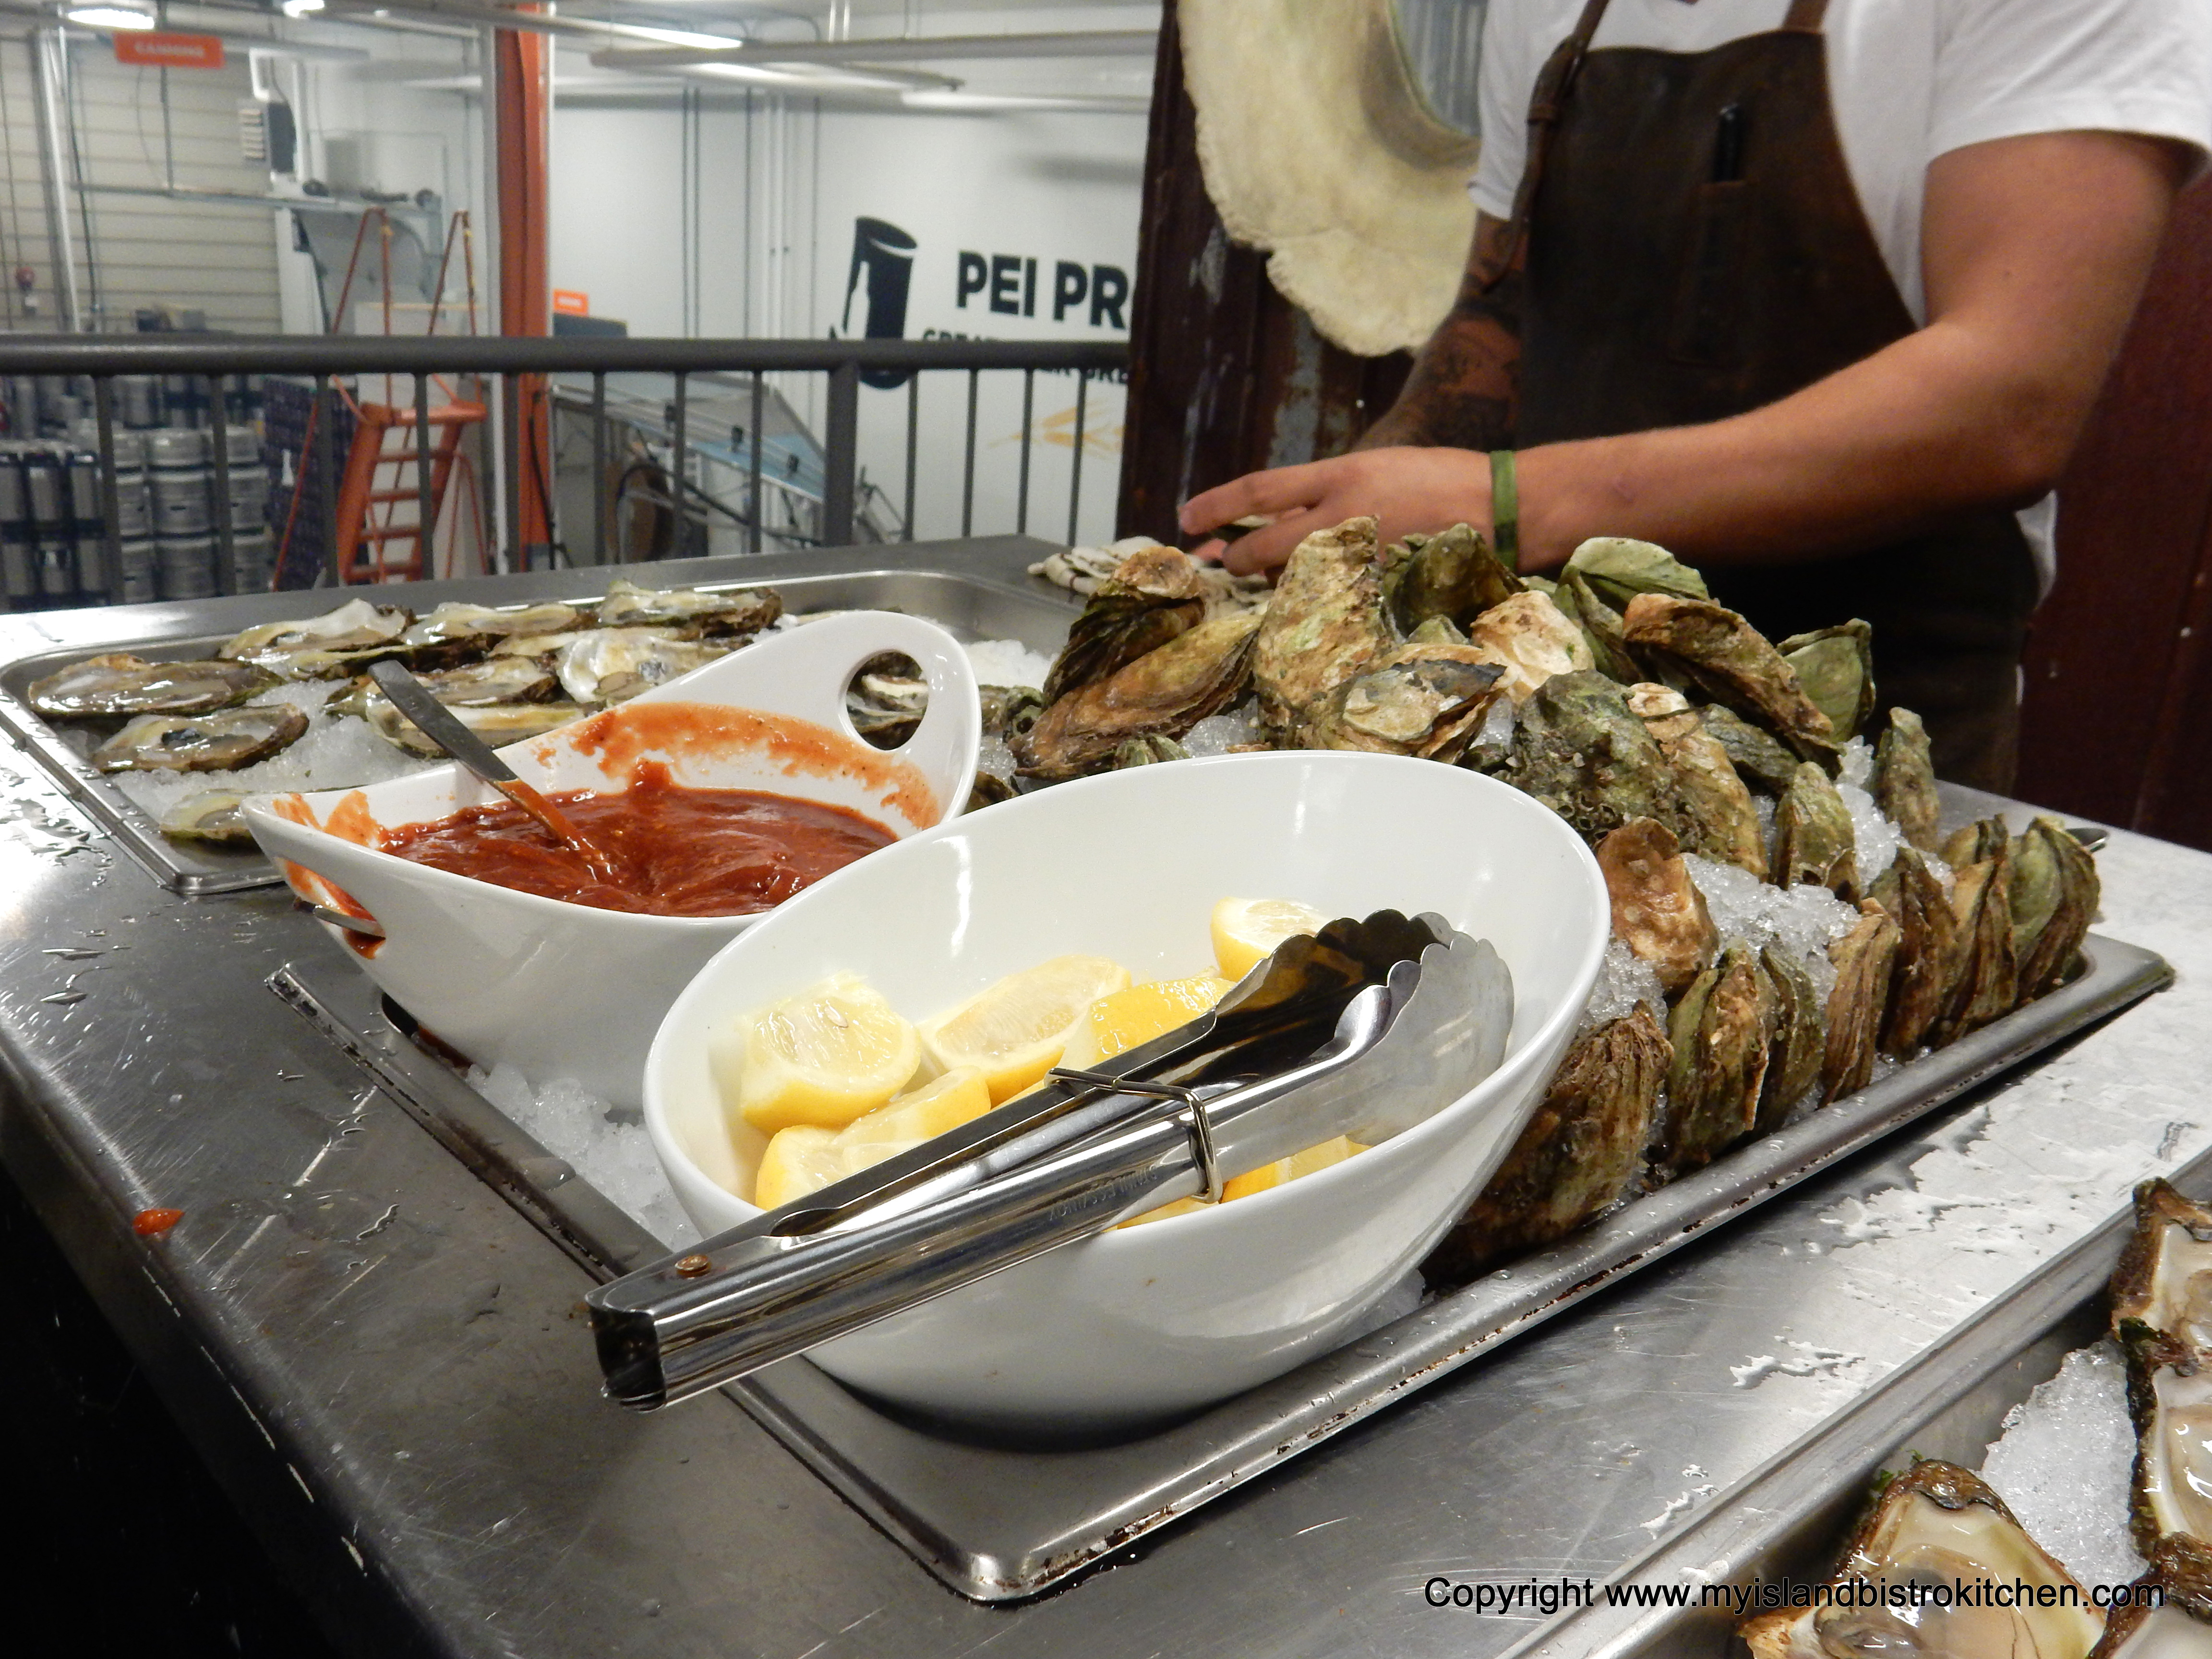
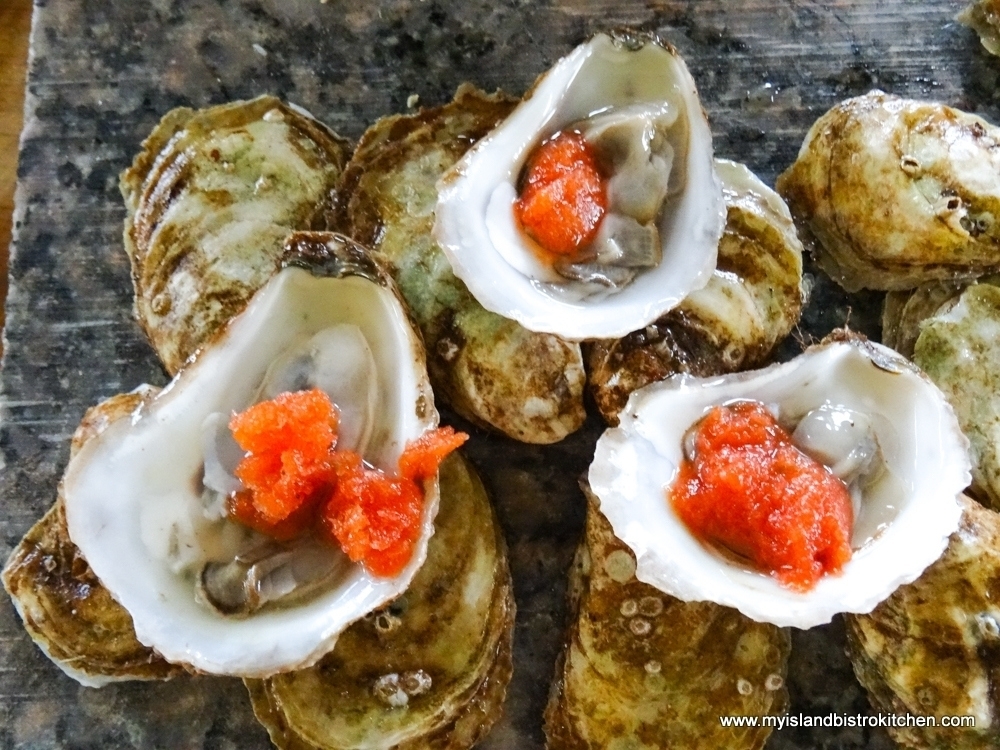
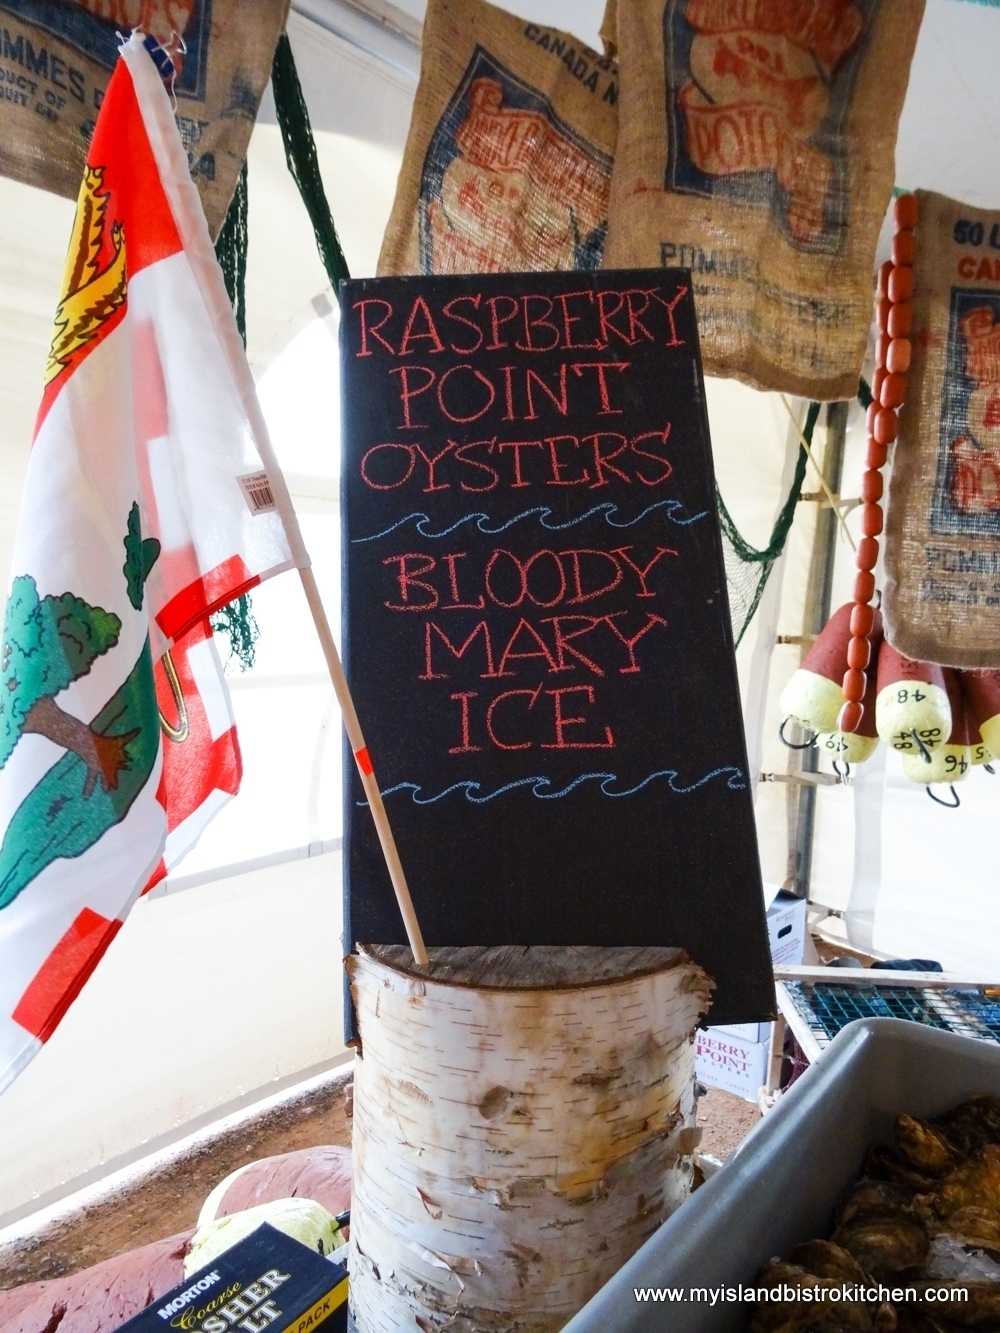
Oysters are most often served raw on the half shell on a bed of ice with freshly squeezed lemon or, sometimes, with a peppery shallot mignonette.  Chef Michael Smith often serves oysters with a Bloody Mary Ice seen in the photo below.

Shucked PEI Oysters Served with Bloody Mary Ice

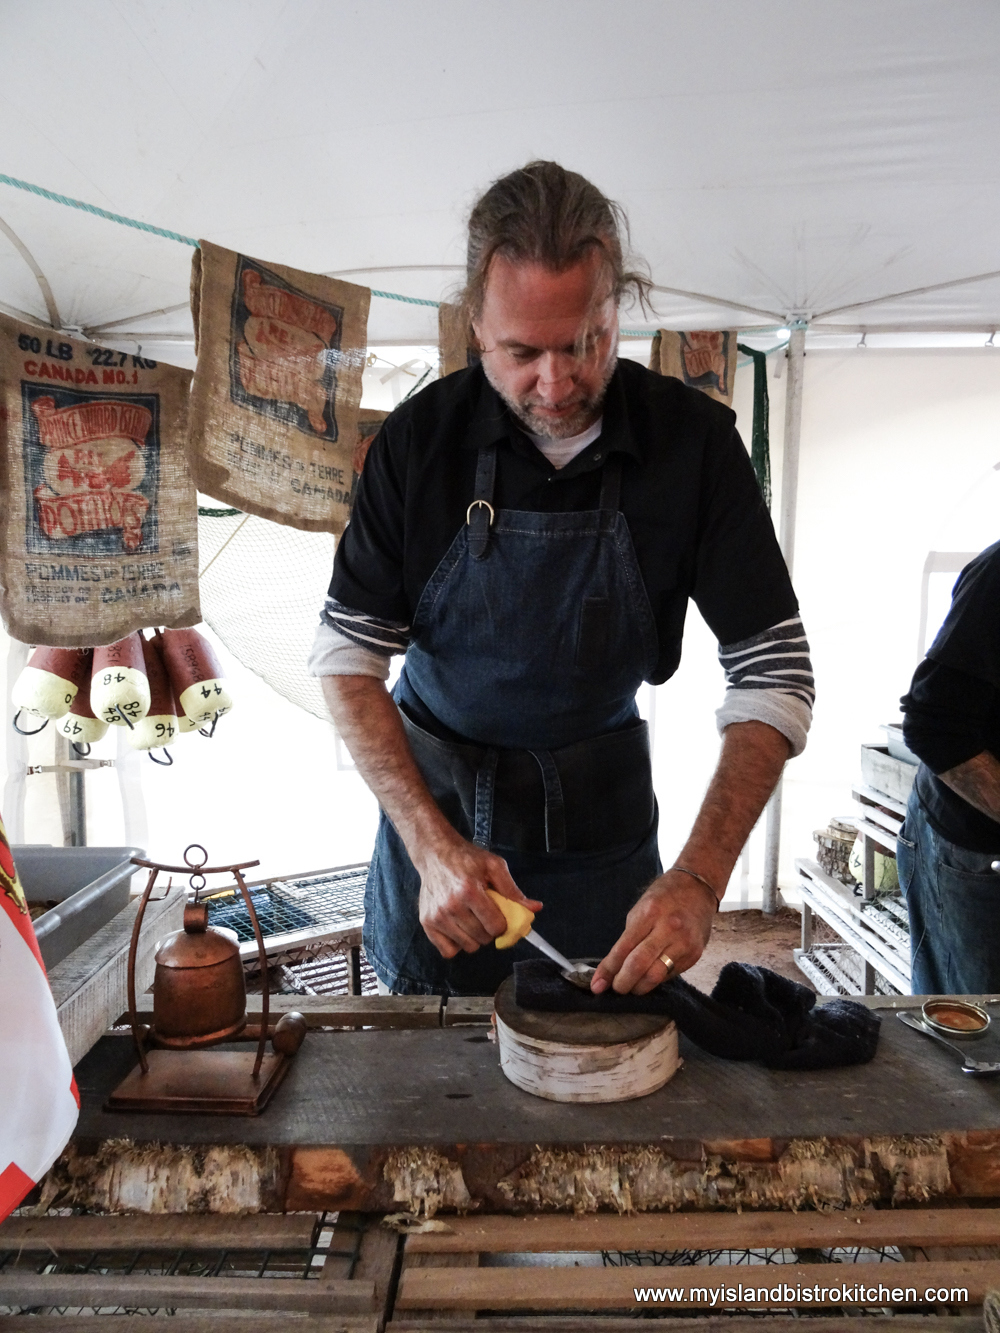
Oysters are shucked using a special short, blunt knife made for this purpose. Power says he believes oysters are popular, especially eaten raw, because they are an all-natural food, not processed or transformed.  Oyster bars are very popular and an emerging trend is to pair oysters with wines, beers, and whiskey. Fresh oysters are available at most fish markets on PEI as well as the larger supermarkets. On PEI, many restaurants serve raw oysters and, at many Fall Flavours Festival events each September, oysters are a staple, like they were at the 2017 “A Taste of Rustico” event where Chef Michael Smith (in photo below) was busy shucking Raspberry Point oysters.

Chef Michael Smith Shucking Raspberry Point Oysters at "Taste of Rustico" Fall Flavours event 2017
Chef Michael Smith Shucking Raspberry Point Oysters at “Taste of Rustico” Fall Flavours event 2017
Raspberry Point Oysters at Taste of Rustico Event 2017

So, the next time you are slurping back one of the plump briny Prince Edward Island oysters, you’ll now know a little bit more about how the Island oysters are produced, the flavour profile of an Island oyster, and you’ll be enjoying a unique terroir (or perhaps it’s “merroir”) taste from waters in and around Prince Edward Island on Canada’s East Coast.

Plump PEI Oysters
Plump PEI Oysters

Pin Me To Pinterest!
Oyster Farming
Oyster Farming

The Ultimate Gluten-Free Zucchini Date Muffins

Gluten Free Zucchini Date Muffins
Gluten-Free Zucchini Date Muffins

These Gluten-Free Zucchini Date Muffins will rival any traditional wheat-based muffins!  They sport a lovely gently domed top that is the hallmark of a perfect muffin shape, they are packed full of flavor, and they have a lovely tender, moist crumb. Continue reading The Ultimate Gluten-Free Zucchini Date Muffins

Beef Pasta Casserole Recipe

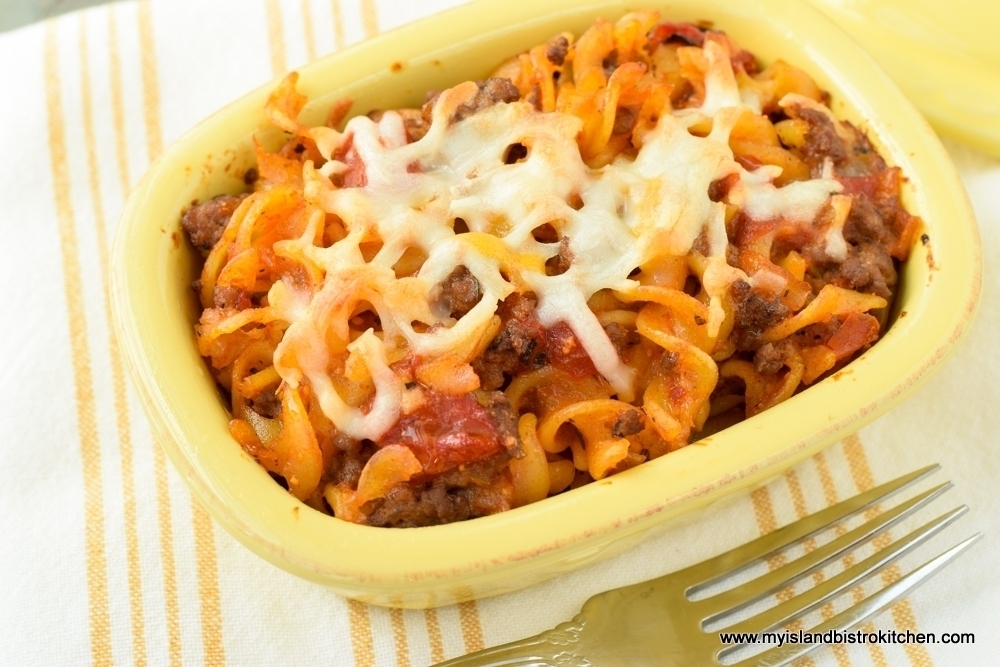
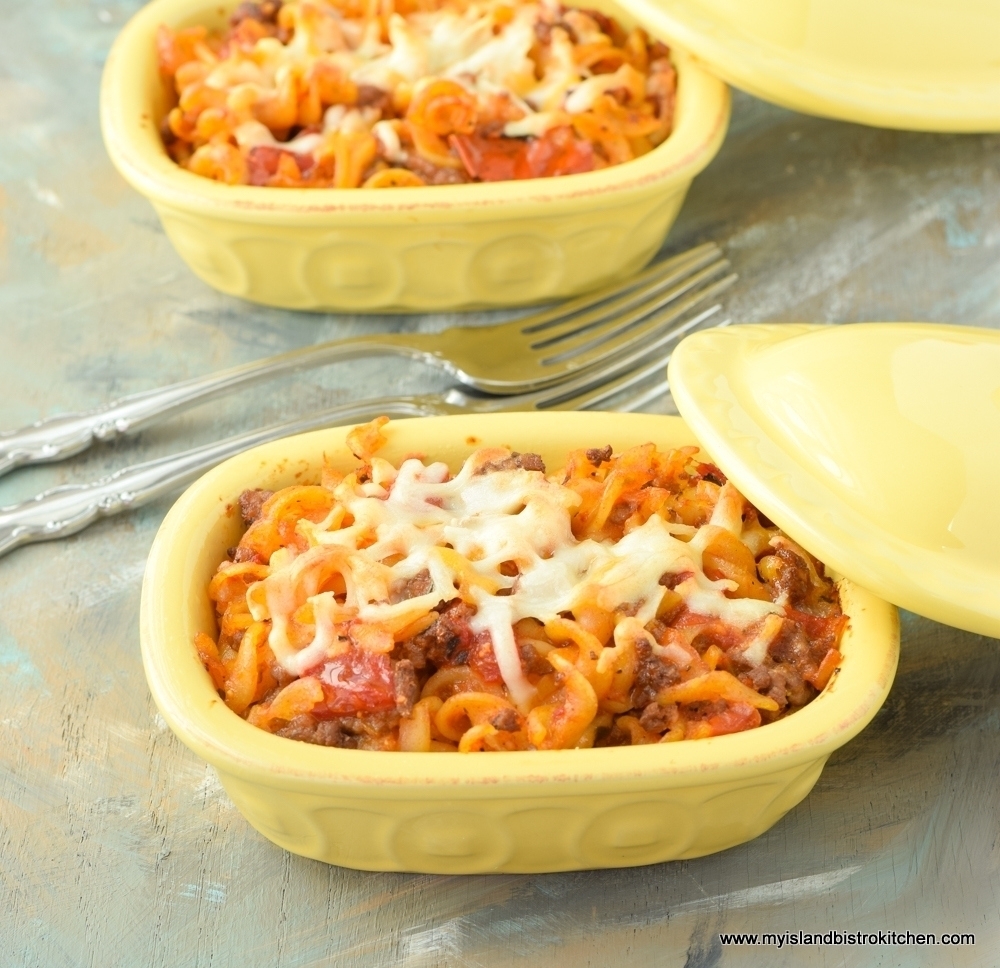
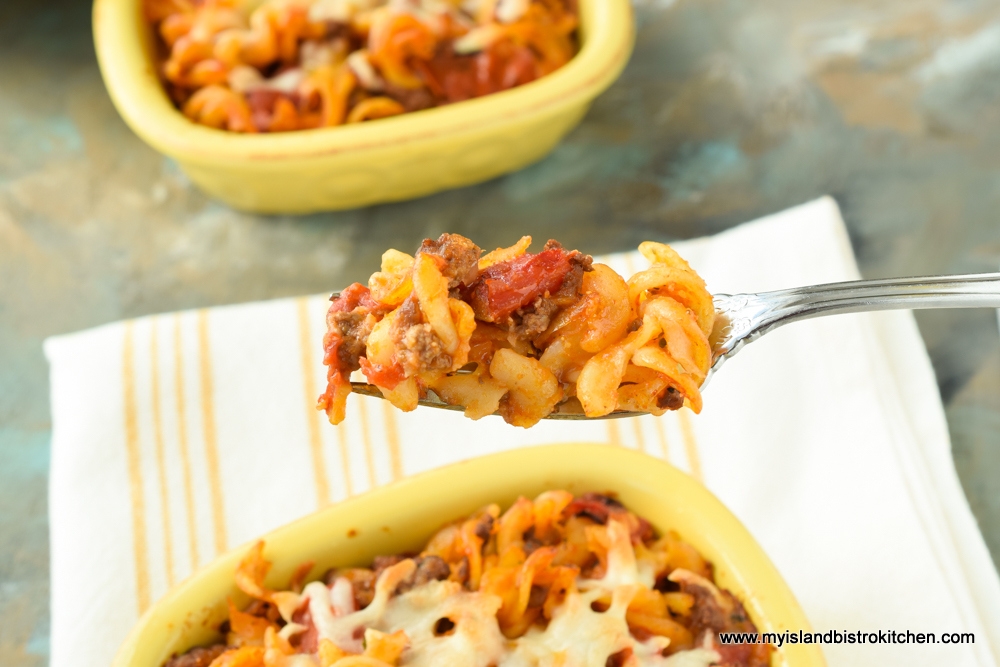
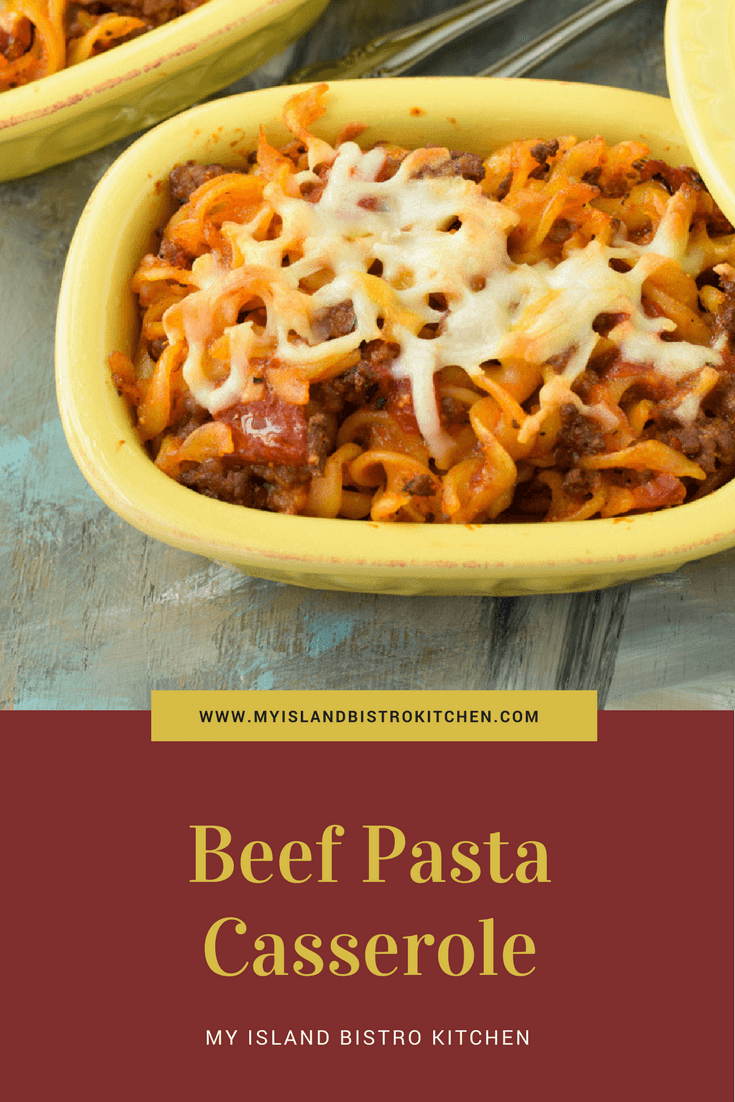
Beef Pasta Casserole

I am a huge fan of batch cooking and preparing make-ahead meals, like this Beef Pasta Casserole, to freeze for easy weeknight meal preparation.

I began batch cooking many years ago when I moved away from my family home and began life on my own.  I went in search of cookbooks designed for cooking for one or two and didn’t find much on the market. What recipes I did find took ingredients that either weren’t available locally or the recipes called for sizes of ingredients that weren’t available in Canada.

I also soon discovered it really wasn’t much fun having to prepare a meal from scratch each night for one person.  That’s when I realized I didn’t need cookbooks with recipes sized down to one or two servings; I needed a freezer and I needed to batch cook make-ahead meals!

Beef Pasta Casserole

I currently have two freezers plus a deep freezer compartment in the bottom of the refrigerator and all are filled with make ahead-meals.  The entrées are a mix of very basic fare, like baked beans, pasta casseroles, and fish cakes, and more elaborate meals like fillings for vol-au-vents and crèpes for nights that call for something a little extra special.

Batch cooking means you still do the prep work but it is all done upfront at once and it eases the pressure of meal preparation on weeknights, especially on nights where one is late getting home from work.  So long as I have the makings for a salad in the fridge and some rolls, biscuits, or bread in the freezer, I can pull out a frozen entrée and have dinner on the table in 30 minutes or so. Clean-up is super easy, too, since there are no prep dishes or pots and pans to be washed, just the plate, glass, and utensils to be loaded into the dishwasher.

Beef Pasta Casserole

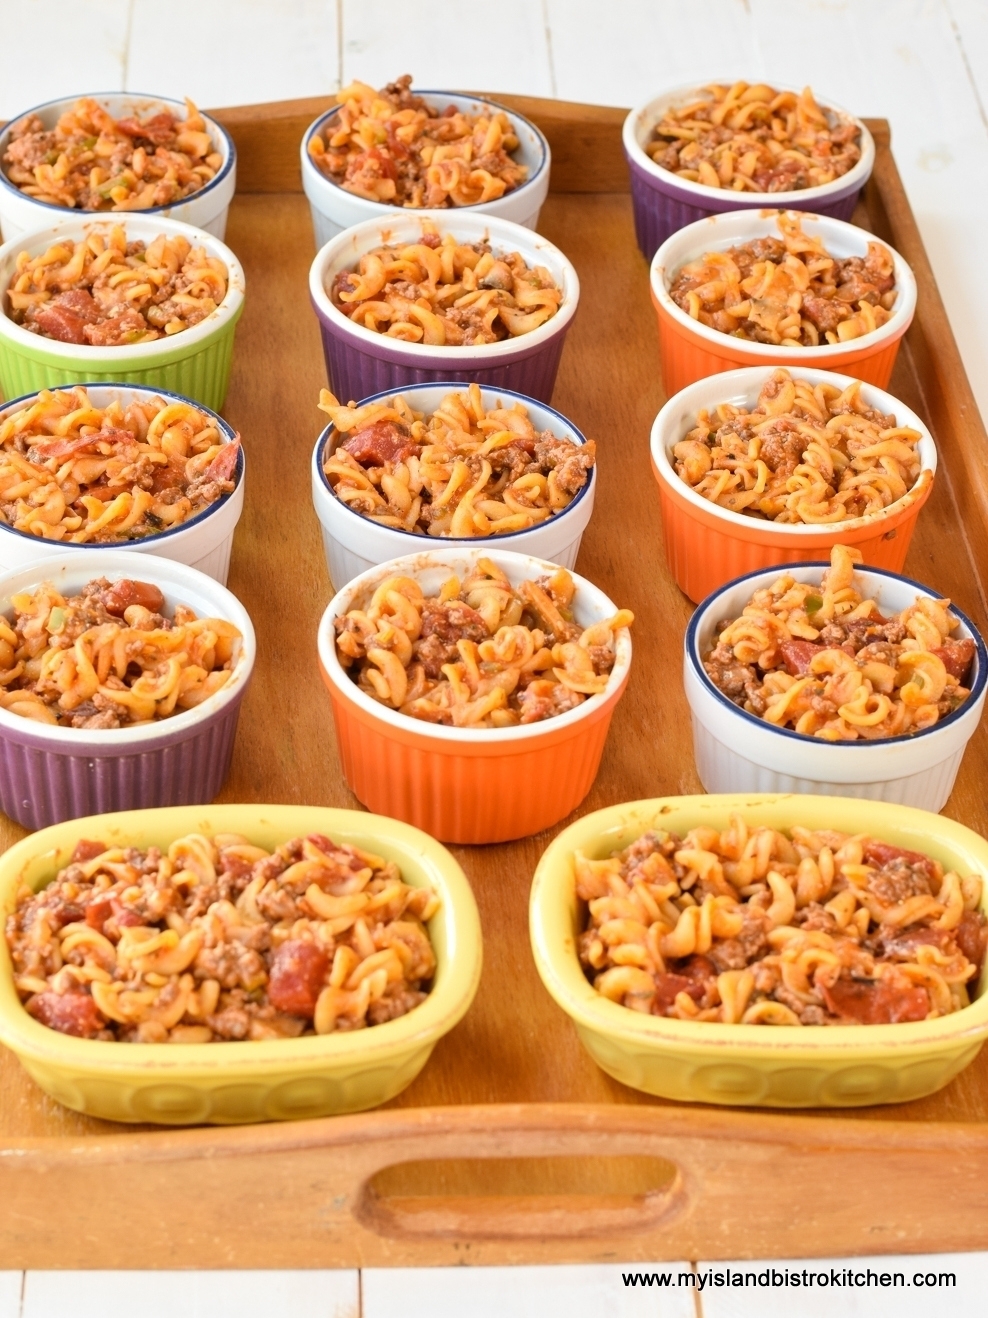
One of my standby casseroles is this beef pasta casserole.  It’s not hard to prepare and does not take any wild or weird ingredients. This makes a huge casserole so it’s great to take to potlucks or divide into meal-sized servings and frozen.  Use a large roaster or two 2-quart casseroles or, if you have a small household, divide the casserole up into small single serving casseroles or ramekins and freeze them.  I have a ton of ramekins and small individual-sized casserole dishes as I find they are the perfect serving size for individual servings of casseroles.  I store these casseroles, unbaked, in large plastic freezer containers in the freezer.

Beef Pasta Casserole
Beef Pasta Casserole Ready for the Freezer

Easy steps make this casserole.  Brown the ground beef, drain, and set it aside.  Cook the pasta. Next, sauté the onion, garlic cloves, celery, green pepper, and mushrooms.  Then, combine all the liquid ingredients and canned tomatoes. Combine all the ingredients together along with some cheese and, voilà, that’s it!  Top the casserole with some extra cheese and bake in the oven for 25-30 minutes.   If freezing the casserole, freeze it unbaked and without the cheese topping which is best added at the time of baking.

Serve with your favorite green salad and biscuits, rolls, or bread.

Beef Pasta Casserole

Beef Pasta Casserole

Ingredients:

1½ lbs lean ground beef
1½ – 2 tbsp vegetable oil

1-2 tbsp vegetable oil
2/3 cup onion, chopped
3 garlic cloves, minced
1/3 cup celery, chopped
¼ cup green pepper, chopped
¾ cup sliced button mushrooms

1 – 284ml can tomato soup
1 tsp Worcestershire sauce
½ cup beef broth (homemade or commercial)
¼ cup tomato paste
1 tbsp maple syrup
2 tbsp basil pesto (homemade or commercial)
2 tsp Italian seasoning
¼ tsp ground ginger
1 – 398ml can diced tomatoes with juice
Salt and pepper, to taste

400g fusilli (regular or gluten-free), cooked according to package directions and drained (about 5 cups raw pasta)
2/3 cup shredded cheese of choice (e.g., cheddar, or a blend of cheeses)
2 tbsp grated Parmesan cheese

½ cup shredded cheese of choice for topping casserole

Method:

In large frypan, heat the vegetable oil and brown the meat over medium-low heat. Drain. Set aside.

Preheat oven to 350°F.

In large saucepan, heat second amount of vegetable oil over medium heat.  Sauté the onion, garlic, celery, and green pepper for approximately 2 minutes.  Add the mushrooms and sauté for 3-4 minutes.  Remove from heat and set aside.

In a large bowl or measuring cup, combine the tomato soup, Worcestershire sauce, beef broth, tomato paste, maple syrup, basil pesto, Italian seasoning, and ground ginger. Stir well.  Stir in canned tomatoes with juice. Season with salt and pepper, to taste.

In large bowl or pot, combine the cooked pasta, meat, vegetables, liquid ingredients, 2/3 cup shredded cheese, and Parmesan cheese.  Stir gently to combine ingredients.  Transfer mixture to large greased roaster, two – 2-quart casseroles, or divide into individual serving-sized dishes such as ramekins.

Sprinkle casserole(s) with remaining ½ cup shredded cheese.  Bake in oven for 25-30 minutes to heat through.  Serve hot.  Casserole freezes well.

Yield:  12-14 servings

If you have made this recipe and enjoyed it and/or wish to share it with your friends and family, please do so on social media but be sure to share the direct link to this posting from my website.

Beef Pasta Casserole

This tasty Beef Pasta Casserole is an easy-to-make weeknight casserole that combines ground beef, pasta, cheese, and a tomato-based sauce. Freezes well.

Course Main Course
Cuisine American
Servings 12
My Island Bistro Kitchen My Island Bistro Kitchen

Ingredients

  • 1 1/2 lbs lean ground beef
  • 1 1/2 - 2 tbsp vegetable oil
  • 1-2 tbsp vegetable oil
  • 2/3 cup onion, chopped
  • 3 garlic cloves, minced
  • 1/3 cup celery, chopped
  • 1/4 cup green pepper, chopped
  • 3/4 cup sliced button mushrooms
  • 1 - 284ml can tomato soup
  • 1 tsp Worcestershire sauce
  • 1/2 cup beef broth
  • 1/4 cup tomato paste
  • 1 tbsp maple syrup
  • 2 tbsp basil pesto
  • 2 tsp Italian seasoning
  • 1/4 tsp ground ginger
  • 1 - 398ml can diced tomatoes with juice
  • salt and pepper, to taste
  • 400g fusilli (regular or gluten-free), cooked according to package directions and drained (about 5 cups raw pasta)
  • 2/3 cup shredded cheese of choice (e.g., cheddar, or a blend of cheeses)
  • 2 tbsp grated Parmesan cheese
  • 1/2 cup shredded cheese of choice for topping casserole

Instructions

  1. In large frypan, heat the vegetable oil and brown the meat over medium-low heat. Drain. Set aside.
  2. Preheat oven to 350°F.
  3. In large saucepan, heat second amount of vegetable oil over medium heat. Sauté the onion, garlic, celery, and green pepper for approximately 2 minutes. Add the mushrooms and sauté for 3-4 minutes. Remove from heat and set aside.
  4. In a large bowl or measuring cup, combine the tomato soup, Worcestershire sauce, beef broth, tomato paste, maple syrup, basil pesto, Italian seasoning, and ground ginger. Stir well. Stir in canned tomatoes with juice. Season with salt and pepper, to taste.
  5. In large bowl or pot, combine the cooked pasta, meat, vegetables, liquid ingredients, 2/3 cup shredded cheese, and Parmesan cheese. Stir gently to combine ingredients. Transfer mixture to large greased roaster, two – 2-quart casseroles, or divide into individual serving-sized dishes such as ramekins.
  6. Sprinkle casserole(s) with remaining ½ cup shredded cheese. Bake in oven for 25-30 minutes to heat through. Serve hot. Casserole freezes well.

Recipe Notes

[Copyright My Island Bistro Kitchen]

Looking for other tasty casseroles?  Try these from My Island Bistro Kitchen:

Chicken Chow Mein Casserole
Hawaiian Fiesta Casserole 
Ham and Pasta Casserole
Creamy Tuna Noodle Casserole
Macaroni and Sausage Casserole
Chicken and Ham Casserole
Sausage, Black Beans, and Pasta Casserole
Green Bean Casserole

Connect on social media with My Island Bistro Kitchen:

Join the Facebook page for My Island Bistro Kitchen:  https://www.facebook.com/MyIslandBistroKitchen/

Follow “the Bistro” on “X” (formerly Twitter)https://twitter.com/PEIBistro/

See the drool-worthy gallery of mouth-watering food photos from My Island Bistro Kitchen on Instagramhttps://www.instagram.com/peibistro/

Follow “the Bistro” on Pinterest at https://www.pinterest.ca/peibistro/

Pin One of the Custom  Pins Below To Your Favorite Pinterest Boards!
Beef Pasta Casserole

Meal Planning – Week 4

Here is my suggested meal plan for the upcoming week. If you want to check out previous weeks’ meal plans, click here for the meal plan for week 1, here for week 2’s plan,  here for the meal plan for week 3, here for Week 5, and here for Week 6.  I’ve provided a list of the main ingredients that, for the most part, would probably involve a shopping trip to the supermarket for most. However, as always, read each recipe thoroughly and carefully to create your own list as I have not listed what I consider to be “staple” items like regular milk, butter, eggs, flour, sugar, butter/shortening, oil, spices, etc.

This week, we’ll start off with a roast chicken or turkey.  I watch and get chickens or turkeys when they are on sale and I usually have a stock of 2-3 in the freezer.  They are great week starters because, yay, there are leftovers!!!! This means the leftovers can be transformed into other dishes such as turkey chowder and chicken (turkey) chow mein casserole.  And, if you are cooking a turkey (or a large chicken), don’t throw out the carcass as it makes great poultry stock!

Click on the green links below to access the recipes for this week’s meal plan.

MONDAY

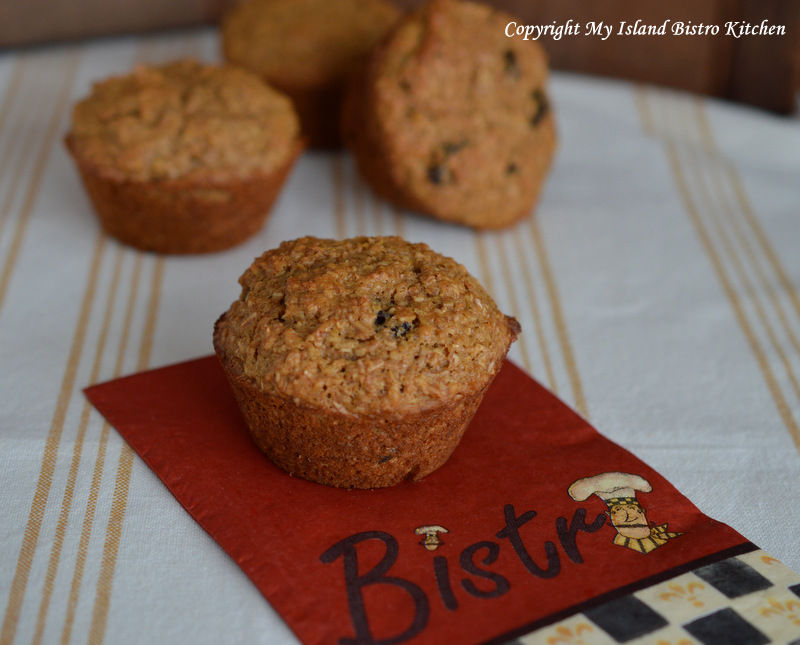
Bran Muffins – A healthy batch of muffins to start off the week.

Shopping List:  Applesauce, molasses, natural bran, all-purpose and whole wheat flours, and raisins

Bran Muffins
Bran Muffins

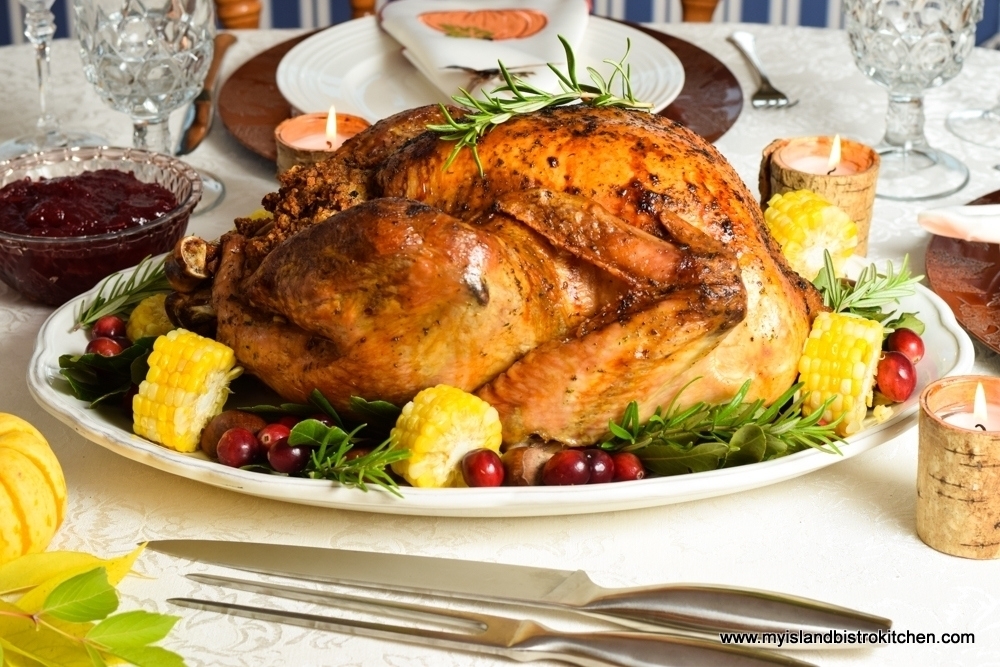
Dinner:  Roast Chicken or Turkey with Mashed Potatoes, Favorite Side Vegetables, Turnip Puff Casserole, Stuffing/Dressing, Cranberry Sauce

Who can pass up a roast chicken or turkey dinner with all the fixins’!

Shopping List: Roasting Chicken or Turkey, Vegetables of Choice. For Turnip Puff Casserole – Rutabaga, applesauce, onion, parmesan and cheddar cheeses. For Stuffing – Potatoes, bread crumbs, onion, summer savory, celery, apple, and liquid chicken bouillon. For Cranberry Sauce – cranberries (fresh or frozen), apple, and orange juice.

Roast Turkey
Roast Turkey
Turnip Puff Casserole
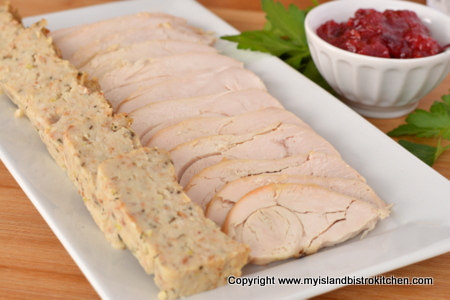
Turkey and Dressing
Turkey and Dressing
Cranberry Sauce
Zesty Cranberry-Orange Sauce

Dessert:  Blueberry Buckle

A cake type dessert made even more tasty with blueberry sauce and vanilla ice cream.

Shopping List:  Blueberries (fresh or frozen), orange juice + general baking supplies

Blueberry Buckle
Blueberry Buckle with Vanilla Ice Cream Drizzled with Blueberry Sauce

TUESDAY

Make stock from the carcass of the turkey/chicken.

Homemade stock is so flavorful and versatile. You’ll find a multitude of uses for this stock.

Shopping List:  2 lbs fresh turkey pieces, onion, leek, carrots, celery, garlic, rutabaga, parsnips, mushrooms, cider vinegar, herbs and spices (rosemary, parsley, thyme, dill, sage, basil, coriander, summer savory, cardamom pods, cloves, allspice, star anise pod, peppercorns)

Homemade Turkey Stock

NOTE: Be sure to save 2 cups of cubed turkey/chicken for the turkey chowder for Wednesday’s dinner and 1 cup for the casserole for Thursday’s dinner.

Dinner:  Leftover Roast Chicken or Turkey with Potato Salad (add a green salad, if desired)

Don’t reserve potato salad just for summer picnics and barbeques.  It’s great any time of the year and is a fine accompaniment to cold chicken or turkey.

Shopping List: For the Potato Salad – potatoes (such as Yukon Gold or Reds), eggs, celery, onion, salad dressing (click here for my recipe), sour cream, sweet relish, and mustard).

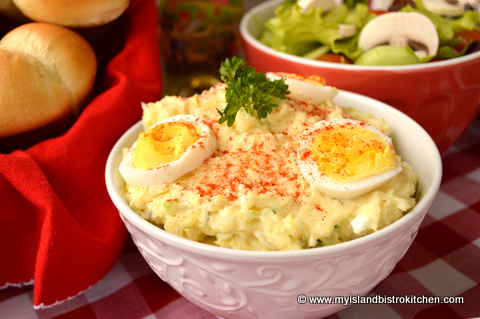
Potato Salad
My Island Bistro Kitchen’s PEI Potato Salad

Dessert:  Leftover Blueberry Buckle

Blueberry Buckle

WEDNESDAY

Dinner:  Turkey Chowder

Leftover turkey gets transformed into this hearty and flavorful chowder.

Shopping List: Onion, celery, carrots, mushrooms, red pepper, summer savory, poultry stock, potatoes, milk, 1 – 10oz can creamed corn, and Parmesan cheese (Note: This recipe requires 2 cups of the cooked, cubed leftover turkey/chicken)

Homemade Chowder
Turkey Chowder

Dessert: Molasses Spice Cookies

A spicy and chewy cookie.  Great for the cookie jar!

Shopping List: Molasses and general baking supplies 

Spice Cookies
Molasses Spice Cookies

THURSDAY

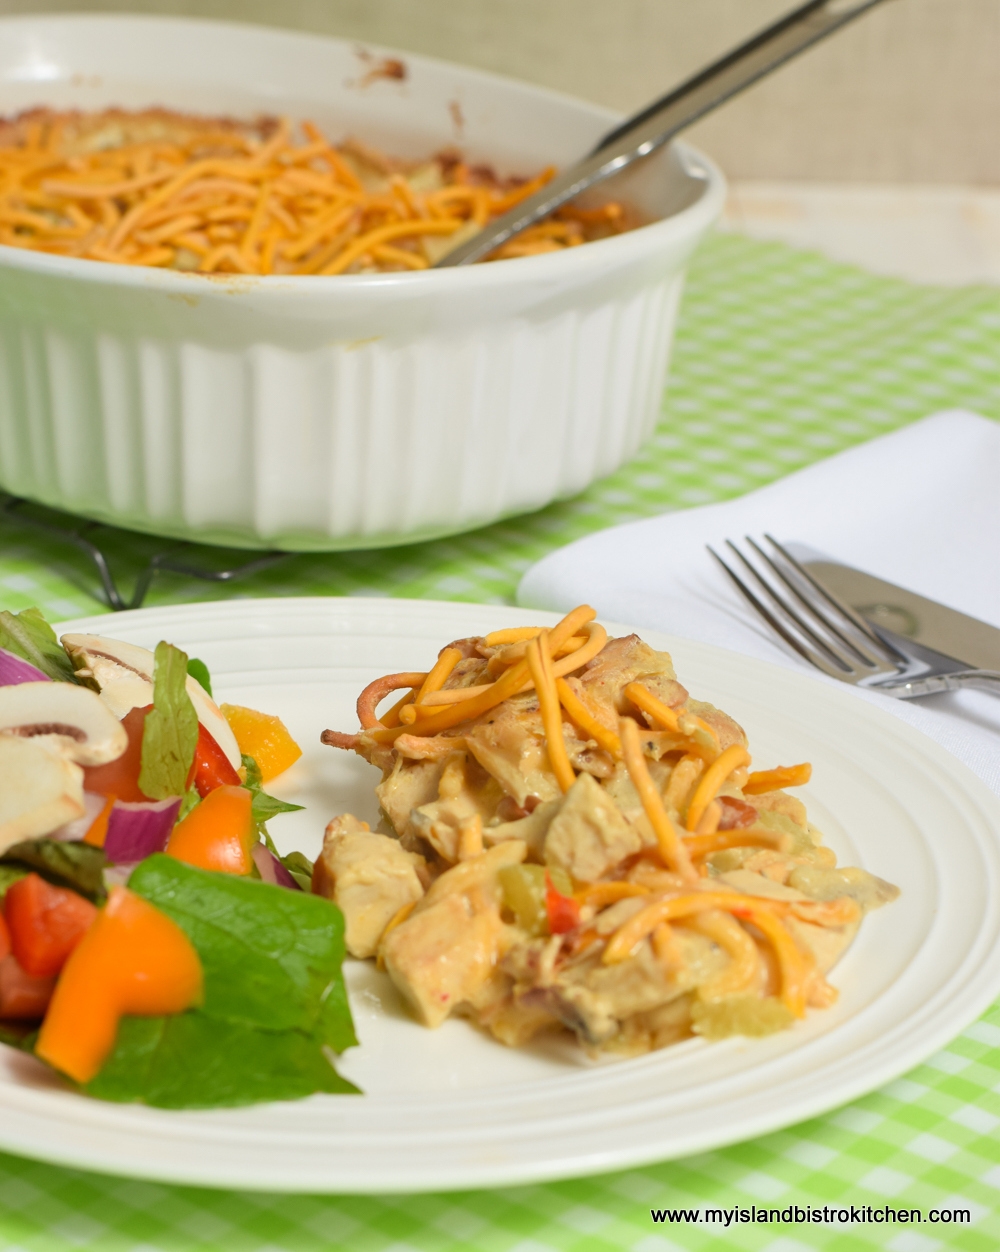
 DinnerChicken Chow Mein Casserole served with a green salad and fresh biscuits

Leftover chicken (or turkey) gets re-purposed into this flavorful easy-to-prepare casserole.

Shopping list:  For the casserole: 1 – 10oz can Cream of Chicken Soup, Parmesan cheese, fresh mushrooms, red pepper, celery, onion, garlic, chicken broth, cashew pieces, sliced water chestnuts, and chow mein noodles. (Note: This recipe requires 1 cup of the cooked, cubed leftover turkey/chicken) For the salad: Lettuce and fresh vegetables of choice and dressing. For the biscuits: Whipping cream, milk, and standard baking supplies.

Chicken Chow Mein Casserole
Tea Biscuits
Tea Biscuits

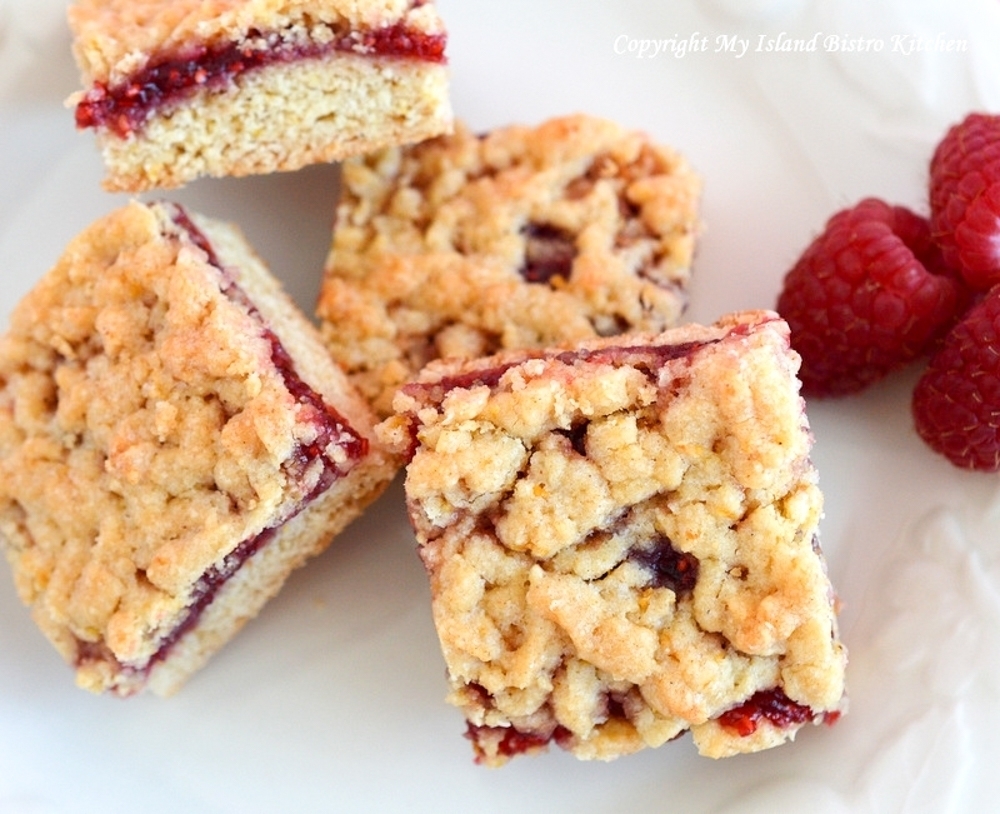
Dessert: Old-fashioned Jam Squares

A real old favorite, these jam squares demand red jam like raspberry!

Shopping List: Raspberry Jam, Lemon, and general baking supplies

Jam Squares
Jam Squares

FRIDAY

 Dinner:  Seven Layer Dinner (aka Shipwreck Dinner)

By far, one of my most popular recipes and one of the most frequently searched for on my website. Dinner in one casserole! A simple meal but a mighty tasty one!

Shopping List: Ground beef, potatoes, onion, celery, parsnips, carrots, frozen peas, Minute Rice, and 1 – 10oz can tomato soup

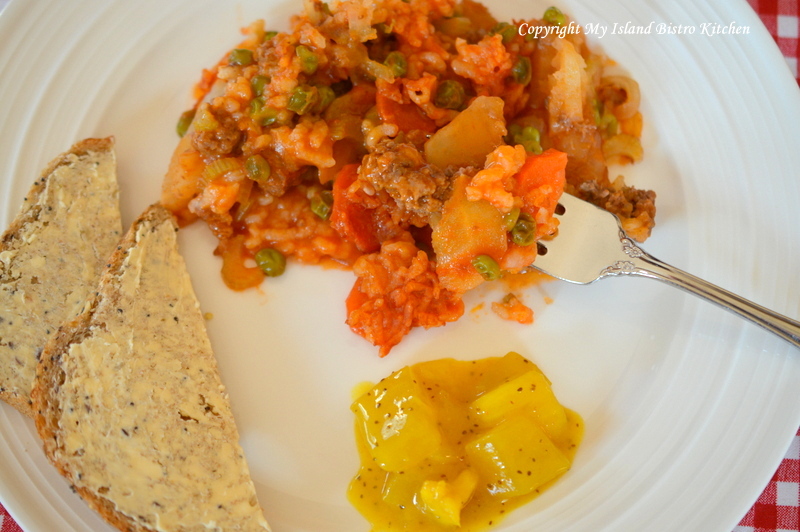
Shipwreck Dinner
Seven Layer DInner

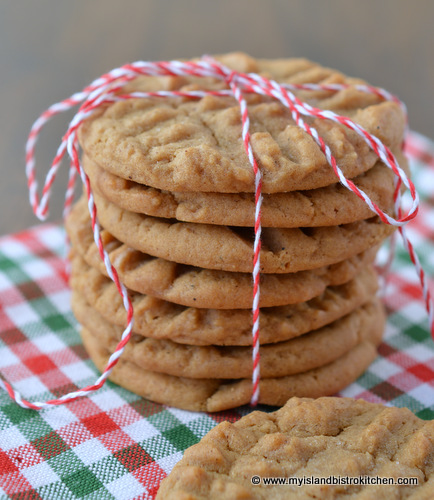
Dessert: Peanut Butter Cookies

This is an all-time favorite cookie.

Shopping List: Peanut butter + general baking supplies

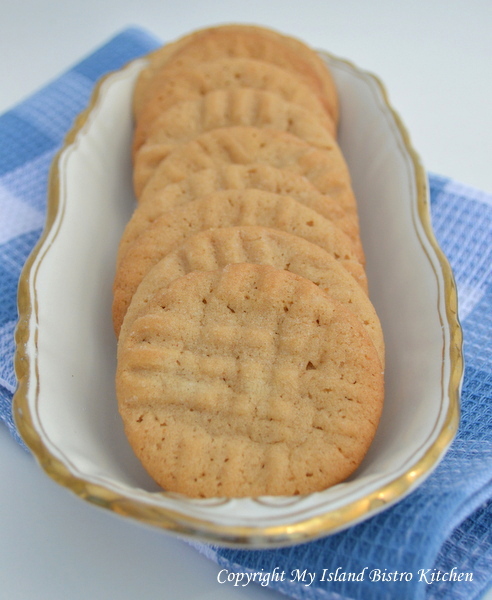
Peanut Butter Cookies

NOTE:  Soak the yellow-eyed beans overnight tonight in preparation for making the Maple Syrup Baked Beans for tomorrow night’s dinner.

SATURDAY

 Dinner: Maple Syrup Baked Beans with Homemade White Bread

A Saturday night tradition in many Maritime homes.  These beans freeze great if there are any leftovers.

Shopping List: For the Baked Beans – 1 – 1lb bag yellow eye beans, garlic, dry mustard, liquid chicken bouillon, tomato paste, cider vinegar, pure maple syrup, molasses, BBQ sauce, and onion.  For White Bread: Yeast, milk, flour and general baking supplies.

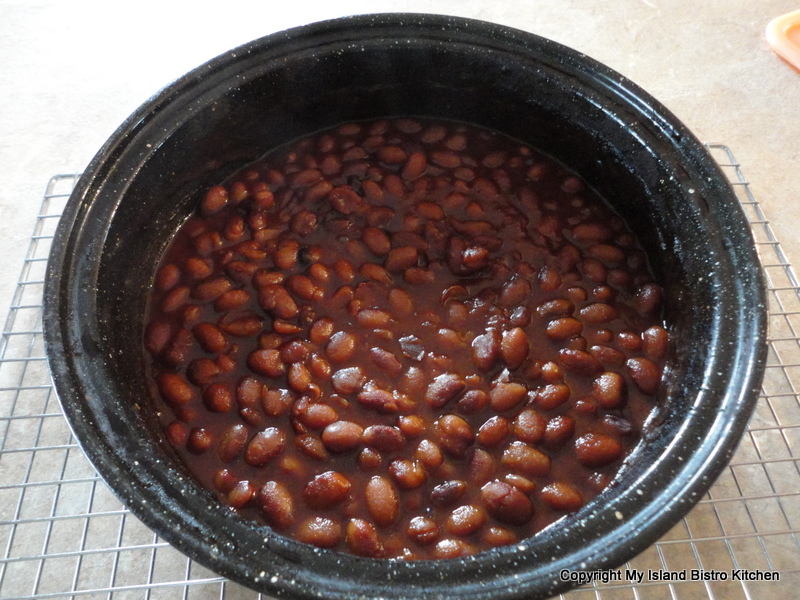
Baked Beans


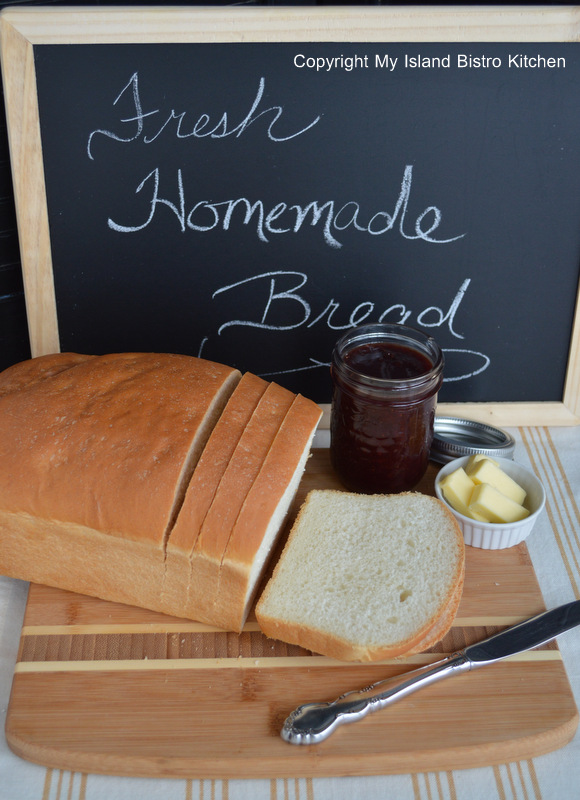
White Bread
Homemade White Bread

Dessert: Apple-Maple Bread Pudding with Maple Sauce

This bread pudding is such a treat, especially when flavored with maple liqueur that is made right here in PEI by Deep Roots Distillery in Warren Grove, just outside Charlottetown.

Shopping List:  For Pudding: 1 – 1lb loaf of soft French bread, whole milk, blend/cream, baking apples, maple liqueur, and raisins. For Sauce: Maple syrup and maple liqueur.

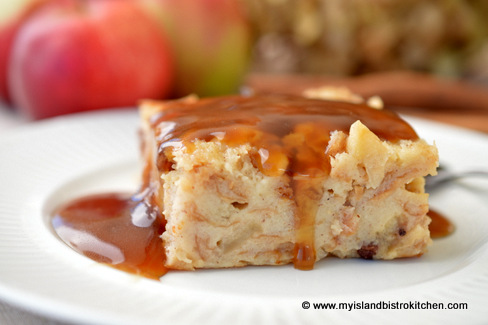
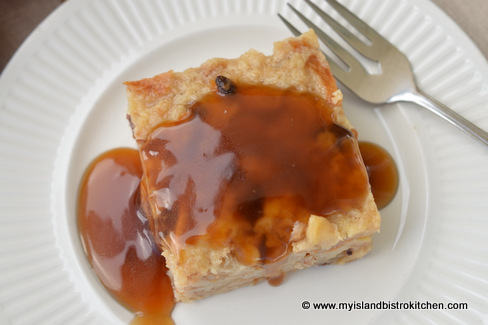
Apple-Maple Bread Pudding

SUNDAY

 Sunday Breakfast: Special Treat – Irish Cream French Toast, a great way to use some of the homemade bread from yesterday

Irish Cream jazzes up traditional French toast. A lovely weekend treat.

Shopping List: Irish Cream Liqueur (click here for my recipe), orange juice, eggs

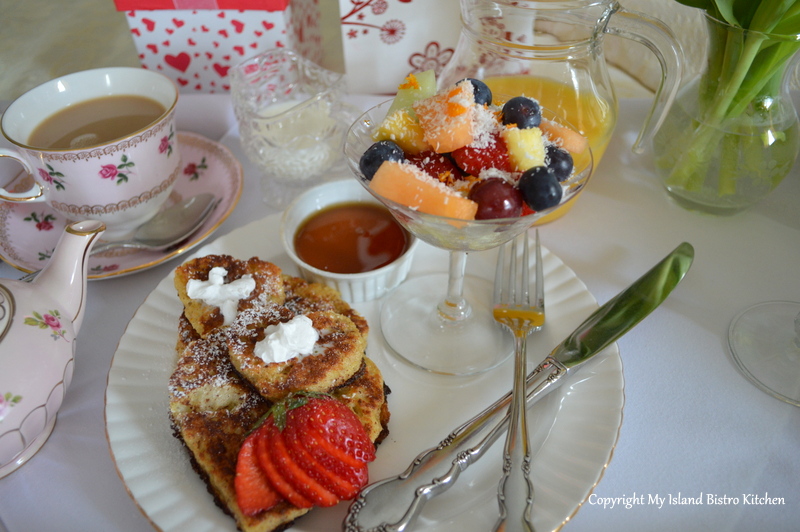
Irish Cream French Toast

DinnerPork Chops with Bread Stuffing and Creamy Mushroom Sauce; serve with baked potato and medley of favorite steamed vegetables

This is such a flavorful way to present pork chops. Yummy.

Shopping List: Pork Chops (bone-in), bread crumbs, onion, summer savory, celery, apple, liquid chicken bouillon, 1 – 10oz can mushroom soup

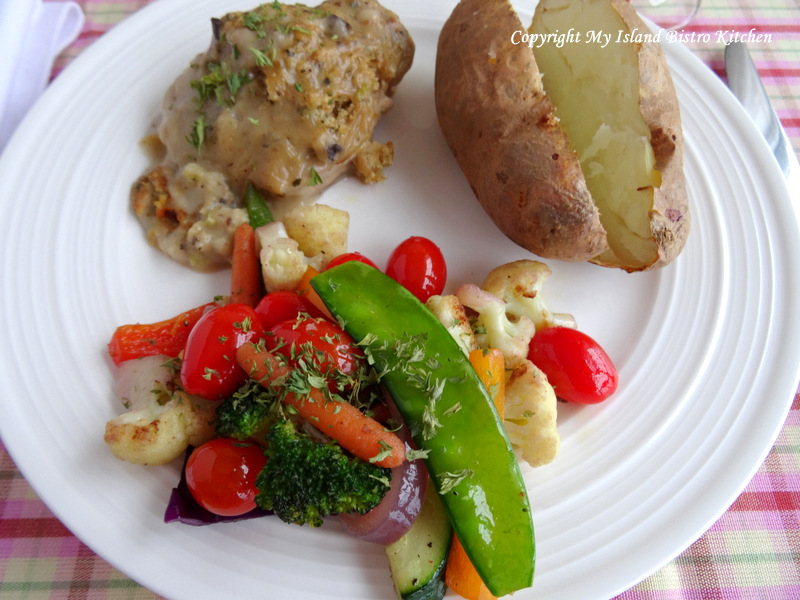
Pork Chops with Bread Stuffing and Creamy Mushroom Sauce

Dessert: Leftover Apple-Maple Bread Pudding with Maple Sauce

Maple Sauce on Apple-Maple Bread Pudding

Week 1 Menu Plan
Week 2 Menu Plan
Week 3 Menu Plan

So, there you have it! A weekly menu that makes full use of a roasted turkey or large roasted chicken.

Chicken Chow Mein Casserole Recipe

Chicken Chow Mein Casserole

Casserole recipes are useful for the home cook’s meal planning. They are a convenient entrée for a dinner meal, can be prepared ahead of time, are often a great way to use leftovers and re-purpose them into a new entrée, and they can stretch the food dollar.  My Chicken Chow Mein Casserole is one that fits that bill nicely. Continue reading Chicken Chow Mein Casserole Recipe

Meal Planning – Week 3

A weekly meal plan is always useful to have. It helps with shopping, meal preparation, healthy eating, meal variety, and can save on the grocery bill. What follows is my suggested meal plan and shopping list for Week 3. I have several weeks’ worth of meal plans developed using recipes I have created for my food blog.  You can access the meal plans for other weeks by clicking on the hotlinks at the end of this posting.   Of note, the Week 1 posting also includes information on meal planning in general.

I’ve provided a list of the main ingredients that, for the most part, would probably involve a shopping trip to the supermarket for most. However, as always, read each recipe thoroughly and carefully to create your own list as I have not listed what I consider to be “staple” items like regular milk, butter, eggs, flour, sugar, butter/shortening, oil, spices, etc.

Click on the green hotlinks to access the recipes.

MONDAY

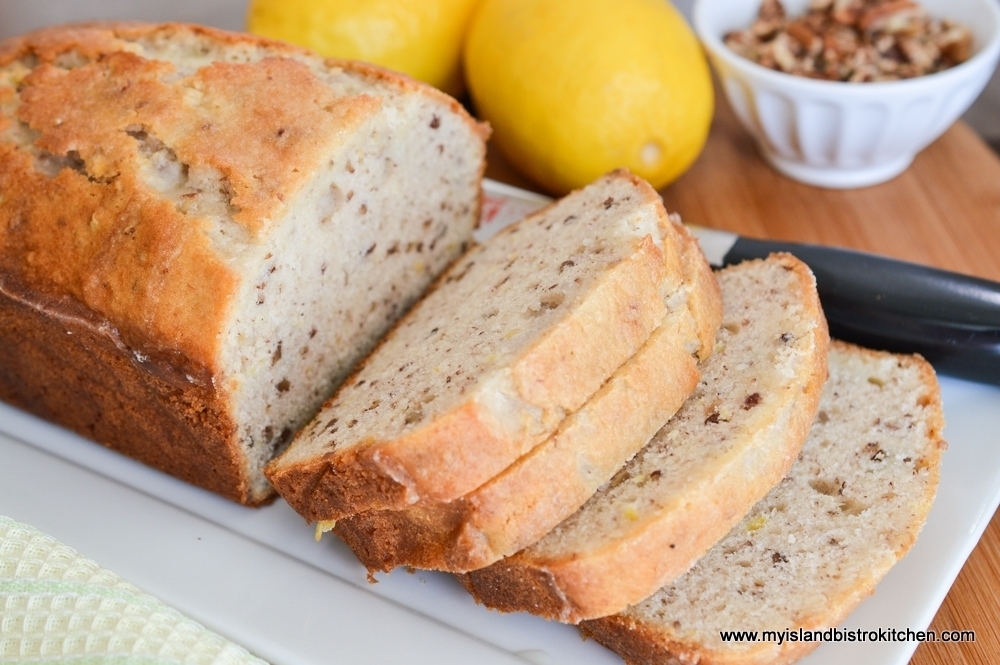
Glazed Lemon Pecan Sweet Bread – This is a lovely treat to start off the week. Tuck it in to the lunch bags for a treat at break.

Shopping List: Lemon, pecans

Glazed Lemon Pecan Sweet Bread

Dinner:  Rich and Hearty Goulash Soup with Whole Wheat Biscuits

This soup is the full meal deal – very filling and flavorful.

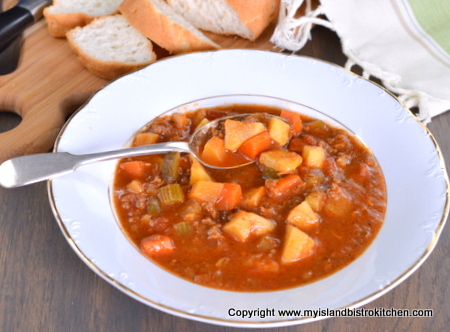
Shopping List: For the Soup – Ground beef, onion, celery, carrots, rutabaga, parsnip, potatoes, zucchini, garlic, tomato paste, canned diced tomatoes, ketchup, beef stock (click here for my recipe), red wine vinegar. For the Biscuits – All purpose and whole wheat flours, buttermilk

Goulash Soup
Rich and Hearty Goulash Soup

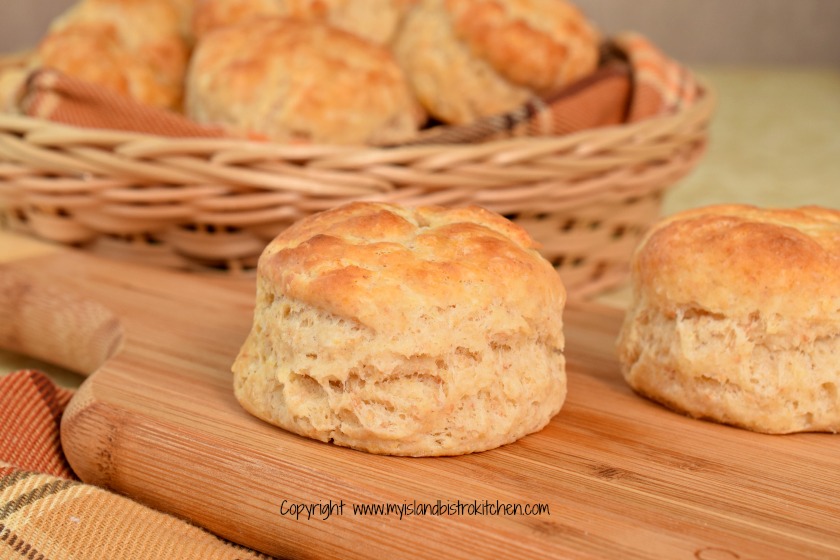
There’s nothing like a wholesome homemade biscuit and these whole wheat biscuits go really well with the Goulash Soup.

Whole Wheat Biscuits

Dessert: Apple Crisp

No matter the season, this old faithful dessert will always meet with satisfaction. Pure comfort food at its best!

Shopping List: Apples (e.g., any combo of Cortland, Honeycrisp, Humes, Gingergold), rolled oats, pecans, lemon juice

Apple Crisp
Apple Crisp with Vanilla Ice Cream

TUESDAY

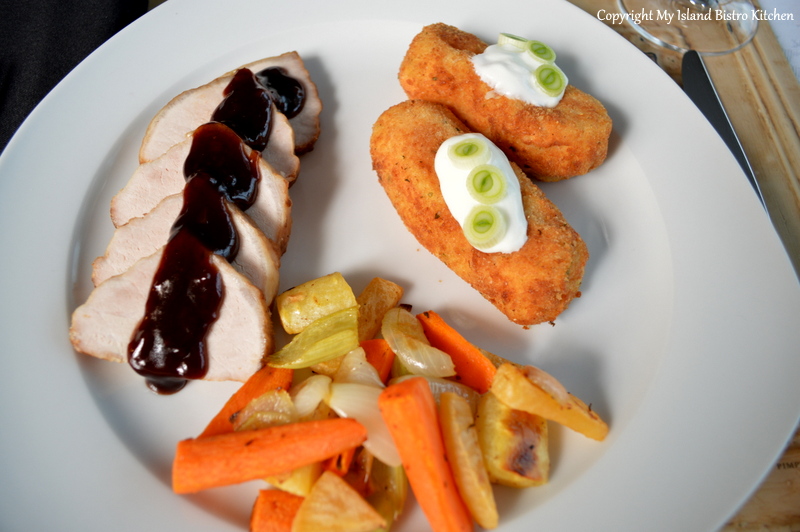
Dinner:  Pork Loin Roast with Pomegranate, Red Wine, and Black Garlic; serve with Potato Patties and medley of roasted vegetables of choice

Black garlic is not all that common yet, here on PEI, the garlic grower at Eureka Garlic just outside Kensington produces black garlic. Click here to read the story I wrote on Eureka Garlic’s black garlic.  Not at all the taste you might think – in fact, no garlic flavor at all. Its transformation is more of a cross between a fig and a prune. Goes particularly well with pork.

Shopping List: For Pork Loin Roast – Pork rib roast, garlic, soya sauce, white wine vinegar, shallots, pomegranate molasses, chicken stock, black garlic, balsamic vinegar, red wine, orange juice. For Potato Patties – Potatoes, sour cream chicken bouillon, breadcrumbs.

Pork Loin
Pork Loin Roast with Pomegranate, Red Wine, and Black Garlic Sauce served with Potato Croquettes and Roasted Root Vegetables

These potato patties are such an incredibly tasty way to serve potatoes and they freeze well, too!

PEI Potato Patties
PEI Potato Patties

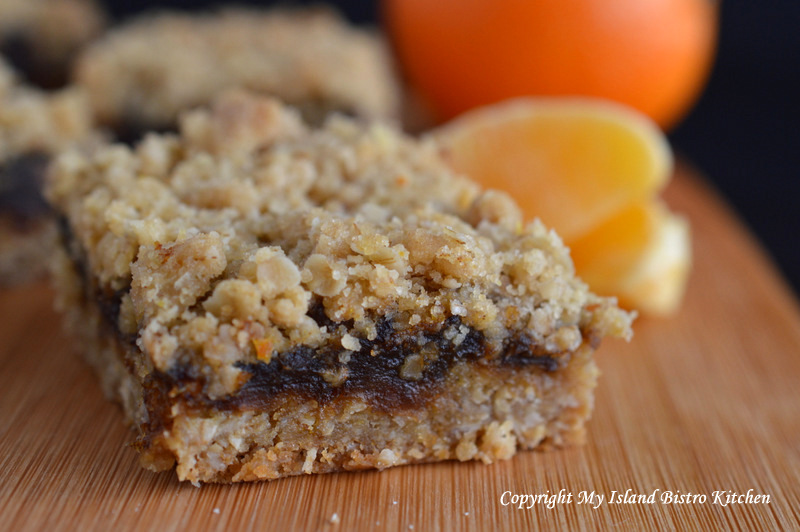
Dessert:  Date Squares

Date Squares, the perennial favorite with many! These are a yummy treat and they freeze well, too.

Shopping List: Dates, rolled oats, orange juice

Date Squares
Date Squares (aka Matrimonial Squares)

WEDNESDAY

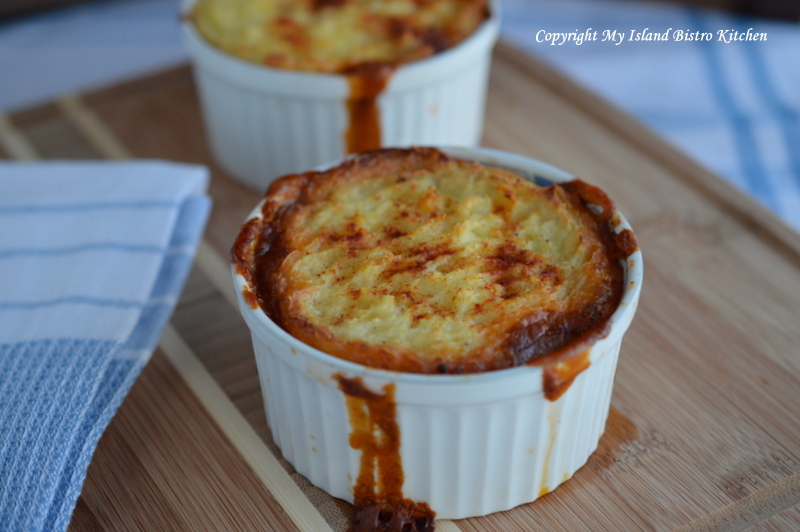
Dinner:  Savory Cottage Pie

Lovely winter time treat, these little pies are packed full of flavor!

Shopping List: Ground beef, onion, carrots, parsnip, celery, green pepper, garlic, mushrooms, tomato paste, tomato sauce, ketchup, canned diced tomatoes, Worcestershire sauce, Dijon mustard, beef broth, molasses, frozen peas and corn, potatoes, grated cheddar cheese

cottage pie
My Island Bistro Kitchen’s Cottage Pie

Dessert: Butter Tarts

When it comes to food, it doesn’t get any more Canadian than these sweet butter tarts! A treat for sure, eh!

Butter Tarts
Butter Tarts

Shopping List: Pie Pastry, general baking supplies + maple syrup, milk/blend/cream 
Butter Tarts

THURSDAY

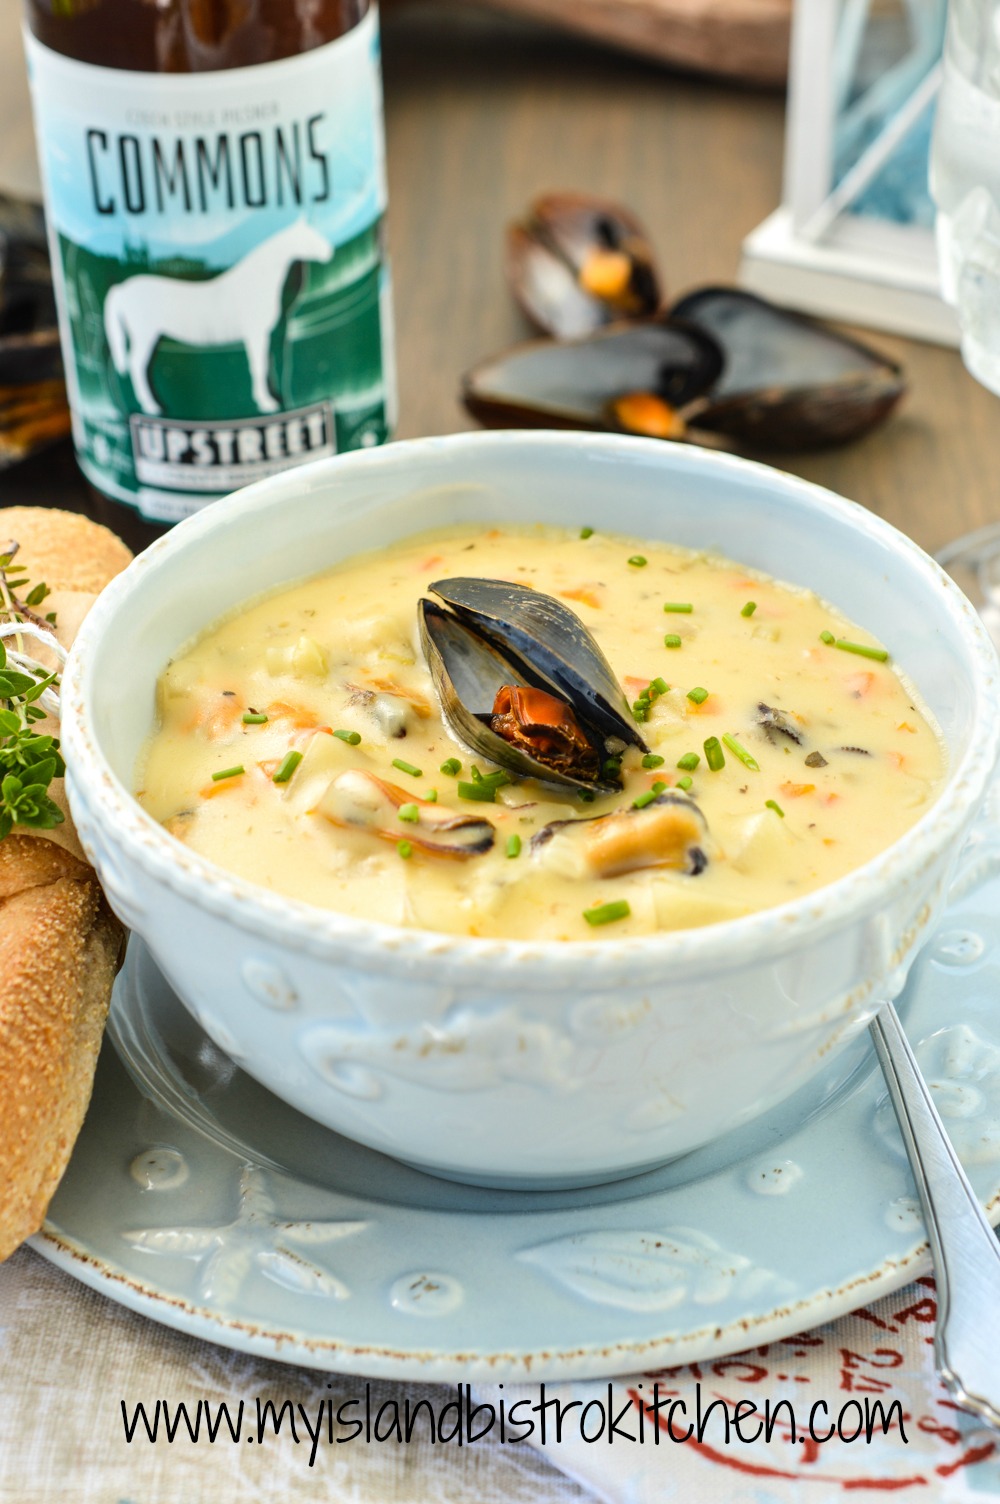
DinnerMussel Chowder served with Pan Rolls

This chowder is incredibly flavorful. They’ll ask for seconds on this one!

Shopping list: For Chowder:  2 lbs PEI mussels, onion, garlic, white wine, celery, carrots, potatoes, chicken broth, whole milk (or evaporated milk); For Pan Rolls: Yeast + standard baking supplies

PEI Mussel Chowder Paired with Upstreet Brewing Company's Commons Czech Style Pilsner
PEI Mussel Chowder Paired with Upstreet Brewing Company’s Commons Czech Style Pilsner

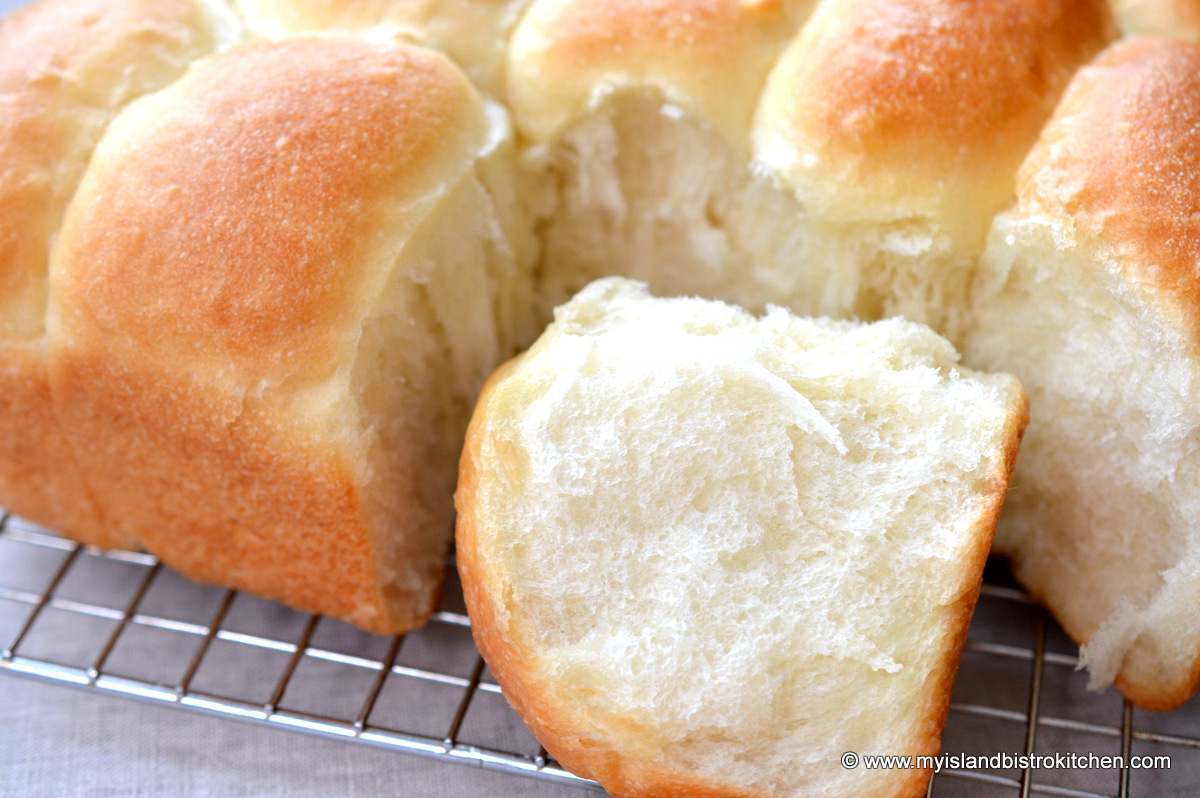
Nothing better with chowder than fresh homemade rolls, still warm from the oven! Bring on the butter!

Pan Rolls
Pan Rolls

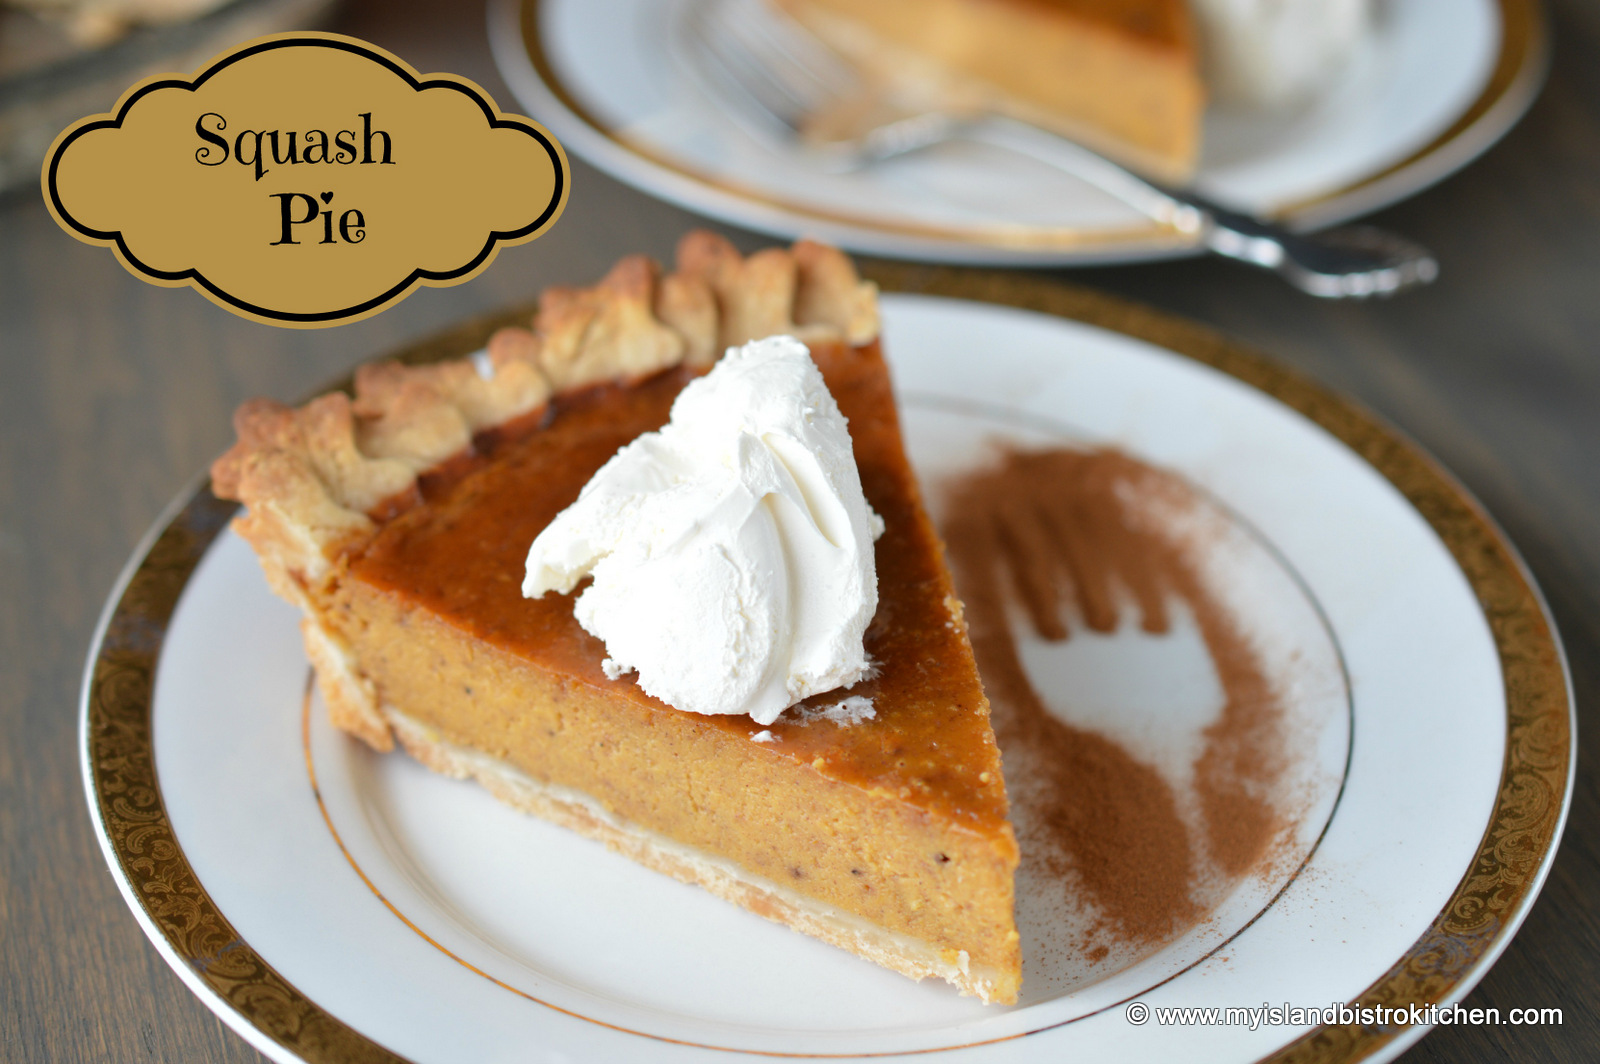
Dessert: Squash Pie

Pick up a butternut squash and make this delectable pie – it’s even better than pumpkin pie and has a deeper flavor. Don’t reserve this recipe just for the autumn – it’s good any time of the year!

Shopping List:  1½ – 1¾ lb butternut squash, pastry for 10” single crust pie, evaporated milk, whipping cream

Squash Pie
Squash Pies

FRIDAY

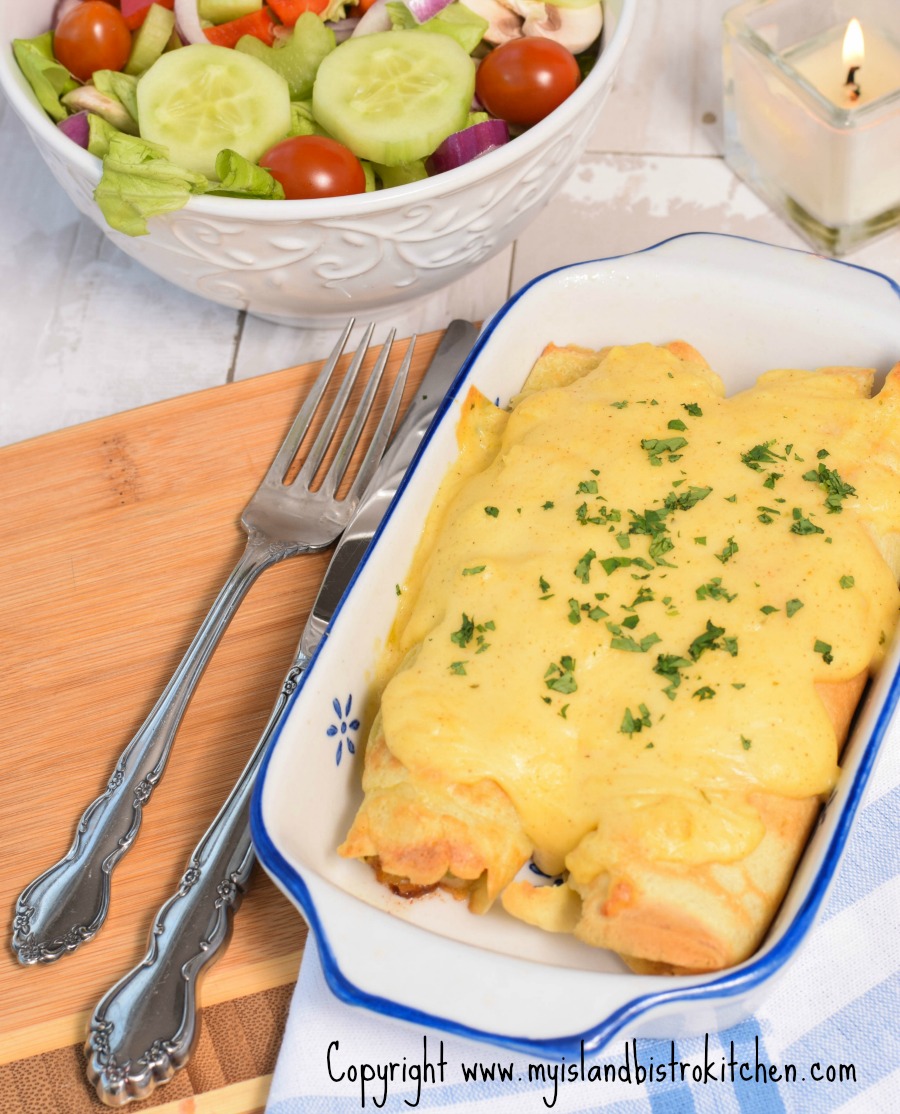
 Dinner:  Chicken and Mushroom Crepes with Cheese Sauce; serve with favorite green salad

A real special Friday night dinner. These crepes are so tasty with their cheesy sauce!

Shopping List: For crepes – 2 cups cubed cooked chicken, chicken stock, cheese mix (e.g., mozzarella, provolone and parmesan), celery, mushrooms; For salad – lettuce and favorite salad fixings and dressing.

Chicken and Mushroom Crepes with Cheese Sauce

Dessert: Leftover Squash Pie

Squash Pie
Squash Pie

SATURDAY

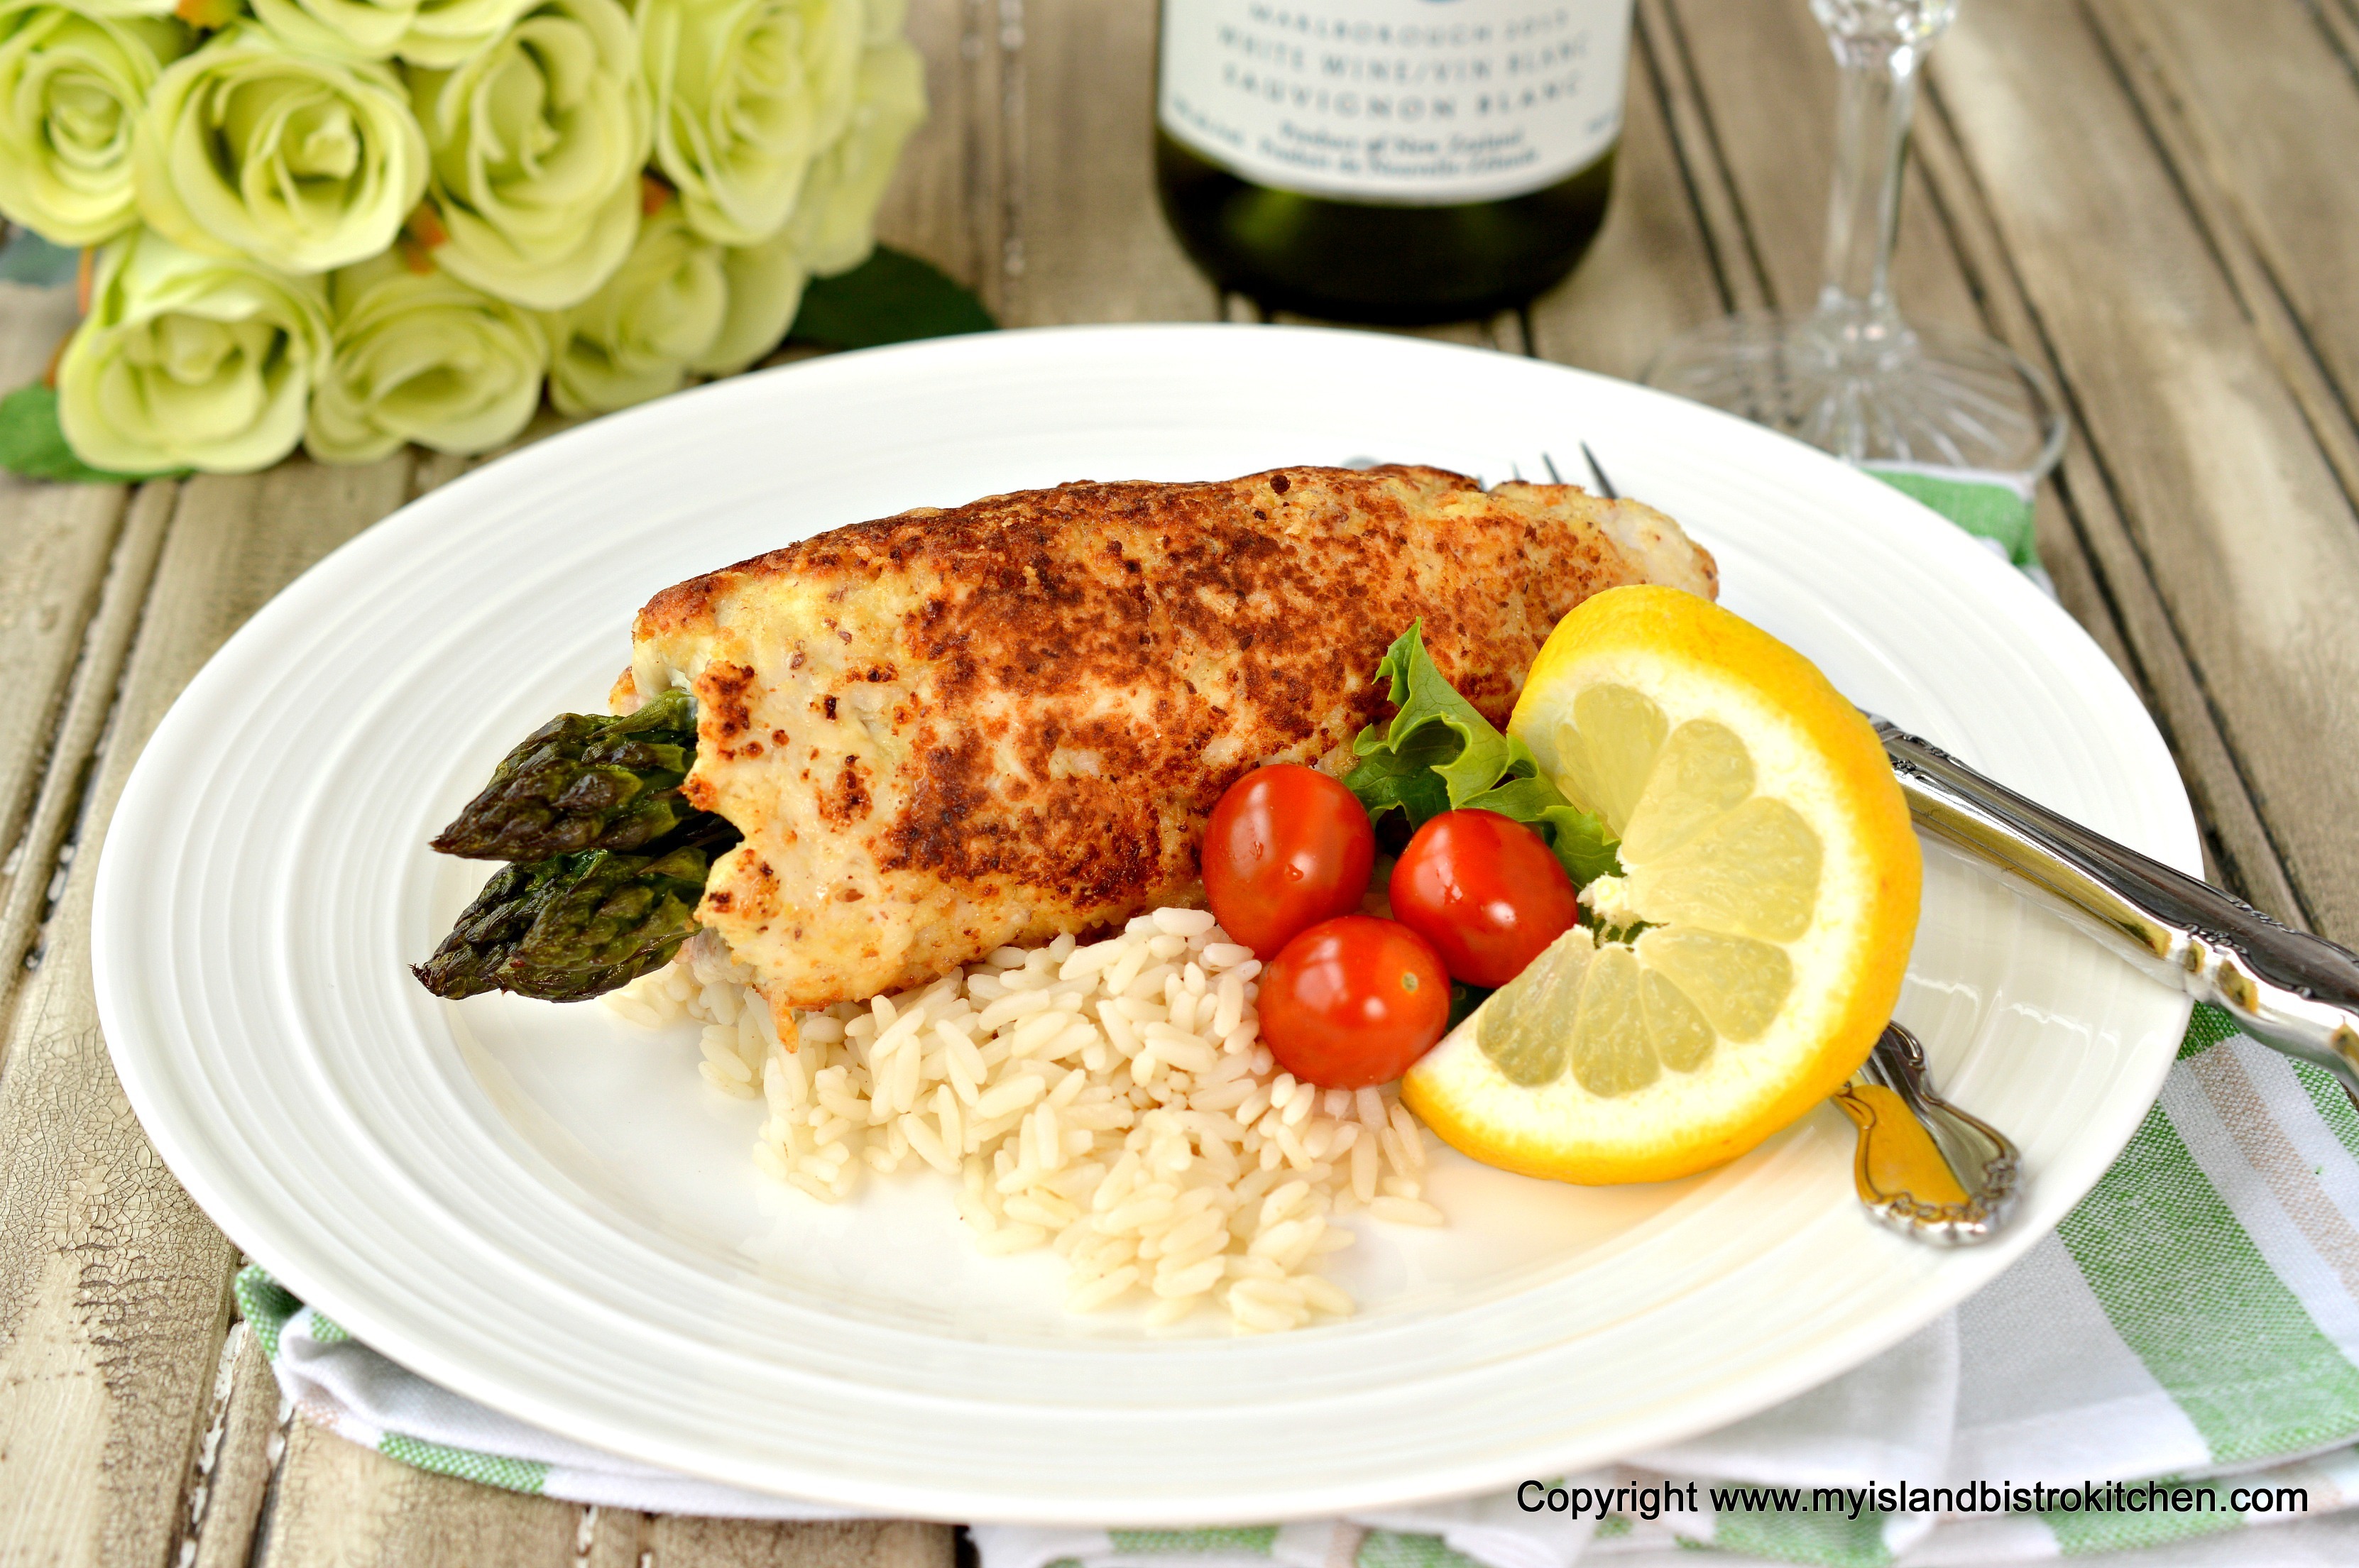
Dinner: Asparagus Stuffed Chicken Breasts with Rice

Fresh asparagus works best in this chicken dish.  Super yummy and looks great when it is sliced with the rings of the asparagus being very showy!

Shopping List: Boneless skinless chicken breasts, Boursin cheese, fresh asparagus spears, prosciutto, parmesan cheese, rice.

Asparagus
Asparagus-Stuffed Chicken Breasts

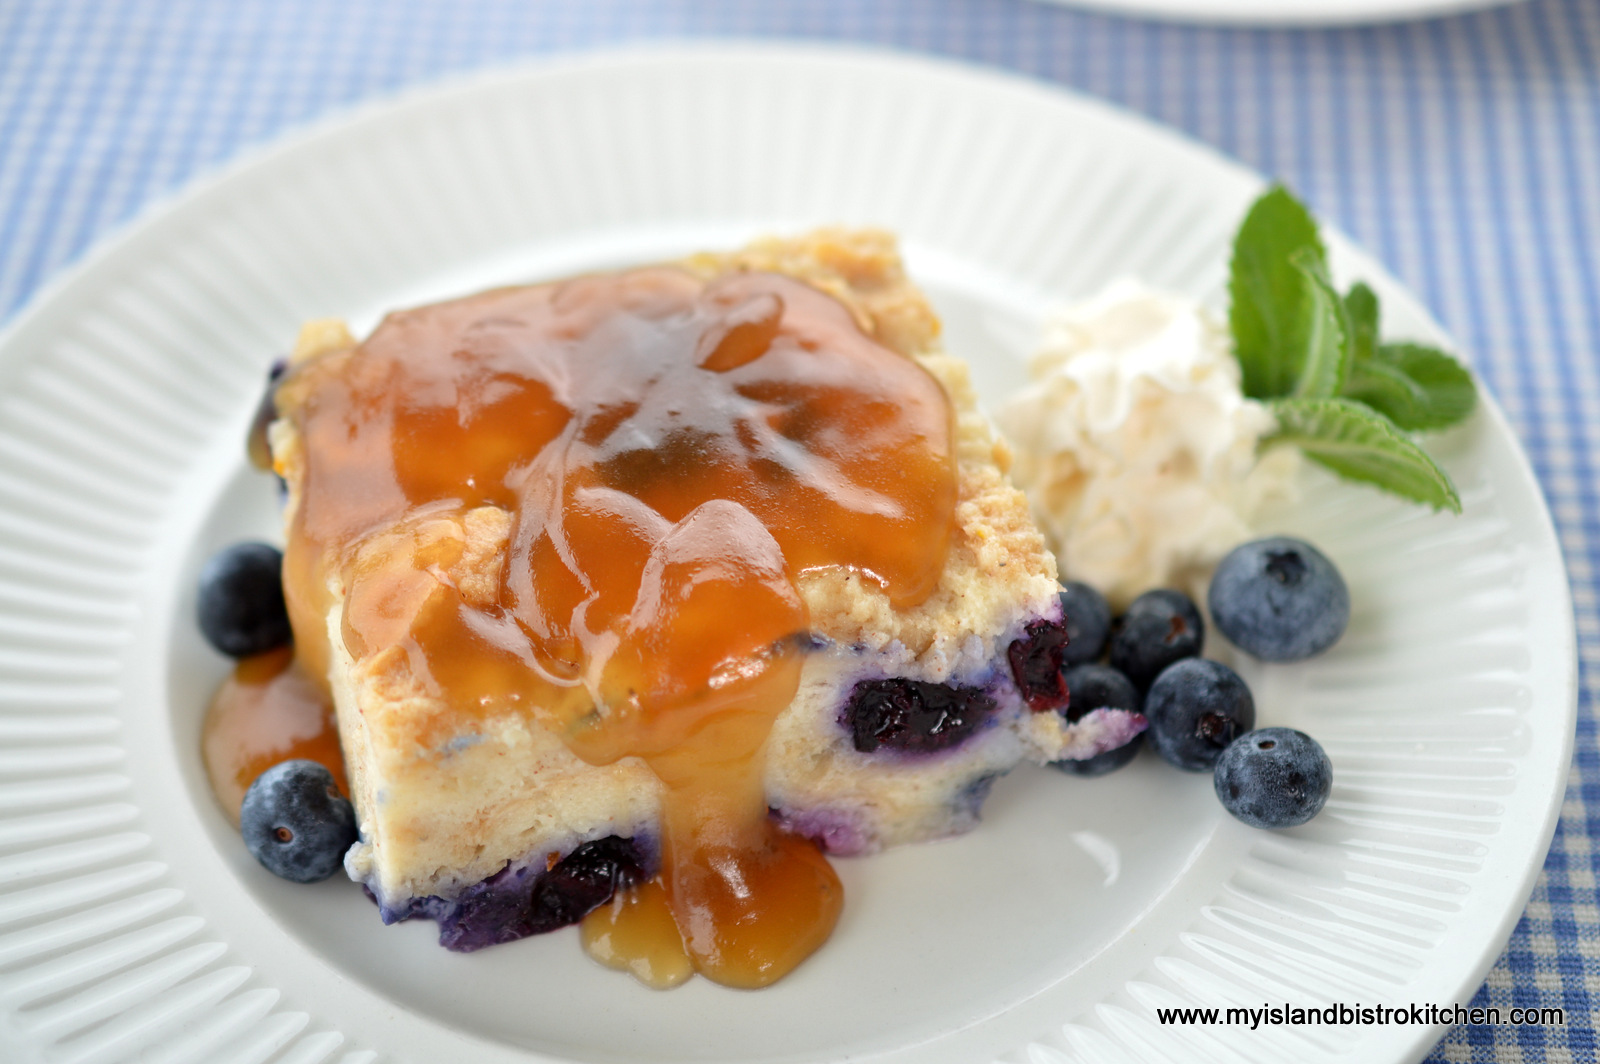
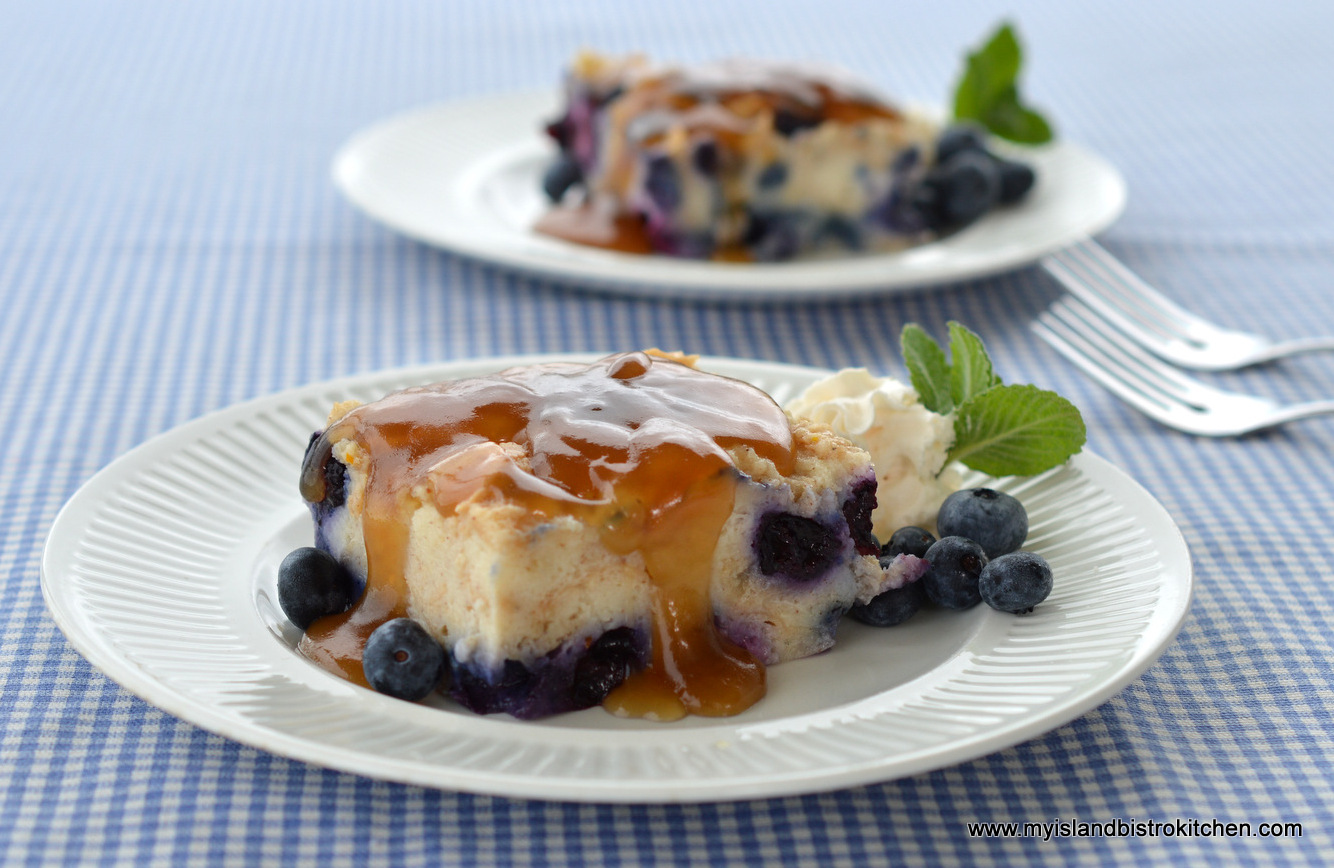
Dessert: Blueberry Bread Pudding with Grand Marnier Sauce

Oh là-là, how many different ways can you say “yummy”? This moist and flavorful bread pudding will have them calling for seconds!

Shopping List:  For Pudding: 1 – 1lb loaf of soft French bread, whole milk, maple syrup, 2 cups high-bush blueberries (fresh or frozen). For Sauce: Grand Marnier, corn syrup

Blueberry Bread Pudding

SUNDAY

 Sunday Breakfast: Special Treat – Cinnamon Rolls

Cinnamon Rolls
Cinnamon Buns

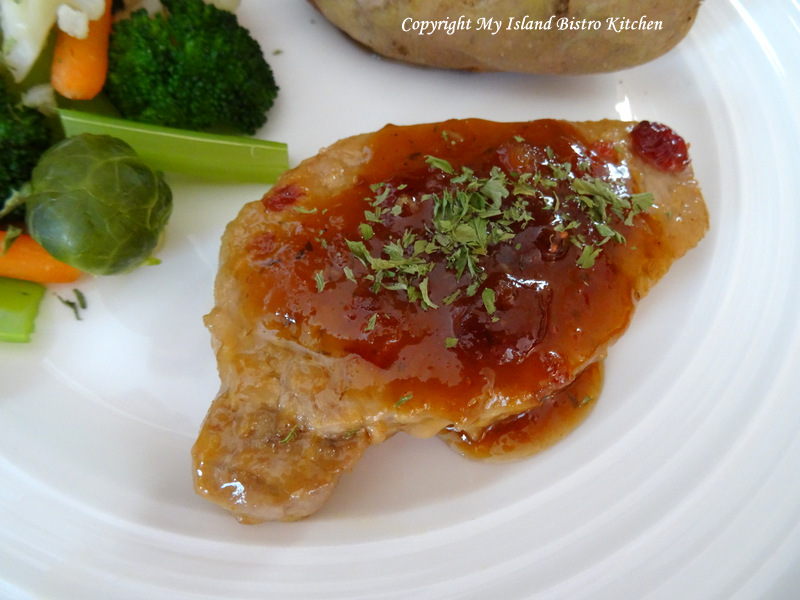
DinnerCranberry and Ginger Sauced Pork Chops; serve with baked potato and medley of favorite steamed vegetables

Jazz up pork chops with a tasty and colorful cranberry and ginger sauce.

Shopping List: Pork Chops, chicken broth, orange juice, balsamic vinegar, cranberry preserve/jam, mustard, onion

Pork Chops
Cranberry and Ginger Sauced Pork Chops

Dessert: Leftover Blueberry Bread Pudding

Bread Pudding
My Island Bistro Kitchen’s Blueberry Bread Pudding

I hope you have found some interesting recipes from my food blog to try this week!

For other weekly meal plans from My Island Bistro Kitchen, click on the links below:

Week 1 Meal Plan
Week 2 Meal Plan
Week 4 Meal Plan
Week 5 Meal Plan
Week 6 Meal Plan

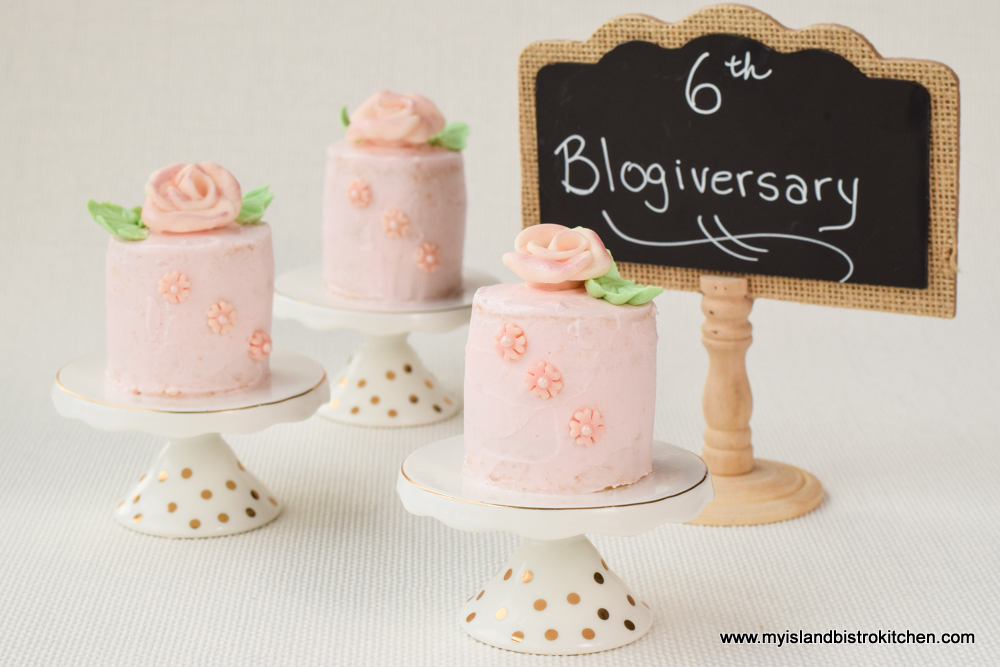
My Island Bistro Kitchen Celebrates 6th Blogiversary!

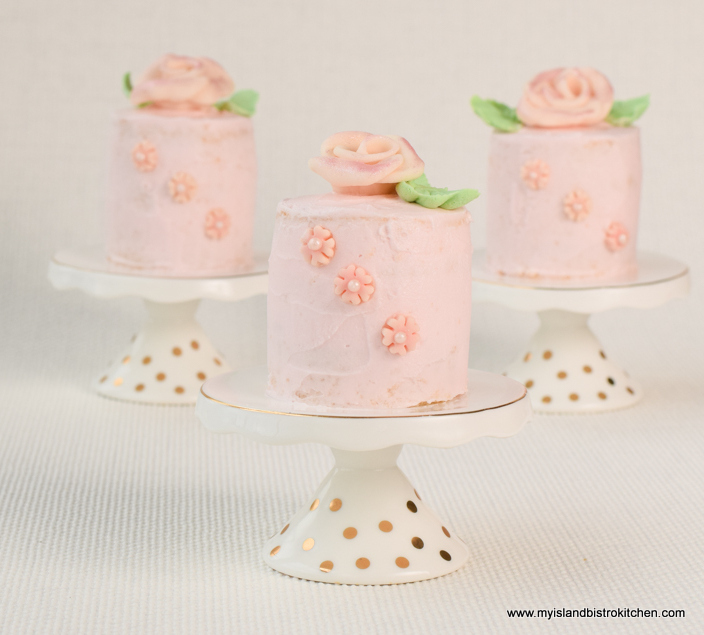
My Island Bistro Kitchen's 6th Blogiversary Mini Cakes
My Island Bistro Kitchen’s 6th Blogiversary Mini Cakes

Six years ago today, I began my food blog called My Island Bistro Kitchen.  Six years later and I have created and published many recipes and written many stories about local food producers here on PEI.

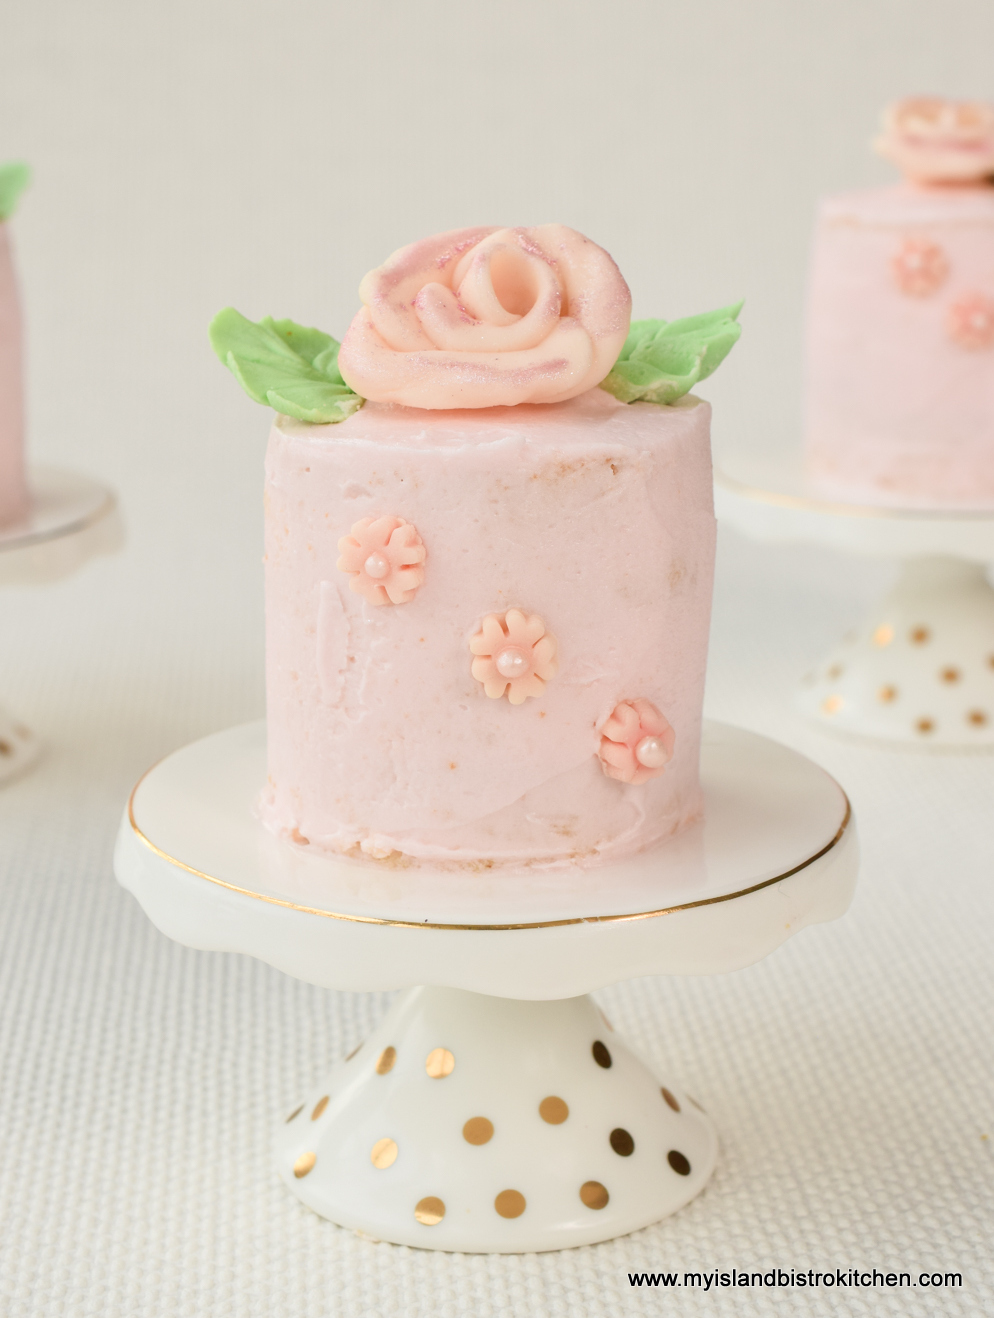
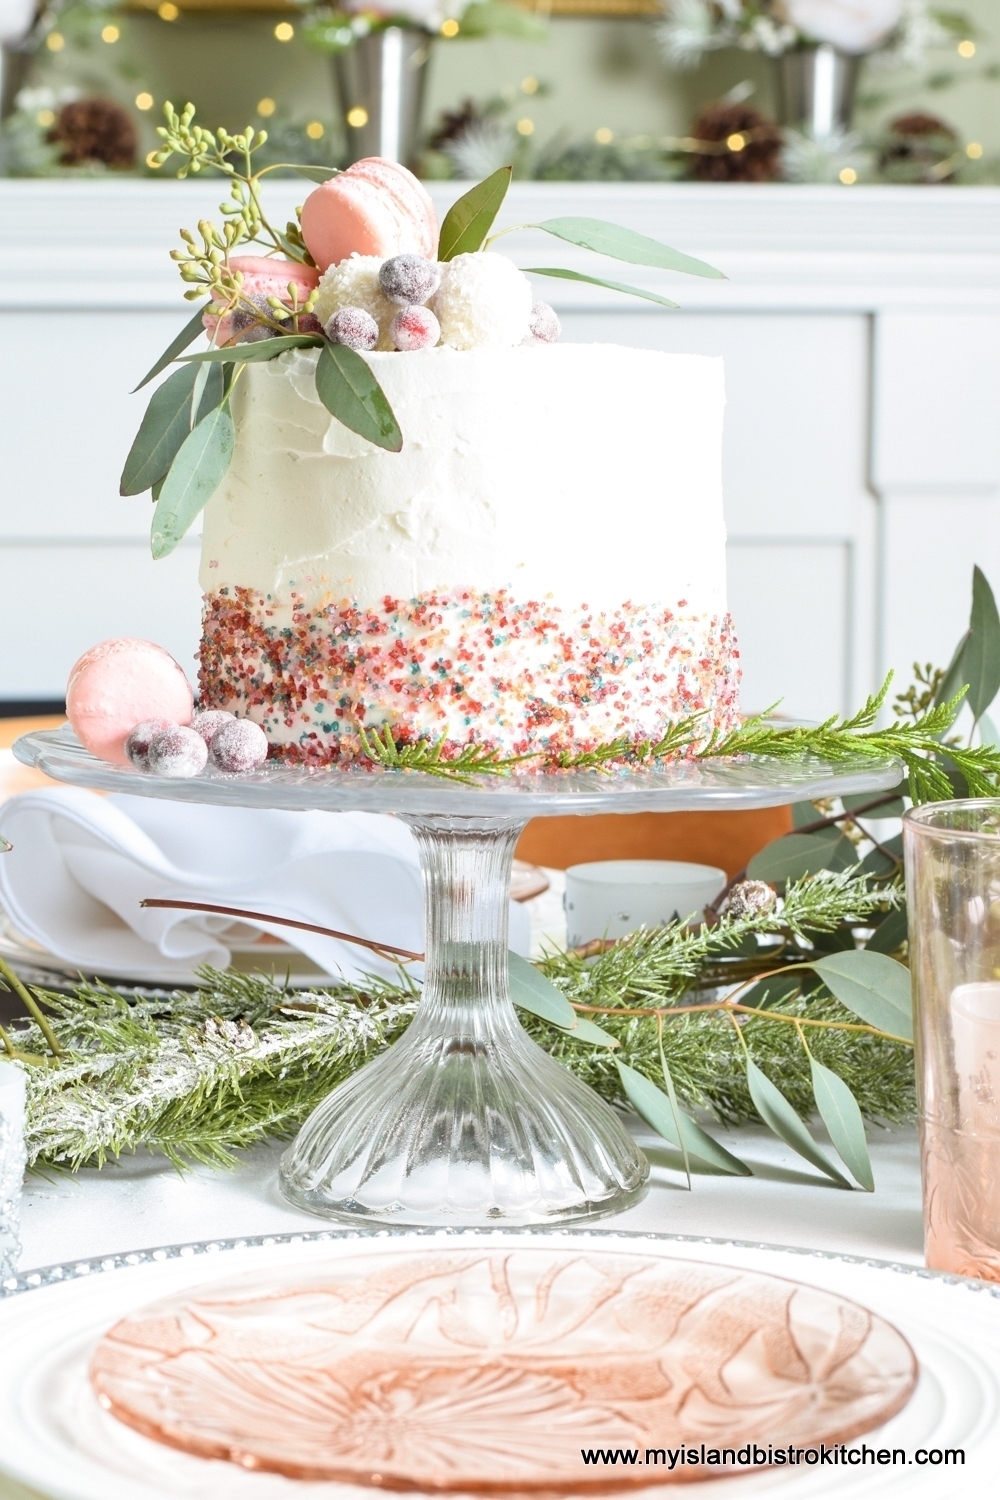
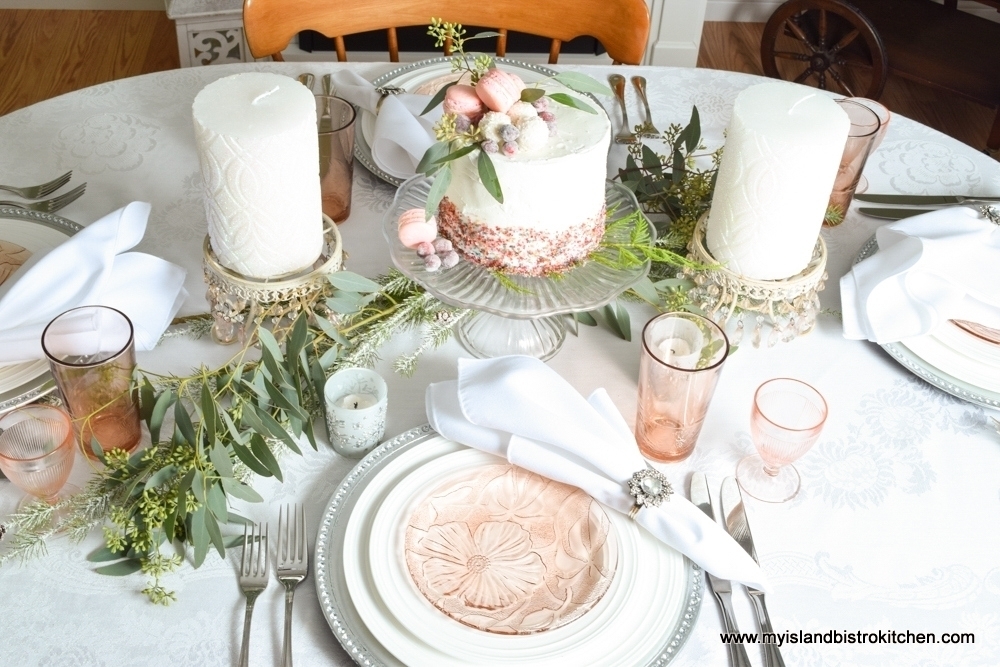
Every anniversary deserves some kind of celebratory cake or cupcakes. For this 6th blogiversary, I have opted to go with mini cakes.  Positioned on tiny individual pedestal stands, they each have their own prominence.

Mini Cake
Mini Cake

A touch of whimsy, these little cakes are great for desserts, afternoon teas, weddings, showers, or just about any event imaginable.

A trio of Mini Cakes

Displays of clusters of mini cakes always signify a celebration of some kind!

Thanks for following along on my culinary pursuits!


MEAL PLANNING – WEEK 2

Here is my suggested meal plan for the upcoming week. This is the Week 2 menu.  You can access the meal plans for Week 1 by clicking here, Week 3 here,  Week 4 here, Week 5 here, and Week 6 here.

I am a big fan of meal planning – it takes some coordination and effort upfront but the payoff is great. Find tested and reliable recipes with ingredients you know your family will like, read through the recipes to see what’s involved in their preparation and how long it will take to prepare them, make the shopping list, shop for the ingredients, and set aside the time to make the recipes. If you have helpers in the household, assign them tasks to help with the preparation.

Rather than spend time aimlessly perusing recipes in books or magazines or searching through the internet for a recipe that might pique your interest, I recommend first thinking about what main ingredient might appeal to you – is it ham, beef, poultry, fish, pasta, vegetables, etc. Are you looking for a casserole, a pot pie, or a main entrée, a one-time meal recipe or one that leftovers could be frozen for another meal or transformed into another dish altogether? Once you narrow down what you are aiming for, your search for the recipe will be more focused and concentrated and you will spend less time on the recipe search and more time productively spent actually making the dish.

To help you with that search, I hope you find some, or all, of the following recipes of interest and ones you will add to your weekly meal plan.

I’ve provided a list of the main ingredients that, for the most part, would probably involve a shopping trip to the supermarket for most. However, as always, read each recipe thoroughly and carefully to create your own personalized list as I have not listed what I consider to be “staple” items like regular milk, butter, eggs, flour, sugar, butter/shortening, oil, spices, etc.

Make sure you read through the menu suggestions for the entire week as some require some leftover meat or gravy, etc., from a previous day’s dinner so you will need to know what amounts of ingredients need to be set aside for a subsequent day’s meal.

Click on the green hotlinks to access the recipes.

MONDAY

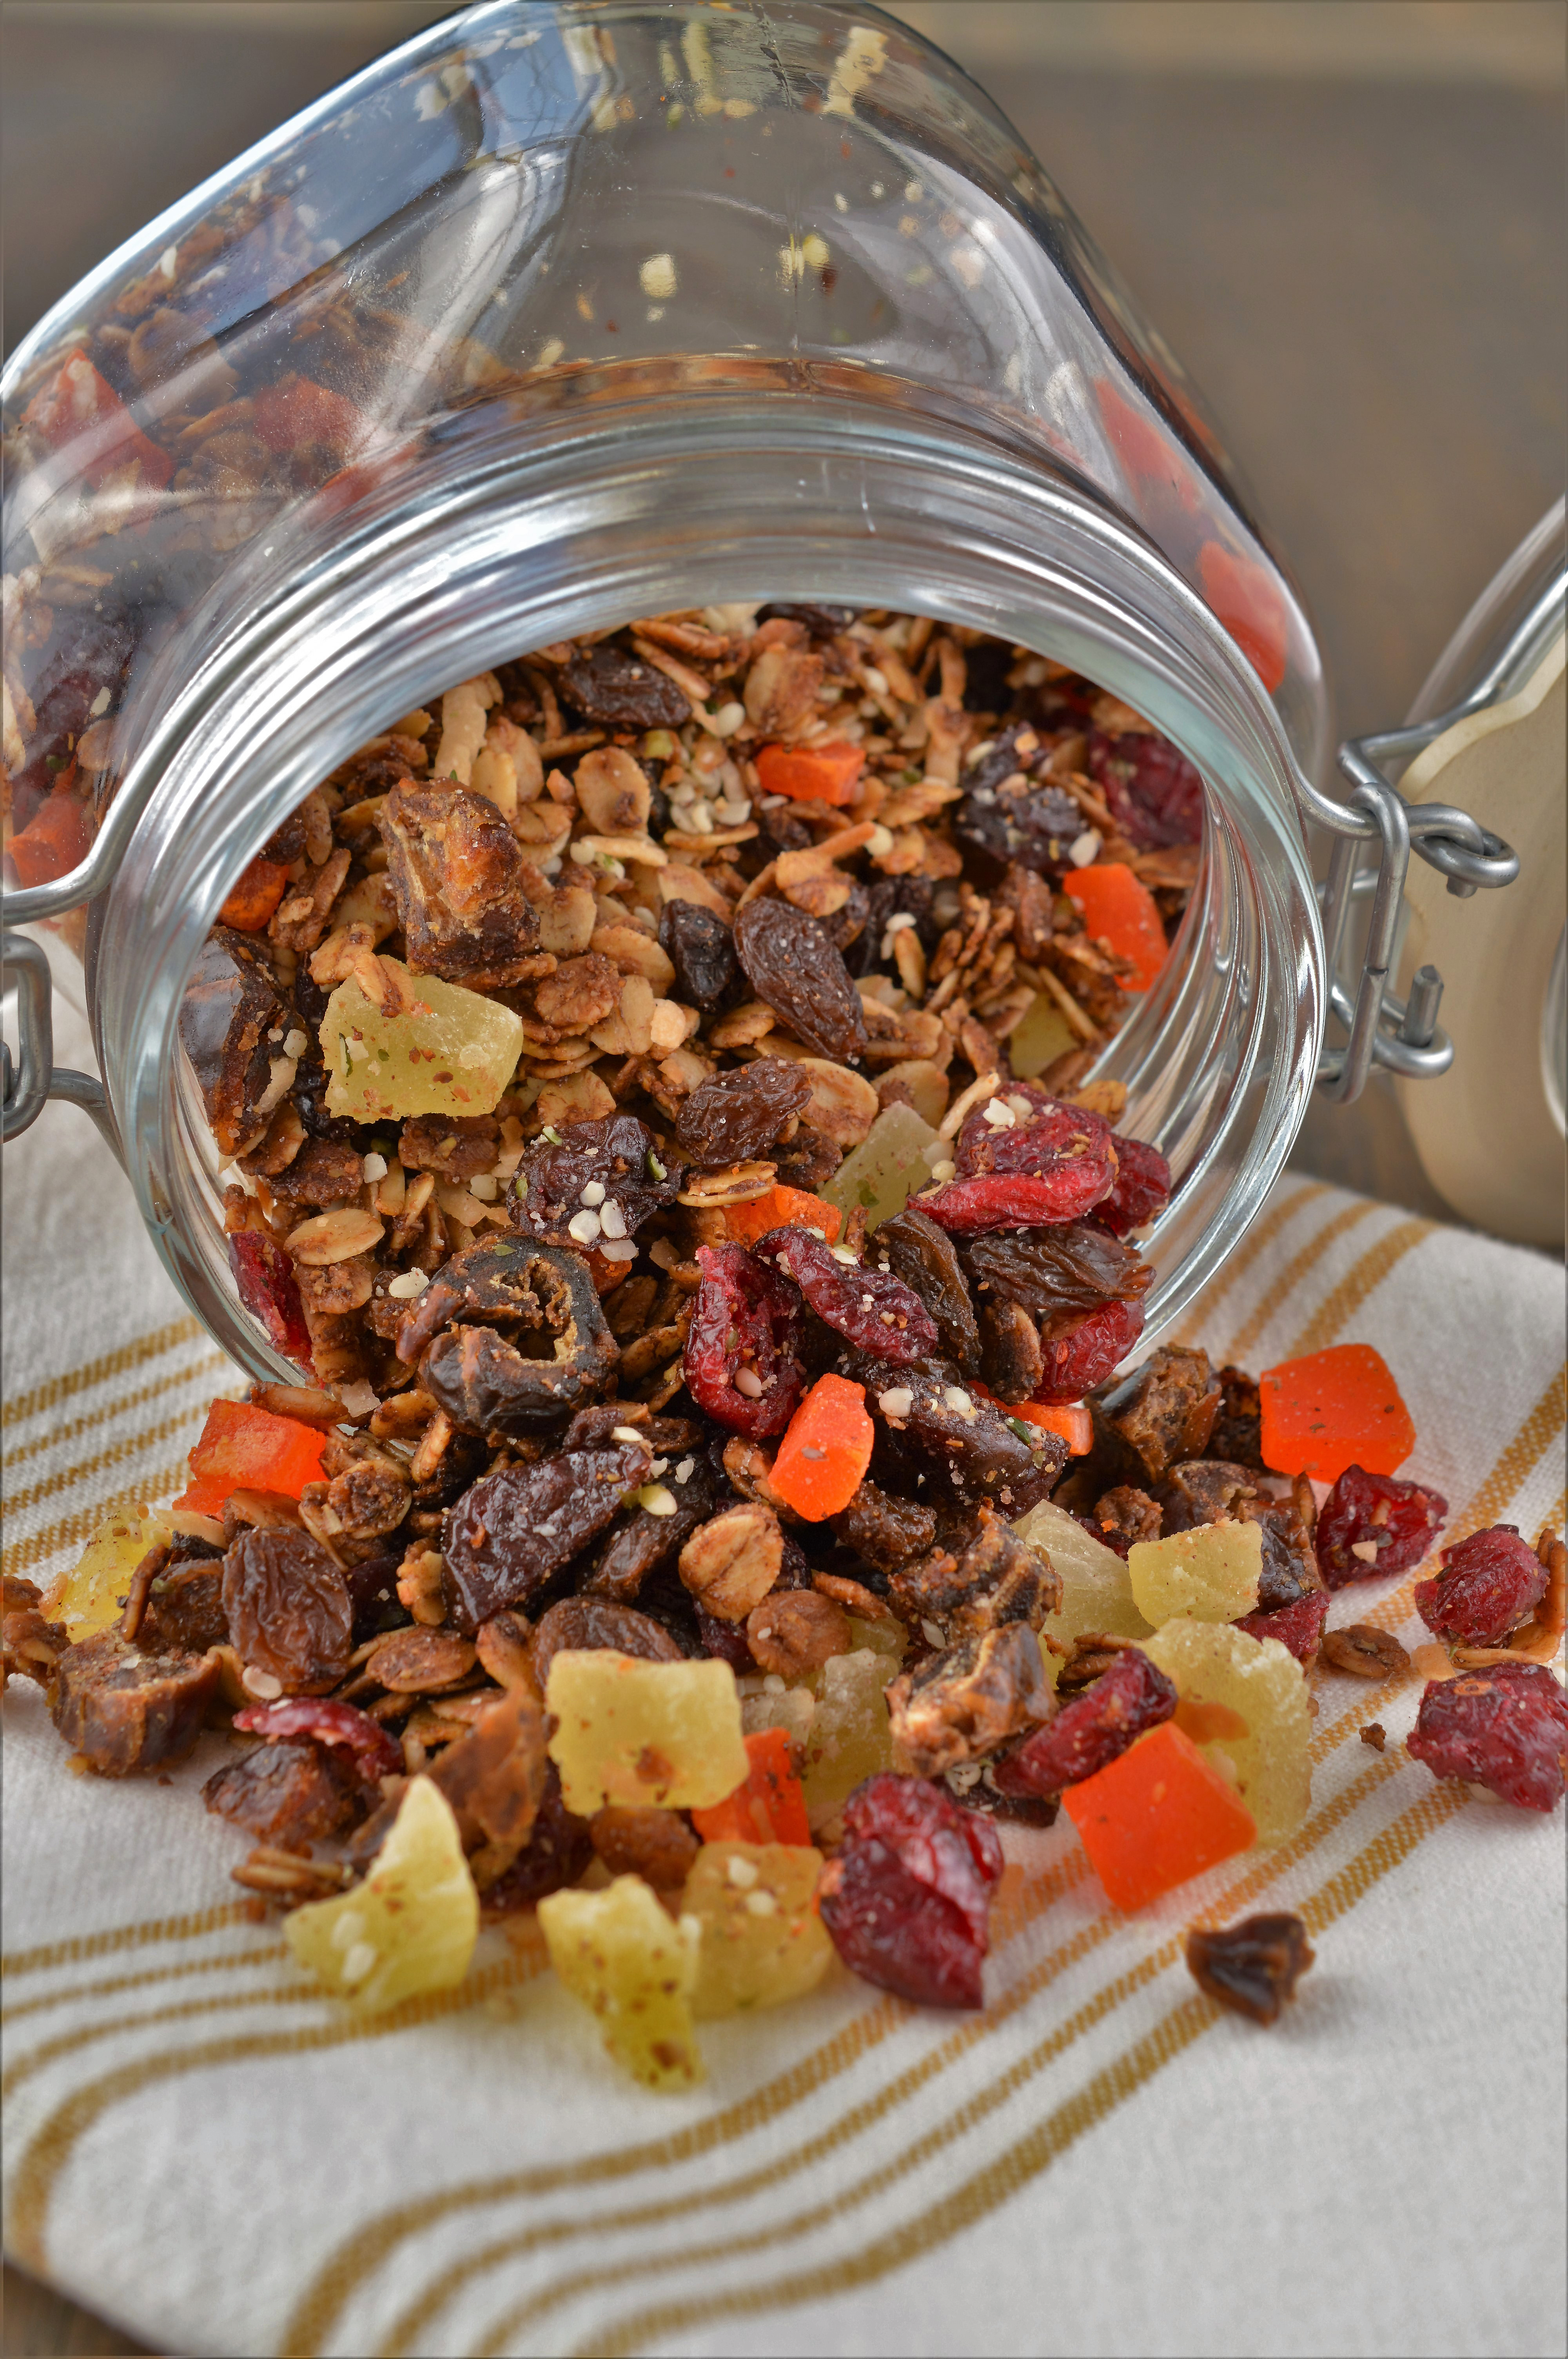
GranolaMy recipe for granola is nut free.  So tasty, it’s actually yummy eaten as a trail mix treat, too! 

Granola
The Bistro’s Great Nut-Free Granola

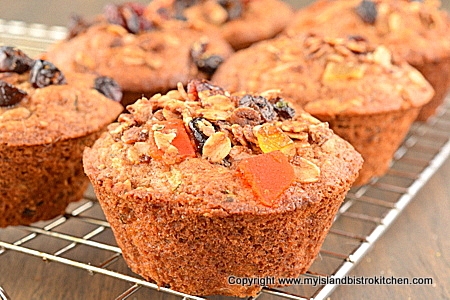
Best Zucchini Granola Muffins – These are great breakfast or coffee break muffins and they freeze very well.  Great treat to start off the week!

Shopping List: Granola (click here for my recipe), zucchini, applesauce

Zucchini Granola Muffins

Dinner:  Roast Beef, Potato Patties, Turnip Puff Casserole

A roast beef dinner is so tasty (and the house smells so great when the beef is roasting).  Be sure to save some of the beef and make some gravy for the beef pot pies for Tuesday night’s dinner!

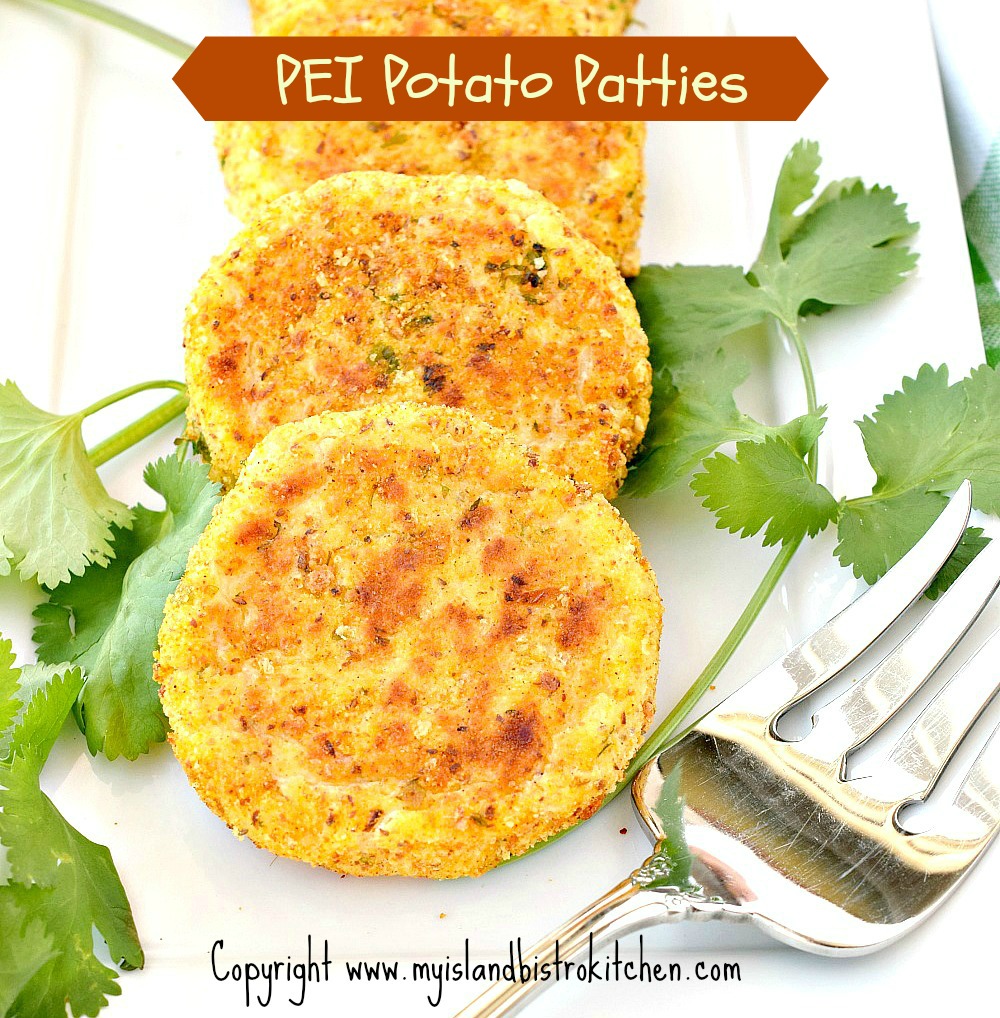
The potato patties are a change from traditional mashed or boiled potatoes and these are super tasty.  Turnip goes particularly well with beef and is transformed into a lovely flavorful casserole to serve as a side dish. Jazzes up a roast beef dinner for sure!

Shopping List: Roast of beef, cut of choice. For Potato Patties – Potatoes, sour cream chicken bouillon, breadcrumbs. For Turnip Puff Casserole – Rutabaga, applesauce, onion, parmesan and cheddar cheeses.

PEI Bistro-style Potato Patties

 Turnip Puff Casserole

Turnip Puff Casserole

Dessert: Rustic Apple Pie

Who can say no to a homemade apple pie!  Add a scoop of your favorite vanilla ice cream to make this an even more special treat!

Shopping List: Apples, pie pastry for double-crust pie + enough for a single crust pie (needed for tomorrow’s Beef Pot Pie)

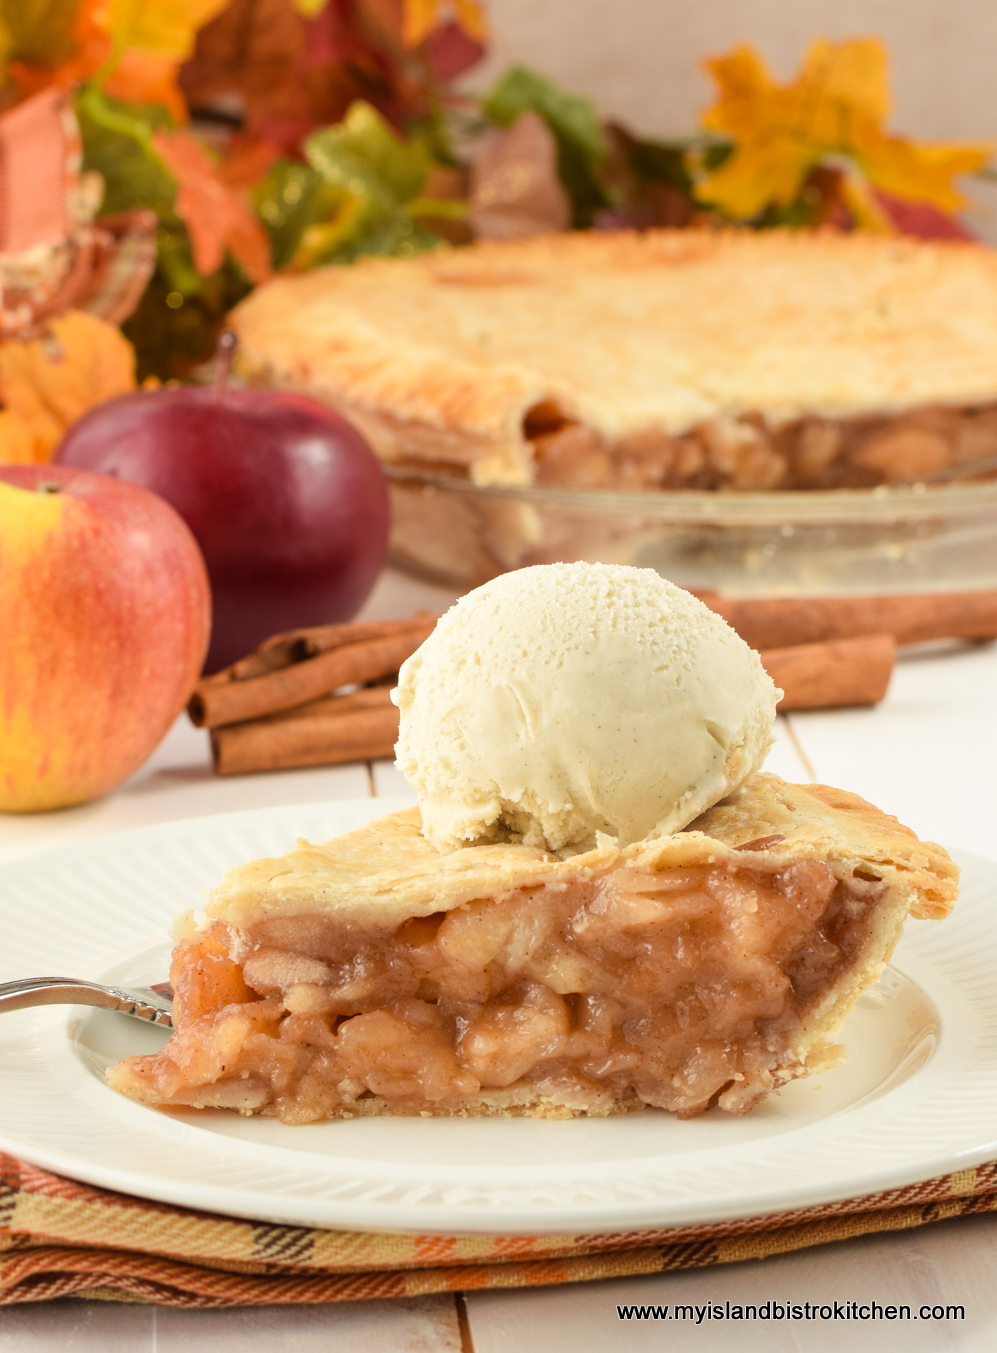
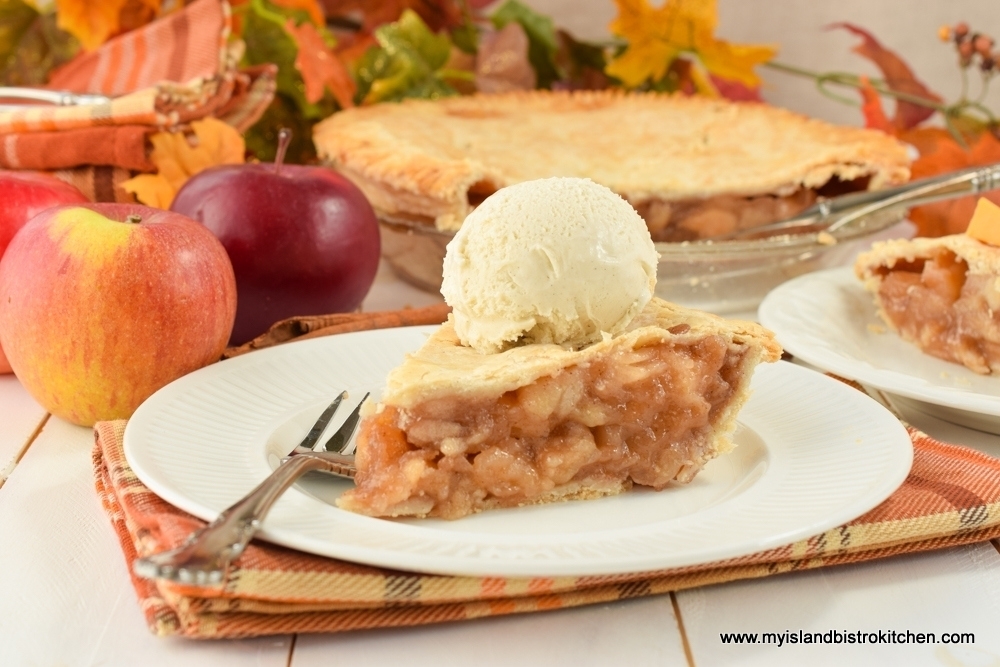
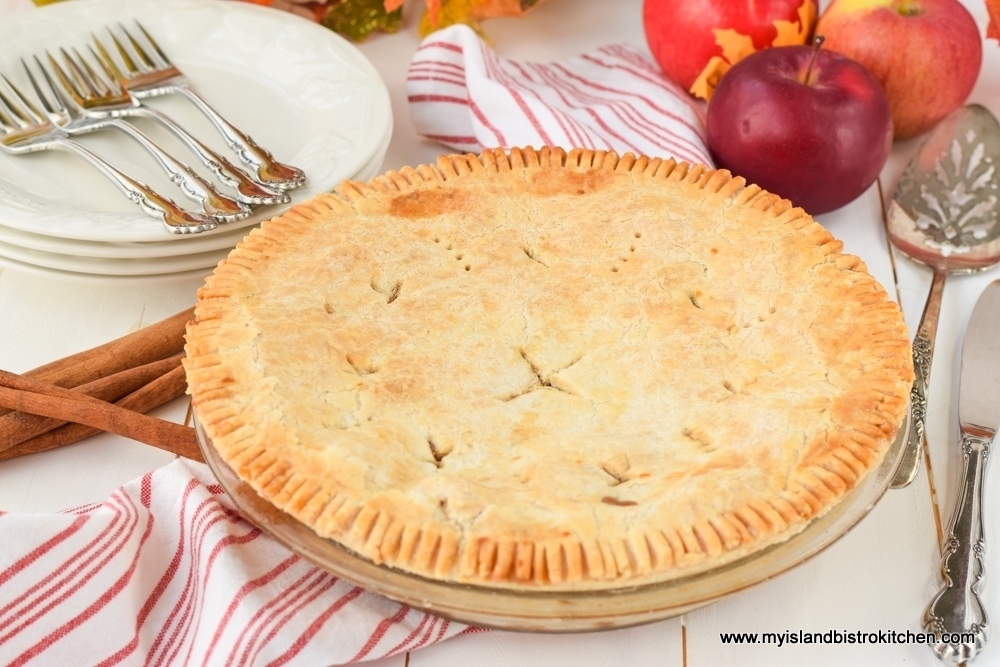
Apple Pie
Rustic Apple Pie

TUESDAY

Dinner:  Beef Pot Pie – This is a great way to use up leftover roast beef and gravy from Monday night’s dinner.

Sometimes, depending on the size of roast, after a couple of days of leftover sliced cold roast beef, it can be a little boring, shall we say.  That’s why it’s important to find other uses for the leftover roast beef, like this Beef Pot Pie, so it seems like a brand new idea for dinner!

Shopping List: Rutabaga, carrots, potatoes, onion, mushrooms, tomato paste, Worcestershire sauce, red wine summer savory, frozen peas and corn, fresh parsley, pastry for single crust pie

Beef Pot Pie
Beef Pot Pie

Dessert:  Leftover Apple Pie

Apple Pie
Apple Pie

WEDNESDAY

Dinner:  Potato Leek Soup with Whole Wheat Biscuits

Sometimes you just need a plain old-fashioned silky smooth cream soup and this Potato Leek Soup fits that bill nicely.  Serve it with some warm homemade whole wheat biscuits, with a slather of butter, of course!

Shopping List: For Soup – Potatoes, leek, celery, onion, garlic, chicken/turkey stock, milk, white cheese blend (e.g., mozzarella, provolone, parmesan) For Biscuits – All purpose and whole wheat flours, buttermilk

Potato Leek Soup
Potato Leek Soup


Whole Wheat Biscuits

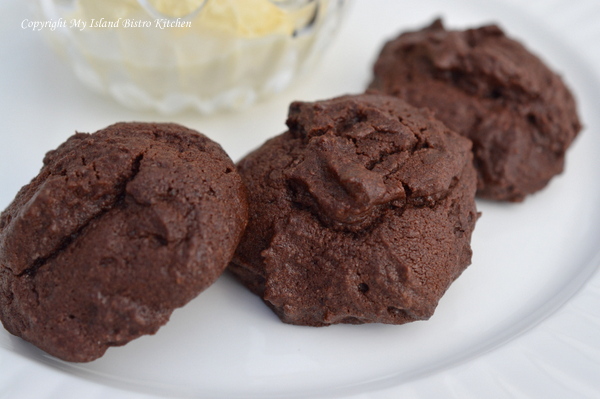
Dessert: Chocolate Drop Cookies

These are a great chocolate cookie and sure to find their way into the heart of any chocolate lover.

Shopping List: General baking supplies + cocoa

 Chocolate Drop Cookies

Chocolate Drop Cookies

THURSDAY

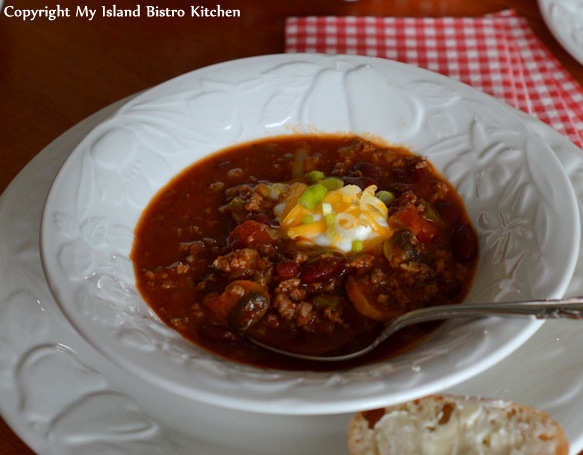
Dinner:  Chili Con Carne served with Pan Rolls

This chili is packed full of flavorful ingredients.  While I think it’s perfect any time of the year, it’s especially inviting on cold winter days!  Make a batch of homemade pan rolls to accompany this chili.

Shopping List: For Chili – Ground beef, onion, green pepper, celery, garlic, 1 – 28oz can diced tomatoes, 2 – 14oz cans red kidney beans, 1 – 10oz can tomato soup, 1 – 5.5oz can tomato paste, chili powder, balsamic vinegar, liquid beef bouillon, mushrooms. For Pan Rolls – Yeast + standard baking supplies

Chili
Homemade Chili


Pan Rolls
Pan Rolls

Dessert: Creamy Coconut Rice Pudding

Baked rice pudding is a comfort food and many will remember their mothers and grandmothers making this treat. I’ve jazzed up my recipe with coconut milk and raisins that have had a little “nip” of amaretto!

Shopping List: Arborio rice, amaretto, raisins, coconut milk, maple syrup, shredded coconut

Rice Pudding
Creamy Coconut Rice Pudding

FRIDAY

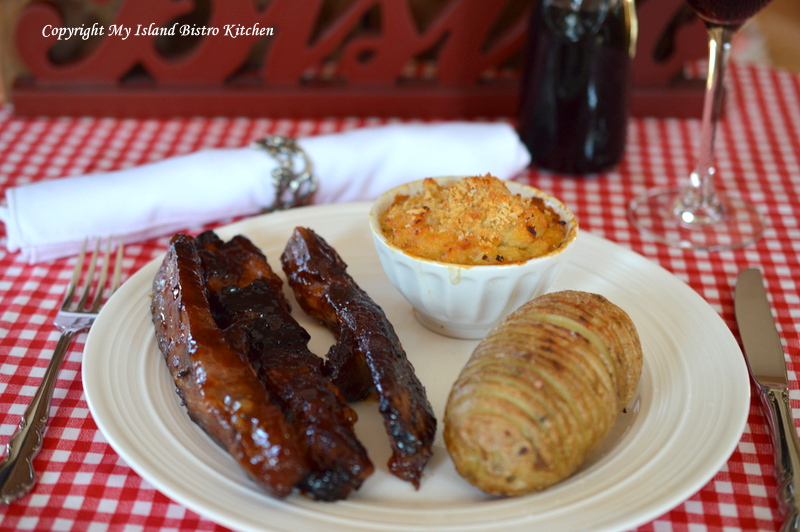
 Dinner:  Honey Garlic Spare Ribs, Twice-baked Potatoes, favorite side vegetable

Nothing beats honey and garlic to add some life to spare ribs!  These ribs can be served with rice or choice of potato but my favorite is to add a twice-baked potato to the plate. Super yummy.

Shopping List: For Spare Ribs – Ribs, apple juice, honey, soya sauce, garlic, onion. For Twice-baked Potatoes – Baking potatoes such as Russet variety, sour cream, whole milk or cream, liquid chicken bouillon, garlic, cheddar and parmesan cheeses

Garlic Spareribs
Garlic Spareribs served with Turnip Casserole and Baked Potato


Stuffed Baked Potato
Twice-baked Potato

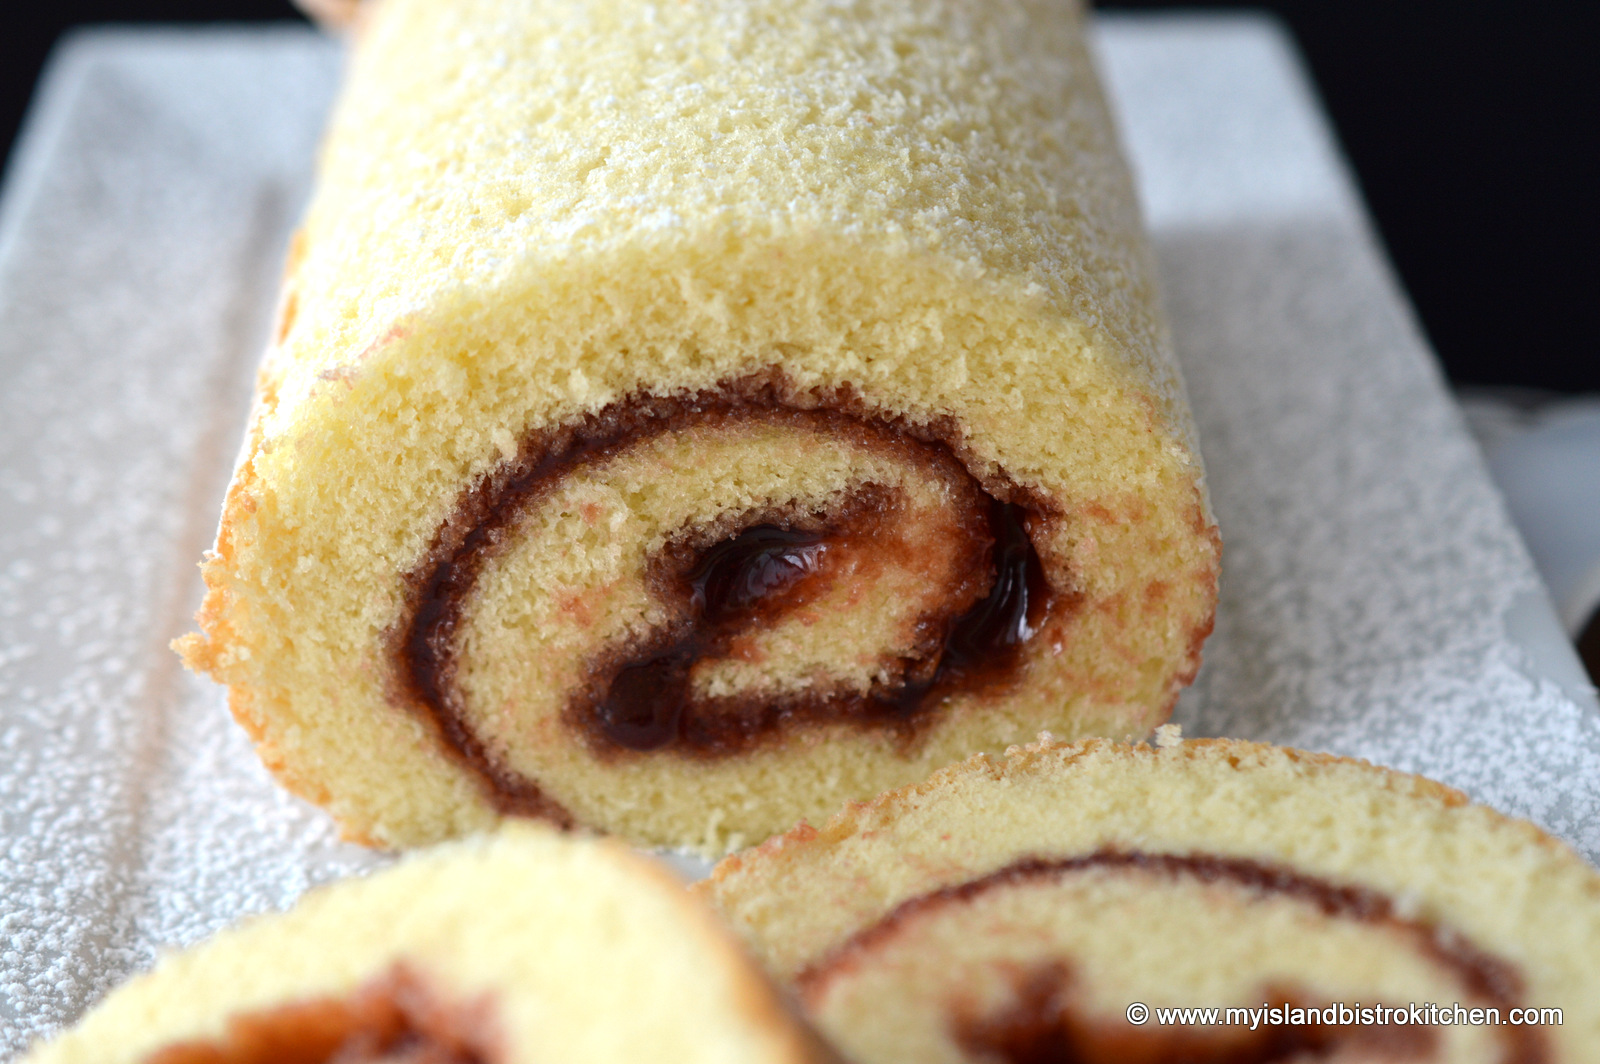
Dessert: Jelly Roll

Lovely sponge cake rolled with red jam or jelly. Yes, this is indeed an old favorite with many.

Shopping List:  Cake and pastry flour, favorite red jam or jelly

Jelly Roll

SATURDAY

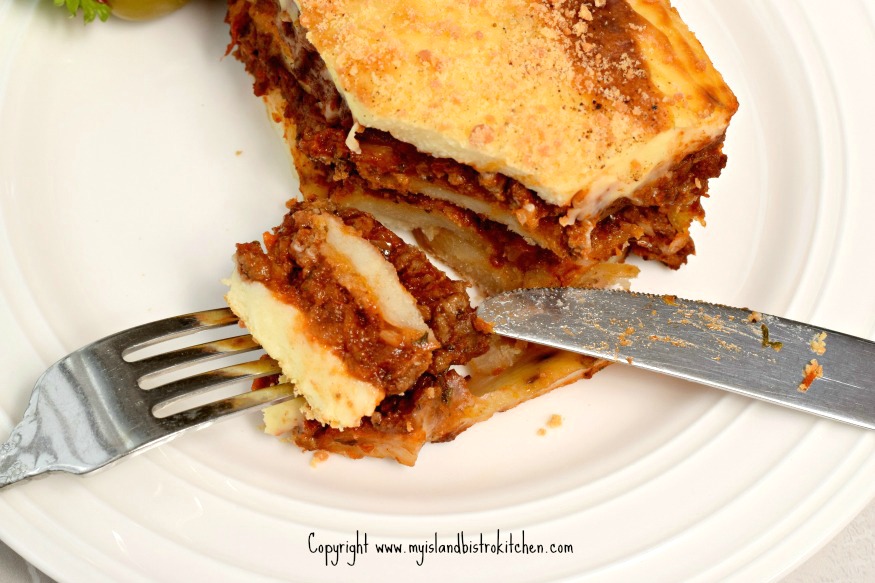
 Dinner: Moussaka with green salad

While I have made Moussaka for years, recent visits to Greek islands reignited my love for this dish.  As a nod to my Prince Edward Island heritage, my version uses potatoes instead of the traditional eggplant. A little time-consuming to make but the end result is so worth it!

Shopping List: For Moussaka – Ground beef, onion, celery, garlic, 14-oz can crushed tomatoes, tomato paste, red wine, beef broth, russet potatoes, milk, Gouda cheese, breadcrumbs. For green salad – favorite lettuce and salad fixings of choice, dressing.

Moussaka
Moussaka

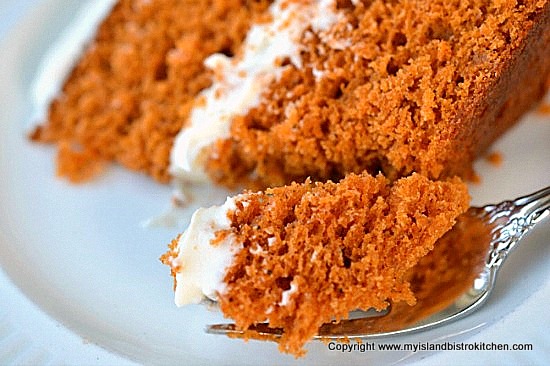
Dessert: Vintage Tomato Soup Cake

I grew up with this cake being frequently made.  Bet you can’t tell there is a can of tomato soup in it!

Shopping List:  Tomato soup, molasses

Tomato Soup Cake
Tomato Soup Cake

SUNDAY

 Sunday Breakfast: Special Treat – Blueberry Buttermilk Pancakes

Sunday mornings call for something just a little more special than you might make on busy weekday mornings.  Try these Blueberry Buttermilk Pancakes with maple syrup or a rich blueberry sauce for double the blueberry flavor.

Shopping List:  Buttermilk, blueberries (fresh or frozen)

Blueberry Pancakes

DinnerLeftover Moussaka

Moussaka
Moussaka

Dessert: Leftover Vintage Tomato Soup Cake

Tomato Soup Cake
Tomato Soup Cake

So, there you have it – the Week 2 Meal Planning Menu from My Island Bistro Kitchen.

For other meal plans from My Island Bistro Kitchen, click on the links below:

Week 1 Meal Plan

Week 3 Meal Plan

Week 4 Meal Plan

Week 2 Meal Plan
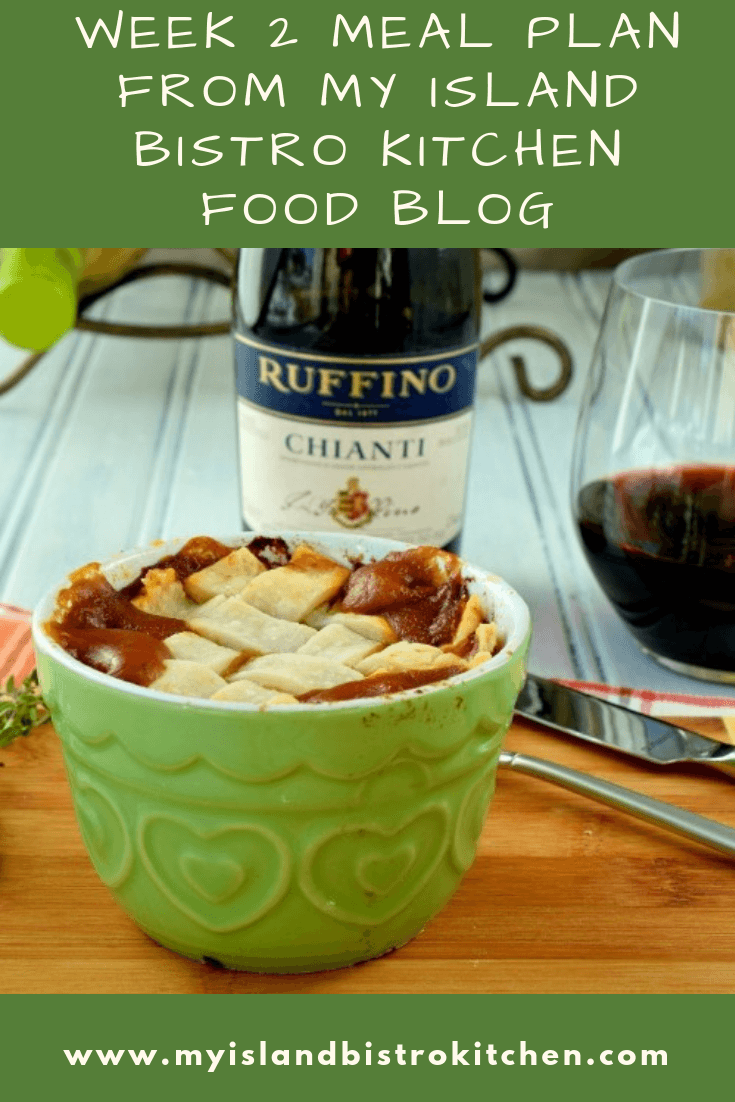
Week 2 Meal Plan from My Island Bistro Kitchen

Pin Me To Pinterest!
Week 2 Meal Plan from My Island Bistro Kitchen Food Blog


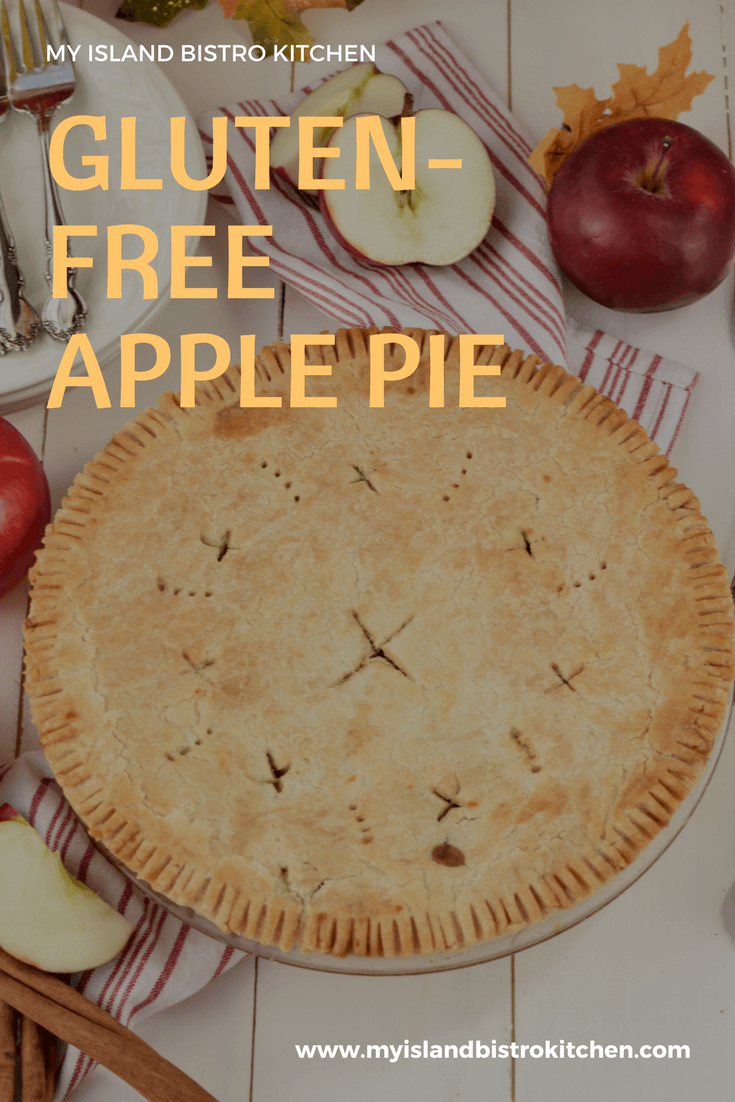
Gluten-free Apple Pie

I earlier posted my recipe for Rustic Apple Pie.  This apple pie recipe differs from that one in two ways. First, this one is gluten free. Yes, even the lovely tender, flaky crust is gluten free.  Second, the filling is pre-cooked before being added to the pie.

Gluten-free Apple Pie

For those following a gluten-free diet, they know how difficult it can sometimes be to find a pie pastry that closely resembles a wheat flour version.  I love making pastry and enjoy a lot of quiches and pies.  It pains me that those on a gluten-free diet cannot enjoy the same foods simply because they don’t have a good gluten-free pastry recipe.  So, I have developed this pie pastry recipe that, in my opinion, rivals any gluten version (and, in fact, is better than many I have been served).  When I first started developing gluten-free pastry, I figured it would not roll out, would crumble into bits, be hard as a rock, and/or would not transfer, in one piece, to the pie plate. However, I have adapted the basic pastry recipe I have been using for years and I could not be more pleased with it.  Serve this pastry to someone not on a gluten-free diet and I think they would be hard-pressed to know it’s gluten free!

Gluten-free Apple Pie

So, let’s start with some hints and tips on making the pastry, many of which apply to any pastry, gluten or gluten free.

The Pastry

First, all ingredients must be cold – super cold.  Yes, even the flour should be chilled for 30-40 minutes in the refrigerator. I use a one-to-one gluten-free flour in this recipe.  I have been having great success with Bob’s Red Mills 1-to-1 gluten-free flour in my baking and find it has better flavor than gluten-free all-purpose flour and has the texture in baked goods more closely resembling a wheat-based flour.

There are various schools of thought on the type of fat to use in pastry — butter, lard, or shortening. Using all butter in pastry will give a wonderful flavor and a lovely tanned crust. It can, however, be a bit finnicky to work with because it softens very easy and can quickly be over-blended with the flour. If overworked, a tough crust is likely. While lard is easy to work with and will give layers of flakiness in the pastry, it lacks the flavour that butter gives.  Using shortening will yield a nice tender crust but, like lard, has little flavor.  As with butter, shortening softens extremely easy as it is being worked with so, if the dough is overworked, it will yield a tough crust.

I find the best combination of fats to provide flakiness, tenderness, flavour, and structure to pastry is to use one part lard and one part butter.  I coarsely chop/cube the butter and lard into the flour then take my pastry cutter and blend the fats to the consistency of large peas.  There is no need to mash it or blend it finely.

For liquid, I combine vinegar, egg, and water to equal 2/3 cup – all ingredients to be super cold.  Not all of this liquid may be required. It’s important to use only enough of the liquid that the dry ingredients are incorporated and will cling together and the dough forms a ball.  Don’t add too much liquid or you will end up with a gummy mess that will yield a tough pastry. I don’t use a food processor to make the pastry as I find it is too easy to overprocess the dough. Mixing the pastry by hand gives more control and, I find, a flakier crust.

Gluten-free pastry has a different texture and consistency than wheat-based pastry. The most noticeable difference is the lack of elasticity that wheat-based pastry has from the gluten in it. To ensure the safe transferal of pastry from counter to pie plate in one piece, I recommend rolling out the pastry between two sheets of parchment paper.  Once the pastry has been rolled to the desired thickness, generally somewhere between 1/16” about 1/8” thickness, simply remove the top sheet of parchment, slide your hand under the bottom sheet and carefully lift the pastry, flip it over into the pie plate, and peel off the parchment paper. A tip is to lightly flour the bottom piece of parchment and the top of the pastry.  This will make the task of peeling off the parchment paper easier. Fit the dough snugly into the plate and trim pastry flush with pie plate edge. I don’t like thick pie crusts so you’ll notice, from the photos, that I roll my pastry quite thin.  That’s a matter of personal preference so, if you like a thicker crust, by all means, go ahead and roll the pastry a little bit thicker.

Gluten-free Apple Pie

Roll the pastry for the top crust the same as for the bottom crust but make sure there is no wrinkle in the parchment paper as this will form a wrinkle imprint in the pastry as the pastry is being rolled out.  This is less of a concern for the bottom pastry crust but, for presentation purposes, is an issue for the top crust.  For this reason, I recommend starting with a new piece of parchment when rolling out the top crust pastry.

Don’t forget to dampen the outside rim of the bottom pie pastry before placing the top pastry over the filling.  The pastry edge needs to be dampened lightly with water which will seal the two crusts together.

Gluten-free Apple Pie
The Filling

My traditional apple pie recipe calls for uncooked apples mixed with spices and sugar.  That version will yield a pie where the layers of apples stay intact and totally visible once the pie is baked and sliced.  For this apple pie recipe, however, I am pre-cooking the apples by sautéing them in butter, then mixing in the sugar, spices, and cornstarch while they sauté. The result is a filling that resembles the consistency of a can of apple pie filling (only this homemade version is, in my opinion, much better!).

Gluten-free Apple Pie

There are advantages to this method of making the filling. First, juices from the apples are released during the sautéing process and are thickened before going in to the pie. I find there is less chance of the pie boiling out significantly because the juices have already been released and thickened before going into the pie. Second, it is easier to arrange the filling in the pie because the apples have softened a bit.  Whereas for raw apples there can be gaps in the filling, there are generally none with a pre-cooked filling.

The trick to this method is to not overcook the apples because, remember, they will continue to cook as the pie bakes.  You still want to be able to see the apples (not applesauce) in the filling.  For this reason, it’s important to use apples that have a crisp, firm texture so they can stand up to the sautéing and baking and still hold shape when the pie is sliced.  My favorites are Spartans, Cortland, Pippins, Honeycrisp, and Lobo. I usually use a combination of at least three (and sometimes more) different varieties. Using a mix of apple varieties will give better flavor, especially if a blend of tart and sweet apples is used.  Slice the apples at least ¼” thick for this filling.

I use mostly brown sugar combined with a small amount of granulated sugar for this recipe.  Brown sugar will give a richer flavor and deeper color to the filling.  Choosing spices for an apple pie filling is always subjective.  Some use just cinnamon while others will add nutmeg.  I like a blend of spices in my apple pies so have chosen cinnamon, nutmeg, and allspice for this recipe.  A splash of brandy (optional) will also enhance the flavor of the pie but, note, just a small splash! Either flour or cornstarch can be used to thicken the filling. Cornstarch, however, will tend to yield a more clear filling than will flour.

Gluten-free Apple Pie
Preparing the Pie for the Oven

After the top pie pastry has been placed over the filling, the edges of the top and bottom pastries need to be pressed together to seal in the filling. There are various ways the pie edges can be joined. I tend to go with the simple pressing of the bottom and top pastry with the tines of a fork. I think this is also the easiest method to ensure the pie cuts out with the edges intact. Other methods, such as crimping, are raised up and can burn more quickly during baking and are also at risk of breaking off as the pie is cut.

Gluten-free Apple Pie

It’s important that the top pie pastry be vented for baking. Otherwise, the crusts may be soggy from too much steam trapped in the pie.  It may also cause the top crust to leave the filling and puff up, leaving a hollow space between crust and filling.  This will cause the crust to break when the pie is sliced and, for presentation purposes, the pie slice will not be visually pleasing when plated.

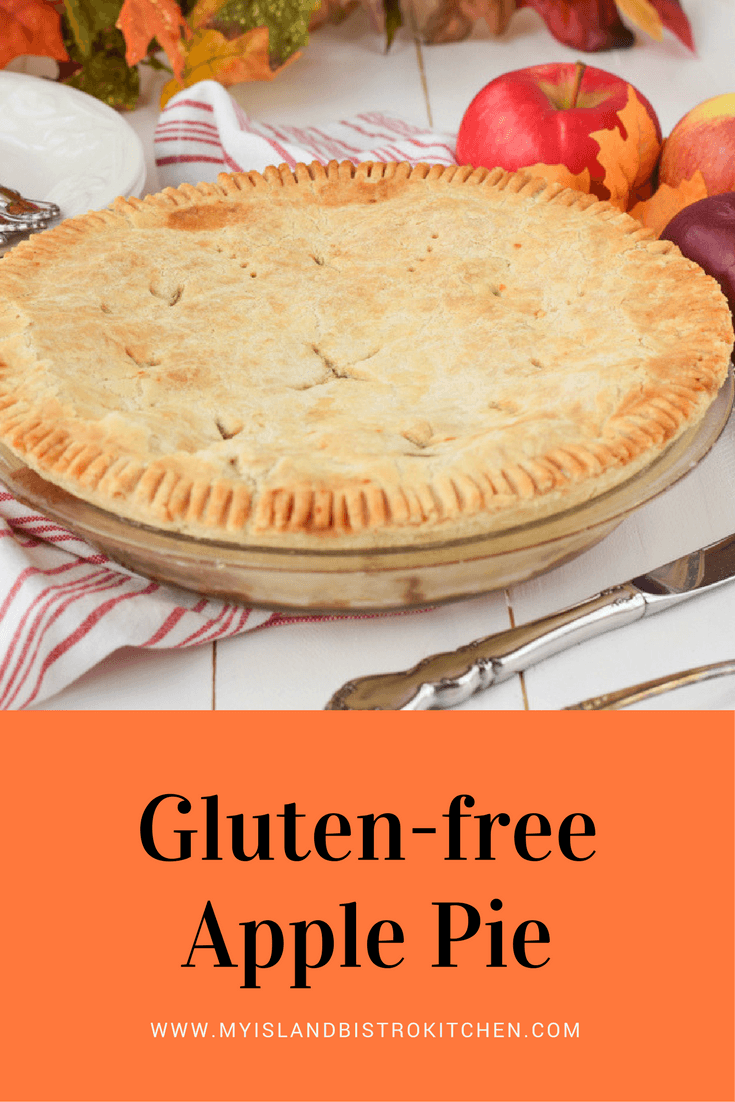
Use a sharp-tipped paring knife to cut criss-crosses in the pie pastry starting in the center with a slightly large “X” and then adding smaller ones all around the circumference of the pie.  I also use the tines of a fork to prick the pie pastry in various places in the top crust pastry for added venting.

Brushing a very light coating of an egg-milk wash on the top crust will yield a crust with more “tan”.  A sprinkle of granulated sugar may also be added but note this may cause the top crust to brown fast and before the pie is baked.  If this happens, tent the pie loosely with tin foil.

I recommend placing the pie in the refrigerator for approximately 30 minutes or so before baking.  This will chill the pastry and reduce chance of it shrinking significantly while baking.

Fruit pies have a tendency to boil out during baking, even if they are well vented and the filling pre-cooked, so I recommend placing the pie on a tinfoil-lined rimmed baking sheet.  If the pie does boil out, you won’t be faced with an oven cleaning job.

Baking the Pie

Preheat the oven to 425°F and bake the pie at this temperature for 10 minutes then reduce the heat to 375°F and bake for approximately 40 minutes or until the crust is lightly tanned and juice from the pie is bubbling slightly through vented holes.

Transfer the pie to a cooling rack and allow it cool completely before cutting.  This allows the filling to settle so it stays intact (instead of running) when the pie is cut.

Serving the Pie

This pie benefits from a few hours of refrigeration after it has cooled completely at room temperature.  The chilled pie is easier to cut and the filling stays in place.

Gluten-free Apple Pie

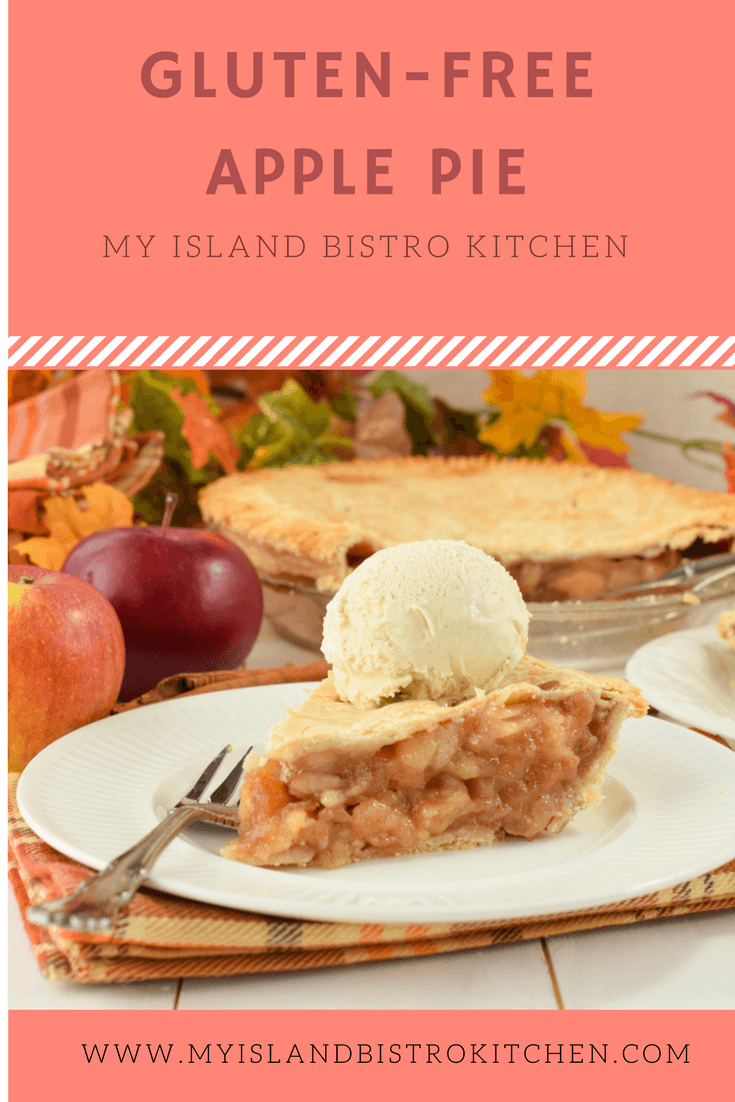
The most common ways to serve apple pie are plain, with cheddar cheese, or with vanilla ice cream.

Gluten-free Apple Pie

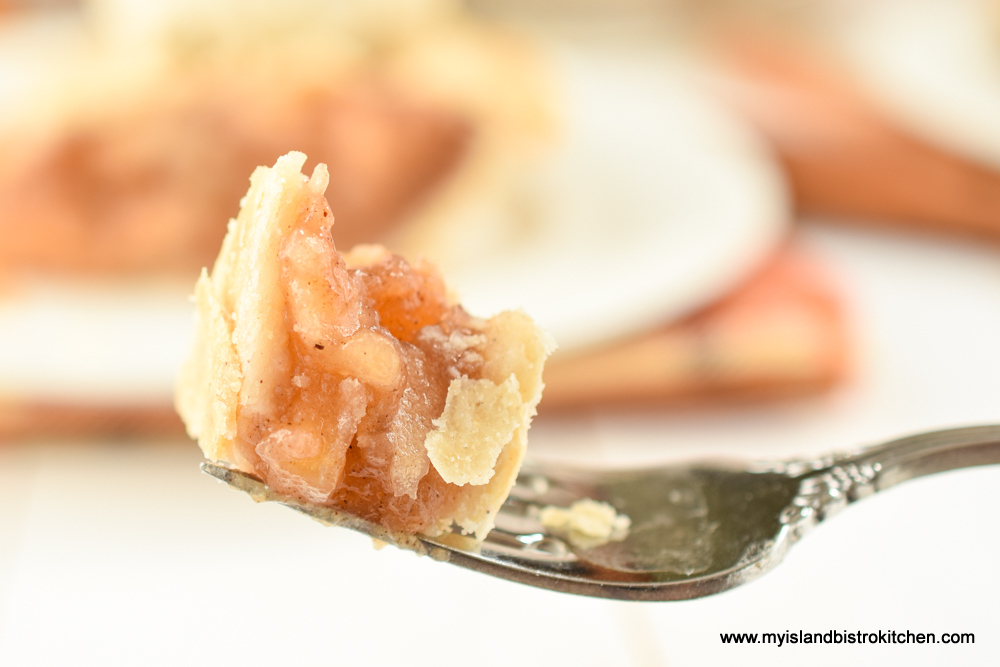
This gluten-free apple pie is a tasty treat indeed!

Gluten-free Apple Pie

Gluten-free Apple Pie

[Printable recipe follows at end of posting]

Gluten-free Apple Pie

Filling

Ingredients:
2/3 cup brown sugar, lightly packed
¼ cup granulated sugar
1 tsp cinnamon
½ tsp nutmeg
1/8 tsp allspice
1/8 tsp salt
3 tbsp cornstarch

2-3 tbsp butter

2½ lbs apples, peeled, cored, and sliced into ¼” thick slices (about 8 medium-large sized apples)
1 tbsp lemon juice
1 tbsp brandy (optional)

Method:
In small bowl, whisk together the brown and white sugars, spices, salt, and cornstarch.  Set aside.

Prepare apples and sprinkle with lemon juice and brandy (optional).  With large wooden spoon, gently toss apples to coat with the lemon juice and brandy.

In large saucepan, melt butter over medium-high heat.  Reduce heat to medium low and add the apples.  Sauté for 5 minutes, stirring gently and frequently.

Stir in the sugar-spice-cornstarch mixture.  Cook for 4 minutes, stirring gently and frequently.  Remove from heat and cool filling completely.

While filling is cooling, prepare the pastry.

Pastry for 1 double-crusted 9” pie

2 cups (276g) gluten-free 1-to-1 flour
½ tsp salt
1½ tsp sugar

¼ cup cold butter (76g)
¼ cup cold lard (76g)

1 large egg (reserve apx 1 tsp of the yolk for the egg wash)
1 tsp white vinegar
Enough water to make 2/3 cup liquid

1-2 tsp milk
Method:

In medium-sized bowl, whisk the flour, salt, and sugar together.  Cut the butter and lard into chunks and add to the flour.  With a pastry cutter, cut the butter and lard into the flour until the fats resemble the size of large peas.

In a measuring cup, whisk the egg and vinegar together.  Add enough cold water to measure 2/3 cup.  Add the egg-vinegar-water mixture to the flour, small amounts at a time, and mix with a fork.  Add only enough water that the dough clings together and can be formed into a ball.

Divide the dough in half.  Form disk shapes with each piece. Place disks in the refrigerator for about 10-12 minutes to chill. Remove one disk from the refrigerator and place between two sheets of parchment paper. Roll pastry to desired thickness, generally between 1/16”and 1/8” thickness. Peel the top piece of parchment from the rolled out pastry. Slide hand under parchment that has the rolled pastry and carefully flip it into a 9” pie plate that has been lightly sprayed with cooking spray or greased.  Cut off excess dough so pastry is flush with the pie plate edge.  Place pie shell in refrigerator for 15-20 minutes to chill. Remove second disk of pastry from refrigerator.

Prepare pastry for the top crust in the same manner as for the bottom crust.  Remove pie shell from refrigerator and arrange cooled pie filling in prepared cold shell. Brush edges of bottom crust along pie plate edge with a bit of water to moisten. Transfer pastry to the top of pie filling. Trim excess pastry from the pie plate edge.  Press the edge of the pastry all around the pie plate rim with tines of fork to adhere top crust to bottom crust.  Cut slits in top of pie pastry to allow steam to escape as pie bakes. For additional venting, prick the pie in several places with tines of a fork.

In small bowl, lightly beat the reserved egg yolk with 1-2 tsp milk.  With a pastry brush, lightly brush the pie with the egg-milk mixture.  Sprinkle with granulated sugar.

Place pie in refrigerator for 30 minutes to allow filling to settle and to chill pastry to reduce shrinkage while it bakes.

Preheat oven to 425°F.

Transfer pie to oven. Bake at 425°F for 10 minutes then reduce heat to 375°F. Bake for another 40 minutes then test with fork inserted into slit in center of pie to determine if apples are cooked. Apples should be fork-tender when pie is done. If not done, return pie to oven and check every 5 minutes until apples are fork tender.  If pie browns too quickly before it is cooked, loosely tent pie with tin foil.  Remove pie from oven and transfer to cooling rack.

Yield:  1 – 9” pie (apx. 6 servings)

Gluten-free Apple Pie

A lightly spiced cooked apple pie filling sandwiched between a tender, flaky, and flavorful gluten-free pie crust.

Course Dessert
Cuisine American
Servings 6
My Island Bistro Kitchen My Island Bistro Kitchen

Ingredients

  • 2/3 cup brown sugar, lightly packed
  • 1/4 cup granulated sugar
  • 1 tsp cinnamon
  • 1/2 tsp nutmeg
  • 1/8 tsp allspice
  • 1/8 tsp salt
  • 3 tbsp cornstarch
  • 2-3 tbsp butter
  • 2 1/2 lbs apples, peeled, cored, and sliced into 1/4" thick slices (about 8 medium-large sized apples)
  • 1 tbsp lemon juice
  • 1 tbsp brandy (optional)

Gluten-Free Pastry for 1 double-crusted 9" pie

  • 2 cups (276g) gluten-free 1-to-1 flour
  • 1/2 tsp salt
  • 1 1/2 tsp granulated sugar
  • 1/4 cup (76g) cold butter
  • 1/4 cup (76g) cold lard
  • 1 large egg (reserve apx 1 tsp of the yolk for the egg wash)
  • 1 tsp white vinegar
  • Enough cold water to make 2/3 cup liquid
  • 1-2 tsp milk

Instructions

  1. Filling:  In small bowl, whisk together the brown and white sugars, spices, salt, and cornstarch. Set aside.

  2. Prepare apples and sprinkle with lemon juice and brandy (optional). With large wooden spoon, gently toss apples to coat with the lemon juice and brandy.
  3. In large saucepan, melt butter over medium-high heat. Reduce heat to medium low and add the apples. Sauté for 5 minutes, stirring gently and frequently.
  4. Stir in the sugar-spice-cornstarch mixture. Cook for 4 minutes, stirring gently and frequently. Remove from heat and cool filling completely.

  5. While filling is cooling, prepare the pastry.

Gluten-free Pastry for 1 Double-crusted Pie

  1. In medium-sized bowl, whisk the flour, salt, and sugar together. Cut the butter and lard into chunks and add to the flour. With a pastry cutter, cut the butter and lard into the flour until the fats resemble the size of large peas.
  2. In a measuring cup, whisk the egg and vinegar together. Add enough cold water to measure 2/3 cup. Add the egg-vinegar-water mixture to the flour, small amounts at a time, and mix with a fork. Add only enough water that the dough clings together and can be formed into a ball.
  3. Divide the dough in half. Form disk shapes with each piece. Place disks in the refrigerator for about 10-12 minutes to chill. Remove one disk from the refrigerator and place between two sheets of parchment paper. Roll pastry to desired thickness, generally between 1/16”and 1/8” thickness. Peel the top piece of parchment from the rolled out pastry. Slide hand under parchment that has the rolled pastry and carefully flip it into a 9” pie plate that has been lightly sprayed with cooking spray or greased. Cut off excess dough so pastry is flush with the pie plate edge. Place pie shell in refrigerator for 15-20 minutes to chill. Remove second disk of pastry from refrigerator.
  4. Prepare pastry for the top crust in the same manner as for the bottom crust. Remove pie shell from refrigerator and arrange cooled pie filling in prepared cold shell. Brush edges of bottom crust along pie plate edge with a bit of water to moisten. Transfer pastry to the top of pie filling. Trim excess pastry from the pie plate edge. Press the edge of the pastry all around the pie plate rim with tines of fork to adhere top crust to bottom crust. Cut slits in top of pie pastry to allow steam to escape as pie bakes. For additional venting, prick the pie in several places with tines of a fork.
  5. In small bowl, lightly beat the reserved egg yolk with 1-2 tsp milk. With a pastry brush, lightly brush the pie with the egg-milk mixture. Sprinkle with granulated sugar.
  6. Place pie in refrigerator for 30 minutes to allow filling to settle and to chill pastry to reduce shrinkage while it bakes.
  7. Preheat oven to 425°F.
  8. Transfer pie to oven. Bake at 425°F for 10 minutes then reduce heat to 375°F. Bake for another 40 minutes then test with fork inserted into slit in center of pie to determine if apples are cooked. Apples should be fork-tender when pie is done. If not done, return pie to oven and check every 5 minutes until apples are fork tender. If pie browns too quickly before it is cooked, loosely tent pie with tin foil. Remove pie from oven and transfer to cooling rack.

Recipe Notes

[Copyright My Island Bistro Kitchen]

If you have made this recipe and enjoyed it and/or wish to share it with your friends and family, please do so on social media but be sure to share the direct link to this posting from my website.

Connect with My Island Bistro Kitchen on Social Media

Join the Facebook page for My Island Bistro Kitchen:  https://www.facebook.com/MyIslandBistroKitchen/

Follow “the Bistro” on “X” (formerly Twitter)https://twitter.com/PEIBistro/

See the drool-worthy gallery of mouth-watering food photos from My Island Bistro Kitchen on Instagramhttps://www.instagram.com/peibistro/

Follow “the Bistro” on Pinterest at https://www.pinterest.ca/peibistro/ and pin the Pinterest-ready photo found at the end of this post to your favorite Pinterest boards.

For my Rustic Apple Pie recipe, click here.
PIN THESE PHOTOS TO YOUR FAVORITE PINTEREST BOARDS!
Gluten-free Apple Pie

Glazed Lemon Pecan Sweet Bread

Glazed Lemon Pecan Sweet Bread

This recipe for Glazed Lemon Pecan Sweet Bread is an adaptation of my great grandmother’s lemon sweet bread.  Back in her day, this sweet bread would have been considered quite a luxurious treat, perhaps one reserved for company.  Continue reading Glazed Lemon Pecan Sweet Bread

Blush Pink Holiday Tablesetting

Edible Centerpiece
Edible Centerpiece

This holiday tablesetting focuses on the blush pink color. It’s a fresh look and a departure from the usual red-green-gold we often associate with the holiday period. There is nothing wrong with those colors but, sometimes, change is good.

Pink Blush Holiday Tablesetting
Blush Pink Holiday Tablesetting

The inspiration for this tablesetting actually came from my dining room mantle design. I had these mint julep cups and thought they would look lovely with individual arrangements in them.

Pink Blush Dining Room Mantle
Blush Pink Dining Room Mantle

This year, I wanted my dining room décor to be in a fashion that didn’t scream Christmas but yet still had an understated Christmas look and feel to it. I found these lovely pale blush pink cabbage roses at Michael’s and, well, you see the result! They have the faintest dusting of glitter to give them a bit of a festive look and, voilà, blush pink became my color theme!

Pink Blush Arrangement
Blush Pink Arrangement

The addition of fairy lights makes the mantle come alive in evening and the lights, with such a fine wire string, give the illusion that they are suspended in mid air. When I am designing my dining room mantle for the holidays, I keep in mind what the design will look like in daylight and in the evening. It’s important that the design be constructed such that it works in different lighting situations.

I have never grown tired of the pale sage green wall color in my dining room – almost any accent colors, like blush and pink gold, look stunning in the room.

Fancy tablesettings do not need to cost a fortune! When I am designing tablesettings, I don’t rush out to buy all the elements. I first go through my “storehouse” to see what I have that will work. The tablesetting I am sharing today is composed mostly of items I already had. This makes a tablesetting interesting and less of a “cookie-cutter matchy-matchy” look.  It’s more curated in that carefully selected items, coming from different designs and textures, are used.

Centerpiece

You’ve heard me say it in postings before – I like to work with a blank white canvas. It’s clean, simple, always elegant, always en vogue.  I am using an antique white Irish linen tablecloth for my setting today.

Let’s start with the base. I was able to find good quality artificial greenery this year – greens that actually look real! I used two of these stems at an angle along the length of my oval dining table.

Pink Blush Tablesetting
Blush Pink Tablesetting

While I wanted to keep the table simple, I did add some fresh seasonal foliage, like seeded eucalyptus, to give some depth and texture. I often combine real and faux greenery to get the look I would not likely otherwise get if I used only real or all faux greens.  Using some fresh natural foliage brings an element of the outdoors to the setting.

Seeded Eucalyptus
Seeded Eucalyptus

There is nothing to say the centerpiece can’t be edible! Why not make your guests salivate for dessert all through dinner! It makes a great conversation piece.

Festive Holiday Cake Centerpiece

Here, I have decorated a cake which will be dessert and I have given it center table prominence by displaying it on a glass pedestal cake plate. Using a glass plate (versus a solid color) lends an airy look to the tablescape.

The cake top is constructed from Ferrero Rocher Raffaello Coconut and Almond White Chocolate Truffles to simulate snowballs, soft pink French Macarons to tie in with the blush color theme, and sugared cranberries to add a frosty look and deep color to the cake top. A sprig of seeded eucalyptus adds the natural element.  Any time colored sprinkles are added to a cake, as I have done here at the cake’s base, it means it’s a party cake!

Edible Cake Centerpiece

Two tall pillar candles flank the sides of the cake.

Holiday Tablesetting

I have had the antique-look ivory pillar candle stands for years.

Pink jeweled candlestands

The candle stands have blush pink jewels hanging from their bases so they tie in well with the color scheme.

Decorative pillar candlestands

I scattered a few little white and silver votives around the centerpiece.  I like to use candles of different heights in my tablescapes because their varying heights of light lend depth to the scene and, of course, candlelight always gives softness and warmth to a tablesetting.  The white pillar candles have some glitter on them which adds a bit of sparking and a festive look to the setting.

Placesettings

Blush Pink Placesetting

In keeping with the silver and blush theme, I am using my glitzy silver and rhinestone chargers to frame the white dinnerware.  I am a huge fan of plain white dishes because food colors just pop, with no distractions, on white. To tie the blush scheme in to the placesettings, I am using pale salmon-pink colored glass salad plates.  I have positioned these on slightly larger white supper/salad plates because the white underneath grounds the pale pink color and provides a background for the glass plates. These pink glass plates were bought years ago at a thrift shop.

Pink Glass Plates
Pink Glass Plates

I have had these small pale pink antique pedestal glasses for years. I am not sure what their intended use was – if anyone knows for sure, please do let me know.

Antique Pink Glasses

I am using them here for wine glasses in much the same way as I would use stemless wine glasses.  The pink water glasses were a thrift shop find a few years ago.  Mixing and matching styles and color tones make the setting more unique and interesting.

Pink Glasses
Pink Glasses

To add some pizzazz and glamour  to the placesettings, I have opted to thread white dinner napkins through glitzy rhinestone napkin rings.  Using napkin rings is a quick easy way to present napkins and you really can’t do them wrong!

Napkin Threaded Through Rhinestone Napkin Ring

I am using very basic, classic flatware in this setting and, of course, the flatware is placed in the order in which it will be used for the meal.

Concluding Thoughts

I hope you have enjoyed a glimpse of my blush pink tablesetting.  It does not scream Christmas like reds, greens, and golds do but it is a more gentle color scheme option that works for any holiday dinner. Other than some greenery and new candles, everything else in the tablesetting (excluding, obviously, the cake – it’s fresh!) was constructed from items I already had.  Proof that you don’t have to spend a lot of money to create a beautiful holiday-themed table.

Pink Blush Placesetting
Blush Pink Placesetting

To view other holiday tablesettings from My Island Bistro Kitchen, click on the links below:

Just Hear Those Sleigh Bells Jinglin’ Tablesetting
Glitz ‘n Glamour New Year’s Eve Tablesetting
The Warmth of the Christmas Light Tablesetting
Christmas Eve Tablesetting and Dinner
A Tartan Holiday Tablesetting
Pretty Poinsettia Tablesetting
Poinsettia Trio Tablesetting
The Holiday Table
The Pink and Green Holiday Table
Christmas at My Island Bistro Kitchen
Purple Tablesetting for the Holidays
Evergreens and Reindeer Christmas Tablesetting
Cupcake Tablescape
Twas The Night Before Christmas

Pin Me To Pinterest!
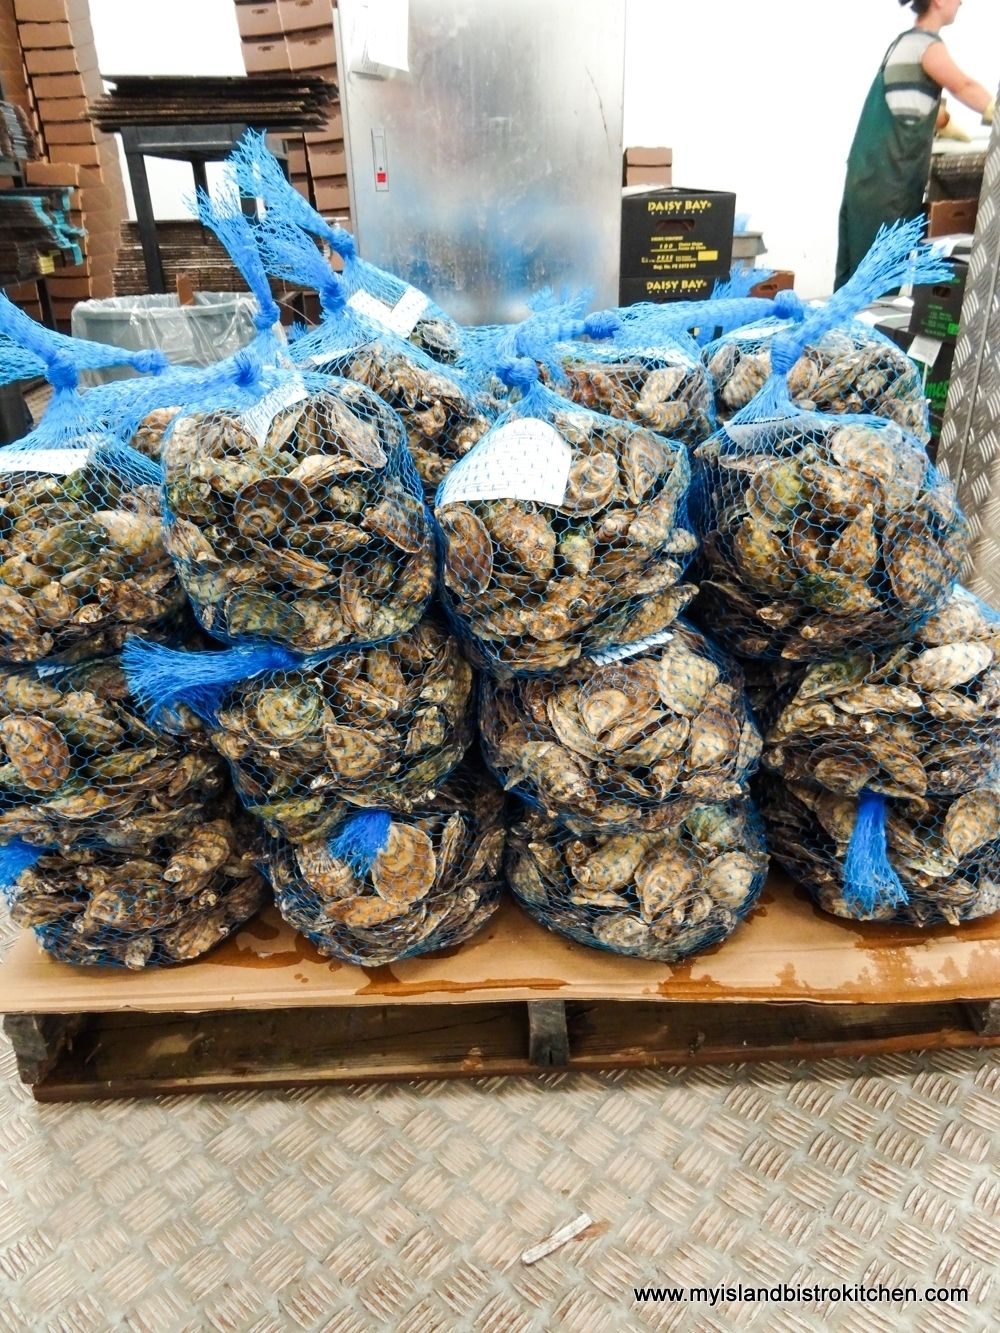
Blush Pink Tablesetting

Gluten-Free Pumpkin-Mincemeat Muffins

Gluten-free Pumpkin-Mincemeat Mini Loaves

These Gluten-Free Pumpkin-Mincemeat Muffins or mini loaves are super tasty and it’s hard to tell they are gluten-free! I believe this is so because I use a mix of gluten-free flours that include almond and coconut flours which lend exceptional texture and flavour to baked goods. Continue reading Gluten-Free Pumpkin-Mincemeat Muffins

Unbaked Chocolate Coconut Square

Chocolate Coconut Squares

This no-bake chocolate coconut square is one of the easiest to make and it does not take a lot of ingredients.  The recipe calls for graham wafer crumbs –   to make this square gluten-free, use gluten-free graham style crumbs. There may be a number of brands of these crumbs available. I use the Kinnikinnick brand. In fact, the squares in the photos in this post are made with these gluten-free crumbs.

Chocolate Coconut Squares

This square is almost candy-bar quality.  It is not a thick square but it is rich, moist, and very tasty! A great treat anytime and a sure favorite on any sweet tray.

Chocolate Coconut Squares

Unbaked Chocolate Coconut Square

Ingredients:
½ cup butter, softened at room temperature
2 tbsp brown sugar
2 tbsp granulated sugar
3 tbsp unsweetened cocoa

1 extra large egg, room temperature, beaten
1 tsp vanilla

2 cups graham wafer crumbs
1 cup shredded unsweetened coconut
½ cup chopped pecans

Method:
Line 9”x9” baking pan with parchment paper, leaving enough paper overhang that finished square can be lifted from the pan for easy icing and cutting.

Combine butter, sugars, and cocoa in medium-sized heavy bottomed saucepan.  Cook over medium low heat until butters melt and ingredients are combined and heated.  Stir frequently to prevent scorching.  Do not boil.

Add the beaten egg and vanilla.  Cook over medium low heat for 2-3 minutes, stirring constantly.

Remove from heat and add the graham wafer crumbs, coconut, and pecans.  Stir to combine ingredients well.

Spread mixture evenly in prepared pan.  Cool.  Ice with buttercream icing (recipe follows). Cut into squares of desired size.

Icing

Ingredients:

2 cups sifted powdered sugar (aka icing sugar/confectioner’s sugar)
3 tbsp butter, softened at room temperature
2½ tbsp water
½ tsp almond flavoring

1 – oz square semi-sweet chocolate
1 tbsp butter, softened at room temperature

Method:
Combine the powdered sugar and butter in bowl of stand mixer.  Mix on low speed to blend in butter.  Add the water and almond flavoring and increase speed to medium-low to blend ingredients. Increase speed to high and beat an additional minute to ensure ingredients are well combined and icing is smooth.  Additional water may be required to make icing of desired spreading consistency. If adding additional water, add by ½ teaspoon at a time.

Spread icing evenly over square.  Melt the chocolate square and butter in small dish in microwave only until the ingredients have melted enough to be blended together.  Drizzle in desired design over icing.  Cut squares into desired size.

Yield:  1 – 9”x9” pan of squares

Unbaked Chocolate Coconut Square

Easy-to-make unbaked chocolate coconut square is sure to appeal to any sweet tooth and make a fine addition to sweet trays

Course Dessert
My Island Bistro Kitchen My Island Bistro Kitchen

Ingredients

  • 1/2 cup butter, softened at room temperature
  • 2 tbsp brown sugar
  • 2 tbsp granulated sugar
  • 3 tbsp unsweetened cocoa
  • 1 extra large egg, room temperature, beaten
  • 1 tsp vanilla
  • 2 cups graham wafer crumbs
  • 1 cup shredded unsweetened coconut
  • 1/2 cup chopped pecans

Icing

  • 2 cups sifted powdered sugar (aka icing sugar/confectioner's sugar)
  • 3 tbsp butter, softened at room temperature
  • 2 1/2 tbsp water
  • 1/2 tsp almond flavoring
  • 1 oz square semi-sweet chocolate
  • 1 tbsp butter, softened at room temperature

Instructions

  1. Line 9”x9” baking pan with parchment paper, leaving enough paper overhang that finished square can be lifted from the pan for easy icing and cutting.
  2. Combine butter, sugars, and cocoa in medium-sized heavy bottomed saucepan. Cook over medium low heat until butters melt and ingredients are combined and heated. Stir frequently to prevent scorching. Do not boil.

  3. Add the beaten egg and vanilla. Cook over medium low heat for 2-3 minutes, stirring constantly.
  4. Remove from heat and add the graham wafer crumbs, coconut, and pecans. Stir to combine ingredients well.
  5. Spread mixture evenly in prepared pan. Cool. Ice with buttercream icing (recipe follows). Cut into squares of desired size.

Icing

  1. Combine the powdered sugar and butter in bowl of stand mixer. Mix on low speed to blend in butter. Add the water and almond flavoring and increase speed to medium-low to blend ingredients. Increase speed to high and beat an additional minute to ensure ingredients are well combined and icing is smooth. Additional water may be required to make icing of desired spreading consistency. If adding additional water, add by ½ teaspoon at a time.
  2. Spread icing evenly over square. Melt the chocolate square and butter in small dish in microwave only until the ingredients have melted enough to be blended together. Drizzle in desired design over icing. Cut squares into desired size. 

    Yield: 1 – 9”x9” pan of squares

Recipe Notes

To make this square gluten-free, use gluten-free graham style crumbs.


[Copyright My Island Bistro Kitchen]


Enjoy these other squares, bars, and brownie recipes from My Island Bistro Kitchen:

Classic Nanaimo Bars
Hello Dolly Square
Decadent Dream Square
Cranberry Shortbread Square
Pecan Shortbread Square
Sweet Marie Bars
Decadent Chocolate Chip Square
Old-fashioned Jam Square
Marshmallow Square
Peanut Butter and Chocolate Chip Blondies
Date Squares
Orange-scented Blueberry Oat Square
Double Decker Chocolate and Coconut Brownies
Black Bean Mocha Brownies
Old-fashioned Brownies
Scrumptious Strawberry Rhubarb Bars 

If you have made this recipe and enjoyed it and/or wish to share it with your friends and family, please do so on social media but be sure to share the direct link to this posting from my website.

Connect with My Island Bistro Kitchen on Social Media

Join the Facebook page for My Island Bistro Kitchen:  https://www.facebook.com/MyIslandBistroKitchen/

Follow “the Bistro” on “X” (formerly Twitter)https://twitter.com/PEIBistro/

See the drool-worthy gallery of mouth-watering food photos from My Island Bistro Kitchen on Instagramhttps://www.instagram.com/peibistro/

Follow “the Bistro” on Pinterest at https://www.pinterest.ca/peibistro/ and pin the Pinterest-ready photo at the end

Pin Me To Pinterest!
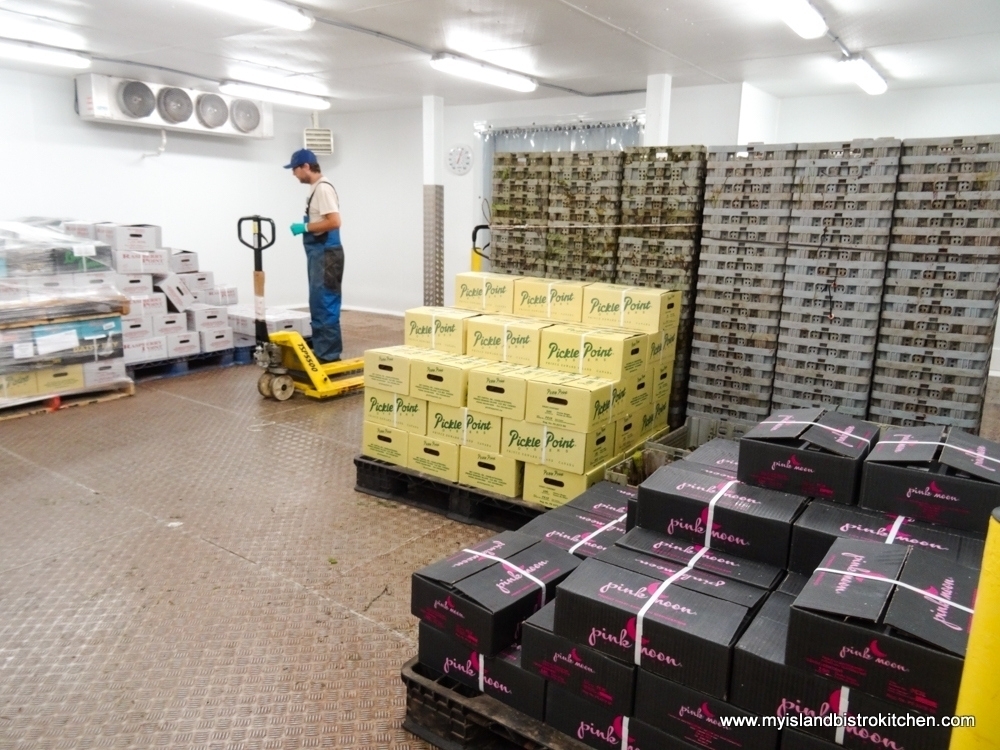
Chocolate Coconut Squares

Clementine Curd

Clementine Curd
Clementine Curd

Christmas is an excellent time to make Clementine Curd when fresh clementines are readily available.  While certainly lesser known than the traditional Lemon Curd, Clementine Curd is lovely in its own way.

Less sharp and “puckery” than Lemon Curd, Clementine Curd is almost identical in color to lemon curd (perhaps a slight bit paler) and still has a lovely citrus flavour.

Clementine Curd
Clementine Curd

Be prepared to devote some time and patience to making any curd.  It cooks slowly over a pot of simmering (never boiling) water to reach its finished stage (170F on a candy thermometer). You may wish to read my previous postings on making lemon curd and rhubarb curd for hints and tips on make curd as the same techniques apply to the making of Clementine Curd.

Clementine Curd
Clementine Curd

Use this Clementine Curd in the same way in which you would use Lemon Curd — as a spread on biscuits, scones, muffins, or toast; as a filling for cakes; in a parfait with Greek yogurt; or as a filling for tarts and cookies. Bottle the curd in a fancy jar and you have a lovely gift for someone, especially if you include a batch of homemade scones or biscuits with it.

Clementine Curd
Clementine Curd

[Printable recipe follows at end of posting]

Clementine Curd

Ingredients:

¾ cup caster* sugar or granulated sugar
2½ tsp clementine zest
7 tbsp freshly squeezed clementine juice, strained (apx. 5 clementines, depending on size)
2 extra-large egg yolks
1 large whole egg
3 tbsp unsalted butter at room temperature

Method:

In bottom of double boiler, bring about 2” of water to the simmer point (around 200°F). Maintain the water at this simmer point over medium-low heat.  Place sugar in top of double boiler or heat-proof bowl.  Mix in the clementine zest.  Whisk the clementine juice into sugar.
In small bowl, lightly beat the 2 egg yolks and the whole egg together with a fork, just enough to break up the yolks and blend with the whole egg.  Whisk the eggs into the sugar-clementine juice mixture. Add the soft butter.  Place this pot or bowl over the simmering water. Stir the mixture continuously as it cooks until it is thickened and the temperature of the mixture registers 170°F on a candy thermometer.  Be patient as this will take awhile. Make sure the water in the bottom of the boiler does not boil and stays only at the simmer point.
Remove curd from heat and strain through a mesh strainer to remove any of the egg white that may have coagulated as well as the clementine rind.  Pour strained curd into a sterilized bottle.  Place a piece of plastic wrap directly on the surface of the curd to prevent it from forming a skin on top. Cool at room temperature. Remove plastic wrap. Cover jar tightly and refrigerate for up to 1 week.

Yield: Apx. 1 cup

*caster sugar may also be known as fruit sugar, berry sugar, super fine sugar, or instant dissolving sugar.

Note:  Altitude may affect the temperature at which the water reaches the simmering point. The important thing is that the water in the bottom of the double boiler does not boil or touch the top of the double boiler/heatproof bowl during the cooking of the curd.

Clementine Curd

Similar to lemon curd but more mellow, this delightful clementine curd is especially lovely at Christmas when fresh clementines are readily available.

Course Dessert
My Island Bistro Kitchen My Island Bistro Kitchen

Ingredients

  • 3/4 cup caster sugar or granulated sugar
  • 2 1/2 tsp clementine zest
  • 7 tbsp freshly squeezed clementine juice, strained (apx. 5 clementines, depending on size)
  • 2 extra-large egg yolks
  • 1 large whole egg
  • 3 tbsp unsalted butter at room temperature

Instructions

  1. In bottom of double boiler, bring about 2” of water to the simmer point (around 200°F). Maintain the water at this simmer point over medium-low heat. Place sugar in top of double boiler or heat-proof bowl. Mix in the clementine zest. Whisk the clementine juice into sugar.
  2. In small bowl, lightly beat the 2 egg yolks and the whole egg together with a fork, just enough to break up the yolks and blend with the whole egg. Whisk the eggs into the sugar-clementine juice mixture. Add the soft butter. Place this pot or bowl over the simmering water. Stir the mixture continuously as it cooks until it is thickened and the temperature of the mixture registers 170°F on a candy thermometer. Be patient as this will take awhile. Make sure the water in the bottom of the boiler does not boil and stays only at the simmer point.
  3. Remove curd from heat and strain through a mesh strainer to remove any of the egg white that may have coagulated as well as the clementine rind. Pour strained curd into a sterilized bottle. Place a piece of plastic wrap directly on the surface of the curd to prevent it from forming a skin on top. Cool at room temperature. Remove plastic wrap. Cover jar tightly and refrigerate for up to 1 week. Yield: Apx. 1 cup

Recipe Notes

*caster sugar may also be known as fruit sugar, berry sugar, super fine sugar, or instant dissolving sugar.

Note:  Altitude may affect the temperature at which the water reaches the simmering point. The important thing is that the water in the bottom of the double boiler does not boil or touch the top of the double boiler/heatproof bowl during the cooking of the curd.


[Copyright My Island Bistro Kitchen]

If you have made this recipe and enjoyed it and/or wish to share it with your friends and family, please do so on social media but be sure to share the direct link to this posting from my website.

Connect with My Island Bistro Kitchen on Social Media

Join the Facebook page for My Island Bistro Kitchen:  https://www.facebook.com/MyIslandBistroKitchen/

Follow “the Bistro” on “X” (formerly Twitter)https://twitter.com/PEIBistro/

See the drool-worthy gallery of mouth-watering food photos from My Island Bistro Kitchen on Instagramhttps://www.instagram.com/peibistro/

Follow “the Bistro” on Pinterest at https://www.pinterest.ca/peibistro/ and pin the Pinterest-ready photo at the end

Enjoy these other Curd recipes from My Island Bistro Kitchen:

Cranberry Curd
Lime Curd
Rhubarb Curd
Lemon Curd

Pin one or more of these images to your favorite Pinterest boards!
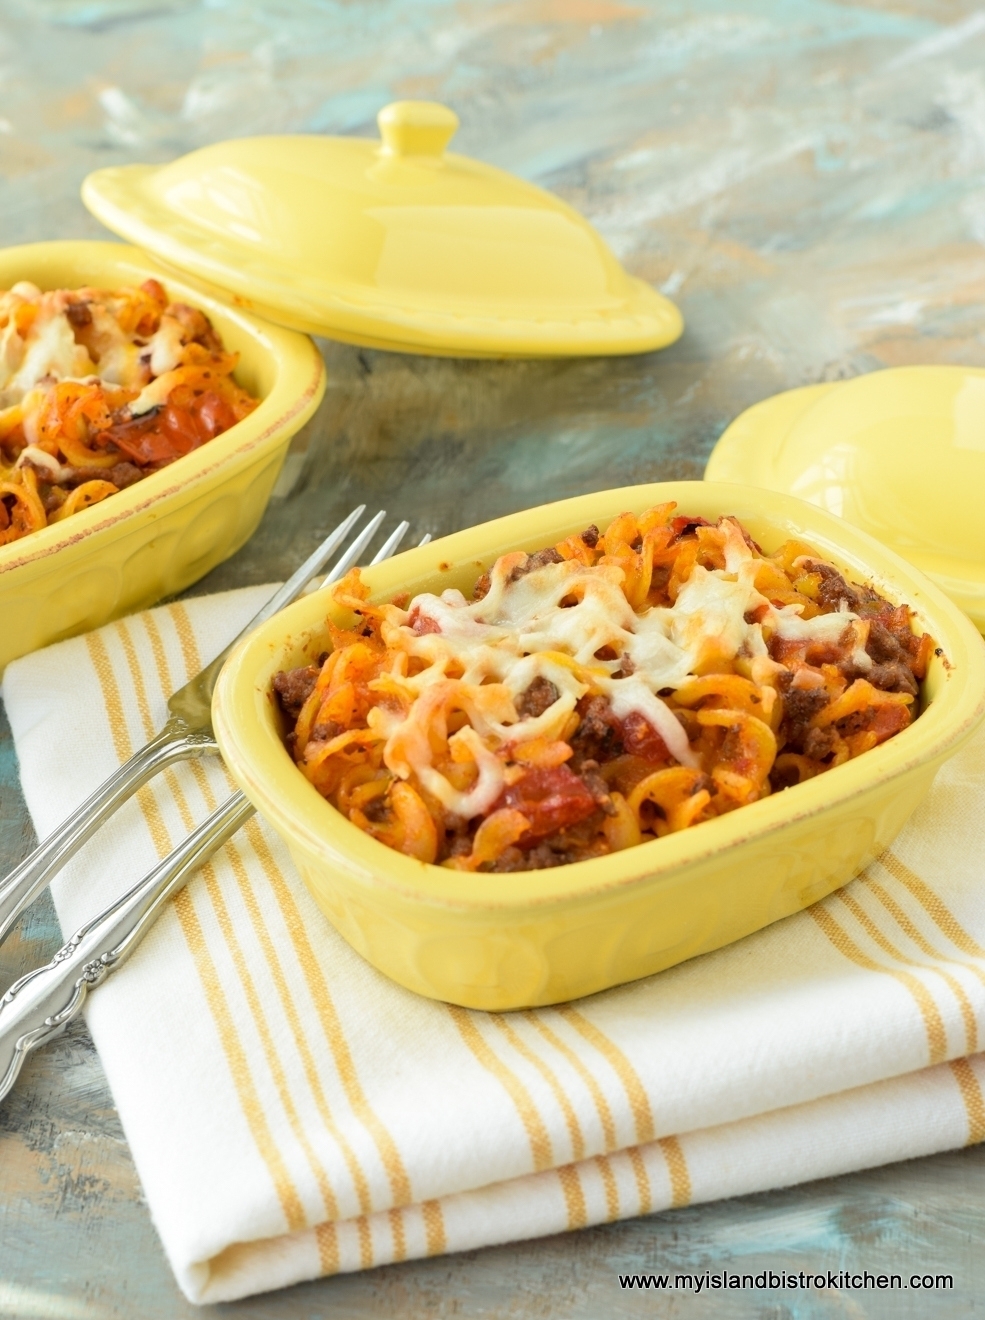
Clementine Curd
Clementine Curd


Clementine Curd
Clementine Curd


Clementine Curd
Clementine Curd


Chocolate Peanut Butter Balls

Chocolate Peanut Butter Balls

Chocolate Peanut Butter Balls are a Christmas treat in my neck of the woods and, for many, it isn’t Christmas unless there is a batch or two of these delectable homemade confections.  They are one food item that just never seems to go out of style. And, they are addicting! Who can stop at just one!
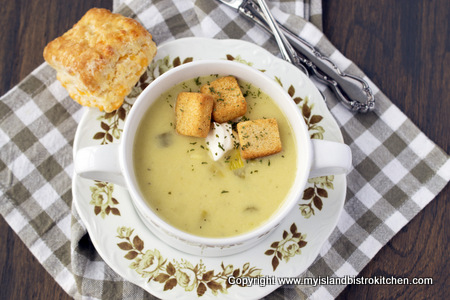
Chocolate Peanut Butter Ball

These balls are not difficult to make and only take very basic ingredients. They are, however, a bit time consuming to make because the peanut butter and butter must be melted then mixed in with the icing sugar (which you may know as confectioner’s sugar or powdered sugar) and crisp rice cereal.  Then the balls need to be formed from the mixture, chilled, and then individually dipped in melted chocolate and chilled again. It’s critical that the icing sugar be sifted (and before it is measured). No matter how soft and fluffy the icing sugar may seem, there are always little lumps/clumps that will not mix in as well as if the sugar is sifted. Take the time to do this step.

Chocolate Peanut Butter Balls

It’s important that the balls not be formed too large as they will get larger in size when dipped in chocolate.  The size to aim for would be the size of a chocolate truffle that would fit nicely inside a paper candy cup so form the mixture into ½” inch balls. They may look small at this stage but they’ll get bigger once dipped in chocolate.  These confections are meant to be 1-2 bites and they are rich!

A teaspoon can be used to twirl the balls around in the chocolate and to swirl the tops; however, my preference is to use a spiral swirl candy dipper.

Spiral Swirl Candy Dipper

I find it is much more efficient, the excess chocolate can be dripped off the balls with a gentle tap or two of the swirl dipper tool on the side of the pot, and the tops of the balls are automatically swirled attractively when the balls drop from the candy dipper tool.

Using a spiral swirl candy dipper to coat chocolate peanut butter balls

Various kinds of chocolate can be used in which to dip the balls.  Semi-sweet chocolate chips are the norm; however, white chocolate can be used as can peanut butter chips for the ultimate peanut butter flavor.  Sometimes, I will mix the semi-sweet chocolate chips with the peanut butter chips and this makes a lovely coating as well.  Melted chocolate in contrasting colors can be used, if desired, to decorate the tops of the balls.

Chocolate Peanut Butter Balls

Store the balls between layers of waxed paper in an airtight container in the refrigerator.  These balls freeze well.

[Printable recipe follows at end of posting]

Chocolate Peanut Butter Balls

Ingredients:
1 cup smooth peanut butter
¼ cup + 1 tbsp butter
½ tsp vanilla
2¼ cups sifted icing sugar (apx. ½ pound)
1½ cups crisp rice cereal

10 oz semi-sweet chocolate chips, white chocolate, or peanut butter chips (or a combination of all three)

Method:
Line two large rimmed baking sheets with wax paper.  Set aside.

Combine peanut butter and butter in small saucepan.  Melt the butters over medium-low heat, stirring frequently to prevent scorching. Remove from heat and stir in vanilla.

In large heat-proof bowl, combine the icing sugar and rice cereal.  Pour the melted peanut butter and butter mixture over the cereal and icing sugar. Mix ingredients with large spoon or hands until all of the icing sugar has been fully incorporated.

Pinch off bits of the mixture and form into ½” balls.  Place balls on one of the prepared baking sheets. Refrigerate for about 30 minutes, or until firm.

Melt half of the chocolate in the top of a double boiler or heat proof bowl over a pot of simmering (not boiling) water.  Using a teaspoon, or a spiral swirl candy dipper, dip the balls into the chocolate and swirl to coat.  If using the spiral swirl dipper, gently tap the dipper tool on the side of the chocolate pot to remove any excess chocolate from the dipped balls.  Transfer dipped balls to the second prepared baking sheet. Melt remaining chocolate as needed to complete the dipping process. Refrigerate for 30 minutes.  Store balls between layers of wax paper in airtight container. Keep refrigerated or freeze for longer storage.

Yield:  Apx. 50-55 balls

Chocolate Peanut Butter Balls

A tasty confection that combines peanut butter, butter, icing sugar, and crisp rice cereal formed into balls dipped in decadent chocolate

Course Snack
Cuisine American
My Island Bistro Kitchen My Island Bistro Kitchen

Ingredients

  • 1 cup smooth peanut butter
  • 1/4 cup + 1 tbsp butter
  • 1/2 tsp vanilla
  • 2 1/4 cups sifted icing sugar (apx. 1/2 pound)
  • 1 1/2 cups crisp rice cereal
  • 10 oz semi-sweet chocolate, white chocolate, or peanut butter chips (or a combination of all three)

Instructions

  1. Line two large rimmed baking sheets with wax paper. Set aside.
  2. Combine peanut butter and butter in small saucepan. Melt the butters over medium-low heat, stirring frequently to prevent scorching. Remove from heat and stir in vanilla.
  3. In large heat-proof bowl, combine the icing sugar and rice cereal. Pour the melted peanut butter and butter mixture over the cereal and icing sugar. Mix ingredients with large spoon or hands until all of the icing sugar has been fully incorporated.

  4. Pinch off bits of the mixture and form into ½” balls. Place balls on one of the prepared baking sheets. Refrigerate for about 30 minutes, or until firm.
  5. Melt half of the chocolate in the top of a double boiler or heat proof bowl over a pot of simmering (not boiling) water. Using a teaspoon, or a spiral swirl candy dipper, dip the balls into the chocolate and swirl to coat. If using the spiral swirl dipper, gently tap the dipper tool on the side of the chocolate pot to remove any excess chocolate from the dipped balls. Transfer dipped balls to the second prepared baking sheet. Melt remaining chocolate as needed to complete the dipping process. Refrigerate for 30 minutes. Store balls between layers of wax paper in airtight container. Keep refrigerated or freeze for longer storage.

    Yield: Apx. 50-55 balls

Recipe Notes

Copyright My Island Bistro Kitchen


If you have made this recipe and enjoyed it and/or wish to share it with your friends and family, please do so on social media but be sure to share the direct link to this posting from my website.

Connect with My Island Bistro Kitchen on Social Media

Join the Facebook page for My Island Bistro Kitchen:  https://www.facebook.com/MyIslandBistroKitchen/

Follow “the Bistro” on “X” (formerly Twitter)https://twitter.com/PEIBistro/

See the drool-worthy gallery of mouth-watering food photos from My Island Bistro Kitchen on Instagramhttps://www.instagram.com/peibistro/

Follow “the Bistro” on Pinterest at https://www.pinterest.ca/peibistro/ and pin the Pinterest-ready photo at the end

Choose one of these images to pin this recipe to your favorite Pinterest board(s)!

Cookbook Giveaway Contest!!!


Thanks to the publishers at Robert Rose Inc., I have an extra copy of Best of Bridge Sunday Suppers to give away in conjunction with the review I just published on this cookbook.

Cookbook Giveaway Rules

These Official Rules govern the Cookbook giveaway. By participating or attempting to participate in the giveaway event, you will be deemed to have received, understood, and agreed to these Official Rules.

This cookbook giveaway event is exclusively for fans of My Island Bistro Kitchen’s Facebook page and who are Canadian residents (excluding Quebec residents).  So, if you have not already become a fan of My Island Bistro Kitchen’s Facebook page, and if you wish to participate in the cookbook giveaway event, head on over to https://www.facebook.com/MyIslandBistroKitchen/ and click the “Like” button on the Facebook page, located just below the cover photograph, and then proceed with the following eligibility steps for the cookbook giveaway:

  1. Click “Like” on the specific Facebook posting that details the cookbook giveaway.
  2. Leave a comment on the posting indicating what your favorite Sunday supper is.
  3. Share the Cookbook Giveaway post (make sure your privacy setting is set to “public” so I can verify that you shared the post).

Only individuals who have correctly completed the eligibility criteria above will be eligible for the cookbook draw.

Tag a Facebook friend on the posting and you will receive an extra bonus entry!

  • No purchase is necessary to participate.
  • This giveaway is open only to Canadian residents (excluding residents of Quebec) having a Canadian mailing address and who are fans of My Island Bistro Kitchen’s Facebook page. Entrants must be 19 years of age or older.
  • Only one (1) entry per person with the exception of those who tag a Facebook friend on their entry – those who tag a Facebook friend will receive one (1) extra bonus entry.
  • There is one (1) prize only to be won – one (1) copy of Best of Bridge Sunday Suppers cookbook with an approximate Canadian retail value of $29.95. The book for this giveaway has been provided by the cookbook’s publisher, Robert Rose Inc. The prize is non-transferable and non-exchangeable. It cannot be exchanged for money value.  The prize offering is valid only during the specified allotted time as described in these Official Rules.
  • Odds of winning depend on the number of eligible entries received.
  • The submission entry period opens at 12:00 noon (AST) on December 14, 2017, and closes at 12 noon (AST) on December 17, 2017. Draw of winner will be made by 9:00pm (AST) on December 17, 2017.
  • All eligible entries received during the submission period will be gathered at the end of the submission period. One entrant will be randomly selected as a potential winner and notified through Facebook. In the event any potential winner does not respond to such notification within 48 hours of having been sent notification, declines the prize for any reason, or does not meet the requirements set forth in these Official Rules, the potential winner will be disqualified and an alternate potential winner may be randomly selected from among remaining eligible entries, or the prize may be cancelled.
  • Potential winner must correctly answer a mathematical skill-testing question to win.
  • Each entrant is responsible for monitoring his or her Facebook account for potential prize notification and receipt of other communications related to this cookbook giveaway.
  • Once the definitive winner has been determined to have successfully met all the eligibility criteria afore-mentioned, and claimed the prize, his or her name will be announced on My Island Bistro Kitchen’s Facebook page and, in order to receive the prize, the winner must agree to this publication announcement as a condition of winning.
  • Cookbook prize may not be awarded if an insufficient number of eligible entries is received. The determination of insufficient number of eligible entries will be at the sole discretion of My Island Bistro Kitchen.
  • In order to receive the cookbook, the winner must agree to provide My Island Bistro Kitchen with their Canadian mailing address to which the cookbook will be mailed. This information will be provided to Robert Rose Inc. by My Island Bistro Kitchen for the purposes of mailing the cookbook to the declared winner and the winner must agree to the sharing of their mailing address with Robert Rose Inc. for this purpose. The prize will not be replaced if lost, destroyed, mutilated, or stolen.
  • This giveaway event is in no way sponsored, endorsed, administered by, or associated with, Facebook. All entrants agree to release Facebook from any liability with respect to this giveaway event or its prize.
  • All entrants agree to be bound by the rules of this giveaway event and release My Island Bistro Kitchen and all parties associated with this giveaway event from any liability with respect to this giveaway event or of its prize.
  • All decisions by My Island Bistro Kitchen with regards to all aspects of this giveaway event are final.
  • If, for any reason, and in the opinion of My Island Bistro Kitchen, this giveaway event is not capable of running as planned or if it is adversely affected by computer virus, fraud, technical failures, or other causes beyond its control, My Island Bistro Kitchen reserves the right to cancel, modify, or suspend the giveaway event, at any time, and at the sole discretion of My Island Bistro Kitchen, without notice.

(Mostly) PEI and Maritime Food – Good Food for a Good Life!