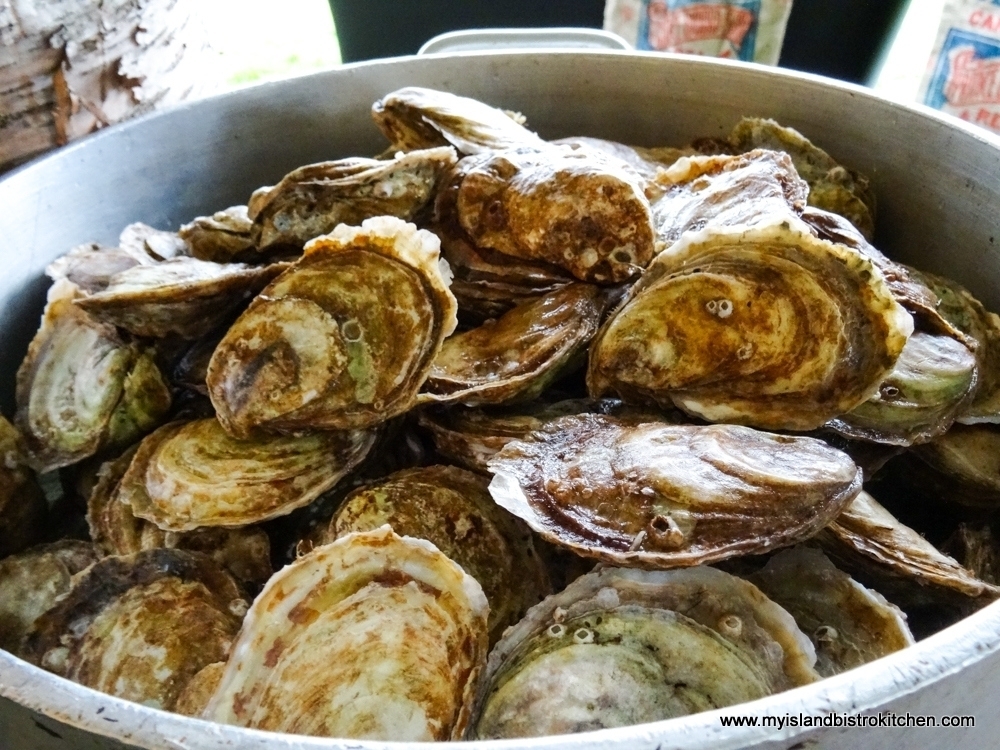
Prince Edward Island is well-known for its variety of high quality shellfish – think lobster, mussels, and oysters, in particular. Today, however, my blog posting is all about the world-famous PEI Malpeque oysters. According to the PEI Government website (https://www.princeedwardisland.ca/en/information/agriculture-and-fisheries/oysters ), the Island is Canada’s second largest oyster producing province and is the largest oyster producing province in the Atlantic region. It’s not uncommon in my travels to find PEI Malpeque Oysters on a restaurant menu. No matter the variety or brand of oysters from PEI, or what part of the Island they are fished or farmed, they are generally all referred to as “Malpeques”. How that came to be is, itself, an interesting story.
PEI oysters have a long history with the government issuing leases for oyster fishing back as far as the mid-1800s to those wishing to fish oysters from the ocean seabed. The oysters were made famous at the 1900 Paris World Fair where, in an oyster-tasting contest, they were crowned the world’s best oysters. The oysters were simply named for Malpeque Bay on the Island’s north shore from where the winning oysters were fished.
However, the oyster industry on PEI was stricken in 1915 when disease wiped out about 90% of the Island’s oyster population. Miraculously, however, the oysters in Malpeque Bay survived. Seed (which is basically a tiny version of an adult oyster) from these oysters was gathered and spread throughout other bodies of water around the Island and the oyster industry rebounded. To this day, over 100 years later, all oysters produced on PEI are considered to be direct descendants of oysters from Malpeque Bay. So, that’s why all PEI oysters, regardless from what part of the Island they come, or what variety or brand they are, are called “Malpeques”. Who knew PEI oysters had lineage and a family tree! So, while there is one species – the Malpeques – there can be any number of varieties and brands. A little more about the varieties of “Malpeques” a bit later.
To find out more about the oyster industry on PEI, I paid a visit to the Raspberry Point Oyster Co., one of the Island’s largest oyster growing operators, processors, and exporters. At the company’s hub operations center in Bayview near Cavendish on PEI’s north shore, I caught up with James Power, oyster connoisseur and manager of the Raspberry Point Oyster Co.
James lives and breathes oysters and you would be hard pressed to find anyone any more passionate about the oyster industry than James. And, with good reason. Oyster sales are brisk for the Raspberry Point Oyster Co., growing year over year. James tells me that more than 10M oysters are cultured annually from the company’s farming operations in New London Bay, Rustico, and Oyster Bed Bridge/Rustico Bay. While the majority (about 90%) of their sales are in North America (with Montreal, Toronto, and Boston accounting for about 75% of sales), they regularly ship internationally all over the world that includes weekly shipments to the Netherlands as well as regular shipments to places like Belgium, France, Hong Kong, China, and Singapore. Small wonder, then, why it’s generally not too surprising to find PEI oysters on restaurant menus in all corners of the world!
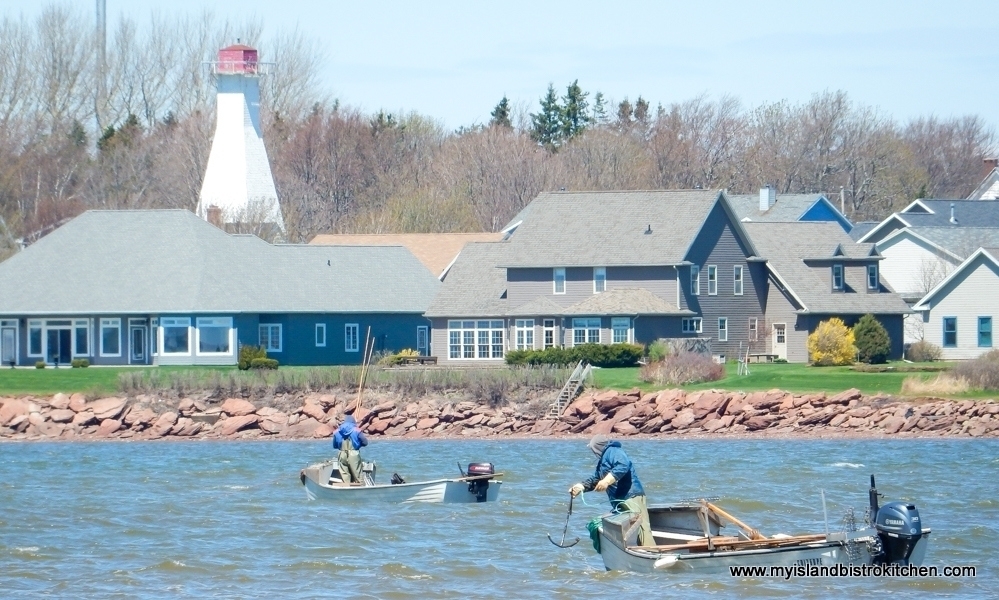
Both oyster fishing and oyster farming exist on PEI. The traditional method of oyster fishing is done through the use of manually-operated large wooden tongs.
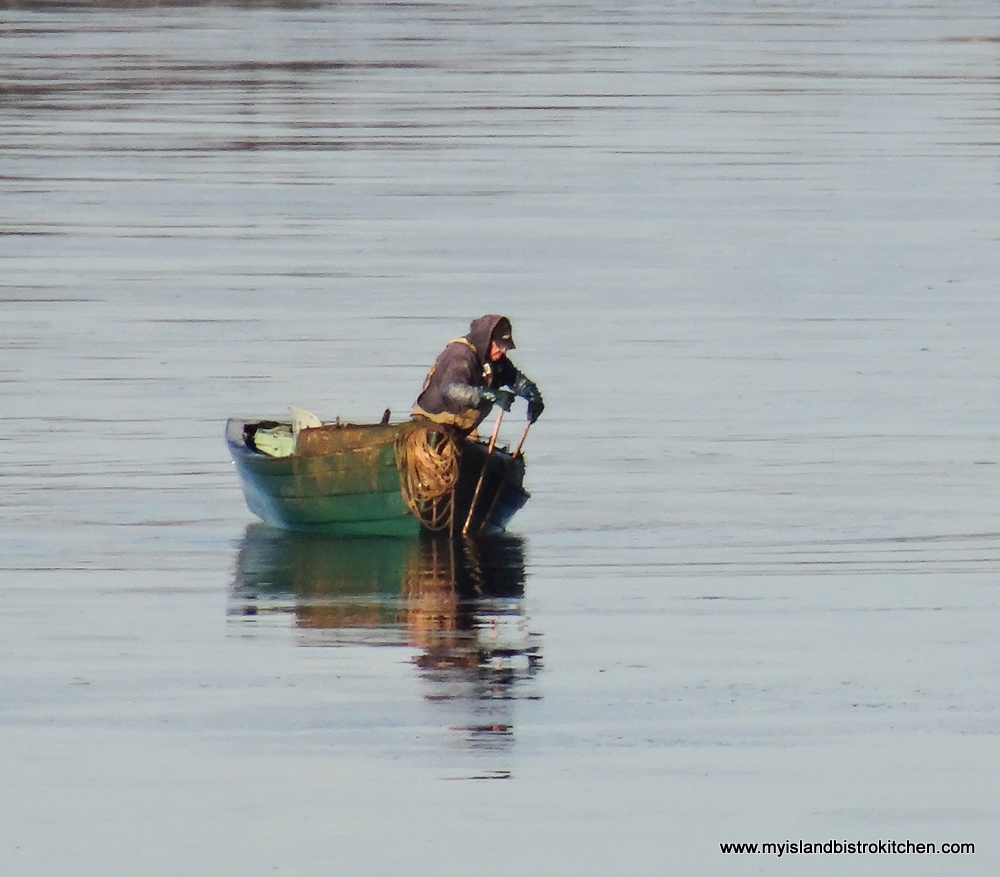
If you travel around the shores, bays, rivers, and estuaries of PEI, a common sight from spring to fall will be dozens of little dories each manned by a lone fisher using long wooden tongs with rakes at the ends to scoop up the oysters. These are independent local oyster fishers who buy licenses from the federal government allowing them to fish wild oysters on any public fishing grounds.
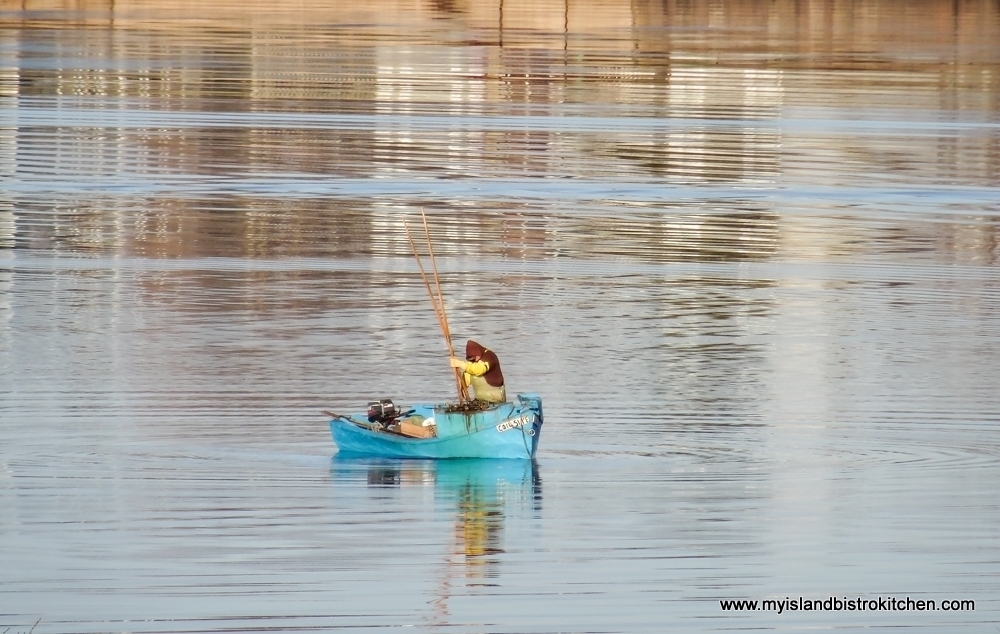
These oysters are known as bottom culture oysters that are slow to mature taking, on average, 5-7 years to grow to the desired market size of 3” – 3½“. Bottom culture oysters grow slowly because there is less natural food available to them. Oysters harvested by these small independent fishers are sold to oyster processing plants.
The other method of producing oysters is to raise, culture, or grow the oysters, a practice commonly known as “oyster farming” and that’s the method used by large commercial growers for mass production needed to meet demands from around the world. Growers lease ground, that is not public fishing ground, in which to grow their oysters.
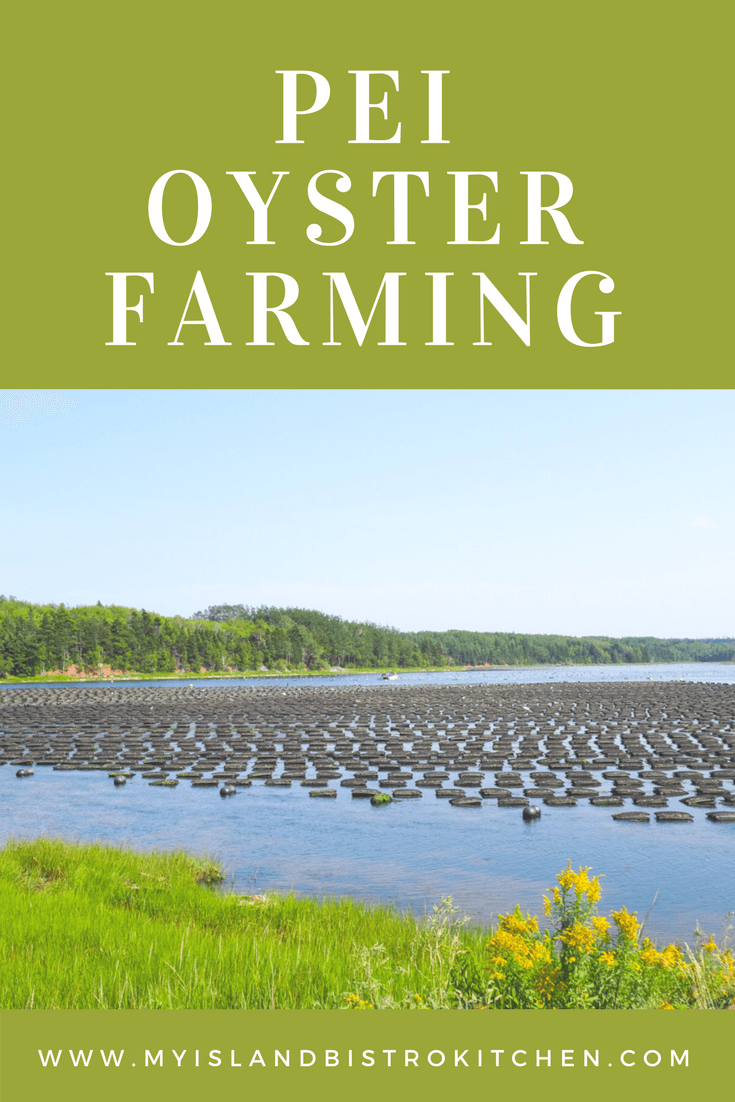
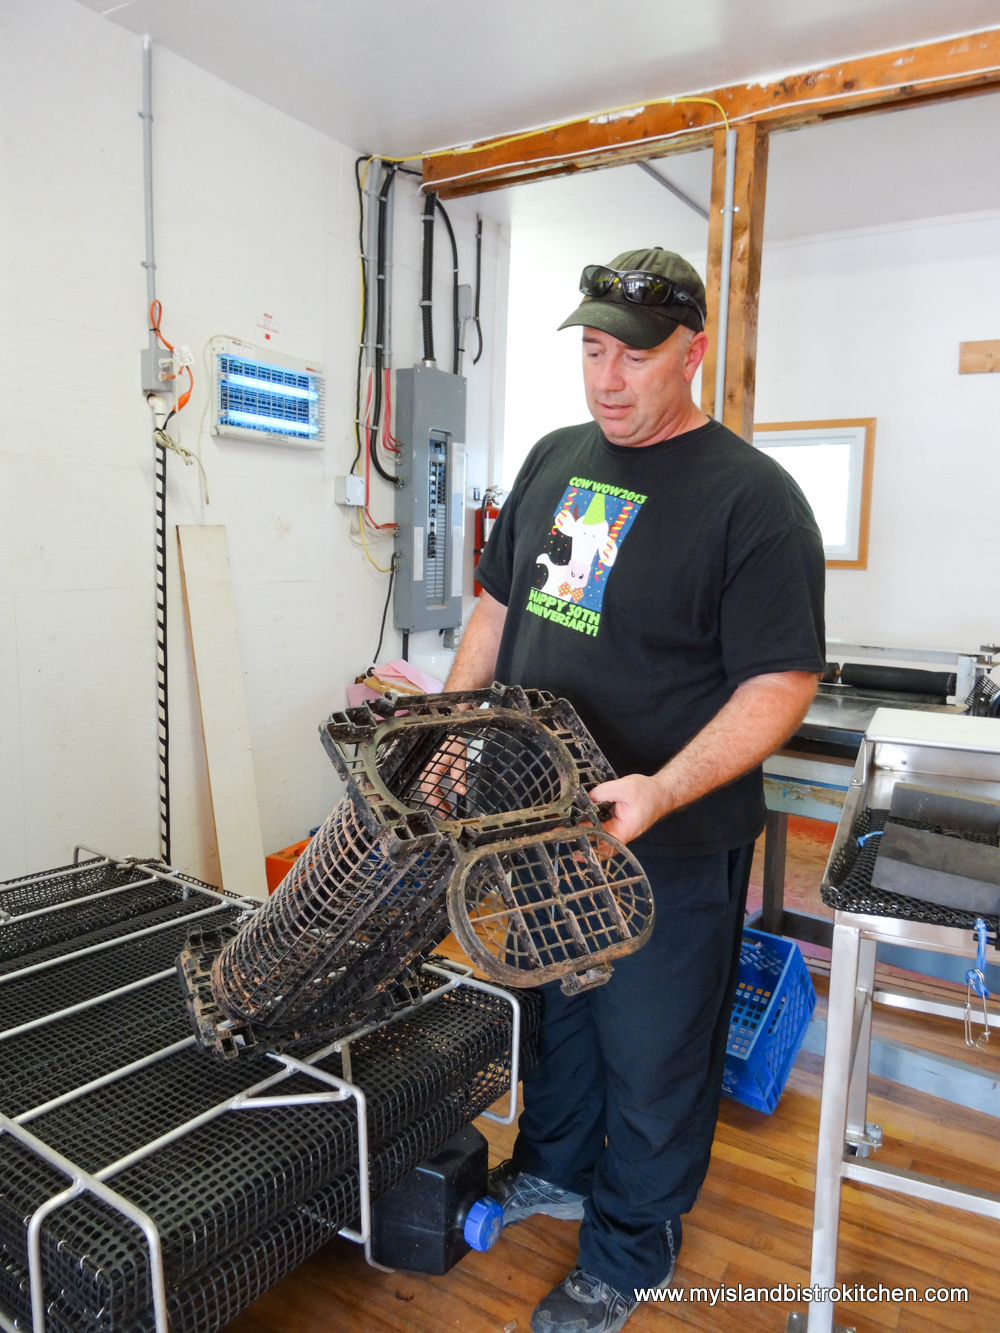
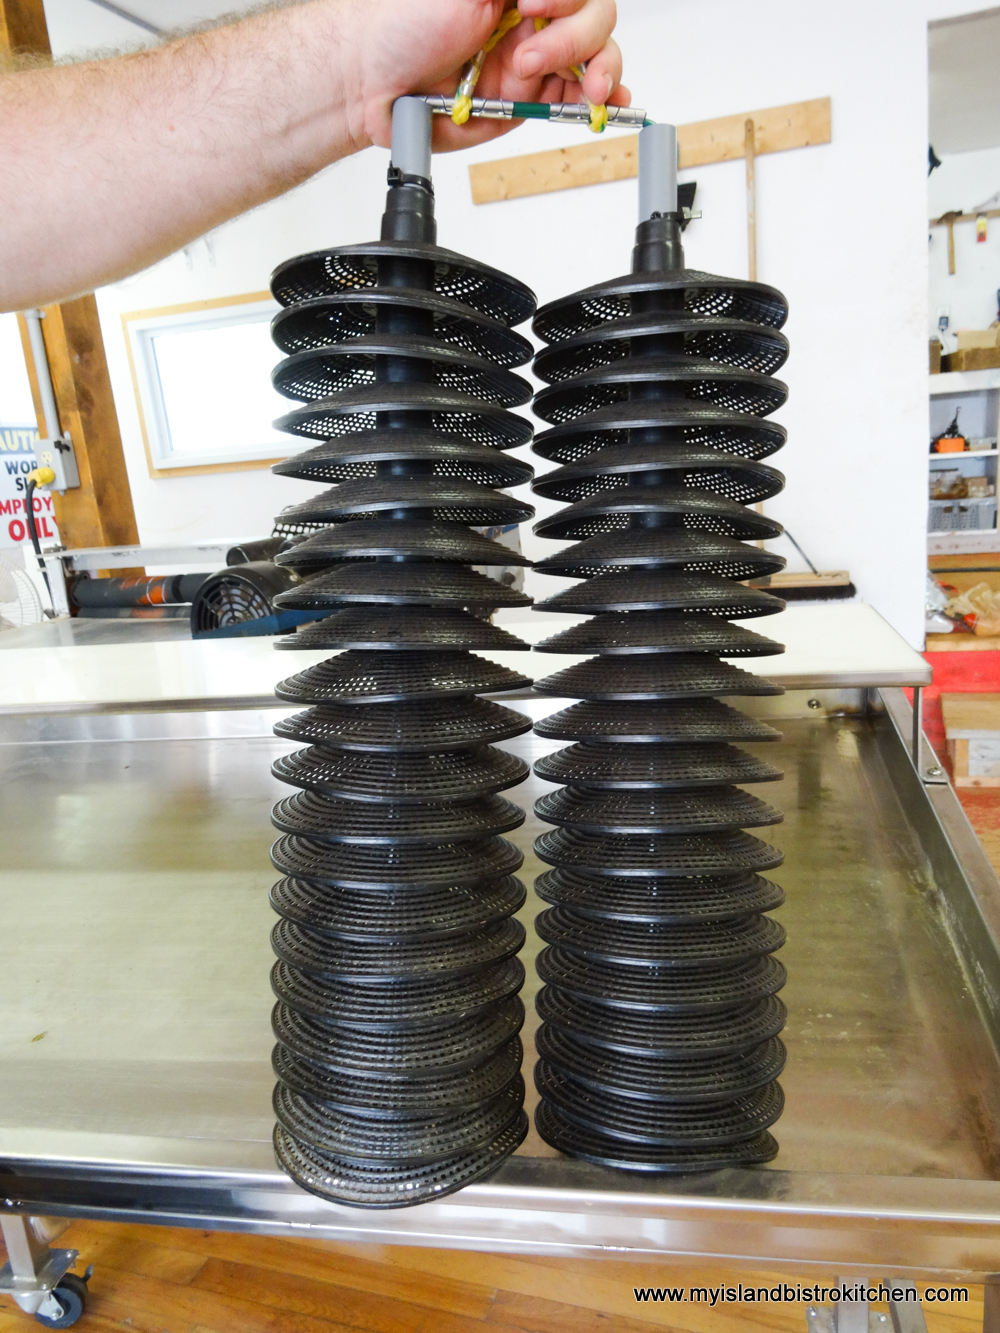
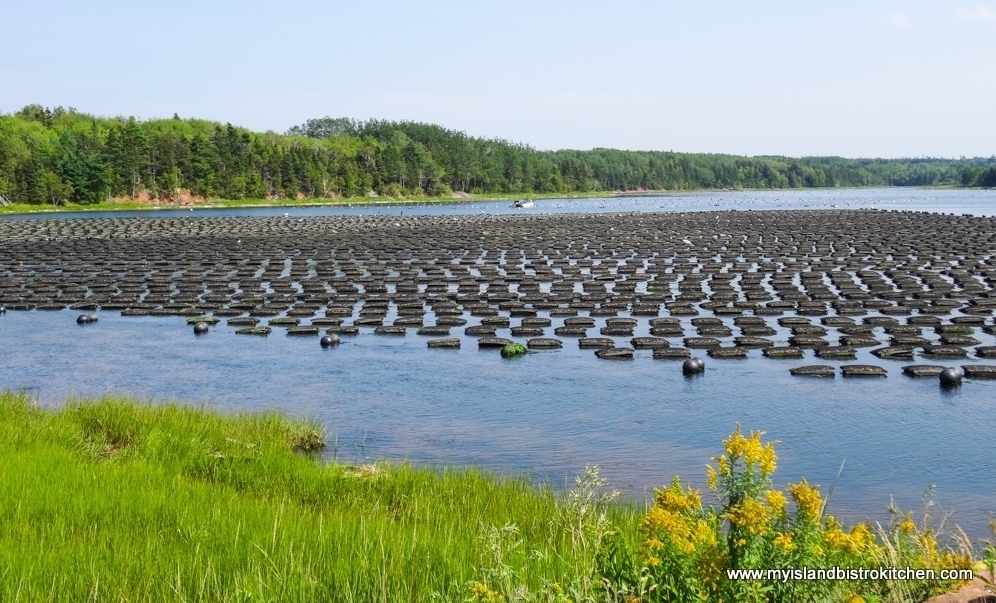
There are two methods of oyster aquaculture – bottom culture and off-bottom (sometimes known as top, floating, or surface culture) and Raspberry Point Oyster Co. uses both methods. With bottom culture oysters, grown in water depth between 3’ and 8’, the grower spreads the oyster seed on the seabed. James says their top culture oysters are grown in water that is between 8’ and 15’ deep. The oyster seed is purchased from hatcheries and from oyster farmers who catch wild spat, or larvae in collectors like the ones in the photo below. Once the oysters are big enough, they will be transferred to netted bags to grow, safe from predators like starfish and crabs.
All oysters at Raspberry Point Oyster Co. are started as top culture in floating mesh bags and then some are moved to bottom culture areas. The type of culture (bottom or top) used is often chosen on the basis of local growing conditions. Some parts of leased areas are too shallow for top culture and others might have too soft a seabed for bottom culture oysters. Using the two methods of farming, therefore, allows the Raspberry Point Oyster Co. to maximize the growing areas in their leases and also allows oysters to develop with different flavours, colors (they range from brown/white, gray to green), and appearance. Generally, the larger oyster seed is spread on the seabed because the oysters’ advanced size makes it more difficult for crabs and starfish to get at them.
When the bottom culture oysters have grown to market size, specialized oyster harvesters that use water pressure, scoop up the oysters. The oysters come up from the seabed on to an escalator and those that are of the desired size are harvested while ones not quite of sufficient size are returned to the seabed bottom to allow them to continue to grow. Bottom culture oysters usually take 5-7 years to grow to market size and this is because there is usually less water flow and food on the sea bed than is available for surface culture oysters. Oyster farmers do not need to provide special food for their oysters as the bivalves draw all the necessary nutrients from their seawater habitat along with naturally occurring plankton and plant life. So long as the mollusks have clean water and care is taken to limit their predators access, oysters will grow naturally on their own.
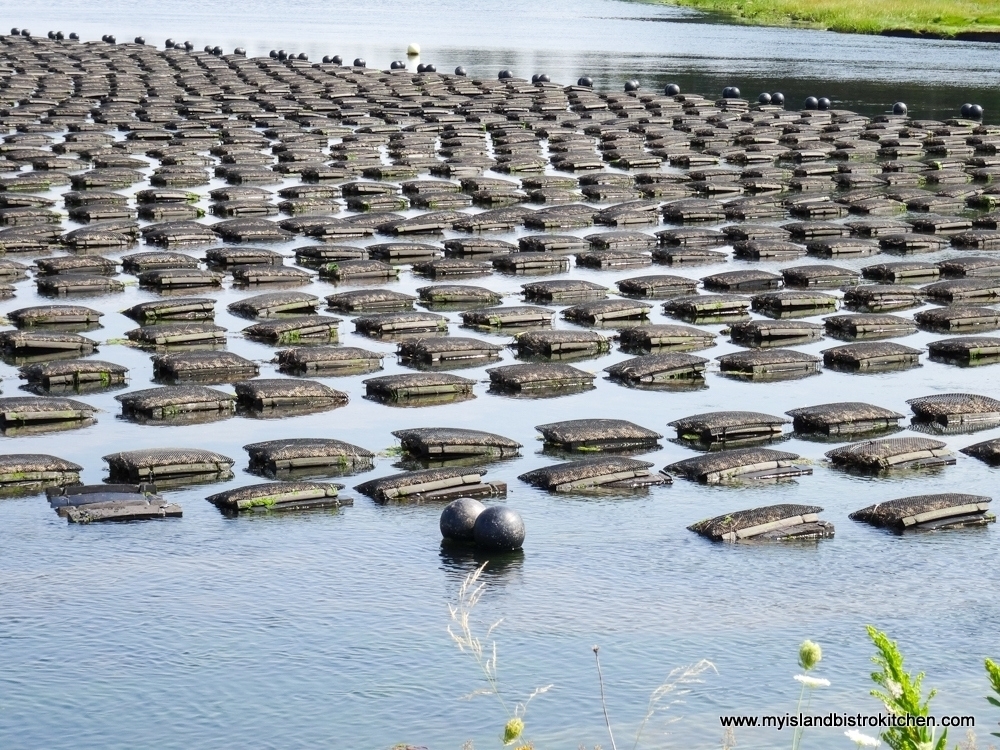
The other method of growing oysters is top culture, often referred to as surface or floating culture. With advances in oyster growing technology and methods, today’s floating aquaculture speeds up the rate of maturation allowing for top culture oysters to be grown in about 3-5 years. There is usually more constant water flow as the result of wave action during tidal changes and more natural food supplies nearer the water’s surface so oysters grown as top culture in floating bags just at or under the water surface are able to grow to market size sooner. Top culture oyster farming involves growing the oysters in mesh bags that float in basket-like cages around the water surface level.
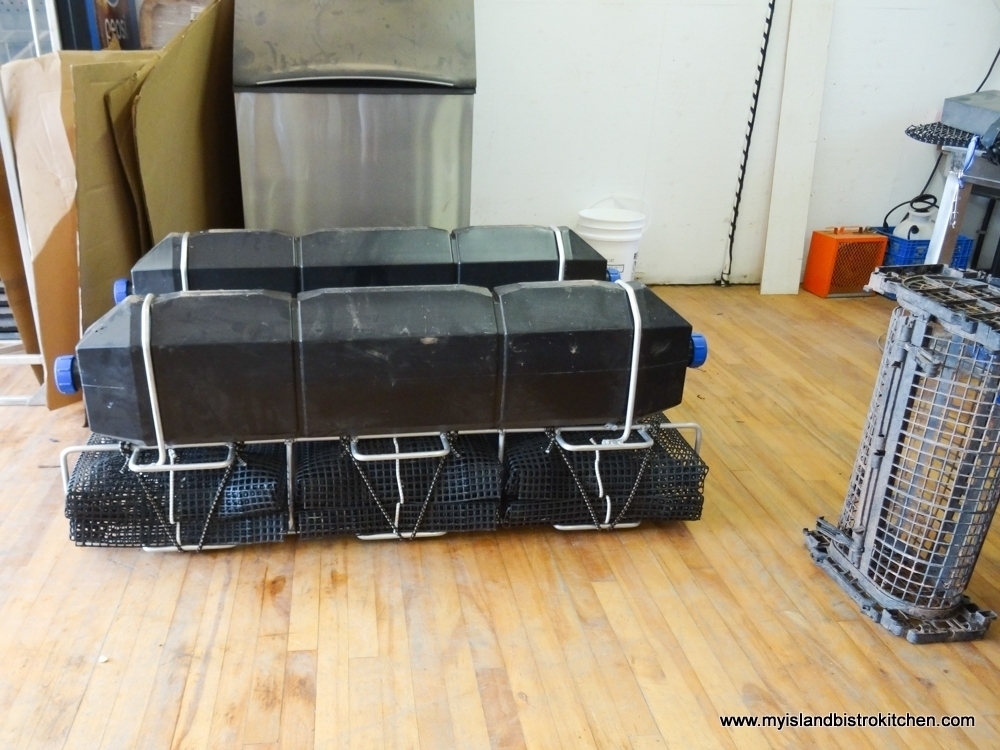
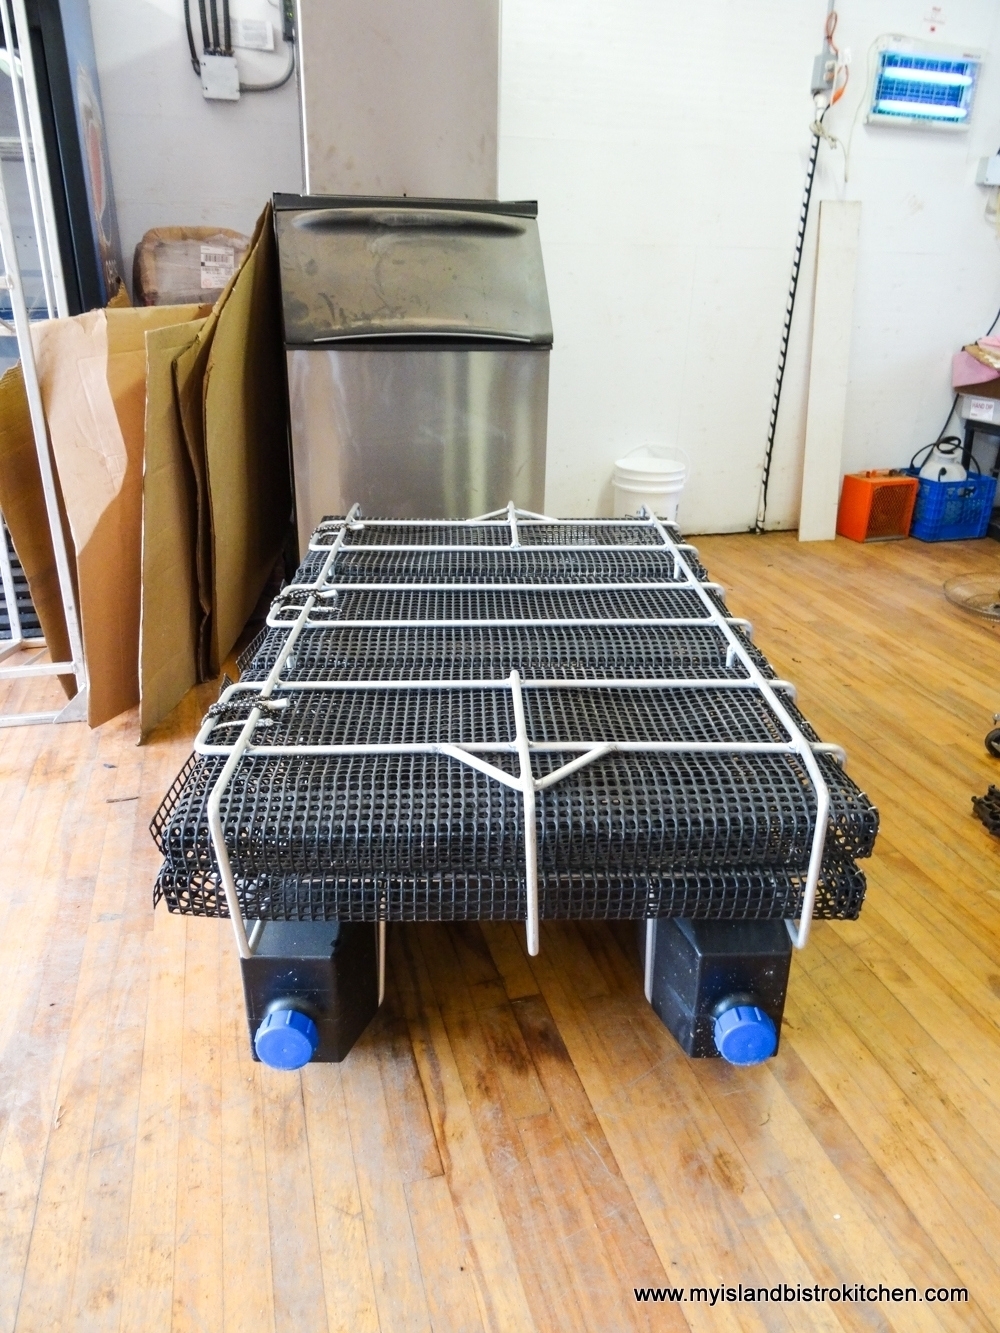
The baskets are constructed so that the water is able to flush through, bringing food to the mollusks and keeping them cleaner than those grown in the mud on the seabed bottom. The baskets are regularly flipped and the water flow and waves rock the baskets and chip away, or manicure, the rough edges of the oysters, giving them a more desirable looking shell. This also allows for seaweed, barnacles, and other organisms that find their way into the baskets to be exposed to sunlight and dry out and not become an infestation to the growing oysters. The bags inside the floating baskets also help to protect the oysters against predators. So, if you see rows of these floating cages in a body of water around the Island, you’ll know they’re filled with growing oysters.
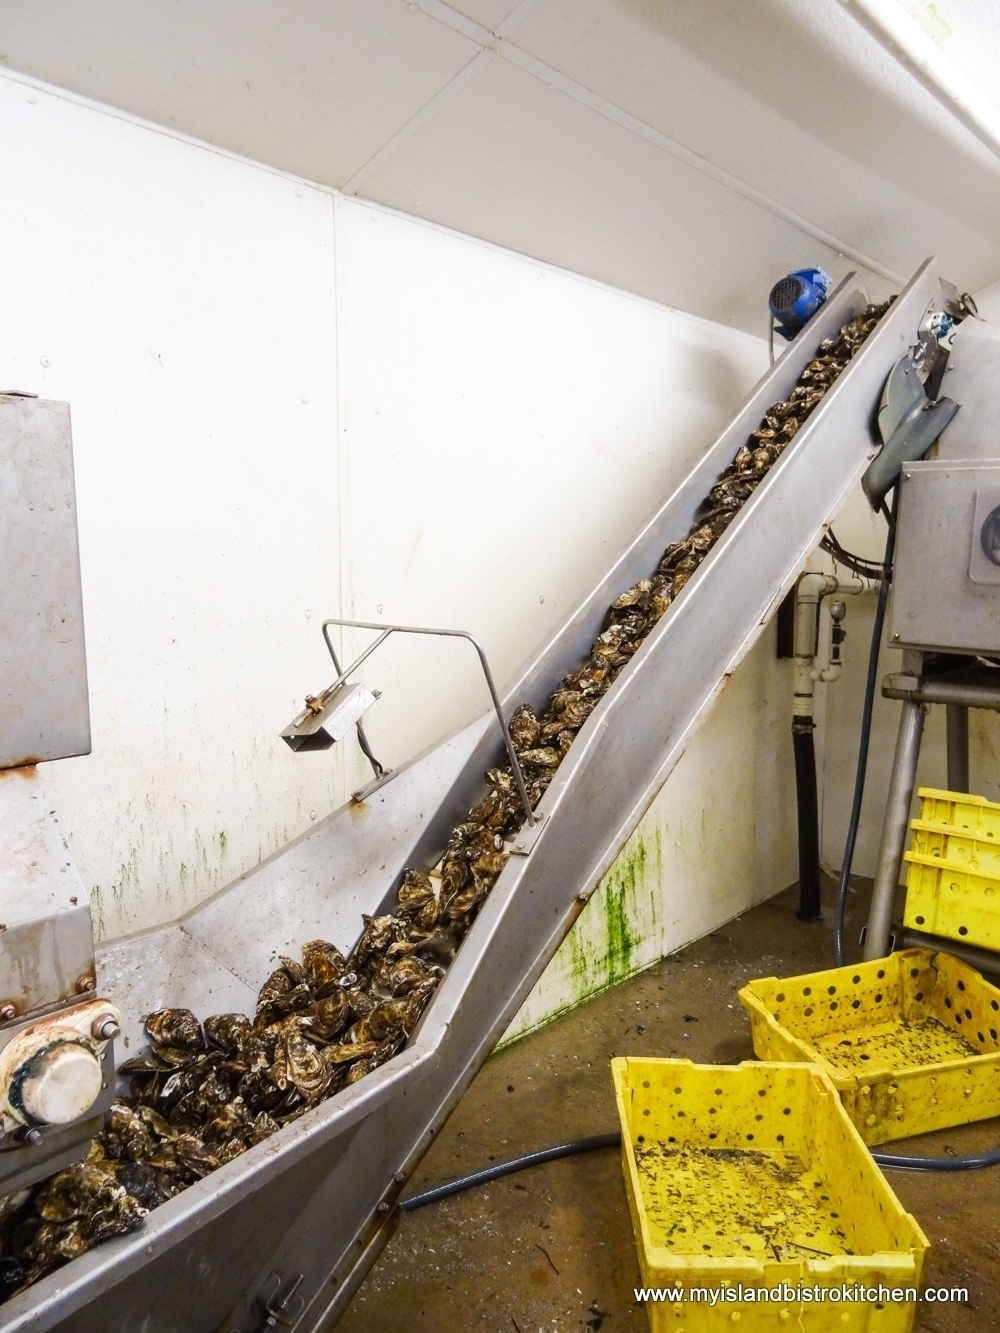
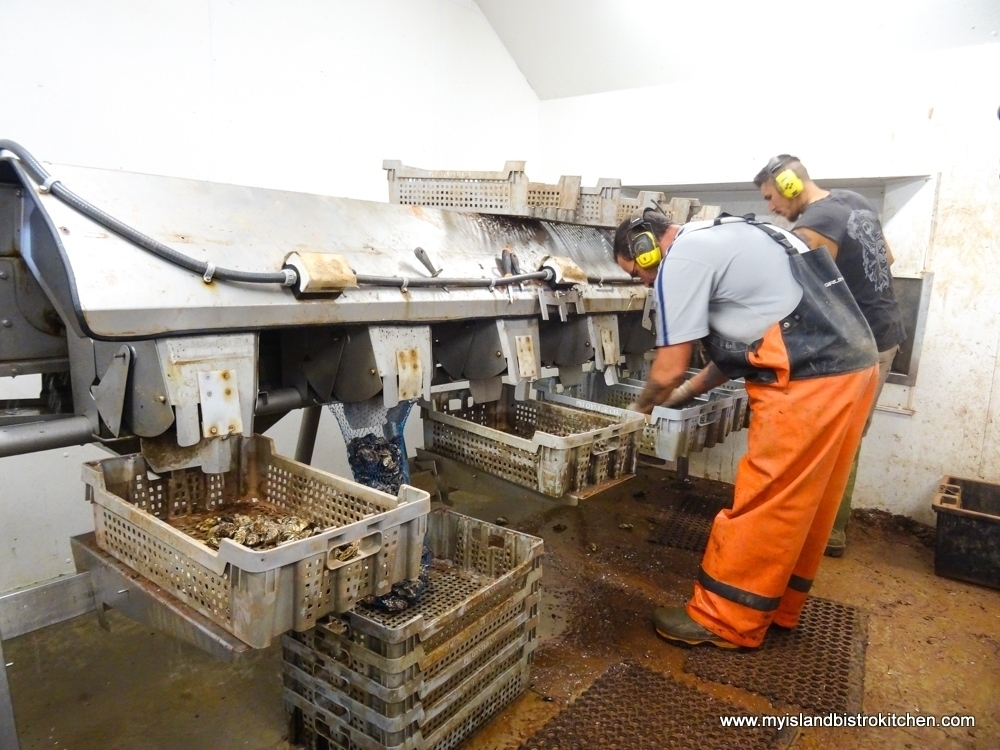
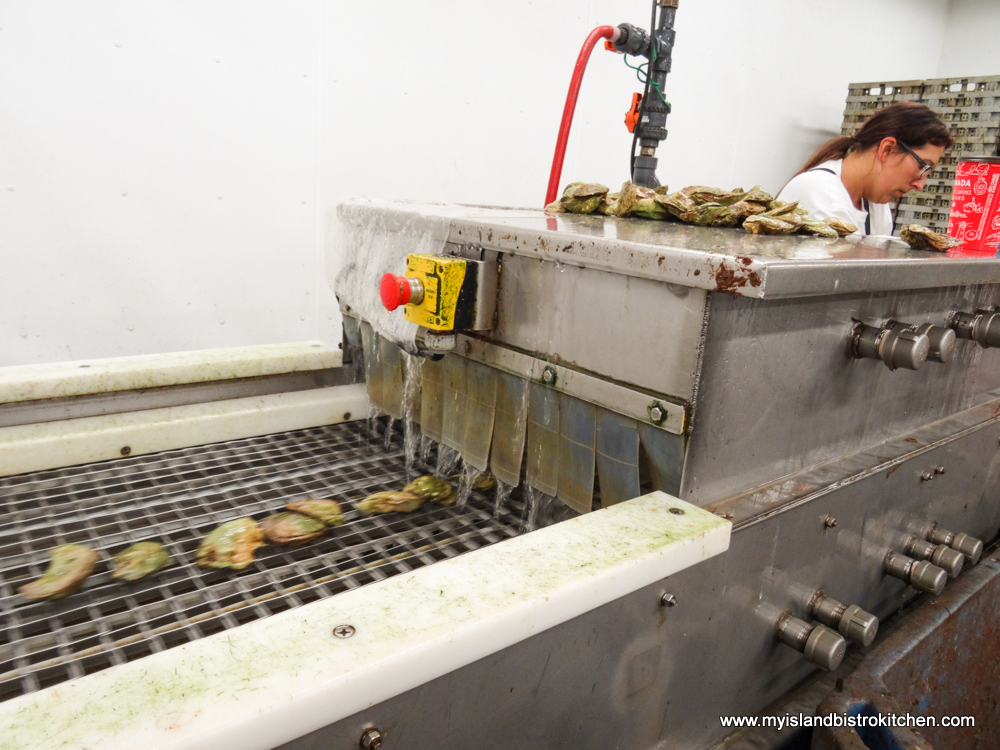
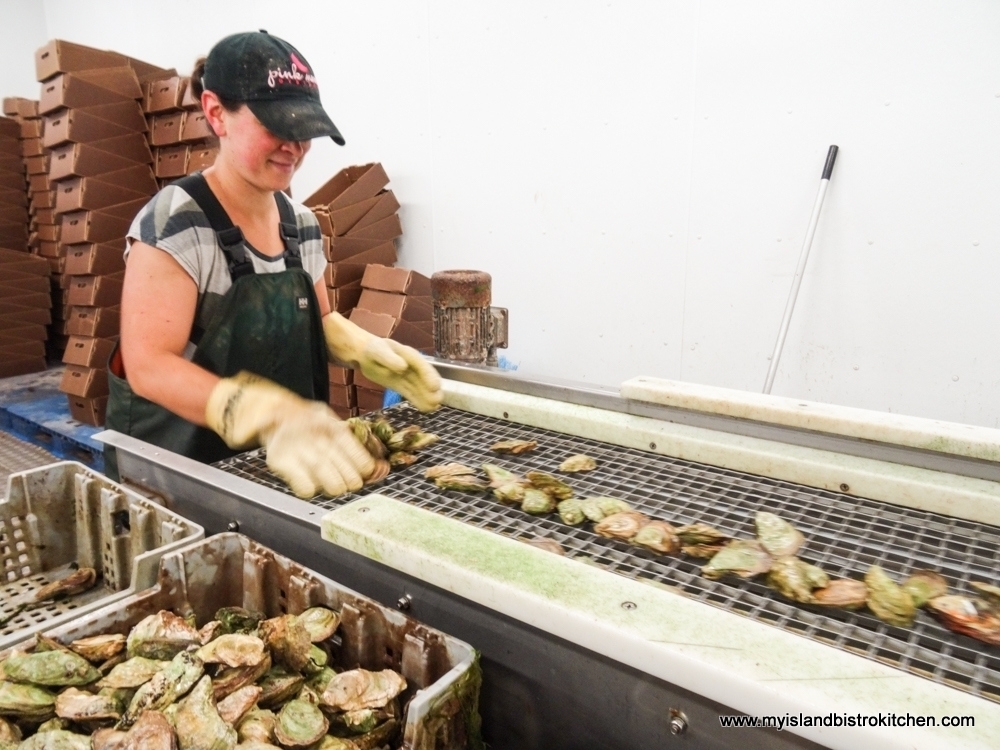
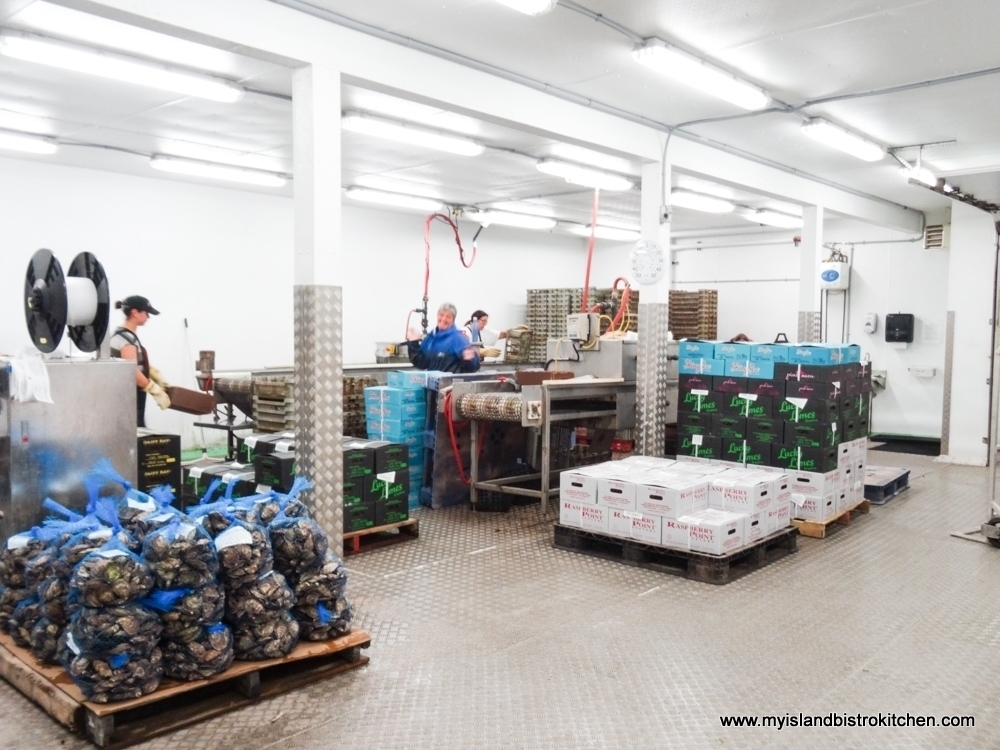
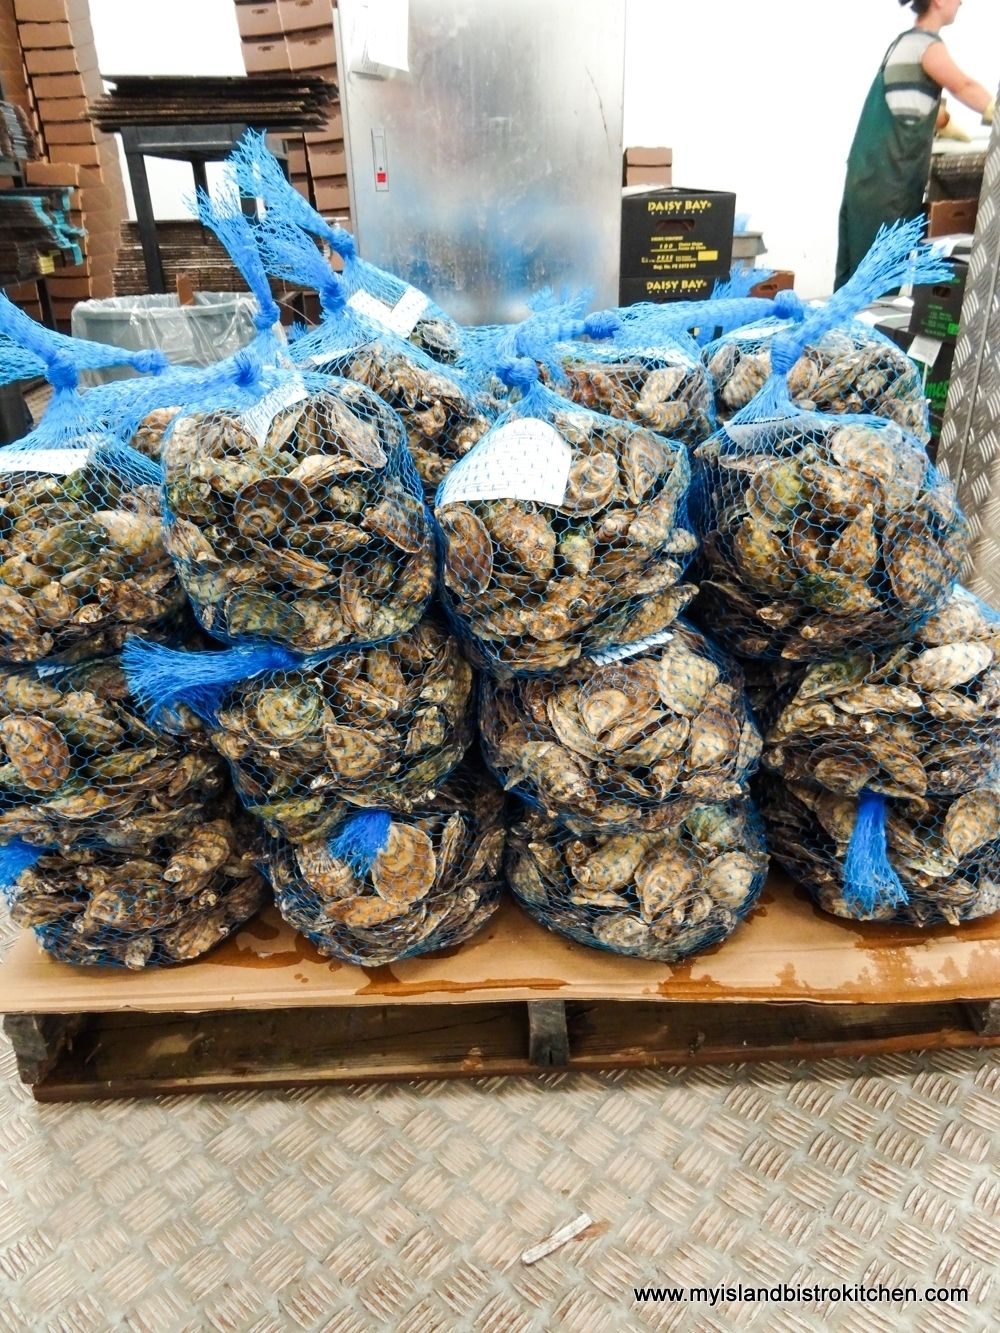
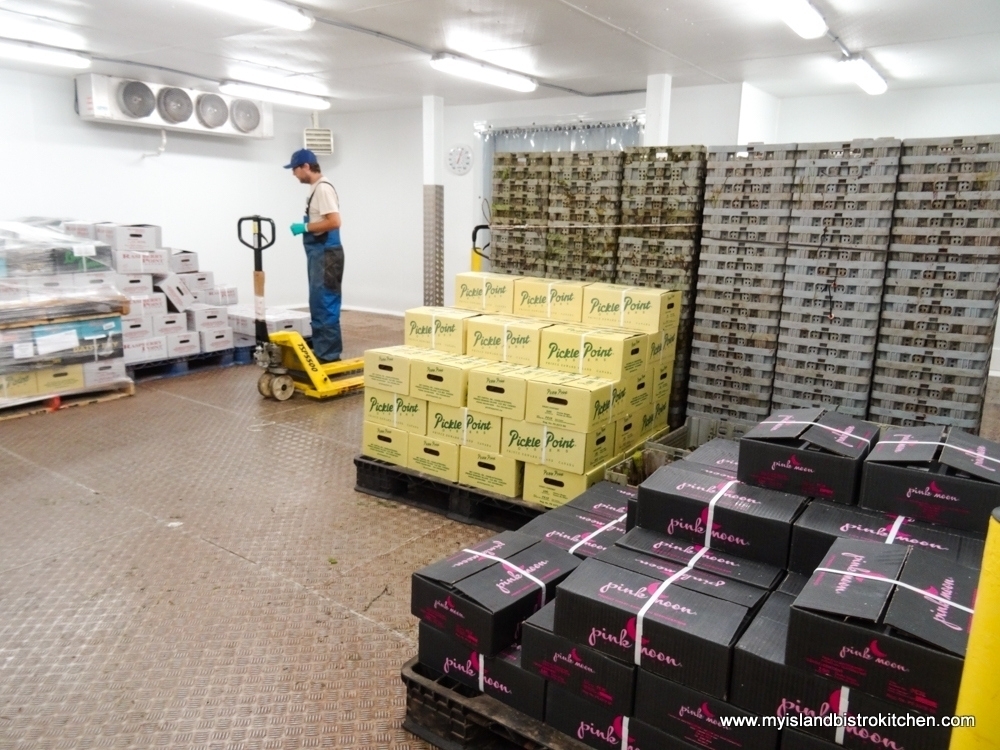
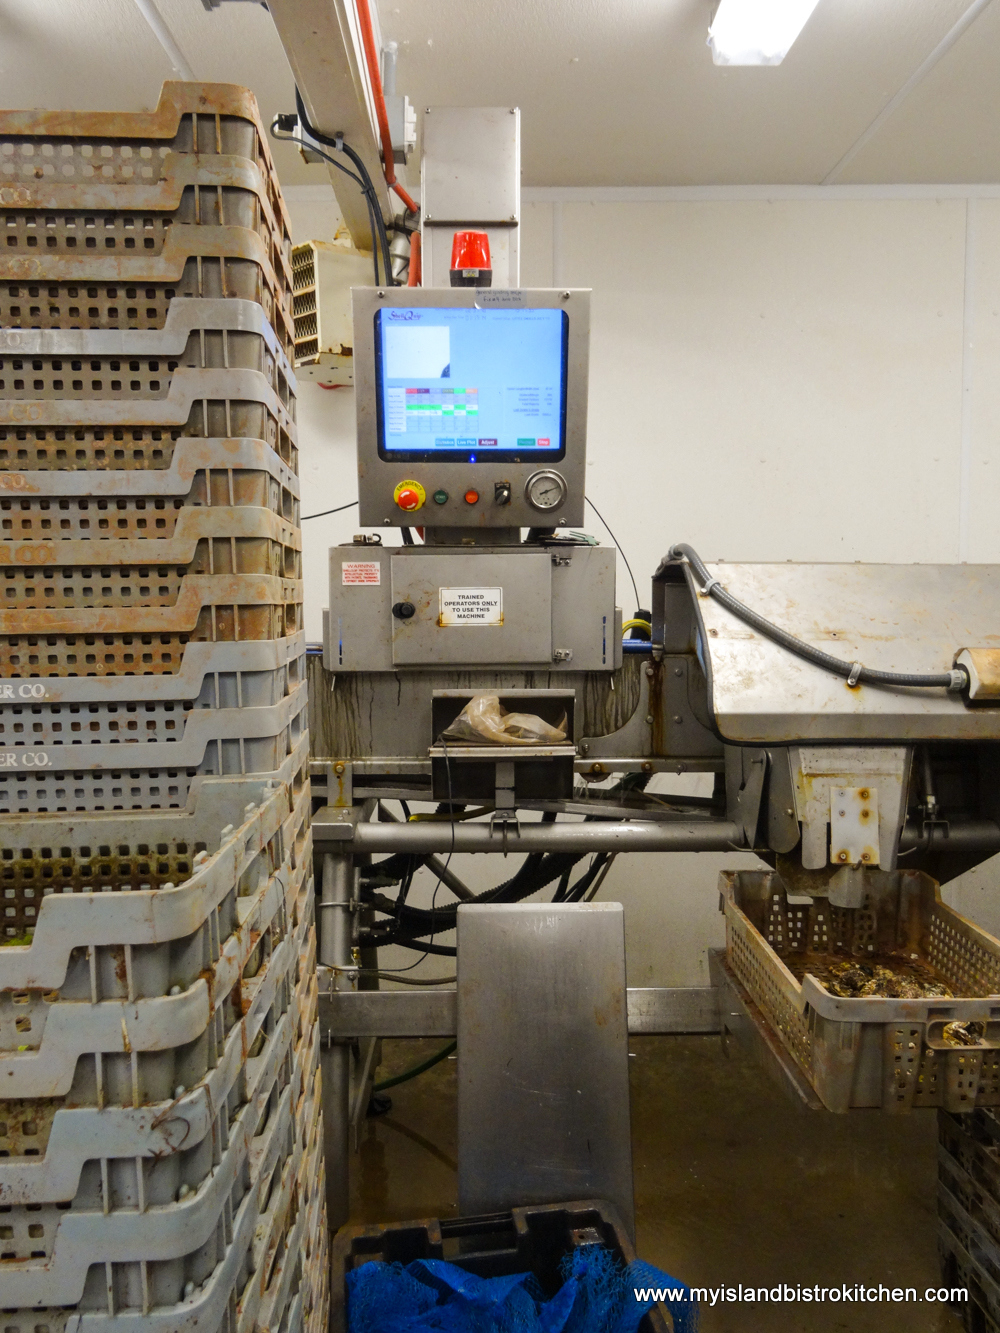
Once oysters, either bottom or top cultures, have reached their market size, they are brought into the processing plant where they are culled, graded for size and shape, washed, counted, boxed, and are shipped to customers around the world.

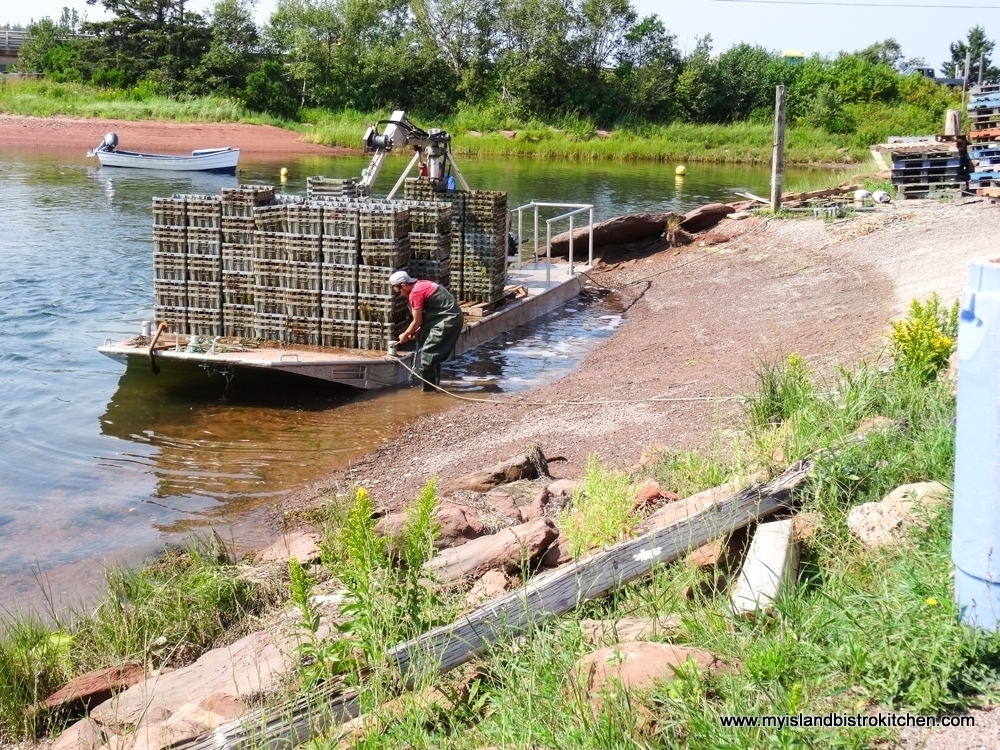
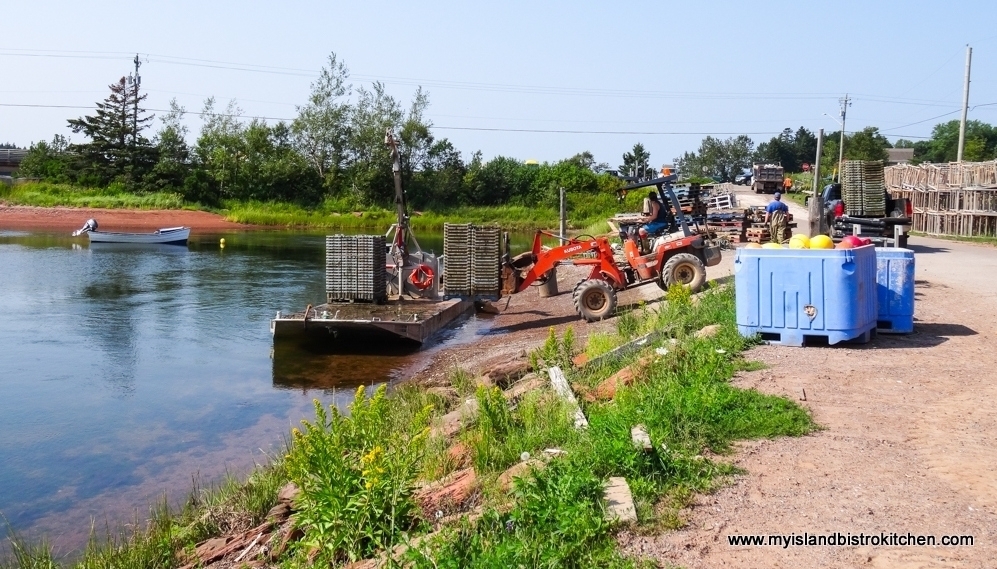
Because this industry is now year-round, oysters not needed for immediate shipment are put into trays like the ones shown to the left in the photo below and placed back out into shallow water until needed.
Since they are already graded, counted, and sorted by variety, they can quickly be retrieved and shipped when orders come in year-round.
The barge in the photo below is returning to shore with a load of trays filled with graded and sorted oysters which will soon be on their way somewhere in the world to fill orders!
Oysters like cold water but, in PEI’s cold winters, they can’t stay up near the water’s surface where they would freeze. So, for top culture/surface grown oysters, the Raspberry Point Oyster Co. sinks aluminum cages filled with oysters into 15’ – 20’ of water each winter. At the time of writing, the company prepared upwards of 1000 aluminum cages that they filled and sunk with 7000 graded and sorted oysters per cage at the end of November. Locations of cages are marked by a metal pole and the oyster harvesters head out over the ice to retrieve the oysters to fill winter shipments, making the Island’s oyster farming a year-round industry.

Sometimes, the ice is so thick that workers have to use a high-powered saw (shown in photo above) to cut through the thick ice so that tethered divers can dive in and locate the cages and hook them up to a hydraulic lift that will pull them out of the water.
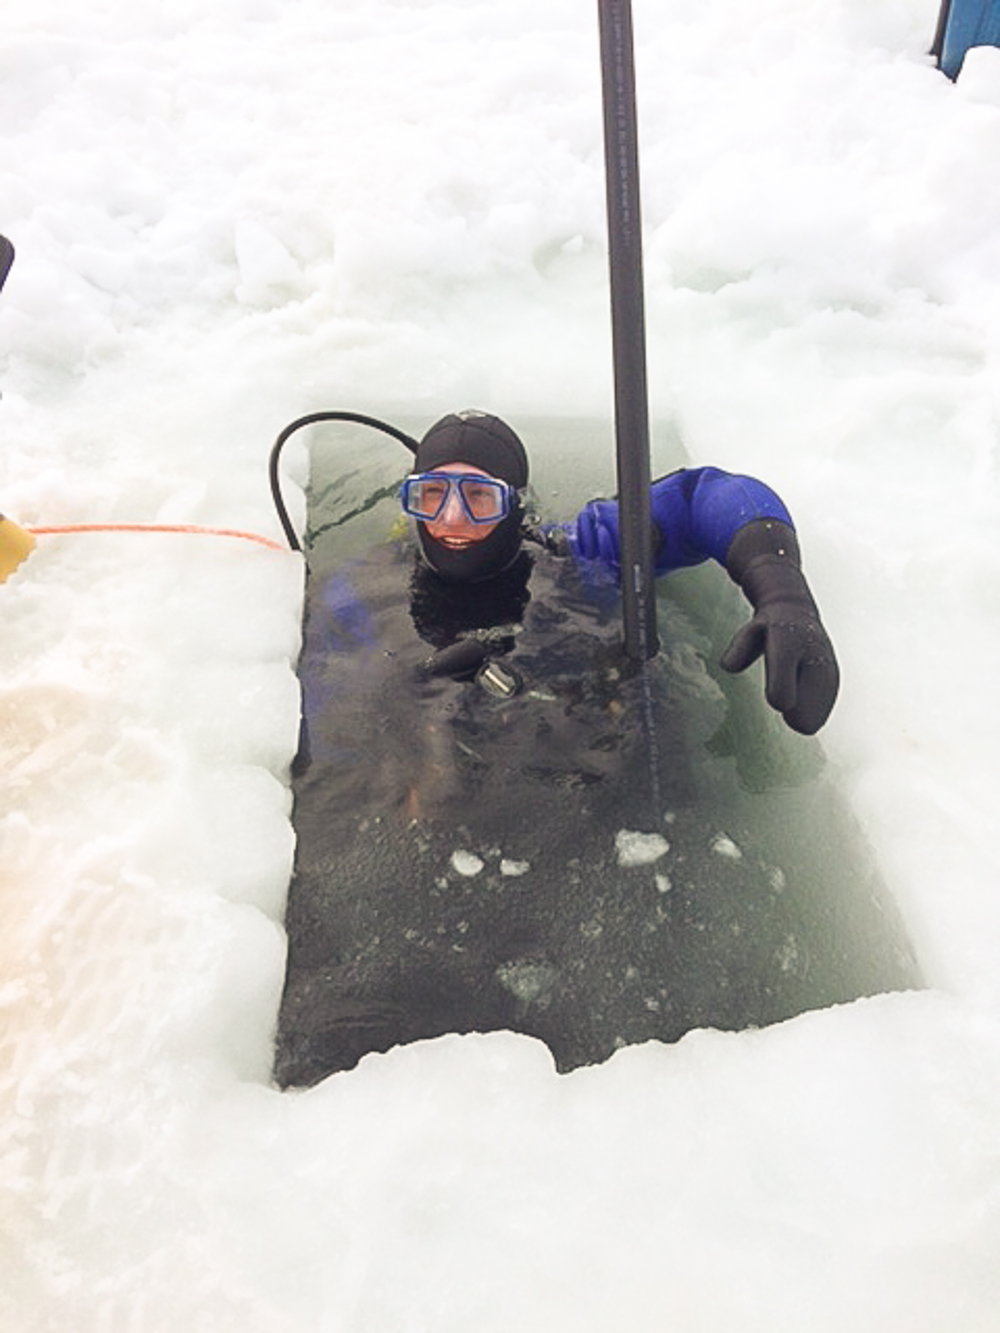
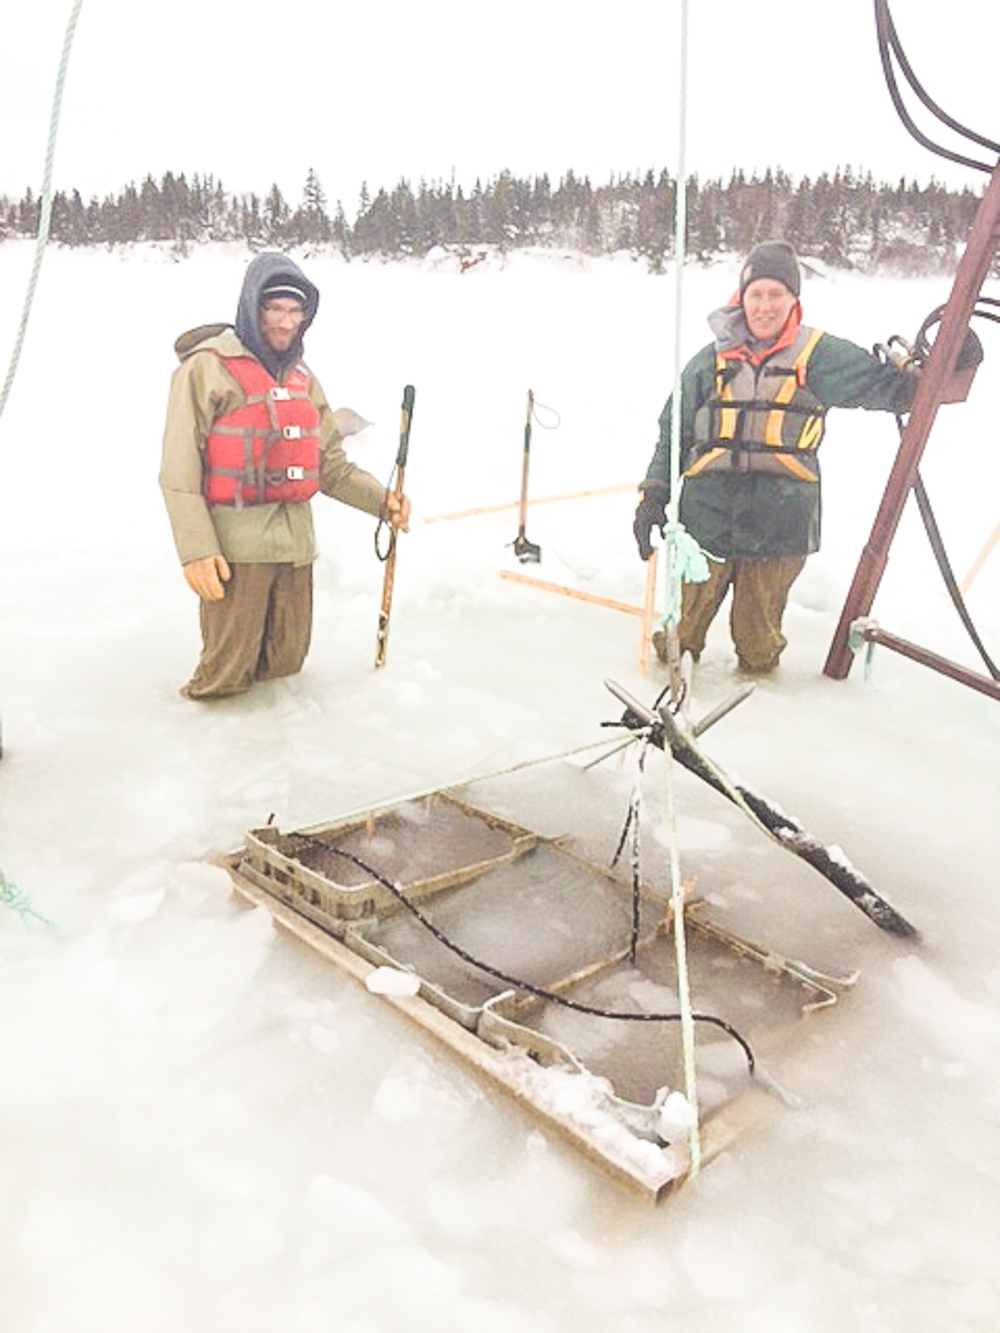
The oysters are then hauled on a sled towed behind a four-wheeler or, if the ice is sufficiently thick, by a truck, back to the processing and shipping plant.
The varieties of oysters on PEI are often (though not always) named for the body of water in which they are grown. The Raspberry Point Oyster Co. draws its name from a little point of land on the Homestead Trail in nearby Cavendish. Readers from outside PEI will likely associate the Cavendish name as the setting for famed authoress Lucy Maud Montgomery’s famous Anne of Green Gables series of books. A number of years ago, Scott and Charles Linkletter, the owners of Raspberry Point’s forerunner company, The PEI Oyster Company, had a lease to fish oysters in this area so they renamed the company to the Raspberry Point Oyster Co. Today, still owned and operated by the Linkletter family, Raspberry Point Oyster Co. has six varieties of Malpeque oysters on the market:
- Raspberry Point – Bearing the company name, this variety of 3” oysters is grown as bottom culture in leases in New London Bay. The Raspberry Point variety is the company’s most popular oyster.
- Lucky Limes – These are 3” oysters, also bottom grown in a lease along the Homestead Trail in New London Bay. The water in this area is filled with algae and that’s what turns the oyster shells green, thus the “lime” in the name.
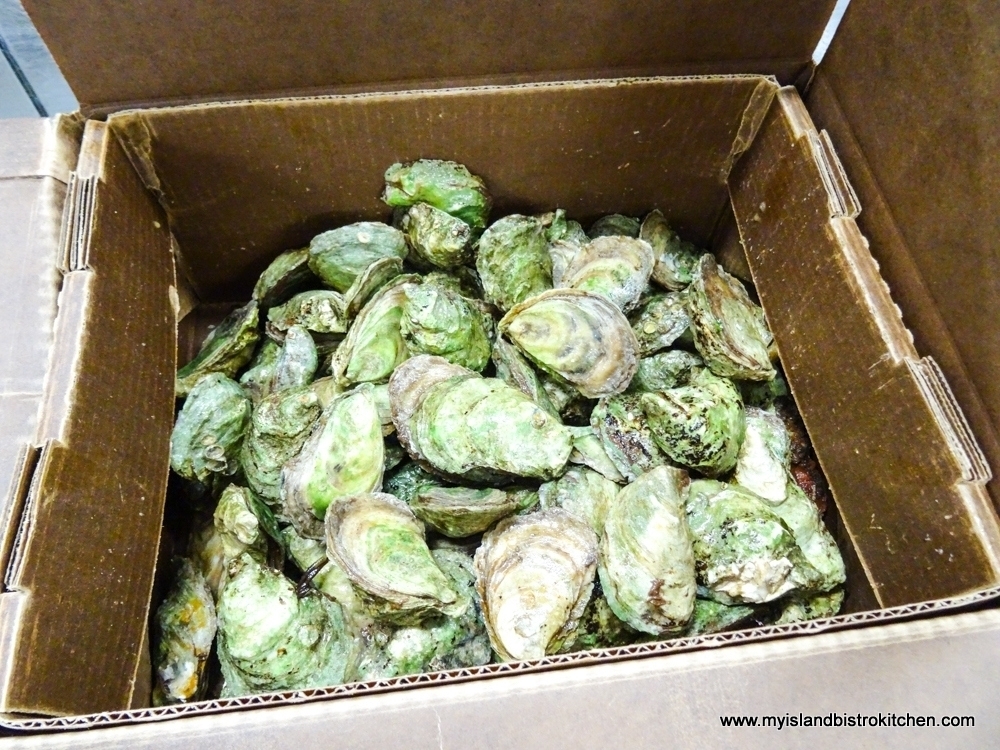
Box of Lucky Lime Variety of Oysters from Raspberry Point Oyster Co. - Shiny Sea – At 2½“ in size, these are considered to be the “baby brother” of the larger 3” Raspberry Point variety. These bottom cultures are also grown in New London Bay.
- Pickle Point – These are top-culture oysters as they are grown nearer the water’s surface in floating bags in New London Bay.
- Daisy Bay – These 3” oysters are top-culture, or surface culture, grown in North Rustico.
- Irish Point – Considered to be cocktail size oysters, these 2½“ oysters are also surface cultures and are grown in North Rustico.
Controls are in place to ensure sustainability of the Island’s oyster industry. Only so many leases are granted by the government to avoid overfishing. The mollusks, themselves, help to ensure their species continue to survive as they act as great filters to clean the water of toxins by filtering algae and phytoplankton from the water.
According to James, the nature of the water flow and the shape of the seed oyster will basically determine the final shape of the oyster. While James will say that the perfect oyster is very much an individual’s own taste, he says the perfect shaped oyster, in his opinion, is a rounded tear-drop shape that is 3” long by 2” wide. The perfect flavour should consist of a clean, salty taste and a sweet finish. The meat should be a little bit, but not too, fatty because nothing should interfere with the natural salty taste.
Power says oysters are like terroir is to wine – the flavour of each variety is built on the content of the bay or stream in which the oysters are grown and each oyster will look and taste a little different from the next one. Since the oysters are coming from the sea and the French word for sea is “mer”, perhaps the term “merroir”, as some have coined it, might be the best description! Power says true oyster connoisseurs can identify the different flavour profiles in raw oysters. Oysters grown in waters that have more of a rock base may have a mineral-rich flavour (though none of Raspberry Point oysters have this terroir/merroir) while others grown elsewhere may have a slight vegetable taste picked up from whatever vegetation or algae may be in their water habitat.
Power also says the oyster meat and flavour change with the seasons. In summer, the oysters are thin and salty – the bivalves are more interested in reproduction than getting fat so keeping their svelte figure is obviously their concern! In the fall (September – October), the waters are getting colder and the oysters will start building up fat for the cold winter months. When the water temperature gets down to 5°C, the oysters shut down and hibernate inside their hard shells, living off the fat they built up in the fall. So, if you are eating oysters that come from icy waters, they’re likely to be quite plump and perhaps just a little sweeter. In the spring, the oysters still stay fat but, as the snow melts, it dilutes the natural salt in the water so the oysters will taste less salty.
Oysters are low in fat, high in protein, and are a good source of iron and zinc. They are also a source of, amongst others, Vitamins B12 and C along with Thiamin, Magnesium, and Phosphorus.
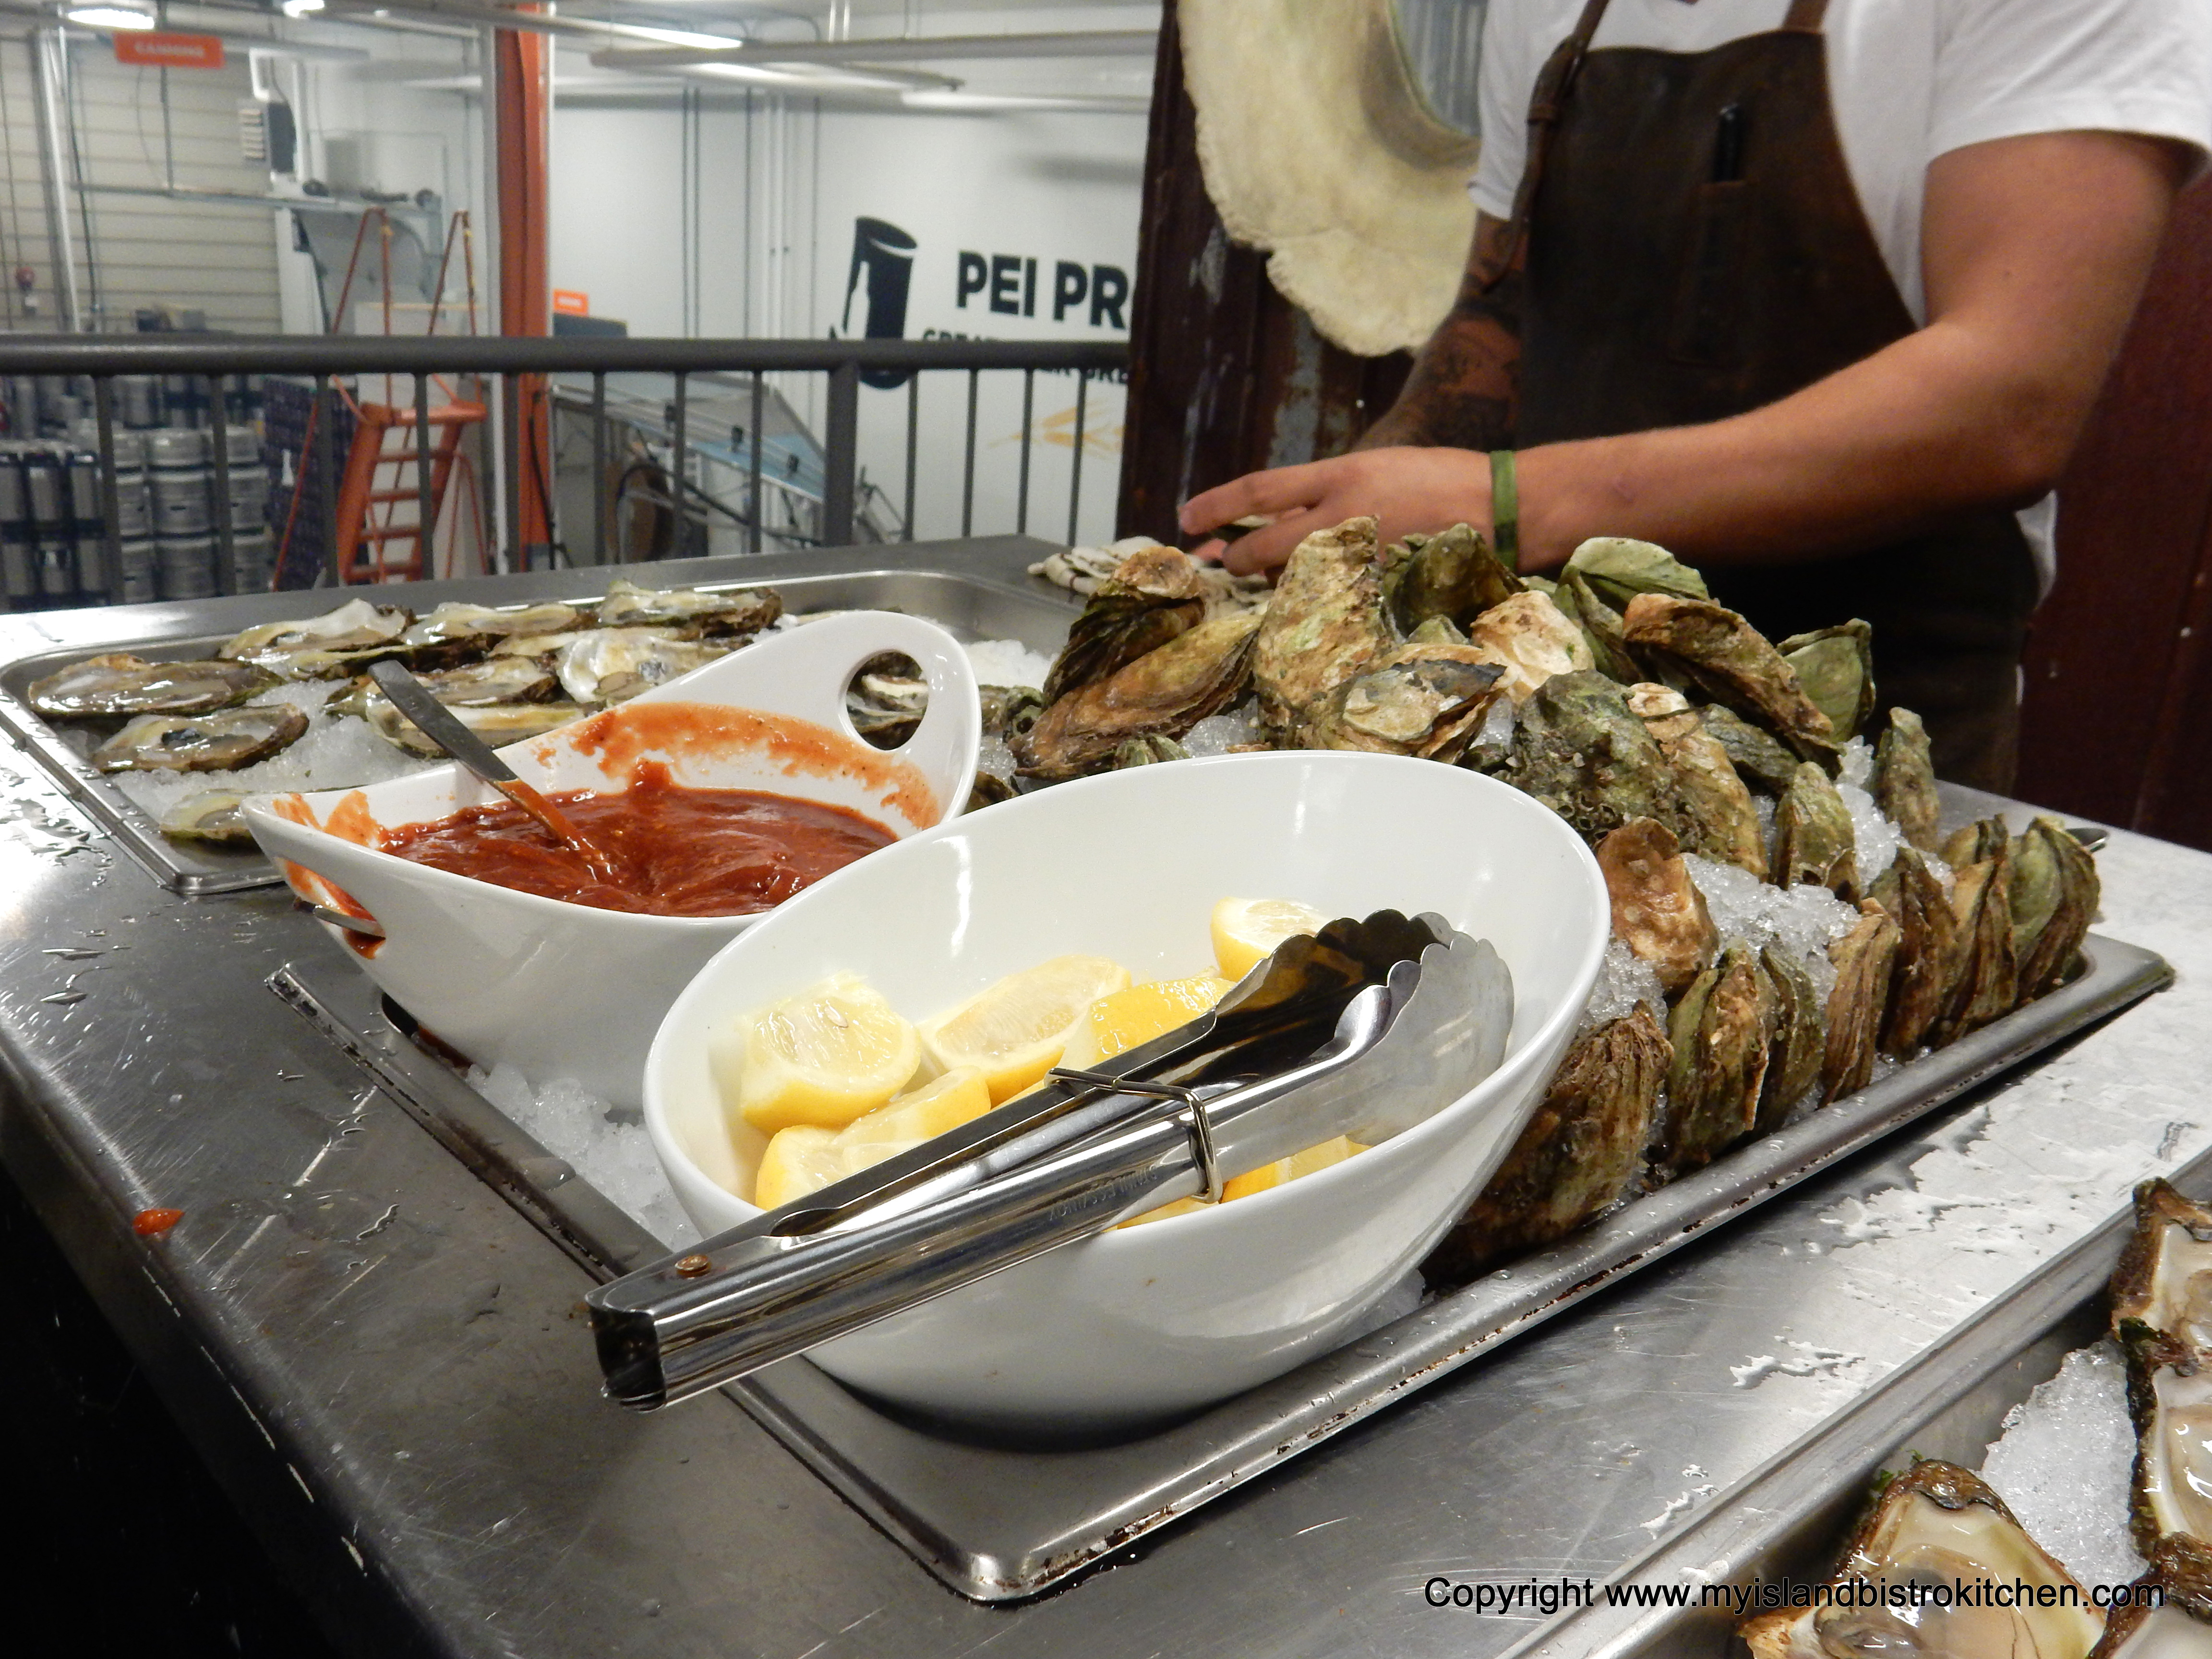
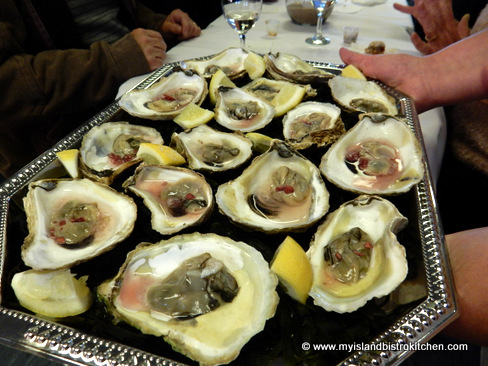
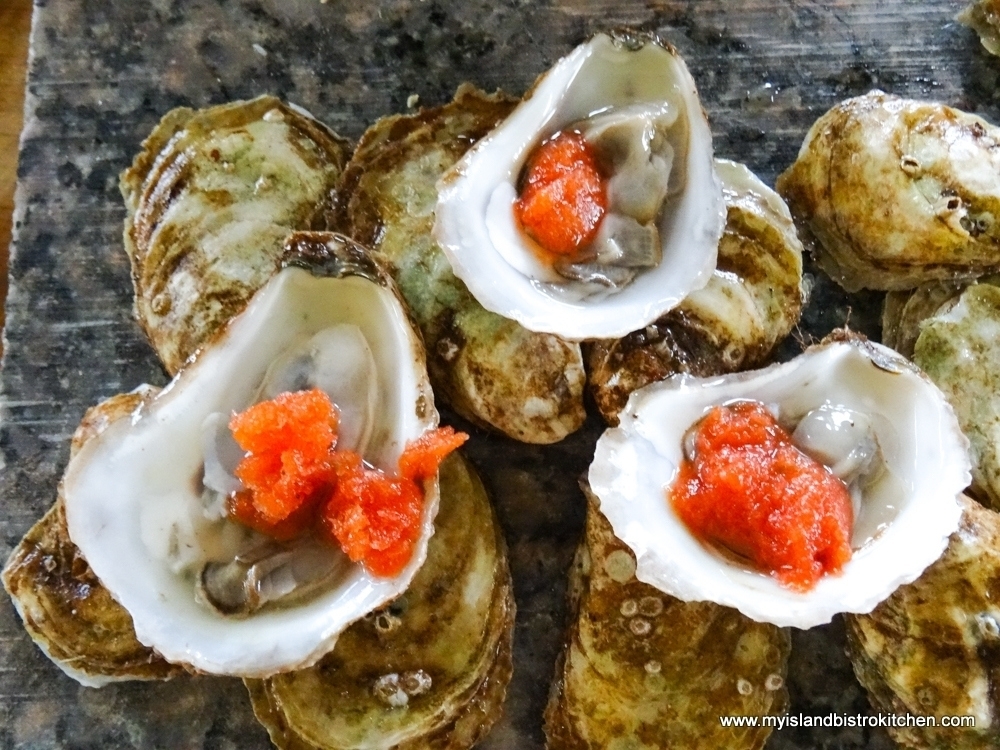
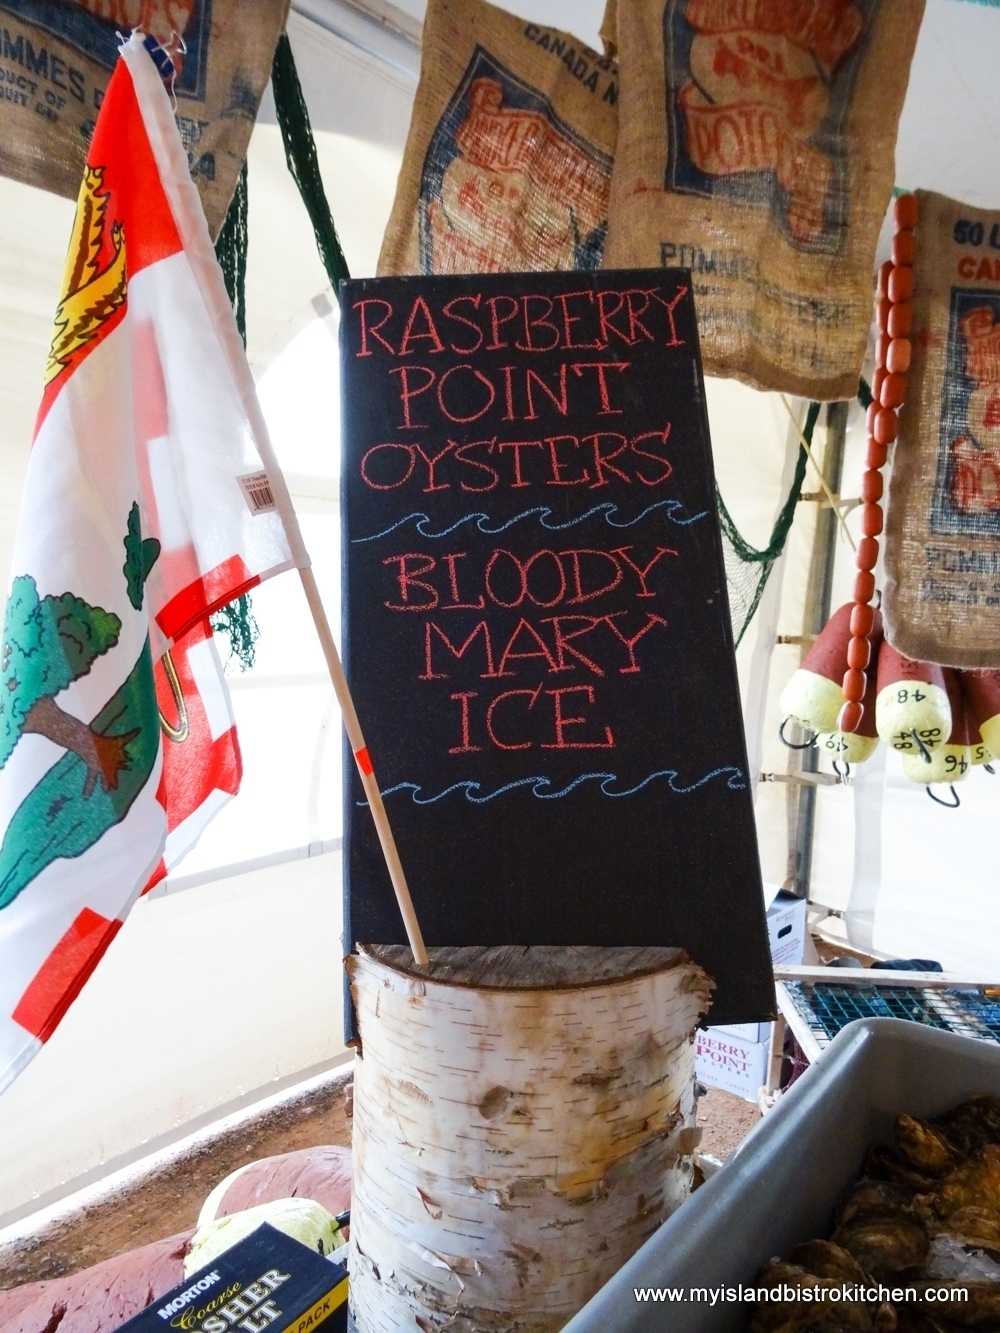
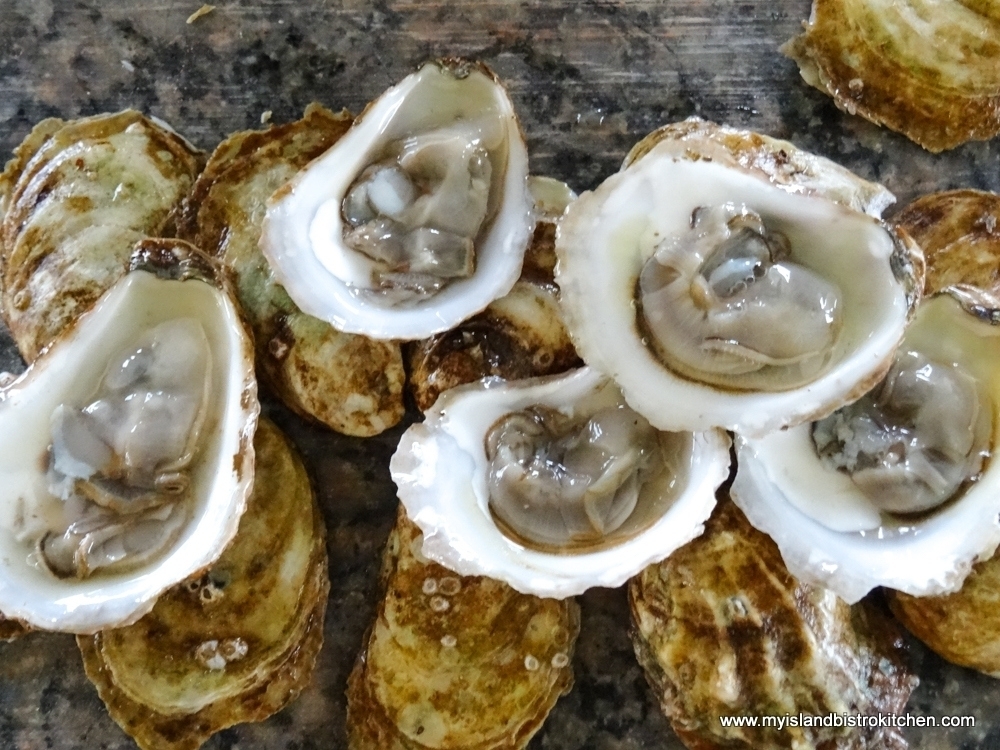
Oysters are most often served raw on the half shell on a bed of ice with freshly squeezed lemon or, sometimes, with a peppery shallot mignonette. Chef Michael Smith often serves oysters with a Bloody Mary Ice seen in the photo below.
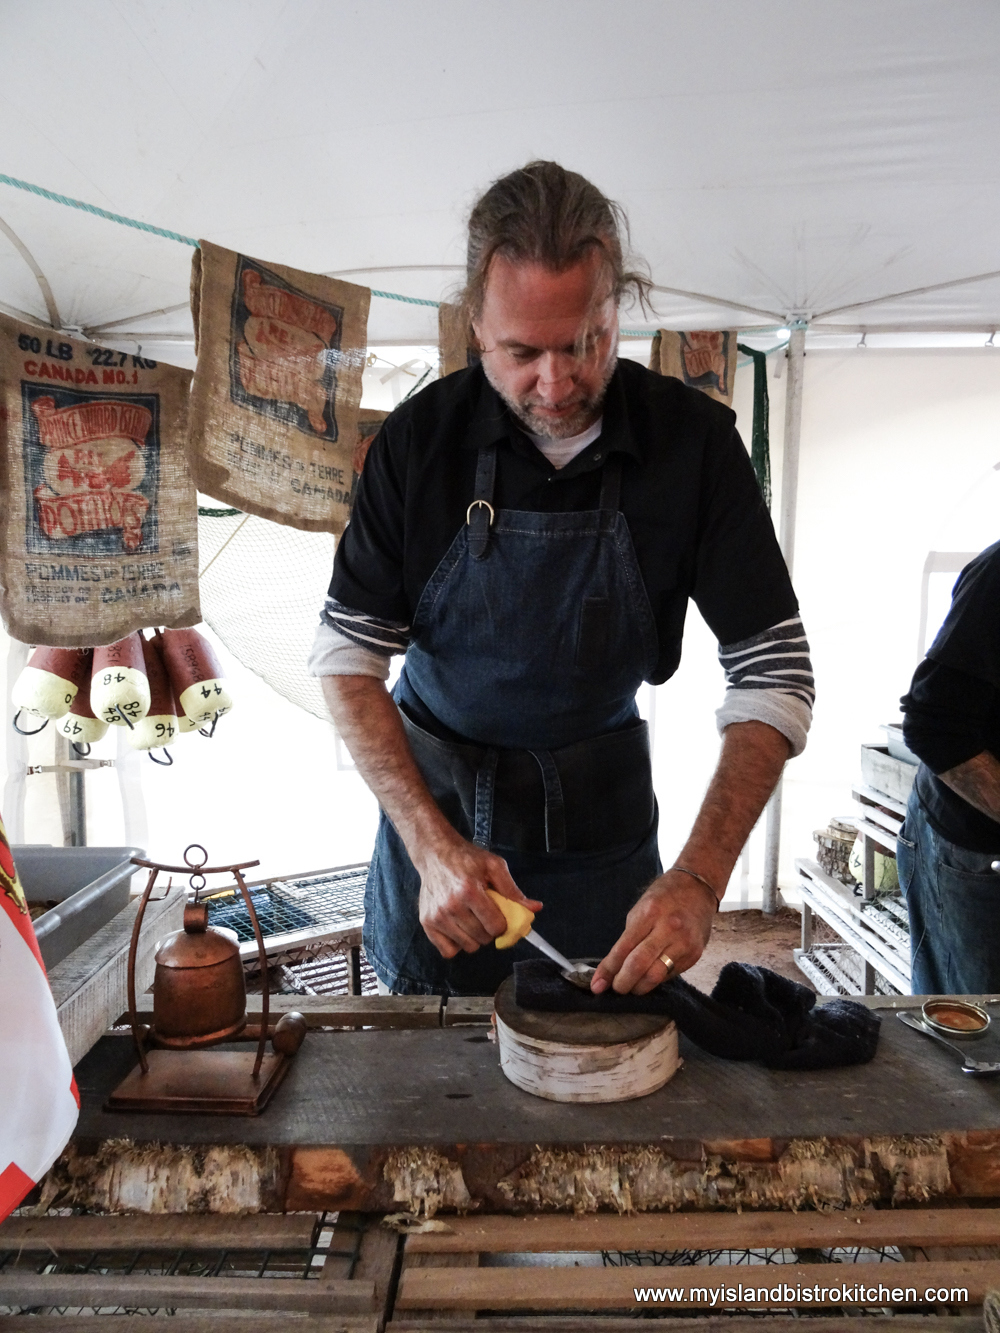
Oysters are shucked using a special short, blunt knife made for this purpose. Power says he believes oysters are popular, especially eaten raw, because they are an all-natural food, not processed or transformed. Oyster bars are very popular and an emerging trend is to pair oysters with wines, beers, and whiskey. Fresh oysters are available at most fish markets on PEI as well as the larger supermarkets. On PEI, many restaurants serve raw oysters and, at many Fall Flavours Festival events each September, oysters are a staple, like they were at the 2017 “A Taste of Rustico” event where Chef Michael Smith (in photo below) was busy shucking Raspberry Point oysters.
So, the next time you are slurping back one of the plump briny Prince Edward Island oysters, you’ll now know a little bit more about how the Island oysters are produced, the flavour profile of an Island oyster, and you’ll be enjoying a unique terroir (or perhaps it’s “merroir”) taste from waters in and around Prince Edward Island on Canada’s East Coast.
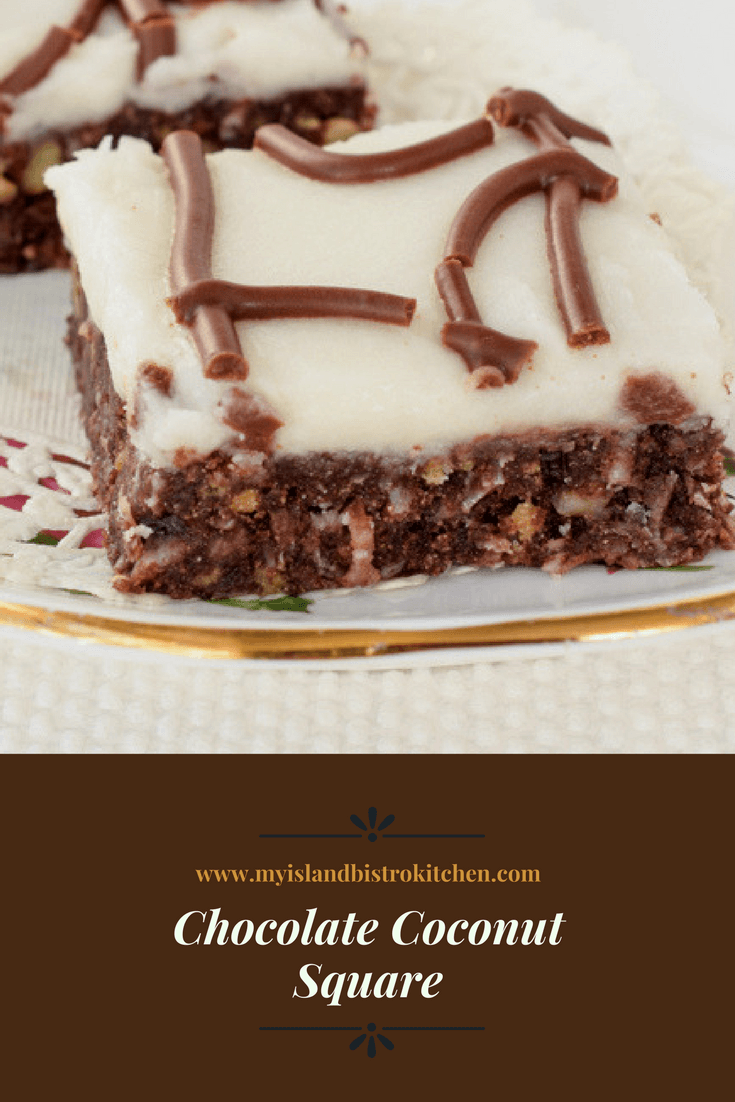
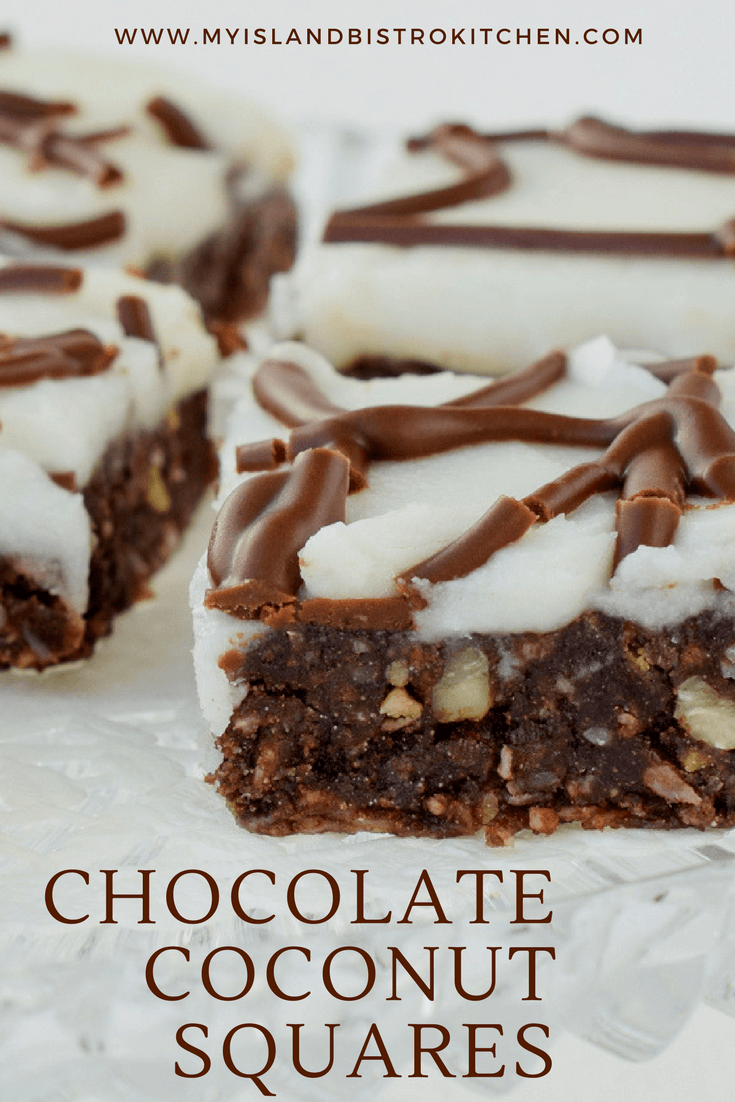
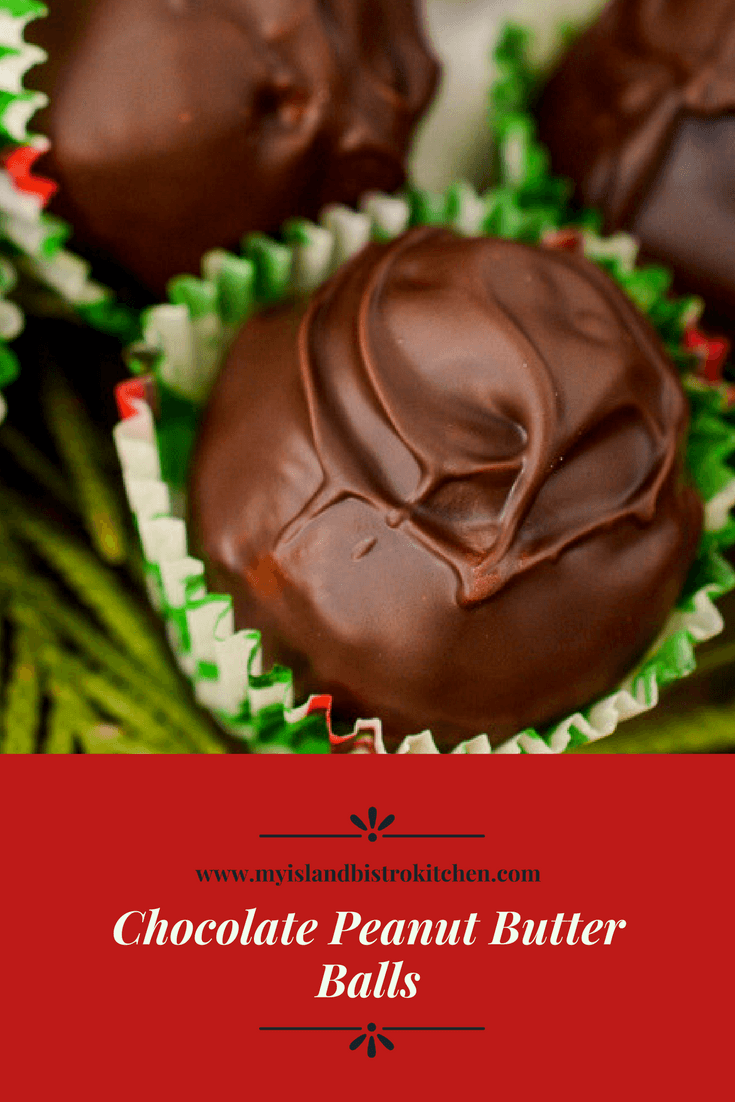
Pin Me To Pinterest!